

WARNING
TO REDUCE THE RISK OF FIRE OR
ELECTRIC SHOCK, DO NOT EXPOSE
THIS APPLIANCE TO RAIN OR
MOISTURE.
FR-A250 U
q RADIO RECEIVER
k RECEPTOR DE RADIO
OWNER’S RECORD
For your convenience, record the model number and serial
number (you will find it in the battery compartment) in the space
provided below. Please refer to them when you contact your
Aiwa dealer in case of difficulty.
Model No.
‘erialNO ~
FR-A250
1
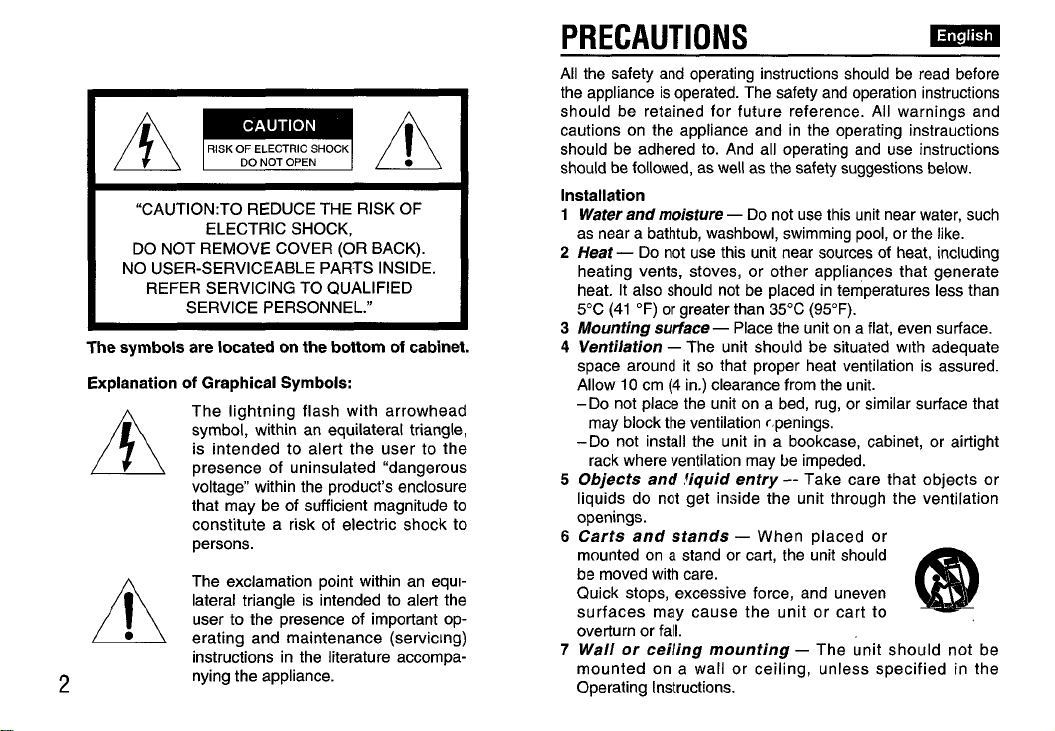
“CAUTION:TO REDUCE THE RISK OF
DO NOT REMOVE COVER (OR BACK).
NO USER-SERVICEABLE PARTS INSIDE.
The symbols are located on the bottom of cabinet.
Explanation of Graphical Symbols:
/4’/
●
A
2
ELECTRIC SHOCK,
REFER SERVICING TO QUALIFIED
SERVICE PERSONNEL.”
The lightning flash with arrowhead
symbol, within an equilateral triangle,
is intended to alert the user to the
presence of uninsulated “dangerous
voltage” within the product’s enclosure
that may be of sufficient magnitude to
constitute a risk of electric shock to
persons.
The exclamation point within an equilateral triangle is intended to alert the
user to the presence of important opcrating and maintenance (servicing)
instructions in the literature accompanying the appliance.
PRECAUTIONS
All the safety and operating instructions should be read before
the appliance is operated. The safety and operation instructions
should be retained for future reference. All warnings and
cautions on the appliance and in the operating instructions
should be adhered to. And all operating and use instructions
should be followed, as well as the safety suggestions below.
Installation
Water and mokture — Do not use this unit near water, such
1
as near a bathtub, washbowl, swimming pool, or the like.
Heat — Do not use this unit near sources of heat, including
2
heating vents, stoves, or other appliances that generate
heat. It also should not be placed in temperatures less than
5°C (41 “F) or greater than 35°C (95”F).
Mounting surface — Place the unit on a flat, even surface.
3
Ventilation – The unit should be situated whh adequate
4
space around it so that proper heat ventilation is assured.
Allow 10 cm (4 in.) clearance from the unit.
– Do not place the unit on a bed, rug, or similar surface that
may block the ventilation rpenings.
– Do not install the unit in a bookcase, cabinet, or airtight
rack where ventilation may be impeded.
Objects and !iquid entry -- Take care that objects or
5
liquids do not get inside the unit through the ventilation
openings.
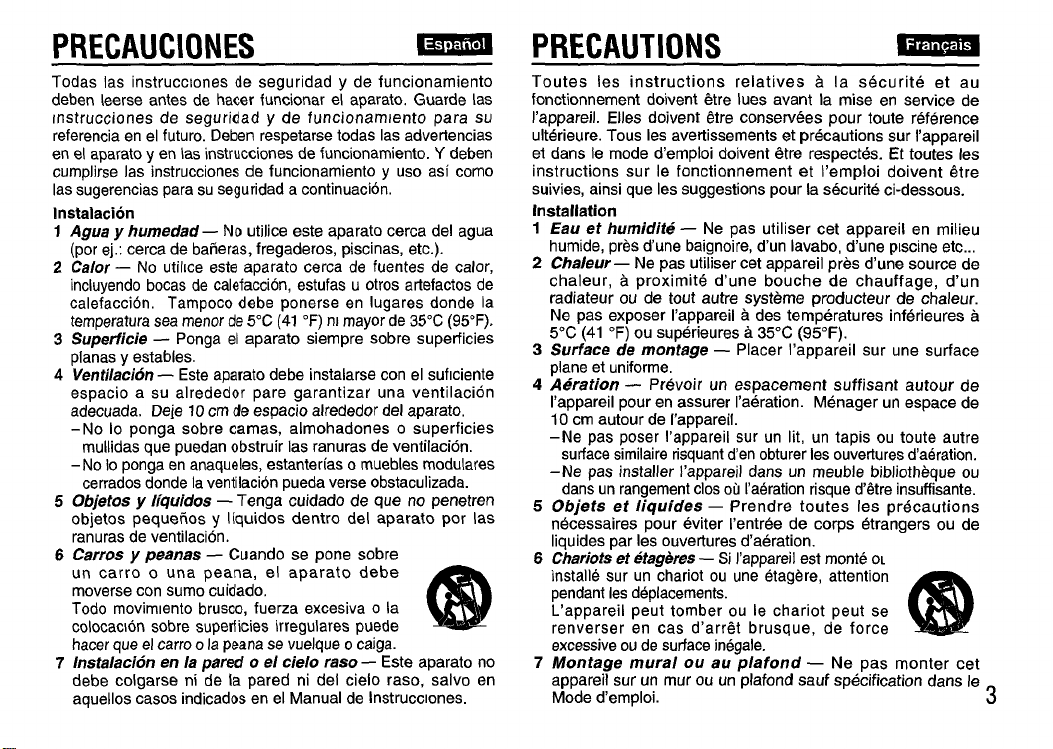
Carts and stands — When placed or
6
mounted on a stand or cart, the unit should
be moved with care.
Quick stops, excessive force, and uneven
surfaces may cause the unit or cart to
overturn or fall.
Wa// or ceiling mounting – The unit should not be
7
mounted on a wall or ceiling, unless specifiad in the
Operating Instructions.
@
PRECAUCIC)NES
Todas Ias instrucclones deseguridad ydefuncionamiento
deben Ieerseantesde hacerfuncionarel aparato. Guardelas
Instrucciones de seguridad y de funcionamlento para su
referencia en el future. Deben respetarse todas Ias advertencias
en el aparato y en Ias instrucciones de funcionamiento. Y deben
cumplirse Ias instrucciones de funcionamiento y uso asi como
Ias sugerencias para su segurfdad a continuation.
Instalacion
1
Agua y Iwnedad — NOWce este aparato cerca del agua
(per ej.: cerca de bafieras, fregaderos, piscinas, etc.).
Ca/or — No util[ce este aparato cerca de fuentes de calor,
2
incluyendo bocas de calefaccion, estufas u otros artefactos de
calefaccion, Tampoco debe ponerse en lugares donde la
temperature sea menor de 5°C (41 “F) nl mayor de 35°C (95”F),
Superficie —
3
planas y estables.
4
Ventilaciorr — Este aparato debe instalarse con el suflciente
espacio a su alrededor pare garantizar una ventilation
adecuada. Deje 10 cm de espacio akededor del aparato,
-No 10 ponga sobre camas, almohadones o superficies
mullidas que puedan obstruir Ias ranuras de ventilation.
– No 10ponga en anaqueles, estanter~as o muebles modulares
cerrados donde la venllaci6n pueda verse obstaculizada.
5
Obietos v Iiauidos — Tenaa cuidado de aue no genetren
obj’etos ~eqtiehos y Iiquid~s dentro del aparato por Ias
ranuras de ventilation.
6 Carros y peanas — Cuando se pone sobre
un carro o una peana, el aparato debe
moverse con sumo cuidado.
Todo movimlento brusco, fuerza excesiva o la
colocaclon sobre superficies irregulars puede
hater que el carro o la peana se vuelque o caiga.
7 Instalacion en la pared o el cielo raso — Este aparato no
debe colgarse ni de la pared ni del cielo raso, salvo en
aquellos cases indicados en el Manual de Instrucclones.
Ponga el aparato siempre sobre superficies
mm
m
PRECAUTIONS
Toutes Ies instructions relatives a la securite et au
fonctionnement doivent &re Iues avant la mise en service de
I’appareil. Elles doivent Mre conserves pour toute reference
ulterieure. Tous Ies avertissements et precautions sur I’appareil
et clans Ie mode d’emploi doivent 6tre respectes. Et toutes Ies
instructions sur Ie fonctionnement et I’emploi doivent t$tre
suivies, ainsi que Ies suggestions pour la securite ci-dessous.
Installation
1
Eau et humidite — Ne pas utiliser cet appareil en milieu
humide, pres dune baignoire, d’un Iavabo, d’une piscine etc..,
2
Cha/eur — Ne pas utiliser cet appareil pres d’une source de
chaleur, a proximite d’une bouche de chauffage, d’un
radiateur ou de tout autre systeme producteur de chaleur.
Ne pas exposer I’appareil a des temperatures inferieures a
5°C (41 “F) ou superieures a 35°C (95”F).
3
Surface de montage — Placer I’appareil sur une surface
plane et uniforme,
4
Aeration —
I’appareil pour en assurer I’aeration. Menager un espace de
10 cm autour de I’appareil.
–Ne pas poser I’appareil sur un lit, un tapis ou toute autre
surface similaire risquant den obturer Ies overtures &aeration.
–Ne pas installer I’appareil clans un meuble bibliotheque ou
clans un rangement CIOSou I’aeration risque d’6tre insuffisante.
5
Objats et liqufdes — Prendre toutes Ies precautions
necessaires pour eviter I’entree de corps etrangers ou de
Iiquides par Ies overtures d’aeration.
chariots et 6ta@res — ~ I’apparei!
6
installe sur un chariot ou une etagere, attention
pendant Ies replacements.
L’appareil peut tomber ou Ie chariot peut se
renverser en cas d’arr6t brusque, de force
excessive ou de surface inegale.
7
Montage mural ou au plafond — Ne pas monter cet
appareil sur un mur ou un plafond sauf specification clans Ie
Mode demploi.
Prevoir un espacement suffisant autour de
eStMOtIt601
-
@!!!
3
PFIECAUTIONS
Electric Power
1 lJowersources -Connect this unit only to power sources
specified in the Operating Instructions, and as marked on
the unit.
2 Polarization —As a safety feature, some units are
equipped with polarized AC power plugs which can only be
inserted one way into a power outlet. If it is difficult or
impossible to insert the AC power plug into an outlet, turn
the plug over and try again. If it still does not easily insert
into the outlet, please call a qualified service technician to
service or replace the outlet. To avoid defeating the safety
feature of the polarized plug, do not force it into a power
outlet.
3 AC power cord
–When disconnecting the AC power cord, pull it out by the
AC power plug. Do not pull the cord itself.
– Never handle the AC power plug with wet hands, as this
could result in fire or shock.
–Power cords should be firmly secured to avoid being
severely bent, pinched, or walked upon. Pay particular
attention to the cord from the unit to the power socket.
-Avoid overloading AC power plugs and extension cords
beyond their capacity, as this could result in fire or shock.
4 Extension cord — To help prevent electric shock, do not
use a polarized AC power plug with an extension cord,
receptacle, or other outlet unless the polarized plug can be
completely inserted to prevent exposure of the blades of the
plug.
5 When not in use —
power plug if the unit will not be used for several months or
more. When the cord is plugged in, a small amount of
current continues to flow to the unit, even when the power is
turned off.
Unplug the AC power cord from the AC
PRECAUCIONES
Alimentacion electrica
12Fuentes de alimer?tsciorr — Conecte el aparato solamente
a Ias fuentes de alimentacion especificadas en el Manual de
Instrucciones y del modo indicado en el mismo aparato.
Polarization— Como medida de seguridad, algunos
aparatos cuentan con enchufes de corriente polarizados, Ios
cuales pueden enchufarse en el tomacorriente solamente en
unadireccion. Sicuesta oresulta imposible inset’tarelenchufe
en la toma de corriente, de vuelta el enchufe y vuelva a probar.
Si incluso despues decambiar nose puedeenchufar con
facilidad pidaa untecnico calificadoque repareocambie la
tomade corriente. Noinserte el enchufe a la fuerza, para
evitar anular la protection de seguridad del enchufe polarizado.
3 Cable decorriente
–Paradesconectarel cablede corriente, tire tomando el
enchufeenla mane. Nuncatiredel cable.
- Nunca tome el enchufe de corriente con Ias manes mojadas,
ya que corre el riesgo de descargas electrical o incendio.
-Los cables decorriente deben asegurarse firmemente de
manera que no queden dobiados apretados y esten fuera
del paso de Ias personas pare evitarquesean pisados.
Tenga especial cuidado con el cable electrico del aparato,
enchufado en el tomacorriente.
– Evite conectar demasiados aparatos en el mismo enchufe
ocablede extension, yaquecorreel riesgodedescargas
electrical o incendio.
Csb/ede extension —Paraevitarel riesgode descargas
4
electrical, no utilice enchufes de corriente polarizados con
cables de extension, receptaculos uotrastomas decorriente,
salvo que el enchufe pueda insertarse por completo y asf
evitar que queden expuestas Ias patas del enchufe.
5 Cuandono seuti/iza e/aparato —Desenchufe elcablede
corriente de Iatomaelectrica siempre que novayaa utilizar
elaparato porvariosmeses. Pormasque esteapagado, el
aparato siempre consume una pequefia corriente electrica
cuando el cable esta enchufado.
-
PRECAUTIONS
Alimentation electrique
1
Source d’alirnentation — Ne raccorder cet appareil qu’aux
seules sources d’alimentation electrique specifiers clans Ie
Mode demploi et marquees sur I’appareil.
2
Po/arisation —Atitre de securite, certains appareils sent
equipes de prises electriques CA polarisees qui ne peuvent
done &re inserees clans une prise secteur que clans un seul
sens. S’il s’avere difficile, voire impossible d’inserer une
prise electrique CA clans une prise secteur, retourner la prise
et essayer a nouveau. Si I’insertion n’est toujours pas
possible, demander I’intervention d’un reparateurqualifie
pour reparer ouchanger laprise. Forcer unepriseelectrique
en place est contraire a tous Ies principes de securite.
3
Cable d’alimentation CA
-Pour debrancher lec5ble d’alimentation electrique CA,
tirersur laprise. Nejamais tirersur lecAblelui-m6me.
-Ne jamais manipuler un cable electrique avecdes mains
humides sous peine de risque d’incendie ou d’electrocution.
– Immobiliser Ies cables de sorle qu’ils ne soient pas plies ni
coinces par d’autres objets et qu’ils ne g&rent pas Ie
passage. Attention en particulier au c~ble raccordant
I’appareil ala prise secteur.
– Eviter de surcharge Ies prises et Ies cables electriques
CA sous peine de risque d’incendie ou delectrocution.
4
Cable rallonge — Pour eviter tout risque d’electrocution, ne
pas utiliser un cable rallonge ou une prise multiple avec une
prise electrique polarisee si toutes Ies fiches de celle-ci ne
peuvent pas 6tre entierement inserees.
Periodes de non utilisation — Si I’appareil ne doit pas &re
5
utilise pendant une periode de plusieurs mois, debrancher
Ie cilble d’alimentation electrique CA de la prise secteur.
Quand Ie cable est raccorde, une faible quantite de courant
electrique continue a passer clans I’appareil m~me si
I’interrupteur de marche/arr6t est coupe.
5
PRECAUTIONS
Maintenance
Clean the unit only as recommended in the Operating
Instructions.
Damage Requiring Service
Have the units serviced by a qualified service technician if:
-The AC power cord or plug has been damaged
– Foreign objects or liquld have gotten inside the unit
-The unit has been exposed to rain or water
–The unit does not seem to operate normally
–The unit exhibits a marked change in performance
–The unit has been dropped, or the cabinet has been
damaged
DO NOT ATTEMPT TO SERVICE THE UNIT YOURSELF.
Servicing – The user should not attempt to service the
appliance beyond that described in the operating instruction.
All other servicing should be referred to qualified service
personnel.
m

PRECAUCIONES
Mantenimiento
Limpie de acuerdo a Ias instrucciones del manual de
instrucciones.
Desperfectos que requieren servicio tecnico
Solicite la reparation de SLI aparato el serwcio tecnico
autorizado en Ios siguientes cases:
– Cuando se haya daiiado el cable de corriente o el enchufe
– Cuando hayan penetrado objetos o Iiquidos en el interior
del aparato
–Cuando se haya expuesto el aparato a agua o Iluvia
– Cuando el aparato no parezca funcionar como es debido
–Cuando note una diferencia marcada en el rendimiento del
aparato
–Cuando se haya caido el aparato o se haya dafiado su
exterior
JAMAS INTENTE REPARAR EL APARATO POR SU
CUENTA.
Servicio -El usuario no debe tratar de hater el servicio del
aparato mas alla de 10que se describe en Ias instrucciones de
funcionamiento. Para todos Ios demas trabajos de serwcio,
soliclte la ayuda de personal de servicio cualificado.
- PRECAUTIONS -
Entretien
Nettoyer I’appareil seulement comme recommande clans Ie
mode d’emploi.
Deg5ts demandant des reparations
Faire reparer I’appareil par un technician qualifie si:
– Le cable ou la prise d’alimentation electrique est deteriore
- Un objet ou du Iiquide a penetre a I’interieur de I’appareil
–L’appareil a ete expose ala pluie ou a I’eau
– L’appareil ne fonctionne pas normalement
–L’appareil fait montre d’un changement radical de
performance
– L’appareil est tombe ou Ie coffret est deteriore
NE PAS TENTER DE REPARER L’APPAREIL SOI-MEME.
Entretlen – L’utilisateur ne doit pas essayer d’entretenir
I’appareil au-dela des indications du mode d’emploi. Tout Ie
reste doit &re confie a personnel de service competent.
7

BACKUP FUNCTION
If the AC power supply is interrupted, the clock display goes
off and the alarm setting is canceled. To back up the clock and
alarm, insert a 6F22 battery in the battery compartment on the
rear of the unit.
● The backup battery is not for radio reception.
Note
The backup function lasts about 10 minutes. Set the clock
again if 10 minutes passed after a power interruption.
Replacing the battery
Replace the battery with new one if the clock display flashes or
the alarm timer does not work properly when you connect the
AC power cord again.
Note on battery
● When you are not going to use the unit for a long period of
time, remove the battery to prevent possible electrolyte
leakage.
. -rfi ..P=v-.q ~~e ~;s~ ~f - I.-.-+.-l .$.- l-- l---- --
,U p,= G,, =I=e,l +,= ICamaye VI explosions,
never recharge the battery, apply heat to it, or take it apart.
-

FUNCION DE RESPALDO -
Si se corta la fuente de corriente alterna, se apaga la
indication del reloj y se cancela la alarma. Para mantener el
respaldo del reloj la alarma, instale una pila 6F22 en el
portapilas en la parte trasera del aparato.
● La pila de respaldo no sirve para escuchar la radio.
Nota
La funcion de respaldo dura unos 10 minutes. Ajuste
nuevamente el reloj si han transcurrido 10 minutes de un torte
electrico.
Cambio de la pila
Cambie la pila por una nueva cuando la indication del reloj
destel[a o la aiarma no funciona bien al conectar nuevamente
el cable electrico.
Notas sobre la pila
● Si no se va a utilizar el aparato durante un Iargo perfodo de
tiempo, saque la pila para evitar que se produzca una
perdida de electrolito.
● Para evitar que se produzca una perdida de electrolito o
explosion, no recargue la pila, caliente o desarme.
FONCTION D’ALIMENTATION DE SECOURS
En cas de coupure de courant, I’affichage dhorloge disparaft
et Ie reglage d’alarme est annule. Pour sauvegarder I’horloge
et I’alarme, inserez une pile 6F22 clans Ie logement piles situe
a I’arriere de I’appareil.
● La pile d’alimentation de secours n’est pas destinee a la
reception de la radio.
Remarque
La fonction dalimentation de secours dure environ 10 minutes.
Refaites Ie reglage de I’horloge si 10 minutes se sent ecoulees
apres une coupure de courant.
Replacement de la pile
Remplacez la pile par une neuve si I’affichage de I’horloge
clignote ou si Ie programmateur dalarme ne fonctionne pas
correctement Iorsque vous rebranchez Ie cordon secteur.
Remarques sur la pile
● Si vous ne prevoyez pas d’utiliser I’appareil pendant
Iongtemps, retirez la pile afin d’emp~cher une fuite
delectrolyte.
● Pour emp~cher une fuite delectrolyte ou une explosion, ne
rechargez jamais la pile, ne la chauffez pas et ne la
demontez pas.
9

SETTING THE CLOCK + @ -
1 Connect the AC power cord to a wall outlet (@).
The clock display begins flashing.
2 While holding down CLOCK, press HOUR to set the
hour.
7:00 7:00 a.m.
7:00. 7:00 p.m.
3 While holding down CLOCK, press MIN to set the
minute.
The clock starts running at “00 seconds.
To display the seconds, press SLEEP while holding down
ALARM.
The seconds are displayed while the buttons are pressed,
+@
@ The 1st digit of the minute
@ Seconds
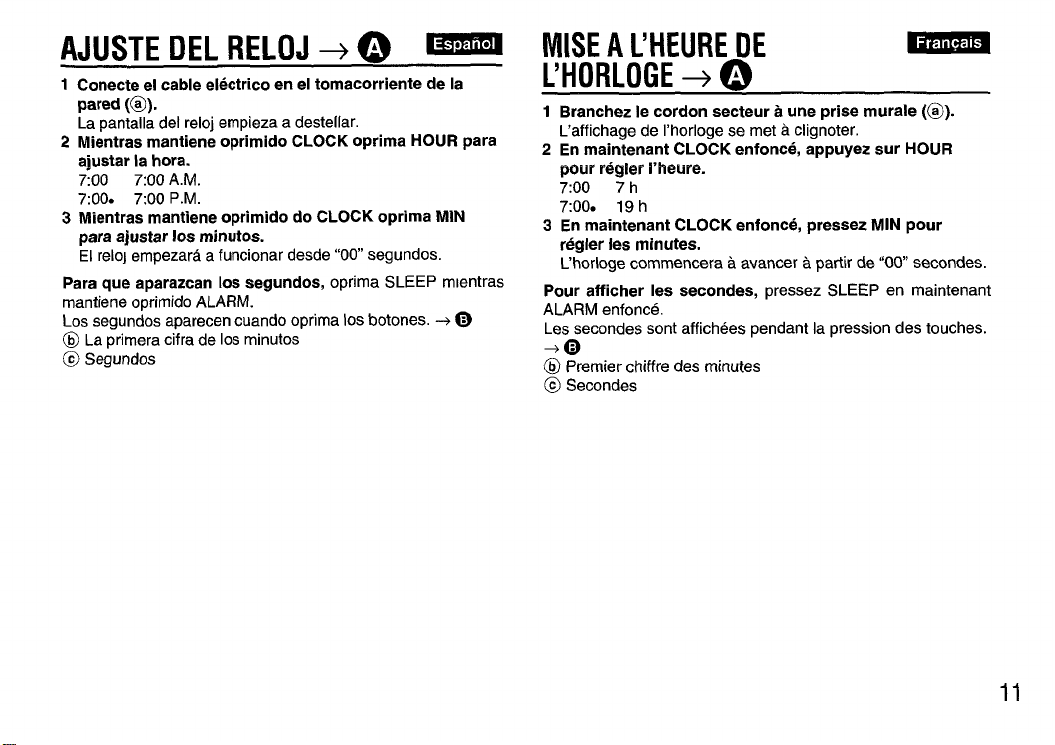
AJUSTE DEL RELOJ + @ -
1 Conecte el cable electrico en el tomacorriente de la
pared (@).
La pantalla del reloj empieza a destellar.
2 Mientras mantiene oprimido CLOCK oprima HOUR para
ajustar la hors.
700 7:OOA.M.
7:000 7:00 P.M.
3 Mientras mantiene oprimido do CLOCK oprima MIN
para ajustar 10s minutes.
El relo} empezara a funcionar desde “00 segundos.
Para que aparazcan Ios aegundos, oprima SLEEP mlentras
mantiene oprimido ALARM.
Los segundos aparecen cuando oprima Ios botones. + @
@ La primers cifra de Ios minutes
@ Segundos
MISE A L’HEURE DE
-
L’HORLOGE + @
1 Branchez Ie cordon secteur a une prise murale (@).
L’affichage de I’horloge se met a clignoter.
2 En maintenant CLOCK enfonce, appuyez sur HOUR
pour r@gler Vheure.
7:00 7 h
7:000 19 h
3 En maintenant CLOCK enfonce, pressez MIN pour
regler Ies minutes.
L’horloge commencera a avancer a partir de “00 secondes.
Pour afficher Ies secondes, pressez SLEEP en maintenant
ALARM enfonce.
Les secondes sent affichees pendant la pression des touches.
+0
@ Premier chiffre des minutes
@ Secondes
11

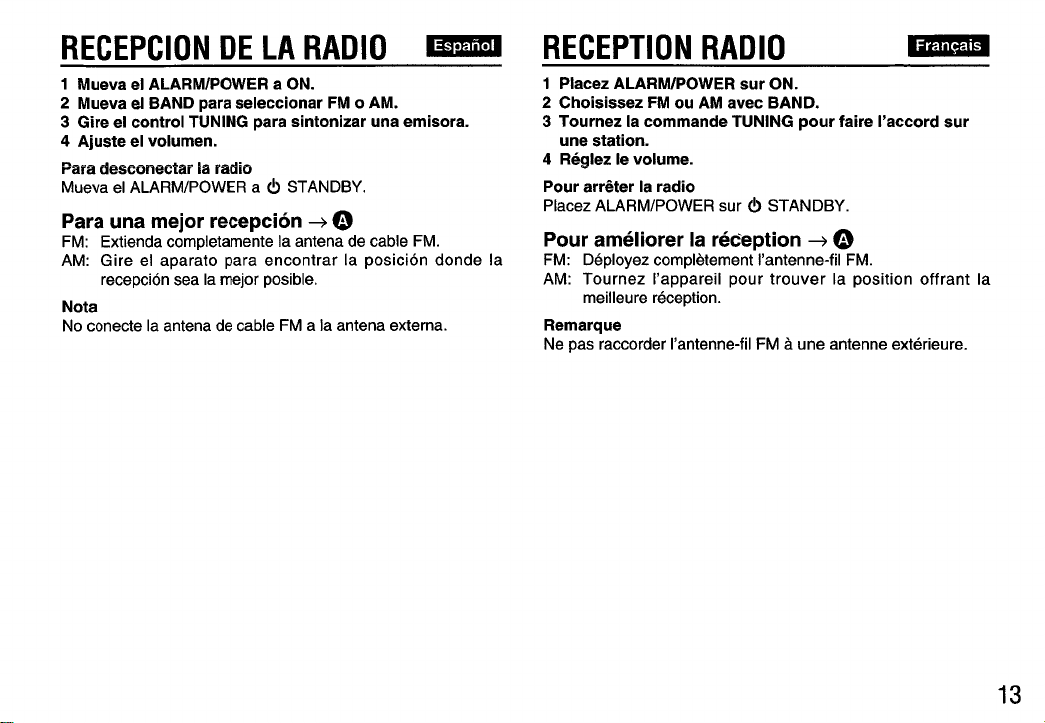
RADIO RECEPTION
I
1 Set ALARMIPOWER to ON.
2 Set BAND to select FM or AM.
3 Turn the TUNING control to tune into a station.
4 Adjust the volume.
To turn off the radio
Set ALARM/POWER to (!) STANDBY.
—
For better reception + @
FM: Extend the FM wire antenna fully.
AM: Turn the unit to find the position which gives the best
reception.
Note
Do not connect FM wire antenna to external antenna.
RECEPCION DE LA RADIO -
1 Mueva el ALARM/POWER a ON.
2 Mueva al BAND para seleccionar FM o AM.
3 Gire el control TUNING para sintonizar una emiaora.
4 Ajuste el voiumen.
Para deaeoneetar la radio
Mueva el ALARM/POWER a & STANDBY.
Para una mejor recepcion + @
FM: Extienda completamente la antena de cable FM.
AM: Gire el aparato para encontrar la position donde la
recepcion sea la mejor posible.
Nota
No conecte la antena de cable FM ala antena externa.
RECEPTION RADIO
1 Placez ALARM/POWER sur ON.
2 Choisissez FM ou AM avec BAND.
3 Tournez la commande TUNING pour faire I’accord sur
une station.
4 Reglez Ie volume.
Pour arr6ter la radio
Placez ALARM/POWER sur (!) STANDBY.
-
Pour ameliorer la reception + @
FM: Deployez completement I’antenne-fil FM.
AM: Tournez I’appareil pour trouver la position off rant la
meilleure reception.
Remarque
Ne pas raccorder I’antenne-fil FM a une antenne exterieure.
13

SLEEP OFF
‘1
ALARM SETTING
The radio or buzzer automatically sounds at the designated
time every day.
1 While holding down ALARM, press HOUR or MIN to set
the alarm time.
7:00 7:00 a.m.
7:000 7:00 p.m.
2 Set ALARM/POWER to RADIO or BUZZER.
When the preset time comes, the radio or buzzer sounds.
To turn off the alarm, press ALARM or SNOOZE/SLEEP
OFF. When SNOOZELSLEEP OFF is pressed, the buzzer will
automatically come on again after about 9 minutes.
To check the slarm time
Press ALARM. The alarm time will be displayed.
To change the alarm time
Set the alarm time again.
Listening to radio while the alarm is set
Set ALARM/POWER to ON. After tistening, set the switch to
RADIO or BUZZER.
Note
● The radio or buzzer automatically turns off after about 2
hours.
● To cancel the alarm before the preset time comes, set
ALARM/POWER to (!) STANDBY. The ALARM indicator (@)
goes out.
● The buzzer volume is fixed and cannot be set with the
VOLUME control.

AJUSTE DE LA ALARMA -
La radio o la alarma suenan automaticamente a la hors
especificada todos Ios d~as.
1 Mantenga oprimido el ALARM y oprima HOUR o MIN
para ajustar la hors de la alarma.
7:00 A.M.
7:00
7:ooo 7:oO P.M.
2 Mueva el ALARM/POWER a RADIO o BUZZER.
Cuando Ilega la hors programada, suena la radio o la
campana de alarma.
Para desactivar la alarma, oprima ALARM o
SNOOZE/SLEEP OFF. Cuando se oprima SNOOZE/SLEEP
OFF, la campana suena nuevamente despues de unos
9 minutes.
Para verificar la hors de la alarma
oprima ALARM. Aparecera la hors de la alarma
Para cambiar la hors de la alarma
AJustenuevamente la hors de la alarma.
Para eacuchar la radio mientras la alarma esta puesta
Mueva el ALARM/POWER a ON. Cuando termine de
escuchar, mueva el interruptor a RADIO o BUZZER.
Nota
● La radio o la campana se desconecta automaticamente
despues de aprox. 2 horas.
● Para cancelar la alarma antes de la hors prefijada, mueva et
ALARM/POWER a (!) STANDBY. Se apaga el indicador (@)
ALARM.
● El volumen de la campana esta fijo y no puede ajustarse con
el control VOLUME.
REGLAGE DU REVEIL
La radio ou Ie signal sonore se fait automatiquement entendre
a I’heure prereglee chaque jour.
1 En maintenant ALARM enfonce, pressez HOUR ou MIN
pour regler I’heure du reveil.
7:00 7 h
7:00, 19 h
2 Reglez ALARM/POWER a RADIO ou BUZZER.
A l’heure prereglee, la radio ou Ie signal sonore se fera
entendre.
Pour arr&er Ie reveil quand ii se fait entendre, appuyez sur
ALARM ou SNOOZE/SLEEP OFF. Si SNOOZE/SLEEP OFF
est presse, Ie signal sonore se fera automatiquement entendre
a nouveau apres environ 9 minutes.
Pour verifier I’heure du reveil
Pressez ALARM. L’heure du reveil s’affichera.
Pur changer I’heure du reveil
Reglez a nouveau I’heure du reveil.
Ecoute de la radio alors que Ie reveil est regle
Reglez ALARM/POWER a ON. Apres I’ecoute, reglez Ie
commutateur sur RADIO ou BUZZER.
Remarques
● La radio ou Ie signal sonore s’arr~te automatiquement apres
2 heures environ.
● Pour annuler Ie reveil avant I’heure prereglee, reglez
ALARM/POWER a (!) STANDBY. Le voyant ALARM (@)
s’eteint.
● Le volume de I’avertisseur sonore est flxe et ne peut ne pas
se regler avec la commande VOLUME.
15

SLEEP TIMER SETTING -
You can use the sleep timer to turn the radio off automatically
after up to 1 hour 59 minutes.
● Before setting, tune in to a station. (See page 12.)
1 Set ALARM/POWER to d) STANDBY.
2 While holding down SLEEP, press MIN to set the time to
turn off the radio.
To cancel the sleep timer, press SNOOZE/SLEEP OFF.
To set the time longer than 59 minutes
While holding down SLEEP, press HOUR once in step 2, then
press MIN.
To use both the sleep timer and the alarm
You can fall asleep listening to the radio and still be awakened
by the radio/buzzer alarm at a preset time.
1 Set the alarm timer referring to steps 1 – 2 on page 14.
2 While holding down SLEEP, press MIN to set the sleep
timer.
Note
You cannot check the remaining time of sleep timer.
.

AJUSTE DEL
TEMPORIZADOR PARA DORMIR
Se puede utilizar el temporizador para dormir para apagar
automaticamente la radio despues de hasta 1 hors 59
minutes.
● Antes de este ajuste, sintonice una emisora. (Consulte la
pagina 13.)
1 Mueva el ALARM/POWER a (!) STANDBY.
2 Mantenga oprimido SLEEP y oprima MIN para ajustar la
hors de desconexion de la radio.
Para cancelar el temporizador para dormir, oprima
SNOOZE/SLEEP OFF.
Para fijar un tiempo de mas de 59 minutes
Mientras mantiene oprimido SLEEP, oprima HOUR una vez
en el paso 2, oprima MIN.
Para utilizar tanto al temporizador para dormir como la
alarma
Puede quedarse dormido escuchando la radio y sin embargo
despertarse con la alarma de la radio/campana a la hors
prefijada.
1 Ajuste el temporizador de alarma consultando Ios pasos 1 –
2 de la pagina 15.
2 Mantenga oprimido SLEEP y oprima MIN para ajustar el
temporizador de dormir.
Nota
No se puede verificar el tiempo remanente del temporizador
para dormir.
REGLAGE DE LA
MINUTERIE D’ARRET DIFFERE
Vous pouvez utiliser la minuterie d’arr& differe pour que la
radio s’eteigne automatiquement apres une duree allant
jusqu’a 1 heure 59 minutes.
● Avant d’effectuer Ie reglage, syntonisez une station. (Voir la
page 13.)
1 Reglez ALARM/POWER sur (!) STANDBY.
2 Maintenez SLEEP enfonce et pressez MIN pour regler
I’heure de coupure de la radio.
Pour annuler la minuterie d’arr6t differe, appuyez sur
SNOOZE/SLEEP OFF.
Pour regier a plus de 59 minutes
Maintenez SLEEP enfonce et appuyez sur HOUR une fois a
I’etape 2, puis sur MIN.
Pour utiliser a la fois la minuterie d’arr~t differe et Ie reveil
Vous pouvez vous endormir au son de la radio et vous faire
reveiller par la radio/signal sonore a I’heure programmed.
1 Reglez la minuterie d’arr& differe aux etapes 1 et 2 de la
page 15.
2 Maintenez SLEEP enfonce et appuyez sur MIN pour regler
la minuterie d’arr6t differe.
Remarque
Le contr61e du temps restant de la minuterie d’arrt+t differe est
impossible.
17

SPECIFICATIONS
Power source
output
Power consumption
Speaker
Frequency range
AC 120 V, 60
280 mW (EIAJ)
4W
57 mm, 8 ohms
FM: 67.5-108 MHz
.-
Hz
AM: 530 – 1,710 kHz
Antennas
FM wire antenna
Ferrite bar antenna for AM
Dimensions (W x H x D)
124x 126x 160mm
(5x 5 x 6
3/, in.)
Approx. 708 g (1.56 Ibs.)
● The specifications and external appearance are subject to
change without notice.
● Specifications, trade mark and model name are marked on
the bottom of the unit.
Note
Keep cassette tapes, magnetic cards and other magnetically
recorded materials away from the speaker as the recorded
information may be erased or noise on cassette tapes may
occur.
To clean the cabinet
Use a soft cloth lightly moistened with a mild detergent
solution.
Do not use strong solvents, such as alcohol, benzine or
thinner.
4

ESPECIFICACIONES
Fuente de alimentacion CA de 120 V, 60 Hz
Salida
Consumo electrico
Altavoz 57 mm, 8 ohmios
Gama de frecuencias
Antenaa
Dimensioned (An. x Al. x Prof.)
Peso
● Las especificaciones y aspecto exterior estan sujetos a
cambios sin previo aviso.
QLas especificaciones, Iogotlpo de la marca y nombre del
modelo estan indlcados debajo del aparato.
Nota
Mantenga Ias cintas de cassette, tarjetas magneticas u otros
materials grabados magneticamente alejados del altavoz ya
que la information grabada puede borrarse o puede haber
ruidos en Ias cintas de cassette.
Para Iimpiar el mueble
Utilice un pafio suave empapado en una solution de
detergence neutro.
No utilice disolventes fuertes tales como alcohol, bencina o
diluyente de pmtura.
280 mW (EIAJ)
4W
FM: 87,5 – 108 MHz
AM: 530 – 1.710 kHz
Antena de cable FM
Antena de barra de ferrita para
AM
124x 126x 160mm
Aprox, 708 g
FICHE TECHNIQUE “
Source d’alimentation
Courant de sortie
Consummation electrique
Haut-parleur
Plage de frequencies
Antennes
Dimensions (1x h
Poids
● Les caracteristiques et I’aspect exterieur sent susceptible
d’6tre modifies saris preavis.
● Les caracteristiques, la marque et la designation du modele
sent indiquees au-dessous de I’appareil.
Remarque
N’approchez pas de cassettes, cartes magnetiques ou autres
supports d’enregistrement magnetique du haut-parleur car
ceci pourrait effacer Ies information enregistrees ou creer des
parasites sur Ies cassettes.
Pour nettoyer Ie coffret
Utilisez un chiffon doux Iegerement imbibe d’une solution de
detergence deuce.
N’utilisez pas de solvants puissants, tels qu’alcool, benzine ou
diluant.
x p)
Alimentation secteur
120 V CA, 60
280 mW (EIAJ)
4W
57 mm, 8 ohms
FM: 87,5 – 108 MHz
AM: 530 – 1.710 kHz
Antenne-fil FM
Antenne-tige de ferrite pour AM
124x 126x 160mm
env. 708 g
I-Iz
19

AIVVA CO.,LTD.
8Z-FNJB-903-11
981 214CY0-OX
printed in Hong Kong
 Loading...