

Page 1

CoreNVR 9/16
User’s Manual
Page 2

Copyright and Disclaimer
Copyright & Disclaimer
No part of this publication may be reproduced in any form or by any means, whether
electronic, mechanical, photocopying, or recording without the written consent of OvisLink
Corp.
OvisLink Corp. has made the best effort to ensure the accuracy of the information in this
user’s guide. However, we are not liable for the inaccuracies or errors in this guide.
Please use with caution. All information is subject to change without notice
All Trademarks are properties of their respective holders.
i AirLive CoreNVR 9/16 User’s Manual
Page 3

Copyright and Disclaimer
FCC Statement
Federal Communication Commission Interference Statement
This equipment has been tested and found to comply with the limits for a Class B digital
device, pursuant to Part 15 of the FCC Rules. These limits are designed to provide
reasonable protection against harmful interference in a residential installation. This
equipment generates, uses and can radiate radio frequency energy and, if not installed and
used in accordance with the instructions, may cause harmful interference to radio
communications. However, there is no guarantee that interference will not occur in a
particular installation. If this equipment does cause harmful interference to radio or
television reception, which can be determined by turning the equipment off and on, the A
user is encouraged to try to correct the interference by one of the following measures:
Reorient or relocate the receiving antenna.
Increase the separation between the equipment and receiver.
Connect the equipment into an outlet on a circuit different from that to which the
receiver is connected.
Consult the dealer or an experienced radio/TV technician for help.
FCC Caution
Any changes or modifications not expressly approved by the party responsible for
compliance could void the user's authority to operate this equipment. This device complies
with Part 15 of the FCC Rules. Operation is subject to the following two conditions: (1) This
device may not cause harmful interference, and (2) this device must accept any
interference received, including interference that may cause undesired operation. For
product available in the USA/Canada market, only channel 1~11 can be operated.
Selection of other channels is not possible.
This device and its antenna(s) must not be co-located or operation in conjunction with any
other antenna or transmitter.
FCC Radiation Exposure Statement
This equipment complies with FCC radiation exposure limits set forth for an uncontrolled
environment. This equipment should be installed and operated with minimum distance
20cm between the radiator & your body.
AirLive SD-2020 User’s Manual ii
Page 4

Table of Contents
Table of Contents
1. Overview .....................................................................................................1
1.1 Introduction .........................................................................................1
1.2 Key Features ......................................................................................2
2. Package Contents and Installation...........................................................3
2.1 Package Content ................................................................................3
2.2 Connections........................................................................................5
2.3 Start to use CoreNVR .........................................................................6
3. CoreNVR Main System ..............................................................................7
3.1 Main Console......................................................................................7
3.2 System Information .............................................................................7
3.3 Screen Division...................................................................................8
3.4 Sub-screen Functions .........................................................................8
4. System Setting .........................................................................................10
4.1 Camera Setup...................................................................................10
4.1.1 Auto Setting ............................................................................................................. 10
4.1.2 Template Setting ...................................................................................................... 11
4.1.3 Camera List.............................................................................................................. 12
4.1.4 Camera Setup ........................................................................................................... 12
4.1.5 Parameter Setting ..................................................................................................... 13
4.1.6 Search Camera .........................................................................................................14
4.2 Schedule Setting...............................................................................14
4.3 Network Setting ................................................................................15
4.3.1 Network.................................................................................................................... 16
4.3.2 PPPOE...................................................................................................................... 16
4.3.3 UPNP .......................................................................................................................16
4.3.4 UPnP Transversal.....................................................................................................16
4.3.5 Server ....................................................................................................................... 16
AirLive CoreNVR 9/16 User’s Manual iii
Page 5

Table of Contents
4.4 System Setting..................................................................................17
4.4.1 Device Info............................................................................................................... 17
4.4.2 Date Time Info ......................................................................................................... 17
4.5 User Setting ......................................................................................18
4.6 Motion Detection Setting...................................................................19
4.7 Address Book Setting .......................................................................20
4.8 Notification Setting ............................................................................21
5. System Management ...............................................................................23
5.1 System Management ........................................................................23
5.2 Disk Management .............................................................................24
5.3 Snapshot...........................................................................................25
5.4 Event Snapshot ................................................................................26
5.5 Samba Server...................................................................................26
6. Event Setting ............................................................................................28
6.1 Add a New Event ..............................................................................28
6.2 Modify exist Event schedule or Output Action...................................30
6.3 Delete exist Event schedule or Output Action...................................30
6.4 Event Action Type .............................................................................31
7. Log Viewer................................................................................................33
7.1 System Log.......................................................................................33
7.2 Event Log..........................................................................................33
7.3 Bitrate Log ........................................................................................34
8. Playback ...................................................................................................35
8.1 Search Recorded Video Files ...........................................................35
8.2 Playback Control Buttons .................................................................37
8.3 Convert to Avi file..............................................................................38
AirLive CoreNVR 9/16 User’s Manual iv
Page 6

Table of Contents
8.4 Back up Video Files ..........................................................................39
9. Remote Viewing on IE .............................................................................40
9.1 Connection to CoreNVR ...................................................................40
9.2 Live View on IE .................................................................................42
9.3 System Information ...........................................................................42
9.4 Screen Division.................................................................................42
9.5 Subscreen Functions ........................................................................43
9.6 Playback on IE..................................................................................45
10. Appendix.................................................................................................47
A. Product Specification...........................................................................47
AirLive CoreNVR 9/16 User’s Manual v
Page 7
1. Overview
1. Overview
1
This user’s guide explains how to operate CoreNVR series system. A user should read this
manual completely and carefully before you operate the device.
1.1 Introduction
The CoreNVR series is a stable and high capacity network video recorder for IP cameras;
users are able to see the live streaming and also recording multiple events on internet at
the same time. Users may install HDD in the CoreNVR machine for recording so it doesn’t
need any extra computer for storage. The CoreNVR system provides you convenient and
efficient to manage your IP cameras.
AirLive CoreNVR 9/16 User’s Manual 1
Page 8

1. Overview
1.2 Key Features
H.264 codec for live view and recording over internet
Multi-channel scheduled recording, playback, motion detection
Supports 5 Megapixel resolution
High Resolution Local Display
2X SATAll HDD up to total 6TB and one external eSATA port.
Two-Way Audio
PTZ camera control by joystick and mouse
Event alarm including by motion detection, camera disconnection, HDD error, DI/DO,
Disconnect Alarm, PIR Alarm, Audio Detection Alarm.
AirLive CoreNVR 9/16 User’s Manual 2
Page 9

2. Package Contents and Installation
2. Package Contents and
2
2.1 Package Content
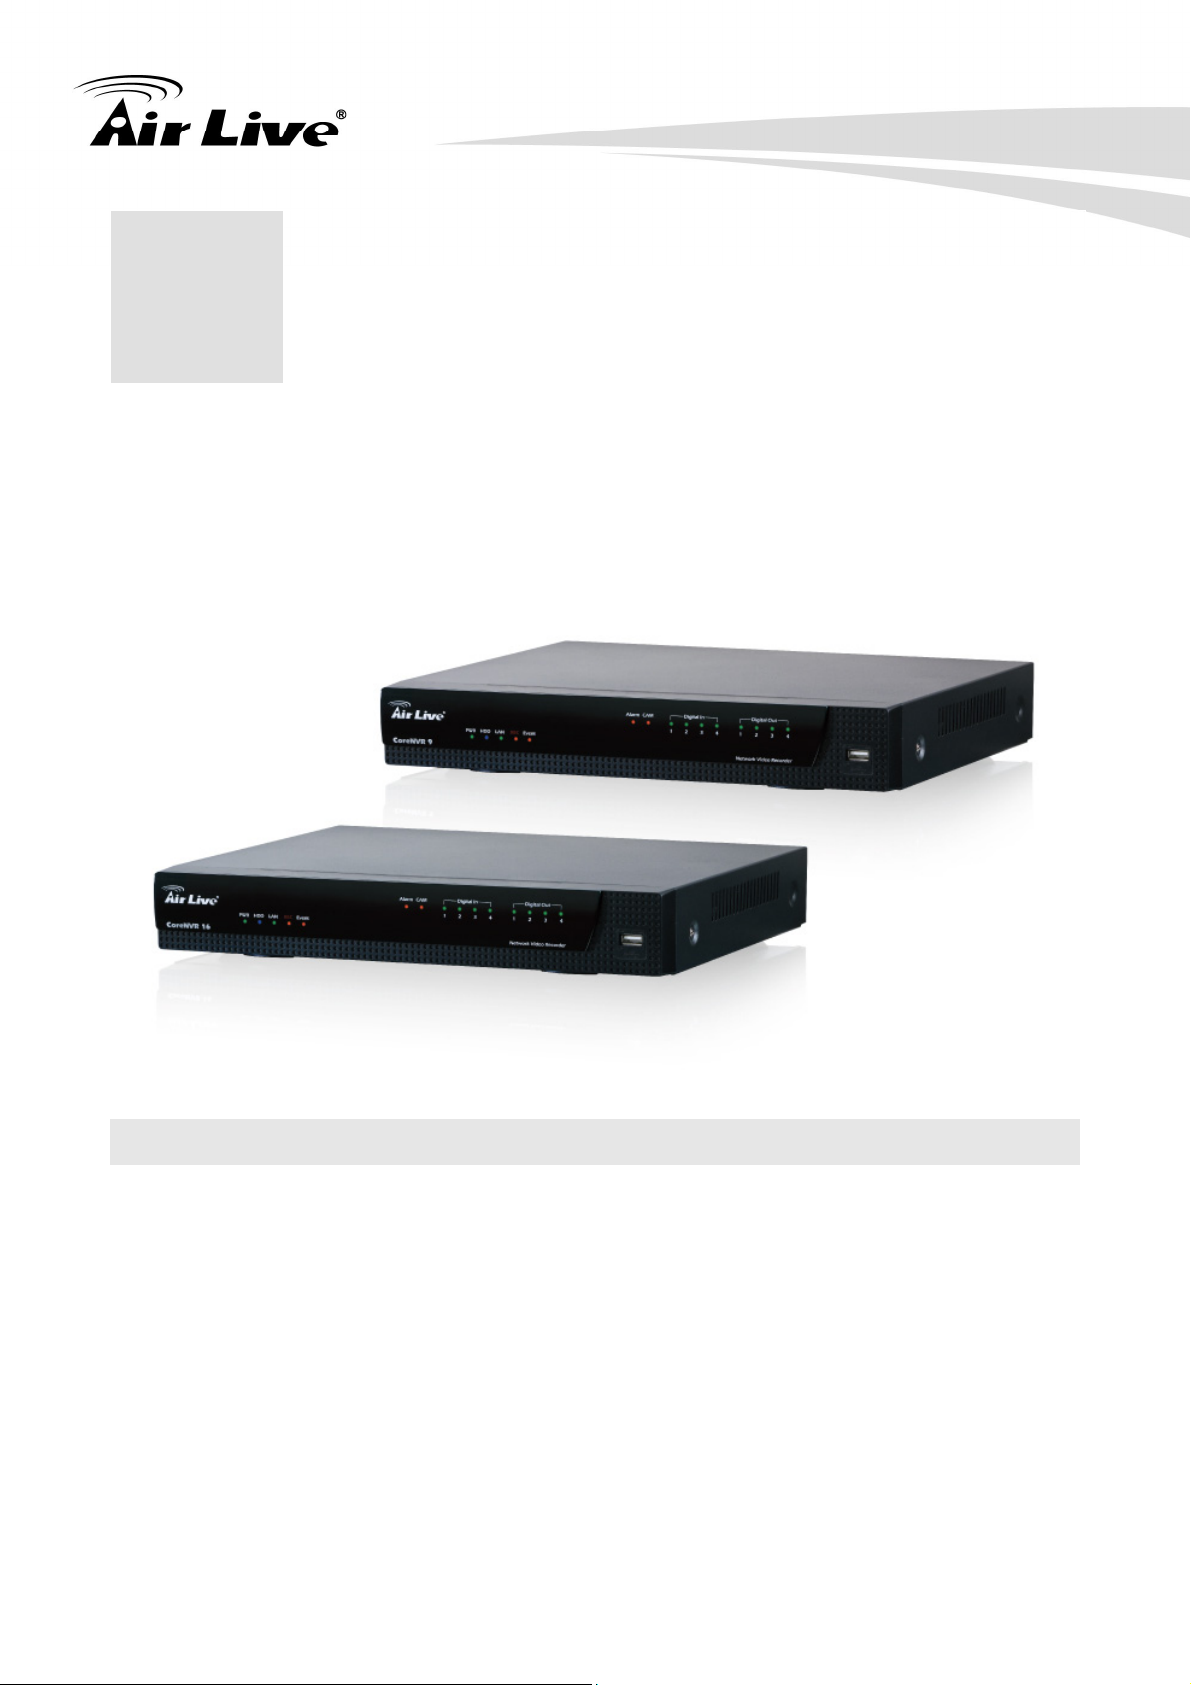
1. CoreNVR 9ch or CoreNVR 16ch X1
2. 12V / 5A adapter X1
3. SATA data cord X2
4. SATA power cord X2
5. Hard disk holder X4 pcs
6. Quick install guide X1
7. Manual disc X1
Front:
Installation
1. Status LED:
PWR: LED on when system is ready.
HDD: LED on when Hard Disk is reading or writing.
LAN: LED on when network is on communication.
REC: LED on when Record schedule is on.
Event: LED on when alarm monitoring is on.
2. Alarm LED:
Alarm: LED on when Hard Disk write error.
CAM: LED on when system have camera disconnected.
3. Digital Input LED: LED on means Digital Input is triggered.
4. Digital Output LED: LED on means Digital output device is reacting.
5. USB: For connect USB stick or mouse.
AirLive CoreNVR 9/16 User’s Manual 3
Page 10
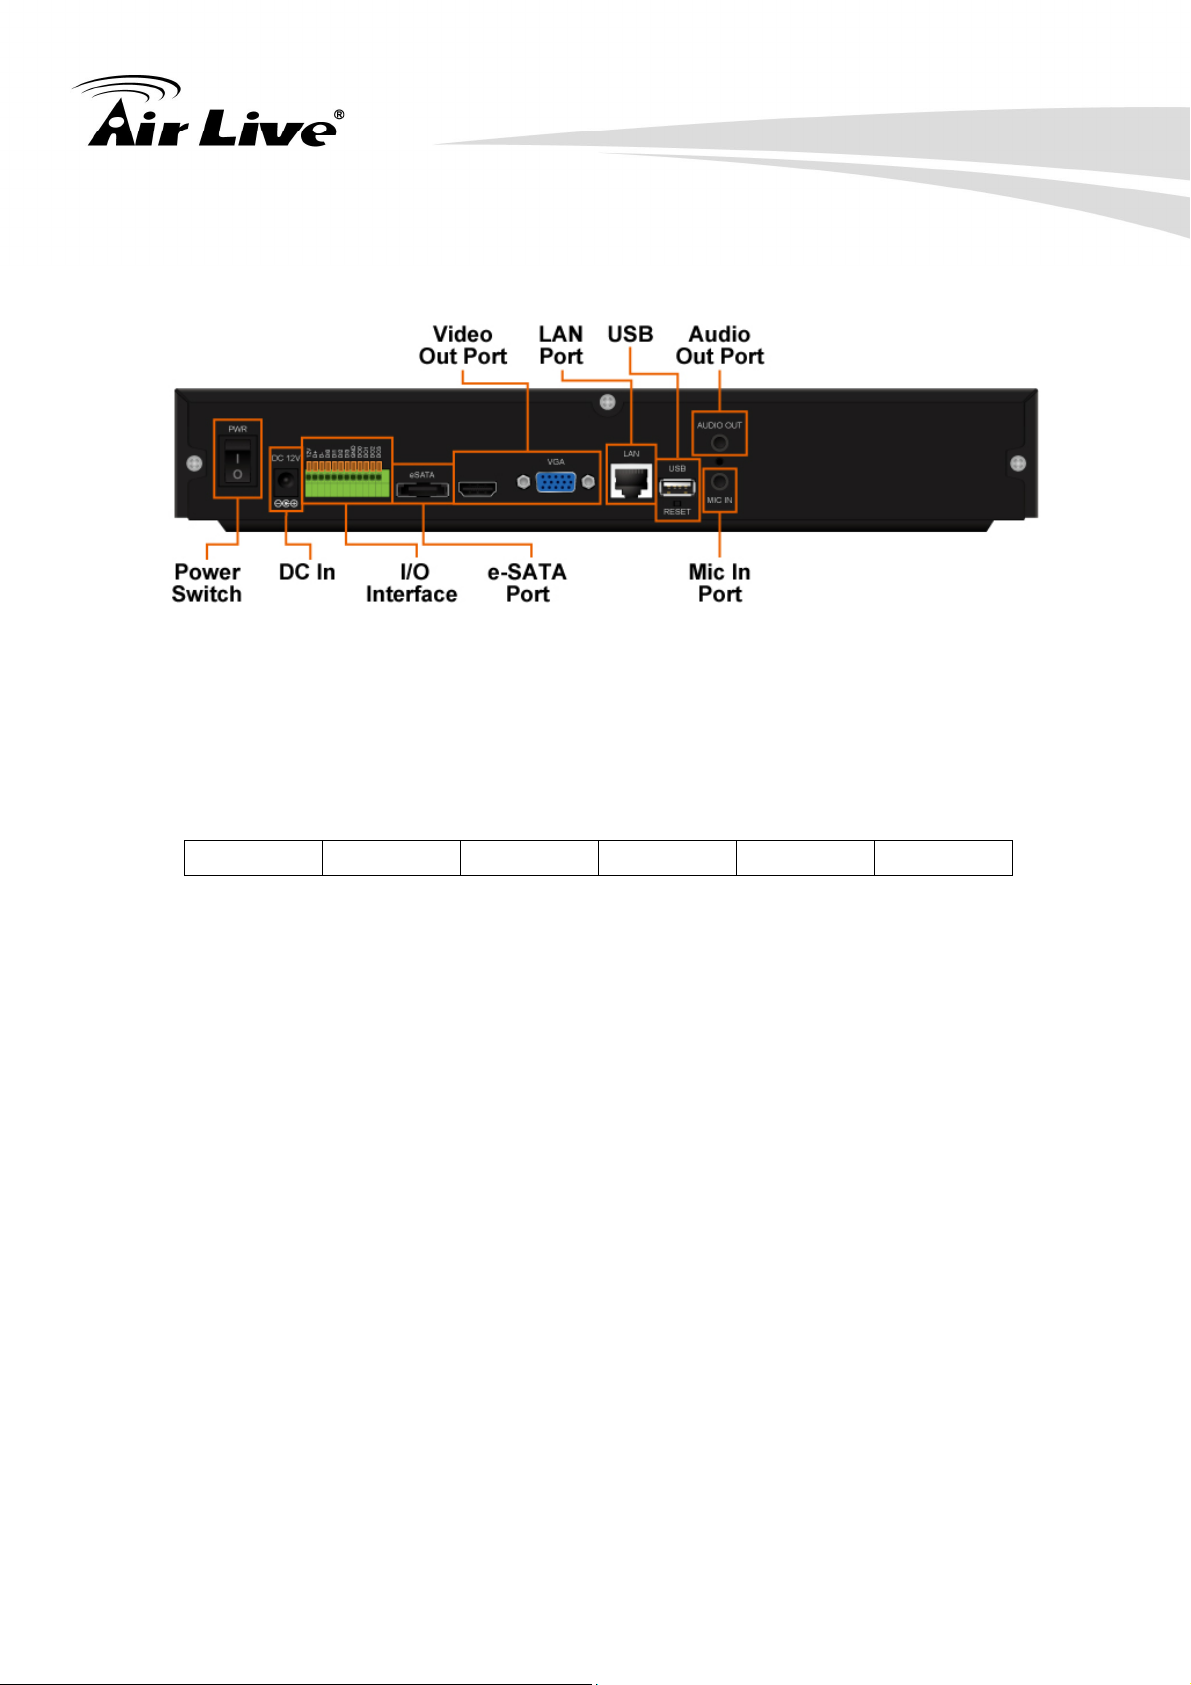
Back:
2. Package Contents and Installation
1. Power Switch: Switch to “ | ” for Power on.
Switch to “ O “ for Power off.
2. DC Adaptor In: Insert 12VDC / 4A adaptor here.
3. I/O interface: Look from back side.
12V out RS485 D+ RS485 D- DI0 ~ DI3 Ground DO0~DO3
4. e-SATA port: Connect to e-SATA storage device.
5. Video Output: Insert local display connector here.
7. LAN port: Gigabit LAN port.
8. USB: For connect USB stick or mouse.
9. Audio Out port: Insert speaker connector here.
10. Mic In port: Insert Microphone connector here.
AirLive CoreNVR 9/16 User’s Manual 4
Page 11

2. Package Contents and Installation
2.2 Connections
The CoreNVR was designed for small office, home and convenience stores, you may
refer to the picture below to get an idea of connections between IP cameras, router/PoE
switch and CoreNVR.
AirLive CoreNVR 9/16 User’s Manual 5
Page 12
2. Package Contents and Installation
2.3 Start to use CoreNVR
1. Please refer to the QIG to install the HDD into the CoreNVR system for video
storage.
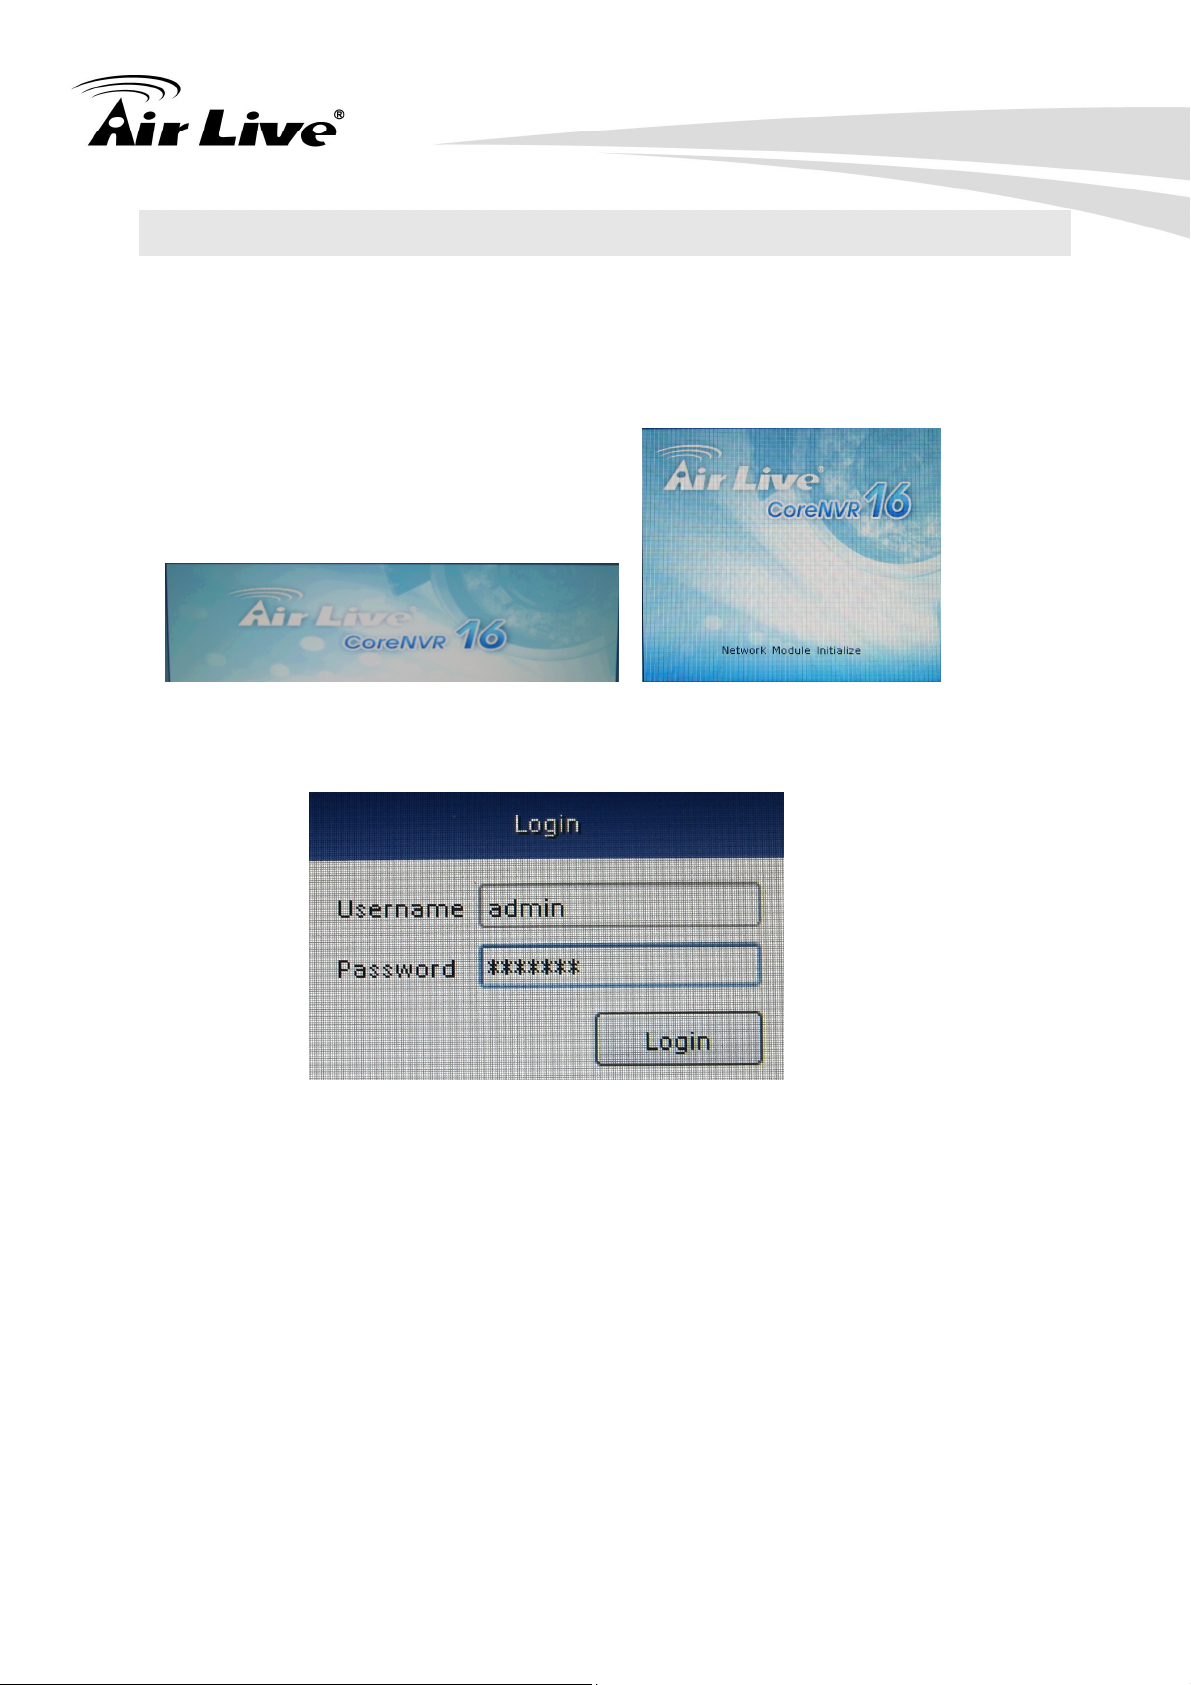
2. Turn On the NVR Power then you will see the AirLive CoreNVR logo as below.
3. Login NVR system with default username “admin” and password “airlive”.
AirLive CoreNVR 9/16 User’s Manual 6
Page 13
3. CoreNVR Main System
3. CoreNVR Main System
3
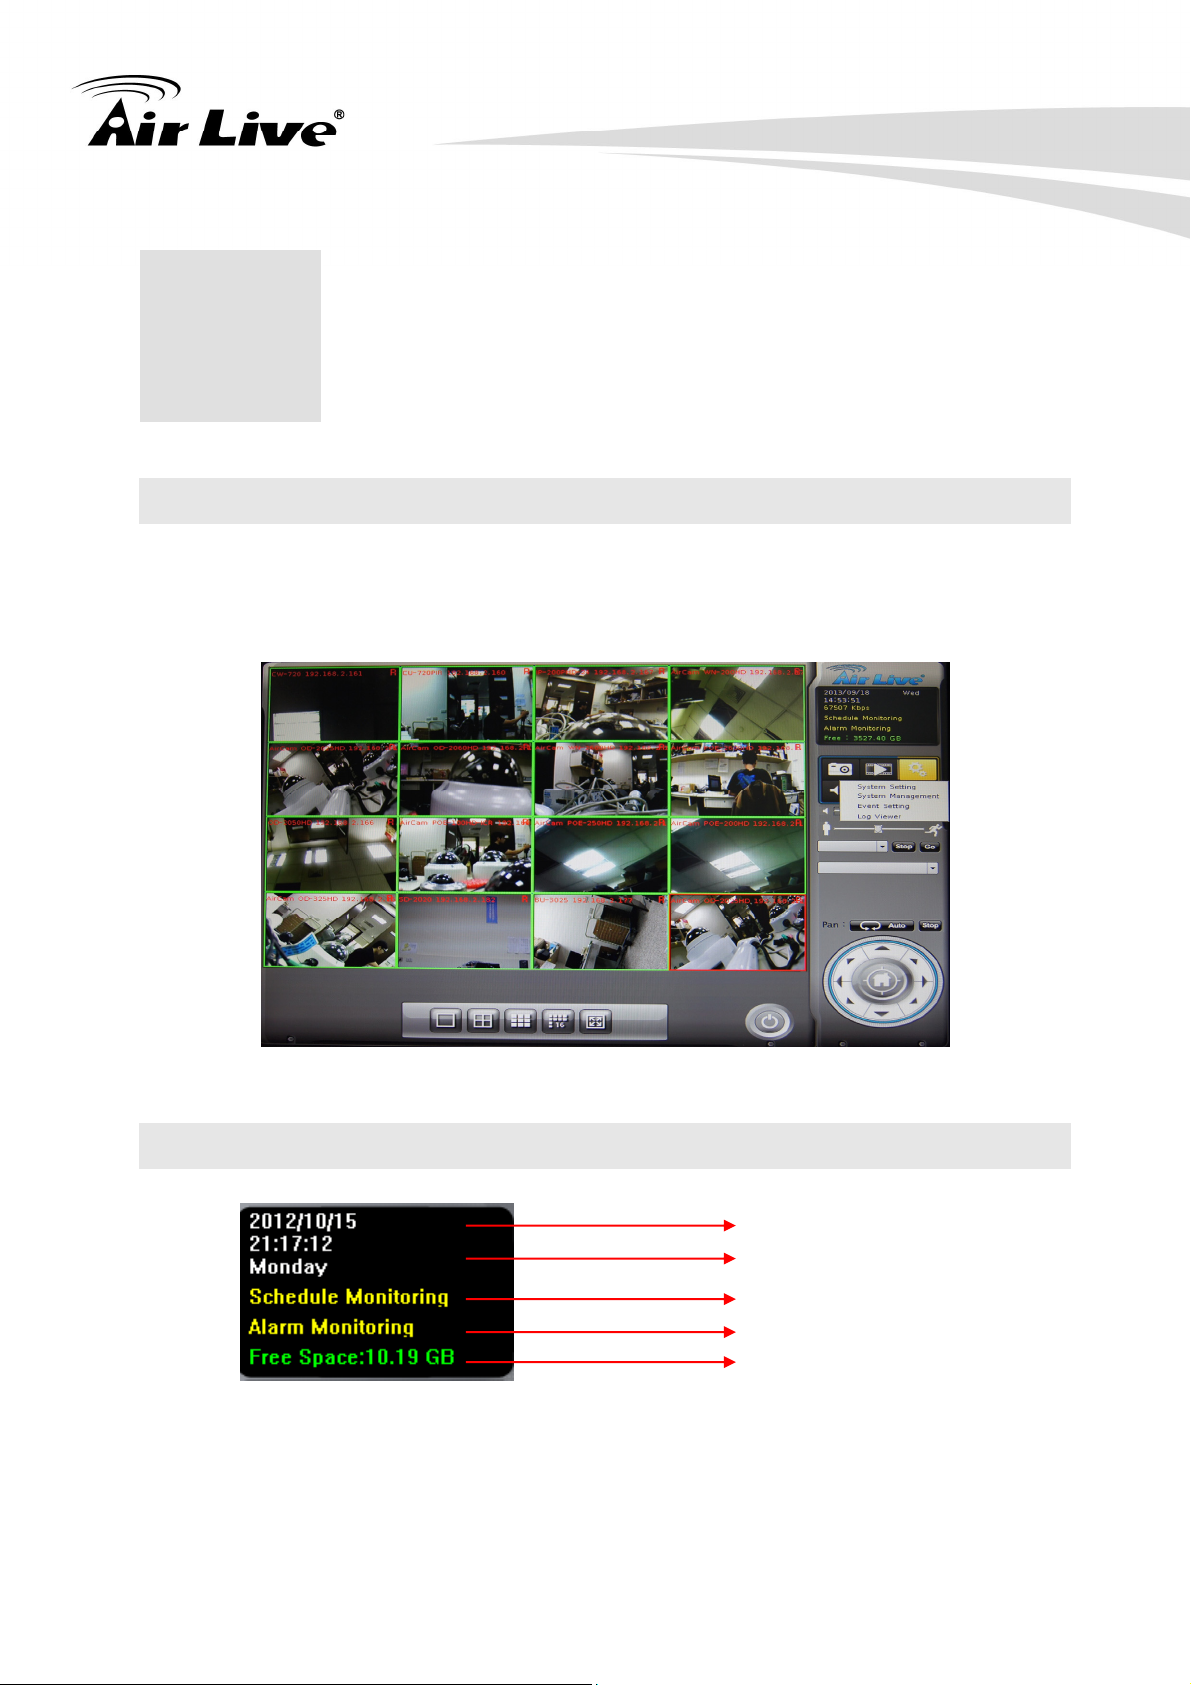
3.1 Main Console
This is the main control panel of system, to provide live stream preview, system setup,
Two-way audio, playback, volume control, snapshot, start or stop monitor, and PTZ
controls.
3.2 System Information
Date
Time
Recording Status
Event Alarm Status
HDD Status
AirLive CoreNVR 9/16 User’s Manual 7
Page 14
3. CoreNVR Main System
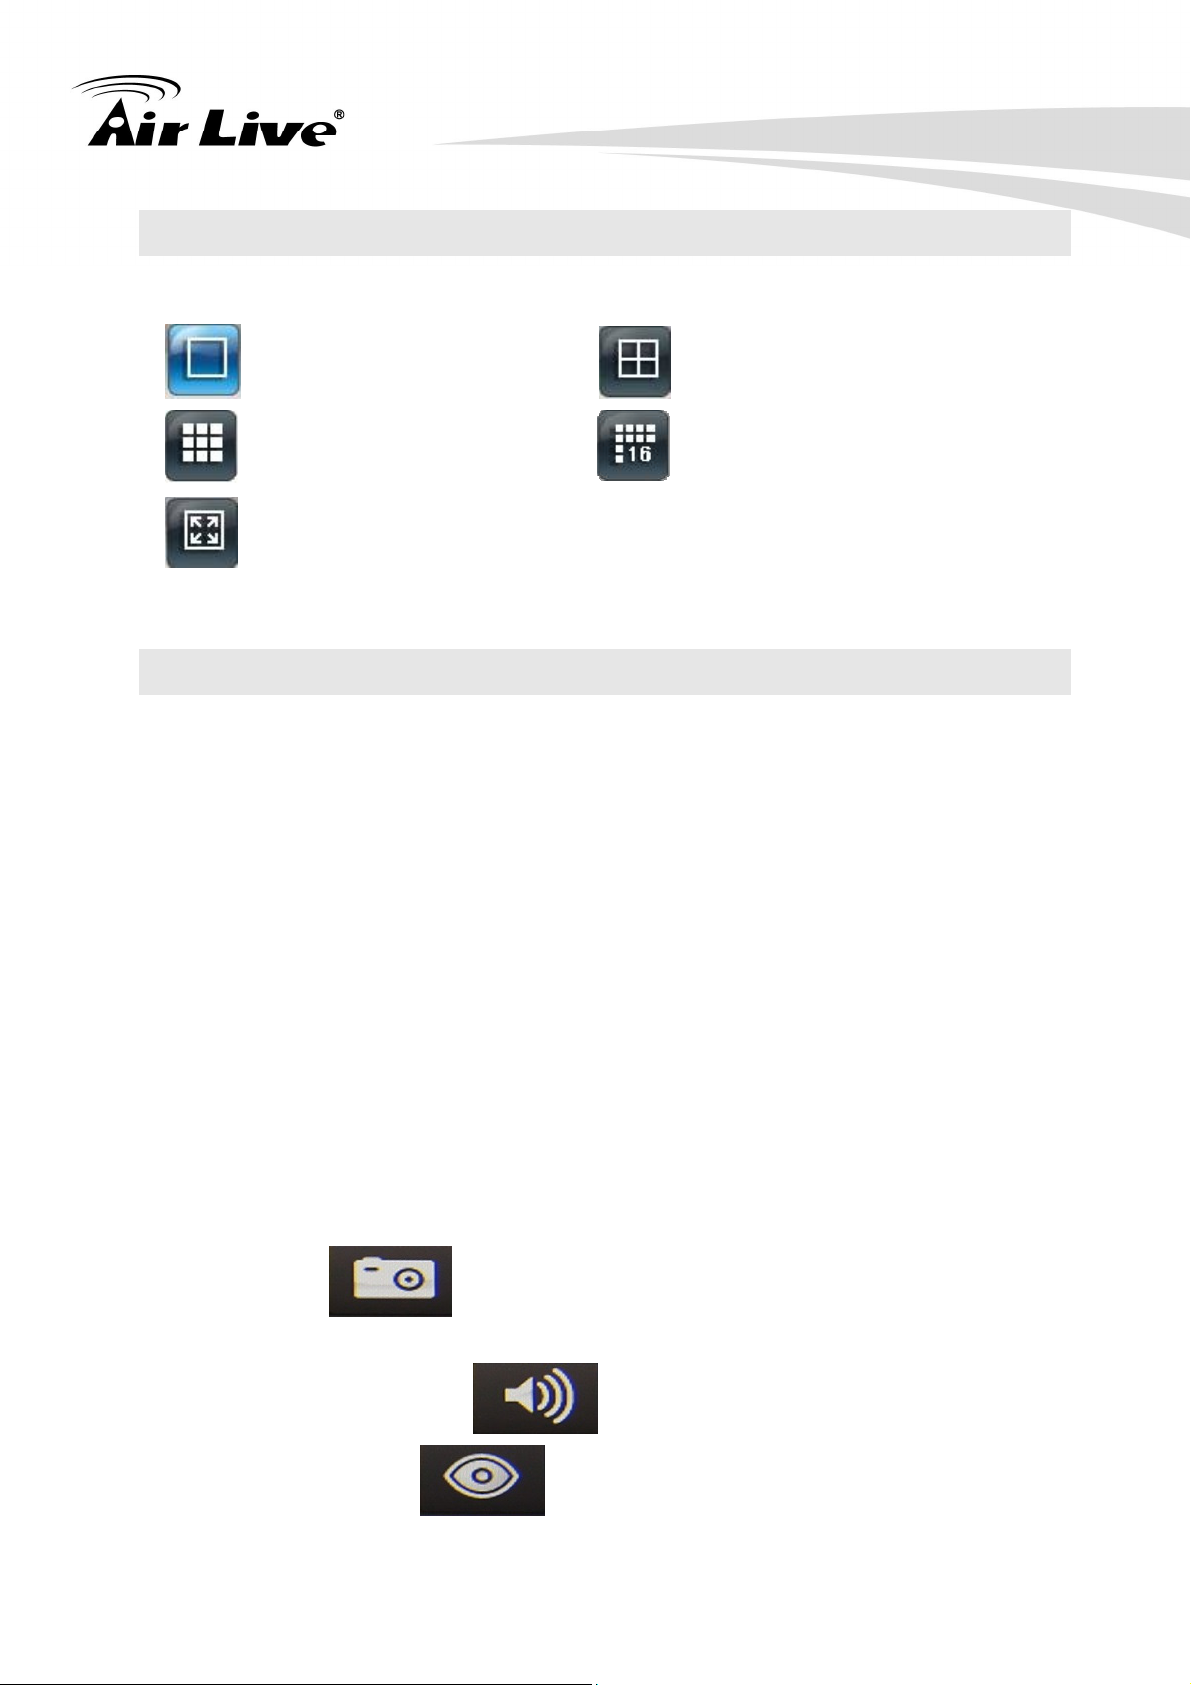
3.3 Screen Division
Assign the preview screen to expected layout division by clicking these buttons.
Switch to 1 Division. Switch to 4 Division.
Switch to 9 Division. Switch to 16 Division.
Switch to Full screen, and click mouse right button to cancel Full Screen.
3.4 Sub-screen Functions
Digital Zoom:
Sub-screen window supported digital zoom, operation step as follow,
1. Click on preview image for switch current focus channel.
2. Scroll the mouse wheel, forward for digital zoom-in, and backward for
zoom-out.
3. Switch division mode will reset digital zoom status to default.
Popup Menu:
Click mouse right button, select an option from the popup menu.
1. Change current channel display camera.
2. Change current division mode.
3. Switch current channel display ratio mode.
4. Switch to Full Screen mode / Cancel Full Screen mode.
5. Reset all channels to default camera list.
6. Snapshot current display.
7. Enable / Disable Auto Switch.
Snapshot: Click to take a snapshot to the HDD; you can management
snapshots at system management “snapshot” page.
Audio Volume Control: Click to switch between normal and mute.
Schedule Monitor: Click
button to enable or disable Schedule monitoring,
the recording will be stopped if it is disabled.
AirLive CoreNVR 9/16 User’s Manual 8
Page 15

3. CoreNVR Main System
Two Way Audio: Click button to start or stop selected channel two-way
audio.
PTZ Control:
Move PTZ camera direction by click direction buttons.
Click to make camera return home position.
Move the thumb to left to make slower,
move to right to make move faster.
Tour: Select a tour setting from combo box, and click “go” button to start tour, click
“Stop” button to stop tour.
Preset: Select a preset position from combo box, camera will move to preset position
after click.
IRIS: Adjust camera’s IRIS setting, or set it to auto.
Focus: Adjust camera’s focus setting, or set it to auto.
Zoom: Zoom-in or zoom-out focus camera.
Pan: Begin camera auto pan or stop.
AirLive CoreNVR 9/16 User’s Manual 9
Page 16
4. System Setting
4. System Setting
4
Click setup button and select “System Setting” from pop-up menu to approach System
setting dialog.
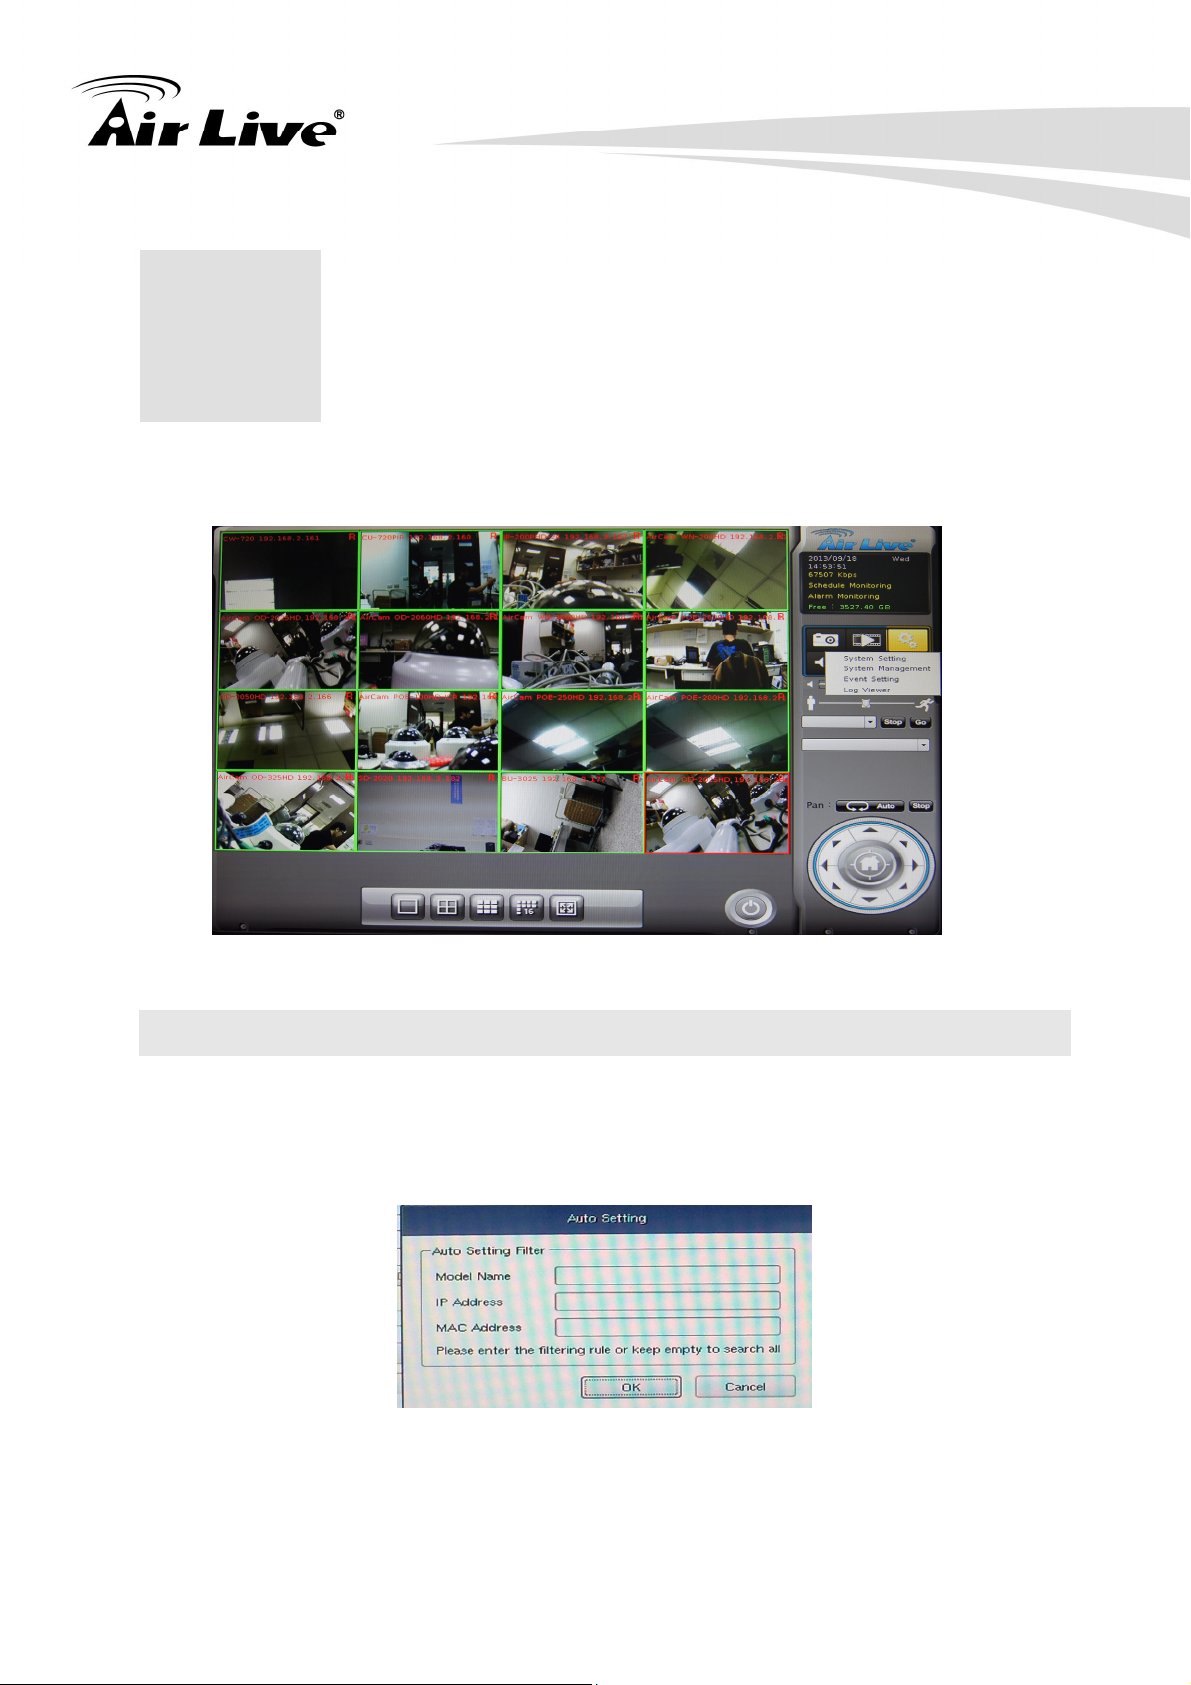
4.1 Camera Setup
4.1.1 Auto Setting
Click the “Auto Setting” button for auto add cameras to system, maximum number of
cameras are depend on NVR’s model.
After click the button, system will show the fuzzy search filter dialog, you could input the
search filter by model name, IP address or MAC address, or you could keep them
empty for search all cameras.
AirLive CoreNVR 9/16 User’s Manual 10
Page 17
4. System Setting
Auto setting could insert intranet’s cameras , even them behind of several switch hubs ,
or you could just direct insert cameras on NVR’s switch hub , then click “ Auto Setting
“ button to add them into system .
Through “ Auto Setting “ function , you won’t need to key-in any network IP or sub-mask
parameter , you only need to click “ Auto Setting “ button to finish insert IP camera job.
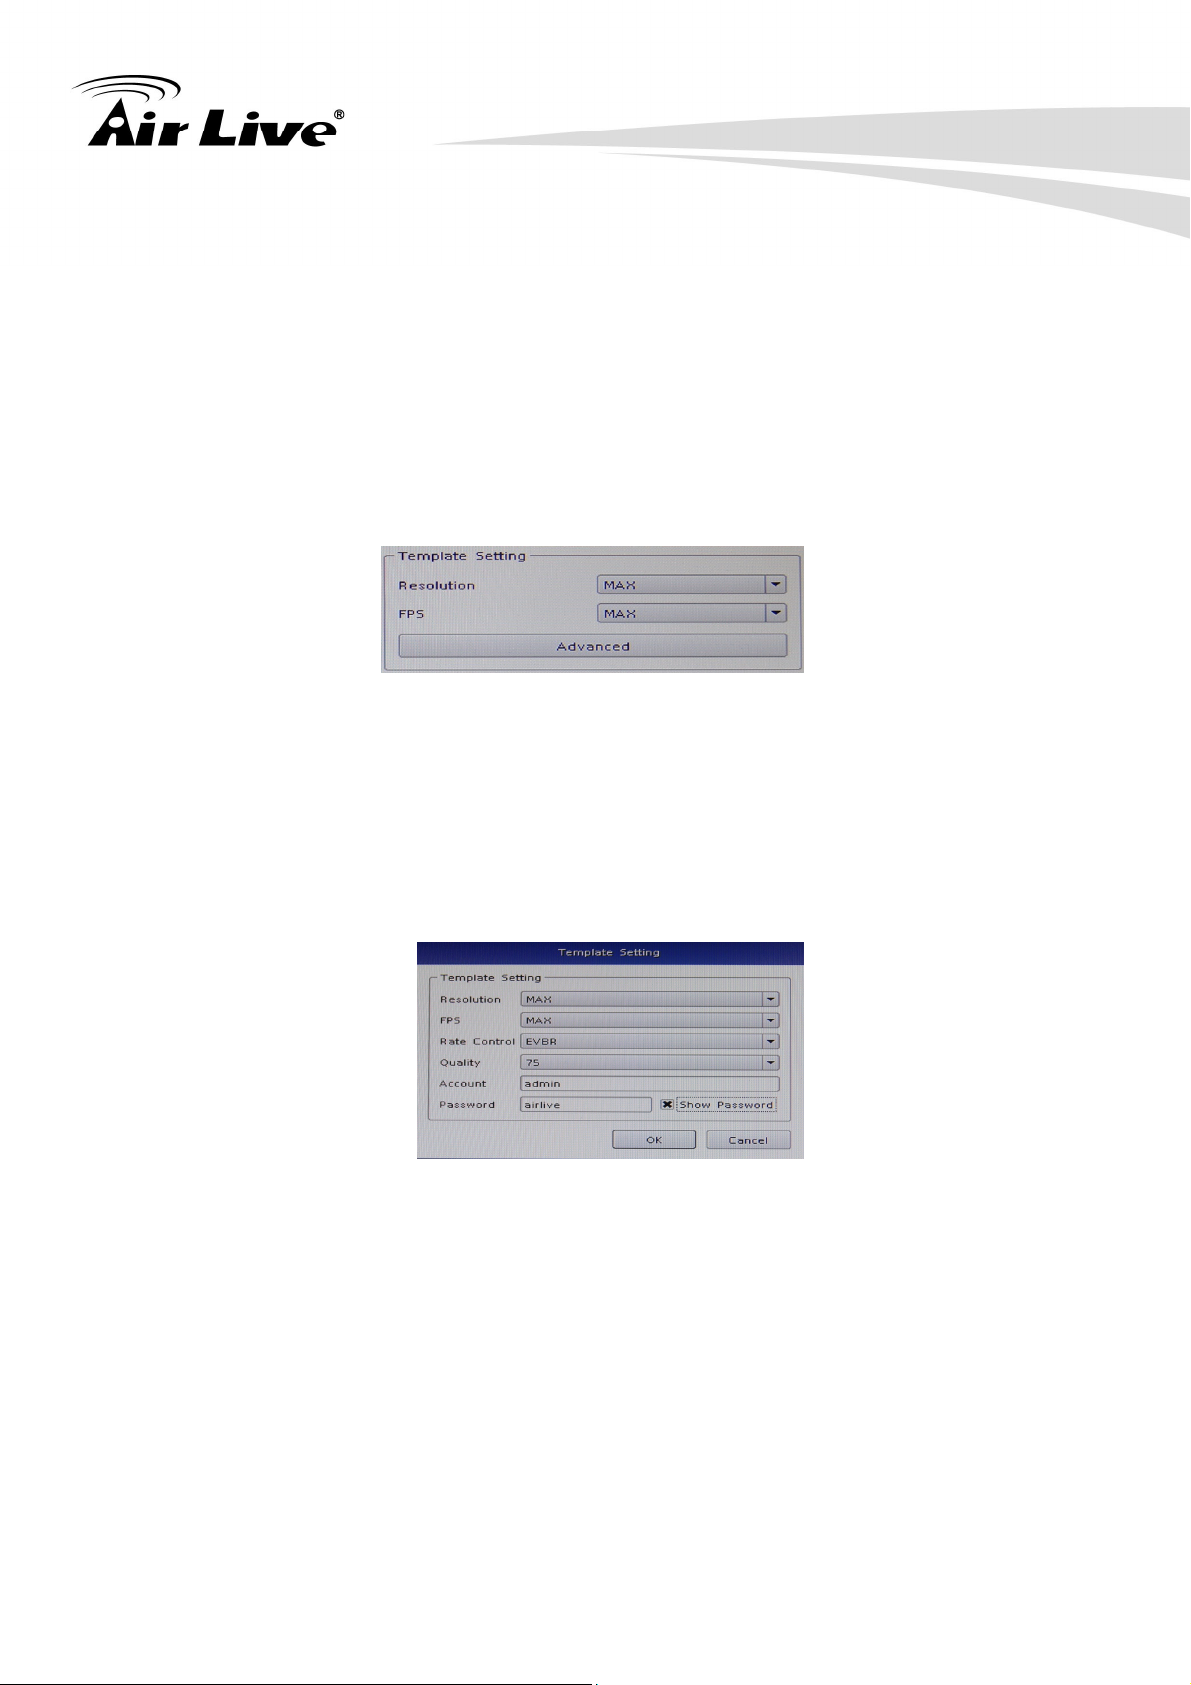
4.1.2 Template Setting
When you use “Auto Setting” or add a new camera, system will read the camera
template from “Template Setting” for fill the camera parameter.
After you confirm the template, in most case, you will no longer need to set camera’s
parameter again.
You could setting the quick template from camera setting page, in most case you only
need set the camera’s resolution and frames per second.
If you need set more detail template, please click the “Advanced” button to approach the
template setting dialog.
Resolution
The new camera will try to fit selected resolution, if you select “Max”, camera will use
maximum resolution, or you could select another resolution, system will choose a
near one resolution of camera.
FPS: Set the frames per second of camera, system will try to set a near or equal FPS
to camera.
Rate Control: Set the rate control algorithm of new camera.
Quality: If you select the EVBR for new cameras, you could set then VBR quality
here.
Account: Setup the default login camera user account.
Password: Setup the default login camera password.
AirLive CoreNVR 9/16 User’s Manual 11
Page 18

4. System Setting
4.1.3 Camera List
List all inserted IP camera’s name, click the row of camera to display detail information
and live streaming video.
Check the box to make the camera available for video streaming; otherwise the camera
will be disabled if the check box is empty.
Switch Camera sequential
Click mouse right button on the camera, and select another camera in the popup menu,
system will switch these two camera’s setting.
4.1.4 Camera Setup
Vendor: You may select camera vendor or use OnVIF protocol for camera connection.
Detect: Check camera available and receive camera model name.
Camera Name: Key in camera name at here.
IP Address: Key-in camera’s IP address.
HTTP port: Set camera’s HTTP port, default is 80.
RTSP port: Set camera’s RTSP port, For TCP streaming, default is 554.
OnVIF Authentication: Select connect to camera with WSSE authentication or without
authentication.
AirLive CoreNVR 9/16 User’s Manual 12
Page 19

User Name: Set the User name for login camera.
Password: Set the Password for login camera.
4.1.5 Parameter Setting
4. System Setting
Profile: Select video codec and resolution for live view and recording.
FPS: Select FPS for live view and recording.
Protocol: Select protocol HTTP / TCP and UDP.
Rate Control: Select EVBR or CBR for better video performance.
Quality: Select video quality by numbers.
Enable Audio: You have to enable audio for two-way audio function.
Audio Record: Enable it for audio recording.
Two Way Audio: Enable it for Two-Way Audio function.
Input Gain: Adjust the gain to reduce the input audio noise.
Output Gain: Adjust the gain to reduce the output audio noise.
※ Note: The parameter settings are different from each vendor.
Add Camera:
1. Click “Search” button and wait for search job finished.
2. Select a camera on search result list.
3. Preview live streaming video at preview window to confirm current camera.
4. Click “Add” button to add selected camera into system.
AirLive CoreNVR 9/16 User’s Manual 13
Page 20

4. System Setting
Delete Camera:
2. Select a camera from installed camera list.
3. Click “Delete” button to remove selected camera from list.
Update Camera setting:
1. Select a camera from installed camera list.
2. Modify camera’s setting at each setting fields.
3. Click “Update” button to save modified result.
※ Note: Updated setting will write to disk after click “OK” at bottom of page. If
you click “Cancel” button to leave setting page, system will ignore all
your modified setting.
Clear button: Clear all setting fields.
4.1.6 Search Camera
Click “Search” button, system will list all camera can be searched in “Search List”, you
can click on each row to preview live video streaming.
4.2 Schedule Setting
Schedule setting allows you to setup different type of recording, you may define multiple
recording type for each day or within 24 hours.
AirLive CoreNVR 9/16 User’s Manual 14
Page 21

4. System Setting
1. Select a camera: Select a camera for schedule configuration.
2. Select a weekday: Select a weekday bar; system will list time periods with this
weekday.
3. Add / Configure: Select the time period and type of recording.
4. Delete: Delete the preset schedule.
5. Copy: Copy selected schedule to all weekdays.
4.3 Network Setting
AirLive CoreNVR 9/16 User’s Manual 15
Page 22

4. System Setting
4.3.1 Network
DHCP setting: Checked the “Obtain IP address automatically (DHCP)” to enable auto
get IP from DHCP server.
MAC address: Display MAC address of this NVR.
IP Address: Input the fixed IP address If you disable the DHCP function, then click
“Test” button to detect IP conflict.
Subnet Mask: User define
Gateway: User define
Obtain DNS from DHCP: User define
Primary DNS: User define
Secondary DNS: User define
DNS setting: Checked “Obtain DNS from DHCP” to get DNS setting from DHCP server,
it only works on DHCP was enabled. If “Obtain DNS from DHCP” was
disabled, you could key-in DNS server IP in the text box.
4.3.2 PPPOE
Enable / Disable: Select from the radio boxes to enable or disable PPPOE function.
Account: Key-in user name to login PPPOE server here.
Password: Key-in login PPPOE server password here.
IP address: Display current IP address get from PPPOE server.
Subnet Mask: Display current subnet mask get from PPPOE server.
Gateway: Display current gateway get from PPPOE server.
Status: Display PPPOE status.
4.3.3 UPNP
Friendly Name: Display UPnP friend name on network.
4.3.4 UPnP Transversal
Enable UPnP Traversal to auto request port mapping with router, and define maximum
and minimum port value here.
Port Range: User define
External IP Address: User define
4.3.5 Server
Enable server option for start HTTP and RTSP server, after remote service started,
Users could be connecting remote service by IE browser.
HTTP Port: Set HTTP service port here. Default 80.
RTSP Port: Set RTSP service port here. Default 554.
RTSP over HTTP: Enable RTSP over HTTP function, the remote live streaming will use
HTTP protocol and HTTP port.
AirLive CoreNVR 9/16 User’s Manual 16
Page 23

4.4 System Setting
4. System Setting
4.4.1 Device Info
Model Name: Display Model Name.
Device Title: Key-in device title here.
Software version: Display current firmware version.
4.4.2 Date Time Info
Current Time: Display current time.
Server Date & Time: Display current system date-time.
Adjust:
Manual:
Click setting to approach date-time setting dialog, and select current date and time
now, click “OK” to change system time or click “Cancel” button to abort
configuration.
Synchronize with NTP:
Enable synchronize date-time with NTP service.
NTP Server:
Key-in NTP server IP or domain name, if you use the domain name to connect NTP
server, the DNS service must be enabled.
NTP Sync Interval:
Select time period to synchronization with NTP service.
Time Zone: Select the time zone of NVR location.
Daylight saving: Enable or disable daylight saving mode.
Daylight saving Start Time: Configure daylight saving start time, it works with daylight
saving mode enabled.
AirLive CoreNVR 9/16 User’s Manual 17
Page 24

4. System Setting
Daylight saving End Time: Configure daylight saving end time, it works with daylight
saving mode enabled.
Daylight saving Offset: Configure daylight saving offset time with current time, it works
with daylight saving mode enabled.
Auto Login: Enable auto login mode to login with defined user name and password
when system boot up.
User: Key-in auto login user name.
Password: Key-in auto login password.
System Setting: Enable “Auto full screen” to switch to full screen mode when system
boot up.
Change display language from language combo box.
Adjust Auto switch interval seconds.
DIPS: Display device DIPS ID.
Click “Test” button for test connection with DIPS server.
4.5 User Setting
You may manage all user accounts or groups for different permission of functions or
access the cameras.
Setting
Group: Select user’s login group.
Username: Setup username for account.
Password: Setup password for account.
Confirm Password: Confirm the password is correct.
Description: Describe the user or group.
AirLive CoreNVR 9/16 User’s Manual 18
Page 25

4. System Setting
Live View: Define the live view camera access permission for each user.
Playback: Define the playback camera access permission for each user.
Record: Define user permission for recording.
Setting: Define user permission for system setting.
PTZ: Define user permission for PTZ controls.
Two Way Audio: Define user permission for two way audio.
Add: Click to add user after key-in the user information.
Modify: Modify the user information and permissions.
Delete: Delete selected user account.
4.6 Motion Detection Setting
You may set up to 10 regions of each camera for motion detection setting.
Select a camera: Click on camera list to select a camera to management motion
detection setting.
Add new motion detection: Click “Add” button to insert new motion window, the new
window will inserted at left-up corner.
Enable motion window: Check the window name to enable motion detection.
Modify motion detection
area: Move mouse cursor to
motion window border, and drag cursor to resize
motion window. Drag mouse cursor on motion
window to re-position of motion window.
AirLive CoreNVR 9/16 User’s Manual 19
Page 26

4. System Setting
Remove motion window: Click on motion window or window’s name to set focus
window, then click “Delete” button to remove it.
Modify motion parameter: Click on motion window or window’s name to set focus
window, then edit it’s motion parameters, you must click
“Update” button to save modified values, or the settings will
be lost.
Name: Key-in motion window’s name.
Include / Exclude: Include meets system will detect motion inside of window area.
Exclude meets system will detect motion outside of window area.
Object Size: Set motion detection object size, value between 0 to 100, greater value
means the object is bigger in the defined detection area.
Sensitivity: Set motion detection sensitivity value between 0 to100, greater value
means the motion detection is more sensitive.
4.7 Address Book Setting
Add E-Mail and other information to address book for send E-Mail alert.
Key-in the personal e-mail account information then click on “Add” to add the
information to the address book; you may also click on “Modify” to modify the
information or “Delete” to delete the account from the list.
AirLive CoreNVR 9/16 User’s Manual 20
Page 27

4. System Setting
4.8 Notification Setting
You may setup the notification to receive e-mails, send file to FTP server or HTTP CGI
when the event is triggered.
SMTP Config
SMTP Server: SMTP sever IP or domain name.
SMTP Port: SMTP service port number.
User Name: Login SMTP server user ID.
Password: Login SMTP server Password.
From: E-Mail sender’s name.
Subject: Mail’s Subject.
Body: Mail’s body content.
Retry: Retry how many times when send mail fail.
Send Interval: Set the interval of each time send mail out.
Send without Picture: Do not attach picture with notification mail.
Server Require Authentication: The Email server need Authentication.
Server Require Secure Connection: The Email server need SSL connection.
Send Test Button: Send out a test mail for test Server information is correct.
HTTP Config
HTTP IP: HTTP server’s IP or domain name.
HTTP Port: HTTP server’s service port.
HTTP User Name: Login HTTP server’s user account.
HTTP Password: Login HTTP server’s password.
HTTP CGI: HTTP server receive notification CGI path
AirLive CoreNVR 9/16 User’s Manual 21
Page 28

FTP Config
FTP Server: FTP server IP or domain name.
FTP Port: FTP server service port.
User Name: Login FTP server account.
Password: Login FTP server password.
Path: Upload picture or video path.
Retry: Retry how many times when upload fail.
Recycle Days: Keep upload failed picture or video how many days.
TCP Config:
TCP server: TCP server IP or domain name.
TCP port: TCP service port number.
4. System Setting
AirLive CoreNVR 9/16 User’s Manual 22
Page 29

5. System Management
5. System Management
5
The system management is for you to setup the CoreNVR for video image, return to
default, firmware upgrade, event, and storage management. Click setup button and
select “System Management” from pop-up menu to approach System setting dialog.
5.1 System Management
AirLive CoreNVR 9/16 User’s Manual 23
Page 30

5. System Management
Resolution: Change monitor current display resolution, please confirm change result,
or system will recover old resolution after 15 seconds.
Style: You may change the interface to Simple / Normal / Professional / Advance.
Image: Adjust monitor Brightness, Contrast, Saturation, Sharpness, and Hue value.
※ Note: Only available on D-sub interface.
Maintenance:
Default Setting: Reset all setting to factory default value.
Backup Setting: Export backup setting file to remove-able storage device.
Restore Setting: Restore a backup setting file from remove-able storage device.
Firmware Upgrade: Select a firmware file from remove-able storage device, then
click “Firmware Upgrade” button to begin update firmware job.
System Restart: Restart CoreNVR system.
Audio: Adjust audio input or output gain value for better audio quality.
5.2 Disk Management
The CoreNVR supports up to two 3TB HDD install in the system, you may also manage
all USB storage devices in this page.
Device list: Display all devices were detect on NVR, and their information.
Partition Button: Select a storage device, and click “Partition” button, system will
remove all data and partitions on selected device, and create a new
partition.
Mount / Un-Mount button: Mount or Un-Mount USB stick.
S.M.A.R.T button: Display the Hard Disk S.M.A.R.T status.
AirLive CoreNVR 9/16 User’s Manual 24
Page 31

5. System Management
Partition list: Display all partitions of selected device, and their information. Click
“Format” button will format selected partition to “ext4” format, all data will
be lost.
5.3 Snapshot
You may save your video snapshot and save them to the HDD or any removable USB
device.
Source Snapshot List:
Search snapshot image:
1. select a hard disk path
2. select a time period
3. click “search” button
4. The search result will display in the list box.
5. select a snapshot file name, the snapshot image will display on right
Copy: Click “Copy” button will copy selected snapshot file to remove-able device.
Delete: Click “Delete” button will delete selected snapshot file.
Destination Snapshot List:
1. Select a remove-able device path
2. system will show snapshot file’s name of selected folder
3. select a snapshot file name, the snapshot image will display on right
Delete: Click “Delete” button will delete selected snapshot file.
AirLive CoreNVR 9/16 User’s Manual 25
Page 32

5.4 Event Snapshot
5. System Management
Event Snapshot:
Event Type: Select trigger snapshot event type.
Input: Select DI input port number.
Time: Select search time period.
Search: To search event snapshot based on the condition you set above.
Result table:
Time: Event Time.
Event Type: Triggered Event Type.
Input: Event DI port number, if not DI event will fill -1.
Device: Event triggered device ID.
Snapshot Viewer: Select a event from search result table and click the “Play”
button, the snapshot video will display on right of window.
Next frame: Click “>“ button for next frame.
Pre frame: Click “<“ button for pre-frame.
Information: Display snapshot video information.
Snapshot button: Click “Snapshot” button will snapshot current image to
removable device.
Backup button: Click “Backup” button will backup this event video to
removable device.
5.5 Samba Server
AirLive CoreNVR 9/16 User’s Manual 26
Page 33

Samba Name: Key-in Samba server name for identify server.
5. System Management
Samba IP Address: Samba server IP address.
Samba Path: Key-in Samba server recording path.
User Name: Login Samba server account.
Password: Login Samba server password.
Add button: Key-in all Samba server information then Click “Add” button to add to
samba server list.
Update Button: Select a Samba server from list, then modify server’s information,
when finish the modify job, click the “Update” button to save.
Delete Button: Select a Samba server for list, then Click “Delete” Button to remove it
from list.
AirLive CoreNVR 9/16 User’s Manual 27
Page 34

6. Event Setting
6.Event Setting
6
You may define each event alarm on different day and actions for each camera or
CoreNVR system, please refer to the below for the operation instructions.
6.1 Add a New Event
1. Select a camera or local from tree list
2. Click “Add” button below device list.
3. Select an event from table.
Motion Alarm: Camera’s motion detection. Please set the camera motion first.
AirLive CoreNVR 9/16 User’s Manual 28
Page 35

Disconnect Alarm: Lost camera connection.
Digital Input_0 ~ Digital Input_4: Detected input.
Schedule Trigger: Trigger by schedule setting.
HDD Error Alarm: Record failed or HDD error will send event alarm.
4. Click “Add” button below Event Schedule List table
5. Select event will detected week days and the time periods of each day.
6. Set Alarm detail parameter.
6. Event Setting
Week Days: Select week days for event notification.
Time Period: Select time period for event notification.
Alarm Setting
Alarm Condition:
For Motion event, true means alarm trigger by motion, false means alarm
triggered by no motion.
For DI event, true means alarm trigger by DI in open status, false means alarm
triggered by DI in close status.
For Schedule trigger, true means alarm is triggered in during schedule period,
false for alarm triggered when not in schedule period.
Alarm seconds: Define the alarm time period when the event is triggered.
Merge seconds: is set for merge two same alarms between setting seconds.
7. Click “Add” button below Action list table.
8. Select an action, when event was triggered system will execute it.
AirLive CoreNVR 9/16 User’s Manual 29
Page 36

6.2 Modify exist Event schedule or Output Action
Modify Event Schedule:
1. Select an event from event list.
2. select a schedule from Event schedule list
3. Click “Modify” button
4. Modify setting values from schedule setting dialog.
5. Click “OK” button when finished the modification..
Modify Output Action:
1. Select an event from event list.
2. Select a schedule from Event schedule list
3. Select an action from “Action List”.
4. Click “Modify” button.
6. Event Setting
5. Modify setting values from each Action setting dialog.
6. Click “OK” button to close dialog
6.3 Delete exist Event schedule or Output Action
Delete Event:
1. Select an Event from “Event List”.
2. Click “Delete” button below the “Event List”
Delete Event Schedule:
1. Select an event from “Event List”
2. Select an event schedule from “Event Schedule List”.
3. Click “Delete” button below “Event Schedule List”.
Delete Action:
1. Select an event from “Event List”
2. Select an event schedule from “Event Schedule List”.
3. Select an Action from “Action List”.
4. Click “Delete” button below “Action List”.
AirLive CoreNVR 9/16 User’s Manual 30
Page 37

6. Event Setting
6.4 Event Action Type
Buzzer: Buzzer work after event was triggered.
Digital Output: Select a device to change DO status after event was triggered.
Set output to “True”, DO will change to “Close” status when alarmed.
Set output to “False”, DO will change to “Open” status when alarmed.
Display on Channel: When event was triggered, system will display OSD string on
selected channels.
Record: When event was triggered, system will force selected channels record.
※ Note: 1. System must switch “Schedule Monitor” On event was triggered.
2. The selected channels must has set “Recording schedule” when event
was triggered.
Snapshot:
System will snapshot images with selected channels, and save snapshot to event snapshot
folder automatically, you could search them in “Event Snapshot” page in “System
Management”.
E-Mail:
1. Select channels for snapshot or record a file when event is triggered.
2. Select Snapshot or Record a period video file
3. Setup Pre-Alarm seconds and Post-Alarm seconds for record file.
4. Select users to send notification E-Mail when event is triggered.
AirLive CoreNVR 9/16 User’s Manual 31
Page 38

6. Event Setting
TCP: Send notification TCP sockets to TCP server when event is triggered.
HTTP: Send notification to HTTP server when event is triggered.
FTP:
1. Select channels for snapshot or record a file when event is triggered.
2. Select Snapshot or Record a period video file
3. Setup Pre-Alarm seconds and Post-Alarm seconds for record file.
4. System will upload file to FTP server when event is triggered.
AirLive CoreNVR 9/16 User’s Manual 32
Page 39

7
7.1 System Log
7. Log Viewer
7.Log Viewer
Log Type: Select a log type to filter data.
Time: Setup search logs in time period.
Limit Record: Setup maximum number records of search result.
Search: Click “Search” button to start search, the search result will display in the table of
below.
7.2 Event Log
AirLive CoreNVR 9/16 User’s Manual 33
Page 40

7. Log Viewer
Device: Select a Device for search filter.
Log Type: Select a log type to filter data.
Input: Setup DI input port search filter, only worked on search DI event.
Time: Setup search logs in time periods.
Limit Record: Setup maximum number records of search result.
Search: Click “Search” button to start search, the search result will display in the table of
below.
Preview Event Images: Select an event log from log table, event image will display in the
window, you could click the play control buttons to preview event
images.
Change display Channel: Select another camera id from combo box, system will display
selected channel image in event time.
Snapshot: Insert USB dongle to the NVR first, and click the Snapshot button to save it.
7.3 Bitrate Log
You may search bitrate for selected time period; it will show different color of bitrate data as
below.
Select a date: Click on the calendar with blue background days.
Bit-rate table: System will display the bit-rate log in the table.
Blue: Bit-rate is very low.
Green: Bit-rate is fine.
Yellow: Bit-rate is a bit high.
Orange: Bit-rate is very high.
Red: Bit-rate is over limit.
AirLive CoreNVR 9/16 User’s Manual 34
Page 41

8. Playback
8.Playback
8
You may search and playback the recorded video files with selectable time period, also
able to convert the video to avi or backup the video files.
8.1 Search Recorded Video Files
Click to approach search dialog.
Normal Search:
AirLive CoreNVR 9/16 User’s Manual 35
Page 42

1. Select playback date: If there is record history data, System will set calendar’s day
to blue to identify which days has record files.
2. Begin search: Click “Search” button to start search record file in selected date, and
system will draw search result in the grid.
3. Select playback camera and time period: Select cameras from list, and drag on
search result or edit start / end time from date-time picker control to define
playback period.
4. Begin playback: Confirm playback camera and period then click “OK” button to
begin playback.
Search by Event:
8. Playback
Input search filter first, click the “Search” button, the search result will display on the list as
above.
Select a log that you need to playback, system will fill the event period automatically, and
select which cameras you need playback together.
Click the “OK” button when you finished the search
AirLive CoreNVR 9/16 User’s Manual 36
Page 43

Simple Search:
8. Playback
Select playback period from date controls directly, and select which cameras will be
playback.
Click the “OK” button when you finished the search.
8.2 Playback Control Buttons
Play video forward.
Pause playing video.
Stop playing video.
Play video backward.
Seek to previous frame when on pause mode.
Seek to next frame when on pause mode.
AirLive CoreNVR 9/16 User’s Manual 37
Page 44

8. Playback
Close playback and return to live view.
Change of playback speed.
Adjust playback audio volume.
The IP Camera supports up to eight Cruise Paths. Please follow the instructions below for
Cruise Path setup.
Select play audio way as below
1. Mute : Mute sound output
2. Live Audio: Play live focus channel sound
3. Playback Audio: Play playback sound.
Switch display mode to full screen, click mouse right to return normal mode.
Take a snapshot to hard disk.
8.3 Convert to Avi file
1. Click to open search dialog.
2. Select convert camera(s) and time period for converting
3. Select converted files destination folder then click “OK”.
AirLive CoreNVR 9/16 User’s Manual 38
Page 45

8.4 Back up Video Files
1. Click to open backup dialog.
2. Select backup camera(s) and time period for backup.
3. Select backup files destination folder then click “OK”.
8. Playback
AirLive CoreNVR 9/16 User’s Manual 39
Page 46

9. Remote Viewing on IE
9.Remote Viewing on IE
9
The CoreNVR is able to be viewed from Internet Explorer when the network is available,
you can have live view, playback and most of all functions are as same as the CoreNVR
system.
9.1 Connection to CoreNVR
For first time connection, you need to install the ActiveX control if it appears on your web
page as below.
After installed the ActiveX component then please login the system on pop-up window.
AirLive CoreNVR 9/16 User’s Manual 40
Page 47

9. Remote Viewing on IE
Please login your username and password, and then you will see the “Select View
Channel” window as below.
You may select channel(s) you would like to view on your computer. Please also check
the “Low Bitrate” to reduce the bandwidth consumption on IE.
Click on “OK” to see the live view.
AirLive CoreNVR 9/16 User’s Manual 41
Page 48

9. Remote Viewing on IE
9.2 Live View on IE
The picture below is the live view on IE, which exactly the same as CoreNVR system.
9.3 System Information
Date
Time
Recording Status
Event Alarm Status
HDD Status
9.4 Screen Division
Assign the preview screen to expected layout division by clicking these buttons.
Switch to 1 Division. Switch to 4 Division.
AirLive CoreNVR 9/16 User’s Manual 42
Page 49

9. Remote Viewing on IE
Switch to 9 Division. Switch to 16 Division.
Switch to Full screen, and click mouse right button to cancel Full Screen.
9.5 Subscreen Functions
Popup Menu: Click mouse right button, select an option from the popup menu.
Show Live Camera: You may select any connected camera to display on selected
channel.
Remove Camera Display: You may remove the camera from selected channel.
Digital Zoom: You must enable this function to zoom the selected camera on the
web.
Snapshot: Take a snapshot of selected channel.
Full Screen: Make full screen of selected channel.
Restore Division Default: Restore to default division when you finished full screen
view.
Snapshot: Click to take a snapshot to the HDD; you can management
snapshots at system management “snapshot” page.
Playback: Click
to see Playback page.
System Setting: Click
Setting/ Log Viewer.
for System setting / System Management / Event
AirLive CoreNVR 9/16 User’s Manual 43
Page 50

9. Remote Viewing on IE
※ Note: All settings in IE are as the same as in the CoreNVR system, please refer to
the previous chapter 4, 5, 6 and 7 for detail settings.
Audio Volume Control: Click to switch between normal and mute.
Schedule Monitor: Click button to enable or disable Schedule monitoring,
the recording will be stopped if it is disabled.
Two Way Audio: Click button to start or stop selected channel two-way
audio.
PTZ Control:
Move PTZ camera direction by click direction buttons.
Click to make camera return home position.
Move the thumb to left to make slower, move to right to make move faster.
Tour: Select a tour setting from combo box, and click “go” button to start tour, click “Stop”
button to stop tour.
Preset: Select a preset position from the box, camera
will move to preset position after click.
IRIS: Adjust camera’s IRIS setting, or set it to auto.
Focus: Adjust camera’s focus setting, or set it to auto.
Zoom: Zoom-in or zoom-out focus camera.
Pan: Begin camera auto pan or stop.
AirLive CoreNVR 9/16 User’s Manual 44
Page 51

9.6 Playback on IE
Click to see Playback page on IE.
9. Remote Viewing on IE
Play video forward.
Pause playing video.
Stop playing video.
Play video backward.
Seek to previous frame when on pause mode.
Seek to next frame when on pause mode.
Close playback and return to live view.
AirLive CoreNVR 9/16 User’s Manual 45
Page 52

9. Remote Viewing on IE
Change of playback speed.
Adjust playback audio volume.
The IP Camera supports up to eight Cruise Paths. Please follow the instructions below for
Cruise Path setup.
Convert to AVI, please see chapter 8.3 for information.
Select play audio way as below
1. Mute : Mute sound output
2. Live Audio: Play live focus channel sound
3. Playback Audio: Play playback sound.
To select which information you would like to show as below.
Search recorded video files, please see chapter 8.1 for information.
Take a snapshot to hard disk.
Backup video files, please see chapter 8.4 for information.
AirLive CoreNVR 9/16 User’s Manual 46
Page 53

10
A.Product Specification
Hardware
Chipset ARM Cortex A9
LAN Port Giga RJ-45 Ethernet Port x 1
Video Output Local Display x 2
Audio Input MIC x 1 (phone jack 3.5mm)
10. Appendix
10.Appendix
Audio Output Phone Jack 3.5mm x 1
HDD SATAll HDD up to 3TB x 2
e-SATA e-SATA Port x1
Backup USB Mass Storage
LED Indicator PWR x 1, HDD x 1, LAN x 1, REC x 1, Event x 1, Alarm x 1,
CAM x 1, DI x 4, DO x 4
USB Mouse x 1 / Backup x 1
Sensor In / Alarm Out Digital Input x 4 / Digital Output x 4
Button Factory Default Reset x 1
Buzzer Buzzer x 1
Software
Video Codec H.264
Audio Codec G.711 / G.726
Video Resolution QVGA / VGA / WXGA / SXGA / Full HD / 3M / 5M
System Setting z Resolution selectable, 1024x768 / 1280x1024 /
1366x768 / 1440x900 / 1920x1080
z Display style selectable. Normal / Simple / Professional /
Advance
z Reset Default
z Backup / Restore
z Firmware Upgrade
z System Restart
Live View z 1 / 4 / 9 / 16 Division(Max 9ch for CoreNVR 9) / Full
Screen
AirLive CoreNVR 9/16 User’s Manual 47
Page 54

10. Appendix
z Snapshot
z Selectable display cameras
PTZ z Support PTZ cameras
z Preset / Tour / Auto pan / Iris / Focus / Speed
Record z Schedule / RTC / Motion Detection / DI Detection / Event
Trigger
z Pre-alarm / Post alarm configuration
z Auto recycle
z Samba path supported
Playback z 1 /4/ 9/ 16 Division(Max 9ch for CoreNVR 9) / Full
Screen
z Play / Reverse / Pause / Seek / Pre- I frame / Next
Frame
z Speeds: 1/4 , 1/2 , 1 , 2 , 4 , 8 , 16 , 32
z Convert to AVI
z Multi-Cameras Backup
Languages English / Traditional Chinese / German / Greece / Russia /
Spain / Portugal / Polish / Czech / Korean
Alarm Buzzer / DO / Display on Screen / Record / Snapshot / E-Mail
/ TCP / HTTP / FTP
Notification SMTP / HTTP / FTP / TCP
Schedule Setting RTC / Motion Detection / DI Detection / Event Detection
Network Fix IP / DHCP / PPPOE / DIPS Report / UPNP transversal
Snapshot z Preview snapshot in HDD or Removable device
z Search Event Snapshot
z Backup snapshot to removable device
Disk Management z Partition management
z Format partition
z Samba management
Motion Detection z Up to 10 regions
z Adjustable Object Size and Sensitivity
Remote z Fully function remote live view and playback
z Support low bit-rate connection
z selectable Camera Connection
AirLive CoreNVR 9/16 User’s Manual 48
Page 55

General
Power AC100-240V/in, DC12V(4A)
Temperature Operating: 0°C ~ 40°C
Humidity Operating: 10%~80%
Dimension 33.3 x 5.7 x 25.2 cm
Certificate CE, FCC
10. Appendix
AirLive CoreNVR 9/16 User’s Manual 49
 Loading...