

Page 1
WARNING:
!
This installation is not for the electrically or mechanically
challenged! Use this gauge with EXTREME caution! If you are
uncomfortable with anything about this, please refer the
installation to an AEM trained tuning shop or call 800-423-0046
for technical assistance. You should also visit the AEM
Performance Electronics Forum at http://www.aempower.com
NOTE: AEM holds no responsibility for any engine damage that
results from the misuse of this product!
Download the latest AEM software at:
http://www.aemelectronics.com/downloads
Installation Instructions for
30-4300
AEM Serial Gauge
This product is legal in California for racing vehicles only and should
never be used on public highways.
ADVANCED ENGINE MANAGEMENT INC.
2205 126th Street Unit A, Hawthorne, CA. 90250
Phone: (310) 484-2322 Fax: (310) 484-0152
http://www.aempower.com
Instruction Part Number: 10-4300 Rev 112205
2005 Advanced Engine Management, Inc.
Page 1
Page 2
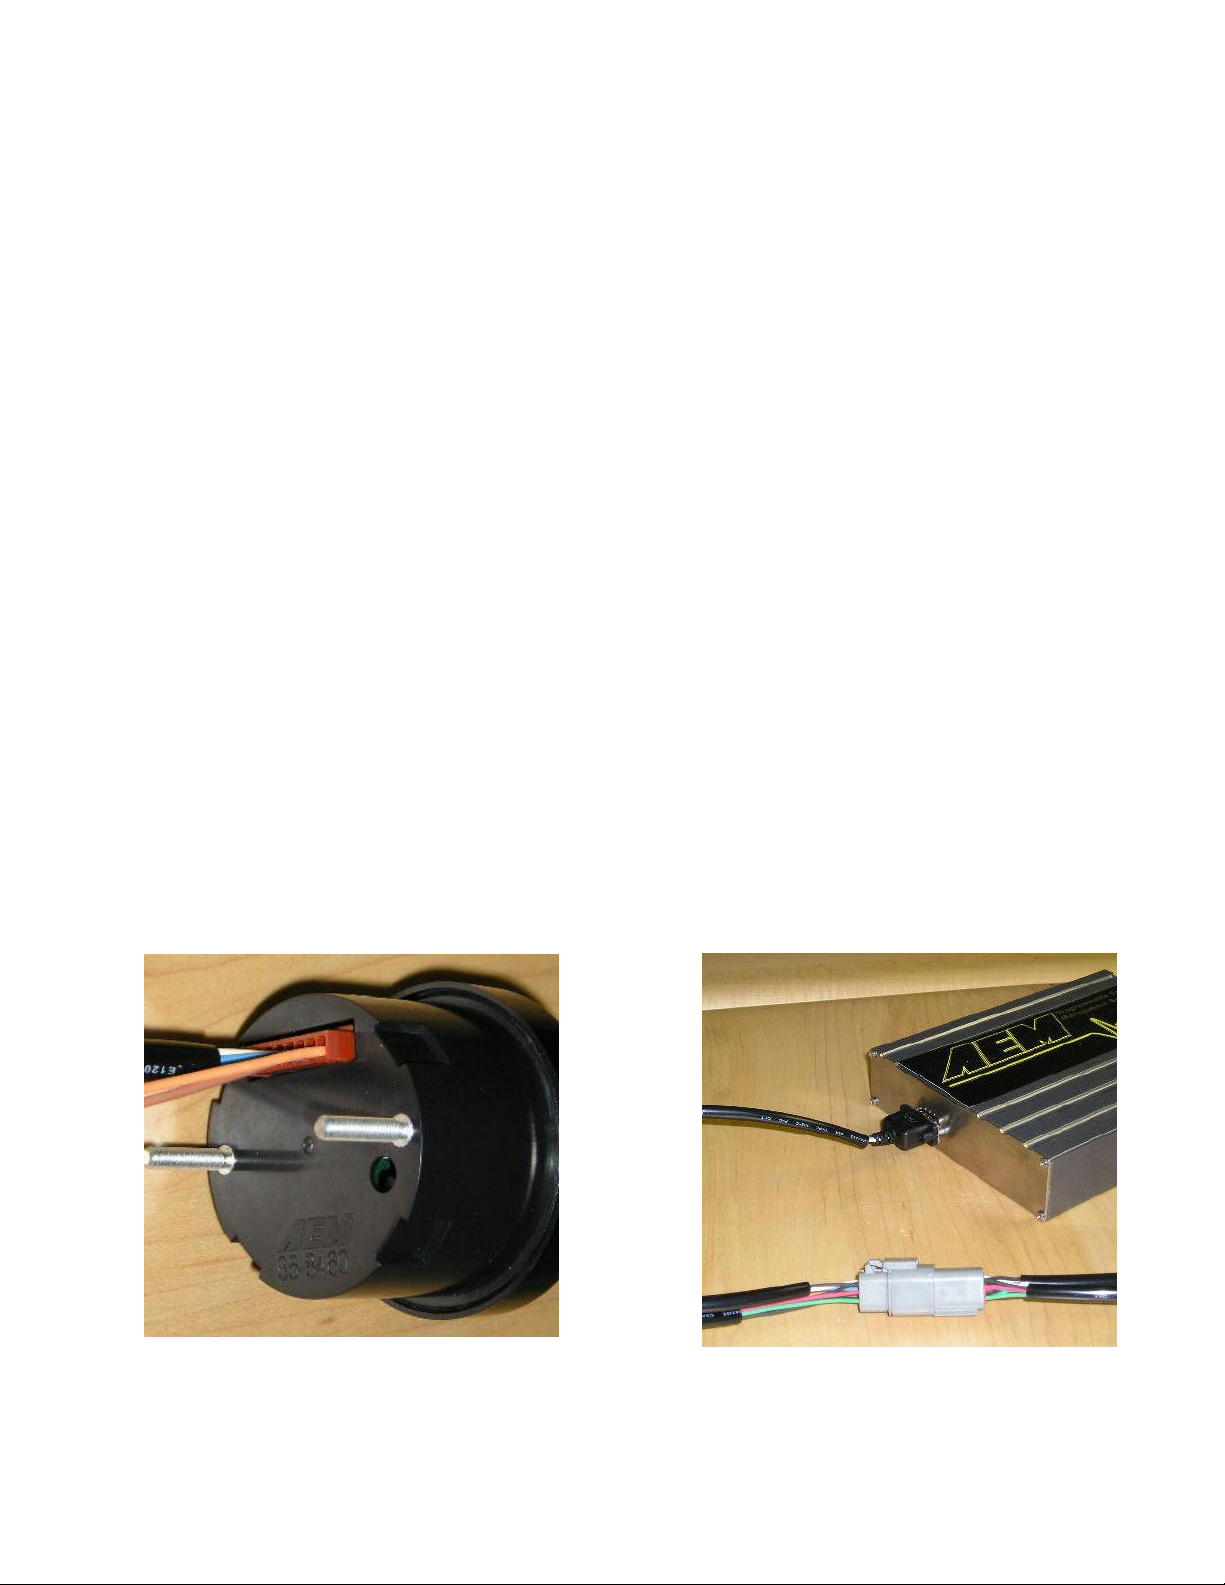
Figure 1. 8-pin connector location
Figure 2. Installation connections
Congratulations, the 52MM (2 1/16”) AEM Serial Gauge features a three digit LED
digital readout with 24 sweeping multi color LED’s, and two input buttons. Also included
in the box are all the necessary wiring cables and brackets to install and use the gauge.
A non-limited fully functional version of Pro Gauge software by AEM is also in the box.
The AEM Serial Gauge allows users to monitor up to 19 different parameters. In
addition, users can “daisy chain” multiple gauges together using the included harness.
Contents:
(1) Serial Gauge assembly
(1) Appearance kit (Silver bezel, silver pin guide, white faceplate)
(1) Installation kit ( Butt connector, 6 pieces)
(1) Serial Gauge adapter cable
(1) Serial Gauge flying lead
(1) Instruction manual
(1) DB9 Female Female adapter cable
Getting Started
NOTE: The Serial Gauge only works with version 1.19 and newer EMS firmware.
Installation
Disconnect the negative (-) battery cable from the battery. Secure the gauge in a
suitable mounting panel/pod using the supplied bracket and thumbnuts. Locate the
single row 8-pin connector on the adapter harness. Plug the 8-pin connector into the
connector on the back of the gauge as shown in Figure 1. Connect the flying lead to the
adapter as shown in Figure. 2. Connect the DB9 connector on the flying lead to its
mate on the backside of the EMS as shown in Figure 2. Connect the two nonterminated black wires on the flying lead to a known good ground. Connect the nonterminated red wire to a switched +12Vdc source.
Page 2
Page 3

Configuring AEM Pro
Figure 3. Telemetry wizard
Figure 4. Select AEM Serial Datastream
Note: The serial gauge will only work with version 1.19 or newer firmware. When
connected to the EMS, the firmware version is shown in the blue strip at the top of the
screen.
Open AEM Pro and connect to the EMS. Wait for the EMS to finish downloading. Left
click on “VIEW” and select the telemetry wizard from the wizards drop down menu, see
Figure 3. In the telemetry wizard, left click on “AEM Serial Datastream Gauge: and click
OK, see Figure 4. Close AEM Pro, connect the serial gauge to the EMS, and cycle
power to the EMS. The EMS is now configured to output data to the gauge.
Using the Gauge:
The gauge comes pre-configured to display engine speed, engine load, throttle,
air temp, coolant temp, O2#1, and vehicle speed. The gauge also stores the min and
max value for each parameter. The two buttons on the front of the gauge (see Figure 5)
allow the user to switch between parameters and view min/max values. The functions
for the buttons are listed below.
Right button: Displays next gauge, moves in forward direction
Left button: Displays next gauge, moves in backward direction
Press and hold right button for 2 seconds: Displays max value
Press and hold left button for 2 seconds: Displays min value
Pres and hold both buttons for 2 seconds: Clears min/max values for displayed gauge
Press and hold both buttons for 5 seconds: Clears all min/max values
Page 3
Page 4

Figure 5. Gauge buttons
Changing the gauge configuration
The AEM Serial gauge comes configured with the black bezel, black pin guide, and the
black faceplate. However, a silver bezel, a silver pin guide, and a white faceplate are
also included in the gauge kit. To change the faceplate, pin guide, or bezel, orient the
gauge so you are looking at the faceplate. Rotate the bezel counter-clockwise to
unscrew it from the gauge cup. The bezel, lens, pin guide, rubber spacer, faceplate,
diffuser, and anti-glare shield are all removable. Reassemble the gauge as shown in
Figure 6. Make sure the small light holes in the faceplate, diffuser, and anti-glare shield
line up with the light sensor on the circuit board. Do not over tighten the bezel when
reassembling the gauge.
Wire Connections
RED <Power>
Connect to a switched 10-18 volt power source.
BLACK <Ground>
Connect to a clean power ground.
Page 4
Page 5

*BROWN <Low Side 1>
Connect to negative side of warning device, 1 amp max.
*ORANGE<Low Side 2>
Connect to negative side of warning device, 1 amp max.
GREEN ,<Not Used>
*optional
Visit the AEM electronics forum for instructions on how to use the Pro Gauge
software.
AEM Electronics Warranty
Advanced Engine Management Inc. warrants to the consumer that all AEM Electronics
products will be free from defects in material and workmanship for a period of twelve
months from date of the original purchase. Products that fail within this 12-month
warranty period will be repaired or replaced when determined by AEM that the product
failed due to defects in material or workmanship. This warranty is limited to the repair or
replacement of the AEM part. In no event shall this warranty exceed the original
purchase price of the AEM part nor shall AEM be responsible for special, incidental or
consequential damages or cost incurred due to the failure of this product. Warranty
claims to AEM must be transportation prepaid and accompanied with dated proof of
purchase. This warranty applies only to the original purchaser of product and is nontransferable. All implied warranties shall be limited in duration to the said 12-month
warranty period. Improper use or installation, accident, abuse, unauthorized repairs or
alterations voids this warranty. AEM disclaims any liability for consequential damages
due to breach of any written or implied warranty on all products manufactured by AEM.
Warranty returns will only be accepted by AEM when accompanied by a valid Return
Merchandise Authorization (RMA) number. Product must be received by AEM within 30
days of the date the RMA is issued.
Please note that before AEM can issue an RMA for any electronic product, it is first
necessary for the installer or end user to contact the tech line at 1-800-423-0046 to
discuss the problem. Most issues can be resolved over the phone. Under no
circumstances should a system be returned or a RMA requested before the above
process transpires.
AEM will not be responsible for electronic products that are installed incorrectly,
installed in a non approved application, misused, or tampered with.
Any AEM electronics product can be returned for repair if it is out of the warranty period.
There is a minimum charge of $50.00 for inspection and diagnosis of AEM electronic
parts. Parts used in the repair of AEM electronic components will be extra. AEM will
provide an estimate of repairs and receive written or electronic authorization before
repairs are made to the product.
Page 5
 Loading...