

Page 1
PYRO 1394 PCI Card
Upgrade Your Computer to FireWire
http://www.adstech.com
ADS Technologies - 12627 Hidden Creek Way - Cerritos - CA - 90703
Phone: 562.926.1928 - Fax: 562.926.0518 - Support: 562.926.4338
Page 2
PYRO 1394 PCI Card Hardware Installation
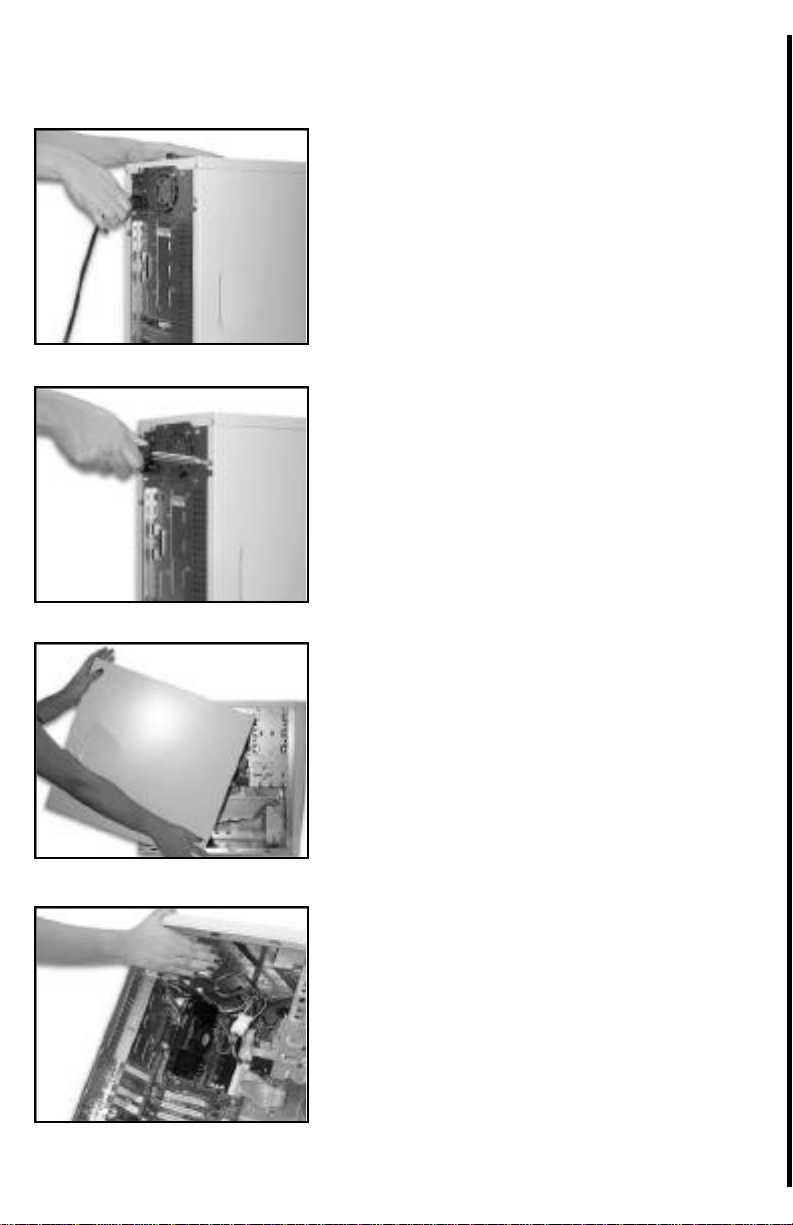
Step 1
Power down your computer and disconnect the power cord. Be sure to remove
the power cord completely from your
computer as shown in the picture to the
left.
Step 2
Remove each screw found on the back
of the computer. Be sure to put the
screws you removed in a safe place, as
you will need them again when replacing the shell on your computer.
Step 3
Carefully remove the shell from your
computer.
Step 4
With the power cable disconnected from
your computer, touch the metal part of
the case to ground yourself. This will
discharge any static electricity from your
body which can damage your computer .
1
Page 3

Step 5
Locate an available PCI expansion slot.
This will be in the area of your computer where other cards that look similar to
the PYRO PCI card are installed.
Step 6
Visually confirm that the PYRO 1394
PCI Card will fit into the available slot
you have chosen.
Step 7
If necessary, remove the knockout on
the back of your computer which corresponds to the PCI slot you have confirmed as your selection. If there is a
screw, place it in a safe place as you will
be using it to attach the PYRO 1394 PCI
Card.
Step 8
Push the PYRO 1394 PCI Card firmly
into the PCI slot. Apply pressure as
needed (but do not force the card) until
the edge connector is completely
sealed.
2
Page 4

Step 9
Once the PYRO 1394 PCI Card is fully
seated, the gold edge connectors are
completely in the slot.
Step 10
Mount the PYRO 1394 PCI Card in
place with a screw. Make sure the
screw is firmly tightened so the PYRO
1394 PCI Card does not slide out of its
seated position.
Step 11
Replace the computer’s shell and screw
it back in place with the screws you
removed in step 2.
Step 12
Now that your PYRO 1394 PCI Card is
installed and the shell is in place, you
can safely connect the power cable.
Now restart your computer and install
the drivers from the CD.
3
Page 5

Driver Installation for Windows
Step 1
To the left is a picture of the dialog box
that will notify you that Windows has
detected your new hardware.
Step 2
Windows will now automatically run the
"Add New Hardware Wizard." Select
the first option "Search for the best driver..." and click the "Next" button.
Step 3
You will now see a box that asks where
you would like to search for the drivers.
Select the "CD-ROM" option. Make sure
you have the Windows 98 SE, Windows
2000, or Windows ME CD inserted in
your CD-ROM drive. After you have
done this, click on the "Next" button.
Step 4
After Windows locates your new driver
on the Windows 98 SE, Windows 2000,
or Win ME CD, it will ask if you would
like to install the driver. Select the first
option that says "The Updated Driver"
then click the "Next" button.
Page 6

Step 5
Windows will now inform you it is ready
to install your new driver. Verify that the
path is the same as the picture to the
left. It should read
"C:\WINDOWS\INF\1394.INF"
Now click the "Next" button.
Step 6
Congratulations! You are now done with
the driver installation. All that is needed
from you now is to click the "Finish" button.
 Loading...