

Page 1
Archive & Share Your Home Movies On CD
Instant Video PCI
Page 2

Page 3

© 2004 ADS Technologies. All Rights Reserved
ADS is a registered trademark of ADS Technologies Inc.
ADS Technologies (ADS) makes no warranty of any kind with regard to this material,
ADS makes no commitment to update or to keep current information contained within this
Page 4

4. User’s Guide
SP1 only (minimum)
WMV or VCD Video on CD’s
Applications:
Applications:
Page 5

transferred to portable devices or allow for lots of video to fit on a normal
video compression engines can be used to compress the video into the
Your Instant Video PCI includes the Ulead VideoStudio 8 video capture
Windows Media Video 9
®
and Divx
®
Video.
What is video compression?
When video is digitized the file size is very large. The video is more
video stream in a different way. Each video compression method has
the general goal of reducing the overall size of the finished video file
while retaining video quality but each video compression method may
formats for different purposes and applications.
What compression formats can I capture in with Instant
Video PCI?
very low bit rates while retaining very good video quality. This process is
very CPU intensive. Divx Video, for example, is a compression
Page 6

technology that can reduce the file size of video more than 5 times
Video PCI is set at 2.4 GHz.
What can I do with these video compression formats?
is a format for digital music. DivX™ is the brand
is based on the
compression standard. This codec is so advanced that it can
video (the same format used for
or Pay-Per-
View) to ten percent of its original size.
• Divx video files can be copied to a CD-R disc and then be played
back in DivX Certified DVD players. You can generally get a 2 hour
movie on a single CD-R disc.
when a compatible software player has been installed.
Entertainment receiver. Capture video in the DivX video format and
then distribute the video over your wired or wireless Ethernet
network. The Media-Link Receiver decodes the video and displays
it on your Big Screen TV.
x 288 (PAL), commonly referred to as SIF resolution.
Applications:
viewing on the PC
Page 7

Video CD (VCD)
VCD is probably the most common application for MPEG-1 video and
virtually everywhere except North America. VCD is the same video
that will play in VCD players. The advantage of VCD is that you can
• Create Video CD’s - they play back in most late model DVD players.
to MPEG-4. Windows Media video 9 can be captured in a variety of
With Instant Video PCI we have included two ways to create Windows
plug-in to capture video directly into a WMV 9 file.
capture WMV 9 files on your PC or broadcast video across your
home, office network or serve over the Internet.
Page 8

Page 9

Video CD Manual before using this product to help ensure you get
the most out of your Instant Video CD.
and a “Found New Hardware” wizard will appear
4) Follow the directions on-screen
will appear.
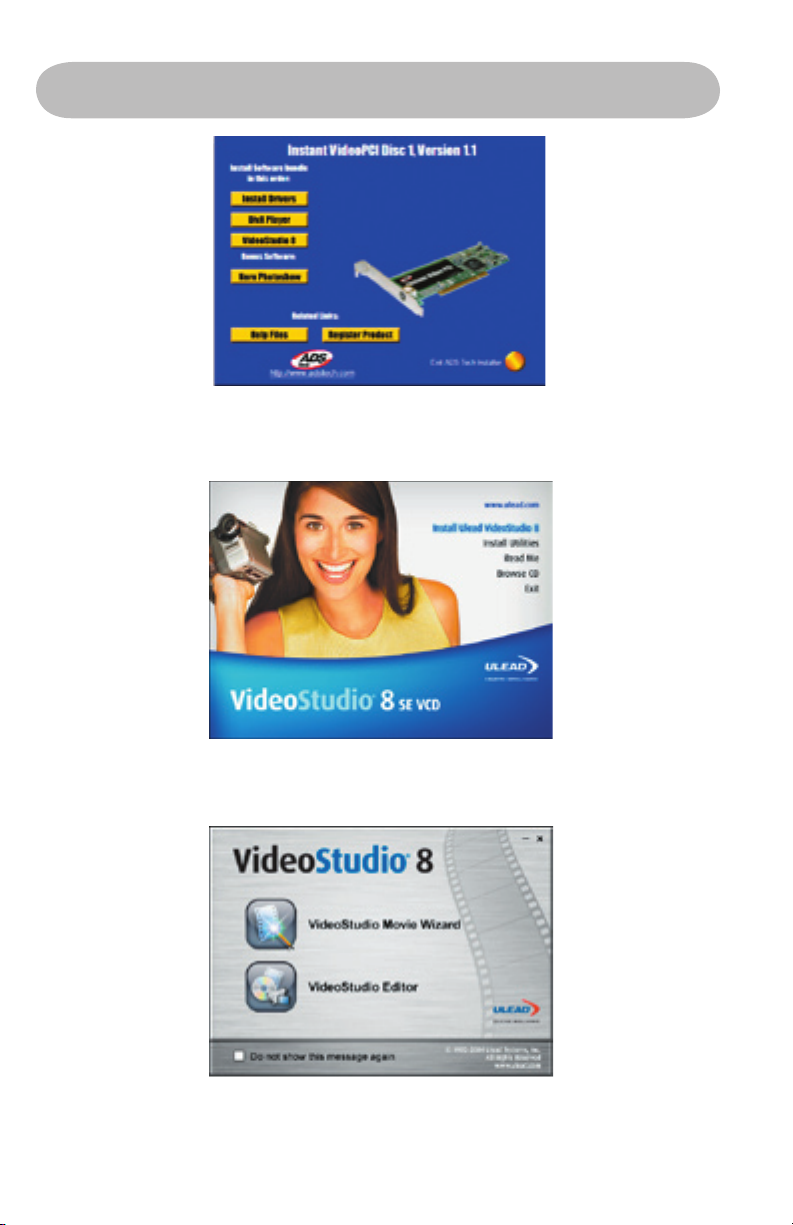
that appears. When the software installation is complete, click on “Exit”
A. Plug the PCI card directly into an open PCI port on your
computer’s motherboard.
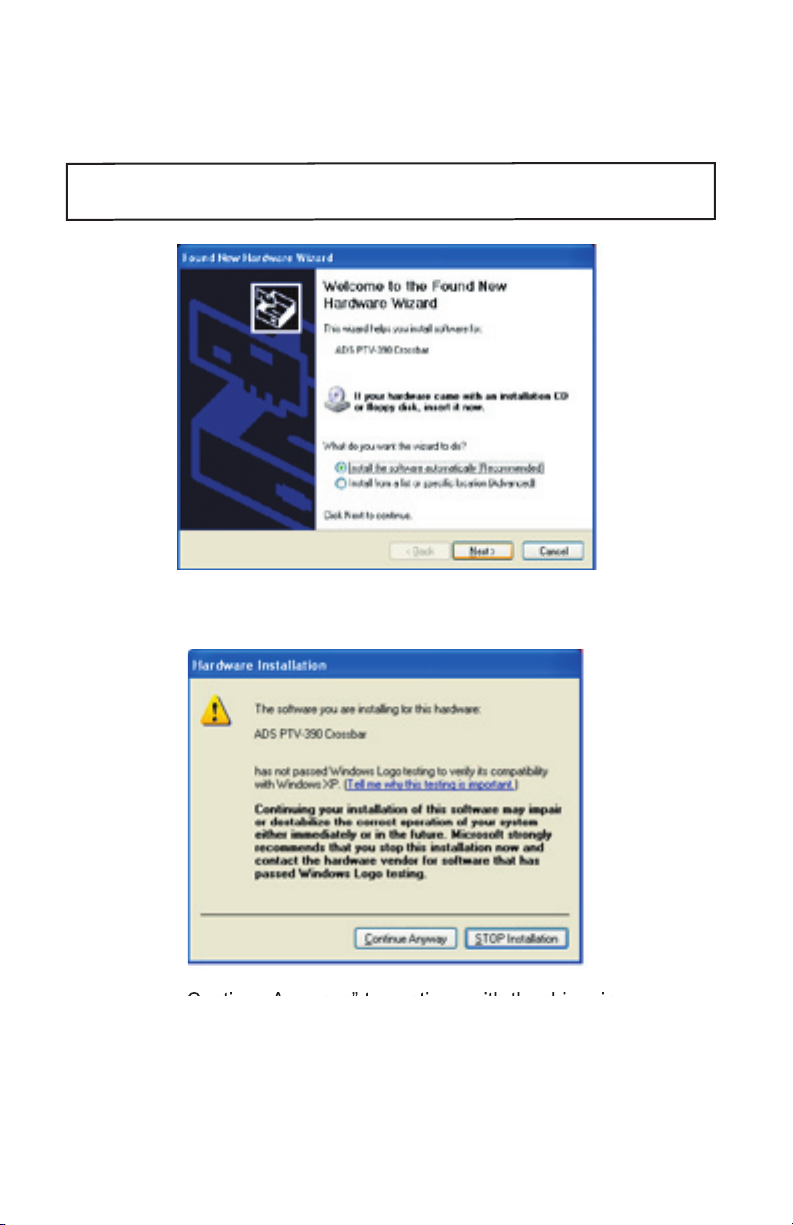
B. Once plugged in, turn on your computer and a “Driver Setup
Wizard” will appear on your screen.
Page 10

click on “Next”.
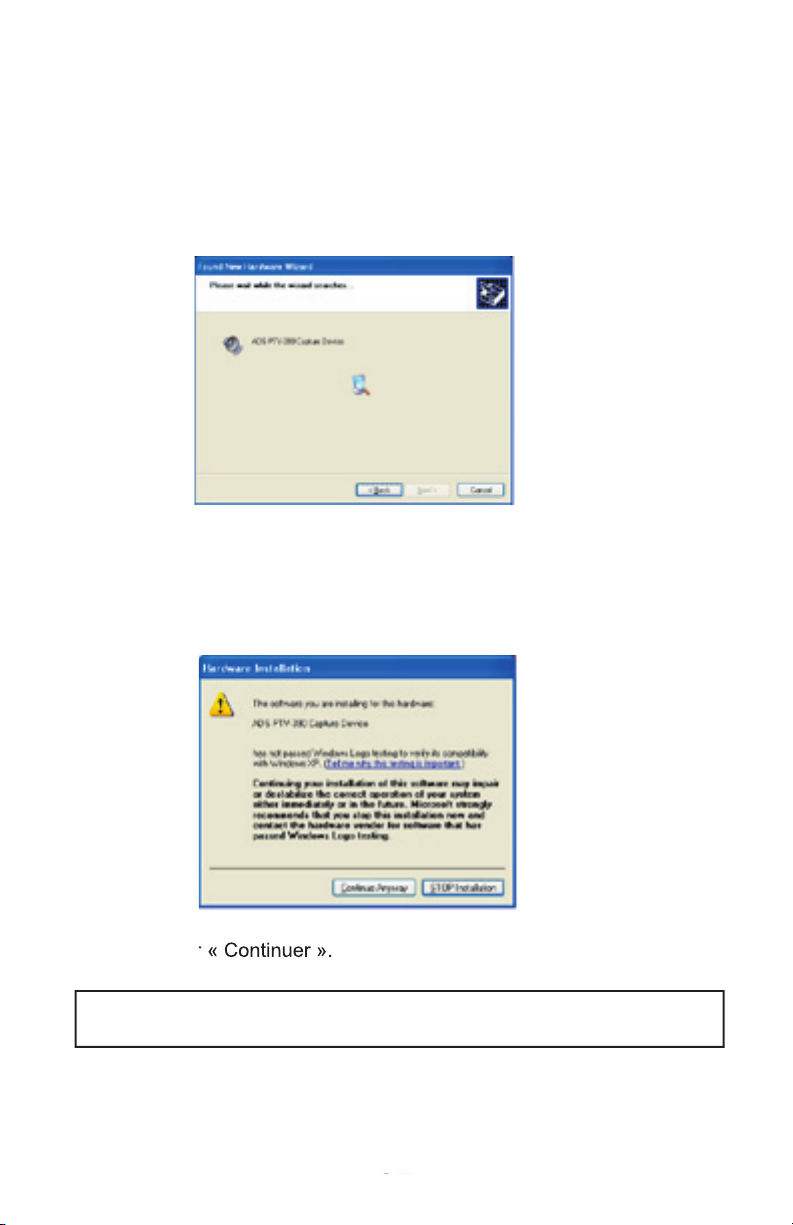
the “Hardware Installation” pop-up window will appear.
Page 11
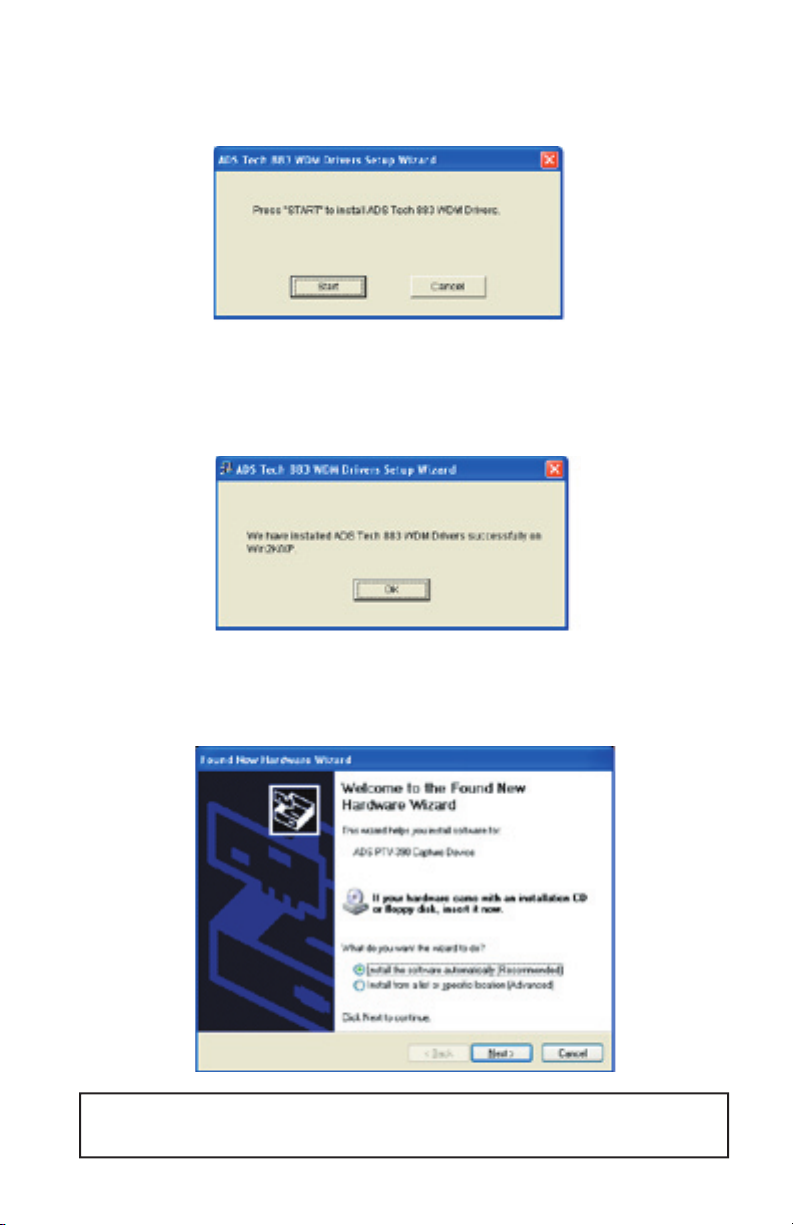
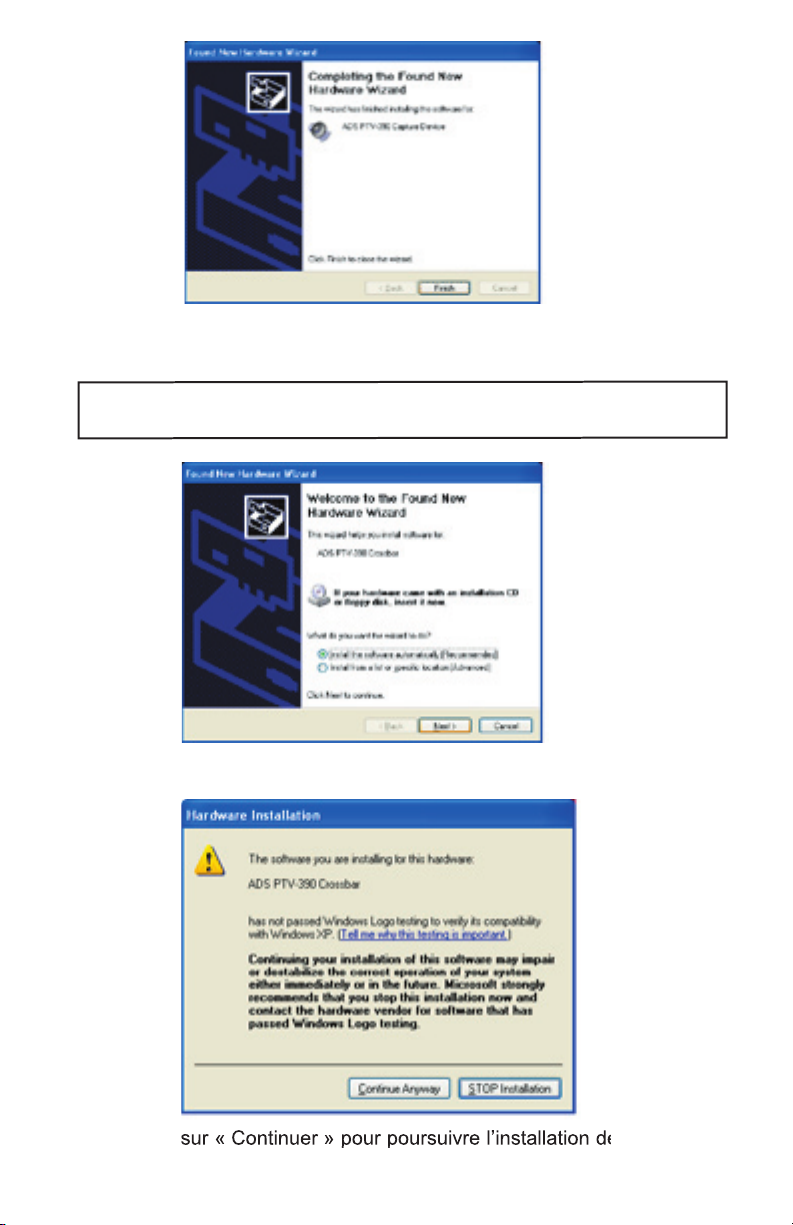
4) Your device, Instant Video PCI, is now installed, Click on
“Finish” when the installation is complete.
Page 12

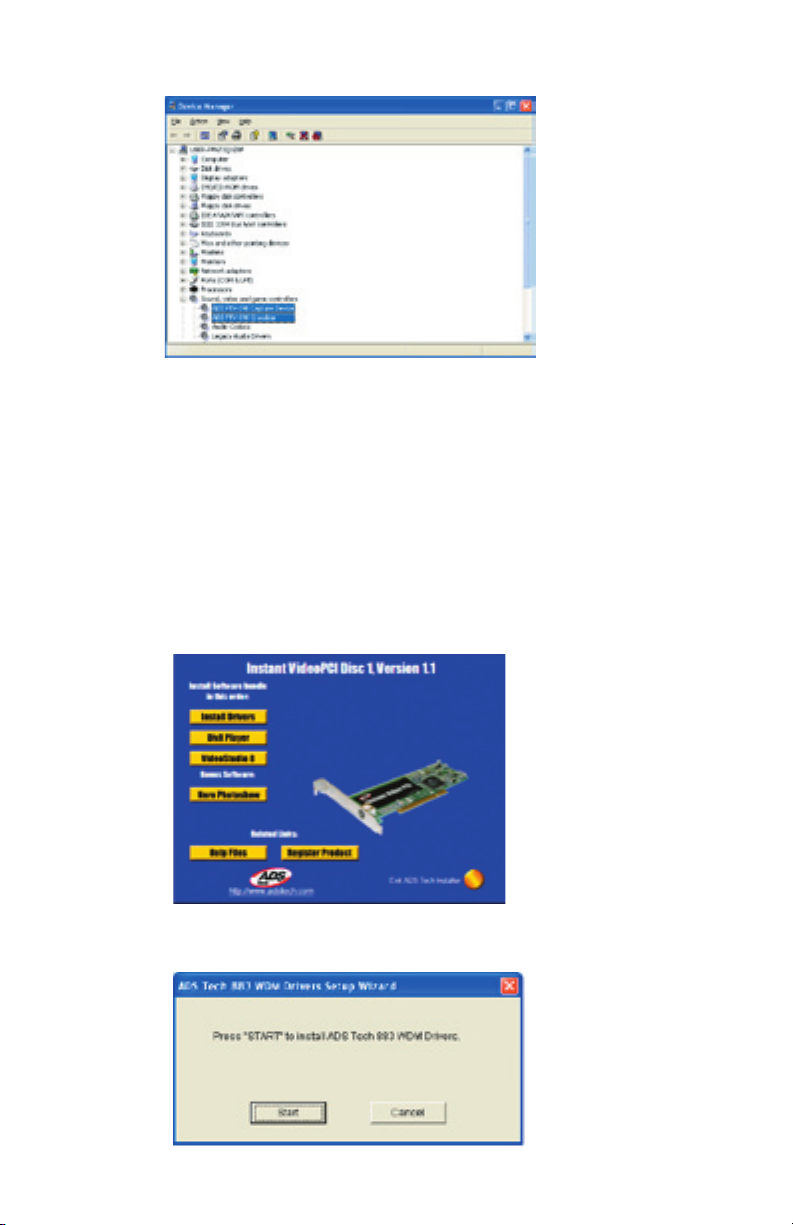
“ADS PTV-390 Capture Devices” and “ADS PTV-390 Crossbar ”.
window. Congratulations, you have installed the Instant Video PCI
Page 13
This alert will appear 2 times during the installation process. Click on “Continue
Anyway” to proceed.
Page 14
home movies.
Page 15
VideoStudio follows a step-by-step paradigm so that editing tasks
their order, apply transitions, and add overlays, animated titles, voiceover
A movie production is in the form of a VideoStudio project le (*.VSP), which
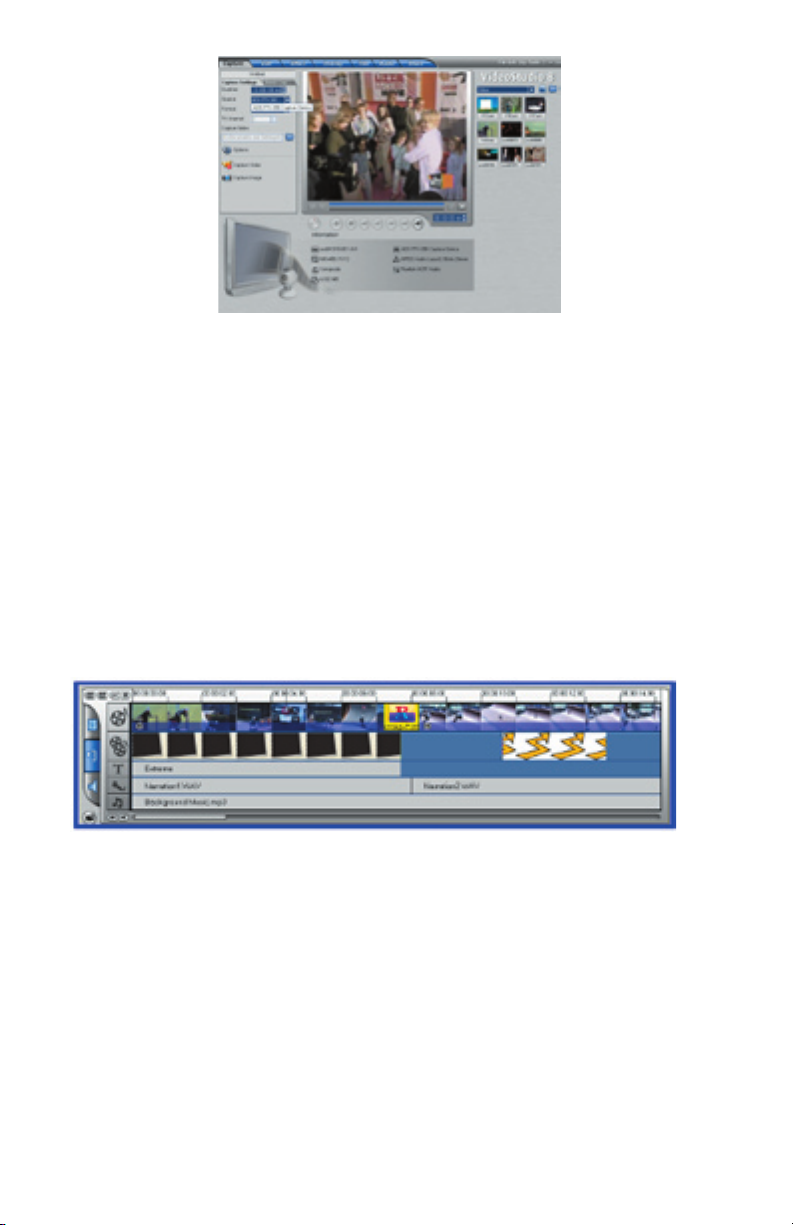
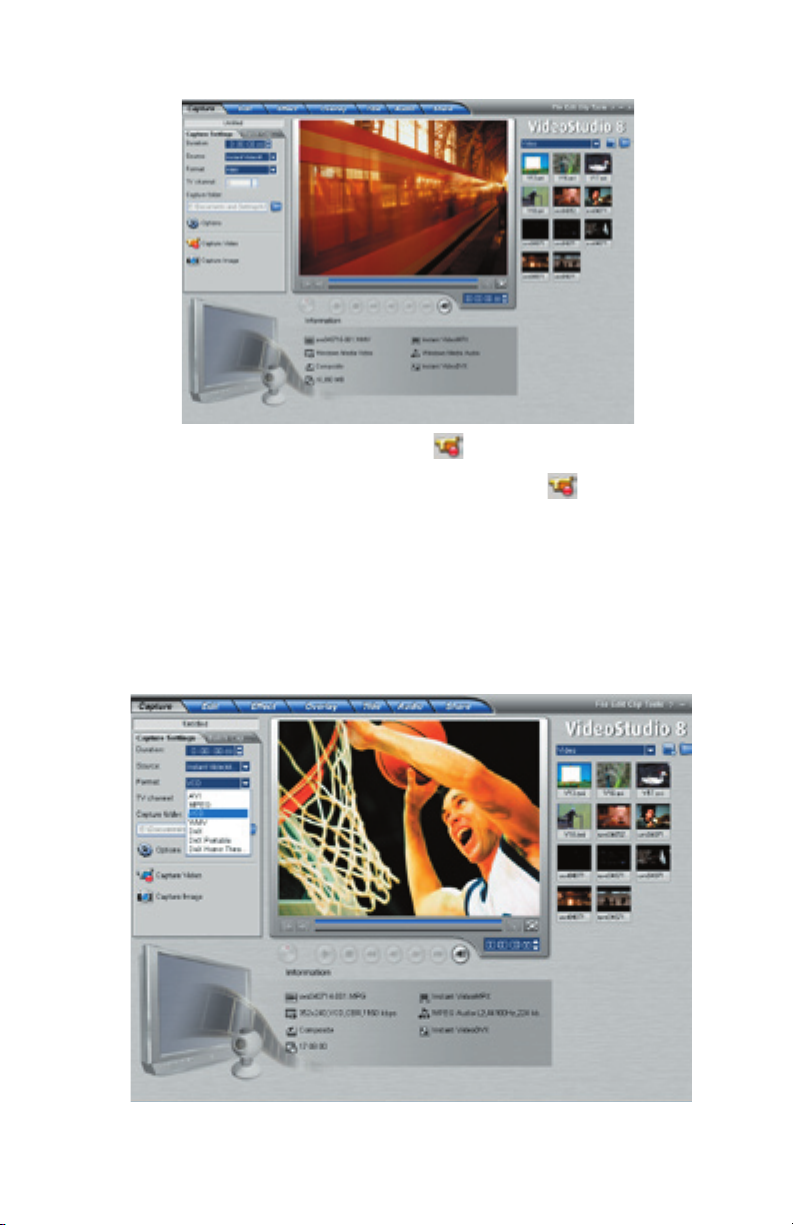
VideoStudio Editor
VideoStudio Editor
ADS PTV-390 Capture Device.
Page 16
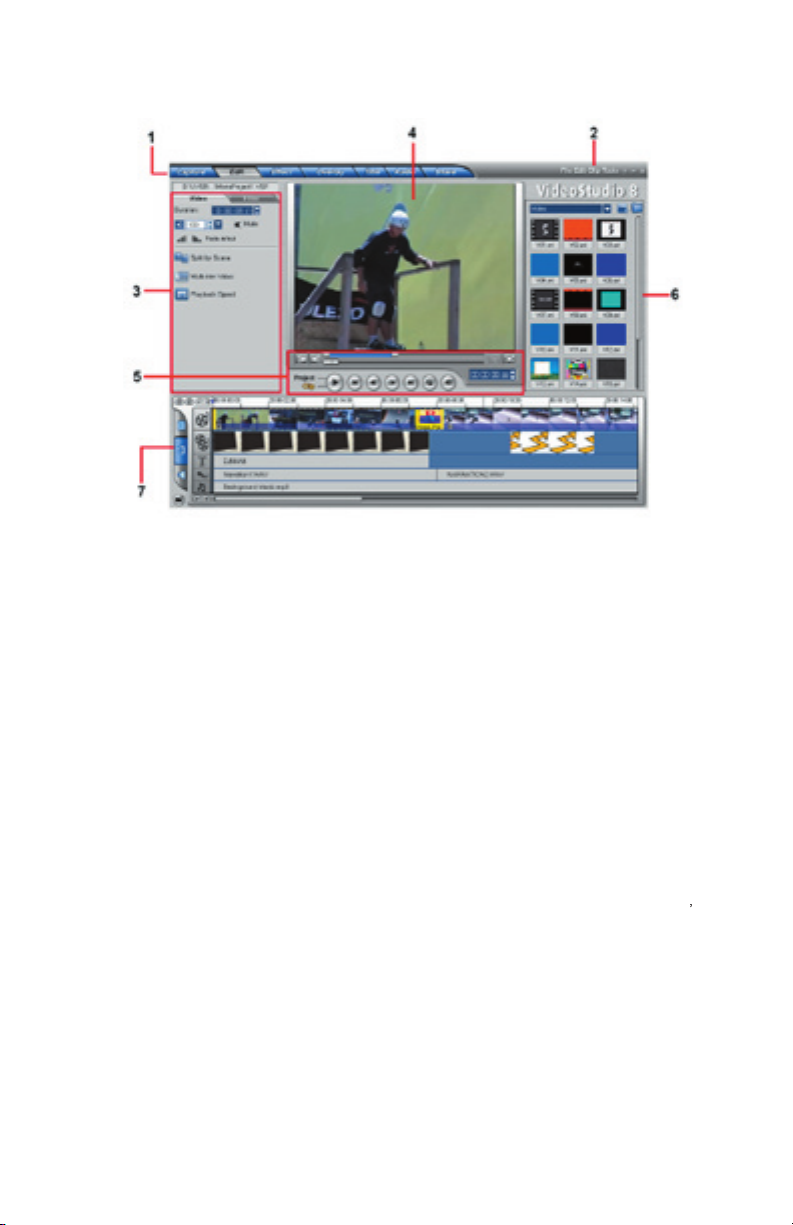
Contains menus that provide different set of commands.
Contains controls, buttons, and other information that you can use to customize the
settings of the selected clip. The contents of this panel change depending on the step you
are in.
4 Preview Window
Provides buttons for playback and for precision trimming of clips. In the
this also acts as the device control for the DV camcorder.
Stores and organizes all of your media clips.
Displays all the clips, titles, and effects included in your project.
Page 17

VideoStudio simpli es the process of creating movies into seven simple
to switch between steps.
to your computer’s hard disk in the
tape can be captured as a single le or automatically divided into multiple
les. This step allows you to capture video and still images.
and the Timeline are the heart of VideoStudio. This is
where you arrange, edit, and trim your video clips. Video lters can also
lets you add transitions between video clips in your
allows you to superimpose one clip over another to
from various presets in the Library.
Audio Step
lets
you select and record music les from one or several CD-ROM drives
When your movie is complete, you can create a video le for sharing on
the Web or output the movie on tape, DVD, or CD in the
These steps do not necessarily need to be followed in the order that they
Page 18

You can change the video resolution and video bit rate settings
to adjust for quality and also the file size of your video capture
@ 300 MB/Hr.
500 kb/sec.
Page 19
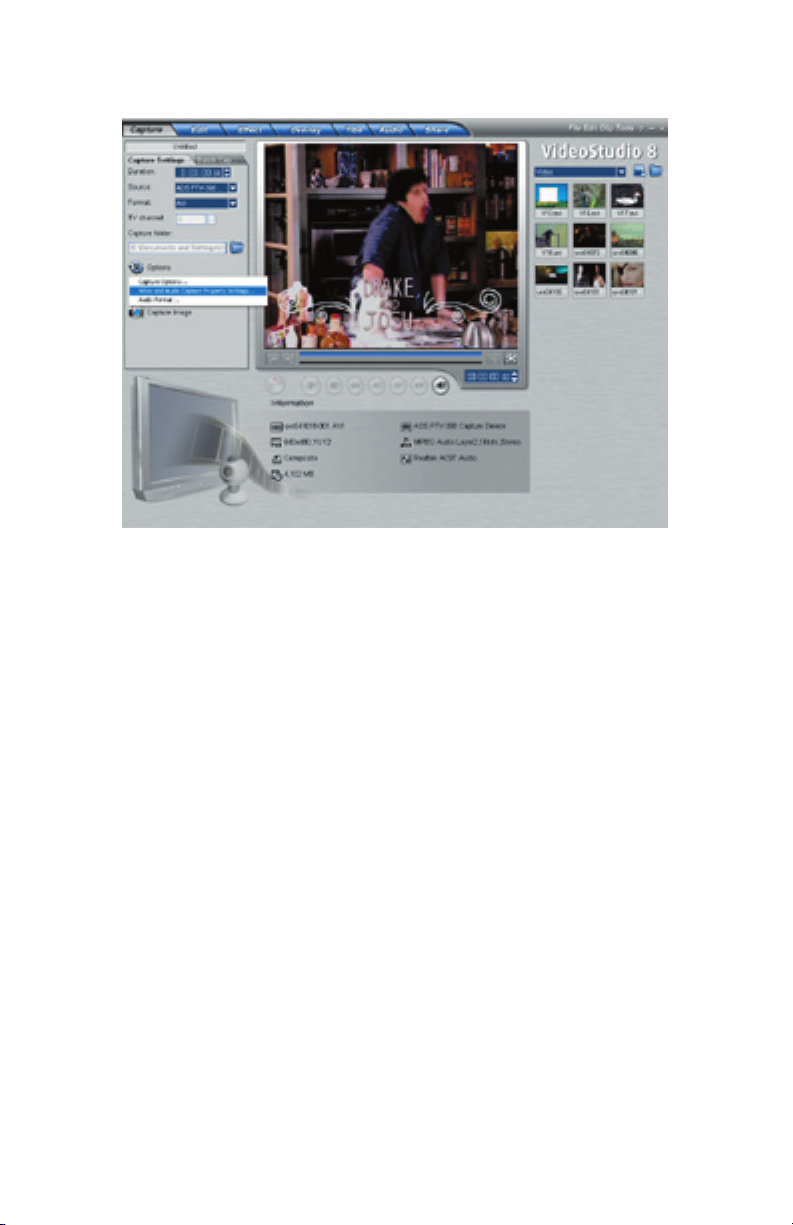
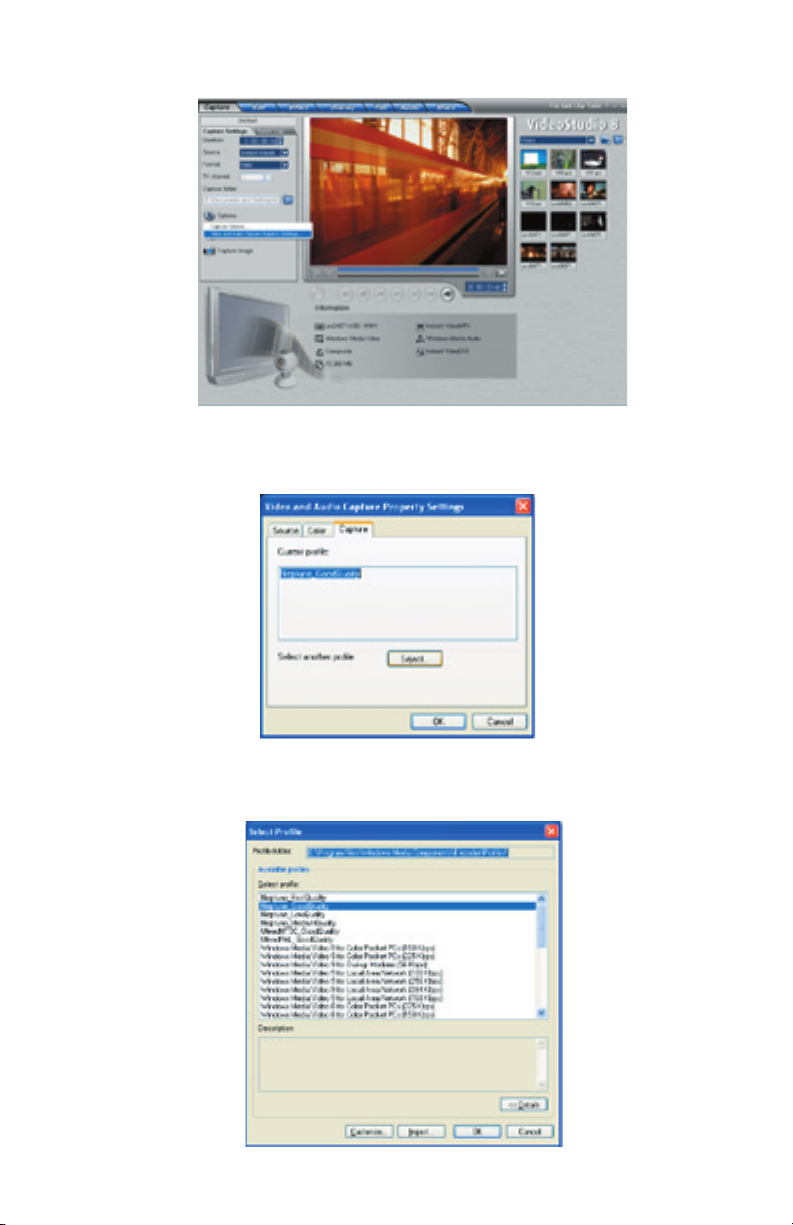
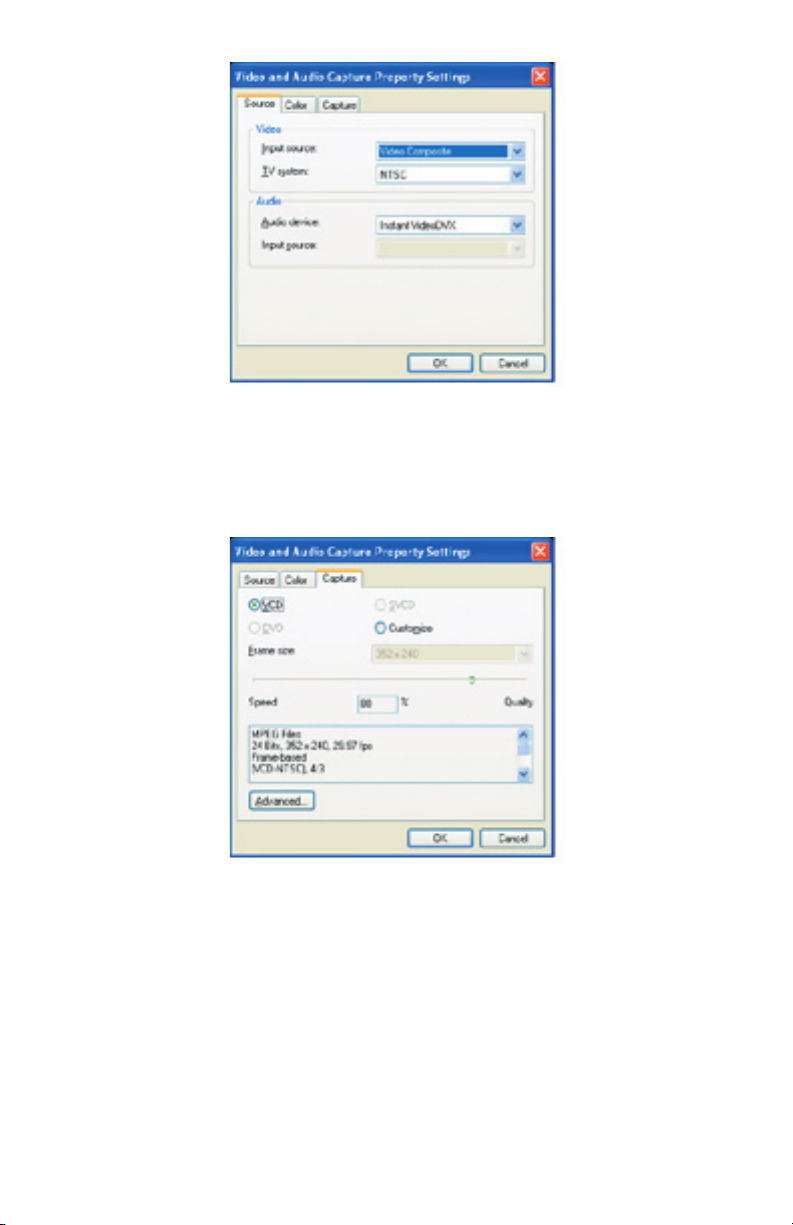
Property Settings…”
analog source with RCA cables then please select Video Composite
and if connected with S-Video then Video S-video.
Page 20

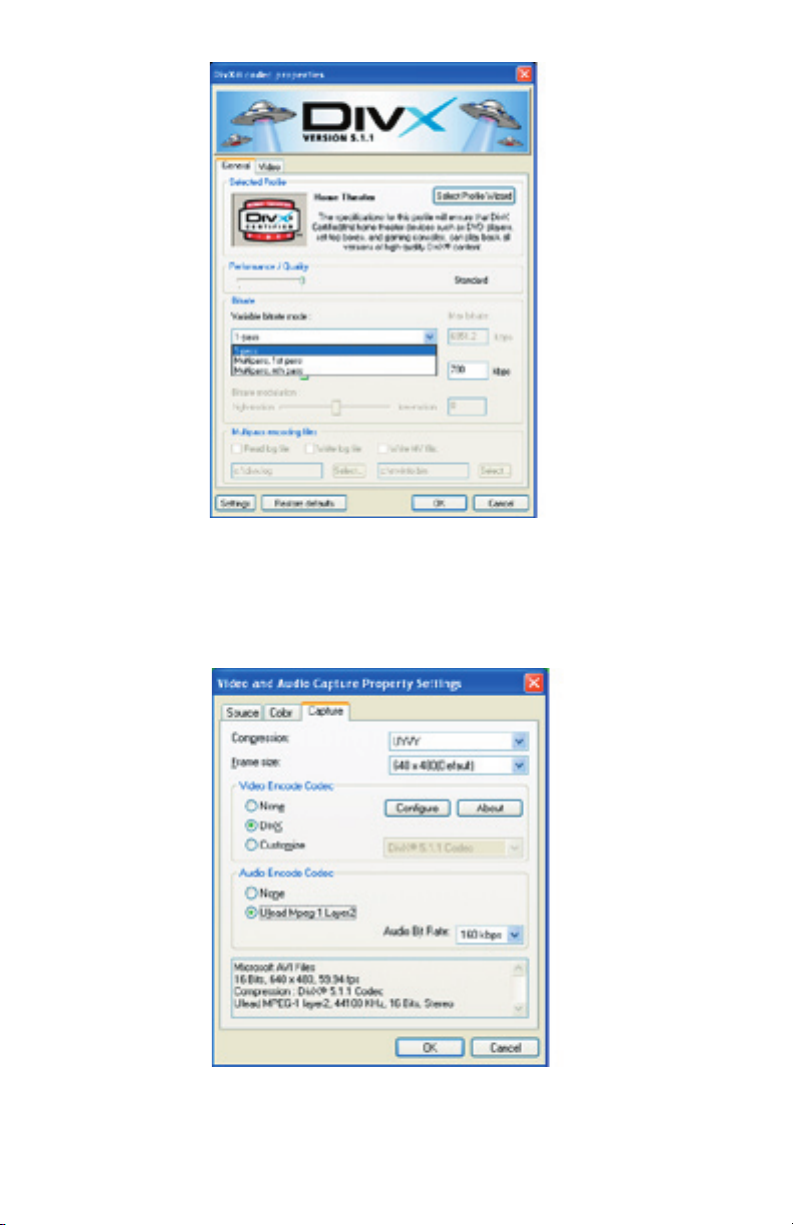
pull-down arrow.
Page 21
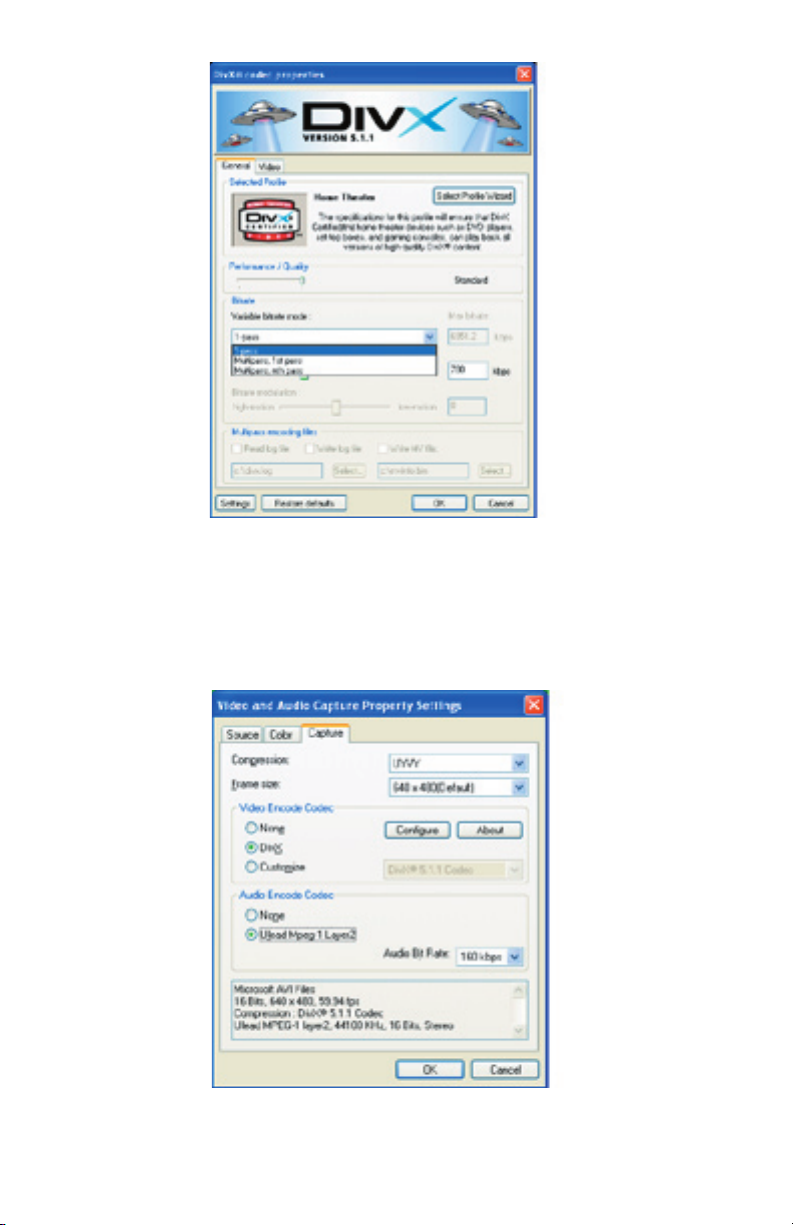
Encode Codec and then click “OK” to finish and save your settings.
Page 22

the ESC key.
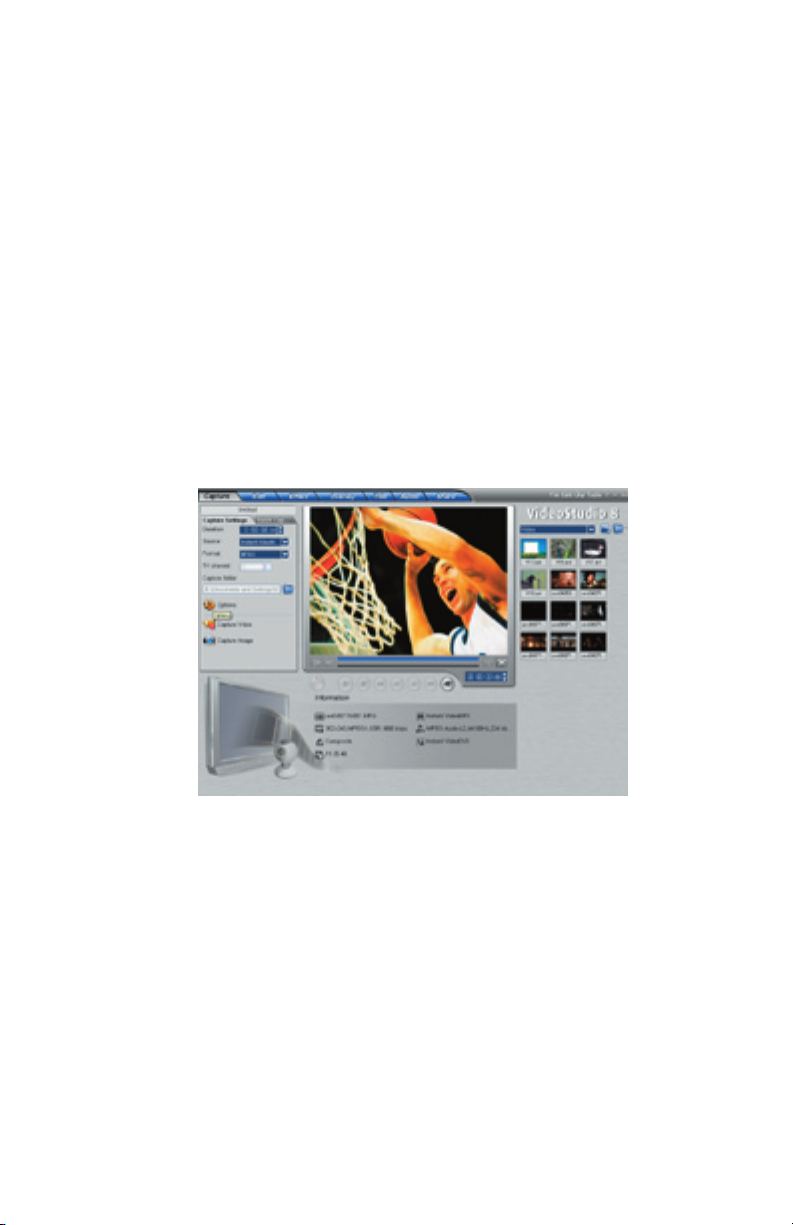
to start capturing.
to a CD. If you have a CD burner you most likely received CD burning
the capability of writing files to a CD is built in so no extra software
Page 23

Windows Media video is a format that is generally created to send video
you can capture video at a low bit rate (small file size) yet still have good
You may want to capture video in the Windows Media Video format for
Page 24

Property Settings…”
will see a list of different Profiles you can select from.
Page 25
the ESC key.
to start capturing.
write Windows Media Video files to a CD.
Page 26

Property Settings…”
VCD is a format that was specifically created to put video on a CD-R
You can capture approximately 70 minutes of audio and video to fill a
Page 27

analog source with RCA cables then please select Video Composite
and if connected with S-Video then Video S-video.
default (recommended), but you can also customize the frame size by
clicking on the “Customize” setting.
Page 28

the ESC key.
to start capturing.
creating your VCD disc.
Page 29
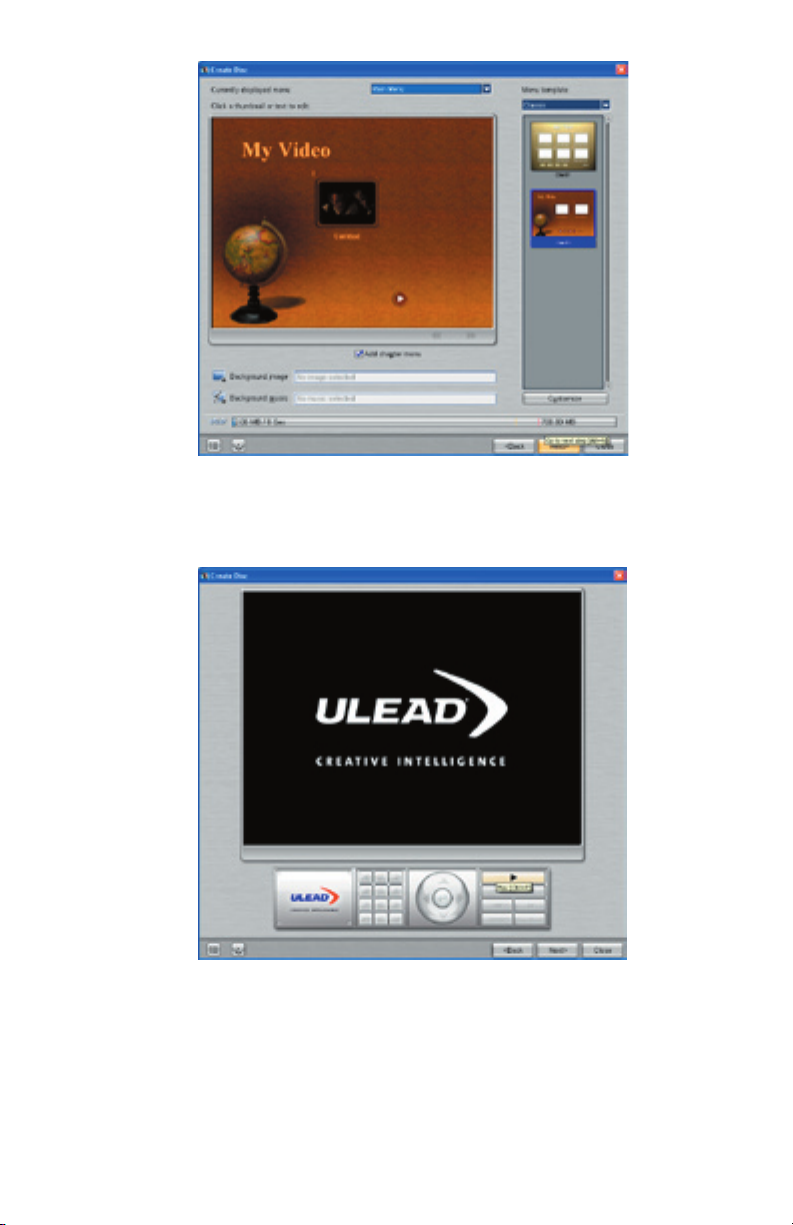
disc or you can just skip it by clicking “Next”.
Page 30

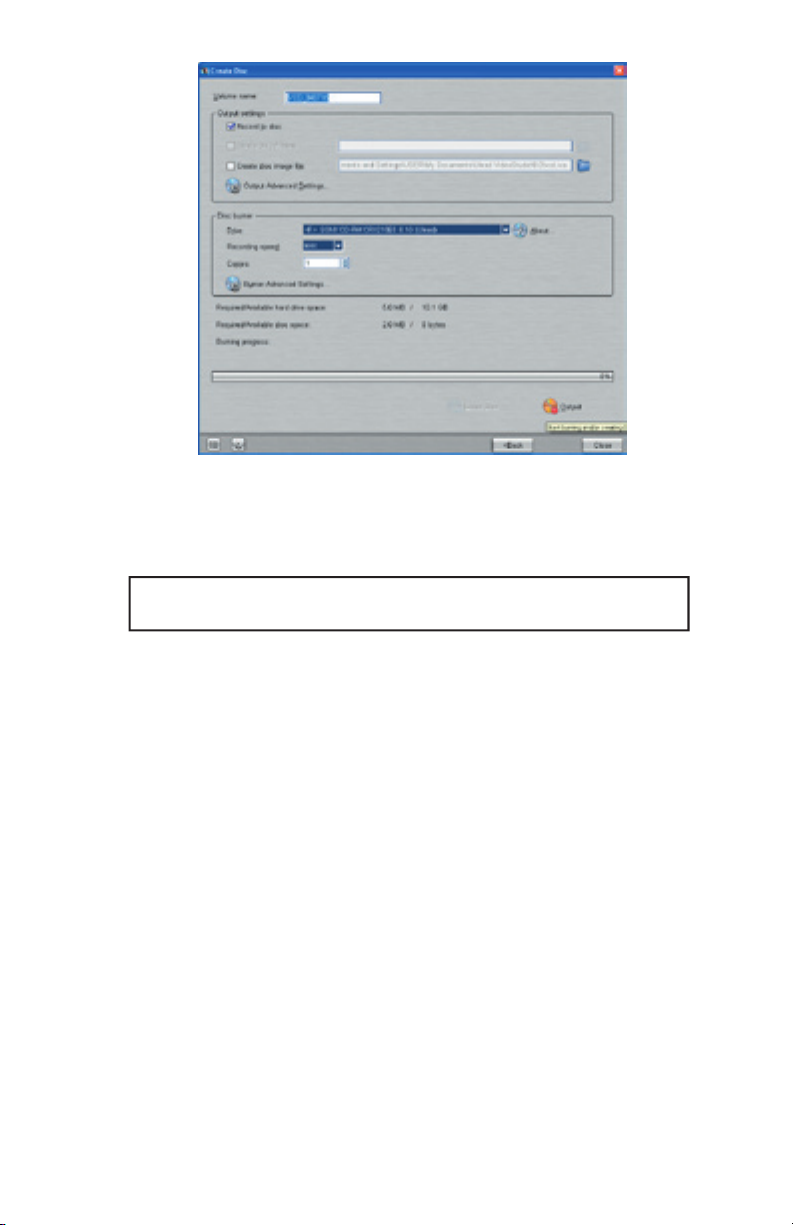
4) Here you can rename your disc, then select the Drive your recordable
disc is in and then click “Output” to start the burn.
VCD discs will playback in most late model DVD players. Check your
Page 31

4. Guide de l’utilisateur
minimum
DivX
Applications:
Applications:
Page 32

vidéo compacts facilement transférables à des dispositifs portatifs ou permettant
Votre Instant Video PCI est fourni avec l’application de capture et d’édition de
vidéos Ulead VideoStudio 8, qui supporte la capture directe et la compression
Windows Media Video 9
®
et Divx
®
Video.
Avec Instant Video PCI, avec quels formats de
très « gourmand » en CPU. DivX Video, par exemple, est une technologie de
fois plus petite qu’un DVD, tout en offrant une qualité
Page 33

vidéo.
Des fichiers vidéo DivX peuvent être reproduits sur un disque CD-R puis
repassés dans des lecteurs DVD à certification DivX. Il est normalement
possible de placer un film d’une durée de 2 heures sur un CD-R unique.
Un grand nombre de lecteurs de vidéos portables supportent la lecture
vidéo DivX.
La plupart des Pocket PC et des PALM PDA peuvent supporter la lecture
vidéo DivX lorsqu’un lecteur au logiciel compatible a été installé.
DivX Video est compatible avec le récepteur Media-Link Entertainment
d’ADS Tech. Capturez la vidéo en format DivX Video puis distribuez la
vidéo sur votre réseau Ethernet par câble ou sans fil. Le récepteur Media
Link décode la vidéo et l’affiche sur votre grand écran de télévision.
Windows, avec Media Player de Microsoft. Aucun logiciel supplémentaire n’est
faible : fréquemment réglée sur 352 x 240 (NTSC) ou 352 x 288 (PAL), elle est
Applications:
• Insérer MPEG-1 Video dans des présentations en PowerPoint
Archivez les prises de vue vidéo sur le disque dur ou sur CD dans des
fichiers de petite taille, pour pouvoir les visualiser sur le PC
Créez un VidéoCD
Page 34

VidéoCD (VCD)
VCD est probablement l’application la plus répandue pour les vidéos
film format DVD.
• Créez des CD vidéo : ils peuvent être lus par la plupart des
modèles de lecteurs de DVD les plus récents.
toute une série de résolutions et des débits binaires, en fonction de
Avec Instant Video PCI, nous avons incorporé deux façons de créer un
• VideoStudio 8 - vous pouvez sélectionner facilement le module
enfichable Windows Media Capture pour capturer directement la
vidéo dans un fichier WMV 9.
• Windows Media Encoder - Installez le Windows Media Encoder
pour capturer des fichiers WMV 9 dans votre PC, diffusez des
vidéos dans votre réseau domestique ou le réseau de votre bureau,
ou encore pour prendre en charge sur Internet.
Page 35

Page 36

vivement de lire entièrement le manuel de l’Instant Video PCI avant
Video PCI.
1) Insérez le CD d’installation
2) Cliquez sur « Install Drivers » lorsque le menu d’installation
s’affiche
3) Windows détecte automatiquement l’Instant Video PCI et
une fenêtre « Nouveau matériel trouvé » s’affiche
4) Suivez les instructions sur l’écran
5) Effectuez l’installation
Veuillez désactiver / fermer / éteindre les applications qui tourneraient
votre ordinateur, un message vous demande d’installer ce programme
terminée, cliquez sur « Terminer » dans le coin inférieur droit de l’écran.
Page 37
A. Branchez la carte PCI directement dans un port PCI ouvert de la
pilotes trouvés, la fenêtre « Installation matérielle » apparaît.
puis cliquez sur « Suivant ».
cliquer sur « Continuer quand même » ne peut endommager votre ordinateur et
vous permet d’achever l’installation de votre nouveau matériel.
Page 38
4) Votre périphérique, Instant Video PCI, est maintenant installé :
cliquez sur « Terminer » lorsque l’installation est terminée.
Page 39
Video PCI ».
Après confirmation des deux adresses, fermez la fenêtre « Gestionnaire
l’installation des pilotes.
pilotes.
Page 40

Cette alerte apparaîtra 2 fois pendant le processus d’installation. Cliquez sur
Page 41

films amateur.
Page 42

VideoStudio suit un paradigme progressif, conçu de sorte que les tâches
tion de titres et simples outils de création de bandes son. Apprenez en quelques
film, vous pouvez le graver sur DVD, VCD ou SVCD, ou encore le réenregistrer
fichier vidéo pour en permettre la lecture par votre ordinateur.
VideoStudio Editor
VideoStudio Editor
comporte un déroulement des opérations pas à pas, conçu
réglée sur ADS PTV-390 Capture Device.
Page 43

Il contient des boutons correspondants aux différents stades de l’édition de la vidéo.
Elle contient des menus offrant différentes séries de commandes.
Il contient des commandes, boutons et informations diverses que vous pouvez utiliser
pour personnaliser les réglages de la scène sélectionnée. Le contenu de ce panneau
varie en fonction de la scène dans laquelle vous vous trouvez.
4 Fenêtre « Preview »
Contient des boutons pour la lecture et pour la coupure précise des scènes. Dans
caméscope DV.
Mémorise et organise toutes vos scènes.
Affiche l’ensemble des scènes, titres et effets contenus dans votre projet.
Page 44

VideoStudio simplifie la procédure de création de films, en la divisant en sept
vous permet d’ajouter des transitions entre scènes vidéo dans votre projet.
Vous avez le choix entre toute une série de transitions dans la «
vous permet de superposer deux scènes pour créer un effet d’«
».
»).
Audio
transmettre sur le Web, ou bien sortir le film sur bande, sur DVD ou sur CD avec
ces opérations ne doivent pas nécessairement suivre l’ordre dans lequel elles
contient différentes commandes pour personnaliser
VideoStudio, pour créer et sauvegarder des projets de film, pour
travailler sur certaines scènes et pour d’autres applications.
Page 45

sélectionnez DivX.
Vous pouvez modifier la résolution de la vidéo ainsi que le réglage du
votre projet de capture vidéo. Vous désirez peut-être placer 2 heures
@ 300 Mo/h
500 kb/sec.
Page 46

Property Settings . . . »
votre source analogique avec des câbles RCA, puis sélectionnez
Video Composite et, si vous êtes raccordé à S-Video, sélectionnez
Video S-video.
Page 47

flèche de déroulement.
Page 48
Encode, puis cliquez sur « OK » pour terminer et sauvegarder
vos réglages.
Page 49

ou tapez simplement sur la touche ESC.
la capture.
vous pouvez utiliser n’importe quel logiciel de gravage de CD proposé
Windows XP, la capacité d’écriture de fichiers sur CD est déjà comprise,
Page 50

Windows Media Video est un format généralement créé pour effectuer
Vous désirez peut-être capturer des vidéos en format Windows Media
Video, pour transmettre des vidéos par l’Internet, ou tout simplement
Page 51
Property Settings . . . »
verrez une liste de profils parmi lesquels vous pouvez effectuer
votre sélection.
Page 52

logiciel de gravage de CD fourni avec votre PC ou votre graveur de CD.
ou tapez simplement sur la touche ESC.
la capture.
Page 53
Property Settings . . . »
VCD est un format créé spécifiquement pour placer des vidéos sur
Vous pouvez capturer environ 70 minutes d’audio et vidéo pour remplir
facilement « partager » le film capturé et/ou édité sur CD. Après avoir
; cliquez sur le bouton « Create Disc », puis suivre les messages
votre film VCD sur CD.
Page 54
votre source analogique avec des câbles RCA, puis sélectionnez
Video Composite et, si vous raccordé avec S-Video, sélectionnez
Video S-video.
défaut (préconisé), mais vous pouvez également personnaliser la
taille de l’image en cliquant sur le réglage « Customize ».
Page 55

VCD(MPEG-1) :
« Share », puis sur « Create Disc ».
ou tapez simplement sur la touche ESC.
la capture.
Page 56

sur « Next ».
votre disque : vous pouvez également le « sauter » en cliquant
sur « Next ».
Page 57
4) Vous pouvez maintenant renommer votre disque, puis sélectionner le
: les disques VCD peuvent être lus dans la plupart des derniers
veuillez vous reporter à la notice sur le CD.
Page 58

Video Studio Help – Press “F1” on your keyboard at any time.
Video Studio User Manual – on CD
ADS Web Site:
www.adstech.com
We are constantly adding more information to the On-Line Help sec-
tion of our web site. Click the “Support” button on the home page and
www.ulead.com
http://www.ulead.com.tw/ulead/suppform.cfm
www.adstech.com
Page 59

your computer store or computer parts dealer. If your ADS product needs repair or replace-
The ADS Technologies technical support and customer service staff can aid in solving
to the dealer or store where you purchased the product. Each individual computer store or
for a refund, you must get the refund from the dealer or store you purchased the product
from. If you purchased the product directly from ADS please see the “Terms and Conditions
to return product to ADS Technologies, Inc. for repair or replacement you must follow these
Authorization (RMA) number.
4. Replacement product cannot be shipped to you until the defective product has been
Page 60

Warranty:
Warranty:
This ADS Technologies, Inc. product comes with a One (1) year hardware warranty. ADS
Technologies, Inc. (ADS) warrants this product against defects in material and workmanship
for a period of One (1) year from the date of original purchase from ADS or an authorized
ADS dealer. This warranty applies only to the original purchase of the product and is not
transferable. This warranty does not cover any incompatibilities due to the user’s computer,
This warranty does not cover any damage caused by negligence, non-authorized modifica-
tions, or parts installed without prior written permission from ADS.
This warranty does not apply if the product has been damaged by accident, abuse, or mis-
warranties of merchantability and fitness for a particular purpose.
* Reorient or relocate the receiving antenna
* Increase the separation between the equipment and receiver.
* Connect the equipment into an outlet on a circuit different from that to which the receiver is connected.
* Consult the dealer or an experienced radio TV technician for help.
Page 61

Page 62

Instant Video PCI
8:00 am - 5:00 pm, PST
www.adstech.com
www.adstech.com/support/support.asp
Support Hours
Tech
www.adstech.com
 Loading...