

Page 1
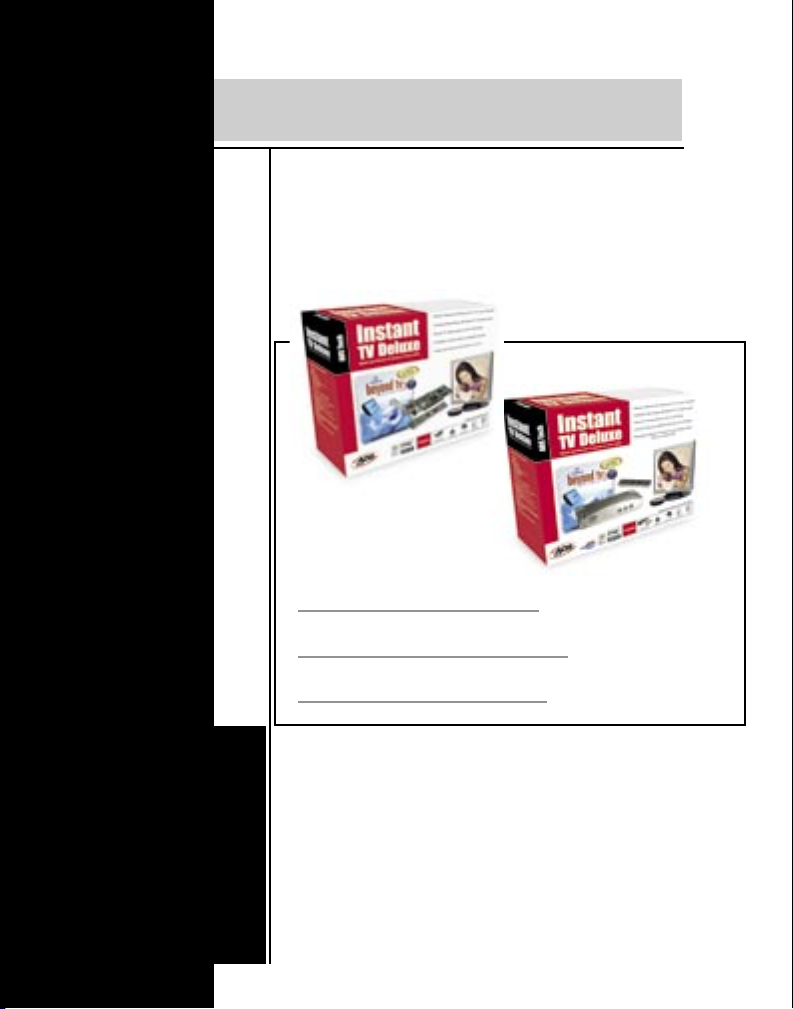
Instant TV Deluxe
English
Watch and Record TV shows on CD or DVD
Software User's Guide
• Beyond tv3.5 SE
• ArcSoft QuickDVD
• ArcSoft ShowBiz
Instant TV Deluxe
ADS Tech
website: www.adstech.com
Support: www.adstech.com/support/support.asp
Page 2

Page 3

Table of Contents
SnapStream Beyond TV 3.5 . . . . . . . . . . . . . . . . . . . . . . . . . . . . . . . . . . . . . . . 4
SnapStream Beyond TV 3.5 Setup Wizard . . . . . . . . . . . . . . . . . . . . . . . . . . 7
Using Beyond TV . . . . . . . . . . . . . . . . . . . . . . . . . . . . . . . . . . . . . . . . . . . . . . . 11
Troubleshooting Tips . . . . . . . . . . . . . . . . . . . . . . . . . . . . . . . . . . . . . . . . . . . . 19
ArcSoft QuickDVD Installation. . . . . . . . . . . . . . . . . . . . . . . . . . . . . . . . . . . . . 21
Using ArcSoft QuickDVD2 . . . . . . . . . . . . . . . . . . . . . . . . . . . . . . . . . . . . . . . 23
ArcSoft ShowBiz DVD 2 Installation . . . . . . . . . . . . . . . . . . . . . . . . . . . . . . . 27
Using ArcSoft ShowBiz DVD 2 . . . . . . . . . . . . . . . . . . . . . . . . . . . . . . . . . . . . 28
Capturing Video . . . . . . . . . . . . . . . . . . . . . . . . . . . . . . . . . . . . . . . . . . . . . . . 29
© 2004 ADS Technologies. All Rights Reserved
Revision 4 March 2004
Apple and Macintosh are registered trademarks of Apple Computer, Inc. Microsoft, Windows, & Windows 98 are registered trademarks of Microsoft
Corporation. IBM is a registered trademark of the International Business Machines, Inc.
ADS is a registered trademark of ADS Technologies Inc. ADS Technologies (ADS) makes no warranty of any kind with regard to this material, including but
not limited to, the implied warranties of merchantability and tness for a particular purpose. The information furnished within this written document is for
information purposes only and is subject to change without notice. ADS Technologies assumes no responsibility or liability for any errors or inaccuracies
that may appear herein. ADS makes no commitment to update or to keep current information contained within this document. (rtt)
page 3
Page 4
page 5
Beyond TV 3.5
Beyond TV does for your PC what no other software is capable of doing. We harness the full
potential of your computer and transform it into a true home entertainment powerhouse. Beyond
TV gives you the power to schedule recordings by selecting the shows you want to record through
Beyond TV’s electronic programming guide.
You can also pause, fast-forward and rewind not only your recordings, but also live television.
It’s no exaggeration to say that we’re totally convinced that Beyond TV will change the way you
watch television.
NOTE: In order to use Beyond TV, Microsoft’s DirectX 9.x must be installed with the Windows
operating system on your computer. Microsoft describes DirectX as “the core Windows technology
that drives high-speed multimedia and games on the PC.” Earlier versions of Windows such as
Windows 98 and Windows 2000, may not have DirectX installed at all. If you are using Windows
XP, you likely have an earlier version of DirectX installed.
Beyond TV Software Installation:
* Note: You must have Microsoft DirectX 9.x installed before installing SnapStream Beyond TV
To install DirectX 9.x, do the following:
1) Install DirectX 9.x from the ADS Instant TV Deluxe CD provided.
2) Follow the DirectX 9.x install instructions provided by Microsoft.
3) Then run the Install Beyond TV from the ADS Instant TV Deluxe CD provided.
For more information on DirectX, see the Microsoft DirectX Reference online at
http://www.microsoft.com/directx/
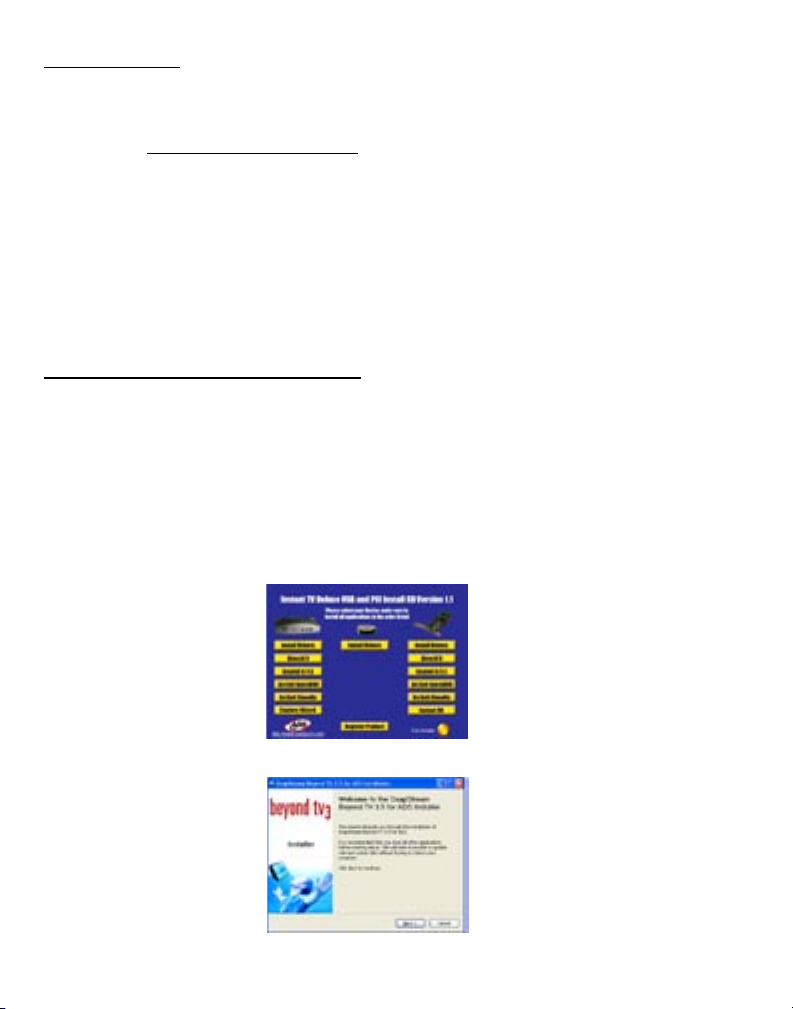
Step 1:
Place the Instant TV Deluxe CD into your CD-ROM drive and once the autorun screen comes up
click on “Install Beyond TV”.
Step 2:
Click on “Next” to continue with the installation.
page 4
Page 5
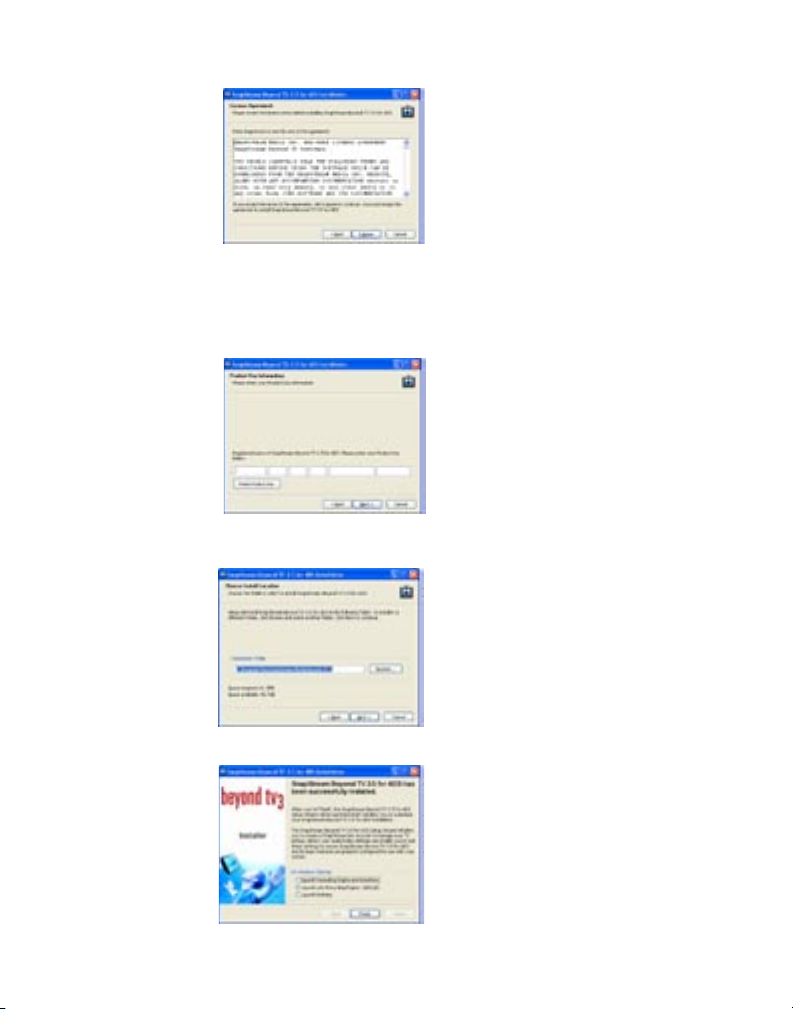
Step 3:
Click on “I Agree” for the installation to continue.
Step 4:
Please input the Product Key located on the paper jacket containing your CD in the blank elds.
The Product Key is an alphanumeric key (numbers and lowercase letters) consisting of six
sections that uniquely identies an installation of Beyond TV.
Here is an example of the Product Key format:
96832a94-19g1-57a8-nnbx-11v6067812s86-XXXXXXXX (Do not use this product key)
Step 5:
This screen allows you to select a location to where you want to install the software and click
“Next” to start the installation.
Step 6:
The software installation will start installing and when nished click “Finish” to the installation.
page 5
Page 6

page 7
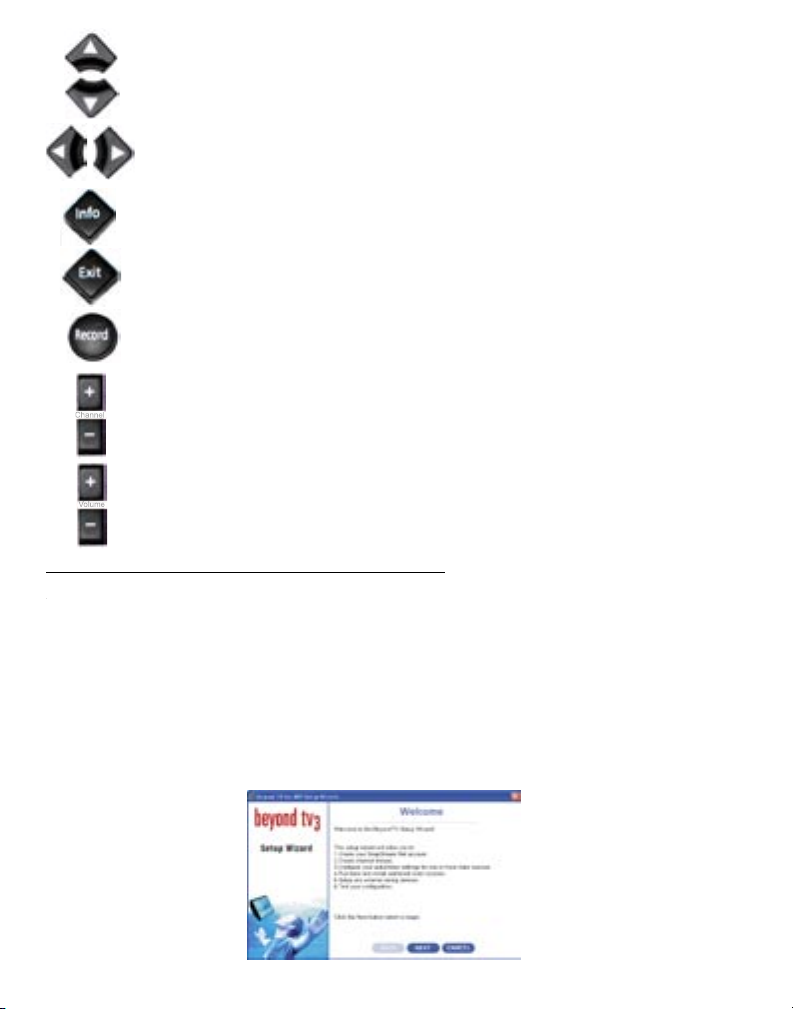
Remote Control
Off Button
Mute
(Electronic Program Guide)
Channel up and down
Guide
Info
(channel description)
Record
Menu of Beyond TV
Scroll up
Scroll down
Exit
Live TV
Volume up and down
This button will allow you to turn Beyond TV ON/OFF
To mute/unmute the volume
0 - 9 number pad
To toggle between the channel you are on and the previous channel
Within Beyond TV this button will bring up the Electronic Program Guide that shows your tv listings
Within Beyond TV this button will bring you back to the menu page
Rewind/ Fast Forward your live TV shows
Rewind/ Fast Forward your live TV shows
Play/ Pause your live TV which is called “Time-shift”
Stop button will stop your live TV show
Takes you directly to live TV
page 6
Page 7
page 7
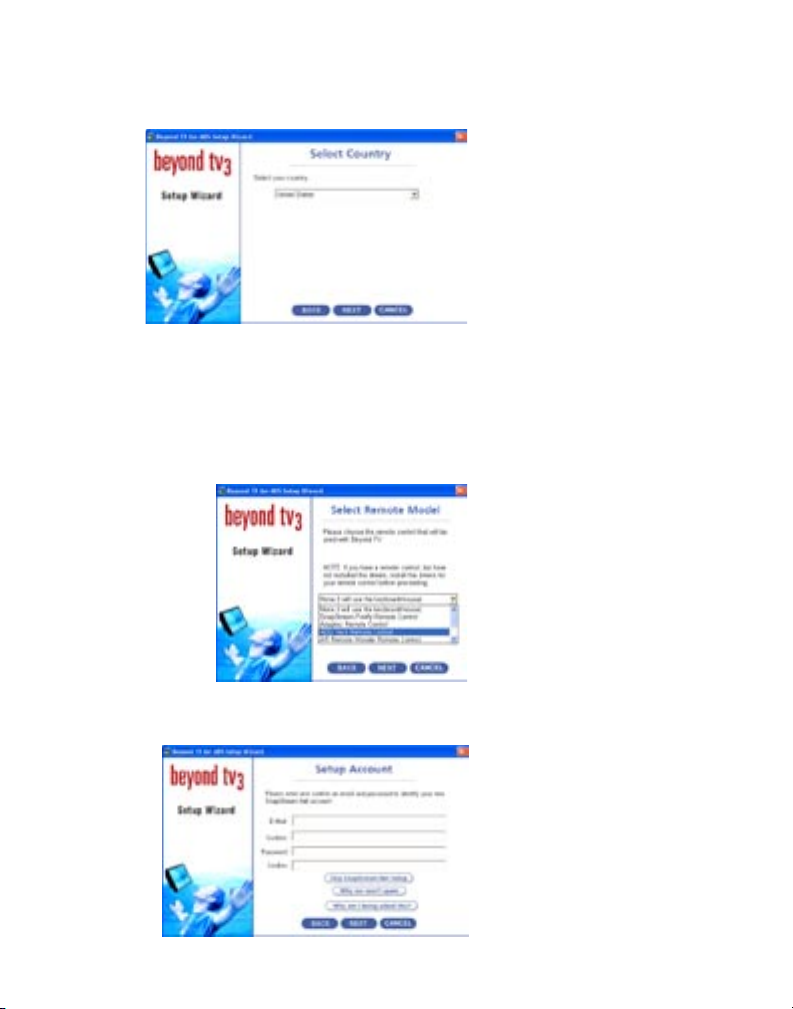
SnapStream Beyond TV 3.5 Setup Wizard:
*NOTE: Before running the Setup Wizard, please be sure that you are connected to the internet and have DirectX 9.0 or
greater installed.
The Setup Wizard is a utility that will help navigate the process of con guring Beyond TV with
your particular system.
While it is generally used during the initial con guration of Beyond TV, you can use it anytime you
want to change the con guration of Beyond TV. Launch the Setup Wizard from your Windows
Start Menu.
Step 1:
Once you have nished installing the software, the “Beyond TV Setup Wizard” will appear and
help you to con gure Beyond TV with your system’s hardware and software. Click “Next” to
continue.
To navigate up/ down in the Electronic Program Guide
Navigate through the Electronic Program Guide and skim back and forth through your tv shows
This will bring up the description of what you are watching
This will take you out of the screen and take you back to the menu page
This will take you to the Electronic Program Guide to setup recording
Changing channels up and down
Raising/ Lowering the volume control
Channel
Channel
Volume
Page 8
page 9
Step 2:
Select the country in which you are using Beyond TV. The Setup Wizard uses country selection
to determine the Frequency standard (PAL, NTSC, etc.) in that country. Beyond TV will use these
frequencies to tune available TV channels. Click “Next” to continue.
Step 3:
Choose the remote that you will be using with Beyond TV. Select “ADS Tech Remote Control” in
the pull down menu and click “Next”.
If you don’t plan on using any remote, selet “None” (I will use the keyboard/mouse).
SnapStream.Net Setup
Note: Please make sure that you are connected to the internet because it will start downloading the
90 day trial (E)lectronic (P)rogram (G)uide.
Step 4:
Because you are a rst time user, you will need to register the software to be able to download the
90 day trial (E)lectronic (P)rogram (G)uide. Once you have nished the registration click “Next”.
page 8
Page 9
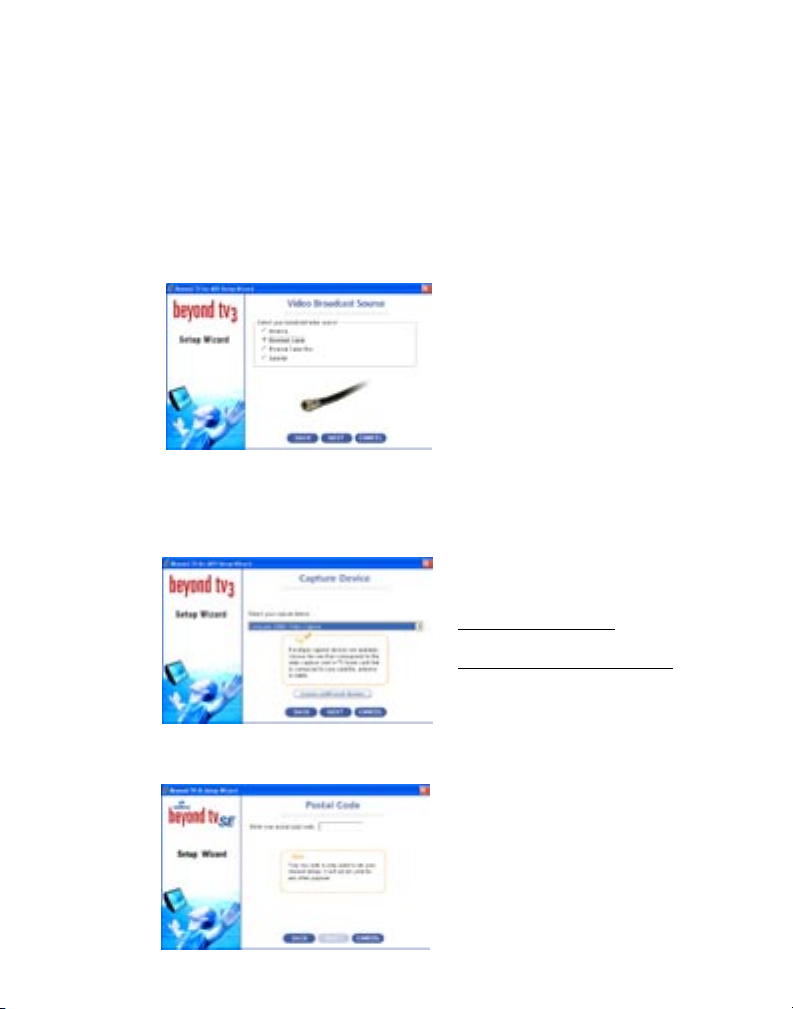
Step 5:
The broadcast source is the means by which you receive television reception. Beyond TV uses
the source you select to determine the proper setup process to tune to the channels available for
watching and recording via your broadcast source.
* Select “Antenna” or “Standard Cable” option if you receive television reception through a coaxial
cable that you connect directly to the video input on your television. This coaxial cable will connect
directly to the Instant TV Deluxe.
* Select “External Cable Box” or” Satellite” option if you receive television reception on an external
set-top cable box or satellite receiver. You would then connect via RCA or S-Video from your Video
Source to the back of your Instant TV Deluxe.
Step 6:
The capture device you’re selecting in this portion of the Setup Wizard is the TV Tuner device
to which you’ve connected your broadcast source. The Setup Wizard may identify other video
capture devices, such as a web cam or an additional video capture card, which are installed in or
connected to your PC. If you see multiple capture devices in the pick-list, enusure that you select
Instant TV Deluxe and click “Next”.
Choose:
• Instant DVD for USB
or
• ADS PTV 305 Video Capture
Step 7:
By entering your zip code, Beyond TV will determine what local cable/satellite providers are
available to choose from.
page 9
Page 10
page 11
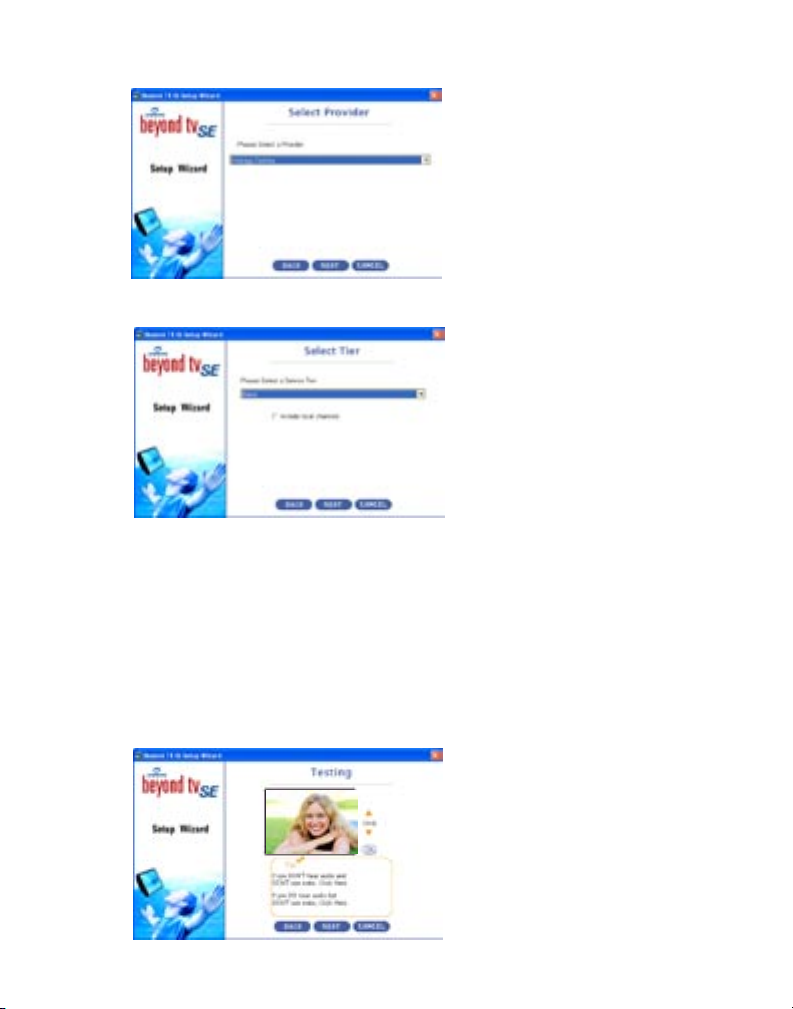
Step 8:
Select your local/satellite providers and click “Next”.
Step 9:
Please select a service tier based on your cable or satellite service (basic, extended basic,
premiere channels, etc.)
Step 10:
This step of the Setup Wizard allows you to test the options you’ve selected and conm that
Beyond TV 3.5 is working properly with your system. If your setup is working, the following will be
true:
- You can view live TV
- You can hear audio while viewing live TV
- You can change channels
If any of these are not working for you, use the “Back” button to return to specic sections of the
Setup Wizard to change your conguration to address the problem.
Once you veried that you have both, click “Next” to proceed.
page 10
Page 11
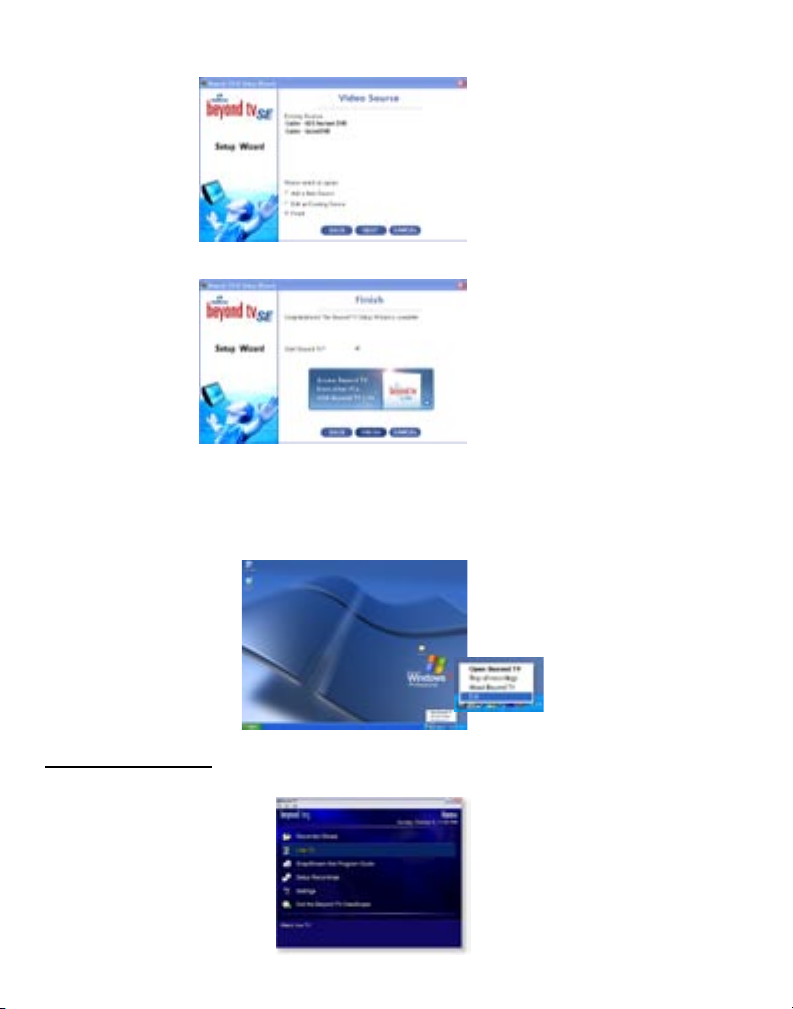
Step 11:
Select “Finish” and click “Next” to nalize your setup.
Step 12:
Beyond TV 3.5 is now congured for use with your system. Select the “Finish” button to launch the
Beyond TV Interface.
NOTE: Users can run the Setup Wizard any time after installing Beyond TV 3.5 by launching it from
the Windows Start Menu.
Start > Programs > SnapStream Media > Beyond TV 3 > Beyond TV Setup Wizard
NOTE: The Beyond TV server must be closed to use the Setup Wizard. Exit Beyond TV from the
Navigator Interface from the le menu by going to File > Exit.
Using Beyond TV:
ViewScape™ Overview - The Beyond TV ViewScape™ allows you to transform your PC into a
home theater.
page 11
Page 12
page 12
page 13
Watch Live TV
The Live TV function transforms your monitor into a television set. You can use a remote control,
keyboard, or mouse to navigate through the available channels. SnapStream.Net provides program
information for each channel as you surf through them.
Timeshifting
While you watch live television, you can pause, rewind and fast forward what you watch.
Keyboard commands:
Spacebar Toggle between Pause and Play
Rewind (press multiple times for higher speed rewind)
Fast Forward (press multiple times for higher speed
fast forward)
Mouse commands:
Pause
Drag the timeshift marker to the desired part
of broadcast
Remote Control commands:
Rewind (press multiple times for higher speed rewind)
Fast Forward (press multiple times for higher speed
fast forward)
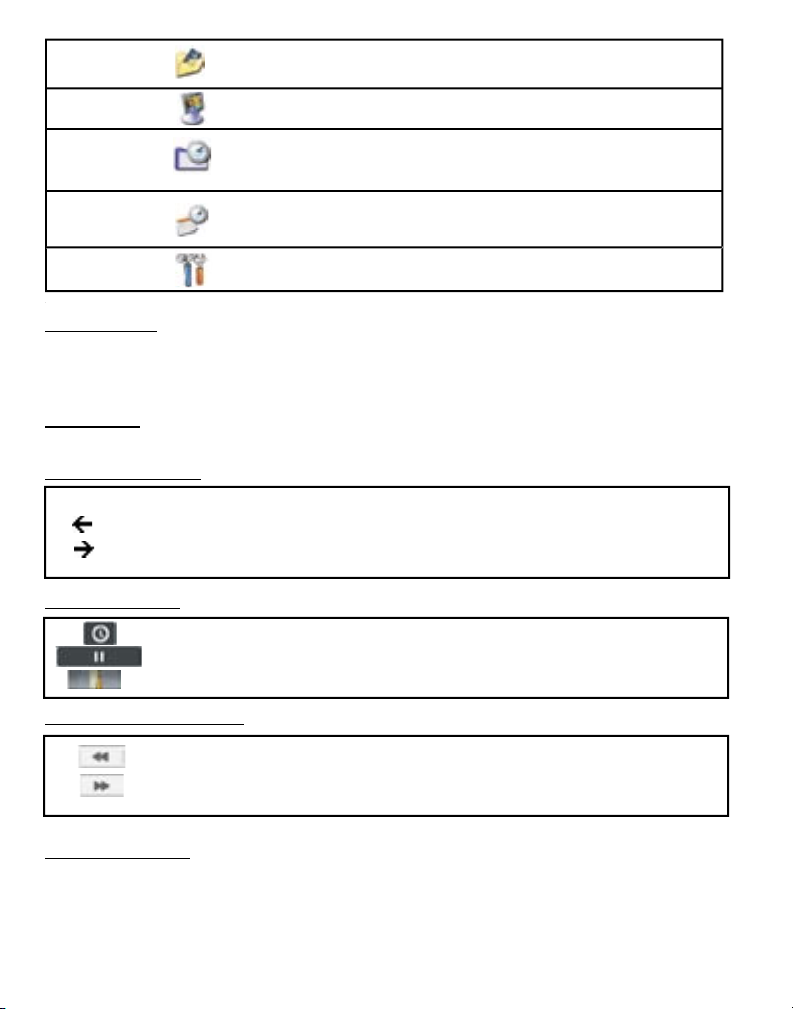
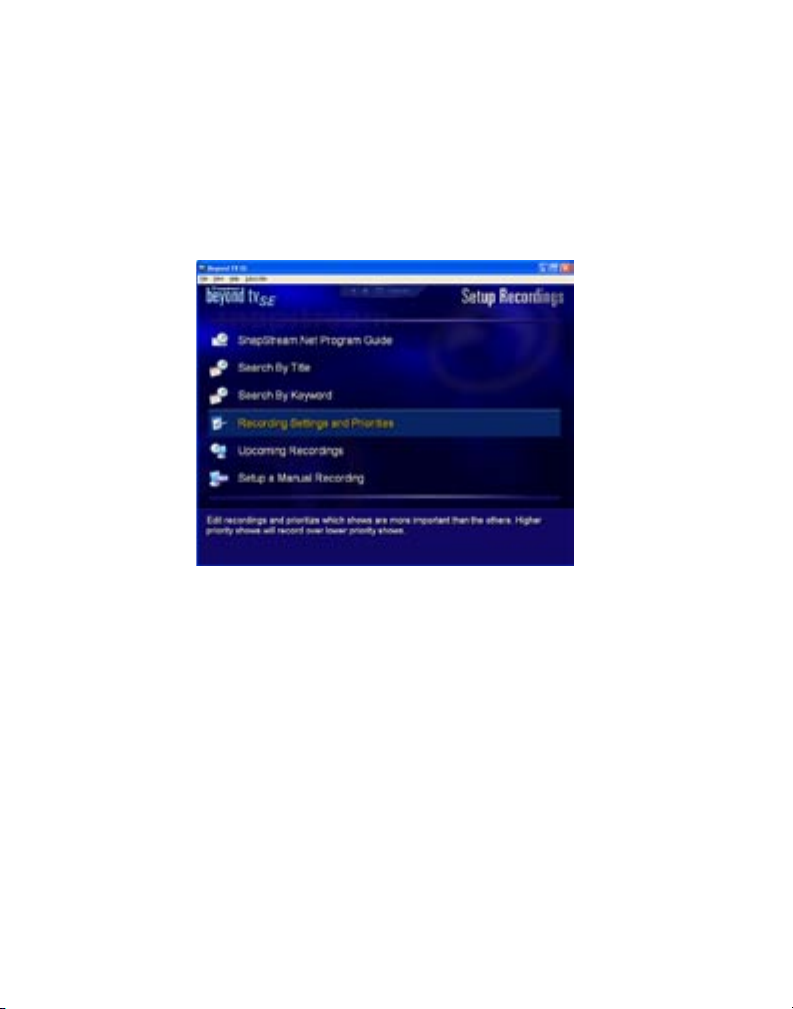
Setup Recordings
Beyond TV gives you maximum exibility in creating and managing your favorite TV shows. The
Setup Recordings page is divided into six different sections – SnapStream.Net Program Guide,
Search By Title, Search By Keyword, Recording Settings and Priorities, Upcoming Recordings,
and Setup a Manual Recording.
Recorded Shows
Recorded Shows contains a library of your recordings and allows you to select how
long to keep a show before deletion.
Live TV Live television can be viewed and timeshift (pause/rewind/fast forward).
The SnapStream.Net Program Guide displays schedules and descriptions of what is
scheduled to air. From here, you can schedule recordings and view a list of all
upcoming episodes of each show within the program guide.
Setup Recordings
Setup recordings by browsing the program guide, searching by show title or keyword,
or scheduling a time and date manually. You can set priorities for certain shows and
resolve con icts when two shows are scheduled for recording at the same time.
Settings Settings lets you change most commonly used Playing, Recording, SnapStream.Net,
SmartSkip, and ShowSqueeze settings.
long to keep a show before deletion.
scheduled to air. From here, you can schedule recordings and view a list of all
upcoming episodes of each show within the program guide.
or scheduling a time and date manually. You can set priorities for certain shows and
resolve con icts when two shows are scheduled for recording at the same time.
SmartSkip, and ShowSqueeze settings.
SnapStream.Net
Program Guide
The SnapStream.Net Program Guide displays schedules and descriptions of what is
Page 13

page 13
SnapStream.Net Program Guide
Beyond TV’s integrated electronic programming guide (EPG) is available to U.S. and Canadian
users completely free during the 90 day trial period. It stores two weeks of program data. Channel
listings are available for all antenna, cable and satellite lineups. The program guide is automatically
updated from the SnapStream.Net servers on a daily basis.
Follow the steps below to record a show with the SnapStream.Net
Program Guide
1. From the Home page, select SnapStream.Net Program Guide.
2. Scroll through the Program Guide to the show you want to record
and select it.
3. Select a recording option.
Recording Options
View upcoming episodes Provides a listing of all future episodes. Select
individual episodes in the list to schedule a recording.
Record this episode Schedule to record only the episode for the date and
time you’ve selected. If the episode is currently
showing, recording begins immediately.
Record all episodes Schedule recording for all future episodes of the
chosen show.
Record all new episodes
Schedule recordings for all episodes that aren’t
repeats or re-runs.
Cancel
Do not record the selected show and return to the
Program Guide.
Recording icons with a slash on it indicates that this particular episode will not be
recorded. These icons appear when you manually choose to not record speci c
episodes in a series or if another recording with higher priority is scheduled to record
at the same time.
Search by Title or Keyword
With Search By Title, you can search for your favorite show by entering the show title.
With Search By Keyword, you can search for your favorite show by entering keywords. Beyond TV
will search titles, episode titles, episode descriptions, actors, and directors for your keywords.
Recording Settings and Priorities
The Recording Settings and Priorities function displays the shows you have selected to record and
allows you to adjust their priority in case of con icts.
Example:
If you select to always record Friends and always record NBA Basketball, you can assign
Friends a higher priority in the Recording Priorities. If there is ever a con ict, Friends will
always take priority and be recorded instead of NBA Basketball.
You can also view and edit details of shows to be recorded in Recording Settings and Priorities.
Details include the quality of the recording, the target folder to store the recording, whether the
show will be ShowSqueezed, and whether the show will have SmartSkip chapters generated.
Page 14
page 15
Set Beyond TV to Record Direct to Disc with Quick DVD
We have integrated QuickDVD with Beyond TV so that you can schedule a TV recording to be
recorded direct to DVD disc.
This is single session recording meaning that only a single programming event can be recorded
direct to disc. The advantage is that you can have a TV show recorded to DVD disc while you are
away, come home grab the recorded disc and play it in your home theatre.
When you run the Beyond TV Setup Wizard and select the “Instant DVD” or ADS PTV 305 Video
Capture – the Quick DVD application will also automatically be setup as a recording source.
Follow these steps to tell Beyond TV to launch Quick DVD:
1) Use the Program Guide to schedule a recording as normal
2) Press the Home key on the software or Menu key on the remote.
3) Select “Setup Recordings”
4) Then Select “Recording Settings and Priorities”
5) Now you will see a list of scheduled recordings. Click on the show that you wish to
record direct to disc and then click “View and Edit Details”
6) The rst setting is “Record From” – change this setting to display Quick DVD. If you are
capturing from a Cable TV source it will be listed as “Cable- Quick DVD”
7) Click the Home button at the top of the software or press the Menu key on the remote.
You have now set that your scheduled recording to be recorded directly to DVD disc.
Quick DVD – Direct to Disc
If you have set Beyond TV to use Quick DVD for disc recording, the Beyond TV will close down just
before the scheduled record time. The TV channel will be changed and Quick DVD is launched and
recording begins.
Quick DVD will record the TV show to your hard disc rst, then automatically burn the DVD disc.
page 14
Page 15

Managing TV Recordings
Upcoming Recordings
Upcoming Recordings displays all shows scheduled to be recorded. You can cancel recordings in
Upcoming Recordings.
Example:
If you select to record every episode of Everybody Loves Raymond, each individual episode will
be listed in Upcoming Recordings, along with the episode title and description.
Remote Recordings
A remote recording is a recording scheduled while you are away from your Beyond TV computer.
Remote recordings can be triggered through SnapStream.Net from Internet browsers, web-enabled
cell phones, and Pocket PCs
To remotely schedule a recording:
1. Connect to SnapStream.Net (WAP and web-enabled Pocket PC users should use
http://mobile.snapstream.net; PC Internet browser users should use www.snapstream.net)
2. Login using your SnapStream.Net username and password
3. Locate and choose the show you want to record in “Television Listings”, with the
“At a Glance” feature, or by doing a search.
4. Choose one of the remote recording options
5. Check to see if the job has been added by going to the “Remote Recordings” tab in
the SnapStream.Netn interface.
NOTE: Your SnapStream.Net account must rst be congured for remote recordings. You can do
this from your personal settings page in SnapStream.Net.
Beyond TV polls SnapStream.Net at least every 15 minutes for remote recordings. Once Beyond
TV has retrieved your remote recordings, they will be deleted from the “Pending Recordings” list on
SnapStream.Net and appear in your list of scheduled recordings in Beyond TV.
Adjusting Recording Quality
Beyond TV sets the quality level, by default, to an automatic setting most suitable for your
hardware. Higher quality recordings can be made by changing the quality setting.
To change the quality setting:
1. Go to the Settings section in the Beyond TV ViewScape.
2. Select Recording Settings.
3. Change Record Quality to a higher setting.
Other Recording Formats
By default, Beyond TV records all content in the MPEG-2 format, which then can be
ShowSqueezed into the Windows Media format. Optionally, users who have TV tuner cards without
hardware encoding can skip the process of ShowSqueezing MPEG-2
to Windows Media by recording directly to Windows Media.
page 15
Page 16

page 17
To change the le format from MPEG-2 to Windows Media:
1. Go to the Settings section in the Beyond TV ViewScape.
2. Select Recording Settings
3. Change the Recording Format to Windows Media
NOTE: When recording to Windows Media as the default le format you cannot timeshift.
Watch Recordings
Follow the steps below to watch recorded shows in the Beyond TV ViewScape.
1. Go to the Recorded Shows section in the Beyond TV ViewScape.
2. Scroll through the list of recorded shows and select the show you want to watch.
3. Select the “Play” option from the list on the bottom right of your screen.
SmartSkip™
SmartSkip creates “chapters” that let you skip a series of commercials in one click.
The trackbar displays alternating SmartSkip chapters.
Beyond TV will automatically insert markers at major scene changes of recordings, creating
chapters. You can then easily skip quickly from one chapter to another at the touch of a button.
Chapters are indicated by dark and light blue bars alternating on the trackbar at the bottom of the
screen.
Use the up and down buttons on either the keyboard or remote control to navigate through the
chapters. With a mouse, you can click on the point where indicating bars change colors.
30-Second Skip and Instant Replay
While watching a recording in the Beyond TV ViewScape, you can skip forward 30 seconds with
one click or get a 7- second instant replay. Skip forward and back lengths can be personalized on
the Playback Settings page. Press “.” on the keyboard for 30-second skip and “,” for the 7-second
instant replay. Press on the remote for 30-second skip and for 7-second instant replay.
Click on with a mouse to display timeshifting bar and navigation icons.
Managing Recordings
There are a variety of options for storing and deleting recordings.
Keep Until…
You can designate a recorded show as either Keep until I delete it or Keep until space is
needed. If Keep until I delete it is selected, the show will not be deleted automatically. If Keep
until space is needed is selected, then the show will be automatically deleted when space is
needed on the hard drive.
page 16
Page 17

page 17
ShowSqueeze™
ShowSqueezing a show makes the recording take up less space on your hard drive, enabling you
to store more recorded shows. On the Home page of the Beyond TV ViewScape, go into Settings,
then ShowSqueeze Settings to enable automatic ShowSqueeze, select the le format of the
recompressed le and adjust the quality of the squeezed show.
Copying Shows to CD/DVD
Beyond TV supports the MPEG-2 format, which makes burning TV shows to DVDs a breeze. Just
load Beyond TV recordings into third-party software such as ArcSoft QuickDVD or ShowBiz.
NOTE: You should record your TV shows to the right MPEG-2 quality pro le to avoid the time-
consuming recompressing step before burning to DVD. To avoid having to recompress, choose
one of the pre-con gured “DVD” quality settings in Beyond TV.
Settings
Recording Settings From here, you can change what le format your
shows are recorded in, the quality they are
recorded in, and how many minutes of padding to add
to the beginning and end of each recorded show.
Playback Settings
From here, you can change how Beyond TV displays
your recorded shows. You can change
settings such as the preferred MPEG-2 decoder,
deinterlacing options, and the method of
rendering to your screen. You can also change various
time settings to adjust how you navigate through your shows.
ShowSqueeze and
SmartSkip Settings This section of the settings allows you to enable or
disable Beyond TV’s automatic generation
of SmartSkip chapters and Automatic ShowSqueeze
features. You can also con gure your advanced
ShowSqueeze options here.
SnapStream.Net Settings From this section, you can perform a manual
SnapStream.Net Program Guide update or download
any pending Remote Recordings. You can also
con gure whether or not to let Beyond TV automatically
update your SnapStream.Net Program Guide
periodically and whether or not to automatically check
for pending Remote Recordings.
Miscellaneous Settings This section contains various other settings such as the
Screen Saver timer.
Page 18

page 19
Keyboard Commands
Global
Keystroke Function Comments
h Move Selection Up
i Move Selection Down
Page Up Move One Page Up
Page Down Move One Page Down
Enter Choose Selection / View Details
Esc Exit current screen or Cancel
Home Return to Home Screen
Q Quiet Mode Mute navigation sounds
Alt + Enter Toggle Full Screen and Windowed
Del Delete Video Library,
Recording Manager Only
P Play Recording Video Library Only
F1 View Remote Control help
F5 View Recorded Shows
F6 Launch Live TV
F7 Open SnapStream.Net Program Guide
F11 Toggle the border on and off For Windowed mode only
Theater (Watching Live TV and Recording)
Keystroke Function Comments
1-9 Select Specic Channel or jump to
a specic time.
h or PgUp Channel Up When watching Live TV
i or PgDn Channel Down When watching Live TV
h Jump to the next chapter When watching a recording with
SmartSkip chapters
i Jump to the previous chapter When watching a recording with
SmartSkip chapters
L Return to the previous channel When watching Live TV
g Fast Forward (3 Speeds)
f Rewind (3 Speeds)
. [period] Skip Forward (30 Seconds)
, [comma] Skip Backward (7 Seconds)
page 18
If watching Live TV, this will
change channels. If watching a
recorded show, this will jump to a
specic time in the show.
Page 19

Backspace Go to front of buffer When watching Live TV
Space(bar) Pause / Resume
+ [plus] Raise Volume
- [minus] Lower Volume
E View SnapStream.Net Guide
M Mute Audio / Unmute Audio
R Record Live TV
S Stop Recording
P Play
G Adjust Video Settings Brightness, Contrast, Gamma
X Reset Video Settings Each setting resets to the value 50
I Show / Hide Program Information
Program Guide
Keystroke Function Comments
g Scroll Right
f Scroll Left
h Scroll Up
i Scroll Down
Ctrl + f Skip Back 6 Hours
Ctrl + g Skip Forward 6 Hours
Ctrl + h Move Page Up
Ctrl + i Move Page Down
Space(bar) Go to Current Time
1-9 Select Specic Channel
U Update Guide Information Requires an Internet connection
R Open Record Options
Troubleshooting Tips
No video in setup wizard
1. Ensure that you are using a supported capture device as listed on the “System
Requirements” page (http://www.snapstream.com/Products/Products_PVS3_SysReq.asp).
2. Ensure that your video input to the capture card is securely connected and is transmitting a
signal on the channel you have selected in the “Test” page.
3. Exit the Setup Wizard, and download and install the latest drivers for your capture device and
video device.
4. Ensure that, in multiple display systems (two monitors, or one monitor and a TV-OUT), the
Setup Wizard is running on the PRIMARY display, which will be indicated by the numeral 1 in
the “Display Properties” window on the “Settings” tab (CONTROL PANEL gDISPLAYg
SETTINGS (tab). Click the “Identify” button to display alarge numeral 1 on the primary
page 19
Page 20

page 21
display and 2 on the secondary display.
5. Try adjusting your refresh rate by clicking the “Advanced” button and going to the “Monitor” tab.
6. Run the setup wizard again. You should get video in the setup wizard’s “test” page.
No audio in setup wizard
1. Ensure that your tuner device is upgraded to the latest appropriate drivers.
2. Beyond TV works best with WHQL-approved sound drivers. To ensure that you are using
approved drivers, visit http://windowsupdate.microsoft.com and allow it to look for updates.
If it nds appropriate drivers for your audio device, it will list them in the “driver update” section.
Install those drivers and run the Setup Wizard again.
3. Ensure that the audio cable is connected from your tuner device’s audio output to your
computer’s Line-In input.
4. If you are using a SoundBlaster (Audigy, Audigy 2, et.) device, you should enable the “Record
Without Monitoring” or “Record Without Playback” option available in the “Advanced” section of
your audio settings (START BUTTON gRUN gSNDVOL32).
After a driver update, run the Setup Wizard again. If you still have no audio, nish the Setup Wizard
as though you were receiving audio, and continue:
1. Make a short test recording with Beyond TV.
2. Start the volume control utility (This is usually a speaker or control board icon in your system
tray, or is available through START BUTTONgRUN gSNDVOL32. Ensure that your “Master”
(or “Main”) and your “Wave” (or “WAV”) outputs, in particular, are neither muted nor turned
down. Then, view the recording you created in step 1, using Windows Media Player. If there is
still no audio, please continue.
3. Start your volume control utility as in the previous step. Note the input (recording) and output
(playback) settings. (You can change from recording to playback settings and back again
through OPTIONSgPROPERTIES.)
NOTE: The following assumes that you are using your “Line In” input; change as applicable.
4. Ensure that:
• the Line-In Playback is muted or turned down all the way.
• the Line-In Recording is both “selected” (via the checkbox marked “Selected”) and that
the volume bar is close to the top.
5. Repeat steps 1 and 2. If you still get no audio, please contact SnapStream Support.
No program guide data or can’t retrieve remote recordings
NOTE: Program Guide Data is provided by SnapStream.Net, and the setup is done in the Setup
Wizard. SnapStream.Net accounts are currently only available to customers in the United States
and Canada.
1. Ensure that you have successfully signed up for and properly congured a SnapStream.Net
account via the Setup Wizard. If you have not done so, exit Beyond TV and run the Setup
Wizard again to setup your account. Verify that it is functioning properly by logging in at
http://www.snapstream.net with your login ID (e-mail address) and password.
page 20
Page 21

2. Ensure that your computer is able to contact SnapStream.Net for Program Guide data
downloads by conguring any routers or rewalls to allow Beyond TV use of port 443.
Poor video quality
Note: Many users compare the “Live TV” or recording quality to that of proprietary TV-viewing
software provided with the capture device. These programs do not compress the video stream at
all, so there is no quality loss. Beyond TV compresses the stream, so in most cases there will be
discernible quality loss. Beyond TV will by default attempt to detect the best quality level that your
computer is capable of, and will set that quality prole by default. Many of the following suggestions
will lower the CPU usage on your machine so that you may try a higher quality prole.
1. The following steps apply to all setups, and usually help to improve video quality, be it in
recordings or in Live TV, greatly.
a. Full system virus scan and removal
b. Full system adware (spyware) scan and removal
c. Full hard disk defragmentation
2. Try lowering the resolution or color depth of your desktop (CONTROL PANEL g DISPLAYg
SETTINGS (tab)).
3. Ensure that, in multiple display systems (two monitors, or one monitor and a TV-OUT),
Beyond TV is running on the PRIMARY display, which will be indicated by the numeral 1 in
the “Display Properties” window on the “Settings” tab (CONTROL PANELg DISPLAYg
SETTINGS (tab)). Clicking the “Identify” button to display a large numeral 1 on the primary
display and 2 on the secondary display. You can also try disabling the second monitor.
4. Playback of MPEG-2 videos can be greatly improved with the use of a third-party decoder,
which Beyond TV 3.2 (and above) support. For detailed information on using a third-party
decoder, please see our community article, “Improve the performance of Beyond TV 3 with
third party MPEG-2 decoders,” through the “Community” sectionfrom our website
(http://www.snapstream.com).
Note: To be able to burn your movies to disc in Beyond TV, you must have QuickDVD Installed.
ArcSoft QuickDVD Installation:
ArcSoft QuickDVD™ offers you the absolute easiest way to make your own DVD movies. Forget
about all the complicated procedures typically associated with digital video… if you can use a
remote control, you can put your home movies on DVD. It’s really that simple. Attention couch
potatoes--DVD is in your hands!
You can now quickly and easily burn pre-recorded television programs and personal home video to
DVD disc. Users simply press play on their VCR or camcorder, or choose content from a list of prerecorded shows, and in no time their hot little DVD disc is ready for archiving or sharing with family
and friends.
ArcSoft QuickDVD offers a striking, wizard-style interface design features large buttons and easy-toread text, making video-transfer and disc creation fast and simple for even the most novice users.
With QuickDVD it enables users to customize their DVD discs with beautifully illustrated menu
backgrounds. Users may choose from dozens of attractive images in a variety of styles and categories.
page 21
Page 22

page 23
Step 1:
Insert the Instant TV Deluxe disc into your CD-ROM drive and wait till the autorun comes up and
then click Install QuickDVD.
Step 2:
A window will come up to select
the language you want to intall.
Step 4:
Click “Yes” to agree with the agreement
.
Step 6.
Click “Next” again to proceed
with the installation
Step 3:
To continue with the installation
click on “Next”
Step 5:
Click on “Next” to start the
installation of QuickDVD 2
Step 7:
Now you have nished installing ArcSoft
QuickDVD 2, Click “Finish” to nalize the
install.
page 22
Page 23

Using ArcSoft QuickDVD2:
There are 2 ways of using QuickDVD to burn your videos to DVD. We will walk you through the
basics from adding video les, capturing from the Instant TV Deluxe, to authoring your DVDs
and recoriding to DVD.:
- My Videos - If you already have Captured videos save on your computer and want to
create a DVD then select this option..
- Video Tape/Camcorder - If you want to capture from a Camcorder, VCR, or TV shows
directly to disc then select this option.
“My Videos”
Step 1:
Click on “My Videos” to create DVDs from Previous Captured Videos.
Step 2:
You will see a list of your captured videos that are stored in “My Videos” folder located in “My
Documents” folder. Select a video by clicking on the title where you can do basic trimming by
clicking on “Trim” or leaving the le alone and click “Next” to continue with the creation of your
DVD.
Step 3:
On the “Trim” screen, drag the white vertical slider bar from the left to right and click on the “Trim”
to trim the front end of the video; then click on the far right of the trim slider bar to bring the white
bar over to the end and drag it to the left, and to where you want to trim click “Trim”; then when you
are nish click “OK” to go back to the previous page and click “Next” to continue on with your disc.
page 23
Page 24

page 25
Step 4:
This screen is where you can give your disc a Title, Add Date, change different background menu
preferences. Once you have nished giving your disc a title and selecting the right background,
click “Burn DVD”.
Step 5:
This screen shows you the progress of your disc to completion.
Step 6:
Your Disc is now nished and your burner will now pop out with your nished DVD disc.
It will also ask you if you want to create another copy of your movie, if you don’t want to then click
“No” to nish your project.
Step 7:
With QuickDVD 2 you can also create and print DVD Jewel Case or DVD movie case.
“Video Tape/Camcorder”
Step 1:
Click on “Video Tape/Camcorder” to create a DVD from a Live Capture.
page 24
Page 25

Step 2:
This screen is where you can give your disc a Title, Add Date, change different background menu
preferences. Once you have nished giving your disc a title and selecting the right background,
click “Next”
Step 3:
If you are uncertain how to connect your video device to your computer, on step 2 select the
connection that you want to use under “Choose Video Input” and then on Step 1 click on “Show Me
How” button to give you a diagram on how the connections would look like. If you chose “TV Tuner”
on step 2, Step 3 will highlight where you can change channel you want to record to disc and
also have the option to select what type of TV signal you are using either Cable or Antenna. Step
4 is where you would set the duration of your capture. (Max: 2.5 hours) Once you have nished
conguring all your settings, click “Transfer to start the burning process.
Step 4:
This screen will show what you are recording and how long till the video is done depending on how
long you set the duration time, it will automatically stop when the time that you set ends.
Step 5:
This process will show you the progress of your video being recorded on your DVD disc.
page 25
Page 26

page 27
Step 6:
Your Disc is now nished and your burner will now pop out with your nished DVD disc.
It will also ask you if you want to create another copy of your movie, if you don’t want to then click
“No” to nish your project.
Step 7:
With QuickDVD 2 you can also create and print DVD Jewel Case or DVD movie case.
page 26
Page 27

ArcSoft ShowBiz® DVD 2:
Whether you’re experienced with DVD movie making or just looking for the perfect complement
to your brand new digital camera, this easy-to-use program has everything you need to capture
your home movies and create your own DVDs to share with friends or send to customers.
Includes tools for editing your video footage, customizing DVD menus, and designing DVD photo
slideshows!
ArcSoft ShowBiz DVD 2 Installation:
Step 1:
Place the Instant TV Deluxe CD into your CD-ROM drive and wait till the autorun screen comes
up and click on “Install ShowBiz 2”.
Step 2:
Select the language for this installation and click “OK”.
Step 3:
Click “Next” to start the Installation Wizard for ArcSoft ShowBiz DVD 2.
Step 4:
Click “Yes” to agree to License Agreement which will allow you to continue on the installation of
ShowBiz.
page 27
Page 28

page 29
Step 5:
Here is where you would select where you want to install ShowBiz, click “Next” to continue with the
installation.
Step 6:
Click “Next” to start the installation.
Step 7:
You have now nished installing ArcSoft ShowBiz DVD 2 on your system, to nalize it click on the
“Finish” button.
Using ArcSoft ShowBiz DVD 2:
Welcome! Are you ready to learn how to capture, edit, and create DVDs on your computer? Great!
We’ll walk you through these three main processes to help you put together and share your own
home movies. Don’t forget to consult the built-in Help le--it goes over every button and command
found in the program. Here, we’ll go step-by-step through the video capture, edit, and authoring
procedures. They may not require the description of every command, so just be sure to have that
handy Help le open whenever you’re working on a project.
Choose where you want to go! (You can also navigate using the links at the top of every page.)
• Capture video
• Edit/assemble video clips
• Create a DVD movie
To launch ShowBiz, click on your Windows Start Menu > All Programs > ArcSoft ShowBiz DVD
2 > ShowBiz DVD 2
page 28
Page 29

CAPTURING VIDEO
The rst thing you’ll probably want to do before you make your movie is transfer some video from
your camera (or another video device) to your computer. We’ve made it easy. We’ll start from
square one.
1. Connect your Instant TV Deluxe to the computer.
2. Launch the program. From the welcome wizard, select “Capture or Edit Video.”
3. Click “Capture from the Device”.
4. From the next screen, select “Capture” in the top left corner of the screen.
5. Under “Video Device” make sure “ADS Instant DVD” is selected as your video source.
6. When you’re all set, click the big red Record button beneath the preview window. You can now
dene the specics of your captured le:
• Choose the le name and save location
• Set the le type. If you plan on using the video when you create a DVD, choose the DVD
(MPEG-2) le type.
• You can optionally enter in the capture time. If you have a really long video and only want to
capture a small part, use this option.
• You’ll almost denitely want to save your captured le to an album. If you plan on doing any type
of editing, it’s going to need to be in an album. You’ll learn more about albums in the Edit section.
page 29
Page 30

page 31
EDITING / ASSEMBLING VIDEO CLIPS
The creative possibilities here are limitless, it’s a bit difcult to do a step-based walkthough.
Instead, we’ll talk about the fundamentals of creating a custom video clip. The heart of the
program lies in this section; here’s where you can get really creative by making truly unique and
professional-looking videos.
OVERVIEW
Video clips are created by adding content (existing videos, photos, and audio tracks) to a template
called the STORYBOARD. The Storyboard can also referred to as the TIMELINE. The Storyboard/
Timeline is basically a template for the creation of your movie. They represent different views of
the same thing. You add still images, videos, and scene transitions when in Storyboard view. In
addition to these, you can add audio, text, and special effects using the Timeline. So as you can
see, you aren’t limited to pictures, video clips, and music. You can also add transitions between
each component that you add (for example, you can have one video clip fade out as the next one
fades in), as well as other special effects. You can add scrolling text for beginning titles or end
credits. When you’re done, you video can then be included as a chapter in your nal DVD.
The Storyboard displays still images, video clips, and transitions.
The Timeline displays still images, videos, transitions, text, audio, and special effects.
If you want to create a basic video that consists of smaller video clips and still images, stick to the
Storyboard. If you’d like to include additional audio tracks, special effects, and text, you’ll need to
use the Timeline. Practice makes perfect! Use the included sample content to play around with the
Timeline and all of its options.When your nal video is compiled, all the content is processed into a
single video. The video will progress through each clip and image that you’ve added.
The bulk of your options are accessed through the top portion of the screen that is divided into
numerous tabs: MEDIA, TEXT, TRANSITIONS, EFFECTS, and EXPORT (this last may not appear
until you’ve actually started to construct your video).
All of your content comes from “albums.” Before we go any further, you’re going to need to have a
basic understanding of what albums are and how they work.
page 30
Page 31

ALBUMS
In order to add content to the Storyboard/Timeline, you need to rst create an album. Albums
consist of shortcuts that link to les stored on your computer. If you can master this concept (and it
isn’t that difcult, trust us), you’re way ahead of the game. Think of album content in the same light
as shortcuts on your desktop or taskbar. The icons that you click aren’t the actual program icons;
they’re merely shortcuts. It’s the same with albums. Albums contain shortcuts to your pictures,
music, and videos. There are a few sample albums included.
You can create multiple albums, giving each one a unique name. For example, you can have one
album for vacation photos, another one for family events... you get the idea. Obviously, you need to
know the location of the photos, videos, and sounds that you want to include in your album.
To create a new album:
1. Make sure you are within the “Media” tab. From the album pull-down, choose “<New Album>.”
2. Enter in a new album name. Just click on and type over the existing name.
3. Click where indicated to browse your system for les to add to the album. You can add still
pictures, video clips, and audio tracks.
page 31
Page 32

page 33
4. To add additional les at any other time, click the Add button.
Once your album is ready, you can then add content to the Storyboard/Timeline. Remember, the
album thumbnails only link to the actual les on your system. If you delete, rename, or move the
actual les, you won’t be able to use the respective thumbnails in the album to add to your project.
Also, don’t forget that you can create more than one album. Organize your media so that it’s easy
to nd what you need when you’re making your movies.
ADDING CONTENT TO THE STORYBOARD
With your albums ready to go, you can now add content to the Storyboard and start to piece
together your movie. Let’s take a look at part of a blank Storyboard:
You’ll notice that the Storyboard consists of several squares. The larger squares are where you
can insert STILL IMAGES and VIDEOS. The smaller squares are reserved for TRANSITIONS.
Transitions are effects that occur as one video/image changes to another. When your nal movie is
compiled, everything on the Storyboard is combined into a single video le. This picture shows you
how to add a still image or video clip to the Storyboard:
You can either follow the above method (highlight the thumbnail you want to add, then click the
“Add” arrow), double-click the thumbnail, or click-and-drag the item you want to the next available
spot on the Storyboard.
Click on the “Transitions” tab. Choose a transition that you like and add it before or after any photo
or video. HINT: If you want a quick and easy way to apply transitions to your movie, right-click the
Storyboard and choose “Random Transition to All.” The program will automatically add transitions
to every available spot on the Storyboard.
page 32
Page 33

When you’re nished adding content, your Storyboard may look something like this:
Remember, the larger squares represent still images and/or video clips. The small, colorful squares
in between represent transitions.
SAVE YOUR WORK
Now’s as good a time as any to save your project. Remember to save often! Nothing’s worse than
when your computer crashes and you lose all of your hard work. Go to “File” and select “Save
Project.” Give your project a name and remember where you save it. All of your work on the
Storyboard/Timeline will be saved and can be fully edited the next time you access the le.
PREVIEWING YOUR MOVIE
All right, so you’ve got some cool content on the Storyboard! Good for you! These small steps are
important. Don’t worry, while you don’t need to be a wiz to make your own movies, you’ll nd that
with a little practice you’ll pick things up in no time. Or Chaplin. Anyway, let’s take a look at your
movie so far:
“The Player” offers standard playback controls for viewing your entire movie, or only specic
sections. If you want to view your movie in its entirety, click “Entire Movie.” Easy, right? Told you so.
Then just click “Play” and see all the content you worked so hard to put on the Storyboard come to
life in the preview window. If you only want to view a specic piece of your movie, click “Active Clip.”
Then, click the thumbnail on the Storyboard that you want to preview. Follow that by clicking “Play”
and you’ll see the section playback in the window.
page 33
Page 34

page 35
EDITING / TRIMMING VIDEO CLIPS
When you click on a video clip on the Storyboard, you’ll see editing options similar to those
available when editing photos. In addition to being able to modify the video color, you can also
adjust the volume and playback speed.
Sometimes the volume of a certain video clip will be too loud when played with the rest of the audio
in your movie. If that’s the case, simply drag the slider to the left to lower the sound level. If you
want to completely mute the sound, simply check the appropriate box.
You can have a lot of fun playing with the speed control. Speed video up to produce funny slapstick
scenes of your family members running around the house, or slow things down to create that
cheesy slo-mo action sci- effect that Hollywood has been milking for the past few years. Whoa.
If your video clip is a little long or has parts you simply don’t want to include, you can trim it in no
time. Take a look at the video in the Player. You’ll notice that there are green and pink trim markers.
These let you change the start/end time of the video. All you need to do is click and drag them.
Alternately, you can move the timer to the spot you want, then click the respective Trim button (the
green and pink scissorses). Save your project!
GLOBAL AUDIO SETTINGS
When viewing your entire project, you can modify the overall audio of the Video track and both
Audio tracks.
page 34
Page 35

THE TIMELINE & ADVANCED EDITING
You now know how to add still images, video clips, and transitions to the Storyboard. You know
that when you compile your movie, everything on the Storyboard is smooshed together to create
a single video. You know how to enhance your still images and trim video clips. Now, let’s nd out
how to add a soundtrack, special effects, and text to your movie. In order to do this, we need to
leave the comfort zone of the Storyboard and use the slightly more complex Timeline.
As you already know, the Timeline displays all the same information as the Storyboard, and more.
Things may look a little jumbled at rst, but once you have a basic understanding of the layout,
things appear much less confusing. The Timeline is divided into separate tracks. The tracks are:
Text, Video, Audio 1, and Audio 2. As you may have guessed, the Text track is where you can add
text effects. The Video track is where you can add still images, transitions, and video clips. The
Video track also has a section that displays any audio that may be included with a video. The two
audio tracks are where you can add audio les. Two different audio tracks are provided so that
you can layer multiple audio les. You can effectively include an ongoing soundtrack, along with a
narration or special sound effects track.
ADDING AUDIO
Adding audio to the Timeline works exactly the same as adding still images, videos, and transitions
to the Storyboard. Choose your audio from whichever album, and double-click it. You can move
audio tracks around from Audio Track 1 and 2 freely. Click-and-drag them anywhere you want.
TRIMMING AUDIO
If you’ve added a song that’s really long or you only want to include a single verse or chorus
or whatnot, you can trim the clip just like you would a video. You can also click and drag the
respective edge of the le on the Timeline to change the start/end point. (Coincidentally, this works
for video clips on the Video track as well.)
page 35
Page 36

page 37
ADDING TEXT EFFECTS
Just like the pros, you can add scrolling text effects to your movies. In fact, you can choose from a
variety of effects to add to your text. Click on the Text tab to get started. Start off by choosing the text
style. There are two categories: Simple and Fancy. Simply click the style you want, then click-anddrag the text style you want to the Timeline. A new window will appear, allowing you to enter in the
text, modify the font, etc.
Okay, so, all you need to do is double-click within the text box and modify the text that’s already
there. You can alter the text style by choosing a new one on the right side. You can add a new text
string by clicking anywhere outside the existing text box. You can add multiple strings, and have
each one use a different font and style. The Scroll checkbox and corresponding buttons let you add
motion to the text. When you’re content with your text, click OK. You can then add/alter a text effect.
Choose the Effect category that you want, then click and drag the effect directly over one of the
effects on either side of the newly added text on the Timeline. You can use a different effect for when
text appears and disappears. Below shows a sample of a Timeline with an added text effect.
Both the text and its related effects can be modied. Simply click on the desired component and
look at the available options that appear. You can adjust the display time for the text. Depending on
the effect, you may be able to adjust the display time in addition to specic effect properties. For
example, if you chose a motion effect, you can choose the direction of the text movement. By the
way, you’ve saved your project, right?
page 36
Page 37

ADDING SPECIAL EFFECTS
Click the Effects tab to see all of the fun and unusual effects. Effects are added to specic items on
the Video track. You can modify the duration of the effect by clicking and dragging the edges. Note
that effects are added to individual components of the video track. You can’t, for example, extend
an effect over two pictures. You need to add the effect over both of them. By the way, you can tell
which components have effects attached to them in the Storyboard view by the star icon that they
display.
EXPORT YOUR VIDEO
Okay, now go ahead and click the Export tab.
Go ahead and choose “DVD File” from the pull-down. You can save in a variety of le types, and
alter various settings for each one. Verify that you’re saving the movie as a DVD (MPEG-2) le to
your hard drive, then click Start. A standard Save As window will appear.
Type in a le name for your movie, and save it in a location that’s easy to remember. VERY
IMPORTANT: Check the box called “Add to album” and then select the album to which the saved
le will be added. It isn’t critical, but if you want to use this video clip when you’re creating your DVD,
it’ll need to be in an album anyway. That’s it! You’re done. Just relax while your movie is compiled
and saved. Once it’s done, you can add the clip to a DVD or VCD project in the Create section.
page 37
Page 38

page 39
CREATING A DVD
The Create module of the program is where you actually put together your DVD (or VCD). It’s really
simple. If you’ve created your own custom clips in the edit section, here’s where your work really
pays off, because you can now add it as a chapter on your DVD. You can do all of the following:
1. Choose the video clips that you want to add to your movie (they’ll be added as individual chapters).
2. Create multiple starting points for longer video clips (submenus).
3. Design your movie menus (you can have multiple menu screens, each with their own unique look).
4. Create photo slideshows.
5. Burn your movie to disc.
ADDING CHAPTERS TO YOUR MOVIE
If you’ve read the edit section (which you should have), you’re already somewhat familiar with how
albums work. In order to create your DVD (or VCD), you basically apply the same principles. At this
point, just worry about adding all your content. Once you’re done, you can then arrange the movie
menu however you like. To add content:
1. Choose the album that has the video clips you wish to add.
2. Double-click the video clip you want to add. The video clip will appear on the menu as a new
chapter. Remember, you can customize the look of the menu, including the chapter button
layout, later. For now, just add all the video chapters that you plan on including in your movie.
You aren’t limited to adding content from one album.
page 38
Page 39

ADDING AN INTRODUCTION VIDEO
Introduction videos play as soon as the disc is inserted into a DVD player. Once the video clip
completes, the movie menu is shown. To add an introduction video to your disc, click and drag the
desired video from the album area to the Introduction Video box. You will see a thumbnail of the
video appear.
DESIGNING YOUR MENU
Now that your content is added, you can customize the look and feel of your menu. You can
change the background, title, and chapter button layout and text. Before changing your text, it’s
recommended that you set your background rst. Often, the color of your text will be dependent
on the background color. A good amount of contrast between the colors is necessary to ensure
that the text stands out clearly.
ORGANIZING CHAPTER BUTTONS
Click the “Customize” tab. In the Layout section, double-click the layout that you want applied to
your menu. Your chapter buttons will be arranged accordingly. You can also click and drag the
chapter buttons to swap their positions. If multiple pages are required, navigation buttons will
automatically appear on the menu.
CHOOSING A NEW BACKGROUND
Click the “Themes” tab. An entire collection of backgrounds are available. The “Animated Menu”
album contains a collection of video backgrounds.
page 39
Page 40

page 41
Of course, you can also choose a photo (or video!) from your personal collection to use as the menu
background. To do so, simply click “New Background” in the preview area. You can then browse your
system for the le that you want to use.
ANIMATED CHAPTER BUTTONS
Instead of having static chapter buttons, they can actually run the videos that they represent. From
the “Media” tab, check the “Animated Thumbnails” box. You set the time (in seconds) that you want
them to play before they loop. Click “Preview Animation” to see how it looks. Note that there may be
considerable processing time depending on your system and the length of the animated loop.
ADDING AUDIO TO YOUR MENU
Add music to your menu (you can add a different track to each menu page) by clicking and dragging
an audio le to the “Background Music” section beneath the preview area.
page 40
Page 41

UPDATING CHAPTER BUTTON FRAMES
Each chapter button can have it’s own unique frame. First, go back to the Customize tab.Then,
highlight the chapter button that you want to update, and then double-click the frame you want to use.
BREAKING UP LONGER VIDEO CLIPS / CREATING SUBMENUS
Longer video clips can be broken into separate chapters. To do this:
1. Highlight the video clip you wish to break up into smaller segments.
2. Click the “Set Chapters” tab.
3. Use the playback controls/slider to go to the point where you’d like to insert a break.
4. Click “Set Chapter.” A chapter break will be inserted.
5. You can also trim the overall length of the video. Navigate to the spot where you want the video
to start, and click the left bracket icon. To change the ending point, navigate to the spot you want,
and then click the right bracket icon.
page 41
Page 42

page 43
A “submenu” is created for the video le, with new chapters appearing for each chapter break you
set. You can also create a submenu by clicking “Create Submenu” beneath the main preview area
(make sure you’re under the “Media” tab). Submenus are useful if you have lots of different videos
under a broad subject. For example, your DVD can be titled “Vacation,” with numerous submenus
for your various trips (spring, summer, winter, etc.).
CUSTOMIZING MENU TEXT
Double-click any text that appears on the menu to edit it. Click the “Text” tab to see the various
text options. You can modify the font, size, style, alignment, and color. You can even add a drop
shadow. To do so, check the “Shadow” box. You can reposition the shadow by clicking-anddragging the shadow in the small preview window. Two sliders are available; these let you modify
the characteristics of the shadow.
CREATING A SLIDESHOW
You can easily create a photo slideshow, which is added to your movie as a separate chapter. To
create a slideshow:
1. From the Media tab, click “Create Slideshow.”
2. Choose the album or folder that contains the photos you wish to include in your slideshow.
3. Hold down the CTRL key and single-click the photos you wish to add.
4. Click “Add” (click “Add All” to add all of the photos in the current location).
5. Click and drag the photos you’ve added to place them in the desired order.
6. If a photo needs to be rotated, highlight the photo and click “Rotate.”
7. The “Set Thumbnail” button uses the currently highlighted photo as the chapter button thumbnail
for the slideshow on the menu.
8. Click “Next.”
page 42
Page 43

9. If you’d like to include a soundtrack, click “Select Files” and choose the audio tracks you’d like
to add.
10. In the “Pacing” section, set the display time for the slides. If you’d like the program to time the
slideshow according to the length of your soundtrack, choose “Fit slideshow to soundtrack.”
11. Transitions, or special effects, can occur as one slide changes to the next. Choose the effect
you want from those available (choose “Random” to have the program automatically mix in
transitions for you).
12. Pan & Zoom: this is a fun option that lets you apply your own scrolling and zooming effect to
each photo. Here’s how it works:
The Pan & Zoom effect works by setting two different windows:
Zoom From and Zoom To. When the slide is displayed, the focus shifts from the Zoom From
window to the Zoom To window. For example, you can set the Zoom From window to focus on
one object in the photo, and the Zoom To to focus on the entire photo. (Click and drag the
window to reposition it, click and drag the various points on the box to resize it, and click and
drag the sides to rotate it.) The resulting Pan & Zoom effect will start by showing the gure you
boxed, and then zoom out to show the whole photo. Note: when you preview your effect in the
program, it will appear much choppier than the actual result when compiled on your DVD.
13. When you’re ready to produce your slideshow, click “Finish.” The program will compile it and
add it to your movie.
page 43
Page 44

page 45
BURNING YOUR MOVIE TO DISC
When you’re all ready to go, click on “Write Disc.” You can preview your movie with the virtual
remote control. It should work similarly to a standard DVD player remote control. Use it to navigate
through your various menus and playback your movie. If you’re creating a VCD, press the
corresponding number to view the chapter.
Once you’re ready to burn your movie to disc, click “Start.” You’ll be prompted to save your project.
Then, there are just a few things you need to set before the program begins compiling your nal
movie and burning it to disc.
1. First off, choose the playback format. If you’re in the US, choose NTSC. Most of Europe uses PAL.
2. Next, choose where you wish to save the movie. From the pull-down, choose your DVD burner
drive (or your hard drive if you’re saving your movie locally).
3. In the Disc Label eld, enter in a title for your movie.
4. Lastly, depending on where you’re saving your movie, you can choose the burn speed of the
drive, or the directory on your hard drive to which the movie will be written.
5. When you’re ready to go, click “OK.” That’s it! From here on, the program takes care of the rest.
Your movie will be converted into DVD (or VCD) format, and then burned to your disc (or hard drive).
That’s it! From here on, the program takes care of the rest. Your movie will be converted into DVD
(or VCD) format, and then burned to your disc (or hard drive).
page 44
Page 45

TECHNICAL SUPPORT
N. America
ArcSoft, Inc.
46601 Fremont Blvd
Fremont, CA 94538
Tel: 1.510.440.9901
Fax: 1.510.440.1270
Web: www.arcsoft.com
China
ArcSoft Beijing Co., Ltd.
No. 6 South Capital Gym Road
Beijing New Century Hotel
Ofce Building #1060
Beijing 100044, China
Tel: 8610-6849-1368
Fax: 8610-6849-1367
Email: tech@arcsoft.com.cn
Latin America
Tel (Brazil): 00817-200-0709
Tel (Chili): 800-202-797
Email: latinsupport@arcsoft.com
Europe
Unit 14, Shannon Industrial Estate
Shannon, Co. Clare, Ireland
Tel: +353 (0) 61-702087
Fax: +353 (0) 61-702001
Email: eurosupport@arcsoft.com
Japan
ArcSoft Japan
9F, 1-21-9, Higashi-Gotanda,
Shinagawa-ku,
Tokyo 141-0022, Japan
Tel: +81-3-5795-1392
Fax: +81-3-5795-1397
Web: www.arcsoft.jp
Email: support@arcsoft.jp
Taiwan
Tel: +886 (0) 2-2506-9355
Fax: +886 (0) 2-2506-8922
Web: www.arcsoft.com.tw
Email: support@arcsoft.com.tw
page 45
Page 46

Service and Warranty:
If you require assistance with the installation, operation, or application of your ADS Technologies, Inc. product there are several options
available to you as described in the technical support section of this manual. Your primary source for information and assistance is
always your computer store or computer parts dealer. If your ADS product needs repair or replacement, contact your dealer for on-site
repair service. The ADS Technologies technical support and customer service staff can aid in solving many problems. Our technical
support department is available to repair any ADS Technologies product. You or your dealer must return products to our factory for
repair or warranty replacement.
Return/Replacement:
If you need to return your ADS Technologies product you should return the product directly to the dealer or store where you purchased
the product. Each individual computer store or dealer sets product returns policies for their customers. ADS Technologies, Inc. cannot
be responsible for the actions or policies set by our dealers. If you desire to return the product for a refund, you must get the refund
from the dealer or store you purchased the product from. If you purchased the product directly from ADS please see the “Terms and
Conditions of Sale” on the reverse side of your sales invoice.
Returns to ADS Technologies, Inc. are for repair or warranty replacement only. If you need to return product to ADS Technologies, Inc.
for repair or replacement you must follow these steps:
1. Call our Technical Support department at (562) 926-4338 in the USA or +353-61-702042 in Europe to obtain a Return
Merchandise Authorization (RMA) number.
2. The RMA number is valid for 30 days.
3. Ship the product to the ADS factory with the RMA number marked on the inside and outside of the package. If there is
no RMA number on the package or the RMA number has expired, the shipment will be refused. ADS will not be liable
for lost or mis-shipped products.
4. Replacement product cannot be shipped to you until the defective product has been received by ADS.
5. Once the product is received at the factory it will be tested and then repaired or replaced.
6. Turn around time is approximately one week. A repaired or replacement product will be shipped back to you.
Warranty:
This ADS Technologies, Inc. product comes with a One (1) year hardware warranty. ADS Technologies, Inc. (ADS) warrants this product against defects in material
and workmanship for a period of One (1) year from the date of original purchase from ADS or an authorized ADS dealer. This warranty applies only to the original
purchase of the product and is not transferable. This warranty does not cover any incompatibilities due to the user’s computer, hardware, software or other related
system configuration in which the product interfaces. Proof of
purchase will be required before any warranty consideration by ADS occurs.
This warranty does not cover any damage caused by negligence, non-authorized modifications, or parts installed without prior written permission from ADS.
This warranty does not apply if the product has been damaged by accident, abuse, or misapplication, nor as a result of service to the product by anyone other than
ADS.
If your ADS product is not in working order, your only recourse is repair or warranty replacement, as described above. UNDER NO CIRCUMSTANCES will ADS Technologies, Inc. be liable for consequential damages, including but not limited to any lost savings, lost profits, or any other dama-ges, caused
by the use of any ADS Technologies, Inc. product or inability to use the product, even if the dealer or ADS Technologies, Inc. has been advised of such liability or
other claims. This includes damage to property and, to the extent permitted by law, damages for personal injury. This
warranty is in lieu of all other warranties including implied warranties of merchantability and fitness for a particular purpose.
FCC Information:
Federal communications Commission Radio Frequency Interference Statement
Note: This equipment has been tested and found to comply with the limits for a class B digital device, pursuant to Part 15 of the FCC
Rules. These limits are designed to provide reasonable protection against harmful interference when the equipment is operated in
a residential installation. This equipment generates, uses and can radiate radio frequency energy and if not installed and used in
accordance with the instruction manual may cause harmful interference to radio communications. However, there is no guarantee that
interference will not occur in a particular installation. If this equipment does cause harmful interference to radio or television reception,
which can be determined by turning the equipment off and on, the user is encouraged to try to correct the interference by one or more
of the following measures:
• Reorient or relocate the receiving antenna
• Increase the separation between the equipment and receiver.
• Connect the equipment into an outlet on a circuit different from that to which the receiver is connected.
• Consult the dealer or an experienced radio TV technician for help.
Notice:
• The changes or modifications not expressly approved by the party responsible for compliance could void the user’s
authority to operate the equipment.
• Shielded interface cables and AC power cord, if any, must be used in order comply with the emission limits.
page 46
Page 47

If you have any problems or questions on this product, please call:
Technical Support - 562.926.4338
North America Support Hours:
Mon-Fri: 8am - 5pm, PST
Support: www.adstech.com/support/support.asp
www.adstech.com
ADS Tech
European Technical Support: +353.61.702042
North America Support Hours
Phone: 562-926-4338
M-F: 8:00 am - 5:00 pm, PST
www.adstech.com
Support: www.adstech.com/support/support.asp
Southern Europe Ofce
51-55 rue Hoche
94200 Ivry sur Seine, France
Phone. +33 1.43.90.19.20
Fax. +33 1.46.58.67.06
Part no. 305-511
www.adstech.com
Instant TV Deluxe
 Loading...