

Page 1
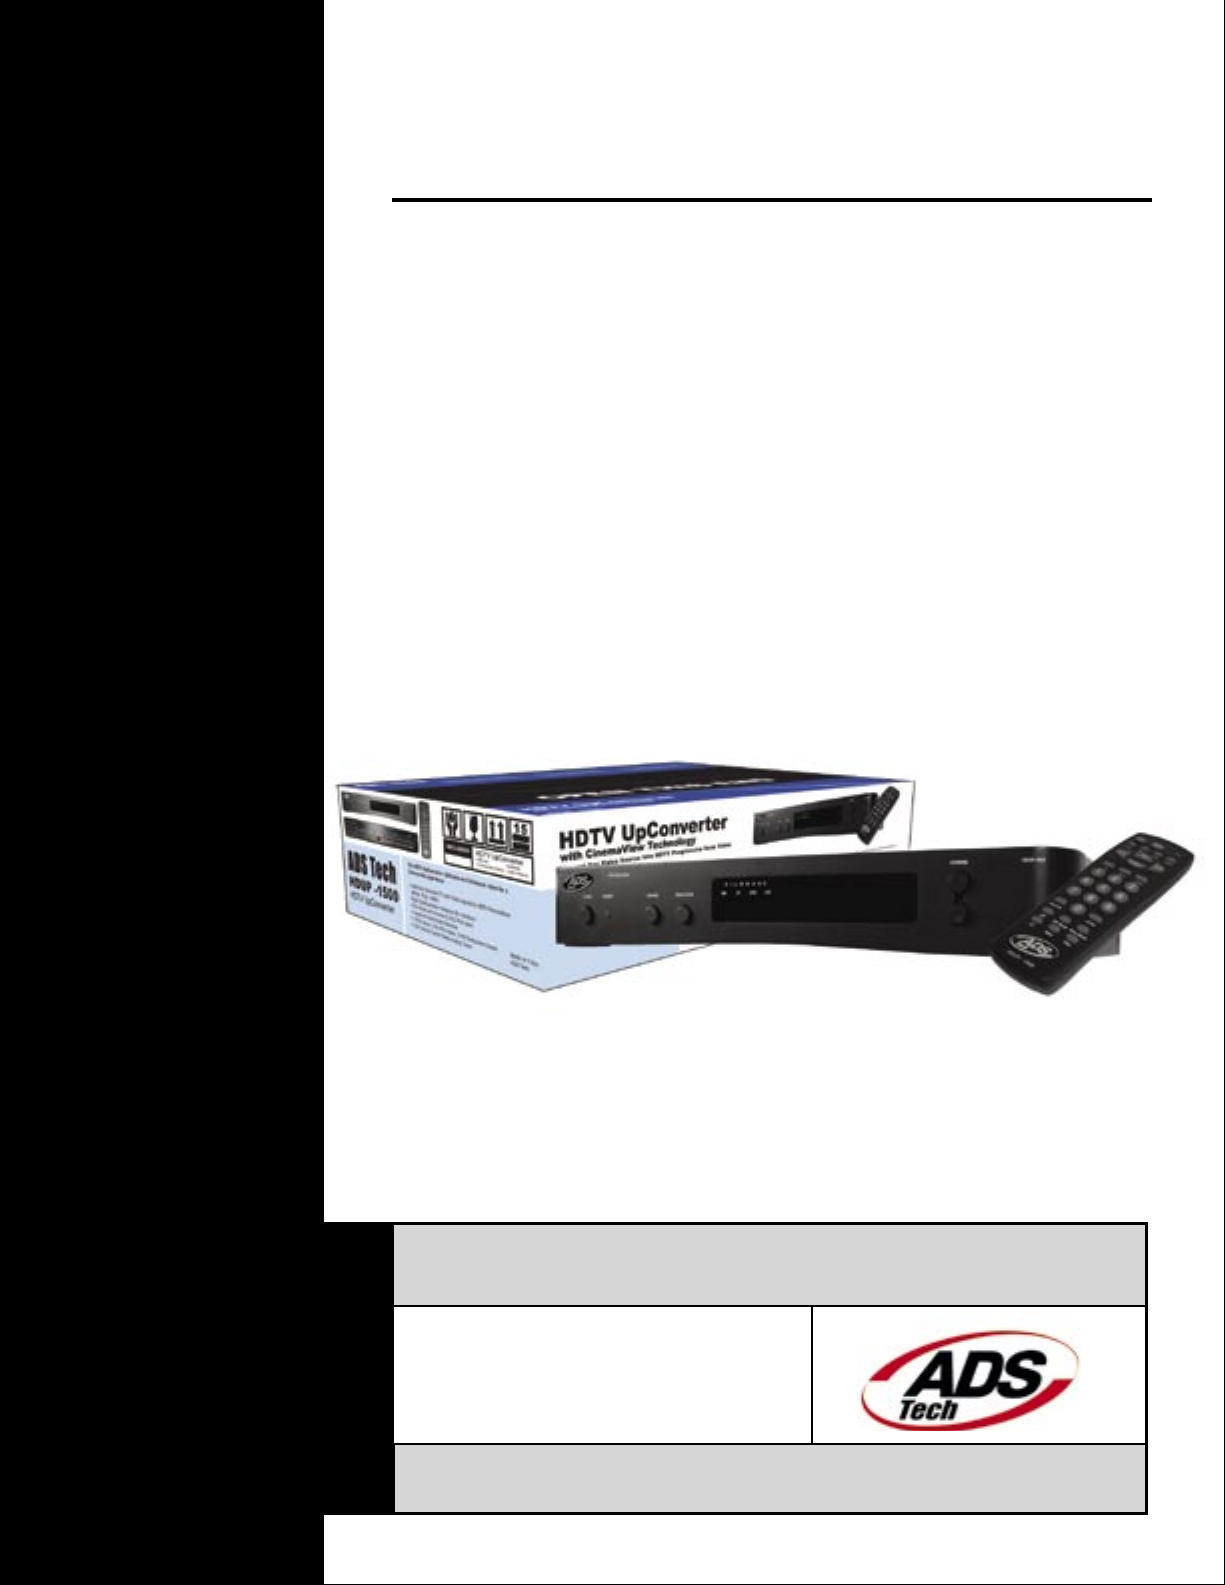
HDTV UpConverter
Convert your standard denition video signals to HDTV
Operating Instructions: SECOND EDITION
Model No: HDUP-1500
HDTV UpConverter
ADS Tech
North America Support Hours:
M-F : 8 am - 5 pm, PST
Email : support@adstech.com
website : www.adstech.com
Page 2

English
First Thing’s First: 3
SAFETY PRECAUTIONS. . . . . . . . . . . . . . . . . . . . . . . . . . . . . . . . . . . . . .3
FCC NOTICE. . . . . . . . . . . . . . . . . . . . . . . . . . . . . . . . . . . . . . . . . . . . . . . 4
IMPORTANT SAFETY INSTRUCTIONS. . . . . . . . . . . . . . . . . . . . . . . . . . 5
Introduction: 6
PRODUCT FEATURES. . . . . . . . . . . . . . . . . . . . . . . . . . . . . . . . . . . . . . . 6
PRODUCT SPECIFICATIONS. . . . . . . . . . . . . . . . . . . . . . . . . . . . . . . . . . 9
FRONT PANEL & DISPLAY. . . . . . . . . . . . . . . . . . . . . . . . . . . . . . . . . . . 10
REAR PANEL. . . . . . . . . . . . . . . . . . . . . . . . . . . . . . . . . . . . . . . . . . . . . . 12
CONNECTING THE UPCONVERTER TO YOUR TV. . . . . . . . . . . . . . . . 13
CONNECTING THE UPCONVERTER THROUGH A RECEIVER. . . . . . 14
REMOTE CONTROL. . . . . . . . . . . . . . . . . . . . . . . . . . . . . . . . . . . . . . . . 15
REMOTE COMBINATION CODES. . . . . . . . . . . . . . . . . . . . . . . . . . . . . 17
Functions: 18
USING UPCONVERTER FOR FIRST TIME. . . . . . . . . . . . . . . . . . . . . . 18
TV TUNING FUNCTIONS. . . . . . . . . . . . . . . . . . . . . . . . . . . . . . . . . . . . .19
PICTURE IN PICTURE FUNCTIONS. . . . . . . . . . . . . . . . . . . . . . . . . . . .20
CHANGING ASPECT RATION WITH VIEW MODE. . . . . . . . . . . . . . . . .21
ON-SCREEN MENU FUNCTIONS. . . . . . . . . . . . . . . . . . . . . . . . . . . . . .23
Appendix: 29
FAQ’s: 31
HDTV UpConverter 2 HDTV UpConverter 3
Page 3
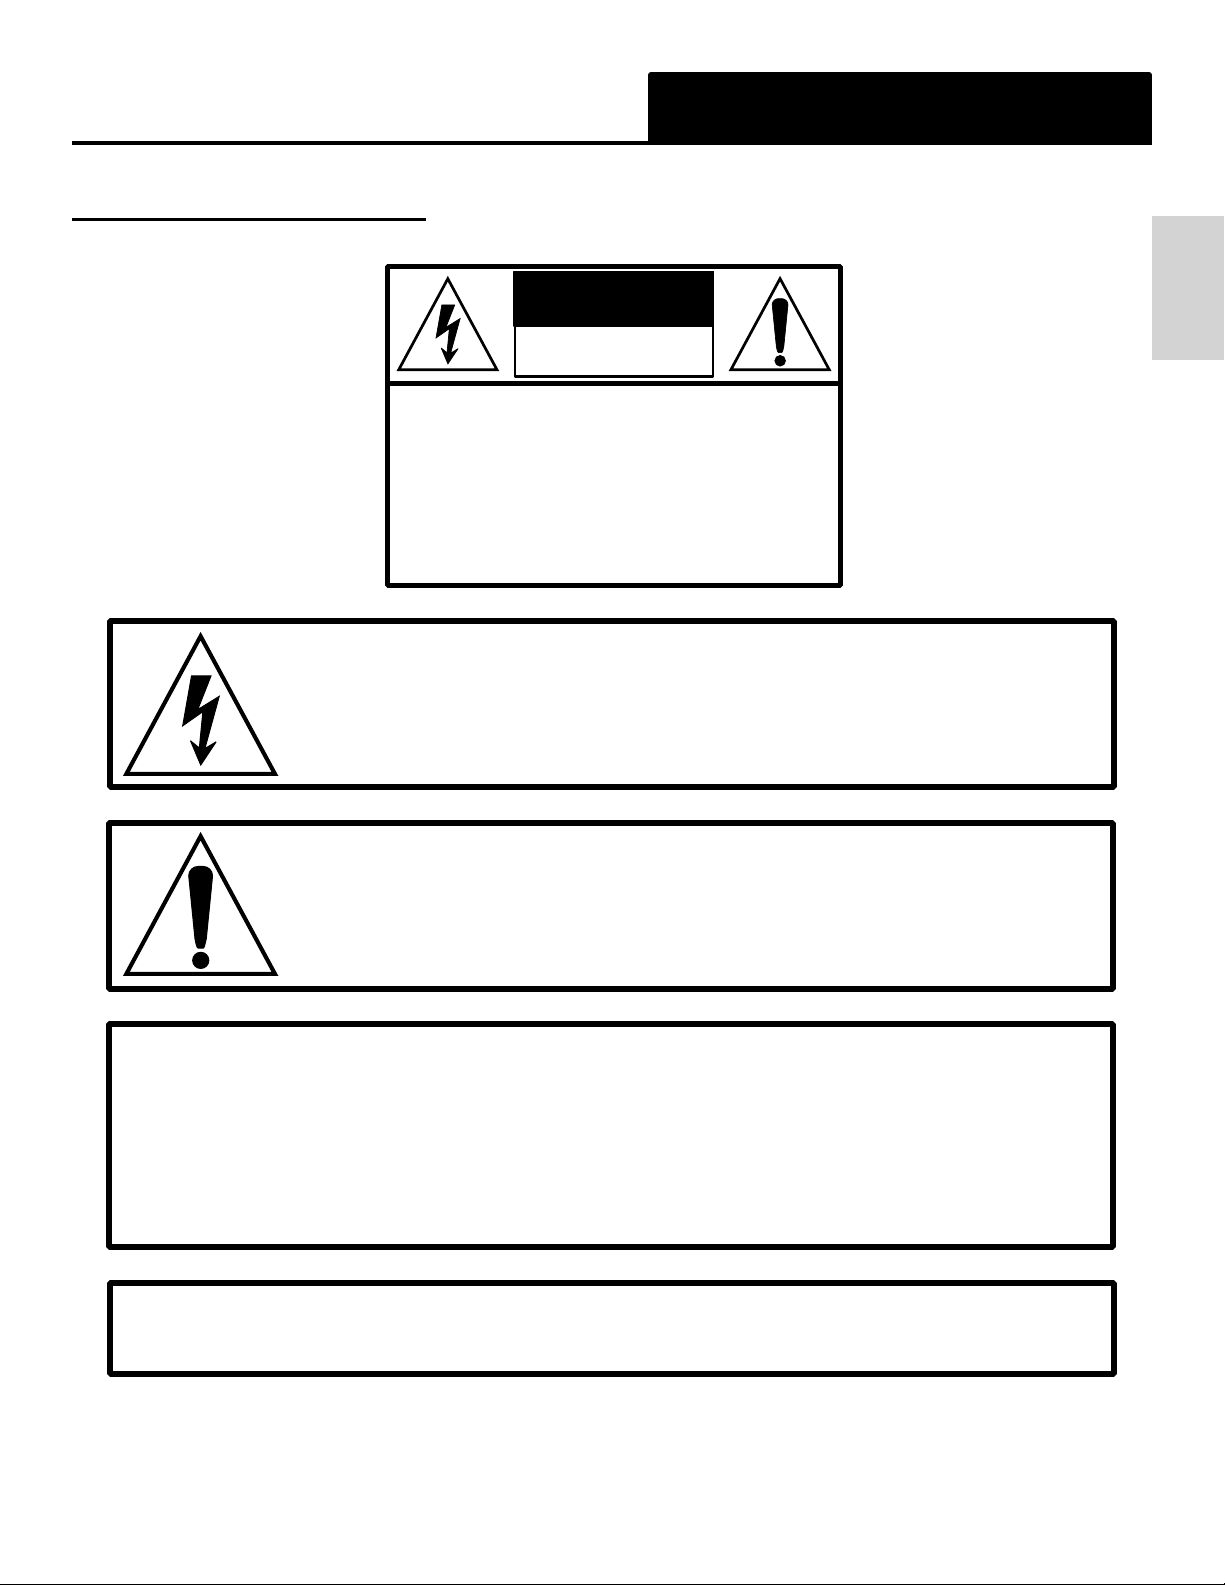
SAFETY PRECAUTIONS:
: P re ca utio ns :
Fir s t T hing’ s Fi r st
CAUTION
RISK OF ELECTRIC SHOCK
DO NOT OPEN
CAU TION: TO REDUC E THE RISK OF
ELE CTRIC SHOC K , DO NOT
REM OVE C O VER ( OR BA CK).
NO USER- S ERV I CEABL E PART S
INS IDE. REFE R SERVICIN G TO
QUA LIFIE D SER VICE PERSO NNEL
The lightning ash with arrowhead symbol, within an equilateral
triangle, is intended to alert the user to the presence of uninsulated
“dangerous voltage” within the product’s enclosure that may be of
sufcient magnitude to constitute a risk to persons.
The exclamation point, within an equilateral triangle, is intended to
alert the user to the presence of important operating and maintenance
(servicing) instructions in the literature accompanying the appliance.
English
WARNING: TO REDUCE THE RISK OF FIRE OR ELECTRIC SHOCK,
DO NOT EXPOSE THIS PRODUCT TO RAIN OR MOISTURE
THE APPARATUS SHALL NOT BE EXPOSED TO DRIPPING
OR SPLASHING, AND OBJECTS FILLED WITH LIQUIDS,
SUCH AS VASES, SHALL NOT BE PLACED ON THE
APPARATUS.
CAUTION: TO PREVENT ELECTRIC SHOCK, MATCH WIDE BLADE OF
PLUG TO WIDE SLOT, FULLY INSERT.
Page 4

HDTV UpConverter 5
Fir s t T hing’ s Fi r st
English
Fir s t T hing’ s Fi r st
: F CC :
FCC NOTICE:
This equipment has been tested and found to comply with the limits for a Class B digital
device, pursuant to Part 15 of the FCC Rules. These limits are designed to provide
English
reasonable protection against harmful interference in a residential installation.
This equipment generates, uses, and can radiate radio frequency energy and, if not
installed and used in accordance with the instructions, may cause harmful interference
to radio communications.
However, there is no guarantee that interference will not occur in a particular
installation.
If this equipment does cause harmful interference to radio or television reception, which
can be determined by turning equipment off and on, the user is encouraged to try to
correct the interference by one or more of the following measures:
- Reorient or relocate the receiving antenna.
- Increase the separation between the equipment and receiver.
- Connect the equipment into an outlet on a circuit different from that to which the
receiver is connected.
- Consult the dealer or an experienced radio/TV technician for help.
j PLEASE READ AND FOLLOW ALL WARNINGS AND
CAUTION
INSTRUCTIONS IN THIS OWNERS MANUAL AND THOSE
MARKED ON THE UNIT. RETAIN THIS BOOKLET FOR
FUTURE REFERENCE.
This set has been designed and manufactured to assure personal safety. Improper use
can result in electric shock or re hazard. The safeguards incorporated in this unit will
protect you if you observe the following procedures for installation, use and servicing.
This unit is fully transistorized and does not contain any parts that can be repaired by
the user.
DO NOT REMOVE THE CABINET COVER, OR YOU MAY BE EXPOSED TO
DANGEROUS VOLTAGE, REFER SERVICING TO QUALIFIED SERVICE
PERSONNEL ONLY.
HDTV UpConverter 4
Page 5

IMPORTANT SAFETY INSTRUCTIONS:
1.) Read these instructions.
: S af et y :
Fir s t T hing’ s Fi r st
2.) Keep these instructions.
3.) Heed ALL warnings.
4.) Follow all instructions.
5.) Do not use this apparatus near water.
6.) Clean only with dry cloth.
7.) Do not block any ventilation openings. Install in accordance with the
manufacturer’s instructions.
8.) Do not install near any heat sources such as radiators, heat registers, stoves,
or other apparatus (including ampliers) that produce heat.
9.) Do not defeat the safety purpose of the polarized or grounding-type plug. A
polarized plug has two blades with one wider than the other. A grounding
type plug has two blades and a third grounding prong. The wide blade or the
third prong are provided for your safety. If the provided plug does not t into
your outlet, consult an electrician for replacement of the obsolete outlet.
English
10.) Protect the power cord from being walked on or pinched particularly at plugs,
convenience receptacles, and the point where they exit from the apparatus.
11.) Only use attachments/accessories specied by the manufacturer.
12.) Use only with the cart, stand, tripod, bracket,
or table specied by the manufacturer, or sold
with the apparatus. When a cart is used, use
caution when moving the cart/apparatus
combination to avoid injury from tip-over.
13.) Unplug this apparatus during lightning storms or when unused for long
periods of time.
14.) Refer all servicing to qualied service personnel. Servicing is required when
the apparatus has been damaged in any way, such as power-supply cord or
plug is damaged, liquid has been spilled or objects have fallen into the
apparatus, the apparatus has been exposed to rain or moisture, does not
operate normally, or has been dropped.
HDTV UpConverter 5
Page 6

HDTV UpConverter 7
Int r odu ctio n
English
Int r odu ctio n
The A-D-S Tech HDTV UpConverter provides superior resolution conversion of
standard denition TV and video signals (480i or 480p) into HDTV resolutions of 480p,
720p or 1080i to provide you with Cinema-quality video for an exhilarating home theatre
experience with your HDTV. The HDTV UpConverter uses advanced video
English
processing technology which has the ability to analyze incoming video signals and
format and convert the video to always present the best video quality possible.
: P ro du ct Fe at ur es :
Product Features:
HDTV UpConversion of Video from Any Source
The A-D-S Tech HDTV UpConverter uses an advanced video processor to do more
than line doubling or quadrupling and actually up scales standard denition video
sources to HDTV resolutions displaying up to 6 times more pixels than the original
video content without introducing new artifacts.
Advanced Frame Rate Conversion
Video content that was originally shot on lm at 24 progressive frames per second
such as Movies, Cartoons and many TV shows have been converted to 30 frames per
second interlaced video for TV viewing. The HDTV UpConverter utilizes 2:2/3:2 inverse
pull-down to restore the movie back to progressive scan images.
Image Enhancement
The HDTV UpConverter provides superior image enhancement with features found in
professional level products such as:
Picture Enhancement
- 3D Noise Reduction
- Vertical and Horizontal Sharpening
- Adaptive 4 line comb lter
- 9 bit A to D conversion 2X over sampled
- 10 bit digital to analog Progressive or
Interlaced output
Full Color Controls
- Contrast, Brightness, Hue and Saturation
Color Space Conversion
- Standard Denition to High Denition
HDTV UpConverter 6
Page 7

: P ro du ct Fe at ur es :
Int r odu ctio n
CinemaView™ Video Scan Conversion
- Pixel based motion adaptive de-interlacing provides the best image quality from
interlaced video sources processing pixel by pixel and also diagonally.
- Inverse 2:2/3:2 lm processing provides “cinema-like” progressive scan images from
film originated content like DVD movies and many TV shows.
- Film mode detectors and ltering ensure smooth, artifact-free de-interlacing as the
characteristics of video content changes.
Integrated Audio/Video Switching
The HDTV UpConverter is also an Audio/Video Switcher. Connect up to nine (9) video
devices, plus connect your Cable TV to built-in tuner and UpConvert TV to HDTV
resolutions. Use the remote or front panel controls to switch from one video source to
the next.
Advanced Format Conversion
The HDTV UpConverter supports a variety of picture formats and aspect ratios to
provide the optimum display resolution and format.
- Anamorphic
- Panoramic
- Letterbox
- Pan-Scan and Crop (480i, 480p)
- Pillar Box
- Expand
English
Picture in Picture Modes
The HDTV UpConverter supports various PiP and multi-PiP windows and
re-synchronization of display timing with no temporal artifacts.
TV Auto Scan – In the TV Channel Setup menu you can select SCAN to auto scan
available TV channels.
1.) Select TV Channel Setup Menu
2.) Select AUTO-Tune and choose SCAN
3.) Close on-screen menu by pressing Menu button twice
4.) Press the TV button on the remote to begin channel scanning.
HDTV UpConverter 7
Page 8

HDTV UpConverter 9
Int r odu ctio n
English
Int r odu ctio n
Video Input Auto-Detect – The UpConverter can detect which inputs you have video
signals connected. You can scan through the video inputs and then when you use the
Input button on the remote you will skip to only those inputs.
English
Have video playing on all of your connected devices when choosing Video
input auto-detect.
1.) Select Video Input Menu
2.) Select Auto-detect and choose SCAN
3.) Close on-screen menu by pressing Menu button twice
4.) Press the INPUT button on the remote to begin scanning video inputs
Video Input Menu – We have added Red, Blue and Green settings for both Black Level
and Picture (contrast) for the Component video inputs. This sets the levels of the incoming
component video signal before any video processing occurs. This will give you greater
control of color and image quality from the component input source. The brightness, color,
saturation, etc. controls on Main and PiP menus are for output settings from the video
processor.
: P ro du ct Fe at ur es :
Additional Output Resolutions – we have published that the HDTV UpConverter will
support 480i, 480p, 720p and 1080i, however we have added the following resolutions to
accommodate the native resolutions of several xed pixel display devices such as Plasma
and LCD at panels and video projectors:
Additional supported resolutions are: 852 x 480p, 1024 x 768p, 1280 x 768p, 1336 x 768p
and 1920 X 540p.
Your display device will likely not support all of these resolutions. If you select a resolution
that your device does not support, you may get a black screen or you may see video
garbled on the screen. If this happens, Press the menu button 2 times and then press the
480p button on the remote and your video image should re-appear.
Down Conversion – We have published the features of this product as an HDTV
UpConverter but in fact the unit can Down Convert as well as UpConvert video signals.
This means that if you are receiving a 1080i HD signal from your HDTV tuner or receiver,
you can down convert to 720p or to a native resolution (see above) that matches the xed
pixel resolution of your display device.
HDTV UpConverter 8
Page 9

: P ro du ct Fe at ur es :
Int r odu ctio n
High Denition Input – We have published the capability to accepting standard
denition input and upconverting the video signal to HDTV resolutions. We are happy
to advise that the HDTV UpConverter can accept HDTV signals from terrestrial set
top box tuners, HD satellite receivers and HDTV Digital Cable boxes through any of
the three (3) Component video inputs. The UpConverter can receive signals at 480p,
720p or 1080i.
1080i pass-through – the HDTV UpConverter can receive a 1080i input signal, however
when the output resolution is also set to 1080i the image will be pillar boxed (black
bars on left and right side) so you may want to display a 1080i input signal at the 720p
resolution or any other lower resolution. An input signal of 1080i will also appear in
Pillar Box mode if 1920 x 540p resolution is selected.
Product Specications:
English
Specications:
Front Panel:
• Power On/Standby
• Display showing input, display resolution, TV channel
• TV Tuning buttons
• Source and resolution select buttons
Inputs:
• 3 - RCA Video jacks
• 3 - S-VHS jacks
• 3 - Component video jacks (480i/480p, 1080i)
• 1 - 125 channel cable ready tuner
• 9 - R+L RCA Audio jacks
Outputs:
• 1 – HDTV Component jack
• 1 – R + L RCA jack
Video Input:
• Std. Denition 480 interlaced or progressive scan 480p, and HD sources of 720p and 1080i
Video Output:
• HDTV 480p, 720p or 1080i resolutions as well as additional output resolutions for xed pixel
display devices of 852 x 480p, 1024 x 1024p, 1280 x 768p, 1280 x 1024p
Power:
• Internal Switching Power Supply
• Input: 110-240 VAC
Requirements:
• HDTV Ready TV, Plasma, LCD or projector with HD Component Video Inputs (YPbPr)
• Analog Video source w/RCA, S-VHS or Component Video output or analog TV signal
HDTV UpConverter 9
Page 10

HDTV UpConverter 11
Int r odu ctio n
English
Int r odu ctio n
: P ro du ct Fe at ur es :
FRONT PANEL & DISPLAY:
English
Front Panel
1.) Power Button 5.) Film Mode/De-Interlace Mode Indicator
2.) Standby LED 6.) VFD Display Window
3.) Source Select Button 7.) Channel Up/Down Buttons
4.) Video Resolution Button
Power Button – Toggles between Standby and Power On modes. All settings are saved
when device is in Standby mode. When device comes out of Standby mode the device will
return to the previous input source and resolution. Input/output settings will be momentarily
displayed on the TV or video device.
Standby LED - A red LED indicator will be lit when the device is in Standby mode.
Source Select Button – Press button to cycle through the video input sources. Press the
button periodically to cycle through all 10 video input sources.
Video Resolution Button – Press to cycle through the standard video output resolutions
(480i, 480p, 720p and 1080i)
Film Mode/De-Interlace Mode Indicator – The HDTV UpConverter has the capability to
use several different de-interlacing techniques depending upon the characteristics of the
video being processed. The front panel of the UpConverter will display the Film mode
process being used at any one time. These are displayed as: AFM, SM, VT, GFX and will be
explained later in this user guide.
HDTV UpConverter 10
Page 11

: P ro du ct Fe at ur es :
Int r odu ctio n
VFD Display Window – The Vacuum Fluorescent Display provides information about the
current status of the HDTV UpConverter.
English
VFD Display
1.) TV Channel – displays the current channel you are viewing
2.) Current Output Resolution – indicates the current video resolution that is being
sent to your display device (480i, 480p, 720p, 1080i, etc.)
3.) Video Source – displays source descriptions (Comp YPbPr, S-Video, RCA Video or
TV Tuner) and either the source number (1-9) or the TV channel (1-125).
Channel Up/Down Buttons – Use these buttons when TV is the current video source to
change TV channels.
HDTV UpConverter 11
Page 12
HDTV UpConverter 13
Int r odu ctio n
English
Int r odu ctio n
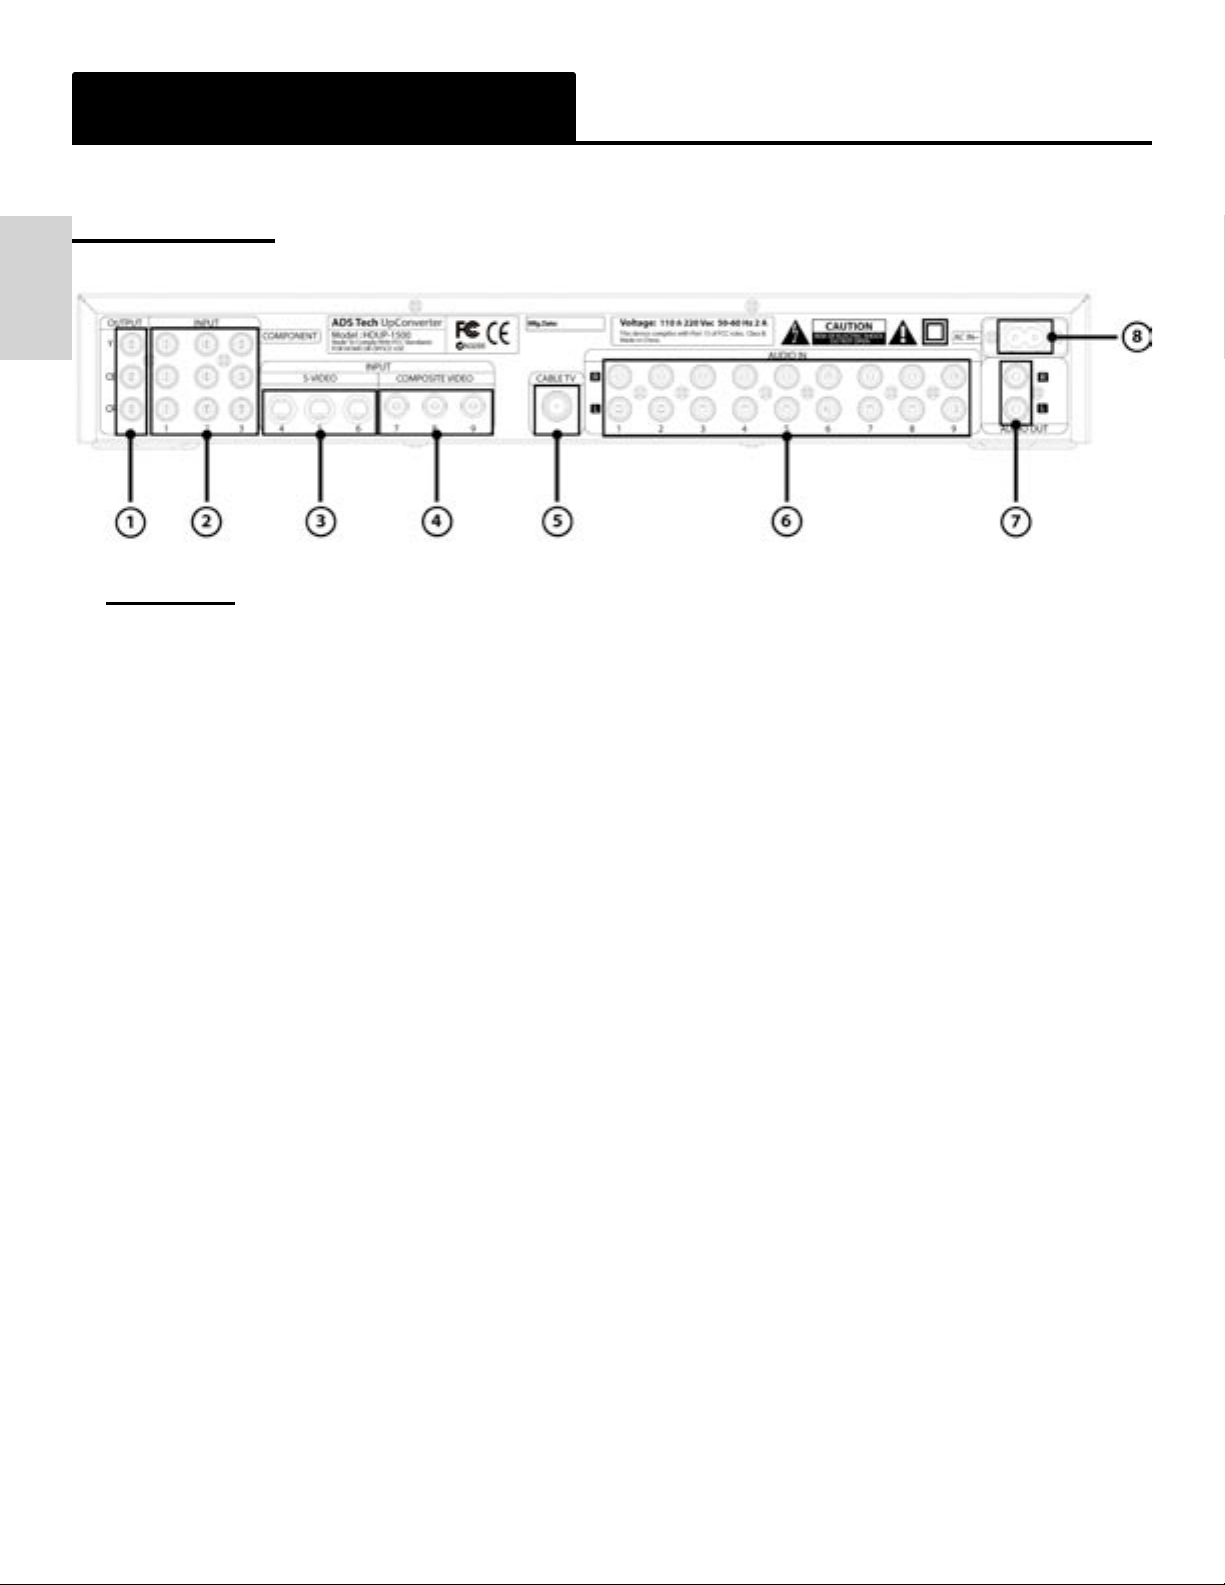
REAR PANEL:
: P ro du ct Fe at ur es :
English
Rear Panel
1.) High Denition Component Video Outputs (YPbPr/YCbCr)
2.) Set of 3 High Denition Component (YPbPr) video inputs (480i – 1080i)
3.) Set of 3 S-Video (Y/C) inputs
4.) Set of 3 RCA video (Composite) input Jacks
5.) Analog Cable Ready 125 channel Tuner
6.) Right and Left Stereo audio inputs – matched to switch with corresponding video inputs.
7.) Right and Left Stereo audio outputs
8.) AC Power Receptacle
HDTV UpConverter 12
Page 13

: C on ne ctio ns :
Int r odu ctio n
CONNECTING THE UPCONVERTER TO YOUR TV OR PLASMA:
English
HDTV UpConverter 13
Page 14

HDTV UpConverter 15
Int r odu ctio n
English
Int r odu ctio n
: C on ne ctio ns :
CONNECTING THE UPCONVERTER THROUGH AN A/V RECEIVER:
English
HDTV UpConverter 14
Page 15

REMOTE CONTROL:
: R em ot e :
Int r odu ctio n
Inserting Batteries into the Remote Control
Insert four (4) size AAA batteries (supplied) by matching
the + and the – on the batteries to the diagram inside the
battery compartment.
• Remove the batteries to avoid damage from
possible battery leakage whenever you anticipate
that the remote control will not be used for an
extended period.
• Handle the remote control with care. Avoid dropping
it, getting it wet, or placing it in direct sunlight, near a
heater, or wherever the humidity is high.
English
Remote Control
1.) Power Button
2.) Menu Button
3.) LED
4.) Screen Resolution Buttons (480i, 480p, 720p, 1080i)
5.) Left, Right, Up, Down Buttons
6.) TV Button
7.) Input Button
8.) Enter Button
9.) 0 - 9 Keys
10.) Favorites Button
11.) Jump
12.) PIP
13.) PIP Mode
14.) View Mode
15.) CC
16.) Mute
17.) Film
HDTV UpConverter 15
Page 16

HDTV UpConverter 17
Int r odu ctio n
English
Int r odu ctio n
Power Button - On/Standby
Menu - Displays on TV screen menu options
English
LED - Indicates remote activity
480i - Changes UpConverter output resolution to 480i
480p - Changes UpConverter output resolution to 480p
720p - Changes UpConverter output resolution to 720p
1080i - Changes UpConverter output resolution to 1080i
Left, Right, Up, Down - Use for menu selections and TV Up/Down channel changing when in
TV mode.
TV - Switches main video input source to TV – press a second time to return to previous video
source.
Input - Toggle from one input source to another or use in combination with video source number to directly select a new video source ( Example: Input + 3 – switches to Input source 3)
Enter - Pressing enter at any time will display the current input and output sources and resolutions. You also use Enter to make On Screen Menu selections.
0 – 9 keys - Directly select TV channels in TV mode and use in combination with Input button
to directly select video source.
Favorites - Toggles between 5 favorite TV channels (you set 5 favorite stations in the TV
Channel Setup menu)
Jump - Jump back to previously tuned TV channel
PIP - Opens Picture in Picture Window
PIP Mode - Toggles between several PIP window modes
View Mode - Toggles between Video Format modes; Letterbox, Panoramic, Expand and Pan
& Scan (480i and 480p only)
CC - Toggles Closed Captioning on and off
Mute - Mutes audio output
Film - Toggles between various de-interlacing methods (Auto, VT, AFM, SM and GFX)
HDTV UpConverter 16
Page 17

Int r odu ctio n
Remote Button Combination Codes:
Some functions are available by using remote control buttons in combination.
Here is a summary of those functions:
The Zero (0) button is generally used as the leading button for most button combinations.
Select Input Source Input + Source #
Delete TV Channel from Channel list 0 + TV Channel (0 + 3 deletes Ch. 3)
Add TV Channel to Channel list Enter channel number (14 adds Ch. 14)
Toggle Main and Pip Sources 0 + PiP Mode
English
Toggle Audio between Main and PiP 0 + Jump
Pause/Freeze PiP Window 0 + PiP
Change PiP Input Source Input + Enter + Source #
Select Tiled Active PiP Window as Main 0 + View Mode
HDTV UpConverter 17
Page 18

HDTV UpConverter 19
Fun c tio ns
English
Fun c tio ns
Using your HDTV UpConverter for the rst time
1.) Connect your video sources (VCR, DVD player, Laser Disk player, Cable TV, etc.) as
English
shown previously in the conguration drawings.
2.) Use the HDTV Component video cable (supplied) between the UpConverter and the
High Denition Component Video inputs on your video display device (HDTV Ready TV,
LCD TV, Plasma screen, projector, etc.).
3.) Connect the AC Power cable to your AC outlet
4.) Turn on your TV or video display device.
5.) Select the HD Component video inputs on your TV or Video device as your video
source. (check owners manual of your display device).
6.) Press the Power Button on the HDTV UpConverter or the PWR button on the remote
control to initialize the device. The rst time the unit is powered up the VFD display
will show the following text: “ADS Tech HDTV UpConverter” and then it will display the
rmware version “Firmware Version 1.00.45”
7.) The UpConverter will then search for a video input with an active video signal.
8.) The VFD Display will show the current video input source and output resolution.
9.) You can use the “Source” button on the front of the UpConverter to toggle through the
video sources to select a different video source, or use the Remote to select a video
source: Press the “Input” button followed by the source number (1 – 10) to jump to a
video source.
10.) You should now see your video source displayed on your TV or video display device.
HDTV UpConverter 18
Page 19

Fun c tio ns
TV Tuning Functions
The HDTV UpConverter includes a 125 channel cable ready tuner. This is an analog tuner,
not a digital or HDTV tuner. You can receive TV signals from Cable TV sources or from a
conventional TV antenna.
Changing to TV mode – There are 2 ways to select the TV tuner as your active video
source.
1.) Press the “TV” button on the remote control
2.) Press Input followed by 1 and 0 on the remote (Input + 10) – this takes you to video
source number 10.
Changing TV Channels - Once you are TV mode, the 0 – 9 keys on the remote control can
be used for channel selection.
English
- Selecting channels with the number keys – when directly selecting a TV channel,
simply press in the channel numbers; example Press “7” to go to channel “7”, Press
“10” to go to channel “10” and press “54” to go directly to channel “54”.
**Do not put a “0” in front of the channel number you want to tune.
- Using Front Panel TV Channel buttons – to move up or down the TV Channel list,
press the Channel Up or Down button. The channels will tune up or down one station
for each button press.
- Using Up/Down buttons on the Remote Control – The Up/Down buttons on the
remote control will tune through the TV channel list when you are in the TV mode. The
Remote Up/Down buttons control on screen menu choices when the On screen menu
appears on the screen.
Changing Channels in PiP mode – When you are using Picture in Picture (PiP) features and
TV is playing in the PiP window, you can use any of the tuning methods above to change the
TV channel appearing in the PiP window. More on PiP and PiP modes later in this manual.
Jump Button – When in TV mode, you can press the “Jump” button at any time to instantly
tune to the pervious TV station you watched. Use the Jump button to bounce back and forth
between two TV stations.
Favorite Button – Use the “Favorite” button to tune through up to 5 of your favorite or most
often watched TV channels. Pressing the Favorite button repeatedly will cycle through the
5 favorite TV stations that you will program into the UpConverter in the TV Channel Setup
menu explained below.
HDTV UpConverter 19
Page 20

HDTV UpConverter 21
Fun c tio ns
English
Fun c tio ns
Picture in Picture Functions
The HDTV UpConverter supports Picture in Picture capabilities. This allows you to have 2
or more windows on the TV screen at the same time allowing you to, for example, watch a
movie in the main portion of the screen and tune a TV channel in the PiP window. TV Input is
English
the default source for the PiP Window, but you can change the PiP source.
See Menu Functions and Appendix B – Main/Pip Selection Chart.
PiP Window Examples
PiP Button – Press the PIP button to open a Single PiP window.
Single PiP Window positions– Press the Left or Right buttons to cycle through Single PiP
window locations.
PIP Mode Button – Press the PIP Mode button to cycle through several PiP modes (Single,
Side by Side, Main + 4, Main + 12, 16 tiled windows). *(Main+12 and 16 Tiled can only be
viewed at 1080i resolution)
TV as the PiP Input – When the TV tuner is selected as the PiP input you can have up to 16
PiP TV Channels Auto-Fill into the multiple PiP window modes. Select your 16 PiP window
channels in the TV Channel Setup Menu. When you enter a PiP mode that has multiple PiP
windows, your PiP TV channels will automatically ll into these windows.
Pause PiP Window Fill – To pause the cycling of PiP windows with TV channels. Press the
PiP button.
When in PiP Pause mode you can:
1.) Use the Up/Down buttons to tune to a different channel or you can use the number keys to
tune to any specic TV channel.
2.) Use the Left/Right buttons to move left or right to make that channel the active PiP
window.
Changing the Pip Window to the Main Video Window - If you have selected a PiP Window
and want that to ll your TV screen, Press “0” + “View Mode”
HDTV UpConverter 20
Page 21

Fun c tio ns
Changing Aspect Ratio with View Mode
The HDTV UpConverter has the ability to convert the aspect ratio in several ways as
explained below.
Press the View button to cycle through the available format settings
Display of WideScreen content on 16:9 screen
• Anamorphic (Wide Screen) – Display Wide Screen movie format on 16:9
displays – wide screen movies are “horizontally squeezed” prior to DVD
mastering. On DVD playback TV scaling must support horizontal zoom to
recover aspect ratio for display on 16:9 wide screen TV. If the TV is 4:3 it will
automatically scale to Letterbox format.
• Not all WideScreen DVD’s are the same. There are several WideScreen aspect
ratios such as 1.85:1 and 2.35:1 also known as “Scope”. A movie with the
aspect ratio of 1:85:1 will exactly ll a 16:9 screen. Scope (2.35:1) will have
narrow black bars at the top and bottom of the screen to allow for the wider
aspect ratio of Scope.
English
Display of 4:3 content on 16:9 screen
• Panoramic – zooms center panel of 4:3 and non-linear zoom of side panels.
Can cause distortion along scene periphery
• Pillar box - scales/zooms and frames the 4:3 image in the center of screen with
vertical black bars on sides of 16:9 screen
• Expand – zooms 4:3 input to ll the 16:9 display without regard for aspect ratio
Display of widescreen source on 4:3 display
• Letterbox –– shrinks (scales) input and surrounds top and bottom with black bars
• Pan-scan and crop – selects a region of interest (area of action) in the wide-
screen source then crops, scales and displays 4:3 image with correct aspect ratio
• Expand – shrinks (scales) wide screen input to t 4:3 without regard to aspect
ratio
Selecting De-Interlacing Method with Film Button
The HDTV UpConverter has the capability to use several different de-interlacing techniques
depending upon the characteristics of the video being processed. The front panel of the
UpConverter will display the Film mode process being used at any one time. These are
displayed as: AFM, SM, VT, GFX.
HDTV UpConverter 21
Page 22

HDTV UpConverter 23
Fun c tio ns
English
Fun c tio ns
Press the Film button to cycle through the de-interlacing methods
- Advanced Film Mode (AFM)– Another term for Inverse 3:2 pull-down. In this mode
English
the 3:2 cadence is being detected and Pixel by Pixel Motion Adaptive De-Interlacing is
being applied. Video with 3:2 eld sequences are processed with the built-in Adaptive
Film Mode controller. The eld sequence is rst detected by examining the eld motion
values and once a eld sequence is identied, the corresponding lm mode processing
is applied. Most DVD’s and VHS movies fall into this de-interlacing process.
- Static Mesh (SM): Static mesh involves the meshing of odd and even elds (without
considering temporal effect) to form the output frame. Static Mesh is best used for
static images when the elds can be simply meshed together to create the progressive
frame. This process is used for fully static images (such as a PAUSE in DVD, the
image appears static)
- Vertical Temporal (VT): Used when there is motion from one eld to the next. This is
also used to de-interlace normal video where no extra elds have been added by a 3:2/
2:2 pull-down process. This is simple de-interlacing. A form of static de-interlacing that
examines and lters both vertically across several video lines and temporally from one
or more adjacent video elds. This approach reduces icker and increases resolution
because of input from adjacent elds. Edge effects still exist but are much less evident
than other static de-interlacing methods.
- Graphics (GFX): This is the process for 2:2 sequence de-interlacing. Most PAL DVD
and VHS movies are in this category. Some NTSC computer animation and cartoons
also behave in 2:2 sequence when converted to NTSC video.
Auto – Setting to AUTO mode will allow the UpConverter to examine the video content and
automatically apply the de-interlacing method best suited at that moment. Normally DVD or
VHS movies are either in 3:2 or 2:2 except in the footage where it may be video. However,
there are cases where a mixing of 3:2/2:2 and video. TV will mostly be in video except
when it’s playing movie. The most complicated eld sequences that we encounter are TV
commercials and MTV. In these 2 cases there are always a mixture of video and lm and the
editing makes it more complicated. In Auto mode you may see the indicator lights move from
AFM to VT or GFX depending upon the video content.
HDTV UpConverter 22
Page 23

Fun c tio ns
On-Screen Menu Functions
The on screen menu functions are accessible only from the remote control by pressing the
“Menu” button. When the menu button is pressed you will see the menu options displayed
below in the upper left hand corner of your TV or video output of your video display device.
Main Menu – The main menu will provide you with several options. Each of these options will
open a sub-menu.
English
Overview of Menu Options
Adjust contrast, brightness, saturation,
Brightness/Color - Main Video
Brightness/Color – PiP Video Adjust contrast, brightness, saturation, hue
Video Input Setup
Output Settings
TV Channel Setup Auto-Scan TV channel setup, Set PiP
hue, horizontal and V=vertical sharpness
and noise reduction lter.
Select Main and PiP video sources, as well
as Main and PiP video format aspect ratio
(Auto, 4:3, FS Letterbox, 16:9)
Change Output Resolution including
selection of custom resolutions, Output
format aspect ratio, MADI type and
threshold setting, OSD position
channels and Favorite TV channels
PiP Setup Set PiP aspect ratio, PiP size, PiP position
and PiP Alpha blending
HDTV UpConverter 23
Page 24

HDTV UpConverter 25
Fun c tio ns
English
Fun c tio ns
Using the Remote Control to access menus and change settings
English
1.) Press MENU button on remote control to display main menu.
2.) Use the Up/Down buttons on the remote to select the sub-menu you wish to access.
3.) Press the ENTER button on the remote to open the sub-menu
4.) The sub-menu will appear.
5.) Use the Up/Down buttons to select the menu option you want to change. As you move
up or down the menu, the adjustable setting will be highlighted with WHITE text.
6.) Press ENTER to select the option or setting you want to change and the item will
change to RED text. Once the item is red in color you can change the setting.
7.) Use the Left/Right buttons to move a slider or cycle through the menu choices.
8.) Press ENTER to set your menu choice. The menu item will change back to White text
to represent the choice has been set.
9.) Press MENU to collapse the sub-menu back to main menu. Press MENU a second
time to close the main menu.
HDTV UpConverter 24
Page 25

Brightness/Color – Main Video
In this menu you can make changes to:
- Brightness/Color Main menu
- Contrast
- Brightness
- Saturation
- Hue
- Horizontal Sharpness
- Noise Reduction Filter
Fun c tio ns
English
Use the Remote Control to adjust sliders and choose the noise reduction lter that matches
your preference.
Brightness/Color – PiP Video
In this menu you can make changes to:
- Contrast
- Brightness
- Saturation
- Hue
HDTV UpConverter 25
Page 26

HDTV UpConverter 27
Fun c tio ns
English
Fun c tio ns
Video Input Setup
English
In this menu you can make changes to the Main and PiP video sources, the input format of
the video content
- Main and PiP Input selection
Changes you make from the remote control will be represented here as well. You
can set the PiP source from this menu but only valid Main/PiP congurations will be
allowed, see Appendix B for Main/Pip selection chart.
- Main and PiP Format
The default setting for both is Auto. In Auto mode the HDTV UpConverter will
detect the aspect ratio of the incoming signal. Using the remote control you can
over-ride this and set the input format to 4:3, FS Letterbox, 16:9.
*If FS Letterbox is used while viewing TV, the TV image will overscan and cut off.a
portion of the TV image.
Output Settings
This menu allows you to congure your output resolution that will be sent to your display device*, and
the aspect ratio of the video being displayed.
HDTV UpConverter 26
Page 27

Fun c tio ns
- Resolution
Use the remote to cycle through the available resolution settings. If you are using
a TV or display that accepts the default settings of 480i, 480p, 720p or 1080i, you
can select these resolutions from the buttons on the remote or from the front panel
display.
If you have a xed pixel display such as a Plasma or LCD at panel or a front
projection device which support native resolutions, you can use this menu to cycle
through the additional resolutions supported by the HDTV UpConverter; 852 x
480p, 1024 x 1024p, 1280 x 768p, 1280 x 1024p
* Check the owner’s manual for your display device and select only resolutions that
are documented as supported by your display device.
- Format
The default format is Expand. Expand will provide the maximum horizontal width
and vertical height that is appropriate for the processed video content. When
output is set to Expand you have the option of manually adjusting the horizontal and
vertical size. The Input Format setting selection can affect the output format and
output aspect ratio. You can use the remote control to change this menu or the
View Mode button to change the output aspect ratio from Expand to Pillar Box or
Panoramic. In 480i and 480p modes you also have the Pan and Scan option.
English
- MADI (Motion Adaptive De-Interlacing) Setting
Choose between Vertical Temporal (VT) or Spatial and then adjust the MADI
threshold setting to your preference.
- Diagonal Interpolation (DI)
This toggles the diagonal processing. Diagonal processing can help remove jaggies
in scenes with diagonal lines. Set this feature in either on or off position.
- OSD Position
Use the OSD position controls to change the On Screen Display location to match
your preference.
HDTV UpConverter 27
Page 28

Fun c tio ns
TV Channel Setup
English
This menu allows to Auto-Scan the available TV channels and create a TV tuning list in the
UpConverter. You can also easily add or delete channels you may not want to view. The TV
Setup menu also allows you to set up your 5 Favorite TV channels (accessed by the Favorite
button on the remote) and up to 16 PiP channels that are displayed in PiP modes.
Auto-Scan TV Channels -
Adding and Deleting Stations from the Channel List
Use the remote Control as follows:
Delete TV Channel from Channel list 0 + TV Channel (0 + 3 deletes Ch. 3)
Add TV Channel to Channel list Enter channel number (14 adds Ch. 14)
PiP Setup
This menu allows you to open a PiP window, set the PiP mode, set the aspect ratio of the PiP
window (4:3 or 16:9), change the horizontal and vertical position of the PiP window on your
video display and use Alpha blending to set the transparency of the PiP window.
You can also use the PiP and PiP Mode buttons on the remote control to Open and Close
a PiP window and cycle through available PiP modes. When a Single PiP window is on the
screen you can use the Left or Right buttons to move the PiP Window to set locations on the
Video display.
HDTV UpConverter 28 HDTV UpConverter 29
Page 29

Appendix A:
App e ndi x
Remote Control Codes
The table below shows the custom hex codes
for each button press of the remote control.
If you have a programmable remote control
device that allows the input of hex codes, you
can use the list below to program your remote.
PWR 15C1
Menu 15C2
480i 15C3
480p 15C4
720p 15C5
1080i 15C6
Up 15C7
Left 15C8
Right 15C9
Down 15CA
TV 15CB
Input 15CC
Enter 15CD
1 15CE
2 15CF
3 15D0
4 15D1
5 15D2
6 15D3
7 15D4
8 15D5
9 15D6
Favorite 15D7
0 15D8
Jump 15D9
PIP 15DA
PIP Mode 15DB
View Mode 15DC
CC 15DD
Mute 15DE
Film 15DF
English
Page 30

HDTV UpConverter 31
App e ndi x
English
App e ndi x
Appendix B
English
Main Video/PiP Video Selections Chart
The HDTV UpConverter has been designed to allow many different Main/PiP video
combinations. This allows you to have great exibility in selecting video sources for using as
the Main and or PiP video windows. The HDTV UpConverter will not allow you to select a nonvalid combination. If a non-valid combination is selected, the UpConverter will automatically
revert to a valid selection.
Below is the table of allowable Main/PiP combinations:
Input Name Source # Input Name Source #
Component 1 1 TV Tuner 10
Component 1 1 S-Video 4
Component 1 1 S-Video 5
Component 1 1 S-Video 6
Component 1 1 RCA Video 7
Component 1 1 RCA Video 8
Component 1 1 RCA Video 9
Component 2 2 TV Tuner 10
Component 2 2 S-Video 4
Component 2 2 S-Video 5
Component 2 2 S-Video 6
Component 2 2 RCA Video 7
Component 2 2 RCA Video 8
Component 2 2 RCA Video 9
Component 3 3 TV Tuner 10
Component 3 3 S-Video 4
Component 3 3 S-Video 5
Component 3 3 S-Video 6
Component 3 3 RCA Video 7
Component 3 3 RCA Video 8
Component 3 3 RCA Video 9
HDTV UpConverter 30
Page 31

S-Video 1 4 Component 1 1
S-Video 1 4 Component 2 2
S-Video 1 4 Component 3 3
S-Video 2 5 Component 1 1
S-Video 2 5 Component 2 2
S-Video 2 5 Component 3 3
S-Video 3 6 Component 1 1
S-Video 3 6 Component 2 2
S-Video 3 6 Component 3 3
RCA Video 1 7 Component 1 1
RCA Video 1 7 Component 2 2
RCA Video 1 7 Component 3 3
RCA Video 2 8 Component 1 1
RCA Video 2 8 Component 2 2
RCA Video 2 8 Component 3 3
RCA Video 3 9 Component 1 1
RCA Video 3 9 Component 2 2
RCA Video 3 9 Component 3 3
TV Tuner 10 Component 1 1
TV Tuner 10 Component 2 2
TV Tuner 10 Component 3 3
App e ndi x
English
User Notes:
1.) On the Brightness/Color – Main Video menu why can’t I change the Vertical Sharpness?
a. We have set the type of Motion Adaptive De-interlacing (MADI) to SPATIAL in the Video
Output settings menu as the default setting because we fell this presents the best image
quality. If you change the MADI setting to Vertical Temporal (VT), you will notice that
now you can change the Vertical Sharpness setting in the Brightness/Color – Main
menu
2.) I connected my Progressive DVD player and now I cannot select MADI settings or Noise
reduction lters.
a. This is because your input signal is already a progressive signal and de-interlacing
cannot be performed.
b. This function will also apply to 480p or 720p input from an HD cable, satellite or
terrestrial signal.
3.) I have made lots of changes but I’d like to reset back to factory defaults. How can I do this?
a. Unplug the UpConverter power Cable.
b. Re-attach the power cable.
c. Press and hold down the Channel Up Button on the front panel of the UpConverter.
d. While holding down the Channel Up Button, Press the Power button. The unit will
power up and you will notice the following message in the display area:
“RESET ADS TECH Factory Defaults”.
FA Q’s
HDTV UpConverter 31
Page 32

Page 33

If you have any problems or questions on this product, please call :
Technical Support 562.926.4338
North America Support Hours:
M-F : 8 am - 5 pm, PST
Email : support@adstech.com
website : www.adstech.com
ADS Tech
European Technical Support: +353.61.702042
HDTV UpConverter
1500-511
 Loading...