

Page 1
ADOBE® PREMIERE® PRO CS3
April 1, 2008
USER GUIDE
Page 2

Copyright
April 1, 2008
© 2007 Adobe Systems Incorporated. All rights reserved.
® Premiere® Pro CS3 User Guide for Windows® and Mac OS
Adobe
If this guide is distributed with software that includes an end user agreement, this guide, as well as the software described in it, is furnished under license and may be used or
copied only in accordance with the terms of such license. Except as permitted by any such license, no part of this guide may be reproduced, stored in a retrieval system, or transmitted, in any form or by any means, electronic, mechanical, recording, or otherwise, without the prior written permission of Adobe Systems Incorporated. Please note that the
content in this guide is protected under copyright law even if it is not distributed with software that includes an end user license agreement.
The content of this guide is furnished for informational use only, is subject to change without notice, and should not be construed as a commitment by Adobe Systems Incorporated. Adobe Systems Incorporated assumes no responsibility or liability for any errors or inaccuracies that may appear in the informational content contained in this guide.
Please remember that existing artwork or images that you may want to include in your project may be protected under copyright law. The unauthorized incorporation of such
material into your new work could be a violation of the rights of the copyright owner. Please be sure to obtain any permission required from the copyright owner.
Any references to company names in sample templates are for demonstration purposes only and are not intended to refer to any actual organization.
Adobe, the Adobe logo, Adobe Premiere, After Effects, Encore, Flash, Illustrator, Photoshop, PostScript, and Soundbooth, are either registered trademarks or trademarks of
Adobe Systems Incorporated in the United States and/or other countries.
Dolby is a trademark of Dolby Laboratories. OpenType and Windows are either registered trademarks or trademarks of Microsoft Corporation in the United States and/or other
countries. Mac OS is a trademark of Apple Inc., registered in the United States and other countries. All other trademarks are the property of their respective owners.
MPEG Layer-3 audio compression technology licensed by Fraunhofer IIS and Thomson Multimedia (
This product includes software developed by the Apache Software Foundation (
http://www.apache.org/).
http://www.mp3licensing.com).
This Program was written with MacApp®: ©1985-1988 Apple Inc. APPLE INC. MAKES NO WARRANTIES WHATSOEVER, EITHER EXPRESS OR IMPLIED, REGARDING
THIS PRODUCT, INCLUDING WARRANTIES WITH RESPECT TO ITS MERCHANTABILITY OR ITS FITNESS FOR ANY PARTICULAR PURPOSE. The MacApp
software is proprietary to Apple Inc. and is licensed to Adobe for distribution only for use in combination with Adobe Premiere.
Speech compression and decompression technology licensed from Nellymoser, Inc. (
Flash CS3 video is powered by On2 TrueMotion video technology. © 1992-2005 On2 Technologies, Inc. All Rights Reserved.
www.nellymoser.com)
http://www.on2.com
This product includes software developed by the OpenSymphony Group (http://www.opensymphony.com/).
This product contains either BISAFE and/or TIPEM software by RSA Data Security, Inc.
Sorenson SparkTM video compression and decompression technology licensed from Sorenson Media, Inc.
Notice to U.S. Government end users: The Software and Documentation are “Commercial Items,” as that term is defined at 48 C.F.R. §2.101, consisting of “Commercial
Computer Software” and “Commercial Computer Software Documentation,” as such terms are used in 48 C.F.R. §12.212 or 48 C.F.R. §227.7202, as applicable. Consistent with
48 C.F.R. §12.212 or 48 C.F.R. §§227.7202-1 through 227.7202-4, as applicable, the Commercial Computer Software and Commercial Computer Software Documentation are
being licensed to U.S. Government end users (a) only as Commercial Items and (b) with only those rights as are granted to all other end users pursuant to the terms and conditions herein. Unpublished-rights reserved under the copyright laws of the United States. Adobe agrees to comply with all applicable equal opportunity laws including, if appropriate, the provisions of Executive Order 11246, as amended, Section 402 of the Vietnam Era Veterans Readjustment Assistance Act of 1974 (38 USC 4212), and Section 503 of
the Rehabilitation Act of 1973, as amended, and the regulations at 41 CFR Parts 60-1 through 60-60, 60-250, and 60-741. The affirmative action clause and regulations contained
in the preceding sentence shall be incorporated by reference.
Adobe Systems Incorporated, 345 Park Avenue, San Jose, California 95110, USA.
Page 3

Contents
April 1, 2008
Chapter 1: Getting started
Installation
About Adobe Help
Resources
What’s new
Chapter 2: Workspace
Customizing the workspace
Tools, clip details, and menus
Chapter 3: Projects
Project basics
Aspect ratios
Special projects
Workflows
. . . . . . . . . . . . . . . . . . . . . . . . . . . . . . . . . . . . . . . . . . . . . . . . . . . . . . . . . . . . . . . . . . . . . . . . . . . . . . . 1
. . . . . . . . . . . . . . . . . . . . . . . . . . . . . . . . . . . . . . . . . . . . . . . . . . . . . . . . . . . . . . . . . . . . . . . . 2
. . . . . . . . . . . . . . . . . . . . . . . . . . . . . . . . . . . . . . . . . . . . . . . . . . . . . . . . . . . . . . . . . . . . . . . . . . . . . . . . 5
. . . . . . . . . . . . . . . . . . . . . . . . . . . . . . . . . . . . . . . . . . . . . . . . . . . . . . . . . . . . . . . . . . . . . . . . . . . . . . 11
. . . . . . . . . . . . . . . . . . . . . . . . . . . . . . . . . . . . . . . . . . . . . . . . . . . . . . . . . . . . . . . . . . . . . . . . . . . . 21
. . . . . . . . . . . . . . . . . . . . . . . . . . . . . . . . . . . . . . . . . . . . . . . . . . . . . . . . . . . . . . . . . . . . . . . . . . . . . 28
. . . . . . . . . . . . . . . . . . . . . . . . . . . . . . . . . . . . . . . . . . . . . . . . . . . . . . . . . . . . . . . . . . . . . . . . . . 33
. . . . . . . . . . . . . . . . . . . . . . . . . . . . . . . . . . . . . . . . . . . . . . . . . . . . . . . . . . . . . . . . . . . . . . . . . . . . . . . 37
iii
. . . . . . . . . . . . . . . . . . . . . . . . . . . . . . . . . . . . . . . . . . . . . . . . . . . . . . . . . . . . . . 13
. . . . . . . . . . . . . . . . . . . . . . . . . . . . . . . . . . . . . . . . . . . . . . . . . . . . . . . . . . . . 18
Chapter 4: Setting up, and bringing in assets
Setting up your system
Bringing assets into a project
Capturing and digitizing
Batch capturing
Timecode
Online and offline editing
Importing files
Chapter 5: Managing and viewing assets
Customizing the Project panel
Organizing assets with the Project panel
Working with assets
Work with proxy files
Source and Program Monitors
Playing assets
Reference Monitor
Chapter 6: Editing a sequence
Editing basics
Trimming clips
Assembling a sequence
Correcting mistakes
Changing clip scale, duration, speed, or interlacing
Working with clips in a sequence
Rearranging clips in a sequence
Previewing sequences
. . . . . . . . . . . . . . . . . . . . . . . . . . . . . . . . . . . . . . . . . . . . . . . . . . . . . . . . . . . . . . . . . . . . . . . . . . . . . . . . 70
. . . . . . . . . . . . . . . . . . . . . . . . . . . . . . . . . . . . . . . . . . . . . . . . . . . . . . . . . . . . . . . . . . . . . . . . . . . . 96
. . . . . . . . . . . . . . . . . . . . . . . . . . . . . . . . . . . . . . . . . . . . . . . . . . . . . . . . . . . . . . . . . . . . . . . . . . . 100
. . . . . . . . . . . . . . . . . . . . . . . . . . . . . . . . . . . . . . . . . . . . . . . . . . . . . . . . . . . . . . . . . . . 47
. . . . . . . . . . . . . . . . . . . . . . . . . . . . . . . . . . . . . . . . . . . . . . . . . . . . . . . . . . . . . 52
. . . . . . . . . . . . . . . . . . . . . . . . . . . . . . . . . . . . . . . . . . . . . . . . . . . . . . . . . . . . . . . . . 53
. . . . . . . . . . . . . . . . . . . . . . . . . . . . . . . . . . . . . . . . . . . . . . . . . . . . . . . . . . . . . . . . . . . . . . . . . . 63
. . . . . . . . . . . . . . . . . . . . . . . . . . . . . . . . . . . . . . . . . . . . . . . . . . . . . . . . . . . . . . . . 73
. . . . . . . . . . . . . . . . . . . . . . . . . . . . . . . . . . . . . . . . . . . . . . . . . . . . . . . . . . . . . . . . . . . . . . . . . . . 74
. . . . . . . . . . . . . . . . . . . . . . . . . . . . . . . . . . . . . . . . . . . . . . . . . . . . . . . . . . . 84
. . . . . . . . . . . . . . . . . . . . . . . . . . . . . . . . . . . . . . . . . . . . . . . . . . 87
. . . . . . . . . . . . . . . . . . . . . . . . . . . . . . . . . . . . . . . . . . . . . . . . . . . . . . . . . . . . . . . . . . . . . . 89
. . . . . . . . . . . . . . . . . . . . . . . . . . . . . . . . . . . . . . . . . . . . . . . . . . . . . . . . . . . . . . . . . . . . . 92
. . . . . . . . . . . . . . . . . . . . . . . . . . . . . . . . . . . . . . . . . . . . . . . . . . . . . . . . . . . . 92
. . . . . . . . . . . . . . . . . . . . . . . . . . . . . . . . . . . . . . . . . . . . . . . . . . . . . . . . . . . . . . . . . . . . . . . 99
. . . . . . . . . . . . . . . . . . . . . . . . . . . . . . . . . . . . . . . . . . . . . . . . . . . . . . . . . . . . . . . . . . . . . . . . . . 106
. . . . . . . . . . . . . . . . . . . . . . . . . . . . . . . . . . . . . . . . . . . . . . . . . . . . . . . . . . . . . . . . . 115
. . . . . . . . . . . . . . . . . . . . . . . . . . . . . . . . . . . . . . . . . . . . . . . . . . . . . . . . . . . . . . . . . . . . . 122
. . . . . . . . . . . . . . . . . . . . . . . . . . . . . . . . . . . . . . . . . . . . . . . . . . . . . . . . 135
. . . . . . . . . . . . . . . . . . . . . . . . . . . . . . . . . . . . . . . . . . . . . . . . . . . . . . . . . 138
. . . . . . . . . . . . . . . . . . . . . . . . . . . . . . . . . . . . . . . . . . . . . . . . . . . . . . . . . . . . . . . . . . 141
. . . . . . . . . . . . . . . . . . . . . . . . . . . . . . . . . . . . . . 124
Page 4

Chapter 7: Editing: Beyond the basics
April 1, 2008
Using markers . . . . . . . . . . . . . . . . . . . . . . . . . . . . . . . . . . . . . . . . . . . . . . . . . . . . . . . . . . . . . . . . . . . . . . . . . . 146
Editing audio in the Timeline panel
Creating special clips
Multiple sequences
Subclips
. . . . . . . . . . . . . . . . . . . . . . . . . . . . . . . . . . . . . . . . . . . . . . . . . . . . . . . . . . . . . . . . . . . . . . . . . . . . . . . . 156
. . . . . . . . . . . . . . . . . . . . . . . . . . . . . . . . . . . . . . . . . . . . . . . . . . . . . . . . . . . . . . . . . . . . 153
. . . . . . . . . . . . . . . . . . . . . . . . . . . . . . . . . . . . . . . . . . . . . . . . . . . . . . . . . . . . . . . . . . . . . 154
Editing a multi-camera sequence
Working in other applications
Adobe Dynamic Link
. . . . . . . . . . . . . . . . . . . . . . . . . . . . . . . . . . . . . . . . . . . . . . . . . . . . . . . . . . . . . . . . . . . . 167
. . . . . . . . . . . . . . . . . . . . . . . . . . . . . . . . . . . . . . . . . . . . . . . . . . . . . . 150
. . . . . . . . . . . . . . . . . . . . . . . . . . . . . . . . . . . . . . . . . . . . . . . . . . . . . . . . 157
. . . . . . . . . . . . . . . . . . . . . . . . . . . . . . . . . . . . . . . . . . . . . . . . . . . . . . . . . . . 162
Chapter 8: Transitions
Transition overview
Adding transitions
Fine-tuning transitions
Customizable transitions
. . . . . . . . . . . . . . . . . . . . . . . . . . . . . . . . . . . . . . . . . . . . . . . . . . . . . . . . . . . . . . . . . . . . . 172
. . . . . . . . . . . . . . . . . . . . . . . . . . . . . . . . . . . . . . . . . . . . . . . . . . . . . . . . . . . . . . . . . . . . . . 175
. . . . . . . . . . . . . . . . . . . . . . . . . . . . . . . . . . . . . . . . . . . . . . . . . . . . . . . . . . . . . . . . . . 177
. . . . . . . . . . . . . . . . . . . . . . . . . . . . . . . . . . . . . . . . . . . . . . . . . . . . . . . . . . . . . . . . 180
Chapter 9: Audio
Working with audio
Working with clips, channels, and tracks
Recording audio
Adjusting volume levels
Audio transitions
Applying effects to audio
Recording audio mixes
Panning and balancing
Advanced mixing
Editing audio in Adobe Soundbooth
. . . . . . . . . . . . . . . . . . . . . . . . . . . . . . . . . . . . . . . . . . . . . . . . . . . . . . . . . . . . . . . . . . . . . 182
. . . . . . . . . . . . . . . . . . . . . . . . . . . . . . . . . . . . . . . . . . . . . . . . . 188
. . . . . . . . . . . . . . . . . . . . . . . . . . . . . . . . . . . . . . . . . . . . . . . . . . . . . . . . . . . . . . . . . . . . . . . . 194
. . . . . . . . . . . . . . . . . . . . . . . . . . . . . . . . . . . . . . . . . . . . . . . . . . . . . . . . . . . . . . . . . 198
. . . . . . . . . . . . . . . . . . . . . . . . . . . . . . . . . . . . . . . . . . . . . . . . . . . . . . . . . . . . . . . . . . . . . . . 201
. . . . . . . . . . . . . . . . . . . . . . . . . . . . . . . . . . . . . . . . . . . . . . . . . . . . . . . . . . . . . . . 202
. . . . . . . . . . . . . . . . . . . . . . . . . . . . . . . . . . . . . . . . . . . . . . . . . . . . . . . . . . . . . . . . . . 206
. . . . . . . . . . . . . . . . . . . . . . . . . . . . . . . . . . . . . . . . . . . . . . . . . . . . . . . . . . . . . . . . . 208
. . . . . . . . . . . . . . . . . . . . . . . . . . . . . . . . . . . . . . . . . . . . . . . . . . . . . . . . . . . . . . . . . . . . . . . 210
. . . . . . . . . . . . . . . . . . . . . . . . . . . . . . . . . . . . . . . . . . . . . . . . . . . . . 214
iv
Chapter 10: Titles
Creating titles
Adding text to titles
Adding shapes and images
. . . . . . . . . . . . . . . . . . . . . . . . . . . . . . . . . . . . . . . . . . . . . . . . . . . . . . . . . . . . . . . . . . . . . . . . . . . 216
. . . . . . . . . . . . . . . . . . . . . . . . . . . . . . . . . . . . . . . . . . . . . . . . . . . . . . . . . . . . . . . . . . . . . 220
. . . . . . . . . . . . . . . . . . . . . . . . . . . . . . . . . . . . . . . . . . . . . . . . . . . . . . . . . . . . . . 224
Working with text and objects in titles
Adding fills, strokes, and shadows in titles
Working with styles
Rolling and crawling titles
. . . . . . . . . . . . . . . . . . . . . . . . . . . . . . . . . . . . . . . . . . . . . . . . . . . . . . . . . . . . . . . . . . . . . 236
. . . . . . . . . . . . . . . . . . . . . . . . . . . . . . . . . . . . . . . . . . . . . . . . . . . . . . . . . . . . . . . 238
Chapter 11: Applying Effects
Working with effects
. . . . . . . . . . . . . . . . . . . . . . . . . . . . . . . . . . . . . . . . . . . . . . . . . . . . . . . . . . . . . . . . . . . . 240
Applying, removing, and organizing effects
Adjusting effects
Customizing effect presets
Motion
. . . . . . . . . . . . . . . . . . . . . . . . . . . . . . . . . . . . . . . . . . . . . . . . . . . . . . . . . . . . . . . . . . . . . . . . . . . . . . . . . 251
Color correction
. . . . . . . . . . . . . . . . . . . . . . . . . . . . . . . . . . . . . . . . . . . . . . . . . . . . . . . . . . . . . . . . . . . . . . . . 246
. . . . . . . . . . . . . . . . . . . . . . . . . . . . . . . . . . . . . . . . . . . . . . . . . . . . . . . . . . . . . . 249
. . . . . . . . . . . . . . . . . . . . . . . . . . . . . . . . . . . . . . . . . . . . . . . . . . . . . . . . . . . . . . . . . . . . . . . . 258
Special color and luminance adjustments
Vectorscope and waveform monitors
. . . . . . . . . . . . . . . . . . . . . . . . . . . . . . . . . . . . . . . . . . . . . . . . . . . . 278
. . . . . . . . . . . . . . . . . . . . . . . . . . . . . . . . . . . . . . . . . . . . . . . . . . . 229
. . . . . . . . . . . . . . . . . . . . . . . . . . . . . . . . . . . . . . . . . . . . . . . 232
. . . . . . . . . . . . . . . . . . . . . . . . . . . . . . . . . . . . . . . . . . . . . . 243
. . . . . . . . . . . . . . . . . . . . . . . . . . . . . . . . . . . . . . . . . . . . . . . . 272
Page 5

Chapter 12: Animation
April 1, 2008
Keyframing effects . . . . . . . . . . . . . . . . . . . . . . . . . . . . . . . . . . . . . . . . . . . . . . . . . . . . . . . . . . . . . . . . . . . . . . 282
Activating and selecting keyframes
Adding and setting keyframes
Moving and copying keyframes
Controlling effect changes using keyframe interpolation
. . . . . . . . . . . . . . . . . . . . . . . . . . . . . . . . . . . . . . . . . . . . . . . . . . . . . . 286
. . . . . . . . . . . . . . . . . . . . . . . . . . . . . . . . . . . . . . . . . . . . . . . . . . . . . . . . . . . 288
. . . . . . . . . . . . . . . . . . . . . . . . . . . . . . . . . . . . . . . . . . . . . . . . . . . . . . . . . 292
. . . . . . . . . . . . . . . . . . . . . . . . . . . . . . . . . 293
Chapter 13: Effect reference
About the effect reference
Gallery of effects
Adjust effects
. . . . . . . . . . . . . . . . . . . . . . . . . . . . . . . . . . . . . . . . . . . . . . . . . . . . . . . . . . . . . . . . . . . . . . . . 297
. . . . . . . . . . . . . . . . . . . . . . . . . . . . . . . . . . . . . . . . . . . . . . . . . . . . . . . . . . . . . . . . . . . . . . . . . . . 299
Blur and Sharpen effects
Channel effects
. . . . . . . . . . . . . . . . . . . . . . . . . . . . . . . . . . . . . . . . . . . . . . . . . . . . . . . . . . . . . . . . . . . . . . . . . 305
Color Correction effects
Distort effects
. . . . . . . . . . . . . . . . . . . . . . . . . . . . . . . . . . . . . . . . . . . . . . . . . . . . . . . . . . . . . . . . . . . . . . . . . . . 321
GPU effects (Windows only)
Generate effects
. . . . . . . . . . . . . . . . . . . . . . . . . . . . . . . . . . . . . . . . . . . . . . . . . . . . . . . . . . . . . . . . . . . . . . . . 326
Image Control effects
Keying effects
. . . . . . . . . . . . . . . . . . . . . . . . . . . . . . . . . . . . . . . . . . . . . . . . . . . . . . . . . . . . . . . . . . . . . . . . . . . 335
Noise & Grain effects
Perspective effects
Stylize effects
Time effects
Transform effects
Transition effects
Utility effects
Video effects
Audio effects
. . . . . . . . . . . . . . . . . . . . . . . . . . . . . . . . . . . . . . . . . . . . . . . . . . . . . . . . . . . . . . . . . . . . . . . . . . . 343
. . . . . . . . . . . . . . . . . . . . . . . . . . . . . . . . . . . . . . . . . . . . . . . . . . . . . . . . . . . . . . . . . . . . . . . . . . . . 347
. . . . . . . . . . . . . . . . . . . . . . . . . . . . . . . . . . . . . . . . . . . . . . . . . . . . . . . . . . . . . . . . . . . . . . . 350
. . . . . . . . . . . . . . . . . . . . . . . . . . . . . . . . . . . . . . . . . . . . . . . . . . . . . . . . . . . . . . . . . . . . . . . 351
. . . . . . . . . . . . . . . . . . . . . . . . . . . . . . . . . . . . . . . . . . . . . . . . . . . . . . . . . . . . . . . . . . . . . . . . . . . 353
. . . . . . . . . . . . . . . . . . . . . . . . . . . . . . . . . . . . . . . . . . . . . . . . . . . . . . . . . . . . . . . . . . . . . . . . . . . . 354
. . . . . . . . . . . . . . . . . . . . . . . . . . . . . . . . . . . . . . . . . . . . . . . . . . . . . . . . . . . . . . . . . . . . . . . . . . . 354
. . . . . . . . . . . . . . . . . . . . . . . . . . . . . . . . . . . . . . . . . . . . . . . . . . . . . . . . . . . . . . 297
. . . . . . . . . . . . . . . . . . . . . . . . . . . . . . . . . . . . . . . . . . . . . . . . . . . . . . . . . . . . . . . . 302
. . . . . . . . . . . . . . . . . . . . . . . . . . . . . . . . . . . . . . . . . . . . . . . . . . . . . . . . . . . . . . . . . 308
. . . . . . . . . . . . . . . . . . . . . . . . . . . . . . . . . . . . . . . . . . . . . . . . . . . . . . . . . . . . . 325
. . . . . . . . . . . . . . . . . . . . . . . . . . . . . . . . . . . . . . . . . . . . . . . . . . . . . . . . . . . . . . . . . . . 334
. . . . . . . . . . . . . . . . . . . . . . . . . . . . . . . . . . . . . . . . . . . . . . . . . . . . . . . . . . . . . . . . . . . . 338
. . . . . . . . . . . . . . . . . . . . . . . . . . . . . . . . . . . . . . . . . . . . . . . . . . . . . . . . . . . . . . . . . . . . . . 341
v
Chapter 14: Compositing
Compositing video
Transparency (masks, alpha channels)
Defining transparent areas with keys
Creating transparency and solid colors with mattes
. . . . . . . . . . . . . . . . . . . . . . . . . . . . . . . . . . . . . . . . . . . . . . . . . . . . . . . . . . . . . . . . . . . . . . 364
. . . . . . . . . . . . . . . . . . . . . . . . . . . . . . . . . . . . . . . . . . . . . . . . . . . 367
. . . . . . . . . . . . . . . . . . . . . . . . . . . . . . . . . . . . . . . . . . . . . . . . . . . . 368
. . . . . . . . . . . . . . . . . . . . . . . . . . . . . . . . . . . . . . 373
Chapter 15: Exporting
Choosing export formats
Exporting editable movie and audio files
Exporting still images and still-image sequences
Exporting PDFs for comments
Exporting to DVD, Blu-ray disc, or CD
Exporting projects for online editing or archiving
Exporting to videotape or film
Exporting for the web
. . . . . . . . . . . . . . . . . . . . . . . . . . . . . . . . . . . . . . . . . . . . . . . . . . . . . . . . . . . . . . . . 379
. . . . . . . . . . . . . . . . . . . . . . . . . . . . . . . . . . . . . . . . . . . . . . . . 386
. . . . . . . . . . . . . . . . . . . . . . . . . . . . . . . . . . . . . . . . . 389
. . . . . . . . . . . . . . . . . . . . . . . . . . . . . . . . . . . . . . . . . . . . . . . . . . . . . . . . . . . 392
. . . . . . . . . . . . . . . . . . . . . . . . . . . . . . . . . . . . . . . . . . . . . . . . . . . . 395
. . . . . . . . . . . . . . . . . . . . . . . . . . . . . . . . . . . . . . . . 400
. . . . . . . . . . . . . . . . . . . . . . . . . . . . . . . . . . . . . . . . . . . . . . . . . . . . . . . . . . . 404
. . . . . . . . . . . . . . . . . . . . . . . . . . . . . . . . . . . . . . . . . . . . . . . . . . . . . . . . . . . . . . . . . . . 407
Exporting to iPods, cell phones, PSPs and other mobile devices
. . . . . . . . . . . . . . . . . . . . . . . . . . 413
Page 6

Adobe Media Encoder basics . . . . . . . . . . . . . . . . . . . . . . . . . . . . . . . . . . . . . . . . . . . . . . . . . . . . . . . . . . . . 416
April 1, 2008
Export settings . . . . . . . . . . . . . . . . . . . . . . . . . . . . . . . . . . . . . . . . . . . . . . . . . . . . . . . . . . . . . . . . . . . . . . . . . . 419
Chapter 16: Keyboard shortcuts
Finding and customizing keyboard shortcuts
Default keyboard shortcuts
. . . . . . . . . . . . . . . . . . . . . . . . . . . . . . . . . . . . . . . . . . . . . . . . . . . . . . . . . . . . . 429
. . . . . . . . . . . . . . . . . . . . . . . . . . . . . . . . . . . . . . . . . . . . 427
vi
Index
. . . . . . . . . . . . . . . . . . . . . . . . . . . . . . . . . . . . . . . . . . . . . . . . . . . . . . . . . . . . . . . . . . . . . . . . . . . . . . . . . . 436
Page 7

Chapter 1: Getting started
April 1, 2008
If you haven’t installed your new software, begin by reading some information on installation and other preliminaries. Before you begin working with your software, take a few moments to read an overview of Adobe Help and
of the many resources available to users. You have access to instructional videos, plug-ins, templates, user communities, seminars, tutorials, RSS feeds, and much more.
Installation
Requirements
❖ To review complete system requirements and recommendations for your Adobe® software, see the Read Me file
on the installation disc.
Install the software
1 Close any other Adobe applications open on your computer.
2 Insert the installation disc into the disc drive, and follow the on-screen instructions.
1
Note: For more information, see the Read Me file on the installation disc.
Activate the software
If you have a single-user retail license for your Adobe software, you will be asked to activate your software; this is a
simple, anonymous process that you must complete within 30 days of starting the software.
For more information on product activation, see the Read Me file on your installation disc, or visit the Adobe
website at www.adobe.com/go/activation.
1 If the Activation dialog box isn’t already open, choose Help > Activate.
2 Follow the on-screen instructions.
Note: If you want to install the software on a different computer, you must first deactivate it on your computer. Choose
Help > Deactivate.
Register
Register your product to receive complimentary installation support, notifications of updates, and other services.
❖ To register, follow the on-screen instructions in the Registration dialog box, which appears after you install and
activate the software.
If you postpone registration, you can register at any time by choosing Help > Registration.
Page 8
ADOBE PREMIERE PRO CS3
April 1, 2008
User Guide
Read Me
The installation disc contains the Read Me file for your software. (This file is also copied to the application folder
during product installation.) Open the file to read important information about topics such as the following:
• System requirements
• Installation (including uninstalling the software)
• Activation and registration
• Font installation
• Troubleshooting
• Customer support
• Legal notices
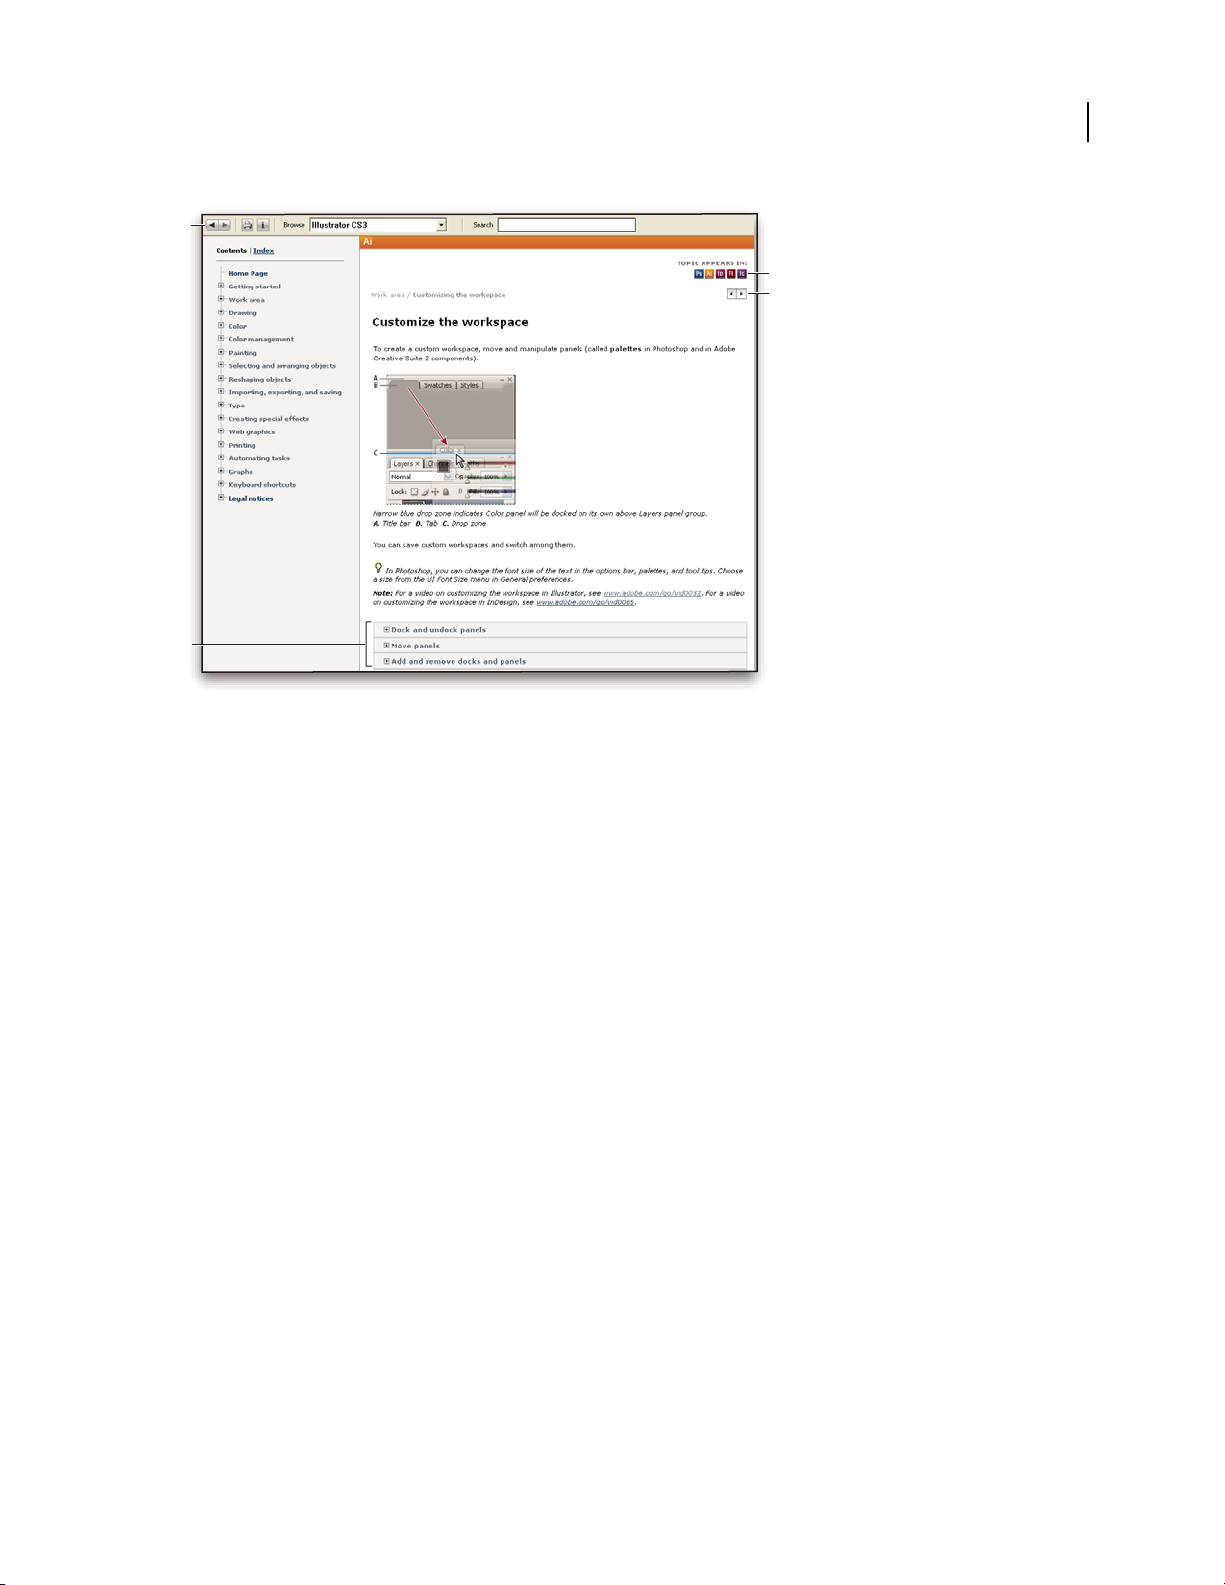
About Adobe Help
Adobe Help resources
Documentation for your Adobe software is available in a variety of formats.
2
In-product and LiveDocs Help
In-product Help provides access to all documentation and instructional content available at the time the software
ships. It is available through the Help menu in your Adobe software.
LiveDocs Help includes all the content from in-product Help, plus updates and links to additional instructional
content available on the web. For some products, you can also add comments to the topics in LiveDocs Help. Find
LiveDocs Help for your product in the Adobe Help Resource Center, at www.adobe.com/go/documentation.
Page 9

ADOBE PREMIERE PRO CS3
April 1, 2008
User Guide
Most versions of in-product and LiveDocs Help let you search across the Help systems of multiple products. Topics
may also contain links to relevant content on the web or to topics in the Help of another product.
Think of Help, both in the product and on the web, as a hub for accessing additional content and communities of
users. The most complete and up-to-date version of Help is always on the web.
Adobe PDF documentation
The in-product Help is also available as a PDF that is optimized for printing. Other documents, such as installation
guides and white papers, may also be provided as PDFs.
All PDF documentation is available through the Adobe Help Resource Center, at www.adobe.com/go/documen-
tation. To see the PDF documentation included with your software, look in the Documents folder on the installation
or content DVD.
Printed documentation
Printed editions of the in-product Help are available for purchase in the Adobe Store, at www.adobe.com/go/store.
You can also find books published by Adobe publishing partners in the Adobe Store.
A printed workflow guide is included with all Adobe Creative Suite® 3 products, and stand-alone Adobe products
may include a printed getting started guide.
3
Using Help in the product
In-product Help is available through the Help menu. After you start the Adobe Help Viewer, click Browse to see
Help for additional Adobe products installed on your computer.
These Help features facilitate cross-product learning:
• Topics may contain links to the Help systems of other Adobe products or to additional content on the web.
• Some topics are shared across two or more products. For instance, if you see a Help topic with an Adobe
Photoshop® CS3 icon and an Adobe After Effects® CS3 icon, you know that the topic either describes functionality
that is similar in the two products or describes cross-product workflows.
• You can search across the Help systems of multiple products.
If you search for a phrase, such as “shape tool,” enclose it in quotation marks to see only those topics that include
all the words in the phrase.
Page 10
ADOBE PREMIERE PRO CS3
April 1, 2008
User Guide
A
C
D
B
4
Adobe Help
A. Back/Forward buttons (previously visited links) B. Expandable subtopics C. Icons indicating shared topic D. Previous/Next buttons
(topics in sequential order)
Accessibility features
Adobe Help content is accessible to people with disabilities—such as mobility impairments, blindness, and low
vision. In-product Help supports these standard accessibility features:
• The user can change text size with standard context menu commands.
• Links are underlined for easy recognition.
• If link text doesn’t match the title of the destination, the title is referenced in the Title attribute of the Anchor tag.
For example, the Previous and Next links include the titles of the previous and next topics.
• Content supports high-contrast mode.
• Graphics without captions include alternate text.
• Each frame has a title to indicate its purpose.
• Standard HTML tags define content structure for screen reading or text-to-speech tools.
• Style sheets control formatting, so there are no embedded fonts.
Keyboard shortcuts for Help toolbar controls (Windows)
Back button Alt+Left Arrow
Forward button Alt+Right Arrow
Print Ctrl+P
About button Ctrl+I
Browse menu Alt+Down Arrow or Alt+Up Arrow to view Help for another application
Search box Ctrl+S to place the insertion point in the Search box
Page 11
ADOBE PREMIERE PRO CS3
April 1, 2008
User Guide
Keyboard shortcuts for Help navigation (Windows)
• To move between panes, press Ctrl+Tab (forward) and Shift+Ctrl+Tab (backward).
• To move through and outline links in a pane, press Tab (forward) or Shift+Tab (backward).
• To activate an outlined link, press Enter.
• To make text bigger, press Ctrl+equal sign.
• To make text smaller, press Ctrl+hyphen.
Resources
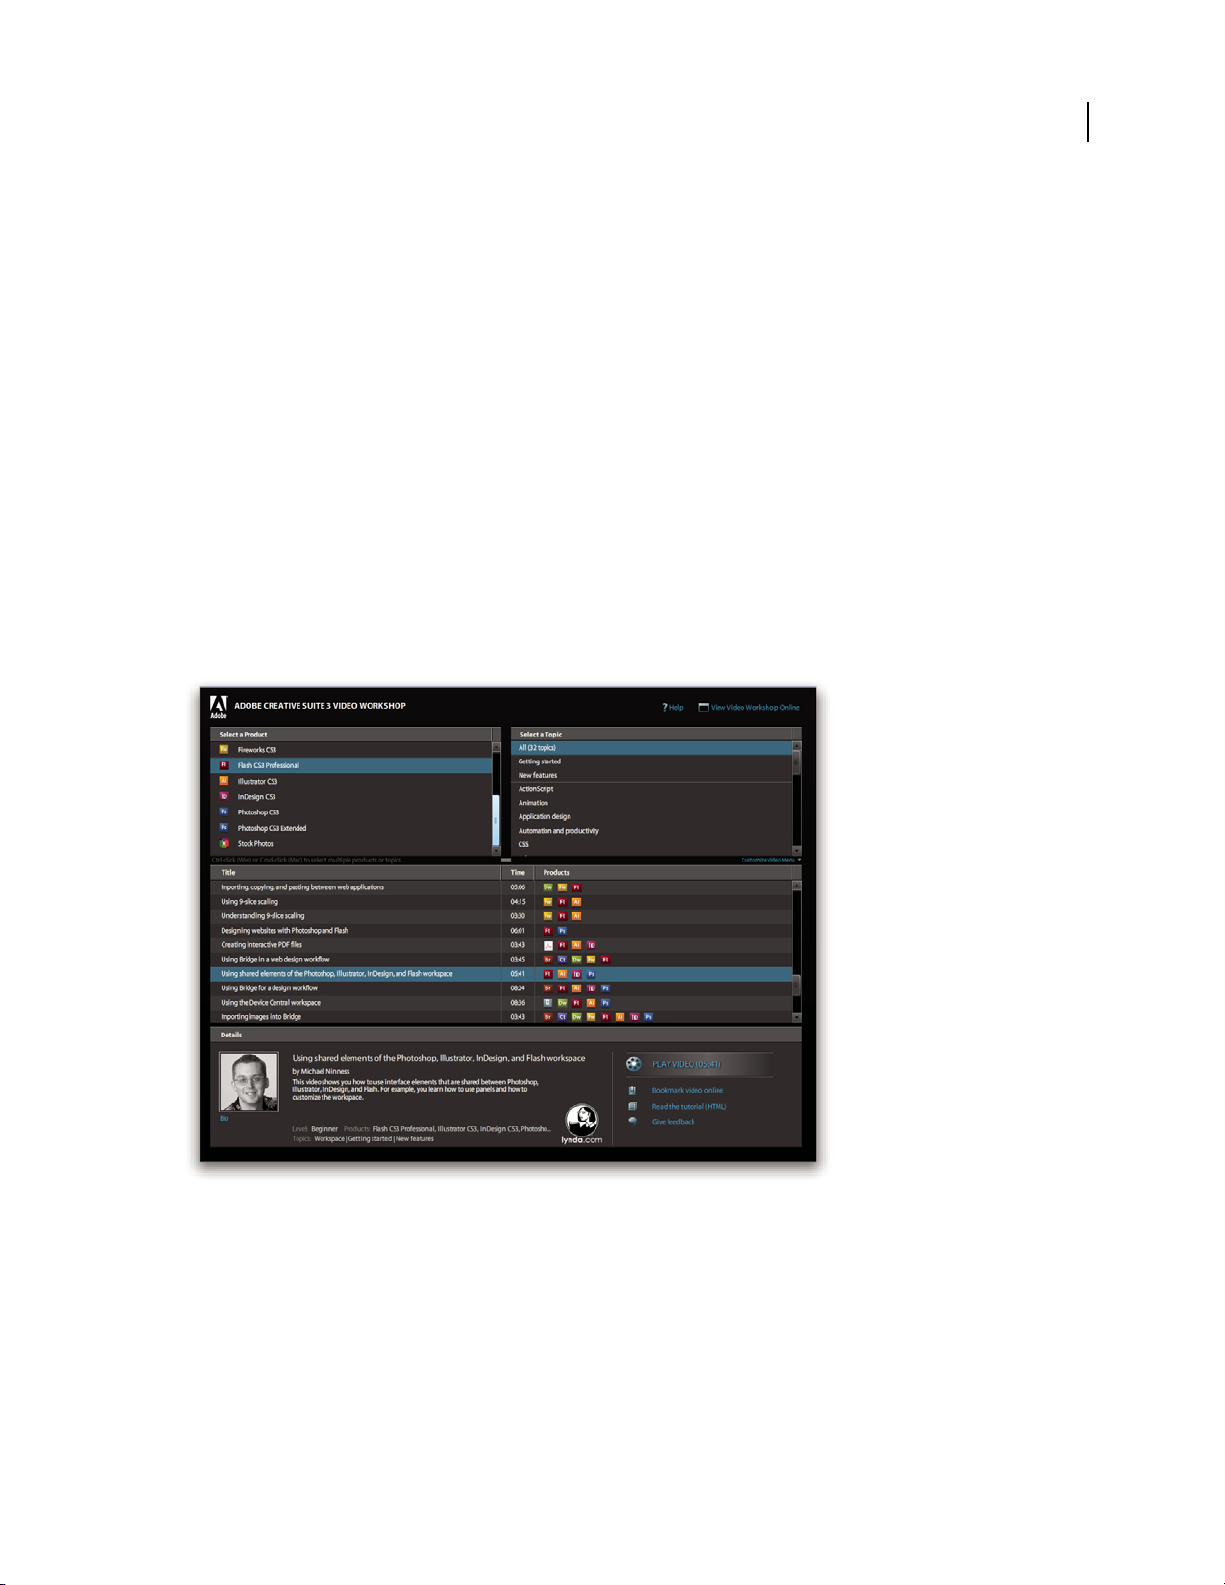
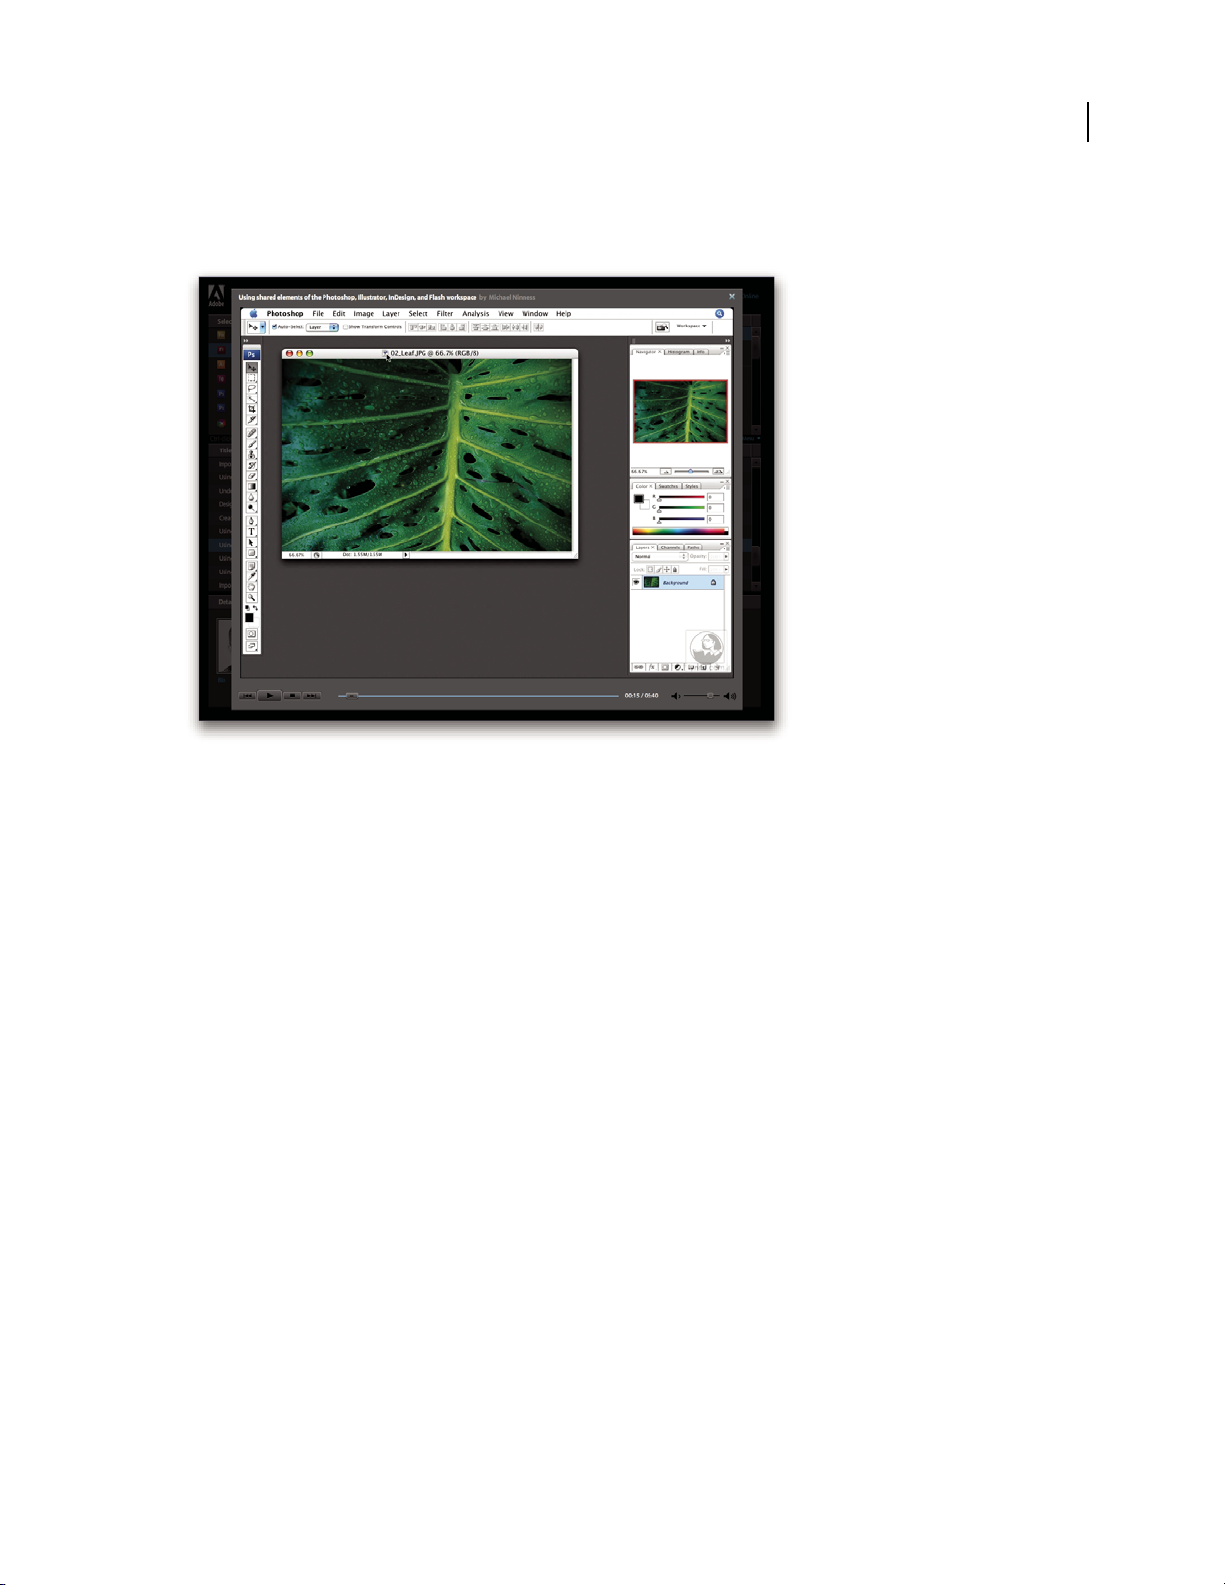
Adobe Video Workshop
The Adobe Creative Suite 3 Video Workshop offers over 200 training videos covering a wide range of subjects for
print, web, and video professionals.
You can use the Adobe Video Workshop to learn about any Creative Suite 3 product. Many videos show you how
to use Adobe applications together.
5
Page 12
ADOBE PREMIERE PRO CS3
April 1, 2008
User Guide
When you start the Adobe Video Workshop, you choose the products you want to learn and the subjects you want
to view. You can see details about each video to focus and direct your learning.
6
Community of presenters
With this release, Adobe Systems invited the community of its users to share their expertise and insights. Adobe and
lynda.com present tutorials, tips, and tricks from leading designers and developers such as Joseph Lowery, Katrin
Eismann, and Chris Georgenes. You can see and hear Adobe experts such as Lynn Grillo, Greg Rewis, and Russell
Brown. In all, over 30 product experts share their knowledge.
Tutorials and source files
The Adobe Video Workshop includes training for novices and experienced users. You’ll also find videos on new
features and key techniques. Each video covers a single subject and typically runs about 3-5 minutes. Most videos
come with an illustrated tutorial and source files, so you can print detailed steps and try the tutorial on your own.
Using Adobe Video Workshop
You can access Adobe Video Workshop using the DVD included with your Creative Suite 3 product. It’s also
available online at www.adobe.com/go/learn_videotutorials. Adobe will regularly add new videos to the online
Video Workshop, so check in to see what’s new.
Adobe Premiere Pro CS3 videos
Adobe Video Workshop covers a wide range of subjects for Adobe Premiere Pro® CS3, including these:
• Editing and color correcting video
• Importing footage
• Managing media
• Sending work for review using Clip Notes
Page 13
ADOBE PREMIERE PRO CS3
April 1, 2008
User Guide
• Exporting video and FLV files
Videos also show you how to use Adobe Premiere Pro CS3 with other Adobe products:
• Using Dynamic Link
• Creating video for mobile devices
• Creating DVDs using Adobe Premiere Pro and Encore®
To access Adobe Creative Suite 3 video tutorials, visit Adobe Video Workshop at
www.adobe.com/go/learn_videotutorials.
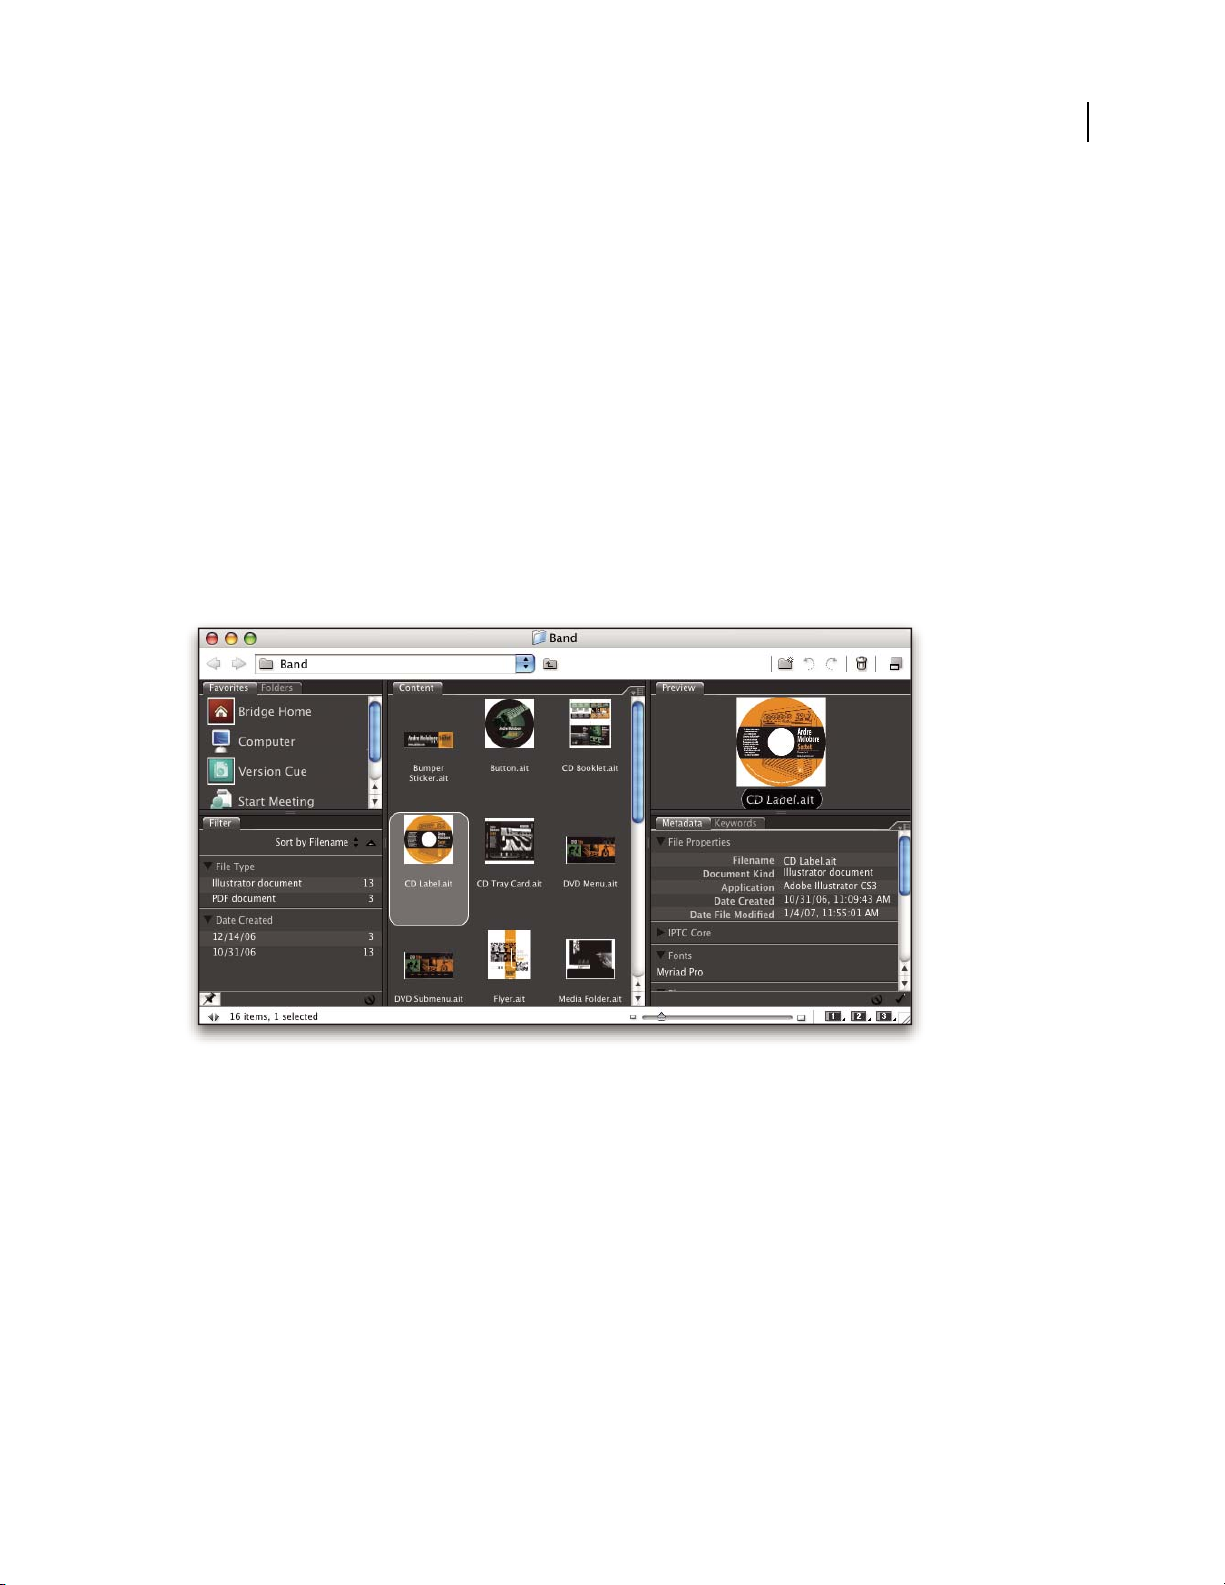
Bridge Home
Bridge Home, a new destination in Adobe Bridge CS3, provides up-to-date information on all your Adobe Creative
Suite 3 software in one convenient location. Start Adobe Bridge, then click the Bridge Home icon at the top of the
Favorites panel to access the latest tips, news, and resources for your Creative Suite tools.
Note: Bridge Home may not be available in all languages.
7
Adobe Bridge CS3 videos
Adobe Video Workshop covers a wide range of subjects for Adobe Bridge CS3, including these:
• Using Adobe Bridge
• Searching, sorting, and filtering in Adobe Bridge
• Applying keywords and adding metadata
• Rating images and documents
Videos also show you how to use Adobe Bridge CS3 with other Adobe products:
• Using Adobe Stock Photos
• Using Adobe Bridge in a design workflow
• Using Adobe Bridge in a photography workflow
Page 14

• Using Adobe Bridge in a web design workflow
April 1, 2008
To access Adobe Creative Suite 3 video tutorials, visit Adobe Video Workshop at
www.adobe.com/go/learn_videotutorials.
Adobe Device Central CS3 videos
Adobe Video Workshop covers many subjects for Adobe Device Central CS3, including these:
• Using Device Central with Photoshop
• Using Device Central with Flash®
• Using Device Central and Adobe Bridge
• Creating mobile content in Flash
To access Adobe Creative Suite 3 video tutorials, visit Adobe Video Workshop at
www.adobe.com/go/learn_videotutorials.
Encore CS3 videos
Adobe Video Workshop covers a wide range of subjects for Adobe Encore® CS3, including these:
• Animating menus
• Creating disc navigation
• Creating and modifying menus
Videos also show you how to use Encore with other Adobe products:
ADOBE PREMIERE PRO CS3
User Guide
8
• Using Dynamic Link
• Creating DVDs using Adobe Premiere Pro® CS3 and Encore
• Working with markers and cue points
To access Adobe Creative Suite 3 video tutorials, visit Adobe Video Workshop at
www.adobe.com/go/learn_videotutorials.
User communities
User communities feature forums, blogs, and other avenues for users to share technologies, tools, and information.
Users can ask questions and find out how others are getting the most out of their software. User-to-user forums are
available in English, French, German, and Japanese; blogs are posted in a wide range of languages.
To participate in forums or blogs, visit www.adobe.com/communities.
Customer support
Visit the Adobe Support website, at www.adobe.com/support, to find troubleshooting information for your product
and to learn about free and paid technical support options. Click the Training link for access to Adobe Press books,
a variety of training resources, Adobe software certification programs, and more.
Page 15

ADOBE PREMIERE PRO CS3
April 1, 2008
User Guide
Downloads
Visit www.adobe.com/go/downloads to find free updates, tryouts, and other useful software. In addition, the Adobe
Store (at www.adobe.com/go/store) provides access to thousands of plug-ins from third-party developers, helping
you to automate tasks, customize workflows, create specialized professional effects, and more.
Extras
You have access to a wide variety of resources that will help you make the most of your Adobe software. Some of
these resources are installed on your computer during the setup process; additional helpful samples and documents
are included on the installation or content disc. Unique extras are also offered online by the Adobe Exchange
community, at www.adobe.com/go/exchange.
Installed resources
During software installation, a number of resources are placed in your application folder. To view those files,
navigate to the application folder on your computer.
• Windows®: [startup drive]\Program Files\Adobe\[Adobe application]
• Mac OS®: [startup
drive]/Applications/[Adobe application]
The application folder may contain the following resources:
9
Plug-ins Plug-in modules are small software programs that extend or add features to your software. Once installed,
plug-in modules appear as options in the Import or Export menu; as file formats in the Open, Save As, and Export
Original dialog boxes; or as filters in the Filter submenus. For example, a number of special effects plug-ins are
automatically installed in the Plug-ins folder inside the Photoshop CS3 folder.
Presets Presets include a wide variety of useful tools, preferences, effects, and images. Product presets include
brushes, swatches, color groups, symbols, custom shapes, graphic and layer styles, patterns, textures, actions,
workspaces, and more. Preset content can be found throughout the user interface. Some presets (for example,
Photoshop Brush libraries) become available only when you select the corresponding tool. If you don’t want to
create an effect or image from scratch, go to the preset libraries for inspiration.
Templates Template files can be opened and viewed from Adobe Bridge CS3, opened from the Welcome Screen,
or opened directly from the File menu. Depending on the product, template files range from letterheads,
newsletters, and websites to DVD menus and video buttons. Each template file is professionally constructed and
Page 16

ADOBE PREMIERE PRO CS3
E
T
V
ER
O
EO
S
E
T
AC
C
U
S
AM
E
T
JU
S
T
O
D
UO
DO
LO
R
ES
ET
EA
RE
B
U
M
.
S
T
E
T
CL
I
T
A
KA
SD
.
ET
COSETETUR SAD
IPSCING
01
PelletirInc.
CORE I
NVESTM
ENT SPE CTRUM
Vel illum do
lore eu feugiat nulla facilisis
at vero eros et accums
an
et iusto odio dignissim qui.
RETI
REMEN
T SAVI
NG
PLAN
Vel illum do
lor
e eu feugiat nulla facilisis
at vero eros et accums
an
et iusto odio
dignissim qui.
Your Inv estment Guide
Are
you leaving mo
ney on the table ?
01
Typi non habent claritatem
insitam; est usu
s leg
entis in iis qui facit eo
rum
claritatem.
Investig
ationes dem
onst
raverunt lectores lege
re me li
us quod ii
legu
nt saepi
us. Claritas est e
tiam processu
s.
Typi
non
habent cla
ritatem
insitam; est usu
s leg
entis in iis qui facit e
o
rum
claritatem.
In
vestig
ationes dem
onstraverunt lectores lege
re me li
us quod
ii
legu
nt saepi
us. Claritas est e
tiam processu
s.
SURVICE MENU
NULCHE
vero dio eum
nulche
agiam
e
t ad lorperi
t
sum a
$45
agiame
t ad atin utet
vero dio eum
nulche suma
agaim
et ad eum
nullam
$25
lorperit sum a
agiam
e
t ad lorperit
vero dio
eum nullam
$35
SUCCIVEROS
sucicvero dio
vero dio
eum
nul
che su
ma
$15
eum nul
lam
vero dio eum
nulche suma
agaimet ad e
um
nullam
$35
N
eum nullam
$35
SUCCI
VEROS
sucicvero dio
vero dio eum
nulche suma
$15
eum
nullam
vero dio eum
nulche suma
agaimet ad eum
nullam
$35
CC
a
s
i
o
p
i
a
S
p
A
April 1, 2008
represents a best-use example of product features. Templates can be a valuable resource when you need to
jump-start a project.
User Guide
10
Travel Earth
Best 100 places to see on the planet
in your lifetime
Vel: Ad : Vulputate:
volute
ipsummy
, commy
re eugiarud tem
eraes-
exer
n ullutet
Samples Sample files include more complicated designs and are a great way to see new features in action. These files
demonstrate the range of creative possibilities available to you.
Fonts Several OpenType® fonts and font families are included with your Creative Suite product. Fonts are copied
to your computer during installation:
• Windows: [startup
drive]\Windows\Fonts
• Mac OS X: [startup drive]/Library/Fonts
For information about installing fonts, see the Read Me file on the installation DVD.
DVD content
The installation or content DVD included with your product contains additional resources for use with your
software. The Goodies folder contains product-specific files such as templates, images, presets, actions, plug-ins,
and effects, along with subfolders for Fonts and Stock Photography. The Documentation folder contains a PDF
version of the Help, technical information, and other documents such as specimen sheets, reference guides, and
specialized feature information.
Adobe Exchange
For more free content, visit www.adobe.com/go/exchange, an online community where users download and share
thousands of free actions, extensions, plug-ins, and other content for use with Adobe products.
Adobe Labs
Adobe Labs gives you the opportunity to experience and evaluate new and emerging technologies and products
from Adobe.
Page 17

ADOBE PREMIERE PRO CS3
April 1, 2008
User Guide
At Adobe Labs, you have access to resources such as these:
• Prerelease software and technologies
• Code samples and best practices to accelerate your learning
• Early versions of product and technical documentation
• Forums, wiki-based content, and other collaborative resources to help you interact with like-minded developers
Adobe Labs fosters a collaborative software development process. In this environment, customers quickly become
productive with new products and technologies. Adobe Labs is also a forum for early feedback, which the Adobe
development teams use to create software that meets the needs and expectations of the community.
Visit Adobe Labs at www.adobe.com/go/labs.
What’s new
New features
Adobe Premiere® Pro CS3 is now available for both Windows and Mac OS X. Adobe Premiere Pro CS3, in combination with Adobe® OnLocation™ and Adobe® Encore® CS3, makes every step of video production more efficient;
from on-location capture, through post-production, to final delivery: on-disk, on-line and on mobile devices. Here's
a quick look at some of the new features that help make Adobe Premiere Pro CS3 an integral part of Adobe's
comprehensive solution for even the most demanding productions.
11
Adobe® OnLocation now included Eliminate the capture process by recording SD and HD video directly from your
camera to a laptop or workstation. Instantly review any shot. Log clips during your shoot. Maximize camera image
quality during shoots by calibrating your camera, checking levels, and monitoring your signal. Avoid problems and
improve quality on location with the virtual reference monitor, comprehensive waveform monitor, vectorscope,
and audio spectrum analyzer. Save tape and save time with Adobe OnLocation. (Requires Bootcamp for Mac OS.)
Adobe® Encore® CS3 now included Create DVDs and take advantage of Blu- ray Disc technology using Adobe
Encore CS3, now included with Adobe Premiere Pro. Work with the same Encore authoring interface and features
used to create standard-definition DVDs. Author once, deliver twice: Automatically convert HD Blu-ray Disc
projects into standard-definition DVDs.
High quality slow motion with time remapping Create dramatic slow and fast motion effects without exporting
clips to another application. The Time Remapping effect gives precise keyframe control, real-time feedback, and
advanced frame-blending quality. You can change speed slowly or quickly, and even make a clip run backwards
before resuming normal forward motion. With the Time Warp effect borrowed from After Effects, you can generate
even better in-between frames through pixel-motion analysis. The Clip Speed effect has also been improved, with
high-quality de-interlacing borrowed from After Effects.
Other new effects Adobe Premiere Pro CS3 includes the Color Key effect borrowed from After Effects. This is now
the preferred effect for chromakey. Also, in the effects folders, you will find a Difference Matte effect, a Dip To
White transition, and six new audio filters: Chorus, DeClicker, DeCrackler, Flanger, Phaser, and SpectralDeNoiser.
For more information on using Dip To White, watch the online training video on the Total Training website.
Publish DVD projects to the web With one click, easily create Adobe Flash® versions of DVD and Blu-ray Disc
projects for publishing to the web. Use Encore, included with Adobe Premiere Pro, to create Flash content, complete
with DVD interactivity and menus, without learning Flash programming.
Page 18

ADOBE PREMIERE PRO CS3
April 1, 2008
User Guide
Smart File Search Find files faster with search tools that instantly update their results lists as you type. Sort and
organize assets into multiple project panels, each with its own graphical or text view setting. Manage your project
and its assets with greater ease and efficiency.
Improved editing efficiency Work faster with powerful and flexible editing tools. No more waiting for audio to
render when working with nested sequences. Replace any clip in the timeline with a new clip while preserving the
replaced clip's attributes, filters, and settings.
Output for mobile devices Make your video viewable on the latest delivery platforms. Encode video for delivery to
cell phones, portable media players, and other mobile devices. Check playback through emulations of the interface,
screen size, and data rate of specific popular devices. Download profile updates to simulate the latest devices as they
are released.
Flash Video export with markers converted to cue points Encode video and audio for Flash projects and web
playback with direct Flash Video (FLV) export. Adobe Premiere Pro timeline markers become Flash cue points that
trigger interactivity and navigation. Create Flash Video with ease.
Broader format editing support Edit the progressive HDV formats and frame rates found in new cameras from
Canon, Sony, and JVC. Saving time, Adobe Premiere Pro indexes HDV files during capture, rather than after.
Edit MXF files imported from P2 media.
Work with emerging camera formats through the wide range of third-party products, both software and hardware,
optimized to work with Adobe Premiere Pro CS3.
12
Broader support of keyboard shortcuts You can map keyboard shortcuts to bring focus to any panel, and use a
keyboard shortcut to load a clip from the Project panel into the Source Monitor. You can select clips, load them into
the Source monitor, mark their In and Out points, and drop them into any spot in the timeline, all without touching
the mouse.
Page 19

Chapter 2: Workspace
April 1, 2008
The consistency among all Adobe video and audio workspaces supports cross-application familiarity. This design
allows users to move projects through the application best for any task in the workflow.
Customizing the workspace
About workspaces
Adobe video and audio applications provide a consistent, customizable workspace. Although each application has
its own set of panels (such as Tools, Properties, Timeline, and so on), you move and group panels in the same way
across products.
The main window of a program is the application window. Panels are organized in this window in an arrangement
called a workspace. The default workspace contains groups of panels as well as panels that stand alone.
You customize a workspace by arranging panels in the layout that best suits your working style. You can create and
save several custom workspaces for different tasks—for example, one for editing and one for previewing.
13
You can drag panels to new locations, move panels into or out of a group, place panels alongside each other, and
undock a panel so that it floats in a new window above the application window. As you rearrange panels, the other
panels resize automatically to fit the window.
You can use floating windows to create a workspace more like those in previous versions of Adobe applications, or
to place panels on multiple monitors.
BC
A
Example workspace
A. Application window B. Grouped panels C. Individual panel
For a video about the Adobe workspace, see www.adobe.com/go/vid0249.
Page 20

ADOBE PREMIERE PRO CS3
April 1, 2008
User Guide
Choose a workspace
Each Adobe video and audio application includes several predefined workspaces that optimize the layout of panels
for specific tasks. When you choose one of these workspaces, or any custom workspaces you’ve saved, the current
workspace is redrawn accordingly.
❖ Open the project you want to work on, choose Window > Workspace, and select the desired workspace.
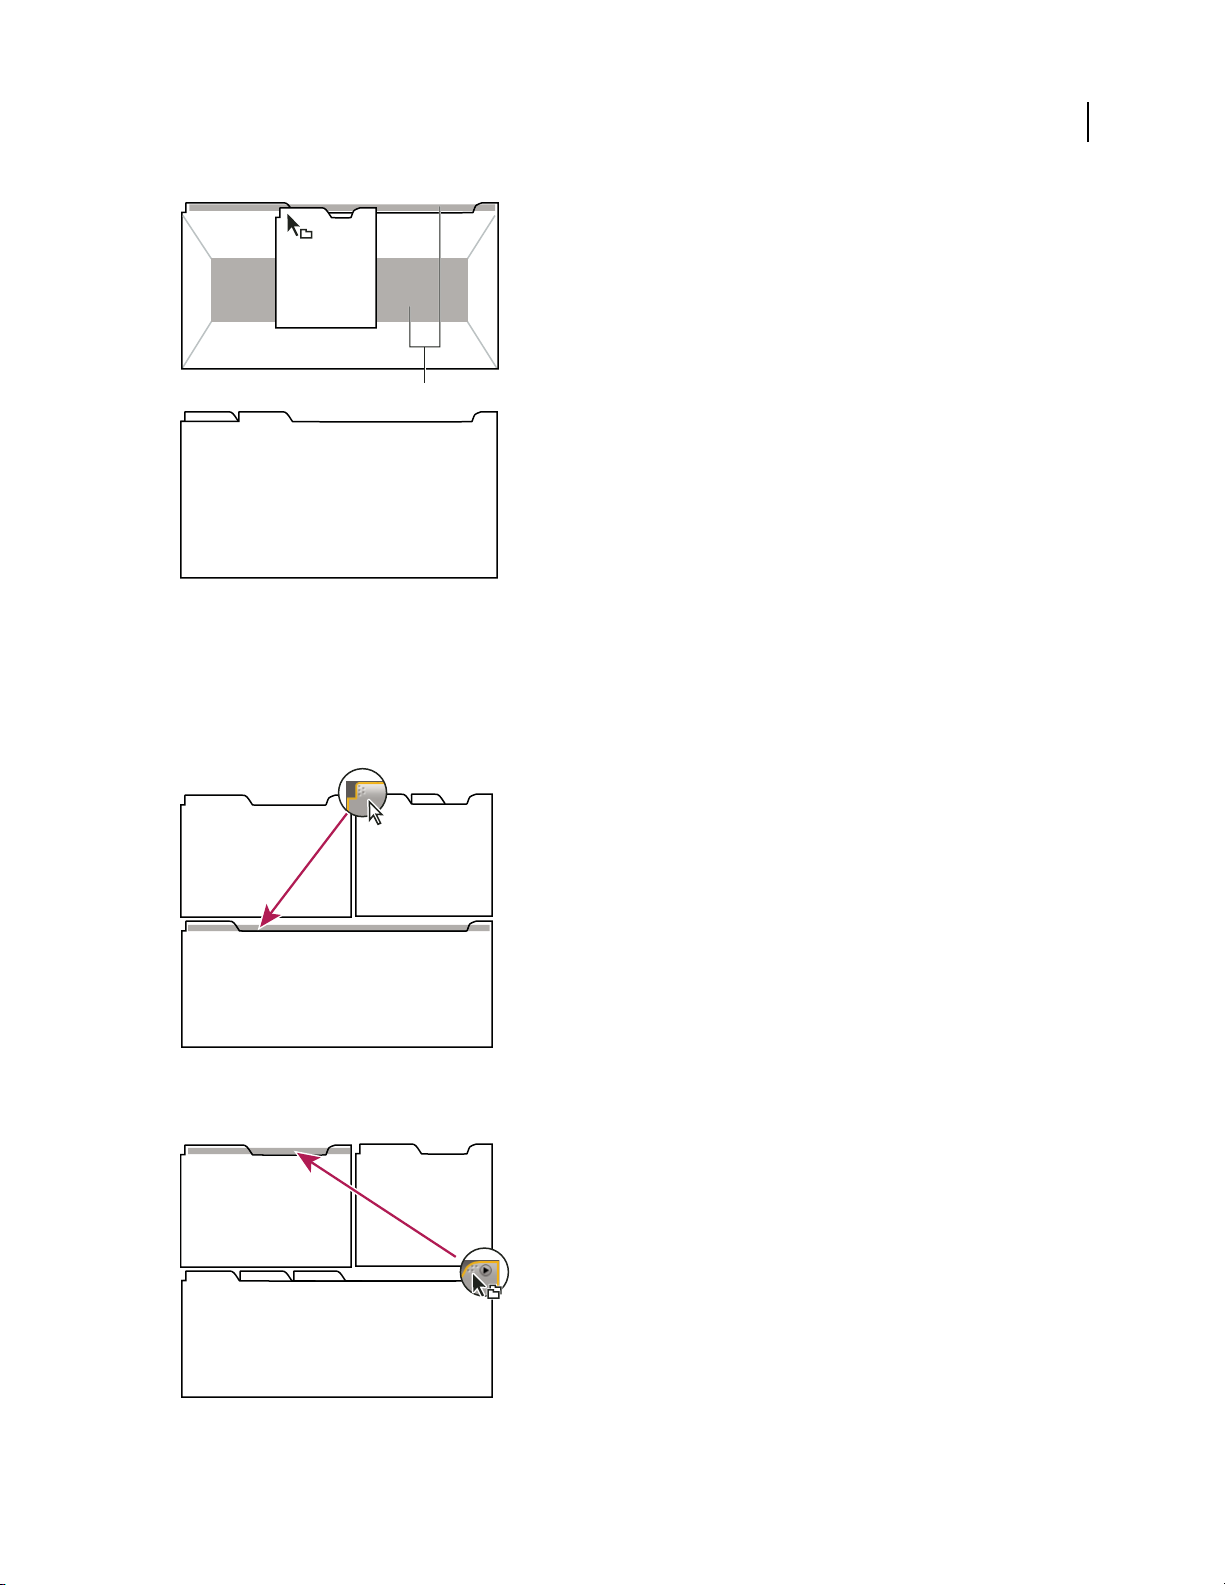
Dock, group, or float panels
You can dock panels together, move panels into or out of a group, and undock a panel so that it floats in a new
window above the application window. As you drag a panel, drop zones—areas onto which you can move the
panel— become highlighted. The drop zone you choose determines where the panel is inserted, and whether it
docks or groups with other panels.
Docking zones
Docking zones exist along the edges of a panel, group, or window. Docking a panel places it adjacent to the existing
group, resizing all groups to accommodate the new panel.
14
A
B
C
Dragging panel (A) onto docking zone (B) to dock it (C)
Grouping zones
Grouping zones exist in the middle of a panel or group, and along the tab area of panels. Grouping a panel stacks it
with other panels.
Page 21
ADOBE PREMIERE PRO CS3
April 1, 2008
A
B
C
Dragging panel (A) onto grouping zone (B) to group it with existing panels (C)
User Guide
Dock or group panels
1
If the panel you want to dock or group is not visible, choose it from the Window menu.
2 Do one of the following:
• To move an individual panel, drag the gripper area in the upper-left corner of a panel’s tab onto the desired drop zone.
15
Drag panel gripper to move one panel
• To move an entire group, drag the group gripper at the upper-right corner onto the desired drop zone.
Drag group gripper to move entire group
Page 22

ADOBE PREMIERE PRO CS3
April 1, 2008
User Guide
The application docks or groups the panel, according to the type of drop zone.
Undock a panel in a floating window
When you undock a panel in a floating window, you can add panels to the window or otherwise modify it, as you
do the application window. You can use floating windows to make use of a secondary monitor, or to create a
workspace like those in earlier versions of Adobe applications.
❖ Select the panel you want to undock (if it’s not visible, choose it from the Window menu), and then do one of the
following:
• Choose Undock Panel or Undock Frame from the panel menu. Undock Frame undocks the panel group.
• Hold down Ctrl (Windows®) or Command (Mac OS®), and drag the panel or group from its current location.
When you release the mouse button, the panel or group appears in a new floating window.
• Drag the panel or group outside the application window. (If the application window is maximized, drag the panel
to the Windows task bar.)
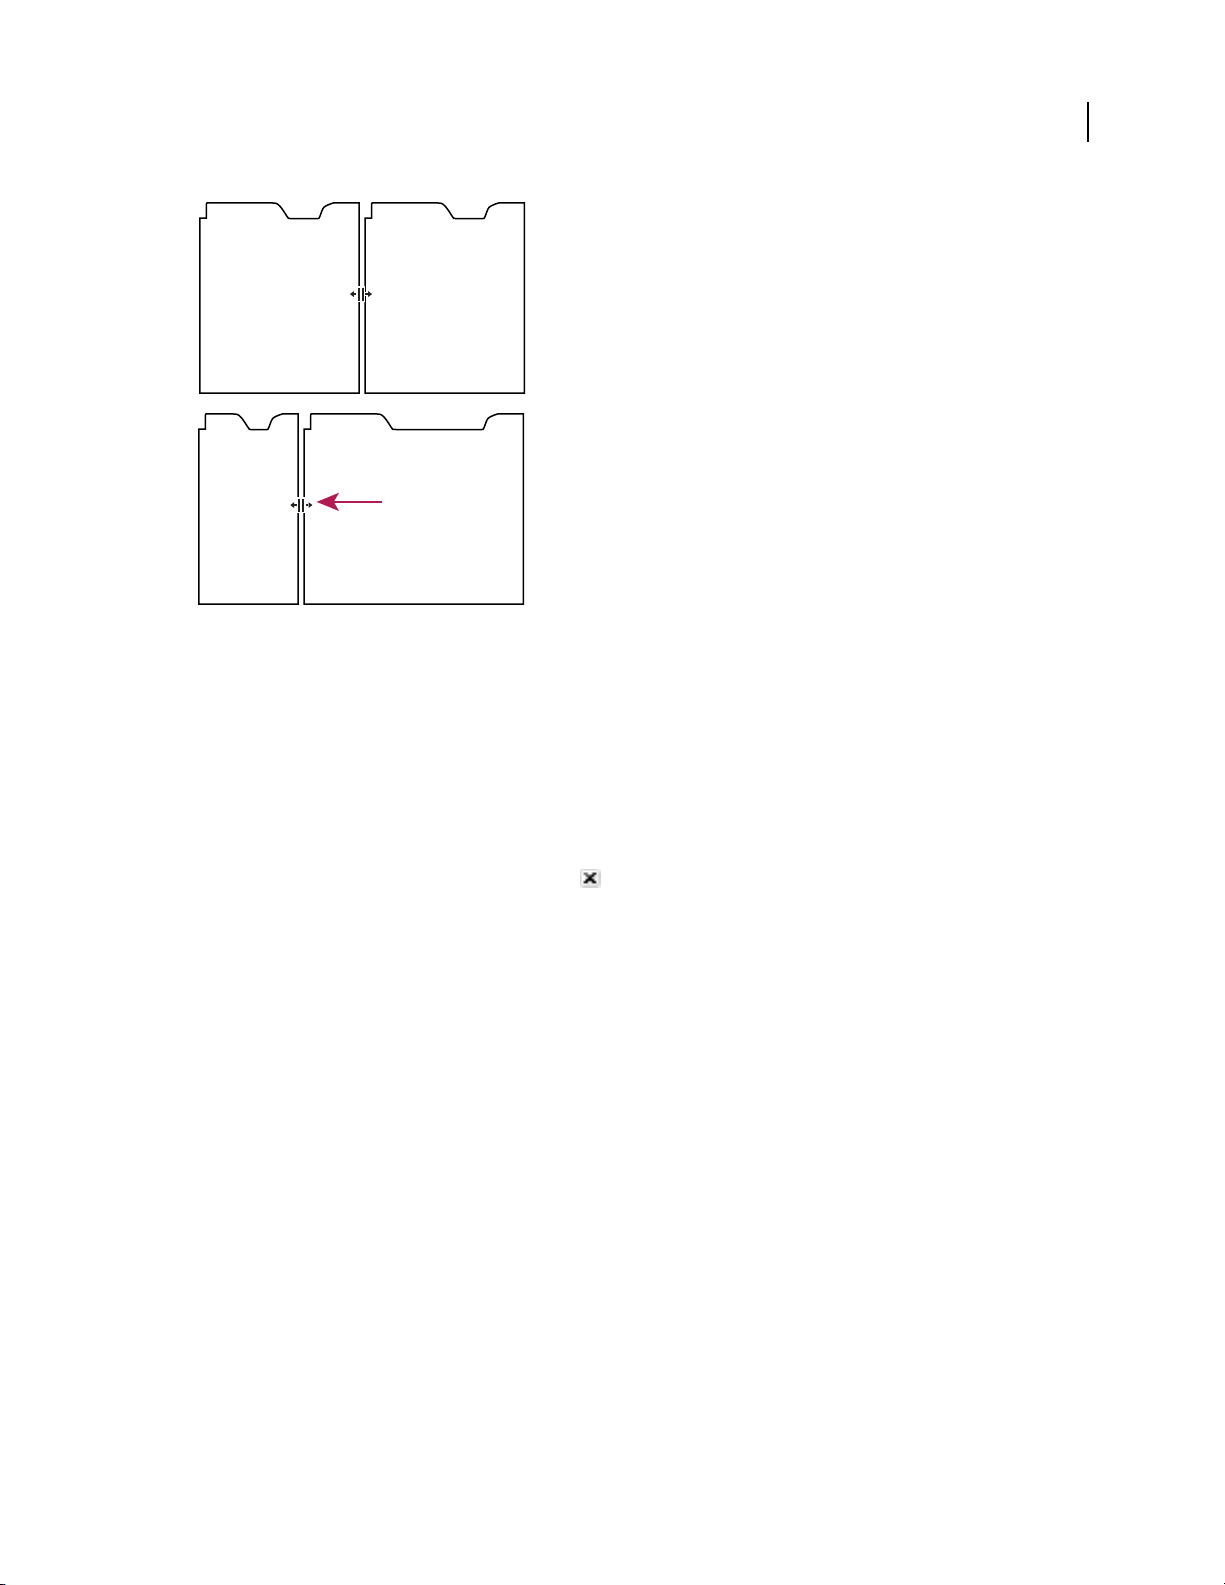
Resize panel groups
When you position the pointer over dividers between panel groups, resize icons appear. When you drag these icons,
all groups that share the divider are resized. For example, suppose your workspace contains three panel groups
stacked vertically. If you drag the divider between the bottom two groups, they are resized, but the topmost group
doesn’t change.
16
To quickly maximize a panel beneath the pointer, press the tilde (~) key. (Do not press Shift.) Press the tilde key
again to return the panel to its original size.
1 Do either of the following:
• To resize either horizontally or vertically, position the pointer between two panel groups. The pointer becomes a
double-arrow .
• To resize in both directions at once, position the pointer at the intersection between three or more panel groups.
The pointer becomes a four-way arrow .
2 Hold down the mouse button, and drag to resize the panel groups.
Page 23
A
April 1, 2008
B
Dragging divider between panel groups to resize them horizontally
A. Original group with resize icon B. Resized groups
ADOBE PREMIERE PRO CS3
User Guide
17
Open and close panels and windows
Even if a panel is open, it may be out of sight, beneath other panels. Choosing a panel from the Window menu opens
it and brings it to the front.
When you close a panel group in the application window, the other groups resize to make use of the newly available
space. When you close a floating window, the panels within it close, too.
• To open or close a panel, choose the panel from the Window menu.
• To close a panel or window, click its Close button .
Display any panel full-screen
You can expand any panel to display it in full-screen mode, and toggle back to normal view.
1 Select the panel you want to view full-screen.
2 Press the tilde key (~).
Press the tilde key again to toggle back to normal view.
Working with multiple monitors
To increase the available screen space, use multiple monitors. When you work with multiple monitors, the application window appears on the main monitor, and you place floating windows on the second monitor. Monitor
configurations are stored in the workspace.
See also
“Dock, group, or float panels” on page 14
Page 24

ADOBE PREMIERE PRO CS3
April 1, 2008
User Guide
Save a custom workspace
As you customize a workspace, the application tracks your changes, storing the most recent layout. To store a
specific layout more permanently, save a custom workspace. Saved custom workspaces appear in the Workspace
menu, where you can return to and reset them.
❖ Arrange the frames and panels as desired, then choose Window > Workspace > New Workspace. Type a name
for the workspace, and click OK.
Note: If a project saved with a custom workspace is opened on another system, the application looks for a workspace
with a matching name. If it can’t find a match (or the monitor configuration doesn’t match), it uses the current local
workspace.
Reset a workspace
Reset a workspace to return to its original, saved layout of panels.
❖ With the workspace you want to reset active, choose Window > Workspace > Reset workspace
name.
Delete a workspace
1 Choose Window > Workspace > Delete Workspace.
2 Choose the workspace you want to delete, and then click OK.
18
Note: You cannot delete the currently active workspace.
Brighten or darken the interface
You may prefer to lower the brightness when working in a darkened editing suite or when making color corrections.
Changing the brightness affects panels, windows, and dialog boxes but doesn’t affect scroll bars, title bars, and
menus that aren’t inside panels. In addition, the change doesn’t affect the application background on Windows.
1 Choose Edit > Preferences > User Interface (Windows) or Premiere Pro > Preferences > User Interface (Mac OS).
2 Drag the User Interface Brightness slider to the left or right. Click Default Brightness to restore the default
brightness level.
Tools, clip details, and menus
Tools
The Tools panel contains a number of tools for editing sequences in a Timeline panel. When you select a tool, the
pointer changes shape according to the selection. For example, when you select the Razor tool and position the
pointer over a clip in a Timeline panel, the icon changes to a razor . However, the Selection tool icon may
change to reflect the task currently being performed. In some cases, pressing a modifier key (such as Shift) as you
use a tool changes its function, and its icon changes accordingly. Select tools from the Tools panel, or use a keyboard
shortcut. You can resize the Tools panel and orient it vertically or horizontally.
Note: The Selection tool is the default tool. It’s used for everything other than specialized functions. If the program isn’t
responding as you expect, make sure that the Selection tool is selected.
Page 25

ADOBE PREMIERE PRO CS3
April 1, 2008
User Guide
A B C D E F G H I J K
Toolbox
A. Selection tool B. Track Selection tool C. Ripple Edit tool D. Rolling Edit tool E. Rate Stretch tool F. Razor tool G. Slip tool H. Slide
tool I. Pen tool J. Hand tool K. Zoom tool
Select any tool to activate it for use in a Timeline panel by clicking it or pressing its keyboard shortcut. Let the cursor
hover over a tool to see its name and keyboard shortcut.
Selection Tool The standard tool for selecting clips, menu items, and other objects in the user interface. It’s
generally a good practice to select the Selection Tool as soon as you are done using any of the other, more
specialized, tools.
Track Selection Tool Select this tool to select all the clips to the right of the cursor in a sequence. To select a clip and
all clips to the right in its own track click the clip. To select a clip and all clips to its right in all tracks, Shift-click the
clip. Pressing Shift changes the Track Selection Tool into the Multi-track Selection Tool.
Ripple Edit Tool Select this tool to trim the In or Out point of a clip in a Timeline. The Ripple Edit Tool closes gaps
caused by the edit and cascades clips to the right or left in the Timeline in order to preserve all edits to the left or
right of the trimmed clip.
19
Rolling Edit Tool Select this tool to roll the edit point between two clips in a Timeline, simultaneously trimming the
In point of one and the Out point of the other, while leaving the combined duration of the two unchanged.
Rate Stretch Tool Select this tool to shorten a clip in a Timeline by speeding up its playback, or to lengthen it by
slowing it down. The Rate Stretch Tool changes speed and duration, but leaves the In and Out points of the clip
unchanged.
Razor Tool Select this tool to make one or more incisions in clips in a Timeline. Click a point in a clip to split it at
that precise location. To split clips in all tracks at that location, Shift-click the spot in any of the clips.
Slip Tool Select this tool to simultaneously change the In and Out points of a clip in a Timeline, while keeping the
timespan between then constant. For example, if a 10-second clip has been trimmed to five seconds in a sequence,
you can can use the slip tool to show an earlier part of the clip, while retaining its five-second duration and its
location in the Timeline.
Slide Tool Select this tool to move a clip to the left or right in a Timeline while simultaneously trimming the two
clips that surround it. The combined duration of the three clips, and the location of the group in the Timeline,
remain unchanged.
Pen Tool Select this tool to set or select keyframes, or to adjust connector lines in a Timeline. Click and drag a
connector line vertically to adjust it. Ctrl-click (Windows) or Command-click (Mac OS) on a connector line to set
a keyframe. Shift-click non-contiguous keyframes to select them. Drag a marquee over contiguous keyframes to
select them.
Hand Tool Select this tool to move the viewing area of a Timeline to the right of left. Click and drag left or right
anywhere in the viewing area.
Zoom Tool Select this tool to zoom in or out in a Timeline viewing area. Click in the viewing area to zoom in by one
increment. Alt-click (Windows) or Option-click (Mac OS) to zoom out by one increment.
Page 26

ADOBE PREMIERE PRO CS3
April 1, 2008
User Guide
Clip details in the Info panel
The Info panel displays information about a selected item. For clips, the Info panel displays duration, In point, Out
point, and more. The information displayed may vary depending on the media type, the current window, and so on.
For example, the Info panel displays information unique to an empty space in the Timeline panel, a rectangle in the
Titler, and a clip in the Project panel display.
In the Info panel, the Video line indicates frame rate, dimensions, and pixel aspect ratio, in that order. The Audio
line indicates sample rate, bit depth, and channels, in that order.
Display context and panel menus
In addition to choosing from the menus at the top of your screen, you can choose from context menus, which display
commands relative to the active tool or selected item. Panel menus display commands relative to the active panel.
• To display panel menus, click the triangle in the upper right corner of the panel.
• To display context menus, right-click a panel.
20
Page 27

Chapter 3: Projects
April 1, 2008
A project stores information about sequences and assets, such as settings for capture, transitions, and audio mixing.
Also, the project file contains the data from all of your editing decisions, such as the In and Out points for trimmed
clips and the parameters for each special effect. Adobe Premiere Pro CS3 creates a folder on your hard disk at the
start of each new project. By default, this is where it stores the files it captures, the preview and conformed audio
files it creates, and the project file itself.
Project basics
About projects
For every project you create, Adobe Premiere Pro creates a project file. This file contains the settings you select for
the project, as well as crucial data about the assets, edit decisions, and effects used in the project.
Adobe Premiere Pro doesn’t store video, audio, or still image files in the project file—it stores only a reference to
each of these files based on its filename and location at the time you imported it. If you later move, rename, or delete
a source file, Adobe Premiere Pro can’t find it automatically the next time you open the project. In this case, Adobe
Premiere Pro displays the Where Is The File dialog box.
21
Every project includes a Project panel. This acts as a storage area for all files used in the project. You can organize a
project’s media and sequences using bins in the Project panel.
A project may contain multiple sequences. Within a single project, you can edit individual segments as separate
sequences, and then combine the segments into a finished program by nesting them into a longer sequence.
Similarly, you can store multiple variations of a sequence in the same project.
Note: There’s no need to save copies of a project when creating different segments or versions of the same video
program. Simply create new or duplicate sequences within a single project file.
See also
“Adjust project settings and presets” on page 23
A digital video primer
Create a project
In most cases, you can start a project simply by using one of the presets provided in the New Project dialog box. The
presets included with Adobe Premiere Pro include common project types. Preserve editing quality by using a preset
that conforms to the specifications of your original assets. For example, if your project uses footage mostly in DV
format, use a DV preset. If you need to specify lower quality settings for output (such as streaming web video), don’t
change your project settings—instead, change your export settings later.
If your computer has a capture card compatible with Adobe Premiere Pro, its own optimized presets may appear in
the Available Presets list.
Page 28

ADOBE PREMIERE PRO CS3
April 1, 2008
User Guide
The project settings must be correct when you create the project file. Once a project is created, some project settings,
such as the timebase settings, are locked. This prevents unwanted inconsistencies that could result from changing
project settings later.
1 Either choose New Project on the Welcome screen that appears when Adobe Premiere Pro starts up or, after the
application is open, choose File > New > Project.
2 Do one of the following:
• To apply a preset, select it from the Available Presets list.
• To customize settings, choose the preset that most closely matches your source footage, click Custom Settings,
and then select your specific project settings. For Location, specify where you want to store the project on disk.
3 Type the name of the project, and then click OK.
Note: Whenever possible, specify a location and name that you won’t have to change later. By default, Adobe Premiere
Pro stores rendered previews, conformed audio files, and captured audio and video in the folder where you store the
project. Moving a project file later may require moving its associated files as well.
Open a project
Adobe Premiere Pro for Windows can open project files created with earlier versions of Adobe Premiere Pro or
Adobe Premiere 6.x. You can open only one project at a time. To transfer the contents of one project into another,
use the Import command.
22
Use the Auto Save command to automatically save copies of your projects in the Adobe Premiere Pro Auto-Save
folder.
You may encounter missing files as you work on a project. You can continue working by substituting offline files as
placeholders for the missing files. You can edit using offline files, but you must bring the originals back online before
rendering your movie.
To bring a file back online after the project is open, use the Link Media command. You can continue working
without having to close and reopen the project.
1 Choose File > Open Project.
2 Browse to the project file and select it.
3 Select Open.
4 If the Where Is The File dialog box opens, locate the file using the Look In field, or choose one of the following
in the Where Is The File dialog box:
Find Launches the Windows Explorer (Windows) or Finder (Mac OS) search feature.
Skip Replaces a missing file with a temporary offline file for the duration of a session. When you close your project
and then reopen it, you see a dialog box that asks you to locate the file or allows you to skip it again.
Skip All Like Skip, Skip All replaces all missing files with temporary offline files.
Important: Select Skip or Skip All only when you are certain that you want to rework all the instances where the file
is used in the project. If you want to keep the file in the project but can’t locate it at the moment, use Offline instead.
Skip Previews Stops Adobe Premiere Pro from searching for any preview files already rendered for the project. This
allows the project to load faster, but you may need to render parts of its sequences for best playback performance.
Page 29

ADOBE PREMIERE PRO CS3
April 1, 2008
User Guide
Offline Replaces a missing file with an offline file, a placeholder that preserves all references to the missing file
everywhere in the project. Unlike the temporary offline file created by Skip, the one generated by Offline persists
between sessions, so you won’t have to locate missing files every time the project is opened.
Offline All Like Offline, Offline All replaces all missing files with persistent offline files.
Note: Do not delete source files while you are using them as clips in an Adobe Premiere Pro project unless they were
captured using device control and you plan to recapture them. After you deliver the final movie, you can delete source
files.
Adjust project settings and presets
All project settings apply to the whole project, and most can’t be changed after a project is created.
Project settings presets are groups of project settings. Adobe Premiere Pro comes with several categories of project
settings presets installed: DV-24P, DV-NTSC (North American standard), DV-PAL (European standard),
Panasonic P2 DVCPRO50, Panasonic P2 DVCPROHD, HDV, and Mobile & Devices. These contain the correct
project settings for the most typical project types. The Panasonic P2 DVCPRO50 and Panasonic P2 DVCPROHD
categories of project settings presets are for editing DVCPRO material recorded to MXF files using a Panasonic P2
video camera. For DV25 material recorded in Panasonic P2 format, use a preset for DV-NTSC or DV-PAL,
depending on the television standard of the footage.
23
When creating a new project, you can either select from among the standard project settings presets or customize a
group of project settings and save the customized group as a custom project settings preset. If you want full control
over almost all the project’s parameters, you must start a new project and customize its project settings presets.
After you begin working in a project, you can review project settings, but you can change only a few of them. Choose
Project > Project Settings to view the settings you can change.
Project settings are organized into the following categories:
General Controls the fundamental characteristics of the project, including the file format Adobe Premiere Pro uses
for its preview files and playback (Editing Mode), count time (Display Format), and play back video (Timebase).
Capture Controls how Adobe Premiere Pro transfers video and audio directly from a deck or camera. (None of the
other project settings options affect capturing.) The contents of this panel depend on the editing mode. If you’re
capturing DV footage, you don’t need to change capture settings. When DV/IEEE 1394 Capture is the selected
capture format, no options are available because the options are automatically set to the IEEE 1394 standard.
Additional capture formats and options may appear if you install other software, such as software included with a
capture card certified to be compatible with Adobe Premiere Pro.
Note: For P2 DVCPRO 50 and P2 DVCPRO HD projects, the Capture Format setting is not relevant, because the assets
are captured and recorded directly to the P2 card as digital files by the camera.
Video Rendering Sets the file format, compressor, color depth, and bit depth Adobe Premiere Pro uses for its
preview files and playback.
Default Sequence Controls the number of video tracks and the number and type of audio tracks for new sequences
you create.
Note: If you must change project settings that are unavailable, you can create a new project with the settings you want
and import the current project into it. However, if you import the current project into a project with a different frame
rate or audio sampling rate, check video and audio edits carefully. Although edit positions made under the old settings
are preserved, they may not synchronize precisely with the new settings. Edits or changes you make after importing are
synchronized with the new settings.
Page 30

ADOBE PREMIERE PRO CS3
April 1, 2008
User Guide
See also
“Preview on a television monitor” on page 143
Create a custom preset
To customize most project settings, you must start a new project, select an existing preset, and change its settings.
1 Click New Project or choose File > New > Project.
2 In the Load Preset panel, select the preset that most closely matches your video footage or the needs of your
capture card.
3 In the Custom Settings panel, modify the General, Capture, Video Rendering, and Default Sequence settings to
match the needs of your project.
4 To save your custom settings as a preset that you can use for future projects, click Save Preset.
A dialog box asks you to name and describe the custom preset. Here you can choose whether to save the device
control settings as part of the preset.
5 Specify where to save the project on disk, give it a name, and then click OK.
General settings
Choose General settings that conform to the specifications of the main type of output intended for your project (for
example, if your target output is DV NTSC, use the DV NTSC editing mode). Changing these settings arbitrarily
may result in a loss of quality.
24
Editing Mode Specifies which video format is used for preview files and playback, which timebases are made
available, which compression methods appear in the Video Settings panel, and which display formats are available.
Choose an Editing Mode option that best matches the specifications of your target format, preview display, or
capture card. The Desktop editing mode allows you to customize all of the other project settings. The editing mode
does not determine the format of your final movie. You specify output settings when you export.
Timebase Specifies the time divisions Adobe Premiere Pro uses to calculate the time position of each edit. In
general, choose 24 for editing motion-picture film, 25 for editing PAL (European standard) and SECAM video, and
29.97 for editing NTSC (North American standard) video. Do not confuse timebase with the frame rate of the video
you play back or export from sequences, although timebase and frame rate are often set to the same value. The
options listed for Timebase vary according to the editing mode you selected.
Playback Settings Displays playback options for most of the editing modes. Select this option to display a dialog
box of Realtime Playback, Export, 24P Conversion Method, and Desktop Display Mode options. You can also
choose whether to disable video output when Adobe Premiere Pro is in the background, and whether to enable
aspect ratio correction on external devices.
Frame Size Specifies the dimensions, in pixels, for frames when you play back sequences. In most cases, the frame
size for your project should match the frame size of your source files. Don’t change the frame size to compensate for
slow playback—instead, adjust playback resolution by choosing a different quality setting from the Project panel
menu, or adjust the frame size of final output by changing export settings.
Pixel Aspect Ratio Sets the aspect ratio for individual pixels. Choose Square Pixels for analog video, scanned images,
and computer-generated graphics, or choose the format used by your source. If you use a pixel aspect ratio that is
different from that of your video, the video may play back and render with distortion.
Fields Specifies the field order, or which field of each frame’s interlaced fields is drawn first. If you work with
progressive-scan video, select No Fields (Progressive Scan). Note that many capture cards capture fields regardless
Page 31

ADOBE PREMIERE PRO CS3
April 1, 2008
User Guide
of whether you shot progressive scan footage. (See “Interlaced video, noninterlaced video, and progressive
scanning” on page 125)
Display Format (Video) Adobe Premiere Pro can display any of several formats of timecode. You may want to see
the project’s timecode in a film format, for example, if you are editing footage captured from film; or in simple frame
numbers if your assets were imported from an animation program. Changing the Display Format option does not
alter the frame rate of clips or sequences—it changes only how their timecodes are displayed. The time display
options correspond to standards for editing video and motion-picture film. For Frames and Feet + Frames
timecodes, you can change the starting frame number to match the time-counting method of another editing system
you may be using.
The options made visible in the Display Format field depend on the Editing Mode selected. You can choose from
the following Display Format options, depending on which editing mode is selected:
• 30 fps Drop-Frame Timecode Reports time in hours, minutes, seconds, and frames, separating units with
semicolons. Drop-frame timecode assumes a rate of 30 frames per second (fps), but skips some numbers by design:
To accommodate the NTSC actual frame rate of 29.97 fps drop-frame timecode skips, or drops, two frame numbers
(not the actual frames of video) each minute except every tenth minute. Use for output to NTSC videotape.
30 fps drop-frame timecode as indicated by semicolons
25
• 30 fps Non Drop-Frame Timecode Reports time in hours, minutes, seconds, and frames, separating units with
colons. It assumes a rate of 30 fps and does not drop frame numbers. Use for output to computer displays via the
web or CD-ROM.
30 fps non drop-frame timecode as indicated by colons
• 24 fps Timecode Reports time in hours, minutes, seconds, and frames; separating units with colons. Use for 24p
footage and to output to 24-fps formats for film and DVD distribution.
24 fps timecode showing “23” as highest possible number of frames before next second
• 25 fps Timecode Reports time in hours, minutes, seconds, and frames, separating units with colons. Use for
output to PAL videotape.
25 fps timecode showing “24” as highest possible number of frames before next second
• Feet + Frames 16mm Reports time in feet and frames, assuming the frame rate of 16mm film: 40 frames per foot.
Use for output to 16mm film.
Feet + frames 16mm timecode showing “39” as highest possible number of frames before next foot
Page 32

ADOBE PREMIERE PRO CS3
April 1, 2008
User Guide
• Feet + Frames 35mm Reports time in feet and frames, assuming the frame rate of 35mm film: 16 frames per foot.
Use for output to 35mm film.
Feet + frames 35mm timecode showing “15” as highest possible number of frames before next foot
• Frames Reports time solely in a running count of frames. Does not assign measurements of either time or spatial
length. Use to output sequential stills such as those generated for an animation or DPX film editor.
Frames timecode simply numbers each frame in sequential order.
Note: When working with NTSC video assets, you should usually use 30 fps drop-frame timecode. This format
conforms with the timecode base inherent in NTSC video footage and displays its duration most accurately.
Title Safe Area Specifies how much of the frame edge to mark as a safe zone for titles, so that titles aren’t cut off by
television set overscan. A rectangle with cross hairs marks the title-safe zone when you click the Safe Margins button
in the Source Monitor or Program Monitor. Titles are usually assumed to require a wider safe zone than action.
Action Safe Area Specifies how much of the frame edge to mark as a safe zone for action so that action isn’t cut off
by television set overscan. A rectangle marks the action-safe zone when you click the Safe Margins button in the
Source Monitor or Program Monitor.
26
Sample Rate In general, higher rates provide better audio quality when you play back audio in sequences, but they
require more disk space and processing. Resampling, or setting a different rate from the original audio, also requires
additional processing time and affects the quality. Try to record audio at a high-quality sample rate, and capture
audio at the rate at which it was recorded.
Display Format Specifies whether audio time display is measured using audio samples or milliseconds. Display
Format applies when Show Audio Time Units is selected in the Source Monitor or Program Monitor menu. (By
default, time is displayed in frames, but it can be displayed in audio units for sample-level precision when you are
editing audio.)
Note: DV video and audio use standardized settings that are specified automatically when you select DV Playback
editing mode. When you use DV Playback editing mode, avoid changing the Timebase, Frame Size, Pixel Aspect Ratio,
Fields, and Sample Rate settings.
Video Rendering settings
Video Rendering settings determine the file format, compressor, and color depth Adobe Premiere Pro uses for
preview files and playback of clips and sequences.
Maximum Bit Depth Maximizes the color bit depth, up to 32 bpc, to include in video played back in sequences. This
setting may not be available if the selected compressor provides only one option for bit depth. You can also specify
an 8-bit (256-color) palette when preparing a video program for 8 bpc color playback, such as when using the
Desktop editing mode for the web or for some presentation software. If your project will contain high-bit-depth
assets generated by programs such as Adobe Photoshop, or high-definition camcorders, select Maximum Bit Depth
to make Adobe Premiere Pro make use of all the color information in those assets when processing effects or generating preview files.
Previews These options determine the file format, compressor, and color depth Adobe Premiere Pro uses for
preview files and playback. Select a combination that gives the best quality previews while keeping rendering time
and file size within tolerances acceptable for your system. For certain editing modes, these settings cannot be
Page 33

ADOBE PREMIERE PRO CS3
April 1, 2008
User Guide
changed. The Uncompressed 10-bit (4:2:2 YUV) and Uncompressed 8-bit (4:2:2 YUV) file formats match the specifications for SD-SDI and HD_SDI video respectively. Select one of them if you intend to monitor or output to one
of these formats.
Note: If you use a clip in your video program without applying effects or changing frame or time characteristics, Adobe
Premiere Pro uses the clip’s original codec for playback. If you make changes that require recalculation of each frame,
Adobe Premiere Pro applies the codec that you choose here.
Optimize Stills Uses still images efficiently in sequences. For example, if a still image has a duration of 2 seconds in
a project set to 30 fps, Adobe Premiere Pro creates one 2-second frame instead of 60 frames at 1/30 of a second each.
Deselect this option if sequences exhibit playback problems when displaying still images.
Save and name your project settings even if you plan to use them in only one project. Saving settings creates a
backup copy of the settings in case someone accidentally alters the current project settings.
Change the Auto Save settings
By default Adobe Premiere Pro automatically saves your project every 20 minutes and retains the last five versions
of the project file on the hard disk. You can revert to a previously saved version at any time. Archiving many iterations of a project consumes relatively little disk space because project files are much smaller than source video files.
It’s usually best to save project files to the same drive as your application. Archived files are saved in the Adobe
Premiere Pro Auto-Save folder.
27
1 Choose Edit > Preferences > Auto Save (Windows) or Premiere Pro > Preferences > Auto Save (Mac OS).
2 Do any of the following, and then click OK:
• Select Automatically Save Projects, and type the number of minutes between saves.
• For Maximum Project Versions, enter the number of versions of a project file you want to save. For example, if
you type 10, Adobe Premiere Pro saves the ten most recent versions.
Create a project with uncompressed video playback (Windows only)
For the highest quality previews of sequences on an SDI card or device connected to an external monitor, you should
use one of the uncompressed formats for preview files. Uncompressed 8-bit (4:2:2 YUV) is particularly suitable for
projects meant for SD output, while Uncompressed 10-bit (4:2:2 YUV) is best for projects meant for HD.
Additionally, with Uncompressed 10-bit (4:2:2 YUV) and high bit-depth color rendering Adobe Premiere Pro will
make use of the color information in 10-bit assets and will upsample other assets in a sequence to generate 10-bit
preview files. Adobe Premiere Pro delivers the best preview performance when using these preview file formats on
a system with a supported SD-SDI or HD-SDI card installed.
Both these uncompressed formats do subsample video files at 4:2:2 YUV, but unlike the other file formats available
for preview files, they do not then run the video data through a compressor. They are called uncompressed because
they do not add this second layer of compression, and thereby retain much higher color depth in the previews than
the compressed formats. As a consequence, uncompressed preview files can be quite a bit larger than compressed
preview files.
1 Select File > New > Project.
2 In the New Project dialog box, click the Custom Settings tab.
3 Select General.
4 From the Editing Mode drop-down menu, choose Desktop.
5 Select Video Rendering.
Page 34

ADOBE PREMIERE PRO CS3
April 1, 2008
User Guide
6 From the File Format drop-down menu, select Uncompressed 10-Bit (4:2:2 YUV), or Uncompressed 8-Bit (4:2:2
YUV).
7 Enter a name for the project and click OK.
Change your preferences
You can customize the look and behavior of Adobe Premiere Pro in many ways, from determining the default length
of transitions to setting the brightness of the user interface. These preferences will remain in effect until you change
them.
❖ Choose Edit > Preferences (Windows) or Premiere Pro > Preferences (Mac OS), and select the category of prefer-
ences you wish to change.
See also
“Play a sequence with preroll and postroll” on page 143
“Work with default transitions” on page 175
“Import still images” on page 78
“Scroll the Timeline panel during preview” on page 143
28
“Change bin behaviors” on page 88
“Optimize rendering for available memory” on page 52
Aspect ratios
About aspect ratios
An aspect ratio specifies the ratio of width to height. Video and still picture frames have a frame aspect ratio, and
the pixels that make up the frame have a pixel aspect ratio. Some cameras can record various frame aspect ratios,
and different video standards use different pixel aspect ratios.
You set the frame and pixel aspect ratios for an Adobe Premiere Pro project when you create it. Once they are set,
you cannot change them for that project. You can, however, use assets created with different aspect ratios in that
project.
Adobe Premiere Pro automatically tries to compensate for the pixel aspect ratio of source files. If an asset still
appears distorted, you can manually specify its pixel aspect ratio. It's important to reconcile pixel aspect ratios before
reconciling frame aspect ratios, because an incorrect frame size can be due to a misinterpreted pixel aspect ratio.
Frame aspect ratio
Frame aspect ratio describes the ratio of width to height in the dimensions of an image. For example, DV NTSC has
a frame aspect ratio of 4:3 (or 4.0 width by 3.0 height) and a typical widescreen frame has a frame aspect ratio of
16:9. Many cameras that have a widescreen mode can record using the 16:9 aspect ratio. Many films have been shot
using even wider aspect ratios.
Page 35

416
April 1, 2008
ADOBE PREMIERE PRO CS3
User Guide
29
3
A 4:3 frame aspect ratio (left), and wider 16:9 frame aspect ratio (right)
9
When you import clips shot in one frame aspect ratio into a project that uses another frame aspect ratio, you must
decide how to reconcile the different values. For example, there are two common techniques for showing a
widescreen movie with a 16:9 frame aspect ratio on a standard television with a 4:3 frame aspect ratio. You can fit
the entire width of the 16:9 frame in a black 4:3 frame (called letterboxing), which results in black bands above and
below the widescreen frame. Or you can fill the 4:3 frame vertically with the entire height of the 16:9 frame, varying
the horizontal position of the 16:9 frame behind the narrower 4:3 frame so that important action is visible in the 4:3
frame (called pan & scan). In Adobe Premiere Pro, you can implement either technique by using Motion effect
properties such as Position and Scale.
AB
CD
NTSC displays
A. 16:9 NTSC footage B. DVD player display using original widescreen format on widescreen TV screen C. 16:9 image on a 4:3 TV screen
cropped using automatic pan and scan D. 16:9 image on a 4:3 TV screen using automatic letterboxing to reduce overall frame size and
display entire image
Page 36

ADOBE PREMIERE PRO CS3
April 1, 2008
User Guide
Pixel aspect ratio
Pixel aspect ratio describes the ratio of width to height of a single pixel in a frame. Pixel aspect ratios vary because
different video systems make various assumptions about the number of pixels required to fill a frame. For example,
many computer video standards define a 4:3 aspect ratio frame as 640 pixels wide by 480 pixels high, which results
in square pixels. Video standards such as DV NTSC define a 4:3 aspect ratio frame as 720x480 pixels, which results
in narrower, rectangular pixels because there are more pixels within the same frame width. The computer video
pixels in this example have a pixel aspect ratio of 1:1 (square), whereas the DV NTSC pixels have a pixel aspect ratio
of 0.9 (nonsquare). DV pixels, which are always rectangular, are vertically oriented in systems producing NTSC
video and horizontally oriented in systems producing PAL video. Adobe Premiere Pro displays a clip’s pixel aspect
ratio next to the clip’s image thumbnail in the Project panel.
If you display rectangular pixels on a square-pixel monitor without alteration, images appear distorted; for example,
circles distort into ovals. However, when displayed on a broadcast monitor, the images appear correctly proportioned because broadcast monitors use rectangular pixels. Adobe Premiere Pro can display and output clips of
various pixel aspect ratios without distortion because it attempts to automatically reconcile them with the pixel
aspect ratio of your project.
You may occasionally encounter a distorted clip if Adobe Premiere Pro interprets pixel aspect ratio incorrectly. You
can correct the distortion of an individual clip by manually specifying the source clip’s pixel aspect ratio in the
Interpret Footage dialog box. You can correct similar misinterpretations of groups of same-size files by editing the
file Interpretation Rules.txt.
30
AB C
Pixel and frame aspect ratios
A. 4:3 square-pixel image displayed on 4:3 square-pixel (computer) monitor B. 4:3 square-pixel image interpreted correctly for display on
4:3 non-square pixel (TV) monitor C. 4:3 square-pixel image interpreted incorrectly for display on 4:3 non-square pixel (TV) monitor
Common pixel aspect ratios
Pixel aspect ratio When to use
Square pixels 1.0 Footage has a 640 x 480 or 648 x 486 frame size, is 1920 x 1080 HD (not
D1/DV NTSC 0.9 Footage has a 720 x 486 or 720 x 480 frame size, and the desired result
D1/DV NTSC Widescreen
D1/DV PAL 1.0666 Footage has a 720 x 576 frame size, and the desired result is a 4:3 frame
D1/DV PAL Widescreen
1.2 Footage has a 720 x 486 or 720 x 480 frame size, and the desired result
1.422 Footage has a 720 x 576 frame size, and the desired result is a 16:9
HDV or DVCPRO HD), is 1280 x 720 HD or HDV, or was exported from an
application that doesn’t support nonsquare pixels. This setting can also
be appropriate for footage that was transferred from film or for
customized projects.
is a 4:3 frame aspect ratio. This setting can also be appropriate for
footage that was exported from an application that works with
nonsquare pixels, such as a 3D animation application.
is a 16:9 frame aspect ratio.
aspect ratio.
frame aspect ratio.
Page 37

Pixel aspect ratio When to use
April 1, 2008
ADOBE PREMIERE PRO CS3
User Guide
31
Anamorphic 2:1 2.0 Footage was shot using an anamorphic film lens, or it was anamorphic-
HDV 1080/DVCPRO
HD 720 (After Effects),
HD Anamorphic 1080
(Adobe Premiere Pro)
DVCPRO HD 1080
(After Effects only)
1.33 Footage has a 1440 x 1080 or 960 x 720 frame size, and the desired
1.5 Footage has a 1280 x 1080 frame size, and the desired result is a 16:9
ally transferred from a film frame with a 2:1 aspect ratio.
result is a 16:9 frame aspect ratio.
frame aspect ratio.
About square-pixel footage
Many graphics and animation programs generate square-pixel assets meant for display on square-pixel computer
monitors. Adobe Premiere Pro, however, typically generates files with non-square pixels for display on television
sets. Adobe Premiere Pro automatically conforms square-pixel assets to the project’s pixel aspect ratio. After the
asset is conformed, however, it no longer has its original frame aspect ratio. Also, its frame aspect ratio is not likely
to match that of the project, even if it did before it was conformed.
For example, suppose you generate a square-pixel asset at 720x540 and import it into an Adobe Premiere Pro DV
project with an aspect ratio of 720x540. In this case, the asset will be wider than the screen when it is conformed.
You can use the Scale control to set the size of the asset’s frame within the project’s frame. However, to preserve the
asset’s frame aspect ratio, Adobe Premiere Pro often needs either to crop the asset or to frame it within black bars.
You can prevent this kind of cropping and framing by generating assets from your square-pixel graphics or
animation programs in a frame aspect ratio that, when conformed, matches the project’s frame size exactly. For best
results, use programs such as Adobe Photoshop® and Adobe After Effects® that include pixel aspect ratio settings,
and set the frame dimensions and pixel aspect ratio to match those of your project. If the pixel aspect ratio setting
is unavailable in your program, do not try to match the frame dimensions (for example, 720x540). Instead, ensure
that the overall frame aspect ratio matches that of your project (for example, 4:3 or 16:9). Adobe Premiere Pro
automatically adjusts the video so that it is not distorted.
If your square-pixel program requires frame dimensions, use the option that matches your project’s output:
• 4:3 DV (NTSC) or ATSC SD—create and save the square-pixel file at 720x534.
• 4:3 D1 (NTSC)—create and save the square-pixel file at 720x540.
• 4:3 DV or D1 (PAL)—create and save the file at 768x576.
• 16:9 DV (NTSC)—create and save the file at 864x480.
• 16:9 D1 (NTSC)—create and save the file at 864x486.
• 16:9 DV or D1 (PAL)—create and save the file at 1024x576.
• 16:9 1080i HD—create and save the file at 1920x1080.
• 16:9 720p HD—create and save the file at 1280x720.
Using assets with various aspect ratios
Adobe Premiere Pro automatically attempts to preserve the frame aspect ratio of imported assets, sometimes
changing the pixel aspect ratio, the frame dimensions, or both so that the asset does not appear cropped or distorted
when used in a sequence. Assets created in an Adobe Creative Suite application contain metadata that allows Adobe
Premiere Pro to make the calculations automatically and precisely. For assets lacking this metadata, Adobe Premiere
Pro applies a set of rules to interpret pixel aspect ratio.
Page 38

ADOBE PREMIERE PRO CS3
April 1, 2008
User Guide
When you capture or import NTSC footage with the ATSC frame size of 704x480, the D1 frame size of 720x486, or
the DV frame size of 720x480, Adobe Premiere Pro automatically sets the pixel aspect ratio for that asset to D1/DV
NTSC (0.9). When you capture or import footage with the HD frame size of 1440x1080, Adobe Premiere Pro
automatically sets the pixel aspect ratio for that file to HD 1080 Anamorphic (1.33). When you capture or import
PAL footage with the D1 or DV resolution of 720x576, Adobe Premiere Pro automatically sets the pixel aspect ratio
for that file to D1/DV PAL (1.067).
For other frame sizes, Adobe Premiere Pro assumes that the asset was designed with square pixels and changes the
pixel aspect ratio and frame dimensions in a way that preserves the asset’s image aspect ratio. If the imported asset
is distorted, you may need to change the pixel aspect ratio manually.
When you drag an asset into a sequence, Adobe Premiere Pro centers the asset in the program frame by default.
Depending on its frame size, the resulting image may be too small or overcropped for the needs of the project. If so,
you may need to change its scale. You can do this manually or have Adobe Premiere Pro do it automatically
whenever you drag an asset into a sequence.
It is always a good idea to make sure that files are interpreted correctly. You can read an asset’s frame dimensions
and pixel aspect ratio near the preview thumbnail and in the Video Info column of the Project panel. You can also
find this data in the asset’s Properties dialog box, the Interpret Footage dialog box, and the Info panel.
See also
“Add images to titles” on page 228
32
“Clip details in the Info panel” on page 20
Fix aspect ratio distortion
The project settings preset you choose when you create a project sets the frame and pixel aspect ratios for the project.
You can’t change these after you save the project file, but you can change the pixel aspect ratio that Adobe Premiere
Pro assumes for individual assets. For example, if a square-pixel asset generated by a graphics or animation program
looks distorted in Adobe Premiere Pro, you can correct its pixel aspect ratio to make it look right. By ensuring that
all files are interpreted correctly, you can combine footage with different ratios in the same project and generate
output that doesn’t distort the resulting images.
See also
“Import still images” on page 78
Correct individual aspect ratio misinterpretations
1
Select the file in the Project panel.
2 Choose File > Interpret Footage, specify options in the Pixel Aspect Ratio section, and click OK.
Correct recurring aspect ratio misinterpretations
Adobe Premiere Pro automatically assigns pixel aspect ratios to files according to a file of rules. If a specific type of
image is consistently misinterpreted (distorted) when you import it, you can change the relevant rule.
1 Open a text editor, such as Notepad (Windows) or TextEdit (Mac OS).
2 From within the text editor, go to the Adobe Premiere Pro Plug-ins folder.
3 Open the file named Interpretation Rules.txt.
4 Edit the rule that you want to modify, and choose Save.
Page 39

ADOBE PREMIERE PRO CS3
April 1, 2008
User Guide
Special projects
About 24p footage and projects
Footage acquired from a camcorder or by film transfer, at roughly 24 non-interlaced (progressive) fps is called 24p
footage. This footage emulates film in its picture quality and depiction of movement because the 24p frame rate is
very close to that of motion-picture film, and each frame is built from progressive lines (not from interlaced halfframe fields). 24p formats have become popular among low-budget digital filmmakers because they lend a film look
to its subjects.
To create a 24p project in Adobe Premiere Pro, you select one of the 24p project preset that matches the format and
frame aspect ratio of your footage. You can import files and capture footage as usual.
Adobe Premiere Pro includes two alternate 24p pulldown schemes: Repeat Frame and Interlaced Frame. Both
options convert 24p footage so that it plays back at 29.97 fps, but there are subtle visual and performance differences
between them. You can select one of these options in Project Settings when starting a new project, or change it in
an existing project.
You can edit 24p footage in Adobe Premiere Pro. If you edit 24p footage in a project using one of the standard
Adobe Premiere Pro DV-NTSC presets, Adobe Premiere Pro uses a 24p DV pulldown scheme to convert the
footage to 23.976 fps interlaced video for playback to standard NTSC devices. You would use this method, for
example, to export your movie to a standard NTSC format for mastering to tape or broadcasting.
33
If you edit 24p footage in a project based on one of the DV-24p presets, Adobe Premiere Pro, by default, disables
the 24p pulldown scheme, and enables a pull-up scheme for playback to standard NTSC devices. This allows you to
export the movie to a file in a 24p format. You would use this method, for example, if you want to export your movie
to a DVD for playback on DVD players and TV monitors that support 24p formats.
When you are done editing, you can use the Adobe Media Encoder to export the 24p movie from Adobe Premiere
Pro to Adobe Encore CS3. You can open it in Encore, author your DVD, then master and burn the project as a 24p
MPEG-2 stream. The resulting DVD exhibits no interlacing artifacts on 480p-capable (progressive scan-capable)
DVD players and televisions. Alternatively, you can export the Adobe Premiere Pro 24p project into a format, such
as still-image sequences, appropriate for transfer to film.
Note: Adobe Premiere Pro accepts 24p and 24Pa footage only from cameras using these schemes.
About 3:2 and 24Pa pulldown
When you transfer 24-fps film to 29.97-fps video, you use a process called 3:2 pulldown, in which the film frames
are distributed across video fields in a repeating 3:2 pattern. The first frame of film is copied to fields 1 and 2 of the
first frame of video, and also to field 1 of the second video frame. The second frame of film is then spread across the
next two fields of video—field 2 of the second video frame and field 1 of the third frame of video. This 3:2 pattern
is repeated until four frames of film are spread over five frames of video, and then the pattern is repeated.
The 3:2 pulldown process results in whole frames (represented by a W) and split-field frames (represented by an S).
The three whole video frames contain two fields from the same film frame. The remaining two split-field frames
contain a video frame from two different film frames. The two split-field frames are always adjacent to each other.
The phase of 3:2 pulldown refers to the point at which the two split-field frames fall within the first five frames of
the footage. Phase occurs as a result of two conversions that happen during 3:2 pulldown: 24-fps film is redistributed
through 30-fps video, so each of four frames of 24-fps film is spread out over five frames of 30 (29.97)-fps video.
First, the film is slowed down 0.1% to match the speed difference between 29.97 fps and 30 fps. Next, each film frame
is repeated in a special pattern and mated to fields of video.
Page 40

ADOBE PREMIERE PRO CS3
April 1, 2008
User Guide
23 23
A
B
WS S WW
When you apply 3:2 pulldown to footage, one frame of the film (A) is separated into two or three interlaced video fields (B) which are grouped
into video frames containing two fields each.
It’s important to remove 3:2 pulldown from video footage that was originally film, so that effects you add
synchronize perfectly with the original frame rate of film. Removing 3:2 pulldown reduces the frame rate by 1/5:
from 30 to 24 fps or from 29.97 to 23.976 fps. Reducing the frame rate also reduces the number of frames you have
to change.
Adobe Premiere Pro also supports Panasonic DVX100 24p DV camera pulldown, called 24p Advance (24Pa). This
format is used by some cameras to capture 23.976 progressive-scan imagery using standard DV tapes.
34
Create a 24p project
1 Select File > New > Project.
2 In the New Project dialog box, choose the Load Preset tab.
3 From the Available Presets list, choose the 24p preset that matches the format and frame aspect ratio of most of
your footage. 24p presets are located in the DV-24P, DVCPRO50 > 480i, DVCPROHD > 1080i, and
DVCPROHD > 720p folders.
4 Select a location, type a name for your project, and click OK.
Note: If you capture 24p footage, Adobe Premiere Pro recognizes the footage as 24p and treats it accordingly, regardless
of your project settings.
Set 24p playback options
1 Choose Project > Project Settings > General.
2 Click the Playback Settings button.
3 In the 24P Conversion Method pane, select one of the following options:
Repeat Frame (ABBCD) Duplicates frames where necessary to maintain 29.97 fps playback. This option uses fewer
CPU resources.
Interlaced Frame (2:3:3:2) Combines the frames in a telecine-like scheme to maintain 29.97 fps playback. This
option produces smooth playback but uses more CPU resources.
4 Click OK in the Playback Settings dialog box, and click OK in the Project Settings dialog box.
Page 41

ADOBE PREMIERE PRO CS3
April 1, 2008
User Guide
Disable 24p pulldown to simulate film-video transfer
By default, Adobe Premiere Pro uses a 24p pulldown scheme to playback 24p DV footage at 29.97 fps in a project
based on one of the NTSC presets. You can disable the pulldown scheme to give your movie the look of a film transferred to video or broadcast, without frame interpolation.
1 Right-click (Windows) or Control-click (Mac OS) a 24p clip in the Project panel.
2 Select Interpret Footage.
3 Under Frame Rate, select Remove 24P DV Pulldown.
4 Click OK.
Additionally, you can apply any of a number of third-party film-look plug-in effects to the master sequence. These
plug-ins can often perform telecine-style conversion, or add grain or color correction to simulate various film stocks.
Pay close attention to lighting and, during shooting, use tripods and do slow pans to create the appearance of using a
heavy film camera. Attention to these details will give your project more of a film look.
Display 24p source timecode
When you import 24p footage, Adobe Premiere Pro treats it as 23.976 fps progressive footage. Because of this, when
you work with 24p footage in a 24p project, the timecode is displayed as 24 fps. However, the camera records and
logs 24p footage in 30 fps non-drop-frame timecode. When you log 24p footage for capture, you log clips according
to the camera’s timecode count of 30 fps non-drop-frame timecode.
35
For example, a clip that you log for capture may have an In point of 00:01:00:28. However, as an offline clip in a 24p
project, the In point is shown as 00:01:00:23. In addition, mixing non-drop-frame footage with drop-frame footage
can cause larger differences in timecode display between the project and the clip, with minutes, seconds, and entire
durations seemingly out of sync. Be aware of these discrepancies as you edit.
If you use 30 fps non-drop-frame timecode for projects containing 24p footage, Adobe Premiere Pro drops every
fifth frame from the 24p footage timecode count. When you view the properties of your 24p clip, the frame rate is
shown as 23.976, but the timebase as 29.97. If you’d prefer to read a clip’s original timecode, do the following:
1 Right-click (Windows) or Control-click (Mac OS) the clip in the Project panel.
2 Select Interpret Footage > Use Frame Rate from File.
Start an HDV or HD project
You can edit HDV footage in the 720p, 1080p, or 1080i formats. When creating a new project for these formats,
make sure you select the project settings preset that matches the specifications of your source footage.
The DVCPROHD project settings presets included with Adobe Premiere Pro are for editing material recorded to
MXF files with a Panasonic P2 video camera. Additional HD project settings presets are usually installed into Adobe
Premiere Pro when an HD capture card that supports Adobe Premiere Pro is installed.
For best playback performance, it is sometimes helpful to render HD footage when you first place it in a sequence.
1 Do one of the following:
• From the Welcome screen, click New Project.
• Select File > New > Project.
2 In the New Project dialog box, select the Load Preset tab.
3 Select a project preset that matches your footage.
Page 42

ADOBE PREMIERE PRO CS3
April 1, 2008
User Guide
4 (Optional) Select the Custom Settings tab, and customize the preset as needed.
5 (Optional) For DVCPRO50 P2 or DVCPROHD P2 projects, to set the number of monaural channels that you
can output to P2, select Default Sequence. Then in the Master drop-down menu in the Audio pane, select one of the
following:
Mono Outputs a single mono channel.
Stereo Outputs two mono channels with stereo panning intact.
5.1 Outputs four mono channels respecting the Left-Front, Right-Front, Left-Rear, and Right-Rear panning.
6 Enter a location and name for the project file and click OK.
Note: On Windows, you can create a custom project preset for previewing uncompressed 10-bit or uncompressed 8-bit
footage. For more information, see Create A Project With Uncompressed Video Playback (Windows Only) in “Adjust
project settings and presets” on page 23 in Adobe Premiere Pro Help.
See also
“About high-definition (HD) video” on page 381
“Adjust project settings and presets” on page 23
“Options for exporting HD and HDV sequences” on page 382
36
“Importing assets from file-based sources” on page 82
“Export to Panasonic P2 format” on page 387
Start a widescreen project
You can edit widescreen footage shot in DV, HDV, or HD formats. To display and play back widescreen assets
correctly, you must set your project settings to accomodate widescreen assets. When you are done editing your
movie, use Adobe Media Encoder to output 3GP files with the correct audio and video characteristics for the target
device.
1 Do one of the following:
• From the Welcome screen, click New Project.
• Select File > New >Project.
2 In the New Project dialog box, select the Load Preset tab.
3 Select a preset that matches your footage. Do one of the following:
• For DV footage, select one of the DV-NTSC or DV-PAL presets with Widescreen in its name. These use
horizontal pixels (with pixel aspect ratios of 1.2 for NTSC and 1.422 for PAL).
• For an HDV project, select an HDV preset using HD Anamorphic 1080 (pixel aspect ratio 1.333) or Square pixels
(pixel aspect ratio 1.0).
• For an HD project, select one of the presets provided with your HD capture card.
4 Enter a location and name for the project file and click OK.
See also
“Adjust project settings and presets” on page 23
Page 43

ADOBE PREMIERE PRO CS3
April 1, 2008
User Guide
Start a mobile device project
You can edit video for delivery to mobile phones, portable media players, and other portable devices. Selecting a
project preset that matches the requirements of the target device is the easiest way to get started. When you are done
editing your movie, use Adobe Media Encoder to encode it with the audio and video characteristics correct for the
target devices.
1 Do one of the following:
• From the Welcome screen, click New Project.
• Select File > New >Project.
2 In the New Project dialog box, select the Load Preset tab.
3 Select the Mobile & Devices presets folder. Do one of the following:
• To edit a movie aimed exclusively at devices supporting 3GPP video at frame sizes of 176x144 or 88x72, select the
CIF, QCIF, QQCIF preset.
• To edit a movie for distribution on the web or on mobile devices that can display 4:3 video at frame sizes of
320x240 or 128x96, select the iPod, QVGA, Sub-QCIF preset.
4 Enter a location and name for the project file and click OK.
37
See also
“Adjust project settings and presets” on page 23
“Export to iPods, cell phones, PSPs and other mobile devices” on page 413
Workflows
Basic workflow
Whether you use Adobe Premiere Pro to edit video for broadcast, DVD, or the web, you’re likely to follow a similar
workflow. For a video about the basic workflow, see www.adobe.com/go/vid0230.
1. Shoot video with Adobe OnLocation
Adjust the video signal coming from your camcorder before you shoot, and then shoot directly to your hard drive
with Adobe OnLocation, the signal monitoring application bundled with Adobe Premiere Pro. For a video on
direct-to-disk recording, see www.adobe.com/go/vid0237.
Page 44

ADOBE PREMIERE PRO CS3
April 1, 2008
User Guide
Adobe OnLocation
2. Start or open a project
Open an existing project, or start a new one from the Adobe Premiere Pro Quickstart screen. When starting a new
project, you can specify the television standard, video format, and other settings for your project. (See “About
projects” on page 21.)
38
Quickstart screen
3. Capture and import video and audio
Using the Capture panel, transfer footage directly from a camcorder or VTR. With the proper hardware, you can
digitize and capture other formats, from VHS to HD. Each file you capture to your hard disk automatically becomes
a clip in the Project panel.
Page 45

ADOBE PREMIERE PRO CS3
April 1, 2008
User Guide
39
Project panel and Capture panel
You can also import a variety of digital media, including video, audio, and still images. Adobe Premiere Pro also
imports Adobe Illustrator® artwork or Photoshop layered files, and it translates After Effects projects for a seamless,
integrated workflow. You can create synthetic media, such as standard color bars, color backgrounds, and a
countdown. (See “About capturing, digitizing, and importing” on page 52.)
You can also use Adobe Bridge to organize and find your media files, and then use the Place command in Adobe
Bridge to place the files directly into Adobe Premiere Pro.
In the Project panel you can label, categorize, and group footage into bins to keep a complex project organized. You
can open multiple bins simultaneously, each in its own panel, or you can nest bins, one inside another. Using the
Project panel icon view, you can arrange clips in storyboard fashion to visualize or quickly assemble a sequence.
4. Assemble and refine a sequence
Using the Source Monitor, you can view clips, set edit points, and mark other important frames before adding clips
to a sequence. For convenience, you can break a master clip into any number of subclips, each with its own In and
Out points. You can view audio as a detailed waveform and edit it with sample-based precision. (See “Source and
Program Monitors overview” on page 92.)
Page 46

ADOBE PREMIERE PRO CS3
April 1, 2008
User Guide
40
Source Monitor, Program Monitor, and Timeline panel
You add clips to a sequence in the Timeline panel by dragging or by using controls in the Source Monitor. You can
automatically assemble clips into a sequence that reflects their order in the Project panel. You can view the edited
sequence in the Program Monitor or watch the full-screen, full-quality video on an attached television monitor. (See
“Timeline panel overview [F30903 Metadata 'Track' in Timeline]” on page 101 and “Adding clips to a sequence” on
page 115.)
Refine the sequence by manipulating clips in the Timeline panel, with either context-sensitive tools or tools in the
Tools panel. Use the specialized Trim Monitor to fine-tune the cut point between clips. By nesting sequences—using
a sequence as a clip within another sequence—you can create effects you couldn’t achieve otherwise.
5. Add titles
Using the Adobe Premiere Pro full-featured Titler, create stylish still titles, title rolls, or title crawls that you can
easily superimpose over video. If you prefer, you can modify any of a wide range of provided title templates. As with
any clip, you can edit, fade, animate, or add effects to the titles in a sequence. (See “About the Titler” on page 216.)
Page 47

ADOBE PREMIERE PRO CS3
April 1, 2008
User Guide
Titler
6. Add transitions and effects
The Effects panel includes an extensive list of transitions and effects you can apply to clips in a sequence. You can
adjust these effects, as well as a clip’s motion, opacity, and Variable Rate Stretch using the Effect Controls panel. The
Effect Controls panel also lets you animate a clip’s properties using traditional keyframing techniques. As you adjust
transitions, the Effect Controls panel displays controls designed especially for that task. Alternatively, you can view
and adjust transitions and a clip’s effect keyframes in the Timeline panel. (See “About transitions” on page 172 and
“Working with effects” on page 240.)
41
Effects and Effect Controls panels
Page 48

ADOBE PREMIERE PRO CS3
April 1, 2008
User Guide
7. Mix audio
For track-based audio adjustments, the Audio Mixer faithfully emulates a full-featured audio mixing board,
complete with fade and pan sliders, sends, and effects. Adobe Premiere Pro saves your adjustments in real time, on
the fly. With a supported sound card, you can record audio through the sound mixer, or mix audio for 5.1 surround
sound. (See “Mixing audio tracks and clips” on page 184.)
42
Audio Mixer
8. Collaborate
Using the Clip Notes feature, you can easily send out draft edits for review, and import reviewers’ comments back
into the timeline. The comments show up in sequence markers situated at the precise frames where comments were
placed.
Export Settings set for Clip Notes export
Page 49

ADOBE PREMIERE PRO CS3
April 1, 2008
User Guide
9. Export
Deliver your edited sequence in the medium of your choice: tape, DVD, Blu-ray Disc, or movie file. Using the Adobe
Media Encoder, you can customize the settings for MPEG2, MPEG4, Adobe Flash Video, and other codecs, to the
needs of your viewing audience. (See “Exporting basics” on page 379.)
43
Export Settings dialog box and Export to Encore dialog box
See also
Adobe Premiere Pro Workflow
Direct-to-disk recording
DVD workflow
Using Adobe Encore and Adobe Premiere Pro, you can burn a single sequence to DVD, and each sequence in your
project can be burned to a separate DVD. First, you add all the content you want to include on a DVD into a
sequence. After you prepare the sequence, perform the following basic tasks:
1. Add Encore markers.
You can add Encore markers in Adobe Premiere Pro that will be carried over into Encore. Encore markers are
different from sequence markers (which will not appear in Encore), but you apply them in the Timeline panel like
sequence markers.
If you create an auto-play DVD, the Encore markers become chapter points that allow the viewer to use a DVD
player remote control to move from scene to scene. If you create a DVD with menus, you can link scene buttons on
the menus to the Encore markers in the Encore timeline.
Page 50

ADOBE PREMIERE PRO CS3
April 1, 2008
User Guide
2. Export to Encore or to an MPEG-2 file.
The File > Export > Export To Encore command brings your sequence, or any portion of it you designate with the
work area bar, into Encore. From Encore, you can burn it directly to a DVD without menus, or add menus and
buttons before burning. You can burn the project to disc, or you can save it to a DVD image file, a set of DVD
folders, or DVD master files on DLT tape.
Alternately, you can export a DVD-compliant MPEG-2 file from Adobe Premiere Pro that you can use to author a
DVD in most DVD-authoring applications.
3. Choose a menu template.
Encore templates are predesigned menus that come in several styles. Buttons on the templates automatically link to
DVD markers placed in the sequence. Encore creates additional submenus as necessary to accommodate all the
DVD markers in a sequence.
Note: Auto-play DVDs don’t have menus, so you don’t need to choose a template for them.
4. Customize the menu template.
Edit titles, change graphics, or add video for backgrounds in Encore. You can also use video in button thumbnails
by specifying a section of a clip to play in the button.
44
5. Preview the DVD.
Check the functionality and the look of your DVD menus in the Preview DVD window.
6. Burn the DVD.
With a DVD burner installed or connected, you can burn your DVD content to disc. You can save the compressed
files to a folder for playback from a computer hard drive. You can also save a DVD ISO image to distribute or burn
to a DVD.
Note: Encore creates DVDs that conform to DVD-video format. It doesn’t create data or audio DVDs.
Cross-platform workflow
You can work on a project across computer platforms, for example, by starting on a Windows machine and
continuing on a Macintosh, or the other way around. A few functions will change, however, as the project moves
from one platform to the other. For a video on editing in a multi-platform environment, see
www.adobe.com/go/vid0236.
Project settings If a project is created on one platform and then moved to another, the equivalent project settings
will be set automatically for the second platform if an equivalent is found. For example, if a DV project containing
DV capture and device control settings is created on Windows, when the project is opened on a Macintosh the
appropriate Mac DV capture and device control settings will be applied. Saving the project will record these
Macintosh settings and a translation to Windows settings will occur if the project is later opened on Windows.
Effects All video effects available on the Mac are available on Windows. Windows effects not available on the Mac
will appear as offline effects if the project is opened on the Mac. These effects are designated “Windows only” in
Adobe Premiere Pro Help. All audio effects are available on both platforms. Effect presets will work on both
platforms (unless the preset applies to an effect not available on a given platform).
Adobe Media Encoder presets Presets created on one platform are not available on the other.
Page 51

ADOBE PREMIERE PRO CS3
April 1, 2008
User Guide
Preview files Preview files made on one platform are not available on the other. When a project is opened on a
different platform, Adobe Premiere Pro re-renders the preview files. When that project is then opened on its
original platform, Adobe Premiere Pro must render the preview files yet again.
High bit-depth files Windows AVI files containing either 10-bit 4:2:2 uncompressed video (v210), or 8bit 4:2:2
uncompressed video (UYVU) are not supported on the Mac.
Preview rendering Playback quality of unrendered non-native files (for example, AVI on Mac OS and MOV on
Windows) will not be as high as playback quality of these files on their native platforms. Preview files must be
rendered for them on the current platform. Preview files always are rendered in a native format. A red bar in the
timeline indicates which sections contain files needing rendering.
See also
Editing in a multi-platform environment
Cross-application workflows
You can make use of various other Adobe applications to enhance or modify the assets used in an Adobe Premiere
Pro project.
• Launch Adobe Bridge from within Adobe Premiere Pro, use Adobe Bridge to organize, tag and find assets, and
then use it to place them in various applications, including Adobe Premiere Pro, for modification. (See Adobe
Bridge Help.)
• Import layered Photoshop files, Illustrator files, After Effects projects, files made with the previous version of the
Adobe Title Designer, and various files made with Adobe Premiere 6.0, all into Adobe Premiere Pro. (See “Import
files” on page 74.)
• Use the Edit Original command in Adobe Premiere Pro to edit an asset in the application in which it was
generated. (See “Edit a clip in its original application” on page 162.)
• Use the Edit In Adobe Soundbooth command in Adobe Premiere Pro to edit an audio file or soundtrack in
Soundbooth. (See “About editing audio in Adobe Soundbooth” on page 214.)
• Use Adobe Dynamic Link to create a new After Effects composition from within an Adobe Premiere Pro project.
Any changes made to that composition in After Effects will immediately appear in Adobe Premiere Pro without
a need for rendering. (See “About Dynamic Link (Production Premium only)” on page 167)
• Export any sequence from Adobe Premiere Pro into Adobe Encore for authoring, mastering, and burning to
DVDs or Blu-ray Discs. (See “About exporting to DVD, Blu-ray disc, or CD” on page 395.)
• Export any sequence to Adobe Flash Video for web delivery, or further authoring in Adobe Flash or Adobe
Dreamweaver. (See “About exporting for the web” on page 407.)
45
About Adobe Bridge
Adobe® Bridge CS3 is a cross-platform tool included with Adobe® Creative Suite® 3. It helps you locate, organize,
and browse both Adobe and non-Adobe assets that you need to create print, web, video, and audio content. You can
start Adobe Bridge from any Adobe Creative Suite application except Acrobat 8.
From Adobe Bridge, you can do the following:
• Manage image, footage, and audio files: you can view, search, sort, and process files. You can also edit metadata
for files in Adobe Bridge, and place files into documents, projects, or compositions.
• Work with Adobe Version Cue-managed assets.
Page 52

ADOBE PREMIERE PRO CS3
April 1, 2008
User Guide
• Perform automated tasks, such as batch commands.
• Manage photos: Generate a web gallery from a group of images, import and edit photos from a digital camera
card, group related photos in stacks, and open or import camera raw files and edit their settings without starting
Photoshop. You can also search leading stock libraries and download royalty-free images by way of Adobe Stock
Photos in Adobe Bridge.
• Start a real-time web conference to share your desktop and review documents.
• Synchronize color settings across color-managed Adobe Creative Suite components.
46
Page 53

Chapter 4: Setting up, and bringing in
April 1, 2008
assets
With your hardware hooked up, you can bring assets into a project by capturing them from digital sources,
digitizing them from analog sources, or importing them as computer files.
Setting up your system
About setting up your system
To use the full range of features in Adobe Premiere Pro CS3, you’ll probably need to connect additional equipment
to your computer. Most editing workflows, for example, require connections with a camcorder or VTR, a television
monitor, and sometimes a device controller. These devices make it possible to log and capture footage, to recapture
it at different resolutions, to monitor picture quality and framing throughout the editing process, and finally, to
export the finished movie to tape for mastering.
47
Set up a DV or HDV system
C
A
B
DV/HDV setup
A. Computer and computer monitor B. 6-pin FireWire port and connector C. 4-pin FireWire port and connector D. DV/HDV camcorder
E. RCA jacks and plugs for L (white) audio, R (red) audio, composite video (yellow); jack and plug for S-video (y/c) F. HDMI port and
connector G. Television monitor
With this setup you can capture audio and video from a DV or HDV source, monitor the signal on a TV monitor
while editing, and export any sequence back to videotape.
1 Connect the DV or HDV camcorder or VTR to the computer using a FireWire cable.
2 Connect the camcorder or VTR to the television monitor with an S-video or RCA video cable and RCA audio
cables, or an HDMI cable.
3 Put the camcorder or VTR into VTR or Play mode.
4 (For HDV camcorders or VTRs only) Make sure the device is in DV playback mode for DV projects, or HDV
playback mode for HDV projects. See the user’s manual for your device for details.
D
G
FE
Page 54

ADOBE PREMIERE PRO CS3
April 1, 2008
User Guide
5 Start Adobe Premiere Pro, and, on the Welcome screen, click New Project.
6 In the Load Preset panel of the New Project dialog box, select the DV or HDV preset that matches the format of
your source footage.
7 Browse to a location, and type a name for the project file. Then click OK.
See also
“About projects” on page 21
Set up an SD-SDI, HD-SDI, or component system
I
H
D
48
A B
C E
SDI/component setup with breakout box
A. Computer and computer monitor B. A/V breakout box C. XLR jacks and plugs for L & R audio D. RS232/422 port and connector
E. BNC jacks and plugs for Y/Pb/Pr component video, BNC jack and plug for SDI video F. HD/SD VTR G. BNC jacks and plugs for Y/Pb/Pr
component video, BNC jack and plug for SDI video H. RCA jacks and plugs for L (white) & R (red) audio I. Speakers J. Television monitor
F
G
J
With this setup you can capture audio and video from an SD-SDI, HD-SDI, or component video device (camcorder
or VTR), monitor the signal on a TV monitor while editing, and export any sequence back to the camcorder or VTR.
This setup requires either an SDI or component PCI card installed in the computer, or an external SDI or
component device connected to the computer via FireWire. Either of these would provide ports, usually with BNC
connectors, capable of receiving SDI or component video signals.
Some SDI and component PCI cards come with breakout boxes which provide ports for the SDI or component
signals, and sometimes also ports for genlock, in an easy-to-access array.
1 Connect the SD-SDI, HD-SDI, or component device to the computer or breakout box using SDI or component
video cables. A single cable with BNC connectors carries SDI video, but three separate cables with BNC connectors
carry component video signals. Run video cables from the video outputs of the computer or breakout box to the
video inputs of the device. Also run video cables from the video outputs of the device to the video inputs of the
computer or breakout box.
2 Connect the SD-SDI, HD-SDI, or component device to the computer or breakout box using XLR audio cables.
Run audio cables from the audio outputs of the computer or breakout box to the audio inputs of the device. Also
run audio cables from the audio outputs of the device to the audio inputs of the computer or breakout box.
Page 55

ADOBE PREMIERE PRO CS3
April 1, 2008
User Guide
3 Do one of the following:
• Connect the serial device control port (RS-422 or RS-232) on the camcorder or VTR with the serial port
(Windows) or USB port (Mac OS) on the computer. Use the Pipeline Digital ProVTR cable for RS-232/422controlled devices.
• If your system has a breakout box with a serial device control port (RS-422 or RS-232), connect the serial device
control port on the camcorder or VTR with this, rather than with the serial or USB port on the computer. You
may need to use a standard serial 9-pin D-Sub cable instead of the Pipeline Digital ProVTR cable. Consult the
documentation from the manufacturer of the breakout box.
Note: Native serial device control is available on Windows only.
4 Connect the deck or camcorder to the television monitor with component video cables and to amplified speakers
with RCA audio cables.
5 Put the camcorder or deck into VTR or Play mode.
6 Start Adobe Premiere Pro, and, on the Welcome screen, click New Project.
7 In the Load Preset panel of the New Project dialog box, select the SDI or component preset that matches the
format of your source footage. Adobe Premiere Pro does not provide these presets. They are provided by the
manufacturers of SDI and component capture cards and devices, and must be installed with those cards and devices.
8 Browse to a location and type a name for the project file. Then click OK.
49
See also
“Create a project” on page 21
Set up an S-video or composite system
B
C
A
S-video/composite setup
A. Computer and computer monitor B. Ports and connectors for FireWire, USB 2.0 C. A/D converter D. Jacks and plugs for RCA composite
video, S-video (y/c) E. RS 232/422 port and connector F. RCA jacks and plugs for L (white) and R (red) audio G. Analog camcorder, analog
VTR H. RCA jacks and plugs for L (white) audio, R (red) audio, and composite video (yellow); jack and plug for S-video (y/c) I. Television
monitor
With this setup, you can capture audio and video from an analog camcorder or VTR, monitor the video signal on a
TV monitor while editing, and export any sequence back to the camcorder or VTR.
D
F
G
E
H
I
Page 56

ADOBE PREMIERE PRO CS3
April 1, 2008
User Guide
To convert the analog source signal to a digital one the computer can use, this setup requires an analog/digital (A/D)
converter, or digitizer, either installed in the computer or attached to it, or a digital camcorder or VTR capable of
digitizing an incoming analog signal.
1 Connect the analog camcorder or VTR to the computer or its interface, such as a breakout box, A/D converter,
digital camcorder or VTR, using S-video or RCA video cables. Run video cables from the video outputs of the
computer or its interface to the video inputs of the device. Also run video cables from the video outputs of the device
to the video inputs of the computer or its interface.
2 Connect the analog camcorder or VTR to the computer or its interface, such as a breakout box, A/D converter,
digital camcorder or VTR, using XLR or RCA audio cables. Run audio cables from the audio outputs of the
computer or its interface to the audio inputs of the device. Also run audio cables from the audio outputs of the
device to the audio inputs of the computer or its interface.
3 (Optional) On Windows machines, if the analog camcorder or VTR has an RS-422 or RS-232 port, connect the
serial device control port on the camcorder or VTR with the serial port (Windows) on the computer using the
Pipeline Digital ProVTR cable.
Note: Native serial device control is available on Windows only.
4 Connect the analog camcorder or VTR, or the breakout box, A/D converter, digital camcorder or VTR, to the
television monitor with an S-video or RCA video cable, and RCA audio cables.
5 Put the analog camcorder or deck into VTR or Play mode.
6 Start Adobe Premiere Pro, and, on the Welcome screen, click New Project.
7 In the Load Preset panel of the New Project dialog box, select the preset that matches the format of your A/D
converter, not that of the source footage. For example, if you use a DV camcorder or A/D converter to convert the
analog signal, choose a DV preset.
8 Browse to a location and type a name for the project file. Then click OK.
50
Specify scratch disks to improve system performance
When you edit a project, Adobe Premiere Pro uses disk space to store files required by your project, such as captured
video and audio, conformed audio, and preview files that you create manually or that are created automatically
when exporting to certain formats. Adobe Premiere Pro uses conformed audio files and preview files to optimize
performance, allowing real-time editing, 32-bit floating-point quality, and efficient output.
All scratch disk files are preserved across work sessions. If you delete preview files or conformed audio files, Adobe
Premiere Pro automatically recreates them.
By default, scratch disk files are stored where you save the project. The scratch disk space required increases as
sequences become longer or more complex. For best performance, it is recommended that you dedicate a hard drive
or drives strictly to your media assets. Specify these dedicated disks as your scratch disks. If your system has multiple
disks, you can use the Edit > Preferences > Scratch Disks (Windows) or Premiere Pro > Preferences > Scratch Disks
(Mac OS) command to specify which disks Adobe Premiere Pro uses for media files. This is best done when you set
up a new project.
In terms of performance, it’s usually best to dedicate a different disk to each asset type, but you can also specify
folders on the same disk. You can specify unique scratch disk locations for the following types of file:
Captured Video Video files that you create using File > Capture.
Captured Audio Audio files that you create using File > Capture.
Page 57

ADOBE PREMIERE PRO CS3
April 1, 2008
User Guide
Video Previews Files created when you use the Sequence > Render Work Area command, export to a movie file, or
export to a device. If the previewed area includes effects, the effects are rendered at full quality in the preview file.
Audio Previews Files created when you use the Sequence > Render Work Area command, use the Clip > Audio
Options > Render And Replace command, export to a movie file, or export to a DV device. If the previewed area
includes effects, they are rendered at full quality in the preview file.
Media Cache Files created by the Media Cache feature, including conformed audio files, PEK audio files and video
index files (for MPEG).
DVD Encoding Files created when you export movies to a DVD folder.
Specify scratch disks
You set up scratch disks in the Scratch Disk pane of the Preferences dialog box. Before changing scratch disk
settings, you can verify the amount of free disk space on the selected volume by looking in the box to the right of the
path. If the path is too long to read, position the pointer over the path name, and the full path appears in a tool tip.
1 Choose Edit > Preferences > Scratch Disks (Windows) or Premiere Pro > Preferences > Scratch Disks (Mac OS).
2 Identify a location for each type of file named in the dialog box. Adobe Premiere Pro creates a subfolder named
for each file type (for instance, Captured Video) and stores the folder’s associated files in it. The pop-up menu lists
three default locations:
My Documents (Windows) or Documents (Mac OS) Stores scratch files in the My Documents folder (Windows) or
Documents folder (Mac OS).
51
Same As Project Stores scratch files in the same folder where the project file is stored.
Custom Allows you to specify a location of your choosing. Choose Custom, then click Browse and browse to any
available folder.
Maximizing scratch disk performance
For maximum performance, follow these guidelines:
• If your computer has only one hard disk, consider leaving all scratch disk options at their default settings.
• Set up scratch disks on one or more separate hard disks. In Adobe Premiere Pro, it’s possible to set up each type
of scratch disk to its own disk (for example, one disk for captured video and another for captured audio).
• On Windows machines, specify only partitions formatted for the NTFS file format as scratch disks. On Mac OS
machines, use partitions formatted for Mac OS Extended. FAT32 partitions are not recommended for video.
They do not support large file sizes.
• On Mac OS machines, disable journaling for best performance.
• Specify your fastest hard disks for capturing footage and storing scratch files. You can use a slower disk for audio
preview files and the project file.
• Specify only disks attached to your computer. A hard disk located on a network is usually too slow. Avoid using
removable media because Adobe Premiere Pro always requires access to scratch disk files. Scratch disk files are
preserved for each project, even when you close the project. They are reused when you reopen the project
associated with them. If scratch disk files are stored on removable media and the media are removed from the
drive, the scratch disk won’t be available to Adobe Premiere Pro.
• Although you can divide a single disk into partitions and set up partitions as scratch disks, this doesn’t improve
performance because the single drive mechanism becomes a bottleneck. For best results, set up scratch disk
volumes that are physically separate drives.
Page 58

ADOBE PREMIERE PRO CS3
April 1, 2008
User Guide
Optimize rendering for available memory
By default, Adobe Premiere Pro renders video using the maximum number of available processors, up to 16.
However, some sequences, such as those containing high-resolution source video or still images, require large
amounts of memory for the simultaneous rendering of multiple frames. These can force Adobe Premiere Pro to
abort rendering and to give a Low Memory Warning alert. In these cases, you can maximize the available memory
by changing the rendering optimization preference from Performance to Memory. Change this preference back to
Performance when rendering no longer requires memory optimization.
1 Select Edit > Preferences, and select General in the Preferences dialog box.
2 In the drop-down menu next to Optimize Rendering For, select Memory.
3 Click OK, close Adobe Premiere Pro, and reopen the project for the new preference to take effect.
Bringing assets into a project
About capturing, digitizing, and importing
To bring media files (assets) into an Adobe Premiere Pro project, you can capture, digitize, or import them,
depending on the type of source material:
52
Capture You capture digital video from a live camera or from tape. That is, you record it from the source to the hard
disk. Most digital camcorders and decks can record video to tape, but video on tape must be captured (transferred
to the hard disk) before Adobe Premiere Pro can use it in a project. In Adobe Premiere Pro, the capture function,
in conjunction with a digital port or capture card (for example, FireWire or SDI), can capture digital video from
tape and save it to disk as files that you can then add to your project. You can use Adobe After Effects to start Adobe
Premiere Pro and start the capture process. Alternately, you can use Adobe OnLocation to capture video.
Digitize You digitize analog video. Analog video is recorded by analog camcorders and decks. The data must be
digitized (converted to digital form) before a computer can store and process it. In Adobe Premiere Pro, the capture
function, in conjunction with a digitizing card or device, converts analog video to digital files.
Import Use the Import command to bring files that are already on your hard disk or other connected storage device
(such as a Panasonic P2 card) into your project. Adobe Premiere Pro lets you import numerous types of video, still
images, and audio. You can also locate files in Adobe Bridge and use the File > Place command to import them into
Adobe Premiere Pro. Finally, you can export an Adobe Premiere Pro project from After Effects, and import it into
Adobe Premiere Pro.
For a video on capturing and importing assets, see www.adobe.com/go/vid0231.
See also
“About recording audio” on page 194
Importing footage into Adobe Premiere Pro
“Importing assets from file-based sources” on page 82
Page 59

ADOBE PREMIERE PRO CS3
April 1, 2008
User Guide
Capturing and digitizing
System requirements for capturing
To capture digital video footage, your editing system needs the following components:
• For DV or HDV footage, either an OHCI-compliant IEEE 1394 (FireWire, i.Link) port or capture card, or a
non-OHCI-compliant IEEE 1394 capture card with presets, drivers, and plug-ins written specifically for Adobe
Premiere Pro.
• For non-HDV HD or SD footage, a supported HD or SD capture card with SDI or component inputs.
• For recording audio from analog sources, a supported audio card with an analog audio input.
• A codec (compressor/decompressor) for the type of data you need to capture. Adobe Premiere Pro has its own
codecs for importing DV and HDV footage. Plug-in software codecs are available for other types. Hardware
codecs are built into some capture cards.
• A hard disk capable of sustaining the data rate of the type of digital video you need to capture.
• Sufficient disk space for the captured footage. The length of a captured clip may be limited by your operating
system.
• A project that was created using a preset in the New Project dialog box in which all settings match the footage you
plan to capture.
53
Note: Some DV and HDV camcorders require a connection to their power adapters to activate their IEEE 1394 ports.
Other camcorders may go into sleep mode or demo mode if left in the camera mode without tape activity for a period
of time. To avoid these problems, connect your camcorder to its power adapter when setting it up for capturing or
dubbing video. If the camcorder goes into demo mode with the power adapter connected, disable this feature using the
camcorder’s menu system.
Capturing DV or HDV video
You can capture audio and video from a DV or HDV device by connecting the device to your computer with a
FireWire cable. Adobe Premiere Pro records the audio and video signal to the hard disk and controls the device
through the FireWire port.
You can capture DV or HDV footage from XDCAM media, provided your computer has a supported third-party
capture card or device installed, along with their respective drivers.
When you start a new project using one of the DV or HDV project presets, the capture settings are set for DV
Capture or HDV Capture, respectively. You can, however, change the capture settings to either DV or HDV from
within the Capture panel in an established project.
You can choose whether to preview DV video in the Capture window during preview and capture. You can also
preview HDV footage in the Capture window, on Windows only. However, you cannot preview HDV footage in the
Capture window during capture. Instead, the word Capturing will appear in this window during HDV capture.
See also
“Set up a DV or HDV system” on page 47
“Capture with device control” on page 61
Page 60

ADOBE PREMIERE PRO CS3
April 1, 2008
User Guide
“Export a movie file for further editing” on page 386
“Export a sequence to tape with device control” on page 405
Capturing HD video
You can capture audio and video from an HD device with an SDI port, provided your computer has a supported
SDI capture card installed, along with its drivers and software. Similarly, you can import HD footage from XDCAM
sources provided a supported XDCAM capture card or drive is installed, along with its respective driver. The correct
installation adds HD project presets to the Load Preset pane of the New Project panel and HD capture formats to
the Capture Format drop-down menu in the Capture area of the Custom Settings pane.
You typically connect the HD device to your computer by connecting its SDI ports by coaxial cable with BNC
connectors. To provide device control (Windows only), you also connect the serial port on the device with an RS422
or RS-232 port on the computer. Refer to the setup instructions provided by the capture card manufacturer.
Note: You can import DVCPRO HD assets directly from a Panasonic P2 card, without an additional capture step. For
more information, see “Importing assets from file-based sources” on page 82.
See also
“Set up an SD-SDI, HD-SDI, or component system” on page 48
54
“Set up device control” on page 58
“Capture without device control” on page 60
“Export a movie file for further editing” on page 386
“About exporting to videotape” on page 404
Capture analog video
In order to edit video shot in an analog format, you must first digitize it. You can digitize it by routing the video
signal through either a digital camcorder that can digitize on the fly or a digitizing device installed in your computer.
Alternatively, you can dub the analog footage to a digital format, and then capture the video from a digital device
through a capture card as any other digital source. Depending on your equipment, you may be able to digitize analog
video from any of several signal types, including component video, composite video, and S-video. Some digitizers
provide device control. They connect to your source device through RS-232 or RS-422 ports, enabling you to control
the device through Adobe Premiere Pro’s Capture panel and to perform batch capturing. Refer to the instructions
included with your camcorder and digitizer/capture card. For information on troubleshooting analog video
capture, go to Adobe Technical Support.
See also
“Set up an S-video or composite system” on page 49
“Capturing analog audio” on page 194
Troubleshoot analog capture problems in Premiere Pro
Page 61

ADOBE PREMIERE PRO CS3
April 1, 2008
About capture card settings
User Guide
Some of the capture settings you see in Adobe Premiere Pro may be from the plug-in software that came with your
digitizer/capture card. Because of the differences among brands of cards, specific options and supported formats
can vary. This complex relationship between video-capture cards and Adobe Premiere Pro can make it difficult to
identify which part of the system is responsible for a particular option or problem. Adobe, as well as most capture
card manufacturers, provides troubleshooting documents online that can help you determine whether an option or
problem is related to the video-capture card and its software or to Adobe Premiere Pro. Check the Adobe Premiere
Pro website and the capture card manufacturer’s website for troubleshooting resources.
Most of the supported capture cards install a settings file (preset) that you can select in the Adobe Premiere Pro New
Project dialog box, in the Load Preset pane. This preset automatically sets all capture settings for optimal support of
your capture card. For best results, use your capture card’s preset, if provided, and don’t change the capture settings
in the Custom Settings pane.
Digitize analog video
1
Exit from Adobe Premiere Pro.
2 Connect the analog device’s video and audio outputs to the digital device’s (digitizer, digital camcorder or digital
deck) analog inputs.
3 If the digital device is an external digitizer, deck, or camcorder, connect its FireWire or SDI port to the
computer’s.
4 (Windows only) If the digital device is a digitizer with device controls, connect its device control port (RS-232 or
RS-422) with the same type port on the analog device.
5 Turn on the analog source and the digitizing device.
6 If the digitizing device is a camcorder, put it into VTR, VCR, or Play (not Camera) mode.
7 Set the input selection control on the digitizing device to the correct analog input.
8 Start Adobe Premiere Pro.
9 When the Welcome screen appears, do one of the following:
• To start a new project using a capture card, click New Project, select the capture card’s preset (if available) from
the Load Preset pane, and click OK.
• To open an existing project using a capture card, select an existing project that was set up with the capture card’s
preset.
• To start a new project using an external device, such as a camcorder or deck, to digitize, click New Project, select
a DV or HDV preset that matches your target television standard and format, and click OK.
• To open an existing project using an external device, such as a camcorder or deck, to digitize, select an existing
project that was set up with the correct DV or HDV preset.
10 Choose File > Capture.
11 In the Capture panel, carefully check the settings on the Settings pane. If you need to change them, click Edit.
(If you’re using a capture card, the settings are provided by the card manufacturer’s plug-in software, not by Adobe
Premiere Pro, and vary according to the capture card’s brand and model. See the documentation for the software
driver provided by the capture card manufacturer.)
12 Do one of the following:
• If the digital device offers no device control, cue up your source using the analog device’s own controls. Press Play
on the analog device and click the Record button in the Capture panel.
55
Page 62

ADOBE PREMIERE PRO CS3
April 1, 2008
User Guide
• If the digital device offers device control, capture or log footage using the Capture panel’s controls, as you would
with a digital source.
To help determine the effects of your compression settings on the data rate of the captured video, use the Adobe
Premiere Pro Data Rate graph. (For more information, see “Understanding video compression, file size, and data
rate” on page 383.)
Capturing content for DVD
DVD content is compressed according to DVD specifications so that it plays reliably on a wide range of players.
When preparing content for a DVD project, pay attention to frame size and frame rate, so that content retains its
quality in the transition to DVD.
For best results, make sure that you capture or record according to these specifications:
Frame size NTSC standard 720x480 or PAL standard 720x576. If your project uses a different frame size, Adobe
Premiere Pro scales it automatically.
Frame rate 29.97 fps (NTSC) or 25 fps (PAL); alternately, 23.976 (NTSC) for 24p. All footage in a single project
must be of the same frame rate.
Aspect ratio 4:3 or 16:9 (widescreen).
Audio bit depth 16 bits.
56
Audio sample rate 48 kHz.
Prepare for digital video capture
1 After connecting the device to your computer using an IEEE 1394 or SDI connection, turn the device on, and do
one of the following:
• If it’s a camera, set it to the playback mode, which may be labeled VTR or VCR.
• If it’s a deck, make sure that its output is set properly.
Note: Don’t set a camera to any of the recording modes, which may be labeled Camera or Movie.
2 Start Adobe Premiere Pro. When the Welcome screen appears, do one of the following:
• Click New Project, select the desired preset from the Load Preset panel, and click OK.
• Select an existing project. The project must use a preset that matches the video and audio settings of the footage
you’re going to capture.
3 Choose Edit > Preferences > Scratch Disks (Windows) or Premiere Pro > Preferences > Scratch Disks (Mac OS),
and specify the locations for Captured Video and Captured Audio.
Note: Adobe Premiere Pro supports high bit-depth (greater than 8-bit) video necessary for editing standard and high
definition footage.
Set capture format and preferences
Use the Capture panel (choose File > Capture) to capture digital or analog video and audio. This panel includes a
preview, which displays video being captured, controls for recording with or without device control, a Settings pane
for editing your capture settings, and a Logging pane for logging clips for batch capturing. For convenience, some
options available in the Capture panel are also available in the Capture panel menu.
Page 63

ADOBE PREMIERE PRO CS3
April 1, 2008
User Guide
You can control certain source devices, such as camcorders and decks, directly from the Capture panel, provided
your computer has an Adobe Premiere Pro-compatible IEEE1394, RS-232, or RS-422 controller. If your source
device lacks any of these interfaces, you still use the Capture panel, but you must cue, start, and stop your source
device using its controls.
Note: When not capturing in Adobe Premiere Pro, close the Capture panel. The Capture panel assumes primary focus,
so leaving it open while editing or previewing video disables output to the source device and may decrease performance.
57
A
E
Capture panel
A. Status area B. Preview C. Tabs D. Panel menu E. Transport controls
CB D
Set the capture format
1
With a project open, choose Project > Project Settings > Capture.
2 From the Capture Format menu, choose the settings that match your source material.
Set capture preferences
1
Choose Edit > Preferences > Capture (Windows) or Premiere Pro > Preferences > Capture (Mac OS).
2
Specify whether you want to cancel capture on dropped frames, report dropped frames, or generate a batch log file.
3 Select whether to use device control timecode. If a device controller is in use (for example, for
RS-422/232-controlled devices), the last selection enables Adobe Premiere Pro to record the timecode supplied by
the controller instead of attempting to record any timecode that might be written to the source tape.
File size limits
Adobe Premiere Pro does not limit the size of files. However, your capture card, operating system, or hard disk may
set such a limit. Check your capture card and hard disk documentation for information on support of large files.
Page 64

ADOBE PREMIERE PRO CS3
April 1, 2008
User Guide
The format of your hard disk greatly affects its ability to handle large files. FAT32 formatting limits each file to 4
GB, or about 18 minutes of DV footage. NTFS formatting doesn’t limit file size, although files are still subject to
limitations that may be imposed by other components of your video-editing system. This is why it is best to use
NTFS-formatted disks as the scratch disks where you capture video and for the target drives where you export video
files.
Set up device control
You can use device control to manage and automate video capture and to export sequences to tape. Device control
lets you precisely control devices, such as decks and camcorders, with capture and batch capture controls. With
device control, you can use the Capture panel to log each clip and then use the Batch Capture command to record
logged clips automatically.
Adobe Premiere Pro controls devices through its built-in support of IEEE 1394 (FireWire, i.Link) and its support,
on Windows only, of compatible RS-232 and RS-422 controllers. Regardless of type, if your device isn’t automatically recognized, you need to set it up. Before setting up device control, make sure that you have a tape deck or
camcorder that supports external device control and a cable that connects the device to your controller, computer,
or both.
Set up a project for device control
Some device control settings are available when you choose Edit > Preferences > Device Control (Windows) or
Premiere Pro > Preferences > Device Control (Mac OS), and others are in the Device Control section at the bottom
of the Settings pane of the Capture panel. Device control settings apply to the entire project.
58
1 Choose Edit > Preferences > Capture (Windows) or Premiere Pro > Preferences > Capture (Mac OS).
2 Select one or more of the Capture options. If you are using a device controller that generates its own timecode,
select Use Device Control Timecode. This replaces the unreadable timecode recorded on the tape with the
controller’s timecode. Click OK.
3 If you want captured clips to be saved to a specific bin in a project, make sure that the project is open and that the
bin exists in the Project panel.
4 Choose File > Capture.
5 In the Settings pane, click Edit to verify that the capture settings are appropriate for your device.
Note: Not all formats have options for capture settings. For example, the HDV format has no options.
6 (Optional) Click Save to save a group of project settings to a new custom Project Settings preset.
7 Click OK when you’ve selected the correct settings for your device.
8 In the Capture Locations section of the Settings pane, make sure that the drives you designate for captured video
and audio have sufficient free space. If you want to change the locations, click the corresponding Browse button, set
the location, and click OK.
9 In the Device Control section, if device control has not been set up, choose a device from the Device menu and
click Options to set it up. Options vary depending on the device; see the documentation for your device driver.
10 Test the device control buttons in the Capture panel to verify that they work and that you see video in the
preview.
11 Click Logging. In the Setup area, make sure that the Capture menu setting is correct, and select a bin from the
list if needed. By default, the Project panel is selected in the Log Clips To field.
12 Enter information into the Clip Data area as needed.
Page 65

ADOBE PREMIERE PRO CS3
April 1, 2008
User Guide
Note: To avoid confusion, make sure that the tape name is unique. Some types of device control software may ask you
to specify the Tape Name setting each time you insert a new tape. The other Logging Data options aren’t required.
Set up a device for device control
Adobe Premiere Pro supports the control of devices such as camcorders and VTRs. It controls DV and HDV devices
by way of IEEE 1394 (FireWire, i.Link) connections and, on Windows only, serially controlled devices by way of
RS-232 or RS-422 controllers that might be installed on a given computer.
1 Open the Device Control Preferences dialog box by doing one of the following:
• Choose Edit > Preferences > Device Control (Windows) or Premiere Pro > Preferences > Device Control (Mac OS).
• In the Capture panel, click Settings.
2 Select the type of device you want to control from the Device pop-up menu.
3 Click Options, and do one of the following:
• If you are connecting a DV or HDV device, select the device brand and device type. If your particular device is
not listed, select a device from the same family (if known), leave at Standard, or click Go Online For Device Info.
• If you are connecting a serial device, specify Protocol, Port, Time Source, and Time Base settings.
4 In the Device Control Options dialog box, check the status display:
Offline Adobe Premiere Pro does not see your device, and you need to check all your connections and settings.
59
Detected Adobe Premiere Pro sees your device but cannot control the tape (possibly because there is no tape
inserted).
Online Adobe Premiere Pro sees your device and can control the tape. Click OK.
5 In the Device Control section of the Settings pane, specify the following options as needed:
Preroll Time Indicates how much before the In point Adobe Premiere Pro starts playing the tape before capture.
The appropriate value varies depending on the device you are using.
Timecode Offset Indicates the number of frames to adjust the timecode embedded in the captured video so that it
corresponds with the timecode number of the same frame on the source tape.
Calibrate an RS-422 or RS-232 device (Windows only)
1
Select File > Export > Export To Tape.
2 Click Options.
3 Enter the number of offset frames, as appropriate for your device, to the Delay Movie Start, Manual Edit Timing,
and Preroll boxes.
Control an RS-422 or RS-232 device (Windows only)
1
Select Edit > Preferences > Device Control (Windows).
2 From the Devices menu, select Serial Device Control.
3 Click Options.
4 In the VTR And Port Control section, select a protocol and port for your device.
5 In the Time Control section, select a time source and timebase for your device.
Page 66

ADOBE PREMIERE PRO CS3
April 1, 2008
Device controls in the Capture panel
User Guide
You can use the controls in the Capture panel to operate the device as you log clips. The jog control lets
you navigate quickly to nearby frames, and the shuttle control lets you change the speed of the tape as you
play it forward or backward. The Record button lets you begin a manual capture.
If you press the Rewind button when the tape is stopped, the device rewinds the tape at full speed. If you
rewind when the tape is playing or paused, the device rewinds while displaying video in the preview.
If you press the Fast Forward button when the tape is stopped, the device moves the tape forward at full speed.
If you fast forward when the tape is playing or paused, the device moves the tape forward while displaying video in
the preview.
If you press the Previous Scene button, the tape shuttles to the previous start point and pauses. If you press the
Next Scene button, the tape shuttles to the start point of the next scene and pauses.
Note: Previous Scene and Next Scene are supported for DV on Windows only, and not supported for HDV for either
Windows or Mac OS.
You can also press the J, K, and L keys to control your device. J rewinds the tape; L fast forwards it, and K stops it.
The speed of forward or reverse increases each time you press J or L. To rewind or forward one frame at a time, hold
down K and press J or L once. To slowly rewind or forward, hold down K+J or K+L.
To operate Capture panel controls using the keyboard, see the tool tips in the Capture panel. You can change the
shortcuts by choosing Edit
> Keyboard Customization. You can also shuttle to a tape location by typing its timecode
into the Capture Panel’s current timecode field, to the lower left of the monitor, and pressing Enter/Return.
60
Capture without device control
If you do not have a device that can be controlled by Adobe Premiere Pro, you can capture video manually. You
have to operate both the playback device controls and the Capture panel controls in Adobe Premiere Pro.
Note: You must preview HDV footage on an external TV monitor, or, if the source is a camcorder, on the camcorder
viewfinder while shuttling, logging, and capturing on Mac OS. The preview pane in the Capture panel will show the
words Previewing On Camera.
1 Make sure that the deck or camcorder is properly connected to your computer.
2 Choose File > Capture.
3 (Mac OS) If a QuickTime Capture Settings dialog box opens, choose video and audio settings appropriate to your
project.
These settings will be preserved for the project, but you may need to set them again for each new project.
4 In the Setup area of the Logging pane, choose your media type from the Capture pop-up menu.
5 Use the controls on the deck or camcorder to move the videotape to a point several seconds before the frame
where you want to begin capturing.
6 Press the Play button on the deck or camcorder, and then click the red Record button in the Capture panel.
7 Record a few seconds beyond the end of the footage you need, to provide room for editing. Press the Esc key to
stop recording.
When the Save Captured File dialog box appears, enter logging data and click OK. The new file is listed in the
Project panel and is saved to the disk location specified in the Settings pane of the Capture panel.
Page 67

ADOBE PREMIERE PRO CS3
April 1, 2008
User Guide
Capture with device control
After a device and the project are set up properly, you can begin capturing clips using device control. You can capture
an entire tape or you can mark In and Out points for each clip, and then capture the clip. You can log In and Out
points for any number of clips and have Adobe Premiere Pro capture as many as you like in a batch. Adobe Premiere
Pro supports FireWire device control on both platforms, but supports serial device control on Windows only.
Note: On Mac OS, you must preview HDV footage on an external TV monitor, or, if the source is a camcorder, on the
camcorder viewfinder while shuttling, logging, and capturing. The preview pane in the Capture panel will show the
words Previewing On Camera.
See also
“Set up device control” on page 58
Capture an entire tape
1
Choose File > Capture.
2 (Mac OS) If a QuickTime Capture Settings dialog box opens, choose video and audio settings appropriate to your
project.
These settings will be preserved for the project, but you may need to set them again for each new project.
61
3 In the Capture panel, make sure that the device is online, as indicated above the preview.
4 Insert a tape into the device. Adobe Premiere Pro prompts you to name the tape. Be sure not to give any two tapes
the same name.
Including a unique number in the name can help you avoid using the same name twice.
5 In the Setup area of the Logging pane, choose the media type from the Capture pop-up menu.
6 Rewind the tape to its beginning.
7 If you want to create a separate file (Windows) or a subclip (Mac OS) for each new scene on the tape, select Scene
Detect in the Capture area (not available for HD or HDV footage).
8 If you want to capture frames that extend beyond the In and Out points of each clip, enter the number of frames
in the Handles box in the Capture area.
9 Click Tape.
Select and capture a clip
1
Choose File > Capture.
2 (Mac OS) If a QuickTime Capture Settings dialog box opens, choose video and audio settings appropriate to your
project.
These settings will be preserved for the project, but you may need to set them again for each new project.
3 In the Capture panel, make sure that the device is online, as indicated above the preview.
4 Insert a tape into the device. Adobe Premiere Pro prompts you to name the tape. Be sure not to give any two tapes
the same name.
5 In the Setup area of the Logging pane, choose the media type from the Capture pop-up menu.
6 Use the controls in the Capture panel to move to the first frame you want to capture, and click Set In. Then move
to the last frame you want to capture, and click Set Out.
Page 68

ADOBE PREMIERE PRO CS3
April 1, 2008
User Guide
Note: If capturing HDV footage on Mac OS, you must preview on an external TV monitor or camcorder viewfinder
while logging. The preview pane in the Capture panel will show the words Previewing On Camera.
7 If you want to capture frames that extend beyond the In and Out points of each clip, enter the number of frames
in the Handles setting of the Capture section.
8 Click the In/Out button in the Capture area of the Logging pane to capture the clip.
Determine if your device is online
1 Select File > Capture.
2 (Mac OS) If a QuickTime Capture Settings dialog box opens, choose video and audio settings appropriate to your
project.
These settings will be preserved for the project, but you may need to set them again for each new project.
3 Select the Settings tab in the Capture panel.
4 In the Device Control area of the Settings tab, click Options.
5 In the DV/HDV Device Control Settings dialog box, click Check Status.
Use automatic scene detection
Instead of manually logging In and Out points, you can use the Scene Detect feature. Scene Detect analyzes the video
for scene breaks as indicated by the tape's Time/Date stamp, such as those caused when you press the camera’s pause
button while recording. When Scene Detect is on and you perform a capture, Adobe Premiere Pro CS3 automatically captures a separate file (Windows) or creates a master clip with a subclip (Mac OS) at each scene break it
detects. On Mac OS, it places the subclips in a new bin. Scene Detect works whether you capture an entire tape or
just a section between specific In and Out points. If you turn on Scene Detect and capture using In and Out points,
Scene Detect may break up clips between the defined In and Out points if a scene break is detected.
62
Scene Detect logs scenes for batch capturing without altering the tape’s progress. It also logs scenes that occur across
timecode breaks.
❖ In the Capture panel, do either of the following:
• Click the Scene Detect button below the image.
• Select Scene Detect in the Capture area of the Logging pane.
Scene Detect starts a separate file (Windows) or subclip (Mac OS) at the first frame of each scene
Note: Automatic scene detection isn’t available for HDV or HD assets.
Page 69

ADOBE PREMIERE PRO CS3
April 1, 2008
User Guide
Adobe Premiere Pro CS3 will capture a separate file for each scene it detects (Windows), or it will capture a master
clip for the duration of the capture, with a subclip for each scene, placing all subclips into a new bin (Mac OS).
Common capture issues
If you run into problems while capturing digital footage, refer to Adobe Premiere Pro Help or the documentation
for your camera, deck, or capture card. For more information, check Adobe Technical Support. The following are
common issues that may arise when you capture digital video:
• If your device (camera or deck) goes into sleep mode, close and then reopen the Capture panel; or close the
Capture panel, turn the device off and back on, and then reopen the Capture panel. You can disable sleep mode
on many cameras by connecting them to AC power and ejecting the tape.
• If video looks grainy in the Capture panel or Monitor panel, Adobe Premiere Pro may have decreased display
quality to preserve capture quality. Video is captured and stored at the quality you determine and always plays at
that quality on an NTSC or PAL monitor. On slower systems, Adobe Premiere Pro may lower the quality of the
capture preview in order to ensure that sufficient CPU resources are available for full-quality capture.
• If the video image does not appear in the Capture panel, verify your device control and capture settings. Then,
leaving the device on, restart Adobe Premiere Pro.
• If captured audio and video are not in sync, make sure that sections of tape weren’t skipped (left unrecorded)
between shots. Blank tape areas lack timecode, which may cause interruptions in the camera time mode. When
you capture the blank area, the camera doesn’t transmit valid frames, but time continues to be marked.
• If no audio is recording, try playing a source through the computer’s sound input and speaker system without
recording. If you can’t hear it, the audio source may not be connected properly or audio parameters may not be
set properly. Check hardware connections, Sounds And Audio Devices in the Windows Control Panel, and mixer
settings, and refer to the documentation for your sound card. In Adobe Premiere Pro, select Edit > Preferences
(Windows) or Premiere Pro > Preferences (Mac OS), and check the settings for Audio, Audio Hardware, and
Audio Output Mapping.
• When shuttling, logging, and capturing HDV footage on Mac OS, the preview pane in the Capture panel will
remain blank. You must preview this footage on an external TV monitor or, when the source device is a
camcorder, on its viewfinder.
63
See also
Troubleshoot digital video capture and playback
Batch capturing
About batch capturing
Adobe Premiere Pro supports batch capturing—automatic, unattended capture of multiple clips from a controllable
device. You can define a batch by selecting a group of clips you have logged. These appear as offline (placeholder)
clips in the Project panel or in a bin. You can capture any number of logged, offline clips by selecting them and
choosing File > Batch Capture. When you begin capture, Adobe Premiere Pro automatically re-sorts entries by tape
name and timecode In points so that they’re captured as efficiently as possible.
To save time by reducing the number of clips you log manually, consider using Scene Detect. See “Use automatic
scene detection” on page 62.
Page 70

ADOBE PREMIERE PRO CS3
April 1, 2008
User Guide
When you want to batch capture a set of logged (offline) clips, select them in the Project panel and choose File >
Batch Capture. If you organized offline clips into bins, you can batch capture an entire bin by selecting the bin.
Adobe Premiere Pro can capture video in the background so that you can perform other tasks during capture. When
you start either a manual capture or batch capturing in Adobe Premiere Pro, you can minimize the Adobe Premiere
Pro application or switch to another application without stopping capture. After you restore the Adobe Premiere
Pro window, you can click anywhere inside it to halt capture. However, be aware that frames may drop out if you
perform a system-intensive task while capturing. The chance of dropped frames is lower on a high-performance
system, such as one with dual processors.
Note: Batch capturing is not recommended for the first and last 30 seconds of your tape because of possible timecode
and seeking issues. Capture these sections manually.
64
A
B
Preparing for batch capturing
A. Clips selected for capture B. Capture Settings option
See also
“Set up device control” on page 58
Log clips for batch capturing
You can specify which shots you want to use from source tapes by logging them as a set of offline files for later
capture. If you set device-control options in the Preferences dialog box to remotely control your camera or deck,
you can create offline files by using the clip-logging controls in the Capture panel, and then use the Batch Capture
command to capture the logged clips automatically.
If you have a list of In and Out points, you can log them manually without a device online; simply enter each shot’s
In and Out points and click the Log Clip button. You can also log frame numbers using a separate logging or spreadsheet program and then import the spreadsheet into Adobe Premiere Pro as a list of offline files.
1 In the Capture panel, make sure that your device is online, as indicated above the preview.
2 Insert a tape into your device. Adobe Premiere Pro prompts you to name the tape. Be sure not to give any two
tapes you log the same name.
3 Use the controls in the Capture panel to move to the first frame in your first shot, and click the Set In button.
Then move to the last frame in the shot and click the Set Out button.
Page 71

ADOBE PREMIERE PRO CS3
April 1, 2008
User Guide
4 In the Setup area of the Logging pane, choose your media type from the Capture pop-up menu.
5 If you want to capture some frames extending beyond the In and Out points of each clip, enter the number of
frames for these handles in the Handles setting of the Capture section.
6 Click the Log Clip button in the Timecode area of the Logging pane to log the clip you identified. Name the clip
when prompted. Adobe Premiere Pro logs the clip by placing an offline file for it in the Project panel.
7 Repeat steps 2 through 6 to log each shot you want to batch capture.
65
Capture panel with Logging active
Log clips interactively
1 Make sure that your device is connected and in VTR or VCR (not Camera) mode, and then choose File >
Capture.
2 In the Logging pane, enter the settings you want to use as the defaults for Setup and Clip Data.
3 Play the tape. Click Set In or Set Out at any time, even as the tape plays. Repeat as necessary.
4 When you are satisfied with the In and Out points, click Log Clip, verify the clip data, and click OK.
You can make slight timecode adjustments by using the plus sign (+) or minus sign (–). For example, to add five
frames to the end of the Out point, select the entire Out point timecode, type +5, and press Enter/Return.
Page 72

ADOBE PREMIERE PRO CS3
April 1, 2008
User Guide
Tips for logging clips interactively
• Set options on the Logging pane of the Capture panel. Adobe Premiere Pro uses the current data in the Setup and
Clip Data sections as defaults for subsequent logged clips. If you want to log a series of clips into the same bin
with similar logging data, save work by specifying clip data before you start logging the series. When you click the
Log Clip button, a dialog box appears so that you can accept or change the clip data.
• In the Clip Data section, specify a tape name. Adobe Premiere Pro asks for this name every time you begin batch
capturing.
• The Clip Name in the Clip Data section progresses in numerical increments automatically. For example, if you
want to number a series of clips with clip names starting with Car Chase, enter Car Chase 01, making sure that
the clip name ends with the number. Subsequent logged clips default to the next number, such as Car Chase 02.
• You can change Capture panel settings at any time. For example, if you see the action changing as the tape plays
back, you can get ready to capture the new upcoming action by selecting a different bin to log subsequent clips
into or by typing a different name for Description or Scene. You don’t have to stop the tape as you change settings.
• You can operate the device and log clips using the keyboard. See the tool tips for Capture panel controls, or
choose Edit > Keyboard Customization to view or change the shortcuts.
• You must click Log Clip to create a new offline file. This pauses the tape as you confirm the clip data for the new
offline file.
66
About batch-capture settings
A batch list of logged clips appears as a list of offline files in the Project panel. If you plan to capture many clips, you
may want to create bins in the Project panel in advance so that you can log each set of offline clips directly into its
own bin. When you batch capture, the offline files are replaced by captured clips, maintaining the bin organization
you set up in advance.
You can capture audio and video to separate drives, if this is supported by the format codec. (This is not supported
by the native DV and HDV capture in Adobe Premiere Pro.) Set the locations for new files by choosing Edit >
Preferences > Scratch Disks (Windows) or Premiere Pro > Preferences > Scratch Disks (Mac OS). If you don’t
change the defaults, all files captured or created by Adobe Premiere Pro are stored in the same folder in which it
stores the project files.
By default, the settings that Adobe Premiere Pro uses to batch capture offline files are the project’s current capture
settings. If an offline file has its own capture settings, Adobe Premiere Pro uses those settings when capturing it; the
resulting clip maintains its capture settings so that it can easily be recaptured using the same settings. For example,
if a clip’s settings specify capture at a frame size of 720 x 480 in a project with a frame size of 320 x 240, Adobe
Premiere Pro captures the clip at 720 x 480 unless you change its default. You can override a clip’s capture settings
by choosing the Override Capture Settings option in the Batch Capture dialog box.
Specify capture settings
You can assign capture settings to an offline file that are different from the project’s, for example, to capture the clip
at a resolution higher than the project’s.
• To determine whether the offline file already has its own capture settings, look in the Capture Settings column in
the Project panel. Scroll right to see this column. If an offline file has its own capture settings, its box in this
column has a check mark. If the column is hidden, choose Edit Columns from the Project panel menu; then select
Capture Settings. Click OK.
Page 73

ADOBE PREMIERE PRO CS3
April 1, 2008
User Guide
• To find out or change the capture settings for an offline file, select the clip in the Project panel, and choose Clip >
Capture Settings > Set Capture Settings. The Capture Format menu lets you view the clip’s capture format or
choose a new one. Typically, choose a format that matches that of the source footage.
• To remove a clip’s capture settings, select the clip in the Project panel and choose Clip > Capture Settings > Clear
Capture Settings. By default, Adobe Premiere Pro captures this clip with the project’s capture settings.
See also
“Set up device control” on page 58
Batch capture clips
1 Select the offline clips that you want to capture, and then choose File > Batch Capture.
2 In the Batch Capture dialog box, do any of the following:
• Choose Capture With Handles and enter the number of frames for the handles if you want to capture frames
beyond the In and Out points identified for each clip in the batch.
Note: The number of frames you enter here will be added to the number you set for handles in the Capture panel.
• Choose Override Capture Settings if you want to replace the capture settings of individual clips in the batch with
the project’s default settings.
3 Verify that the deck and source videotape are set up properly for capture, and then click OK.
4 In the Insert Tape dialog box, insert the requested tape and click OK. If you are capturing from multiple tapes,
be ready to insert them when prompted.
5 If you want to stop batch capturing, click the Stop button in the Capture panel, or press the Esc key.
67
Troubleshooting batch capturing
You can perform trouble-free batch capturing if device control and the project’s capture settings are set up properly
and if the offline files you logged are consistent and free of conflicting data. If you encounter problems with batch
capturing, make sure that all clips you want to batch capture are set up with the proper settings:
• Each clip’s Status must be Offline. Verify the status in the Project panel List view. If a clip is not offline, select it
in the Project panel and choose Project > Unlink Media. If you select multiple clips and some are online, Adobe
Premiere Pro captures the offline files only.
• Tape Name, Media Start, and Media End must be specified in the Edit Offline File dialog box for each offline file.
As long as one selected offline file contains these settings, the Batch Capture command is available, but only clips
with all three settings are captured. If necessary, verify this in the Project panel List view or double-click each
offline file to edit settings.
• Recording video, audio, or both must be supported by the selected capture device. For example, audio isn’t
captured if the capture device doesn’t capture audio. If settings exist that can’t be captured, batch capturing stops
and the Capture Settings Error dialog box appears.
• The file name of each clip (as specified in the Capture Settings dialog box) must not duplicate the file name of an
existing clip. If necessary, double-click each offline file to verify that its name is unique. If you select an offline file
with a duplicate name for batch capturing, Adobe Premiere Pro slightly alters the name of that clip when it
captures it. In this way, it avoids overwriting the other file with the same name.
Page 74

ADOBE PREMIERE PRO CS3
April 1, 2008
User Guide
To manage capture errors when the Capture Settings Error dialog box appears, do one of the following:
• To fix the capture settings for any clips in the list, select one or more files in the list and click Edit Settings.
• To omit the clips with invalid capture settings and proceed with the rest of the batch capture, click Skip. Clips you
skip are removed from the list and are not captured.
• To stop batch capturing, click Cancel. No clips are captured.
Import and export batch lists
You can import batch lists in a variety of file formats: tab-delimited text (TXT), comma-separated value (CSV),
TAB, and PBL. When imported, each entry in the text batch list appears as an offline file in the Project panel. You
can also export offline files as a CSV batch list so that you can transfer a logged clip list between projects and
workstations. To see the format of a batch list, export it and open the file in a text editor such as Notepad or in a
spreadsheet application. A batch list text file may come from sources such as Adobe Premiere 6.5, logging utilities
such as Pipeline Autolog, or custom video-production software that uses a database or spreadsheet program to
generate a batch list.
When you import a batch list, the order of fields in the list must be as follows: tape name, In point, Out point, clip
name, and comment. When you export offline files as a batch list, Adobe Premiere Pro orders the fields as follows:
tape name, In point, Out point, clip name, log note, description, scene, and shot/take. Exported field data is exported
from the corresponding columns in the List view of the Project panel.
68
• To import a batch-list timecode log, open a project and choose Project > Import Batch List. Locate and select the
file, and click Open.
• To export a batch-list timecode log, select the files that you want to log. Then choose Project > Export Batch List.
Specify a file name and location, and click Save.
Work with offline files
An offline file is a placeholder for a source file that isn’t currently available on disk. Offline files contain information
about the missing source files they represent, and they give you flexibility when actual files are not available. If an
offline file appears in the Timeline panel, “Media Offline” appears in the Program Monitor and in the track.
When you use the Capture panel to log clips from a tape, Adobe Premiere Pro automatically creates offline files
containing the exact information required to capture the clips later. You can also create offline files manually. Use
offline files in situations such as the following:
• Clips are logged but not yet captured. Because offline files behave like captured clips, you can organize the logged
offline files in the Project panel and even lay out sequences with them in the Timeline panel before the offline
clips are actually captured. When the offline files are captured (or located, if they were captured but missing), they
replace the corresponding offline files.
• You want to capture logged clips using device control or batch capturing. In Adobe Premiere Pro, a batch-capture
list is a set of offline clips; selecting specific offline clips sets them up for batch capturing.
• You want to recapture clips used in the project. This requires making the online clips offline by using the Unlink
Media command.
• A source file is unavailable when you open a project, so that Adobe Premiere Pro can’t locate it automatically and
you can’t locate it manually. Adobe Premiere Pro provides Offline and Offline All buttons in this case.
Note: Online and offline clips in Adobe Premiere Pro are not related to the concepts of online and offline editing.
Page 75

ADOBE PREMIERE PRO CS3
April 1, 2008
Create an offline file
1
In the Project panel, click the New Item button at the bottom of the panel and choose Offline File from the menu.
2 For Contains, select an option as needed.
3 For Tape Name, type the name of the tape containing the source video for the offline clip.
4 For File Name, type the name of the file as you want it to appear on disk when you capture it using Adobe
User Guide
Premiere Pro. If you’re creating an offline file for a source file that is captured but isn’t on your computer yet, type
the name of that file.
5 Enter a description, scene, shot/take, and log note as needed.
6 Enter the timecode for the entire untrimmed clip, including any extra frames you plan to capture for editing and
transitions.
Note: To be eligible for capture, an offline file must contain at least a tape name, file name, and Media Start and Media
End settings.
Edit an offline file
❖ In the Project panel, double-click the offline file, edit options as needed, and then click OK.
Replace an offline file with a captured source file
You can link an offline clip to a source file, even to a source file different from the one from which the offline clip
might have been made. The linked source file will appear anywhere the offline clip is used in a project. It is possible,
for example, to edit an online clip into a sequence, make its source offline, and link the offline clip to another source
file. The new source will appear in the sequence wherever the original one did.
69
Note: The source file must have the same type of audio track as the offline clip. For example, if the offline clip has a
stereo audio track, you cannot link it to a source file with a monaural audio track.
1 In the Project panel, select one or more offline files.
2 Choose Project > Link Media.
3 Select the source file, and click Select.
Note: If you selected more than one offline file, the Attach Which Media dialog box appears in turn for each file you
selected. Pay attention to the offline file name in the title bar of the dialog box so that you relink the correct source file
to each offline file.
Convert an online file to offline
1
In the Project panel, select one or more online files.
2 Choose Project > Make Offline.
3 Select one of the following options:
Media Files Remain On Disk
Media Files Are Deleted Makes the selected files offline in the project and erases the source files from the disk.
Makes the selected files offline in the project but doesn’t erase the source files from the disk.
Note: If you select Media Files Remain On Disk and recapture a clip using the same file name as the file left on disk,
the original media file is replaced. To preserve original clips without changing their names, move them to another
folder or disk, or specify different file names for the clips you recapture.
Page 76

ADOBE PREMIERE PRO CS3
April 1, 2008
User Guide
Timecode
About timecode
Many camcorders and high-end video decks record timecode, which marks specific frames with unique addresses.
Timecode is important whenever you want to capture exactly the same frames that were identified or captured
previously, as in the following tasks:
• You want to log clips before you capture them.
• You plan to capture clips using batch (automated) capture.
• You want to recapture clips because the original files became corrupted or were deleted.
• You plan to export sequences to another system by using AAF or EDL.
• You’re using a system in which you edit quickly with low-resolution captures, and later recapture the clips at full
resolution and quality for the final version.
• You plan to synchronize captured video with audio recorded separately.
Unlike the numbers on time counters found in home VCRs, timecode is recorded onto videotape as part of the video
signal. If footage lacks timecode, you can add it by copying it with a camera or deck that writes timecode. You can
then log or capture the video from that device.
70
For best results, timecode should run continuously from the beginning to the end of the tape; it shouldn’t restart
from zero anywhere in the middle. In editing, if you log a capture In point such as 00:00:01:09 but that number
occurs on the tape two or three times because of timecode restarts, Adobe Premiere Pro can’t be certain which
00:00:01:09 is the place to start its capture. It can easily capture the wrong clips from tapes with discontinuous
timecode.
To ensure unbroken timecode, you need to either shoot it continuously or stripe your tape with it before shooting.
To ensure that you always shoot continuous timecode, record at least 5 seconds of extra video past the end of the
action in any shot. If you review a clip in the camera, be sure to rewind the tape back into that 5-second margin
before recording again. Your camcorder reads the timecode from the frame on which you stop and begins recording
timecode with the very next frame number when you start your next shot. Be careful; if you leave a gap between the
last frame of the previous shot and the first frame of the next, the camcorder begins writing timecode at 00:00:00:00
again.
Stripe tape or replace timecode
You can ensure continuous timecode by recording timecode onto the tape before you use it. This process is called
striping the tape. Striping is not necessary if you follow recommended shooting practices, but it can protect you from
accidentally breaking timecode by miscuing a tape in your camera.
Stripe a tape with timecode
1
Put an unused tape in the camera. It should have no timecode.
2 If you’re using a camera for striping, attach the lens cap and disable audio recording.
3 Ensure that all camera settings (particularly the audio sample rate) are exactly the same as the settings you will
use when you shoot. Use all these same settings whenever shooting on that tape.
4 Begin recording. Let the camera or deck run until the entire tape has been recorded.
Page 77

ADOBE PREMIERE PRO CS3
April 1, 2008
User Guide
5 Before you record video on a striped tape, play about 30 seconds of it from the beginning. Verify that the
camcorder is reading the timecode you striped before you start shooting. The 30-second empty lead on the tape also
helps in batch capturing.
Check your camera’s settings whenever changing tapes, especially when reinserting a tape you had begun shooting
previously. Though you may want to use different settings for different tapes, it’s best to use the same settings from
beginning to end of each tape. These should match the settings used when first striping that tape.
Replace DV timecode
If your source footage is in DV format and its timecode isn’t continuous, you can replace its timecode by making a
DV copy, or dub, of the tape. The DV device making the copy records new timecode that is continuous, so you can
then log and capture video, with the new timecode, from the copy.
Note: This technique does not work when dubbing to the DVCAM format or using a Panasonic AG-DV2500 as the
record deck.
1 Load the tape you shot into a camcorder or deck, and fully rewind it.
2 Load a new tape into a second camcorder or deck, which you will use to record the copy.
3 If the recording device includes an option to record video with the timecode from your original tape, be sure that
this option is disabled. See the operating instructions for the device for information on this option.
4 If both devices are digital, connect them using a digital connection, such as IEEE 1394 or SDI. This will make a
full-quality copy.
5 Connect the recording device to a television monitor.
6 Set both devices to VTR mode.
7 Make sure that the recording device is set to record from the digital port.
8 Begin recording the new tape and then start your original tape playing. Let the camcorders or decks run until the
entire original tape has been copied.
71
Note: Scene Detect recognizes the starting and stopping points for each shot by looking for jumps in the timestamps.
Because copying a tape this way creates a single clip with a continuous timestamp, you can’t use Scene Detect when
you capture the copy in Adobe Premiere Pro.
Capturing timecode
The timecode of source video is captured when you use device control. Timecode capture with controllable analog
devices depends on the precision of your tape deck. If your tape deck cannot read the timecode accurately, you may
have to calibrate your system or manually assign the timecode to your movie by matching frames.
Note: Timecode is visible in the tape counter only on equipment that can recognize timecode, unless the timecode has
been burned in or recorded over the picture in a copy of the tape. Most analog home VCRs cannot read or write
timecode.
Page 78

ADOBE PREMIERE PRO CS3
April 1, 2008
User Guide
Set timecode manually for a clip
At times you may want to change the timecode from that recorded by Adobe Premiere Pro. For example, you
captured footage from a DV copy of a Hi8 tape originally recorded with RCTC (Rewritable Consumer Time Code).
The DV copy, and the video files on your computer copied from it, carry the DV timecode, not the original RCTC.
For convenience in referencing shot logs made for the original Hi8 tape, you want to reset the timecode to the
original RCTC numbers.
1 Select the clip in the Project panel.
2 Choose File > Timecode, specify options as needed, and click OK.
Enter timecode
As you capture and edit video, you enter timecode values many times. For example, you enter timecode values to
set In and Out points for clips and to navigate the Timeline panel. Adobe Premiere Pro provides many ways to enter
timecode.
In Adobe Premiere Pro, the duration between the In and Out points includes the frames indicated by the timecode.
For example, if you enter the same timecode for the In and Out points of a clip, the duration of the clip is one frame.
When entering timecode, you can substitute periods for colons or type numbers without punctuation. Adobe
Premiere Pro interprets the numbers you type as hours, minutes, seconds, and frames.
72
• To set a specific timecode, select the timecode, type a new timecode, and then press Enter/Return.
• To adjust the current timecode by dragging, drag the timecode horizontally. For example, to set an earlier
timecode, drag to the left.
• To adjust the current timecode by using a relative value, type the plus sign (+) or minus sign (–) and the number
of frames to add or subtract. For example, to subtract five frames from the current timecode, select the entire
timecode, type –5, and then press Enter/Return.
View timecode as a burn-in
You can display a clip’s timecode within the video portion of the clip by applying the Timecode effect to that clip.
You can display timecode within the video portion of a sequence, or any part of a sequence, by applying the
Timecode effect to a transparent video clip for the period when you want the timecode visible. Onscreen timecode
is commonly referred to as burn-in timecode, and is used in rough edits and proofs to give frame-accurate reference
points to editors and their collaborators.
See also
“Timecode effect” on page 354
View clip timecode as a burn-in
1
In the Video Effects bin of the Effects panel, click the triangle next to the Video sub-bin to open it.
2 Drag the Timecode effect and drop it onto a clip in a sequence.
3 Click the Effect Controls panel to make the panel active.
4 Click the triangle next to Timecode to expose the options for this effect.
5 Adjust the options as needed.
Page 79

ADOBE PREMIERE PRO CS3
April 1, 2008
View sequence timecode as a burn-in
1
At the bottom of the Project panel, click the New Item icon . Select Transparent Video.
2 Drag the transparent video clip to an empty track in the sequence higher than all other video tracks.
3 In the Video Effects bin of the Effects panel, click the triangle next to the Video sub-bin to open it.
4 Drag the Timecode effect and drop it onto the transparent video clip.
5 Click the Effect Controls panel to make the panel active.
6 Click the triangle next to Timecode to expose the options for this effect.
7 Adjust the options as needed.
User Guide
Online and offline editing
About online and offline editing
For online editing, you capture clips at the level of quality required for the final version of the video program. This
is the default method of working in Adobe Premiere Pro. Online editing works well when the speed and storage
capacity of the host computer are adequate to the demands of the video formats used. For example, most modern
computers can handle the data rate of DV in full resolution. They may be challenged, however, by the greater
demands of, for example, HDV or HD footage. For many videographers, that’s where offline editing comes in.
73
In offline editing, you capture low-quality clips for editing purposes, but recapture them at high resolution when it’s
time to finish, render, and export your final product. Editing the low-resolution clips allows standard computers to
edit excessively large assets, such as HDV or HD footage, without losing performance speed or running out of
storage. It also lets editors use laptop computers to edit—for example, while on location.
You may edit a project entirely online. On the other hand, you may edit in a two-phase workflow: making your
initial creative decisions offline, then switching to online for finishing tasks like fine-tuning, grading, and color
correction.
You can complete an offline edit of, for example, an HD project with Adobe Premiere Pro and then export your
project to the Advanced Authoring Format (AAF) or EDL for transfer to an editing system with more powerful
hardware. You can then perform the final online edit and rendering, at full HD resolution, on that system.
Recapture clips
You can recapture clips in an existing project using batch capturing. Clips can be recaptured only if they have been
unlinked from their source files, becoming offline files; if they have names in their Tape Name fields; and if their
source medium contains timecode.
1 If you want to override the capture settings for any clip that you intend to recapture, set the clip’s Capture
settings.
2 In the Project panel, select all the clips you want to recapture. If you want to select clips in different bins, use List
view, which lets you view multiple bins.
3 Choose Project > Make Offline. The selected clips are dissociated from their current source files.
4 In the Make Offline dialog box, specify whether the source media files are to remain on disk or be deleted.
5 With the offline files still selected, choose File > Batch Capture. Adjust the settings as necessary.
6 Verify that the deck and source videotape are set up properly for capture, and then click OK.
Page 80

ADOBE PREMIERE PRO CS3
April 1, 2008
User Guide
7 After recapturing is complete, save the project.
Importing files
Import files
You can import video, audio, and still files in a variety of file formats into an Adobe Premiere Pro project. You can
import a single file, multiple files, or an entire folder. Frame sizes cannot exceed 4096x4096 pixels.
If the software you use to create art doesn’t let you specify pixels as a unit of measure, try specifying points.
You can import files by using the File > Import command in Adobe Premiere Pro, or in Adobe Bridge, you can select
a file and use the File > Place command to place it into Adobe Premiere Pro.
If you import a file and it appears horizontally or vertically distorted (stretched), its pixel aspect ratio may be interpreted incorrectly. Change the pixel aspect ratio for the file if necessary. Adobe Premiere Pro continuously rasterizes
EPS images, so you can scale these files without pixilation.
The import of certain file types that Adobe Premiere Pro doesn’t support natively may be enabled if your computer
has a capture card installed, or if you have installed plug-in software from a third party. For more information, check
the manual that came with the installed card or plug-in.
74
• To import clips, choose File > Import. Locate and select a file, or hold down Ctrl (Windows) or Command (Mac
OS) and select multiple files. Click Open.
• To import a recently imported clip, choose File > Import Recent File > [filename]. (The filename may not appear
if Adobe Premiere Pro preferences have been reset.)
• To import a folder of clips, choose File > Import. Locate and select the folder, and then click Import Folder. The
folder is added as a new bin in the Project panel with the folder’s contents.
• To locate and import a clip using Adobe Bridge, choose File > Browse. Locate the clip in Adobe Bridge and drag
it into the Project panel of Adobe Premiere Pro.
For a video on using Adobe Bridge, see www.adobe.com/go/vid0090.
• To import a still image sequence as a movie file, select Numbered Stills in the Import dialog box, select the first
file in the series, and click Import.
You can also import files and folders by dragging them from Windows Explorer (Windows) or Finder (Mac OS)
into the Project panel.
See also
“About Adobe Bridge” on page 45
Start Adobe Bridge from Adobe Premiere Pro
❖ Do one of the following:
• Choose File > Browse
• Select a file in the Project panel, then choose File > Reveal in Bridge.
Page 81

ADOBE PREMIERE PRO CS3
April 1, 2008
User Guide
See also
“About Adobe Bridge” on page 45
File formats supported for import
Adobe Premiere Pro can import a number of video and audio formats. It also supports 10-bit color depth,
sometimes useful for editing standard and high-definition footage.
File format support is provided by plug-in software modules. Most of these software modules are installed automatically with Adobe Premiere Pro.
Adobe Premiere Pro supports four-channel assets. Every processed pixel in its render pipeline uses four channels.
When it processes a three-channel asset, such as DV, HDV, or MPEG footage, as when it has to add an effect or
transition, Adobe Premiere Pro automatically converts it to a four-channel asset.
Supported video and animation file formats
• ASF (Netshow, Windows only)
• AVI (DV-AVI, Microsoft AVI Type 1 and Type 2)
• DLX (Sony VDU File Format Importer, Windows only)
• FLM (Filmstrip, Windows only)
• GIF (Animated GIF)
• MOV (QuickTime)
• MP4 (XDCAM EX)
• MPEG, MPE, MPG, M2V (MPEG-1, MPEG-2)
• MXF (Media eXchange Format; Panasonic DV, DVCPRO, DVCPRO 50, DVCPRO HD, Sony XDCAM HD. )
• VOB (Video OBject: DVD files without encryption)
• WMV (Windows Media Video, Windows only)
75
Note: Type 1 AVI clips must be rendered before they can be previewed from a DV device. To render a Type 1 AVI clip,
add it to a sequence in a DV project, and preview it.
Supported audio file formats
• Audio Interchange File Format, AIFF (AIF)
• Audio Video Interleaved Audio (AVI)
• Audio Waveform (WAV)
• M4A
• MP3
• MPEG, MPG
• MXF
• QuickTime Audio (MOV; requires QuickTime player)
• Windows Media Audio (WMA) (Windows only)
Page 82

ADOBE PREMIERE PRO CS3
April 1, 2008
User Guide
Supported still-image and sequence file formats
Adobe Premiere Pro supports 8-bit per-channel (4 bytes per pixel) and 16-bit per-channel (8 bytes per pixel) stillimage files. It converts images with lower bit-depths to 8-bits per channel and images with higher bit-depths to 16bits per channel on import. High bit-depth files are supported at 1 single-precision float per channel (16-bytes per
pixel).
• Adobe Illustrator and Illustrator sequence (AI, EPS)
• Adobe Photoshop and Photoshop sequence (PSD)
• Adobe Premiere 6.0 Title (PTL)
• Adobe Title Designer (PRTL)
• Bitmap and Bitmap sequence (BMP, DIB, RLE)
• EPS
• Filmstrip (FLM)
• GIF
• Icon File (ICO) (Windows only)
• JPEG and JPEG sequence (JPE, JPG, JFIF)
• PCX and PCX sequence (PCX) (Windows only)
• PICT and PICT sequence (PIC, PCT)
• Portable Network Graphics (PNG)
• PSQ
• PTL, PRTL (Adobe Title Designer)
• Targa and Targa sequence (TGA, ICB, VDA, VST)
• TIFF and TIFF sequence (TIF)
76
Note: You can import layered Illustrator and Photoshop files as sequences.
Supported video project file formats
• Adobe Premiere 6.x Library (PLB) (Windows only)
• Adobe Premiere 6.x Project (PPJ) (Windows only)
• Adobe Premiere 6.x Storyboard (PSQ) (Windows only)
• Adobe Premiere Pro (PRPROJ)
• Advanced Authoring Format (AAF)
• After Effects Project (AEP)
• Batch lists (CSV, PBL, TXT, TAB)
• Edit Decision List (EDL)
See also
“File formats supported for export” on page 380
Page 83

ADOBE PREMIERE PRO CS3
April 1, 2008
User Guide
Importing digital audio
You can import digital audio clips stored as audio files or tracks in video files. Digital audio is stored on computer
hard disks, audio CDs, or digital audio tape (DAT) as binary data readable by computers. To keep quality as high as
possible, transfer digital audio files to your computer via digital connections. Avoid digitizing the analog outputs
from your audio sources through your sound card.
Note: If you want to capture an audio-only file from a digital video source, choose Audio from the Capture pop-up
menu in the Logging pane of the Capture panel. Adobe Premiere Pro does not support audio-only capture for some
formats, such as HDV.
For maximum editing performance and audio quality, Adobe Premiere Pro processes each audio channel, including
audio channels in video clips, as 32-bit floating-point data at the project’s sample rate. To do this it must conform
certain types of audio to match the 32-bit format and the project sample rate. If it is necessary, conforming is done
when a file is imported into a project for the first time, taking time and disk space. A progress bar appears at the
lower right of the Adobe Premiere Pro window when conforming begins.
You can work with audio files, even applying effects to them, before they are fully conformed, but you will be able
to preview only the part of the files that have been conformed. You won’t hear unconformed sections on playback.
These rules determine which types of audio get conformed:
• Adobe Premiere Pro does not conform uncompressed 32kHz or 48kHz audio, such as might be found in DV AVI,
AVI, uncompressed AIFF and uncompressed MOV files, if the sample rate of the imported file has either a 1:1 or
2:3 ratio to the project’s sample rate. For example, a DV AVI file containing 32 kHz audio will not be conformed
when imported into a project with an audio sample rate of 48kHz, since the sample rates are in a 2:3 ratio.
However, a file containing 48 kHz audio will get conformed when imported into a project with an audio sample
rate of 32 kHz, as the sample rates are in a 3:2 ratio.
• Adobe Premiere Pro does not conform a file that was conformed in one project when you import it into another
project with the same audio sample rate, so long as you haven’t moved or renamed the file since it was conformed.
Adobe Premiere Pro keeps the location of the conform files for all files it has conformed in the Media Cache
Database.
• Adobe Premiere Pro does conform compressed audio, such as might be found in MP3, WMA, MPEG, or
compressed MOV files, regardless of their sample rates.
77
To avoid conforming, use audio editing software, or transcoding software, to convert your files to supported uncom-
pressed formats with sampling rates in a 1:1 or 2:3 ratio with your project’s audio sample rate.
In addition to conforming some files, Adobe Premiere Pro also creates a pek file for any file containing audio when
it is first imported into a project. It uses these pek files for drawing the audio waveforms in Timelines. Adobe
Premiere Pro stores pek files in the Scratch Disk location specified for the Media Cache through the Project Settings
dialog box.
You can use CD audio (CDA) files in a project, but before you can import them into Adobe Premiere Pro, you need
to convert them to a supported file format, such as WAV or AIFF. You can convert CDA files using an audio application such as Adobe Audition®.
Note: Make sure that you own the copyrights or have licensed the copyrights to any audio tracks you use.
See also
“File formats supported for import” on page 75
Page 84

ADOBE PREMIERE PRO CS3
April 1, 2008
User Guide
Using compressed audio formats
Music stored in formats such as MP3 and WMA are compressed using a method that removes some of the original
audio quality. To play back compressed audio, Adobe Premiere Pro must decompress the file and may need to
resample it to match your output settings. These conversions are likely to degrade audio quality. For this reason, use
an uncompressed or CD audio version of the audio clip whenever possible.
Using audio from Adobe Soundbooth
You can use Adobe Soundbooth to perform advanced audio editing. If you export the audio from Adobe Soundbooth to an audio file format compatible with Adobe Premiere Pro, you can import the audio into Adobe Premiere
Pro projects.
Import still images
You can import still images with frame sizes up to 4096x4096 pixels, individually or in groups. The size and aspect
ratio of imported still images are affected by the same factors that affect other imported assets, for example, whether
they use square pixels.
An imported still image uses the duration specified in the Still Image preferences. You can change the duration of a
still image in a Sequence panel.
78
See also
“About aspect ratios” on page 28
“Create and edit Photoshop files” on page 164
Preparing still images
You can import individual still images into Adobe Premiere Pro or import a numbered sequence of still images as
a sequence. You can import still images from Adobe applications such as Photoshop and Illustrator, or you can
import Adobe Stock Photos from Adobe Bridge. For information about the still-image formats that Adobe Premiere
Pro imports, see “File formats supported for import” on page 75.
Before you import a still image into Adobe Premiere Pro, prepare it as completely as possible to reduce rendering
time. It’s usually easier and faster to prepare a file in its original application. Consider doing the following:
• Make sure that the file format is supported by the operating system you plan to use.
• Set the pixel dimensions to the resolution you will use in Adobe Premiere Pro. If you plan to scale the image over
time, set image dimensions that provide enough detail at the largest size the image has in the project.
• For best results, create files with a frame size at least as large as the frame size of the project so that you don’t have
to scale up the image in Adobe Premiere Pro. Scaling an image larger than its original size can cause loss of
sharpness. If you plan to scale up an image, prepare it at a larger frame size than the project’s. For example, if you
plan to scale up an image 200%, prepare the image at double the project frame size before you import it.
• Crop the parts of the image that you don’t want to be visible in Adobe Premiere Pro.
• If you want to designate areas as transparent, create an alpha channel or use the transparency tools in applications
such as Photoshop or Illustrator.
• If final output will be shown on standard television screens, avoid using thin horizontal lines (such as 1-pixel
lines) for images or text. These may flicker as a result of interlacing. If you must use thin lines, add a slight blur
so that the lines appear in both video fields. See “Interlaced video, noninterlaced video, and progressive scanning”
on page 125.
Page 85

ADOBE PREMIERE PRO CS3
April 1, 2008
User Guide
• Save the file using the correct naming convention. For example, if you plan to import the file into Adobe Premiere
Pro on Windows, use a three-character filename extension.
• When you prepare still images in applications that support color management, such as Photoshop, colors may
appear more consistent between the application and Adobe Premiere Pro if you prepare images in a
video-friendly color space, such as sRGB or NTSC RGB.
Change the default duration for still images
1
Choose Edit > Preferences > General (Windows) or Premiere Pro > Preferences > General (Mac OS).
2 For Still Image Default Duration, specify the number of frames you want as a default duration for a still image.
Note: Changing the default duration of still images does not affect the duration of still images that are already part of
a sequence.
Change the duration of a still image in the Timeline panel
❖ Do one of the following:
• Drag the Selection tool over either end of the image.
• Select the clip, and choose Clip > Speed/Duration. Enter a new duration, and click OK.
Adjust the pixel aspect ratio of an imported still image
1
Select the still image in the Project panel.
2 Choose File > Interpret Footage.
3 Select an option in the Pixel Aspect Ratio section, and click OK.
4 Select one of the following:
Use Pixel Aspect Ratio From File Uses the original aspect ratio saved with the still image.
79
Conform To Lets you choose from a list of standard aspect ratios.
Note: When using Photoshop to generate images for use in video projects, it’s best to use the Photoshop preset named
for the video format you’ll use. Using the preset ensures that your images are generated with the correct aspect ratio.
Importing Photoshop images
You can import files from Adobe Photoshop 3.0 or later. Adobe Premiere Pro supports 16-bit per channel as well
as 8-bit per channel Photoshop files. You can control how layered Photoshop files are imported. Empty (transparent) areas of nonflattened Photoshop files are transparent when imported into Adobe Premiere Pro, because the
transparency is stored as an alpha channel. This lets you import Photoshop graphics and superimpose them over
clips in other tracks with no extra effort.
In addition, you can import a layered Photoshop file as a sequence, enabling you to set up graphics in Photoshop
and then import them into an Adobe Premiere Pro project.
Note: Individual layers moved from a Photoshop composition into an Adobe Premiere project may not behave as
expected.
Importing Illustrator images
You can import an Adobe Illustrator still-image file directly into an Adobe Premiere Pro project. Adobe Premiere
Pro converts path-based Illustrator art into the pixel-based image format used by Adobe Premiere Pro, a process
known as rasterization. Adobe Premiere Pro automatically anti-aliases, or smooths, edges of the Illustrator art.
Adobe Premiere Pro also converts all empty areas into an alpha channel, so that empty areas become transparent.
Page 86

ADOBE PREMIERE PRO CS3
April 1, 2008
User Guide
If you want to define the dimensions of the Illustrator art when it is rasterized, use Illustrator to set crop marks in
the Illustrator file. For information about setting crop marks, see Illustrator Help.
Import a layered Photoshop or Illustrator file
When you import a layered file saved in Photoshop or Illustrator file formats, you can choose how to import the
layers in the Import Layered File dialog box:
• Merge the layers, combining all layers into a flattened clip.
• Import only one of the layers from the file.
• Convert the layers into a sequence of frames.
Adobe Premiere Pro imports attributes that were applied in the original file, including position, opacity, visibility,
transparency (alpha channel), layer masks, adjustment layers, common layer effects, layer clipping paths, vector
masks, and clipping groups. A white background in Photoshop exports as opaque white, whereas a checkerboard
background indicates areas that translate into alpha channel transparency when the Photoshop file is exported to a
format that supports alpha channels.
Converting layers into a sequence makes it easy to set up graphics using layers in Photoshop or Illustrator. When
Adobe Premiere Pro converts layers to a sequence, the sequence is imported into the Project panel as a bin; each
layer in the file becomes an individual clip in the bin. Each clip’s name consists of the layer name followed by the
name of the file that contained it. In addition, Adobe Premiere Pro automatically creates a sequence in which each
layer is inserted in order at the default still-image duration. You can use this sequence as a clip in other sequences.
80
Note: Some Photoshop layer attributes aren’t supported, such as special blending modes and the Knockout option. For
best results, use basic transparency and opacity in Photoshop.
1 Choose File > Import.
2 In the Import dialog box, locate and select the layered file. (If the file name doesn’t appear, make sure that All
Supported Files is selected for Files Of Type.)
3 In the Import Layered File dialog box, select either Footage or Sequence from the Import As pop-up menu.
4 Choose Merged Layers to import all layers in the file as a single layer, or choose the layer you want to import from
the file.
5 Choose one of the following options from the Footage Dimensions pop-up menu, and then click OK:
Document Size Resizes the file to the size of the document as specified in Project settings.
Layer Size Imports the file at the size of the merged layers or selected layer.
Note: When you import one layer as a single clip, its name in the Project panel consists of the layer name followed by
the original file name.
Importing image sequences
You can import an animation contained in a single file, such as an animated GIF. You can also import a sequence
of numbered still-image files and automatically combine them into a single video clip; each numbered file becomes
one frame of video. Importing a sequence is useful for animations exported as a series of numbered still images by
applications like After Effects. The images in the series cannot include layers. For information on layers and
flattening, see the application’s documentation.
When creating 3D images or animations for use in Adobe Premiere Pro, follow these guidelines whenever possible:
• Use broadcast-safe color filtering.
Page 87

ADOBE PREMIERE PRO CS3
April 1, 2008
User Guide
• Use the pixel aspect ratio and frame size specified in the project settings in Adobe Premiere Pro.
• Use the appropriate field settings to match your project.
• If you’re using an Adobe application to generate the sequence, select the Embed Project Link option so that you
can open the sequence in the application that was used to create it.
Import numbered still-image files as one clip
1 Make sure that each still-image file name contains an equal number of digits at the end and has the correct file
extension—for example, file000.bmp, file001.bmp, and so forth.
2 Choose File > Import.
3
Locate and select the first numbered file in the sequence, select Numbered Stills, and click Open. When Numbered
Stills is selected, Adobe Premiere Pro interprets each of the numbered files as a single frame in a video clip.
Note: Changing the default duration of still images in the Preferences dialog box does not affect the duration of
numbered stills imported into a video clip. Each still becomes one frame when imported in this way.
Importing earlier Adobe Premiere Pro projects
You can add the contents of an Adobe Premiere 6.0 or 6.5 project, or the contents of a project made with an earlier
version of Adobe Premiere Pro into an open Adobe Premiere Pro project, on Windows only. The imported project’s
clips and sequences are added to the Project panel in a bin named after the imported project. The bin hierarchy of
the imported project is maintained within its new bin. Discontinued transitions and effects are not maintained. Use
caution when importing a project into another project with a different timebase or audio sample rate, because these
differences may affect edit positioning and audio quality.
81
Importing a project into another project is the only way to transfer its complete sequence and clip information.
Also, you can open projects made with Adobe Premiere Pro CS3 for Windows, including any contents that may
have been imported from earlier versions, in Adobe Premiere Pro for Mac OS.
Note: In earlier versions of Adobe Premiere, storyboards were stored in files independent of project files. Adobe
Premiere Pro contains all storyboard features within the Project panel, but, on Windows only, you can import storyboard files created in earlier versions by choosing File >
Import.
Importing libraries (Windows only)
Adobe Premiere 6.5 supports containers called libraries, which store clips from one or several projects in files. A
library (PLB) is a file apart from any project file. Although Adobe Premiere Pro doesn’t directly support libraries, it
allows you to import PLB library files, on Windows only. A library converts to a bin when you import it into an
Adobe Premiere Pro project. To store a set of clips to make them available for other projects, simply save a project
that contains the clips, and import that project into other projects.
Importing After Effects compositions
You can import After Effects compositions like any other supported file type by using the File > Import command.
You can export an Adobe Premiere Pro project file from After Effects and open it for editing in Adobe Premiere
Pro. You can also copy and paste layers and assets between Adobe Premiere Pro and After Effects. Finally, if you
have Adobe Production Premium installed, you can create or import After Effects compositions by using Dynamic
Link. Dynamic Link allows changes made to a file in either application to appear in both, instantaneously, without
a need for rendering.
Page 88

ADOBE PREMIERE PRO CS3
April 1, 2008
User Guide
See also
“Copy between After Effects and Adobe Premiere Pro” on page 164
“About Dynamic Link (Production Premium only)” on page 167
About Panasonic P2 media
A P2 card is a solid-state memory device that plugs into the PCMCIA slot of a Panasonic P2 video camera, such as
the AG-HVX200. The digital video and audio data from the video camera is recorded onto the card in a structured,
codec-independent format known as MXF (Media eXchange Format). Specifically, Adobe Premiere Pro supports
the Panasonic Op-Atom variant of MXF, with video in DV, DVCPRO, DVCPRO 50 and DVCPRO HD formats. A
clip is said to be in the P2 format if its audio and video are contained in Panasonic Op-Atom MXF files, and these
files are located in a specific file structure.
The root of the P2 file structure is a CONTENTS folder. Each essence item (an item of video or audio) is contained
in a separate MXF wrapper file; the video MXF files are in the VIDEO subfolder, and the audio MXF files are in the
AUDIO subfolder. The relationships between essence files and the metadata associated with them are tracked by
XML files in the CLIP subfolder.
Note: Adobe Premiere Pro does not support proxies recorded by some Panasonic P2 camcorders in P2 card PROXY
folders.
82
The video and audio on a P2 card are already in a digital form, as if the P2 card were a hard disk, so there is no
capture step involved in importing media from a P2 card. The process of reading the data from the card and
converting it to a format that can be used in a project is sometimes referred to as ingest.
For your computer to read P2 cards, you must install the appropriate driver, which you can download from the
Panasonic website. Panasonic also provides the P2 Viewer application, with which you can browse and play media
stored on a P2 card. See the Panasonic website for details: http://www.adobe.com/go/learn_pp_panasonicp2.
Note: Files recorded to P2 format may be read-only. To use certain features to modify these files, such as changing a
clip's metadata using the Timecode dialog box, you may first need to change file properties, through the operating
system, to allow write access.
About Sony XDCAM and XDCAM EX media
Sony XDCAM HD and XDCAM EX also use specific directory structures and digital file formats (MXF for XDCAM
HD and MP4 for XDCAM EX). These can be recorded to hard disks, optical media, or flash memory media, and
ingested into Adobe Premiere Pro.
Importing assets from file-based sources
1 (Optional) Copy the entire contents of one or more P2 cards, XDCAM or XDCAM EX media to a hard disk.
Though it is possible to import assets into Adobe Premiere Pro directly from a these media, it is usually more
efficient to copy the contents of any of them to a hard disk before importing.
Note: For XDCAM EX, you must copy the entire BPAV folder and its contents, not just one MP4 file at a time.
2 Select File > Import.
3 Browse to the CONTENTS\VIDEO folder for P2 files, the Clip folder for XDCAM files, or the BPAV folder for
XDCAM EX files.
Page 89

ADOBE PREMIERE PRO CS3
April 1, 2008
User Guide
4 Select one or more MXF files (for P2 or XDCAM HD), or MP4 files (for XDCAM EX). Do one of the following:
• To import P2, XDCAM HD, or XDCAM EX video content and its associated audio content, select the respective
files from the VIDEO (P2), or Clip (XDCAM HD, XDCAM EX) folder.
• To import only the P2 or XDCAM HD audio content, select the MXF files from the AUDIO (P2) or Sub
(XDCAM HD) folder.
5 Click Import.
The asset(s) will be imported into the Project panel as single clips.
About spanned clips
When a shot is recorded requiring more than the 4 GB file size limit, a P2 camcorder or XDCAM HD camcorder
starts another file and continues recording the shot to it without interruption. This is referred to as clip spanning as
the shot spans more than one file or clip. Similarly, a P2 camcorder may span a shot across clips on different P2
cards, if it has more than one P2 card loaded. It will record the shot until it runs out of room on the first P2 card,
then start a new file on the next P2 card with available space, and continue recording the shot to it. Although a single
shot can be recorded to a group of multiple spanned clips, it is designed to be treated as a single clip.
Adobe Premiere Pro imports all of the spanned clips within a single shot as a single clip. It will import all the clips
within a shot on a card when you select any one of them, provided none of the spanned clips is missing and the
relevant XML is present. When one or more spanned clips is missing from a shot, Adobe Premiere Pro will import
one or more of them depending on where the missing clips fall within the shot.
83
To import a group of spanned clips, select one of them to import all of them. If you select more than one spanned
clip, you will import duplicates of the whole group of spanned clips as duplicate clips in the Project panel.
If the group of spanned clips itself spans two P2 or XDCAM EX cards, copy the full directory trees from them both
to same-level folders on the hard disk before importing. For P2 media only, you can alternatively import clips
spanning two P2 cards if both cards are simultaneously mounted to your computer.
Page 90

Chapter 5: Managing and viewing assets
April 1, 2008
After you import assets into a project, you can use Adobe Premiere Pro to organize them, view their details, and find
them quickly.
Customizing the Project panel
About managing assets in the Project panel
In the Project panel, you can create bins for assets of different types, place bins within other bins, and open multiple
bins simultaneously in their own panels. You can show or hide various columns of data in the Project panel, use
these to add important data to your assets, and sort your assets by any of these columns. You can switch between
List View and Icon View in the Project panel, and use the latter to rearrange assets in a bin. You can quickly locate
any asset by typing part of its name into the Find box. Finally, you can quickly show any assets in Adobe Bridge
where you can use an even greater variety of asset-management tools and share your assets between applications.
84
Change Project panel views
After you obtain an asset, its name appears in the Project panel. The Project panel lists detailed information about
each asset in your project. You can view and sort assets in either List view or Icon view. List view displays additional
information about each asset. You can customize the information it displays to meet the needs of your project.
BA
Project panel views
A. List view B. Icon view
• To change from one view to another, click the List View button or the Icon View button at the bottom
of the panel, or choose View > List or View > Icon from the Project panel menu.
• To arrange items in Icon view, drag an item to any square. As you drag, a vertical bar indicates where the item is
going. If you drag an item to a bin, the item goes inside the bin.
You can use Icon view for storyboarding and then use the Automate To Sequence feature to move the storyboard
into a sequence.
• To sort items in List view, click the column heading by which you want to sort the items. If bins are expanded,
items sort from the top level and down the Project panel hierarchy. To reverse the sort order, click the column
heading again.
•
To hide or show the thumbnail viewer and clip information, choose View > Preview Area from the Project panel menu.
Page 91

ADOBE PREMIERE PRO CS3
April 1, 2008
User Guide
• To hide or set the size of thumbnails, choose Thumbnails from the Project panel menu.
• To remove empty space between items in Icon view and arrange them within the width of the Project panel,
choose Clean Up from the Project panel menu.
Customize List view columns
The columns in the Project panel’s List view tell various things about the assets listed. You can select which columns
Adobe Premiere Pro will display, rename columns, and change their order.
Edit the display of columns
❖ Choose Edit Columns from the Project panel menu, and do any of the following:
• To display a column, select the option next to the column.
• To rename a column, select a column name, click Rename, and edit the name.
• To remove a column, select a column name and click Remove.
• To move a column to the left in List view, select its name and click Move Up. To move it to the right, click Move Down.
Note: If you can’t locate or change a column attribute in the Edit Columns dialog box, the attribute is locked by Adobe
Premiere Pro and cannot be changed. For example, you can change the names of columns you added, but not the
names of columns built into Adobe Premiere Pro.
85
Rearrange columns
❖ In the List view of the Project panel, drag the column header horizontally to the desired position.
Change the width of a column
❖ In the List view of the Project panel, position the mouse over a dividing line between column headings until the
Column Resize icon appears; then drag horizontally.
Sort by a column
❖ In the List view of the Project panel, click a column name to switch between ascending and descending sorts based
on the content of that column.
Add a column
1
Choose Edit Columns from the Project panel menu.
2 Select the name of the column after which the new column will appear, and click Add.
3 Type a name.
4 Choose a type. Text columns can contain any text you enter. Boolean columns provide a check box. Click OK.
List view columns
The names of most of the Project panel’s columns are self explanatory. Following are definitions for the less obvious ones:
Name By default, displays the asset’s file name. You can change the name the asset uses within the project. You
cannot remove the Name field from the List view.
Label Color that helps identify and associate assets.
Media Duration Length of the source file, expressed in the currently specified Display option.
Page 92

ADOBE PREMIERE PRO CS3
April 1, 2008
User Guide
Note: In Adobe Premiere Pro, all durations in any panel include the frames specified by the In point and Out point.
For example, setting the In point and Out point to the same frame results in a duration of one frame.
Video Duration The duration of a clip’s video component as defined by the Video In point and Out point and incor-
porating any adjustments applied in Adobe Premiere Pro, such as changing the clip speed.
Audio Duration The duration of an asset’s audio component as defined by the Audio In point and Out point and
incorporating any adjustments applied in Adobe Premiere Pro, such as changing the clip speed.
Video Info The frame size and aspect ratio of the asset, and whether an alpha channel is present.
Video Usage The number of times the video component of an asset is used in the project’s sequences.
Audio Usage The number of times the audio component of an asset is used in the project’s sequences.
Tape Name The name of the source tape, as entered when the clip was logged or captured.
Description Optional description of the asset, entered when the clip was logged or captured.
Comment Optional comment, entered when the asset was logged or captured, intended for identification and
sorting purposes.
Log Note Field for optional text entered through the Capture panel or Edit Offline File dialog box.
File Path Location of the file on disk, expressed as a folder path.
86
Capture Settings Indicates whether a file has capture settings assigned in Adobe Premiere Pro.
Status Whether an asset is online or offline. If a clip is offline, this also indicates why.
Offline Properties Whether the source of an offline file contains video, audio, or both.
Scene Field for scene name entered through the Capture panel or the Edit Offline File dialog box. It can be helpful
to use scene names from a script here to help organize your work.
Shot/Take
Good Indicates preferred assets.
Field for shot and/or take name entered using the Capture panel or through the Edit Offline File dialog box.
Define a different thumbnail for a clip
By default, the first frame of a clip appears in the thumbnail viewer and in other places in the project where the
thumbnail is displayed. You can override the default thumbnail by designating any clip frame as a poster frame.
1 Select the clip in a Project panel.
2 Press the Play button or drag the play slider on the thumbnail viewer in the upper left corner of the Project
panel until the frame you want is displayed.
3 Click the Set Poster Frame button .
You can also set the poster frame by right-clicking (Windows) or Control-clicking (Mac OS) the thumbnail viewer
and choosing Set Poster Frame.
Page 93

ADOBE PREMIERE PRO CS3
April 1, 2008
User Guide
Organizing assets with the Project panel
About bins
The Project panel can include bins, which you can use to organize project contents in much the same way as folders
in Windows Explorer or Mac OS Finder. Bins can contain source files, sequences, and other bins. You may want to
use bins in the following ways:
• To store lists of offline files for batch capture.
• To store each sequence and its source files separately.
• To organize files by type, such as video, still images, and audio files.
A
B
87
Project panel
A. Parent bin B. Child bin
See also
Managing Media
Work with bins
These are the default behaviors of bins. You can change the last three bin default behaviors by editing bin preferences.
• To add a bin, click the New Bin button at the bottom of the Project panel.
• To delete one or more bins, select the bins and click the Delete icon at the bottom of the Project panel.
If you click New Bin multiple times in a row, each new bin is nested inside the previous new bin.
• To move an item into a bin, drag the item to the Bin icon. You can move bins into other bins to nest them.
Dropping an item into a bin does not automatically open the bin.
• To display the contents of a bin, in List view, click the triangle beside the Bin icon to expand it, or double-click
the bin.
Page 94

ADOBE PREMIERE PRO CS3
April 1, 2008
User Guide
• To show the contents of an enclosing (parent) bin when you’re viewing only the contents of a nested bin, click
the Parent Bin button in the Project panel. You can continue to click this button until the top-level contents
of the Project panel appear.
• To open a bin in its own floating panel, double-click the bin. This panel can be docked or grouped like any other
panel.
• To open a bin in place, Ctrl-double-click (Windows) or Command-double-click (Mac OS) the bin.
• To open a bin in a new tab, Alt-double-click (Windows) or Option-double-click (Mac OS) the bin.
88
Double-click to open a bin in its own dockable panel.
See also
“Find and group effects” on page 243
Change bin behaviors
You can change the default behaviors of Project panel bins, by editing the bin preferences.
1 Select Edit > Preferences > General (Windows) or Premiere Pro > Preferences > General (Mac OS).
2 In the Bins area, select options from the menus for Double-Click, +Ctrl (Windows) or +Cmd (Mac OS), and +Alt
(Windows) or +Opt (Mac OS).
3 Click OK.
Label assets
Labels are colors that help you identify and associate assets. You assign and view labels in the Project panel. Label
colors mark assets in the Project panel’s Label column and in the Timeline panel.
• To assign a label to an asset, select a clip in the Project panel, choose Edit > Label, and choose a color.
• To select all assets with the same label, select an asset that uses the label and choose Edit > Label > Select Label
Group.
• To edit label names or colors, choose Edit > Preferences > Label Colors (Windows) or Premiere Pro >
Preferences > Label Colors (Mac OS). Click a color swatch to edit a color.
Page 95

ADOBE PREMIERE PRO CS3
April 1, 2008
User Guide
• To set default labels for a media type, choose Edit > Preferences > Label Defaults (Windows) or Premiere Pro >
Preferences > Label Defaults (Mac OS).
Note: Label defaults affect assets you add to the Project panel from the time you change the defaults; the command
doesn’t change label colors for assets already in the Project panel. To change label colors for assets already in the Project
panel, use the Edit > Preferences > Label Colors (Windows) or Premiere Pro > Preferences > Label Colors (Mac OS)
command.
Find assets in the Project panel
1 In the Project panel, select the column you want to search from the In menu.
2 Place the cursor in the Find box in the Project panel.
3 Type the name of the asset.
The Project panel will show only assets with names containing the characters you type.
4 Click the Close icon to end the search and show all assets.
Find assets matching criteria F30844 Static Metadata UI: Project Panel]
For more detailed searches, you can locate any assets in your project that meet criteria you specify. For example, you
can search for a video clip that has a certain word in its Name column and a phrase in its Comment column.
89
1 Click the Find icon at the bottom of the Project panel.
2 In the Find dialog box, select the name of the columns to search from the menus under Column.
3 Select the appropriate operators from the menus under Operator.
4 Type in the characters to be found in the specified columns in their respective Find What fields.
5 If you’re searching for two criteria simultaneously, do one of the following:
• To find assets that match both criteria, select All from the Match menu.
• To find assets that match either criteria, select Any from the Match menu.
6 Click Find.
Working with assets
About clip properties
Adobe Premiere Pro includes clip analysis tools that you can use to evaluate a file in any supported format stored
inside or outside a project. For example, after producing a video clip to be streamed from a web server, you can use
clip analysis tools to determine whether a clip you exported has an appropriate data rate for Internet distribution.
The Properties feature provides detailed information about any clip. For video files, analyzed properties can include
the file size, number of video and audio tracks, duration, average frame rate, audio sample rate, video data rate, and
compression settings. The Properties window will not show all these properties for every clip. The data shown in
the Properties window is determined by the file format of the clip being examined.
Page 96

ADOBE PREMIERE PRO CS3
April 1, 2008
User Guide
You can also use the Properties feature to alert you to the presence of any dropped frames in a clip you just captured.
Use the data rate graph to evaluate how well the output data rate matches the requirements of your delivery
medium. It charts each frame of a video file to show you the render keyframe rate, the difference between
compression keyframes and differenced frames (frames that exist between keyframes), and data rate levels at each
frame. The graph includes the following information:
Data rate The line represents the average data rate.
Sample size The red bars represent the sample size of each keyframed frame.
Differenced frames sample size The blue bars represent the sample size of the differenced frames between
compression keyframes.
View the properties of a clip
❖ Do one of the following:
• If the clip is in the Project panel, select it to display a subset of its properties in the preview area at the top of the
Project panel.
• If the clip is in the Source Monitor, Timeline panel, or Project panel, select it and choose File > Get Properties
For > Selection.
• If the clip is not in the project, choose File > Get Properties For > File. Locate and select the clip you want to
analyze, and then click Open.
90
You can also view clip properties in the Source Monitor, Timeline panel, or Project panel by right-clicking
(Windows) or Control-clicking (Mac OS) a clip and choosing Properties.
Duplicate a clip
1 In the Project panel, select a clip, and choose Edit > Duplicate.
2 To rename the duplicate clip, select it, choose Clip > Rename, and type a new name for the clip.
You can also create a duplicate clip by copying and pasting it in the Project panel (or its folders), by Ctrl-dragging
(Windows) or Command-dragging (Mac OS) a clip in the Project panel, or by dragging a clip from the Source
Monitor to the Project panel.
Rename assets
All files in your project are stored on your hard disk as individual files. Only a reference to each file is added to the
Project panel in Adobe Premiere Pro. Whenever you rename a clip in Adobe Premiere Pro, the original file and file
name remain untouched on your hard disk.
Rename a clip
1
Select the clip, and choose Clip > Rename.
2 Type the new name, and press Enter (Windows) or Return (Mac OS).
You can also rename a selected clip by clicking its name once to select the text, typing the new name, and pressing
Enter (Windows) or Return (Mac OS). In addition, the Rename command is available when you right-click
(Windows) or Control-click (Mac OS) a clip.
Rename an original source file
❖ Quit Adobe Premiere Pro and rename the file on the Windows desktop.
Page 97

ADOBE PREMIERE PRO CS3
April 1, 2008
The next time you open the project, Adobe Premiere Pro asks you to locate the file.
Remove assets from a project
You can remove assets you don’t need from the Project panel without removing them from your hard disk.
See also
“Trim or copy your project” on page 402
Remove an item from the Project panel
❖ Select the item and press the Delete key.
The file remains on the hard disk
User Guide
91
Note: When you use the Project
> Make Offline command, you have the option of deleting the actual source file along
with its reference in the project. (See “Work with offline files” on page 68.)
Remove unused assets from the Project panel
You can remove assets you haven’t used in the Timeline panel from the Project panel.
❖ Do one of the following:
• Sort the Project panel List view by the Video Usage or Audio Usage columns to identify unused clips, and then
select and delete them.
• Choose Project > Remove Unused.
Play back a clip in the Project panel
You can use the preview area at the top of a Project panel to preview individual clips.
1 Select the clip.
2 Press the Play button on the thumbnail viewer. The Play button becomes a Stop button. Press Stop to stop
playback. (Playing the clip in the thumbnail viewer does not affect Source Monitor views.)
Change the frame rate of a file [F23124 Create single "Modify Clip" dialog (combining Offline File, Timecode, Interpret Footage, Field Options and Audio Channel Mapping]
You can use the Interpret Footage command to change the frame rate that Adobe Premiere Pro assumes for a clip.
Changing the frame rate changes the original duration proportionally. For example, if you set a 10-second, 24-fps
clip to 48 fps, it becomes half as long, with a new duration of 5 seconds. Be aware that a clip’s frame rate is reconciled
with the project’s frame rate. For example, if you change a 24-fps clip to 48 fps and it’s used in a 24-fps project, the
project can display only every other frame of the clip.
You can also change clip speed and duration by choosing the Clip > Speed command for a clip selected in the
Timeline panel. However, such a change affects only that clip instance in the Timeline panel. Using the Interpret
Footage command changes how a file is interpreted throughout a project.
1 In the Project panel, select a clip.
2 Choose File > Interpret Footage, select a Frame Rate option, and click OK.
Page 98

Work with proxy files
April 1, 2008
About proxy files [F8488 Proxy Editing]
Create proxy files from the Project panel [F8488 Proxy Editing]
Create proxy files from the Timeline [F8488 Proxy Editing]
Delete a proxy file [F8488 Proxy Editing]
Make original media offline, or delete it [F8488 Proxy Editing]
ADOBE PREMIERE PRO CS3
User Guide
92
Relink proxies to original media [F8488 Proxy Editing]
Enable or disable a proxy for playback [F8488 Proxy Editing]
Source and Program Monitors
Source and Program Monitors overview
The Source Monitor plays back individual clips. In the Source Monitor you prepare clips that you want to add to a
sequence by specifying In and Out points and the clip’s source tracks (audio or video). You can also insert clip
markers and add clips to a sequence in the Timeline panel.
The Program Monitor plays back the sequence of clips that you are assembling. It’s your view of the active sequence
in the Timeline panel. You can set sequence markers and specify a sequence’s In and Out points, which define where
frames are to be added or removed from the sequence.
Each monitor contains both a time ruler and controls to play back and cue the current frame of a source clip or
sequence.
Page 99

ADOBE PREMIERE PRO CS3
April 1, 2008
User Guide
Source Monitor (left) and Program Monitor (right)
Set display quality
You can reduce the resolution of the Source or Program Monitors to decrease the processing demands on your
computer. Reducing the quality setting of the Program Monitor may allow your system to create real-time previews
of parts of the sequence that would otherwise require rendering.
❖ In the Source or Program Monitor panel menu, choose a quality setting:
Highest Quality Displays video in the monitor at full resolution.
93
Draft Quality Displays video in the monitor at one-half resolution.
Automatic Quality Measures playback performance and dynamically adjusts quality.
Note: All quality settings use a bilinear pixel resampling method to resize the video image. For exporting a sequence,
a cubic resampling method (which is superior to bilinear) is used.
Change magnification
The Source and Program Monitors scale video to fit into the available area. You can change the magnification
setting for each view to see the video in more detail, or to increase the size of the pasteboard area around the image
(to adjust motion effects more easily, for example).
1 Choose a magnification setting from the View Zoom Level menu (to the right of the current time display) in the
Source or Program Monitor.
In the Source Monitor, percentage values refer to the size of the source media. In the Program Monitor, percentage
values refer to the image size specified by the project settings. Fit scales the video to fit in the monitor’s available
viewing area.
2 To change the visible area of a monitor, use the monitor’s scroll bars to change the visible area of the video image.
Scroll bars appear when the current size of the monitor can’t contain the entire image.
Open or clear a clip in the Source Monitor
To view and edit source clips listed in the Project panel or individual clip instances in a sequence, open the clips in
the Source Monitor. The Source menu, accessed from the Source Monitor tab, lists open clips.
1 To open a clip, do any of the following:
• Double-click the clip in the Project or Timeline panel, or drag a clip from the Project panel to the Source Monitor.
The clip appears in the Source Monitor and its name is added to the Source menu.
Page 100

ADOBE PREMIERE PRO CS3
April 1, 2008
User Guide
• Drag multiple clips or an entire bin from the Project panel into the Source Monitor, or select multiple clips in the
Project panel and double-click them. Clips are added to the Source menu in the order in which they were selected,
and the last clip selected appears in the Source Monitor.
• Choose the name of the clip you want to see from the Source menu (click the triangle to the left of the current
clip’s name on the Source tab to make the menu appear).
The Source menu lists master clips by name. Clips opened from a sequence are listed by their sequence name, clip
name, and starting time in the sequence.
94
Choosing a clip to view from the Source menu
2 To clear a clip from the Source monitor, in the Source menu, choose Close to clear or Close All to clear all clips.
You can also close all clips and the Source Monitor itself by clicking the Close button in the Source Monitor tab.
Source and Program Monitor time controls
The Source Monitor has several controls for moving through time (or frames) in a clip. The Program Monitor
contains similar controls for moving through a sequence.
D ECA B
Time controls in the Source and Program Monitors
A. Time ruler B. Current-time indicator C. Viewing area bar D. Current time display E. Duration display
Time rulers Display the duration of a clip in the Source Monitor and sequence in the Program Monitor. Tick marks
measure time using the counting method specified in the project settings. You can toggle the time rulers to display
audio samples. Each ruler also displays icons for its corresponding monitor’s markers and In and Out points. You
can adjust the current time, markers, and the In and Out points by dragging their icons in a time ruler.
Current-time indicator (CTI) Shows the location of the current frame in each monitor’s time ruler. The CTI is the
light blue triangle in the ruler.
 Loading...