

Page 1

GBC/GFC Series
(
P.N. 3056610587, Revision B3, November 2011)
Software Rev 2.18 and up
Adam Equipment
© Adam Equipment Company 2011
Page 2

Easy Reference:
Model name of the indicator/scale:
Serial number of the unit:
Software revision number
(Displayed when power is first turned on):
Date of Purchase:
Name of the supplier and place:
© Adam Equipment Company 2011
Page 3

1.0 CONTENTS
1.0 CONTENTS.......................................................................................... 1
2.0 INTRODUCTION.................................................................................. 3
3.0 INSTALLATION................................................................................... 6
3.1 UNPACKING..................................................................................... 6
3.2 LOCATING........................................................................................ 6
3.3 SETTING UP THE SCALES.............................................................. 7
4.0 KEY DESCRIPTIONS .......................................................................... 8
5.0 DISPLAYS ........................................................................................... 9
5.1 WEIGHT DISPLAY............................................................................ 9
5.2 UNIT WEIGHT DISPLAY................................................................. 10
5.3 COUNT DISPLAY............................................................................ 10
5.4 OTHER SYMBOLS.......................................................................... 10
6.0 OPERATION...................................................................................... 11
6.1 ZEROING THE DISPLAY................................................................ 11
6.2 TARING........................................................................................... 11
6.3 PARTS COUNTING ........................................................................ 12
7.0 USER PARAMETERS........................................................................ 15
8.0 CALIBRATION................................................................................... 17
9.0 RS-232 INTERFACE.......................................................................... 18
9.1 INPUT COMMANDS FORMAT........................................................ 21
9.2 RS-232 SETUP ............................................................................... 22
9.3 REAL TIME CLOCK SETUP............................................................ 24
9.4 AUTO SLEEP FUNCTION............................................................... 25
10.0
BATTERY AND BACKLIGHT OPERATION................................... 25
10.1
BATTERY..................................................................................... 25
10.2
BACKLIGHT FOR LCD................................................................. 26
11.0
ERROR CODES.............................................................................. 27
12.0
SERVICE PARAMETERS............................................................... 28
12.1
USING “0000” TO ENTER THE CALIBRATION PARAMETER.... 28
13.0
REPLACEMENT PARTS AND ACCESSORIES............................. 30
14.0
SERVICE INFORMATION............................................................... 31
15.0
WARRANTY INFORMATION.......................................................... 32
P a g e 1 © Adam Equipment Company 2011
Page 4

P a g e 2 © Adam Equipment Company 2011
Page 5

2.0 INTRODUCTION
• The GBC/GFC series provides accurate, fast and versatile parts counting scales.
• There are 2 types of scales within the GBC/GFC series: GBC/GFC scales are
kilogram/gram scales and the GBC/GFC-a scales are changeable from pounds to
kilograms if the user requires it. The scales have the same functions except that
GBC/GFC-a scales have the ability to toggle between the weighing units.
• All scales are supplied with a RS-232 bi-directional interface and real time clock
(RTC).
• The GBC/GFC has a sealed keypad with colour coded membrane switches and
there is a large, easy to read liquid crystal type display (LCD). The LCD is supplied
with a backlight.
• The GBC/GFC include automatic zero tracking, audible alarm for pre-set counts,
automatic tare, pre-set tare, an accumulation facility that allows the count to be
stored and recalled as an accumulated total.
P a g e 3 © Adam Equipment Company 2011
Page 6

SPECIFICATIONS
GBC Models
Model #
Maximum Capacity
Readability
Repeatability (Std Dev)
Linearity +
Units of Measure Kilograms and Grams. Pounds for GBC XXa units
Stabilization Time 2-3 Secs
Operating Temperature -10°C to +40°C / +14°F to +104°F
Power Supply 230VAC 50/60Hz. in Europe, Asia and South Africa.
Calibration External
Calibration Mass User Selectable
Display Backlit Green display 25mm with capacity tracker
Balance Housing Cast aluminium base, Pantone cool grey painted base, stainless steel grade 304 Top pan, ABS Cool grey indicator housing
Pan Size
Overal Dimensions
(w x d x h)
Net Weight 7.6kg / 16.8 Lb
GBC 16 GBC 32 GBC 60
16kg 32kg 60kg 16kg/35lb 32kg/70lb 60kg/130lb
0.5g 1g 2g 0.5g/0.001lb 1g/0.002lb 2g/0.005lb
0.5g 1g 2g 0.5g/0.001lb 1g/0.002lb 2g/0.005lb
1g
12vDC 800mA UL/CSA adapter for USA
300mm x 400mm x 50mm / 12” x 15.7” x 2”
300mmx 520mm x 660mm / 11.8” x 20.5” x 26”
2g
4g
GBC 35a
1g/0.002lb
GBC 70a
2g/0.004lb
GBC 130a
4g/0.01lb
Features Weighing/Counting/Checkweighing with LED lights/Percentage/Hold function/RS232
P a g e 4 © Adam Equipment Company 2011
Page 7
GFC Models
Model #
Maximum Capacity
Readability
Repeatability (Std Dev)
Linearity +
Units of Measure Kilograms and Grams. Pounds for GFC XXa units
Stabilization Time 2-3 Secs
Operating Temperature -10°C to +40°C / +14°F to +104°F
Power Supply 230VAC 50/60Hz. in Europe, Asia and South Africa.
Calibration External
Calibration Mass User Selectable
Display Backlit Green display 25mm with capacity tracker
Balance Housing Cast aluminum base, Pantone cool grey painted base, stainless steel grade 304 Top pan, ABS Cool grey indicator housing
Pan Size
Overal Dimensions
(w x d x h)
Net Weight 12.5kg / 27.6 Lb
GFC 75 GFC150 GFC 300 GFC 165a GFC 330a GFC 660a
75kg 150kg 300kg 75kg / 165lb 150kg / 330lb 300kg / 660lb
5g 10g 20g 5g / 0.01lb 10g / 0.02lb 20g / 0.05lb
5g 10g 20g 5g / 0.01lb 10g / 0.02lb 20g / 0.05lb
10g 20g 40g 10g / 0.02lb 20g / 0.04lb 40g / 0.1lb
12vDC 800mA UL/CSA adapter for USA
400mm x 500mm x 65mm/ 15.7” x 19.7” x 2.6”
400mmx 620mm x 860mm / 15.7” x 24.4” x 33.9”
Features Weighing/Counting/Checkweighing with LED lights/Percentage/Hold function/RS232
P a g e 5 © Adam Equipment Company 2011
Page 8
3.0 INSTALLATION
3.1 UNPACKING
The user’s application and the technical specifications of the platform or load cell
will determine the necessary configuration.
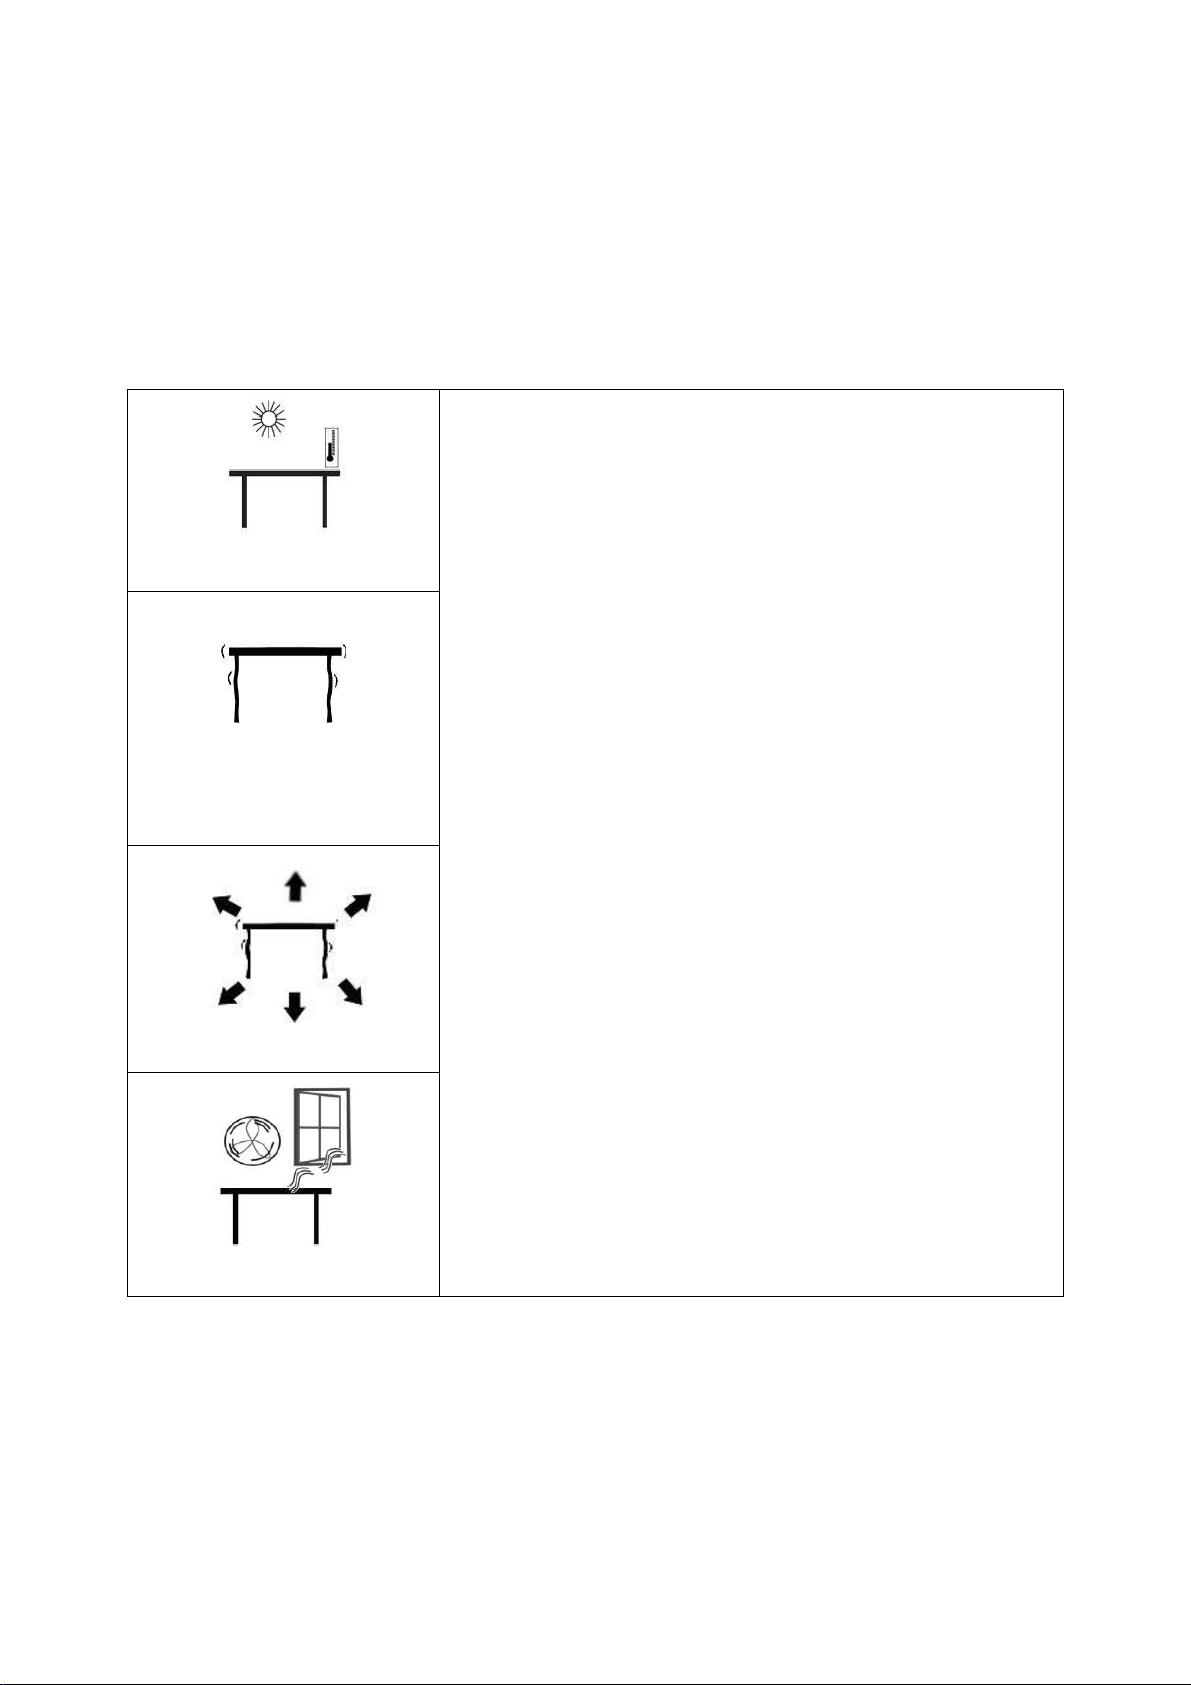
3.2 LOCATING
• The scales should not be placed in a location
that will reduce the accuracy.
• Avoid extremes of temperature. Do not place in
direct sunlight or near air conditioning vents.
• Avoid unsuitable tables. The table or floor must
be rigid and not vibrate.
• Avoid unstable power sources. Do not use near
large users of electricity such as welding
equipment or large motors.
• Do not place near vibrating machinery.
• Avoid high humidity that might cause
condensation. Avoid direct contact with water.
Do not spray or immerse the scales in water.
• Avoid air movement such as from fans or
opening doors. Do not place near open windows
or air-conditioning vents.
• Keep the scales clean. Do not stack material on
the scales when they are not in use.
P a g e 6 © Adam Equipment Company 2011
Page 9

3.3 SETTING UP THE
• The pillar is attached to the base using a bracket that must be attached
to the base frame first using the 4 bolts supplied. The pillar is secured
to the bracket using 2 sets of screws. The cable from the base to the
indicator module is run through the tube and taken out through the
plastic support at the top. Excess cable can be stored within the tube.
• The GBC/GFC Series comes with a stainless steel platform packed
separately. Place the platform in the base.
• Level the scale by adjusting the four feet. If the scale rocks re-adjust the
feet.
SCALES
• Attach the indicator module to the pillar by sliding it over the bracket
with the flanges engaged in the groves on the base. Attach the cable
from the base to the connector on the rear of the indicator.
• Attach the power to the indicator. Press the [On/Off] key which is at
the rear of the indicator. The software revision number will be
displayed followed by a self-test showing all digits before the zero is
displayed along with the unit of weight that was selected last.
P a g e 7 © Adam Equipment Company 2011
Page 10

4.0 KEY DESCRIPTIONS
Keys
[0-9, .] Numeric entry keys, used to manually enter a value for tare weights, unit
weight, and sample size.
[CE] Used to clear the unit weight or an erroneous entry.
[M+] Add the current count to the accumulator. Up to 99 values or full capacity of
the weight display can be added. Also prints the displayed values when Auto
print is switched off.
Functions
[MR] To recall the accumulated memory.
[Pst]
To set the upper limit for the number of items counted. When this upper limit
is exceeded the scale will sound the beeper.
[Print] To print the weight/ unit weight and count to a PC or printer using the RS-232
interface. Print the totals from memory when [MR] is pressed first.
[Smpl] Used to input the number of items in a sample.
[U.Wt./Units] Used to enter the weight of a sample manually.
Select the weighing unit when the “Unit Weight” display is at zero if enabled.
[Tare] Tares the scale. Stores the current weight in memory as a tare value, subtracts
the tare value from the weight and shows the results. This is the net weight.
Entering a value using the keypad will store that as the tare value.
[Zero] Sets the zero point for all subsequent weighing to show zero.
P a g e 8 © Adam Equipment Company 2011
Page 11

5.0 DISPLAYS
The scales have three sections. These are “Weight”, “Unit Weight” and “Count”.
The LCD design is:
WEIGHT UNIT WEIGHT
5.1 WEIGHT DISPLAY
It has 6-digit display to indicate the weight on the scale.
Net Weight Display, "Net"
Stability indicator, symbol
Zero indicator, 0 symbol
The weighing unit: kg, lb
COUNT
P a g e 9 © Adam Equipment Company 2011
Page 12

5.2 UNIT WEIGHT DISPLAY
This display will show the unit weight of a sample. This value is either input by
the user or computed by the scale. The unit of measurement is grams if grams if
kilograms is selected for the weighing unit, or pounds if pounds is selected.
5.3 COUNT DISPLAY
This display will show the number of items on the scale or the value of the
accumulated count. See the next section on OPERATION.
5.4 OTHER SYMBOLS
• The symbol, when there is insufficient number of samples to
accurately determine the count.
• When the unit weight is not large enough to determine an accurate count,
the symbol will be on.
• In both cases the scale continues to operate and the indications are to
alert the user for a potential problem.
• If a preset count has been stored the symbol will be on.
• A low battery symbol will turn on if the battery should be recharged.
• The Lo, OK, Hi symbols will be used when the preset count has been set.
• The symbol “Mem” will be seen when the internal memory has a record of
previous weighings stored in it.
P a g e 10 © Adam Equipment Company 2011
Page 13

6.0 OPERATION
NOTE: GBC/GFC-a Scales only
SETTING THE WEIGHING UNIT, lb or kg
The scale will turn on displaying the last weighing unit selected, either kilograms or
pounds. To change the weighing unit press the [U. Wt./Units] key when the “Unit
Weight” display shows zero. If necessary press the [CE] key to clear the unit weight
before changing.
6.1 ZEROING THE DISPLAY
• You can press the [Zero] key at any time to set the zero point from which
all other weighing and counting is measured. This will usually be necessary
only when the platform is empty. When the zero point is obtained the
“Weight” display will show the indicator for zero, “>Z<”.
• The scale has an automatic re-zeroing function to account for minor
drifting or accumulation of material on the platform. However you may
need to press [Zero] to re-zero the scale if small amounts of weight are
still shown when the platform is empty.
6.2 TARING
• Zero the scale by pressing the [Zero] key if necessary. The indicator
“>Z<” will be ON.
• Place a container on the platform and its weight will be displayed.
• Press [Tare] to tare the scale. The weight that was displayed is stored as
the tare value which is subtracted from the display, leaving zero on the
display. The indicators “Net” and “>Z<” will be ON.
• As a product is added only the weight of the product will be shown. The
scale could be tared a second time if another type of product was to be
added to the first one. Again only the weight that is added after taring
will be displayed.
• When the container is removed a negative value will be shown. If the
scale was tared just before removing the container, this value is the
gross weight of the container plus all products those were removed.
The indicator “>Z<” will also be ON because the platform is back to the
same condition as it was when the [Zero] key was pressed last.
6.2.1 Preset Tare
P a g e 11 © Adam Equipment Company 2011
Page 14

• The user can enter a preset tare value if the display is at zero or gross
weight. Enter the value for preset tare using the keypad, then press the
[Tare] key to set the preset zero value.
• If the display was at zero the weight will show a negative value equal to
the preset tare value entered and the “Net” indicator will be on.
6.3 PARTS COUNTING
6.3.1 Setting Unit Weight
In order to do parts counting it is necessary to know the average weight of the items
to be counted. This can be done by weighing a known number of the items and
letting the scale determine the average unit weight or by manually inputting a
known unit weight using the keypad.
A. Weighing a sample to determine the Unit Weight
To determine the average weight of the items to be counted, you will need to
place a known quantity of the items on the scale and then to key in the
number of items being weighed. The scale will then divide the total weight by
the number of items and display the average unit weight. Press [CE] anytime
to clear the unit weight.
• Zero the scale by pressing the [Zero] key if necessary. If a container is to
be used, place the container on the scale and tare by pressing [Tare] as
discussed earlier.
• Place a known quantity of items on the scale. After the weight display is
stable, enter the quantity of items using the numeric keys and then
press the [Smpl] key.
• The number of units will be displayed on the "Count" display and the
computed average weight will be shown on the "Unit Weight" display.
• As more items are added to the scale, the weight and the quantity will
increase.
• If a quantity which is smaller than the sample is placed on the scale,
then the scale will automatically enhance the Unit Weight by recalculating it. To lock the Unit Weight and avoid re-sampling, press [U.
Wt./Units].
• If the scale is not stable, the calculation will not be completed. If the
weight is below zero, the “Count” display will show negative count.
P a g e 12 © Adam Equipment Company 2011
Page 15

B. Entering a known Unit Weight
• If the unit weight is already known then it is possible to enter that value
using the keypad.
• Enter the value of the unit weight in grams, using the numeric keys
followed by pressing the [U. Wt./Units] key. The "Unit Weight" display
will show the value as it was entered.
• The sample is then added to the scale and the weight will be displayed
as well as the quantity, based on the unit weight.
6.3.2 Counting more parts
• After the unit weight has been determined or entered, it is possible to
use the scale for parts counting. The scale can be tared to account for
the container weight as discussed in the earlier section.
• After the scale is tared the items to be counted are added and the
"Count" display will show the number of items, computed using the
total weight and the unit weight.
• It is possible to increase the accuracy of the unit weight at any time
during the counting process by entering the count displayed and then
pressing the [Smpl] key. You must be certain that the quantity
displayed matches the quantity on the platform before pressing the
key. The unit weight can be adjusted based upon a larger sample
quantity. This will give greater accuracy when counting larger sample
sizes.
6.3.3 Check-counting
• Check-counting is a procedure to cause an alarm to sound when the
number of items counted on the scale meets or exceeds a number
stored in the memory by using the [Pst] key.
• The value to be stored is entered from the keyboard. Enter the numeric
value to be stored using the numeric keys. Then press the [Pst] key to
store the value.
• To clear the value from the memory and thereby turn off the check-
counting feature, enter the value "0" and press [Pst].
• During counting if the count is below the setpoint the “Lo” indicator will
be on, if it is equal to the set point the “OK” indicator will be on and if it
is above the limit the “Hi” indicator will be on.
P a g e 13 © Adam Equipment Company 2011
Page 16

6.3.4 Manually Accumulated Totals
• The values (weight and count) shown on the display can be added to
the values in the memory by pressing the [M+] key. The "Weight"
display will show the total weight, the "Count" display will show the
total accumulated count and the "Unit Weight" display shows the
number of times, the items have been added to the memory for
accumulation. The values will be displayed for 2 seconds before
returning to normal. If the accumulated number exceeds 6 digits the
display will show “diSPEr”, the count is still being stored correctly and
the RS232 printout will still show the correct values.
• The “Mem” symbol will be on when there are values stored in the
accumulation memory.
• The scale must return to zero or a negative number, before another
sample can be added to the memory.
• More products can then be added and the [M+] key to be pressed
again. This can continue for up to 99 entries or until the capacity of the
“Weight” display is exceeded. When the weight exceeds 6 digits the
display will show “diSPEr”.
• To observe the total stored value, press the [MR] key. The total will be
displayed for 2 seconds.
• To clear the memory- first press [MR] to recall the totals from memory
and then press the [CE] key to clear all values from the memory.
6.3.6 Automatic Accumulated Totals
• The scale can be set to automatically accumulate totals when a weight
is placed on the scale. This eliminates the need to press the [M+] key to
store values into the memory. However the [M+] key is still active and
can be pressed to store the values immediately. In this case the values
will not be stored when the scale returns to zero.
• See the Section 9.0 on RS-232 Interface for details on how to enable
Automatic Accumulation.
P a g e 14 © Adam Equipment Company 2011
Page 17

7.0 USER PARAMETERS
The parameters are set to customise the scale to suit the weighing applications. You
need to enter a secure menu by entering a password when requested.
• Press [Tare] once, during the initial counting of the display after the
power is turned on.
• The “Weight” display will show "PIn " requesting for the password
number.
• The default password is "0000" but other numbers can be set using the
parameter menus. Press the [0] key four times.
• Press the [Tare] key.
• There are 3 functions that can be cycled through using the [U.
Wt./Units] key. The Weight window will show the parameter number
and the Unit Price window will show the word describing the function.
• The first parameter is “F1” “CAL”. (See section 8.0 for details)
• To enter into Calibration function, press the [Tare] key.
• To exit a parameter, press the [Zero] key.
• To select the second parameter press the [U. Wt./Units] key.
P a g e 15 © Adam Equipment Company 2011
Page 18

SETTING OF PIN
• Display will show “F2” “Pin”. This parameter allows setting of a new
password number. The default password is “0000”.
• Press [Tare]. The “Weight” display will show "Pin 1".
• Enter the new password number. The “Unit Weight” display will show
dashes. Press [Tare].
• The “Weight” display will change to "Pin 2 ", Enter the password again
and press [Tare].
• The display will show "donE" to show the new password has been
accepted and will return to the menu. Record the new password in a
secured place.
• To exit a parameter, press the [Zero] key.
ENABLE WEIGHING UNITS
• Display will show “F3” “Unit”. This parameter allows weighing units to be
enabled or disabled. If enabled the weighing units will change when the
[U.Wt./Unit] key is pressed. See section 6.0.
• To enter this function press the [Tare] key.
• The display will show the first weighing unit and if it is currently On or
Off. Press the [U.Wt./Unit] key to change the setting and then press
the [Tare] key to go to the next weighing unit. The weighing units
selected will depend upon the model and the capacity of the scales.
See Section 12.2, Service Parameters.
• Press the [Zero] key to return to the weighing mode.
P a g e 16 © Adam Equipment Company 2011
Page 19

8.0 CALIBRATION
• The GBC/GFC scales are calibrated using metric weights and GBC/GFC-a
scales are calibrated using metric or pound weights depending on the
unit in use before calibration. See the Service parameters section for
more information.
• The scale will display a value of the weight to be used for calibration,
this value is the last weight used for calibration. You can enter a
different value, if desired.
• For entering Calibration, see section 7.0 Parameters
• When “F1” “CAL” is displayed, press [Tare].
• The display will then show "unLoAd" to request all weight be removed
from the platform.
• Press the [Tare] key to set the zero point.
• The displays will then show the calibration weight suggested, the value
is shown as an integer number, it is not possible to have fractions of a
kilogram or pound. For example:
LoAd 00004
KiLoS
• Place the calibration weight on the platform. If the calibration weight is
different from the value shown, Press [CE] to clear the current value
then enter the correct value.
• Press [Tare] to calibrate.
• When calibration is done the display will show “SPAn” “PASS”.
• Remove the weight. The scale will return to normal weighing.
• If an error message “SPAn” “FAIL” is displayed, then repeat the process.
• After calibration, the scale should be checked whether the calibration is
correct. If necessary, repeat calibration.
NOTE: GBC/GFC-a scales will have the lb or kg indicator on, to show the unit of the
weight requested. If the scale was in pounds before starting the calibration, the
weights requested will be in pound values or if the scale was weighing in kilograms
then metric weights will be requested.
P a g e 17 © Adam Equipment Company 2011
Page 20

9.0 RS-232 INTERFACE
The GBC/GFC Series are supplied with a RS-232 bi-directional interface. The scale
when connected to a printer or computer through the RS-232 interface, outputs the
weight, unit weight and count.
Specifications:
RS-232 output of weighing data
ASCII code
Adjustable Baud rate, 600, 1200, 2400, 4800, 9600 and 19200 baud
8 data bits
No Parity
Connector:
9 pin D-subminiature socket
Pin 3 Output
Pin 2 Input
Pin 5 Signal Ground
The scale can be set to print text in English, French, German or Spanish. See the RS232 parameters section for details.
All lines end with line feed <lf>, and carriage return <cr>characters.
P a g e 18 © Adam Equipment Company 2011
Page 21

Data Format-Normal Output:
<lf><cr>
<lf><cr>
DATE 12/09/2006
TIME 14:56
<lf><cr>
GROSS Wt 1.234 Kg Net Wt. if net weight is displayed
Unit Wt. 123 g Kg or g for metric weights and lb for pounds.
Pcs 10 pcs
<lf><cr> Includes 2 line feeds with carriage return
<lf><cr> at beginning and end of the form
Data Format- Memory Recall Print:
<lf><cr>
DATE 12/09/2006
TIME 14:56
<lf><cr>
-----------------TOTAL
No. 5
Wt. 1.234 Kg
Pcs 10 pcs
<lf><cr>
-----------------<lf><cr>
2 line feeds, carriage return
<lf><cr>
Includes 1 line feed
P a g e 19 © Adam Equipment Company 2011
Page 22

Data Format- Continuous Print:
ST,GS, 0.9080 kg
U.W. 0.90798 g/pcs
PCS 1000 pcs
<lf><cr> Includes 2 line feeds with carriage return
<lf><cr> between sets of data
In other languages the format is the same but the text will be in the language
selected. See Section 9.2
Description ENGLISH FRENCH GERMAN SPANISH
Print gross
weight
Net weight
Weight per
unit counted
Number of
items
counted
Number of
weighings
added to
subtotals
Total weight
and count
Gross Wt Pds Brut Brut-Gew Pso Brut
Net Wt. Pds Net Net-Gew Pso Net
Unit Wt. Pds unit Gew/Einh Pso/Unid
Pcs Pcs Stck. Piezas
No. Nb. Anzhl Num.
Total Total Gesamt Total
printed
Print date
Print time
P a g e 20 © Adam Equipment Company 2011
Date Date Datum Fecha
Time Heure Zeit Hora
Page 23

9.1 INPUT COMMANDS FORMAT
The scale can be controlled with the following commands. The commands must be
sent in upper case letters, i.e. “T” not “t”. Press the Enter key of the PC after each
command.
T<cr><lf>
Z<cr><If>
P<cr><lf>
R<cr><lf>
C<cr><lf>
Tares the scale to display the net weight. This is the same as
pressing [Tare] key.
Sets the zero point for all subsequent weighing. The display shows
zero. Same as pressing the [Zero] key.
Prints the weight, unit weight and totals same as pressing the
[Print] key.
Recall and Print, Same as if first the [MR] key and then the [Print]
key is pressed. Will display the current accumulated memory and
print the total results.
Same as pressing [MR] first and then the [CE] key to erase the
current memory.
P a g e 21 © Adam Equipment Company 2011
Page 24

9.2 RS-232 SETUP
The RS-232 interface uses parameters set by the user for language, baud rate and
date format.
Press and hold the [Print] key for 4 seconds to access the parameters.
Press [U. Wt./Units] to scroll through the options and [Tare] to confirm the change
and then advance to the next parameter.
When a parameter is entered by pressing [Tare], the displays will guide you through
the parameter selected and the options available.
The parameters and their functions are:
Displays
Weight
Unit
Weight
Port
9600 bPS
Print mAn
AC mAn
on
Count
Options Functions
On
oFF
Enable or disable the RS232 interface.
600
1200
2400
4800
9600
19200
Cont to PC
Print Auto
Print mAn
Select printing options for
continuous printing, print
Set baud rate.
automatically or printing
manually.
AC Auto
AC mAn
AC oFF
Select the operation of
accumulating
automatically, manually or
turned off.
LAnG EnGLiS
P a g e 22 © Adam Equipment Company 2011
EnGLiS
FrEnCH
GErMAn
SPAniS
Select Language for
printing.
Page 25

The scale will perform the following functions depending on the Accumulation and Print
d print
settings:
ACCUMULATION FUNCTIONS
PRINT
FUNCTIONS
Print Auto
Print mAn
Cont to PC
AC Auto AC mAn AC oFF
Accumulate and
print automatically
Automatically
Accumulate but not
print, Print only
when [Print] key
pressed
Print continuously
and accumulate
automatically when
stable , [Print] key
no function
Print automatically ;
Accumulate and print
when [M+] is pressed
Accumulate an
when [M+] or [Print] is
pressed
Print continuously and
accumulate when [M+] is
pressed, [Print] key no
function
Print automatically,
[M+] key has no
function
Print when [Print] key
is pressed, [M+] key
has no function
Print continuously ,
[M+] and [Print] key
have no function
P a g e 23 © Adam Equipment Company 2011
Page 26

9.3 REAL TIME CLOCK SETUP
The Real Time Clock (RTC) is used only for the RS-232 output. The Date and Time
can be set as required. The scale will keep the clock running even when the power
is off.
Setting up the clock
• Press and hold the [CE] key for 4 seconds, release when the date and time is
displayed. The initial displays show the current date and time set.
“ rtC “ “11,14,06” “16,41,35”
• Press the [CE] key to change the date and time. The display will show the
current time in the format, “H-m-S”.
“timE” “H-m-S” “142929” or if no time has been set show “000000”
• Enter the time using the numeric keys using a 24 hour clock format, 3:41PM is
“154100”.
“timE” “H-m-S” “154100” new time overwrites the old
• Press the [Tare] key to accept the time. The display will show the current
date format.
“dAtE” “y-m-d”
• Press the [U.Wt./Unit] key to change the date format. Available formats are:
“Y-m-d” year, month, day
“m-d-Y” month, day, year
“d-m-Y” day, month, year
• Press the [Tare] key to accept the chosen format and then enter the date in
this format.
“dAtE” “m-d-y” “051209” note current date is in current format, will
show 000000 if no date has been set.
• Press the [Tare] key to accept the date.
An error code will be shown if the time (Err 1) or the date (Err 2) is not the
permissible values. For example, 34th day of a month is an invalid entry.
P a g e 24 © Adam Equipment Company 2011
Page 27

9.4 AUTO SLEEP FUNCTION
This function may be enabled or disabled by the user. If enabled, when the scale is
not used for some time (as pre-set by the user under this function) it automatically
switches off. To set this parameter-
• Press and hold the [Zero] key for 4 seconds, release when the display
shows “SLEEP nodE”.
• Press [U/Wt/Unit] key to scroll through the auto sleep values.
“0” Auto sleep mode disabled
“1” Auto sleep after 1 minute
“5” Auto sleep after 5 minutes
“10” Auto sleep after 10 minutes
• Press [Tare] to set the value. The scale returns to zero.
10.0 BATTERY AND BACKLIGHT OPERATION
10.1 BATTERY
• The scales can be operated from the battery, if desired. The battery life
is approximately 70 hours.
• When the battery needs charging the battery symbol will appear to be
empty. The battery should be charged as possible. Once the “LO bAT”
message is shown the scale will still operate for about 10 minutes after
which it will automatically switch off to protect the battery.
• To charge the battery, simply apply power to the scale. The scale does
not need to be turned on.
• The battery should be charged for at least 12 hours for full capacity.
• Just above the “Unit Weight” display is an LED to indicate the status of
battery charging. When the scale is plugged into the mains power, the
internal battery will be charged. If the LED is green the battery is fully
charged. If it is red, the battery is nearly discharged and yellow
indicates the battery should be charged longer, preferably overnight.
• If the battery has not been used properly or it is used for a number of
years it may eventually fail to hold a full charge. If the battery life
becomes unacceptable then contact your supplier.
P a g e 25 © Adam Equipment Company 2011
Page 28

10.2 BACKLIGHT FOR LCD
• The backlight of the LCD can be set to be-
“1”: ON at all the time,
“2”: ON only when a weight is placed on the scale or
“3”: Turned off.
• To set the backlight press and hold [Pst] key for 4 seconds.
• The weight display will show “EL xx” where xx is the current setting for
the backlight.
Press [U. Wt./Units] to scroll through the options.
Sets the backlight to be on at all times.
“EL on”
Sets the backlight to operate automatically when a
“EL Au”
weight is placed on the scale or a key is pressed.
Sets the backlight to be off.
“EL OFF”
Press the [Tare] key to store the value or press the [Zero] key to escape from this
setting and return to weighing.
P a g e 26 © Adam Equipment Company 2011
Page 29

11.0 ERROR CODES
During the initial power-on testing or during operation, the scale may show an error
message. The meaning of the error messages is described below.
If an error message is shown, repeat the step that caused the message, turning the
balance on, carry out the calibration or other functions. If the error message is still
shown contact your dealer for further support.
ERROR CODE DESCRIPTION POSSIBLE CAUSES
Err 1
Err 2
Err 4
Err 6
Time input error.
Date input error
Initial Zero is greater
than allowed (typically
4% of the maximum
capacity) when power is
turned on or when the
[Zero] key is pressed,
A/D count is not correct
when turning the scale
on.
Tried to set an illegal time, i.e.
26hours
Tried to set an illegal date, i.e. 36th
day
Weight is on the pan when turning
the scale on.
Excessive weight on the pan when
zeroing the scale.
Improper calibration of the scale.
Damaged load cell.
Damaged Electronics.
Platform is not installed.
Damaged Load cell.
Damaged Electronics.
diSPEr
Shows when a number
is too large tot fit the
display
P a g e 27 © Adam Equipment Company 2011
The accumulated totals for weight
or count exceed 999999. The data
on RS232 is still shown accurately
Page 30

12.0 SERVICE PARAMETERS
12.1 USING “0000” TO ENTER THE CALIBRATION PARAMETER
• Press the [Tare] key during the display counting when turned on. The
display will ask for a code number, “Pin “ on the Weight Display.
• Enter the number 0000 when “Pin “ is displayed and then press
[Tare]. If another PIN number has been previously stored enter that
number instead.
• The displays will show the first parameters, called “F1” “CAL”.
• To select another parameter press the [U.Wt./Units] key to advance
through the parameters.
• Press the [Tare] key to enter a parameter.
• To exit a parameter, press the [Zero] key.
• The Weight window will show the parameter number and the Unit
Price and Count windows will show the word describing the function.
• When a parameter is entered by pressing the [Tare] key, the displays
will guide you through the parameter selected and the options
available.
The parameters available are:
“F1” “CAL”
To enter the Calibration
“F2” “Pin” To set a new Pin number for access
“F3” “Unit” Enable Weighing Units
P a g e 28 © Adam Equipment Company 2011
Page 31

12.1.1 F1 -CALIBRATION
To enter the calibration parameter, press the [Tare] key when “F1” “CAL” is displayed.
The scale should be calibrated using a mass of approximately 2/3Maximum to
Maximum. If the scale has been calibrated previously the value will be stored.
Details of calibration are given is section 8.0 .
12.1.2 F2 –PIN
• To enter this parameter, press the [Tare] key when “F2” “Pin” is shown.
• The “Weight” display will show “Pin 1”
• Enter the new password. The “Unit Weight” display will show dashes.
Press [Tare].
• The “Weight” display will change to “Pin 2 “, Enter the password again
and press [Tare].
• The display will show “donE” indicating the new password has been
accepted and will return to the menu. “F3” “Unit” is shown.
• Record the new password in a secured place.
• Press [Zero] to return to weighing.
12.1.3 F3 –Unit
• To enter this parameter, press the [Tare] key when “F3” “unit” is
shown.
• This parameter allows the user to enable or disable the weighing units
available in his scales.
• To enter this parameter, press the [Tare] key when “F3” “Unit” is
shown.
• The display will show the first available weighing unit and if it is On or
Off.
• Press the [U.Wt./Units] key to change the value. Press [Tare] to
accept the displayed setting and go to the next unit.
• Press the [Zero] key to return to the menus. Press the [Zero] key again
to return to normal weighing.
P a g e 29 © Adam Equipment Company 2011
Page 32

13.0 REPLACEMENT PARTS AND ACCESSORIES
If you need to order any spare parts and accessories, contact your supplier or Adam
Equipment. A partial list of such items is as follows-
• Main Power cord
• Power supply (GFB/GFC-a)
• Replacement Battery
• Stainless steel Pan
• In use cover
• Printer
P a g e 30 © Adam Equipment Company 2011
Page 33

14.0 SERVICE
A. Details of your company
INFORMATION
This manual covers the details of operation. If you have a problem with the scale
that is not directly addressed by this manual then contact your supplier for
assistance. In order to provide further assistance, the supplier will need the
following information which should be kept ready:
-Name of your company:
-Contact person’s name:
-Contact telephone, e-mail,
fax or any other methods:
B. Details of the unit purchased
(This part of information should always be available for any future correspondence.
We suggest you to fill in this form as soon as the unit is received and keep a print-out in
your record for ready reference.)
Model name of the scale:
Serial number of the unit:
Software revision number
(Displayed when power is first turned on):
Date of Purchase:
Name of the supplier and place:
C. Brief description of the problem
Include any recent history of the unit. For example:
-Has it been working since it’s delivered
-Has it been in contact with water
-Damaged from a fire
GBC/GFC _____
P a g e 31 © Adam Equipment Company 2011
-Electrical Storms in the area
-Dropped on the floor, etc.
Page 34

15.0 WARRANTY INFORMATION
Adam Equipment offers Limited Warranty (Parts and Labour) for the components failed due to defects
in materials or workmanship. Warranty starts from the date of delivery.
During the warranty period, should any repairs be necessary, the purchaser must inform its supplier or
Adam Equipment Company. The company or its authorised Technician reserves the right to repair or
replace the components at any of its workshops depending on the severity of the problems. However,
any freight involved in sending the faulty units or parts to the service centre should be borne by the
purchaser.
The warranty will cease to operate if the equipment is not returned in the original packaging and with
correct documentation for a claim to be processed. All claims are at the sole discretion of Adam
Equipment.
This warranty does not cover equipment where defects or poor performance is due to misuse,
accidental damage, exposure to radioactive or corrosive materials, negligence, faulty installation,
unauthorised modifications or attempted repair or failure to observe the requirements and
recommendations as given in this User Manual. Additionally rechargeable batteries (where supplied)
are not covered under warranty.
Repairs carried out under the warranty does not extend the warranty period. Components removed
during the warranty repairs become the company property.
The statutory right of the purchaser is not affected by this warranty. The terms of this warranty is
governed by the UK law. For complete details on Warranty Information, see the terms and conditions
of sale available on our web-site.
P a g e 32 © Adam Equipment Company 2011
Page 35

FCC COMPLIANCE
Manufacturer’s Declaration of Conformity
This product has been manufactured in accordance with the harmonised European
standards, following the provisions of the below stated directives:
Electro Magnetic Compatibility Directive 2004/108/EC
Low Voltage Directive 2006/95/EC
Adam Equipment Co. Ltd.
Bond Avenue, Denbigh East
Milton Keynes, MK1 1SW
United Kingdom
This equipment has been tested and found to comply with the limits for a Class A digital device, pursuant
to Part 15 of the FCC Rules. These limits are designed to provide reasonable protection against harmful
interference when the equipment is operated in a commercial environment. The equipment generates,
uses, and can radiate radio frequency energy and, if not installed and used in accordance with the
instruction manual, may cause harmful interference to radio communications. Operation of this
equipment in a residential area is likely to cause harmful interference in which case the user will be
required to correct the interference at his own expense.
Shielded interconnect cables must be employed with this equipment to insure compliance with the
pertinent RF emission limits governing this device.
Changes or modifications not expressly approved by Adam Equipment could void the user's authority to
operate the equipment.
WEEE COMPLIANCE
Any Electrical or Electronic Equipment (EEE) component or assembly of parts intended to be
incorporated into EEE devices as defined by European Directive 2002/95/EEC must be recycled or
disposed using techniques that do not introduce hazardous substances harmful to our health or the
environment as listed in Directive 2002/95/EC or amending legislation. Battery disposal in Landfill Sites is
more regulated since July 2002 by regulation 9 of the Landfill (England and Wales) Regulations 2002 and
Hazardous Waste Regulations 2005. Battery recycling has become topical and the Waste Electrical and
Electronic Equipment (WEEE) Regulations are set to impose targets for recycling.
© Adam Equipment Company 2011
Page 36

ADAM EQUIPMENT
years experience in the production and sale of electronic weighing equipment.
Adam products are predominantly designed for the Laboratory, Educational, Medical, retail
and Industrial Segments. The product range can be described as follows:
-Analytical and Precision Balances
-Compact and Portable Balances
-High Capacity Balances
-Moisture analysers / balances
-Mechanical Scales
-Counting Scales
-Digital Weighing/Check-weighing Scales
-High performance Platform Scales
-Crane scales
-Medical Scales
-Retail Scales for Price computing
For a complete listing of all Adam products visit our website at www.adamequipment.com
is an ISO 9001:2008 certified global company with more than 35
© Copyright by Adam Equipment Co. Ltd. All rights reserved. No part of this publication may be reprinted or
translated in any form or by any means without the prior permission of Adam Equipment.
Adam Equipment reserves the right to make changes to the technology, features, specifications and design of
the equipment without notice.
All information contained within this publication is to the best of our knowledge timely, complete and accurate
when issued. However, we are not responsible for misinterpretations which may result from the reading of
this material.
The latest version of this publication can be found on our Website.
www.adamequipment.com
© Adam Equipment Company 2011
 Loading...