

Page 1
The Original
Backnobber®II Tool
User Guide
Self Care
Deep Muscle Therapy
Page 2

About the Author: Denise M. Miller, OTR
Denise
M. Miller is an occupational therapist, an independent consultant
and
a technical writer. She teaches, lectures and conducts seminars for
health
care professionals worldwide on topics in industrial therapy and
ergonomic applications. In addition, she has numerous written
contributions
in a variety of publications. Ms. Miller is active in the
American
Occupational Therapy Association (AOTA) and the
Occupational
Injury Prevention and Rehabilitation Society (OIPRS). She
is
a graduate of the College of St. Catherine in St. Paul, MN and a native of
Southern
California.
About the Artist: Jill Ott
o
Jill
Otto received her B.F.A. in art from the University of Iowa, with a major
in
drawing and minors in printmaking and photography. She created all
of
the illustrations, layout and design of this handbook. Ms. Otto lives in
Eagan,
Minnesota with her husband, son and daughter.
Page 3

Forward
Within all of us is a strong desire to be healthy and free of pain and toxic
stress. By using Pressure Positive products, you have taken a positive step
in that direction.
When used as intended, The Original Backnobber
II tool, in combination
with simple stretching and strengthening exercises, helps ease the
symptoms of muscle fatigue, back, neck and shoulder discomfort and
headaches. Such symptoms can result from injury as well as chronic
conditions including arthritis, tendinitis and fibromyalgia.
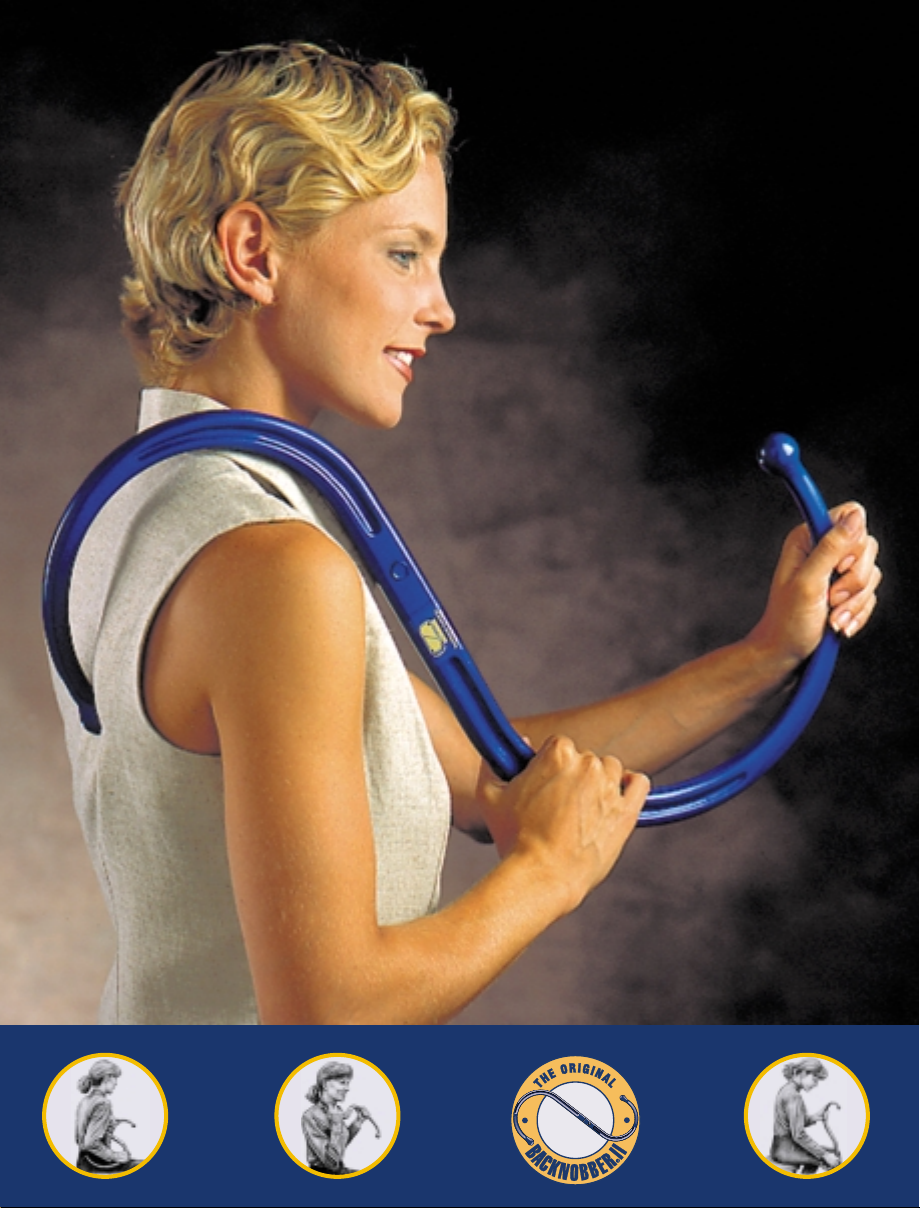
The natural shape and dimensions of The Original Backnobber
II tool
allow you to apply pressure for as long as required to achieve its
remarkable effects. The Original Backnobber
II tool is made of a highly
durable polymer composite molded in the shape of an "S." This shape allows
the user to hook it over the shoulder or under the arm so that one of the
two ends can be pressed into any of the posterior muscles of the neck and
shoulders, upper, middle or lower back and the hips, buttocks and thighs.
We hope our products will assist you in managing and reducing muscular
pain and discomfort, enhance your ability to function and contribute to
your goal of painless and stress free good health.
Bernard L. Gladieux, Jr.
President
The Pressure Positive Company
The Pressure Positive Staff Workshop and Offices
1
Page 4
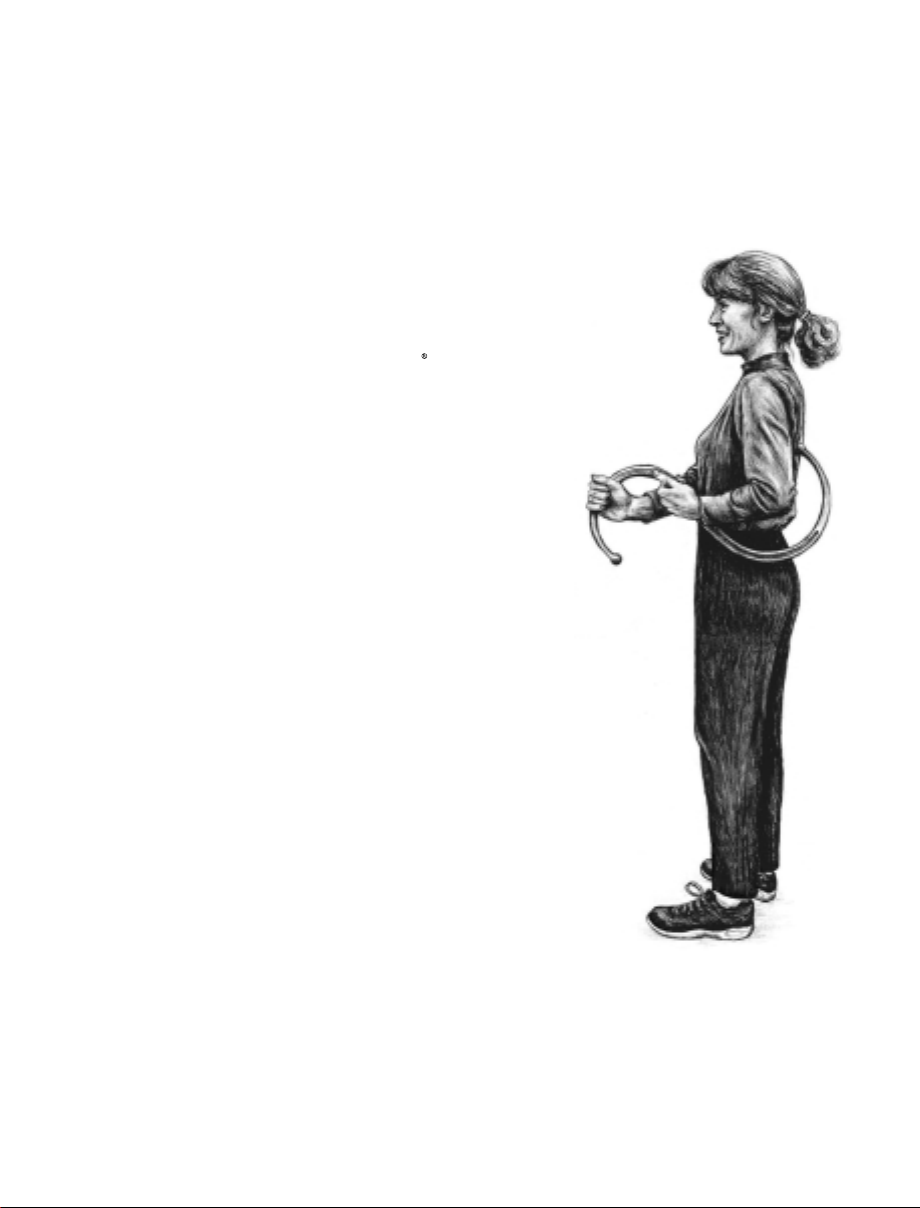
Table of Contents
1 What is a Trigger Point? 3
2 Self Care 4
3 Precautions 5
4 Using The Original Backnobber
Locking Mechanism 8
Storage 9
Techniques 10
5 Trigger Points and Exercises 14
Neck and Shoulder 15
Shoulder and Upper Back 18
Mid and Low Back 22
Hip, Buttocks and Lower Extremity 27
6 A Word from Satisfied Customers 31
7 Frequently Asked Questions 32
8
Resources 34
II Tool 6
About our Products 35
9
2
Page 5
What is a Trigger Point?
.
Tender spots in taut bands of muscles are referred to as "trigger points,"
according to Janet G. Travell, MD, a noted pioneer in the field of
myofascial pain and dysfunction. These tender spots may actively occur
in the affected muscle, produce additional tender spots or refer pain to
other muscles in the body.
Throughout our lifetimes, we
all experience some
muscle pain and discomfort. This
pain and tenderness may be a
direct result of injury or disease
or it may have occurred
following a strenuous sport
activity, or as a result
of lifting or repetitive work.
Whatever the cause, most
of us are susceptible to
trigger points in our muscles.
A trigger point may feel
like a hard "lump", knot
or band in the muscle. Or
you may experience
broad muscle soreness.
Applying pressure to the
muscle almost always
alleviates pain, even though
the pressure itself can be
somewhat uncomfortable
when applied. If you do not
experience immediate results,
try applying deeper pressure
for a longer time and to the muscles
surrounding the most affected area.
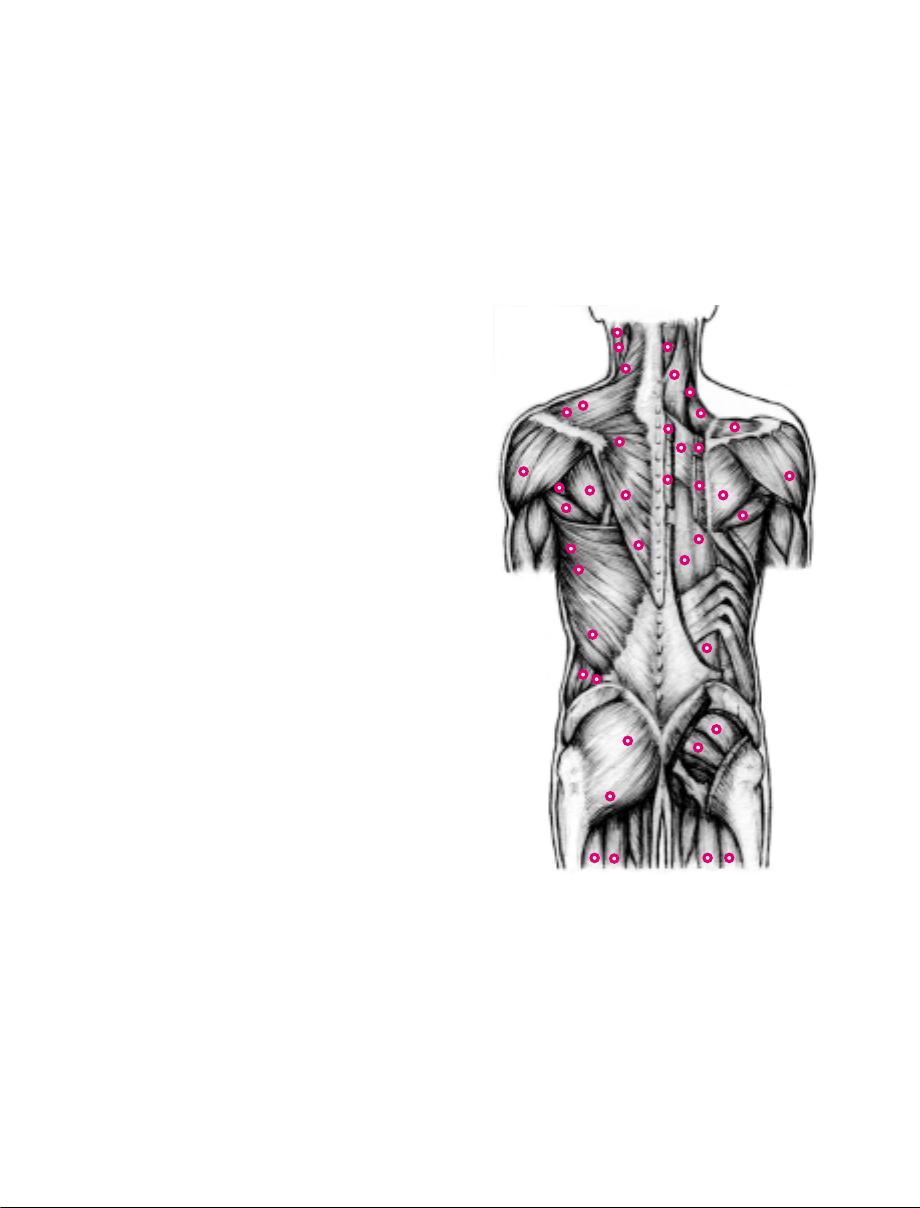
Please note that the various diagrams throughout this book show only
common or typical trigger point locations. The exact sites of these areas of
soreness can vary widely from person to person
Typical Trigger Point Locations
3
Page 6
Self Care
It is important to pay attention to the responses our bodies produce when
stressed or in pain and to follow-up with stretching, relaxation and other
exercises which help to reduce discomfort and tenderness. Be particularly mindful
when using The Orginal Backnobber II tool to keep your body as relaxed as
possible, especially in the area where you are applying pressure.
strengthening and resistance exercises to build and tone the muscles, along
with proper nutrition and sleep will produce noticeable benefits.
In addition,
The goals of trigger point therapy
function, increase range of motion and improve strength, posture and
balance. The Original Backnobber
achieve these goals.
to reduce pain and stiffness, restore
are
II tool and this guide will help you to
S
tart slowly until you are
familiar with the technique of
using The Original Backnobber II
tool.
4
Page 7
Precautions
1 Only use The Original Backnobber II tool for its intended purpose.
This product is designed for use on all large and small muscles that can
be comfortably reached.
2 Do not use The Original Backnobber
consultation if (1) you recently experienced an injury or (2) suffer from
a serious medical ailment or (3) are currently under a physician's or
therapist's care.
3 If you recently underwent surgery, consult your physician and/or
therapist before initiating massage and exercises with The Original
Backnobber
4 If bruising occurs, or if you experience
residual pain, discontinue use until
symptoms subside completely.
Reduce the amount of pressure when
resuming application.
5 Following use, if the
area is swollen or red,
apply cold packs.
Consult a physician if
inflammation persists
more than two days.
6 Do not apply directly to the
bones of the spinal column.
II tool.
II tool without a physician's
7 Stretching the muscles after
using The Original Backnobber
reduces soreness and inflammation.
8 Remember to pay attention to the signals your body is sending you.
Only apply pressure that you can comfortably tolerate. Although you
may experience some soreness and discomfort after initial use, these
symptoms will subside as overall health improves.
II tool
5
Page 8

Using The Original Backnobber II Tool
Trigger points can occur in any muscle. Remember that every person is
unique, and that you are the best judge of your pain and discomfort.
Regular use of The Original Backnobber
understand the source and nature of such problems and can be an
exceptionally valuable aid in your pursuit of a healthy, pain free lifestyle.
The guidelines listed below can be followed when using The Original
Backnobber
1 Isolate a trigger point by pressing firmly with your fingertips or The
Original Backnobber
upper, middle or lower back, buttocks or thighs.
2 When you feel a hard knot (like a lump) or soreness, apply pressure
to determine the level of tenderness in the area. Some sensation of
pain is to be expected from the pressure; although for many people, this
sensation is quite pleasurable and satisfying.
tolerable level of pressure.
3 Once you have located the trigger
point and know how it feels,
you're ready to begin using The
Original Backnobber
you become more accustomed to
detecting trigger points on your
body and how to apply pressure,
you can begin immediately with
The Original Backnobber
instead of performing the
preliminary search.
II tool on any muscle in the body.
II tool over a specific part of the neck, shoulders,
II tool. As
II tool
II tool can help you better
Experiment to determine a
4 The Original Backnobber
can be hooked over the shoulder
or under the arm. Apply direct, steady,
pressure to the trigger point in the muscle.
Pressure preferences vary widely among professionals and patients alike, but for
5
many, pressure can be effectivley applied for between 5 and 30 seconds. It often
takes time for muscles to begin to "trust" the pressure, so the first 20 seconds
may be a mere beginning. In general it is best to start slowly and gradually
increase pressure as desired following your own best intuition and feelings.
6
II tool
Page 9
6 Apply pressure firmly to the affected muscle. Move along the muscle band
at one-inch intervals. Stop and apply longer or deeper pressure to any knots
or lumps
usually have some releasing effect, it is best to apply pressure along
the entire muscle from one end to the other, in approximately one inch
intervals, and then stretch before moving onto
another area.
7 Harmony and balance between both
sides of the body are vital to achieving
proper posture and function. It is best
to work both sides of the body, just in
case any pain is referred to the other side
after being "detriggered."
8 Remember to breathe! Sit back, relax and
take some deep breathes both before,
during and after using The Original
Backnobber
9 Specific concentration
on breathing can
enhance the desired
results of the trigger point
technique. Take a deep breath
and begin applying pressure
as you exhale. Continue deep
breathing as you perform this
trigger point technique.
as you work. Although almost any pressure
II tool.
on a muscle
will
10 In addition to using The
Original Backnobber
paying attention to healthy
lifestyle habits may also
produce noticeable and desired
results. Drink plenty of water,
participate in physical activity
at least 30 minutes a day, eat properly and get plenty of sleep. As you
notice improvement in function and movement, you may also find
yourself relaxing and enjoying life more than ever before!
II tool,
7
Page 10
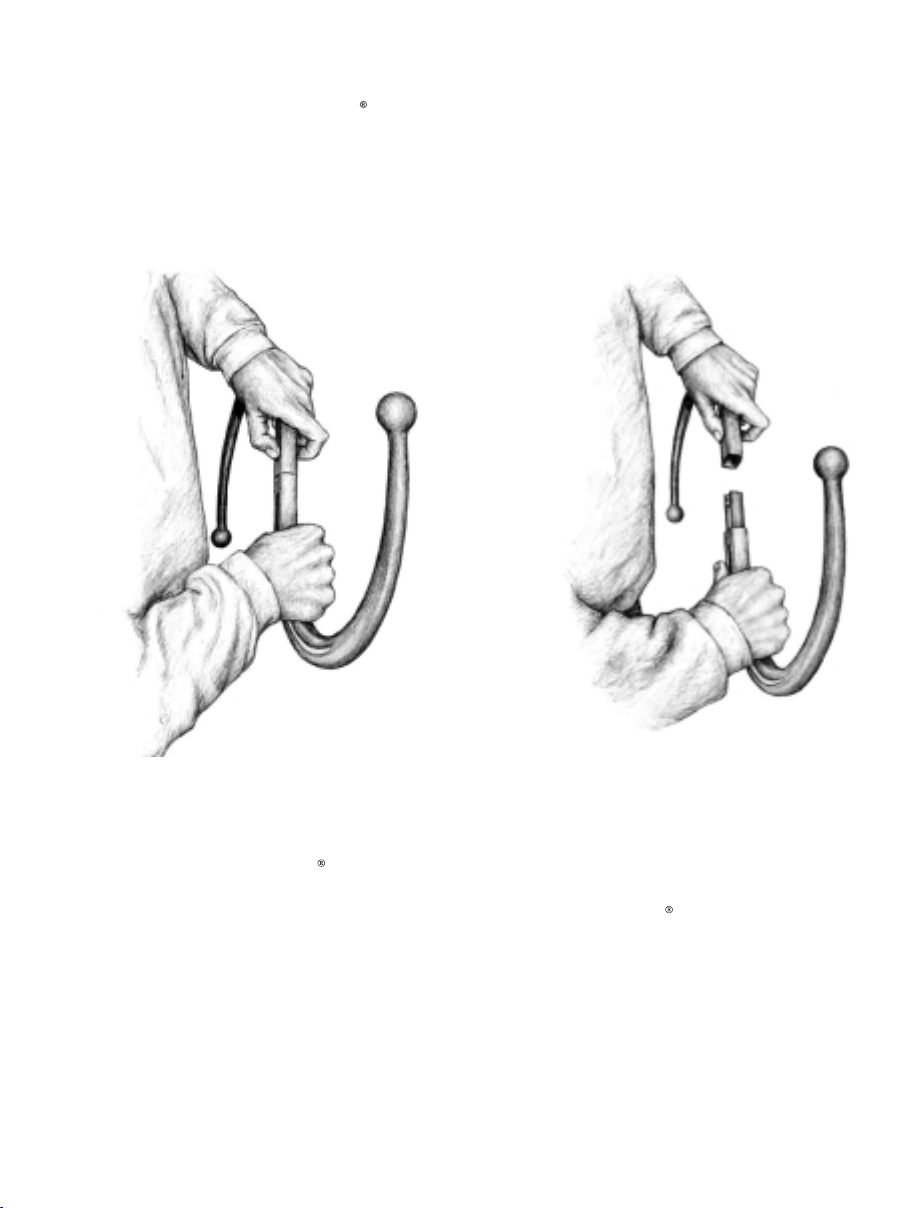
THE ORIGINAL BACKNOBBER II TOOL LOCKING MECHANISM
The Original Backnobber
II tool is equipped with a built in, patented
mechanism that allows it to be taken apart for easy transport and storage.
Press the buttons on each side of The Original Backnobber
II tool, located
directly in the center of the mechanism and gently pull apart.
To reassemble, just fit the two ends and push gently until they click
together. To ensure proper assembly of the parts and the locking
mechanism, pull on both ends after each assembly. The two ends cannot
be pulled apart, unless the buttons are pressed.
8
Page 11
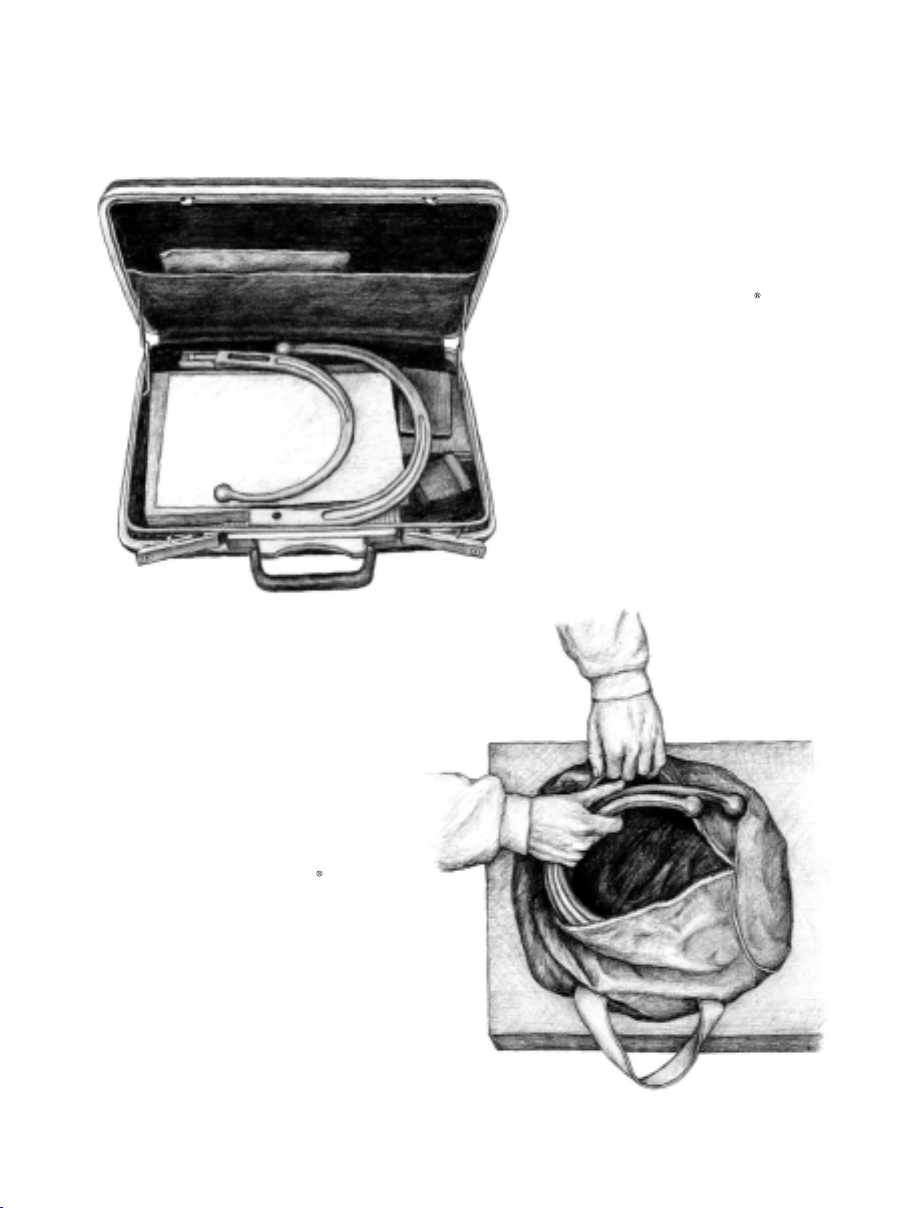
TAKING THE ORIGINAL BACKNOBBER II® TOOL WITH YOU.
It is ideal for travelers,
sports enthusiasts and
others on the go.
The Original Backnobber II
tool is made of a highly
durable, polymer composite
making it a reliable travel
companion.
The Original Backnobber
tool will easily fit into a
normal size briefcase,
overnight bag, or gym bag.
II
9
Page 12

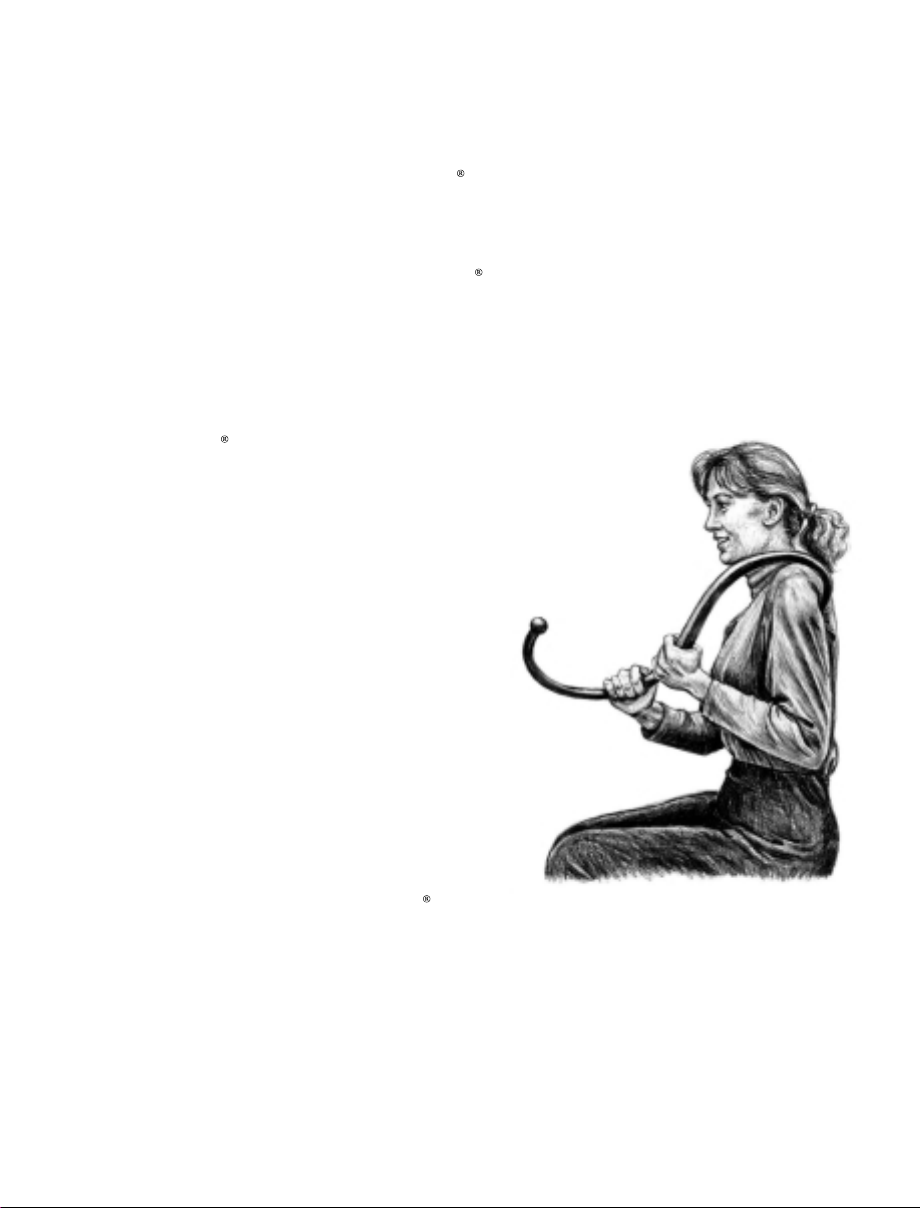
TECHNIQUES WITH ORIGINAL BACKNOBBER ® II TOOL
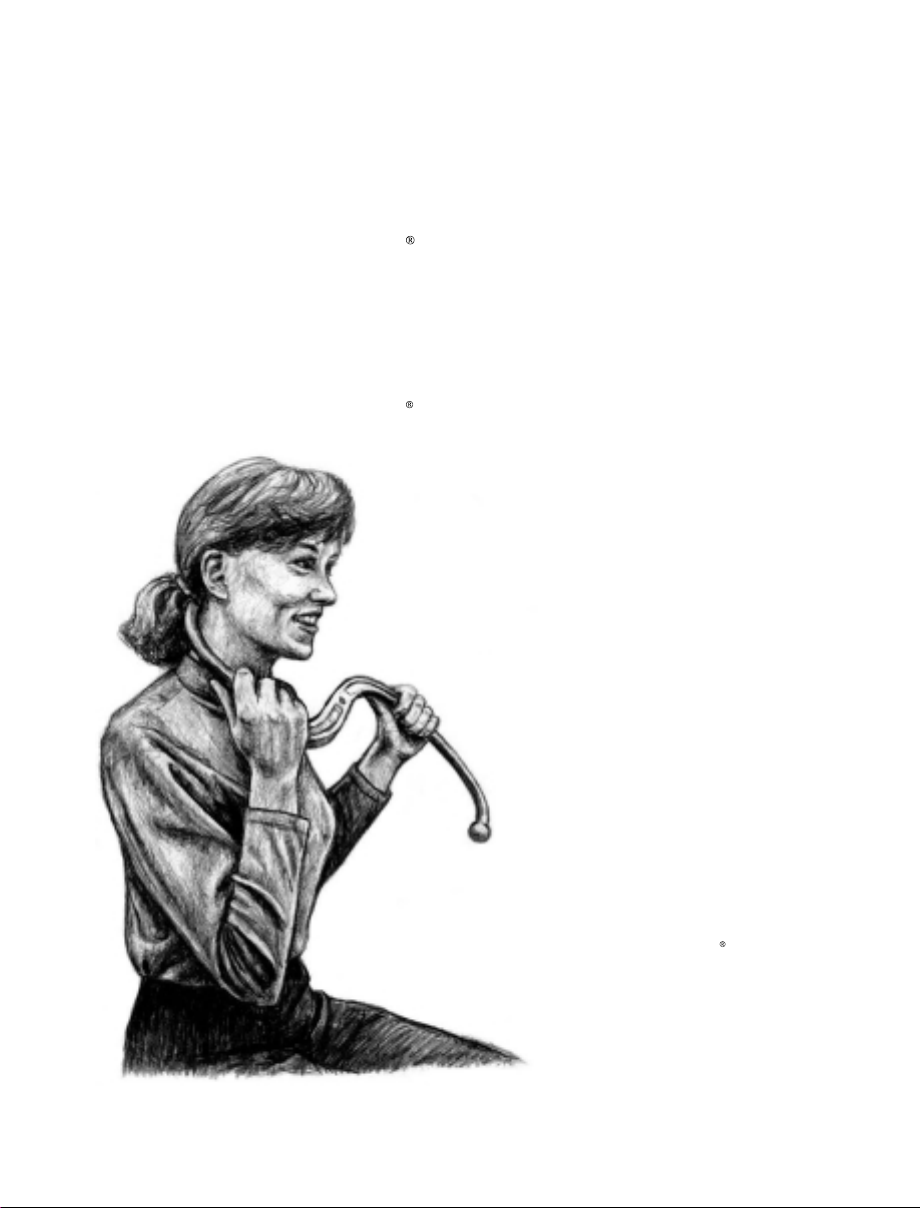
Working the muscles
around the neck and
shoulders can relieve
simple headaches.
10
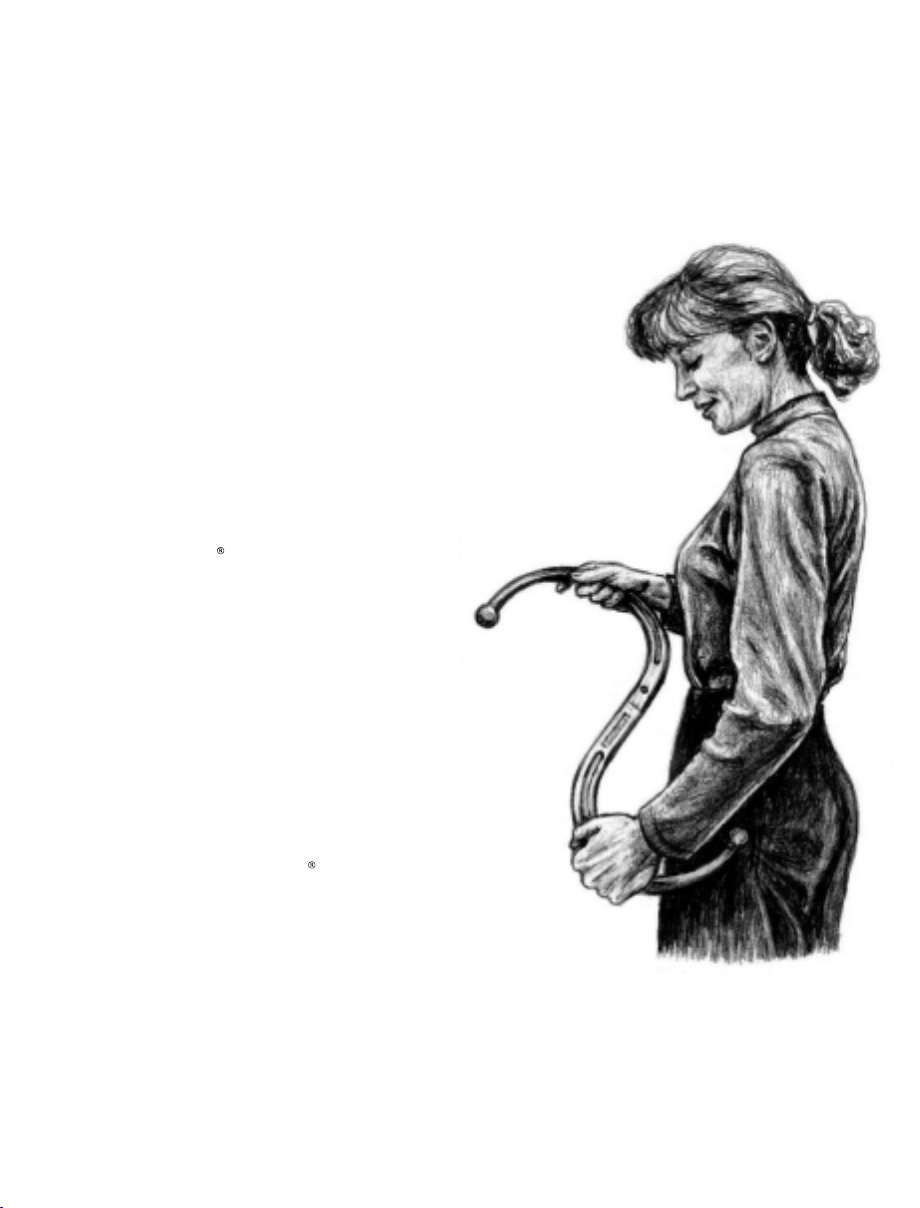
The larger end of The Original Backnobber
tool can reach over the shoulder or under an
arm and into the middle back area.
Experiment with
different positions
until you find the
ones that work best
for you.
II
Page 13

There is no "right" or
"wrong" way to hold The
Original Backnobber II
tool. Use it however it
works best and feels
most comfortable in
your hands.
Always look for ways to use The
Original Backnobber II tool that
require the least amount of energy
and provides the deepest amount of
pressure.
When using The Original Backnobber II tool
lying down, let the floor act as a fulcrum.
11
Page 14

It is generally best to use The
Original Backnobber II tool
over a layer of light weight
clothing such as a cotton tee
shirt or light weight pants
or shorts.
You can safely use The Original
Backnobber II tool, one, two or even
three times a day.
Using The Original
Backnobber II tool
should be a relaxed,
reflective experience.
12
Page 15

Avoid pressing The Original
Backnobber II tool into bones,
especially those on the neck and
directly on the spinal column.
Use either end of The
Original Backnobber II
tool, whichever feels
most comfortable.
Although there may be some
discomfort while pressing with
The Original Backnobber II
tool, that discomfort should go
away immediately after use,
and be replaced by more relaxed
muscles, and decreased pain.
13
Page 16

Trigger Points and Exercises
g
STRETCHING AND RESISTANCE STRENGTHENING EXERCISES
Deep muscle massage or trigger point therapy in all their variations,
combined with stretching, strengthening and resistance exercises, can
enhance and often reduce pain and restore range of motion
and over all function.
Stretching, especially after applying trigger point pressure, enhances the
effects of The Original Backnobber
is normal to feel a pulling sensation when stretching, but stop if
painful symptoms develop or increase.
Strengthening exercises improve the condition of the muscles
and assist in preventing further injury. As the muscles
become stronger, they do not have to exert as much
energy to perform. As you become stronger,
you can tolerate more physical activity
and do more work without experiencing an
increase in stiffness, soreness, and fatigue.
II tool. Stretching should not hurt. It
Resistance exercise promotes
strengthening and toning and helps
to stretch muscles. Applying
resistance may be accomplished by
using the hands and legs or by
holdin
Stretching and strengthening exercises should be executed in a slow,
consistent, comfortable manner. Begin with five to ten repetitions of each
exercise. Gradually increase the number of repetitions as physical wellbeing improves. Consult your health care professional as needed.
14
weights.
Page 17

NECK AND SHOULDER DISCOMFORT
Trigger points can be found in taut bands in the muscles on the sides and
back of the neck and upper back region. There are many muscles that
originate in the head and neck and extend to different muscles in the rest of
the body. When these muscles have been injured or overused, they can
result in general soreness, stiffness, fatigue and/or headaches.
15
Sternocleidomastoid
Upper T r apezuis
Middle Trapezuis
Lower T rapezuis
Levator scapulae
Splenius capitis
Semispinalis capitis
Sternocleidomastoid
Upper Trapezuis
Middle Trapezuis
Lower Trapezuis
Semispinalis capitis
Splenius capitis
Levator scapulae
Page 18

NECK AND SHOULDER STRETCHING AND STRENGTHENING EXERCISES
Head Turn
Turn your head to one
side and hold for 10
seconds. Repeat on the
other side.
Move slowly and consistently until
you feel a gentle stretch.
Head Lift
Slowly raise your chin (extension)
and hold for 10 seconds. Lower the
chin towards your chest (flexion)
and hold for another 10 seconds.
16
Head Tilt
While facing forward, tilt and lower the
head toward one shoulder. Hold for 10
seconds and repeat on the opposite side
(lateral rotation).
The suggested durations of these and other
exercises are only approximations. Begin
slowly and gradually increase the intensity
and the time according to the signals your
body gives you.
Page 19
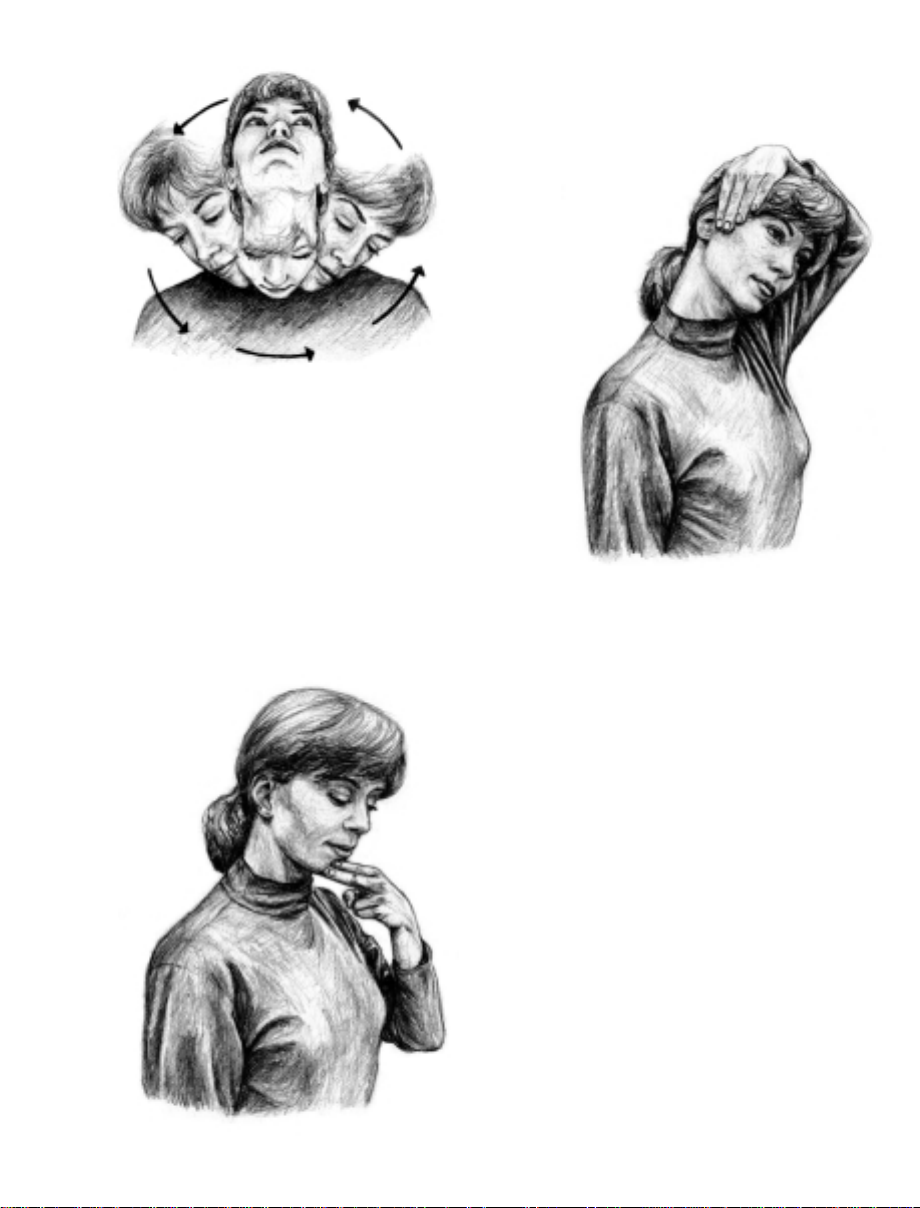
Head Roll
Gently and slowly move the chin and
neck in circular motions. Lead with the
chin, by moving forward and downward.
Repeat in the opposite direction.
You should feel a
gentle stretch in
the neck and
shoulder.
You will feel
resistance in the
neck muscles on
the sides of your
neck.
Lateral Neck Stretch
Place the left hand around to the
opposite side of the head and gently
pull towards the left shoulder.
Hold for 10 seconds and release.
Repeat on the opposite side.
Chin Press
Place two fingers on the chin and
gently push downward. At the same
time, gently raise you head and resist
against the pushing movement of the
fingers. Hold for 10 seconds and
release.
17
Page 20

SHOULDER AND UPPER BACK DISCOMFORT
Trigger points can be found in the taut bands of muscles in the posterior
upper back and shoulders. The muscles provide the support mechanisms
for successfully performing everyday work and leisure activities. It is easy
to take for granted how many activities these specific muscles support,
such as providing the ability to sit and type at the computer, talk on the
phone, hold a child, garden or golf. All too often, we become acutely aware
of their existence when pain and discomfort occur. During stressful times,
whether physical or emotional, the shoulders and upper back generally
become tense.
18
Infraspinatus fascia
Serratus posterior
superior
Rhomboideus
minor (cut)
Supraspinatus
Levator scapulae
Trapezius
Deltoid
Teres minor
Teres major
Trapezius
Deltoid
Teres minor
Teres major
Levator scapulae
Supraspinatus
Infraspinatus fascia
Serratus posterior
superior
Rhomboideus
minor (cut)
Page 21

SHOULDER AND UPPER BACK STRETCHING EXERCISES
Shoulder Rolls
Roll the shoulders
in a circular motion.
Repeat in the
opposite direction.
Feel a gentle stretch.
Move gently
and slowly.
Shrugs
Elevate both shoulders
and hold for 20 seconds.
Shoulder Stretch
With arms at shoulder
height, grasp your elbow and
pull it across your chest as far
as you comfortably can. Hold
for 20 seconds and release.
Repeat on the opposite side.
Side Stretch
Reach overhead
and clasp hands
together. Slowly,
lean to one side
and hold for 20
seconds.
Repeat on the
opposite side.
19
Page 22

SHOULDER AND UPPER BACK STRENGTHENING EXERCISES
Arm Circles
With arms at shoulder
height, rotate in small
circular motions. Repeat
in the opposite direction.
Gradually increase the
arc of the arm circles.
Take a deep breath.
Shoulder Blade Squeeze
Clasp hands behind the base of the head.
As you inhale, slowly press the shoulder
blades together. Hold for 5 seconds exhale,
and release.
20
Feel a gentle stretch
across the chest.
Wall Chest Stretch
Face the corner of a wall with the
hands at shoulder height and feet
apart. Slowly lean forward, hold
for 10 seconds and release.
Page 23

SHOULDER AND UPPER BACK RESISTANCE EXERCISES
Apply resistance by holding small weights (1-2 lb.) or by attaching
weighted bands around the wrists.
Hold weights that you
can lift easily.
Side Arm Lifts
Begin with arms at hip level
and raise to shoulder height.
Hold for 5 seconds and release.
As strength and endurance
improve, increase weight,
and height of lift.
Front Arm Lifts
Raise arms straight out
in front of your body to
shoulder height. Hold
for 5 seconds and release.
Keep your back straight and
shoulders relaxed.
Shoulder Rotation Internal/External
Bend your elbow 90 and hold the
weight close to the center of your body.
Extend the weight out and to the side of
your body. Repeat on the opposite side.
21
Page 24

MID AND LOW BACK MUSCLE DISCOMFORT
Trigger points can be found in the taut band of muscles in the posterior mid
and low back regions. The large muscle groups of the middle and low back
are generally responsible for maintaining good posture in sitting, standing
and lying down. Many people lift, carry, push and pull during work and
leisure activities. However, some weight may be too heavy, an awkward
size, or lifted too often with improper posture. Over time, repeated stress
to the back may produce sore, tight and stiff muscles. Muscular back pain
can also be a direct result of illness, trauma or injury.
22
Trapezuis
Teres minor
Teres major
Latssimus dorsi
External abdominal
oblique
Internal abdominal
oblique
Serratus anterior
Erector spinae
Trapezius
Teres minor
Teres major
Latssimus dorsi
External abdominal
oblique
Internal abdominal
oblique
Serratus anterior
Erector spinae
Page 25

MID AND LOW BACK STRETCHING AND STRENGTHENING EXERCISES
Ab Extension
Place both hands in the small of
the back. Keep your head facing
forward with knees slightly
bent. Gently extend your upper
body backwards. Hold for 15
seconds.
Feel an easy stretch in the hips
and abdominal muscles.
Ab Extension
(alternative)
Elevate one foot on
a firm surface, no
higher than 8".
Hold for 15 seconds.
Seated Rotation Stretch
Sit on a firm surface with your legs straight in front
of you. Bend your left leg at the knee and place
foot on the floor, against the outside
of your right knee.
Place your right elbow against
the outside of your left
knee, and slowly
rotate your body
towards the left.
Hold for 15 seconds
and repeat on the
opposite side.
Feel an easy stretch across the low back, hips and buttocks.
23
Page 26

Tighten the
abdominal
muscles to
raise leg.
Knee Pull
Lie on your back with knees bent, feet flat on the floor, and arms relaxed at your
sides. Bring one knee up to your chest, and hold for 20 seconds. Release the knee
slowly, extending the leg. Resume start position and repeat with the opposite
knee.
Feel a gentle
stretch.
Towel Pull
If you find it difficult to the maintain the Knee Pull posture on your own, wrap
a towel behind one knee, hold the ends of the towel in each hand and slowly
raise the knee towards the chest.
Feel the stretch in your
low back, hips and
buttocks.
Crossed Knee Pull
Intensify the knee pull stretch by placing the heel across the opposite knee.
Slowly bring the left foot toward your chest. Hold for 20 seconds and repeat
with the opposite leg.
24
Page 27
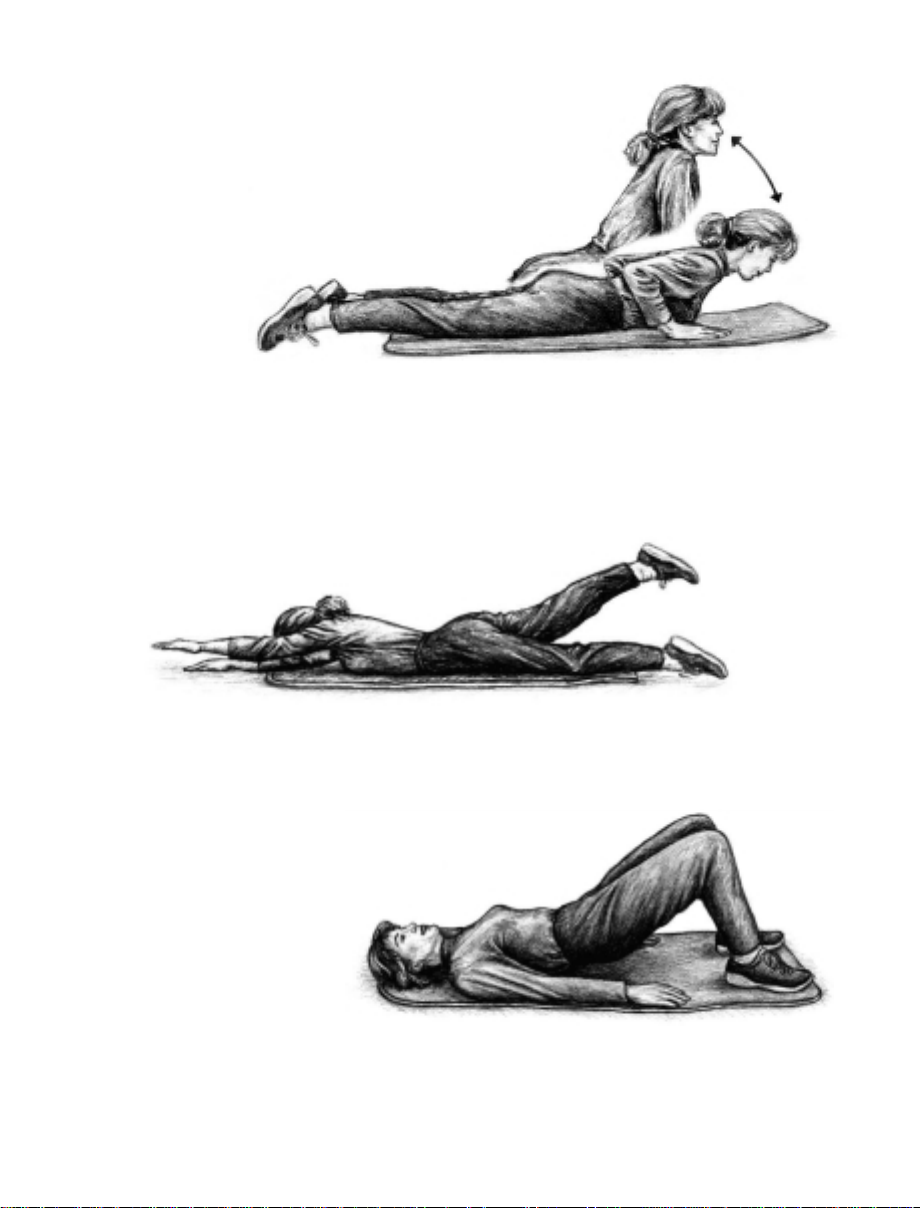
Modified Push Up
Lie face down with your elbows bent as if
beginning a standard push up. Slowly push your
body off the floor. Your waist, hips and legs
remain touching the floor. Hold for 10 seconds
and release.
Alternate Leg and Arm Lifts
Lie face down on the floor. Extend your arms above your head. Lift one arm
and the opposite leg. Hold for 10 seconds and release. Repeat using the
opposite arm and leg.
Feel a gentle stretch in your abdomen.
Always follow this exercise with corresponding stretches of your low back, hips, and buttocks.
Bridging
Lie on your back with
knees bent and arms at
the sides of your body.
Elevate your hips and
buttocks slightly,
keeping the small of the
back touching the floor.
Hold for 15 seconds and
slowly release.
Deliberately tighten your stomach muscles,
and slowly elevate your hips.
25
Page 28

Cat Stretch
Extend arms directly out in front
of you and sit back on your heels.
Hold for 15 seconds, release and
move back into a cat-like arching
position.
Feel an easy stretch in the low back, hips and buttocks
Cradle Rock
Lie on your back with knees bent.
and clasp
Hold for 20 seconds and release.
your hands under your legs.
Bring both knees up to your
chest
Rotation
Lie on your back with knees bent, feet flat
on the floor and arms at the sides of your
body. Slowly drop your knees to one side.
Hold for 15 seconds. Resume start position
and repeat on the opposite side.
26
Page 29

HIP, BUTTOCKS AND LOWER EXTREMITY DISCOMFORT
Trigger points can be found in taut bands of muscles in the posterior hips,
buttocks and upper legs. These muscles stabilize the body and are essential
for activities such as sitting, walking, riding a bike or driving a car. When
they are overworked, fatigued or injured, soreness and tightness occur, and
every movement may produce discomfort. Once these muscles have been
detriggered using deep, trigger point compression, stretching can help to
restore flexibility and function.
27
Gluteus maximus
Tere major
Internal abdominal
oblique
Latissimus
dorsi
External abdominal
oblique
Erector spinae
Hamstrings
Pyriformis
Gluteus maximus
Pyriformis
Hamstrings
Teres major
Latssimus
dorsi
External abdominal
oblique
Internal abdominal
oblique
Erector spinae
Page 30

Groin Stretch 1
Sit on the floor with back straight,
shoulders relaxed and heels together.
Gently pull your upper body forward. Hold
for 20 seconds and release. This stretch is
also great for the lower back and hips.
Feel an easy stretch in your groin
and the inside of the thighs.
Groin Stretch 2
If you find it difficult to keep your heels together, sit on the floor with
relaxed. shoulders Extend the legs out to form a wide v-
Reach forward. Hold for 20 seconds.
A good way to maintain
a straight upper body
position is to lean your
back against a wall.
Sitting Hamstring Stretch
Sit on the floor with your legs apart and toes upright.
Reach toward one foot. Hold for 20 seconds and repeat
on the opposite side.
Reach forward for a
comfortable stretch. Do
not bounce!
shape.
28
Page 31

Calf Stretch
Stand a few feet from a wall or fixed support.
Place one foot forward and bend at the knee.
Straighten the other leg behind your body, with
the heel firmly on the ground. While pushing
against the wall with your hands, slowly
towards the wall. Hold
repeat with the opposite leg.
Feel an easy
stretch in the
front
of the
thigh.
lean
for 20 seconds and
Quadriceps Stretch
Holding onto a firm surface with one
hand, grasp the opposite ankle and pull
foot behind the body.
Hold for 20 seconds.
Standing Hamstring Stretch
Stand with one foot firmly on the
ground and place the other foot
(heel) upon a flat, firm surface no
higher than hip level.
hands reach towards your ankle as
far as is comfortable. Hold for 20
seconds.
With both
29
Page 32

Iliospoas Stretch
Place one foot firmly on
the floor, and bend your
knee The top of the
other knee is touching the
floor. With a straight
back, slowly lean forward
until you feel a stretch in
the front of your thigh.
Hold for 20 seconds and
repeat with the opposite
side.
Place a pillow under the knee for
added comfort and hold on to
something if necessary for
balance.
Do not bounce!
Feel an easy stretch in your hips, groin and quadricep mucles.
Modified Lunges
Stand with one leg in front of the other as if in mid stride. Bend one knee and
move forward until it is bent directly over the ankle. The opposite leg is
outstretched behind, with your foot resting on the floor. Hold that position and
lower the front of the hips. Hold for 20 seconds and release. Repeat with
opposite leg.
Feel an easy
stretch in the
hips and thighs.
Hip Stretch
Stand with your arm
touching a wall or fixed
support. Cross one foot in
front of the other. Hold for
20 seconds.
Next, cross the same foot
behind the other and hold
for 20 seconds. Repeat with
the opposite leg.
30
Page 33

A Word from Satisfied Customers
"Your Backnobber is great for those patients who need to have regular
specific trigger point therapy in chronic areas, as well as for all of us who
need to de-stress after a hard day's work! Add me to your list of loyal
fans."
Betty Knox Singleton, D.C. Gig Harbor, WA
"I have found the Backnobber
spasm and discomfort in those areas you cannot reach! Thank you again."
Martha Clayton Cottrell, M.D., New York, NY
"I have never been so impressed with a product in my life. This little object
has transformed the life of everyone in our office. I don't normally take the
time out of my day to write manufacturers, but in your case, I had to make
an exception."
C. Starrett, Sears Business Centers
"Your Backnobber
Ronald Lawrence, M.D., Ph.D., Santa Monica, CA
"The Backnobber
treatments, so I recommend it in appropriate circumstances. People have
been delighted with it."
John Rolland, M.D. Milwaukee, WI
"A friend brings her Backnobber
that we have to wait in line just to use it."
Michelle Sterry, Moorpark, CA
is a modern wonder."
works better than many more expensive products or
to be very helpful in alleviating muscle
to work everyday. It is getting so popular
31
Page 34

Frequently Asked Questions
1 How do I locate the trigger point?
Feel the muscle for a knot or lump or hypersensitive area. Trigger
points often reside deep in the muscles where you experience
pain, tightness, soreness or discomfort.
2 How do I hold The Original Backnobber
Hook the Original Backnobber
the arm - whichever is more comfortable to achieve the best results.
In general hold the Original Backnobber
close to your body.
3 How much pressure should I apply?
Apply pressure gradually to the sore muscle, ideally increasing it until
you actually feel the muscle relax.
to person. Only apply pressure that you can tolerate and that produces
the desired results.
4 How should I apply pressure?
Gradually apply pressure directly, firmly and steadily to a sore muscle,
holding it until you feel the muscle respond by relaxing slightly. Such
changes in the muscle can be subtle, so if you don't notice any change,
be patient and don't give up
5 How long should I apply pressure?
You should apply pressure for about 10-15 seconds or longer if necessary
and if tolerated.
pressure,
and apply pressure again.
gradually ease off and
As you feel tension in the muscle
II tool over one shoulder or under
Optimal pressure
move along the same muscle
II tool?
II tool with both hands,
varies from person
release
under the
32
Stretching after using
The Original Backnobber
increases flexibility and
function.
Page 35

6 How should I position The Original Backnobber II tool?
Hold The Original Backnobber II tool in any position that is
comfortable, which allows your body to be relaxed and which
allows you to apply p
ressure to affected muscles.
7 What else do I need to do?
St
retch the muscle area, especially after applying The Original
Backnobbe
r
II tool. Breathe and work the opposite muscles.
8 Will I experience pain and soreness?
You may experience some discomfort after initial use. When used
as
intended, the product is designed to relieve muscle-pain and
discomfort
and restore function and pain-free movement.
9 What if the area I use this technique on becomes swollen, inflamed
o r bruise d ?
Rest,
apply cold packs and consult your physician, if necessary.
Discontinue use
on bruised area and resume only when healed. You
may
be applying too much pressure. Next time take it slower and
easier
and remember to always include gentle stretching. Be
particularly
careful if you bruise easily.
33
Satisfaction guaranteed!
Page 36

Resources
1 Travell, JG and Simons, DG, Myofascial Pain and Dysfunction: The
Trigger Point Manual, Baltimore, Williams & Wilkins, 1983.
2 The Anatomical Chart Co.,
Pain and Discomfort. Skokie, IL, 1994.
3 Prudden, B. , Pain Erasure The Bonnie Prudden Way: Discover the
Wonders of "Trigger Point Therapy, New York, NY, Ballantine Books,
1980.
45Headley,
Trigger Points. Boulder, CO, Innovative Systems for Rehabilitation,
Inc., 1997.
Davis, C., The Trigger Point Therapy Workbook, 2nd Edition, Oakland,
CA, New Harbinger Publications, Inc.
B., When Movement Hurts: A Self-help Manual for Treating
Trigger Points: Understanding Myofascial
Always look for ways to use The
Original Backnobber tool that
require the least amount of
energy and provide the deepest
amount of pressure.
34
Page 37

T h e O r i g i n a l B a c k n o b b e r I I T o o l
®
 Loading...