

Page 1

ACTi Station Management Server
User’s Manual
Version 1.0.01
2016/05/26
Page 2

www.acti.com
ACTi SMS Server User’s Manual
Legal Notice
Disclaimer
The information contained in this document is intended for general information purposes.
ACTi Corporation shall not be liable for errors contained herein or for incidental or
consequential damages arising from the furnishing, performance, or use of this manual.
The information contained herein is subject to change without notice.
The English version of this document is the official one for all purpose. All the translated
versions are provided as a convenience. Any discrepancies or differences created in the
translations of any other languages are not legally binding.
Copyright
Copyright ©2016 ACTi Corporation All Rights Reserved.
Trademarks
ACTi Connecting Vision and its logo are registered trademarks of ACTi
Corporation.
Microsoft® and Windows® are registered trademarks of Microsoft Corporation.
All other product or company names mentioned in this document may be trademarks or
registered trademarks of their respective owners.
2
Page 3

www.acti.com
ACTi SMS Server User’s Manual
Table of Contents
Legal Notice 2
Disclaimer ..........................................................................................2
Copyright ...........................................................................................2
Trademarks ........................................................................................2
Introduction 5
Product Overview ..............................................................................5
System Architecture ..........................................................................5
PC Hardware Requirements .............................................................6
Getting Started 7
Pre-requisites ....................................................................................7
Installing the Server Program ..........................................................7
Install Workstation .......................................................................... 11
License and Activation ................................................................... 14
Log In to SMS System 18
Via Internet Explorer ....................................................................... 18
Via SMS Workstation ....................................................................... 20
Set up the System 23
Storage Management ................................ ................................ ...... 23
Manage User Groups/Users ........................................................... 25
Manage Stations .............................................................................. 32
Event Management .......................................................................... 35
3
Page 4

www.acti.com
ACTi SMS Server User’s Manual
Monitor the Synchronization Process 41
Overview .......................................................................................... 41
Watch Playback 44
Overview .......................................................................................... 44
Search by Time ................................................................................ 46
Search by Event Type ..................................................................... 47
Search by Video Analytics .............................................................. 48
View Search Results ....................................................................... 51
Take a Snapshot of the Playback View .......................................... 53
Export the Recordings .................................................................... 54
4
Page 5
www.acti.com
ACTi SMS Server User’s Manual
Wi-Fi Coverage
Transportation
Standalone NVR
SMS Server+
Workstation Client
Introduction
Product Overview
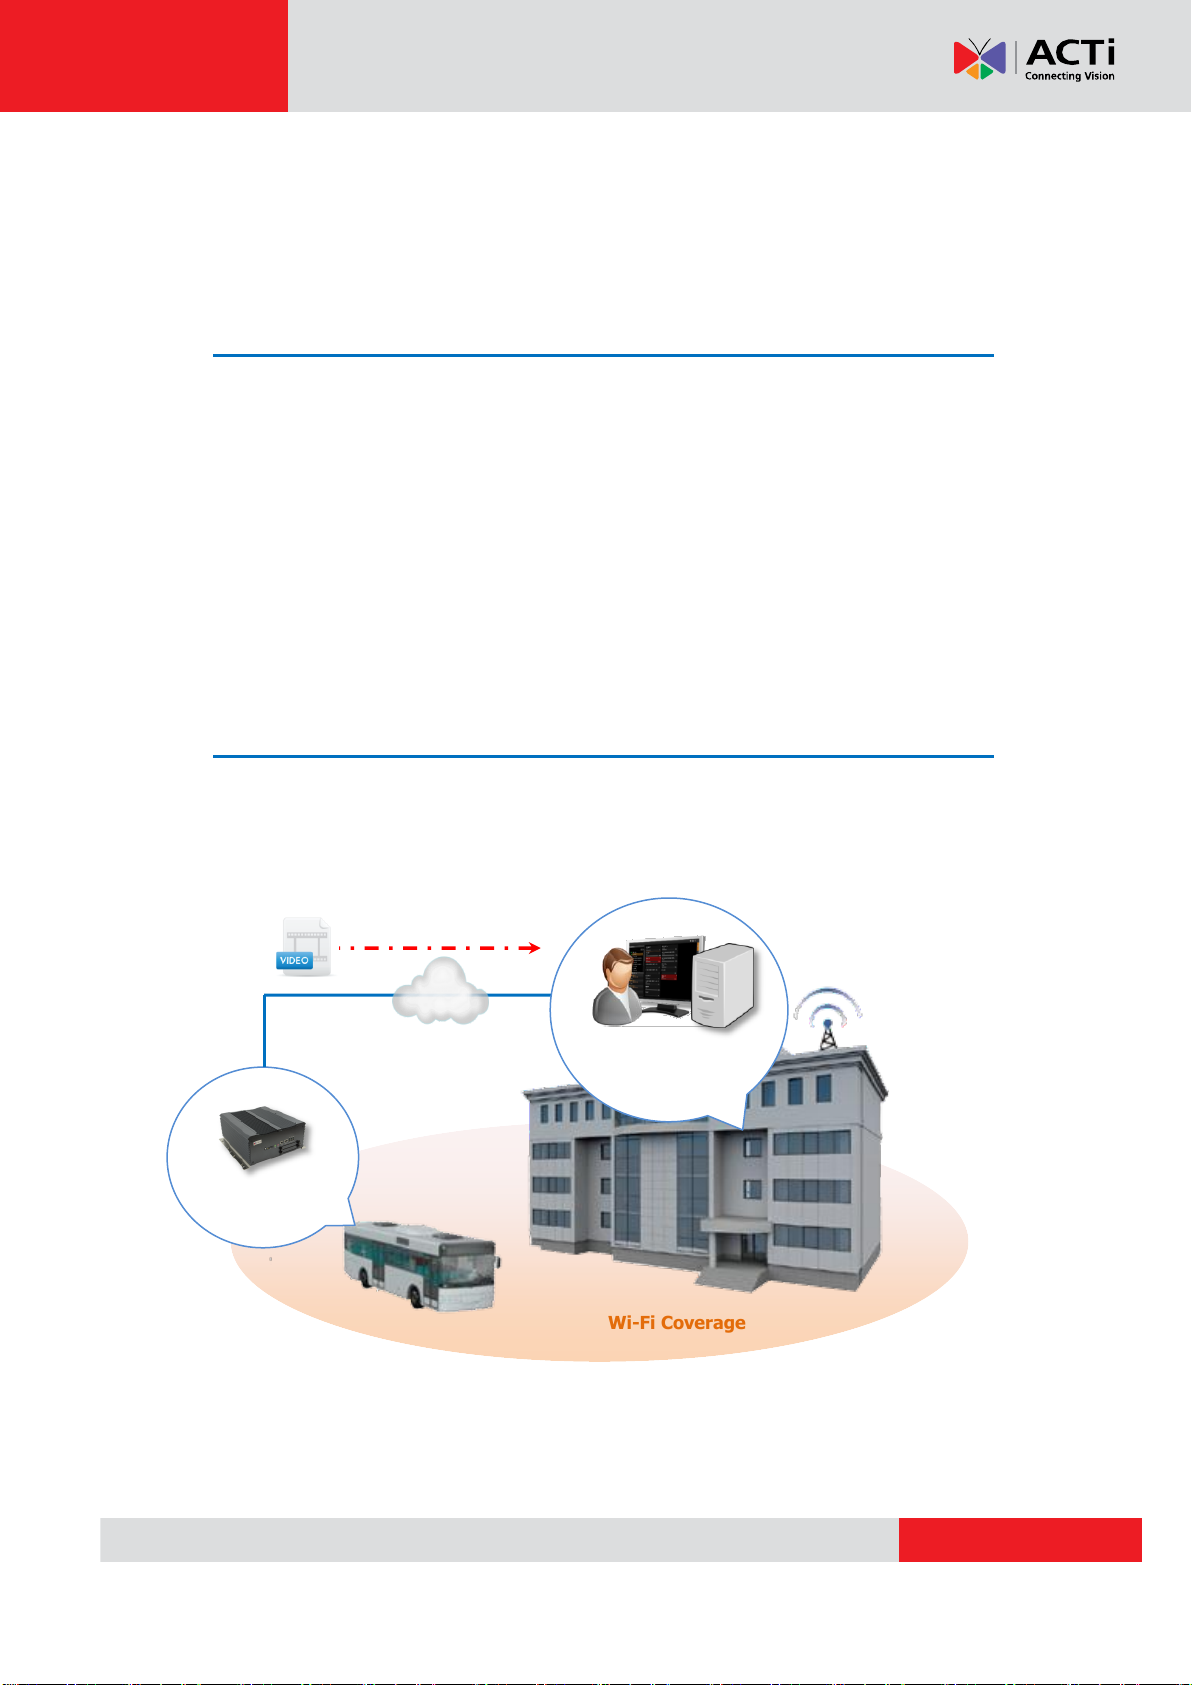
ACTi’s Station Management System (hereafter referred to as SMS) is specially designed
for mobile vehicle surveillance. It helps centralize the storage of recorded videos from all
the vehicles. When the vehicle approaches the depot, the recorded videos stored in the
transportation standalone NVR will be automatically offloaded to the SMS server in the
control center as soon as the transportation standalone NVR connects to Wi-Fi, saving
human efforts on transferring the recordings to the data center.
System Architecture
The service architecture is described in the following figure:
5
Page 6
www.acti.com
ACTi SMS Server User’s Manual
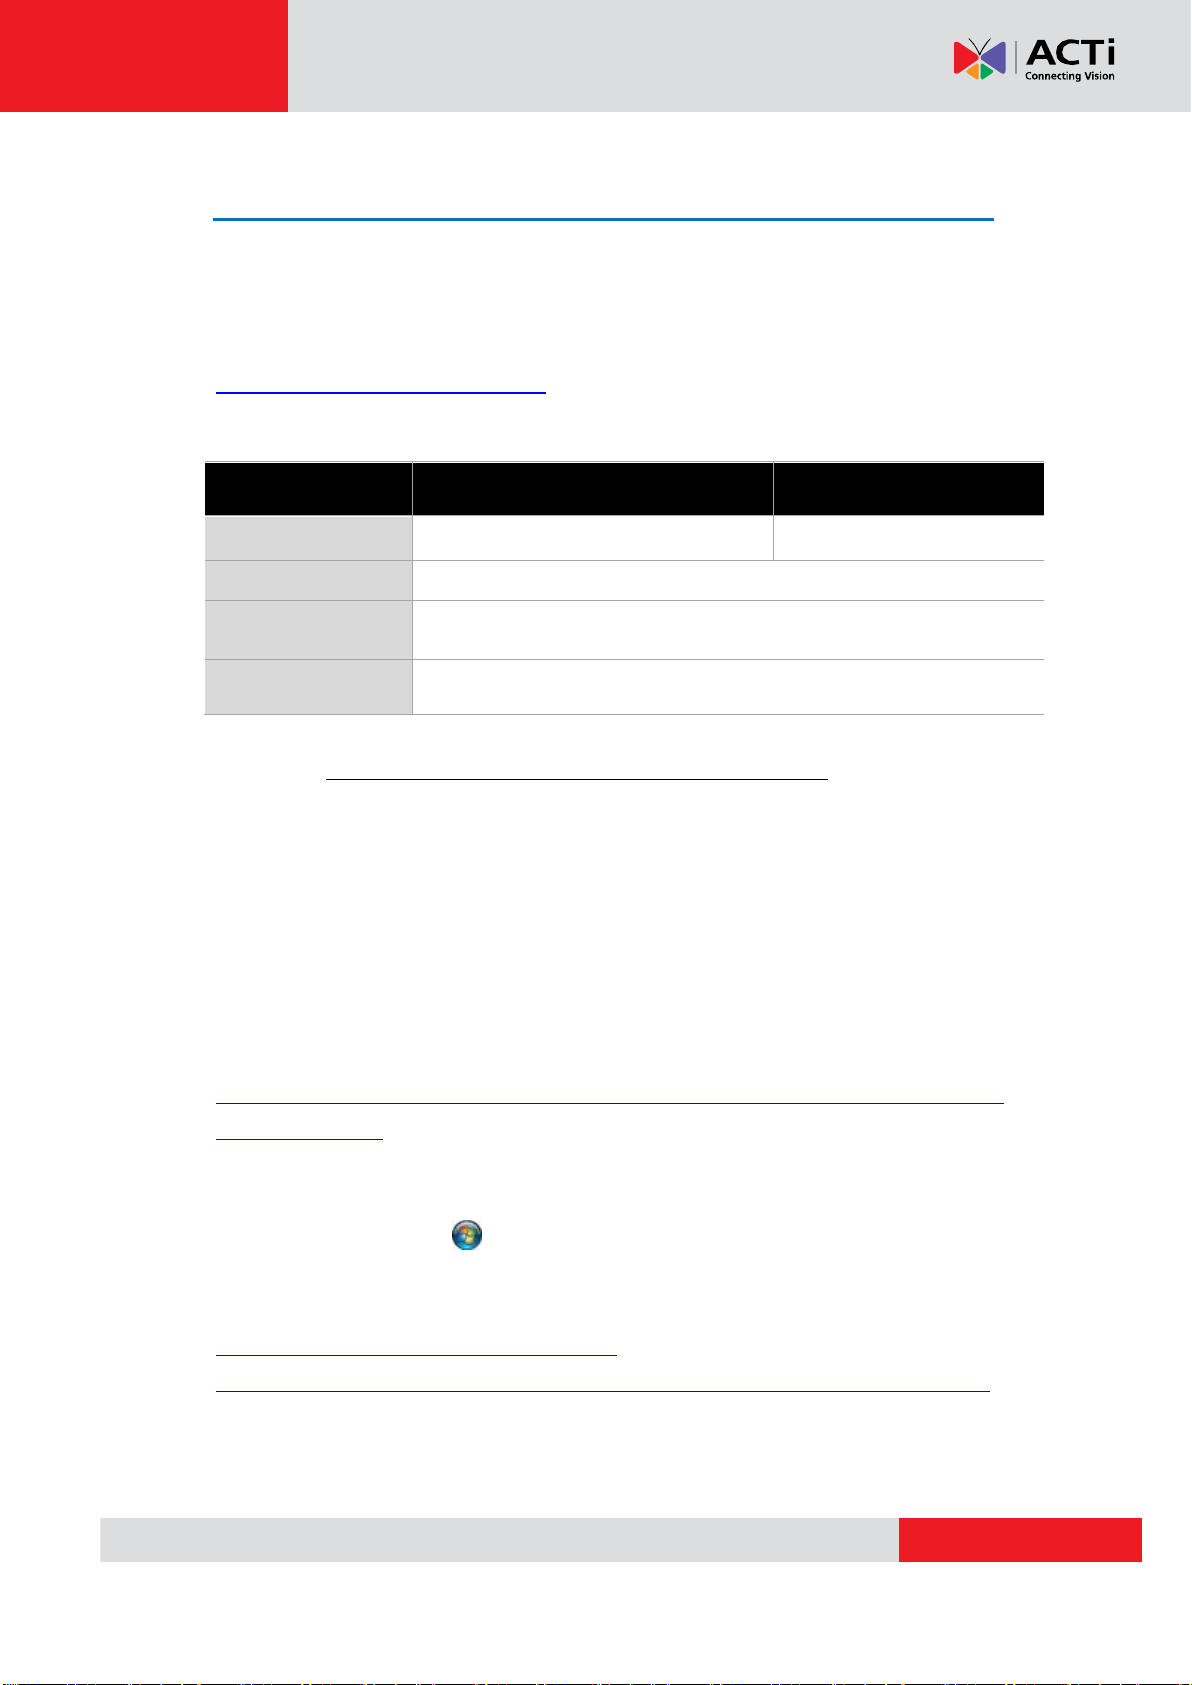
PC Spec
Minimum
Recommended
CPU
Intel Core 2 Quad 2.4 GHz
Intel Core i5 2.4 GHz
RAM
4GB 1
Operation System
Windows 7, Windows 8 2
Network
Ethernet 1000 Base-T
PC Hardware Requirements
The table below provides basic guidelines for selecting proper hardware for the computer
that installs SMS Server. As SMS mainly serves as a recording server, it is suggested that
there be sufficient hard disk space on this computer. You can refer to
http://www.acti.com/storagecalculator to figure out how much storage space is needed
for your system.
1
Please use 64-bit system if your computer has more than 4GB RAM. Windows operating
system has limits on memory and address space regardless of the real or virtual memory
available on a particular computer. Take Windows 7 Professional for example, the
maximum physical memory for a 32-bit(X86) system can address is 3.5 GB even though
16 GB of RAM has been installed on this computer. Therefore, if you consider increasing
the computer’s multi-tasking capability by adding more RAM, you will need a 64-bit version
of Windows to take advantage of it all.
Please visit the link below for more memory limitations on various Windows platforms.
http://msdn.microsoft.com/en-us/library/aa366778%28VS.85%29.aspx#physical_memory
_limits_windows_7
Besides the limitation mentioned above, you may find the usable memory of your
computer displayed here: Computer Properties is still less than actual installed
memory. As this is a common symptoms of all Windows platforms, you can find
explanations and solutions in this Windows official support document
http://support.microsoft.com/kb/978610/en-us and
http://windows.microsoft.com/en-us/windows7/taking-the-mystery-out-of-64-bit-windows
2
Please make sure your operation system is fully patched with the latest service packs.
6
Page 7
www.acti.com
ACTi SMS Server User’s Manual
Getting Started
Pre-requisites
Before installing SMS Server, please make sure the pre-requisites below are fulfilled:
1. Ensure that your computer meets the minimum system requirements.
2. Ensure that your computer has a C Drive.
3. Ensure that you have enough storage space on your computer to save video
recordings of captured events.
Installing the Server Program
The program installation can be simple and intuitive by following the installation wizard’s
instructions. The program can be used right after installation is completed, without the
need to restart the computer.
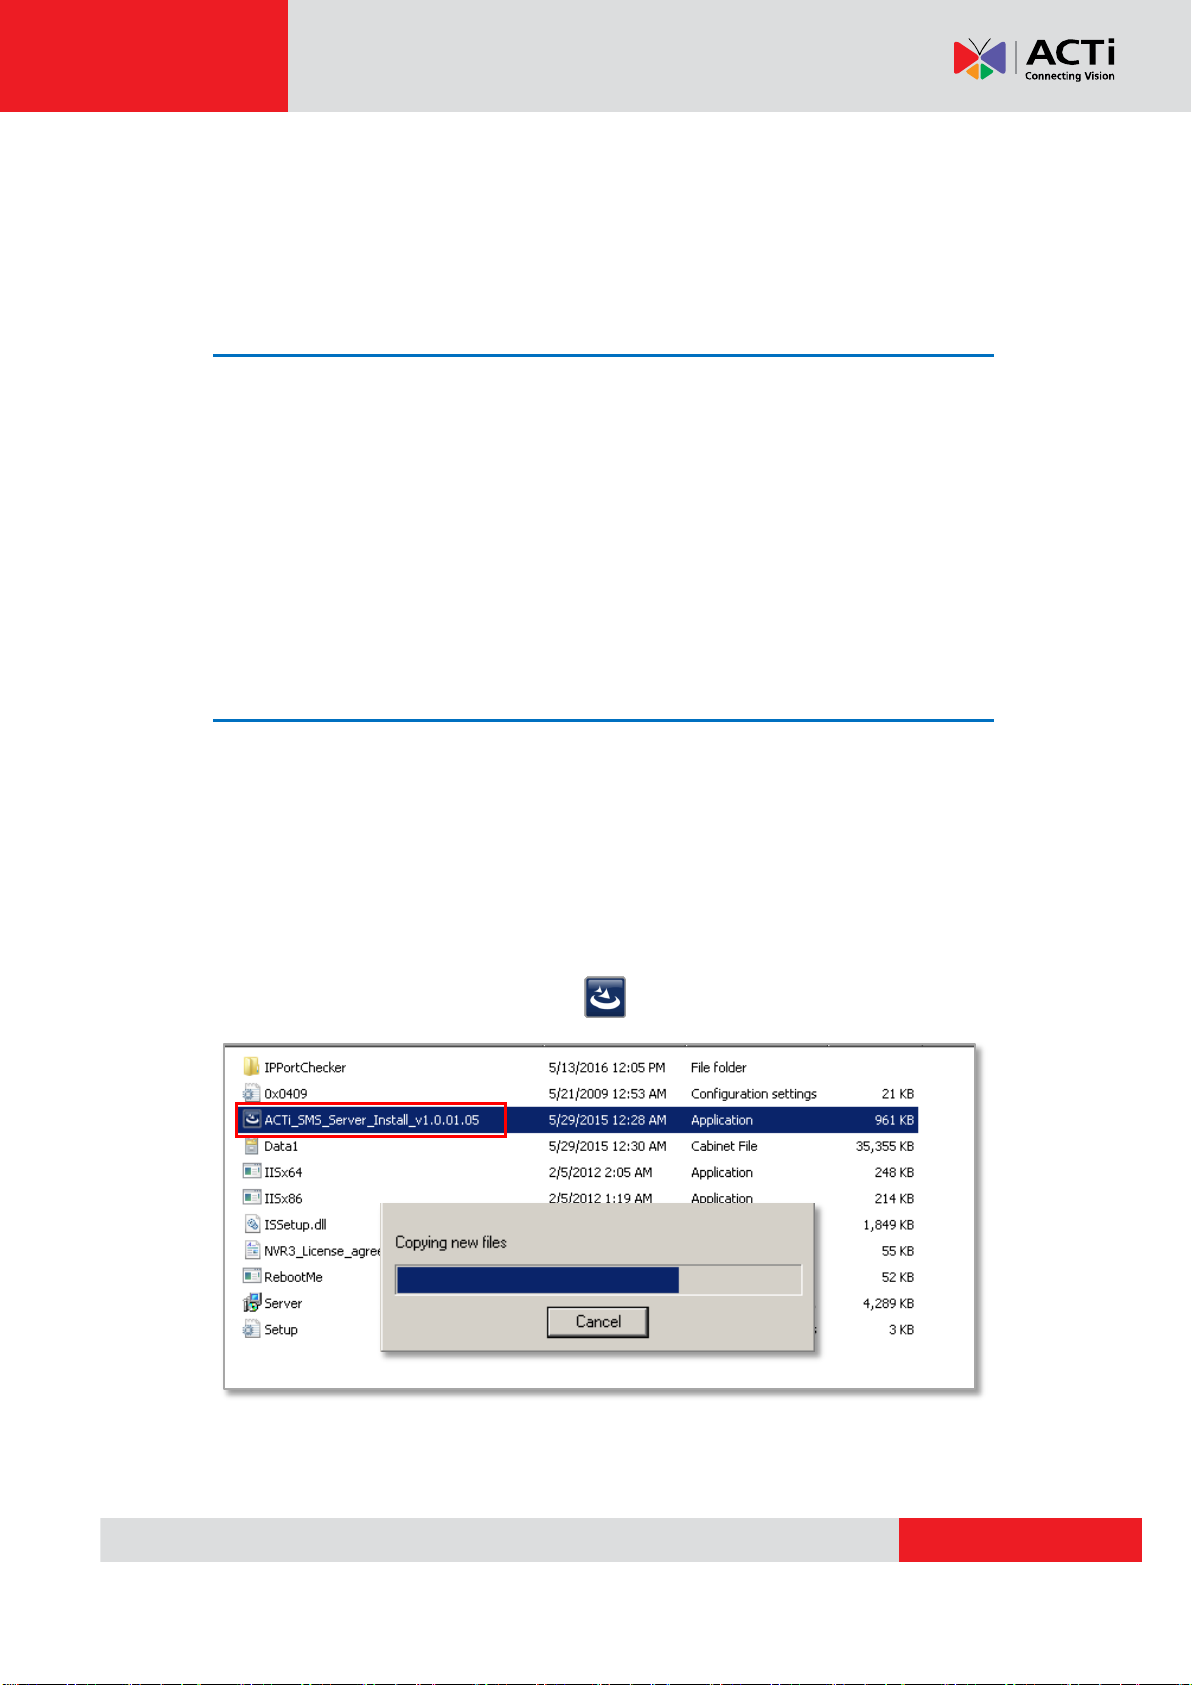
To install the software, follow the steps below:
1. Find the SMS Server compressed file that you downloaded and extract it.
2. Execute the install shield application .
7
Page 8
www.acti.com
ACTi SMS Server User’s Manual
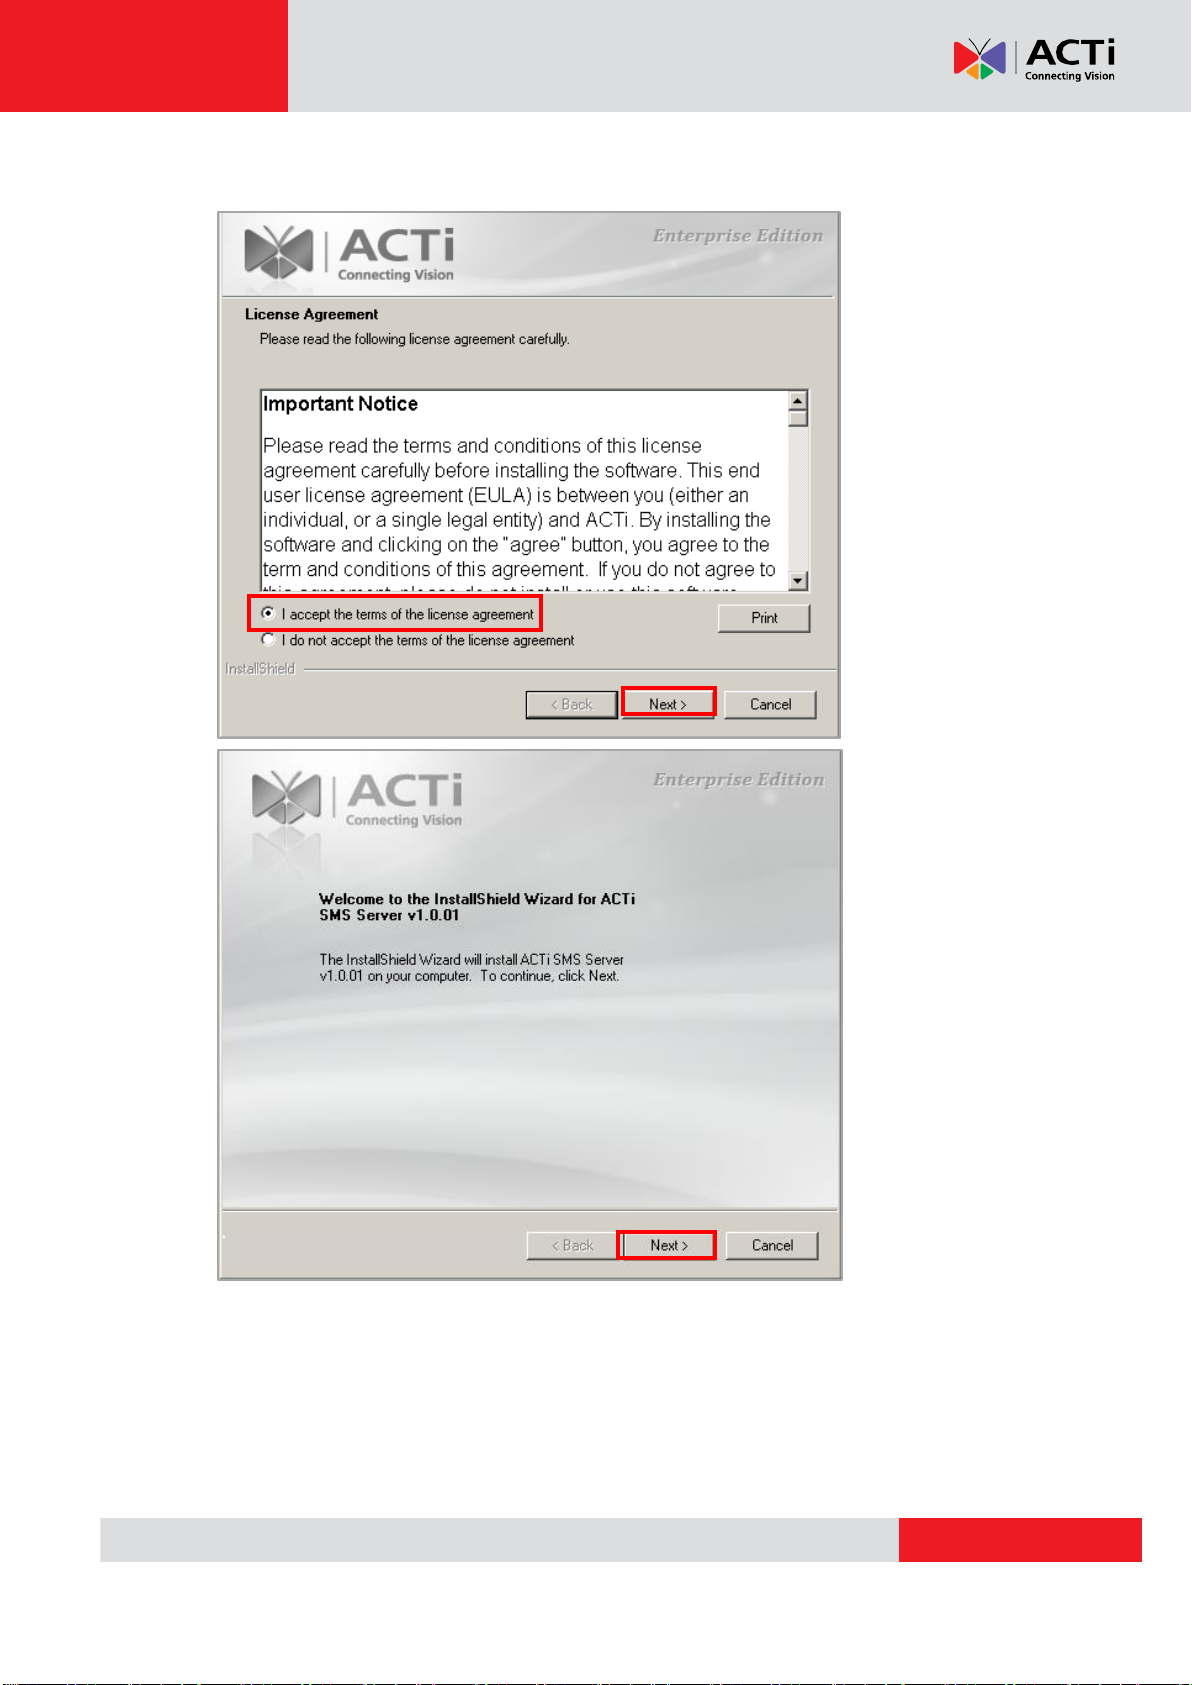
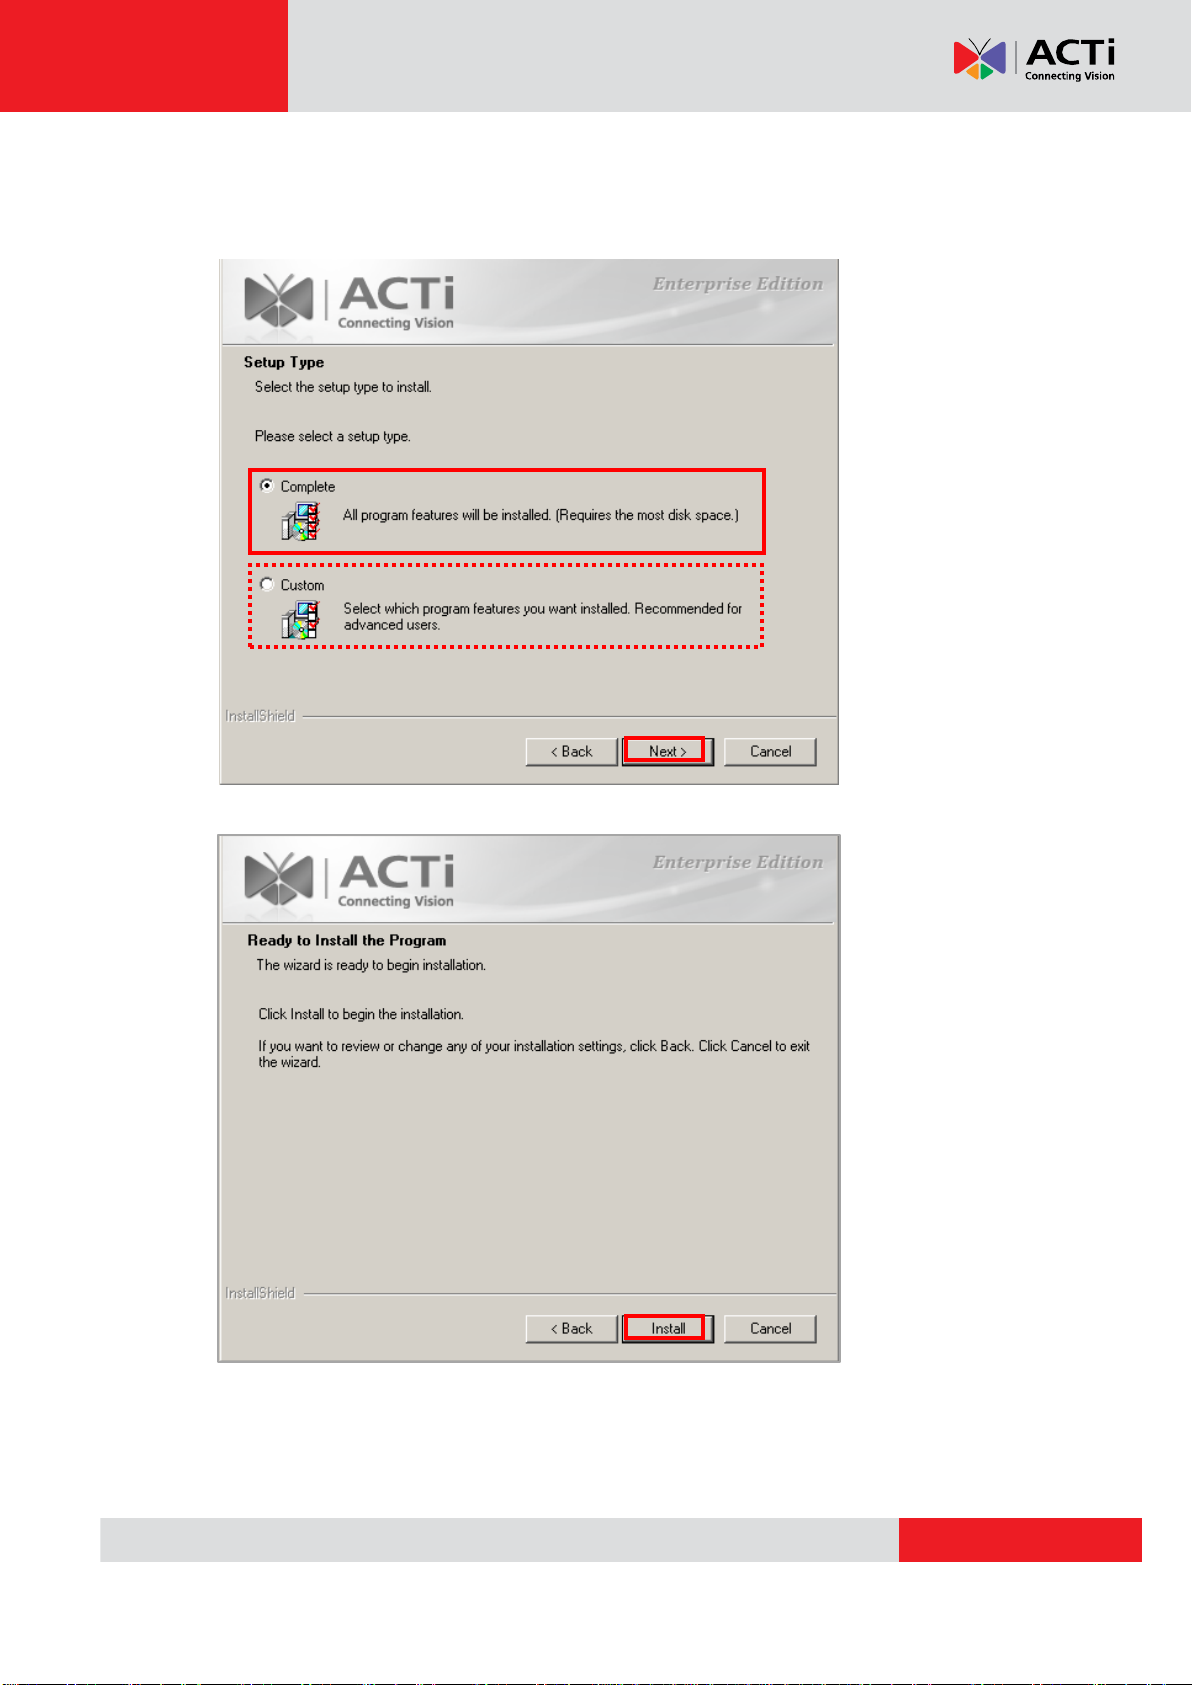
3. Proceed by following the on-screen instructions of the InstallShield Wizard.
8
Page 9
www.acti.com
ACTi SMS Server User’s Manual
When selecting Setup Type, the default “Complete” option will have the program
installed in the default C drive (C:\Program Files). You can select “Custom” to choose
another program location.
9
Page 10
www.acti.com
ACTi SMS Server User’s Manual
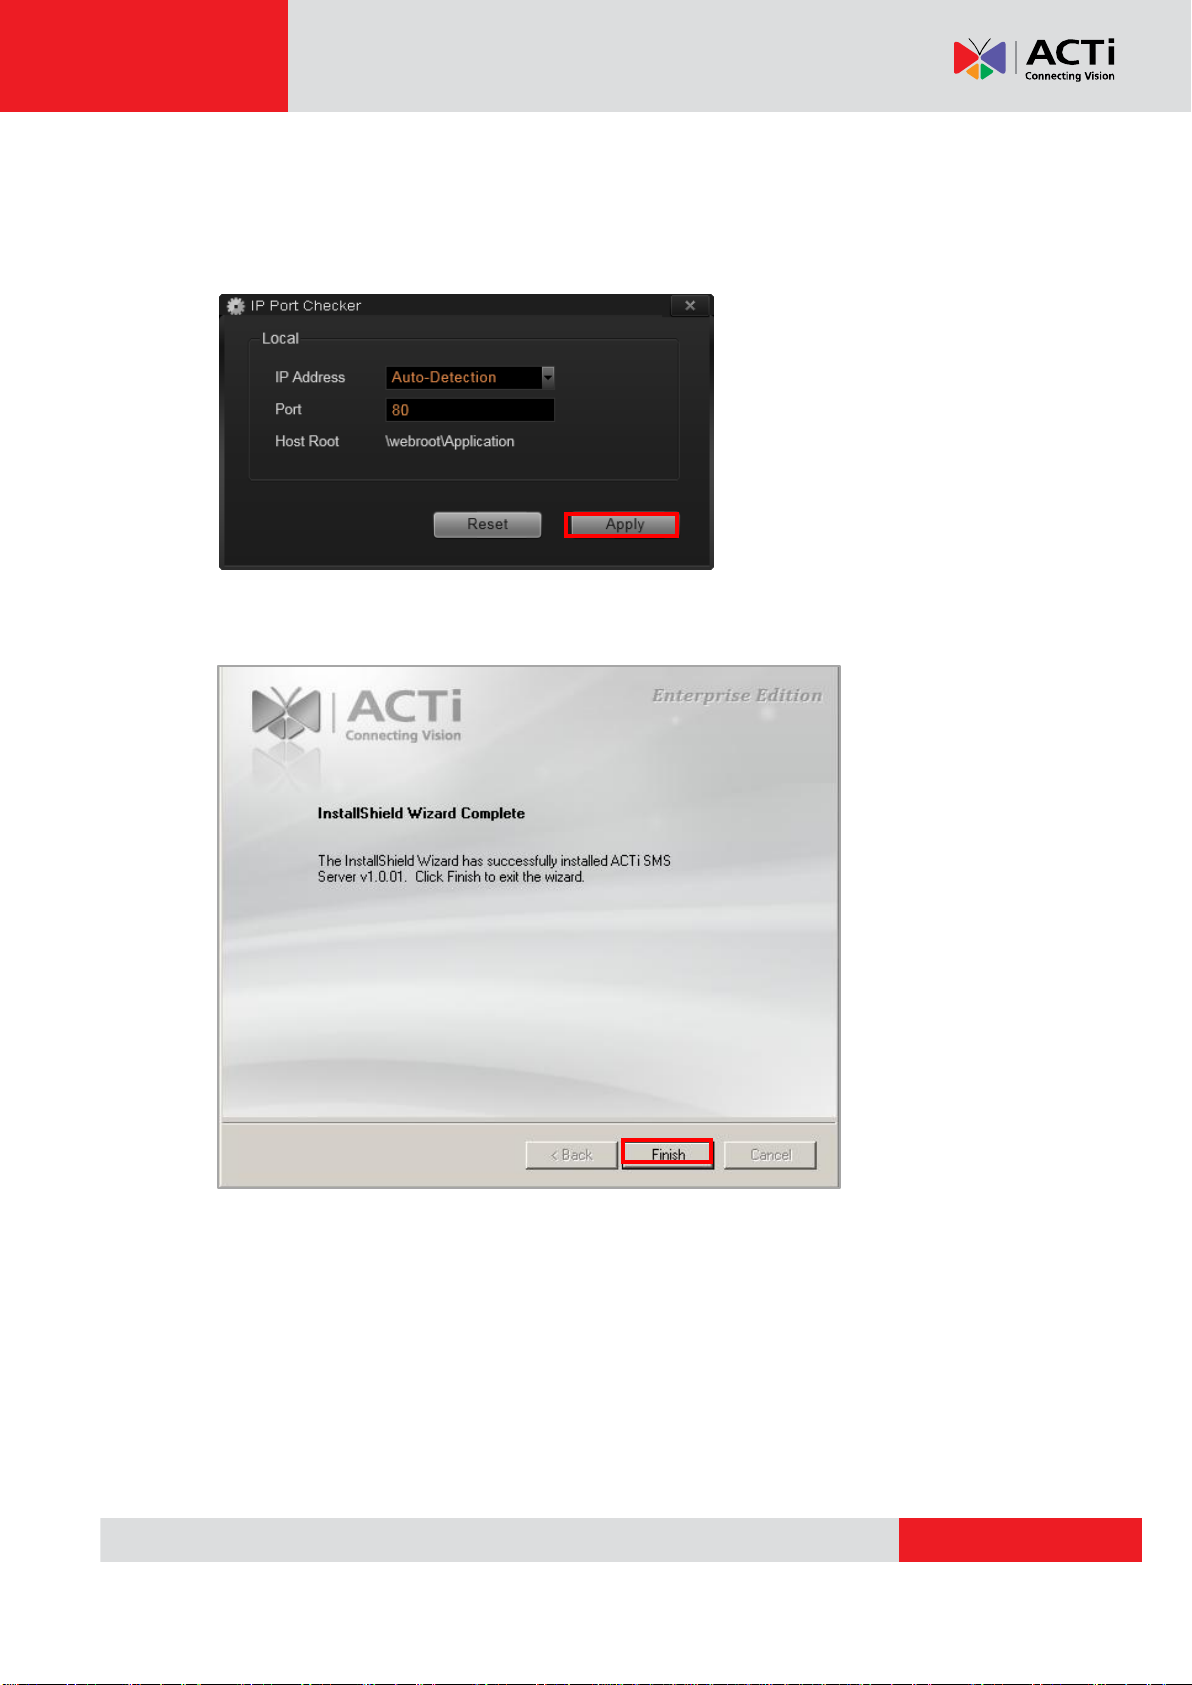
4. The IP Port Checker will pop up to confirm the SMS server port number with you. The
installation program will use 80 as default. You may enter another available port
number in “Listen Port” field and click “Apply”.
5. The installation process is done. Click “Finish”.
10
Page 11
www.acti.com
ACTi SMS Server User’s Manual
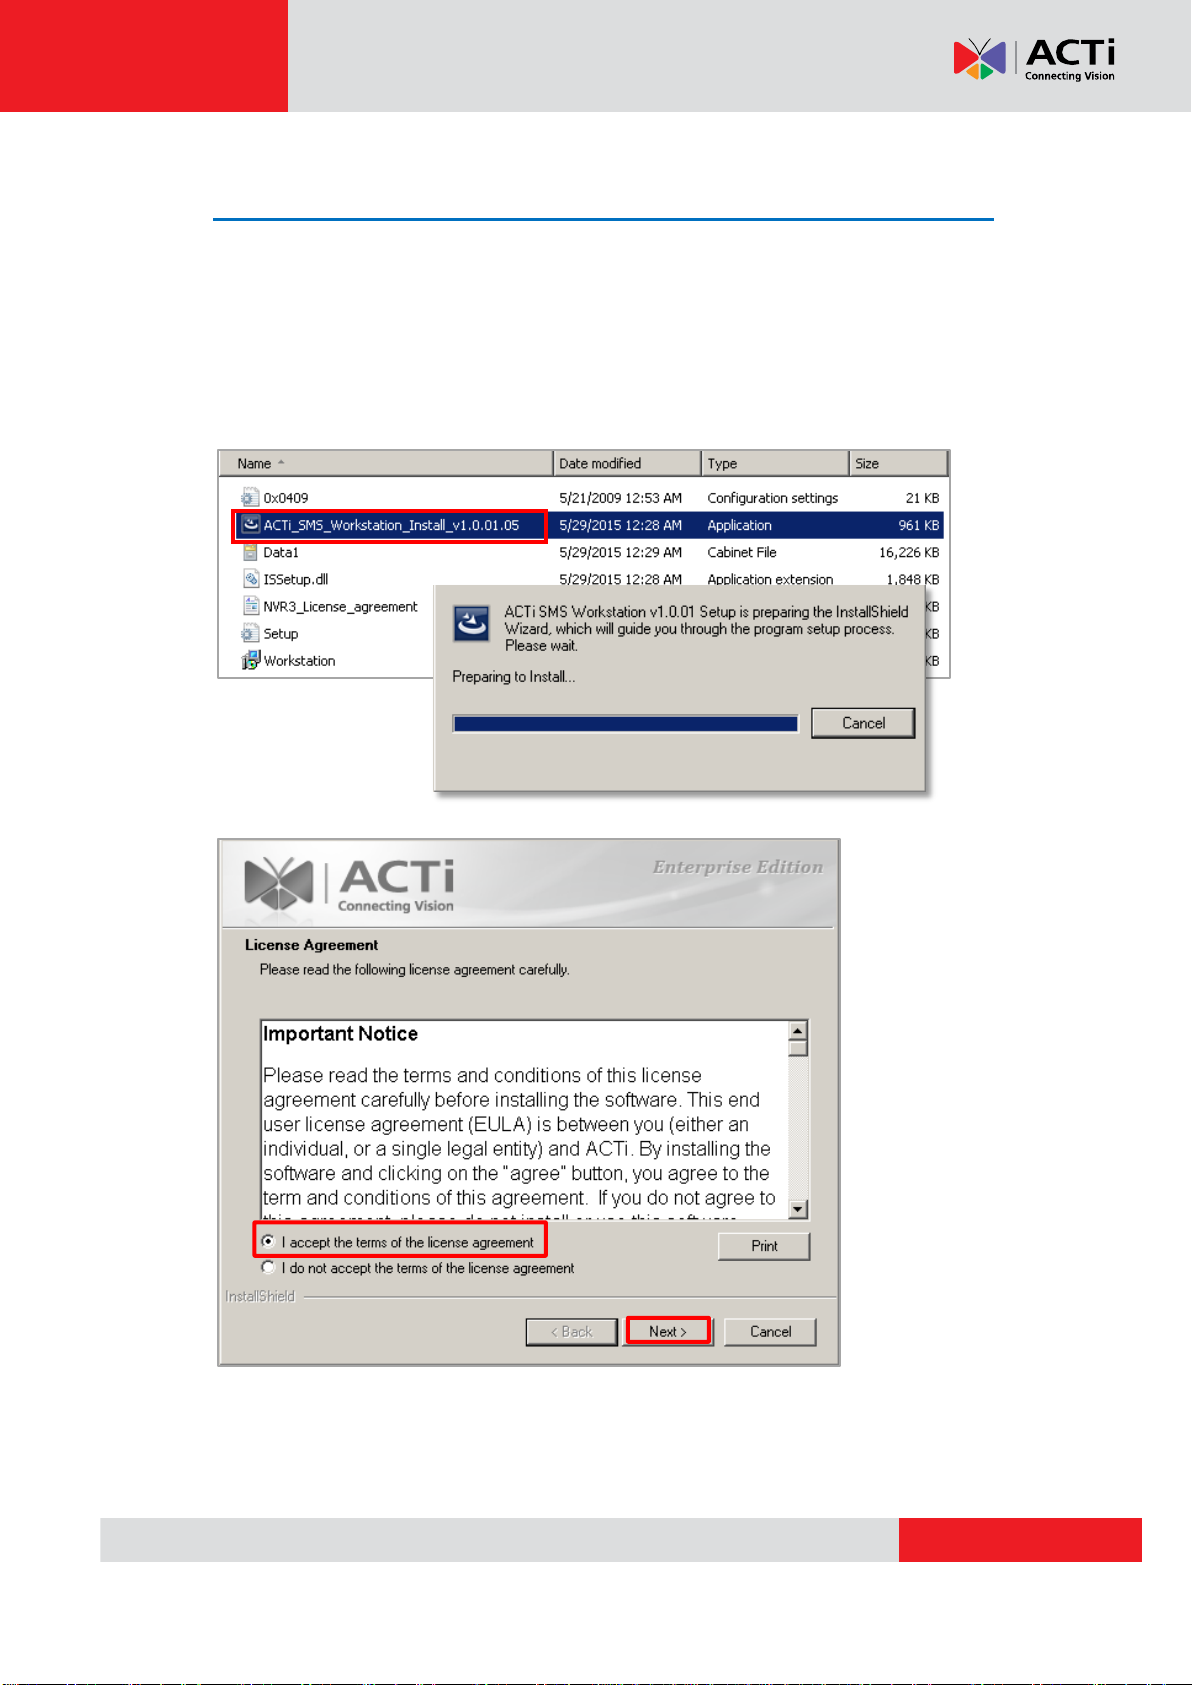
Install Workstation
SMS Workstation provides an interface between users and SMS server. The Server
and Workstation can be installed on the same PC separately.
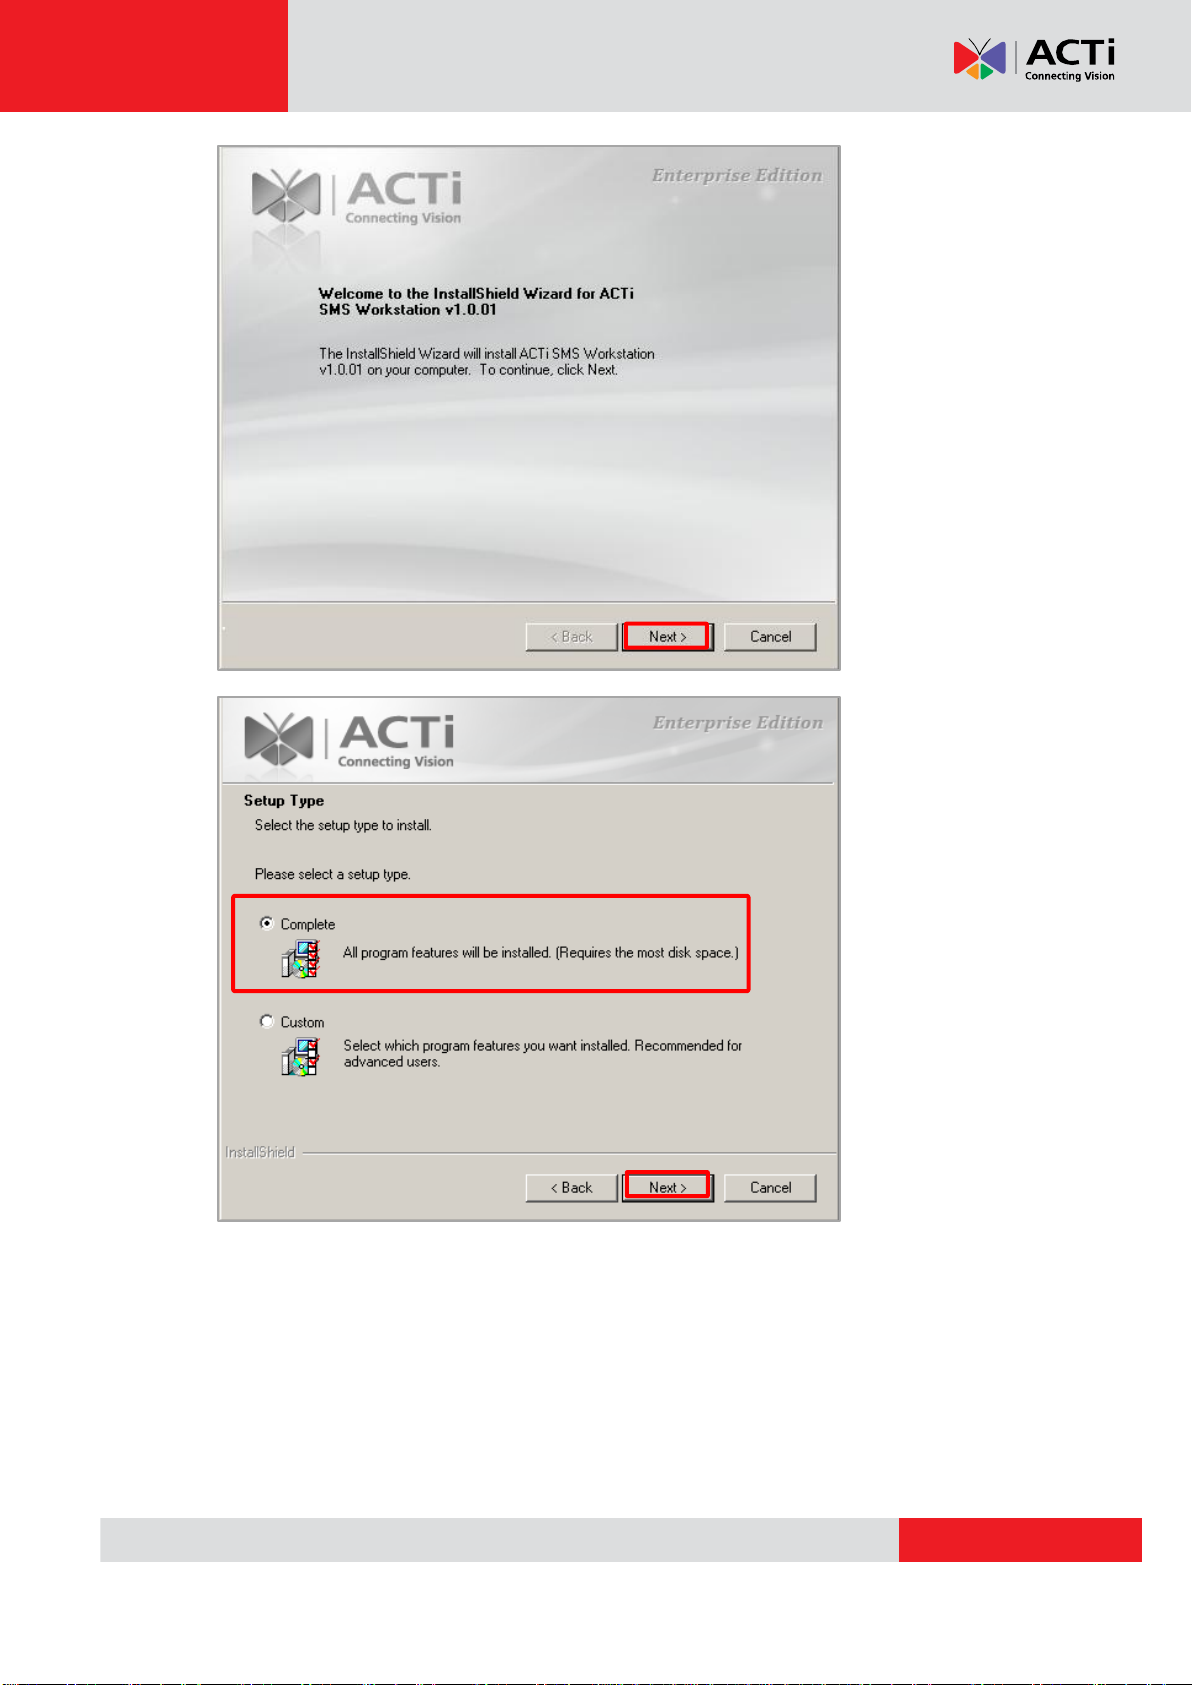
1. Execute the install shield application .
2. Follow the onscreen instructions of Install Shield Wizard, accept the license
agreement and proceed.
11
Page 12
www.acti.com
ACTi SMS Server User’s Manual
12
Page 13

www.acti.com
ACTi SMS Server User’s Manual
As the installation is complete, you can
directly initiate Workstation application
by clicking on “OK”. A shortcut
will also appear on the Desktop.
13
Page 14

www.acti.com
ACTi SMS Server User’s Manual
Purchase licenses
from ACTi, get the
L
L
L
I
I
I
C
C
C
E
E
E
N
N
N
S
S
S
E
E
E
K
K
K
E
E
E
Y
YY
On SMS Server, input the
L
L
L
I
I
I
C
C
C
E
E
E
N
N
N
S
S
S
E
E
E
K
K
K
E
E
E
Y
Y
Y
to activate the
license directly.
1
2
SMS Server
(Internet access)
License and Activation
In SMS Server system, your required number of managed NVR servers (transportation
standalone NVRs) should be licensed and activated before connecting. License activation
is the process of unlocking the channels on SMS Server with the received License Key.
License Key is a serial number delivered as a printed card or an E-mail after the purchase
is carried out. After the license activation, the channels on SMS Server will automatically
become available.
During license activation, your License Key is matched against the MAC address of the
Network Interface Card (NIC) on SMS server computer. Once this license key is used by
the computer with given MAC, it cannot be activated with another MAC. This matching
record will be stored on the ACTi license data server. If your computer has more than one
network cards, NVR server will detect them and provide you a dropdown list to select from.
Please note:
The license is cumulative and perpetual.
The license is not version-specific, upgrading software version will not influence
the existing license(s) you have.
The maximum number of NVRs that can be managed by SMS Server is 100.
There are two ways to activate the licenses depending on your SMS server network
condition: Online Activation and Offline Activation.
Online Activation
If your SMS Server computer has available Internet access, choose online activation.
14
Page 15
www.acti.com
ACTi SMS Server User’s Manual
Purchase licenses
from ACTi, get the
L
L
L
I
I
I
C
C
C
E
E
E
N
N
N
S
S
S
E
E
E
K
K
K
E
E
E
Y
YY
On another computer, access
ACTi website to activate the
licenses using the
L
L
L
I
I
I
C
C
C
E
E
E
N
N
N
S
S
S
E
E
E
K
K
K
E
E
E
Y
Y
Y
1
2
Load the
A
A
A
C
C
C
T
T
T
I
I
I
V
V
V
A
A
A
T
T
T
I
I
I
O
O
O
N
N
N
F
F
F
I
I
I
L
L
L
E
EE
into SMS server
3
SMS server
Computer
(Internet access)
Offline Activation
Offline activation does not require Internet access for SMS Server. It is used when SMS is
located in a network not connected to public Internet (e.g. in a military base). You will need
to get an activation file from another computer and transfer it to the SMS Server computer.
Step-by-step Activation Process
Based on the network conditions of your site, follow Online Activation SOP or Offline
Activation SOP to activate your license.
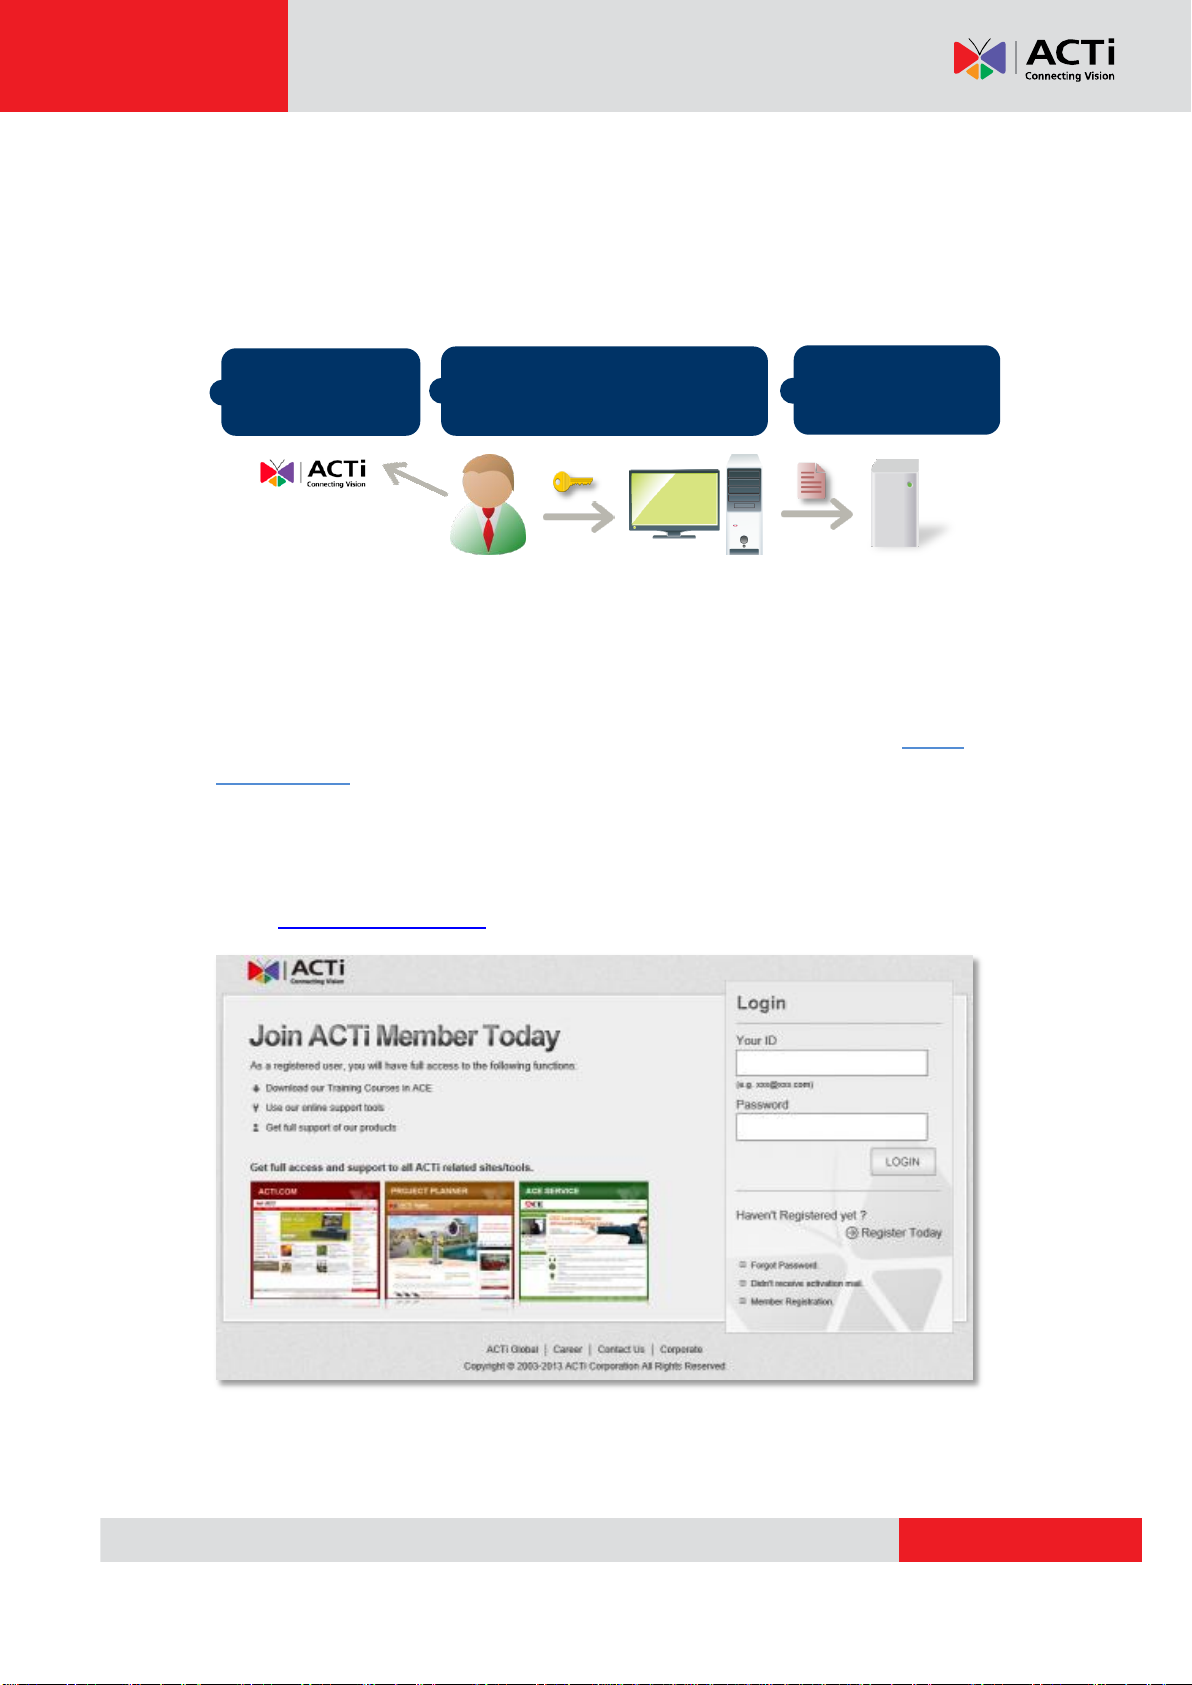
Online Activation SOP
Step 1
: Membership ID in ACTi Member Center is required for activation. Register one for
free at http://member.acti.com/
15
Page 16
www.acti.com
ACTi SMS Server User’s Manual
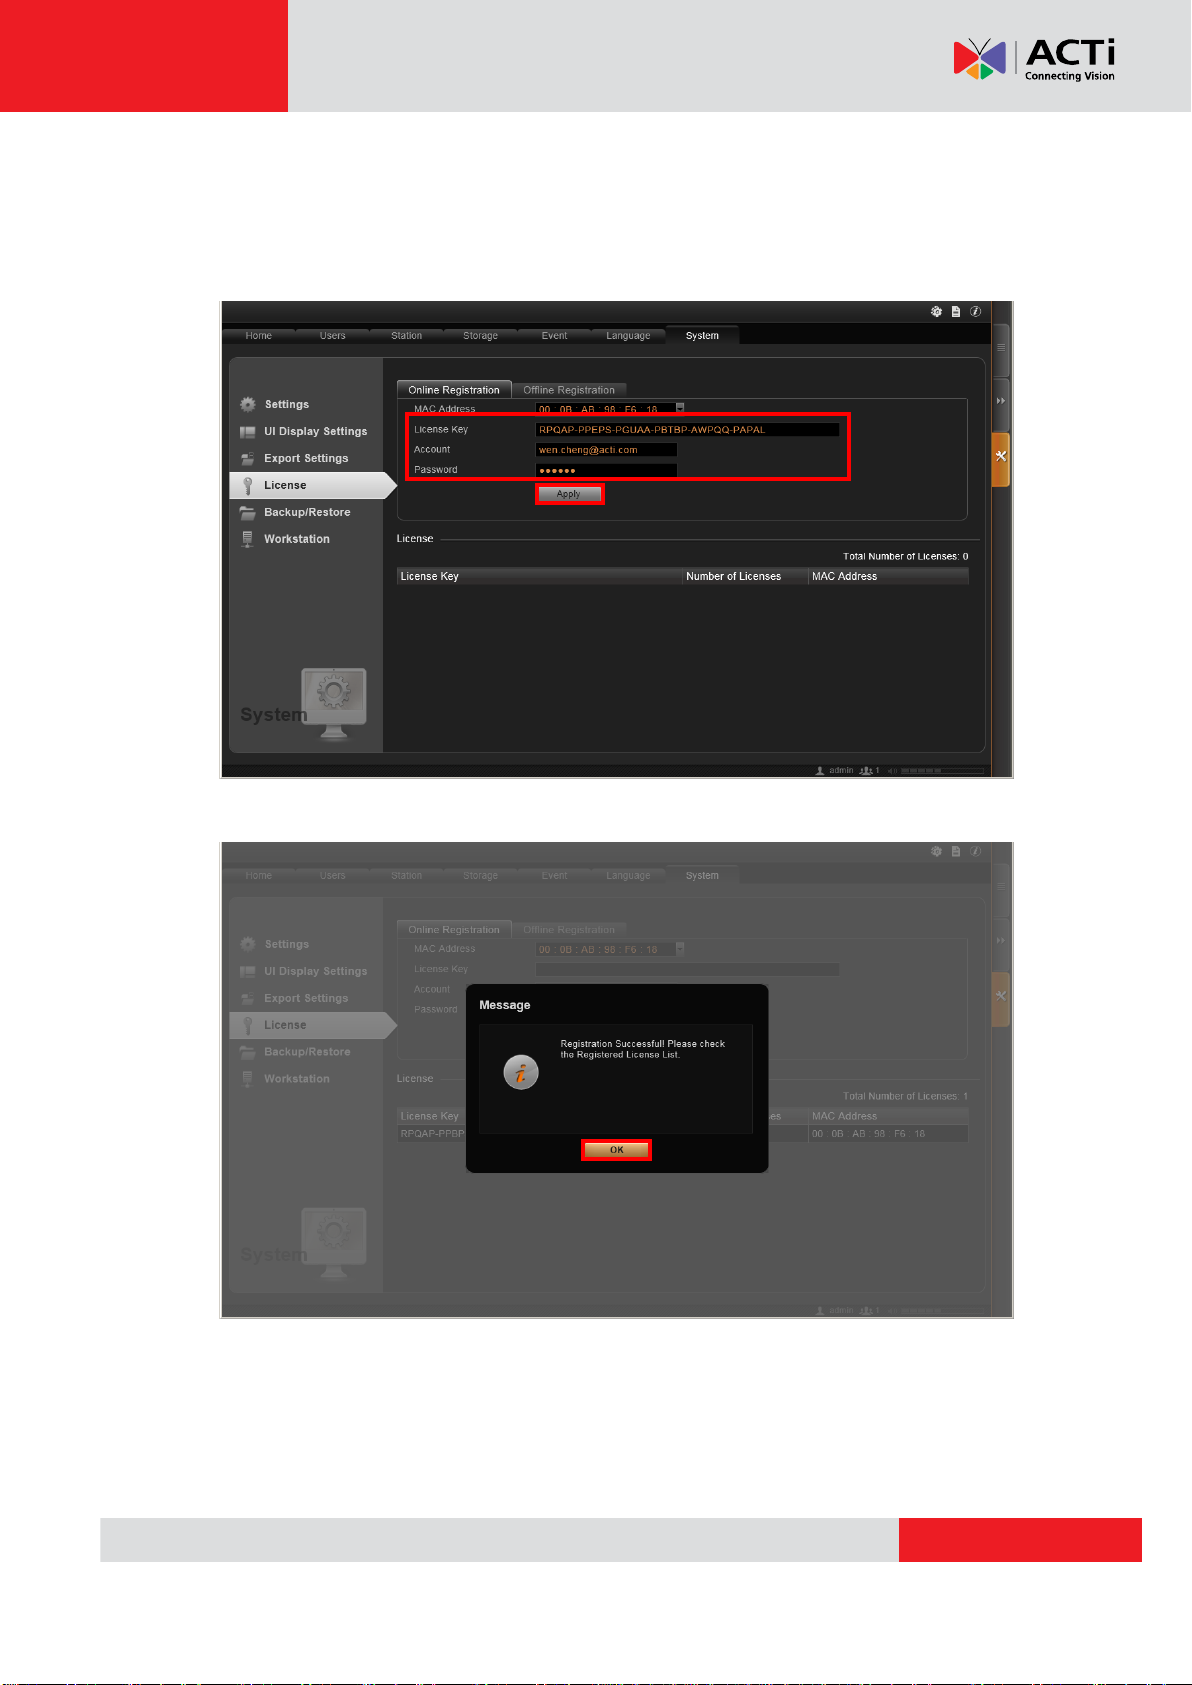
Step 2
: Log in to SMS Server, go to System tab License Online Registration tab.
Select the MAC Address, enter your License Key, ACTi member Account and the
Password, and then click “Apply”. SMS Server will connect to the license data server via
Internet to register the license key, and unlock the channels.
16
Page 17
www.acti.com
ACTi SMS Server User’s Manual
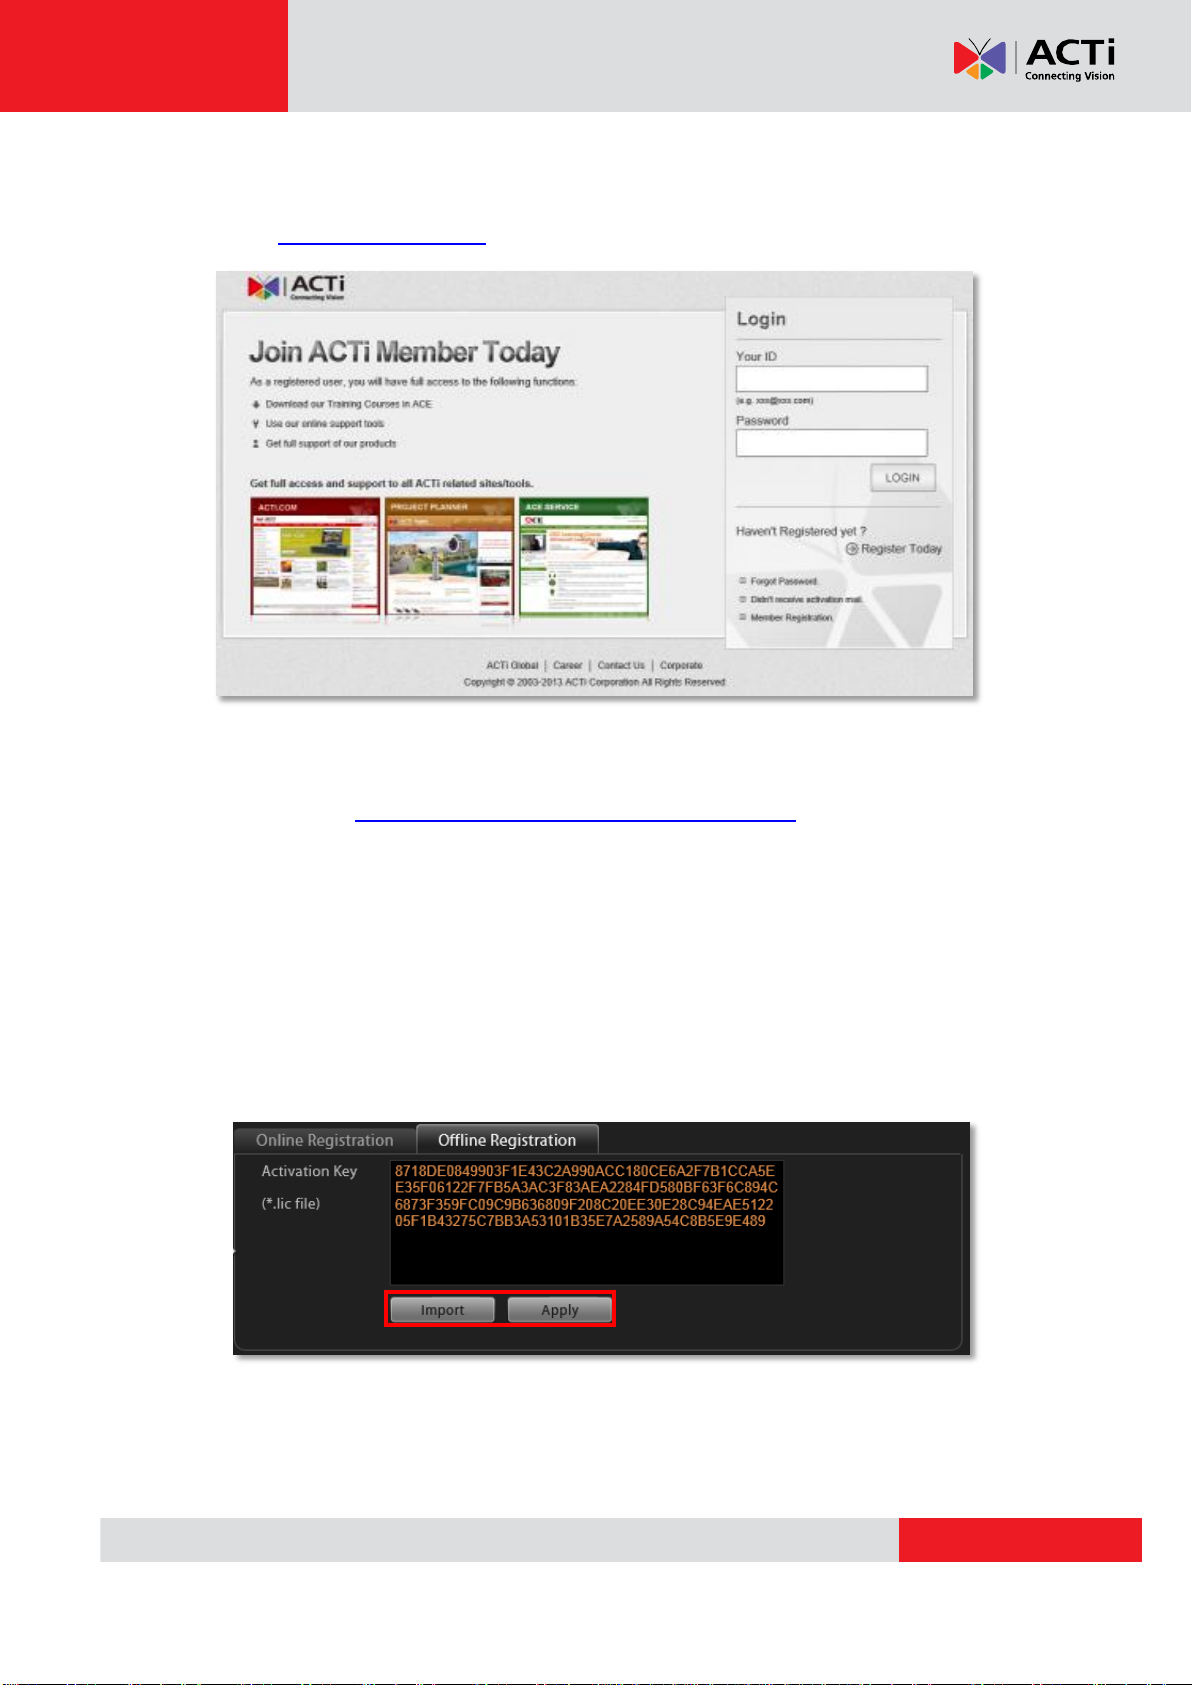
Offline Activation SOP
Step 1
: Membership ID in ACTi Member Center is required for activation. Register one for
free at http://member.acti.com/
Step 2
: Access http://www2.acti.com/support/LicenseMgt/IVS.asp, enter the License
Key and the MAC address of the SMS Server computer, and click “Submit”. An E-mail
with activation code file (AUL.lic) will be sent to your registered E-mail account.
Step 3
: Log in SMS Server from local or via web client. Go to System tab License
Offline Registration tab click “Import” and upload the license file (AUL.lic). Click
“Apply” to activate this license.
17
Page 18

www.acti.com
ACTi SMS Server User’s Manual
Log In to SMS System
Via Internet Explorer
You can access SMS interface via Internet Explorer on your computer.
From Server Computer (as Local Client)
Open Internet Expolrer. If your computer is where SMS server is installed, type
http://localhost/ in URL box.
From Remote Computer (as Remote Client)
A remote client refers to any client using a computer over WAN or LAN other than the
server computer to access SMS. If you are connecting to a SMS server as a remote client,
please type server computer’s ip (e.g. local network ip: http://172.16.26.217 within LAN;
public IP http://220.228.146.21 or domain name http://sms.acti.com over WAN ) in URL
box. Remember to append a colon and the port number after the hostname or IP address.
Accept ActiveX Controls Installation Requests
SMS interface requires the add-on ActiveX Control components, please make sure the
browser’s security settings allow ActiveX controls to be downloaded and installed. When
your browser asks if you allow ACTi Corporation’s add-on components to run, please
accept it .
18
Page 19

www.acti.com
ACTi SMS Server User’s Manual
E A B C D
E
You will have to enter the e-mail address
input in Forgot Password window
should match the one under your User
account saved in NVR server.
D. Remember Login Information and Auto Login
A. Enter Account & Password
Account (non case-sensitive)
Admin (default)
Password (case-sensitive)
123456 (default)
B. Choose the Initial Page
The user interface consists of three
main module screens, Monitor View,
Playback and Setup. You may choose
one where you would like to enter after
login. Default is Monitor screen.
C. Language
Choose a UI language from the
dropdown list.
To have SMS Workstation remember the Account, Password, Initial Page and UI
Language settings, simply check “Remember login info”. Enabling “Don’t Remember”
will clear your input text and reset to default.
To automatically log in to SMS system, please check both
“Remember login info” and “Auto Login” to skip the Login page. If
someone without the system authority also has access to this
computer, you might consider not enabling this function. To
cancel auto-login, on title bar, click “Logout” to return to login
page, and this function will be cancelled.
E. Retrieve the Forgotten Password
SMS can send the password of the User’s account to the User’s e-mail address. To ensure
that Users are able to make use of this function, please make sure (1) the SMTP settings
have been configured, and (2) a valid e-mail address has previously been saved in Setup
page Users tab User list under this account.
19
Page 20

www.acti.com
ACTi SMS Server User’s Manual
A C D E F
G
B
Via SMS Workstation
SMS Workstation includes a set of programs that provide the interface
between users and SMS server. You can install this software on the remote
client computer in order to access SMS server via network. You can download
this software on ACTi website at http://www.acti.com/DownloadCenter, and it
is wrapped together with the SMS system software. For the instructions on the installation
of this software on the client computer, please refer to Install Workstation on page 11.
A. Server IP & Server Port
In Server IP field, please input the LAN or
WAN IP address of NVR server. In Server
Port field, key in the port number. The
default value is 80.
B. Enter Account & Password
Account (non case-sensitive)
Admin (default)
Password (case-sensitive)
123456 (default)
C. Choose the Initial Page
The user interface consists of three major
screens, Monitor, Playback and Setup.
You may choose one that you would like to
enter after logging in.
D. Language
Choose a UI language from the dropdown list.
E. Remember Login Information and Auto Login
To have SMS Workstation remember the Account, Password, Initial Page and UI
Language settings, simply check “Remember login info”. Enabling “Don’t Remember”
will clear your input text and reset to default.
To automatically log in to SMS system, please check both
“Remember login info” and “Auto Login” to skip the Login page. If
someone without the system authority also has access to this
computer, you might consider not enabling this function. To
20
Page 21

www.acti.com
ACTi SMS Server User’s Manual
You will have to enter the e-mail address
input in Forgot Password window
should match the one under your User
account saved in NVR server.
cancel auto-login, on title bar, click “Logout” to return to login page, and this
function will be cancelled.
F. Retrieve the Forgotten Password
SMS can send the password of the User’s account to the User’s e-mail address. To ensure
that Users are able to make use of this function, please make sure (1) the SMTP settings
have been configured, and (2) a valid e-mail address has previously been saved in Setup
page Users tab User list under this account.
G. Server Name/Server Sites List
SMS Workstation can remember multiple server sites and their login credentials and
show the site lists on Login window. To add a new site:
1. Click in the Server Name box and input
the server site name.
2. Fill in the other fields. If you disable the
“Remember login info”, then only the
Server Name, Server IP and Server
Port of this server site will be
remembered.
3. Click “Save”.
4. After a server site
is saved, it will be
shown on Server
Name dropdown
list. You may click on its name to enter
its Login window or to delete it from
5. You can export the saved server sites, or import it to another Workstation client
computer. Access SMS server via SMS Workstation, go to Setup page System tab
Workstation.
the list.
21
Page 22

www.acti.com
ACTi SMS Server User’s Manual
A
B
A. Export current server sites list
Click “Browse” to select a folder to save the list, and then click “Export”. This file will be
saved as an *.xml file.
B. Import a server site list
Click “Browse” to select the *.xml file, and then click “Import”. The server sites will
appear in Server Name dropdown list on Login window of your next login.
22
Page 23

www.acti.com
ACTi SMS Server User’s Manual
Set up the System
This chapter will guide you through everything you need to know in System Setup starting
from the first time you access SMS server to general system configurations.
Storage Management
This section describes how to manage storage space in SMS server. Please note that this
section only deals with the overall storage rules, and not storage of individual channels.
As SMS server continuously writes and deletes file from the disk drive, using a removable
disk may risk losing recording when device is removed while being accessed.
Go to Setup pageStorage tab.
To set up the location and allocation of space for your recordings, follow the steps below:
Change Recordings Folder Name
In “Recording Settings” section, you may change the name of video recordings folder.
The video files are saved in a folder named “Recordings” under hard drive root directory.
You may change the name here.
23
Page 24

www.acti.com
ACTi SMS Server User’s Manual
Item
Description
Free Space (GB)
Currently available space of the chosen disk drive.
Total Space (GB)
The total capacity of the chosen disk drive.
Reserved Space (GB)
This is the amount of space to be kept for other applications
and files. If the free space is used up and hence the remaining
space reaches the threshold of reserved space, SMS server
system will start deleting the earliest recordings. It is strongly
suggested that 10 % of the disk capacity be set as Reserved
Space.
Set System Log Lifecycle
System Log is the record of User activities and events that took place on the server. In
“Recording Settings” section, you may set how long this record is kept on the server.
Default is 30 days.
Set Hard Drives for the Recorded Files Deletion Rule
1. On Disk Drive List displays the detected storage devices in your server computer.
You may select the storage location of the recording files and set the deletion
threshold. By default, SMS server will select C drive as storage location; however, it is
recommended that you prepare one or more disks to store the recording files instead
of using C drive as the sole storage place.
2. After selecting the disk drive, please set the deletion rule. There are two mechanisms
of the automatic file deletion; if both are active, SMS server will start to delete old files
when either criteria below is met:
(1) For a specific channel, you can choose to keep its recordings for a number of days,
and delete files older than this period by 1 GB at a time. Please go to Setup page
Schedule tab to set it.
(2) Keep the overall recordings until the disk is almost full, and then delete the earliest
recording files by 1 GB at a time. SMS server will delete old files when free space is
lower than Reserved Space you set in Disk Drive List.
3. When you finish the settings, click “Apply”.
24
Page 25

www.acti.com
ACTi SMS Server User’s Manual
Setup
Jeremy, Gate Guard
Guard Group
Sam, Security Head
Security Center Group
Monitor
Sean, Manager
Administrator Group
Playback
Playback
Monitor
Manage User Groups/Users
The User Groups/Users page allows you to (1) manage the access permissions of
different user groups, (2) add users to or delete them from user groups, (3) and assign
users to specific user group. This chapter will take you through these settings.
Access Permissions
In SMS, the access permissions are managed by User Groups. User Groups defines
what functions and devices are allowed for each user. Different User Groups will have
different access rights in terms of permitted operations watch the recorded footage of
certain devices in Playback, and server management operations like Station Setup,
Storage Setup, Event Setup and System Setup. For example, an Administrator User is
allowed for all the operations in SMS, while a standard User may only be permitted to
access the Monitor screen.
The chart below displays different employees as SMS Users and their access rights in this
system:
Overview
Go to Setup page Users tab. There are two sections to manage User Groups and
Users individually.
User Groups: To setup user groups and its permissions.
Users: To manage user accounts and configure user information.
SMS server has integrated Microsoft Active Directory® service to provide network
administrators a more convenient choice for user management. Active Directory is a
25
Page 26

www.acti.com
ACTi SMS Server User’s Manual
1
3 4 2
directory service built in Microsoft Server products to manage user identities and privileges
within the domain network. As SMS runs on a server computer logged on to the same
domain with Active Directory server, you can import a user account or a group from those
concurrently existing in Active Directory into SMS server. In this way, the user identification
is processed by Active Directory centrally; there is no need for SMS administrator to
maintain user accounts as long as they are under management of Active Directory service.
User Groups
You can specify access permissions to each device for a whole user group. This user
grouping can save you significant amount of works if you have multiple users performing
similar tasks and acting as similar roles.
There are already two default User groups
Administrator: With full permissions in SMS server.
User: With the permissions to watch all camera live view and playback.
You can create a new user group on SMS server or import an existing group from the
Active Directory database within your domain.
1. Click on
2. Click on “Add”.
3. On Add New Group window, choose the group type:
Add a new local user group:
Insert ID, and group Name, your input in the Name field will be the name of this User
group. Click “Apply” to finish.
26
Page 27

www.acti.com
ACTi SMS Server User’s Manual
Monitor screen
Playback screen
Setup screen
Import a new domain user group:
Choose an existing user group from your domain, and click “Apply” to finish.
1. Click “Apply” to save this group.
2. The domain users within that group will all be added to SMS server. To view all the
users within this group, please select Users on the left. The account information of
these domain users, unlike those user accounts you add one by one to SMS server,
are not editable on Users page.
3. Assign Permissions for created group. This will define what functions this User group
is allowed to access. On Basic tab, by default, a new User group will initially be
allowed to access only Monitor and Playback screen, but without any permission to
change a certain camera’s setting, so you will have to assign the camera permissions
later.
27
Page 28

www.acti.com
ACTi SMS Server User’s Manual
13 2
You can assign more administrative permissions to change system settings to a group
in Setup section and Global section.
4. Configure Station permissions on Permissions tab for the created User group. This
will define which stations this User group is allowed to access. You can define the
common permissions for the existing stations with “Device Unified Settings” and then
select the stations. If you want to apply another set of settings to the stations added in
the future, check “New Station Default” (if this User group is allowed to access all
newly-added stations, check “New Station Default” and edit the permissions.
If this User group is given more advanced permissions to certain stations, instead of
enabling “Device Unified Settings”, you should check “New Station Default” and the
specific stations to define the permissions individually.
You may copy certain camera’s permissions settings to other devices or stations. Select
a camera/station and click “Copy” to bring up the target selection menu, check the target
cameras/stations, and click “Apply”.
Add Users
To create a user account with on SMS server.
1. Click on
2. Select User Type as Customized User or Domain User.
Local User: an account created and managed on SMS server only. You will input an
account name, its password and e-mail address for this User.
Domain User: an account that already exists in Active Directory database within the
28
Page 29

www.acti.com
ACTi SMS Server User’s Manual
2 1 3 4 5
6
domain. Since this is an existing account in your domain, you will have to select this
account from Account dropdown list.
3. Insert user account, name, password, and the account mail (For Local User). Assign
this created user account to a specific user group.
4. After you click “Apply”, this new user will be added to the list on the left. You can
modify the account settings in Settings section, or click on “Delete” to remove this
account.
5. As an administrator, you can set the validity period of thus user account by enabling
“Password Validity Period” and set the duration time, thus enabling you to give a
user temporary access and effectively control the account’s validity.
6. If this user’s group is permitted to access Playback screen, you can even add a
password protection to protect your video data by enabling “Playback Password
Protection”. The password can be a specific one or the same as the account’s.
29
Page 30

www.acti.com
ACTi SMS Server User’s Manual
Note
Account /Password Rules
1. Account and Password fields allow alphabets, numbers, and symbols except the
following: / \ [ ] : ; | = , + * ? < > "
2. In Account field, for alphabets, the input will be recognized as lowercase letters. Space
is only allowed between characters; the space in the beginning or at the end will be
deleted as it is saved.
3. The Password field is case-sensitive, and the space is allowed.
Note
Admin is the default user account and belongs to “Administrator” user group. Hence, the
user Admin and the group Administrator cannot be deleted; it possesses full permissions
to all devices and SMS settings.
Note
SMS server provides a procedure to help Users who have forgotten the password retrieving
the original information, which relies solely on the “e-mail address” authentication. It is
strongly recommended that you input an e-mail address that this User has access to when
you establish the User account. To update the e-mail address of an account, go to Setup
page Users tab edit “E-mail” of an selected User account; the Users can also update
the e-mail addresses themselves after logging in to SMS on Monitor page Update
Profile
30
Page 31

www.acti.com
ACTi SMS Server User’s Manual
Domain:
ACTi.com
Active
Directory
Domain
Controller
SMS
Server
Domain Users Management
As SMS server computer is logged on to a domain Active Directory, it can import a user
account from Active Directory.
This type of User account is “Domain User”. Upon being added to SMS server, the User
properties stored on Active Directory database including (1) account name (2) e-mail
address will be imported to SMS server.
Whenever a domain User client tries to log in to SMS server, SMS server will first verify if
this account exists in SMS server database, and then have Active Directory verify the user
account and password.
As Active Directory owns the privilege to create, edit and delete domain users, the
Domain User’s account and password are not editable through SMS user interface
but via Active Directory Administrative Tool.
31
Page 32

www.acti.com
ACTi SMS Server User’s Manual
Station (MNR)
Link up with SMS server
SMS Server
Add a linked station to the
system
1
2
Manage Stations
To manage multiple transportation standalone NVRs and monitor the recording
synchronization status, you have to add the stations to SMS server. Please make sure you
have purchased sufficient license for your required number of stations.
Add Station
1. Log in to standalone NVR interface, go to Setup System tabSMS. Click on
“Link” and input the IP address of the SMS server, and then click on “Apply”.
32
Page 33

www.acti.com
ACTi SMS Server User’s Manual
2. On SMS server, go to Setup Station tab Click on “Add Station” SMS Click on
“Link” and input the IP address of the SMS server, and then click on “Apply”.
33
Page 34

www.acti.com
ACTi SMS Server User’s Manual
Configure Station Settings
You can configure foundemental NVR server settings via SMS interface.On Station tab,
the added stations are listed below All Stations, click on sign next to the station to
reveal the fundemental settings of this NVR server.
Click on the settings to modify the configutaitons. For examply, you can select a camera
and configure the camera’s video or PTZ properties. By clicking on “Apply” this new
modification will be appplied this device.
34
Page 35

www.acti.com
ACTi SMS Server User’s Manual
Event Source
Event Type
Response Type
(on client computer)
SMS Local
Server Status
Storage disk is full
Storage disk is available for
recording
SMS server can’t detect the
storage disk
Produces audio alert (beep sound
or pre-loaded audio file)
Executes a command
Sends email notification
Camera
Restoration fails
Produces audio alert (beep sound
or pre-loaded audio file)
Executes a command
Sends email notification
Event Management
When certain unexpected incidents occur during the video synchronization process, for
example, SMS server’s storage space is full or the restoration process of a certain camera
just fails, they are considered crucial Events that require not only you immediate
awareness but timely action. SMS server can program these events using Event Rules. A
specific type of event is set as a Trigger that causes SMS server to react in a designated
Response. An example rule would be for SMS server to send an e-mail to alert the
supervisor and to enable a beep sound when the storage disk is full.
The chart below shows SMS server-supported Trigger types and Response types:
35
Page 36

www.acti.com
ACTi SMS Server User’s Manual
Response Types
Function Description
Makes SMS play beep sound or an audio
file for a number of repetitions.
On SMS Corporate Workstation client
computer, you can upload a WAV file or
an MP3 file as the alert sound, and set
how many times this audio file is repeated
when the event occurs. (This SMS server
has to be already on Server Site list,
refer to
G. Server Name/Server Sites List on page
1 4 2
3
Create an Event Rule Based on SMS Server Events
In SMS system, the abnormal status of SMS server is also considered a trigger that is
worth your attention.
1. Go to Setup page Event tab. In Local Server panel, there are already three types
of server event: Disk Full, Disk Is Available and Disk Not Found. Highlight the rule
you want to edit. Double-click on the “Response” column to edit the response action.
2. On Edit Event window, you can rename this event in Event Name field.
3. You can enable multiple responses by first checking the box (ers) to enable the items:
36
Page 37

www.acti.com
ACTi SMS Server User’s Manual
Enable SMS to execute a certain
command upon this event. You can use it
to integrate SMS’ event handling with
other programs. Enter the path of the
command to be executed upon event.
Enable SMS to send e-mail notification via
SMTP server. The default SMTP and
sender’s e-mail settings can be set in
advance in Setup page System
tabSettings E-mail& SMTP
Settings.
1. Type one or more recipients’ e-mail
addresses in “To” column (if more than
one, please separate them by “;”
symbol) or click the icon to select
recipients from existing SMS User list.
The E-mail address should be set in
advance (in Setup pageUsers
tabUsers) for an SMS User so that it
can be selected in this list.
2. Edit the e-mail subject and content.
4. Click “Apply” to save this rule.
37
Page 38

www.acti.com
ACTi SMS Server User’s Manual
Action Items
Function Description
Makes SMS play beep sound or an audio
file for a number of repetitions.
On SMS Corporate Workstation client
computer, you can upload a WAV file or
an MP3 file as the alert sound, and set
how many times this audio file is repeated
when the event occurs. (This SMS server
has to be already on Server Site list,
refer to
G. Server Name/Server Sites List on page
4
2
3
Create a Camera Event Rule
1. Go to Setup page Event tab. Click on the title bar of Camera list, all the editable
event rules are listed in the device ID order.
2. Select a camera from the Camera list on the left. Based on the trigger types this
device supports, the corresponding events rules are listed accordingly on the right. In
this example, this selected camera model supports three motion detection regions,
and hence three MD trigger event rules are available.
3. You can enable multiple responses by first checking the box (es) to enable the items:
38
Page 39

www.acti.com
ACTi SMS Server User’s Manual
Enable SMS to execute a certain
command upon this event. You can use it
to integrate SMS’ event handling with
other programs. Enter the path of the
command to be executed upon event.
Enable SMS to send e-mail notification via
SMTP server. The default SMTP and
sender’s e-mail settings can be set in
advance in Setup page System
tabSettings E-mail& SMTP
Settings.
3. Type one or more recipients’ e-mail
addresses in “To” column (if more than
one, please separate them by “;”
symbol) or click the icon to select
recipients from existing SMS User list.
The E-mail address should be set in
advance (in Setup pageUsers
tabUsers) for an SMS User so that it
can be selected in this list.
4. Edit the e-mail subject and content.
4. Click “Apply” to save this rule.
Manage the Event Rules
Event List panel gives an overview on event rules set on SMS server. Go to Setup page
Event tab click on Camera or Local Server on the left. To delete a certain rule, you
can select it and then click “Delete” to remove it.
39
Page 40

www.acti.com
ACTi SMS Server User’s Manual
Field Name
Description
Server
Input the sender’s SMTP server address. Only alphabets, numbers, and the
symbols (.), (_), (-) are valid.
SMTP Port
Set the SMTP port, allowed value is from 1~65535, default is 25.
Account
Input the name of the SMTP server account. Only alphabets, numbers, and the
symbols (@), (.), (_), (-) are valid.
Password
Input the password of the SMTP server account. Only alphabets and numbers
are valid.
Security
Certain webmail providers provide the SSL/TLS-encrypted SMTP connections
to secure your data when sending/receiving e-mails. Please check if the SMTP
connection settings you use (especially the SMTP Port) now require enabling
either SSL or TLS.
Sender Name
Input the name or title of the sender. You may input a name different from the
account name.
Sender Mail
Input the sender’s e-mail address, which should the same account you set for
SMTP server.
4
2
3 4 1
How to Setup SMTP Settings for Event Rules
SMS supports e-mail notification for Event Handling sent through an SMTP server. You
can specify the e-mail and server settings here.
1. Go to Setup pageSystem tabSettings E-mail& SMTP Settings.
2. Fill in each of the following fields.
3. As all necessary information is filled, click “Send Test Mail” to try sending an e-mail
according to your settings, and then log in to your SMTP server to check incoming
e-mails. If the test mail is sent successfully, SMS server is ready to send out e-mails.
4. As the settings are confirmed, click “Apply” to save.
40
Page 41

www.acti.com
ACTi SMS Server User’s Manual
Vehicle Status
Status Icon
Before setting off
As the vehicle is parked in the depopt, the station on it
hence is within the control center’s local network; a
green bulb will appear in the Station List to show that
it is connected.
If the video recording of this station has been
completely uploaded to SMS server, the restoration
progress percentage will become “--%” to show that
there is currently no running restoration process.
In service
As the vehicle is in service, the station on it hence is
outside of the control center’s local network; a gray
bulb will appear in the Station List to show that it is
disconnected.
If the station is currently not connected, the progress
card will appear red with the latest completed
percentage of video restoration. This progress will
resume after the station is connected again.
Station Name
Station Name
Station status
Progress status
Station status
Progress status
Monitor the Synchronization Process
Overview
Once a station is added to SMS system, its detailed restoration progress will be
individually displayed in the Restoration Progress view. From the Station List, you can
have a glance at the status of the entire stations. By clicking on the title bar of Station
Restore Log panel and Event panel, you can open these panels to get more details.
41
Page 42

www.acti.com
Having retured to the depot
As the vehicle has returned to the deport, the station
on it hence is within the control center’s local network;
the green bulb will appear in the Station List to show
that it is connected, with a blue downloading sign
representing its running restoration process.
A white downloading sign will show along with the
percentage of completion.
Icons
Status
Description
Restoring
Connected
Disconnected
Station List
Log
Restoration Progress
Event
Station Name
Station status
Progress status
Monitor Screen
ACTi SMS Server User’s Manual
Station List
Lists the added stations and their current restoration status:
42
Page 43

www.acti.com
ACTi SMS Server User’s Manual
Status
Description
Log
Informs you of the newest results of each station’s restoration progress such as “Restore
Done” or “Restore Failure”. You can click on in the top right corner of this screen to
export the entire system log.
Event Panel
Displays the important server or station/camera status
43
Page 44

www.acti.com
ACTi SMS Server User’s Manual
1
2
3
Reverse Play Pause Play
Previous Recording
Play Speed
Time bar scale
Define Specific time
Go to current time
Next Recording
Show/Hide Time bar
Daylight Saving Time Status
Watch Playback
Overview
Once the video footage has been successfully uploaded to SMS server, on Playback
screen, you can drag a camera into a channel window to watch the playback.
1. On top of the screen select a desired layout.
2. From Camera list, drag a device into a channel window.
3. On Timetrack, drag the bar to your desired time spot
4. Use the Play Control buttons to fast-foward, rewind, play or pause.
Playback Controls
The playback related controls reside in Playback Control Bar. You may adjust the video
play speed, do a reverse / forward play, or pause the video to spot your desired detail. For
non-continuous recording types such as DI, or Event recording, you may use the
“Previous Recording” or “Next Recording” buttons to jump to the part directly.
44
Page 45

www.acti.com
ACTi SMS Server User’s Manual
Daylight Saving Time Switch
SMS Server will detect and display your client computer local time on Monitor and
Playback screen. Once you apply Daylight Saving Time rule on your computer, SMS
server will automatically enable this function on Control Bar. By default, this function will
be enabled automatically as daylight saving time begins. You may disable this function to
view playback according to Coordinated Universal Time.
45
Page 46

www.acti.com
ACTi SMS Server User’s Manual
1
2
3
Search by Time
If you simply want to skim through the footage record around a certain time, you can start
by locating the specific time on the time bar.
1. Double-click on your desired channel or drag it to the display window. The channel
view will appear in the window.
2. On Playback Control Bar, click , and specify the target date and time on
the calendar window, and then click “Apply”.
3. The time bar will immediately locate the target time.
46
Page 47

www.acti.com
ACTi SMS Server User’s Manual
1 2 3
4
5
Search by Event Type
If you are clear about (1) When (2) as which event type (3) Where the incident happened,
you will not need to drag on time bar all the way to the spot. The event search tool can sort
out the video clips that match your criteria.
1. Double-click on your desired channel or drag it to the display window. The channel
view will appear in the window.
2. Drag time bar to the target time.
3. On Search Tool panel, two search tools will appear, click
4. Select an event type from dropdown list, and click “+” to create this filter. You can
select an unwanted filter and delete it by clicking on the “x” on the right.
5. Select the desired filter and click “Apply” to start searching.
47
Page 48

www.acti.com
ACTi SMS Server User’s Manual
1 2 3
Search by Video Analytics
SMS server is equipped with two useful video analytics that can perform advanced
search – Motion and Tamper.
Motion
- Unlike the typical motion detection method, this motion video analytics algorithm can
detect a maximum of six regions in a view, including rectangle regions and polygon
regions.
Tamper
- A camera that has been tampered with is not able to serve its purpose. To avoid this,
SMS offers an algorithm to detect whether any form of tampering has been done to a
camera, whether it be in the form of redirecting the angle of the camera, de-focusing the
camera, covering, or spray-painting the camera.
To start,
1. Double-click on your desired channel or drag it to the display window. The channel
view will appear in the window.
2. Drag time bar to the target time.
3. On Search Tool panel, two search tools will appear, click
4. Define the time range.
5. Select the video analytics type
6. Click “+” to create this filter. You can select an unwanted filter and delete it by
clicking on the “x” on the right.
48
Page 49

www.acti.com
ACTi SMS Server User’s Manual
Multiple results that
occurred within a
single second will
be count as one
result.
By enabling this,
this search will
analyze the view
using higher
number of pixels
(default is 320x240).
It is suggested that
you only enable this
when you consider
obtaining more
results.
4
5
6
7
7. After this filter is created, draw the regions on the channel view. ( You can define a
total of six regions for a motion filter, while tamper filter will us the whole camera
view for analyzing)
49
Page 50

www.acti.com
ACTi SMS Server User’s Manual
x2
If the area you want to mark does not fit to the form of a rectangle, you may also
choose to draw a polygon by selecting the icon. To draw the lines for the
sides of your polygon, click your cursor to mark the endpoints of each line.
Double-click on the final endpoint of the final line to confirm and highlight the
polygon in light blue, as shown in the illustration below. Make sure your lines
connect (a minimum of three lines) to form a closed shape.
8. Click “Apply” to start searching.
To create a new search, simply double-click on a camera ion Camera list, and follow the
steps narrated above again.
50
Page 51

www.acti.com
ACTi SMS Server User’s Manual
Search Result Viewer
Search Result Tool Bar
View Search Results
The search results will then start being generated in thumbnails in Search Result Viewer
window. However, it might take a few seconds if a large number of results are found. The
thumbnails are listed in sequential order, left-to-right and top-to-bottom. You can drag on
the Search Result Viewer to your desired time to find the snapshots of the incidents.
For easy exploring the search results, on Search Result Tool Bar, you can
● Adjust the size of the snapshots, the smaller the thumbnail’s size is,
the more results you can see in the view.
● Select a thumbnail and click to download its snapshop.
● Select a thumbnail and click to directly start playing this event.
● Select a thumbnail and click to view the event card list instead of thumbnail view.
51
Page 52

www.acti.com
ACTi SMS Server User’s Manual
.
The event card list will be displayed in the Search Tool panel. You can click to
browse throuth the event list, or duoblie-click on an event card to start playing this event.
To return to thumbnail view, click .
52
Page 53

www.acti.com
ACTi SMS Server User’s Manual
Take a Snapshot of the Playback View
You may take a snapshot of a channel live image on Playback screen.
The snapshot will be saved to default folder on your client computer as .jpg format (The
system default location is Windows Desktop). You may find the location path on the
bottom of SMS window after taking a snapshot.
53
Page 54

www.acti.com
ACTi SMS Server User’s Manual
3
123
Note
Other than defining the time duration, on time bar, you can rest the time cursor on a desire time
and then click to enter Export Video window. The default time duration will be one minute
before this time spot plus one minute after it, at a total length of two minutes.
Export the Recordings
SMS playback offers two choices of video format for the exported video. The *.raw file, as
the original video file format captured from video source, is able to be played on ACTi
Archive Player. You may download the this utility from
http://www.acti.com/downloadcenter
The*.AVI file, as The most widely adopted video format on Windows system, can be
instantly transferred by SMS server and played directly in Windows Media Player.
Before starting to export the video, please make sure there is enough memory space on
the hard drive of your destination computer.
Define the Section of Exported Video on Time Bar
You may define the video duration on time bar during the playback. In this way, you don’t
spend extra time and effort on finding the specific date and time information.
1. On time bar, drag to the start point of the video, right-click to bring up quick menu, then
select “Mark Export Start”.
2. If you have successfully set the start point, the time duration will turn yellow as you
drag to another point. Drag to the end, right-click to bring up quick menu, and then
select “Mark Export End”.
3. As both start point and end are set, you may right-click again the quick menu and find
these two options are already gray out. Select “Export Video”
Depending on your scenario, you may first set the ending point, then the start point.
54
Page 55

www.acti.com
ACTi SMS Server User’s Manual
Set the Export Video Settings
You may export video with or without defining the time duration beforehand since you can
configure all the settings on Export Video window. On Search Result Tool bar, click
to enter the window.
1. Select the cameras. If more than one camera are selected, you will get multiple
recordings.
2. Set the time duration. The minimum duration is 10 seconds, maximum is 1 hour. (For
individual recording, if the total size is over 2 GB, or the video encoder type, frame
rate, resolution of this channel’s stream once altered during the selected Time
Duration, this file will be divided).
3. For Video Settings, you can (1) choose the video format,(2) enable the “Filter no
video” function to skip the video gaps, (3) enable “Add Watermark” to embed a
unique code in every frame of this exported video footage, (4) if this channel is a
fisheye camera, make sure you select the desired fisheye view from right-click menu
“Fisheye Mode”, and check “Export current fisheye view” here. The exported
video will be displayed in the view mode you are seeing now; otherwise, the default
fisheye view for exported video is Original View.
4. Set the overlay text if needed. The maximum number of characters for Text is 40.
5. This exported video can be saved to your current client computer. Please choose the
55
Page 56

www.acti.com
ACTi SMS Server User’s Manual
Note
Certain fisheye camera view modes (e.g. Quad mode) display multiple regions in a single
channel. When being exported, these regions will still be put together as a single video file.
Note
By changing a the fisheye modes to the following five modes : Dewarping, Panorama, Double
Panorama, Panorama/Focus and Quad, the live stream of this channel will
Note
Once a channel is changed to any of the following fisheye modes: Dewarping, Panorama,
Double Panorama, Panorama/Focus or Quad, the resolution of this live stream will become
1920x1080, so will the resolution of exported video clip.
location. By default, the files will be saved to Desktop.
6. Click “Apply” to start file converting and exporting. The export process window will
appear. In the Camera column displays the processed/ total number of video clips of
that camera. You may also observe the remaining processing time of each camera’s
video files.
There are five types of process status: success, converting, waiting, no data and fail
It might happen that there is certain section in a recording that exists no video data; if the
status shows “Fail”, it may be that your disk drive does not have enough space for video
files, please make some space and click again to re-execute this export task.
56
 Loading...