

Page 1

Media Management Server
User’s Manual
2019/04/29
o
Page 2

www.acti.com
ACTi Media Management Server User’s Manual
Table of Contents
A. Login/ Logout .............................................................................................3
B. Camera/ Server Setting .............................................................................4
C. Media Playlist Setting ...............................................................................7
D. TV Box Setting .........................................................................................13
2
Page 3
www.acti.com
ACTi Media Management Server User’s Manual
A. Login/ Logout
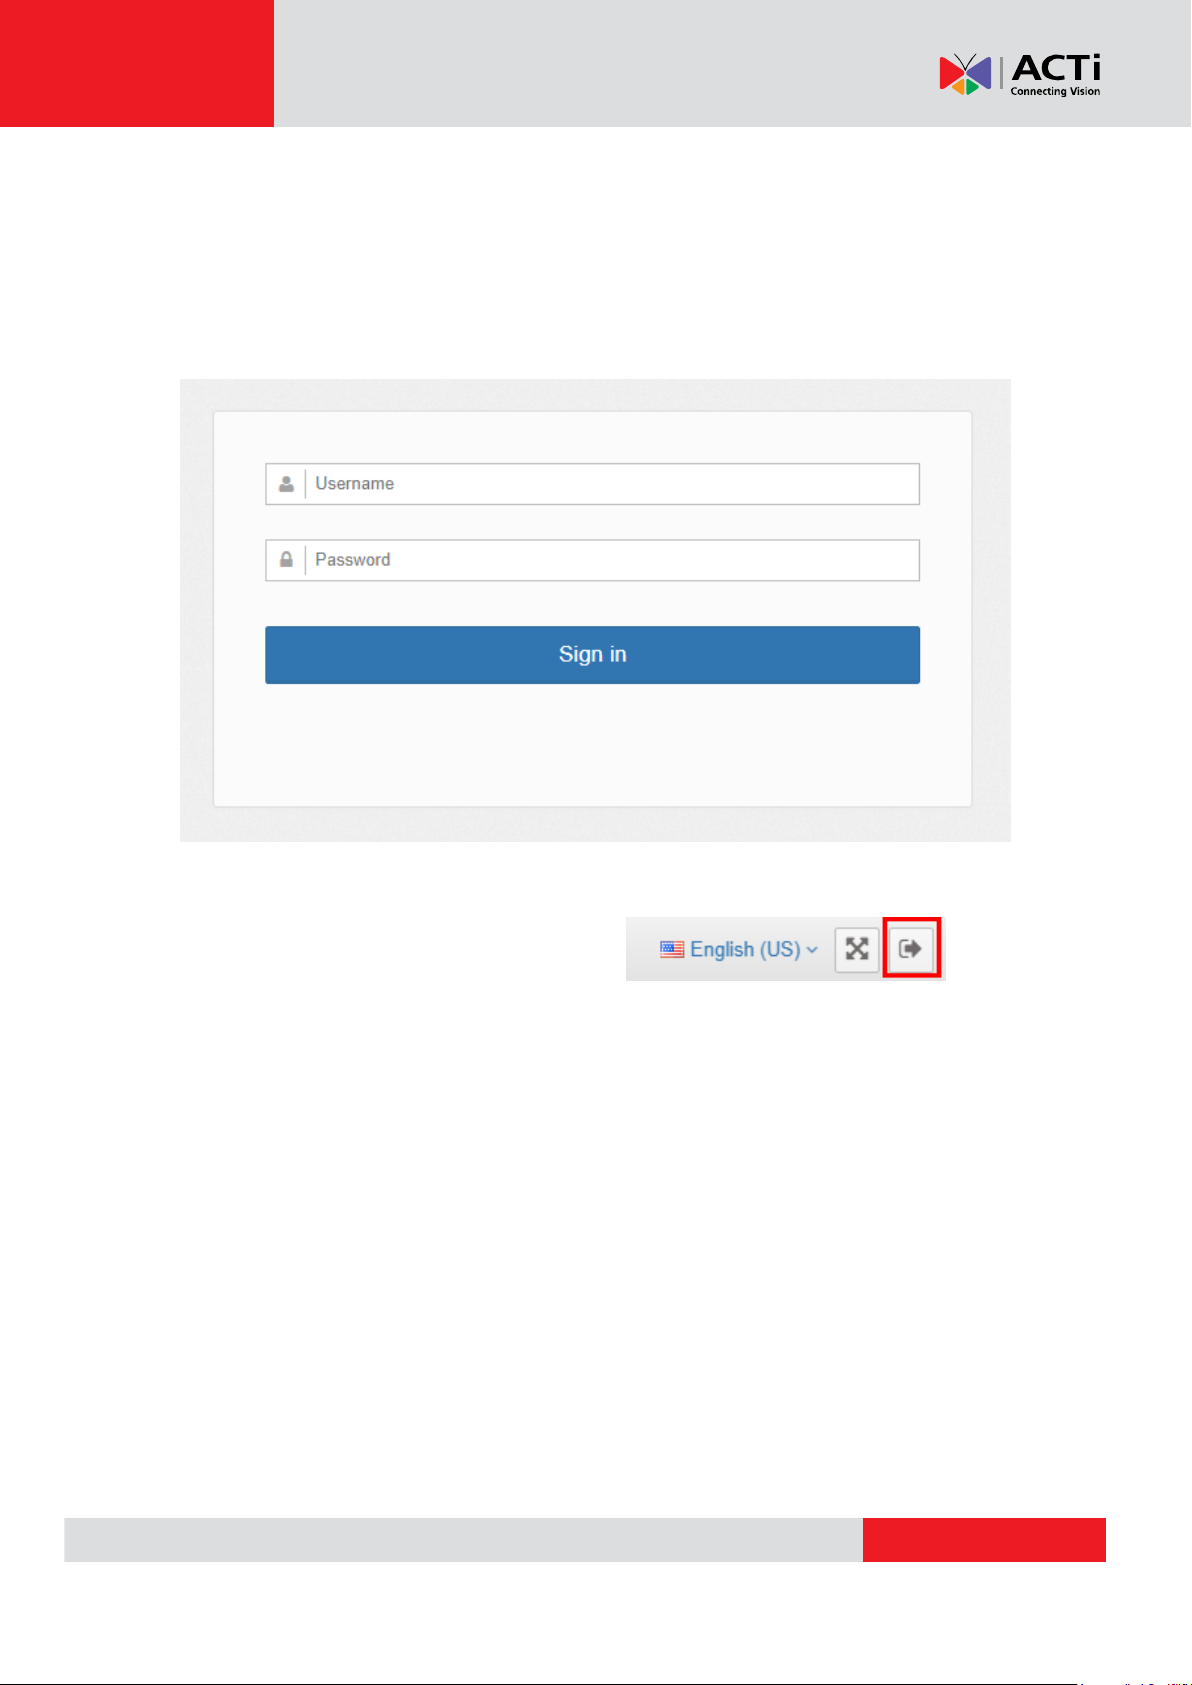
System Login
Open the service main page and enter the account and password.
http://localhost/DigitalSignage/Login/Login.aspx
Default Account and password is: admin / 123456
System logout
Click on the button that is on the top of right
3
Page 4
www.acti.com
ACTi Media Management Server User’s Manual
B. Camera/ Server Setting
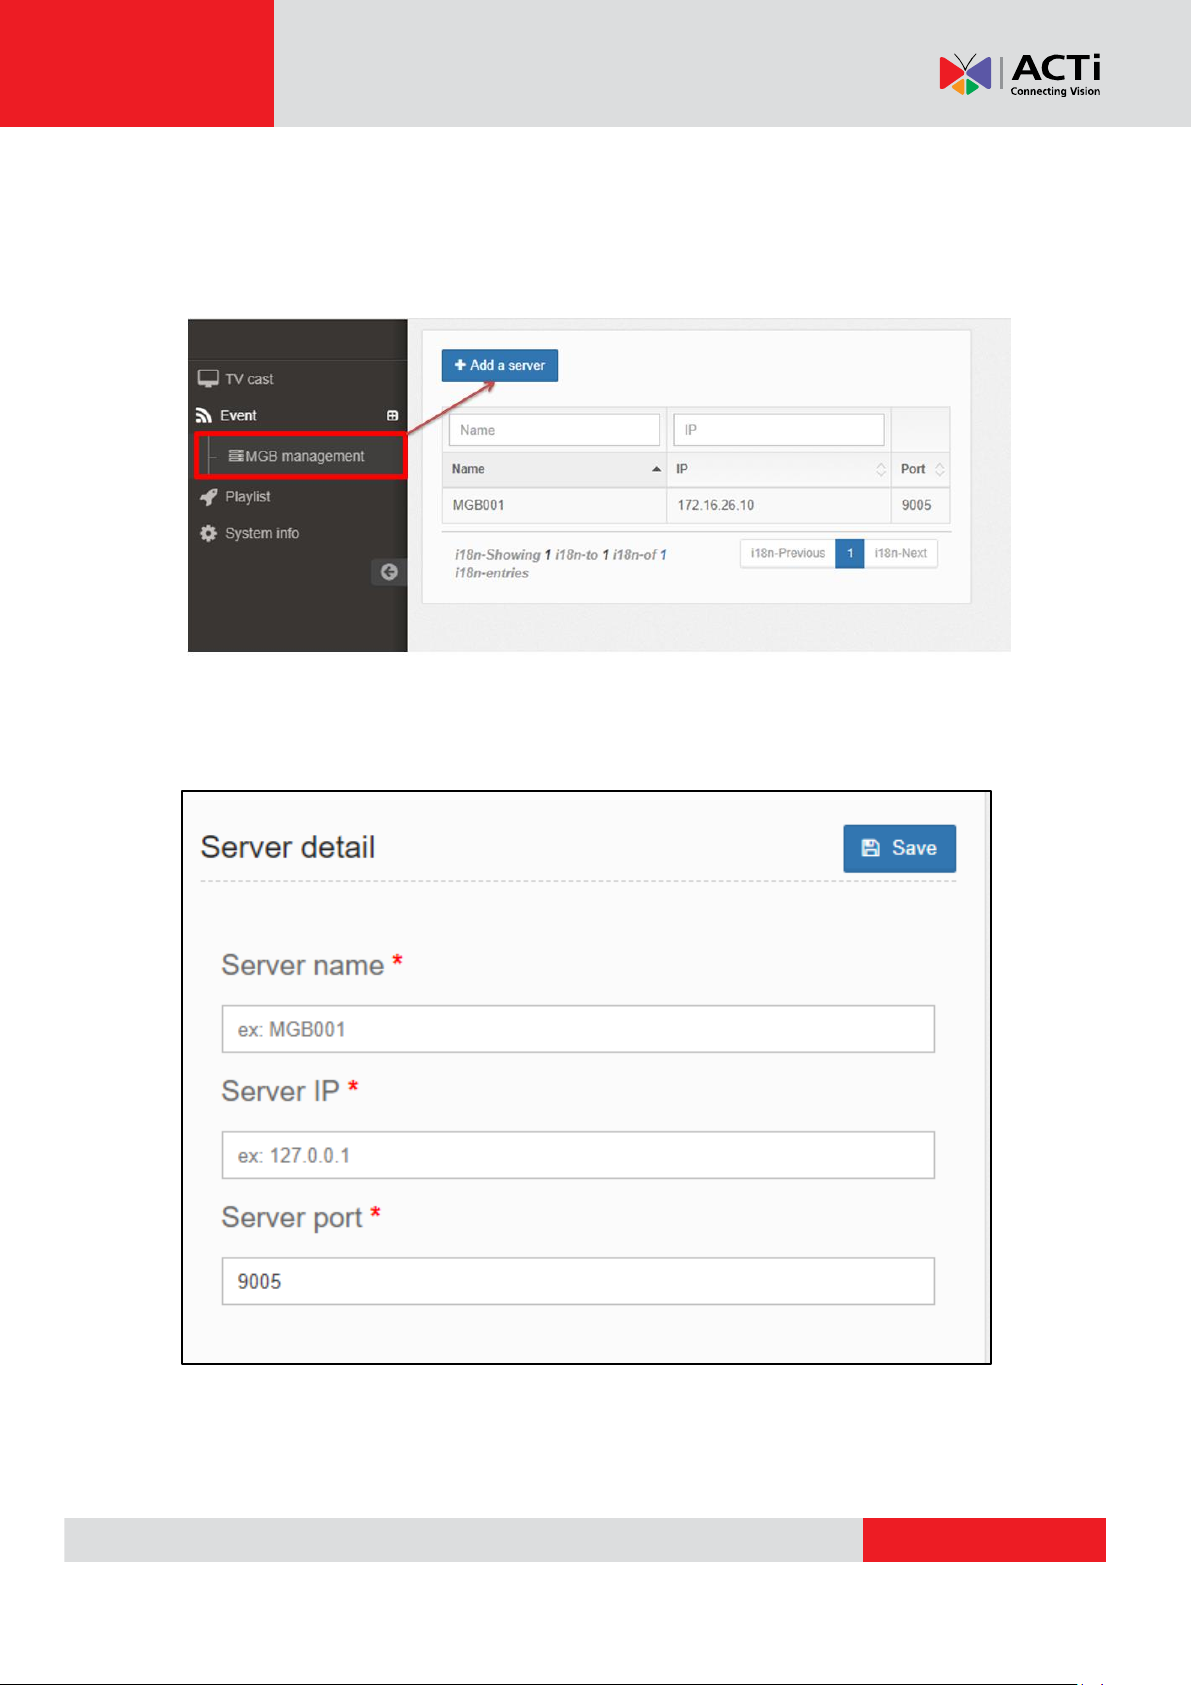
First, you need to add a server. Click on “MGB management” from the left menu
panel, and then click “Add a server”.
Then you have to fill out the information of this MGB server.
Server Name: Please define the name you need
Server IP: Fill out the correct server IP
Server Port: default 9005
4
Page 5
www.acti.com
ACTi Media Management Server User’s Manual
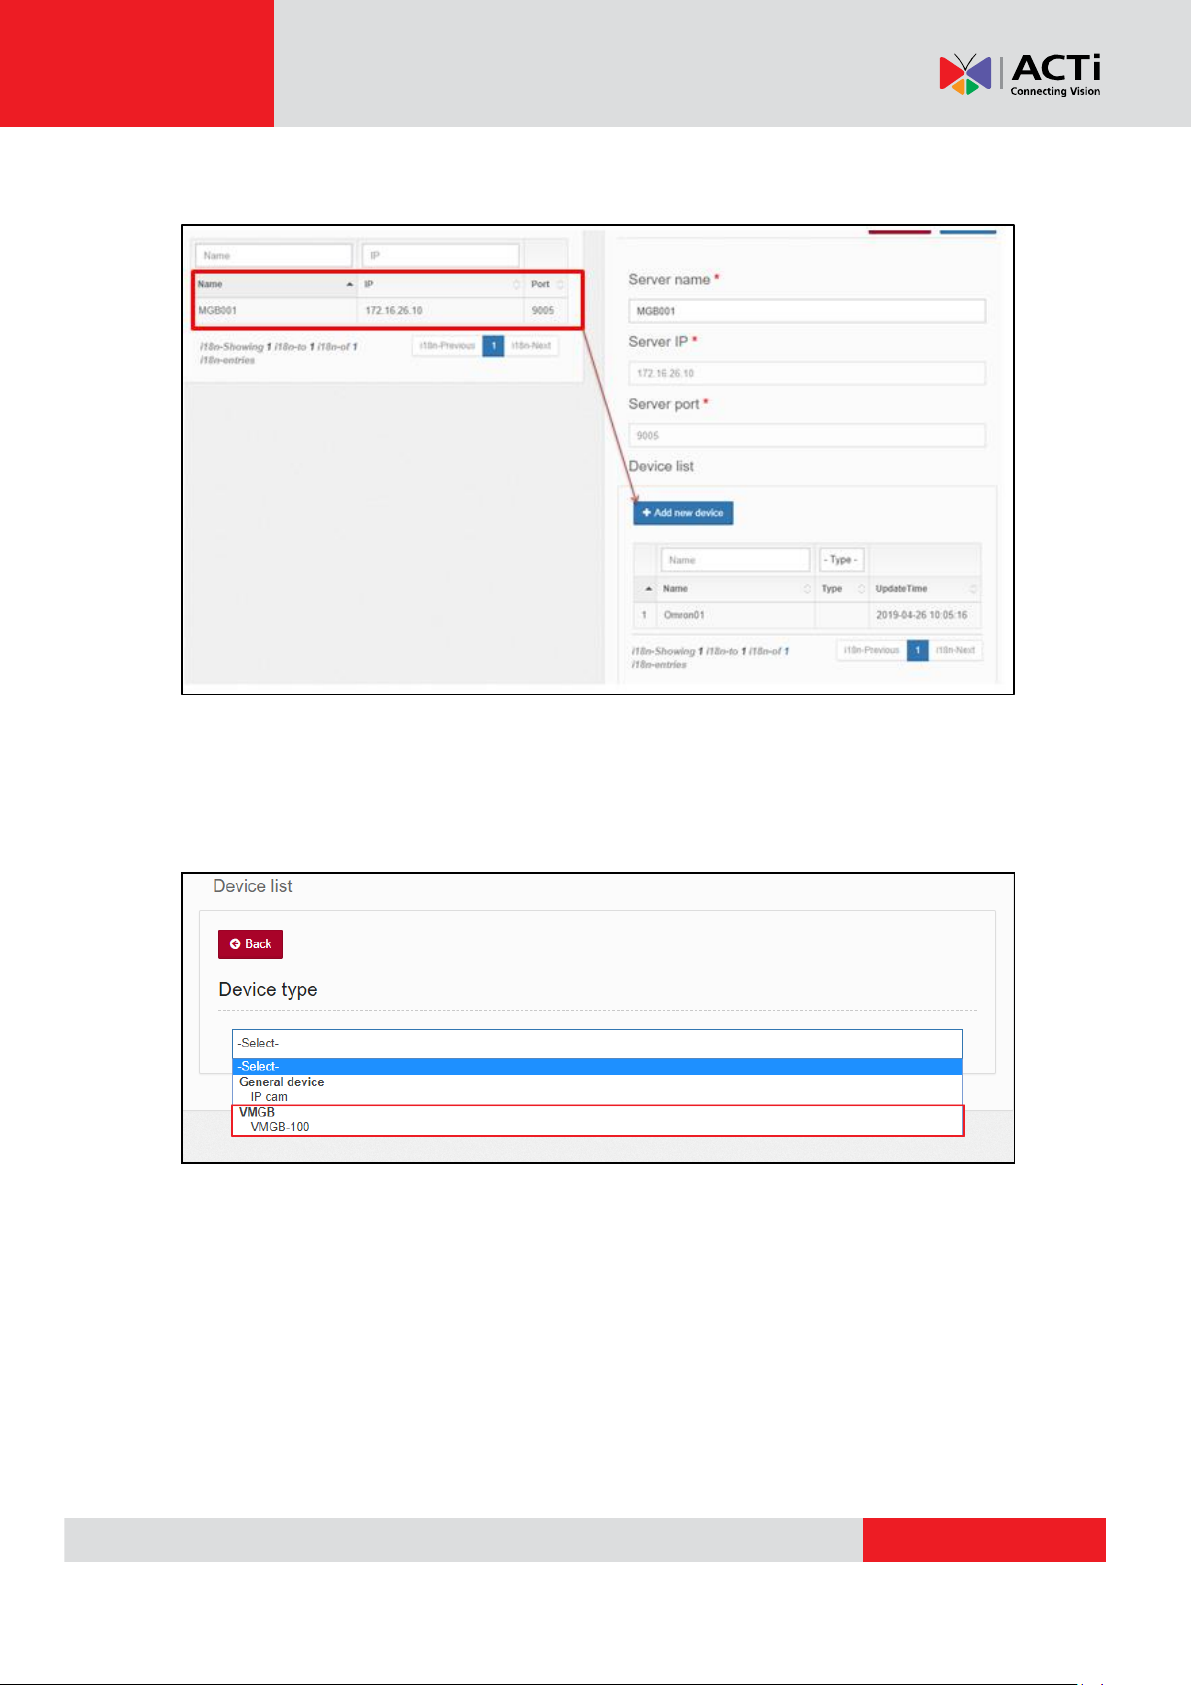
After the above setting, the server will appear on the list.
Click the server item and then click “Add new device”. You can either add a camera
capturing video or a metadata camera recognizing age/ gender.
Take VMGB-100 as an example.
5
Page 6

www.acti.com
ACTi Media Management Server User’s Manual
1. Define the camera name.
2. Fill out the camera COM port which is found in Device Management.
3. Adjust the horizontal resolution.
4. Adjust the vertical resolution.
5. Adjust the threshold depending on the conditions of the actual scenario.
Accomplish the camera setting; please go to Device Management to restart Digital
Signage Service.
6
Page 7

www.acti.com
ACTi Media Management Server User’s Manual
C. Media Playlist Setting
Click on “Playlist” from left menu panel and then add a playlist.
Step 1
Step 1 is to provide the name of this playlist and add the description. Then, Step2 will
be shown.
7
Page 8

www.acti.com
Step 2
ACTi Media Management Server User’s Manual
1. Choose the template size; default setting is 16:10.
2. You can define the template, see Step 2-1
3. Show the size directly on the screen
8
Page 9

www.acti.com
ACTi Media Management Server User’s Manual
Step 2-1
1. Defined the name of this specific template
2. Select the layout from drop-down menu
3. Draw the area for any pattern on media display
After saving this new template, it will be shown on the template list and you can
directly choose it in the future.
9
Page 10

www.acti.com
Step 3
ACTi Media Management Server User’s Manual
1. The area which is chosen will have a blue square outside, you can start to add the
content on this area.
2. Default Playlist: playlist without detection of age/ gender
3. Special Playlist: playlist with detection of age/ gender
4. Add the content for the playlist. Click “Add content”.
10
Page 11

www.acti.com
ACTi Media Management Server User’s Manual
1. Search for the media.
2. Upload media. This can be videos (MP4) or images (JPEG, JPG, PNG).
3. Add the webpage you would like to display.
Then, start to adjust the detail.
1. Duration: the length of time to play the image
2. Can interrupt: Check this box to allow the server to switch to an Ad when age/
gender is being detected while playing a default playlist.
11
Page 12

www.acti.com
ACTi Media Management Server User’s Manual
Special list is when a target age/ gender is detected, the server will automatically play
the pre-set media. Basically, the instruction is the same with the Default playlist, the
different part is you need to choose the metadata camera to proceed with the age/
gender recognition.
1. Edit the Special playlist
2. Select the metadata camera
12
Page 13

www.acti.com
ACTi Media Management Server User’s Manual
D. TV Box Setting
The TV Box is one device that be used with the Media Management Server. Therefore,
the user needs to set the TV Box altogether.
Please connect the TV Box, the DHCP IP will be shown.
1. Click on “TV cast”.
2. Click on “Advanced setting” to add the TV Box.
3. Enter the IP that you got from previous step.
13
Page 14

www.acti.com
ACTi Media Management Server User’s Manual
Add the schedule to control the media, fill out all below information.
After setting, you can see the schedule is listed
At last, please synchronize all the schedules between Media Management server and
TV box to correctly play the right advertisement and schedule.
1. Click the edit button.
2. Save it, then the content and schedule can be synchronized on both the server
and the TV box.
14
 Loading...