

Page 1
TM
MasterSync
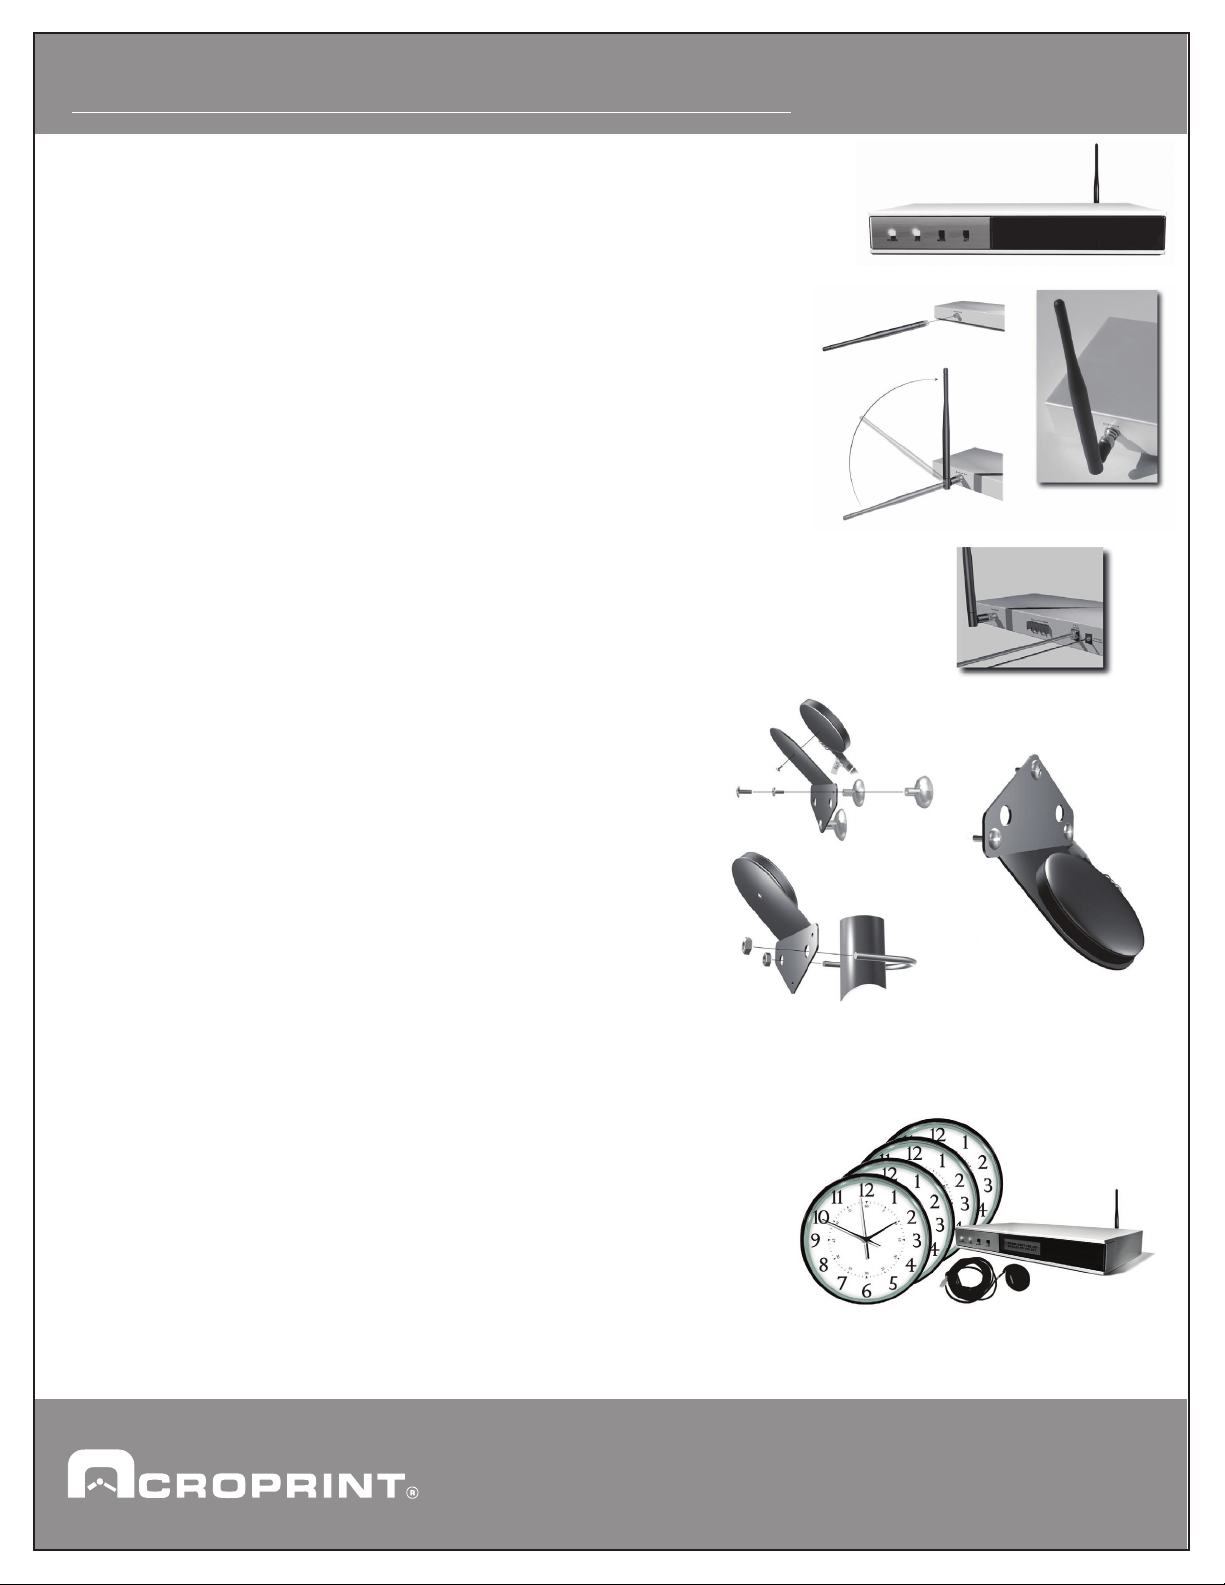
GPS Wireless Transmitter Set-up
Step 1- Screw transmitter antenna onto the back of transmitter. (Figure B)
easy set up guide
(Figure A)
Step 2 GPS Receiver below). Plug the GPS cable into the socket located
on the back of the transmitter.
Step 3 - Plug the 9 Volt 2.6 Amp DC power supply into the transmitter.
(Figure C)
Step 4 - Plug the power supply into a 120 VAC outlet.
Step 5 - Confirm proper settings of time zone and frequency channel
and modify as needed.
Mount GPS Receiver to exterior of the building (see Mounting the
Mounting the GPS Receiver
Connect the round GPS receiver onto the Mounting plate
with the provided screw. (See Figure D) The GPS Receiver
should be located outside of the building, either roof mount
or side wall so it has a clear view of the sky with no overhanging
obstacles blocking its view. Run your GPS cable back to the
transmitter and insert end into GPS socket.
(1)
(Figure B)
(Figure C)
(1)
Power LED
The Power LED Indicator located on the front of the
transmitter will light up once you have connected the
power supply (provided) to the transmitter and then to
an active 120 VAC outlet. (Figure A)
TRANSMITTER DISPLAY:
1. DAY/MONTH/YEAR (Will automatically be set by GPS)
2. TIME ZONE (UTC OFFSET) (Factory Preset)
3. GPS INDICATOR (See GPS Communications section)
4. TIME (Will automatically be set by GPS)
5. AM/PM 12/24 HOUR INDICATOR (Factory set to 12 hour)
6. CHANNEL # (Factory Preset)
7. DST (Daylight Savings Time) (Factory set to DST On)
(2)
(Figure D)
5640 Departure Drive Raleigh, NC 27616-1841
Sales: 800-334-7190 Email: sales@acroprint.com
Fax: 919-850-0720 www.acroprint.com
 Loading...