

Page 1

User's Guide
Page 2

Acronis Backup and Security 2010
User's Guide
Published 2010.04.09
Copyright© 2010 Acronis
Legal Notice
All rights reserved. No part of this book may be reproduced or transmitted in any form or by any means, electronic
or mechanical, including photocopying, recording, or by any information storage and retrieval system, without
written permission from an authorized representative of Acronis. The inclusion of brief quotations in reviews may
be possible only with the mention of the quoted source. The content can not be modified in any way.
Warning and Disclaimer. This product and its documentation are protected by copyright. The information in
this document is provided on an “as is” basis, without warranty. Although every precaution has been taken in the
preparation of this document, the authors will not have any liability to any person or entity with respect to any
loss or damage caused or alleged to be caused directly or indirectly by the information contained in this work.
This book contains links to third-party Websites that are not under the control of Acronis, therefore Acronis is not
responsible for the content of any linked site. If you access a third-party website listed in this document, you will
do so at your own risk. Acronis provides these links only as a convenience, and the inclusion of the link does not
imply that Acronis endorses or accepts any responsibility for the content of the third-party site.
Trademarks. Trademark names may appear in this book. All registered and unregistered trademarks in this
document are the sole property of their respective owners, and are respectfully acknowledged.
Third Party Software Notices. Third party code may be provided with the Software and/or Service. The license
terms for such third-parties are detailed in the license.txt file located in the root installation directory. You can
always find the latest up-to-date list of the third party code and the associated license terms used with the Software
and/or Service at http://kb.acronis.com/content/7696.
Page 3

Table of Contents
Preface . . ..... . . . . . . . . . . . . ..... . . . . . . . . . . . . ..... . . . . . . . . . . . . ..... . . . . . . . . . . . . . ix
1. Conventions Used in This Book . . . . . . . . . . . . . . . . . . . . . . . . . . . . . . . . . . . . . . . . . . . . . . . ix
1.1. Typographical Conventions . . . . . . . . . . . . . . . . . . . . . . . . . . . . . . . . . . . . . . . . . . . . . . ix
1.2. Admonitions . . . . . . . . . . . . . . . . . . . . . . . . . . . . . . . . . . . . . . . . . . . . . . . . . . . . . . . . . . . ix
2. Book Structure . . . . . . . . . . . . . . . . . . . . . . . . . . . . . . . . . . . . . . . . . . . . . . . . . . . . . . . . . . . . . . x
Installation and Removal .............................................. 1
1. System Requirements . . . . . . ..... . . . . . . . . . . . . ..... . . . . . . . . . . . . ..... . . . . . 2
1.1. Minimal System Requirements . . . . . . . . . . . . . . . . . . . . . . . . . . . . . . . . . . . . . . . . . . . 2
1.2. Recommended System Requirements . . . . . . . . . . . . . . . . . . . . . . . . . . . . . . . . . . . . . 2
1.3. Supported Software . . . . . . . . . . . . . . . . . . . . . . . . . . . . . . . . . . . . . . . . . . . . . . . . . . . . . 2
2. Preparing for Installation .... . . . . . . . . . . . . ..... . . . . . . . . . . . . ..... . . . . . . . . . 4
3. Installing Acronis Backup and Security 2010 . . . . . . ..... . . . . . . . . . . . . .. 5
4. Activating the Product . . . . . . . ..... . . . . . . . . . . . . ..... . . . . . . . . . . . . ..... . . . 8
5. Repairing or Removing Acronis Backup and Security 2010 ........ 10
Getting Started ......................................................... 11
6. Overview .. . . . . . . . . . . . . ..... . . . . . . . . . . . . ..... . . . . . . . . . . . . ..... . . . . . . . . . 12
6.1. Opening Acronis Backup and Security 2010 . . . . . . . . . . . . . . . . . . . . . . . . . . . . . . . 12
6.2. User Interface View Modes . . . . . . . . . . . . . . . . . . . . . . . . . . . . . . . . . . . . . . . . . . . . . . 12
6.2.1. Novice Mode . . . . . . . . . . . . . . . . . . . . . . . . . . . . . . . . . . . . . . . . . . . . . . . . . . . . . 13
6.2.2. Intermediate Mode . . . . . . . . . . . . . . . . . . . . . . . . . . . . . . . . . . . . . . . . . . . . . . . . 15
6.2.3. Expert Mode . . . . . . . . . . . . . . . . . . . . . . . . . . . . . . . . . . . . . . . . . . . . . . . . . . . . . . 17
6.3. Setting Up Acronis Backup and Security 2010 . . . . . . . . . . . . . . . . . . . . . . . . . . . . . 19
6.3.1. Step 1 - Select Usage Profile . . . . . . . . . . . . . . . . . . . . . . . . . . . . . . . . . . . . . . . . 20
6.3.2. Step 2 - Describe Computer . . . . . . . . . . . . . . . . . . . . . . . . . . . . . . . . . . . . . . . . 21
6.3.3. Step 3 - Select User Interface . . . . . . . . . . . . . . . . . . . . . . . . . . . . . . . . . . . . . . . 22
6.3.4. Step 4 - Configure Parental Control . . . . . . . . . . . . . . . . . . . . . . . . . . . . . . . . . . 23
6.3.5. Step 5 - Configure Acronis Network . . . . . . . . . . . . . . . . . . . . . . . . . . . . . . . . . 24
6.4. System Tray Icon . . . . . . . . . . . . . . . . . . . . . . . . . . . . . . . . . . . . . . . . . . . . . . . . . . . . . . 25
6.5. Scan Activity Bar . . . . . . . . . . . . . . . . . . . . . . . . . . . . . . . . . . . . . . . . . . . . . . . . . . . . . . 25
6.5.1. Scan Files and Folders . . . . . . . . . . . . . . . . . . . . . . . . . . . . . . . . . . . . . . . . . . . . . 26
6.5.2. Disable/Restore Scan Activity Bar . . . . . . . . . . . . . . . . . . . . . . . . . . . . . . . . . . . 26
6.6. Acronis Manual Scan . . . . . . . . . . . . . . . . . . . . . . . . . . . . . . . . . . . . . . . . . . . . . . . . . . . 27
6.7. Game Mode and Laptop Mode . . . . . . . . . . . . . . . . . . . . . . . . . . . . . . . . . . . . . . . . . . . 28
6.7.1. Game Mode . . . . . . . . . . . . . . . . . . . . . . . . . . . . . . . . . . . . . . . . . . . . . . . . . . . . . . 28
6.7.2. Laptop Mode . . . . . . . . . . . . . . . . . . . . . . . . . . . . . . . . . . . . . . . . . . . . . . . . . . . . . 30
6.8. Automatic Device Detection . . . . . . . . . . . . . . . . . . . . . . . . . . . . . . . . . . . . . . . . . . . . 30
7. Fixing Issues . . ..... . . . . . . . . . . . . . ..... . . . . . . . . . . . . ..... . . . . . . . . . . . . ..... 32
7.1. Fix All Issues Wizard . . . . . . . . . . . . . . . . . . . . . . . . . . . . . . . . . . . . . . . . . . . . . . . . . . . . 32
7.2. Configuring Issue Tracking . . . . . . . . . . . . . . . . . . . . . . . . . . . . . . . . . . . . . . . . . . . . . . 34
iii
Page 4

8. Configuring Basic Settings . . . ..... . . . . . . . . . . . . ..... . . . . . . . . . . . . ..... . 35
8.1. User Interface Settings . . . . . . . . . . . . . . . . . . . . . . . . . . . . . . . . . . . . . . . . . . . . . . . . . 36
8.2. Security Settings . . . . . . . . . . . . . . . . . . . . . . . . . . . . . . . . . . . . . . . . . . . . . . . . . . . . . . 37
8.3. General Settings . . . . . . . . . . . . . . . . . . . . . . . . . . . . . . . . . . . . . . . . . . . . . . . . . . . . . . . 38
9. History and Events . . . . ..... . . . . . . . . . . . . ..... . . . . . . . . . . . . ..... . . . . . . . . . 40
10. Wizards . . ..... . . . . . . . . . . . . ..... . . . . . . . . . . . . . .... . . . . . . . . . . . . . ..... . . . . 42
10.1. Antivirus Scan Wizard . . . . . . . . . . . . . . . . . . . . . . . . . . . . . . . . . . . . . . . . . . . . . . . . . 42
10.1.1. Step 1/3 - Scanning . . . . . . . . . . . . . . . . . . . . . . . . . . . . . . . . . . . . . . . . . . . . . . 42
10.1.2. Step 2/3 - Select Actions . . . . . . . . . . . . . . . . . . . . . . . . . . . . . . . . . . . . . . . . . . 43
10.1.3. Step 3/3 - View Results . . . . . . . . . . . . . . . . . . . . . . . . . . . . . . . . . . . . . . . . . . . 45
10.2. Custom Scan Wizard . . . . . . . . . . . . . . . . . . . . . . . . . . . . . . . . . . . . . . . . . . . . . . . . . . 46
10.2.1. Step 1/6 - Welcome Window . . . . . . . . . . . . . . . . . . . . . . . . . . . . . . . . . . . . . . . 46
10.2.2. Step 2/6 - Select Target . . . . . . . . . . . . . . . . . . . . . . . . . . . . . . . . . . . . . . . . . . . 47
10.2.3. Step 3/6 - Select Actions . . . . . . . . . . . . . . . . . . . . . . . . . . . . . . . . . . . . . . . . . . 49
10.2.4. Step 4/6 - Additional Settings . . . . . . . . . . . . . . . . . . . . . . . . . . . . . . . . . . . . . . 51
10.2.5. Step 5/6 - Scanning . . . . . . . . . . . . . . . . . . . . . . . . . . . . . . . . . . . . . . . . . . . . . . 52
10.2.6. Step 6/6 - View Results . . . . . . . . . . . . . . . . . . . . . . . . . . . . . . . . . . . . . . . . . . . 53
10.3. Vulnerability Check Wizard . . . . . . . . . . . . . . . . . . . . . . . . . . . . . . . . . . . . . . . . . . . . . 54
10.3.1. Step 1/6 - Select Vulnerabilities to Check . . . . . . . . . . . . . . . . . . . . . . . . . . . 55
10.3.2. Step 2/6 - Checking for Vulnerabilities . . . . . . . . . . . . . . . . . . . . . . . . . . . . . . 56
10.3.3. Step 3/6 - Update Windows . . . . . . . . . . . . . . . . . . . . . . . . . . . . . . . . . . . . . . . 57
10.3.4. Step 4/6 - Update Applications . . . . . . . . . . . . . . . . . . . . . . . . . . . . . . . . . . . . 58
10.3.5. Step 5/6 - Change Weak Passwords . . . . . . . . . . . . . . . . . . . . . . . . . . . . . . . . 59
10.3.6. Step 6/6 - View Results . . . . . . . . . . . . . . . . . . . . . . . . . . . . . . . . . . . . . . . . . . . 60
10.4. File Vault Wizards . . . . . . . . . . . . . . . . . . . . . . . . . . . . . . . . . . . . . . . . . . . . . . . . . . . . . 60
10.4.1. Add Files to Vault . . . . . . . . . . . . . . . . . . . . . . . . . . . . . . . . . . . . . . . . . . . . . . . . 61
10.4.2. Remove Vault Files . . . . . . . . . . . . . . . . . . . . . . . . . . . . . . . . . . . . . . . . . . . . . . . 66
10.4.3. View File Vault . . . . . . . . . . . . . . . . . . . . . . . . . . . . . . . . . . . . . . . . . . . . . . . . . . . 71
10.4.4. Lock File Vault . . . . . . . . . . . . . . . . . . . . . . . . . . . . . . . . . . . . . . . . . . . . . . . . . . . 75
Intermediate Mode .................................................... 79
11. Dashboard . . . ..... . . . . . . . . . . . . ..... . . . . . . . . . . . . ..... . . . . . . . . . . . . . .... 80
12. Security . . .... . . . . . . . . . . . . . ..... . . . . . . . . . . . . ..... . . . . . . . . . . . . ..... . . . . 82
12.1. Status Area . . . . . . . . . . . . . . . . . . . . . . . . . . . . . . . . . . . . . . . . . . . . . . . . . . . . . . . . . . 82
12.1.1. Configuring Status Alerts . . . . . . . . . . . . . . . . . . . . . . . . . . . . . . . . . . . . . . . . . 83
12.2. Quick Tasks . . . . . . . . . . . . . . . . . . . . . . . . . . . . . . . . . . . . . . . . . . . . . . . . . . . . . . . . . . 85
12.2.1. Updating Acronis Backup and Security 2010 . . . . . . . . . . . . . . . . . . . . . . . . 85
12.2.2. Scanning with Acronis Backup and Security 2010 . . . . . . . . . . . . . . . . . . . . 86
12.2.3. Searching for Vulnerabilities . . . . . . . . . . . . . . . . . . . . . . . . . . . . . . . . . . . . . . . 87
13. Parental . . . . . . . . . . . . . ..... . . . . . . . . . . . . ..... . . . . . . . . . . . . ..... . . . . . . . . . . 88
13.1. Status Area . . . . . . . . . . . . . . . . . . . . . . . . . . . . . . . . . . . . . . . . . . . . . . . . . . . . . . . . . . 88
13.2. Quick Tasks . . . . . . . . . . . . . . . . . . . . . . . . . . . . . . . . . . . . . . . . . . . . . . . . . . . . . . . . . . 89
14. File Vault .... . . . . . . . . . . . . ..... . . . . . . . . . . . . ..... . . . . . . . . . . . . ..... . . . . . . 90
14.1. Status Area . . . . . . . . . . . . . . . . . . . . . . . . . . . . . . . . . . . . . . . . . . . . . . . . . . . . . . . . . . 90
14.2. Quick Tasks . . . . . . . . . . . . . . . . . . . . . . . . . . . . . . . . . . . . . . . . . . . . . . . . . . . . . . . . . . 91
iv
Page 5

15. Network . . . . . . . . . . . ..... . . . . . . . . . . . . ..... . . . . . . . . . . . . ..... . . . . . . . . . . . . 92
15.1. Quick Tasks . . . . . . . . . . . . . . . . . . . . . . . . . . . . . . . . . . . . . . . . . . . . . . . . . . . . . . . . . . 93
15.1.1. Joining the Acronis Network . . . . . . . . . . . . . . . . . . . . . . . . . . . . . . . . . . . . . . . 93
15.1.2. Adding Computers to the Acronis Network . . . . . . . . . . . . . . . . . . . . . . . . . . 93
15.1.3. Managing the Acronis Network . . . . . . . . . . . . . . . . . . . . . . . . . . . . . . . . . . . . 95
15.1.4. Scanning All Computers . . . . . . . . . . . . . . . . . . . . . . . . . . . . . . . . . . . . . . . . . . 97
15.1.5. Updating All Computers . . . . . . . . . . . . . . . . . . . . . . . . . . . . . . . . . . . . . . . . . . 98
Expert Mode ........................................................... 100
16. General . . . . . ..... . . . . . . . . . . . . ..... . . . . . . . . . . . . ..... . . . . . . . . . . . . ..... 101
16.1. Dashboard . . . . . . . . . . . . . . . . . . . . . . . . . . . . . . . . . . . . . . . . . . . . . . . . . . . . . . . . . . 101
16.1.1. Overall Status . . . . . . . . . . . . . . . . . . . . . . . . . . . . . . . . . . . . . . . . . . . . . . . . . . 102
16.1.2. Statistics . . . . . . . . . . . . . . . . . . . . . . . . . . . . . . . . . . . . . . . . . . . . . . . . . . . . . . 104
16.1.3. Overview . . . . . . . . . . . . . . . . . . . . . . . . . . . . . . . . . . . . . . . . . . . . . . . . . . . . . . 105
16.2. Settings . . . . . . . . . . . . . . . . . . . . . . . . . . . . . . . . . . . . . . . . . . . . . . . . . . . . . . . . . . . . 105
16.2.1. General Settings . . . . . . . . . . . . . . . . . . . . . . . . . . . . . . . . . . . . . . . . . . . . . . . . 106
16.2.2. Virus Report Settings . . . . . . . . . . . . . . . . . . . . . . . . . . . . . . . . . . . . . . . . . . . . 108
16.3. System Information . . . . . . . . . . . . . . . . . . . . . . . . . . . . . . . . . . . . . . . . . . . . . . . . . . 108
17. Antivirus . . . . . . . . . . ..... . . . . . . . . . . . . ..... . . . . . . . . . . . . ..... . . . . . . . . . . . 110
17.1. Real-time Protection . . . . . . . . . . . . . . . . . . . . . . . . . . . . . . . . . . . . . . . . . . . . . . . . . 110
17.1.1. Configuring Protection Level . . . . . . . . . . . . . . . . . . . . . . . . . . . . . . . . . . . . . 111
17.1.2. Customizing Protection Level . . . . . . . . . . . . . . . . . . . . . . . . . . . . . . . . . . . . . 112
17.1.3. Configuring Active Virus Control . . . . . . . . . . . . . . . . . . . . . . . . . . . . . . . . . . 116
17.1.4. Disabling Real-time Protection . . . . . . . . . . . . . . . . . . . . . . . . . . . . . . . . . . . . 119
17.1.5. Configuring Antiphishing Protection . . . . . . . . . . . . . . . . . . . . . . . . . . . . . . . 119
17.2. On-demand Scanning . . . . . . . . . . . . . . . . . . . . . . . . . . . . . . . . . . . . . . . . . . . . . . . . 120
17.2.1. Scan Tasks . . . . . . . . . . . . . . . . . . . . . . . . . . . . . . . . . . . . . . . . . . . . . . . . . . . . . 121
17.2.2. Using Shortcut Menu . . . . . . . . . . . . . . . . . . . . . . . . . . . . . . . . . . . . . . . . . . . . 123
17.2.3. Creating Scan Tasks . . . . . . . . . . . . . . . . . . . . . . . . . . . . . . . . . . . . . . . . . . . . . 124
17.2.4. Configuring Scan Tasks . . . . . . . . . . . . . . . . . . . . . . . . . . . . . . . . . . . . . . . . . . 124
17.2.5. Scanning Files and Folders . . . . . . . . . . . . . . . . . . . . . . . . . . . . . . . . . . . . . . . 135
17.2.6. Viewing Scan Logs . . . . . . . . . . . . . . . . . . . . . . . . . . . . . . . . . . . . . . . . . . . . . . 143
17.3. Objects Excluded from Scanning . . . . . . . . . . . . . . . . . . . . . . . . . . . . . . . . . . . . . . 144
17.3.1. Excluding Paths from Scanning . . . . . . . . . . . . . . . . . . . . . . . . . . . . . . . . . . . 146
17.3.2. Excluding Extensions from Scanning . . . . . . . . . . . . . . . . . . . . . . . . . . . . . . 149
17.4. Quarantine Area . . . . . . . . . . . . . . . . . . . . . . . . . . . . . . . . . . . . . . . . . . . . . . . . . . . . . 153
17.4.1. Managing Quarantined Files . . . . . . . . . . . . . . . . . . . . . . . . . . . . . . . . . . . . . . 154
17.4.2. Configuring Quarantine Settings . . . . . . . . . . . . . . . . . . . . . . . . . . . . . . . . . . 155
18. Antispam . . . . . . . . . ..... . . . . . . . . . . . . ..... . . . . . . . . . . . . ..... . . . . . . . . . . . 157
18.1. Antispam Insights . . . . . . . . . . . . . . . . . . . . . . . . . . . . . . . . . . . . . . . . . . . . . . . . . . . 157
18.1.1. Antispam Filters . . . . . . . . . . . . . . . . . . . . . . . . . . . . . . . . . . . . . . . . . . . . . . . . 157
18.1.2. Antispam Operation . . . . . . . . . . . . . . . . . . . . . . . . . . . . . . . . . . . . . . . . . . . . . 159
18.1.3. Antispam Updates . . . . . . . . . . . . . . . . . . . . . . . . . . . . . . . . . . . . . . . . . . . . . . 160
18.2. Status . . . . . . . . . . . . . . . . . . . . . . . . . . . . . . . . . . . . . . . . . . . . . . . . . . . . . . . . . . . . . . 160
18.2.1. Setting the Protection Level . . . . . . . . . . . . . . . . . . . . . . . . . . . . . . . . . . . . . . 161
18.2.2. Configuring the Friends List . . . . . . . . . . . . . . . . . . . . . . . . . . . . . . . . . . . . . . 162
18.2.3. Configuring the Spammers List . . . . . . . . . . . . . . . . . . . . . . . . . . . . . . . . . . . 164
v
Page 6

18.3. Settings . . . . . . . . . . . . . . . . . . . . . . . . . . . . . . . . . . . . . . . . . . . . . . . . . . . . . . . . . . . . 166
18.3.1. Antispam Settings . . . . . . . . . . . . . . . . . . . . . . . . . . . . . . . . . . . . . . . . . . . . . . 167
18.3.2. Basic Antispam Filters . . . . . . . . . . . . . . . . . . . . . . . . . . . . . . . . . . . . . . . . . . . 168
18.3.3. Advanced Antispam Filters . . . . . . . . . . . . . . . . . . . . . . . . . . . . . . . . . . . . . . . 168
19. Parental Control . . . . . ..... . . . . . . . . . . . . . .... . . . . . . . . . . . . . ..... . . . . . . . 169
19.1. Configuring Parental Control For A User . . . . . . . . . . . . . . . . . . . . . . . . . . . . . . . . 170
19.1.1. Protecting Parental Control Settings . . . . . . . . . . . . . . . . . . . . . . . . . . . . . . . 172
19.1.2. Setting Age Category . . . . . . . . . . . . . . . . . . . . . . . . . . . . . . . . . . . . . . . . . . . 173
19.2. Monitoring Children Activity . . . . . . . . . . . . . . . . . . . . . . . . . . . . . . . . . . . . . . . . . . 176
19.2.1. Checking Visited Websites . . . . . . . . . . . . . . . . . . . . . . . . . . . . . . . . . . . . . . . 176
19.2.2. Configuring E-mail Notifications . . . . . . . . . . . . . . . . . . . . . . . . . . . . . . . . . . 176
19.3. Web Control . . . . . . . . . . . . . . . . . . . . . . . . . . . . . . . . . . . . . . . . . . . . . . . . . . . . . . . . 178
19.3.1. Creating Web Control Rules . . . . . . . . . . . . . . . . . . . . . . . . . . . . . . . . . . . . . . 178
19.3.2. Managing Web Control Rules . . . . . . . . . . . . . . . . . . . . . . . . . . . . . . . . . . . . . 179
19.4. Web Time Limiter . . . . . . . . . . . . . . . . . . . . . . . . . . . . . . . . . . . . . . . . . . . . . . . . . . . . 179
19.5. Applications Control . . . . . . . . . . . . . . . . . . . . . . . . . . . . . . . . . . . . . . . . . . . . . . . . . 180
19.5.1. Creating Application Control Rules . . . . . . . . . . . . . . . . . . . . . . . . . . . . . . . . 181
19.5.2. Managing Application Control Rules . . . . . . . . . . . . . . . . . . . . . . . . . . . . . . . 182
19.6. Keywords Control . . . . . . . . . . . . . . . . . . . . . . . . . . . . . . . . . . . . . . . . . . . . . . . . . . . . 183
19.6.1. Creating Keywords Control Rules . . . . . . . . . . . . . . . . . . . . . . . . . . . . . . . . . 183
19.6.2. Managing Keywords Control Rules . . . . . . . . . . . . . . . . . . . . . . . . . . . . . . . . 184
19.7. Instant Messaging (IM) Control . . . . . . . . . . . . . . . . . . . . . . . . . . . . . . . . . . . . . . . . 185
19.7.1. Creating Instant Messaging (IM) Control Rules . . . . . . . . . . . . . . . . . . . . . . 185
19.7.2. Managing Instant Messaging (IM) Control Rules . . . . . . . . . . . . . . . . . . . . 186
20. Privacy Control . . . . . . . . . . . ..... . . . . . . . . . . . . ..... . . . . . . . . . . . . ..... . . . 187
20.1. Privacy Control Status . . . . . . . . . . . . . . . . . . . . . . . . . . . . . . . . . . . . . . . . . . . . . . . . 187
20.1.1. Configuring Protection Level . . . . . . . . . . . . . . . . . . . . . . . . . . . . . . . . . . . . . 188
20.2. Identity Control . . . . . . . . . . . . . . . . . . . . . . . . . . . . . . . . . . . . . . . . . . . . . . . . . . . . . 188
20.2.1. Creating Identity Rules . . . . . . . . . . . . . . . . . . . . . . . . . . . . . . . . . . . . . . . . . . 190
20.2.2. Defining Exclusions . . . . . . . . . . . . . . . . . . . . . . . . . . . . . . . . . . . . . . . . . . . . . 193
20.2.3. Managing Rules . . . . . . . . . . . . . . . . . . . . . . . . . . . . . . . . . . . . . . . . . . . . . . . . 194
20.2.4. Rules Defined by Other Administrators . . . . . . . . . . . . . . . . . . . . . . . . . . . . 195
20.3. Registry Control . . . . . . . . . . . . . . . . . . . . . . . . . . . . . . . . . . . . . . . . . . . . . . . . . . . . . 195
20.4. Cookie Control . . . . . . . . . . . . . . . . . . . . . . . . . . . . . . . . . . . . . . . . . . . . . . . . . . . . . . 197
20.4.1. Configuration Window . . . . . . . . . . . . . . . . . . . . . . . . . . . . . . . . . . . . . . . . . . . 199
20.5. Script Control . . . . . . . . . . . . . . . . . . . . . . . . . . . . . . . . . . . . . . . . . . . . . . . . . . . . . . . 201
20.5.1. Configuration Window . . . . . . . . . . . . . . . . . . . . . . . . . . . . . . . . . . . . . . . . . . . 202
21. Firewall . ..... . . . . . . . . . . . . ..... . . . . . . . . . . . . ..... . . . . . . . . . . . . ..... . . . . . 204
21.1. Settings . . . . . . . . . . . . . . . . . . . . . . . . . . . . . . . . . . . . . . . . . . . . . . . . . . . . . . . . . . . . 204
21.1.1. Setting the Default Action . . . . . . . . . . . . . . . . . . . . . . . . . . . . . . . . . . . . . . . 205
21.1.2. Configuring Advanced Firewall Settings . . . . . . . . . . . . . . . . . . . . . . . . . . . . 206
21.2. Network . . . . . . . . . . . . . . . . . . . . . . . . . . . . . . . . . . . . . . . . . . . . . . . . . . . . . . . . . . . . 208
21.2.1. Changing the Trust Level . . . . . . . . . . . . . . . . . . . . . . . . . . . . . . . . . . . . . . . . 209
21.2.2. Configuring the Stealth Mode . . . . . . . . . . . . . . . . . . . . . . . . . . . . . . . . . . . . 209
21.2.3. Configuring Generic Settings . . . . . . . . . . . . . . . . . . . . . . . . . . . . . . . . . . . . . 210
21.2.4. Network Zones . . . . . . . . . . . . . . . . . . . . . . . . . . . . . . . . . . . . . . . . . . . . . . . . . 210
21.3. Rules . . . . . . . . . . . . . . . . . . . . . . . . . . . . . . . . . . . . . . . . . . . . . . . . . . . . . . . . . . . . . . . 211
21.3.1. Adding Rules Automatically . . . . . . . . . . . . . . . . . . . . . . . . . . . . . . . . . . . . . . 213
vi
Page 7

21.3.2. Deleting and Reseting Rules . . . . . . . . . . . . . . . . . . . . . . . . . . . . . . . . . . . . . 213
21.3.3. Creating and Modifying Rules . . . . . . . . . . . . . . . . . . . . . . . . . . . . . . . . . . . . 213
21.3.4. Advanced Rule Management . . . . . . . . . . . . . . . . . . . . . . . . . . . . . . . . . . . . . 217
21.4. Connection Control . . . . . . . . . . . . . . . . . . . . . . . . . . . . . . . . . . . . . . . . . . . . . . . . . . 218
22. Vulnerability . . . . . . . . . . . ..... . . . . . . . . . . . . ..... . . . . . . . . . . . . ..... . . . . . . 220
22.1. Status . . . . . . . . . . . . . . . . . . . . . . . . . . . . . . . . . . . . . . . . . . . . . . . . . . . . . . . . . . . . . . 220
22.1.1. Fixing Vulnerabilities . . . . . . . . . . . . . . . . . . . . . . . . . . . . . . . . . . . . . . . . . . . . 221
22.2. Settings . . . . . . . . . . . . . . . . . . . . . . . . . . . . . . . . . . . . . . . . . . . . . . . . . . . . . . . . . . . . 221
23. Encryption ..... . . . . . . . . . . . . ..... . . . . . . . . . . . . ..... . . . . . . . . . . . . ..... . . 223
23.1. Instant Messaging (IM) Encryption . . . . . . . . . . . . . . . . . . . . . . . . . . . . . . . . . . . . . 223
23.1.1. Disabling Encryption for Specific Users . . . . . . . . . . . . . . . . . . . . . . . . . . . . 224
23.2. File Encryption . . . . . . . . . . . . . . . . . . . . . . . . . . . . . . . . . . . . . . . . . . . . . . . . . . . . . . 225
23.2.1. Creating a Vault . . . . . . . . . . . . . . . . . . . . . . . . . . . . . . . . . . . . . . . . . . . . . . . . 226
23.2.2. Opening a Vault . . . . . . . . . . . . . . . . . . . . . . . . . . . . . . . . . . . . . . . . . . . . . . . . 228
23.2.3. Locking a Vault . . . . . . . . . . . . . . . . . . . . . . . . . . . . . . . . . . . . . . . . . . . . . . . . . 228
23.2.4. Changing Vault Password . . . . . . . . . . . . . . . . . . . . . . . . . . . . . . . . . . . . . . . . 229
23.2.5. Adding Files to a Vault . . . . . . . . . . . . . . . . . . . . . . . . . . . . . . . . . . . . . . . . . . . 230
23.2.6. Removing Files from a Vault . . . . . . . . . . . . . . . . . . . . . . . . . . . . . . . . . . . . . . 230
24. Game / Laptop Mode . . . ..... . . . . . . . . . . . . ..... . . . . . . . . . . . . ..... . . . . . 232
24.1. Game Mode . . . . . . . . . . . . . . . . . . . . . . . . . . . . . . . . . . . . . . . . . . . . . . . . . . . . . . . . . 232
24.1.1. Configuring Automatic Game Mode . . . . . . . . . . . . . . . . . . . . . . . . . . . . . . . 233
24.1.2. Managing the Game List . . . . . . . . . . . . . . . . . . . . . . . . . . . . . . . . . . . . . . . . . 234
24.1.3. Configuring Game Mode Settings . . . . . . . . . . . . . . . . . . . . . . . . . . . . . . . . . 235
24.1.4. Changing Game Mode Hotkey . . . . . . . . . . . . . . . . . . . . . . . . . . . . . . . . . . . . 236
24.2. Laptop Mode . . . . . . . . . . . . . . . . . . . . . . . . . . . . . . . . . . . . . . . . . . . . . . . . . . . . . . . . 236
24.2.1. Configuring Laptop Mode Settings . . . . . . . . . . . . . . . . . . . . . . . . . . . . . . . . 237
25. Home Network . . . . . . . . . .... . . . . . . . . . . . . . ..... . . . . . . . . . . . . ..... . . . . . 239
25.1. Joining the Acronis Network . . . . . . . . . . . . . . . . . . . . . . . . . . . . . . . . . . . . . . . . . . . 240
25.2. Adding Computers to the Acronis Network . . . . . . . . . . . . . . . . . . . . . . . . . . . . . . 240
25.3. Managing the Acronis Network . . . . . . . . . . . . . . . . . . . . . . . . . . . . . . . . . . . . . . . . 242
26. Update ......... . . . . . . . . . . . . ..... . . . . . . . . . . . . . .... . . . . . . . . . . . . . ..... . 245
26.1. Automatic Update . . . . . . . . . . . . . . . . . . . . . . . . . . . . . . . . . . . . . . . . . . . . . . . . . . . 245
26.1.1. Requesting an Update . . . . . . . . . . . . . . . . . . . . . . . . . . . . . . . . . . . . . . . . . . . 246
26.1.2. Disabling Automatic Update . . . . . . . . . . . . . . . . . . . . . . . . . . . . . . . . . . . . . 247
26.2. Update Settings . . . . . . . . . . . . . . . . . . . . . . . . . . . . . . . . . . . . . . . . . . . . . . . . . . . . . 247
26.2.1. Setting Update Locations . . . . . . . . . . . . . . . . . . . . . . . . . . . . . . . . . . . . . . . . 248
26.2.2. Configuring Automatic Update . . . . . . . . . . . . . . . . . . . . . . . . . . . . . . . . . . . 249
26.2.3. Configuring Manual Update . . . . . . . . . . . . . . . . . . . . . . . . . . . . . . . . . . . . . . 249
26.2.4. Configuring Advanced Settings . . . . . . . . . . . . . . . . . . . . . . . . . . . . . . . . . . . 249
26.2.5. Managing Proxies . . . . . . . . . . . . . . . . . . . . . . . . . . . . . . . . . . . . . . . . . . . . . . . 250
Integration into Windows and Third-Party Software ........ 252
27. Integration into Windows Contextual Menu .. . . . . . . . . . . . . ..... . . . 253
27.1. Scan with Acronis Backup and Security . . . . . . . . . . . . . . . . . . . . . . . . . . . . . . . . 253
27.2. Acronis Backup and Security File Vault . . . . . . . . . . . . . . . . . . . . . . . . . . . . . . . . . 254
vii
Page 8

27.2.1. Create Vault . . . . . . . . . . . . . . . . . . . . . . . . . . . . . . . . . . . . . . . . . . . . . . . . . . . . 255
27.2.2. Open Vault . . . . . . . . . . . . . . . . . . . . . . . . . . . . . . . . . . . . . . . . . . . . . . . . . . . . . 256
27.2.3. Lock Vault . . . . . . . . . . . . . . . . . . . . . . . . . . . . . . . . . . . . . . . . . . . . . . . . . . . . . . 257
27.2.4. Add to File Vault . . . . . . . . . . . . . . . . . . . . . . . . . . . . . . . . . . . . . . . . . . . . . . . . 257
27.2.5. Remove from File Vault . . . . . . . . . . . . . . . . . . . . . . . . . . . . . . . . . . . . . . . . . . 258
27.2.6. Change Vault Password . . . . . . . . . . . . . . . . . . . . . . . . . . . . . . . . . . . . . . . . . . 258
28. Integration into Web Browsers . . . . . . . . . . . .... . . . . . . . . . . . . . ..... . . . 260
29. Integration into Instant Messenger Programs . . . . . . . . . . . . ..... . . . 263
30. Integration into Mail Clients ...... . . . . . . . . . . . . ..... . . . . . . . . . . . . .... 264
30.1. Antispam Configuration Wizard . . . . . . . . . . . . . . . . . . . . . . . . . . . . . . . . . . . . . . . 264
30.1.1. Step 1/6 - Welcome Window . . . . . . . . . . . . . . . . . . . . . . . . . . . . . . . . . . . . . 265
30.1.2. Step 2/6 - Fill in the Friends List . . . . . . . . . . . . . . . . . . . . . . . . . . . . . . . . . . 266
30.1.3. Step 3/6 - Delete Bayesian Database . . . . . . . . . . . . . . . . . . . . . . . . . . . . . . 267
30.1.4. Step 4/6 - Train Bayesian Filter with Legitimate Mail . . . . . . . . . . . . . . . . . 268
30.1.5. Step 5/6 - Train Bayesian Filter with Spam . . . . . . . . . . . . . . . . . . . . . . . . . 269
30.1.6. Step 6/6 - Summary . . . . . . . . . . . . . . . . . . . . . . . . . . . . . . . . . . . . . . . . . . . . . 270
30.2. Antispam Toolbar . . . . . . . . . . . . . . . . . . . . . . . . . . . . . . . . . . . . . . . . . . . . . . . . . . . . 270
How To ................................................................... 278
31. How to Scan Files and Folders . . . . ..... . . . . . . . . . . . . ..... . . . . . . . . . . . 279
31.1. Using Windows Contextual Menu . . . . . . . . . . . . . . . . . . . . . . . . . . . . . . . . . . . . . . 279
31.2. Using Scan Tasks . . . . . . . . . . . . . . . . . . . . . . . . . . . . . . . . . . . . . . . . . . . . . . . . . . . . 279
31.3. Using Acronis Manual Scan . . . . . . . . . . . . . . . . . . . . . . . . . . . . . . . . . . . . . . . . . . . 281
31.4. Using Scan Activity Bar . . . . . . . . . . . . . . . . . . . . . . . . . . . . . . . . . . . . . . . . . . . . . . 282
32. How to Schedule Computer Scan . . . . . . ..... . . . . . . . . . . . . ..... . . . . . 283
Troubleshooting and Getting Help ............................... 285
33. Troubleshooting ........ . . . . . . . . . . . . ..... . . . . . . . . . . . . ..... . . . . . . . . . . 286
33.1. Installation Problems . . . . . . . . . . . . . . . . . . . . . . . . . . . . . . . . . . . . . . . . . . . . . . . . . 286
33.1.1. Installation Validation Errors . . . . . . . . . . . . . . . . . . . . . . . . . . . . . . . . . . . . . 286
33.1.2. Failed Installation . . . . . . . . . . . . . . . . . . . . . . . . . . . . . . . . . . . . . . . . . . . . . . . 287
33.2. Acronis Backup and Security 2010 Services Are Not Responding . . . . . . . . . . 288
33.3. File and Printer Sharing in Wi-Fi (Wireless) Network Does Not Work . . . . . . . . 289
33.3.1. "Trusted Computer" Solution . . . . . . . . . . . . . . . . . . . . . . . . . . . . . . . . . . . . . 290
33.3.2. "Safe Network" Solution . . . . . . . . . . . . . . . . . . . . . . . . . . . . . . . . . . . . . . . . . 291
33.4. Antispam Filter Does Not Work Properly . . . . . . . . . . . . . . . . . . . . . . . . . . . . . . . . 293
33.4.1. Legitimate Messages Are Marked as [spam] . . . . . . . . . . . . . . . . . . . . . . . 293
33.4.2. Many Spam Messages Are Not Detected . . . . . . . . . . . . . . . . . . . . . . . . . . . 296
33.4.3. Antispam Filter Does Not Detect Any Spam Message . . . . . . . . . . . . . . . . 299
33.5. Acronis Backup and Security 2010 Removal Failed . . . . . . . . . . . . . . . . . . . . . . . 300
34. Support . . . . . . ..... . . . . . . . . . . . . . ..... . . . . . . . . . . . . ..... . . . . . . . . . . . . ... 301
Glossary . . . ..... . . . . . . . . . . . . ..... . . . . . . . . . . . . ..... . . . . . . . . . . . . ..... . . . . . . . . . 302
viii
Page 9

Preface
This guide is intended to all users who have chosen Acronis Backup and Security
2010 as a security solution for their personal computers. The information presented
in this book is suitable not only for computer literates, it is accessible to everyone
who is able to work under Windows.
This book will describe for you Acronis Backup and Security 2010, will guide you
through the installation process, will show you how to configure it. You will find out
how to use Acronis Backup and Security 2010, how to update, test and customize
it. You will learn how to get best from Acronis Backup and Security 2010.
We wish you a pleasant and useful lecture.
1. Conventions Used in This Book
1.1. Typographical Conventions
Several text styles are used in the book for an improved readability. Their aspect
and meaning are presented in the following table.
DescriptionAppearance
sample syntax
http://www.acronis.com/support/
“Preface” (p. ix)
filename
option
Syntax samples are printed with monospaced
characters.
The URL link is pointing to some external
location, on http or ftp servers.
This is an internal link, towards some location
inside the document.
File and directories are printed using
monospaced font.
All the product options are printed using strong
characters.
1.2. Admonitions
The admonitions are in-text notes, graphically marked, bringing to your attention
additional information related to the current paragraph.
Note
The note is just a short observation. Although you can omit it, the notes can provide
valuable information, such as specific feature or a link to some related topic.
Preface
ix
Page 10

Important
This requires your attention and is not recommended to skip over it. Usually, it provides
non-critical but significant information.
Warning
This is critical information you should treat with increased caution. Nothing bad will
happen if you follow the indications. You should read and understand it, because it
describes something extremely risky.
2. Book Structure
The book consists of several parts containing major topics. Moreover, a glossary is
provided to clarify some technical terms.
Installation and Removal. Step by step instructions for installing Acronis Backup
and Security 2010 on a personal computer. Starting with the prerequisites for a
successfully installation, you are guided through the whole installation process.
Finally, the removing procedure is described in case you need to uninstall Acronis
Backup and Security 2010.
Getting Started. Contains all the information you need to get started with Acronis
Backup and Security 2010. You are presented with the Acronis Backup and Security
2010 interface and how to fix issues, configure basic settings and register your
product.
Intermediate Mode. Presents the Intermediate Mode interface of Acronis Backup
and Security 2010.
Expert Mode. A detailed presentation of the Expert Mode interface of Acronis
Backup and Security 2010. You are taught how to configure and use all Acronis
Backup and Security 2010 modules so as to efficiently protect your computer against
all kind of threats (malware, spam, hackers, innapropriate content and so on).
Integration into Windows and Third-Party Software. Shows you how to use
the Acronis Backup and Security 2010 options on the Windows contextual menu
and the Acronis toolbars integrated into supported third-party programs.
How To. Provides procedures to quickly perform the most common tasks in Acronis
Backup and Security 2010.
Troubleshooting and Getting Help. Where to look and where to ask for help if
something unexpected appears.
Glossary. The Glossary tries to explain some technical and uncommon terms you
will find in the pages of this document.
Preface
x
Page 11

Installation and Removal
1
Page 12

1. System Requirements
You may install Acronis Backup and Security 2010 only on computers running the
following operating systems:
● Windows XP (32/64 bit) with Service Pack 2 or higher
● Windows Vista (32/64 bit) or Windows Vista with Service Pack 1 or higher
● Windows 7 (32/64 bit)
Before installation, make sure that your computer meets the minimum hardware
and software requirements.
Note
To find out the Windows operating system your computer is running and hardware
information, right-click My Computer on the desktop and then select Properties
from the menu.
1.1. Minimal System Requirements
● 450 MB available free hard disk space
● 800 MHz processor
● RAM Memory:
▶ 512 MB for Windows XP
▶ 1 GB for Windows Vista and Windows 7
● Internet Explorer 6.0
● .NET Framework 1.1 (also available in the installer kit)
1.2. Recommended System Requirements
● 600 MB available free hard disk space
● Intel CORE Duo (1.66 GHz) or equivalent processor
● RAM Memory:
▶ 1 GB for Windows XP and Windows 7
▶ 1.5 GB for Windows Vista
● Internet Explorer 7 (or higher)
● .NET Framework 1.1 (also available in the installer kit)
1.3. Supported Software
Antiphishing protection is provided only for:
● Internet Explorer 6.0 or higher
● Mozilla Firefox 2.5 or higher
● Yahoo Messenger 8.5 or higher
● Windows Live Messenger 8 or higher
System Requirements
2
Page 13

Instant Messaging (IM) encryption is provided only for:
● Yahoo Messenger 8.5 or higher
● Windows Live Messenger 8 or higher
Antispam protection is provided for all POP3/SMTP e-mail clients. The Acronis Backup
and Security 2010 Antispam toolbar however is integrated only into:
● Microsoft Outlook 2000 / 2003 / 2007
● Microsoft Outlook Express
● Microsoft Windows Mail
● Thunderbird 2.0.0.17
System Requirements
3
Page 14

2. Preparing for Installation
Before you install Acronis Backup and Security 2010, complete these preparations
to ensure the installation will go smoothly:
● Make sure that the computer where you plan to install Acronis Backup and Security
2010 meets the minimum system requirements. If the computer does not meet
all the minimum system requirements, Acronis Backup and Security 2010 will not
be installed or, if installed, it will not work properly and it will cause system
slowdowns and instability. For a complete list of system requirements, please
refer to “System Requirements” (p. 2).
● Log on to the computer using an Administrator account.
● Remove any other security software from the computer. Running two security
programs simultaneously may affect their operation and cause major problems
with the system. Windows Defender will be disabled by default before installation
is initiated.
● Disable or remove any firewall program that may be running on the computer.
Running two firewall programs simultaneously may affect their operation and
cause major problems with the system. Windows Firewall will be disabled by
default before installation is initiated.
Preparing for Installation
4
Page 15

3. Installing Acronis Backup and Security 2010
You can purchase and download the installation file from the Acronis Inc. website:
http://www.acronis.com/homecomputing/
To install Acronis Backup and Security 2010, locate the installation file on your
computer and double-click it. This will launch a wizard, which will guide you through
the installation process.
The installer will first check your system to validate the installation. If the installation
is validated, the setup wizard will appear. The following image shows the setup
wizard steps.
Installation Steps
Follow these steps to install Acronis Backup and Security 2010:
1. Click Next. You can cancel installation anytime you want by clicking Cancel.
Acronis Backup and Security 2010 alerts you if you have other antivirus products
installed on your computer. Click Remove to uninstall the corresponding product.
If you want to continue without removing the detected products, click Next.
Installing Acronis Backup and Security 2010
5
Page 16

Warning
It is highly recommended that you uninstall any other antivirus products detected
before installing Acronis Backup and Security 2010. Running two or more antivirus
products at the same time on a computer usually renders the system unusable.
2. Please read the License Agreement and click I agree.
Important
If you do not agree to these terms click Cancel. The installation process will be
abandoned and you will exit setup.
3. In order to provide better products, Acronis has developed a Customer Experience
Program (CEP). Please read the terms of the Acronis CEP carefully and then select
whether or not you want to participate.
Click Next to continue.
4. Select the type of installation to be performed.
● Typical - to install the program immediately, using the default installation
options. If you choose this option, skip to Step 6.
● Custom - to configure the installation options and then install the program.
This option allows you to change the installation path.
5. By default, Acronis Backup and Security 2010 will be installed in C:\Program
Files\Acronis Backup and Security\Acronis Backup and Security
2010. If you want to change the installation path, click Browse and select the
folder in which you would like Acronis Backup and Security 2010 to be installed.
Click Next.
6. Select options regarding the installation process. The recommended options are
selected by default:
● Open readme file - to open the readme file at the end of the installation.
● Place a shortcut on the desktop - to place a shortcut to Acronis Backup
and Security 2010 on your desktop at the end of the installation.
● Disable DNS Caching - to disable the DNS (Domain Name System) Caching.
The DNS Client service may be used by malicious applications to send
information over the network without your consent.
● Send Virus Reports - to send virus scanning reports to the Acronis Lab for
analysis. Please note that these reports will contain no confidential data, such
as your name or IP address, and that they will not be used for commercial
purposes.
● Turn off Windows Firewall - to turn off Windows Firewall.
Installing Acronis Backup and Security 2010
6
Page 17

Important
We recommend you to turn off Windows Firewall since Acronis Backup and
Security 2010 already includes an advanced firewall. Running two firewalls on
the same computer may cause problems.
● Turn off Windows Defender - to turn off Windows Defender; this option
appears only on Windows Vista.
Click Install to start installing the program. If not already installed, Acronis Backup
and Security 2010 will first install .NET Framework 1.1.
Installing Acronis Backup and Security 2010
7
Page 18

4. Activating the Product
When you reboot your computer after installation, the program will work in trial
mode for 30 days. During the period the product must be activated. If you have not
activated the product in that timeframe, it will stop working.
When you purchase the product, you will receive a 16-character serial number,
either with the box or by e-mail. The 64-character serial number required for product
activation will be sent to your e-mail address after you enter your 16-character
serial number on the registration Web page.
Be aware that your 1-year product subscription starts from the moment the
64-character serial number is sent. After the subscription period ends, your license
will expire and you will not be able to use the product. To unlock the product, you
need to buy a new license. A new 16-character serial number will be sent to you by
e-mail and you will need to perform the activation procedure once again.
Step-by-Step Activation
When you launch the program for the first time, it will ask whether you have the
64-character serial number.
Case 1 - If you have the 64-character serial number:
1. Click the Yes, I Have button.
2. On the next page, paste the serial number in the appropriate box (by using the
CTRL+V key combination).
3. Click the Activate button.
Case 2 - If you do not have the 64-character serial number, but you have
the 16-character serial number:
1. Click the Get Serial Number button.
2. On the Web site, enter your Acronis account information, your 16-character serial
number and e-mail address. A message with the 64-character serial number will
be sent to the e-mail address you have specified.
If you do not have Acronis account yet, it will be created by using the personal
information that you filled in when you registered the product.
3. Open the received e-mail message and copy the serial number.
4. Go back to the program and click the Yes, I Have button.
5. On the next page, paste the serial number in the appropriate box (by using the
CTRL+V key combination).
6. Click the Activate button.
Case 3 - If you have neither 16-character nor 64-character serial number:
Activating the Product
8
Page 19

1. Click the Buy Online link.
2. Buy the product. The 16-character serial number will be sent to you by e-mail.
3. Perform all the steps of case 2.
Case 4 - If you do not have any serial number and you want to try the
product first:
1. Click the Later button. The fully functional product will be available to you for
the trial period.
2. If you have decided to buy the product, perform all the steps of case 3.
Activating the Product
9
Page 20

5. Repairing or Removing Acronis Backup and Security 2010
If you want to repair or remove Acronis Backup and Security 2010, follow the path
from the Windows start menu: Start → Programs → Acronis → Acronis Backup
and Security 2010 → Repair or Remove.
You will be requested to confirm your choice by clicking Next. A new window will
appear where you can select:
● Repair - to re-install all program components installed by the previous setup.
If you choose to repair Acronis Backup and Security 2010, a new window will
appear. Click Repair to start the repairing process.
Restart the computer when prompted and, afterwards, click Install to reinstall
Acronis Backup and Security 2010.
Once the installation process is completed, a new window will appear. Click Finish.
● Remove - to remove all installed components.
Note
We recommend that you choose Remove for a clean re-installation.
If you choose to remove Acronis Backup and Security 2010, a new window will
appear.
Important
By removing Acronis Backup and Security 2010, you will no longer be protected
against viruses, spyware and hackers. If you want Windows Firewall and Windows
Defender (only on Windows Vista) to be enabled after uninstalling Acronis Backup
and Security 2010, select the corresponding check boxes.
Click Remove to start the removal of Acronis Backup and Security 2010 from
your computer.
Once the removal process is completed, a new window will appear. Click Finish.
Note
After the removal process is over, we recommend that you delete the Acronis
Backup and Security folder from Program Files.
Repairing or Removing Acronis Backup and Security 2010
10
Page 21

Getting Started
11
Page 22

6. Overview
Once you have installed Acronis Backup and Security 2010 your computer is
protected.
6.1. Opening Acronis Backup and Security 2010
To access the main interface of Acronis Backup and Security 2010, use the Windows
Start menu, by following the path Start → Programs → Acronis → Acronis Backup
and Security 2010 → Acronis Backup and Security 2010 or, quicker, double
click the Acronis icon in the system tray.
6.2. User Interface View Modes
Acronis Backup and Security 2010 meets the needs of computer beginners and very
technical people alike. Its graphical user interface is designed to suit each and every
category of users.
You can choose to view the user interface under any of three modes, depending on
your computer skills and on your previous experience with Acronis.
DescriptionMode
Novice Mode
Intermediate Mode
Expert Mode
Suited for computer beginners and people who want
Acronis Backup and Security 2010 to protect their
computer and data without being bothered. This mode
is simple to use and requires minimal interaction on
your side.
All you have to do is fix the existing issues when
indicated by Acronis Backup and Security 2010. An
intuitive step-by-step wizard assists you in fixing issues.
Additionally, you can perform common tasks, such as
updating the Acronis Backup and Security 2010 virus
signature and product files or scanning the computer.
Aimed at users with average computer skills, this mode
extends what you can do in Novice Mode.
You can fix issues separately and choose which issues
to be monitored. Moreover, you can manage remotely
the Acronis products installed on the computers in your
household.
Suited for more technical users, this mode allows you
to fully configure each functionality of Acronis Backup
Overview
12
Page 23

DescriptionMode
and Security 2010. You can also use all tasks provided
to protect your computer and data.
By default, the user interface is displayed in Intermediate Mode. To switch to a
different user interface mode, follow these steps:
1. Open Acronis Backup and Security 2010.
2. Click the Settings button in the upper-right corner of the window.
3.
In the User Interface Settings category, click the arrow on the button and select
the desired mode from the menu.
4. Click OK to save and apply the changes.
6.2.1. Novice Mode
If you are a computer beginner, displaying the user interface in Novice Mode may
be the most adequate choice for you. This mode is simple to use and requires
minimal interaction on your side.
Novice Mode
The window is organized into four main sections:
● Security Status informs you of the issues that affect your computer's security
and helps you fix them. By clicking Fix All Issues, a wizard will help you easily
remove any threats to your computer and data security. For detailed information,
please refer to “Fixing Issues” (p. 32).
Overview
13
Page 24

● Protect Your PC is where you can find the necessary tasks to protect your
computer and data. The available tasks you can perform are different depending
on the selected usage profile.
▶ The Scan Now button starts a standard scan of your system for viruses, spyware
and other malware. The Antivirus Scan wizard will appear and guide you through
the scanning process. For detailed information about this wizard, please refer
to “Antivirus Scan Wizard” (p. 42).
▶ The Update Now button helps you update the virus signature and product
files of Acronis Backup and Security 2010. A new window will appear where you
can see the update status. If updates are detected, they are automatically
downloaded and installed on your computer.
▶ When the Typical profile is selected, the Vulnerabilities Check button starts
a wizard that helps you find and fix system vulnerabilities, such as outdated
software or missing Windows updates. For detailed information, please refer
to section “Vulnerability Check Wizard” (p. 54).
▶ When the Gamer profile is selected, the Turn On/Off Game Mode button
allows you to enable/disable Game Mode. Game Mode temporarily modifies
protection settings so as to minimize their impact on system performance.
● Maintain Your PC is where you can find additional tasks to protect your computer
and data.
▶ Add File to Vault starts the wizard that allows you to store your important
files / documents privately by encrypting them in special, vaulted drives.
▶ Deep System Scan starts a comprehensive scan of your system for all types
of malware.
▶ My Documents Scan scans for viruses and other malware your most commonly
used folders: My Documents and Desktop. This will ensure the safety of your
documents, a safe workspace and clean applications running at startup.
● Usage Profile indicates the usage profile that is currently selected. The usage
profile reflects the main activities performed on the computer. Depending on the
usage profile, the product interface is organized to allow easy access to your
preferred tasks.
If you want to switch to a different profile or edit the one you are currently using,
click the profile and follow the configuration wizard.
In the upper-right corner of the window, you can see the Settings button. It opens
a window where you can change the user interface mode and enable or disable the
main settings of Acronis Backup and Security 2010. For detailed information, please
refer to “Configuring Basic Settings” (p. 35).
In the bottom-right corner of the window, you can find several useful links.
Overview
14
Page 25

DescriptionLink
Buy/Renew
Help
Logs
Opens a web page where you can purchase a license key for
your Acronis Backup and Security 2010 product.
Allows you to contact the Acronis support team.Support
Gives you access to a help file that shows you how to use
Acronis Backup and Security 2010.
Allows you to see a detailed history of all tasks performed by
Acronis Backup and Security 2010 on your system.
6.2.2. Intermediate Mode
Aimed at users with average computer skills, Intermediate Mode is a simple interface
that gives you access to all modules at a basic level. You'll have to keep track of
warnings and critical alerts and fix undesired issues.
Intermediate Mode
The Intermediate Mode window consists of five tabs. The following table briefly
describes each tab. For detailed information, please refer to the “Intermediate Mode”
(p. 79) part of this user guide.
Overview
15
Page 26

DescriptionTab
Dashboard
Security
Parental
File Vault
Network
In the upper-right corner of the window, you can see the Settings button. It opens
a window where you can change the user interface mode and enable or disable the
main settings of Acronis Backup and Security 2010. For detailed information, please
refer to “Configuring Basic Settings” (p. 35).
In the bottom-right corner of the window, you can find several useful links.
Displays the security status of your system and lets you reset
the usage profile.
Displays the status of the security modules (antivirus,
antiphishing, firewall, antispam, IM encryption, privacy,
vulnerability check and update modules) together with the
links to antivirus, update and vulnerability check tasks.
Displays the status of the Parental Control module. Parental
Control enables you to restrict your children's access to
Internet and to specific applications.
Displays the status of the file vault together with links to the
file vault.
Displays the Acronis home network structure. This is where
you can perform various actions to configure and manage the
Acronis products installed in your home network. In this way,
you can manage the security of your home network from a
single computer.
DescriptionLink
Buy/Renew
Register
Help
Logs
Opens a web page where you can purchase a license key for
your Acronis Backup and Security 2010 product.
Allows you to enter your serial number and to view the
registration status.
Allows you to contact the Acronis support team.Support
Gives you access to a help file that shows you how to use
Acronis Backup and Security 2010.
Allows you to see a detailed history of all tasks performed by
Acronis Backup and Security 2010 on your system.
Overview
16
Page 27

6.2.3. Expert Mode
Expert Mode gives you access to each specific component of Acronis Backup and
Security 2010. This is where you can configure Acronis Backup and Security 2010
in detail.
Note
Expert Mode is suited for users having above average computer skills, who know the
type of threats a computer is exposed to and how security programs work.
Expert Mode
On the left side of the window there is a menu containing all security modules. Each
module has one or more tabs where you can configure the corresponding security
settings or perform security or administrative tasks. The following table briefly
describes each module. For detailed information, please refer to the “Expert Mode”
(p. 100) part of this user guide.
DescriptionModule
General
Allows you to access the general settings or to view the
dashboard and detailed system info.
Overview
17
Page 28

Antivirus
Antispam
Parental Control
Privacy Control
Firewall
Encryption
Game/Laptop Mode
Network
Update
DescriptionModule
Allows you to configure your virus shield and scanning
operations in detail, to set exceptions and to configure the
quarantine module.
Allows you to keep your Inbox SPAM-free and to configure the
antispam settings in detail.
Allows you to protect your children against inappropriate
content by using your customized computer access rules.
Allows you to prevent data theft from your computer and
protect your privacy while you are online.
Allows you to protect your computer from inbound and
outbound unauthorized connection attempts. It is quite similar
to a guard at your gate - it will keep a watchful eye on your
Internet connection and keep track of who to allow access to
the Internet and who to block.
Allows you to keep crucial software on your PC up-to-date.Vulnerability
Allows you to encrypt Yahoo and Windows Live (MSN)
Messenger communications and also to local encrypt your
critical files, folders or partitions.
Allows you to postpone the Acronis scheduled tasks while
your laptop runs on batteries and also to eliminate all alerts
and pop-ups when you are playing.
Allows you to configure and manage several computers in
your household.
Allows you to obtain info on the latest updates, to update the
product and to configure the update process in detail.
In the upper-right corner of the window, you can see the Settings button. It opens
a window where you can change the user interface mode and enable or disable the
main settings of Acronis Backup and Security 2010. For detailed information, please
refer to “Configuring Basic Settings” (p. 35).
In the bottom-right corner of the window, you can find several useful links.
DescriptionLink
Buy/Renew
Register
Opens a web page where you can purchase a license key for
your Acronis Backup and Security 2010 product.
Allows you to enter your serial number and to view the
registration status.
Overview
18
Page 29

DescriptionLink
Allows you to contact the Acronis support team.Support
Help
Logs
Gives you access to a help file that shows you how to use
Acronis Backup and Security 2010.
Allows you to see a detailed history of all tasks performed by
Acronis Backup and Security 2010 on your system.
6.3. Setting Up Acronis Backup and Security 2010
Acronis Backup and Security 2010 allows you to easily configure its main settings
and user interface by setting up a usage profile. The usage profile reflects the main
activities performed on the computer. Depending on the usage profile, the product
interface is organized to allow easy access to your preferred tasks.
By default, the Typical profile is applied after the Acronis Backup and Security 2010
installation. This profile is suited for computers used mainly for browsing and
multimedia activities.
To reconfigure the usage profile, follow these steps:
1. Open Acronis Backup and Security 2010.
2. Click the Settings button in the upper-right corner of the window.
3. In the User Interface Settings category, click Reconfigure Profile.
4. Follow the configuration wizard.
Overview
19
Page 30

6.3.1. Step 1 - Select Usage Profile
Usage Profiles
Click the button that best describes the activities performed on this computer (the
usage profile).
DescriptionOption
Typical
Parent
Custom
Click here if this PC is used mainly for browsing and
multimedia activities.
Click here if this PC is used by children and you want to control
their access to Internet using the Parental Control module.
Click here if this PC is used primarily for gaming.Gamer
Click here if you want to configure all the main settings of
Acronis Backup and Security 2010.
You can later reset the usage profile from the product interface.
Overview
20
Page 31

6.3.2. Step 2 - Describe Computer
Computer Description
Select the options that apply to your computer:
● This computer is in a home network. Select this option if you want to manage
remotely (from another computer) the Acronis product you installed on this
computer. An additional wizard step will allow you to configure the Home Network
Management module.
● This computer is a laptop. Select this option if you want to have the Laptop
Mode enabled by default. While in Laptop Mode, scheduled scan tasks are not
performed, as they require more system resources and, implicitly, increase power
consumption.
Click Next to continue.
Overview
21
Page 32

6.3.3. Step 3 - Select User Interface
User Interface View Modes
Click the button that best describes your computer skills to select an appropriate
user interface view mode. You can choose to view the user interface under any of
three modes, depending on your computer skills and on your previous experience
with Acronis Backup and Security 2010.
Novice Mode
Intermediate Mode
Overview
DescriptionMode
Suited for computer beginners and people who want Acronis
Backup and Security 2010 to protect their computer and data
without being bothered. This mode is simple to use and
requires minimal interaction on your side.
All you have to do is fix the existing issues when indicated by
Acronis Backup and Security 2010. An intuitive step-by-step
wizard assists you in fixing issues. Additionally, you can
perform common tasks, such as updating the Acronis Backup
and Security 2010 virus signature and product files or
scanning the computer.
Aimed at users with average computer skills, this mode
extends what you can do in Novice Mode.
22
Page 33

DescriptionMode
You can fix issues separately and choose which issues to be
monitored. Moreover, you can manage remotely the Acronis
products installed on the computers in your household.
Expert Mode
Suited for more technical users, this mode allows you to fully
configure each functionality of Acronis Backup and Security
2010. You can also use all tasks provided to protect your
computer and data.
6.3.4. Step 4 - Configure Parental Control
Note
This step appears only if you have selected the Custom option in Step 1.
Parental Control Configuration
Parental Control enables you to control the access to the Internet and to specific
applications for each user holding a user account on the system.
If you want to use Parental Control, follow these steps:
1. Select Enable Parental Control.
2. If you are sharing your Windows user account with your children, select the
corresponding check box and type a password in the corresponding fields to
Overview
23
Page 34

protect the Parental Control settings. Anyone trying to change the Parental Control
settings must first provide the password that you have configured.
Click Next to continue.
6.3.5. Step 5 - Configure Acronis Network
Note
This step appears only if you have specified that the computer is connected to a home
network in Step 2.
Acronis Network Configuration
Acronis Backup and Security 2010 enables you to create a virtual network of the
computers in your household and to manage compatible Acronis products installed
in this network.
If you want this computer to be part of the Acronis Home Network, follow these
steps:
1. Select Enable Home Network.
2. Type the same administrative password in each of the edit fields. The password
enables an administrator to manage this Acronis product from another computer.
Click Finish.
Overview
24
Page 35

6.4. System Tray Icon
To manage the entire product more quickly, you can use the Acronis icon in the
system tray. If you double-click this icon, Acronis Backup and Security 2010 will
open. Also, by right-clicking the icon, a contextual menu will allow you to quickly
manage Acronis Backup and Security 2010.
● Show - opens the main interface of Acronis Backup
and Security 2010.
● Help - opens the help file, which explains in detail
how to configure and use Acronis Backup and
Security 2010.
● About - opens a window where you can see
information about Acronis Backup and Security 2010
and where to look for help in case something
unexpected appears.
● Fix All Issues - helps you remove current security vulnerabilities. If the option
is unavailable, there are no issues to be fixed. For detailed information, please
refer to “Fixing Issues” (p. 32).
● Turn Game Mode On / Off - activates / deactivates Game Mode.
● Update Now - starts an immediate update. A new window will appear where you
can see the update status.
● Basic Settings - opens a window where you can change the user interface mode
and enable or disable the main product settings. For more information, please
refer to “Configuring Basic Settings” (p. 35).
The Acronis system tray icon informs you when issues affect your computer or how
the product operates, by displaying a special symbol, as follows:
Red icon with an exclamation mark: Critical issues affect the security of your
system. They require your immediate attention and must be fixed as soon as
possible.
Letter G: The product operates in Game Mode.
If Acronis Backup and Security 2010 is not working, the system tray icon is grayed
out . This usually happens when the license key expires. It can also occur when
the Acronis Backup and Security 2010 services are not responding or when other
errors affect the normal operation of Acronis Backup and Security 2010.
Tray Icon
6.5. Scan Activity Bar
The Scan activity bar is a graphic visualization of the scanning activity on your
system. This small window is by default available only in Expert Mode.
Overview
25
Page 36

The gray bars (the File Zone) show the number of scanned
files per second, on a scale from 0 to 50. The orange bars
displayed in the Net Zone show the number of Kbytes
transferred (sent and received from the Internet) every
second, on a scale from 0 to 100.
Note
The Scan activity bar will notify you when real-time
protection or the Firewall is disabled by displaying a red
cross over the corresponding area (File Zone or Net Zone).
Scan Activity Bar
6.5.1. Scan Files and Folders
You can use the Scan activity bar to quickly scan files and folders. Drag the file or
folder you want to be scanned and drop it over the Scan Activity Bar as shown
below.
Drag File
Drop File
The Antivirus Scan wizard will appear and guide you through the scanning process.
For detailed information about this wizard, please refer to “Antivirus Scan Wizard”
(p. 42).
Scanning options. The scanning options are pre-configured for the best detection
results. If infected files are detected, Acronis Backup and Security 2010 will try to
disinfect them (remove the malware code). If disinfection fails, the Antivirus Scan
wizard will allow you to specify other actions to be taken on infected files. The
scanning options are standard and you cannot change them.
6.5.2. Disable/Restore Scan Activity Bar
When you no longer want to see the graphic visualization, just right-click it and
select Hide. To restore the Scan activity bar, follow these steps:
1. Open Acronis Backup and Security 2010.
Overview
26
Page 37

2. Click the Settings button in the upper-right corner of the window.
3. In the General Settings category, select the check box corresponding to Scan
Activity Bar.
4. Click OK to save and apply the changes.
6.6. Acronis Manual Scan
Acronis Manual Scan lets you scan a specific folder or hard disk partition without
having to create a scan task. This feature was designed to be used when Windows
is running in Safe Mode. If your system is infected with a resilient virus, you can try
to remove the virus by starting Windows in Safe Mode and scanning each hard disk
partition using Acronis Manual Scan.
To access the Acronis Manual Scan, use the Windows Start menu, by following the
path Start → Programs → Acronis → Acronis Backup and Security 2010 →
Acronis Manual Scan The following window will appear:
Acronis Manual Scan
Click Add Folder, select the location you want to scan and click OK. If you want to
scan multiple folders, repeat this action for each additional location.
The paths to the selected locations will appear in the Scan Target column. If you
change your mind about the location, just click the Remove button next to it. Click
the Remove All Paths button to remove all the locations that were added to the
list.
Overview
27
Page 38

When you are done selecting the locations, click Continue. The Antivirus Scan
wizard will appear and guide you through the scanning process. For detailed
information about this wizard, please refer to “Antivirus Scan Wizard” (p. 42).
Scanning options. The scanning options are pre-configured for the best detection
results. If infected files are detected, Acronis Backup and Security 2010 will try to
disinfect them (remove the malware code). If disinfection fails, the Antivirus Scan
wizard will allow you to specify other actions to be taken on infected files. The
scanning options are standard and you cannot change them.
What is Safe Mode?
Safe Mode is a special way to start Windows, used mainly to troubleshoot problems
affecting normal operation of Windows. Such problems range from conflicting drivers
to viruses preventing Windows to start normally. In Safe Mode, Windows loads only
a minimum of operating system components and basic drivers. Only a few
applications work in Safe Mode. This is why most viruses are inactive when using
Windows in Safe Mode and they can be easily removed.
To start Windows in Safe Mode, restart your computer and press the F8 key until
the Windows Advanced Options Menu appears. You can choose between several
options of starting Windows in Safe Mode. You might want to select Safe Mode
with Networking in order to be able to access the Internet.
Note
For more information on Safe Mode, go to the Windows Help and Support Center (in
the Start menu, click Help and Support). You can also find useful information by
searching the Internet.
6.7. Game Mode and Laptop Mode
Some computer activities, such as games or presentations, require increased system
responsiveness and performance, and no interruptions. When your laptop is running
on battery power, it is best that unnecessary operations, which consume additional
power, be postponed until the laptop is connected back to A/C power.
To adapt to these particular situations, Acronis Backup and Security 2010 includes
two special operation modes:
● Game Mode
● Laptop Mode
6.7.1. Game Mode
Game Mode temporarily modifies protection settings so as to minimize their impact
on system performance. While in Game Mode, the following settings are applied:
● Minimize processor time & memory consumption
● Postpone automatic updates & scans
Overview
28
Page 39

● Eliminate all alerts and pop-ups
● Scan only the most important files
While in Game Mode, you can see the letter G over the Acronis icon.
Using Game Mode
By default, Acronis Backup and Security 2010 automatically enters Game Mode
when you start a game from its list of known games or when an application goes
to full screen. Acronis Backup and Security 2010 will automatically return to the
normal operation mode when you close the game or when the detected application
exits full screen.
If you want to manually turn on Game Mode, use one of the following methods:
● Right-click the Acronis icon in the system tray and select Turn on Game Mode.
● Press Ctrl+Shift+Alt+G (the default hotkey).
Important
Do not forget to turn Game Mode off when you finish. To do this, use the same
methods you did when you turned it on.
Changing Game Mode Hotkey
If you want to change the hotkey, follow these steps:
1. Open Acronis Backup and Security 2010 and switch the user interface to Expert
Mode.
2. Click Game / Laptop Mode on the left-side menu.
3. Click the Game Mode tab.
4. Click the Advanced Settings button.
5. Under the Use HotKey option, set the desired hotkey:
● Choose the modifier keys you want to use by checking one the following: Control
key (Ctrl), Shift key (Shift) or Alternate key (Alt).
● In the edit field, type the letter corresponding to the regular key you want to
use.
For example, if you want to use the Ctrl+Alt+D hotkey, you must check only
Ctrl and Alt and type D.
Note
Removing the checkmark next to Use HotKey will disable the hotkey.
6. Click OK to save the changes.
Overview
29
Page 40

6.7.2. Laptop Mode
Laptop Mode is especially designed for laptop and notebook users. Its purpose is to
minimize the impact of Acronis Backup and Security 2010 on power consumption
while these devices are running on battery. While in Laptop Mode, scheduled scan
tasks are not performed, as they require more system resources and, implicitly,
increase power consumption.
Acronis Backup and Security 2010 detects when your laptop has switched to battery
power and it automatically enters Laptop Mode. Likewise, Acronis Backup and
Security 2010 automatically exits Laptop Mode, when it detects the laptop is no
longer running on battery.
To enable Acronis Backup and Security 2010's Laptop Mode, follow these steps:
1. Open Acronis Backup and Security 2010.
2. Click the Settings button in the upper-right corner of the window.
3. In the General Settings category, select the check box corresponding to Laptop
Mode Detection.
4. Click OK to save and apply the changes.
6.8. Automatic Device Detection
Acronis Backup and Security 2010 automatically detects when you connect a
removable storage device to your computer and offers to scan it before you access
its files. This is recommended in order to prevent viruses and other malware from
infecting your computer.
Detected devices fall into one of these categories:
● CDs/DVDs
● USB storage devices, such as flash pens and external hard-drives
● mapped (remote) network drives
When such a device is detected, an alert window is displayed.
Overview
30
Page 41

To scan the storage device, just click Yes. The
Antivirus Scan wizard will appear and guide you
through the scanning process. For detailed
information about this wizard, please refer to
“Antivirus Scan Wizard” (p. 42).
If you do not want to scan the device, you must click
No. In this case, you may find one of these options
useful:
● Don't ask me again about this type of device
- Acronis Backup and Security 2010 will no longer
offer to scan storage devices of this type when
they are connected to your computer.
● Disable automatic device detection - You will
no longer be prompted to scan new storage
devices when they are connected to the computer.
If you accidentally disabled automatic device detection and you want to enable it,
or if you want to configure its settings, follow these steps:
1. Open Acronis Backup and Security 2010 and switch the user interface to Expert
Mode.
2. Go to Antivirus>Virus Scan.
3. In the list of scan tasks, locate the Device Detection Scan task.
4. Right-click the task and select Open. A new window will appear.
5. On the Overview tab, configure the scanning options as needed. For more
information, please refer to “Configuring Scan Settings” (p. 124).
6. On the Detection tab, choose which types of storage devices to be detected.
7. Click OK to save and apply the changes.
Device Detection Alert
Overview
31
Page 42

7. Fixing Issues
Acronis Backup and Security 2010 uses an issue tracking system to detect and
inform you about the issues that may affect the security of your computer and data.
By default, it will monitor only a series of issues that are considered to be very
important. However, you can configure it as needed, choosing which specific issues
you want to be notified about.
This is how pending issues are notified:
● A special symbol is displayed over the Acronis icon in the system tray to indicate
pending issues.
Red icon with an exclamation mark: Critical issues affect the security of
your system. They require your immediate attention and must be fixed as soon
as possible.
Also, if you move the mouse cursor over the icon, a pop-up will confirm the
existence of pending issues.
● When you open Acronis Backup and Security 2010, the Security Status area will
indicate the number of issues affecting your system.
▶ In Intermediate Mode, the security status is shown on the Dashboard tab.
▶ In Expert Mode, go to General>Dashboard to check the security status.
7.1. Fix All Issues Wizard
The easiest way to fix the existing issues is to follow the step-by-step Fix All Issues
wizard. The wizard helps you easily remove any threats to your computer and data
security. To open the wizard, do any of the following:
●
Right-click the Acronis icon in the system tray and select Fix All Issues.
● Open Acronis Backup and Security 2010. Depending on the user interface mode,
proceed as follows:
▶ In Novice Mode, click Fix All Issues.
▶ In Intermediate Mode, go to the Dashboard tab and click Fix All Issues.
▶ In Expert Mode, go to General>Dashboard and click Fix All Issues.
Fixing Issues
32
Page 43

Fix All Issues Wizard
The wizard displays the list of existing security vulnerabilities on your computer.
All current issues are selected to be fixed. If there is an issue that you do not want
to be fixed, just select the corresponding check box. If you do so, its status will
change to Skip.
Note
If you do not want to be notified about specific issues, you must configure the tracking
system accordingly, as described in the next section.
To fix the selected issues, click Start. Some issues are fixed immediately. For others,
a wizard helps you fix them.
The issues that this wizard helps you fix can be grouped into these main categories:
● Disabled security settings. Such issues are fixed immediately, by enabling
the respective security settings.
● Preventive security tasks you need to perform. An example of such a task
is scanning your computer. It is recommended that you scan your computer at
least once a week. Acronis Backup and Security 2010 will automatically do that
for you in most cases. However, if you have changed the scanning schedule or if
the schedule is not completed, you will be notified about this issue.
When fixing such issues, a wizard helps you successfully complete the task.
Fixing Issues
33
Page 44

● System vulnerabilities. Acronis Backup and Security 2010 automatically checks
your system for vulnerabilities and alerts you about them. System vulnerabilities
include the following:
▶ weak passwords to Windows user accounts.
▶ outdated software on your computer.
▶ missing Windows updates.
▶ Windows Automatic Updates is disabled.
When such issues are to be fixed, the vulnerability scan wizard is started. This
wizard assists you in fixing the detected system vulnerabilities. For detailed
information, please refer to section “Vulnerability Check Wizard” (p. 54).
7.2. Configuring Issue Tracking
The issue tracking system is pre-configured to monitor and alert you about the most
important issues that may affect the security of your computer and data. Additional
issues may be monitored based on the choices you make in the configuration wizard
(when you configure your usage profile). Besides the issues monitored by default,
there are several other issues you can be informed about.
You can configure the tracking system to best serve your security needs by choosing
which specific issues to be informed about. You can do that either in Intermediate
Mode or in Expert Mode.
● In Intermediate Mode, the tracking system can be configured from separate
locations. Follow these steps:
1. Go to the Security, Parental or File Vault tab.
2. Click Configure Status Alerts.
3. Select the check boxes corresponding to the items you want to be monitored.
For detailed information, please refer to the “Intermediate Mode” (p. 79) part of
this user guide.
● In Expert Mode, the tracking system can be configured from a central location.
Follow these steps:
1. Go to General>Dashboard.
2. Click Configure Status Alerts.
3. Select the check boxes corresponding to the items you want to be monitored.
For detailed information, please refer to chapter “Dashboard” (p. 101).
Fixing Issues
34
Page 45

8. Configuring Basic Settings
You can configure the main product settings (including changing the user interface
view mode) from the basic settings window. To open it, do any of the following:
● Open Acronis Backup and Security 2010 and click the Settings button in the
upper-right corner of the window.
●
Right-click the Acronis icon in the system tray and select Basic Settings.
Note
To configure the product settings in detail, use the Expert Mode interface. For detailed
information, please refer to the “Expert Mode” (p. 100) part of this user guide.
Basic Settings
The settings are organized into three categories:
● User Interface Settings
● Security Settings
● General Settings
To apply and save the configuration changes you make, click OK. To close the
window without saving the changes, click Cancel.
Configuring Basic Settings
35
Page 46

8.1. User Interface Settings
In this area, you can switch the user interface view mode and reset the usage profile.
Switching the user interface view mode. As described in section “User Interface
View Modes” (p. 12), there are three modes for displaying the user interface. Each
user interface mode is designed for a specific category of users, based on their
computer skills. In this way, the user interface accommodates all kinds of users,
from computer beginners to very technical people.
The first button shows the current user interface view mode. To change the user
interface mode, click the arrow on the button and select the desired mode from
the menu.
DescriptionMode
Novice Mode
Intermediate Mode
Expert Mode
Suited for computer beginners and people who want
Acronis Backup and Security 2010 to protect their
computer and data without being bothered. This mode
is simple to use and requires minimal interaction on
your side.
All you have to do is fix the existing issues when
indicated by Acronis Backup and Security 2010. An
intuitive step-by-step wizard assists you in fixing issues.
Additionally, you can perform common tasks, such as
updating the Acronis Backup and Security 2010 virus
signature and product files or scanning the computer.
Aimed at users with average computer skills, this mode
extends what you can do in Novice Mode.
You can fix issues separately and choose which issues
to be monitored. Moreover, you can manage remotely
the Acronis products installed on the computers in your
household.
Suited for more technical users, this mode allows you
to fully configure each functionality of Acronis Backup
and Security 2010. You can also use all tasks provided
to protect your computer and data.
Reconfiguring the usage profile. The usage profile reflects the main activities
performed on the computer. Depending on the usage profile, the product interface
is organized to allow easy access to your preferred tasks.
To reconfigure the usage profile, click Reconfigure Profile and follow the
configuration wizard.
Configuring Basic Settings
36
Page 47

8.2. Security Settings
In this area, you can enable or disable product settings that cover various aspects
of computer and data security. The current status of a setting is indicated using
one of these icons:
Green circle with a check mark: The setting is enabled.
Red circle with an exclamation mark: The setting is disabled.
To enable / disable a setting, select / clear the corresponding Enable check box.
Warning
Use caution when disabling real-time antivirus protection, firewall or automatic update.
Disabling these features may compromise your computer's security. If you really
need to disable them, remember to re-enable them as soon as possible.
The entire list of settings and their description is provided in the following table:
DescriptionSetting
Antivirus
Automatic Update
Vulnerability Check
Antispam
Antiphishing
Identity Control
IM Encryption
Real-time protection ensures that all files are scanned
as they are accessed by you or by an application
running on this system.
Automatic update ensures that the newest Acronis
Backup and Security 2010 product and signature files
are downloaded and installed automatically, on a
regular basis.
Automatic vulnerability check ensures that crucial
software on your PC is up-to-date.
Antispam filters the e-mail messages that you receive,
marking unsolicited and junk mail as SPAM.
Antiphishing detects and alerts you in real-time if a
web page is set up to steal personal information.
Identity Control helps you prevent your personal data
from being sent out on the Internet without your
consent. It blocks any instant messages, e-mail
messages or web forms transmitting data you defined
as being private to unauthorized recipients (addresses).
IM (Instant Messaging) Encryption secures your
conversations via Yahoo! Messenger and Windows Live
Messenger provided that your IM contacts use a
compatible Acronis product and IM software.
Configuring Basic Settings
37
Page 48

DescriptionSetting
Parental Control
Firewall
File Encryption
The status of some of these settings may be monitored by the issue tracking system
of Acronis Backup and Security 2010. If you disable a monitored setting, Acronis
Backup and Security 2010 will indicate this as an issue that you need to fix.
If you do not want a monitored setting that you disabled to be shown as an issue,
you must configure the tracking system accordingly. You can do that either in
Intermediate Mode or in Expert Mode.
● In Intermediate Mode, the tracking system can be configured from separate
locations, based on settings categories. For detailed information, please refer to
the “Intermediate Mode” (p. 79) part of this user guide.
● In Expert Mode, the tracking system can be configured from a central location.
Follow these steps:
1. Go to General>Dashboard.
2. Click Configure Status Alerts.
3. Clear the check box corresponding to the item you want not to be monitored.
For detailed information, please refer to chapter “Dashboard” (p. 101).
Parental Control restricts the computer and online
activities of your children based on the rules you
defined. Restrictions may include blocking
inappropriate web sites, as well as limiting gaming and
Internet access according to a specified schedule.
Firewall protects your computer from hacker and
malicious outside attacks.
File Encryption keeps your documents private by
encrypting them in special vaulted drives. If you disable
File Encryption, all file vaults will be locked and you
will no longer be able to access the files they contain.
8.3. General Settings
In this area, you can enable or disable settings that affect product behavior and
user experience. To enable / disable a setting, select / clear the corresponding
Enable check box.
The entire list of settings and their description is provided in the following table:
DescriptionSetting
Game Mode
Configuring Basic Settings
Game Mode temporarily modifies protection settings
so as to minimize their impact on system performance
during games.
38
Page 49

Laptop Mode Detection
Settings Password
Acronis Backup and
Security News
Product Notification
Alerts
Scan Activity Bar
Send Virus Reports
Outbreak Detection
DescriptionSetting
Laptop Mode temporarily modifies protection settings
so as to minimize their impact on the life of your laptop
battery.
This ensures that the Acronis Backup and Security
2010 settings can only be changed by the person who
knows this password.
When you enable this option, you will be prompted to
configure the settings password. Type the desired
password in both fields and click OK to set the
password.
By enabling this option, you will receive important
company news, product updates or new security
threats from Acronis.
By enabling this option, you will receive information
alerts.
The Scan Activity Bar is a small, transparent window
indicating the progress of the Acronis Backup and
Security 2010 scanning activity. For more information,
please refer to “Scan Activity Bar” (p. 25).
By enabling this option, virus scanning reports are sent
to Acronis labs for analysis. Please note that these
reports will contain no confidential data, such as your
name or IP address, and that they will not be used for
commercial purposes.
By enabling this option, reports regarding potential
virus-outbreaks are sent to Acronis labs for analysis.
Please note that these reports will contain no
confidential data, such as your name or IP address,
and that they will not be used for commercial purposes.
Configuring Basic Settings
39
Page 50

9. History and Events
The Logs link at the bottom of the Acronis Backup and Security 2010 main window
opens another window with the Acronis Backup and Security 2010 history & events.
This window offers you an overview of the security-related events. For instance,
you can easily check if the update was successfully performed, if malware was found
on your computer etc.
Events
In order to help you filter the Acronis Backup and Security 2010 history & events,
the following categories are provided on the left side:
● Antivirus
● Antispam
● Parental Control
● Privacy Control
● Firewall
● Vulnerability
● IM encryption
● File Encryption
● Game/Laptop Mode
History and Events
40
Page 51

● Home Network
● Update
● Internet Log
A list of events is available for each category. Each event comes with the following
information: a short description, the action Acronis Backup and Security 2010 took
on it when it happened, and the date and time when it occurred. If you want to find
out more information about a particular event in the list, double click that event.
Click Clear all logs if you want to remove old logs or Refresh to make sure the
latest logs are displayed.
History and Events
41
Page 52

10. Wizards
In order to make Acronis Backup and Security 2010 very easy to use, several wizards
help you carry out specific security tasks or configure more complex product settings.
This chapter describes the wizards that may appear when you fix issues or perform
specific tasks with Acronis Backup and Security 2010. Other configuration wizards
are described separately in the “Expert Mode” (p. 100) part.
10.1. Antivirus Scan Wizard
Whenever you initiate an on-demand scan (for example, right-click a folder and
select Scan with Acronis Backup and Security), the Antivirus Scan wizard will
appear. Follow the three-step guided procedure to complete the scanning process.
Note
If the scan wizard does not appear, the scan may be configured to run silently, in the
background. Look for the scan progress icon in the system tray. You can click this
icon to open the scan window and to see the scan progress.
10.1.1. Step 1/3 - Scanning
Acronis Backup and Security 2010 will start scanning the selected objects.
Wizards
Scanning
42
Page 53

You can see the scan status and statistics (scanning speed, elapsed time, number
of scanned / infected / suspicious / hidden objects and other).
Wait for Acronis Backup and Security 2010 to finish scanning.
Note
The scanning process may take a while, depending on the complexity of the scan.
Password-protected archives. If Acronis Backup and Security 2010 detects a
password-protected archive during scanning and the default action is Prompt for
password, you will be prompted to provide the password. Password-protected
archives cannot be scanned unless you provide the password. The following options
are available:
● I want to enter the password for this object. If you want Acronis Backup
and Security 2010 to scan the archive, select this option and type the password.
If you do not know the password, choose one of the other options.
● I do not want to enter the password for this object (skip this object).
Select this option to skip scanning this archive.
● I do not want to enter the password for any object (skip all
password-protected objects). Select this option if you do not want to be
bothered about password-protected archives. Acronis Backup and Security 2010
will not be able to scan them, but a record will be kept in the scan log.
Click OK to continue scanning.
Stopping or pausing the scan. You can stop scanning anytime you want by
clicking Stop&Yes. You will go directly to the last step of the wizard. To temporarily
stop the scanning process, just click Pause. You will have to click Resume to resume
scanning.
10.1.2. Step 2/3 - Select Actions
When the scanning is completed, a new window will appear, where you can see the
scan results.
Wizards
43
Page 54

Actions
You can see the number of issues affecting your system.
The infected objects are displayed in groups, based on the malware they are infected
with. Click the link corresponding to a threat to find out more information about the
infected objects.
You can choose an overall action to be taken for all issues or you can select separate
actions for each group of issues.
One or several of the following options can appear on the menu:
DescriptionAction
Take No Action
Move to quarantine
Rename files
No action will be taken on the detected files. After the
scan is completed, you can open the scan log to view
information on these files.
Removes the malware code from infected files.Disinfect
Deletes detected files.Delete
Moves detected files to quarantine. Quarantined files
cannot be executed or opened; therefore, the risk of
getting infected disappears.
Changes the name of hidden files by appending
.bd.ren to their name. As a result, you will be able
Wizards
44
Page 55

DescriptionAction
to search for and find such files on your computer, if
any.
Please note that these hidden files are not the files
that you deliberately hide from Windows. They are the
files hidden by special programs, known as rootkits.
Rootkits are not malicious in nature. However, they
are commonly used to make viruses or spyware
undetectable by normal antivirus programs.
Click Continue to apply the specified actions.
10.1.3. Step 3/3 - View Results
When Acronis Backup and Security 2010 finishes fixing the issues, the scan results
will appear in a new window.
Summary
You can see the results summary. If you want comprehensive information on the
scanning process, click View log to view the scan log.
Important
If required, please restart your system in order to complete the cleaning process.
Wizards
45
Page 56

Click Close to close the window.
Acronis Backup and Security 2010 Could Not Solve Some Issues
In most cases Acronis Backup and Security 2010 successfully disinfects the infected
files it detects or it isolates the infection. However, there are issues that cannot be
solved.
In these cases, we recommend you to contact the Acronis Support Team at
http://www.acronis.com/support/?ow=1. Our support representatives will help you
solve the issues you are experiencing.
Acronis Backup and Security 2010 Detected Suspect Files
Suspect files are files detected by the heuristic analysis as potentially infected with
malware the signature of which has not been released yet.
If suspect files were detected during the scan, you will be requested to submit them
to the Acronis Lab. Click OK to send these files to the Acronis Lab for further analysis.
10.2. Custom Scan Wizard
The Custom Scan Wizard lets you create and run a custom scan task and optionally
save it as a Quick Task when using Acronis Backup and Security 2010 in Intermediate
Mode.
To run a custom scan task using the Custom Scan Wizard you must follow these
steps:
1. In Intermediate Mode, go to the Security tab.
2. In the Quick Tasks area, click Custom Scan.
3. Follow the six-step guided procedure to complete the scanning process.
10.2.1. Step 1/6 - Welcome Window
This is a welcome window.
Wizards
46
Page 57

Welcome Window
If you want to skip over this window when running this wizard in the future, select
the Don't show this step the next time this wizard is run check box.
Click Next.
10.2.2. Step 2/6 - Select Target
Here you can specify the files or folders to be scanned as well as the scan options.
Wizards
47
Page 58

Select Target
Click Add Target, select the files or folders that you want to scan and click OK.
The paths to the selected locations will appear in the Scan Target column. If you
change your mind about the location, just click the Remove button next to it. Click
the Remove All button to remove all the locations that were added to the list.
When you are done selecting the locations, set the Scan Options. The following
are available:
DescriptionOption
Scan all files
Scan files with
application extensions
only .bat; .com; .dll; .ocx; .scr; .bin; .dat; .386;
Select this option to scan all the files in the selected
folders.
Only the program files will be scanned. This means
only the files with the following extensions: .exe;
.vxd; .sys; .wdm; .cla; .class; .ovl; .ole; .exe;
.hlp; .doc; .dot; .xls; .ppt; .wbk; .wiz; .pot;
.ppa; .xla; .xlt; .vbs; .vbe; .mdb; .rtf; .htm;
.hta; .html; .xml; .xtp; .php; .asp; .js; .shs;
.chm; .lnk; .pif; .prc; .url; .smm; .pdf; .msi;
.ini; .csc; .cmd; .bas; .eml and .nws.
Wizards
48
Page 59

DescriptionOption
Scan user defined
extensions only
Click Next.
Only the files with the extensions specified by the user
will be scanned. These extensions must be separated
by ";".
10.2.3. Step 3/6 - Select Actions
Here you can specify the scanner settings and the scan level.
Select Actions
● Select the actions to be taken on the infected and suspect files detected. The
following options are available:
DescriptionAction
Take No Action
Disinfect files
Delete files
No action will be taken on infected files. These files
will appear in the report file.
Remove the malware code from the infected files
detected.
Deletes infected files immediately, without any
warning.
Wizards
49
Page 60

DescriptionAction
Move files to Quarantine
● Select the action to be taken on the hidden (rootkits) files. The following options
are available:
Moves infected files into the quarantine. Quarantined
files cannot be executed or opened; therefore, the
risk of getting infected disappears.
DescriptionAction
Take No Action
Rename
● Configure scanner aggressiveness. There are 3 levels to choose from. Drag the
slider along the scale to set the appropriate protection level:
No action will be taken on hidden files. These files
will appear in the report file.
Changes the name of hidden files by appending
.bd.ren to their name. As a result, you will be able
to search for and find such files on your computer,
if any.
DescriptionScan Level
Permissive
Default
Aggressive
Only applications files are scanned and only for
viruses. The resource consumption level is low.
The resource consumption level is moderate. All files
are scanned for viruses and spyware.
All files (including archives) are scanned for viruses
and spyware. Hidden files and processes are
included in the scan The resource consumption level
is higher.
Wizards
Advanced users might want to take advantage of the scan settings Acronis Backup
and Security 2010 offers. The scanner can be set to search only for specific
malware threats. This may greatly reduce scanning times and improve your
computer's responsiveness during a scan.
Drag the slider to select Custom and then click the Custom level button. A
window will appear. Specify the type of malware you want Acronis Backup and
Security 2010 to scan for by selecting the appropriate options:
DescriptionOption
Scans for known viruses.Scan for viruses
50
Page 61

Scan for adware
Scan for spyware
Scan for applications
Scan for dialers
Scan for rootkits
Scan for keyloggers
Click OK to close the window.
Click Next.
DescriptionOption
Acronis Backup and Security 2010 detects
incomplete virus bodies, too, thus removing any
possible threat that could affect your system's
security.
Scans for adware threats. Detected files will be
treated as infected. The software that includes
adware components might stop working if this option
is enabled.
Scans for known spyware threats. Detected files will
be treated as infected.
Scan for legitimate applications that can be used as
a spying tool, to hide malicious applications or for
other malicious intent.
Scans for applications dialing high-cost numbers.
Detected files will be treated as infected. The
software that includes dialer components might stop
working if this option is enabled.
Scans for hidden objects (files and processes),
generally known as rootkits.
Scans for malicious applications that record
keystrokes.
10.2.4. Step 4/6 - Additional Settings
Before scanning begins, additional options are available:
Wizards
51
Page 62

Additional Settings
● To save the custom task you are creating for future use select the Show this
task in Intermediate UI check box and enter a name for the task in the provided
edit field.
The task will be added to the list of Quick Tasks already available in the Security
tab and will also appear in Expert Mode > Antivirus > Virus Scan.
● From the corresponding menu, select an action to be taken if no threats are found.
Click Start Scan.
10.2.5. Step 5/6 - Scanning
Acronis Backup and Security 2010 will start scanning the selected objects:
Wizards
52
Page 63
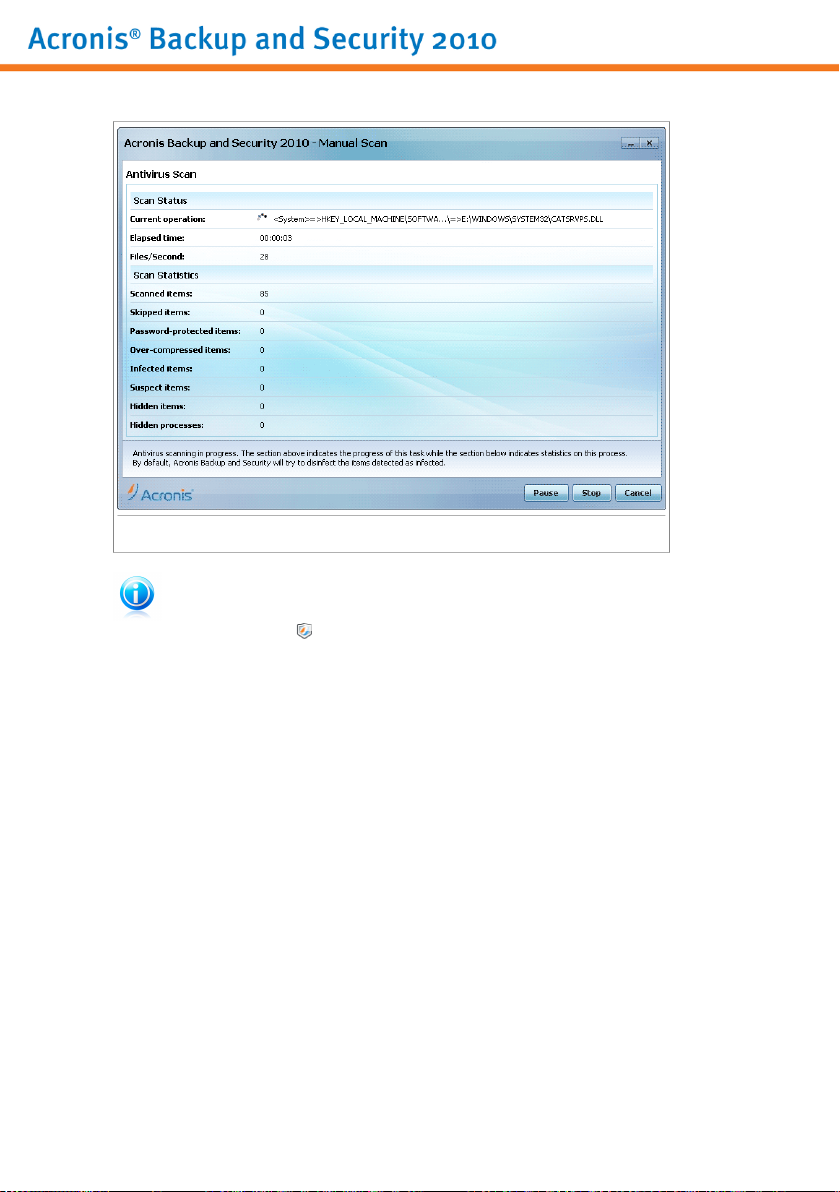
Scanning
Note
The scanning process may take a while, depending on the complexity of the scan.
You can click the scan progress icon in the system tray to open the scan window
and see the scan progress.
10.2.6. Step 6/6 - View Results
When Acronis Backup and Security 2010 completes the scanning process, the scan
results will appear in a new window:
Wizards
53
Page 64

Summary
You can see the results summary. If you want comprehensive information on the
scanning process, click View Log to view the scan log.
Important
If required, please restart your system in order to complete the cleaning process.
Click Close to close the window.
10.3. Vulnerability Check Wizard
This wizard checks the system for vulnerabilities and helps you fix them.
Wizards
54
Page 65

10.3.1. Step 1/6 - Select Vulnerabilities to Check
Vulnerabilities
Click Next to check the system for the selected vulnerabilities.
Wizards
55
Page 66
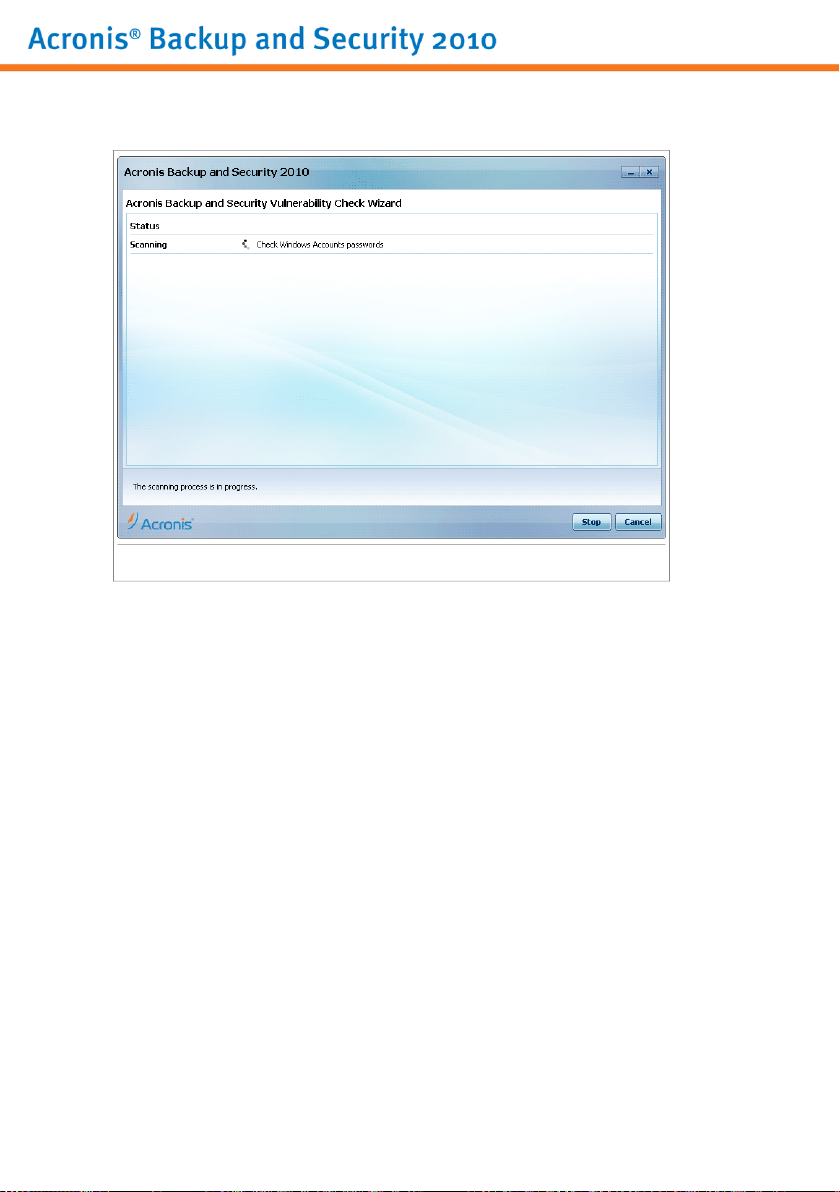
10.3.2. Step 2/6 - Checking for Vulnerabilities
Vulnerability Check
Wait for Acronis Backup and Security 2010 to finish checking for vulnerabilities.
Wizards
56
Page 67

10.3.3. Step 3/6 - Update Windows
Windows Updates
You can see the list of critical and non-critical Windows updates that are not currently
installed on your computer. Click Install All System Updates to install all the
available updates.
Click Next.
Wizards
57
Page 68

10.3.4. Step 4/6 - Update Applications
Applications
You can see the list of applications checked by Acronis Backup and Security 2010
and if they are up to date. If an application is not up to date, click the provided link
to download the latest version.
Click Next.
Wizards
58
Page 69

10.3.5. Step 5/6 - Change Weak Passwords
User Passwords
You can see the list of the Windows user accounts configured on your computer and
the level of protection their password provides. A password can be strong (hard to
guess) or weak (easy to crack by malicious people with specialized software).
Click Fix to modify the weak passwords. A new window will appear.
Change Password
Select the method to fix this issue:
● Force user to change password at next login. Acronis Backup and Security
2010 will prompt the user to change the password the next time the user logs on
to Windows.
Wizards
59
Page 70

● Change user password. You must type the new password in the edit fields.
Make sure to inform the user about the password change.
Note
For a strong password, use a combination of uppercase and lowercase letters,
numbers and special characters (such as #, $ or @). You can search the Internet
for more information and tips on creating strong passwords.
Click OK to change the password.
Click Next.
10.3.6. Step 6/6 - View Results
Results
Click Close.
10.4. File Vault Wizards
The File Vault wizards help you create and manage Acronis Backup and Security
2010 file vaults. A file vault is an encrypted storage space on your computer where
you can securely store important files, documents and even entire folders.
These wizards do not appear when you fix issues, because file vaults are an optional
method of protecting your data. They can only be started from the Intermediate
Wizards
60
Page 71

Mode interface of Acronis Backup and Security 2010, the File Storage tab, as
follows:
● Add File to Vault - starts the wizard that allows you to store your important files
/ documents privately by encrypting them in special, vaulted drives.
● Remove Vault Files - starts the wizard that allows you to erase data from the
file vault.
● View File Vault - starts the wizard that allows you to view the content of your
file vaults.
● Lock File Vault - starts the wizard that allows you to lock an open file vault in
order to protect its content.
10.4.1. Add Files to Vault
This wizard helps you create a file vault and add files to it in order to safely store
them on your computer.
Step 1/6 - Select Target
Here you can specify the files or folders to be added to vault.
Target
Click Add Target, select the file or folder that you want to add and click OK. The
path to the selected location will appear in the Path column. If you change your
mind about the location, just click the Remove button next to it.
Wizards
61
Page 72

Note
You can select one or several locations.
Click Next.
Step 2/6 - Select Vault
This is where you can create a new vault or choose an existing vault.
Select Vault
If you select Browse for a File Vault, you must click Browse and select the file
vault. You will go either to the step 5 if the selected vault is opened (mounted ) or
to the step 4 if it is locked (unmounted).
If you click Select an existing File Vault, then you must click the desired vault
name. You will go either to the step 5 if the selected vault is opened (mounted ) or
to the step 4 if it is locked (unmounted).
Select Create New File Vault if none of the existing vaults are suitable for your
needs. You will go to the step 3.
Click Next.
Step 3/6 - Create Vault
This is where you can specify information for the new Vault.
Wizards
62
Page 73

Create Vault
To complete the file vault related information follow these steps:
1. Click Browse and choose a location for the bvd file.
Note
Remember that the file vault is an encrypted file on your computer with the bvd
extension.
2. Select a drive letter for the new file vault from the corresponding drop-down
menu.
Note
Remember that when you mount the bvd file, a new logical partition (a new drive)
will appear.
3. Type a password for the file vault into the corresponding field.
Note
The password must have at least 8 characters.
4. Re-type the password.
5. Set the size of the file vault (in MB) by typing a number into the corresponding
field.
Click Next.
Wizards
63
Page 74

You will go to the step 5.
Step 4/6 - Password
This is where you will be asked to enter the password for the selected vault.
Enter password
Type the password into the corresponding field and click Next.
Step 5/6 - Summary
This is where you can review chosen operations.
Wizards
64
Page 75

Summary
Click Next.
Step 6/6 - Results
This is where you can view the vault content.
Wizards
65
Page 76
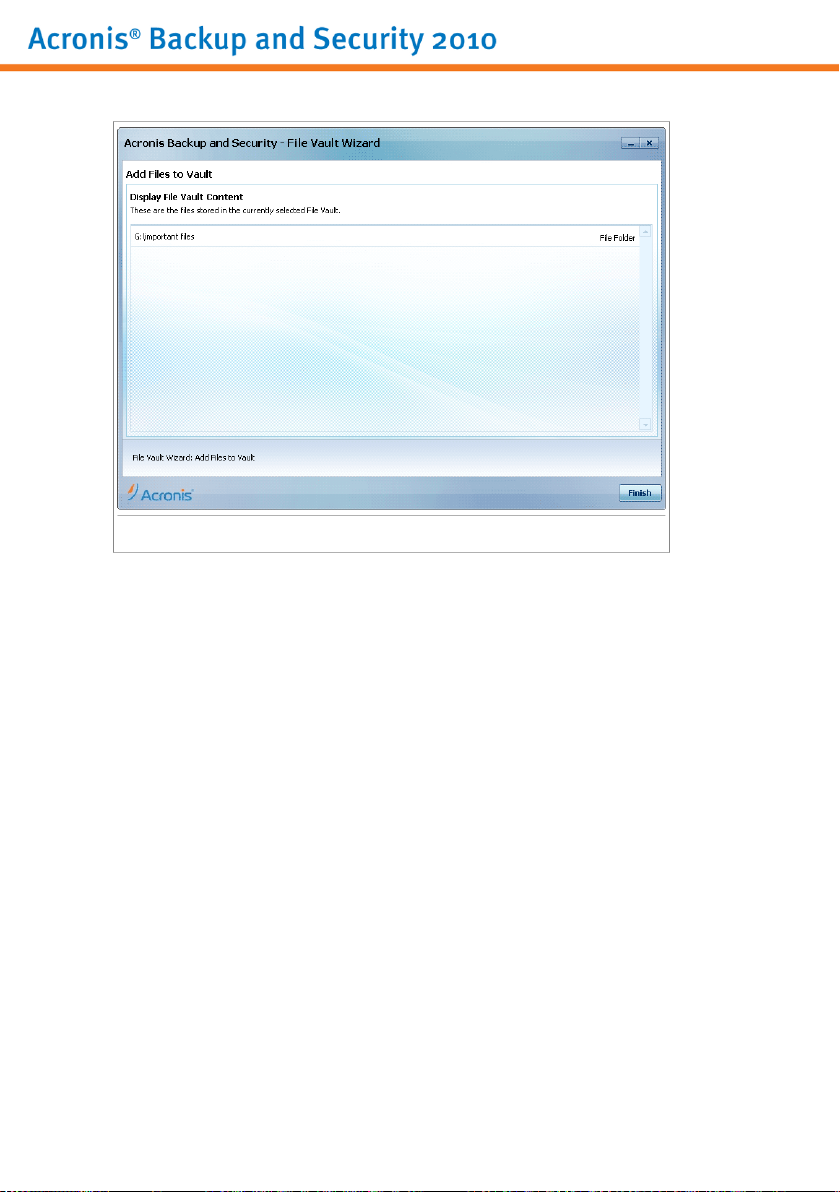
Results
Click Finish.
10.4.2. Remove Vault Files
This wizard helps you remove files from a specific file vault.
Step 1/5 - Select Vault
Here you can specify the vault to remove files from.
Wizards
66
Page 77

Select Vault
If you select Browse for a File Vault, you must click Browse and select the file
vault. You will go either to the step 3 if the selected vault is opened (mounted ) or
to the step 2 if it is locked (unmounted).
If you click Select an existing File Vault, then you must click the desired vault
name. You will go either to the step 3 if the selected vault is opened (mounted ) or
to the step 2 if it is locked (unmounted).
Click Next.
Step 2/5 - Password
This is where you will be asked to enter the password for the selected vault.
Wizards
67
Page 78
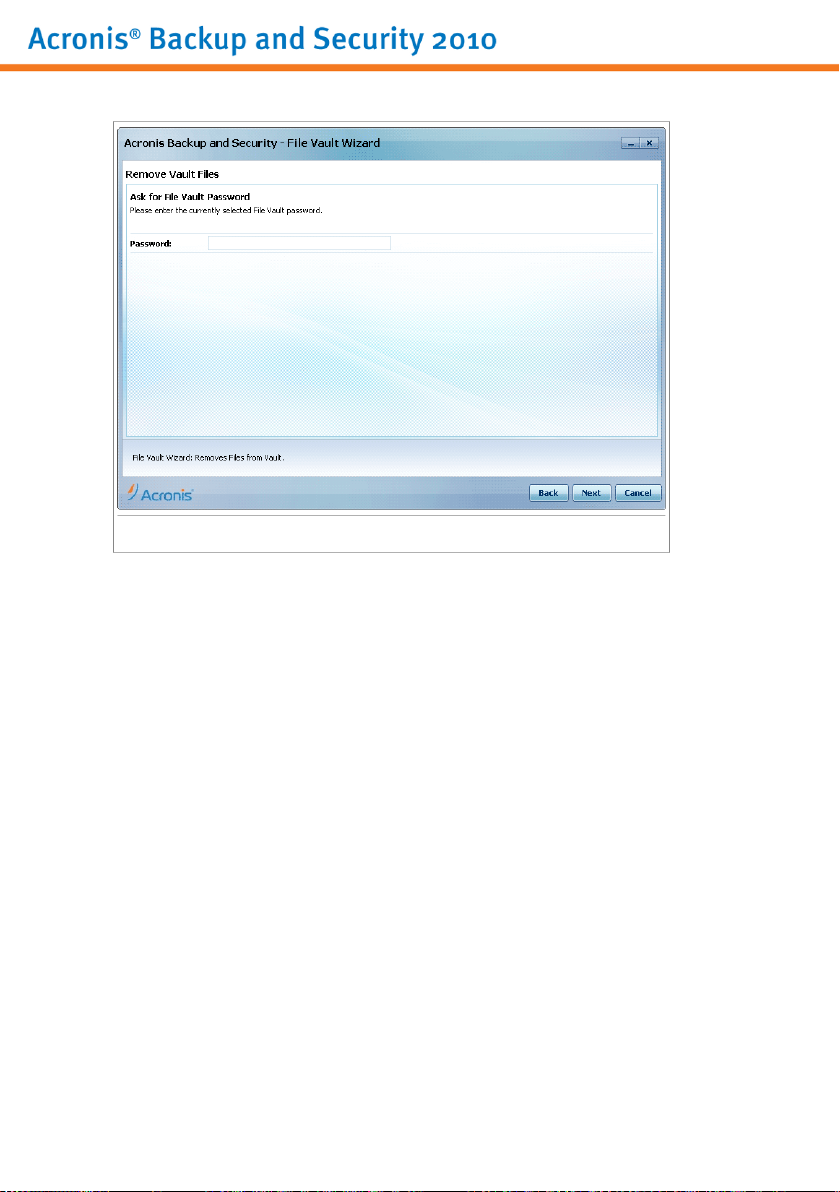
Enter password
Type the password into the corresponding field and click Next.
Step 3/5 - Select files
This is where you will be provided with the list of the files from the previously
selected vault.
Wizards
68
Page 79

Select files
Select the files to be removed and click Next.
Step 4/5 - Summary
This is where you can review chosen operations.
Wizards
69
Page 80

Summary
Click Next.
Step 5/5 - Results
This is where you can view operation result.
Wizards
70
Page 81
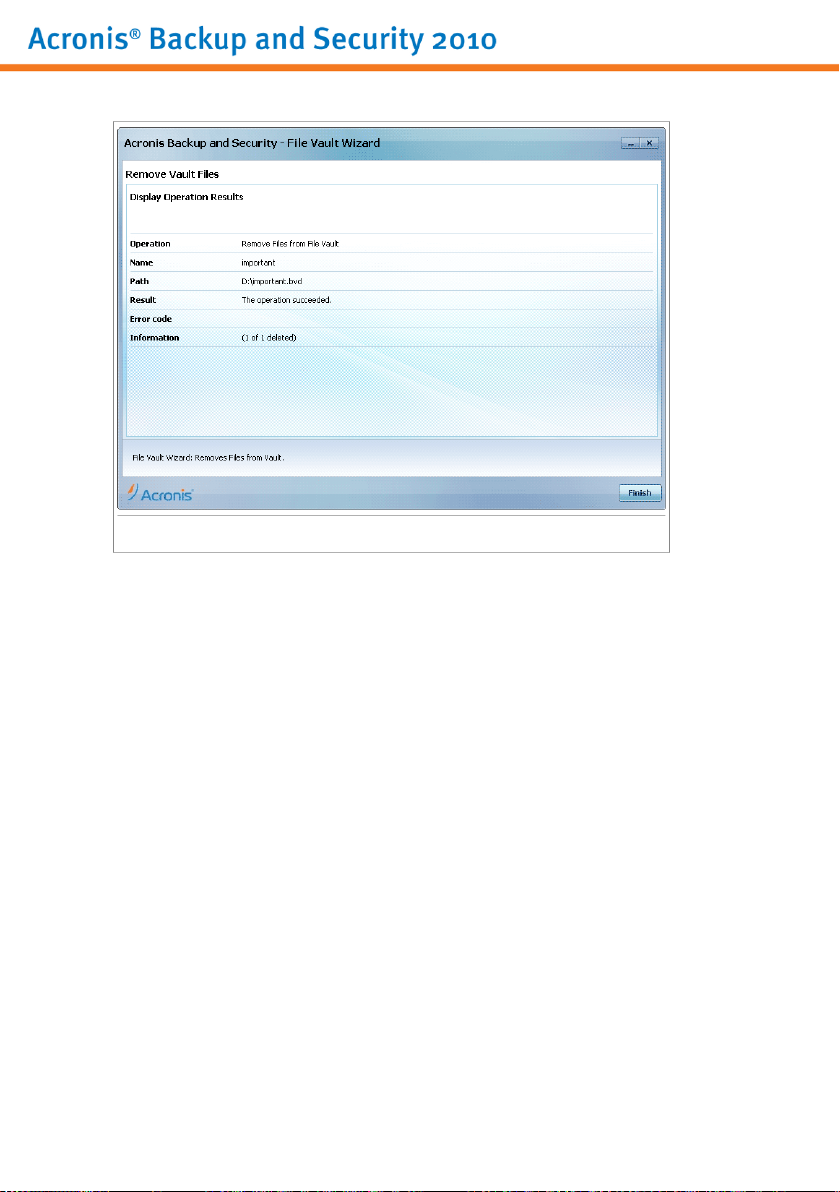
Results
Click Finish.
10.4.3. View File Vault
This wizard helps you open a specific file vault and view the files it contains.
Step 1/4 - Select Vault
Here you can specify the vault to view files from.
Wizards
71
Page 82

Select Vault
If you select Browse for a File Vault, you must click Browse and select the file
vault. You will go either to the step 3 if the selected vault is opened (mounted ) or
to the step 2 if it is locked (unmounted).
If you click Select an existing File Vault, then you must click the desired vault
name. You will go either to the step 3 if the selected vault is opened (mounted ) or
to the step 2 if it is locked (unmounted).
Click Next.
Step 2/4 - Password
This is where you will be asked to enter the password for the selected vault.
Wizards
72
Page 83

Enter password
Type the password into the corresponding field and click Next.
Step 3/4 - Summary
This is where you can review chosen operations.
Wizards
73
Page 84

Summary
Click Next.
Step 4/4 - Results
This is where you can view the files of the vault.
Wizards
74
Page 85

Results
Click Finish.
10.4.4. Lock File Vault
This wizard helps you lock a specific file vault in order to protect its content.
Step 1/3 - Select Vault
Here you can specify the vault to lock.
Wizards
75
Page 86

Select Vault
If you select Browse for a File Vault, you must click Browse and select the file
vault.
If you click Select an existing File Vault, then you must click the desired vault
name.
Click Next.
Step 2/3 - Summary
This is where you can review chosen operations.
Wizards
76
Page 87
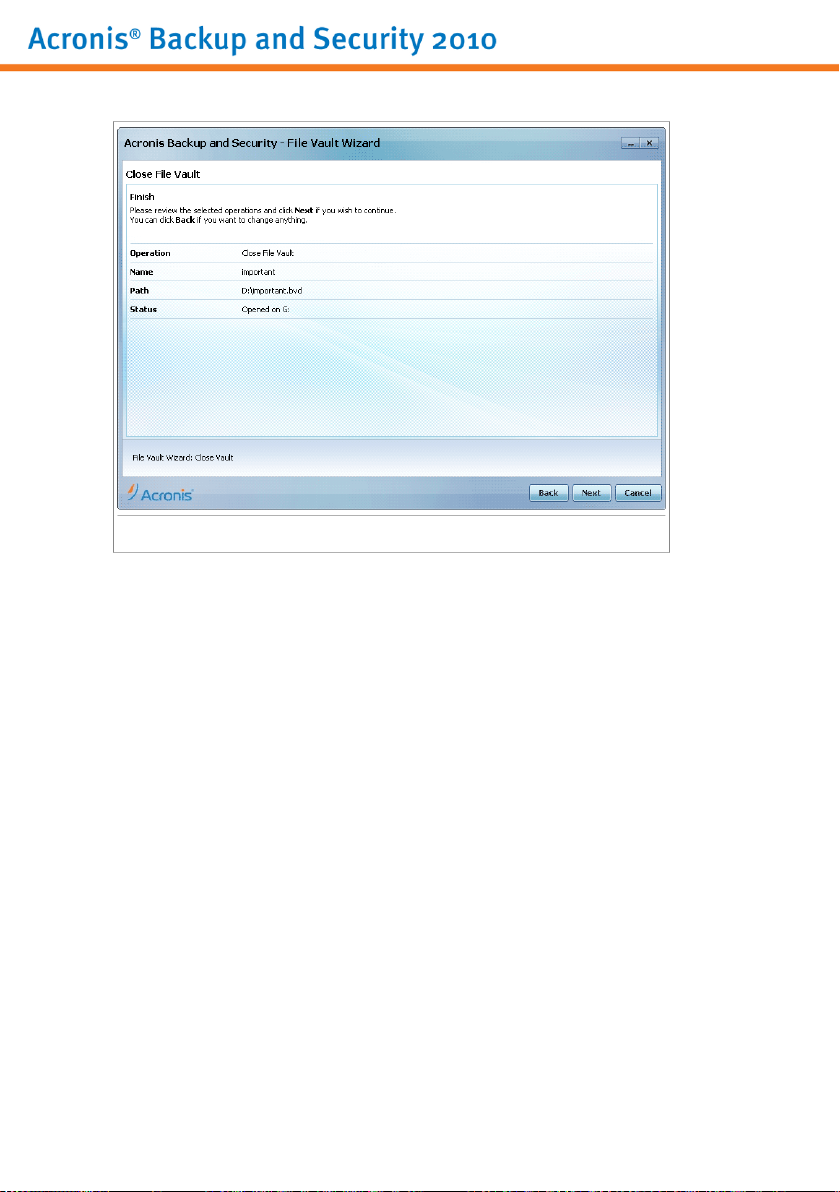
Summary
Click Next.
Step 3/3 - Results
This is where you can view operation result.
Wizards
77
Page 88

Results
Click Finish.
Wizards
78
Page 89

Intermediate Mode
79
Page 90

11. Dashboard
The Dashboard tab provides information regarding the security status of your
computer and allows you to fix pending issues.
Dashboard
The dashboard consists of the following sections:
● Overall Status - Indicates the number of issues affecting your computer and
helps you fix them. If there are any pending issues, you will see a red circle with
an exclamation mark and the Fix All Issues button. Click the button to start
the Fix All Issues wizard.
● Status Detail - Indicates the status of each main module using explicit sentences
and one of the following icons:
Dashboard
Green circle with a check mark: No issues affect the security status. Your
computer and data are protected.
Gray circle with an exclamation mark: The activity of this module's
components is not monitored. Thus, no information is available regarding their
security status. There may be specific issues related to this module.
Red circle with an exclamation mark: There are issues that affect the
security of your system. Critical issues require your immediate attention.
Non-critical issues should also be addressed as soon as possible.
80
Page 91

Click the name of a module to see more details about its status and to configure
status alerts for its components.
● Usage Profile - Indicates the usage profile that is currently selected and offers
a link to a relevant task for that profile:
▶ When the Typical profile is selected, the Scan Now button allows you to
perform a System Scan using the Antivirus Scan Wizard. The entire system will
be scanned, except for archives. In the default configuration, it scans for all
types of malware other than rootkits.
▶ When the Gamer profile is selected, the Turn On/Off Game Mode button
allows you to enable/disable Game Mode. Game Mode temporarily modifies
protection settings so as to minimize their impact on system performance.
▶ When the Custom profile is selected, the Update Now button starts an
immediate update. A new window will appear where you can see the update
status.
If you want to switch to a different profile or edit the one you are currently using,
click the profile and follow the configuration wizard.
Dashboard
81
Page 92
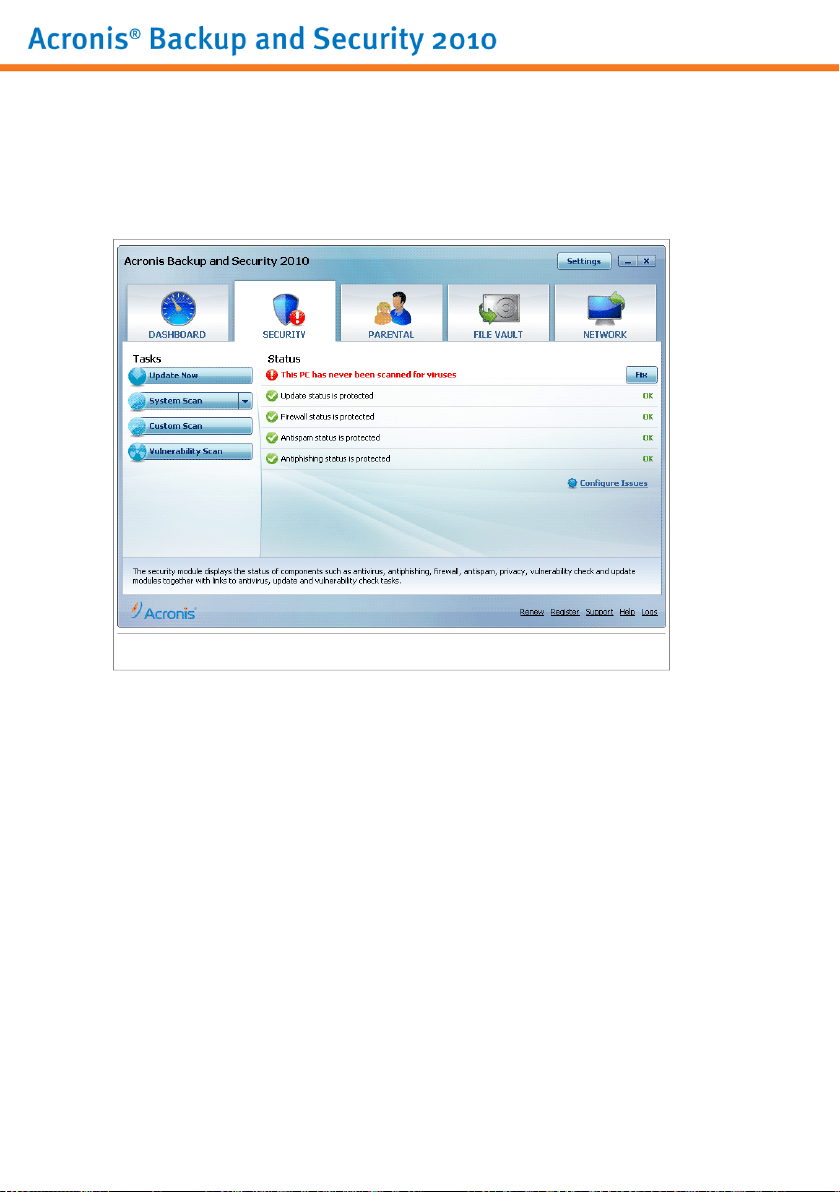
12. Security
Acronis Backup and Security 2010 comes with a Security module that helps you
keep your Acronis Backup and Security 2010 up to date and your computer virus
free. To enter the Security module, click the Security tab.
Security
The Security module consists of two sections:
● Status Area - Displays the current status of all monitored security components
and allows you to choose which of the components should be monitored.
● Quick Tasks - This is where you can find links to the most important security
tasks: update now, system scan, my documents scan, deep system scan, custom
scan, vulnerability scan.
12.1. Status Area
The status area is where you can see the complete list of monitored security
components and their current status. By monitoring each security module, Acronis
Backup and Security 2010 will let you know not only when you configure settings
that might affect your computer's security, but also when you forget to do important
tasks.
The current status of a component is indicated using explicit sentences and one of
the following icons:
Security
82
Page 93

Green circle with a check mark: No issues affect the component.
Red circle with an exclamation mark: Issues affect the component.
The sentences describing issues are written in red. Just click the Fix button
corresponding to a sentence to fix the reported issue. If an issue is not fixed on the
spot, follow the wizard to fix it.
12.1.1. Configuring Status Alerts
To select the components Acronis Backup and Security 2010 should monitor, click
Configure Status Alerts and select the Enable alerts check box corresponding
to the features you want to be tracked.
Important
You need to enable status alerts for a component if you wish to be notified when
issues are affecting the security of that component. To ensure that your system is
fully protected, enable tracking for all components and fix all reported issues.
The status of the following security components can be tracked by Acronis Backup
and Security 2010:
● Antivirus - Acronis Backup and Security 2010 monitors the status of the two
components of the Antivirus feature: real-time protection and an on-demand scan.
The most common issues reported for this component are listed in the following
table.
DescriptionIssue
Real-time protection is
disabled
You have never scanned
your computer for
malware
you started was aborted
before it finished
Antivirus is in a critical
state
Files are not scanned as they are accessed by you
or by an application running on this system.
An on demand system scan was never performed
to check if files stored on your computer are malware
free.
A full system scan was started but not completed.The last system scan
Real-time protection is disabled and a system scan
is overdue.
● Update - Acronis Backup and Security 2010 monitors if the malware signatures
are up-to-date. The most common issues reported for this component are listed
in the following table.
Security
83
Page 94

DescriptionIssue
Automatic Update is
disabled
The update has not been
performed for x days
● Firewall - Acronis Backup and Security 2010 monitors the status of the Firewall
feature. If it is not enabled, the issue Firewall is disabled will be reported.
● Antispam - Acronis Backup and Security 2010 monitors the status of the Antispam
feature. If it is not enabled, the issue Antispam is disabled will be reported.
● Antiphishing - Acronis Backup and Security 2010 monitors the status of the
Antiphishing feature. If it is not enabled for all supported applications, the issue
Antiphishing is disabled will be reported.
● Vulnerability Check - Acronis Backup and Security 2010 keeps track of the
Vulnerability Check feature. Vulnerability Check lets you know if you need to
install any Windows updates, application updates or if you need to strengthen
any passwords.
The most common issues reported for this component are listed in the following
table.
The malware signatures of your Acronis Backup and
Security 2010 product are not being automatically
updated on a regular basis.
The malware signatures of your Acronis Backup and
Security 2010 product are outdated.
DescriptionStatus
Vulnerability Check is
disabled
Multiple vulnerabilities
were detected
Critical Microsoft
updates
Other Microsoft updates
Windows Automatic
Updates are disabled
Application (outdated)
Acronis Backup and Security 2010 does not check
for potential vulnerabilities regarding missing
Windows updates, application updates or weak
passwords.
Acronis Backup and Security 2010 found missing
Windows/application updates and/or weak
passwords.
Critical Microsoft updates are available but not
installed.
Non-critical Microsoft updates are available but not
installed.
Windows security updates are not being
automatically installed as soon as they become
available.
A new version of the Application is available but
not installed.
Security
84
Page 95

DescriptionStatus
User (Weak Password)
A user password is easy to crack by malicious people
with specialized software.
12.2. Quick Tasks
This is where you can find links to the most important security tasks:
● Update Now - starts an immediate update.
● System Scan - starts a standard scan of your computer (archives excluded). For
additional on-demand scan tasks, click the arrow on this button and select a
different scan task: My Documents Scan or Deep System Scan.
● Custom Scan - starts a wizard that lets you create and run a custom scan task.
● Vulnerability Scan - starts a wizard that checks your system for vulnerabilities
and helps you fix them.
12.2.1. Updating Acronis Backup and Security 2010
New malware is found and identified every day. This is why it is very important to
keep Acronis Backup and Security 2010 up to date with the latest malware
signatures.
By default, Acronis Backup and Security 2010 checks for updates when you turn on
your computer and every hour after that. However, if you want to update Acronis
Backup and Security 2010, just click Update Now. The update process will be
initiated and the following window will appear immediately:
Security
85
Page 96
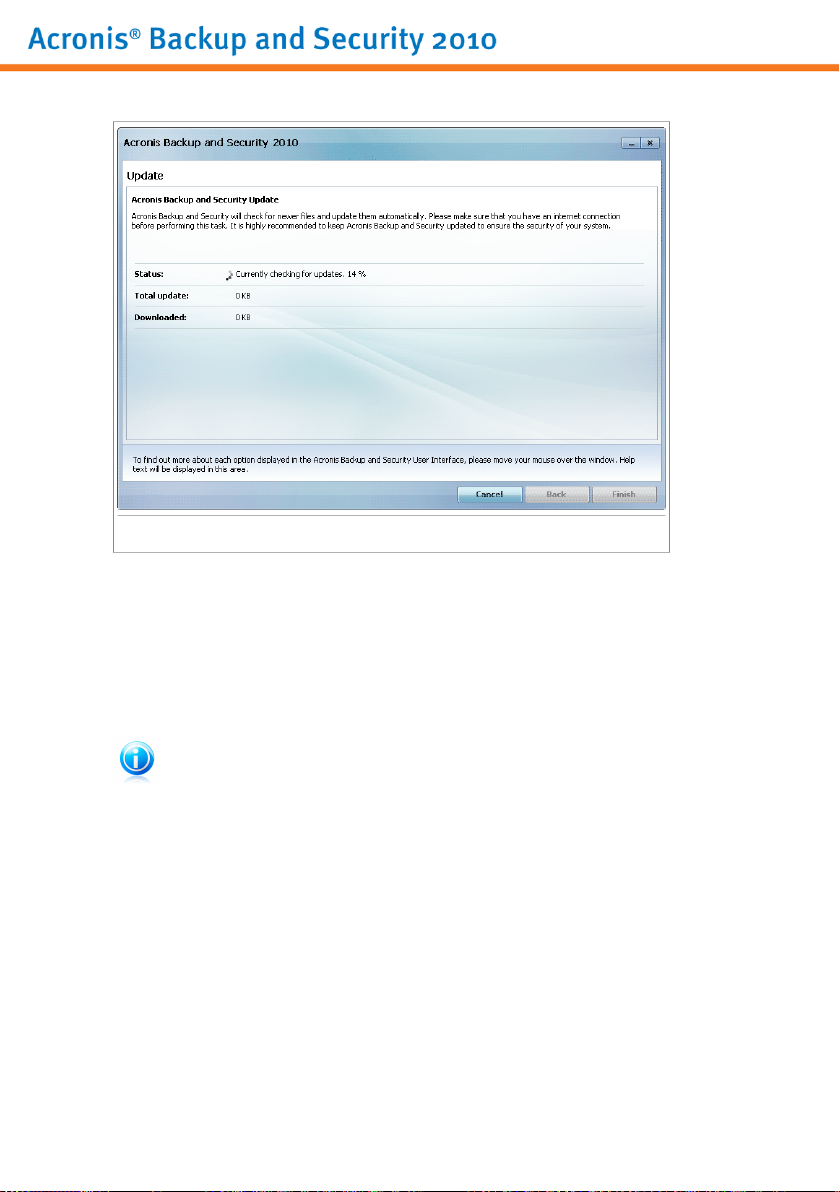
Updating Acronis Backup and Security 2010
In this window you can see the status of the update process.
The update process is performed on the fly, meaning that the files to be updated
are replaced progressively. In this way, the update process will not affect product
operation and, at the same time, all vulnerabilities will be excluded.
If you want to close this window, just click Cancel. However, this will not stop the
update process.
Note
If you are connected to the Internet through a dial-up connection, then it is
recommended to regularly update Acronis Backup and Security 2010 by user request.
Restart the computer if required. In case of a major update, you will be asked
to restart your computer. Click Reboot to immediately reboot your system.
If you want to reboot your system later, just click OK. We recommend that you
reboot your system as soon as possible.
12.2.2. Scanning with Acronis Backup and Security 2010
To scan your computer for malware, run a particular scan task by clicking the
corresponding button or selecting it from the drop-down menu. The following table
presents the available scan tasks, along with their description:
Security
86
Page 97

DescriptionTask
System Scan
My Documents Scan
Deep System Scan
Custom Scan
Scans the entire system, except for archives. In the
default configuration, it scans for all types of malware
other than rootkits.
Use this task to scan important current user folders:
My Documents, Desktop and StartUp. This will
ensure the safety of your documents, a safe workspace
and clean applications running at startup.
Scans the entire system. In the default configuration,
it scans for all types of malware threatening your
system's security, such as viruses, spyware, adware,
rootkits and others.
Use this task to choose specific files and folders to be
scanned.
Note
Since the Deep System Scan and System Scan tasks analyze the entire system,
the scanning may take a while. Therefore, we recommend you to run these tasks on
low priority or, better, when your system is idle.
When you run a System Scan, Deep System Scan or My Documents Scan, the
Antivirus Scan wizard will appear. Follow the three-step guided procedure to complete
the scanning process. For detailed information about this wizard, please refer to
“Antivirus Scan Wizard” (p. 42).
When you run a Custom Scan, the Custom Scan wizard will guide you through the
scanning process. Follow the six-step guided procedure to scan specific files or
folders. For detailed information about this wizard, please refer to “Custom Scan
Wizard” (p. 46).
12.2.3. Searching for Vulnerabilities
Vulnerability Scan checks Microsoft Windows Updates, Microsoft Windows Office
Updates and the passwords to your Microsoft Windows accounts to ensure that your
OS is up to date and that it is not vulnerable to password bypass.
To check your computer for vulnerabilities, click Vulnerability Scan and follow the
six-step guided procedure. For more information, please refer to “Fixing
Vulnerabilities” (p. 221).
Security
87
Page 98

13. Parental
Acronis Backup and Security 2010 includes a Parental Control module. Parental
Control enables you to restrict your children's access to Internet and to specific
applications. To check the status of Parental Control, click the Parental tab.
Parental
The Parental module consists of two sections:
● Status Area - Allows you to see if Parental Control is configured and to
enable/disable tracking this module's activity.
● Quick Tasks - This is where you can find links to the most important security
tasks: system scan, deep scan, update now.
13.1. Status Area
The current status of the Parental Control module is indicated using explicit sentences
and one of the following icons:
Green circle with a check mark: No issues affect the component.
Red circle with an exclamation mark: Issues affect the component.
The sentences describing issues are written in red. Just click the Fix button
corresponding to a sentence to fix the reported issue. The most common issue
reported for this module is Parental Control is not configured.
Parental
88
Page 99

If you want Acronis Backup and Security 2010 to monitor the Parental Control
module, click Configure Status Alerts and select the Enable alerts check box
for this module.
13.2. Quick Tasks
To configure Parental Control, click Parental Control in the Quick Tasks area. A
new window will appear.
Configure Parental Control
Here you can see the status of Parental Control for each Windows user account and
you can configure the Parental Control rules. This configuration window is similar
to the Parental Control tab in Expert Mode. For more information, please refer to
“Parental Control” (p. 169).
Parental
89
Page 100

14. File Vault
Acronis Backup and Security 2010 comes with a File Vault module that helps you
keep your data not only safe, but confidential. To achieve this goal, use file
encryption.
To enter the File Vault module, click the File Vault tab.
File Vault
The File Vault module consists of two sections:
● Status Area - Allows you to see the full list of monitored components. You can
choose which of the components to be monitored. It is recommended to enable
the monitoring option for all of them.
● Quick Tasks - This is where you can find links to the most important security
tasks: adding, viewing, locking and removing file vaults.
14.1. Status Area
The current status of a component is indicated using explicit sentences and one of
the following icons:
Green circle with a check mark: No issues affect the component.
Red circle with an exclamation mark: Issues affect the component.
File Vault
90
 Loading...