

Page 1
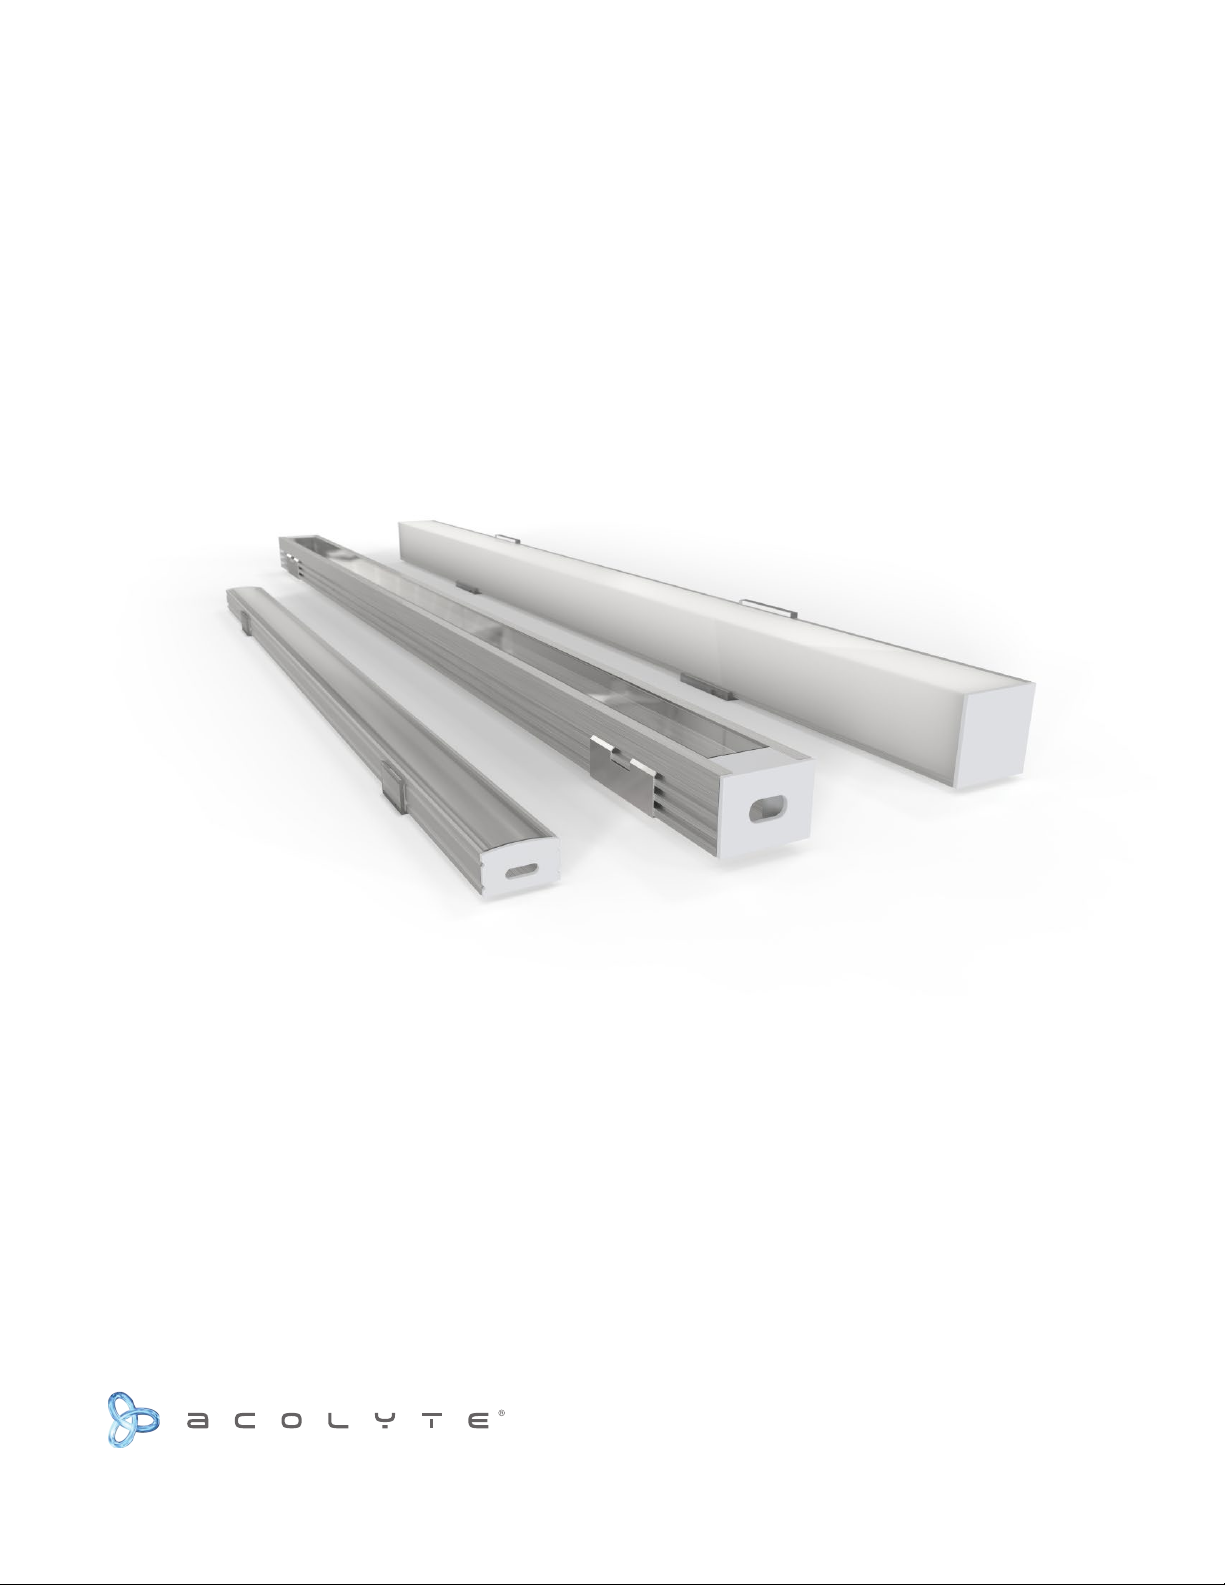
CHANNEL INSTALLATION GUIDE
MOUNTING CLIP & CHANNEL
Complete Integrated LED Lighting Solutions Tech Support: 212.629.6830
Page 2
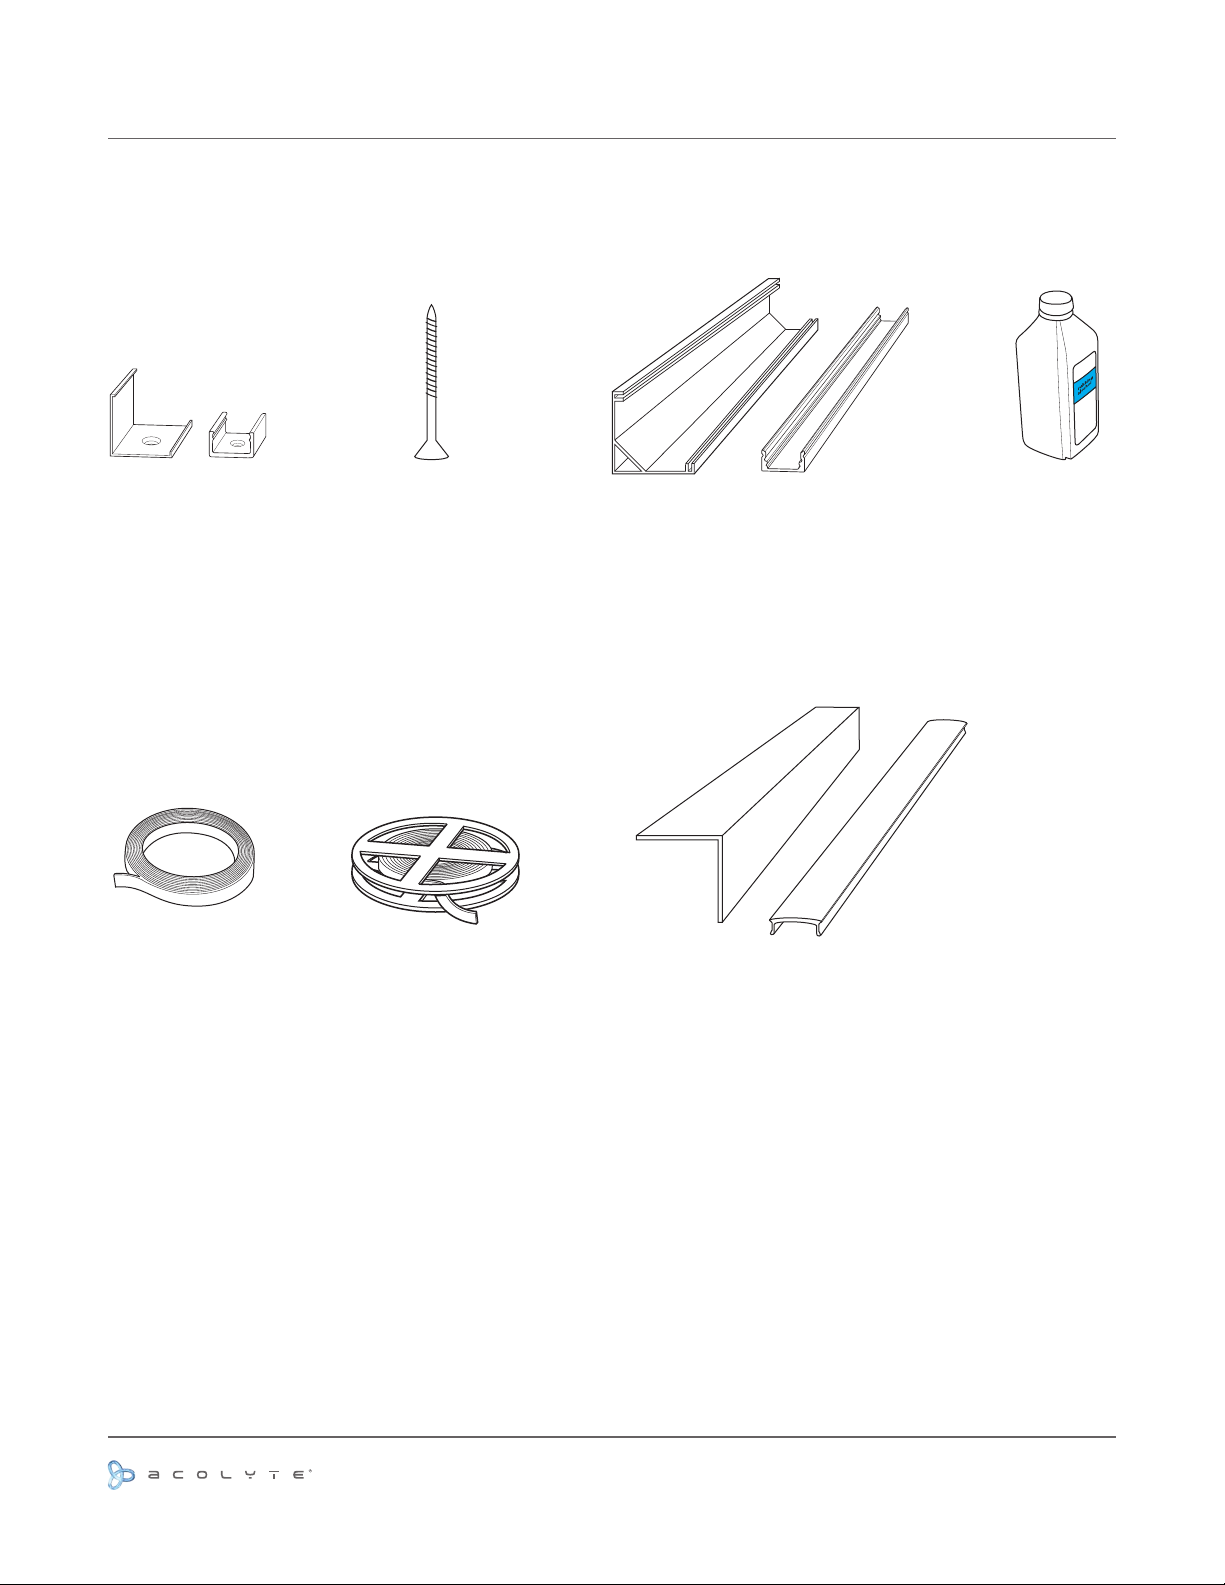
MATERIAL LIST
NOTE: CHANNEL AND CLIP APPEARANCE MAY DIFFER FROM THE ITEMS
SHOWN IN THIS GUIDE, BUT INSTALLATION PROCESS IS THE SAME.
(A)
Mounting Clip
(E)
Double Sided Tape
(B)
Sized Screw
(F)
RibbonLyte
(C)
Channel
(G)
Lens
(D)
Rubbing Alcohol
Use or reprinting prohibited unless explicitly approved by Acolyte Industries.
All artwork and images copyright Acolyte Industries Inc.
PAGE 1
Page 3
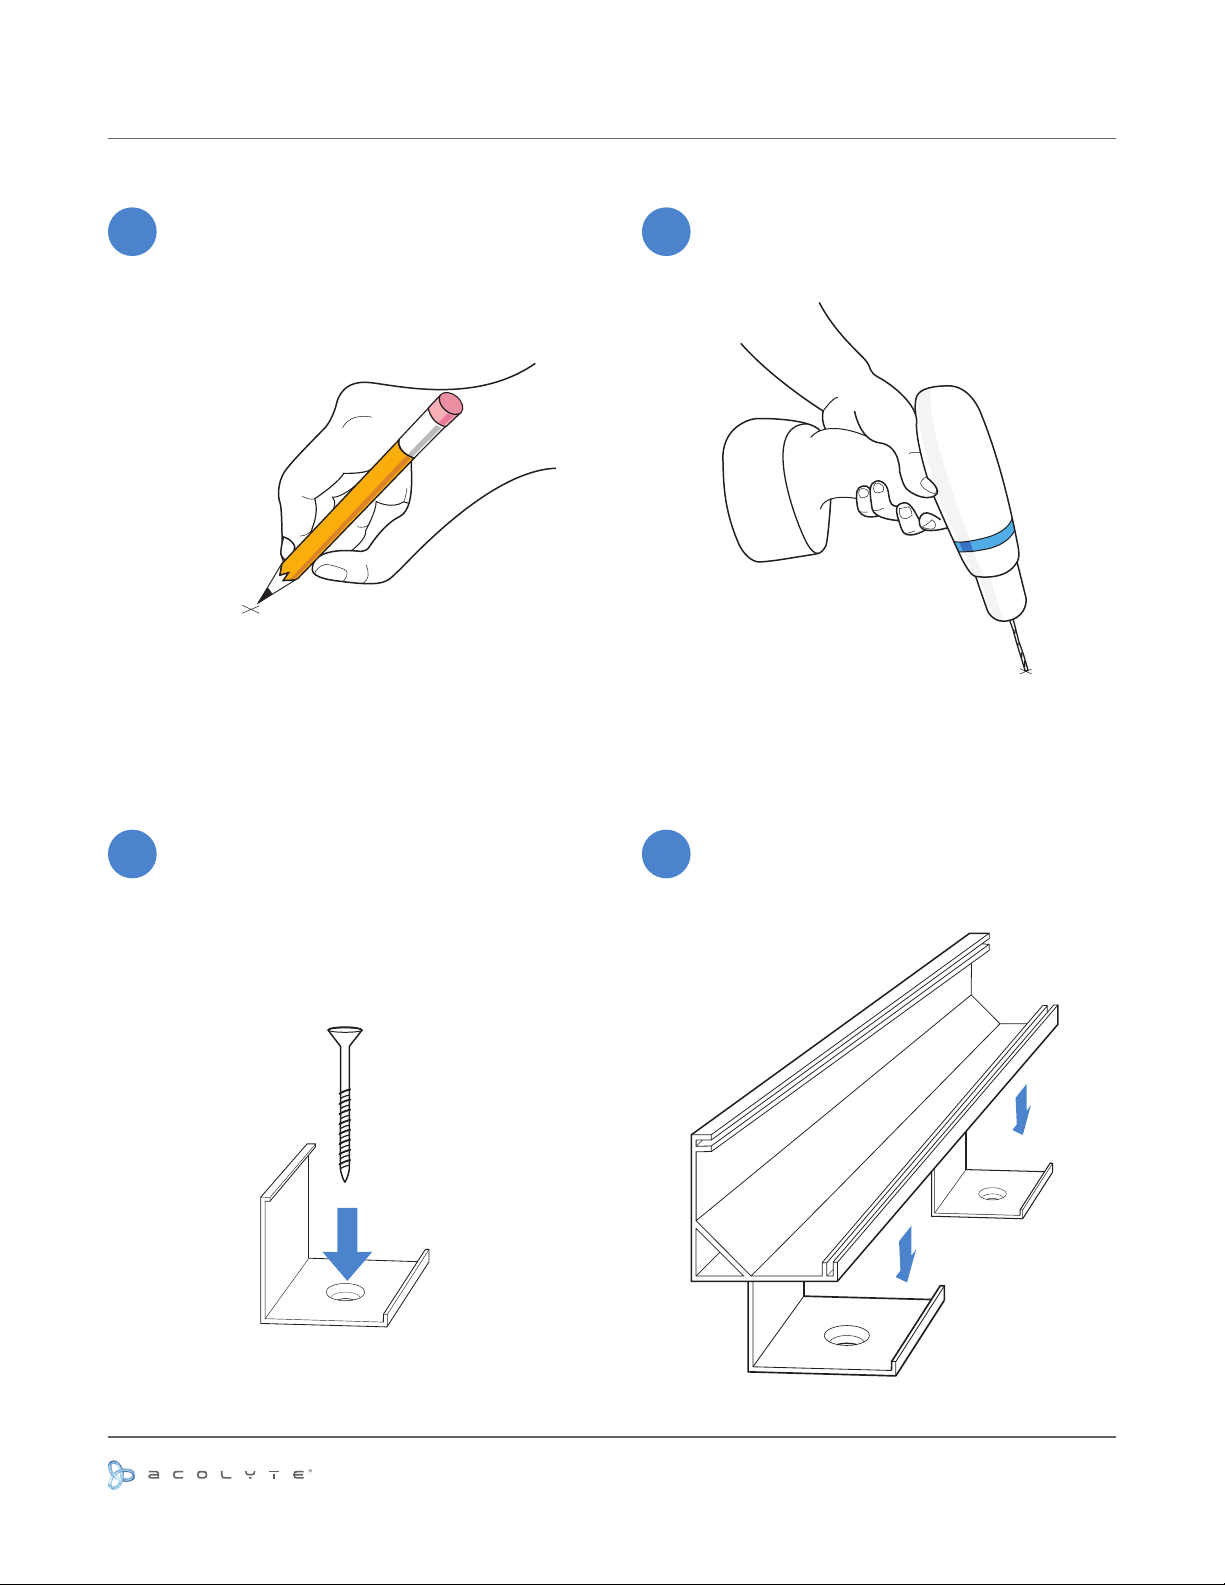
INSTALLATION -- STEPS 1-4
1
Mark points every 1 meter (3.28’) along
the intended path of channel. If channel is
shorter than 1 meter, 2 mounting clips will
be used.
2
Drill a pilot hole for the mounting clips with
a drill bit.
Screw each mounting clip (A) into place
3
using the proper sized screw for the
mounting clup you’re using. (B).
Reminder: actual mounting clip may differ in
appearance from the mounting clip below,
but installation procedure remains the same.
(B)
(A)
Snap channel (C) into mounting clips (A) so
4
that the channel is held in place.
(C)
CLICK!
(A)
(A)
Use or reprinting prohibited unless explicitly approved by Acolyte Industries.
All artwork and images copyright Acolyte Industries Inc.
PAGE 2
Page 4
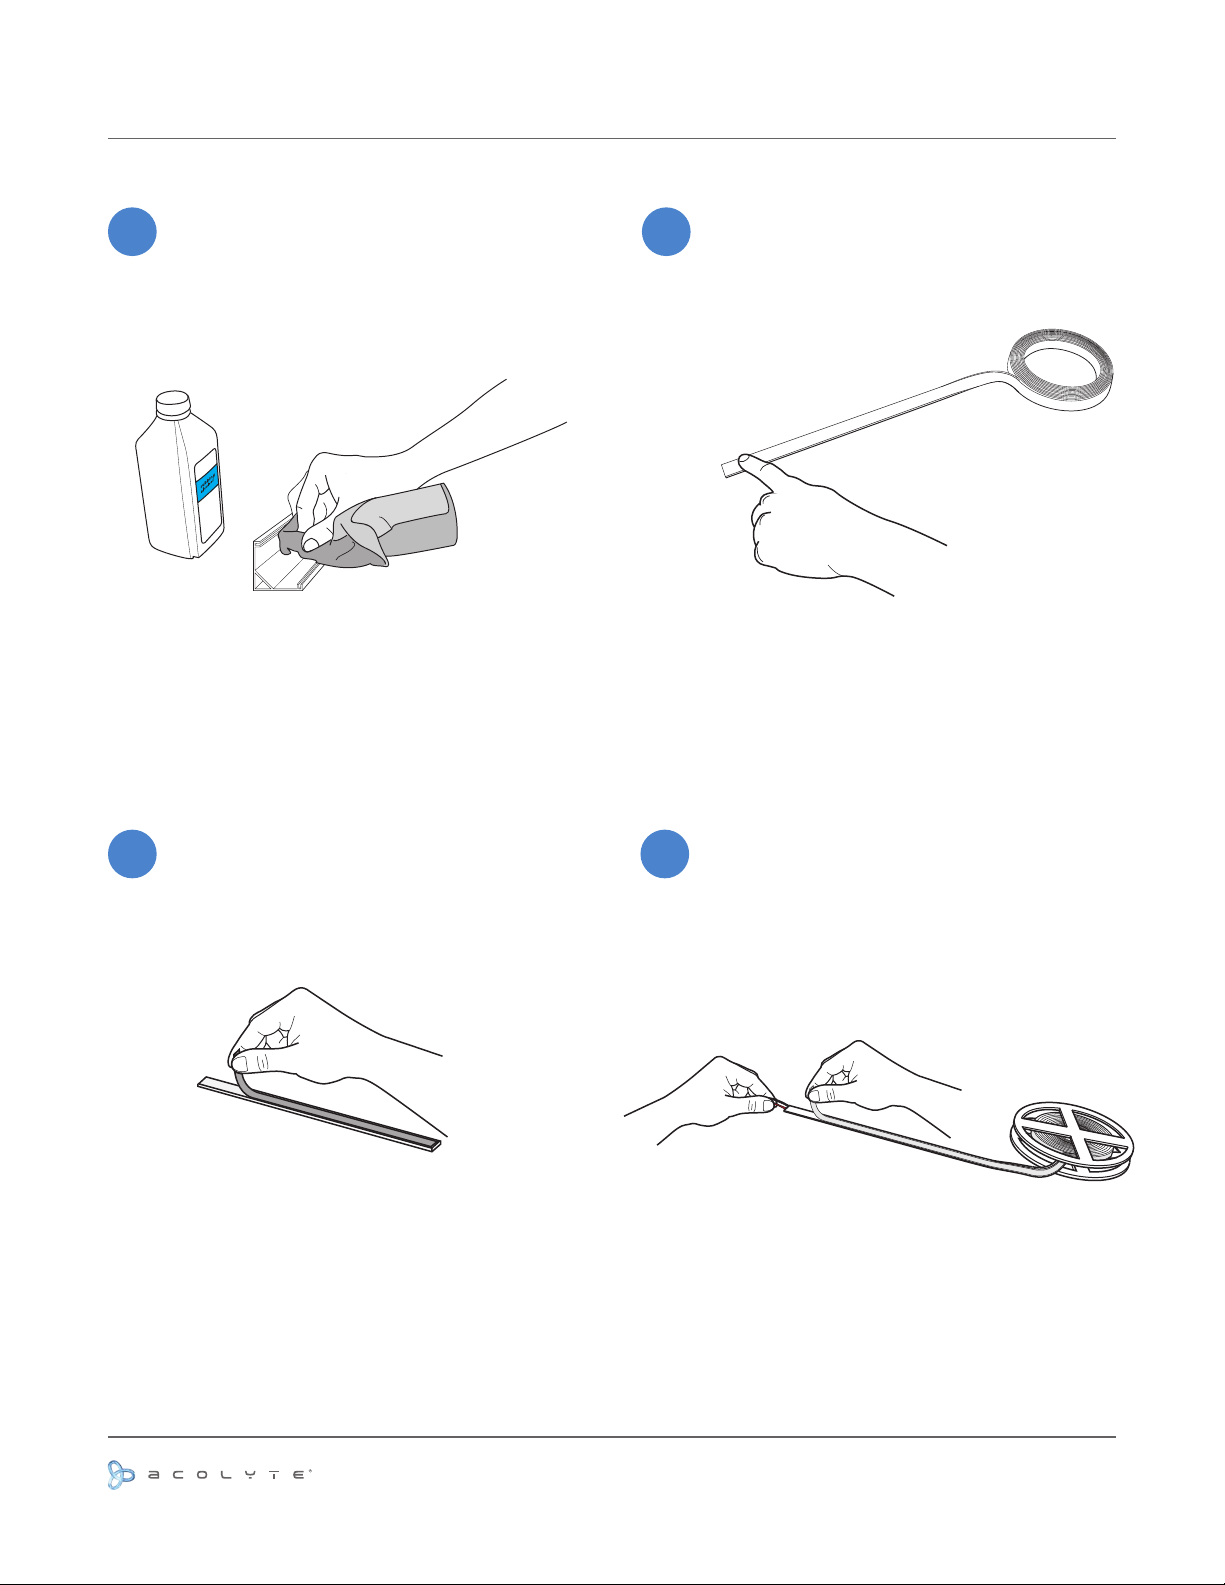
INSTALLATION -- STEPS 5-8
5
Clean the mountain surface free of dust
and debris using a wet cloth. For metal
mounting surfaces use rubbing alcohol (D)
to wipe clean.
(D)
6
After surface is dry, apply 1/16” double-sided
tape (E) to the desired mounting path of
your RibbonLyte.
(E)
Remove backing from double-sided tape
7
(E).
(E)
Remove the backing from the RibbonLyte
8
(F) that you are going to be applying atop
the double-sided tape.
Use or reprinting prohibited unless explicitly approved by Acolyte Industries.
All artwork and images copyright Acolyte Industries Inc.
PAGE 3
Page 5
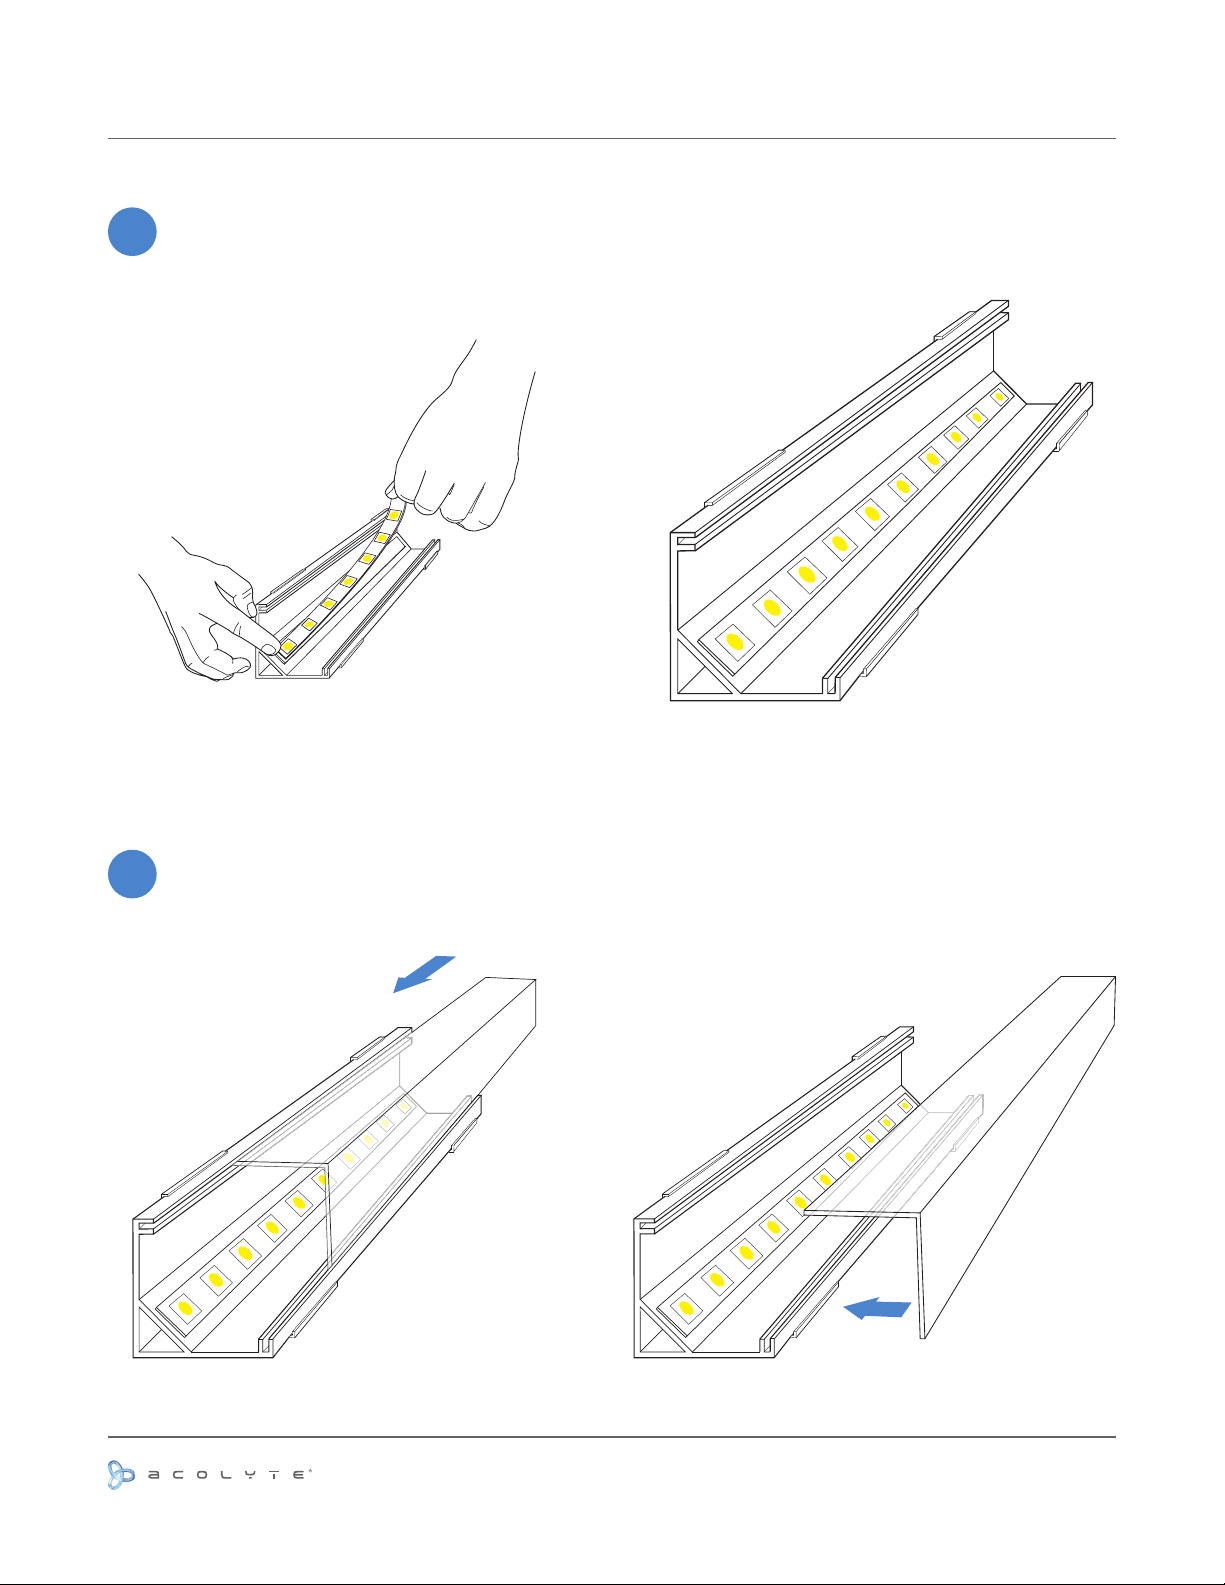
INSTALLATION -- STEPS 9-10
9
Apply the RibbonLyte (F) by placing one end
of the strip at the end of the double-sided tape
(E) inside the channel (C) then slide your nger
along the RibbonLyte (F) to make sure there is
rm contact and that the tape adheres well.
(F)
(C)
(E)
10
Slide or snap the lens (G) into place.
(G)
(G)
Use or reprinting prohibited unless explicitly approved by Acolyte Industries.
All artwork and images copyright Acolyte Industries Inc.
PAGE 4
Page 6
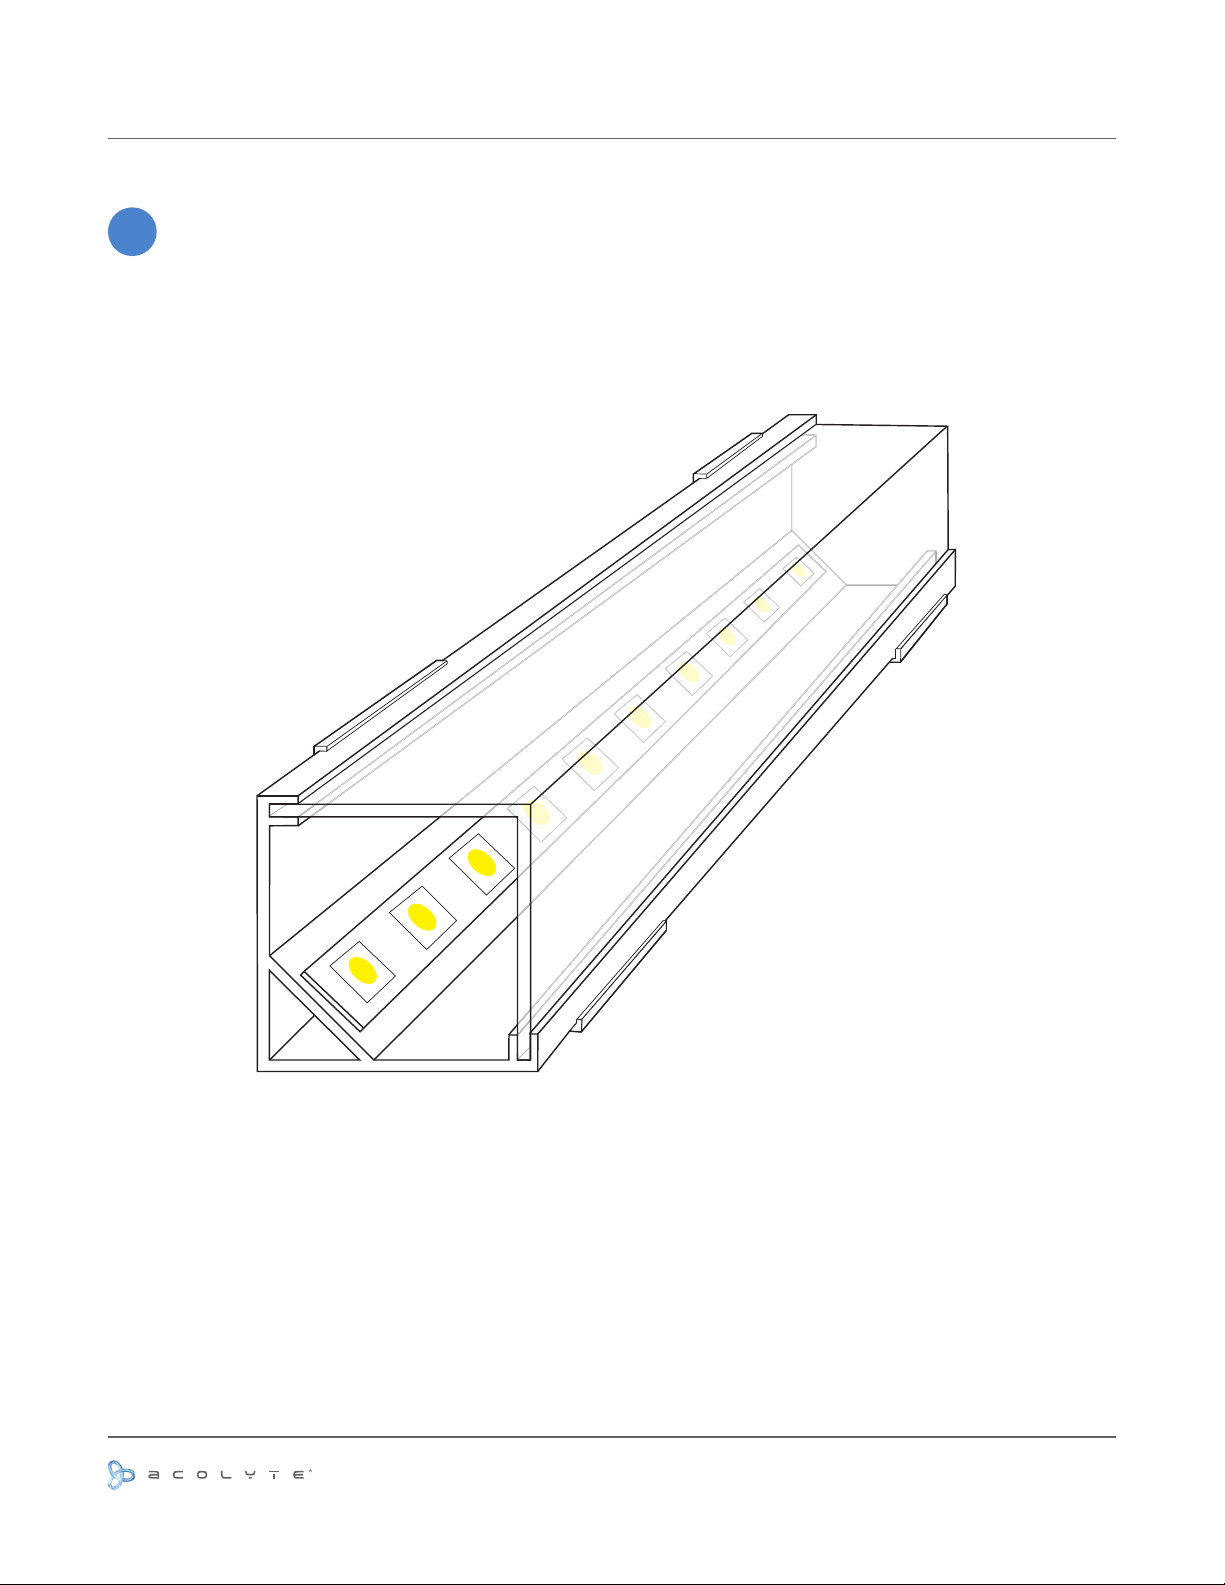
INSTALLATION IS COMPLETE
-
Your channel and mounting clip installation is complete.
Use or reprinting prohibited unless explicitly approved by Acolyte Industries.
All artwork and images copyright Acolyte Industries Inc.
PAGE 5
 Loading...