

Page 1

SIP IP
PHONE
RELEASE # 1.0
ADMINISTRATOR
GUIDE
Page 2

Aastra Telecom will not accept liability for any damages and/or long
distance charges, which result from unauthorized and/or unlawful use.
While every effort has been made to ensure accuracy, Aastra Telecom
will not be liable for technical or editorial errors or omissions
contained within this documentation. The information contained
in this documentation is subject to change without notice.
Copyright 2005 Aastra Telecom. www.aastra.com
All Rights Reserved.
Page 3

Overview.......................................1
General Requirements................1
About this Guide..........................1
Methods of Installation................2
480i IP Phone Set up ...................2
The 480i’s Options List
Administrator Level Options ......3
Network: ....................................3
SIP Settings:..............................4
Phone Status:............................4
The Aastra 480i Web Client ......5
480i IP Phone Configuration.......6
Network.......................................6
Turn DHCP On or Off ................6
Manually Configure
Network Settings ...................6
TFTP Server Settings..................7
SIP settings.................................7
Setting Parameters through
Configuration Files......................9
Setting Parameters —
Network Settings......................9
Setting Parameters —
Time Server Settings..............11
Setting Parameters —
SIP Authentication .................14
Setting Parameters —
Softkey Settings
Firmware Upgrade .....................20
Updating your Phone Through
the Options List....................20
Updating your Phone Through
the Web Client.....................20
Troubleshooting.........................22
Table of Contents
..............3
......................18
Table of Contents
Appendix A: Configuring the
480i at the Asterisk IP PBX...24
Appendix B: Sample
Configuration Files ................26
Appendix C: TFTP Server
Set-up......................................36
Limited Warranty........................37
i
Page 4

Overview
This SIP 480i IP phone
Administration Guide
information on the basic network
setup that is required for the
SIP 480i IP phone. It also includes
details on the functioning and
conÞguration of the 480i phone.
General Requirements
Overview
• A SIP based IP PBX system or
network installed and running
with a number created for the
new 480i phone.
• SIP standard "RFC 3261"
• Access to a Trivial File Transfer
Protocol (TFTP) server.
• 802.3 Ethernet/Fast Ethernet
LAN.
• Category 5/5e straight through
cabling.
• Power over Ethernet (PoE)
power supply (optional
accessory – necessary only if
no inline power is provided
on the network).
provides
About this Guide
This guide targets network
administrators, system
administrators, developers and
partners who need to understand
how to install the 480i on a SIP
network. This guide contains
information that is at a technical
level more suitable for system
or network administrators. Prior
knowledge of IP Telephony
concepts is recommended.
This guide complements the
Aastra 480i Installation Guide and the
Aastra SIP 480i IP Phone User Guide
Aastra 480i Installation Guide –
•
contains installation and set-up
instructions, information on general features and functions, and
basic options list customization.
Included with the phone.
•
Aastra SIP 480i IP Phone
Administration Guide
how to set the phone up on
the network, as well as advanced
conÞguration instructions for
the 480i. This guide contains
information that is at a technical
level more suitable for a system
or network administrator.
•
Aastra SIP 480i IP Phone
User Guide
commonly used features and
functions for an end user.
– explains the most
– explains
.
1
Model 480i SIP Admin Guide
Page 5

Methods of Installation
The Þrmware set up and installation
for the 480i can be done through the
Options List available directly from
the phone or through the
Web Client
480i is initialized for the Þrst time,
DHCP is enabled by default. The
DHCP server passes information to
the 480i so that it can conÞgure itself
for subsequent IP PBX addresses
and normal runtime operations.
The following considerations must
be made before connecting the 480i
phone to the network:
• If you are planning on using
Dynamic IP addresses, make sure
a DHCP server is running on
your network.
• If you are not planning on using
Dynamic IP addresses, refer to
the section “
IP Phone
IP address manually.
• Make sure a TFTP server is set up
on your network and can accept
connections anonymously.
• Every PBX system that interacts
with the 480i phones requires
adherence to the SIP Standard.
To Þnd out how to hook up the
cabling to your 480i phone, please
refer to the
Guide
web interface. When the
ConÞguring the 480i
” on how to set up an
Aastra 480i Installation
.
Aastra 480i
480i IP Phone Set up
When the 480i is Þrst plugged in
or reset it will automatically
download any Þrmware updates
for the phone. The binary and
conÞguration Þles that are required
for the 480i are: “Þrmware.st”,
“aastra.cfg” and “<mac>.cfg”. The
settings of the 480i phone, as well
as the softkeys and the line keys,
can be conÞgured through the
conÞguration Þles. Please refer to
Appendix A for details on the
parameters that can be set for the
480i phone. Please refer to Appendix
B for sample conÞguration Þles
with all the basic parameters that
need to be set in order to register the
IP phone at the PBX.
The following steps illustrate a
typical 480i phone setup:
1. If DHCP is disabled, manually
enter the TFTP server’s IP
address. For details on how to
set the TFTP server setting for the
480i, please refer to the section
“
ConÞguring the 480i IP Phone ”.
2. Copy the Þrmware Þle
“Þrmware.st” to the root directory
of the TFTP server. This Þrmware
Þle is downloaded only when it
is different than the one the phone
is currently using.
3. Copy the Aastra conÞguration
Þle “aastra.cfg” and “<mac>.cfg”
Þle to the root directory of the
TFTP server.
Note: <mac> represents the actual MAC
address of your phone which must
be input ie 00085D030996.cfg
Methods of Installation
Model 480i SIP Admin Guide 2
Page 6

r
s
4
3
The 480i’s Options List
1. Press the £ button on the
phone to enter the options list
2. Use the
through the list of options
3. Press the
button or press the number
corresponding to the option to
select an option
4. Use the softkeys to change a
selected option
5. Press the
time to save the change and exit
the current option
6. Press the
button or the
any time to exit without saving
the changes
Administrator Level Options
480i IP Phone Set up
Some options in the phone’s
options list are considered
administrator level options and
require the administrator user
name and password. When
attempting to access administrator
level options, the phone will
prompt for the administrator
password before allowing access.
The default password for the
administrator is “22222”. For all
other phone options, please refer
to the
The administrator level options in
the phone’s Options List are:
•“ 8.Network
•“ 9.SIP Settings
•“ 4.Factory Default
under option “
and
Show softkey, the
Done softkey at any
Cancel softkey, the
Aastra 480i Installation Guide .
”
to scroll
k button at
”
” found
10.Phone Status
”
Network:
If DHCP is enabled, all the
Network settings are automatically
conÞgured. The 480i’s Þrmware
allows the network settings to be
manually entered, if for any reason
the phone cannot populate any of
the settings with DHCP enabled.
If DHCP is disabled the following
network settings can be conÞgured
manually:
1. DHCP
This turns DHCP on or
off. IP Address, Subnet Mask
and Gateway options are
automatically populated and
are read-only when DHCP is
used. DHCP is used by default.
2. IP Address
This is the phone’s IP address.
To assign a static IP address to the
phone, disable DHCP.
3. Subnet Mask
To assign your own subnet mask
to the phone, disable DHCP.
4. Gateway
To assign your own gateway IP
address, disable DHCP.
5. DNS
To assign your own DNS
addresses, disable DHCP.
6. TFTP Server
This is the TFTP server’s IP
address.
3
Model 480i SIP Admin Guide
Page 7

SIP Settings:
If you have a proxy server or have
a SIP registrar present at a different
location than the PBX server, the
following settings may need to be
changed:
1. Proxy IP
This is the IP address of the proxy
server.
2. Proxy Port
This is the SIP proxy server’s port
number. By default this number
is set to 5060.
3. Registrar IP
This is the IP address of the SIP
registrar.
4. Registrar Port
SIP registrar’s port number. By
default this is set to 5060.
5. User Name
This is used in the name Þeld
of the SIP URI for the 480i phone
and for registering the 480i at
the registrar.
6. Display Name
This is used in the display name
Þeld of the From SIP header Þeld.
Some IP PBX systems use this
as the caller’s ID and some may
overwrite this with the string that
is set at the PBX system.
7. Auth Name
The authorization name that will
be used in the username Þeld of
the Authorization header Þeld of
the SIP REGISTER request.
8. Password
The password that is used to
register at the registrar.
Phone Status:
The following options display
the phone’s status or allow you to
power cycle the phone or reset the
phone to its factory default settings.
1. Network Status
This shows the network status
of the two Ethernet ports at the
back of the phone. You can
also view the phone’s IP and
MAC addresses.
• IP Addr
Shows the IP address of
the phone
• MAC Addr
The MAC or the
hardware address of the
480i’s Ethernet card
2. Firmware Version
This option displays information
about the Þrmware that is
currently installed on the 480i.
3. Reset Phone
This option lets you reboot the
phone. A reset may be necessary
when:
• There is a change in your
network, OR
• To re-load the conÞguration
information modiÞed through
the conÞguration Þles to the
phone, OR
• If the settings for the 480i on
the IP PBX system had been
modiÞed.
4. Factory Default
This option lets you reset the
phone back to the factory default
settings, including the network
settings. Performing this
operation will result in losing
all user modiÞed settings.
Note: For information on other settings
in the options list of the phone,
please refer to the Aastra 480i
Installation Guide provided with
the 480i.
480i IP Phone Set up
Model 480i SIP Admin Guide 4
Page 8
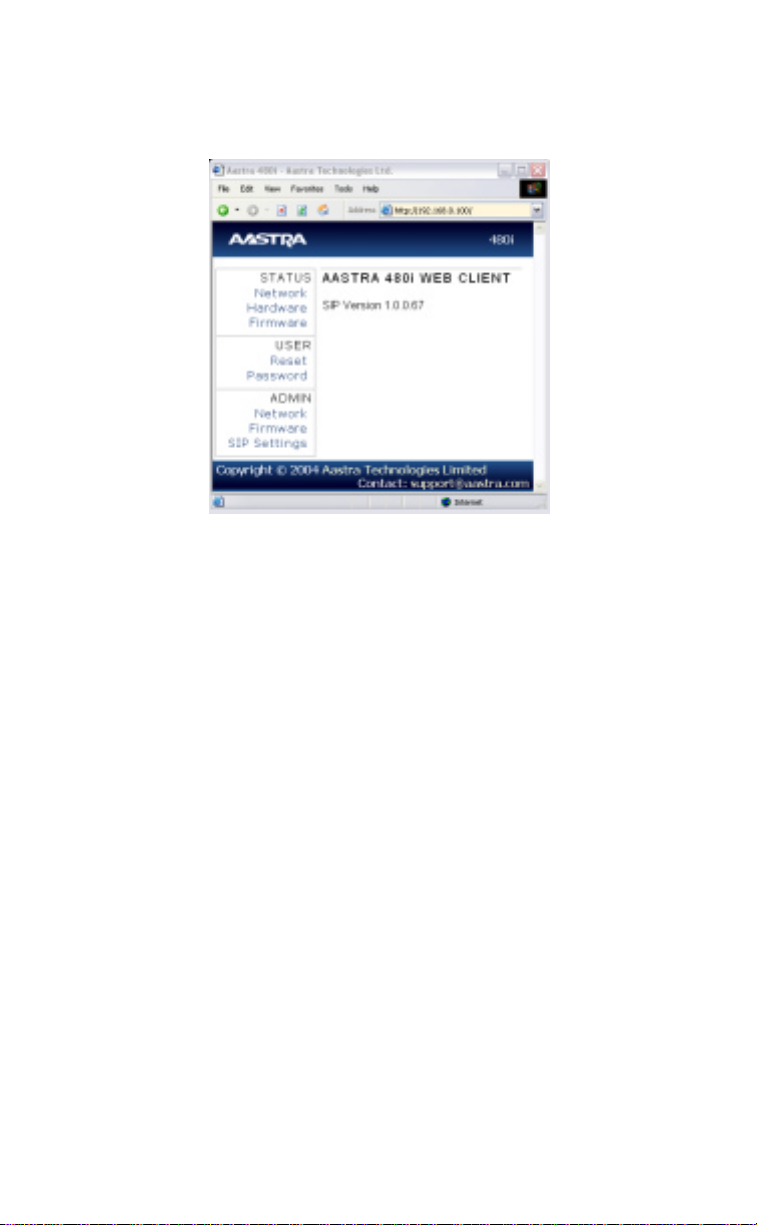
The Aastra 480i Web Client
To access the Aastra 480i Web Client, open your web browser (supports
Internet Explorer and Gecko engine based browsers like Firefox, Mozilla or
Netscape) and enter the phone’s IP address into the address Þeld, starting
with the web preÞx “http://”.
480i IP Phone Set up
In the side menu of the Aastra 480i
Web Client, there are three main
categories: Status, User and Admin.
• The STATUS category contains
read only status information for
sub-categories Network, Hardware and Firmware.
• The USER category contains user
conÞgurable sub-categories Reset
and Password. This section is
accessed through the user level
or the administrator level user
name and password. For more
information, refer to the Aastra
SIP 480i IP Phone User Guide.
• The ADMIN category contains
administrator only conÞgurable
sub-categories: Network,
Firmware and SIP Settings. This
section is accessed through the
admin level user name and
password. You will be prompted
for this information when one
of these options is selected.
For more information, refer to
the section “480i IP Phone Con-
Þguration” of this document
The default for the administrator
user name is “admin” and the
password is “22222”. For a user,
the default user name is “user” and
the password Þeld is left blank.
The user level password can be
changed using the web client.
5 Model 480i SIP Admin Guide
Page 9

480i IP Phone
Configuration
The Network and SIP options
within the 480i phone can be
conÞgured from the phone or from
the Aastra 480i Web Client web
interface. Administrator level
options are password protected in
both the phone and the web
interface.
Network
DHCP automatically sends the IP
address, Subnet Mask and Gateway
network (also DNS and FTP Server)
information to the 480i phone
during initialization when the
phone is Þrst powered up or reset.
By default, the DHCP setting is
enabled. The network settings
cannot be changed when DHCP is
used, so DHCP must be set to “Off”
in order to manually change
these settings.
Turn DHCP On or Off
From the 480i Phone:
1. Press the £ button to
enter the Options List.
2. Select option 8. Network.
3. Enter the administrator’s
password. The default password
is 22222.
4. Press the Enter softkey.
5. Select option 1. DHCP.
6. Press the Change softkey to
indicate whether DHCP should
be used or not.
7. Press Done to save the changes.
From the Web Client:
1. Click on the Network sub-category
under the ADMIN main category.
2. Enter the administrator’s user
name and password (the default
user name is “admin” and
password is “22222”).
3. In the web page that has just
opened, check the Use DHCP check
box to use DHCP and uncheck
to indicate that you do not want
to use DHCP.
4. Click on the Set Values button
to save the changes that you just
made.
Manually Configure
Network Settings
If you are not using DHCP, you
need to conÞgure the network
settings for the phone manually.
From the 480i Phone:
1. Press the £ button to
enter the Options List.
2. Select option 8. Network.
3. Enter the administrator’s
password. The default password
is 22222.
4. Select option 2. IP Address to
change the IP address.
5. Select option 3. Subnet Mask
to change the subnet mask.
6. Select option 4. Gateway to
change the gateway address.
7. Select option 5. DNS to change
the DNS.
8. Press Done to save the changes.
When an IP address has been
assigned to the phone, you have
the option to either continue
conÞguring the 480i through the
£button on the phone or
to start using the Aastra 480i Web
Client. See the section “The Aastra
480i Web Client” within this
guide for details.
480i IP Phone Configuration
Model 480i SIP Admin Guide 6
Page 10

From the Web Client:
1. Click on the Network sub-category
under the ADMIN main category.
2. Enter the administrator’s
user name and password (the
default user name is “admin”
and password is “22222”).
3. In the web page that has just
opened enter the IP address of the
phone, the Subnet Mask and
the Gateway IP address in their
corresponding Þelds.
TFTP Server Settings
The 480i phone uses the TFTP to
download updates of the phone’s
Þrmware and conÞguration Þles.
You must set the TFTP server
address in the phone.
From the 480i Phone:
1. Press the £ button to
enter the Options List.
2. Select option 8. Network.
3. Enter the administrator’s
password. The default
password is 22222.
480i IP Phone Configuration
4. Select option 6. TFTP Server
to change the TFTP server.
From the Web Client:
1. Click on the Network sub-category
under the ADMIN main category.
2. Enter the administrator user
name and password (the default
user name is “admin” and
password is “22222”).
3. In the TFTP Þeld, enter the IP
address of the TFTP server.
4. Click on the Set Values button
to save the changes that you
just made.
SIP settings
The 480i uses the information in
the SIP settings to register at the IP
PBX. To conÞgure the SIP settings:
From the 480i Phone:
1. Press the £button to enter
the Options List.
2. Select option 9. SIP Settings.
3. Enter the administrator’s
password. The default password
is 22222.
4. Select options 1-4 to change the
information about the registrar
and the proxy server.
5. Select option 5. User Name to
change the user name.
6. Select option 6. Screen Name to
change the screen name.
7. Select option 7. Auth. Name to
change the authorization name.
8. Select option 8. Password to
change the user’s password.
From the Web Client:
1. Click on the SIP Settings
sub-category under the ADMIN
main category.
2. Enter the administrator user
name and password (the default
user name is “admin” and
password is “22222”).
3. In the web page that just
opened enter the appropriate
information.
4. Click on the Set Values button
to save the changes that you
just made.
7 Model 480i SIP Admin Guide
Page 11
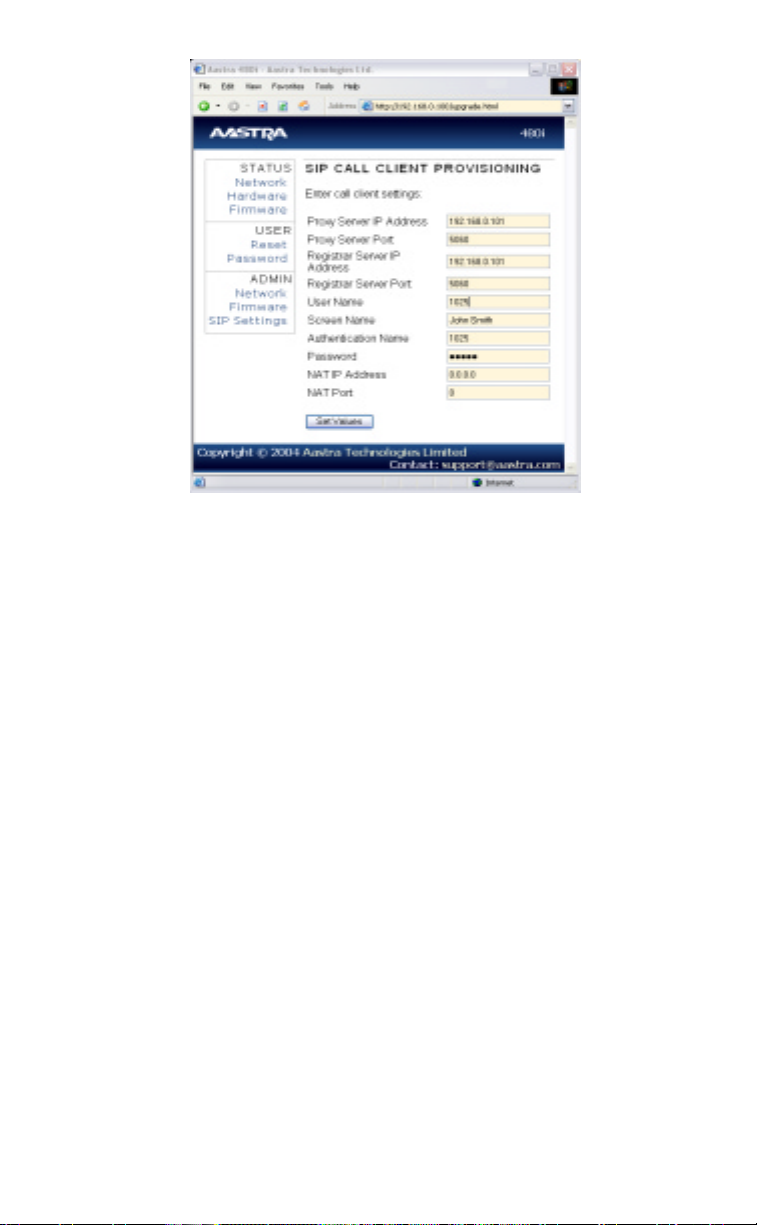
Note: At this point modiÞcations performed to the User name, Screen name,
Authentication name and Password affect line 1 of the 480i only.
ModiÞcations to the other lines should be done through the <mac>.cfg Þle.
The NAT IP Address and NAT Port are currently not supported and will have no
effect when set.
480i IP Phone Configuration
Setting Parameters through Configuration Files
The following are the parameters that can be used to conÞgure the 480i
phone through the conÞguration Þles – aastra.cfg and <mac>.cfg. The
"aastra.cfg" Þle conÞgures the settings server wide, while the <mac>
conÞgures only the phones with the MAC address for which the Þle is
named. The settings in the "aastra.cfg" Þle will be overriden by the settings
which also appear in the <mac> cfg Þle.
Model 480i SIP Admin Guide 8
Page 12

Setting Parameters – Network Settings
The following section contains the parameters to conÞgure the
network settings.
Parameter – dhcp ConÞgurable through the 480i's Options
Description Enabling DHCP will populate most of the
Format Integer
Default Value 1
Range 0 or 1
Example dhcp: 1
Parameter – ip ConÞgurable through the 480i's Options List,
Description This parameter assigns a static IP address to
Format IP address
Default Value 0.0.0.0
Range Not Applicable
Example ip: 192.168.0.25
List, the Aastra 480i web client or through
the conÞguration Þles
network information. The DHCP server
should serve the network information that
the 480i requires. If the 480i is unable to get
any required information then it should be
entered manually. Parameters affected: ip.
Use "0" to disable DHCP and "1" to enable
DHCP
the Aastra 480i web client or through the
conÞguration Þles
the 480i device.
Parameter –
subnet mask
Description The subnet mask IP address.
Setting Parameters – Network Settings
Format IP address
Default Value 255.255.255.0
Range Not Applicable
Example subnet mask: 255.255.255.224
9 Model 480i SIP Admin Guide
ConÞgurable through the 480i's Options List,
the Aastra 480i web client or through the
conÞguration Þles
Page 13

Setting Parameters – Network Settings
Parameter –
default gateway
Description The IP address of the network's gateway or
Format IP address
Default Value 1.0.0.1
Range Not Applicable
Example default gateway: 192.168.0.1
Parameter –
Description Primary domain name servers’ IP address.
Format IP address
Default Value 0.0.0.0
Range Not Applicable
Example dns1: 192.168.0.5
dns1 ConÞgurable through the 480i's Options List,
ConÞgurable through the 480i's Options List,
the Aastra 480i web client or through the
conÞguration Þles
the router IP address
the Aastra 480i web client or through the
conÞguration Þles
For any of the IP address settings on the 480i
a domain name value can be entered instead
of an IP address. With the help of the domain
name servers the domain names for such
parameters can then be resolved to their
corresponding IP addresses.
Parameter –
Description Secondary domain name servers’ IP address.
Format IP address
Default Value 0.0.0.0
Range Not Applicable
Example dns2: 192.168.0.6
dns2 ConÞgurable through the 480i's Options List,
the Aastra 480i web client or through the
conÞguration Þles
Model 480i SIP Admin Guide 10
Page 14

Parameter – tftp server ConÞgurable through the 480i's Options List,
the Aastra 480i web client or through the
conÞguration Þles
Description The TFTP server’s IP address. If DHCP is
enabled and the DHCP server provides the
information, this Þeld is automatically
populated. Use this parameter to change the
IP address of the TFTP server. This will
become effective after this conÞguration Þle
has been downloaded into the phone.
Format IP address
Default Value 0.0.0.0
Range Not Applicable
Example tftp server: 192.168.0.130
Parameter – sip rtp port ConÞgurable through the conÞguration
Þles only
Description Indicates the port through which the RTP
packets will be sent to. The RTP port is used
for sending DTMF tones and for the audio
stream. Your network administrator may
close some ports for security reasons. You
may want to use this parameter to send RTP
data using a different port.
Format Integer
Default Value 3000
Range Not Applicable
Example sip rtp port: 5130
Setting Parameters – Time Server Settings
The following section contains the parameters to conÞgure settings speciÞc to
the timeserver.
Parameter –
time server disabled
Description
Setting Parameters – Time Server Settings
Format Integer
Default Value 0
Range 0 or 1
Example Time server disabled: 0
11 Model 480i SIP Admin Guide
ConÞgurable through the 480i's Options List
or the conÞguration Þles
This parameter enables or disables the
time server. This parameter affects the time server1,
time server2 and time server3 parameters. Use "0"
to enable time server and "1" to disable time server.
Page 15

Parameter –
time server1
Description The primary time server's IP address. If the
Format IP address
Default Value 0.0.0.0
Range Not Applicable
Example time server1: 192.168.0.5
ConÞgurable through the 480i's Options List
or the conÞguration Þles.
time server is enabled, the value for time
server1 will be used to request the time from.
Setting Parameters – Time Server Settings
Parameter –
time server2
Description The secondary time server's IP address. If
Format IP address
Default Value 0.0.0.0
Range Not Applicable
Example time server2: 192.168.0.5
Parameter –
time server3
Description The tertiary time server's IP address. If the
Format IP address
Default Value 0.0.0.0
Range Not Applicable
Example time server3: 192.168.0.5
ConÞgurable through the conÞguration
Þles only
the time server is enabled, and the primary
time server is not conÞgured or cannot be
accessed the value for time server2 will be
used to request the time from.
ConÞgurable through the conÞguration
Þles only
time server is enabled, and the primary and
secondary time servers are not conÞgured or
cannot be accessed the value for time server3
will be used to request the time from.
Model 480i SIP Admin Guide 12
Page 16

Parameter –
time format
Description This parameter changes the time to 12
Format Integer
Default Value 0
Range 0 or 1
Example time format: 0
ConÞgurable through the 480i's Options List
or the conÞguration Þles
hour or 24 hour format. Use “0” for the 12
hour format and “1” for the 24 hour format.
Parameter –
date format
Description This parameter allows the user to change the
Format Integer
Default Value 0
Range 0-7
Example date format: 7
ConÞgurable through the 480i's Options List
or the conÞguration Þles
date to various formats.
Following table shows the format for the
corresponding date format values:
0: WWW MMM DD
1: DD-MMM-YY
2: YYYY-MM-DD
3: DD/MM/YYYY
4: DD/MM/YY
5: DD-MM-YY
6: MM/DD/YY
7: MMM DD
Setting Parameters – Time Server Settings
13 Model 480i SIP Admin Guide
Page 17

Setting Parameters – SIP Authentication
The following parameters are the settings speciÞc to SIP authentication.
Parameter – sip proxy ip ConÞgurable through the 480i's Options
List, the Aastra 480i web client or through
the conÞguration Þles
Description A SIP proxy is a server that makes and
forwards requests generated by the 480i to
the targeted user. This parameter’s IP
address will be the address of the proxy
server that the 480i will use to send all SIP
requests to
Format IP address or fully qualiÞed host name
Default Value 0.0.0.0
Range Not Applicable
Example sip proxy ip: 192.168.0.101
Setting Parameters – SIP Authentication
Parameter –
sip proxy port
Description The proxy server's port number
Format Integer
Default Value 5060
Range Not Applicable
Example sip proxy port: 5060
Parameter –
sip registrar ip
Description A SIP registrar is a server that maintains
Format IP address or fully qualiÞed host name
Default Value 0.0.0.0
Range Not Applicable
Example sip registrar ip: 192.168.0.101
ConÞgurable through the 480i's Options
List, the Aastra 480i web client or through
the conÞguration Þles
ConÞgurable through the 480i's Options
List, the Aastra 480i web client or through
the conÞguration Þles
the location information of the 480i phone.
This parameter’s IP address will be the
address of the registrar that the 480i will use
to send REGISTER requests to
Model 480i SIP Admin Guide 14
Page 18

Parameter –
sip registrar port
Description The registrar's port number
Format Integer
Default Value 5060
Range Not Applicable
Example registrar port: 5060
ConÞgurable through the 480i's Options
List, the Aastra 480i web client or through
the conÞguration Þles
Parameter –
sip digit timeout
Description Represents the time in seconds to conÞgure
Format Integer
Default Value 4
Range Not Applicable
Example sip digit timeout: 6
Parameter –
sip registration period
Description The time in seconds that the 480i should
Format Integer
Default Value 3600
Range Not Applicable
Example sip registration period: 3600
ConÞgurable through the conÞguration
Þles only
the timeout between consecutive key
presses.
ConÞgurable only through the
conÞguration Þles.
use to send re-registration requests to the
registrant.
The value of this parameter will be used in
the expires header Þeld value in the SIP
REGISTER request.
Setting Parameters – SIP Authentication
15 Model 480i SIP Admin Guide
Page 19

Parameter –
sip session timer
Description This session timer parameter is the time in
Format Integer
Default Value 0
Range Not Applicable
Example sip session timer: 30
ConÞgurable only through the conÞguration
Þles
seconds that the 480i uses to send periodic
re-INVITE requests to keep a session alive.
The proxy uses these re-INVITE requests
to maintain the status' of the connected
sessions.
Setting Parameters – SIP Authentication
Parameter –
sip lineN auth name
Description The authorization name that will be used in
Format Text
Default Value Not Applicable
Range N in the sip lineN auth name ranges
Example sip line1 auth name: 1001
Parameter –
sip lineN password
Description The password that will be used to register at
Format Text
Default Value Not Applicable
Range N in the sip lineN password ranges
Example sip line1 password: 12345
ConÞgurable through the conÞguration Þles.
ConÞgurations done through the 480i's
Options List or the Aastra 480i web client
affect the Þrst line only.
the username Þeld of the Authorization
header Þeld of the SIP REGISTER request.
from 1 to 9
ConÞgurable through the conÞguration Þles.
ConÞgurations done through the 480i's
Options List or the Aastra 480i web client
affect the Þrst line only.
the registrar.
from 1 to 9
Model 480i SIP Admin Guide 16
Page 20

Parameter –
sip lineN user name
Description The value for this parameter is used in the
Format Text
Default Value Not Applicable
Range N in the sip lineN user name ranges
Example sip line1 user name: 1001
ConÞgurable through the conÞguration Þles.
ConÞgurations done through the 480i's
Options List or the Aastra 480i web client
affect the Þrst line only.
name Þeld of the SIP URI for the 480i phone
and for registering the 480i at the registrar.
from 1 to 9
Parameter –
sip lineN display name
Description This is used in the display name Þeld of the
Format Text
Default Value Not Applicable
Range N in the sip lineN display name ranges
Example sip line1 display name: Joe Smith
Parameter –
sip lineN screen name
Description This is used to display text on the screen
Format Text
Default Value Not Applicable
Setting Parameters – SIP Authentication
Range N in the sip lineN screen name ranges
Example sip line1 screen name: Joe Smith
ConÞgurable only through the
conÞguration Þles.
From SIP header Þeld. Some IP PBX systems
use this as the caller’s ID and some may
overwrite this with the string that is set at
the PBX system.
from 1 to 9
ConÞgurable through the conÞguration Þles.
ConÞgurations done through the 480i's
Options List or the Aastra 480i web client
affect the Þrst line only.
of the phone. You may want to set this
parameter to display the phone user's name.
from 1 to 9
17 Model 480i SIP Admin Guide
Page 21

Setting Parameters – Softkey Settings
This section contains the softkey parameters that can be conÞgured
on the 480i phone. There are eighteen softkeys that can be conÞgured.
These parameters can be conÞgured either from the Aastra.cfg or
the <mac>.cfg Þle. Softkeys can be conÞgured as either speed dials or
as additional call/line appearances.
Setting Parameters – Softkey Settings
Parameter –
softkeyN type
Description The type of soft key that will be
Format Text
Default Value Not Applicable
Range line or speeddial. N in the softkeyN type ranges
Example softkey1 type: line
Parameter –
softkeyN label
Description The text label that should be displayed for
Format Text
Default Value Not Applicable
Range Sequence of ascii characters. A width less
Example softkey1 label: “Line 9”
ConÞgurable through the conÞguration
Þles only
conÞgured to.
from 1 to 18
softkey2 type: speeddial
ConÞgurable through the conÞguration
Þles only
the soft key. If the soft key is of line type an
icon appears beside the soft key that
indicates the status of the line that this soft
key is conÞgured to.
than 11 characters for line softkey type and a
width less than 9 for the speeddial softkey
type is suggested. N in the softkeyN label
ranges from 1 to 18
softkey2 label: “info”
Model 480i SIP Admin Guide 18
Page 22

Parameter –
softkeyN value
Description If the soft key is of type, line then value
Format Text
Default Value Not Applicable
Range line or speeddial. N in the softkeyN value
Example softkey1 value: 9
ConÞgurable through the conÞguration
Þles only
should be the line number that this
soft key represents. If the softkey is of type,
speeddial then value should be the number
to speed dial.
ranges from 1 to 18
softkey2 value: 411
Setting Parameters – Softkey Settings
19 Model 480i SIP Admin Guide
Page 23

Firmware Upgrade
The 480i phone uses a TFTP server
to download conÞguration Þles and
Þrmware. The TFTP server should
be ready and be able to accept
connections anonymously (without
a requirement for a user name and
password). See Appendix B for
information on setting up a
TFTP server.
You can download the Þrmware
stored on the TFTP server in one of
two ways, by either resetting the
phone through the options list of
the 480i or by activating a Þrmware
download through the web client.
Resetting the phone will force the
phone to check for both Þrmware
and conÞguration Þles stored on the
TFTP server.
Warning: Do not reset or turn off
the phone until the download is
complete.
From the 480i Phone:
1. Press the £ button to
enter the Options List.
2. Select option 10. Phone Status to
enter the Phone Status option.
3. Select option 3. Reset Phone.
4. Press the Reset softkey to
reset the phone.
5. Press the Cancel softkey to
cancel the current operation.
From the Web Client:
1. Click on the Firmware
sub-category under the ADMIN
main category.
2. Enter the administrator user
name and password (the default
user name is “admin” and
password is “22222”).
3. In the Firmware Þeld, enter the
name of the Þrmware Þle that the
phone should be upgraded with,
as shown in Figure 1. This name
must match the actual name of
the Þrmware Þle residing on your
TFTP server.
4. In the TFTP server IP Þeld enter
the IP address of the computer
where the TFTP server is located.
5. After entering the information
into the appropriate Þelds click
on the “Download Firmware”
button. This will start the
upgrade process. If the upgrade
was successful you will be
presented the successful message
as shown in Figure 2.
Firmware Upgrade
Model 480i SIP Admin Guide 20
Page 24

Figure 1
Firmware Upgrade
Figure 2
21 Model 480i SIP Admin Guide
Page 25

Troubleshooting
This section describes solutions
to some most commonly occurring
problems.
Why does my phone display
“Application missing”?
If you have experienced
networking issues while the phone
was downloading the application
from the TFTP server, it is possible
that the phone can no longer
retrieve the required Þrmware Þle.
In the event that the phone is no
longer able to communicate with
the TFTP server in its attempt to
re-download the Þrmware and the
phone cannot locate the application
locally, this message will
be displayed.
The phone will display the
following: “Recovery web-client at:
<IP Address>”. The IP Address
displayed is the IP address of the
phone. If the phone is unable to
receive an IP from the DHCP server
or has lost its record of its static IP,
the phone will auto-assign itself
the default IP 192.168.0.50.
To recover the Þrmware for your
phone in this circumstance, please
perform the following:
1. Launch your web browser on
your computer. Please note that
your computer will need to be
on the same network as your
IP phone.
2. In the URL, type: “http://<IP
Address>” (where IP Address is
the IP Address displayed on
the phone). Your browser will
launch the Aastra 480i IP Phone
Firmware Recovery page.
3. Enter the name of the Þrmware
Þle that is on the TFTP server
and ready for download.
E.g. “Þrmware.st”.
4. Enter the IP of the TFTP server.
5. Press the Download Firmware
button.
Please ensure that the TFTP server
is running and accessible on the
network. If the Þrmware Þle is
correctly located on the running
TFTP server, the phone will locate
the Þle and reload the application
onto the phone.
Why does my phone display
the “No Service” message?
The phone will display the “No
Service” message if the SIP settings
have not been set up correctly.
Check that the SIP settings are
correct in the phone. If using the
conÞguration Þles, this could be
a formatting or syntax error.
For example, when entering the
parameter “sip line1 user name:
5551231234", you cannot use
formatting symbols such as “-”
as in “555-123-1234” to format the
number or the phone will not
recognize it.
How to reset the 480i phone?
From the 480i phone:
1. Press the £ button to
enter the Options List.
2. Select option 10. Phone Status to
enter the Phone Status option.
3. Select option 3. Reset Phone.
4. Press the Reset softkey to
reset the phone.
5. Press the Cancel softkey to cancel
the current operation.
From the web client:
1. Click on the Reset sub-category
under the USER main category.
2. On the web page that just
opened click on the Reset button
to reset the phone.
Troubleshooting
Model 480i SIP Admin Guide 22
Page 26

How to set the 480i phone
to factory default?
From the 480i phone:
1. Press the £ button to
enter the Options List.
2. Select option 10. Phone Status
to enter the Phone Status
options list.
3. Select option 4. Factory Default.
4. Enter the administrator password
and press the Enter softkey.
5. Press the Default softkey to
restore the 480i to the factory’s
default settings.
6. Press the Cancel softkey to cancel
Troubleshooting
the operation.
How to reset a user’s
password?
If a 480i user has forgotten the
password the following steps can be
performed to reset the password.
From the web client:
1. Click on the Password
sub-category under the USER
main category.
2. Enter the administrator level
user password in the Current
Password Þeld. Enter the new
password for the user (the user’s
name for whom the password is
being modiÞed is displayed
beside the User Name Þeld on the
current page). Re-enter the
password to conÞrm the new
password.
3. Click on the Set Password button
to complete the operation.
23 Model 480i SIP Admin Guide
Page 27

Appendix A: Configuring the 480i at the Asterisk IP PBX
The following conÞguration illustrates how to create a user with an extension
to make and receive calls using the Asterisk as the PBX. This conÞguration is
deÞned in the “sip.conf” Þle present along with the other conÞguration Þles
that are created when Asterisk is installed. Usually, the conÞguration Þles can
be found at the “/etc/asterisk” directory.
;This is used in the “extensions.conf” Þle to identify this
;physical phone when issuing Dial commands.
[phone1]
;The type to use for the 480i is “friend”.
;”Peer” is used when the Asterisk is contacting a proxy,
;”user” is used for phones that can only make calls
;and “friend” acts as both a peer and a user.
type=friend
;If your host has an entry in your DNS then you just enter the
;machines name in the host= Þeld.
host=dynamic
defaultip=192.168.1.1 ;default IP address that the phone is
;conÞgured to
Appendix A: Configuring the 480i at the Asterisk
;The password that phone1 will use to register with this PBX
secret=1234
dtmfmode=rfc2833 ;Choices are inband, rfc2833, or info
mailbox=1000 ;Mailbox for message waiting indicator
;If a phone is not in a valid context you will not be
;able to use it. In this example' sip' is used. You can use
;whatever you like, but make sure they are the same, you will
;need to make an entry in your extensions.conf Þle (which we
;will get to later)
context=sip
callerid="Phone 1" <1234>
Model 480i SIP Admin Guide 24
Page 28

After this is deÞned in the “sip.conf” Þle, some information has to be entered
in the “extensions.conf” Þle present in the same directory as the “sip.conf”
Þle. The following deÞnition in the Þle under the [sip]section/context
completes deÞning the extension for the 480i phone.
exten => 1234,1,Dial(SIP/phone1,20)
This deÞnition completes conÞguring the 480i phone at the IP PBX system.
To verify whether the extension has been successfully registered at the IP
PBX system, enter the Asterisk console and reload Asterisk. Use the
command “sip show peers” at the console. This will display the extensions
that are registered at the IP PBX system.
Name/username Host Mask Port Status
phone1/phone1 192.168.1.1 (D) 255.255.255.255 5060 Unmonitored
This completes the basic set-up for the 480i phone with 1234 extension at
the Asterisk IP PBX system. Refer to Asterisk documentation for set-up on
extended or advanced features such as voice mail and call forwarding, etc.
Appendix A: Configuring the 480i at the Asterisk
25 Model 480i SIP Admin Guide
Page 29

Appendix B: Sample Configuration Files
This section consists of the sample conÞguration Þles necessary to conÞgure
the 480i phones. The general format is similar to conÞguration Þles used
by several Unix-based programs. Any text following a number sign (#)
on a line is considered to be a comment, unless the # is contained within
double-quotes. Currently, Boolean Þelds use 0 for false and 1 for true.
aastra.cfg
# Generic SIP Sample ConÞguration File
# ======================================
# Date: December 16th, 04
# File: Sample “aastra.cfg” Þle
# Notes:
# The general format used here is similar to conÞguration Þles
# used by several UNIX-based programs. Any text following a number
# sign (#) is considered to be a comment, unless the number sign is
# contained within double-quotes (“#”) where it is considered to be
# a pound. For Boolean Þelds, 0 = false, 1 = true.
# Comments:
# This Þle contains sample conÞgurations for the “aastra.cfg”
# Þle. The settings included here are examples only.You should
# change/comment the values to suit your requirements.
Appendix B: Sample Configuration Files
# The Aastra 480i IP phones will download 2 conÞguration Þles
# from the TFTP server while restarting, the “aastra.cfg” Þle and
# the “[mac].cfg” Þle. These two conÞguration Þles can be used to
# conÞgure all of the settings of the Aastra 480i phone with the
# exception of assigning a static IP address to a phone and line
# settings, which can only be set in the “<mac>.cfg” Þle.
# The “aastra.cfg” Þle conÞgures the settings server wide,
# while the “[mac].cfg” Þle conÞgures only the phone with
# the MAC address for which the Þle is named (for example,
# “00085d0304f4.cfg”). The settings in the “aastra.cfg” Þle
# will be overridden by settings which also appear in the
# “<mac>.cfg” Þle.
#----------------------------------------------------------------------
Continued...
Model 480i SIP Admin Guide 26
Page 30

# DHCP Setting
# ============
dhcp: 1 # DHCP enabled.
# DHCP:
# 0 = false, means DHCP is disabled.
# 1 = true, means DHCP is enabled.
# Notes: If DHCP is disabled, the following network settings will
# have to be conÞgured manually either through the conÞguration
# Þles, the Options List in the phone, or the Web Client: IP
# Address (of the phone), Subnet Mask, Gateway, DNS, and TFTP
# Server.
#----------------------------------------------------------------------
# Network Settings
# ================
# Notes: If DHCP is enabled, you do not need to set these network
# settings
#ip: # This value is unique to each phone on a server
# and should be set in the “<mac>.cfg” Þle if
# setting this manually.
#subnet mask:
#default gateway:
#dns1:
#dns2:
#tftp server:
# Additional Network Settings:
===========================
Appendix B: Sample Configuration Files
#sip registration period: 300 # Eg. every 300 seconds, a re-register
# request is sent to the SIP server.
#sip rtp port: 3000 # Eg. RTP packets are sent to port 3000.
#----------------------------------------------------------------------
Continued...
27 Model 480i SIP Admin Guide
Page 31

# SIP registrar and Proxy Server Settings
# =======================================
#sip proxy ip: # IP of proxy server.
#sip proxy port: 5060 # 5060 is set by default.
#sip registrar ip: # IP of registrar.
#sip registrar port: 5060 # 5060 is set by default.
sip digit time out: 4 # dialing behaviour
#----------------------------------------------------------------------
# Time Server Settings
# ====================
#time server disabled: 1 # Time server disabled.
#time server1: # Enable time server and enter at
#time server2: # least one time server IP address.
#time server3:
# Time Server Disabled:
# 0 = false, means the time server is not disabled.
# 1 = true, means the time server is disabled.
Appendix B: Sample Configuration Files
#----------------------------------------------------------------------
# Line Settings
# =============
# Lines should be set in the <mac>.cfg Þle since these settings
# are unique to each phone. See the sample “<mac>.cfg” Þle for
# for more information.
#----------------------------------------------------------------------
Model 480i SIP Admin Guide 28
Page 32

# Softkey Settings
# ================
# Softkeys can be set either server wide or unique to each phone.
# Setting softkeys as line/call appearances should be done in the
# “<mac>.cfg” Þle, since these are unique to each phone.
# Notes: There are a maximum of 18 softkeys that can be conÞgured
# on the 480i phone. These can be set up through either of the 2
# conÞguration Þles, depending on whether this is to be server
# wide (“aastra.cfg”) or phone speciÞc (“[mac].cfg”).
# Each softkey needs to be numbered from 1 - 18, for example
# “softkey12 type: speeddial”. Softkeys can be set up as speeddials
# or as additional call/line appearances and have a type, label
# and value associated with it as seen here in the default softkey
# settings.
# SOFTKEY TYPES: “line”, “speeddial”
# SOFTKEY LABEL: Alpha numeric name for the softkey. The maximum
# number of characters for this value is 10 for
# speeddials and 9 for lines.
# SOFTKEY VALUE: If softkey type is a speeddial, any DTMFs (from
# 0 - 9, *, “#”) or a comma (,) for 500ms pause and
# 'E' for On-hook can be set for the value. If
# softkey type is line, enter value as a number from
# 5 up to 9 (1 - 4 are already hardcoded as the L1,
# L2, L3 and L4 hard key line/call appearances)
# Example Softkey Speed Dials
# ===========================
softkey1 type: speeddial
softkey1 label: “Ext Pickup”
softkey1 value: *8
Appendix B: Sample Configuration Files
softkey2 type: speeddial
softkey2 label: “Call Return”
softkey2 value: *69
Continued...
29 Model 480i SIP Admin Guide
Page 33

softkey3 type: speeddial
softkey3 label: “CallFwdOn”
softkey3 value: *72
softkey4 type: speeddial
softkey4 label: “CallFwdOff”
softkey4 value: *73
softkey5 type: speeddial
softkey5 label: “DND On”
softkey5 value: *78
softkey6 type: speeddial
softkey6 label: “DND Off”
softkey6 value: *79
softkey7 type: speeddial
softkey7 label: “CLIDBlock”
softkey7 value: *67
softkey8 type: speeddial
softkey8 label: “Cancel CW”
softkey8 value: *70
Appendix B: Sample Configuration Files
softkey9 type: speeddial
softkey9 label: “Blacklist”
softkey9 value: *60
# Example Softkey Line/Call Appearances
# =====================================
# For the examples of softkey line/call appearances, please
# refer to the sample “<mac>.cfg” Þle.
#----------------------------------------------------------------------
# For more information on parameters that can be set in the
# conÞguration Þles, please refer to your administration guide
# for the 480i IP phone.
#----------------------------------------------------------------------
Model 480i SIP Admin Guide 30
Page 34

<mac>.cfg
# Generic SIP Sample ConÞguration File
# =====================================
# Date: December 16th, 04
# File: Sample “<mac>.cfg” Þle
# Comments:
# This Þle contains sample conÞgurations for the “<mac>.cfg”
# Þle. Please rename this Þle with the MAC address (with the
# dashes removed) of the speciÞc 480i device that you want to
# conÞgure, for example “00085d03059f.cfg”.
# Settings that have already appeared in “aastra.cfg” will be
# overridden by those in this Þle.
# Parameters can be set in either the “<mac>.cfg” Þle or the
# “aastra.cfg” Þle, with the exception of assigning a static
# IP address to a phone which can only be set in the “<mac>.cfg”
# Þle. For more details on sample settings see the sample
# “aastra.cfg” Þle.
#----------------------------------------------------------------------
# DHCP Setting
# ============
# Notes: To set a static IP address, you must Þrst disable DHCP. If
# DHCP is disabled, you will also need to manually conÞgure Subnet
# Mask, Gateway, DNS, and TFTP Server settings.
# DHCP:
Appendix B: Sample Configuration Files
# 0 = false, means DHCP is disabled.
# 1 = true, means DHCP is enabled.
#dhcp: 0 # DHCP disabled.
#----------------------------------------------------------------------
Continued...
31 Model 480i SIP Admin Guide
Page 35

# Network Settings
# ================
#ip: # This value is unique to each phone on a server
# and should be set in the “<mac>.cfg” Þle if
# setting this manually.
#----------------------------------------------------------------------
# Line Settings
# =============
# Lines should be set in the <mac>.cfg Þle since these settings
# are unique to each phone.
# Notes: Setting parameters for lines 1 - 4 conÞgures the 4
# line/call appearance hard keys on the 480i. Setting parameters
# for lines 5 - 9 conÞgures the phone for additional line/call
# appearances that can be set up as softkeys.
# The maximum number of line/call appearances that can be
# conÞgured on the 480i is 8 or 9, depending on how the lines
# have been conÞgured.
Appendix B: Sample Configuration Files
# If all line/call appearances have been set up for the same
# number, a total of 9 lines can be conÞgured. If all line/call
# appearances have been set up between two different numbers, a
# total of 8 lines can be conÞgured. This means that when all
# line/call appearances are in use, 1 is connected while the rest
# are held. No further outgoing or incoming calls can be made until
# one of the line/call appearances becomes available.
Continued...
Model 480i SIP Admin Guide 32
Page 36

# Explanation of Settings with Line 1 as Example
# ==============================================
#sip line1 auth name: # SIP Registrar request authorization name.
#sip line1 password: # SIP Registrar request passcode.
#sip line1 user name: # This parameter value is used by the 480i
# in the From header Þeld of the outgoing
# SIP packet. It may be replaced by your
# registrar.
#sip line1 display name: # Name used for SIP messages.
#sip line1 screen name: # User's name seen on the idle screen of the
# user's phone.
# Example Settings for Lines 2-9
# ==============================
#sip line2 auth name: authname
#sip line2 password: password
#sip line2 user name: 5551231234
#sip line2 display name: Joe Smith
#sip line2 screen name: Joe Smith
#sip line3 auth name: authname
#sip line3 password: password
#sip line3 user name: 5551231234
#sip line3 display name: Joe Smith
#sip line3 screen name: Joe Smith
#sip line4 auth name: authname
#sip line4 password: password
#sip line4 user name: 5551231234
#sip line4 display name: Joe Smith
#sip line4 screen name: Joe Smith
Appendix B: Sample Configuration Files
#sip line5 auth name: authname
#sip line5 password: password
#sip line5 user name: 5551231234
#sip line5 display name: Joe Smith
#sip line5 screen name: Joe Smith
Continued...
33 Model 480i SIP Admin Guide
Page 37

#sip line7 auth name: authname
#sip line7 password: password
#sip line7 user name: 5551231234
#sip line7 display name: Joe Smith
#sip line7 screen name: Joe Smith
#sip line8 auth name: authname
#sip line8 password: password
#sip line8 user name: 5551231234
#sip line8 display name: Joe Smith
#sip line8 screen name: Joe Smith
#sip line9 auth name: authname
#sip line9 password: password
#sip line9 user name: 5551231234
#sip line9 display name: Joe Smith
#sip line9 screen name: Joe Smith
#----------------------------------------------------------------------
# Softkey Settings
# ================
Appendix B: Sample Configuration Files
# Softkeys can be set either server wide or unique to each phone.
# Setting softkeys as line/call appearances should be done in the
# “<mac>.cfg” Þle, since these are unique to each phone.
# Notes: There are a maximum of 18 softkeys that can be conÞgured
# on the 480i phone. These can be set up through either of the 2
# conÞguration Þles, depending on whether this is to be server
# wide (“aastra.cfg”) or phone speciÞc (“[mac].cfg”).
# Each softkey needs to be numbered from 1 - 18, for example
# “softkey12 type: speeddial”. Softkeys can be set up as speeddials
# or as additional call/line appearances and have a type, label
# and value associated with it as seen here in the default softkey
# settings.
Continued...
Model 480i SIP Admin Guide 34
Page 38

# Softkey Speed Dials
# ===================
# For the default softkey speed dials, please refer to the sample
# “aastra.cfg” Þle.
# Example Softkey Line/Call Appearances
# =====================================
#softkey1 type: line
#softkey1 label: “Line 5”
#softkey1 value: 5
#softkey2 type: line
#softkey2 label: “Line 6”
#softkey2 value: 6
#softkey3 type: line
#softkey3 label: “Line 7”
#softkey3 value: 7
#softkey4 type: line
#softkey4 label: “Line 8”
#softkey4 value: 8
#softkey5 type: line
#softkey5 label: “Line 9”
#softkey5 value: 9
#----------------------------------------------------------------------
# For more information on parameters that can be set in the
# conÞguration Þles, please refer to your administration guide
# for the 480i IP phone.
Appendix B: Sample Configuration Files
#----------------------------------------------------------------------
35 Model 480i SIP Admin Guide
Page 39

Appendix C: TFTP Server Set-up
There are a number of TFTP servers available. PumpKIN is one of such
TFTP servers. Use the keywords “pumpkin TFTP server” on Google and
you should get the web site where you can download the software
from. Installing PumpKIN is straightforward. To conÞgure the directory
from where you would be serving the Þles, click on the Options button
on PumpKIN’s main window as shown in the following Þgure.
It is important to select the “Give all Þles” radio button under the “Read
Request Behavior” category. This makes the Þles to be served without any
manual intervention when requested.
If you want to prevent users from writing Þles to the directory select
the “Deny all requests” in the “Write Request Behavior” category. Click
the OK button after you have entered all the required information. All the
Þrmware Þles should be in the Þle system root directory. Currently we
do not support downloads from Þles present in sub-directories. Consult
PumpKIN’s documentation if you need more information on how to set-up
the TFTP server.
Appendix C: TFTP Server Set-up
Model 480i SIP Admin Guide 36
Page 40

Limited Warranty
Aastra Telecom warrants this product
against defects and malfunctions during
a one (1) year period from the date of
original purchase. If there is a defect or
malfunction, Aastra Telecom shall, at its
option, and as the exclusive remedy,
either repair or replace the telephone set
at no charge, if returned within the
warranty period.
If replacement parts are used in making
repairs, these parts may be refurbished,
or may contain refurbished materials.
If it is necessary to replace the telephone
set, it may be replaced with a
refurbished telephone of the same
design and color. If it should become
necessary to repair or replace a defective
Limited Warranty
or malfunctioning telephone set under
this warranty, the provisions of this
warranty shall apply to the repaired or
replaced telephone set until the
expiration of ninety (90) days from the
date of pick up, or the date of shipment
to you, of the repaired or replacement
set, or until the end of the original
warranty period, whichever is later.
Proof of the original purchase date is to
be provided with all telephone sets
returned for warranty repairs.
Exclusions
Aastra Telecom does not warrant its
telephone sets to be compatible with the
equipment of any particular telephone
company. This warranty does not
extend to damage to products resulting
from improper installation or operation,
alteration, accident, neglect, abuse,
misuse, Þre or natural causes such as
storms or ßoods, after the telephone is
in your possession.
Aastra Telecom shall not be liable for
any incidental or consequential
damages, including, but not limited to,
loss, damage or expense directly or
indirectly arising from the customers
use of or inability to use this telephone,
either separately or in combination with
other equipment. This paragraph,
however, shall not apply to
consequential damages for injury to the
person in the case of telephones used or
bought for use primarily for personal,
family or household purposes.
This warranty sets forth the entire
liability and obligations of Aastra
Telecom with respect to breach of
warranty, and the warranties set forth or
limited herein are the sole warranties
and are in lieu of all other warranties,
expressed or implied, including
warranties or Þtness for particular
purpose and merchantability.
Warranty Repair Services
Should the set fail during the warranty
period;
In North America, please call
1-800-574-1611 for further information.
Outside North America, contact your
sales representative for return
instructions.
You will be responsible for shipping
charges, if any. When you return this
telephone for warranty service, you
must present proof of purchase.
After Warranty Service
Aastra Telecom offers ongoing repair
and support for this product. This
service provides repair or replacement
of your Aastra Telecom product, at
Aastra Telecom's option, for a Þxed
charge. You are responsible for all
shipping charges. For further
information and shipping instructions;
In North America, contact our service
information number: 1-800-574-1611.
Outside North America, contact your
sales representative.
Note:
Repairs to this product may be made
only by the manufacturer and its
authorized agents, or by others who
are legally authorized. This restriction
applies during and after the warranty
period. Unauthorized repair will
void the warranty.
37 Model 480i SIP Admin Guide
Page 41

If you’ve read this owner’s manual and consulted the Troubleshooting section and
still have problems, please visit our website at www.aastra.com or call 1-800-574-1611
for technical assistance.
© Aastra Telecom Inc. 2005 41-0099-00 Rev 00
 Loading...