

Page 1

User Manual
3
Clean-Trace™ Luminometer
LM1
Page 2

3
Clean-Trace™ Luminometer
CONTENTS
INTENDED USE......................................................................... 1
PRODUCT DESCRIPTION ..................................................... 3
Using ATP Detection for Hygiene Monitoring
and Management ...................................................... 3
USING THIS MANUAL ........................................................... 3
OPERATING THE
3M™ CLEAN‑TRACE™ LUMINOMETER ..................... 4
Battery usage and maintenance ..................................... 4
Charging the battery ......................................................... 4
When the battery is charged ........................................... 4
Using the battery level indicator .................................... 4
Managing the battery ...................................................... 4
Switching the Power on .................................................. 4
Switching the Power o ....................................................5
Controlling the Software ...................................................5
Operating Controls of the
3M Clean-Trace Luminometer ................................5
Using the Base .................................................................. 6
Logging in on the 3M Clean-Trace Luminometer ........ 6
Logging in on the 3M Clean-Trace Luminometer
with a PIN ....................................................................7
Waking the 3M Clean-Trace Luminometer
from Sleep Mode ........................................................7
Using the Swab Sensor and Vertical
Position Sensor ...........................................................7
Logging out from the
3M Clean-Trace Luminometer .................................7
PERFORMING TESTS ON TEST POINTS WITHIN
SAMPLE PLANS ................................................................ 8
Performing an ATP Test on a Test Point
within a Sample Plan ................................................ 8
Performing a Retest on an ATP Test Point
with a Caution or a Fail Test Status
before Moving to a Dierent Test Point ................ 8
Performing a Retest on an ATP Test Point
with a Caution or a Fail Test Status after
Moving to a Dierent Test Point ............................. 9
Performing a Visual Inspection Test
on a Test Point within a Sample Plan ..................... 9
(English)
EN
Issue Date: 2016-06
Recording Temperature or pH for a Test Point
within a Sample Plan ............................................... 10
Adding Optional Comments to a Caution
or Fail ATP Test Result ..............................................10
Changing Temperature or pH Recording
for a Test Point within a Sample Plan ....................11
Moving to a Dierent Test Point
in the Same Sample Plan .......................................... 11
Moving to a Dierent Test Point
in a Dierent Sample Plan ........................................11
Viewing Test Results ........................................................ 11
Setting Up a Custom Test Type
on a Test Point within a Sample Plan ....................12
Performing a Retest on a Custom Test Type ................ 12
PERFORMING TESTING ON UNPLANNED
TEST POINTS .................................................................... 13
Performing an Unplanned ATP Test .............................. 13
Performing an Unplanned Visual Inspection Test ....... 13
SYNCHRONIZING THE 3M CLEAN‑TRACE
LUMINOMETER WITH THE COMPUTER
DATABASE ......................................................................... 14
Setting Up Synchronization
with a USB Connection ..........................................14
Setting Up Synchronization
with a Bluetooth Connection .................................14
Setting Up Synchronization
with a WiFi Connection ..........................................14
Changing the Connection Type .....................................16
Setting Synchronization Time ........................................16
PERFORMING ADMINISTRATIVE TASKS ......................... 16
Setting the Date and Time on the
3M Clean-Trace Luminometer ............................... 16
Performing a Diagnostic Check .....................................16
Changing the Screen Brightness ...................................16
Restarting the 3M Clean-Trace Luminometer ............. 16
Exporting a Log File ......................................................... 16
Displaying Software Versions ......................................... 17
Troubleshooting ...............................................................17
APPENDIX ............................................................................... 19
ii
Page 3
(English)
EN
INTENDED USE
The 3M Clean-Trace Luminometer is a battery operated Luminometer utilized primarily for objective and sensitive
determination of the end result of Adenosine Tri-Phosphate (ATP) tests. The 3M Clean-Trace Luminometer power supply
is provided to charge the battery. The 3M™ Clean-Trace™ Hygiene Management Software is designed for the transfer,
organization, and storage of data generated from the 3M™ Clean-Trace™ ATP Tests.
3M has not designed nor documented the 3M Clean-Trace Luminometer, and its power supply, or 3M Clean-Trace
Hygiene Management Software for use with other manufacturers’ products, use with other manufacturers’ designs, or use
in any other application that has not been evaluated or documented by 3M and may lead to an unsafe condition. The 3M
Clean-Trace Luminometer is not intended to be used in potentially ammable or explosive environments. Although the 3M
Clean-Trace Hygiene Monitoring and Management System is very sensitive, surfaces or solutions should not be considered
sterile based on results. The 3M Clean-Trace Hygiene Monitoring and Management System is not intended to be used in the
diagnosis of conditions in humans or animals. The user is responsible to know and follow applicable workplace regulations.
3M anticipates that the 3M Clean-Trace ATP Tests, equipment, and software will be utilized by technicians that have been
properly trained on the 3M Clean-Trace ATP Test methods.
If this product is used in a manner not specied, the protection provided by the product may be impaired.
USER RESPONSIBILITY
Users are responsible for familiarizing themselves with product instructions and information. Visit our website at
www.3M.com/foodsafety, or contact your local 3M representative or distributor for more information.
When selecting a test method, it is important to recognize that external factors such as sampling methods, testing
protocols, sample preparation, handling, and laboratory technique may inuence results.
It is the user’s responsibility in selecting any test method or product to evaluate a sucient number of samples with the
appropriate matrices and microbial challenges to satisfy the user that the chosen test method meets the user’s criteria.
It is also the user’s responsibility to determine that any test methods and results meet its customers’ and suppliers’
requirements.
As with any test method, results obtained from use of any 3M Food Safety product do not constitute a guarantee of the
quality of the matrices or processes tested.
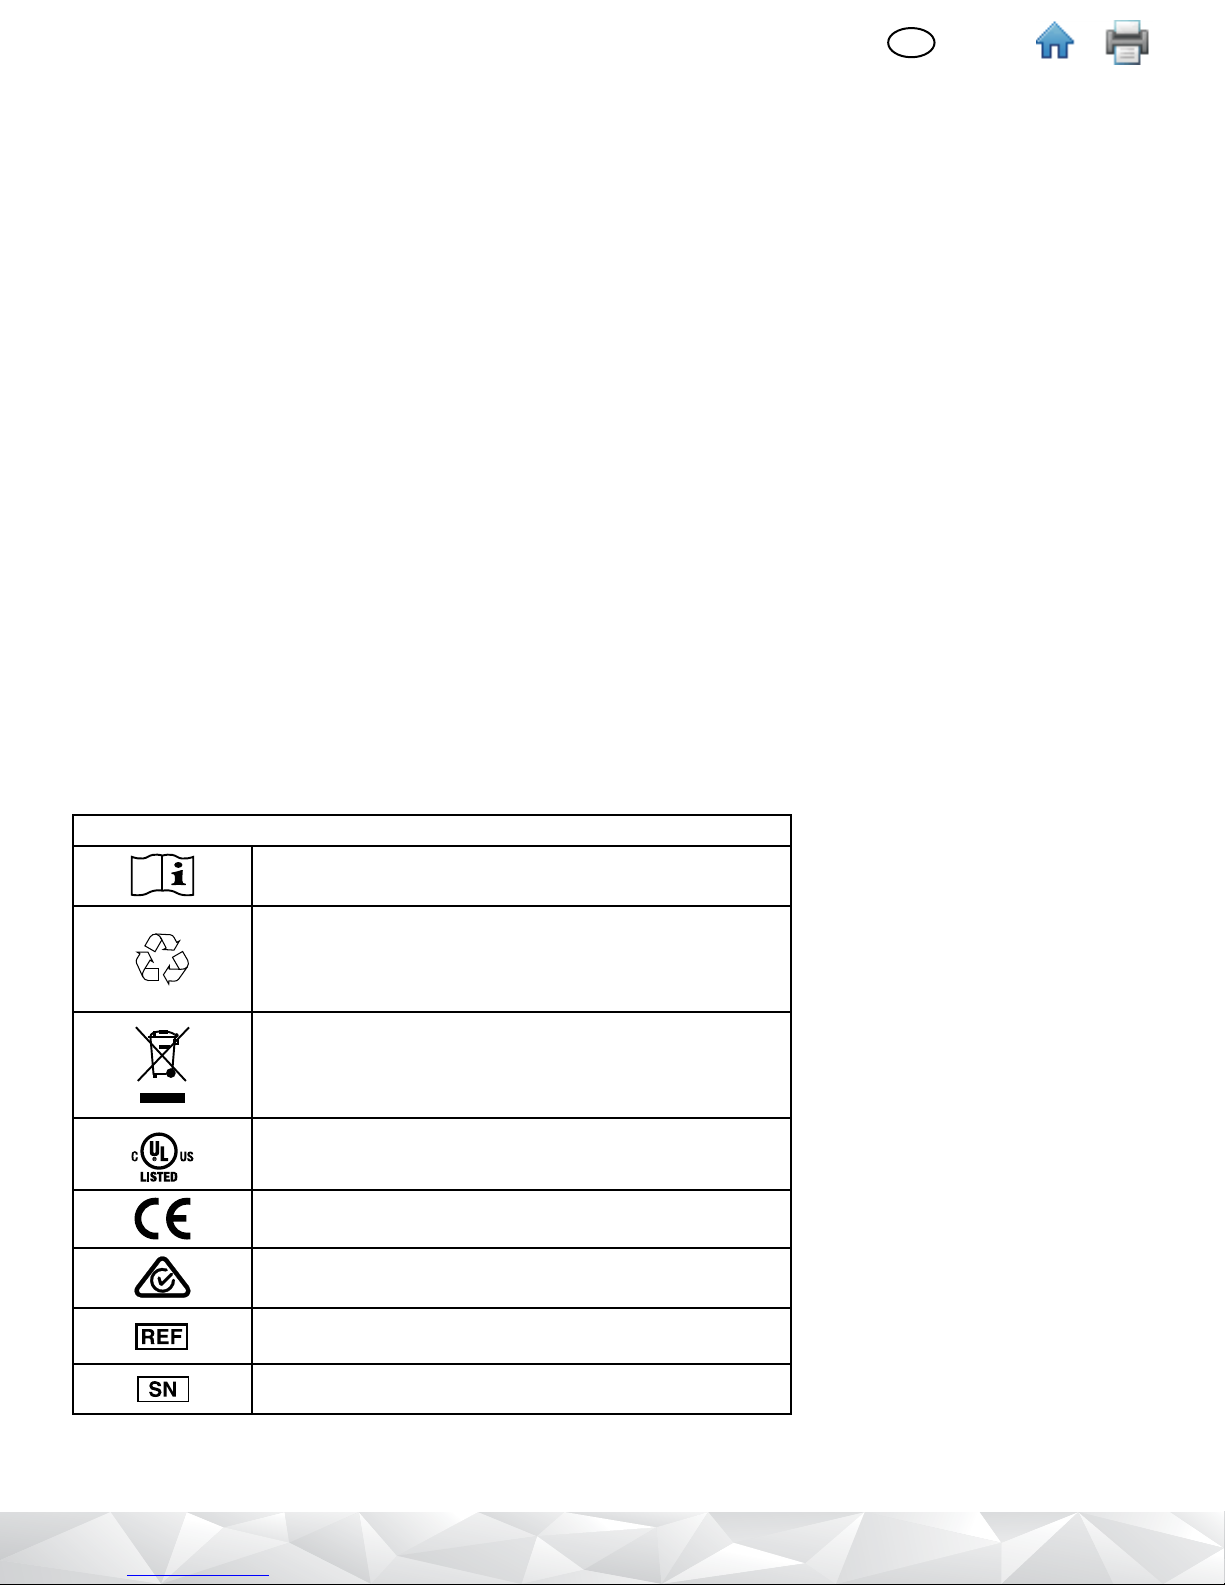
Explanation of Safety Related Symbols
Attention: Read Accompanying Documentation
CAUTION: Recycle 3M Clean-Trace Luminometer to
avoid environmental contamination. This product contains
recyclable parts. For information on recycling - please
contact your nearest 3M Service Center for advice.
WEEE mark - This product contains electrical and
electronic components and must not be disposed of using
standard refuse collection. Please consult local directives
for disposal of electrical and electronic equipment.
UL NRTL mark (US and Canada electrical safety)
CE mark (conforms to applicable requirements for
European Economic Area).
RCM mark (Australia electrical safety and EMC)
The 3M Clean-Trace Luminometer model number, which is
LM1.
The 3M Clean-Trace Luminometer serial number
1
Page 4
EN
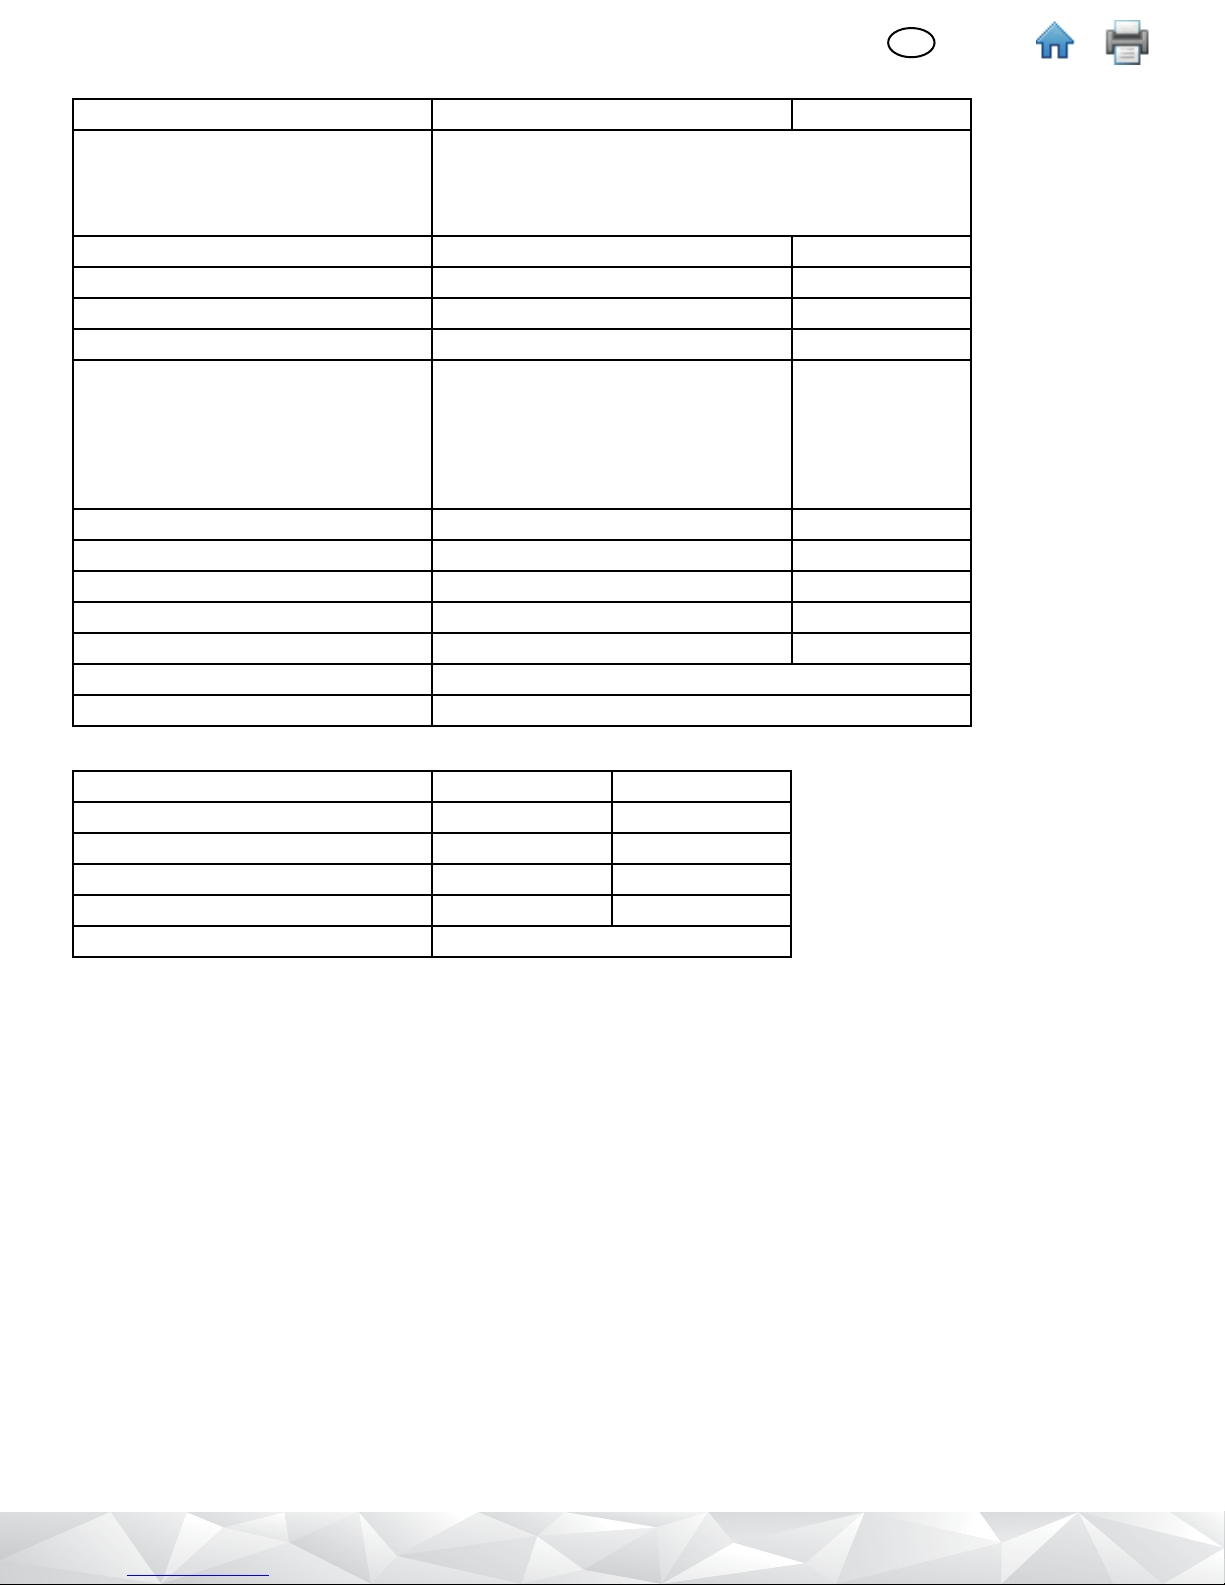
ENVIRONMENTAL OPERATING CONDITIONS
Environmental Condition Operating Condition Units
Indoor Use only - only connect the data connections to a computer that
conforms to IEC/EN/UL/CSA 60950-1
- keep 3M Clean-Trace Luminometer away from liquids
and high humidity when connected to the computer
Altitude 3000 maximum meters
Operating Temperature Range +5 to +40 (+41 to +104) °C (°F)
Relative Humidity 10 - 90 Non-condensing %
Storage Temperature Range -40 to +70 (-40 to +158) °C (°F)
AC Voltage for power supply
Mains Supply voltage uctuations up
to + 10% of nominal voltage
Temporary overvoltages occurring on
the mains supply
Frequency 50-60 Hertz
AC Current for power supply 300 mA
Power supply output voltage 5 Volts DC
Power supply output current 1.2 Amps
Luminometer input current 850 mAmps
Overvoltage Category II
Pollution Degree 2
100 -240 Volts
(English)
INSTRUMENT SPECIFICATIONS
Specication Units
Length 59.27 (2.33) mm (in)
Width 88.47 (3.48) mm (in)
Height 268.17 (10.56) mm (in)
Weight 517.83 (18.26) g (oz.)
External Connectors USB 2.0 type mini-AB receptacle
LIMITED WARRANTY
3M Food Safety Hardware (“Hardware”) includes the 3M Clean-Trace Luminometer and any associated Software and other
components supplied by 3M which are described in the applicable Installation and Use Guides (“User Documentation”).
LIMITED WARRANTY AND DISCLAIMER
3M warrants that for one year from the date of shipment that the Hardware will substantially perform in accordance
with the User Documentation. THIS WARRANTY IS VOID IF: (A) THE HARDWARE HAS BEEN REPAIRED BY PERSONS
NOT AUTHORIZED BY 3M; OR (B) THE HARDWARE HAS BEEN ALTERED, MODIFIED, OR MISUSED; OR (C) THE
HARDWARE IS USED WITH PRODUCTS, SUPPLIES, COMPONENTS OR SOFTWARE NOT SUPPLIED BY 3M FOR USE
WITH THE HARDWARE; OR (D) THE HARDWARE OR A COMPONENT IS USED FOR OTHER USES (FOR EXAMPLE
USE WITH OTHER CIRCUIT BOARDS OR SOFTWARE) OR (E) THE HARDWARE HAS NOT BEEN MAINTAINED OR
USED IN ACCORDANCE WITH THE USER DOCUMENTATION. UNLESS PROHIBITED BY LAW, THIS WARRANTY IS
MADE IN LIEU OF ALL OTHER WARRANTIES, EXPRESS OR IMPLIED, INCLUDING BUT NOT LIMITED TO THE IMPLIED
WARRANTY OF FITNESS FOR A PARTICULAR PURPOSE, THE IMPLIED WARRANTY OF MERCHANTABILITY, OR ANY
IMPLIED WARRANTY ARISING OUT OF A COURSE OF DEALING OR OF PERFORMANCE, CUSTOM OR USAGE OF
TRADE. 3M DOES NOT WARRANT THAT THE SOFTWARE WILL FUNCTION ERROR FREE.
If within one year after shipment, the Hardware does not conform to the express warranty set forth above, 3M’s sole
obligation and User’s sole remedy shall be, at 3M’s option: 1) to repair or replace the non-conforming component; or, 2)
refund the purchase price.
2
Page 5
(English)
?
EN
LIMITATION OF LIABILITY
UNLESS PROHIBITED BY LAW, 3M WILL NOT BE LIABLE TO USER OR OTHERS FOR ANY OTHER DIRECT, INDIRECT,
CONSEQUENTIAL, INCIDENTAL OR SPECIAL DAMAGES INCLUDING, FOR EXAMPLE, LOST PROFITS, BUSINESS,
INVESTMENTS, OR OPPORTUNITIES EVEN IF 3M HAS BEEN ADVISED OF THE POSSIBILITY OF SUCH DAMAGES. The
parties agree that 3M’s total cumulative liability to User for direct damages for all causes shall not exceed One Hundred
Dollars, or the price paid for the Hardware, whichever is higher. Some states or countries may have laws which require
liability rights dierent from those stated above. In such state or countries, the minimum required liability terms shall apply.
To request service, you must request a Returned Material Authorization (RMA) number from the service center. Please call
1-800-328-1671.
PRODUCT DESCRIPTION
Using ATP Detection for Hygiene Monitoring and Management
The 3M Clean-Trace Hygiene Monitoring and Management System consists of the following: 3M Clean-Trace
Luminometer, 3M™ Clean-Trace™ Tests, and 3M Clean-Trace Hygiene Management Software. This system is used to
detect ATP on surfaces or in water samples to measure levels of contamination for the purpose of hygiene monitoring
and management.
The detection technology used is Adenosine Triphosphate (ATP) bioluminescence. ATP is present in all animal and
vegetable material, including most food debris, living and dead bacteria, fungi and other microorganisms. The 3M
Clean-Trace Tests use Luciferin/Luciferase enzyme to produce light that is proportional to the amount of ATP present. The
3M Clean-Trace Luminometer measures the intensity of the light emitted from a sample, and it displays the test result in
Relative Light Units (RLU). Users do a validation study on their surface or water samples to determine the RLU test result
pass, caution and fail thresholds.
The rapid test results provided by the 3M Clean-Trace Luminometer allow users to take immediate remedial action in
response to a fail test result. The Test Point with a fail test result can be re-cleaned and retested before production,
ensuring that hygiene management goals are achieved. The results provide data that can be used in part to make the
decision to begin food or beverage production.
Read the Instructions for Use documents for 3M Clean-Trace Tests before using them along with a 3M Clean-Trace
Luminometer.
USING THIS MANUAL
1. The 3M Clean-Trace Luminometer User Manual is provided in electronic format only. There are two ways to access it:
• Click Help
• Go to www.3M.com/CleanTraceLM1manual
2. Click any heading in the Table of Contents to immediately go to that section, or scroll or page through the User Manual
to the desired section.
3. 3M Clean-Trace Software updates will include updates to this User Manual, which will automatically be installed along
with the software updates.
4. This User Manual describes the operation and behavior of the 3M Clean-Trace Luminometer. It is organized so that you
can search the Table of Contents for a specic task and follow step-by-step instructions.
5. In the step-by-step instructions for using the software, the following style guidelines were used:
a. Italic type is the name of a section in this User Manual.
b. Bold type is the exact text for a term that appears on a screen.
c. [Bold type with brackets] is the name of a button that you can tap or select using the cursor control button on a screen.
on the menu bar in the 3M Clean-Trace Hygiene Management Software, then click [User Manual].
3
Page 6
(English)
EN
OPERATING THE 3M CLEAN‑TRACE LUMINOMETER
Battery usage and maintenance
• A 3M Clean-Trace Luminometer has an internal rechargeable lithium ion battery that must be charged to use a 3M
Clean-Trace Luminometer.
Charging the battery
• Select the charger adapter that is appropriate for power in your country.
• Connect the charger to a 3M Clean-Trace Luminometer.
• Connect the charger to a power outlet.
• The battery becomes fully charged in approximately 2 hours.
• To monitor the charge status, turn on the 3M Clean-Trace Luminometer. A lightning bolt icon appears in the battery
charge level.
When the battery is charged
• Disconnect the charger from the power outlet.
• Unplug the charger from the 3M Clean-Trace Luminometer.
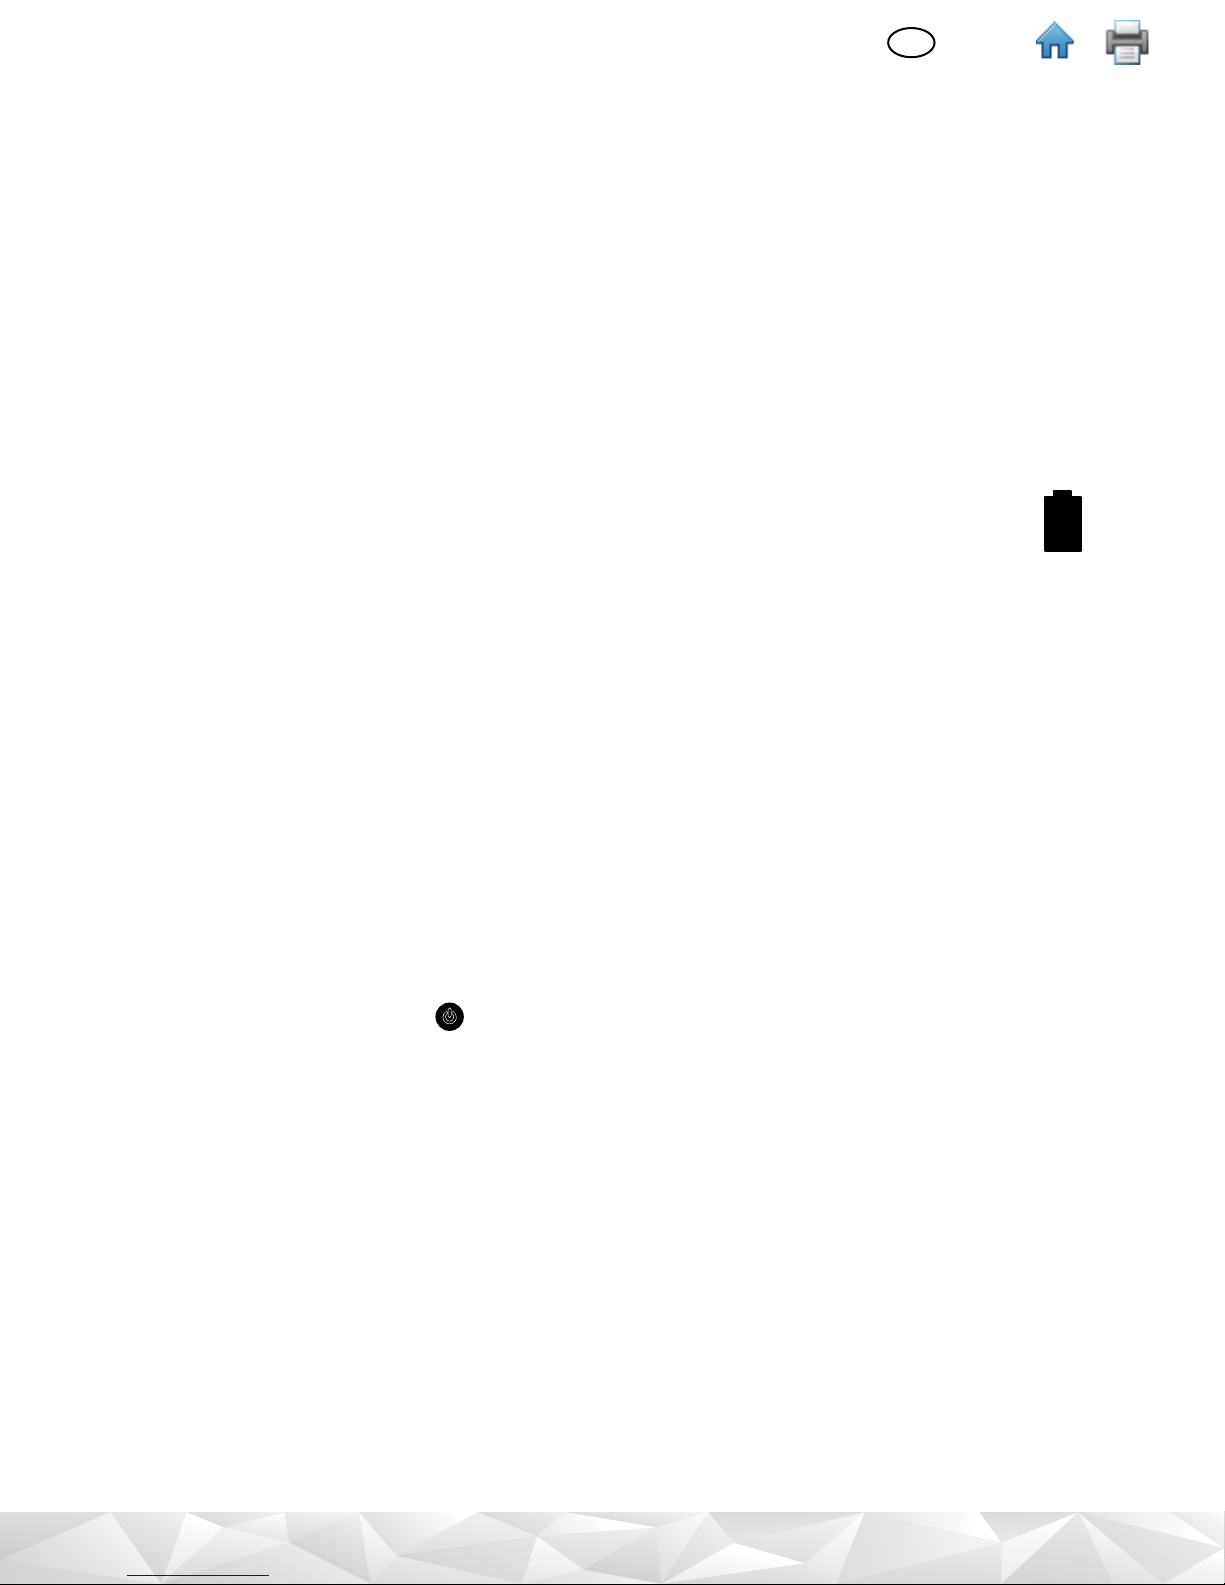
Using the battery level indicator
• The battery level indicator is located in the upper right corner of the screen.
• When a 3M Clean-Trace Luminometer is on, the indicator shows the remaining battery level.
• In Figure 1, the indicator shows the battery is fully charged
• As the battery charge decreases, the blue segment of the indicator becomes smaller.
• When the battery level is less than 10%, the indicator becomes red, showing the battery should be recharged.
• When the battery level is less than 5%, the 3M Clean-Trace Luminometer automatically shuts down.
Managing the battery
• In normal usage, the battery provides up to eight hours of charge capacity.
• As the battery ages, it will provide less than eight hours of charge capacity.
• The battery must be charged when the indicator is red, indicating less than 10% charge capacity.
• The battery does not need to be fully discharged before recharging.
• When storing a 3M Clean-Trace Luminometer for more than a month, the battery level should be at 50% charge. Do
not store a 3M Clean-Trace Luminometer with a fully discharged battery because the battery may lose the ability to be
recharged. Do not store a 3M Clean-Trace Luminometer with a fully charged battery because it may lose the ability to
recharge to full power.
• Battery replacement is recommended after two years of normal use. For battery replacement, the 3M Clean-Trace
Luminometer must be sent to a 3M Service Center.
Switching the Power on
Before switching on the 3M Clean-Trace Luminometer, check the chamber to ensure it is empty.
1. Press and hold the gray on/o button located below the cursor control buttons. The red 3M logo appears to
conrm the power on process has started, then the 3M logo Lockup appears and repeats several times.
2. The Welcome screen displays instructions for installing the 3M Clean-Trace Hygiene Management Software on
your computer using the software installation wizard provided on the segment of memory in the 3M Clean-Trace
Luminometer that appears on your computer as a ash drive.
• To prevent this display from appearing in the future, tap the Do not display again checkbox.
3. The screen goes black for a few seconds, then the Diagnostic Check screen appears. During the diagnostic check, a
progress bar is visible. Tap [Continue] when it’s no longer grayed out.
4. The 3M Clean-Trace Luminometer attempts to synchronize with a computer.
• Refer to the Synchronizing the 3M Clean‑Trace Luminometer with the Computer Database section in this User
Manual for more information.
• To skip the synchronize, tap [Skip Sync].
5. The log in screen appears. Refer to the Logging in on the 3M Clean‑Trace Luminometer section of this User Manual
for instructions.
Figure 1
4
Page 7

(English)
EN
Switching the Power o
1. Press the on/o button for 3 seconds.
2.
[Power o] appears to conrm the power o process has started.
3. Tap [Power o].
4. A conrmation message Your luminometer will shut down appears.
5. Tap [OK]. The display screen goes black to conrm the power o process has completed.
6. Or, tap [Cancel] to cancel the power o process.
Controlling the Software
To control the 3M Clean-Trace Luminometer software, use either the touch screen or the cursor control pad.
• To use the touch screen, use common gestures such as tap and swipe.
• Or, you can use the cursor control pad
on the front of the 3M Clean-Trace Luminometer. Simply press the arrows
on the cursor control pad to move the cursor to the option on the screen you want to select:
Press the up arrow to move the cursor up
Press the down arrow to move the cursor down
Press the left arrow to move the cursor left
Press the right arrow to move the cursor right
• Press the select button on the cursor control pad to select the option on the screen to which you have moved
the cursor.
Operating Controls of the 3M Clean‑Trace Luminometer
Figure 2 shows the operating controls on the 3M Clean-Trace Luminometer.
5
1. On/O Switch - For instructions see Switching the Power On.
2. Cursor Control Buttons - For instructions see Controlling the Software.
4
3. Display/Touch Screen - For instructions see Controlling the Software.
4. USB/Power Port - For instructions see Charging the battery and Setting Up
3
Synchronization with a USB Connection.
5. Rocker Cap - For instructions see Figure 3.
2
1
Figure 2
5
Page 8

Figure 3 shows the step-by-step procedure for inserting a 3M Clean-Trace
Test into a 3M Clean-Trace Luminometer for testing, and removing it after testing
is completed.
1. Open the 3M Clean-Trace Luminometer by pressing the rocker cap.
2. Insert an activated 3M Clean-Trace Test into the chamber, making sure the
cuvette is at the bottom of the chamber.
3. The 3M Clean-Trace Test handle should be visible at the top of the chamber.
4. Release the rocker cap. Now you can do an ATP test with the 3M Clean-Trace
Test that’s inside the chamber.
5. After the ATP test is completed, open the chamber by pressing the rocker cap.
6. To remove the 3M Clean-Trace Test, grasp the top of the test and pull
upwards. Follow the instructions for disposal in the 3M Clean-Trace Test
Instructions for Use. Consult with local regulations for any additional
regulations regarding disposal.
Using the Base
For extra stability and convenience, the 3M Clean-Trace Luminometer can be
placed on the 3M™ Clean-Trace™ Base. The 3M Clean-Trace Base also holds the
3M Clean-Trace Luminometer at an optimum working and viewing angle.
(See Figure4).
(English)
EN
1. 2.
3. 4.
5. 6.
Figure 3
Figure 4
The 3M Clean-Trace Luminometer also has a fold-out stand built into the bottom
of the instrument. (See Figure 5).
Figure 5
Logging in on the 3M Clean‑Trace Luminometer
When the 3M Clean-Trace Luminometer is turned on, it automatically does a diagnostic check. If the diagnostic check is
within the required limits, the login screen appears.
1. The Default User is automatically logged in. Tap [Login].
• Or, if you set up Users using 3M Clean-Trace Hygiene Management Software, to select your User name, tap select
User
and tap your User name. Tap [Login].
2. Unplanned Test automatically appears. Sample Plans appear if you have created and synchronized them using the 3M
Clean-Trace Hygiene Management Software. You can start a new run of a sample plan or start new unplanned testing.
To return to this screen at any time, tap Home
.
• For more information, refer to the Performing Unplanned Testing or the Performing Tests on Test Points in Sample
Plans sections in this User Manual for more information.
6
Page 9

(English)
EN
Logging in on the 3M Clean‑Trace Luminometer with a PIN
When the 3M Clean-Trace Luminometer is turned on, it automatically does a diagnostic check. If the diagnostic check is
within the required limits, the login screen appears.
1. The Default User is automatically logged in. Tap [Login].
• Or, if you set up Users using 3M Clean-Trace Hygiene Management Software, to select your User name, tap select
User
• Use the number pad to enter your 4 digit PIN. As you enter each number, an asterisk (*) appears on the screen. Then
tap Enter
• If you enter a number incorrectly, tap Delete
• If you fail to enter your PIN correctly, you can make two more attempts. After three failed attempts, your user name
and PIN are locked out. Wait 5 minutes for your user name and PIN to clear automatically.
• If your user name does not appear or your PIN does not work, contact your supervisor.
• When you have correctly entered your user name and PIN, tap Enter
2. The New Testing screen displays Unplanned Test and the Sample Plans. You can start a new run of a sample plan or
start new unplanned testing. To return to this screen at any time, tap Home
• For more information, refer to the Performing Unplanned Testing or the Performing Tests on Test Points in Sample
Plans sections in this User Manual for more information.
Waking the 3M Clean‑Trace Luminometer from Sleep Mode
The 3M Clean-Trace Luminometer conserves battery power if the touch screen or the cursor control buttons are inactive.
After 5 minutes of inactivity, the 3M Clean-Trace Luminometer goes into Sleep mode and the screen darkens. After 2
additional hours of inactivity, the 3M Clean-Trace Luminometer automatically shuts down and must be powered on again
before use. Refer to the Switching the Power on section of this User manual for more information.
1. To wake the 3M Clean-Trace Luminometer from Sleep mode, press and hold the up arrow button on the cursor
control pad for 3 seconds.
2. The screen displays the information that appeared before the Sleep mode began so you can continue working.
• If the 3M Clean-Trace Luminometer does not wake from the Sleep mode:
The 3M Clean-Trace Luminometer might be turned o. Press and hold the on/o button for 3 seconds to
The battery might be completely discharged. Refer to the Charging the Battery section in this User Manual for
The 3M Clean-Trace Luminometer might need repair. Contact your 3M Representative for more information.
and tap your User name. Tap [Login].
.
to remove the number, and then enter a correct number.
.
.
turn it on. Refer to the Switching the Power on section in this User Manual for more information.
more information.
Using the Swab Sensor and Vertical Position Sensor
As soon as measurement of a 3M Clean-Trace Test is complete, remove the 3M Clean-Trace Test from the Luminometer
chamber. If a test remains in the 3M Clean-Trace Luminometer chamber for more than 30 seconds, the Swab Sensor
noties you to remove it.
• Keep the 3M Clean-Trace Luminometer upright whenever a test is in the chamber to ensure accurate results and
avoid spillage of reagents, which could damage the sensitive components of the instrument. If the 3M Clean-Trace
Luminometer is held at greater than 68 degrees from vertical when a test is in the chamber, a tilt symbol
you the test measurement was cancelled. Tap [OK], then hold the 3M Clean-Trace Luminometer in a vertical position
and measure the test again.
Logging out from the 3M Clean‑Trace Luminometer
1. Tap Settings
2. Tap [Log Out]. The Login screen appears. Refer to the Logging in on the 3M Clean‑Trace Luminometer section in this
User Manual for more information.
.
noties
7
Page 10

(English)
EN
PERFORMING TESTS ON TEST POINTS WITHIN SAMPLE PLANS
Performing an ATP Test on a Test Point within a Sample Plan
1. To start a new run, tap the Sample Plan, then tap [New Test Run…].
• If a Sample Plan does not appear, tap scroll up
additional Sample Plans.
Or, if you are restarting a Sample Plan that you did not complete, tap the Sample Plan, then tap the starting date and
time you want to restart.
• If a starting date and time does not appear, tap scroll up
• The List View appears, showing a list of the Test Points in the Sample Plan, and the number of Test Points in each
result category:
or scroll down or swipe the list up or down to display
or scroll down or swipe the list up or down.
Total number of
Test Points
• To select a Test Type, tap [Test types…] then tap the Test Type to be performed.
2. To select a Test Point to be tested, tap the Test Point.
• You can test the Test Points in sequence or in any order.
• If a Test Point does not appear, tap scroll up
additional Test Points.
• To display a dierent Test Point, tap Next Test Point Name
appears.
• To display a picture and a description of the test point, tap information
to return to the previous screen.
3. Follow the Instructions for Use for the 3M Clean-Trace Tests. Collect a sample, activate the test and shake it for at least
5 seconds.
a. Open the 3M Clean-Trace Luminometer by pressing the rocker cap. Then insert the activated test into the chamber.
Keep the 3M Clean-Trace Luminometer upright whenever a test is in the chamber to ensure accurate results and
avoid spillage of reagents, which could damage the sensitive components of the instrument.
b. Tap [Start]
c. The test result appears and is stored in the memory so it can be synchronized with the 3M Clean-Trace Hygiene
Management Software. The result is also interpreted using your established pass/fail limits and is displayed on the
screen as PASS
d. To remove the 3M Clean-Trace Test from the 3M Clean-Trace Luminometer, press the rocker cap, grasp the top of
the test and pull upwards. Follow the instructions for disposal in the 3M Clean-Trace Test Instructions for Use.
4. To test another Test Point, tap Next Test Point
• Or, to do a retest, tap [Retest]
• Or, to display the list of Test Points, tap [List View]
to begin measuring. A progress bar appears and moves from left to right.
, CAUTION , or FAIL .
then tap [Start] .
Number in
Pass
category
or scroll down or swipe the list up or down to display
or Previous Test Point until the Test Point you want appears.
.
Number in
Caution
category
or Previous Test Point until the Test Point you want
Number in
Fail
category
next to the Test Point name. Tap Back
Performing a Retest on an ATP Test Point with a Caution or a Fail Test Status before Moving to a Dierent Test Point
1. Before moving to a dierent Test Point, follow the Instructions for Use for the 3M Clean-Trace Test to collect a sample,
activate the test, and shake it for at least 5 seconds.
2. Open the 3M Clean-Trace Luminometer by pressing the rocker cap. Then insert the activated test into the chamber.
Keep the 3M Clean-Trace Luminometer upright whenever a test is in the chamber, to ensure accurate results and avoid
spillage of reagents, which could damage the sensitive components of the instrument.
3. Tap [Retest]
4. The test result appears and is stored in the memory so it can be synchronized with the 3M Clean-Trace Hygiene
Management Software. The result is also interpreted using your established pass/fail limits and is displayed on the
screen as PASS
then tap [Start] to begin measuring. A progress bar appears and moves from left to right.
, CAUTION or FAIL .
8
Page 11

(English)
EN
5. To remove the test from the 3M Clean-Trace Luminometer, press the rocker cap, grasp the top of the test and pull
upwards. Follow the instructions for disposal in the 3M Clean-Trace Test Instructions for Use.
Performing a Retest on an ATP Test Point with a Caution or a Fail Test Status after Moving to a Dierent Test Point
To select the Test Point you want to retest while in the same Sample Plan, tap Next
• Or, to use a dierent Sample Plan, tap Home , then tap the Sample Plan, then tap the date and time of the run.
• Or, tap Scroll down
1. Follow the Instructions for Use for the 3M Clean-Trace Test to collect a sample, activate the test and shake it for at least
5 seconds.
2. Open the 3M Clean-Trace Luminometer by pressing the rocker cap. Then insert the activated test into the chamber.
Keep the 3M Clean-Trace Luminometer upright whenever a test is in the chamber, to ensure accurate results and avoid
spillage of reagents, which could damage the sensitive components of the instrument.
3. Tap [Retest]
4. The test result appears on the screen and is stored in the memory so it can be synchronized with the 3M Clean-Trace
Hygiene Management Software. The result is also interpreted using your established pass/fail limits and is displayed on
the screen as PASS
5. To remove the test from the 3M Clean-Trace Luminometer, press the rocker cap, grasp the top of the test and pull
upwards. Follow the instructions for disposal in the 3M Clean-Trace Test Instructions for Use.
Performing a Visual Inspection Test on a Test Point within a Sample Plan
1. To start a new run, tap the Sample Plan, then tap [New Test Run…].
• If a Sample Plan does not appear, tap scroll up
additional Sample Plans.
Or, if you are restarting a Sample Plan that you did not complete, tap the Sample Plan, then tap the starting date and
time you want to restart.
• If a Sample Plan does not appear, tap scroll up
additional Sample Plans.
• The List View appears, showing a list of the Test Points in the Sample Plan, and the number of Test Points in each
result category:
then tap [Start] to begin measuring. A progress bar appears and moves from left to right.
or Scroll up then tap the Test Point you want to retest.
, CAUTION or FAIL .
or scroll down or swipe the list up or down to display
or scroll down or swipe the list up or down to display
or Previous .
Total number of
Test Points
• To select a Test Type, tap [Test types…] then tap the Test Type to be performed.
2. To select a Test Point to be tested, tap the Test Point.
• If a Test Point includes an ATP test and a Visual Inspection test, the Visual Inspection test appears immediately after
the ATP test.
• You can test the Test Points in sequence or in any order.
• If a Test Point does not appear, tap scroll up
additional Test Points.
• To display a dierent Test Point, tap Next Test Point Name
want appears.
• To display a picture and a description of the test point, tap information
to return to the previous screen.
• Tap [Pass] for a Pass result or tap [Fail] for a Fail result.
• If you selected Pass, the Pass display
• To redo a test, tap [Retest]
then tap [Start] .
appears. If you entered Fail, the Fail display appears.
Number in
Pass
category
or scroll down or swipe the list up or down to display
Number in
Caution
category
or Previous Test Point until the Test Point you
Number in
Fail
category
next to the Test Point name. Tap [Back]
9
Page 12

(English)
EN
• To add a comment to the result, tap Add Comment . The Add Comments screen and any previously added
comments appears. Tap [Add Comments] then tap comment to add. Tap [OK]. Tap [Back]. If you decide not to add a
comment, tap [Back] to return to the previous screen.
3. To test another Test Point, tap Next Test Point
• Or, to do a retest, tap [Retest]
• Or, to display the list of Test Points, tap List View
Recording Temperature or pH for a Test Point within a Sample Plan
1. To start a new run, tap the Sample Plan, then tap [New Test Run…].
• If a Sample Plan does not appear, tap scroll up or scroll down or swipe the list up or down to display
additional Sample Plans.
• If you are restarting a Sample Plan that you did not complete, tap the Sample Plan with the starting date and time
you want. If that Sample Plan does not appear, tap scroll up
Plan names.
• The List View appears, showing a list of the Test Points in the Sample Plan, and the number of Test Points in each
result category:
then tap [Start] .
or Previous Test Point until the Test Point you want appears.
.
or scroll down to display additional Sample
Total number of
Test Points
• To select a Test Type, tap [Test types…] then tap the Test Type to be performed. Tap [Done].
2. To select a Test Point to be tested, tap the Test Point.
• If a Test Point includes an ATP test and a Temperature or pH recording, the Temperature or pH recording appears
immediately after the ATP test.
• You can test points in the Sample Plan in sequence or in any order. The rst Test Point in the Sample Plan appears on
the screen. If you want to test a dierent Test Point, tap Next Test Point
can display a previous test point by tapping Previous Test Point .
• To display an image and a description of the Test Point, tap information
to return to the previous screen.
3. Tap the eld. Use the number pad to enter the Temperature test result or pH test result.
4. The test result appears and is stored in the memory so it can be synchronized with the 3M Clean-Trace Hygiene
Management Software. The result is also interpreted using your established pass/fail limits and is displayed on the
screen as PASS
• To add a comment to the result, tap the Add Comment
previously-selected comments will appear. Tap [Add Comments], and then tap the comment to add. Tap [OK].
Tap [Back].
• If you decide not to add a comment, tap Back
5. To test another Test Point, tap Next Test Point
• Or, to do a retest, tap [Retest]
• Or, to display the list of Test Points, tap List View
, or FAIL .
then tap [Start] .
Number in
Pass
category
to go to the previous screen.
or Previous Test Point until the Test Point you want appears.
.
Number in
Caution
category
symbol . The Add Comments screen and any
Number in
Fail
category
until the test point you want appears. You
next to the Test Point name. Tap [Back]
Adding Optional Comments to a Caution or Fail ATP Test Result
1. To view or add comments for a displayed test result, tap Add Comment
previously-selected comments appear.
2. Tap [Add Comments], and then tap the comment to add. Tap [OK]. Tap [Back].
3. If you decide not to add a comment, tap [Back]
. The Add Comments screen and any
to go to the previous screen.
10
Page 13

(English)
EN
Changing Temperature or pH Recording for a Test Point within a Sample Plan
1. To select the Test Point you want to retest if you are still in the same Sample Plan, tap Next or Previous .
2. To use a dierent Sample Plan, tap Home
3. Tap Scroll down
4. Use the number pad to enter the Temperature test result or pH test result.
• The test result appears and is stored in the memory so it can be synchronized with the 3M Clean-Trace Hygiene
Management Software. The result is also interpreted using your established pass/fail limits and is displayed on the
screen as PASS
• To add a comment to the result, tap the Add Comment
• Tap [Add Comments].
• Tap the comment. Tap [OK]. Tap [Back].
Moving to a Dierent Test Point in the Same Sample Plan
1. To move to the next Test Point in a Sample Plan, tap Next
displays. Tap Next again to move to the following Test Point in the Sample Plan until you reach the last Test Point in
the Sample Plan.
2. To move to a previous Test Point in a Sample Plan, tap Previous
Plan displays. Tap Previous again to move to the preceding Test Point in the Sample Plan until you reach the rst Test
Point in the Sample Plan.
3. When the Test Point you want is displayed, follow the instructions in this manual for Performing an ATP Test on a Test
Point within a Sample Plan, starting with step 5.
or Scroll up then tap the Test Point you want to retest.
, CAUTION or FAIL .
, then tap the Sample Plan, then tap the date and time of the run.
symbol. Any previously-selected comments appear.
. The name of the next Test Point in the Sample Plan
. The name of the previous Test Point in the Sample
Moving to a Dierent Test Point in a Dierent Sample Plan
1. Tap Home to move to the Sample Plan screen.
2. To do an ATP test on a Test Point in a Sample Plan you already started, tap the Sample Plan with the starting date and
time you want. If that Sample Plan does not appear, tap scroll up
display additional Sample Plans.
3. To move to the next Test Point in a Sample Plan, tap Next
displays. Tap Next again to move to the following Test Point in the Sample Plan until you reach the last Test Point in
the Sample Plan.
4. To move to a previous Test Point in a Sample Plan, tap Previous
Plan displays. Tap Previous again to move to the preceding Test Point in the Sample Plan until you reach the rst Test
Point in the Sample Plan.
5. When the Test Point you want is displayed, follow the instructions in this manual for Performing an ATP Test on a Test
Point within a Sample Plan, starting with step 5.
Viewing Test Results
1. To move to the Sample Plan screen, tap Results .
2. To display results with a fail Test Status, tap [Failed Tests]. To display the most recent results, tap [Last Test]. To display
results for the selected Sample Plan, tap [Sample Plan].
3. Test results are displayed using color coding: red for fail test results, yellow for caution test results and green for pass
test results. The display also includes the Sample Plan name, the Test Point name, the date and time of the test, and the
name of the person who did the testing.
4. To display additional test results, tap Scroll down
motion on the touch screen.
or Scroll up . You can also scroll up and down using a swiping
. The name of the next Test Point in the Sample Plan
or scroll down or swipe the list up or down to
. The name of the previous Test Point in the Sample
11
Page 14

(English)
EN
Setting Up a Custom Test Type on a Test Point within a Sample Plan
If a Sample Plan does not appear, tap scroll up or scroll down or swipe the list up or down to display additional
Sample Plans.
• If you are restarting a Sample Plan that you did not complete, tap the Sample Plan with the starting date and time
you want. If that Sample Plan does not appear, tap scroll up or scroll down to display additional Sample
Plan names.
• The List View appears, showing a list of the Test Points in the Sample Plan, and the number of Test Points in each
result category:
Total number of
Test Points
• To select a Test Type, tap [Test types…] then tap the Test Type to be performed. Tap [Done].
1. To select a Test Point to be tested, tap the Test Point
• If a Test Point includes an ATP test and a Custom Test Type, the Custom Test Type appears immediately after the
ATP test.
• You can test points in the Sample Plan in sequence or in any order. The rst Test Point in the Sample Plan appears on
the screen. If you want to test a dierent Test Point, tap Next Test Point
can display a previous test point by tapping Previous Test Point .
• To display an image and a description of the Test Point, tap information
to return to the previous screen.
2. Tap the gray bar that appears below the test type. Tap [Enter value] . Use the number pad to enter the test result. To
remove a number you entered incorrectly, tap backspace
3. The test result appears on the screen and is stored in the memory so it can later be synchronized with the 3M
Clean-Trace Hygiene Management Software. The test result is also interpreted using the pass/fail limits and the test
result status is displayed on the screen as PASS
4. The next Test Point in the Sample Plan you selected appears on the screen. You can repeat the process starting with
step 5 to enter a test result for the Test Point that’s displayed on the screen.
Performing a Retest on a Custom Test Type
1. To select the Test Point you want to retest, tap Next or Previous . To use a dierent Sample Plan, tap Home ,
then tap Next or Previous to move to the Test Point you want to retest.
a. To display a picture and a description of the Test Point, tap information
to return to the previous screen.
2. Tap the eld. Use the number pad to enter the test result. To remove a number you entered incorrectly, tap backspace
, then enter the correct number. Tap [Done].
3. The test result appears on the screen and is stored in the memory so it can be synchronized with the 3M Clean-Trace
Hygiene Management Software. The result is also interpreted using your established pass/fail limits and is displayed on
the screen as PASS
, CAUTION , or FAIL .
Number in
Pass
category
, CAUTION , or FAIL .
Number in
Caution
category
, then enter the correct number. Tap [Done].
Number in
Fail
category
until the test point you want appears. You
next to the Test Point name. Tap [Back]
next to the Test Point name. Tap back
12
Page 15

(English)
EN
PERFORMING TESTING ON UNPLANNED TEST POINTS
Performing an Unplanned ATP Test
1. Tap [Unplanned Test] .
To start a new run, tap [New Test Run…].
• Or, if you are restarting a run of unplanned tests that you did not complete, tap the starting date and time you
want to restart.
2. Tap Select Test Type
• UXL100(Surface ATP)
• AQF100
• AQT200(water total)
3. Tap [OK].
4. Follow the Instructions for Use for the 3M Clean-Trace Test to collect a sample, activate the test and shake it for at least
5 seconds.
5. Open the 3M Clean-Trace Luminometer by pressing the rocker cap. Then insert the activated test into the chamber.
Keep the 3M Clean-Trace Luminometer upright whenever a test is in the chamber, to ensure accurate results and avoid
spillage of reagents, which could damage the sensitive components of the instrument.
6. Tap [Start]
and is stored in the memory so it can be synchronized with the 3M Clean-Trace Hygiene Management Software.
7. To remove the test from the 3M Clean-Trace Luminometer, press the rocker cap, grasp the top of the test and pull
upwards. Follow the instructions for disposal in the 3M Clean-Trace Test Instructions for Use.
8. To do another unplanned ATP test, tap [New] and repeat this process.
• Or, to do a retest, tap [Retest]
to begin measuring. A progress bar appears and moves from left to right. The test result appears
then tap the test type:
then tap [Start] .
Performing an Unplanned Visual Inspection Test
1. Tap [Unplanned Test]
2. To start a new run, tap [New Test Run…].
Or, if you are restarting a run of unplanned tests that you did not complete, tap the starting date and time you want
to restart.
• If a starting date and time does not appear, tap scroll up
display additional Sample Plans.
3. Tap Select Test Type
4. Tap [OK].
5. Tap [PASS] for a Pass result or tap [FAIL] for a Fail result.
6. If you selected Pass, the Pass
symbol appears and [Retest] appears.
7. To do another Visual Inspection test, tap [New].
• To add a comment, tap Add Comment
appear. Tap [Add Comments], then tap the comment to add. Tap [OK]. Tap [Back].
• If you decide not to add a comment, tap [Back]
.
or scroll down or swipe the list up or down to
then tap [Visual Inspection].
display appears. If you entered Fail, the Fail display appears, and the add comment
. The Add Comments screen and any previously added comments
to return to the previous screen.
13
Page 16

(English)
EN
SYNCHRONIZING THE 3M CLEAN‑TRACE LUMINOMETER WITH THE COMPUTER DATABASE
Use the Sync Manager software to initiate a synchronization between the 3M Clean-Trace Luminometer and your
computer. Refer to the Using the Sync Manager section of the 3M Clean-Trace Hygiene Management Software User
Manual for more information.
• You must synchronize the rst time using the USB connection.
• A Diagnostic Check is automatically done when a synchronization is initiated.
• If you start a synchronization less than two minutes after completing the last previous synchronization, a warning
message appears. Wait at least two minutes, then start a synchronization again.
• If you synchronize a 3M Clean-Trace Luminometer that already contains Sample Plans that are dierent than the Sample
Plans on the computer you are currently synchronizing with, a warning message appears.
o Tap Settings. Tap [Synchronize]. The progress bar shows when the synchronization is complete.
o To cancel the synchronization, tap [Skip Sync]
o To continue the synchronization, tap [Continue]. This option removes the Sample Plans and test results from the 3M
Clean-Trace Luminometer and replaces the Sample Plans with the Sample Plans on the computer with which you are
currently synchronizing.
• Synchronizing the 3M Clean-Trace Luminometer with the computer sends information in both directions:
Sent from Computer to 3M Clean-Trace Luminometer:
- User names and PINs
- Sample Plans and Test Points including pass/fail limits and images of the Test Points if available
- Organization congurations such as number of days to retain synchronized test results
Sent from 3M Clean-Trace Luminometer to Computer:
- Test Results including date and time of test, User who did the test and comments if available
- The 3M Clean-Trace Luminometer provides three modes of communication: USB cable, Wi-Fi connection and
Bluetooth connection
Setting Up Synchronization with a USB Connection
To use a USB cable connection: connect one end of the 3M provided USB cable to the USB/Power port and connect the
other end of the USB cable to a USB port on your computer.
• To register a 3M Clean-Trace Luminometer the rst time you synchronize it, log in to the Sync Manager. Refer to the
Logging in Your User Name on the Sync Manager section of the 3M Clean-Trace Hygiene Management Software User
Manual.
• 1. Tap [Settings]
Setting Up Synchronization with a Bluetooth Connection
• You must synchronize the rst time using the USB connection to register the 3M Clean-Trace Luminometer.
• To use a Bluetooth connection: set up the Bluetooth connection for the 3M Clean-Trace Luminometer. This procedure
requires simultaneous use of both a 3M Clean-Trace Luminometer and the Sync Manager software, which is installed
on your computer by the software installation wizard for the 3M Clean-Trace Hygiene Management Software. For
instructions on pairing a Bluetooth connection, refer to the Setting Up a Bluetooth Connection section of the 3M
Clean-Trace Hygiene Management Software User Manual.
Setting Up Synchronization with a WiFi Connection
• You must synchronize the rst time using the USB connection to register the 3M Clean-Trace Luminometer.
• To use a Wi-Fi connection: set up Web Service on the 3M Clean-Trace Luminometer, which then sends the web service
information you set up to the computer the rst time you synchronize using the Sync Manager software.
1. Touch the top of the screen for 1 second, then swipe down.
2. Tap Connections
3. Tap WiFi
.
. Tap [Preferred Connection – (connection type)]. Tap [USB]. Tap [Select].
.
14
Page 17

(English)
EN
4. Turn WiFi on, and select your WiFi network. If it’s a secure WiFi, enter your security credential. Obtain this information
from your IT support.
5. Tap Return
6. Tap Settings
7. Tap [Preferred Connection - (connection type)]
8. Tap [WiFi]
9. Tap [Web Service Setup].
10. Conrm the Host Name, Common Services Port Number, Device Services Port Number are correct. Obtain this
information from your IT support. If this information is correct, tap OK. If not, use the following instructions to update
this information.
• Tap [Enter Host Name] and use the keyboard to enter the name of your webserver. Obtain this information from your
IT support.
• Or, to nd the name of your webserver for this computer:
a. Click the Windows Start button on the computer.
b. Select Computer
c. Select System Properties
d. The name of your webserver is listed on the screen as Full Computer Name.
e. Tap [Done]
• Tap [Common Services Port Number] and use the keyboard to enter the IIS port number for Common Service Port
No. To nd the Common Services Port No. for the computer that has the Sync Manager Software:
a. Click the Windows Start button on the computer.
b. Click Run….
c. Type inetmgr into the Open: eld then click OK.
d. Expand the computer name in the Connections column.
e. Expand Sites.
f. Click Clean-TraceCommonServices. The Common Services Port No. is the 4 digit number that appears in the
Browse Web Site area in the Actions column. For example, 9003.
g. Tap [Done]
• Tap [Device Services Port Number] and use the keyboard to enter the IIS port number for Device Service Port No.
To nd the Device Services Port No. for the computer that has the Sync Manager Software:
a. Click the Windows Start button on the computer.
b. Click Run….
c. Type inetmgr into the Open: eld then click OK.
d. Expand the computer name in the Connections column.
e. Expand Sites.
f. Click Clean-TraceDeviceServices. The Device Services Port No. is the 4 digit number that appears in the Browse
Web Site area in the Actions column. For example, 9004.
g. Tap [Done].
h. Tap [OK].
• To display the current Web Service information on the 3M Clean-Trace Luminometer without changing it, tap
[Settings]
• To change the Connection Type to WiFi, refer to the Changing the Connection Type section in this User Manual.
• The 3M Clean-Trace Luminometer WiFi software uses the following ports by default on your computer: 9002, 9003,
9004, 9005. Ensure that these ports are enabled by your antivirus software or rewall.
.
.
, then tap [Web Service Setup]. To return to Settings, tap [OK].
15
Page 18

(English)
EN
Changing the Connection Type
1. Tap Settings .
2. Tap [Preferred Connection - (connection type)]
3. Tap the connection type you prefer:
• USB
• WiFi
• Bluetooth
• Skip Sync – This selection disables the sync process
4. Tap [Select].
Setting Synchronization Time
1. Tap Settings
2. Tap [Synchronization Time].
3. Rotate the hour and minute wheels until the time you want is highlighted.
4. Tap [Done].
.
PERFORMING ADMINISTRATIVE TASKS
Setting the Date and Time on the 3M Clean‑Trace Luminometer
1. Touch the top of the screen for 1 second, then swipe down.
2. Tap the date and time that’s displayed.
3. To enable [Set date] and [Set time], tap [Automatic date & time]
4. To set the date, tap [Set date] then rotate the month, day, and year wheels until the correct date is displayed.
Tap [Done].
5. To set the time, tap [Set time] then rotate the hour, minute, and AM/PM wheels until the correct time is displayed.
Tap [Done].
6. Tap Return
.
Performing a Diagnostic Check
1. Tap Settings
2. Tap [Diagnostic Check] to do the same diagnostic check the 3M Clean-Trace Luminometer does automatically when
the power is switched on. For more information, refer to the Switching the Power on section in this User Manual
Changing the Screen Brightness
1. Tap Settings .
2. Tap [Screen Brightness].
3. To increase the screen brightness, drag the slider to the right. To decrease the screen brightness drag the slider to the left.
Restarting the 3M Clean‑Trace Luminometer
1. Tap Settings
2. Tap [Restart Device].
Exporting a Log File
1. Tap Settings
2. To generate a log le, tap [Export Log File]
• To view the log le:
a. Connect the 3M Clean-Trace Luminometer to your computer by USB cable.
b. Browse to 3M Clean-Trace\Luminometer Main Storage\Logs
c. To open the log le, use Microsoft® Notepad®.
.
.
16
Page 19

(English)
EN
Displaying Software Versions
1. Tap Settings .
2. Tap [About].
3. Swipe the list of software versions up to display the complete list.
4. Tap [Continue].
Troubleshooting
This section is intended to help you solve problems that you might encounter when using the 3M Clean-Trace
Luminometer. Contact 3M or your local 3M distributor for more information.
Problem Probable Cause Solution
Battery Low
message
Diagnostic Check
Failed Message
Incorrect Swab
Detected
No Display a. Instrument in Sleep mode
No Swab
Detected
Results Lower
than Expected
Rocker Cap Open
message
Swab Left in
Chamber
Swab Not
Recognized
The Luminometer
was dropped
The Luminometer
might have
experienced a
mechanical shock
Test Cancelled Luminometer tilted during test
Battery needs to be charged Turn the 3M Clean-Trace Luminometer o. DO NOT do
testing if a BATTERY LOW warning is displayed. Connect
the charging cable to the 3M Clean-Trace Luminometer
and to the power mains.
Tap [Try Again] to repeat the Diagnostic Check. If the
Diagnostic Check fails again, contact 3M or your local
distributor.
Insert a 3M Clean-Trace Test.
a. Press the up arrow button on the control panel for
b. Battery fully discharged
c. Instrument malfunction
a. Sample / reagent problem
b. Instrument malfunction
Rocker cap was open while you
attempted to start the reading process
measurement
3 seconds
b. Recharge the battery.
c. Contact 3M or your local distributor.
Insert a 3M Clean-Trace Test.
a. Check with a new 3M Clean-Trace Test and known
positive samples such as a 3M™ Clean-Trace™
Surface Positive Control or 3M™ Clean-Trace™ Water
Positive Control.
b. Contact 3M or your local distributor.
Close the rocker cap after you insert a 3M Clean-Trace Test
and before you start the reading process.
To prevent leakage into the chamber, if a 3M Clean-Trace
Test is left in the chamber for more than 30 seconds
following the completion of a measurement, this message
along with an audible tone reminds you to remove the test
from the chamber after the measurement is complete.
Insert a 3M Clean-Trace Test.
Turn power o and wait for 5 minutes. Restart the
Luminometer. If there is no error message, the
Luminometer is OK to use.
Turn power o and wait for 5 minutes. Restart the
Luminometer. If there is no error message, the
Luminometer is OK to use.
The test was cancelled. Please hold the Luminometer rmly
and pointed at most 68 degrees from vertical.
17
Page 20

EN
(English)
Synchronization
Failure
Instrument
becomes
unresponsive
Unexpectedly
high test results
Error: 7 Firmware upgrade problem 1. Turn o the 3M Clean-Trace Luminometer, and turn it
Error: 9 Cap was open while reading a test 1. Close the cap.
Error: 11
Error: 15
Error: 12
Error: 16
Error: 1
Error: 2
Error: 4
Error: 6
Error: 8
Error: 10
Error: 13
Error: 14
Error: 28
Error: 17
Error: 31
Error: 18 - 30
Error: 33 - 123
Instrument not registered To register an instrument the rst time you synchronize
it, log in to the Sync Manager on your computer, then
synchronize the instrument. Refer to the Using the
Sync Manager section of the 3M Clean-Trace Hygiene
Management Software User Manual for more information.
Temporary software malfunction To do a hard reset, press the on/o button for 15 seconds.
To start the instrument again, press the on/o button for
3 seconds.
Instrument was dropped or subjected
to a physical shock
Instrument temperature is >40°C 1. Use the 3M Clean-Trace Luminometer at ambient
Instrument temperature is <5°C 1. Use the 3M Clean-Trace Luminometer at ambient
Switch o the power for 5 minutes, then switch the power
on again.
on again.
2. Repeat the rmware upgrade.
3. If the problem persists, contact 3M or your local
distributor.
2. Repeat reading the test.
3. If the problem persists, contact 3M or your local
distributor.
temperature less than or equal to 40°C.
2. If the problem persists, contact 3M or your local
distributor.
temperatures greater than or equal to 5°C.
2. If the problem persists, contact 3M or your local
distributor.
1. Turn o the 3M Clean-Trace Luminometer, and turn it
on again.
2. Repeat the task using the 3M Clean-Trace Luminometer.
3. If the problem persists, contact 3M or your local
distributor.
18
Page 21

(English)
EN
APPENDIX
The 3M Clean-Trace Luminometer display screen is laminated, bonded and shatter-resistant. It is designed to hold together
in the event of breakage.
The 3M Clean-Trace Luminometer allows for gloved operation. Gloves need to be 4 mil thick or less and cannot be woven
with metallic substances.
Cleaning and Decontaminating the 3M Clean‑Trace Luminometer
WARNING: To reduce the risks associated with hazardous voltage, always turn the instrument o and disconnect from
outlet before cleaning the instrument.
Clean and decontaminate the instrument immediately if any spills occur.
Clean the external surfaces of the instrument regularly once per month.
Cleaning and Decontaminating the External surfaces:
1. Turn o the power by pressing and holding the on/o button for 3 seconds (1, see gure below), and then disconnect
the USB cable (2, see gure below) on the side of the instrument.
2. Use a disposable towel lightly dampened with a solution of mild, non-staining disinfectant/cleaner such as mild
dishwashing soap to gently wipe the outer surfaces of the instrument. Wring out the disposable towel thoroughly so
it is damp, but not dripping. Avoid the USB cable connection on the side of the instrument when cleaning the exterior
surfaces.
3. Use another disposable towel to repeat the procedure with DI water (distilled water or deionized water).
4. Allow the exterior surfaces of the instrument to air dry for at least 1 hour. Do not reconnect the power cable and the
USB cable until you have allowed the instrument to air dry for at least 1 hour.
5. Connect the USB cable (2), and turn on the power by pressing and holding the on/o button for 3 seconds (1).
2
1
19
Page 22

3M Food Safety
3M United States
3M Center
Bldg. 275-5W-05
St. Paul, MN 55144-1000
USA
1-800-328-6553
3M Canada
Post Oce Box 5757
London, Ontario N6A 4T1
Canada
1-800-563-2921
3M Latin America
3M Center
Bldg. 275-5W-05
St. Paul, MN 55144-1000
USA
1-954-340-8263
3M Europe and MEA
3M Deutschland GmbH
Carl-Shurz - Strasse 1
D41453 Neuss/Germany
+49-2131-14-3000
3M United Kingdom PLC
Morley Street,
Loughborough
Leicestershire
LE11 1EP
United Kingdom
+(44) 1509 611 611
3M Österreich GmbH
Euro Plaza
Gebaude J, A-1120 Wien
Kranichberggasse 4
Austria
+(43) 1 86 686-0
3M Asia Pacic
No 1, Yishun Avenue 7
Singapore, 768923
65-64508869
3M Japan
3M Health Care Limited
6-7-29, Kita-Shinagawa
Shinagawa-ku, Tokyo
141-8684 Japan
81-570-011-321
3M Australia
Bldg A, 1 Rivett Road
North Ryde, NSW 2113
Australia
61 1300 363 878
3
3M Health Care
2510 Conway Ave
St. Paul, MN 55144 USA
www.3M.com/foodsafety
© 2016, 3M. All rights reserved.
3M and Clean-Trace are trademarks of 3M. Used under license in Canada.
All other trademarks are the property of their respective companies.
34-8718-2963-5
 Loading...