

ZyXEL Prestige 642 User Manual

Prestige 642
ADSL Modem
User's Guide
Version 2.50
(Mar. 2000)

Prestige 642 ADSL Modem
ADSL Modem
Copyright
Copyright ©2000 by ZyXEL Communications Corporation.
The contents of this publication may not be reproduced in any part or as a whole, transcribed, stored in a
retrieval system, translated into any language, or transmitted in any form or by any means, electronic,
mechanical, magnetic, optical, chemical, photocopying, manual, or otherwise, without the prior written
permission of ZyXEL Communications Corporation.
Published by ZyXEL Communications Corporation. All rights reserved.
Disclaimer
ZyXEL does not assume any liability arising out of the application or use of any products, or software
described herein. Neither does it convey any license under its patent rights nor the patents' rights of others.
ZyXEL further reserves the right to make changes in any products described herein without notice. This
publication is subject to change without notice.
Trademarks
Trademarks mentioned in this publication are used for identification purposes only and may be properties of
their respective owners. ZyNOS is a registered trademark of ZyXEL Communications Corporation
.
ii Copyright

Prestige 642 ADSL Modem
ZyXEL Limited Warranty
ZyXEL warrants to the original end user (purchaser) that this product is free from any defects in materials
or workmanship for a period of up to two (2) years from the date of purchase. During the warranty period,
and upon proof of purchase, should the product have indications of failure due to faulty workmanship
and/or materials, ZyXEL will, at its discretion, repair or replace the defective products or components
without charge for either parts or labor, and to whatever extent it shall deem necessary to restore the
product or components to proper operating condition. Any replacement will consist of a new or remanufactured functionally equivalent product of equal value, and will be solely at the discretion of ZyXEL.
This warranty shall not apply if the product is modified, misused, tampered with, damaged by an act of
God, or subjected to abnormal working conditions.
Note
Repair or replacement, as provided under this warranty, is the exclusive remedy of the purchaser. This
warranty is in lieu of all other warranties, express or implied, including any implied warranty of
merchantability or fitness for a particular use or purpose. ZyXEL shall in no event be held liable for indirect
or consequential damages of any kind of character to the purchaser.
To obtain the services of this warranty, contact ZyXEL's Service Center; refer to the separate Warranty
Card for your Return Material Authorization number (RMA). Products must be returned Postage Prepaid. It
is recommended that the unit be insured when shipped. Any returned products without proof of purchase or
those with an out-dated warranty will be repaired or replaced (at the discretion of ZyXEL) and the customer
will be billed for parts and labor. All repaired or replaced products will be shipped by ZyXEL to the
corresponding return address, Postage Paid (USA and territories only). If the customer desires some other
return destination beyond the U.S. borders, the customer shall bear the cost of the return shipment. This
warranty gives you specific legal rights, and you may also have other rights that vary from state to state.
Please register your Prestige (fast, easy online registration at www.zyxel.com) for free future product
updates and information.
ZyXEL Limited Warranty
iii
Prestige 642 ADSL Modem
Customer Support
If you have questions about your ZyXEL product(s) or desire assistance, please contact ZyXEL
Communications Corporation offices worldwide, in any one of the following ways. Our ftp sites are also
available for software and ROM upgrades.
Method
Region
Worldwide
North
America
Scandinavia
Austria
Germany
EMAIL – Support Telephone Web Site
EMAIL – Sales Fax FTP Site
support@zyxel.com.tw
support@europe.zyxel.com
sales@zyxel.com.tw
support@zyxel.com
+886-3-578-3942
+886-3-578-2439
+1-714-632-0882
www.zyxel.com
www.europe.zyxel.com
ftp.europe.zyxel.com
www.zyxel.com
800-255-4101
sales@zyxel.com
support@zyxel.dk
sales@zyxel.dk
support@zyxel.at
+1-714-632-0858
+45-3955-0700
+45-3955-0707
+43-1-4948677-0
ftp.zyxel.com
www.zyxel.dk
ftp.zyxel.dk
www.zyxel.at
0810-1-ZyXEL
0810-1-99935
sales@zyxel.at
support@zyxel.de
sales@zyxel.de
+43-1-4948678
+49-2405-6909-0
0180-5213247
Tech Support hotline
0180-5099935
RMA/Repair hotline
+49-2405-6909-99
ftp.zyxel.at
Note: for Austrian users with *.at
domain only!
www.zyxel.de
ftp.europe.zyxel.com
Regular Mail
ZyXEL Communications
Corp., 6 Innovation Road II,
Science-Based Industrial
Park, HsinChu, Taiwan.
ZyXEL Communications Inc.,
1650 Miraloma Avenue,
Placentia, CA 92870, U.S.A.
ZyXEL Communications A/S,
Columbusvej 5, 2860
Soeborg, Denmark.
ZyXEL Communications
Services GmbH.,
Thaliastrasse 125a/2/2/4,
A-1160 Vienna, Austria
ZyXEL Deutschland GmbH.,
Adenauerstr. 20/A4, D-52146
Wuerselen, Germany.
iv Customer Support

Prestige 642 ADSL Modem
Table of Contents
Customer Support...............................................................................................................iv
Table of Contents ................................................................................................................v
List of Figures ..................................................................................................................viii
List of Tables .......................................................................................................................x
Preface ................................................................................................................................xi
Structure of this Manual.................................................................................................. xii
What is DSL?................................................................................................................... xiii
Chapter 1 Getting to Know Your ADSL M odem
1.1 The Prestige 642 ADSL Modem ..................................................................................................1-1
1.2 Features of the Prestige 642......................................................................................................... 1-1
1.3 Applications for the Prestige 642................................................................................................. 1-2
1.3.1 Internet Access....................................................................................................................... 1-2
1.3.2 LAN to LAN Application...................................................................................................... 1-3
............................................................... 1-1
Chapter 2 Hardware Installation & Initial Setup.......................................................... 2-1
2.1 Front Panel LEDs OF P642 ......................................................................................................... 2-1
2.2 Prestige 642 Rear Panel and Connections.................................................................................. 2-1
2.3 Additional Installation Requirements.........................................................................................2-2
2.4 Connecting the POTS Splitter ..................................................................................................... 2-3
2.5 Telephone Microfilters ................................................................................................................. 2-4
2.6 Power Up Your Prestige............................................................................................................... 2-4
2.7 Navigating the SMT Interface ..................................................................................................... 2-6
2.7.1 System Management Terminal Interface Summary............................................................... 2-7
2.8 Changing the System Password................................................................................................... 2-7
Chapter 3 Internet Access............................................................................................... 3-1
3.1 Factory Ethernet Defaults............................................................................................................ 3-1
Table of Contents
v

Prestige 642 ADSL Modem
3.2 TCP/IP Parameters .......................................................................................................................3-1
3.2.1 IP Address and Subnet Mask..................................................................................................3-1
3.2.2 Private IP Addresses............................................................................................................... 3-1
3.3 TCP/IP Ethernet Setup.................................................................................................................3-2
3.4 LANs & WANs ..............................................................................................................................3-3
3.4.1 LANs, WANs and the Prestige...............................................................................................3-3
3.5 VPI & VCI .....................................................................................................................................3-3
3.6 Multiplexing...................................................................................................................................3-3
3.6.1 VC-based multiplexing...........................................................................................................3-4
3.6.2 LLC-based multiplexing.........................................................................................................3-4
3.7 Encapsulation ................................................................................................................................3-4
3.7.1 PPP .........................................................................................................................................3-4
3.7.2 RFC 1483 ...............................................................................................................................3-4
3.8 Internet Access Configuration......................................................................................................3-4
Chapter 4 Remote Node Configuration ..........................................................................4-1
4.1 Remote Node Setup .......................................................................................................................4-1
4.1.1 Remote Node Profile ..............................................................................................................4-1
4.1.2 Encapsulation & Multiplexing Scenarios ...............................................................................4-2
Chapter 5 Filter Configuration .......................................................................................5-1
5.1 About Filtering ..............................................................................................................................5-1
5.2 Configuring a Filter Set ................................................................................................................5-3
5.2.1 Filter Rules Summary Menu...................................................................................................5-4
5.3 Configuring a Filter Rule..............................................................................................................5-5
5.3.1 Generic Filter Rule .................................................................................................................5-5
5.4 Example Filter ...............................................................................................................................5-7
5.5 Applying a Filter............................................................................................................................5-9
5.5.1 Remote Node Filters...............................................................................................................5-9
Chapter 6 System Maintenance.......................................................................................6-1
6.1 System Status.................................................................................................................................6-1
6.1.1 Console Port Speed.................................................................................................................6-4
6.2 Diagnostic....................................................................................................................................... 6-5
6.3 Filename conventions ....................................................................................................................6-6
vi Table of Contents

Prestige 642 ADSL Modem
6.3.1 Resetting the Prestige............................................................................................................. 6-7
6.4 Backup Configuration.................................................................................................................. 6-7
6.5 Restore Configuration.................................................................................................................. 6-8
6.6 Upload Firmware.......................................................................................................................... 6-9
6.6.1 Upload System Firmware .................................................................................................... 6-10
6.6.2 Uploading System Configuration File ................................................................................. 6-11
6.7 TFTP Transfer............................................................................................................................ 6-11
6.8 Command Interpreter Mode .....................................................................................................6-13
6.9 Boot module commands ............................................................................................................. 6-14
Chapter 7 Troubleshooting............................................................................................. 7-1
7.1 Problems Starting Up the Prestige.............................................................................................. 7-1
7.2 Problems With the WAN Interface............................................................................................. 7-2
7.3 Problems with the LAN Interface ............................................................................................... 7-2
7.4 Problems Connecting to a Remote Node or ISP......................................................................... 7-2
Glossary .............................................................................................................................. A
Appendix.............................................................................................................................G
Index ...................................................................................................................................H
Table of Contents
vii

Prestige 642 ADSL Modem
List of Figures
Figure 1-1 Internet Access Application ___________________________________________________ 1-2
Figure 1-2 LAN-to-LAN Application _____________________________________________________ 1-3
Figure 2-1 Prestige 642 Front Panel. ____________________________________________________ 2-1
Figure 2-2 Prestige 642 Rear Panel______________________________________________________ 2-2
Figure 2-3 Connecting a POTS Splitter ___________________________________________________ 2-3
Figure 2-4 Connecting the Microfilter ____________________________________________________ 2-4
Figure 2-5 Power-On Display __________________________________________________________ 2-5
Figure 2-6 Login Screen_______________________________________________________________ 2-5
Figure 2-7 SMT Main Menu ___________________________________________________________ 2-7
Figure 2-8 Menu 23.1 - System Password _________________________________________________ 2-8
Figure 3-1 Menu 3 – TCP/IP Ethernet Setup_______________________________________________ 3-2
Figure 3-2 LAN & WAN_______________________________________________________________ 3-3
Figure 3-3 Internet Access Setup ________________________________________________________ 3-5
Figure 4-1 Menu 11 – Remote Node Setup_________________________________________________ 4-1
Figure 4-2 Menu 11.1 Remote Node Profile _______________________________________________ 4-2
Figure 5-1 Filter Rule Process__________________________________________________________ 5-2
Figure 5-2 Menu 21 - Filter Set Configuration _____________________________________________ 5-3
Figure 5-3 Filter Rules Summary________________________________________________________ 5-4
Figure 5-4 Menu 21.1.2 - Generic Filter Rule ______________________________________________ 5-6
Figure 5-5 Example Filter – Menu 21.1.1 _________________________________________________ 5-8
Figure 5-6 Example Filter Rules Summary – Menu 21.3 ______________________________________ 5-9
Figure 5-7 Filtering Remote Node traffic ________________________________________________ 5-10
Figure 6-1 Menu 24 - System Maintenance ________________________________________________ 6-1
Figure 6-2 Menu 24.1 - System Maintenance – Status _______________________________________ 6-2
Figure 6-3 System Information and Console Port Speed ______________________________________ 6-3
Figure 6-4 System Maintenance - Information______________________________________________ 6-4
viii List of Figures

Prestige 642 ADSL Modem
Figure 6-5 Menu 24.2.2 – System Maintenance – Console Port Speed ___________________________ 6-5
Figure 6-6 Menu 24.4 - System Maintenance - Diagnostic ____________________________________ 6-5
Figure 6-7 Backup Configuration _______________________________________________________ 6-8
Figure 6-8 HyperTerminal Screen_______________________________________________________ 6-8
Figure 6-9 Successful Backup __________________________________________________________ 6-8
Figure 6-10 Restore Configuration ______________________________________________________ 6-9
Figure 6-11 HyperTerminal Screen ______________________________________________________ 6-9
Figure 6-12 Successful Backup__________________________________________________________ 6-9
Figure 6-13 Menu 24.7 - System Maintenance - Upload Firmware_____________________________ 6-10
Figure 6-14 Menu 24.7.1 - Uploading System Firmware_____________________________________ 6-10
Figure 6-15 Menu 24.7.2 - System Maintenance - Upload System Configuration File ______________ 6-11
Figure 6-16 TFTP Example ___________________________________________________________ 6-13
Figure 6-17 Command mode __________________________________________________________ 6-13
Figure 6-18 Boot module commands ____________________________________________________ 6-15
Diagram 1 VPI's & VCI's. .............................................................................................................................G
List of Figures
ix

Prestige 642 ADSL Modem
List of Tables
Table 2-1 Front Panel LED Description __________________________________________________ 2-1
Table 2-2 Main Menu Commands _______________________________________________________ 2-6
Table 2-3 Main Menu Summary _________________________________________________________ 2-7
Table 3-1 TCP/IP Ethernet Setup Menu Fields _____________________________________________ 3-2
Table 3-2 Internet Account Information___________________________________________________ 3-5
Table 3-3 Internet Access Setup Menu Fields ______________________________________________ 3-6
Table 4-1 Remote Node Profile Menu Fields _______________________________________________ 4-3
Table 5-1 Abbreviations Used in the Filter Rules Summary Menu ______________________________ 5-4
Table 5-2 Abbreviations Used If Filter Type Is GEN ________________________________________ 5-5
Table 5-3 Generic Filter Rule Menu Fields ________________________________________________ 5-6
Table 6-1 System Maintenance - Status Menu Fields ________________________________________ 6-3
Table 6-2 Fields in System Maintenance - Information _______________________________________ 6-4
Table 6-3 System Maintenance Menu Diagnostic ___________________________________________ 6-6
Table 6-4 Filename Conventions ________________________________________________________ 6-7
Table 7-1 Troubleshooting the Start-Up of your Prestige _____________________________________ 7-1
Table 7-2 Troubleshooting the ADSL connection ___________________________________________ 7-2
Table 7-3 Troubleshooting the LAN Interface ______________________________________________ 7-2
Table 7-4 Troubleshooting a Connection to a Remote Node or ISP _____________________________ 7-2
x List of Tables

Prestige 642 ADSL Modem
Preface
About Your ADSL Modem
Congratulations on your purchase of the Prestige 642 ADSL Modem.
The Prestige 642 is an ADSL bridge/modem used for Internet access via an ADSL line. It can run upstream
maximum rate at 640kbps and downstream rate at 8Mbps. The rate selection depends on the copper
category, distance and central side configuration. We will refer to the Prestige 642 as the P642 or simply the
Prestige from now on.
The P642's 10/100M auto-negotiating LAN interface enables fast data transfer of either 10Mbps or
100Mbps in either half-duplex or full-duplex mode depending on your Ethernet network.
Your Prestige is easy to install and to configure. All functions of the Prestige are software configurable via
the SMT (System Management Terminal) Interface.
About This User's Guide
This user's guide covers all aspects of the Prestige 642 operations and shows you how to get the best out of
the multiple advanced features of your ADSL Internet Access Router using the SMT. It is designed to guide
you through the correct configuration of your Prestige 642 for various applications.
Syntax Conventions
“Enter” means for you to type one or more characters and press the carriage return. “Select” or
•
“Choose” means for you to select one from the predefined choices.
The SMT menu titles and labels are in
•
font. A single keystroke is in Arial font and enclosed in square brackets, for instance, [
Arial
means the Enter, or carriage return, key; [
For brevity’s sake, we will use “e.g.” as a shorthand for “for instance”, and “i.e.” as a shorthand for
•
“that is” or “in other words” throughout this manual
Preface
Bold Times
ESC
font. The choices of a menu item are in
] means the Escape key.
Bold
ENTER
xi
]
Prestige 642 ADSL Modem
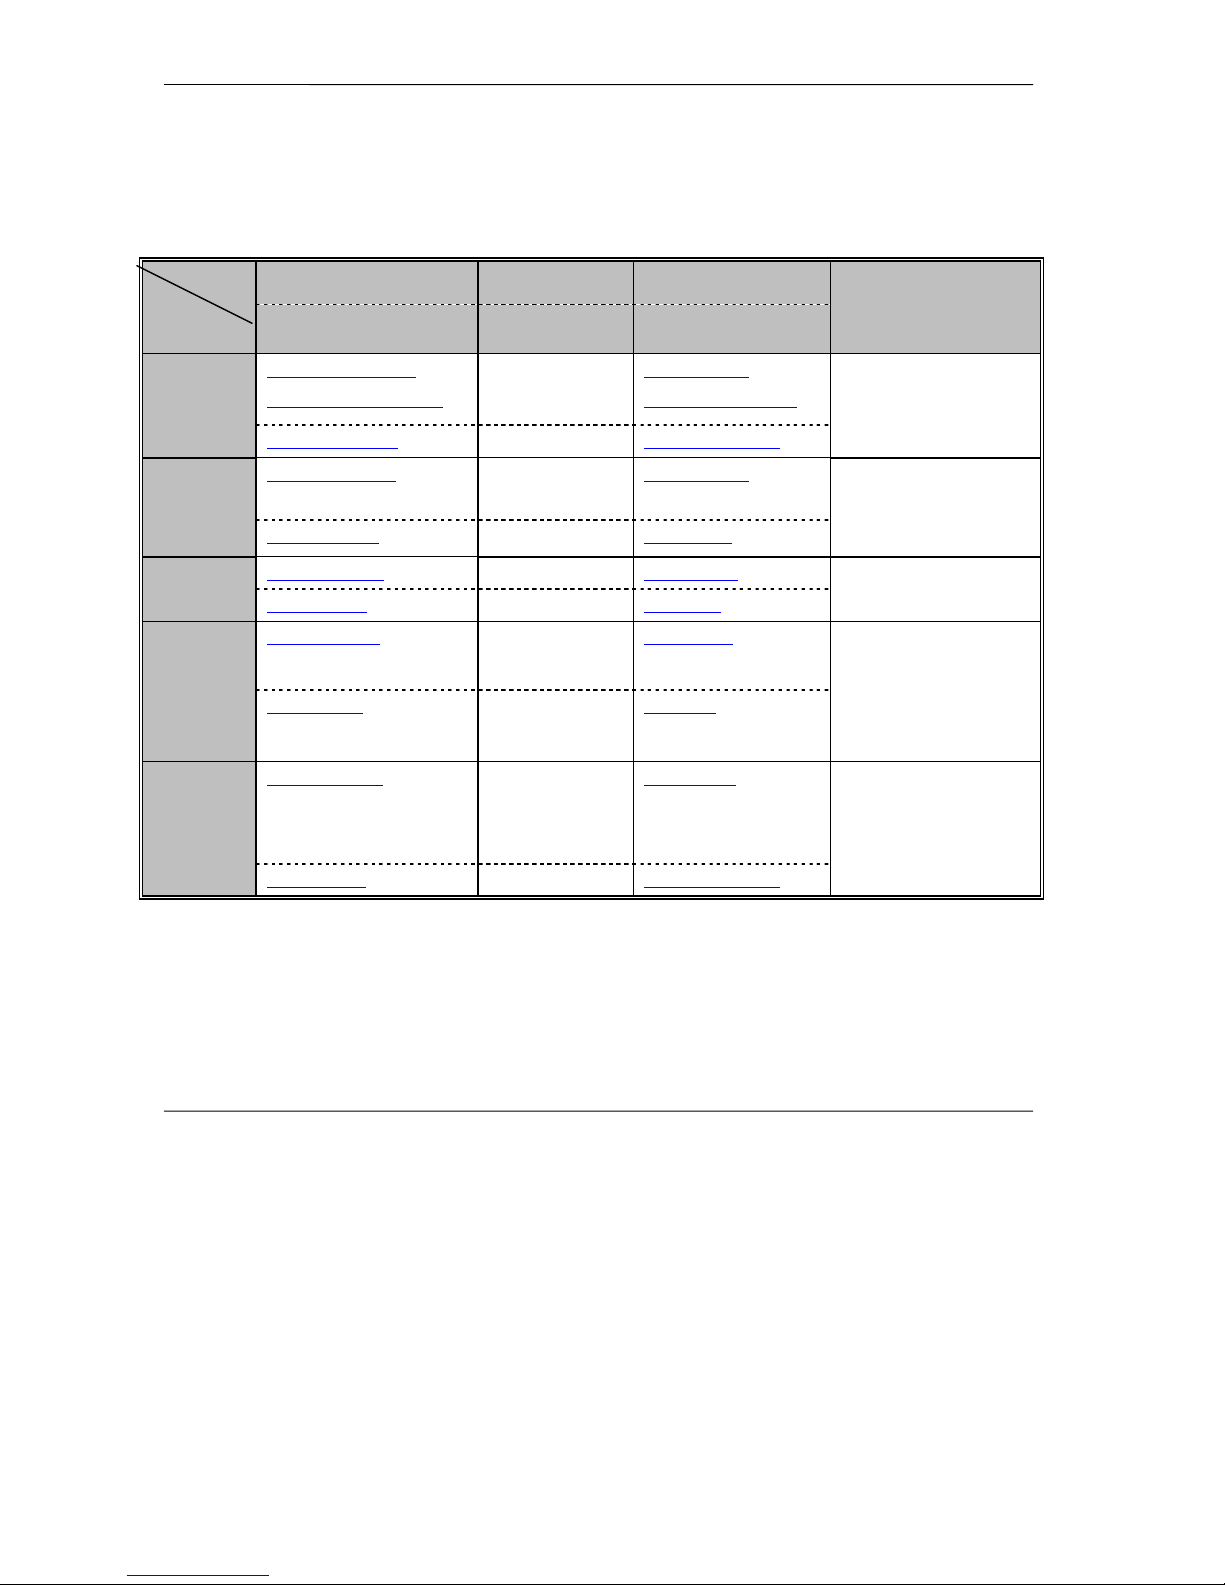
Structure of this Manual
Getting Started
This helps you connect, install and setup your Prestige to operate
on your network
The Internet
This shows you how to configure your Prestige for Internet access.
(Chapters 1-2)
.
(Chapter 3)
Remote Node
This shows you how to configure the remote nodes.
(Chapters 4)
Management & Maintenance
This shows you how to create/apply filters and manage/maintain
your system.
Troubleshooting
This provides information about solving common problems
(Chapters 5-6)
(Chapter 7)
.
The following section offers some background information on ADSL. Skip to Chapter 1 if you wish to
begin working with your router right away.
xii
Structure of the Manual

Prestige 642 ADSL Modem
What is DSL?
DSL (Digital Subscriber Line) enhances the data capacity of the existing twisted-pair wire that runs
between the local telephone company switching offices and most homes and offices. While the wire itself
can handle higher frequencies, the telephone switching equipment is designed to cut off signals above 4,000
Hz to filter noise off the voice line, but now everybody is searching for ways to get more bandwidth to
improve access to the Web - hence DSL technologies!
There are actually seven types of DSL service, ranging in speeds from 16 Kbits/sec to 52 Mbits/sec. The
services are either symmetrical (traffic flows at the same speed in both directions), or asymmetrical (the
downstream capacity is higher than the upstream capacity). Asymmetrical services (ADSL) are suitable for
Internet users because more information is usually downloaded than uploaded. For example, a simple
button click in a web browser can start an extended download that includes graphics and text.
As data rates increase, the carrying distance decreases. That means that users who are beyond a certain
distance from the telephone company’s central office may not be able to obtain the higher speeds. A DSL
connection is a point-to-point dedicated circuit, meaning that the link is always up and there is no dialing
required.
What is ADSL?
It is an asymmetrical technology, meaning that the downstream data rate is much higher than the upstream
data rate. As mentioned, this works well for a typical Internet session in which more information is
downloaded, e.g., from Web servers, than is uploaded. ADSL operates in a frequency range that is above
the frequency range of voice services, so the two systems can operate over the same cable.
What is xDSL ?
xiii


Prestige 642 ADSL Modem
Chapter 1
Getting to Know Your ADSL Modem
This chapter describes the key features and applications of the Prestige 642.
1.1 The Prestige 642 ADSL Modem
Your Prestige integrates a high-speed 10/100Mbps LAN interface and one high-speed ADSL port into a
single package. The Prestige is ideal for high-speed Internet browsing and making LAN-to-LAN
connections to remote networks.
1.2 Features of the Prestige 642
Your Prestige is packed with a number of features that give it the flexibility to provide a complete
networking solution for almost any user.
z Ease of Installation
Your Prestige is designed for quick, intuitive and easy installation. Physically, its compact size and
lightweight make it easy to position anywhere in your busy office.
z High Speed Internet Access
The P642 ADSL Modem can support downstream transmission rates of up to 8Mbps and upstream
transmission rates of 832 Kbps. The P642 also supports rate management. Rate management allows ADSL
subscribers to select an Internet access speed that best suit their needs and budget.
z 10/100Mbps Fast Ethernet LAN Interface
The P642's 10/100M auto-negotiating LAN interface enables fast data transfer of either 10Mbps or
100Mbps in either half-duplex or full-duplex mode depending on your Ethernet network.
z Protocols Supported
PPP (Point-to-Point Protocol) Bridge link layer protocol.
Transparently bridging for unsupported network layer protocols.
♦
z Networking Compatibility
Your Prestige is compatible with the major ADSL DSLAM (Digital Subscriber Line Access Multiplexer)
providers, making configuration as simple as possible for you.
z Multiplexing
The Prestige 642 supports VC-based and LLC-based multiplexing.
Getting to know your Prestige
1-1
Prestige 642 ADSL Modem
z Encapsulation
The Prestige 642 supports PPP (RFC 2364 - PPP over ATM Adaptation Layer 5) and RFC 1483
encapsulation over ATM.
z Full Network Management
Accessing SMT (System Management Terminal) through a telnet connection
♦
z PAP and CHAP Security
The Prestige supports PAP (Password Authentication Protocol) and CHAP (Challenge Handshake
Authentication Protocol). CHAP is more secure since the password is scrambled prior to transmission.
However, PAP is readily available on more platforms.
z Filters
The Prestige's filtering functions allows added network security and management.
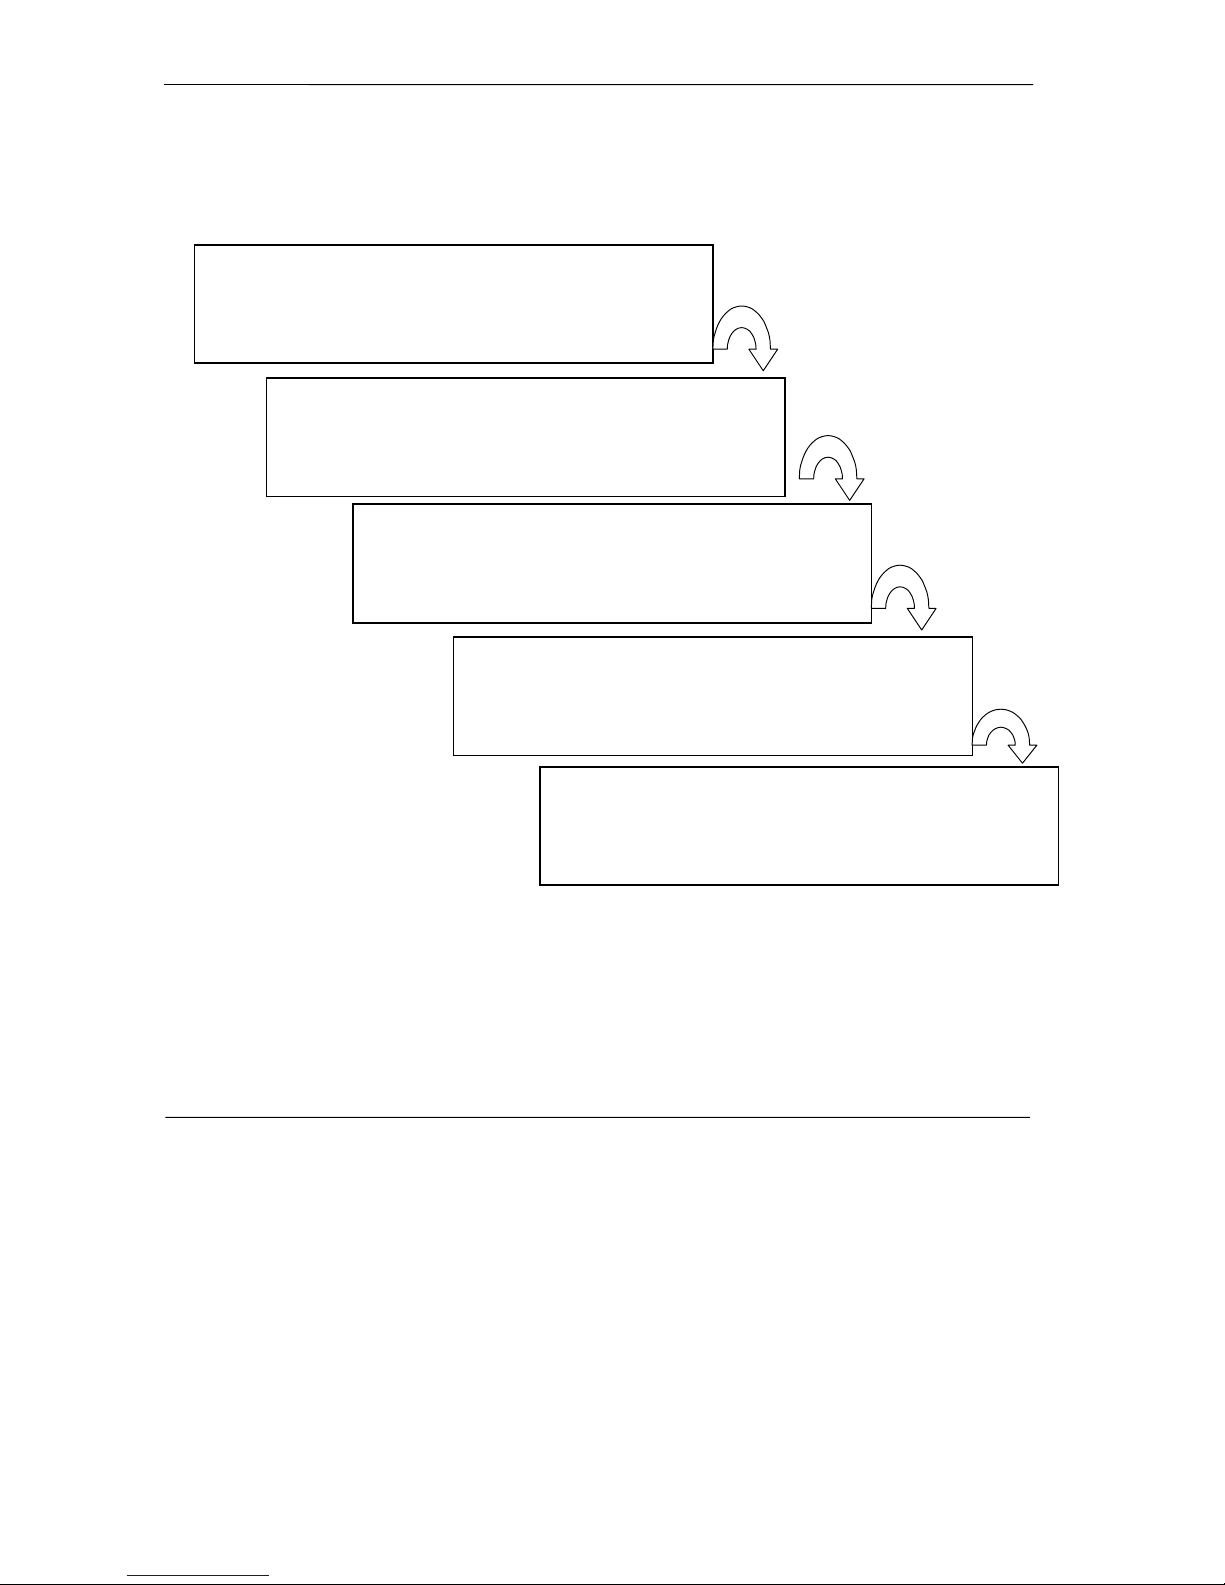
1.3 Applications for the Prestige 642
1.3.1 Internet Access
The Prestige is the ideal high-speed Internet access solution. Your Prestige supports the TCP/IP protocol,
which the Internet uses exclusively. It is compatible with all major ADSL DSLAM (Digital Subscriber
Line Access Multiplexer) providers. A DSLAM is a rack of ADSL line cards with data multiplexed into a
backbone network interface/connection (e.g., T1, OC3, DS3, ATM or Frame Relay). Think of it as the
equivalent of a modem rack for ADSL. A typical Internet Access application is shown below.
1-2 Getting to know your Prestige
Figure 1-1 Internet Access Application
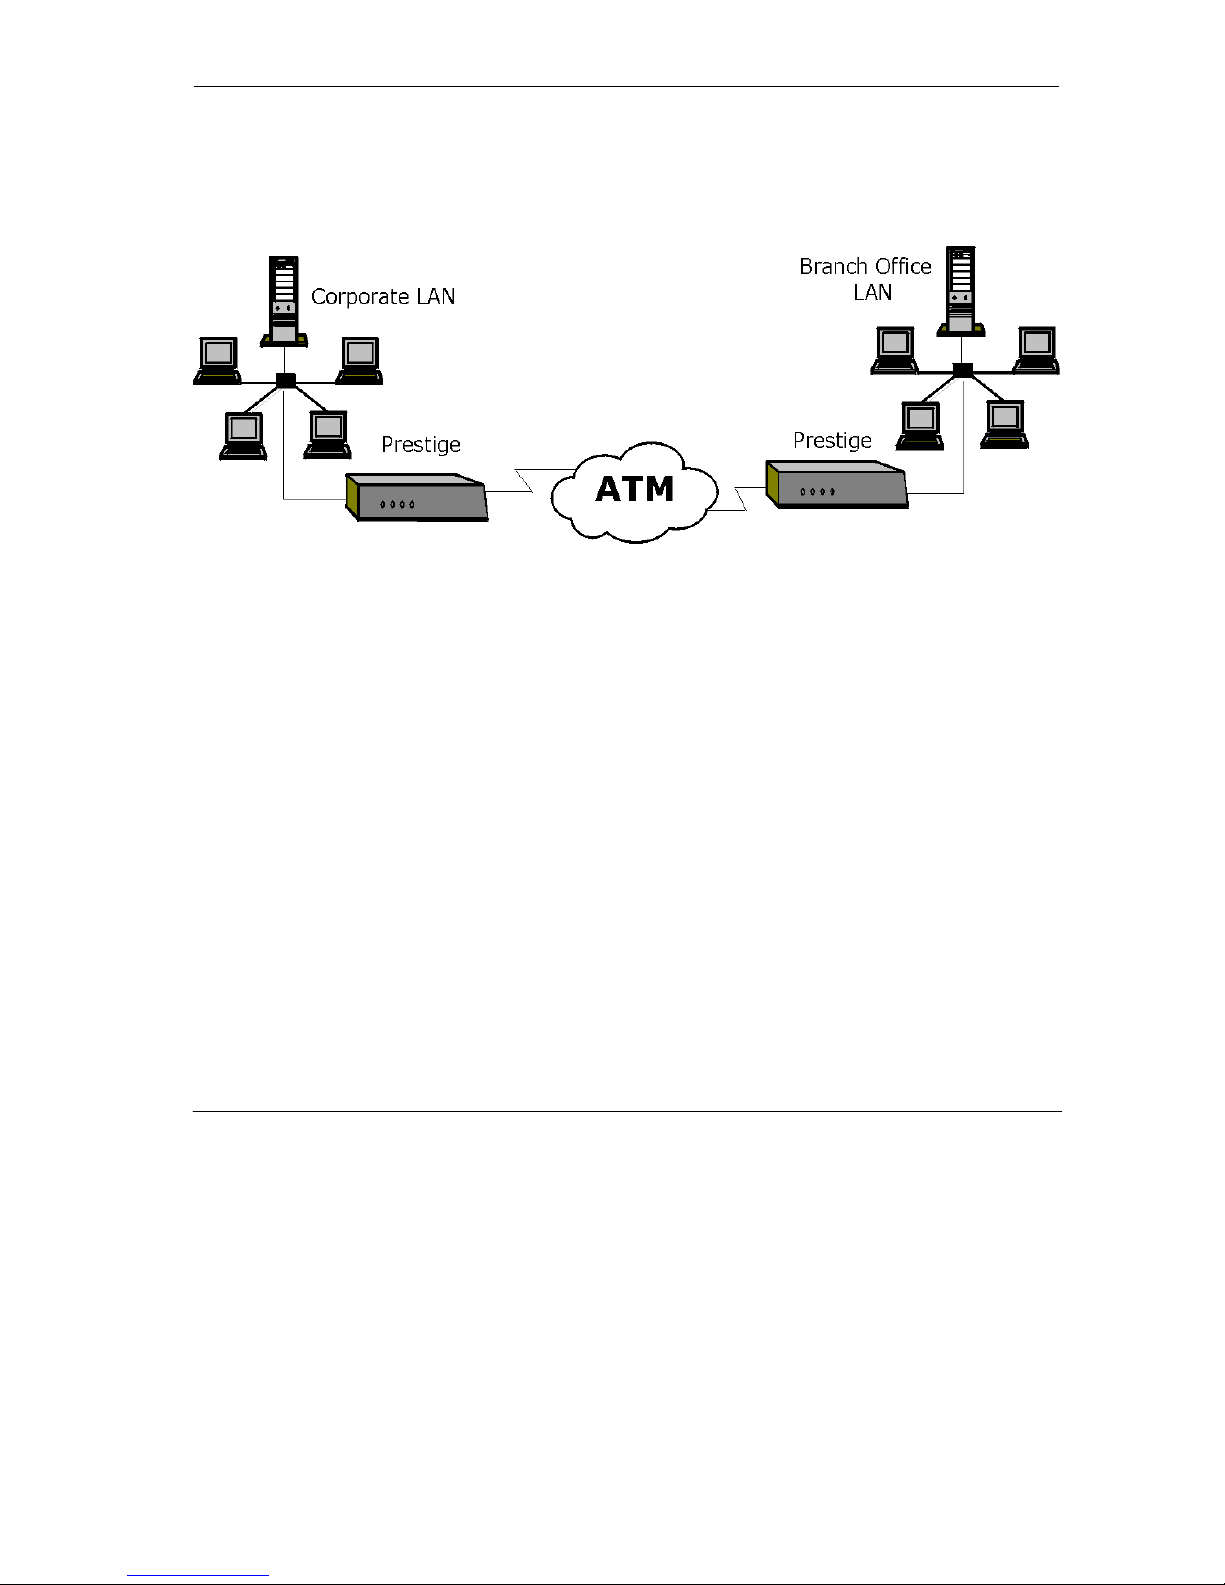
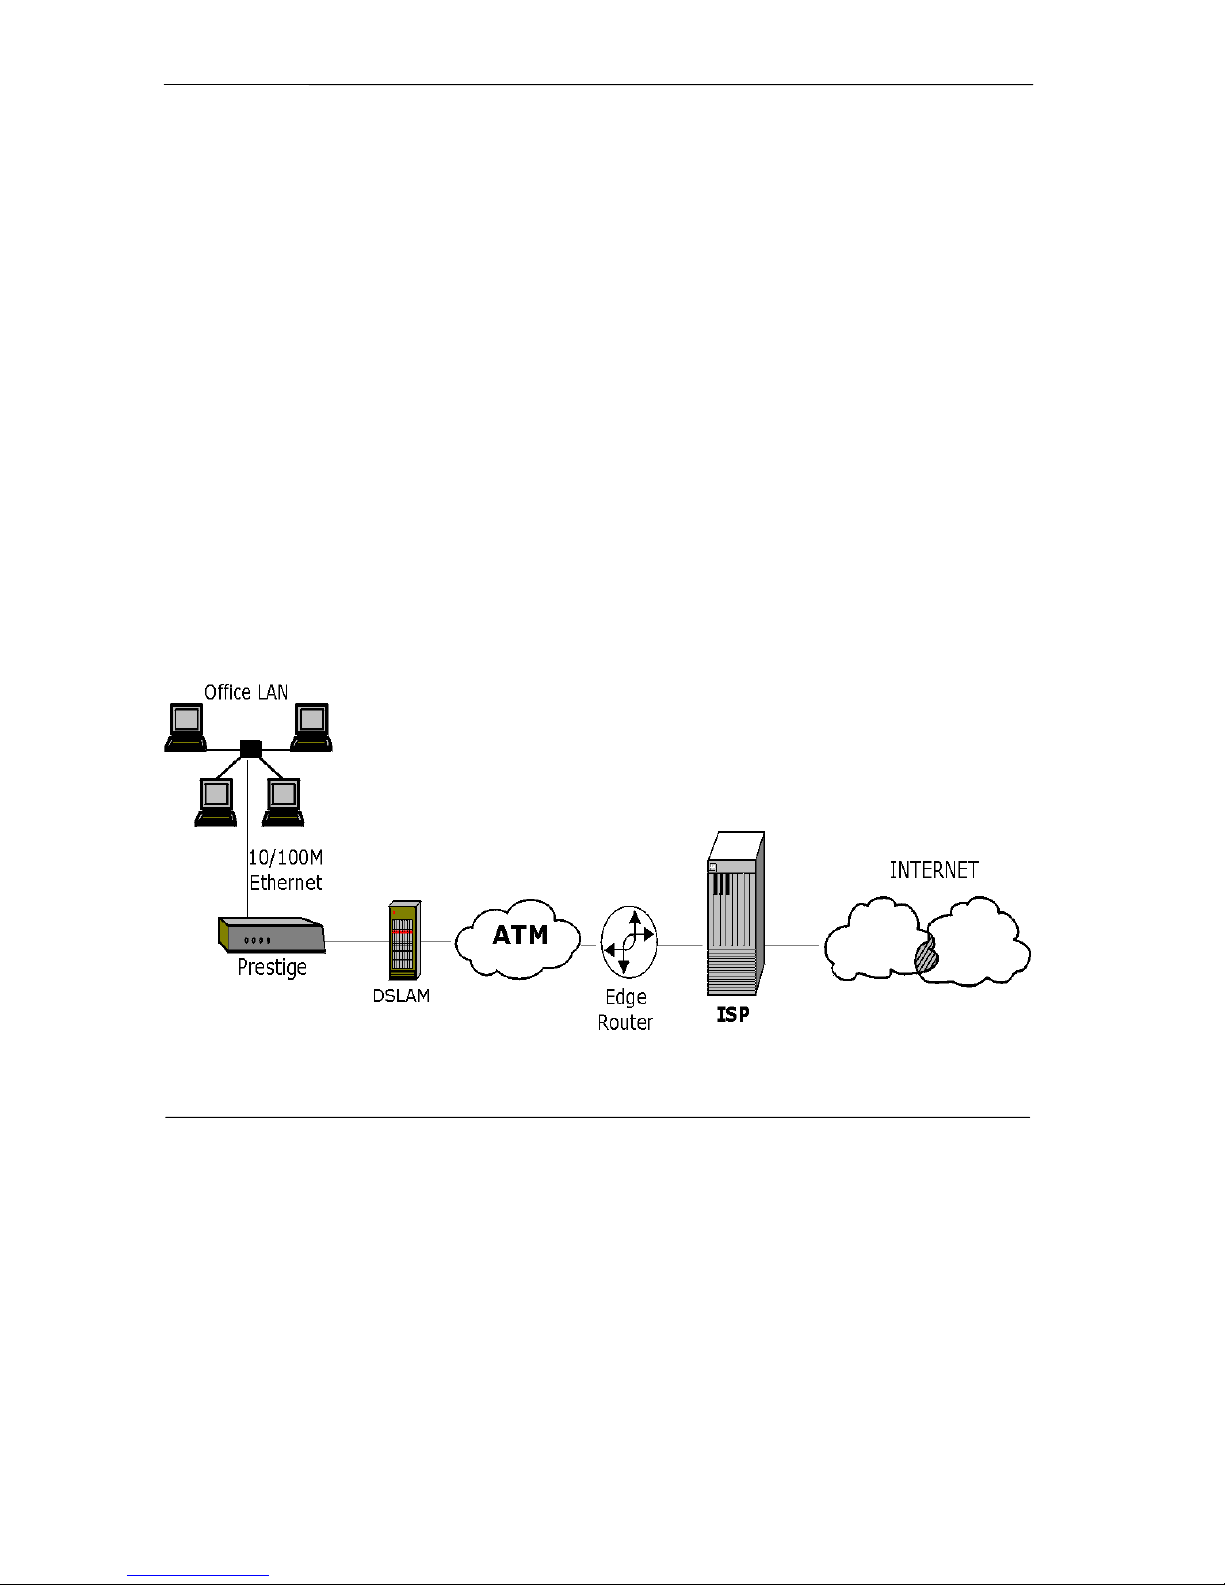
1.3.2 LAN to LAN Application
Prestige 642 ADSL Modem
You can use the Prestige to connect two geogr
aphical
ly dispersed networks over the ADSL line. A typical
LAN-to-LAN application for your Prestige is shown as follows.
Figure 1-2 LAN-to-LAN Application
Getting to know your Prestige
1-3

Prestige 642 ADSL Modem
Chapter 2
Hardware Installation & Initial Setup
This chapter describes the physical features of the Prestige
and how to make the cable connections
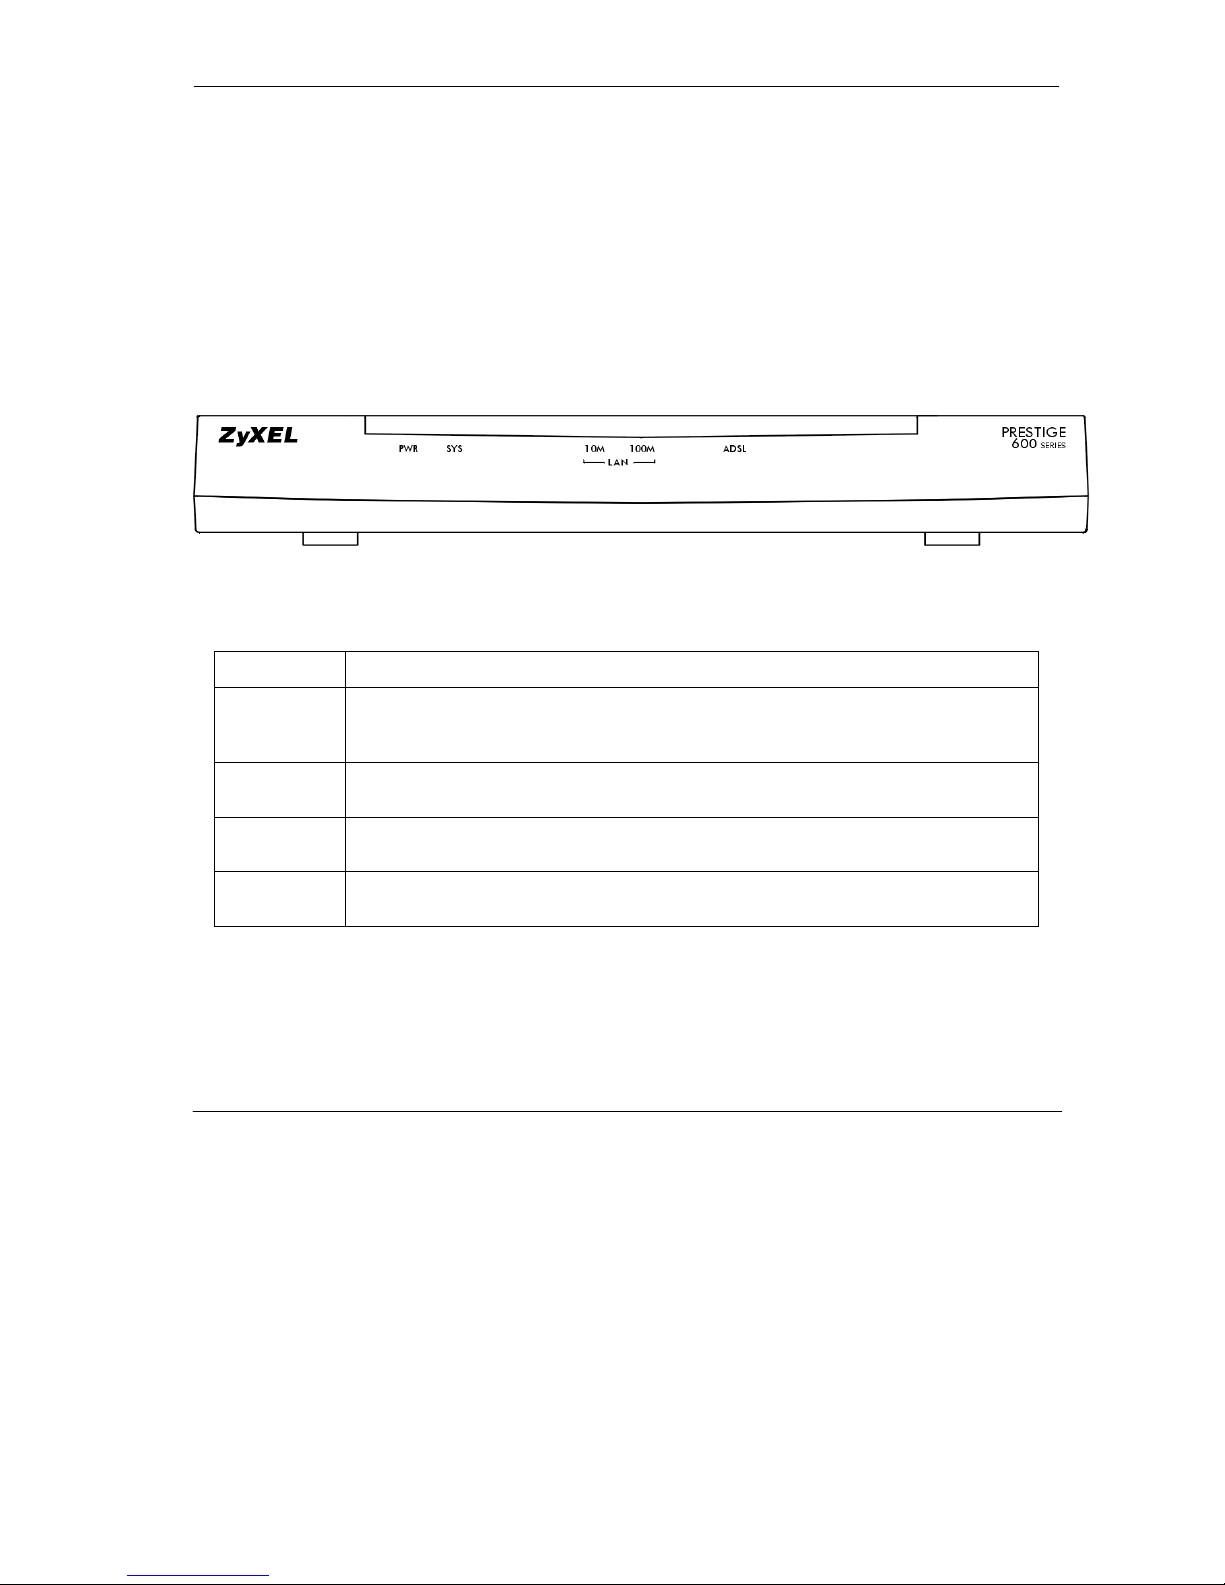
2.1 Front Panel LEDs OF P642
The LED indicators on the front panel indicate the operational status of the Prestige 642. The table below
the diagram describes the LED functions:
Figure 2-1 Prestige 642 Front Panel.
Table 2-1 Front Panel LED Description
.
PWR
SYS
LAN 10M
LAN 100M
ADSL
The PWR (power) LED is on when power is applied to the Prestige.
A steady on SYS (system) LED indicates the Prestige is on and functioning properly
while an off SYS LED indicates the system is not ready or a malfunction. The
system is rebooting when the SYS LED is blinking.
A steady light indicates a 10Mb Ethernet connection. The LED will blink when data
is being sent/received.
A steady light indicates a 100Mb Ethernet connection. The LED will blink when data
is being sent/received.
The ADSL LED is on when the Prestige is connected successfully to a DSLAM. The
LED blinks when data is being sent/received. The LED is off when the link is down.
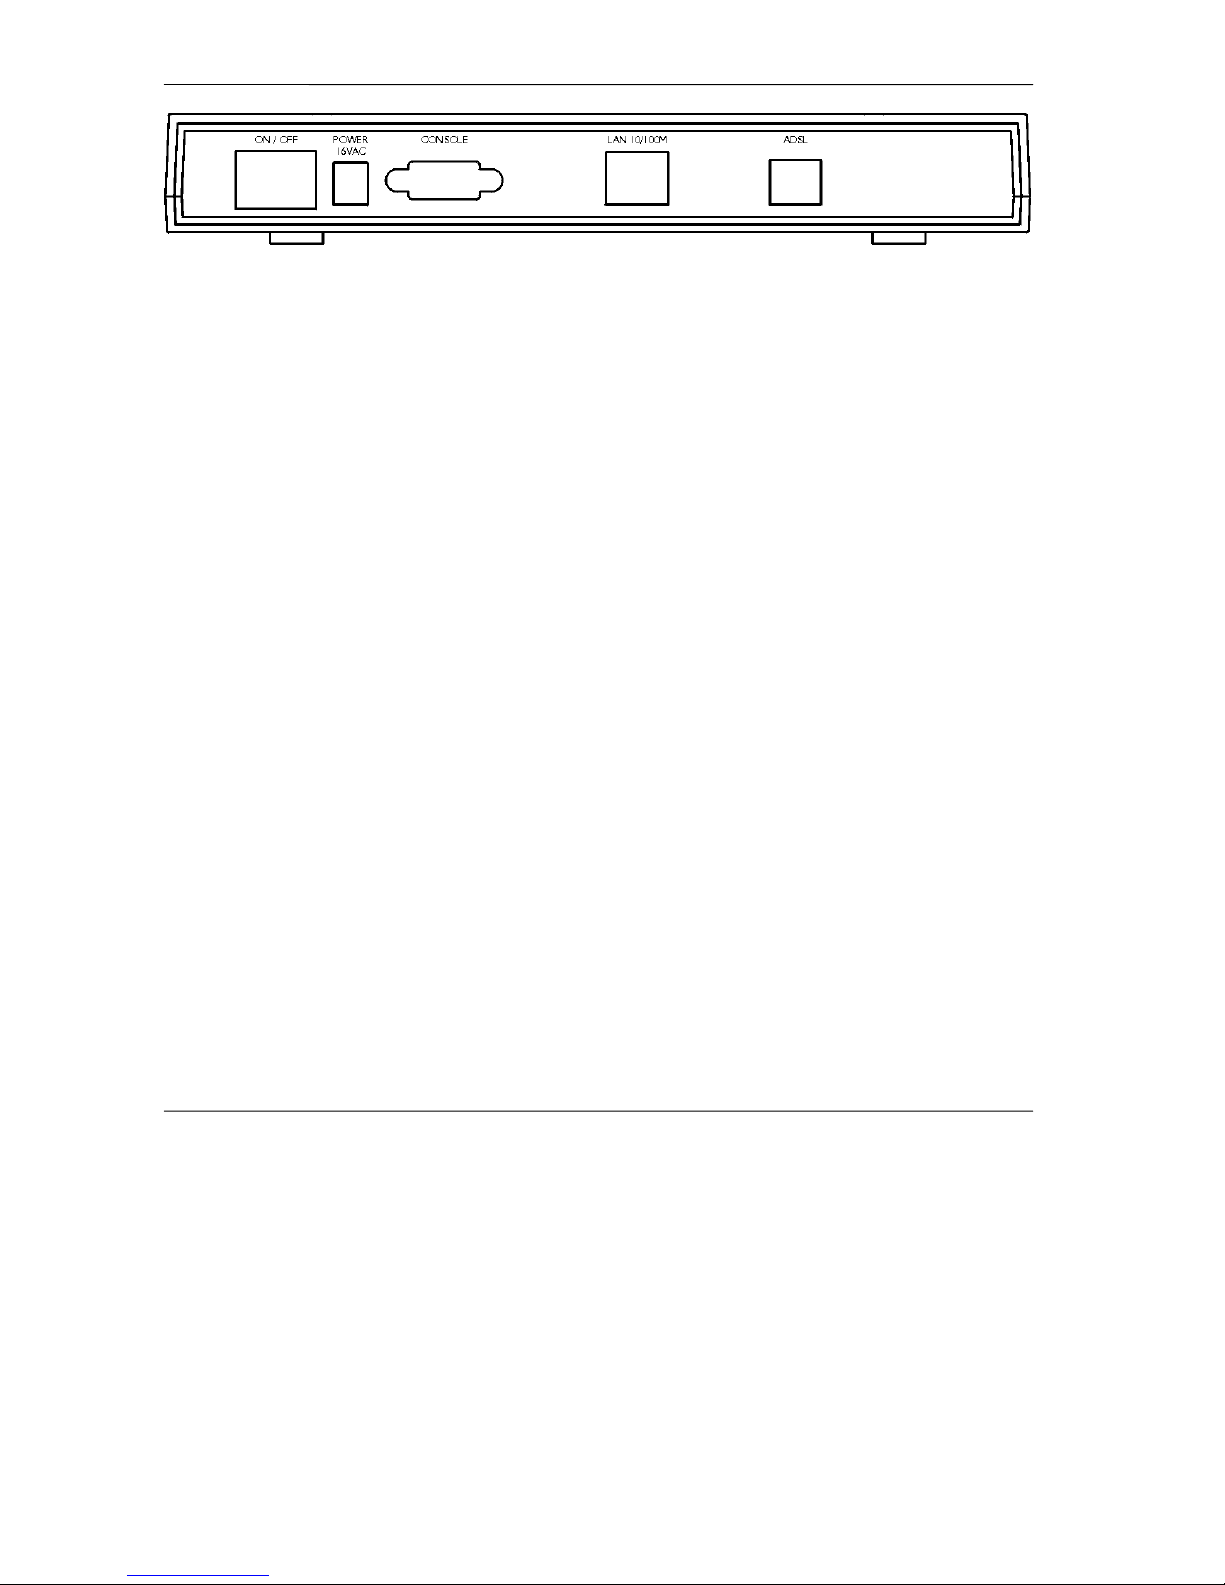
2.2 Prestige 642 Rear Panel and Connections
The following figure shows the rear panel connectors of your Prestige.
Hardware Installation & Setup
2-1
Prestige 642 ADSL Modem
Figure 2-2 Prestige 642 Rear Panel
Step 1.
Connect the Prestige directly to the wall jack using the included ADSL cable. Connect the micro filter(s)
(supplied – see Figure 2-4 Connecting the Microfilter) between the wall jack and your telephone(s). The
micro filters act as low pass filters (voice transmission takes place in the 0 to 4KHz bandwidth).
Step 2.
Ethernet 10Base-T/100Base-T networks use Shielded Twisted Pair (STP) cable with RJ-45 connectors that
look like a bigger telephone plug with 8 pins. Use the crossover cable (red tag) to connect your Prestige 642
to a computer directly. Use straight through Ethernet cable (white tag) to connect to an external hub and
then connect one end of a straight through Ethernet cable (white tag) from the hub to the NIC on the
workstation.
Step 3.
Connect the power adapter to the port labeled
Step 4.
For the initial configuration of your Prestige, you need to use terminal emulator software on a workstation
and connect it to the Prestige through the console port. Connect the 9-pin end of the console cable (9-pin to
25-pin console cable supplied) to the console port of the Prestige and the 25-pin end to a serial port (COM1,
COM2 or other COM port) of your workstation. You can use an extension RS-232 cable if the enclosed
one is too short.
Connecting the ADSL Line
Connecting a Workstation to the Prestige 10/100M LAN port
Connecting the Power Adapter to your Prestige
POWER
on the rear panel of your Prestige.
Connecting the Console Port
2.3 Additional Installation Requirements
In addition to the contents of your package, there are other hardware and software requirements you need
before you can install and use your Prestige. These requirements include:
z A computer with Ethernet 10Base-T/100Base-T NIC (Network Interface Card).
z A computer equipped with communications software (for example, Hyper Terminal in Win95)
configured to the following parameters:
¾ VT100 terminal emulation.
¾ 9600 Baud rate.
2-2 Hardware Installation & Setup
Prestige 642 ADSL Modem
ode
e
e
¾ No parity, 8 Data bits, 1 Stop bit.
¾ Flow Control set to None
After the Prestige has been successfully connected to your network, you can make future changes to the
configuration through telnet application.
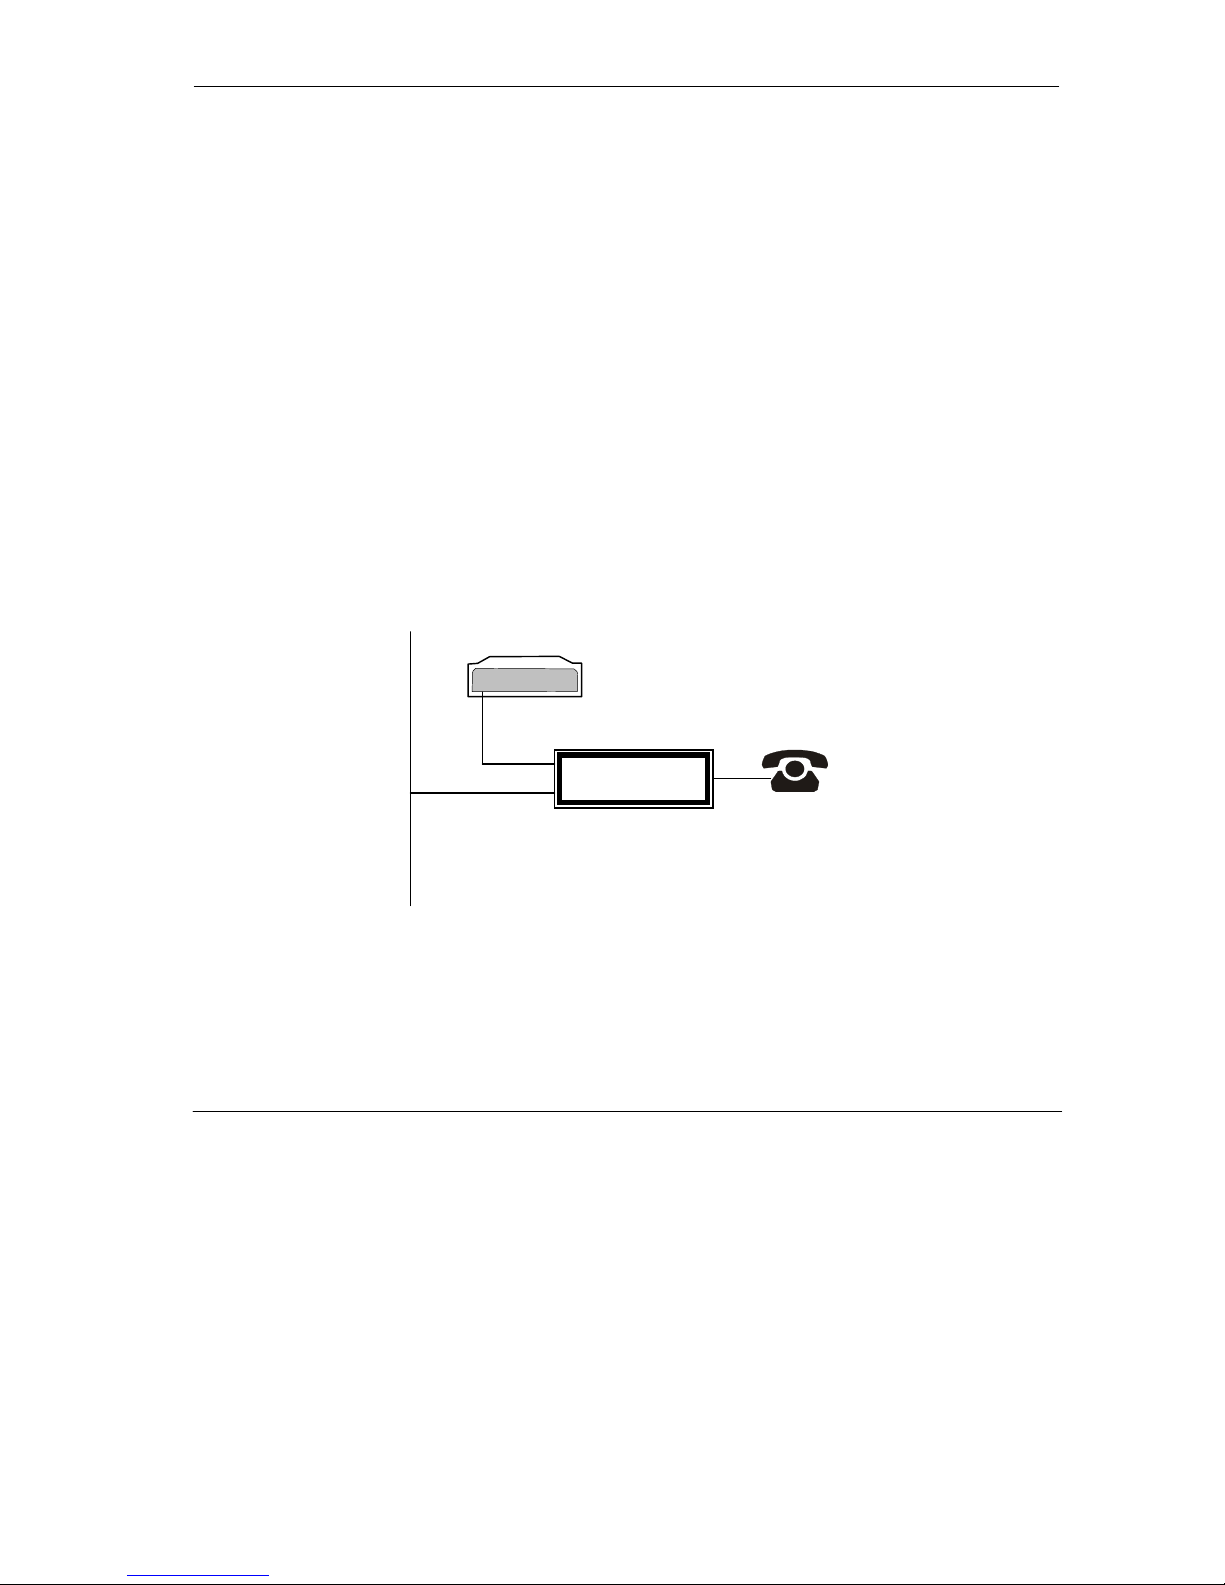
2.4 Connecting the POTS Splitter
This is for the P642’s following the Full Rate (G.dmt) standard only. One major difference between ADSL
and dial-up modems is the need for a telephone splitter. This device keeps the telephone and ADSL signals
separated, giving it the capability to provide simultaneous Internet access and telephone service on the same
line. Splitters also eliminate the destructive interference conditions caused by telephone sets. The telephone
splitter has to be installed on the line at the point of entry to the residence.
Noise generated from a telephone in the same frequency range as the ADSL signal can be disruptive to the
ADSL signal. In addition the impedance of a telephone when off-hook may be so low that it essentially
shunts the strength of the ADSL signal. When a POTS splitter is installed at the entry point where the line
comes into the home, it will filter the telephone signals before combining the ADSL and telephone signals
transmitted and received. The issues of noise and impedance are eliminated with a single POTS splitter
installation.
The following user-friendly telephone splitter can be installed as shown in the following figure.
Prestige
Wall
Jack
Step 1.
Step 2.
Step 3.
Connect the side labeled “Phone” to your telephone.
Connect the side labeled “Modem” to your Prestige.
Connect the side labeled “Line” to the telephone wall jack.
Hardware Installation & Setup
M
m
POTS Splitter
Lin
Phon
Figure 2-3 Connecting a POTS Splitter
2-3
Prestige 642 ADSL Modem
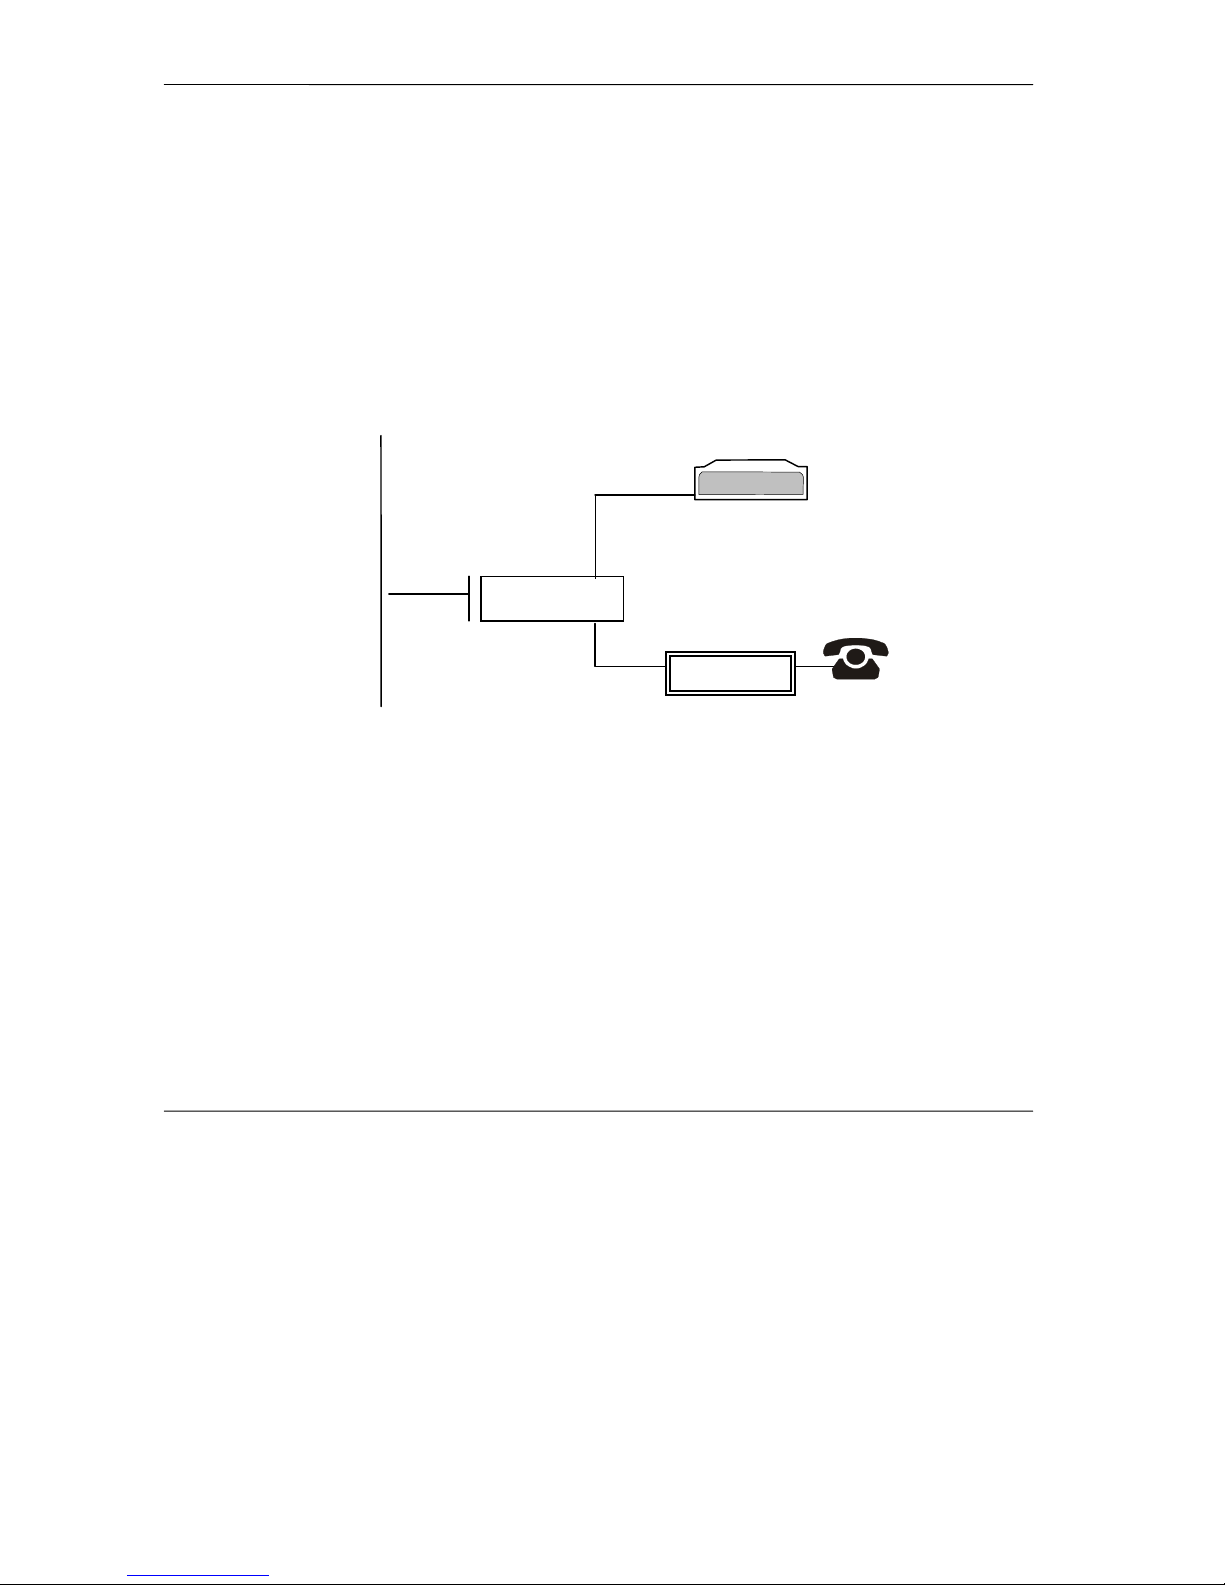
2.5 Telephone Microfilters
Telephone voice transmissions take place in the lower frequency range, 0 - 4KHz, while ADSL
transmissions take place in the higher bandwidth range, above 4KHz. ZyXEL provides a microfilter that
acts as a low-pass filter for your telephone to ensure that ADSL transmissions do not interfere with your
telephone voice transmissions.
Step 1.
Step 2.
Connect a phone cable from the wall jack to the single jack end of the Y- Connector.
Connect a cable from the double jack end of the Y-Connector to the “wall side” of the
microfilter.
Step 3.
Step 4.
Connect another cable from the double jack end of the Y-Connector to the Prestige.
Connect the “phone side” of the microfilter to your telephone as shown in the following figure.
Wall
Jack
Y -CONNECTOR
Figure 2-4 Connecting the Microfilter
2.6 Power Up Your Prestige
Prestige
Microfilter
Wall
Side
Phone
Side
At this point, you should have connected the console port, the ADSL line, the Ethernet port and the power
port to the appropriate devices or lines. You can now apply power to the Prestige by turning the switch on.
Step 1.
Initial Screen
When you power on your Prestige, it performs several internal tests as well as line initialization. After the
initialization, the Prestige asks you to press
to continue, as shown.
Enter
2-4 Hardware Installation & Setup
 Loading...