


Fioptics TV
Wireless Set-Top Box
Installation Instructions
Fioptics TV from Cincinnati Bell is now wireless!
Enjoy the freedom to move your Fioptics TV
service to ANY room in your home, without
requiring an Ethernet or COAX connection.
The Fioptics Atom DVR set-top box features a
Terabyte of storage, and can record up to 8 shows
simultaneously. The Atom connects wirelessly to
access your DVR recordings. The Orbit HD set-top
box provides a high-denition experience, and
communicates wirelessly with Atom to access your
DVR recordings.
Welcome to
Fioptics TV.
What’s included with each Set-Top Box
HDMI Cable
Fioptics Remote
Atom DVR Set-Top Box
Orbit HD Set-Top Box
Ethernet cable
(optional)
Power Cord
A/V Cable
(optional)
STEP
2
Additional Support
I
f you need additional assistance, visit
cincinnatibell.com/selfinstall to view a
how-to video.
You can also visit the help center of our
website (cincinnatibell.com/help-center),
stop by one of our retail stores, or give us
a call at 513-565-9890.
WSTB_AUG2018
1
3
4
2
Ensure that your Apex
Gateway (Zyxel 3415) is set
up and your Wi-Fi is active. If
you are using Fioptics Internet
today, this is likely complete.
If you are installing new
Fioptics Internet service as
well, follow the instructions
with your Apex gateway before
proceeding.
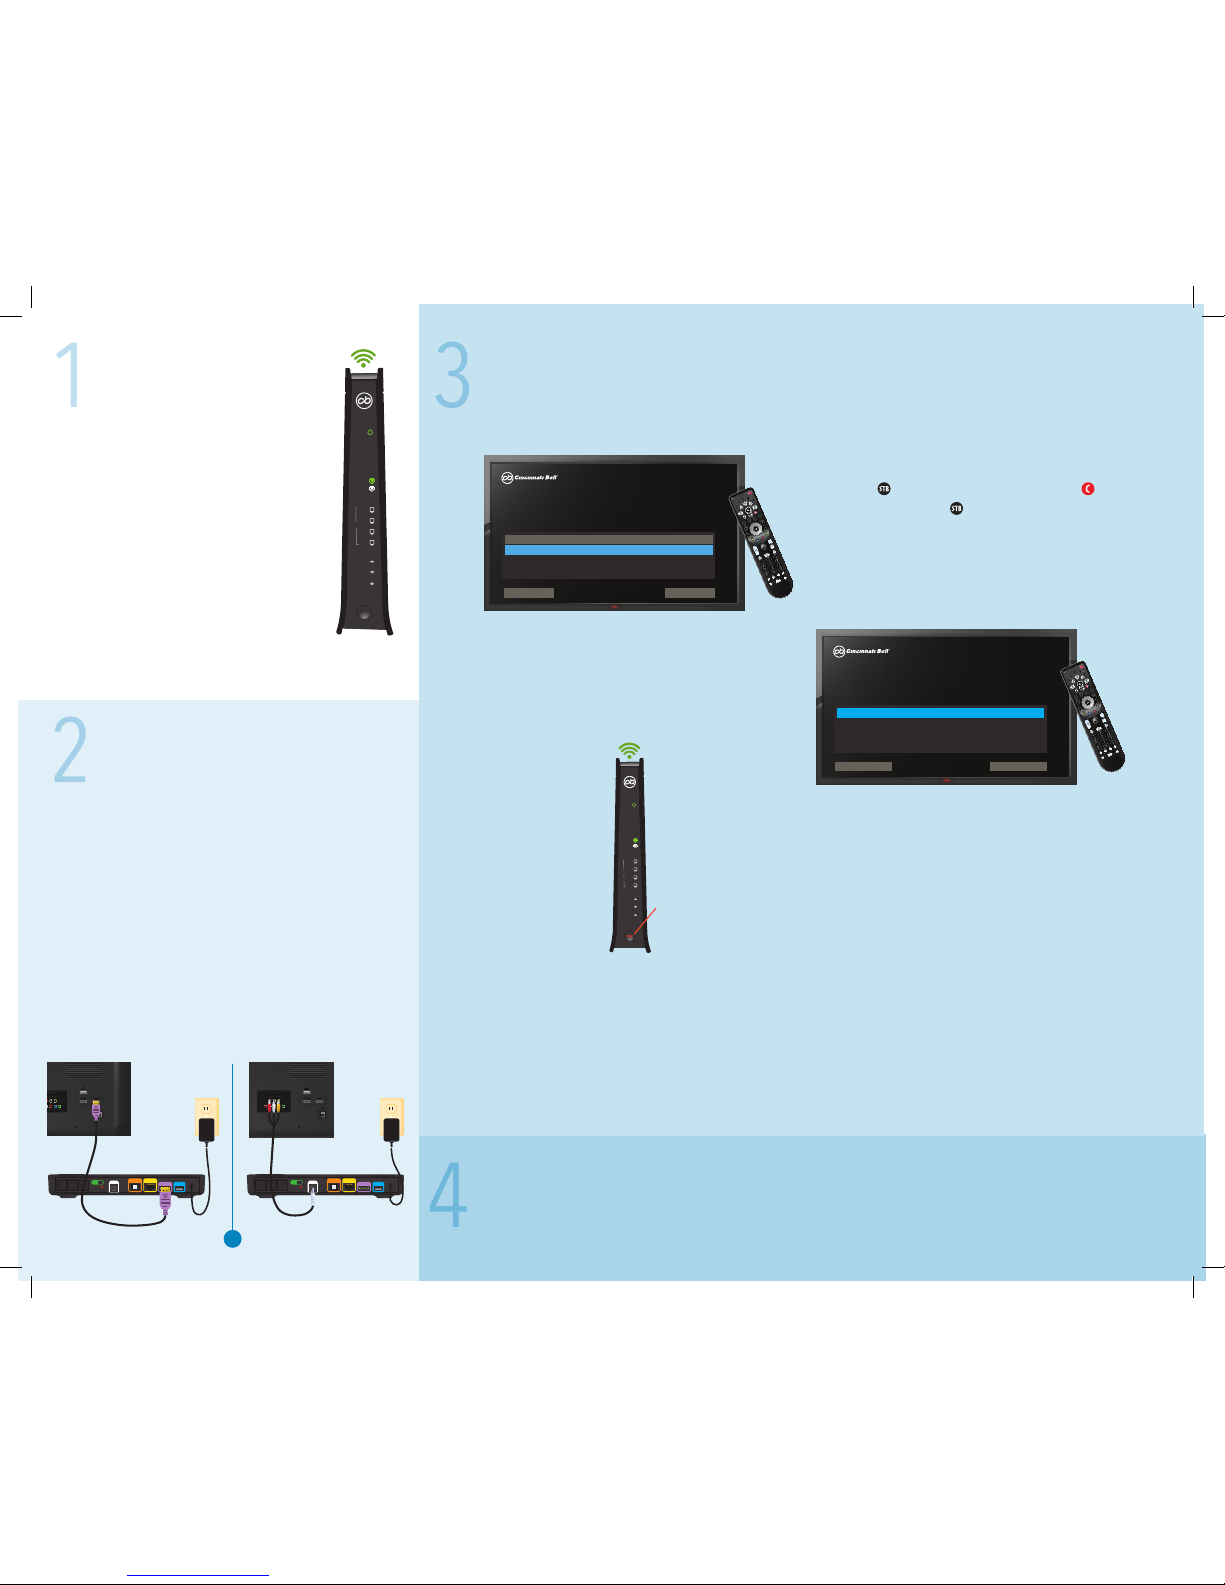
Now, locate your Fioptics remote and proceed to step “A” to program this remote to your
set-top box.
Take your Atom DVR set-top box and place
it close to your TV. Allow at least 7 feet
between Atom and your Apex gateway to
ensure the best quality.
Connect your Atom DVR set-top box to your
TV using either an HDMI or A/V cable.
Plug the power adapter into an outlet. Your
set-top box will begin to power up.
Power on your TV, then select input / source
button using your TV remote. You will see
the Network Setup screen, and can proceed
to step 3.
Locate Your
Gateway
Network Setup
Connect the TV
WPS
WAN
INTERNET
USB
W
I
F
I
2.4G
W
I
F
I
5G
ETHERNET
1
2
3
4
2.4G
5G
POWER
POWERRESETUSBWAN
12VDC 2.5A
ETHERNET
Apex Gateway
(Zyxel 3415)
RESET
POWER
WPS A/V OUT
HDMI
USB
LAN
DIGITAL
AUDIO
RESET
POWER
WPS A/V OUT
HDMI
USB
LAN
DIGITAL
AUDIO
Network Setup
Select connection type
Wired (Ethernet)
Network StatusExit
Wireless (Wi-Fi)
Network Setup
Initiate wireless connection setup
Start WPS
Available NetworksBack
Apex Gateway
(Zyxel 3415)
WAN
INTERNET
USB
W
I
F
I
2.4G
W
I
F
I
5G
ETHERNET
1
2
3
4
2.4G
5G
POWER
WPS
WPS
WPS
WPS
Return to your TV and wait for wireless connection, which can take a few minutes. Once connected,
you will see “Connection successful” on your TV screen. Select “Finish” by pressing OK button on your
Fioptics remote. Next, your set-top box will go through a rmware update. Do not press any buttons
during this update. Once update is complete, your set-top box will reboot and your Fioptics TV service
is now active.
You will still need to program your Fioptics remote to your TV. To do so, please follow the instructions
included with your Fioptics remote.
Connect using HDMI cable Connect using A/V cable
or
Use these same instructions to connect the remainder of your set-top boxes to the other TVs in
your home, following steps 2 and 3.
Go to your Apex Gateway, press and hold the
WPS button for 3 seconds until it ashes
orange.
Now, using your remote, select “Start WPS”
on your TV screen.
B
C
To program your Fioptics remote to your set-top
box, press then hold SETUP button and button
at the same time until blinks twice. Then, using
your remote, from the Network Setup screen,
choose the connection type “Wireless Wi-Fi” by
pressing OK button.
A
 Loading...