

Page 1

X100 User Manual V 1.0
X100
cdma2000 1X Digital Mobile Phone
User Manual
中兴通讯股份有限公司
第1页
http://www.zte.com.cn
Page 2

X100 User Manual V 1.0
Copyright © 2005 by ZTE Corporation
All rights reserved.
No part of this publication may be excerpted, reproduced, translated or utilized in any form or by any means,
electronic or mechanical, including photocopying and microfilm, without the prior written permission of ZTE
Corporation.
st
Edition: 1
edition, Feb., 2005
中兴通讯股份有限公司
第2页
http://www.zte.com.cn
Page 3

X100 User Manual V 1.0
Contents
1 General Information...............................................................................................................................6
1.1 Welcome.............................................. ................................................................................................6
1.2 Security ...................................................... .........................................................................................6
1.3 Safety Warnings............................................................................. ............................ .........................6
2 Getting Started........................................................................................................ ................................7
2.1 Charging the battery .................................................... ......................................................................7
2.1.1 Recharging the battery ....................................... .. .. ... .. .. ..... .. ... .. .. ..... .. ... .. ... .... ... .. .. ... .. .... . .............8
2.1.2 Caring for the battery .................................... .. ..... .. ... .. .. ..... .. ... .. .. ..... .. ... .. .. ..... .. ... .. ... ....................8
2.1.3 Common causes of battery drain ......................... .. ... .. .. ..... .. ... .. .. ..... .. ... .. ... .... ... .. .. ... .... ... .. .. .........8
2.2 Powering on/off the Mobile Phone ..................... ................................. ..............................................8
2.3 Getting to know your phone....................................... .......................... ..............................................9
2.3.1 General introduction...................................... .. ... .. ..... .. .. ... .. .. ..... .. ... .. .. ... .... ... .. ... .. .. ..... .. ................9
2.3.2 Performing basic functions ......................................... ..... .. .. ... .. ..... .. .. ... .. ..... .. ... .. .. ..... .. ... .. .. .........9
2.3.3 Understanding screen icons .......................................................................................................10
2.4 Using the menus ...............................................................................................................................10
3 Making and Receiving Calls............................................................... ............................ .....................12
3.1 Making Calls.................................................................................................. ...................................12
3.1.1 Making a call................................ ... .. .. ... .. ..... .. ... .. .. ... .... ... .. .. ... .. ..... .. .. ... .. .. ..... ... .. .. .....................12
3.1.2 Dialing extension numbers ................................ .. ..... .. .. ... .. ..... .. .. ... .. .. ..... .. ... .. ... .... ... .. .. ... ... ........12
3.1.3 Making IDD ............................................. ... .. .. ... .... ... .. .. ... .... ... .. .. ... .... ... .. ... .. ..... .. .. ... ..................12
3.1.4 Redialing a number ....................................................................................................................12
3.1.5 Calling a saved number................................................................................ ..............................12
3.2 Answering a call............................................................................................................................12
3.2.1 Setting any key to answer calls........................................ .. .. ... .. ..... .. .. ... .. .. ..... .. ... .. ... .. ..... .. . . .......13
3.2.2 Muting an incoming call ............................ ............................. ...................................................13
3.2.3 Mute during a call .................................... ..................................................................................13
3.2.4 Adjusting the volume during a call........................... .. .. ... .... ... .. .. ... .. ..... .. .. ... .. .. ... ..... .. .. ... .. .. .......13
3.3 Dealing with missed calls............... ............................ ......................................................................13
3.4 Setting speed dialing ........................ ........................................................ ............................... .........13
3.5 Calling emergency numbers.............................................................................................................13
4 Using Call Log List................... ... .. .. ..... .. ... .. .. ... ..... .. .. ... .. .. ..... .. ... .. .. ... .... ... .. .. ... .. ..... .. ... .. .......................14
4.1 Calling a number listed in the call log............................................ .................................................14
4.2 Sending a message to the number listed in the call log...................................................................14
4.3 Viewing details of a call........................................................................... ............................... .........14
4.4 Adding a number to the contacts list................................................................................................14
4.5 Accessing the classified lists ........................................... ............................ .....................................14
4.6 Erasing a call record from the call log............................................................................................14
4.7 Erasing all records...........................................................................................................................15
中兴通讯股份有限公司
第3页
http://www.zte.com.cn
Page 4

X100 User Manual V 1.0
5 Entering Letters, Numbers, and Symbols........................... ..... .. .. ... .. .. ..... .. ... .. ... .. ..... .. .. ... .. .. ..... .. ... ....15
5.1 Understanding the text entry modes....................................................................... ..........................15
5.2 Entering words letter by letter (Multitap mode)..............................................................................16
5.3 Entering words quickly............................................. ............................ .............................. ..............16
5.4 Entering symbols ............................ ............................ ......................................................................16
5.5 Entering numbers .................................... .........................................................................................16
5.6 Changing input modes.................... ..................................................................................................16
6 Sending and Receiving Text Messages ................................ .. ..... .. ... .. .. ... .... ... .. ... .. .. ..... .. ... .. .. ... .... .......17
6.1 Sending text messages .................................. ....................................................................................17
6.1.1 Sending a new text message ...................... ..... .. ... .. ... .... ... .. .. ..... .. ... .. .. ..... .. ... .. .. ..... ... .. .. ... .... .......17
6.1.2 Sending a message to more than one recipients ..................... ...................................................17
6.1.3 Sending a pre-written message ............................................... .. .. ..... .. ... .. .. ..... .. ... .. ... .... ... .. .. .......18
6.1.4 Sending a saved message ............................ .. .. ... .... ... .. .. ... .... ... .. .. ... .... ... .. .. ... .... ... .. .. ... ..... .. .........18
6.1.5 Failing to send a message ............................. .. ... .... ... .. .. ... .... ... .. .. ... .... ... .. ... .. ..... .. .. ... .. ..... ...........18
6.1.6 Receiving incoming calls while creating messages ........................ .. ... .... ... .. .. ... .. ... .... ... .. .. ... .. ..18
6.1.7 Viewing the Sent box........................................ ... .. ... .. .. ..... .. ... .. .. ... .... ... .. .. ... .. ..... .. ... .. .. ..............18
6.1.8 Viewing the Inbox...................... .. ... .... ... .. .. ... .. ..... .. ... .. .. ... .... ... .. .. ... .. ..... .. .. ... .. .. ..... ... .. .. ..............18
6.1.9 Marking the priority............................................. .. ..... .. ... .. .. ... .. ..... .. .. ... .. .. ..... ... .. .. ... .. ................19
6.1.10 Using canned messages.................................................... .. ... .. .. ... .... ... .. .. ... .... ... .. ... .. .. ..............19
6.2 Receiving text messages ....................................................................................... ............................19
6.3 Erasing messages ..................................................................... ........................................................19
6.3.1 Erasing a single message.................................... ............................ ............................................19
6.3.2 Auto Erase Inbox............ ... .. .. ..... .. ... .. .. ..... .. ... .. ... .... ... .. .. ... .... ... .. .. ... .... ... .. .. ... ..... .. .. ... .. ................19
6.4 Setting a different call back number.......................................... ... .. ..... .. .. ... .. ... .. .. ... .. .. ... .. .. ... ...........20
6.5 Setting the Delivery confirmation ....................................................................................................20
6.6 Setting the Duplicate detection .................................... ....................................................................20
7 Storage of Contacts............................. .. ..... .. .. ... .. ..... .. ... .. .. ..... .. ... .. .. ..... .. ... .. .. ..... ... .. .. ... .........................20
7.1 Saving a new contact........................................................... .............................................................20
7.2 Adding pauses to a phone number ...................................................................................................21
7.3 Viewing the information of the contacts .............................................. ............................................21
7.4 Editing a contact name.....................................................................................................................21
7.5 Editing a phone number ...................................................................................................................21
7.6 Setup a default number of the contact..............................................................................................21
7.7 Erasing a contact................................................... ............................ ...............................................22
7.8 Erasing a number ........................... ........................................................ ..........................................22
7.9 Assigning a Ring Tone......................................................................................................................22
7.10 Setting speed dialing .............................................................................. ............................. ...........22
8 Calculator ................................ ............................ ..................................................................................23
9 Customizing your Phone...................................... ... .. .. ... .. ..... .. ... .. .. ... .... ... .. .. ... .. ..... .. .. ... .. ... ..................24
9.1 Sound ......................................... ............................ ...........................................................................24
9.1.1 Select a different ring tone............................................... .. .. ... .... ... .. .. ... .. ..... .. ... .. .. ..... .. ..............24
中兴通讯股份有限公司
第4页
http://www.zte.com.cn
Page 5

X100 User Manual V 1.0
9.1.2 Setting sound effects ..................................................................................................................24
9.1.3 Setting the master volume.................................. .. .. ..... .. ... .. .. ..... .. ... .. ..... .. ... .. .. ..... .. ... .. ..... . ..........24
9.1.4 Adjusting other volume....................... ... ..... .. .. ... .... ... .. .. ... .... ... .. .. ..... .. ... .. .. ..... ... .. .. ..... .. ... ...........25
9.2 Display.............................. ............................ ....................................................................................25
9.2.1 Changing the display contrast....................................................................................................25
9.2.2 Adjusting the backlighting.......................................... ..... .. .. ... .. .. ..... .. ... .. .. ..... ... .. .. ... .. ..... . . .........25
9.2.3 Setting the application time .......................... .. ... .. ..... .. .. ... .. ..... .. .. ... .. ..... .. .. ... .... ... .. ... .. ..... . ..........25
9.2.4 Choosing a different language .................................. .. ..... .. .. ... .. .. ..... .. ... .. .. ..... ... .. .. ... .. ..... .. .. .......26
9.2.5 Setting the name order ........................... .. ... .. ..... .. .. ... .. ..... .. .. ... .. ..... .. .. ... .. ..... .. ... .. .. ..... .. ..............26
9.2.6 Choosing a different date format .......................................................... .....................................26
9.2.7 Setting the separator of date........................................ .................................................... ...........26
9.2.8 Choosing a different time format....................... ........................................................................26
9.2.9 Setting personal banner...................................... ........................................................................26
9.3 Shortcuts ...........................................................................................................................................26
9.4 Roaming............................................................................................................................................27
9.5 Phone Features.......................................................................................................... .......................27
9.5.1 Clear personalized dictionary ................................................... .. ..... .. ... .. ... .... ... .. .. ... .. ..... .. .........27
9.5.2 Changing the default text entry........................................................................ ..........................27
9.5.3 Changing the default text language ...................................................................... .....................27
9.5.4 Setting any key to answer calls........................................ .. .. ... .. ..... .. .. ... .. .. ..... .. ... .. ... .. ..... .. . . .......27
9.5.5 Setting keyguard............. ... .. .. ... .... ... .. .. ... ..... .. .. ... .. ..... .. .. ... .. ..... .. .. ... .. ..... .. .. ... .. ..... .. ... .. ................27
9.5.6 Displaying and resetting the call timer .................................................................................... ..28
9.5.7 Changing touchtone length ......................................... .. ... .... ... .. .. ... .... ... .. .. ... ..... .. .. ... .. ..... .. .........28
9.5.8 Setting service tone .................................. ... .. .. ... .. ..... .. .. ... .. ..... .. .. ... .. .. ..... ... .. .. ... .... ... .. ................28
9.6 Security ...................................................... .......................................................................................28
9.6.1 Setting voice privacy.................................................................................................. ................28
9.6.2 Resetting the phone....................................... .............................................................................28
9.7 About.................................................................................................................................................28
10 Brew................................... ... .. .. ..... .. ... .. .. ... .... ... .. .. ... .... ... .. ... .. ..... .. .. ... .. .. ..... .. ... .. .. .................................29
11 Vmail.................................................. .................................................................................... ..............29
12 Clock.......................................................................... ...........................................................................29
12.1 Setting an alarm .............................................................................................................................29
12.2 Using Timer....................................................................................................................................30
12.3 Setting a Countdown ............................................. ............................. ............................................30
13 Poker ....................................................................................................................................................31
14 Troubleshooting................................................ .. ... .. ..... .. ... .. .. ... .... ... .. .. ... .. ..... .. .. ... .. .. ..... .....................32
15 FCC Statement...................... ............................ ..................................................................................33
中兴通讯股份有限公司
第5页
http://www.zte.com.cn
Page 6

X100 User Manual V 1.0
1 General Information
1.1 Welcome
Thank you for using ZTE X100 cdma2000 1X Digital Mobile Phone.
To guarantee the mobile phone always in its best condition, please read this manual carefully and keep it for
further use.
The X100 enables you to freely communicate with people at any time and anywhere. It features intelligent
personal information management, BREW functions, etc. which provides a vivid and dramatic mobile experience
to you.
X100 phone system has covered the cdma2000 1X technical specifications.
ZTE Corporation reserves the right to modify the technical specifications in this manual at any time without notice.
1.2 Security
If your mobile phone is lost or stolen, please report to your service provider or proxy agencies (You need to
provide the phone’s ESN number labeled on the back of the mobile phone. You can see the ESN number after
removing the battery. Please keep the ESN number for future use.)
To protect your mobile phone from illegal use, please take the security measures as follows:
Set handset lock.
Take it with you as you can.
1.3 Safety Warnings
To the owner
Some electronic devices are susceptible to electromagnetic interference sent by mobile phone if inadequately
shielded, such as electronic system of vehicles. Please consult the device manufacturer before using the phone if
necessary.
The operation of mobile phones may interfere with medical devices like hearing aids and pacemakers. Please
always keep the mobile phone more than 20 centimeters away from such medical devices when the phone is
turned on. Do not carry the mobile phone in the breast pocket. Turn the mobile phone off if necessary. Consult a
physician or the manufacturer of the medical device before using the phone.
Be aware of the usage limitation when using a mobile phone at those places where there are explosive gases
or explosive products being processed, such as oil warehouses or chemical factories, because even if your
phone is in standby mode, it can still transmit radio frequency (RF) energy. Therefore, turn off your phone if
required.
Pay attention to the traffic safety. Do not use your mobile phone while driving. Park before making or answering a
call.
Store the phone out of the reach of small children. The phone may cause injury if used as a toy.
Mobile phone
Please use the original accessories or those that are authenticated by ZTE. Using any unauthenticated
accessories may affect your mobile phone’s performance, hurt your phone or even cause danger to your body
and violate related national regulations about telecom terminals.
If you want to clean your phone, please use clean fabric that is a bit wet or static-free. Do not use harsh chemical
中兴通讯股份有限公司
第6页
http://www.zte.com.cn
Page 7

X100 User Manual V 1.0
cleaning solvents or strong detergents to clean it. Turn off your phone before you clean it.
As your mobile phone can transmit electromagnetic waves, do not place it near magnetic items such as
computer disks.
Using the phone near electrical appliances, such as TV, telephone, radio and personal computer can cause
interference, which affects the function of the phone.
Do not expose your mobile phone to direct sunlight or store it in hot areas. High temperatures can shorten the
life of electronic devices.
Prevent liquid from leaking into your phone.
Do not drop, knock or harshly treat it. Rough handling will break internal circuit boards.
Do not connect the phone with other unauthorized peripheral equipments.
Do not attempt to disassemble the mobile phone or battery by yourself. Non-expert handling of the devices may
cause damages.
Do not charge the mobile phone without battery.
Battery use
Do not short-circuit the battery, as this can cause excessive heat to bring about fire.
Do not store the battery in hot areas or dispose of it in a fire.
The battery can be recharged for hundreds of times, but it will eventually wear out. When the operating time (talk
time and standby time) is noticeably shorter than normal, it is time to buy a new one.
Never use any charger or battery damaged or worn out.
Return the worn-out battery to the provider or put it in the appointed recycle place. Do not put it in familial
rubbish.
Warning: If the battery is broken, keep away from the content. If it taints your skin, wash your skin with
abundance fresh water and ask for help from the doctor if necessary.
Safety and general use in vehicles
Before making or answering a call, you should pay attention to the local laws about the use of wireless mobile
phones and take them into account for practical use.
Safety airbag, brake, speed control system and oil eject system shouldn’t be affected by wireless transmitting. If
you do meet problems above, please contact your automobile provider.
Please turn off your mobile phone when refueling your automobile, and the same to the place where duplex
wireless equipments are banned. Don’t put your phone together with flammable or explosive items; inner spark
may cause fire.
Aircraft safety
Please turn off your mobile phone before the airplane takes off. In order to protect airplane’s communication
system from interference, it is never allowed to use mobile phone when it is in flight. Using mobile phone before
the plane taking off should get aircrew’s permission according to safety regulations.
2 Getting Started
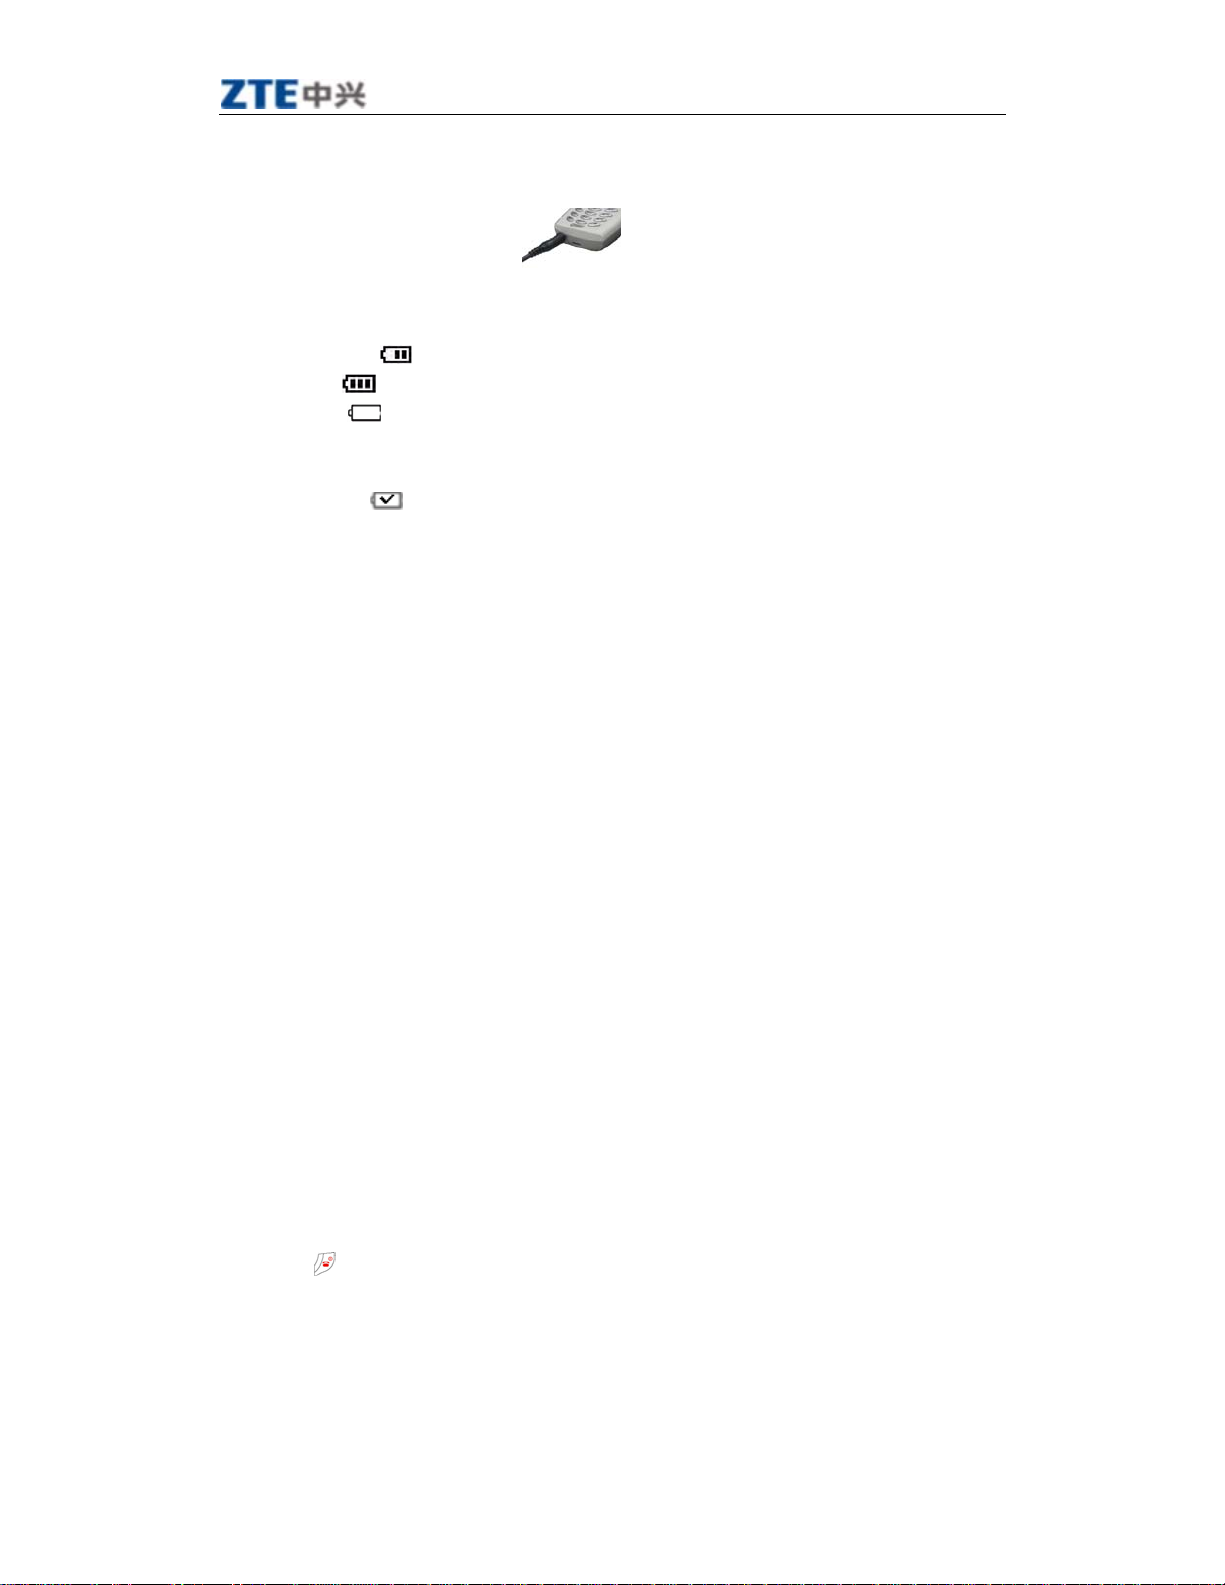
2.1 Charging the battery
Fully charge the new battery for approximately 12 hours when using the phone for the first three times.
中兴通讯股份有限公司
第7页
http://www.zte.com.cn
Page 8
X100 User Manual V 1.0
To charge the battery, plug the charger into the socket located at the bottom left of the phone, then connect the
adapter’s plug to a wall outlet.
The battery icon at the top-right corner of the phone screen may tell you following possible status of the phone:
• Charging (animated icon)
• Partially charged
• Full battery
• Low battery
will automatically power off.
During the charge, your phone and your charger may reasonably become hot, which is normal.
• Finish charging
from the phone and the outlet when charging finished.
while the icon blinks and the phone beeps. When the battery power is used up, the phone
when the battery is fully charged, the sound will be played. Please disconnect the charger
2.1.1 Recharging the battery
You can safely recharge the battery at any time, The procedure is the same as the above.
2.1.2 Caring for the battery
This section gives you some important safety information and tips about how to improve the battery’s
performance.
General safety guidelines
• This phone contains an integrated Li-Ion battery.
• Do not attempt to disassemble, puncture, or short-circuit the battery.
• If the battery has been put out of use for more than a month, recharge it before using your phone.
• Avoid using the phone under extreme temperatures, direct sunlight, or high humidity.
• Never dispose of used batteries in or near a fire. It could lead to explosion. Check with your local regulations for
proper disposal instructions.
2.1.3 Common causes of battery drain
The following operations drain the battery more quickly and thereby adversely affect its talk and standby times:
• Playing games frequently.
• Frequent use of the backlights.
• Operating when no service is available, or service is available intermittently.
• High earpiece and ringer volume settings.
• Unacknowledged voicemail and text message alerts.
2.2 Powering on/off the Mobile Phone
Hold the key, until the power-on/power-off picture appears.
This picture will be different according to different service provider.
中兴通讯股份有限公司
第8页
http://www.zte.com.cn
Page 9
X100 User Manual V 1.0
2.3 Getting to know your phone
2.3.1 General introduction
(1)
Home screen
.
(2) Left soft key: Using as shortcut / corresponding to the function displayed at the left-bottom of the screen.
(3) Right soft key: Using as shortcut /
(4) Nav ig at ion key: (four directions) Scrolls through lists and moves the cursor during text entry. Also adjust the ringer
volume.
(5)
: Access menu or select an option from the list. Also switch between different modes during the text entry.
OK key
(6) Send/Talk key: Dials a number or answers a call.
(7) End/Power key: Turns the phone on or off, ends a call, or returns to the home screen.
(8)
Back key:
Erases the last input in the text entry mode, returns to the previous menu, or erases all characters
during text entry by holding the key.
(9) “1” symbol key: Switches between symbol and other entry method during the text entry.
(10) Keypad: For entering numbers, letters, or symbols.
(11) Jack: For hands-free headset (sold separately).
(12)
* Text key:
Switches between upper and lower case during the text entry.
(13) # Space key: Inserts a space during the text entry.
(14) Jack: For AC adapter (included).
Warning:
Inserting an accessory into the incorrect jack may damage the phone.
1
2
4
6
8
9
10
11
12
corresponding to the function displayed at the right-bottom of the screen.
13
3
5
7
2.3.2 Performing basic functions
To... From the home screen...
Turn on the phone
Turn off the phone
Make a call Enter the number by using the alphanumeric keypad and then
End a call
Answer a call
中兴通讯股份有限公司
for approximately 3 seconds.
Hold
for approximately 3 seconds.
Hold
press
Press
Press
.
.
.
第9页
http://www.zte.com.cn
Page 10
X100 User Manual V 1.0
Set the master volume
Lock the keypad
Unlock the keypad
Access the Contacts list
Access Messages
Access recent Calls list
Access Menu
Hold
Hold
Press
Press
Press
Press
Press
for 3 second.
for 1 second.
then .
left soft key (defined as Contacts shortcut).
right soft key (defined as Messages shortcut).
send key (defined as Call Log shortcut).
OK key.
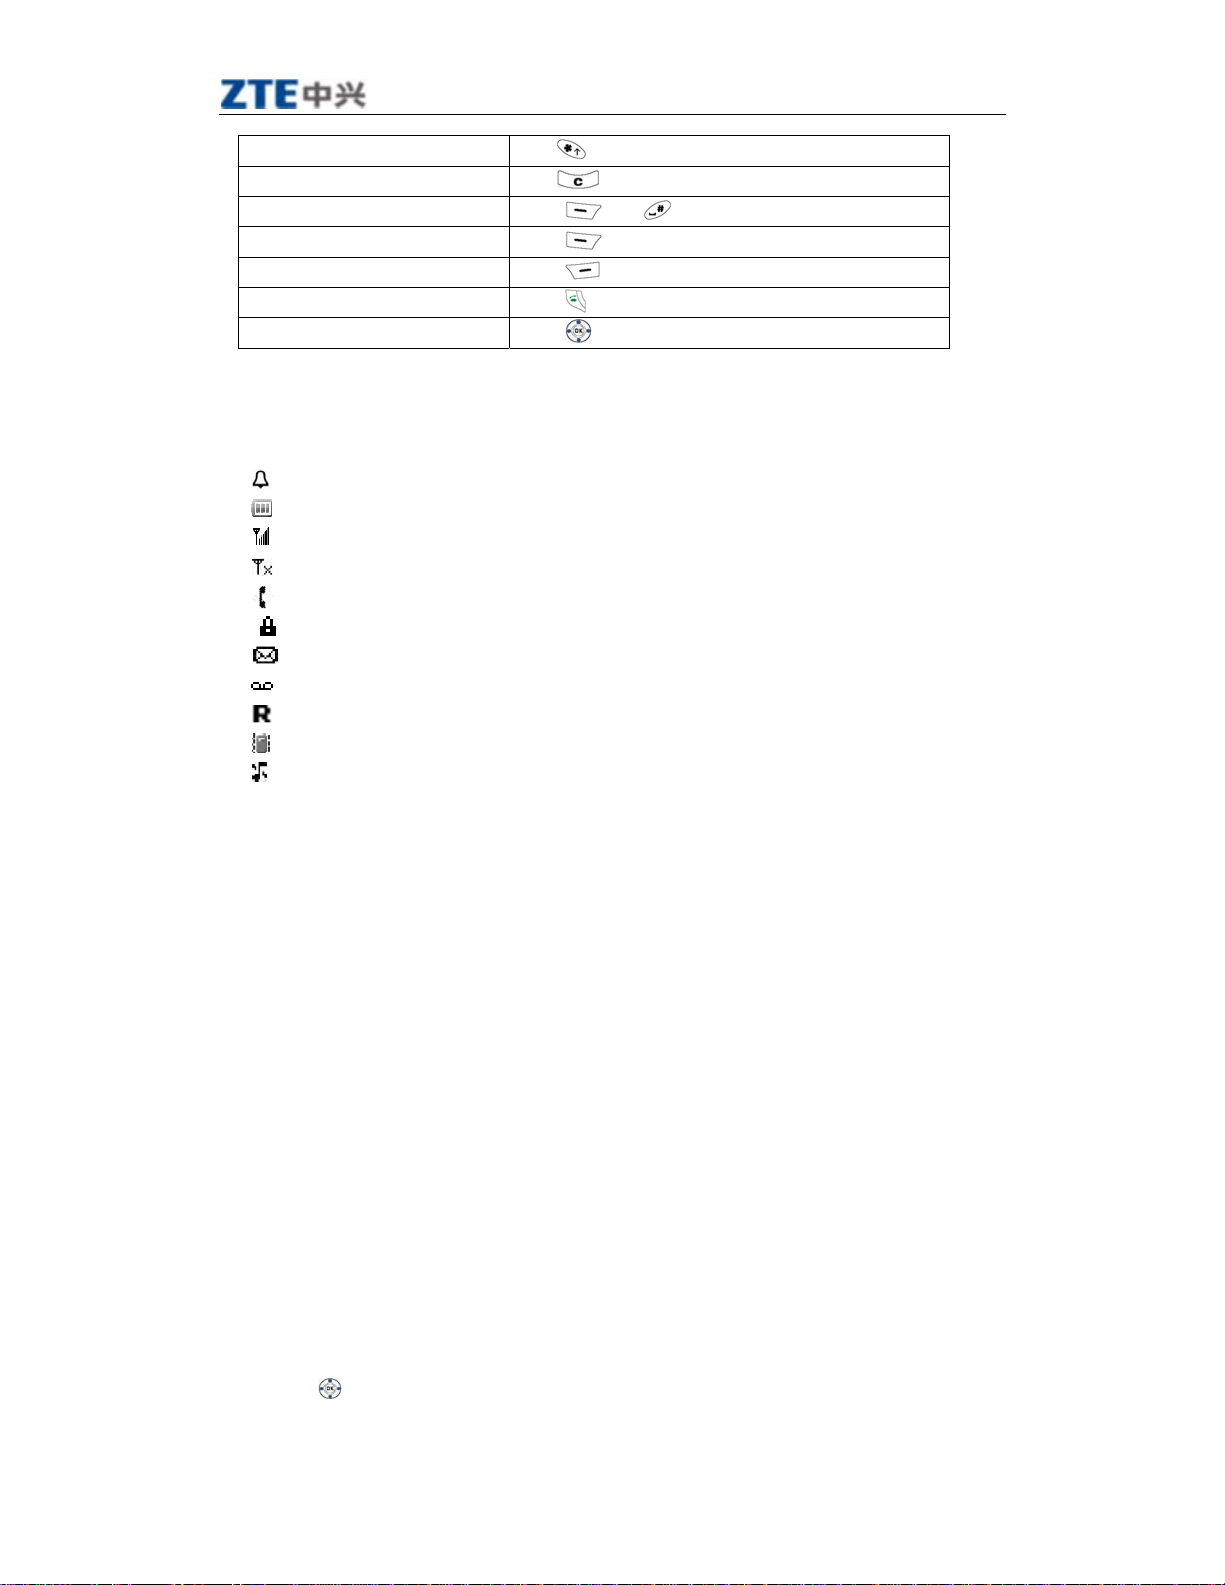
2.3.3 Understanding screen icons
These icons may appear on your phone’s screen.
The alarm is set.
Battery power indicator. More black bars indicates more battery power available.
Service available. You can make and receive calls. More bars indicates stronger signal.
No service available.
Call in progress.
Voice privacy set.
A new text message received.
One or more voicemails received.
Roaming status indication.
Vibration function on.
Ringer off.
2.4 Using the menus
The contents of the main menu are as follows:
Call Log
(options)
Show details Compose Add Sound
Send message Inbox Edit Display
Delete Sent Delete Shortcuts
Show call type Draft Roaming
Clear list Pages Features
Settings Security
About
Brew Vmail Clock Poker
MobileShop Alarm Clock
Settings Timer
Help Countdown
To operate in the menus:
• Press
OK key to access Menu.
Msging Contacts
(options)
Calc Settings
中兴通讯股份有限公司
第10页
http://www.zte.com.cn
Page 11

X100 User Manual V 1.0
• Press OK key to select a menu item.
• Press
• Press
• Press
• In this guide, the arrow → guides you to the next step of an operation. For example, select Menu→ Settings
means to press
left , right , up or down to view menu items.
to return to the previous menu page.
to return to the home screen.
OK key to access Menu, and then select the Settings option.
中兴通讯股份有限公司
第11页
http://www.zte.com.cn
Page 12

X100 User Manual V 1.0
3 Making and Receiving Calls
3.1 Making Calls
3.1.1 Making a call
1. Make sure you are in an area where the network service is available. Note the icon on the home screen.
More bars indicates stronger signal. If no bar appears, try to move the phone to where the signal can be detected.
In some cases, it can be as simple as changing the direction you are facing.
2. Enter the phone number.
3. Press
4. Press
3.1.2 Dialing extension numbers
Method1: Dial the exchange number and then the extension number.
Method2: Add pauses (after entering the exchange number, press “Options” right soft key →Insert pause)
between the exchange number and the extension numbers.
to dial the number.
to end the call.
3.1.3 Making IDD
Hold for about 3 seconds, release the key, and your screen will display the character “+” which replaces
the international access code, then enter the country code, the area code, and the phone number and then press
the
key to dial.
3.1.4 Redialing a number
To redial the last number called, press twice. If the send key is defined as shortcut key to other menus other
than Call Log, you cannot do it.
3.1.5 Calling a saved number
If you have already saved a phone number in your phone, you can use the
1. Press the left soft key (contacts shortcut key) on the home screen or press
brings up a list of all saved contacts.
2. Scroll in the list to search for the contact you want, and then select the number you want to dial, and press
to dial the number.
3. If you have already assigned a speed dial number to a certain contact, press the corresponding speed dial
number, and then press
to dial. For more information, please refer to section “3.4 Setting speed dialing”.
Contacts
list to find it quickly.
OK key
→
contacts. This
3.2 Answering a call
When you receive a call, the phone will ring, vibrate, and /or light up, and an animated phone icon will appear
together with the number of the caller . If the number is stored in your Contacts list, the contact’s name will
appear.
• Press
• Press
to answer the call.
to end the call. The call duration will be displayed on the home screen for a short period of time.
中兴通讯股份有限公司
第12页
http://www.zte.com.cn
Page 13

X100 User Manual V 1.0
3.2.1 Setting any key to answer calls
1. Select Menu → Settings→ Features → Any Key Answer.
2. Select On and press
In this case, all incoming calls can be answered by pressing any key except
OK key to set.
, and .
3.2.2 Muting an incoming call
Select the right soft key “silence” to mute the ringer or stop the vibration when call arrives.
This action will only mute the current call. The phone will still ring when the following call arrives.
3.2.3 Mute during a call
You can set voice mute for a moment during a call.
Select right soft key “options” during the call.
• Select Mute to block your voice.
• Repeat last step and select Unmute to cancel the block.
3.2.4 Adjusting the volume during a call
To adjust the earpiece volume during a call, press up or down.
3.3 Dealing with missed calls
If you have missed a call, “Missed Call” indication will appear on your screen. You can get the caller’s number or
name.
• Press “Done” right soft key to clear the screen.
• Press “Call Back” left soft key to call it.
3.4 Setting speed dialing
Speed dialing allows you to quickly dial a stored phone number by entering a one- or two-digit speed dialing
number.
1. On the home screen, press
Select the contact to which you want to assign a speed dialing number and press
2.
“options”.
3. Select “edit” and press
4. Scroll to Speed Dial and press
5. Select an unassigned speed dial number (2-99) to assign to the phone number.
6. Select one of the contact’s numbers.
7. Press “save” soft key to confirm the speed dial assignment.
When you want to dial a speed dialing number, please enter the one- or two digit speed dialing number and press
key to dial.
shortcut key “contacts” to access your contacts list.
right soft key
OK key.
OK key.
3.5 Calling emergency numbers
You can call emergency numbers even if your account is restricted. However, while calling, your phone will be in
Emergency mode, in which you cannot make normal calls.
Check with your service provider if the network supports this function.
Note:
中兴通讯股份有限公司
第13页
http://www.zte.com.cn
Page 14

X100 User Manual V 1.0
4 Using Call Log List
The call log contains all calls sent or received by your phone, includes 4 type of log lists:
All calls list, Missed calls list, Incoming calls list and Outgoing calls list.
A sign is put ahead of every call number.
Incoming calls.
Outgoing calls.
Missed calls.
4.1 Calling a number listed in the call log
Select
1.
2. Scroll down to select the number you want to call. Press
3. Press Call soft key to make the call.
1. Select Menu → Call log.
2. Highlight the number you want to send a message. Press “options” soft key.
3. Select Send message, press Next soft key, and then enter the text.
4. Press Send soft key.
Menu → Call log.
OK key.
4.2 Sending a message to the number listed in the
call log
4.3 Viewing details of a call
Select
1.
2. Scroll down to select the number you want to view, Press
phone number, as well as the time and date of the call.
Menu → Call log.
OK key. You can get the caller’s name and his
4.4 Adding a number to the contacts list
1. Select Menu → Call log.
Highlight the number you want to save. Press “
2.
3. Select New contact.
4. Select the number type you want to save as.
Finish the following step of the contacts. For more details, please refer to section “ 7.1 saving a new contact”.
5.
save
” soft key.
4.5 Accessing the classified lists
1. Select Menu → Call log.
2. Press “options” soft key.
3. Select Show call type. Press
Select
4.
All Calls, Missed Calls, Incoming
OK key.
or
Outgoing.
Press
OK key.
4.6 Erasing a call record from the call log
You can erase a record listed in your Call log.
1. Select Menu → Call log.
2. Scroll down to select the record you want to delete. Press “options” soft key.
中兴通讯股份有限公司
第14页
http://www.zte.com.cn
Page 15

X100 User Manual V 1.0
3. Select Delete.
A prompt window will pop up: “Delete xxxxxxxxx?”
4. Select Yes to erase it. Select No to return to call log menu.
4.7 Erasing all records
You can erase all records listed in your Call log menu.
1. Select Menu → Call log.
2. Press “option ”soft key.
3. Select Clear lis t, Press
A prompt window will appear: “Delete entire list?”
4. Select Yes to erase all. Select No to return to call log menu.
OK key.
5 Entering Letters, Numbers, and
Symbols
This table is a guide of how to enter letters, numbers, and symbols in the text entry mode, such as Contacts and
Messages. For more detailed information, please refer to section “ 5.1 Understanding text entry mode”.
To... Do this...
Enter a letter
Enter a number
Enter a symbol
Enter a space
Erase a character
In
Multitap
some times until the letter you want appears on the display.
In Numbers mode(display123), press the number key once.
In
Symbols
you want.
Press
Press
mode(display abc), press the appropriate alphanumeric key for
mode, press
.
.
left , right , up or down to select the symbol
Erase all characters
Move cursor right or left
Change modes
Capitalize the next letter
Hold
Press
Press
In
Multitap
you want to capitalize.
.
right or left.
OK key to choose the current input mode.
mode and
eZiText
mode, press
5.1 Understanding the text entry modes
There are four input modes available to you when entering text, numbers, or symbols:
• Multitap mode (displayed as abc)
•
Numbers
• eZiText mode (displayed as ez)
• Symbols mode
中兴通讯股份有限公司
mode (displayed as 123)
The default input mode you start in depends on the task you are doing. For example, when entering a
Note:
第15页
http://www.zte.com.cn
key to choose the mode
Page 16

X100 User Manual V 1.0
phone number in the Contacts menu, the default text mode is Numbers, when entering text for a message, the
default text mode is Multitap, and you can also choose eZiText mode or Numbers mode as default.
5.2 Entering words letter by letter (Multitap mode)
1. Press the appropriate alphanumeric key once to display the first letter that appears on the keypad, twice for
the second letter, and so on.
2. Wait until the cursor move to the right before you enter the next letter.
5.3 Entering words quickly
When you press a series of keys under eZiText mode, it checks the built-in dictionary for common words and
predicts the word you are trying to spell.
1. For each letter of the word you wish to spell, press the appropriate alphanumeric key once.
For example, to enter the word “any”, press the alphanumeric keys
2. If the word suggested by eZiText does not match what you want, keep pressing
matches.
3. When you get the word you want, press
OK key to accept it.
→ → .
until the word
5.4 Entering symbols
While entering text, you can also enter symbols.
1. Press in number mode or press in other mode to switch to the table of symbols.
2. You will access the table of symbols.
Press
3.
4. Press
left, right, up or down to select a symbol.
OK key to accept it.
5.5 Entering numbers
• In Numbers mode, press a number key once.
• In Multitap mode, press the key several times until the number appears on the screen.
• In
mode, press and hold a number key until the number appears on the screen.
eZiText
5.6 Changing input modes
To enter characters that belong to other mode, you’ll need to switch between different modes. For example, to
enter numbers in an email address while in Multitap mode:
1. Press
2. Enter the number, and then Press
中兴通讯股份有限公司
OK key to switch to Numbers.
OK key to switch to Multitap mode to complete the address.
第16页
http://www.zte.com.cn
Page 17

X100 User Manual V 1.0
6 Sending and Receiving Text Messages
This chapter describes how to send, receive and erase text messages. The message consists of to 3 boxes:
inbox, sent box and draft box. Inbox can save 30 messages. Sent box can save 50 messages. Draft box can save
10 messages.
Important: The features and menus described in this chapter may vary from different services available in your
area. Please contact the services provider about details of SMS charge.
6.1 Sending text messages
First, make sure your service provider supports SMS. You can only send text messages to the phones that are
capable of receiving them.
6.1.1 Sending a new text message
You can send messages to at most 5 recipients at one time.
1. Select Menu → Msging → Compose.
2. Enter the number of recipients you want to send.
-Or-
Press left soft key PhBook to access the contacts list, Select a contact name from the list and press
key, Select a number you want from the list and press
Note: You can enter at most 5 recipients.
3. Press next soft key to enter your text message. To learn how to enter letters, see section “ 5 Entering Letters,
Numbers, and Symbols”.
When you edit a message, the state bar will show the maximum number of characters that can fit in the text
body, as well as the current count of current entries.
When you finish editing your text, Press
4.
soft key to send the message.
send
OK key. Then press left soft key Done.
OK
6.1.2 Sending a message to more than one recipients
You can add at most 5 recipients from your contacts list or the phone number manually entered at one time.
1. Select Menu → Msging → Compose.
2. Add at most 5 recipients, You can:
1)Enter the first number. Press
-Or-
Press
2)
)
3
4)
5) Press Done soft key to add the second number.
6) Repeat step 2) to 5) to add the other numbers.
Press
3.
4. Press Send soft key to send the message.
Options
Select a contact name from the list and press
Select a number you want from the list and press
Next
soft key to select
soft key to edit the text.
中兴通讯股份有限公司
key, enter the second number, and so on.
PhBook.
OK key.
OK key.
第17页
http://www.zte.com.cn
Page 18

X100 User Manual V 1.0
6.1.3 Sending a pre-written message
If you don’t want to send the current message while editing, you can save the text to the draft box and edit them
later.
1. Select Menu → Msging → Draft.
2. Scroll through the list of drafts and press
3. Press Edit left soft key.
4. Enter the recipient number and your text.
5.
Press
left soft key, your message will be sent and saved to your
Send
OK key.
Sent
box.
6.1.4 Sending a saved message
Whether a message was successfully sent or not, it would be automatically saved to the
re-use them.
Select
1.
2. Scroll through the list of messages and press
3. Press Options right soft key to select Forward.
4.
5. Press Next left soft key to view and edit the message.
6. Press Send left soft key to send it.
Menu → Msging → Sent
Enter the phone number manually or select one from the
.
OK key to view the message.
Contacts
list.
box. You can
Sent
6.1.5 Failing to send a message
You will fail to send or receive messages if your phone’s memory is full, or the messaging service is not available
during that time. To free up the memory, please erase old messages. See section “ 6.3 Erasing messages”.
6.1.6 Receiving incoming calls while creating messages
• If you don’t wish to answer the call, press Reject left soft key to reject it, and then go on with your messages.
• Press
you to treat it later.
to answer the call. The message you were working on will be automatically saved to the draft box for
6.1.7 Viewing the Sent box
You can check the status of the messages you have sent as long as they have been saved to the Sent Box.
Select
1.
2. Press
3.
4. Press options soft key, select an option from the list to execute the next step.
Menu → Msging→ Sent.
up and down to scroll through the list of messages.
Press
-Forward: send this message to another recipient by entering his/her phone number.
-Msg details: view the details of this message, including its call back number, date and time of call, etc.
-Call:
-Add contact: Add this number to the contact list.
OK key to read the message.
call back.
6.1.8 Viewing the Inbox
You can check the status of the messages you have received as long as they have been saved to the Inbox.
1. Select Menu → Msging → Inbox.
2. Press
中兴通讯股份有限公司
up and down to scroll through the list of messages.
第18页
http://www.zte.com.cn
Page 19

X100 User Manual V 1.0
3. Press OK key to read the message.
4. Press Options soft key, select an option from the list to execute the next step.
-Reply: send a message to reply to this number.
-Forward
-Msg details: to view the details of this message, including its call number, call back number, date and time of
call, etc.
-Call: call back.
-Add contact: Add this number to the contact list.
: send this message to another recipient by entering his/her phone number.
6.1.9 Marking the priority
You can mark the priority of messages.
1. Select Menu → Msging → Compose.
2. Enter the phone number and the text.
3. Press Options right soft key and select Mark urgent /Mark normal from the list.
4. Finish the following steps.
6.1.10 Using canned messages
You phone store 10 common messages for you.
Select
1.
2. Enter the phone number and the text.
3. Press Options right soft key, select Canned msgs.
Select one message of the list, and finish the following steps.
4.
Menu
→
Msging →Compose.
6.2 Receiving text messages
When a new message is coming, a pop-up notification appears on the screen.
• Press Full view left soft key to view the message.
• Press Done right soft key to clear the screen and return to the idle status.
6.3 Erasing messages
You will have to erase old messages as they take up memory in your phone.
You have the option of erasing text messages, by erasing them one-at-a-time from the Sent or Inbox, or by
erasing them automatically.
6.3.1 Erasing a single message
Select
1.
2. Scroll down to select the message you want to erase.
3. Press Delete to erase the message. A pop-up notification will appear: “The message will be deleted.”
4.
Menu → Msging → Inbox, sent
Press
soft key to erase the message.
Yes
6.3.2 Auto Erase Inbox
If your phone’s memory is limited, auto erase will delete old messages which had been read from Inbox to make
room for new coming ones. This option allows the user to turn the Auto Erase feature on or off.
1. Select Menu → Msging → Settings→ Auto Erase.
2. Select on or off.
中兴通讯股份有限公司
or
draft
.
第19页
http://www.zte.com.cn
Page 20

X100 User Manual V 1.0
3. Press OK key.
6.4 Setting a different call back number
You can send a call back number that is different from that of the outgoing text message.
1. Select Menu → Msging → Settings → Callback num .
2. Select on or off, press
3. If on is selected, enter the call back number.
4. Press Save soft key.
The recipient can see the callback number only when his/her phone supports the function of displaying
Note:
callback number.
OK key.
6.5 Setting the Delivery confirmation
1. Select Menu → Msging → Settings → Delivery conf.
2. Select on or off.
-on You can see the outgoing delivery confirmation.
-off The outgoing delivery confirmation will be processed without alerting.
3. Press
OK key.
6.6 Setting the Duplicate detection
The phone can automatically detect homologous incoming text messages and save them as one single copy, in
order to save up your phone’s memory and make room for new ones.
1. Select Menu → Msging → Settings → Dup detection .
2. Select on or off.
-on Keep the original incoming message and erase the new coming homologue ones.
Keep all the homologue incoming messages.
-off
3.
Press
OK key.
7 Storage of Contacts
The Contacts menu plays a roll as a folder of name cards for you to store information of contacts. You can add
data to each element. The order in which the elements would be displayed is shown below:
First name, Last name, Home phone, Work phone, Mobile phone, Unknown phone, Pager, Email, Speed Dial,
Ring tone.
7.1 Saving a new contact
Press
1.
Contacts
2. Press the left soft key Add.
3. “First Name” will be highlighted. You can enter the first name directly. To learn how to enter letters, please refer
to paragraph “5.2 Entering words letter by letter ”.
Press
4.
5. Press
enter the numbers.
Press
6.
After entering the elements of the contact, press the left soft key
7.
shortcut key or Select
down to highlight “Last Name” and enter the last name of the contact.
down to highlight “Home phone”, “Work phone”, “Mobile phone”, “Unknown phone”, “Pager”, “Email”,
down to highlight “Speed Dials” and “Ring tone”, press OK key to go to the next steps.
Menu → Contacts.
to save the information.
Save
中兴通讯股份有限公司
第20页
http://www.zte.com.cn
Page 21

X100 User Manual V 1.0
7.2 Adding pauses to a phone number
When you save a phone number for an automated service or an extension, you may add a pause where you need
to select an option. You can set multiple pauses in a phone number. A Pause will cause the phone to stop dialing
until you select the Stop soft key or the pause time expired.
1. Enter the main calling number.
2. Press Options right soft key.
Select
3.
4.
5. Enter the extension numbers(option selecting numbers) and add more pauses where needed.
Insert pause
Select an option from the list.
- Hard pause: the phone will send the main calling number and then pause the dialing until you press any key
other than the right soft key and the end key, then send the extension number(option selecting numbers)
automatically. Or until you press the right soft key
selecting numbers).
- 2 seconds: the phone will send the main calling number, then pause for 2 seconds, then send the extension
- 5 seconds: the phone will send the main calling number, then pause for 5 seconds, then send the extension
and press
number(option selecting numbers) automatically.
number(option selecting numbers) automatically.
OK key.
, then you can enter the extension number (option
Stop
7.3 Viewing the information of the contacts
1. Select Menu → Contacts.
Scroll down to select the contact you want to view.
2.
3. Press
OK key, then scroll down to view its information.
7.4 Editing a contact name
1. Select Menu → Contacts.
2. Scroll down to locate the contact you wish to edit.
3. Press Options right soft key.
Select
4.
Move the cursor and edit the contact’s name.
5.
6. Press the left soft key Save to save the changes.
Edit
and press
OK key.
7.5 Editing a phone number
1. Select Menu → Contacts.
2. Scroll down to locate the contact you wish to edit.
3. Press Options right soft key.
4. Select Edit and press
Move the cursor to the number you want to edit and enter the new ones.
5.
6. Press the left soft key Save to save the changes.
OK key.
7.6 Setup a default number of the contact
You can set a phone number as the default contact number.
1. Select Menu → Contacts.
2. Scroll down to locate the contact you wish to edit and press
中兴通讯股份有限公司
第21页
http://www.zte.com.cn
OK key.
Page 22

X100 User Manual V 1.0
3. Move the cursor to the number you want to set and press Options right soft key.
4. Select Set as default and press
5. A note will display to confirm the selection.
6.
Press
left soft key.
yes
OK key.
7.7 Erasing a contact
1. Select Menu → Contacts.
2. Scroll down to locate the contact you wish to erase.
Press
3.
Options
4. Select Delete and press OK key.
5. “Delete XXXXX” appears on the screen.
Press
6.
Yes
right soft key.
left soft key.
7.8 Erasing a number
1. Select Menu → Contacts.
Scroll down to locate the contact of which the number you wish to erase, then press
2.
Move the cursor to the number and press
3.
4. Select Erase entry and press
5. The note “Erase entry ” appears on the screen.
6. Press Yes left soft key.
Options
OK key.
right soft key.
OK key.
7.9 Assigning a Ring Tone
You can choose different ring tones for different contacts.
Select
1.
2.
3.
4. Scroll down to Ring tone and press
5. Select a ring tone from the list and press
6. Press Save right soft key to save the change.
Menu → Contacts
Scroll down to locate the contact to which you wish to assign a ring tone, then press
Select
Edit
and press
.
OK key.
OK key.
OK key.
Options
right soft key.
7.10 Setting speed dialing
You can assign a speed dialing number to the phone number of the contact.
1. Select Menu → Contacts.
2. Scroll down to the contact to which you want to assign a speed dialing number, then press options right soft
key.
3. Select edit and press
4. Scroll down to Speed Dial and press
Select an unassigned speed dial number (2-99) to assign to the phone number.
5.
6. Select one of the contact’s numbers.
7. Press “save” soft key to confirm the speed dial assignment.
When you want to dial a speed dialing number, please enter the one- or two digit speed dialing number and
press
key to dial.
OK key.
OK key.
中兴通讯股份有限公司
第22页
http://www.zte.com.cn
Page 23

X100 User Manual V 1.0
8 Calculator
The phone provides a calculator tool. You can use it for basic mathematical calculations.
1. Select Menu → Calc.
2. Use the keypad to enter numbers. Digits 0~9 are mapped to their respective DTMF keys.
3. Use the navigation key to enter operator symbols. Five operators (+, -, x, ÷, =) are mapped to the 5-way
navigation control.
4. Press Advanced left soft key to enter advanced operators. You can use these operators:
sqrt(x) square root x^2 square 1/x reciprocal x^y power PI
For example, If you want to calculate 8 for square, Press ” 8”, “Advanced “left soft key, ”x^2” in turn, The
calculator will display the result ”64”.
Press
5.
Memory
Store: Add the displayed digit to the value stored in memory.
Recall: Display the value currently stored in memory.
Clear: Clear the value currently stored in memory.
6. Press
digit entry mode.
right soft key to store a value for later retrieval .
key to Clear the last entry or clear the calculated result and display a zero, return the calculator to
π
(3.1415)
中兴通讯股份有限公司
第23页
http://www.zte.com.cn
Page 24

X100 User Manual V 1.0
A
A
A
A
9 Customizing your Phone
The contents of the Settings menu are as follows.
Setting
9.1 Sound
Sound
Display
Shortcuts
Roaming
Features
Security
bout
Properties
Formatting
Text Input
nyKey Answer
uto Keyguard
Call Timers
Touchtone
Svc Tones
Ring Tones
Sound Effects
Volumes
Contrast
Light timer
pp TimeOut
UI Lang.
Name Order
Date&Time
Banner
Voice Privacy
Default Reset
Master Volume
Ringer Volume
Voice Volume
Key Volume
9.1.1 Select a different ring tone
X100 handset has 10 ring tones for you to select.
Select
1.
2.
stop it.
3. Press
Menu → Settings → Sound → Ring Tones
Scroll down the list and press the left soft key
OK key to select a ring tone from the list.
.
to hear the different ring tones. Press left soft key again to
Play
9.1.2 Setting sound effects
You can decide how many sound effects will be played when the phone is in use.
1. Select Menu → Settings → Sound → Sound Effects.
2. Select an option from the list:
- Complete: play all sound effects defined.
– Alerts Only: System alerts only.
–
no sound effects played.
None:
3. Press
OK key.
9.1.3 Setting the master volume
You can choose the type of alert you receive for incoming calls.
Select
1.
2.
Menu → Settings → Sound
Select an option from the list:
→
Volumes → Master volume.
中兴通讯股份有限公司
第24页
http://www.zte.com.cn
Page 25

X100 User Manual V 1.0
- On: set the phone to ring during an incoming call alert.
- Off: set the phone to mute and screen–light-up only during an incoming call alert.
–On + Vibrate: set the phone to ring and vibrate during an incoming call alert. (vibrate for the first 10 seconds
and then ring for the rest time of the incoming call alerts ).
–Off + Vibrate: sets the phone to vibrate during an incoming call alert.
3. Press
You can also set the master volume directly by holding
OK key.
for 3 seconds in idle state.
9.1.4 Adjusting other volume
You can adjust the volume level of the ringer, voice and key beeps.
Select
1.
2.
- Ringer Volume: for the currently selected ring tone.
- Voice Volume: for all sounds played through the earpiece.
- Key Volume: for the clicking volume when you press the keys on the keypad.
3.
4.
Menu → Settings → Sound → Volumes.
Select
Ringer Volume, Voice Volume
Scroll
Press the left soft key
up or down to adjust the volume.
to save the change.
Save
or
Key Volume.
9.2 Display
9.2.1 Changing the display contrast
1. Select Menu → Settings → Display → Properties → Contrast.
2. Scroll
3. Press
right or left to adjust the contrast.
OK key to save the change.
9.2.2 Adjusting the backlighting
Your screen lights up while you are in a call or when you press a key on the keypad. However, you can decide
when to turn the backlight off.
1. Select Menu → Settings → Display → Properties → Light Timer.
Select an option from the list:
2.
– After 10 sec: turn the backlight off 10 seconds after your last key press.
– After 30 sec: turn backlight off 30 seconds after your last key press.
–
After 60 sec:
– Always Off: turns backlight off.
– Always On: turns backlight on.
3. Press
turn backlight off 60 seconds after your last key press.
OK key.
9.2.3 Setting the application time
Set the period of time before the handset exit the applications and returns to idle state.
Select
1.
2. Select an option from the list:
– After 60 sec: return to idle state 60 seconds after your last key press.
–
– After 5 min: return to idle state 5 minutes after your last key press.
Menu → Settings → Display → Properties → App TimeOut
After 2 min:
return to idle state 2 minutes after your last key press.
中兴通讯股份有限公司
第25页
http://www.zte.com.cn
.
Page 26

X100 User Manual V 1.0
3. Press OK key.
9.2.4 Choosing a different language
Your phone may support languages apart from English.
1. Select Menu → Settings → Display → Formatting → UI Lang.
2. Scroll to highlight a language.
3. Press
OK key.
9.2.5 Setting the name order
You can choose the order the names in the contacts list and in other places where contacts’ names are displayed.
Select
1.
2.
3.
Menu → Settings → Display → Formatting → Name Order
Scroll to highlight a format.
Press
OK key.
.
9.2.6 Choosing a different date format
1. Select Menu → Settings → Display → Formatting → Date & Time→ Date Format.
Scroll to highlight a format.
2.
3. Press
OK key.
9.2.7 Setting the separator of date
You can select the date separator between year, month and day.
1. Select Menu → Settings → Display → Formatting → Date & Time→ Separator.
2. Select the separator.
3. Press
OK key.
9.2.8 Choosing a different time format
Select
1.
2. Select AM/PM or 24 hour.
3.
Menu → Settings → Display → Formatting → Date & Time→ Time Format.
Press
OK key.
9.2.9 Setting personal banner
You can set the banner on home screen.
1. Select Menu → Settings → Display → Formatting → Banner.
2. Enter the banner text. Press
3. Press Save left soft key to save the change.
to erase the character.
9.3 Shortcuts
You can set a shortcut to launch an application with a single key press. There are five such keys:
Left soft key
these items sets the single press behavior for their corresponding key in idle state.
1. Select Menu → Settings → Shortcuts.
2. Scroll to select a key you want to define.
Scroll to select a menu corresponding to.
3.
4. Press
中兴通讯股份有限公司
, Right soft key , Send key , Left key press , and Right key press . Each of
OK key to confirm.
第26页
http://www.zte.com.cn
Page 27

X100 User Manual V 1.0
9.4 Roaming
You can allow or disallow your phone to access a roaming network. Make sure your phone is permitted to
access a roaming network by the service provider.
1. Select Menu → Settings → Roaming.
2. Select On or Off.
3. Press
OK key.
9.5 Phone Features
9.5.1 Clear personalized dictionary
When you enter the text, the handset will automatically add words you have entered to the personalized dictionary.
You can clear it.
Select
1.
2. Press the left soft key Yes to clear it.
You can set the default input mode.
1.
2. Scroll to select the entry type, press
Menu → Settings → Features → Text Input → Clear Dictionary.
9.5.2 Changing the default text entry
Select
Menu → Settings → Features → Text Input → Text Entry.
OK key.
9.5.3 Changing the default text language
You can set the default input text language.
. Select
1
2. Scroll to select the language type, press
Menu
→
Settings → Features → Text Input → Text Lang
OK key.
.
9.5.4 Setting any key to answer calls
1. Select Menu → Settings → Features → AnyKey Answer.
2. Select On and press
All incoming calls can now be answered by pressing any key except
OK key to set.
9.5.5 Setting keyguard
You can lock the keypad to protect the phone from accidental key presses.
1. Select Menu → Settings → Features → Auto Keyguard.
2. Select an option from the list:
– 30 Seconds: lock the keypad for 30 seconds of inactivity.
– 1 Minute: lock the keypad for 1 minute of inactivity.
–
2 Minutes:
– 5 Minutes: lock the keypad for 5 minutes of inactivity.
– Off: disable the key guard.
3. Press
To unlock the keypad, press the left soft key Unlock then “#”
You can also lock the keypad directly by holding
lock the keypad for 2 minutes of inactivity.
OK key.
.
for 1 second in idle state.
, and .
中兴通讯股份有限公司
第27页
http://www.zte.com.cn
Page 28

X100 User Manual V 1.0
9.5.6 Displaying and resetting the call timer
Your phone has three timers that count the duration of the calls you have made and received. You can reset two
of the timers.
1. Select Menu → Settings → Features → Call Timers
2. Select an option from the list:
– Incoming Timer: This timer shows the total duration of all incoming calls.
– Outgoing Timer: This timer shows the total duration of all outgoing calls.
–
All Calls Timer
3. Press the right soft key Reset to clear duration data. Press the left soft key Done to return to the current menu.
: This timer shows the total duration of all types of calls .You cannot reset this timer.
9.5.7 Changing touchtone length
You can change the length of key beep tones.
Select
1.
2. Select short or long, Press
Menu → Settings → Features
→
OK key.
Touchtone.
9.5.8 Setting service tone
You can set whether the handset play tones when service is acquired and lost.
Select
1.
2. Select on or off, Press
Menu → Settings → Features
OK key.
→
Svc Tones.
9.6 Security
This paragraph describes all the features involved in securing your phone and preventing access to your personal
information.
9.6.1 Setting voice privacy
The voice can be encrypted when the handset communicate with the base stations .You can turn the function on
or off.
1. Select Menu → Settings → Security
2. Select on or off, Press
Note: This function need the service provider to support. Please consult to service provider.
OK key.
→
Voice Privacy.
9.6.2 Resetting the phone
You can restore the all the phone settings to their default value, and no other information will be deleted.
Select
1.
2. “Default” information appears.
3. Press the left soft key Yes to confirm. Press the right soft key No to abort.
Menu → Settings → Security → Default Reset.
9.7 About
The about screen contains information about the MDN, ESN, BREW version, etc.
1. Select Menu → Settings → About.
The screen will display the information. Press
2.
Press the left soft key
3.
to return to the setting menu.
Done
中兴通讯股份有限公司
down to scroll the information .
第28页
http://www.zte.com.cn
Page 29

X100 User Manual V 1.0
10 Brew
You can connect your phone to wireless network by multiplicate Brew platforms in this menu. The menu displayed
will vary from different service providers.
Scroll
left/right or up /down to select the options, press OK key to enter it.
● Mobile shop: you can view the list of applications, download and restore the applications following the
prompt.
● Settings: you can change the applications location in your phone and customize the icon type of applications.
●
: you can get much information about brew application here , such as how to buy new application, how to
Help
remove/ disable/restore/expire applications.
Note: This function need service provider to support. For more details of brew, please contact the service
provider.
11 Vmail
Voicemail is a separated application apart from the messaging service. A user can check his voicemail box on the
network, listen or retrieve them by dialing a certain service number. Additionally, the number of voicemails can be
reset to zero.
To use this function, check with your service provider.
12 Clock
12.1 Setting an alarm
Use the alarm to set an alert for a specific time. The handset supports 3 independent alarms. The alert occurs
only if the phone is on.
Select
1.
Highlight one of the schedule list and press
If there isn’t any alarm, the name will display None.
2. Begin setting, press
– Scroll
– Press number key to change the values.
3. When date is set, press
– Scroll
– Press number key to change the values.
4. When time is set, press
5.
6. When you finish the setting, press left soft key Set to activate the alarm, press right soft key Cancel to cancel
中兴通讯股份有限公司
Menu → Clock → Alarm Clock.
OK key to begin setting.
up, highlight Date.
left or right to move cursor between day, month, and year.
down, highlight Time.
left or right to move cursor between
down, highlight Repeat. Press OK key to select one item:
- Never: the alarm will never repeat.
- Every day
- Once a week: the phone will alert at the same day in a week as the setting date.
- Every week day: the phone will alert every weekday in a week at the same as the setting date.
- Every weekend day: the phone will alert every weekend day in a week at the same as the setting date.
After that, press
Press
: the phone will alert at the setting time every day.
down, highlight
OK key to select a ring tone from the list.
Ringer
hour
.
第29页
and
minute
.
http://www.zte.com.cn
Page 30

X100 User Manual V 1.0
it.
7. If you want to disable an alarm, highlight the alarm name, press Turn off right soft key.
8. When the alarm sounds, press Dismiss left soft key to turn off the alarm.
If you set an alarm while the phone is in silent or vibrate mode, the note will appear “Alarm will not sound in
silent/vibrate mode.”
12.2 Using Timer
You can start/stop/reset the timer.
1. Select Menu → Clock → Timer.
2. Press Start left soft key to begin.
3. When the timer is running, press Stop left soft key to stop it, and the timer has an non-zero value.
If the timer has an non-zero value, press
4.
left soft key to clear it.
Reset
12.3 Setting a Countdown
You can set the duration of the countdown, when the countdown duration elapsed, the phone will ring.
1. Select Menu → Clock → Countdown.
Press
2.
press digit key to enter the values.
left soft key, scroll
Set
left or right to move cursor between the hours, minutes and seconds, then
The maximum duration that can be entered for the countdown is 99:59:59 (99 hours, 59 minutes, 59 seconds).
3. Press Save left soft key to save the value.
Press
4.
Press Options right soft key and select Reset to clear the countdown.
5. Press Start left soft key to begin time count.
6. When the alarm sounds, press Dismiss left soft key to turn off the alarm .
中兴通讯股份有限公司
right soft key and select
Options
ring tone
第30页
to assign a ring tone.
http://www.zte.com.cn
Page 31

X100 User Manual V 1.0
13 Poker
You can play games with your handset.
1. Select Menu → Poker. You can continue the game with the saved game.
2. Press left soft key Play → Deal, to begin the game.
Press left soft key
3.
- Change bet: change the bet value.
- Payouts: information about ratio of payouts and bet of different cards.
- Game restart:
4. Press
Play → Options
to begin the new game.
to exit the game and return to the home screen.
, you can select these options:
中兴通讯股份有限公司
第31页
http://www.zte.com.cn
Page 32

X100 User Manual V 1.0
14 Troubleshooting
Check the following reference if you have problems with your phone. Please contact your distributor if you cannot
solve the problem fluently.
1. Cannot power on the phone.
Check the battery power or the R-UIM card.
2. Short message cannot be sent.
Check the network status.
3. Cannot make or receive a call.
Check the network status.
4. No signal indicated.
Make sure you are in an area where the network service is available.
5. No incoming ring tone.
Check the master volume or the ring volume setting.
6. No alarm tone is sounding when the reminder time is reached.
Check the sound setting.
中兴通讯股份有限公司
第32页
http://www.zte.com.cn
Page 33

X100 User Manual V 1.0
15 FCC Statement
Changes or modifications to this unit not expressly approved by the party responsible for compliance will
void the user’s authority to operate the equipment. Any change to the equipment will void FCC grant.
This equipment has been tested and found to comply with the limits for a Class B digital device, pursuant to
part 15 of the FCC Rules. These limits are designed to provide reasonable protection against harmful
interference in a residential installation. This equipment generates, uses and can radiate radio frequency
energy and, if not installed and used in accordance with the instructions, may cause harmful interference to
radio communications. However, there is no guarantee that interference will not occur in a particular
installation. If this equipment does cause harmful interference to radio or television reception, which can be
determined by turning the equipment off and on, the user is encouraged to try to correct the interference by
one or more of the following measures:
--Reorient or relocate the receiving antenna.
--Increase the separation between the equipment and receiver.
--Connect the equipment into an outlet on a circuit different from that to which the receiver is connected.
--Consult the dealer or an experienced radio/TV technician for help.
Health and Safety Information – RF Exposure Information
(SAR)
THIS MOBILE PHONE MEETS THE GOVERNMENT’S REQUIREMENTS FOR EXPOSURE TO RADIO
WAVES.
This phone is a radio transmitter and receiver. It is designed and manufactured not to exceed the emission
limits for exposure to radio frequency (RF) energy set by the Federal Communications Commission of the
U.S. government. These limits are part of comprehensive guidelines and establish permitted levels of RF
energy for the general population. The guidelines are based on standards that were developed by
independent scientific organizations through periodic and thorough evaluation of scientific studies. The
standards include a substantial safety margin designed to assure the safety of all persons, regardless of
age and health.
The exposure standard for wireless mobile phones employs a unit of measurement known as the Specific
Absorption Rate, or SAR. The SAR limit set by the FCC is 1.6 W/kg. Tests for SAR are conducted using
standard operating positions accepted by the FCC with the phone transmitting at its highest certified power
level in all tested frequency bands. Although the SAR is determined at the highest certified power level, the
actual SAR level of the phone while operating can be well below the maximum value. This is because the
phone is designed to operate at multiple power levels so as to use only the poser required to reach the
network. In general, the closer you are to a wireless base station antenna, the lower the power output.
中兴通讯股份有限公司
第33页
http://www.zte.com.cn
Page 34

X100 User Manual V 1.0
Before a mobile phone is available for sale to the public, it must be tested and certified to the FCC that it
does not exceed the limit established by the government adopted requirement for safe exposure. The tests
are performed in positions and locations (e.g., at the ear and worn on the body) as required by the FCC for
each model. The highest SAR value for the mobile phone when tested for use at the ear is 0.030 W/kg and
when worn on the body is 0.017
While there may be differences between the SAR levels of various phones and at various positions, they all
meet the government requirement.
The FCC has granted an Equipment Authorization for this mobile phone with all reported SAR levels
evaluated as in compliance with the FCC RF exposure guidelines. SAR information on the mobile phone is
on file with the FCC and can be found under the Display Grant section of http://www.gov/oet/fccid
searching on FCC ID stock on the label on the phone.
Note: In the United States and Canada, the SAR limit recommended by international guidelines for mobile
phones used by the public is 1.6 watts/kilogram (W/kg) averaged over one grams of tissue. The limit
incorporates a substantial margin for safety to give additional protection for the public and to account for any
variations in measurements.
W/kg.
after
中兴通讯股份有限公司
第34页
http://www.zte.com.cn
 Loading...