

ZTE BLADE A520 User Manual
y
y
k
r
ZTE BLADE A520
Quick Start Guide
LEGAL INFORMATION
Copyright © 2016 ZTE CORPORATION.
All rights reserved.
No part of this publication may be quoted, reproduced,
translated or used in any form or by any means, electronic or
mechanical, including photocopying and microfilm, without the
prior written permission of ZTE Corporation.
Notice
ZTE Corporation reserves the right to make modifications on
print errors or update specifications in this guide without prior
notice.
We offer self-service for our smart terminal device users.
Please visit the ZTE official website (at www.ztedevice.com)
for more information on self-service and supported product
models. Infor mation on the website t a k es pr ec ed e nc e .
Visit http://www.ztedevice.com to download the user manual.
Just click Support from the home page and then select your
location, product type, and name to search for related support
information.
Disclaimer
ZTE Corporation expressly disclaims any liability for faults and
damages caused by un aut h o r iz e d m od if ic a t i ons of the
software.
Images and screenshots used in this guide may differ from the
actual product. Content in this guide may differ from the actual
product or softw ar e.
Trademarks
ZTE and the ZTE logo s a re t r a dem ar ks of ZTE Corporation .
Google and Android are trademarks of Google, Inc.
The Bluetooth
Bluetooth SIG, Inc. and any use of such trademarks by ZTE
Corporation is under license.
Manufactured under license from Dolby Laboratories. Dolby,
Dolby Audio, and the double-D symbol are trademarks of
Dolby Laborat o r ie s .
Manufactured under license from Dolby Laboratories. Dolby,
Dolby Atmos, and the double-D symbol are trademarks of
Dolby Laborat o r ie s .
Other trademarks and trade names are the property of their
respective owners.
Version No.: R1.0
Edition Time : November 25, 2016
Manual No.:
®
trademark and logos are owned by the
microSDXC logo is a trademark of the SD-3C, LLC.
1
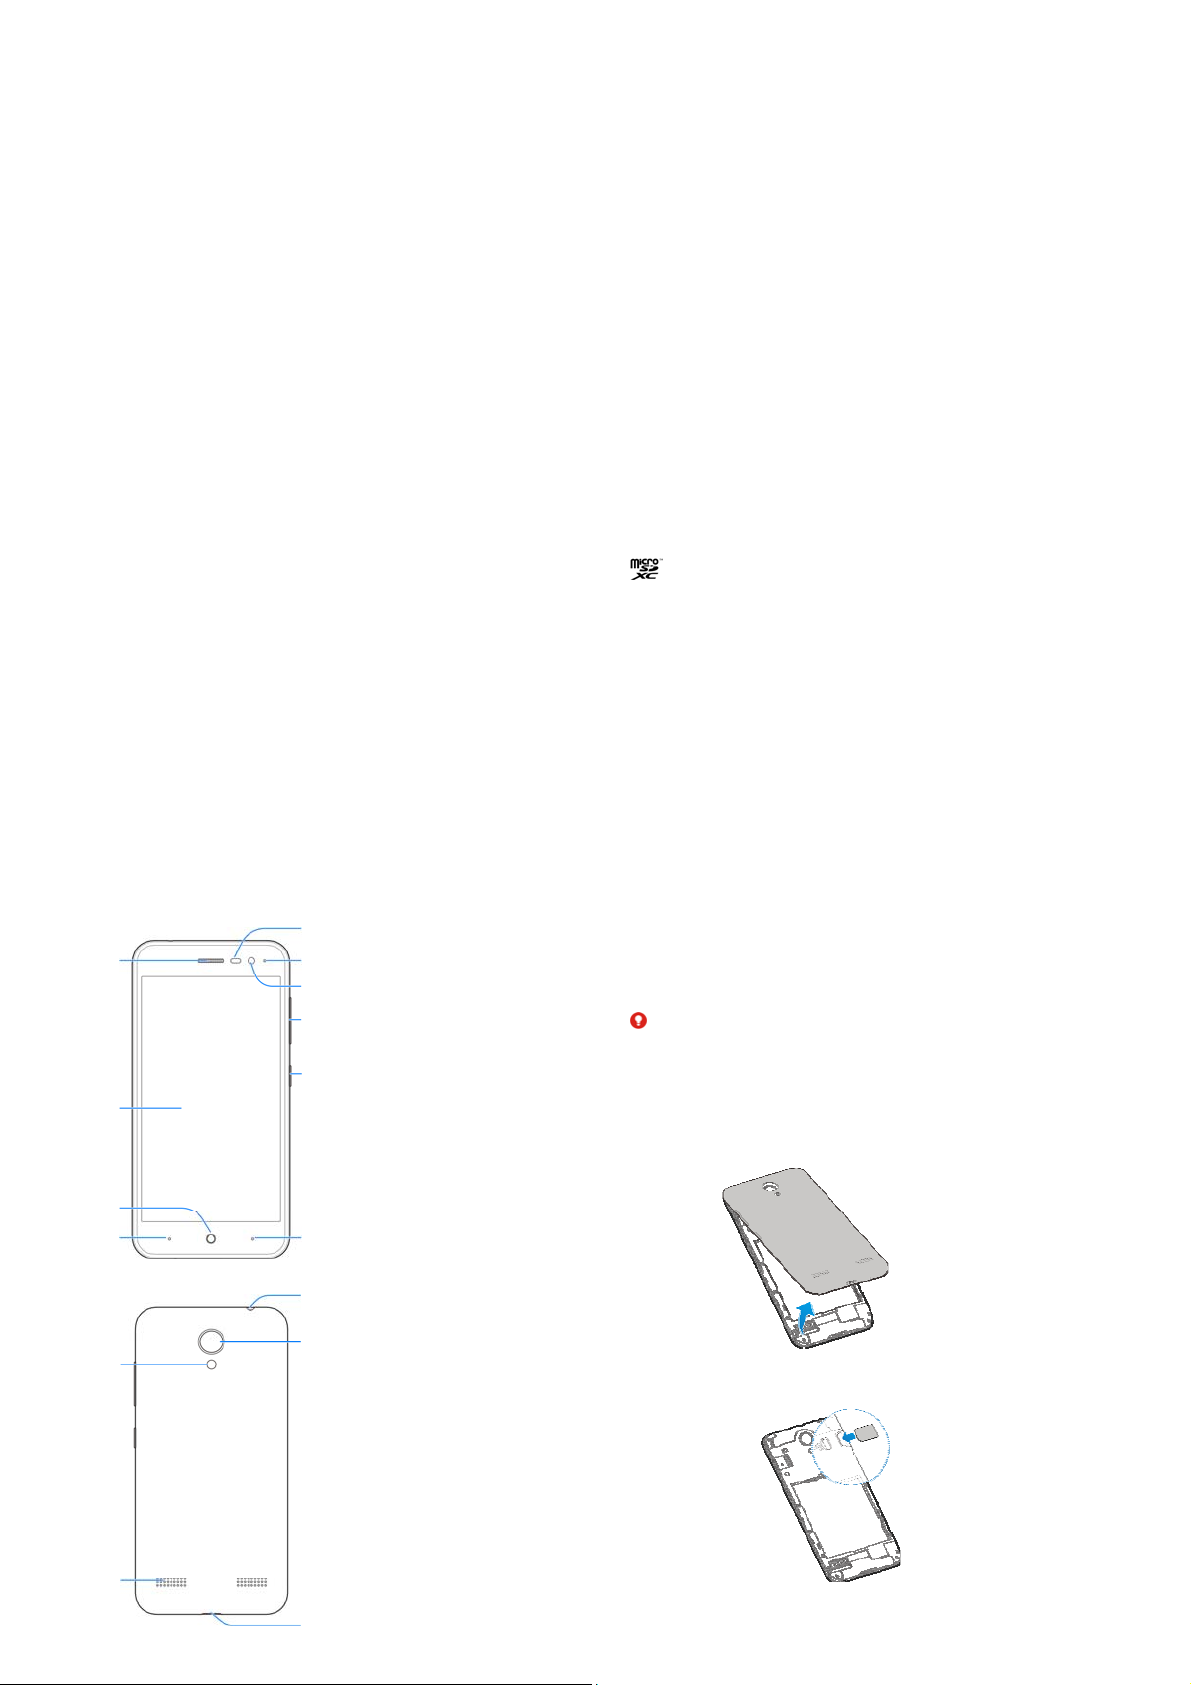
Getting to Know Your Phone
Earpiece
Touch screen
Home ke
Back ke
Flash
Proximity &
light sensor
Indicator light
Front camera
Volume key
Power key
Recent apps key
Headset jac
Back camera
2
Installing the nano-SIM Card and the
microSDXC™ Card (Optional)
The nano-SIM cards can be installed or removed while the
phone is turned on.
Power off your phone before removing or replacing the
battery.
WARNING!
To avoid damage to the phone, do not use any other kind of
SIM cards, or any non-standard nano-SIM card cut from a SIM
card. You can get a standard nano-SIM card from your service
provider.
1. Place your finger in the slot at the bottom of the back
cover to lift and remove the cover.
2. Hold the nano-SIM cards with their cut corner oriented as
shown and slip them into the card holder.
Speake
Charging/
micro-USB jack
3
4
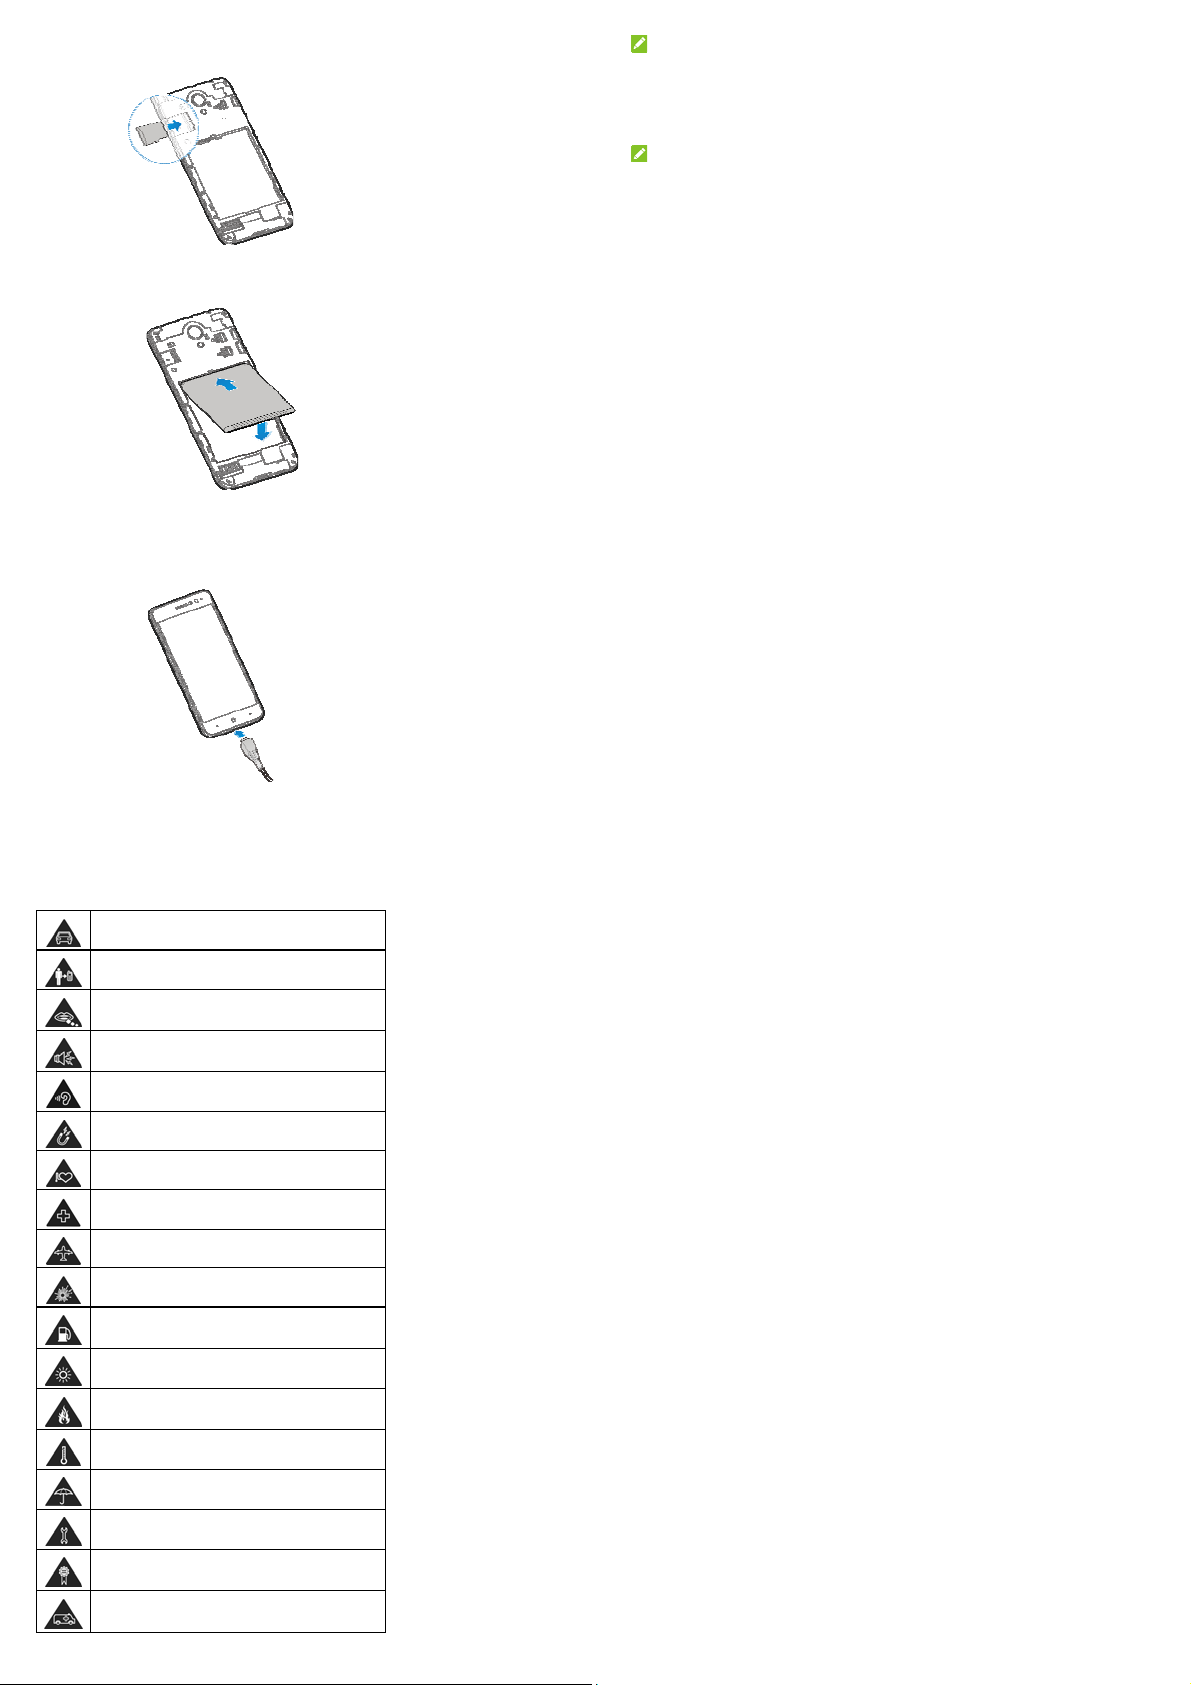
3. Hold your microSDXC card with the metal contacts facing
down and slide it into the microSDXC card slot.
4. Insert the battery by aligning the golden contacts on the
battery and those in the battery compartment. Gently
push down on the battery until it clicks into place.
NOTE:
If the battery is extremely low, you may be unable to power on
the phone even when it is being charged. In this case, try
again after charging the phone for at least 20 minutes. Contact
the customer service if you still cannot power on the phone
after prolonged charging.
NOTE:
If the screen freezes or takes too long to respond, try pressing
and holding the Power key for about 10 seconds t o restart the
phone.
Charging the Phone
Your phone’s batt ery should have enough power for the phone
to turn on, find a signal, and make a few calls. You should fully
charge the battery as soon as possible.
5
Product Safety Information
Don’t make or receive phone calls while driving.
Never text while driving.
Keep your phone at least 5 mm away from your
body while making calls.
Small parts may cause choking.
Your phone can produce a loud sound.
To prevent possible hearing damage, do not listen
at high volume levels for long periods.
Avoid contact with anything magnetic.
Keep away from pacemakers and other electronic
medical devices.
Turn off when asked to in hospitals and medical
facilities.
Turn off when told to on aircraft and at airport.
Turn off when near explosive materials or liquids.
Don’t use at gas stations.
Your phone may produce a bright or flashing light.
Don’t dispose of y our phon e in fi re.
Avoid extreme temperatures.
Avoid contact with liquids. Keep your phone dry.
Do not attempt to disassemble your phone.
Only use approved accessories.
Don’t rely on your phone as a primary device for
emergency communications.
7
6
FCC RF Exposure Information (SAR)
This phone is desig ned and manufactured no t to exc ee d t h e
emission limits for exposure to radio frequency (RF) energy
set by the Federal Co mm un ica ti ons Co mm iss io n of the Un it ed
States.
During SAR testing, this device was set to transmit at its
highest certified power level in all tested frequency bands, and
placed in positions that simulate RF exposure in usage
against the head with no separation, and near the body with
the separation of 10 mm. Although the SAR is determined at
the highest certified power level, the actual SAR level of the
device while operating can be well below the maximum value.
This is because the phone is designed to operate at multiple
power levels so as to use only the power required to reach the
network. In general, the closer you are to a wireless base
station antenna, the lower the power output.
The exposure standard for wireless devices employing a unit
of measurement is known as the Specific Absorption R a te, or
SAR.
The SAR limit set by the FCC is 1. 6 W/ k g. This device is
complied with SAR for general population /uncontrolled
exposure limits in ANSI/IEEE C95.1-1992 and had been
tested in accordance with the measurement methods and
procedures specified in IEEE1528.
The FCC has granted an Equipment Authorization for this
model phone wit h all r ep or ted SAR levels eval ua t e d as in
compliance with the FCC RF exposure guidelines. SAR
information on this model phone is on file with the FCC and
can be found under the Display Grant section of
www.fcc.gov/oet/ea/fccid after searching on FCC ID:
SRQ-ZTEBLADEA520.
8
 Loading...