

Page 1
ZEBRA
Cover
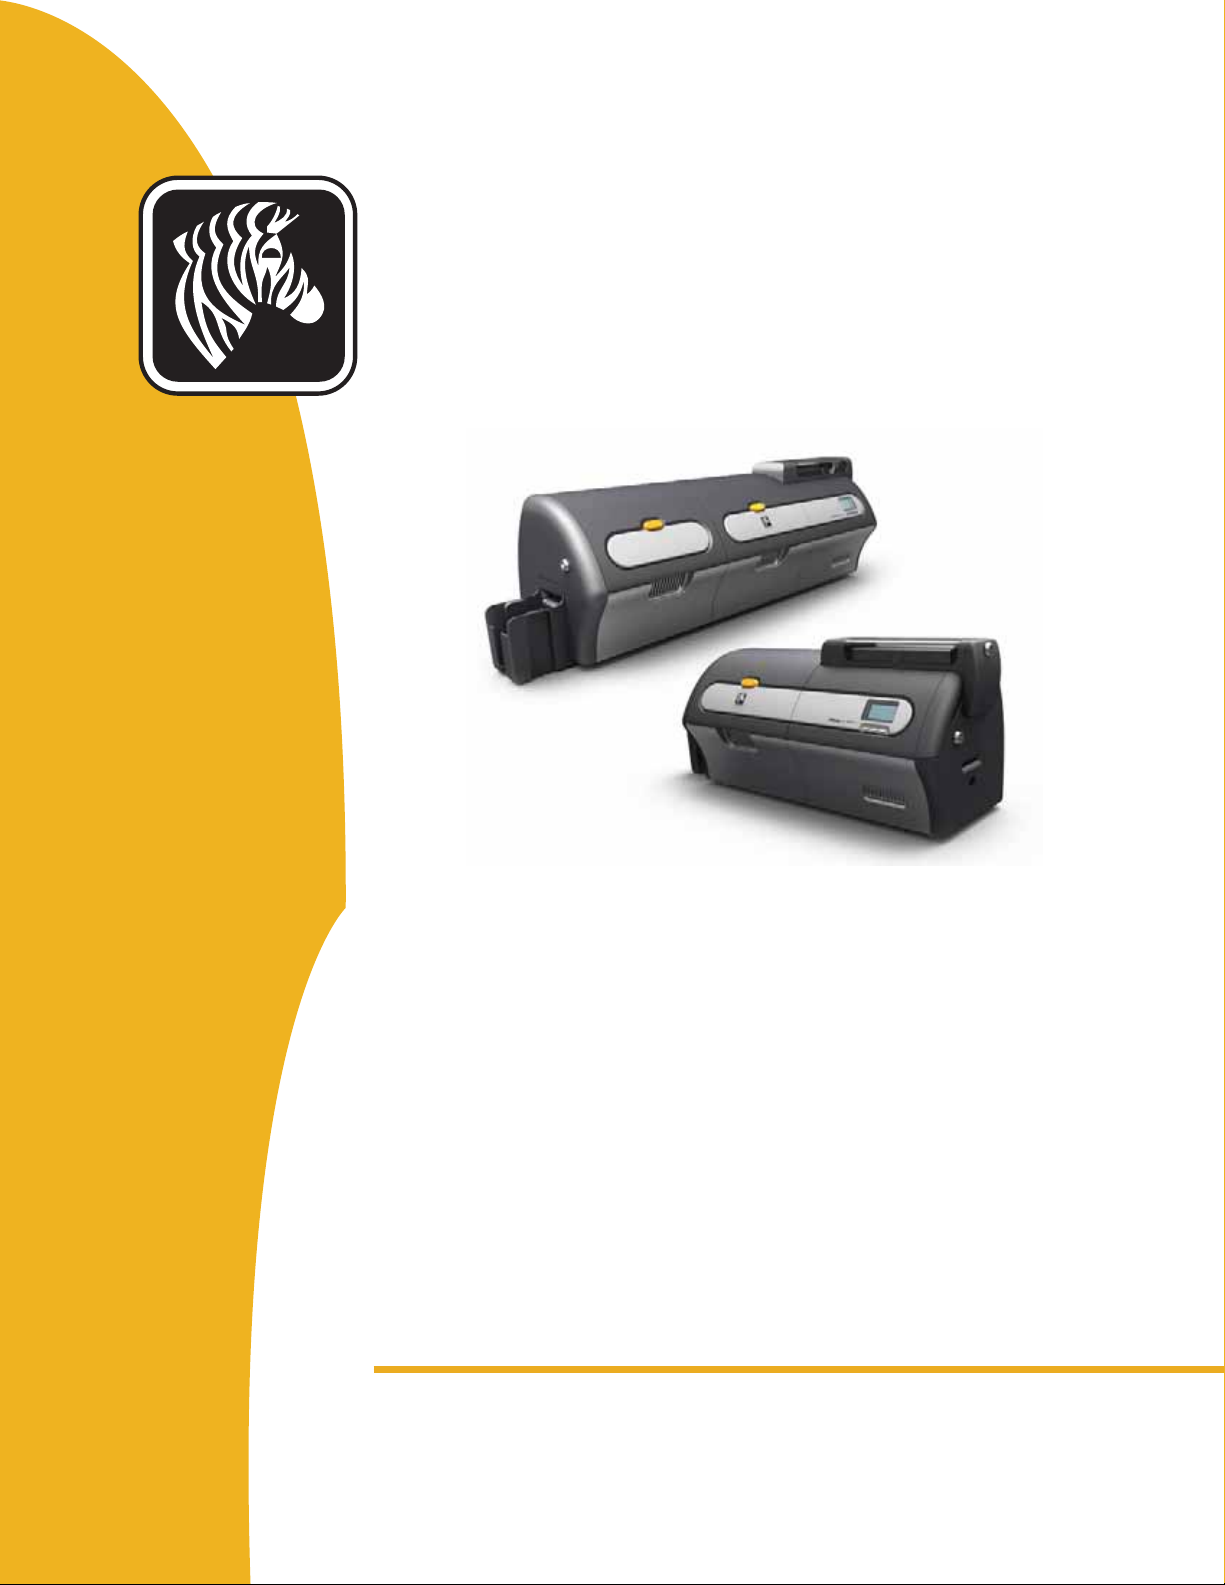
ZXP Series 7™
P1036101-002
User’s Manual
Page 2

Copyright Notice
© 2013 ZIH Corp.
This document contains information proprietary to Zebra Technologies Corporation. This
document and the information contained within is Copyrighted by Zebra Technologies
Corporation and may not be duplicated in full or in part by any person without written
approval from Zebra.
While every effort has been made to keep the information contained within current and
accurate as of the date of publication, no guarantee is given that the document is error-free or
that it is accurate with regard to any specification. Zebra Technologies Corporation reserves
the right to make changes, for the purpose of product improvement, at any time.
Trademarks
ZXP Series 7 is a trademark and Zebra is a registered trademark of Zebra Technologies
Corporation. Windows is a registered trademark of Microsoft Corporation in the United States
and other countries. All other trademarks or registered trademarks are marks of their
respective holders.
Product Disposal
Product Disposal Information • Do not dispose of this product in unsorted municipal
waste. This product is recyclable, and should be recycled according to your local
standards. For more information, please see our web site at:
http://www.zebra.com/environment
P1036101-002 Rev. A
Page 3

Compliance and Regulatory Statements
FCC - Compliance Statement (USA)
This device complies with Part 15 rules. Operation is subject to the following two conditions:
1. This device may not cause harmful interference, and
2. This device must accept any interference received, including interference that may cause undesired
operation.
This equipment has been tested and found to comply with the limits for Class A Digital Devices, pursuant
to Part 15 of the FCC Rules. These limits are designed to provide reasonable protection against harmful
interference when the equipment is operated in a commercial environment. This equipment generates,
uses, and can radiate radio frequency energy and, if not installed and used in accordance with the product
manuals, may cause harmful interference to radio communications. However, there is no guarantee that
interference will not occur in a particular installation. If this equipment does cause harmful interference to
radio or television reception, the user is encouraged to do one or more of the following measures:
Reorient or relocate the receiving antenna.
Increase the separation between the equipment and receiver.
Connect the equipment into an outlet on a circuit different from that to which the receiver is
connected.
Consult the dealer or an experienced RF service technician for help.
Important:
1. The radio must be installed with a minimum 20 cm separation between the user and the antenna.
2. The radio must not be co-located or used in simultaneous transmitting condition with another radio.
3. The host system shall have a label to indicate that the system contains a certified module.
An example is “Contains FCC ID : I28-W2WLAN11G , IC ID: 3798B-W2WLAN11G; or
”Contains FCC ID : I28-RFIDM6EM , IC ID: 3798B-RFIDM6EM.”
4. The radio is for indoor use only in the 5150-5250 GHz frequency range.
The user is cautioned that any changes or modifications not expressly approved by Zebra Technologies
could void the user’s authority to operate the equipment. To ensure compliance, this printer must be used
with fully shielded communication cables.
Brasil - Aviso da Anatel
Este equipamento opera em caráter secundário, isto é, não tem direito a proteção contra interferência
prejudicial, mesmo de estações do mesmo tipo, e não pode causar interferência a sistemas operando em
caráter primário.
"Este produto está homologado pela ANATEL, de acordo com os procedimentos regulamentados pela
Resolução 242/2000, e atende aos requisitos técnicos aplicados"
Para maiores informações, consulte o site da ANATEL www.anatel.gov.br
Agência Nacional
de Telecomunicações
Canadian DOC Compliance Statement
Cet appareil numérique de la classe A est conforme à la norme NMB-003 du Canada.
This Class A digital apparatus complies with Canadian ICES-003.
Industry Canada (IC) Warning
Le présent appareil est conforme aux CNR d'Industrie Canada ap-plicables aux appareils radio exempts
de licence. L'exploitation est auto-risée aux deux conditions suivantes : (1) l'appareil ne doit pas produire
de brouillage, et (2) l'utilisateur de l'appareil doit accepter tout brouillage radioélectrique subi, même si le
brouillage est susceptible d'en compro-mettre le fonctionnement.
This device complies with Industry Canada license-exempt RSS standard(s). Operation is subject to the
following two conditions: 1) This device may not cause interference., 2) This device must accept any
interference, including interference that may cause undesired operation of the device.
UHF RFID Approved Antenna information
Wireless Approved Antenna information
P1036101-002 Zebra ZXP Series 7 Card Printer User’s Manual iii
Only Zebra approved antennas are allowed and cannot be user replaceable.
Antenna PN: Zebra Technologies P1033567-01
Type: Patch
Gain: -10 dBi
Only Zebra approved antennas are allowed and cannot be user replaceable.
802.11 b/g
Antenna PN: Laird Technologies WCR2400SMRP
Gain: 1.3 dBi @ 2.4 GHz
Impedance: 50 Ω
Page 4

Agency Approvals
Zebra ZXP Series 7 Card Printer complies with following applicable directives and standards
for the ITE: Residential, Commercial & Light Industry environments
• For US/Canada/Mexico/Australia&NZ
• FCC Class A, CFR 47, Part 15 Subpart B
• Part15 Subpart C
• Canadian STD RSS-210
•NOM-NYCE (Mexico)
• EN60950: EN60950-1 Safety Standard (TUV & NRTL)
• RCM (Australia)
• For Europe (Applicable Directives and Supporting Standards):
• 2004/108/EC EMC Directive, EN55022: Class A,
• EN55024, EN61000-3-2, EN61000-3-3,
• 2006/95/EC LVD Directive, EN60950-1, CB Scheme
iv Zebra ZXP Series 7 Card Printer User’s Manual P1036101-002
Page 5

Declarations of Conformity
ZEBRA TECHNOLOGIES CORPORATION
Declares that the following Information Technology Equipment
complies with following applicable directives and standards for the
ITE: Residential, Commercial & Light Industry environments
Applicable Directives and Supporting Standards:
2004/108/EC EMC Directive, EN55022:2010 Class A,
EN55024: 2010, EN61000-3-2:2006+A2:2009, EN61000-3-3:2008
2006/95/EC LVD Directive, EN60950-1:2006+A1:2010, CB Scheme
Applicable Directives and Supporting Standards:
99/5/EC R&TTE Directive, ETSI EN 301 489-3 V1.4.1 (2002-08), EN 300 220-2 V2.1.2 (2007-06)
For a formal certificate, please contact the Compliance Office at Zebra’s Agoura Hills facility.
Zebra ZXP Series 7 Card Printer
RFID Enabled
EUROPE:
Norway Only: This product is also designed for IT power system with phase to phase
voltage 230V. Earth grounding is via the polarized, 3-wire power cord.
FI: “Laite on liitettävä suojamaadoitus koskettimilla varustettuun pistorasiaan”
SE: “Apparaten skall anslutas till jordat uttag”
NO: “Apparatet må tilkoples jordet stikkontakt”
Japanese Notification
P1036101-002 Zebra ZXP Series 7 Card Printer User’s Manual v
Page 6
Icons
Throughout this manual, different icons highlight important information, as follows:
Note • Indicates information that emphasizes or supplements important points of the
main text.
Important • Advises you of information that is essential to complete a task, or points out the
importance of specific information in the text.
Provides an example or scenario to demonstrate or clarify a section of text.
Electrostatic Discharge • Warns you of the potential for electrostatic discharge damage
to parts and assemblies.
Electric Shock • Warns you of a potential electric shock situation.
Hot Surface • Warns you of a situation where excessive heat could cause a burn.
Caution • Advises you that failure to take or avoid a specific action could result in
physical harm to you, or could result in physical damage to the hardware.
Zebra Supplies
Genuine Zebra supplies meet stringent quality standards and are recommended for optimal
printing quality and proper printer performance. ZXP Series 7 printers are designed to work
only with Zebra True Colours
http://www.zebra.com/supplies.
Zebra Contacts
Support and Services: http://www.zebra.com/contact
Knowledge Base: https://km.zebra.com
®
Ribbons and Zebra True Secure™ Laminates. For details, go to
vi Zebra ZXP Series 7 Card Printer User’s Manual P1036101-002
Page 7

Contents
1 • Introduction . . . . . . . . . . . . . . . . . . . . . . . . . . . . . . . . . . . . . . . . . . . . . . . 1
Description . . . . . . . . . . . . . . . . . . . . . . . . . . . . . . . . . . . . . . . . . . . . . . . . . . . . 1
Printer Components . . . . . . . . . . . . . . . . . . . . . . . . . . . . . . . . . . . . . . . . . . . . . 2
2 • Installation and Setup. . . . . . . . . . . . . . . . . . . . . . . . . . . . . . . . . . . . . . . 3
General Information. . . . . . . . . . . . . . . . . . . . . . . . . . . . . . . . . . . . . . . . . . . . . . 3
Unpacking the Printer . . . . . . . . . . . . . . . . . . . . . . . . . . . . . . . . . . . . . . . . . . . . 4
Loading Cards. . . . . . . . . . . . . . . . . . . . . . . . . . . . . . . . . . . . . . . . . . . . . . . . . . 8
Installing the Feeder Cartridge and Output Hopper . . . . . . . . . . . . . . . . . . . . 10
Installing the Dual Cleaning Cartridge. . . . . . . . . . . . . . . . . . . . . . . . . . . . . . . 11
Installing the Manual Feed Cleaning Cassette . . . . . . . . . . . . . . . . . . . . . . . . 13
Loading a Print Ribbon . . . . . . . . . . . . . . . . . . . . . . . . . . . . . . . . . . . . . . . . . . 15
Loading the Laminate . . . . . . . . . . . . . . . . . . . . . . . . . . . . . . . . . . . . . . . . . . . 18
Connecting Power . . . . . . . . . . . . . . . . . . . . . . . . . . . . . . . . . . . . . . . . . . . . . . 31
Connecting the Printer to your Computer . . . . . . . . . . . . . . . . . . . . . . . . . . . . 32
Installing the Windows Printer Driver . . . . . . . . . . . . . . . . . . . . . . . . . . . . . . . 35
3 • Operation . . . . . . . . . . . . . . . . . . . . . . . . . . . . . . . . . . . . . . . . . . . . . . . . 49
Introduction . . . . . . . . . . . . . . . . . . . . . . . . . . . . . . . . . . . . . . . . . . . . . . . . . . . 49
Printing a Test Card. . . . . . . . . . . . . . . . . . . . . . . . . . . . . . . . . . . . . . . . . . . . . 50
Manual Card Feed. . . . . . . . . . . . . . . . . . . . . . . . . . . . . . . . . . . . . . . . . . . . . . 51
Operator Control Panel (OCP) . . . . . . . . . . . . . . . . . . . . . . . . . . . . . . . . . . . . 53
4 • Printer Settings and Adjustments . . . . . . . . . . . . . . . . . . . . . . . . . . . . 65
Introduction . . . . . . . . . . . . . . . . . . . . . . . . . . . . . . . . . . . . . . . . . . . . . . . . . . . 65
Printer Properties . . . . . . . . . . . . . . . . . . . . . . . . . . . . . . . . . . . . . . . . . . . . . . 66
Printing Preferences . . . . . . . . . . . . . . . . . . . . . . . . . . . . . . . . . . . . . . . . . . . . 75
P1036101-002 Zebra ZXP Series 7 Card Printer User’s Manual vii
Page 8

: Contents
5 • ZXP Series Toolbox. . . . . . . . . . . . . . . . . . . . . . . . . . . . . . . . . . . . . . . . 97
Introduction . . . . . . . . . . . . . . . . . . . . . . . . . . . . . . . . . . . . . . . . . . . . . . . . . . . 97
ZXP Series Toolbox Access . . . . . . . . . . . . . . . . . . . . . . . . . . . . . . . . . . . . . . 98
Information . . . . . . . . . . . . . . . . . . . . . . . . . . . . . . . . . . . . . . . . . . . . . . . . . . . 99
Configuration . . . . . . . . . . . . . . . . . . . . . . . . . . . . . . . . . . . . . . . . . . . . . . . . . 104
Cleaning . . . . . . . . . . . . . . . . . . . . . . . . . . . . . . . . . . . . . . . . . . . . . . . . . . . . 112
Print Test Card. . . . . . . . . . . . . . . . . . . . . . . . . . . . . . . . . . . . . . . . . . . . . . . . 115
Technology . . . . . . . . . . . . . . . . . . . . . . . . . . . . . . . . . . . . . . . . . . . . . . . . . . 120
Advanced Security . . . . . . . . . . . . . . . . . . . . . . . . . . . . . . . . . . . . . . . . . . . . 124
Print Viewer . . . . . . . . . . . . . . . . . . . . . . . . . . . . . . . . . . . . . . . . . . . . . . . . . . 127
6 • Cleaning. . . . . . . . . . . . . . . . . . . . . . . . . . . . . . . . . . . . . . . . . . . . . . . . 129
Cleaning the Printer. . . . . . . . . . . . . . . . . . . . . . . . . . . . . . . . . . . . . . . . . . . . 130
Cleaning the Laminator . . . . . . . . . . . . . . . . . . . . . . . . . . . . . . . . . . . . . . . . . 134
Dual Cleaning Cartridge . . . . . . . . . . . . . . . . . . . . . . . . . . . . . . . . . . . . . . . . 141
Manual Feed Cleaning Cassette . . . . . . . . . . . . . . . . . . . . . . . . . . . . . . . . . . 141
7 • Troubleshooting . . . . . . . . . . . . . . . . . . . . . . . . . . . . . . . . . . . . . . . . . 143
Introduction . . . . . . . . . . . . . . . . . . . . . . . . . . . . . . . . . . . . . . . . . . . . . . . . . . 143
OCP Test Cards . . . . . . . . . . . . . . . . . . . . . . . . . . . . . . . . . . . . . . . . . . . . . . 150
Ethernet. . . . . . . . . . . . . . . . . . . . . . . . . . . . . . . . . . . . . . . . . . . . . . . . . . . . . 151
8 • Technical Specifications . . . . . . . . . . . . . . . . . . . . . . . . . . . . . . . . . . 153
Standard features . . . . . . . . . . . . . . . . . . . . . . . . . . . . . . . . . . . . . . . . . . . . . 153
Optional features . . . . . . . . . . . . . . . . . . . . . . . . . . . . . . . . . . . . . . . . . . . . . . 153
Specifications . . . . . . . . . . . . . . . . . . . . . . . . . . . . . . . . . . . . . . . . . . . . . . . . 154
Appendix A • Connecting to a Network . . . . . . . . . . . . . . . . . . . . . . . . . 159
Appendix B • Accessing a Network Printer via a Web Browser . . . . . 167
Appendix C • WiFi Connectivity . . . . . . . . . . . . . . . . . . . . . . . . . . . . . . . 171
Appendix D • Magnetic Card Encoder . . . . . . . . . . . . . . . . . . . . . . . . . . 179
Appendix E • Smart Card Options . . . . . . . . . . . . . . . . . . . . . . . . . . . . . 187
Appendix F • Barcode Reader. . . . . . . . . . . . . . . . . . . . . . . . . . . . . . . . . 193
viii Zebra ZXP Series 7 Card Printer User’s Manual P1036101-002
Page 9

1
Introduction
Description
This Manual provides detailed information on the installation and operation of Zebra
ZXP Series 7 Card Printers manufactured by Zebra Technologies Corporation.
The ZXP Series 7 offers the choice of single- or dual-sided direct to card printers with a range
of options that can be installed in the factory or added later so the printer can be scaled as
business needs grow or demands change.
The single-sided Laminator lays down and seals a laminating film on the top surface of the
printed card for added security; the dual-sided Laminator lays down and seals laminating
film on both the top and bottom surfaces of the printed card. A variety of Laminating Films
are available for specific uses; for details, go to
References to “the printer” in this document apply to either the single-sided or the dualsided Printer.; similarly, references to “the laminator” apply to either the single-sided or the
dual- sided Laminator.
http://www.zebra.com/supplies.
P1036101-002 Zebra ZXP Series 7 Card Printer User’s Manual 1
Page 10

1: Introduction
Print Cover
Release Button
Output
Hopper
Feeder Cartridge
Manual
Feed Slot
Operator Control
Panel (OCP)
Reject Bin
Ribbon Drawer
Options Cover
Laminator Cover
Release Button
Laminator
Bottom Cover
Print Cover
Release Button
Feeder Cartridge
Manual
Feed Slot
Reject Bin
Ribbon Drawer
Options Cover
Output
Hopper
Operator Control
Panel (OCP)
Printer Components
Printer Components
Printer only
Printer with Laminator
2 Zebra ZXP Series 7 Card Printer User’s Manual P1036101-002
Page 11

Installation and Setup
General Information
This section will guide you through the installation and setup of your Card Printer. This
consists of the following procedures, which should be performed in the order presented.
2
• Unpacking the Printer. . . . . . . . . . . . . . . . . . . . . . . . . . . . . . . . . . . . . . . . . . . 4
• Loading Cards . . . . . . . . . . . . . . . . . . . . . . . . . . . . . . . . . . . . . . . . . . . . . . . . 8
• Installing the Dual Cleaning Cartridge. . . . . . . . . . . . . . . . . . . . . . . . . . . . . 11
• Installing the Manual Feed Cleaning Cassette . . . . . . . . . . . . . . . . . . . . . . . 13
• Loading a Print Ribbon . . . . . . . . . . . . . . . . . . . . . . . . . . . . . . . . . . . . . . . . 15
• Loading the Laminate. . . . . . . . . . . . . . . . . . . . . . . . . . . . . . . . . . . . . . . . . . 18
• Connecting Power . . . . . . . . . . . . . . . . . . . . . . . . . . . . . . . . . . . . . . . . . . . . 31
• Connecting the Printer to your Computer . . . . . . . . . . . . . . . . . . . . . . . . . . 32
• Installing the Windows Printer Driver . . . . . . . . . . . . . . . . . . . . . . . . . . . . . 35
P1036101-002 Zebra ZXP Series 7 Card Printer User’s Manual 3
Page 12
2: Installation and Setup
Unpacking the Printer
Unpacking the Printer
Printer without a Laminator
Step 1. Inspect the shipping container to ensure that no damage has occurred during
shipment. If any damage is apparent, file a claim with the shipper.
Step 2. Open the shipping container.
Step 3. Remove the packing material and accessories.
Important • Save all the packing material and the shipping carton in case the Printer needs to
be moved or shipped. If the original material is lost or damaged, a replacement Shipping Kit
can be ordered from Zebra.
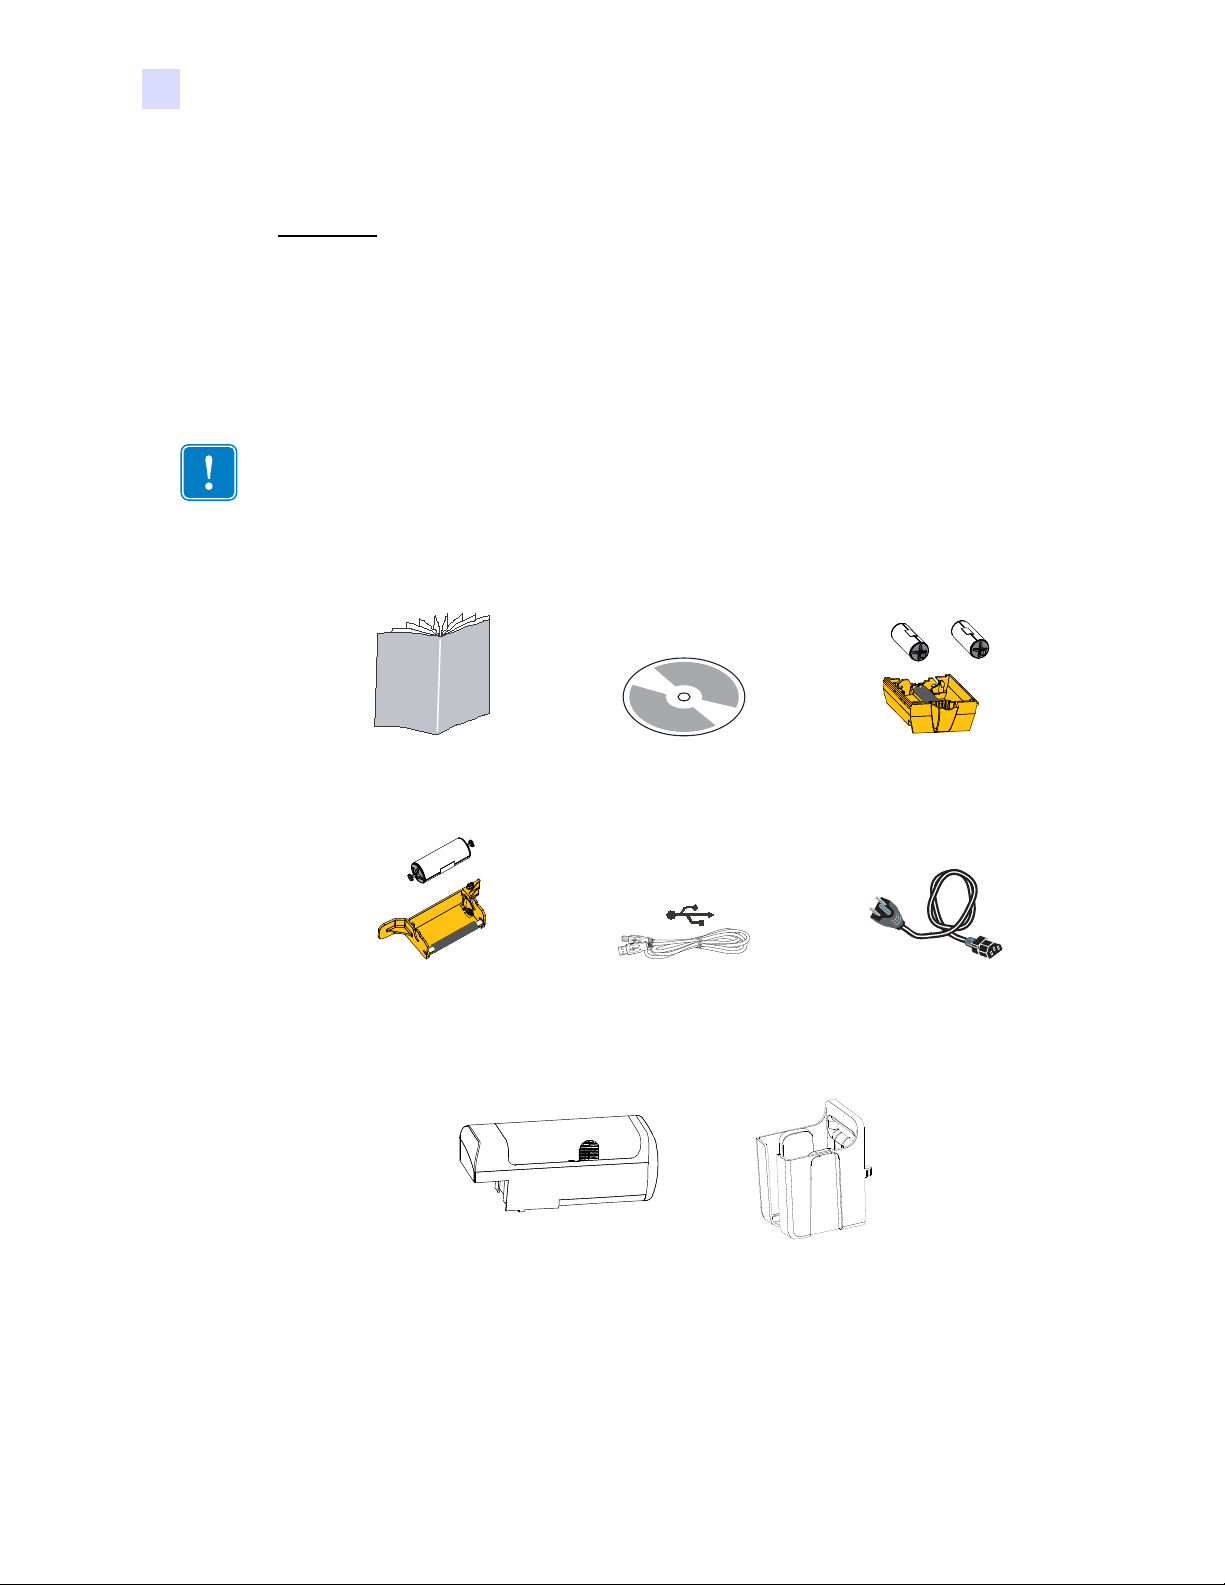
Step 4. Make sure the following items are included with the Printer:
Quick Start Guide CD-ROM with InstallWizard Dual Cleaning Cartridge
USB
Manual Feed
Cleaning Cassette
Feeder Cartridge Output Hopper
USB Cable Power Cable
If any items are missing, please contact your supplier.
4 Zebra ZXP Series 7 Card Printer User’s Manual P1036101-002
Page 13

2: Installation and Setup
Unpacking the Printer
Caution • The Printer weighs approximately 12.2 kg (26.9 lbs). Use two people to lift it
out of the shipping carton.
Step 5. Lift the Printer and Laminator out of the carton by holding it with both hands.
Step 6. Place the Printer in a location that meets the following requirements:
Important • When moving the printer from storage (23º F/-5º C to 158º F/70º C) to the
operating area (59º F/15º C to 95º F/35º C), allow time to acclimate prior to operation.
• A reasonably dust-free and dirt-free environment.
• Flat surface at least 30 in (762 mm) x 12 in (305 mm) that can support the
weight of the Printer; additional space preferred. Allow a 4-inch clearance,
minimum, on all sides.
• Vertical clearance at least 32 in (813 mm).
• Temperature within the range of 59° to 95°F (15° to 35°C).
• Relative humidity 20 to 80% inclusive, non-condensing.
• Auto-switching single-phase AC Power, 90V~264V AC, 47-63Hz (50-60Hz
nominal); see Electrical specifications on page 157 for power consumption.
Step 7. Remove the Printer from the protective bag.
P1036101-002 Zebra ZXP Series 7 Card Printer User’s Manual 5
Page 14
2: Installation and Setup
Single
Sided &
Dual
Sided
Dual
Sided
only
Unpacking the Printer
Printer with a Laminator
Step 1. Inspect the shipping container to ensure that no damage has occurred during
shipment. If any damage is apparent, file a claim with the shipper.
Step 2. Open the shipping container.
Step 3. Remove the packing material and accessories.
Important • Save all the packing material and the shipping carton in case the Printer needs to
be moved or shipped. If the original material is lost or damaged, a replacement Shipping Kit
can be ordered from Zebra.
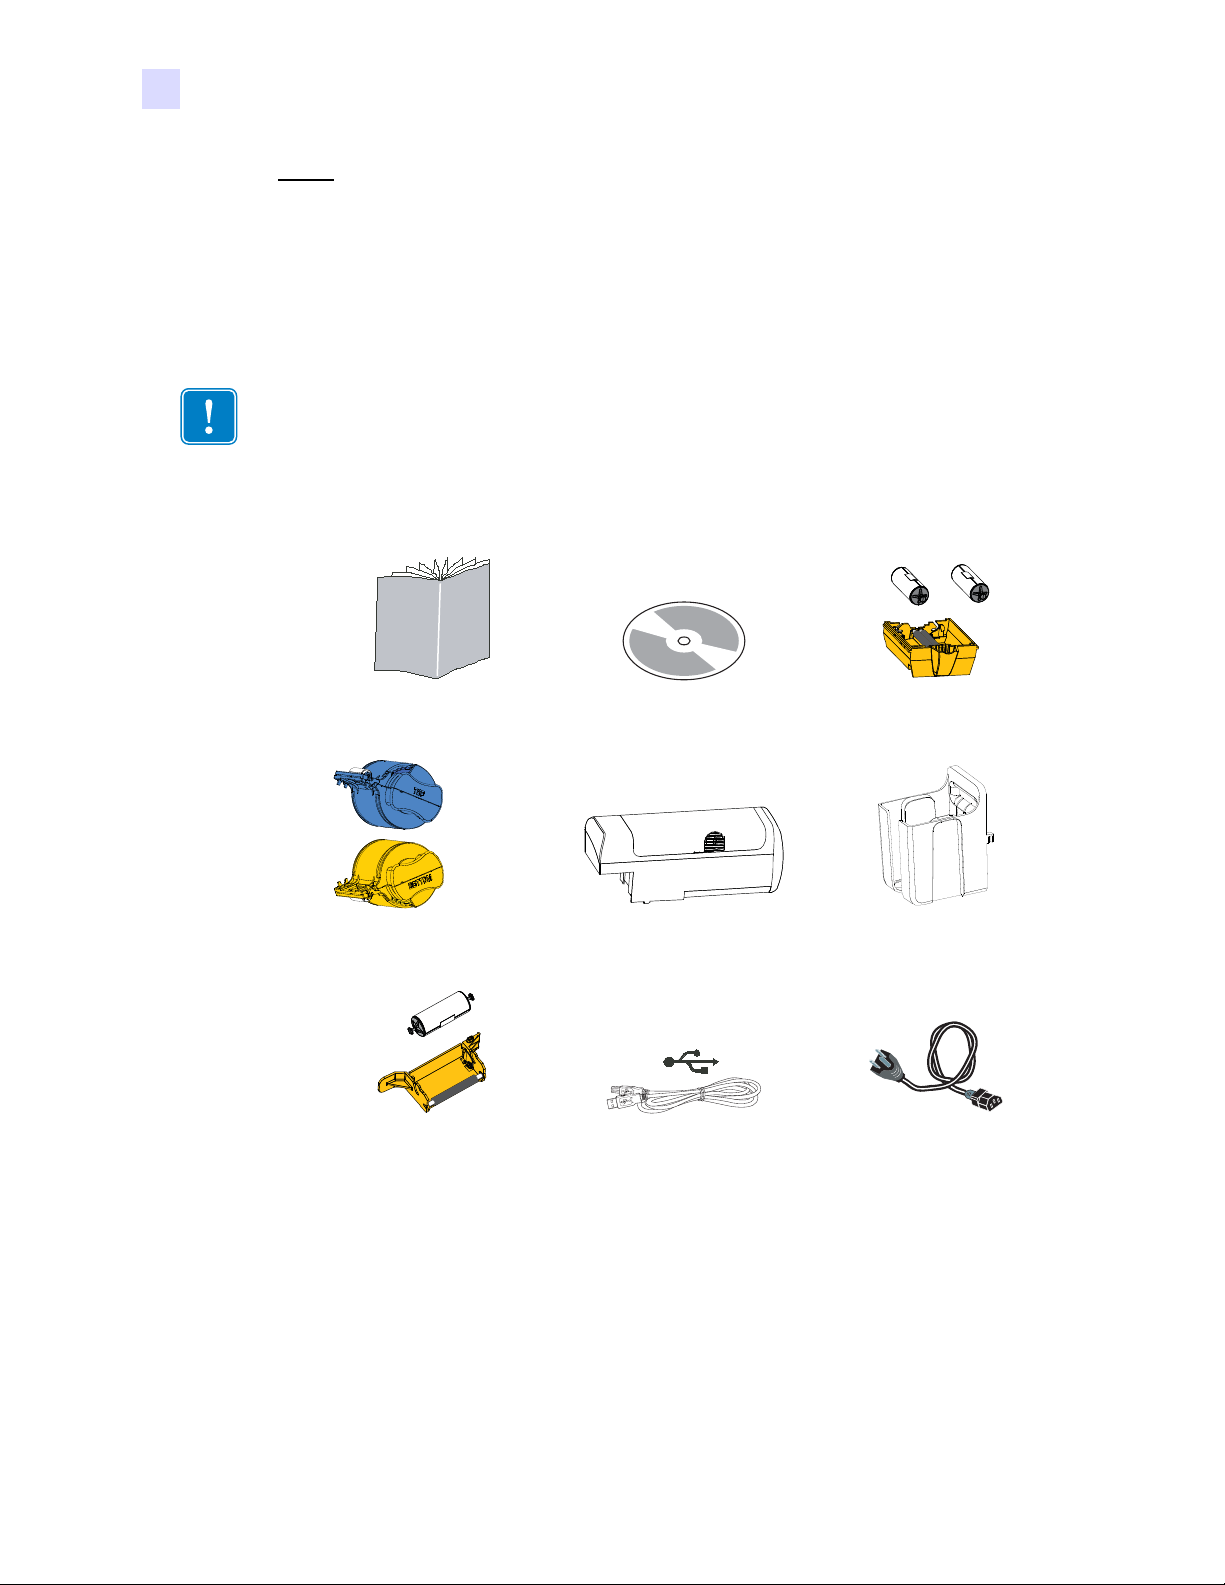
Step 4. Make sure the following items are included with the Printer:
Quick Start Guide CD-ROM with InstallWizard Dual Cleaning Cartridge
Laminate Cassette(s) Feeder Cartridge Output Hopper
USB
Manual Feed
Cleaning Cassette
USB Cable Power Cable
If any items are missing, please contact your supplier.
6 Zebra ZXP Series 7 Card Printer User’s Manual P1036101-002
Page 15

2: Installation and Setup
Unpacking the Printer
Caution • The Printer with Laminator weighs approximately 17.9 kg (39.5 lbs). Use two
people to lift it out of the shipping carton.
Step 5. Lift the Printer out of the carton by holding it with both hands.
Step 6. Place the Printer in a location that meets the following requirements:
Important • When moving the printer from storage (23º F/-5º C to 158º F/70º C) to the
operating area (59º F/15º C to 95º F/35º C), allow time to acclimate prior to operation.
• A reasonably dust-free and dirt-free environment.
• Flat surface at least 40 in (1016 mm) x 12 in (305 mm) that can support the
weight of the Printer; additional space preferred. Allow a 4-inch clearance,
minimum, on all sides.
• Vertical clearance at least 32 in (813 mm).
• Temperature within the range of 59° to 95°F (15° to 35°C).
• Relative humidity 20 to 80% inclusive, non-condensing.
• Auto-switching single-phase AC Power, 90V~264V AC, 47-63Hz (50-60Hz
nominal); see Electrical specifications on page 157 for power consumption.
Step 7. Remove the Printer from the protective bag.
P1036101-002 Zebra ZXP Series 7 Card Printer User’s Manual 7
Page 16

2: Installation and Setup
Loading Cards
Loading Cards
Caution • DO NOT bend cards or touch print surfaces as this can reduce print quality.
The surface of the cards must remain clean and dust free. Always store cards in an
enclosed container. Ideally, use cards as soon as possible after unwrapping.
Step 1. Remove the wrapping from the card stack.
Step 2. Holding the card stack by the sides (do not touch the print surfaces), hold it
vertically against a flat surface such as a desktop. If the stack is too thick for your
hand to hold it comfortably, use about half a stack at a time.
Step 3. Push the stack back and forth to an angle of about 45
all of the cards.
Note • Static charges and edge burrs from the card die-cutting process can render individual
cards stuck together with significant adhesion force. These cards must be physically
separated from each other before inserting into the feeder; if not separated, feeding or
printing problems may occur.
Step 4. Restore the card stack to its original squared-off condition.
° from vertical, so as to separate
8 Zebra ZXP Series 7 Card Printer User’s Manual P1036101-002
Page 17

2: Installation and Setup
Loading Cards
Step 5. Open the Feeder Cartridge Door, and slide the Card Stack Pusher all the way to the
right, until it locks in place.
Step 6. Place the card stack in the Feeder Cartridge in the correct orientation shown below.
For Cards with a Barcode, see Appendix F for details.
Step 7. For optimum performance, ensure that the cards are fully seated; then close the
Feeder Cartridge Door.
P1036101-002 Zebra ZXP Series 7 Card Printer User’s Manual 9
Page 18
2: Installation and Setup
1
2
Installing the Feeder Cartridge and Output Hopper
Installing the Feeder Cartridge and Output Hopper
Feeder Cartridge
The Feeder Cartridge is positioned on the right side of the Printer and holds the cards to
be printed. Note that once in place, you can add cards as needed to the Feeder Cartridge
without removing it from the Printer.
Step 1. Install the Feeder Cartridge by sliding it down and to the left into the receptacle.
You will need to apply enough pressure for it to “snap” and lock securely into place.
Step 2. Ensure that the Feeder Cartridge locks securely in place.
Output Hopper
The Output Hopper is positioned on the left side of the Printer and receives the printed cards.
Step 1. Install the Output Hopper by inserting the two tabs on the right side of the hopper
into the two slots on the left side of the Printer.
Step 2. Ensure that the Output Hopper locks securely in place.
10 Zebra ZXP Series 7 Card Printer User’s Manual P1036101-002
Page 19

Installing the Dual Cleaning Cartridge
The Dual Cleaning Cartridge cleans the cards entering the Printer from the Feeder Cartridge.
The cartridge consists of a cartridge frame and two adhesive rollers.
Step 1. Locate the cartridge frame and the two adhesive rollers.
Step 2. Insert the adhesive rollers into the cartridge frame.
2: Installation and Setup
Installing the Dual Cleaning Cartridge
Step 3. Peel the protective wrapper from the adhesive rollers to expose the sticky surface.
Do not touch the sticky surface.
Step 4. The Dual Cleaning Cartridge is ready to use.
P1036101-002 Zebra ZXP Series 7 Card Printer User’s Manual 11
Page 20

2: Installation and Setup
Installing the Dual Cleaning Cartridge
Step 5. Open the Options Cover.
Step 6. Locate the area where the Dual Cleaning Cartridge will be installed.
Step 7. Hold the cartridge by the extended handle.
Step 8. Insert the lip of the cartridge into the slot, and push forward, into the printer, until it
snaps into place.
Step 9. If you are also installing the Manual Feed Cleaning Cassette, continue to the next
page; otherwise, close the Options Cover.
12 Zebra ZXP Series 7 Card Printer User’s Manual P1036101-002
Page 21

2: Installation and Setup
Installing the Manual Feed Cleaning Cassette
Installing the Manual Feed Cleaning Cassette
The Manual Feed Cleaning Cassette cleans the cards entering the Printer from the Manual
Feed Slot. The cassette consists of a frame and an adhesive roller.
Step 1. Locate the cassette frame and adhesive roller.
Step 2. Insert the adhesive roller into the cassette frame.
Step 3. Peel the protective wrapper from the adhesive roller to expose the sticky surface.
Do not touch the sticky surface.
Step 4. The Manual Feed Cleaning Cassette is ready to use.
P1036101-002 Zebra ZXP Series 7 Card Printer User’s Manual 13
Page 22
2: Installation and Setup
Installing the Manual Feed Cleaning Cassette
Step 5. If not already done, open the Options Cover.
Step 6. Locate the area where the Manual Feed Cleaning Cassette will be installed.
Step 7. Hold the cassette by the extended handle.
Step 8. Slide the cassette into place.
Step 9. Insert the lip of the cassette into the slot in the back panel.
Step 10. Press the cassette down until it seats and latches.
Step 11. Close the Options Cover.
14 Zebra ZXP Series 7 Card Printer User’s Manual P1036101-002
Page 23

Loading a Print Ribbon
1
2
3
The ZXP Series 7 Printer is designed to work only with Zebra True Colours® Ribbons in order
to achieve rich, vibrant image production over the full-color spectrum.
Step 1. Press the Print Cover Release Button.
2: Installation and Setup
Loading a Print Ribbon
Step 2. Open the Print Cover.
Step 3. Slide out the Ribbon Drawer until it stops. It is not necessary to remove it.
Step 4. Remove the printhead protective foam, if present.
P1036101-002 Zebra ZXP Series 7 Card Printer User’s Manual 15
Page 24
2: Installation and Setup
Loading a Print Ribbon
Step 5. Take the print ribbon out of the box.
Step 6. Carefully unroll the print ribbon. Note that there is a clear leader with a sticky
surface holding the print ribbon in place. This leader needs to be pulled free and
rolled onto the take-up spool.
Step 7. Make sure the print ribbon comes off the bottom of the supply spool and feeds to the
bottom of the take-up spool.
Step 8. Set the print ribbon supply spool (PURPLE) into the supply carrier (PURPLE).
Step 9. Set the empty take-up spool (BLUE) into the take-up carrier (BLUE).
Step 10. Rotate the spools as required to take up excess slack in the ribbon.
16 Zebra ZXP Series 7 Card Printer User’s Manual P1036101-002
Page 25

Step 11. Close the Ribbon Drawer.
2: Installation and Setup
Loading a Print Ribbon
Step 12. Close the Print Cover, and press down until it latches securely.
P1036101-002 Zebra ZXP Series 7 Card Printer User’s Manual 17
Page 26

2: Installation and Setup
Loading the Laminate
Loading the Laminate
Opening the Laminator
Note • The Lower Laminate Cassette is only present on the dual-sided laminator.
Step 1. Press the Laminator Cover Release Button, and lift the cover to its upright position. It
will remain in that position.
Step 2. Open the Laminator Bottom Cover.
18 Zebra ZXP Series 7 Card Printer User’s Manual P1036101-002
Page 27

Removing the Laminate Cassette(s)
Step 1. Rotate the locking lever in the direction indicated in the figure below.
2: Installation and Setup
Loading the Laminate
Step 2. Rotate the cassette to the mechanical stop in the direction indicated below.
P1036101-002 Zebra ZXP Series 7 Card Printer User’s Manual 19
Page 28

2: Installation and Setup
Loading the Laminate
Step 3. Remove the cassette(s) by pulling each cassette straight out from its spindle.
Step 4. Open the cassette(s), like a clam shell, by separating its two halves. Grasp the two
halves firmly with your fingers, then pull it apart. Do NOT use tools. (Upper
Laminate Cassette shown.)
Step 5. If there is an empty laminate core in the cassette, remove it.
20 Zebra ZXP Series 7 Card Printer User’s Manual P1036101-002
Page 29

Loading the Laminate Cassette(s)
Step 1. Remove a new roll of laminate from its packaging. There are two different laminate
rolls, one for the Upper Cassette (Blue) and one for the Lower Cassette (Gold).
Important • The geared flange on the laminate spool is removable, but do not remove it. If it
does come off, snap it back onto the end of the spool.
Step 2. Place the roll of laminate in the Upper Laminate Cassette (present on both the
single-sided laminator and dual-sided laminator). Note the orientation of the laminate
spool with respect to the laminate cassette as shown in the figure below.
2: Installation and Setup
Loading the Laminate
Step 3. Pull out an inch or two of laminate past the lip of the cassette.
Step 4. Close the cassette by firmly pressing the “clamshell” together. You will hear a click
and feel a detent when the halves of the cassette seat together.
Step 5. Remove a second new roll of laminate from its packaging (for dual-sided
laminator only).
Step 6. Place the roll of laminate in the Lower Laminate Cassette (present on the dual-
sided laminator only). Note the orientation of the laminate spool with respect to the
laminate cassette as shown in the figure below.
P1036101-002 Zebra ZXP Series 7 Card Printer User’s Manual 21
Page 30

2: Installation and Setup
Loading the Laminate
Step 7. Pull out an inch or two of laminate past the lip of the cassette.
Step 8. Close the cassette by firmly pressing the “clamshell” together. You will hear a click
and feel a detent when the halves of the cassette seat together.
Step 9. Cut the laminate square (as close to perpendicular as possible) with scissors. Hold the
scissors in one hand. Hold the cassette with the other hand. Press the laminate firmly
against the white roller thereby keeping the laminate from moving while cutting.
22 Zebra ZXP Series 7 Card Printer User’s Manual P1036101-002
Page 31

2: Installation and Setup
0 - 0.5 mm
0 - 1/32"
0 - 0.5 mm
0 - 1/32"
Loading the Laminate
Step 10. Rotate the core to adjust the laminate overhang. Stop when the end of the laminate is
just beyond the lip of the cassette, as shown below.
Important • Check for laminate overhang any time the locking lever is pressed or the
cassette is removed.
P1036101-002 Zebra ZXP Series 7 Card Printer User’s Manual 23
Page 32

2: Installation and Setup
Loading the Laminate
Installing the Laminate Cassette(s)
Step 1. If the laminate cassettes are not already removed, remove the cassettes.
Step 2. Slide the cassette onto the spindle.
24 Zebra ZXP Series 7 Card Printer User’s Manual P1036101-002
Page 33

2: Installation and Setup
Loading the Laminate
Step 3. Ensure the cassette is fully seated on the spindle. Gently press the cassette until it is
flush against the laminator frame.
Step 4. Rotate each cassette (in the direction indicated in the figure below) until it stops.
P1036101-002 Zebra ZXP Series 7 Card Printer User’s Manual 25
Page 34

2: Installation and Setup
Loading the Laminate
Step 5. Apply increasing rotational pressure, and listen for the audible click when the
locking lever snaps into place.
Step 6. The laminate is installed
26 Zebra ZXP Series 7 Card Printer User’s Manual P1036101-002
Page 35

Laminating Contact Smart Cards
electrical contacts
index hole
rectangular cutout
Cut the laminate, splitting the
index hole
Use registered laminate for the top surface of a contact smart card. This type of laminate
has a repeating pattern of an index hole and a rectangular cutout to expose the card’s
electrical contacts.
2: Installation and Setup
Loading the Laminate
Step 1. Remove the Upper Laminate Cassette; see Page 19.
Step 2. Open the cassette, and remove the laminate if present.
Step 3. Load the smart card laminate into the cassette; see Page 21.
Step 4. Cut the laminate, splitting the index hole as shown.
P1036101-002 Zebra ZXP Series 7 Card Printer User’s Manual 27
Page 36

2: Installation and Setup
Loading the Laminate
Step 5. Rotate the core to adjust the laminate overhang. Stop when the end of the laminate
(not the edge of the index hole) is just beyond the lip of the cassette, as shown
on Page 22.
Step 6. Install the cassette; see Page 24 for details.
28 Zebra ZXP Series 7 Card Printer User’s Manual P1036101-002
Page 37

Using Partial-Width Laminate
Full-Width
Signature Panel
Magnetic Stripe
Note • Since partial-width laminates are only used for the back (i.e., lower) surface of the
card, this section only applies to the dual-sided laminator.
Laminates come in three widths:
“Full-Width” laminate is 2 in (51 mm) wide. The full-width laminate is used on the front (i.e.,
upper) or back (i.e., lower) surface of the card.
“Partial-Width” laminate is available in two widths:
• 1.66 in (42mm) wide laminate is used for cards with a writable signature panel
• 1.33 in (33 mm) wide laminate is used for cards with a magnetic stripe
For either partial-width laminate, a collar on the spool keeps the laminate positioned correctly.
2: Installation and Setup
Loading the Laminate
2“
1.66“
1.3”
BACK OF CARD
P1036101-002 Zebra ZXP Series 7 Card Printer User’s Manual 29
Page 38

2: Installation and Setup
Collar
Loading the Laminate
Using Partial-Width Laminate (continued)
Step 1. Remove the Lower Laminate Cassette; see Page 19.
Step 2. Open the cassette, and remove the laminate if present.
Step 3. Load the partial-width laminate into the cassette. Note that the collar on the laminate
spool is on the end opposite the geared flange.
Step 4. Trim the partial-width laminate; see Page 22.
Step 5. Rotate the core to adjust the laminate overhang; see Page 23.
Step 6. Install the cassette; see Page 24.
30 Zebra ZXP Series 7 Card Printer User’s Manual P1036101-002
Page 39

Connecting Power
1
2
(OFF)
Electric Shock • Limit AC power supplied to the Printer to 90V~264V, 47-63Hz (50-60Hz
nominal). Limit excess current draw to 16 amps or less, using an associated circuit
breaker or other such device. Never operate the Printer in a location where operator,
computer, or printer can get wet. Personal injury could result. The Printer must be
connected to an earthed electrical power source and properly protected against electrical
surges and grounding faults; the electrical reliability of the Printer is based on the
reliability of the main power source and the earth connection.
The Printer’s power supply is an internal unit that can only be serviced or replaced by
trained and authorized personnel.
2: Installation and Setup
Connecting Power
Step 1. Place the Printer’s power switch in the OFF ( )position.
Step 2. Depending on your local AC voltage, plug the appropriate power cord into the
Printer’s power connector and a grounded AC power source connection.
Important • DO NOT switch the printer on.
P1036101-002 Zebra ZXP Series 7 Card Printer User’s Manual 31
Page 40

2: Installation and Setup
10/100base-T
See Page 33
for details.
See Page 34
for details.
Connecting the Printer to your Computer
Connecting the Printer to your Computer
Interface Connector Locations
32 Zebra ZXP Series 7 Card Printer User’s Manual P1036101-002
USB
Page 41

USB Connection
Step 1. Connect the USB cable to the printer and the computer.
Step 2. Ensure that the printer’s power switch in the OFF ( ) position.
2: Installation and Setup
Connecting the Printer to your Computer
USB
P1036101-002 Zebra ZXP Series 7 Card Printer User’s Manual 33
Page 42

2: Installation and Setup
Connecting the Printer to your Computer
Ethernet Connection
Step 1. Connect the Ethernet Port on the rear of the printer to an Ethernet Network Port.
Step 2. Turn the printer’s power switch to the ON ( | ) position.
10/100base-T
10/100base-T
34 Zebra ZXP Series 7 Card Printer User’s Manual P1036101-002
Page 43

Installing the Windows Printer Driver
Installing the USB Printer Driver
Note • To install the Ethernet driver, see Page 41.
Step 1. If not already done, connect power to the printer. Turn power OFF.
Step 2. Connect the USB port on the rear of the printer to the computer’s USB port.
Step 3. Ensure that the Printer’s power switch is in the OFF (O) position.
Step 4. Insert the User Documentation and Drivers CD into the CD drive of the host
computer. The Main Menu will open.
Step 5. From the Main Menu, click Install Zebra Printer Driver.
Step 6. If a Printer and Driver is already installed on your computer, one of the following
Wel come windows will be displayed; otherwise go to Step 8.
2: Installation and Setup
Installing the Windows Printer Driver
Step 7. Choose the maintenance operation to be performed:
a. If you are installing a newer version of the driver, select Upgrade to install the
new driver.
b. If you are installing the same version driver, select Modify to install additional
Ethernet or USB printer drivers.
c. Select Remove to remove the current printer driver. When asked about
removing the smart card readers drivers, click Ye s to remove them; click No
to leave them installed. At the end of the un-install process, you will be asked
to re-boot your computer.
P1036101-002 Zebra ZXP Series 7 Card Printer User’s Manual 35
Page 44

2: Installation and Setup
Installing the Windows Printer Driver
Step 8. The InstallShield Wizard window will open. To proceed with the installation, click
the Next button.
Step 9. Select Install USB printer drivers, and click the Next button.
Step 10. Ensure that the printer’s power switch is in the OFF ( ) position, and click
the OK button. After installation of the driver, you will be prompted to turn on
the printer.
36 Zebra ZXP Series 7 Card Printer User’s Manual P1036101-002
Page 45

2: Installation and Setup
Installing the Windows Printer Driver
Step 11. This will bring up the License Agreement window. To proceed, select the I accept
the terms of the license agreement option; and click the Next button.
Step 12. This will bring up the Customer Information window. Enter your name and the
name of the company for which you work, and click the Next button.
P1036101-002 Zebra ZXP Series 7 Card Printer User’s Manual 37
Page 46

2: Installation and Setup
Installing the Windows Printer Driver
Step 13. This will bring up the Choose Destination Location window.
• To accept the default destination location where setup will install the files, click
the Next button.
- or -
• Click the Change button, select a folder where setup will install the files, and
click the Next button.
Step 14. This will bring up the Ready to Install the Program window. To continue, click the
Install button.
38 Zebra ZXP Series 7 Card Printer User’s Manual P1036101-002
Page 47

2: Installation and Setup
Installing the Windows Printer Driver
Step 15. Observe the driver installation via Setup Status window.
Step 16. The Congratulations window will appear. Turn on the USB printer. Read the
instructions carefully, and click the Next button.
P1036101-002 Zebra ZXP Series 7 Card Printer User’s Manual 39
Page 48

2: Installation and Setup
Installing the Windows Printer Driver
Step 17. When the InstallShield Wizard Complete window appears, click the Finish button.
Step 18. This completes USB driver installation.
Note • For optimum performance, you may need to change the card setup (card type,
orientation, etc.), encoding, and/or black panel settings via the Printer Driver; see Printing
Preferences on page 75.
40 Zebra ZXP Series 7 Card Printer User’s Manual P1036101-002
Page 49

Installing the Ethernet Printer Driver
Note • To install the USB driver, see Page 35.
Preparation
Before proceeding with the installation, you will need the IP Address of the Printer.
Step 1. The IP Address is accessed via the Operator Control Panel (OCP).
2: Installation and Setup
Installing the Windows Printer Driver
Step 2. Press the INFO button on the OCP (arrow above) to view the Printer Info menu.
Step 3. Press the NEXT button to view the Network Info menu.
Step 4. Record the IP (IPv4) address; e.g., 10.1.24.66.
Step 5. Press the NEXT button again to view the IPv6 address.
Step 6. Record the IPv6 address; e.g., 207:4DFF:FE45:6B22.
Step 7. Press the EXIT button to return to the Operational Mode Display
Step 8. Whether you choose the IPv4 address or the IPv6 address depends on the network
configuration in use.
P1036101-002 Zebra ZXP Series 7 Card Printer User’s Manual 41
Page 50

2: Installation and Setup
Installing the Windows Printer Driver
Installation
Important • The Ethernet printer need not be in the same subnet as the host. It can be in a
different subnet as long as it is reachable from the host.
Step 1. If not already done, connect power to the printer. Turn power ON ( | ).
Step 2. Connect the Ethernet port on the rear of the printer to the Ethernet network
connection or directly to the computer’s Ethernet port.
Step 3. Ensure that the Printer’s power switch is in the ON ( | ) position.
Step 4. Insert the User Documentation and Drivers CD into the CD drive of the host
computer. The Main Menu will open.
Step 5. From the Main Menu, click Install Printer Driver.
Step 6. If a Printer and Driver is already installed on your computer, one of the following
Wel come window will be displayed; otherwise go to, Step 8.
Step 7. Choose the maintenance operation to be performed:
a. If you are installing a newer version of the driver, select Upgrade to install the
new driver.
b. If you are installing the same version driver, select Modify to install additional
Ethernet or USB printer drivers.
c. Select Remove to remove the current printer driver. When asked about
removing the smart card readers drivers, click Ye s to remove them; click No
to leave them installed. At the end of the un-install process, you will be asked
to re-boot your computer.
42 Zebra ZXP Series 7 Card Printer User’s Manual P1036101-002
Page 51

2: Installation and Setup
Installing the Windows Printer Driver
Step 8. The InstallShield Wizard window will open. To proceed with the installation, click
the Next button.
Step 9. Select Install Ethernet printer drivers, and click the Next button.
Step 10. Ensure that the Printer’s power switch is in the ON ( | ) position, and click the
OK button.
P1036101-002 Zebra ZXP Series 7 Card Printer User’s Manual 43
Page 52

2: Installation and Setup
Installing the Windows Printer Driver
Step 11. This will bring up the License Agreement window. To proceed, select the I accept
the terms of the license agreement option, and click the Next button.
Step 12. This will bring up the Customer Information window. Enter your name and the
name of the company for which you work, and click the Next button.
44 Zebra ZXP Series 7 Card Printer User’s Manual P1036101-002
Page 53

2: Installation and Setup
Installing the Windows Printer Driver
Step 13. This will bring up the Search Ethernet Printers window.
Based on the network configuration in use, select the Printer IP Version (IPv4 or
ipV6); and click the Refresh button. Setup will search for the Ethernet printers on
the network and display the available printers. Select the desired printer, and click
the Next button.
- or -
If Ethernet printer is on a different subnet and is not discovered by the host, you
can manually enter the Printer IP Address directly (circled below); and click the
Next button.
Step 14. Enter the Location of the printer and any Comments regarding the printer, and click
the Next button.
P1036101-002 Zebra ZXP Series 7 Card Printer User’s Manual 45
Page 54

2: Installation and Setup
Installing the Windows Printer Driver
Step 15. This will bring up the Choose Destination Location window.
• To accept the default destination location where setup will install the files, click
the Next button.
- or -
• Click the Change button, select a folder where setup will install the files, and
click the Next button.
Step 16. This will bring up the Ready to Install the Program window. To continue, click the
Install button.
46 Zebra ZXP Series 7 Card Printer User’s Manual P1036101-002
Page 55

2: Installation and Setup
Installing the Windows Printer Driver
Step 17. Observe the Setup Status window.
Step 18. When the InstallShield Wizard Complete window appears, click the Finish button.
Step 19. This completes Ethernet driver installation.
Note • For optimum performance, you may need to change the card setup (card type,
orientation, etc.), encoding, and/or black panel settings via the Printer Driver; see Printing
Preferences on page 75.
P1036101-002 Zebra ZXP Series 7 Card Printer User’s Manual 47
Page 56

48 Zebra ZXP Series 7 Card Printer User’s Manual P1036101-002
Page 57

Introduction
Printing with the Card Printer is similar to printing with any other printer in a Windows
environment.
3
Operation
• Install the Printer Driver Software (Section 2, Installing the Windows Printer Driver).
• Connect the Printer to a power source and computer (Section 2, Connecting Power).
• Set the Printer Properties and Printing Preferences (default values will be appropriate for
most applications).
• Select the Printer via either the Operating System or an appropriate application
software program.
• Print a Test Card (you can print via a Microsoft Certified Windows driver or a custom
application using the ZMotif SDK development tools).
P1036101-002 Zebra ZXP Series 7 Card Printer User’s Manual 49
Page 58

3: Operation
Printing a Test Card
Printing a Test Card
To print a test card:
1. Access the Card Setup Tab: Select Start > Devices and Printers. Then right click the
Zebra ZXP Series 7 Card Printer listing, and select Printing Preferences > Card Setup.
2. Ensure that cards are in the Feeder Cartridge.
3. Click the Test Pr int button (circled above).
4. The printer will feed in a card and start printing.
5. Once the printing job is finished, the card exits from the printer into the Output Hopper.
50 Zebra ZXP Series 7 Card Printer User’s Manual P1036101-002
Page 59

Manual Card Feed
A Manual Feed Slot, located in the right-hand side of the Printer, is available for feeding
single cards.
1. Access the Card Setup Tab: Select Start > Devices and Printers. Then right click the
Zebra ZXP Series 7 Card Printer listing, and select Printing Preferences > Card Setup.
3: Operation
Manual Card Feed
2. In the Card Setup tab, select the Manual feed slot from the dropdown menu (arrow above).
3. Click the Apply button.
4. Click the OK button.
P1036101-002 Zebra ZXP Series 7 Card Printer User’s Manual 51
Page 60

3: Operation
Manual Card Feed
5. Hold the cards by the edges only. Do not touch the printing surface as this can reduce
print quality. The surface of the cards must remain clean and dust free.
6. Insert a card into the Manual Feed Slot in the correct orientation:
• For Standard Cards, any orientation is acceptable.
• For Magnetic Cards, the magnetic stripe is
• For Contact Smart Cards, the chip is
DOWN and to the REAR.
UP and to the LEFT.
• For Cards with a Barcode, see Appendix F for details.
7. Continue to insert the card until you feel a slight resistance when the printer “grabs” it.
8. The card will automatically be drawn into the printer when the print job is sent.
52 Zebra ZXP Series 7 Card Printer User’s Manual P1036101-002
Page 61

Operator Control Panel (OCP)
The printer is equipped with an OCP Display and three “soft” OCP Buttons which give access
to the printer menus. The menus can be accessed when the printer status shows
3: Operation
Operator Control Panel (OCP)
READY.
Messages
The OCP Display provides printer status information. The messages displayed fall into three
categories:
• Press the
• Press the
• Operational, see Page 54.
• Warning, see Page 55.
• Error, see Page 55.
MENU button, to access the Main Menu.
INFO button, to access and view the Printer Settings Menu.
P1036101-002 Zebra ZXP Series 7 Card Printer User’s Manual 53
Page 62

3: Operation
Operator Control Panel (OCP)
Operational
MESSAGE DESCRIPTION
ALARM An error message needs to be cleared before normal operations
CANCELING The Cancel button was pressed, and the current operation is
CONFIGURATION DATA Configuration data is being transferred from the computer to
CONTACT OPERATION Contact Smart Card is being encoded; i.e., the card is in position
CONTACTLESS OPERATION Contactless Smart Card is being encoded; i.e., the card is in
COOLING
PRINTHEAD TEMPERATURE
COOLING
WAITING TO LAMINATE
DIAGNOSTIC Diagnostic testing in progress.
can resume.
being terminated.
the printer.
and data is being transferred.
position and data is being transferred.
Cooling printhead to temperature.
Ready to accept a print job, laminator cooling.
JOB DATA Data is being transferred from the computer to the printer.
LAMINATING Print job received, laminating in process.
MAG OPERATION A Magnetic Stripe Card is being encoded; i.e., card is in position
and data is being transferred.
MANUALLY INSERT CARD Waiting for manual card feed (this function is set via the Card
Setup Tab; see Page 51 or Page 76.
OFFLINE Status toggled (offline/online) via the OCP Advanced
Settings Menu.
PAUSING The Pause button was pressed.
PRINTING Print job received, printing in process.
READY Ready and at temperature.
STANDBY Printer is in “sleep” mode; i.e., power save mode.
WAIT
INITIALIZING
WARMING
WAITING TO LAMINATE
WARMING
PRINTHEAD TEMPERATURE
WARNING Indicates that additional OCP instructions need to be performed;
Performing a self test on startup.
Ready to accept a print job, laminator warming; e.g., when
switching from 1-sided laminating to 2-sided laminating, or when
the printer has just powered up and the laminator is warming.
Warming printhead to temperature.
e.g., RIBBON LOW, etc.
54 Zebra ZXP Series 7 Card Printer User’s Manual P1036101-002
Page 63

Warning Messages
Warnings alert the operator to action that should be taken; the printer will generally
continue operation.
3: Operation
Operator Control Panel (OCP)
WARNING
(Printer will still operate)
BOTH LAMINATES LOW Indicates that both Laminate cassettes (Top and Bottom) are
BOTTOM LAMINATE LOW Indicates that the Bottom Laminate cassette is low; see Loading
CLEAN FEEDER Indicates that the Feeder needs cleaning; see Cleaning the
CLEAN CARD PATH Indicates that the Printer Card Path needs cleaning; see
CLEAN LAM CARD PATH Indicates that the Laminator Card Path needs cleaning; see
CLEAN LAM ROLLERS Indicates that the Laminator Rollers need cleaning; see
CLEAN LAM OVEN Indicates that the Laminator Heated Rollers need cleaning; see
RIBBON LOW Indicates that the Ribbon spool is low; see Loading a Print
TOP LAMINATE LOW Indicates that the Top Laminate cassette is low; see Loading the
DESCRIPTION
low; see Loading the Laminate on page 18.
the Laminate on page 18.
Printer on page 130.
Cleaning the Printer on page 130.
Cleaning the Laminator on page 134.
Cleaning the Laminator on page 134.
Clean the Laminator Oven (Heater Rollers) on page 138.
Ribbon on page 15.
Laminate on page 18.
Error Messages
Refer to Section 7, Troubleshooting, for a list of the error messages, possible causes, and
possible solutions.
Errors are displayed when a situation causes the printer to stop operating. Depending on the
cause of the error message, restarting the printer or clearing the displayed error may return the
printer to operational status; or the printer may require troubleshooting and repair.
P1036101-002 Zebra ZXP Series 7 Card Printer User’s Manual 55
Page 64

3: Operation
Main Menu
MENU Button
(Operating Mode Display)
RETURN
PRINT TEST CARDS
NETWORK SETTINGS
ADVANCED SETTINGS
See Print Test Cards Menu on page 58.
Network Settings Menu on page 59.
See Advanced Settings Menu on page 60.
UP DOWN SELECT
• Press the UP button to move up the menu list
• Press the
DOWN button to move down the menu list
• Press the
SELECT button to select the item from the list
ENCODER SETTINGS
WIRELESS SETTINGS
See Encoder Settings Menu on page 61.
See Wireless Settings Menu on page 62.
Operator Control Panel (OCP)
Printer Menu Information
The OCP Display and three OCP Buttons give access to the printer menus.
Main Menu
56 Zebra ZXP Series 7 Card Printer User’s Manual P1036101-002
Page 65

• Press the PREV button to move up the menu list
• Press the
NEXT button to move down the menu list
• Press the
EXIT button to return to the Operational Mode Display
PRINTER INFO
NETWORK INFO
RIBBON INFO
PRINTHEAD USAGE
CONFIGURATION INFO
Displays MCB FW Ver, MAB FW Ver, MSN (Machine Serial Number),
PH S/N (Printhead Serial Number).
Displays DHCP, IP, Mask, GW, and MAC.
Displays Type, # Images, and % Remaining.
Displays Card Count and Printhead Lines.
Lists RAM, Single or Dual Sided, and Options Installed: Mag, Encoder, Laminator, Barcode
INFO Button
(Operating Mode Display)
Info Menu
PREV NEXT EXIT
* Only applies to Printers with a Laminator.
REJECT BIN
Displays number of cards in Reject Bin (Card Count = n).
WIRELESS STATISTICS
WIRELESS INFO
Displays # Cards since last cleaning of Card Path, Feeder Path, Printhead, Laminator Path*, and
Laminator Oven*.
Displays info for LUT 1 (Look-Up Table 1), LUT 2 (Look-Up Table 2), and Color Collaboration.
LAMINATOR INFO *
Displays LCB, MAB, Serial Number, Top installed (yes/no), Bottom installed (yes/no).
TOP LAMINATE INFO *
Displays P/N, Type, # Images, and % Remaining.
BOTTOM LAMINATE INFO *
Displays P/N, Type, # Images, and % Remaining.
LAMINATOR TEMPERATURE *
Displays Settings: Top and Bottom temperature; and Current: Top and Bottom temperature.
LAMINATOR ODOMETER *
Displays Unit on (# days), Top on (# days), Bottom on (# days), # Laminated, # Processed.
CLEANING DUE
CAL LUT INFO
Displays DHCP Enabled/Disabled, Radio Connected/Disconnected.
Displays RX Bytes, Discards, TX Bytes, Discards, Errors, TX Success, TX Retry, RX Success,
RX Duplicate, RTS Success
3: Operation
Operator Control Panel (OCP)
Info Menu
P1036101-002 Zebra ZXP Series 7 Card Printer User’s Manual 57
Page 66

3: Operation
Print Test Cards Menu
UP DOWN SELECT
Main Menu
RETURN
Sets the number of Test Cards to be printed (1, 5, 10, ..., 100).
Selects single-sided or dual-sided card printing.
COUNT
SIDES
GRADIENT BOXES
DENSITY SETUP
Selects Test Card to be printed; see OCP Test Cards on page 150.
•Press the UP button to move up the menu list
•Press the
DOWN button to move down the menu list
•Press the
SELECT button to select the item from the list
MONOCHROME ONLY
NOTE: When a monochrome ribbon is installed, only the MONOCHROME ONLY
card is available.
Operator Control Panel (OCP)
Print Test Cards Menu
58 Zebra ZXP Series 7 Card Printer User’s Manual P1036101-002
Page 67

Network Settings Menu
Network Settings Menu
UP DOWN SELECT
Main Menu
RETURN WITHOUT SAVE
Enables or disables the DHCP Mode.
Changes the IP Address.
Changes the Subnet Mask.
SAVE SETTINGS
DHCP MODE
SET IP ADDRESS
SET SUBNET MASK
SET DEFAULT GATEWAY
Changes the GW (Gateway).
• Press the UP button to move up the menu list
• Press the
DOWN button to move down the menu list
• Press the
SELECT button to select the item from the list
3: Operation
Operator Control Panel (OCP)
P1036101-002 Zebra ZXP Series 7 Card Printer User’s Manual 59
Page 68

3: Operation
Advanced Settings Menu
UP DOWN SELECT
Main Menu
RETURN
Displays current language, sets language option (English, French,
Spanish, German, Brazilian Portuguese, or Italian).
Deletes all pending print jobs in the printer.
Toggles printer Online / Offline.
Sets sleep timer function value (never, 30 minutes, 60 minutes,
120 minutes, or 480 minutes).
Adjusts the OCP display contrast (20 min, 50 max, default 35).
SELECT LANGUAGE
FLUSH PRINT QUEUE
PRINTER ONLINE
CLEAN PRINTER
SET SLEEP TIMER
SET SCREEN CONTRAST
• Press the UP button to move up the menu list
• Press the
DOWN button to move down the menu list
• Press the
SELECT button to select the item from the list
CLEAR REJECT BIN
Resets reject bin card count to 0.
See Clean Printer Menu on page 63.
HOST USB SETTINGS
Selects Port 1 or Port 2.
Operator Control Panel (OCP)
Advanced Settings Menu
60 Zebra ZXP Series 7 Card Printer User’s Manual P1036101-002
Page 69

Encoder Settings Menu
UP DOWN SELECT
Main Menu
RETURN
Sets the printer for USB Encoding. *
Sets the printer for Encoding Over Ethernet. *
USB ENCODING
ETHERNET ENCODING
• Press the UP button to move up the menu list
• Press the
DOWN button to move down the menu list
• Press the
SELECT button to select the item from the list
* The option is highlighted when selected.
3: Operation
Operator Control Panel (OCP)
Encoder Settings Menu
P1036101-002 Zebra ZXP Series 7 Card Printer User’s Manual 61
Page 70

3: Operation
Wireless Settings Menu
UP DOWN SELECT
Enables or disable the Radio.
Main Menu
RETURN WITHOUT SAVE
SAVE SETTINGS
RADIO CONTROL
SETUP WIZARD
DHCP MODE
SET IP ADDRESS
SET SUBNET MASK
SET DEFAULT GATEWAY
SET DEFAULTS
• Press the UP button to move up the menu list
• Press the
DOWN button to move down the menu list
• Press the
SELECT button to select the item from the list
Takes you through the process of connecting your printer to a Wireless Access Point.
Not implemented.
Enables or disable the DHCP Mode.
Sets the IP Address.
Sets the Subnet Mask.
Sets the GW (Gateway).
Operator Control Panel (OCP)
Wireless Settings Menu
62 Zebra ZXP Series 7 Card Printer User’s Manual P1036101-002
Page 71

Clean Printer Menu
Clean Printer Menu
Advanced Settings Menu
RETURN
CLEAN CARD PATH
CLEAN FEEDER
UP DOWN SELECT
• Press the UP button to move up the menu list
• Press the
DOWN button to move down the menu list
• Press the
SELECT button to select the item from the list
Refer to Section 6, Cleaning, for detailed cleaning instructions.
Use the Print Path Cleaning Card, and step through the cleaning process.
Use the Feeder Cleaning Card, and step through the cleaning process.
CLEAN LAM CARD PATH *
Use the Laminator Cleaning Card, and step through the cleaning process.
CLEAN LAM ROLLERS *
Use the Laminator Hot Roller Cleaning Card (with adhesive), and step
through the cleaning proce ss.
Use a Cleaning Swab, and step through the cleaning process.
CLEAN LAM OVEN *
* Only applies to Printers with a Laminator.
3: Operation
Operator Control Panel (OCP)
P1036101-002 Zebra ZXP Series 7 Card Printer User’s Manual 63
Page 72

64 Zebra ZXP Series 7 Card Printer User’s Manual P1036101-002
Page 73

Introduction
4
Printer Settings and
Adjustments
This section describes settings and adjustments that can be made to your Windows Driver.
This consists of two major topics:
Printer Properties . . . . . . . . . . . . . . . . . . . . . . . . . . . . . . . . . . . . . . . . . 66
Printing Preferences . . . . . . . . . . . . . . . . . . . . . . . . . . . . . . . . . . . . . . . 75
P1036101-002 Zebra ZXP Series 7 Card Printer User’s Manual 65
Page 74

4: Printer Settings and Adjustments
Printer Properties
Printer Properties
Access to Card Printer Properties varies depending on your Operating System (OS); e.g., for
Windows 7, select Start > Devices and Printers. Right click the Zebra ZXP Card Printer
listing, then select Printer properties.
General Tab . . . . . . . . . . . . . . . . . . . . . . . . . . . . . . . . . . . . . . . . . . . . . . . . . . .67
Sharing Tab . . . . . . . . . . . . . . . . . . . . . . . . . . . . . . . . . . . . . . . . . . . . . . . . . . .68
Ports Tab . . . . . . . . . . . . . . . . . . . . . . . . . . . . . . . . . . . . . . . . . . . . . . . . . . . . .69
Advanced Tab . . . . . . . . . . . . . . . . . . . . . . . . . . . . . . . . . . . . . . . . . . . . . . . . .70
Color Management Tab . . . . . . . . . . . . . . . . . . . . . . . . . . . . . . . . . . . . . . . . . .71
Security Tab . . . . . . . . . . . . . . . . . . . . . . . . . . . . . . . . . . . . . . . . . . . . . . . . . . .72
Device Information Tab . . . . . . . . . . . . . . . . . . . . . . . . . . . . . . . . . . . . . . . . . .73
The OK button saves the settings and closes the printer properties pages.
The Cancel button exits Printer Properties. Changes made are abandoned.
The Apply button saves the settings but does not close the printer properties pages.
The Help button enables you to view a corresponding page of help information.
66 Zebra ZXP Series 7 Card Printer User’s Manual P1036101-002
Page 75

General Tab
The General tab shows the name, location, model number, and features of the printer.
4: Printer Settings and Adjustments
Printer Properties
• Location - Lets you specify where the printer is physically located.
• Comment - Lets you specify general information about the printer, such as the type
of print device and who is responsible for it. Once set, these fields can be displayed
by applications.
• Model - Specifies the printer model number.
- Features - Specifies whether various options are available on the printer.
The Printing Preferences button takes you to Printing Preferences used to set selected
configuration parameters; see Printing Preferences on page 75.
The Print Test Page button sends the standard Windows test page to the printer.
P1036101-002 Zebra ZXP Series 7 Card Printer User’s Manual 67
Page 76

4: Printer Settings and Adjustments
Printer Properties
Sharing Tab
The Sharing tab lets you share the printer over the network and install additional drivers to
accommodate different operating systems.
Note that for Windows Vista and above, the Render print jobs on client computers checkbox
should be disabled.
Click the Change Sharing Options button to enable this tab.
For details, see Windows-provided help for standard property pages.
68 Zebra ZXP Series 7 Card Printer User’s Manual P1036101-002
Page 77

Ports Tab
Use the Ports tab to specify the computer port to which the printer is connected. This will have
been established at the initial installation of the printer and will not normally require attention.
4: Printer Settings and Adjustments
Printer Properties
Important • Do not un-check the Enable bi-directional support option. If you modify this,
you will lose the communication to the printer.
• Enable printer pooling; see Appendix A for details.
For details, see Windows-provided help for standard property pages.
P1036101-002 Zebra ZXP Series 7 Card Printer User’s Manual 69
Page 78

4: Printer Settings and Adjustments
Printer Properties
Advanced Tab
The Advanced tab determines the spooling (queuing) of print jobs and determines how
spooled jobs are handled relative to the most recent job.
For details, see Windows-provided help for standard property pages.
70 Zebra ZXP Series 7 Card Printer User’s Manual P1036101-002
Page 79

Color Management Tab
This is the standard Windows color management screen, showing user access to various
printer control options.
Click the Color Management button to enable this tab.
4: Printer Settings and Adjustments
Printer Properties
For details, see Windows-provided help for standard property pages.
P1036101-002 Zebra ZXP Series 7 Card Printer User’s Manual 71
Page 80

4: Printer Settings and Adjustments
Printer Properties
Security Tab
This is the standard Windows security screen, showing user access to various printer
control options.
For details, see Windows-provided help for standard property pages.
72 Zebra ZXP Series 7 Card Printer User’s Manual P1036101-002
Page 81

Device Information Tab
The Device Information tab provides device information, security related information, and
printer usage. Access to Media Info and ZXP Toolbox is included.
4: Printer Settings and Adjustments
Printer Properties
•The Media Info button takes you to the Media Info screen; see next page.
•The ZXP Toolbox button takes you to the ZXP Toolbox which provides advanced
configuration capabilities and tools to manage the operation of your printer; see
Section 5, ZXP Series Toolbox, for details.
Note that the ZXP Toolbox relies on the Windows driver to communicate with the printer.
P1036101-002 Zebra ZXP Series 7 Card Printer User’s Manual 73
Page 82

4: Printer Settings and Adjustments
Printer Properties
Media Info
Media Info screen shows ribbon status and top and bottom laminate status.
- Ribbon: Shows the ribbon type installed and the number of ribbon sets remaining.
- Top Laminate: Shows the top laminate type and the number of laminate
panels remaining.
- Bottom Laminate: Shows the bottom laminate type and the number of laminate
panels remaining.
74 Zebra ZXP Series 7 Card Printer User’s Manual P1036101-002
Page 83

Printing Preferences
Access to Card Printing Preferences varies depending on your Operating System (OS); e.g.,
for Windows 7, select Start > Devices and Printers. Right click the Zebra ZXP Card Printer
listing, then select Printing preferences.
4: Printer Settings and Adjustments
Printing Preferences
Card Setup Tab . . . . . . . . . . . . . . . . . . . . . . . . . . . . . . . . . . . . . . . . . . . . . . . . 76
Encoding Tab . . . . . . . . . . . . . . . . . . . . . . . . . . . . . . . . . . . . . . . . . . . . . . . . . 87
Black Panel (K) Optimization Tab . . . . . . . . . . . . . . . . . . . . . . . . . . . . . . . . . 88
Color (YMC) Optimization Tab . . . . . . . . . . . . . . . . . . . . . . . . . . . . . . . . . . . 92
About Tab . . . . . . . . . . . . . . . . . . . . . . . . . . . . . . . . . . . . . . . . . . . . . . . . . . . . 95
The To ol bo x button launches the ZXP Toolbox; see Section 5 for details.
The Restore Defaults button restores the default values for the page.
The OK button saves the settings and closes the printing preferences pages.
The Cancel button exits Printing Preferences. Changes made are abandoned.
The Apply button saves the settings but does not close the printing preferences pages.
The Help button enables you to view a corresponding page of help information.
P1036101-002 Zebra ZXP Series 7 Card Printer User’s Manual 75
Page 84

4: Printer Settings and Adjustments
Printing Preferences
Card Setup Tab
Card Setup tab allows the user to adjust selected card and print job parameters.
• Card options allows the user to select the Card Source and Card Destination.
-Card source
• Manual feed slot: If a card is in the manual feed slot when a print job is sent to the
printer, that card will be printed; otherwise, a card from the feeder cartridge will
be printed.
• Feeder cartridge -- default
• Already in printer (for SDK-enabled applications that use this feature)
• Auto feed: When the print job is sent to the printer, the user is prompted to insert
the card into the manual feed slot within X seconds, otherwise the card is fed
from the feeder cartridge.
- Card destination
• Output hopper -- default
• Reject tray
• Leave in printer (for SDK-enabled applications that use this feature)
76 Zebra ZXP Series 7 Card Printer User’s Manual P1036101-002
Page 85

4: Printer Settings and Adjustments
Portrait
Landscape
• Card options (continued)
-Image size
• Default Size (1006 * 640 pixels): Note that this setting should always be used
unless you are printing images that were specifically designed for other Zebra
card printer models.
• The following selections are for Zebra P640i Card Printer compatibility.:
- Compatibility 1 (578 x 952 pixels)
- Compatibility 2 (610 x 968 pixels)
- Compatibility 3 (600 x 952 pixels)
• Printing options:
- Orientation: Selection for portrait or landscape printing.
Printing Preferences
- Print on both sides: Selection for single-sided or dual-sided printing.
o
- Rotate 180
: Selection for rotating the image 180o. The options are None, Front,
Back, and Front & Back.
- Copies: Specifies the number of copies to print.
- Print the front image on the back side: Selections are Yes or No. This option can be
selected to perform stripe-up magnetic encoding with single or dual-sided printers.
The Tes t P rin t button prints a test card.
P1036101-002 Zebra ZXP Series 7 Card Printer User’s Manual 77
Page 86

4: Printer Settings and Adjustments
Printing Preferences
• Ribbon info and options:
- Ribbon type shows the type of ribbon (e.g., YMCKOK) installed in the printer. Note
that this is automatically detected from the ribbon.
- Ribbon combination allows you to select the combination of panels to be printed
on each side (e.g., YMCKO Front/YMCKO Back).
- Depending on the ribbon type installed, the Front and Back buttons let you set
options for:
• Black Panel Options on page 79
• Overlay Varnish Options on page 82
• UV Panel Options on page 83
• Laminator info and options:
These options apply only to printers with laminator. This section automatically shows the
presence of the laminator and laminate. You can select the Lamination mode via the
dropdown menu.
- Any: Any combination of laminate can be installed; i.e., top, bottom, or both (default).
- Top : Top laminate only must be installed.
- Bottom: Bottom laminate only must be installed.
- Top and bottom: Both top and bottom laminate must be installed.
- Pass through: Top and bottom laminate must be removed. This option allows a card to
pass through the laminator without having laminate applied.
Laminate only can be used to laminate pre-printed cards. This is a special-purpose
function that is enabled when the Lamination mode is set to Top, Bottom, or Top and
bottom and the Card destination is set to Output hopper. When selected, the card is passed
from the input hopper, through the printer without being printed, to the laminator for
lamination, then to the output hopper.
78 Zebra ZXP Series 7 Card Printer User’s Manual P1036101-002
Page 87

4: Printer Settings and Adjustments
Printing Preferences
Black Panel Options
The Black Panel Options pop-up window allows you to manage and configure the use of the
Black Panel (K panel) extraction when the selected Ribbon Combination shows the K panel on
the same side as the Y, M, and C panels (e.g. YMCK Front / K Back).
From the Card Setup tab, select a Ribbon Combination that has YMC and K all on the same
side. The Front K Extraction… and/or Back K Extraction... buttons will become active. Press
the appropriate button to open up the pop-up window.
The figure below shows settings for the front side of the card; settings for the back side of the
card are identical.
This feature determines whether black content will be printed with the black (K) panel or with
color (YMC) panels. Note that black content appears dark gray when printed with color
(YMC) panels.
P1036101-002 Zebra ZXP Series 7 Card Printer User’s Manual 79
Page 88

4: Printer Settings and Adjustments
Printing Preferences
To extract black areas from color images, several selections can be made.
• Select black panel extraction type:
- Disable black extraction does not use the K panel for any part of the image. This
selection will have the effect of rendering all black images as YMC composite.
- Print YMC composite and K black uses both the K panel and the Y, M, and C
panels to print the portions of the image that are identified as black. This selection will
result in a dark, black image; but the edges will be smooth (due to the continuous tone
nature of the YMC dyes), not the sharp edges typically desired for a barcode.
- Print all black data uses only the K panel to print the portions of the image that are
identified as being black.
• Apply black extraction on: Note that this function is dependent on the image having
areas defined as text, graphics (lines, rectangles, and other non-text graphic objects), and
bitmaps (color images, photos, pictures, etc). If the image is flattened, then this function
does not apply.
- Black text applies black extraction to areas of the image identified as text.
- Black graphics applies black extraction to areas of the image identified as graphics.
- Color bitmaps applies black extraction to black areas of a color bitmap. By default,
only areas with a RGB level of 0,0,0 shall be treated as black. For adjustments, see
Black level settings below.
- Black bitmaps applies black extraction to areas of the image identified as bitmaps.
This option will extract only black out of monochrome bitmaps, but not from
color bitmaps.
• Black extraction from color images
- Black level:
Every dot of a printed image has an RGB color value that ranges from 0, 0, 0 (pure
black) to 255, 255, 255 (pure white).
The black level setting allows the user to specify the threshold value for any given
pixel to be treated as black. The maximum setting is 25, 25, 25.
80 Zebra ZXP Series 7 Card Printer User’s Manual P1036101-002
Page 89

4: Printer Settings and Adjustments
Printing Preferences
• Black extraction from color images (continued)
- Area manager: This option is enabled when the Defined areas (extract inside the
zone) or the Except defined areas (extract outside the zone) radio button is selected.
• Defined areas applies black extraction to areas of the image inside of the zones
specified in the Area manager.
• Except defined areas applies black extraction to areas of the image outside of the
zones specified in the Area manager.
• Full card applies black extraction to the entire image.
• Orientation: The Orientation selection sets the image orientation to either
Portrait or Landscape.
• Units: The Units selection sets the units to either inches or mm (millimeters). The
X-dimension, X-offset, Y-dimension, and Y-offset reflect these units.
To create a zone: Select the rectangle icon , click an area of the image to establish
the first corner of the zone, drag the cursor until the zone is the desired size and shape,
then release the mouse button. Note that multiple zones can be defined.
To select, move, or resize a zone: Select the arrow icon , click a zone to select it,
then drag it to move it, or drag on the edges to resize it.
To delete a zone: Select the rectangle icon with an “X” through it , then click the
zone that you want to delete.
P1036101-002 Zebra ZXP Series 7 Card Printer User’s Manual 81
Page 90

4: Printer Settings and Adjustments
Printing Preferences
Overlay Varnish Options
Overlay varnish is a durable layer of film applied to printed cards that reduces fading by
protecting the image from UV exposure.
The Overlay Varnish pop-up window allows you to manage and configure the use of the
Overlay when the selected Ribbon Combination shows the O panel (e.g. YMCKO).
Select the overlay varnish type - Option selection for applying overlay varnish ribbon to a
card. Default setting is Full overlay varnish.
There are various varnish options. A preview pane is shown for each selection.
- Disable overlay - Disables the overlay option; i.e., does not apply any overlay.
- Full overlay varnish (default) - Applies an edge-to-edge overlay.
- Selected area blank - Applies overlay only outside the area selected by user.
- Selected area overlay varnish - Applies overlay only in the area selected by user.
- Bitmap based overlay varnish - Applies a user-defined 1-bit monochrome bitmap
as an overlay.
- Smartcard ISO - Does not apply overlay on the area of the smartcard chip.
- Smartcard AFNOR - Does not apply overlay on the area of the smartcard chip.
- Magnetic Stripe - Does not apply overlay on the area of the magnetic stripe.
When Bitmap based overlay varnish is selected, click the Browse button to locate and
select the desired bitmap.
82 Zebra ZXP Series 7 Card Printer User’s Manual P1036101-002
Page 91

4: Printer Settings and Adjustments
Printing Preferences
UV Panel Options
A UV Panel is used to print images (text or graphics) that will glow in the visible spectrum
when exposed to a UV Light. The UV Panel pop-up window is only available when using UV
ribbons (e.g., YMCUVK).
UV rendering method:
• Diffusion: This mode will render the UV content using error diffusion.
• Halftone: This mode will render the UV content using half-toning.
• Grayscale prints the bitmap image as a grayscale image, which is composed of shades
of gray, varying from black to white.
UV printing options:
• Rotate 180o rotates the provided bitmap image 180o.
• Invert UV content inverts the bitmap image if not inverted in the application.
P1036101-002 Zebra ZXP Series 7 Card Printer User’s Manual 83
Page 92

4: Printer Settings and Adjustments
Printing Preferences
Source of UV content
• Use unique image for each job: Each print job will send a unique UV image along with
the YMCK content.
• Bitmap based static image: Imports the bitmap image to print on the UV panel; e.g.,
import a security seal. The UV image that is selected will be the same for all jobs.
1. Select the Bitmap based static image radio button.
2. Click the Browse button to bring up a dialog box for choosing the file.
3. Locate and select the file (a specific .bmp file on local drive). Note that the UV
image can be any standard .bmp image supported by windows applications like
Paint or Fax Viewer. (24-bit, 1-bit etc.).
4. Select the UV rendering method; see previous page.
5. Select the UV printing options; see previous page.
6. Click the OK button to close the UV Panel pop-up window.
7. The Driver applies this .bmp image as full UV print on all print jobs sent to printer.
84 Zebra ZXP Series 7 Card Printer User’s Manual P1036101-002
Page 93

4: Printer Settings and Adjustments
Printing Preferences
• Extract UV from job image
Similar to K extraction, this mode allows you to print a selected portion of the YMC
image using the UV panel. Options include Defined areas, Except defined areas, and
Full card. These options are selected via their associated radio buttons.
Defined areas allows you to specify what areas will also be printed with YMC and UV.
Undefined areas will print YMC with UV in all areas except those that are indicated. Full
card will print the entire image with YMC and UV.
- Area manager: This section is enabled when either Defined areas or Undefined areas
is selected.
•The Orientation selection sets the image orientation to either Portrait or
Landscape.
•The Units selection sets the units to either inches or mm (millimeters). The X
dimension, X offset, Y dimension, and Y offset reflect these units.
To create a zone: Select the rectangle icon , click an area of the image to establish the
first corner of the zone, drag the cursor until the zone is the desired size and shape, then
release the mouse button. Note that multiple zones can be defined.
To select, move, or resize a zone: Select the arrow icon , click a zone to select it, then
drag it to move it or drag on the edges to resize it.
To delete a zone: Select the rectangle icon with an “X” through it , then click the zone
that you want to delete.
P1036101-002 Zebra ZXP Series 7 Card Printer User’s Manual 85
Page 94

4: Printer Settings and Adjustments
Printing Preferences
Add static text:
When the Add static text checkbox is selected (checked), the Static Text Options button
is enabled. This option automatically prints a unique text value in a fixed location on a card
using the UV panel.
1. Click the Static Text Options button to activate this option.
2. Observe the UV Panel popup.
3. Specify the Text location. Select the location from four pre-defined areas of a card
(Upper left, Upper right, Lower left, Lower right).
4. Specify the Text category (MAC address, Printer serial number, or Custom Text).
If Custom Text is specified, enter the text in the Custom Text field, up to
32 characters.
5. Click the OK button to close the UV Panel pop-up window.
86 Zebra ZXP Series 7 Card Printer User’s Manual P1036101-002
Page 95

Encoding Tab
The Encoding tab lets you manage the various magnetic and smart card encoding options.
4: Printer Settings and Adjustments
Printing Preferences
• Magnetic encoding:
- Disable magnetic encoding: Prevents the printer from encoding a card, whether the
job has magnetic encoding data in it or not.
- Encode only: Disables printing, whether the job has an image to be printed or not.
- Magnetic encoder verification ON: Verifies the data that is written to the card before
declaring the encoding action to be successful.
- Coercivity: Selections are High and Low to match the card type.
- Magnetic encoding type: Selections are ISO, AAMVA, CUSTOM, and BINARY.
ISO is the default. Custom settings are adjusted using the ZXP Series Toolbox.
- Use Hex format to encode tracks: Select this option to encode the tracks using
hexadecimal format.
P1036101-002 Zebra ZXP Series 7 Card Printer User’s Manual 87
Page 96

4: Printer Settings and Adjustments
Printing Preferences
Black Panel (K) Optimization Tab
Note • This tab also applies to monochrome ribbons (red, blue, green, etc.). The tab title will
change depending on the type of ribbon used; e.g., for a red monochrome ribbon, the
tab title will be Monochrome Red Optimization.
The Black Panel (K) Optimization tab displays two identical adjustment sections (Front and
Back) to optimize black panel printing for the type of image being printed. The front side and
back side options are enabled based on the availability of K panel in the ribbon combination or
the presence of a monochrome ribbon.
• Optimize for: Black panel printing can be optimized to improve the quality of individual
elements that comprise the image. There are separate optimization settings for Text,
Barcodes, and Mixed content.
- Te xt sharpens the edges of fonts. This setting will make barcodes appear darker.
- Barcode sharpens fine lines to improve barcodes for scanning. This setting will make
text and graphics appear lighter.
- Mixed combines the optimum settings for text, barcode, and graphics printing in
most applications.
Click the Advanced button for additional black (K) panel optimization options to further fine
tune black (K) panel printing; see next page.
88 Zebra ZXP Series 7 Card Printer User’s Manual P1036101-002
Page 97

4: Printer Settings and Adjustments
Printing Preferences
Advanced Black Panel (K) Optimization
The Advanced Black Panel (K) Optimization tab optimizes black panel printing for the type
of image being printed; i.e., text, barcode, or mixed.
• Monochrome conversions: This section is used to control multi-tone printing when using
a monochrome ribbon or K Panel.
Options are Dither error diffusion, Dither 6x6 halftoning, and Threshold (also known as
Dither pure black on white); see next page for details.
The conversion option selected determines which of the controls is enabled; i.e., selecting
Threshold enables the Threshold, Preheat, and Intensity controls.
- Threshold sets the transition point between black (0) and white (255); i.e., pixel
values less than the threshold value would be black, and pixel values greater than the
threshold value would be white. Default is 128.
- Brightness controls overall the brightness of the image. Move the slider to the right to
lighten the image or to the left to darken the image.
- Contrast controls the difference between the light and dark areas of the image. Move
the slider to the right to increase the contrast and vice versa.
P1036101-002 Zebra ZXP Series 7 Card Printer User’s Manual 89
Page 98

4: Printer Settings and Adjustments
Printing Preferences
• Monochrome conversions (continued)
- Preheat affects the edges of the printed image. Adjustments range from -50 to +50,
default = 0.
Increase the value to enhance edges. Reduce the value if bleeding is present.
Note that the Preheat setting has no effect on the preview image but is applied to the
image during the printing process.
- Intensity adjusts the lightness or darkness of the image. Adjustments range from -10
to +10, default = 0.
Intensity can be used to lighten or darken the entire printed color image. It can be used
to eliminate ribbon wrinkling or ribbon sticking/ripping in hot or humid
environmental conditions.
Note that the Intensity setting has no effect on the preview image but is applied to the
image during the printing process. This adjustment remains set until changed.
90 Zebra ZXP Series 7 Card Printer User’s Manual P1036101-002
Page 99

4: Printer Settings and Adjustments
Printing Preferences
Monochrome Conversion
The monochrome panels in the ribbon can only print binary (pure on or off) images.
Monochrome conversion is used to convert continuous tone 8-bit-per-pixel RGB or gray
image content into binary1-bit-per-pixel content.
• Dither error diffusion (default)
Error diffusion is a dithering technique to convert full color or
gray images into a binary image that when printed simulates
having a continuous tone response. The error diffusion
technique is usually preferred on pictorial images since it
produces a sharper and more detailed image.
• Dither 6x6 halftoning
Halftoning is a dithering technique to convert full color or gray
images into a binary image that when printed simulates having
a continuous tone response. The halftoning technique is
coarser looking than error diffusion but does not have the
inherent image structure seen with error diffusion.
•Threshold
Threshold (also know as Dither pure black on white) converts
full color or gray images into a binary image by a threshold
comparison. If a gray pixel value is above the threshold, it
converted to a white pixel; and if its below the threshold, its
converted to a black pixel.This method will not simulate
shades like error diffusion or halftoning does and is thus not
recommend to be used with pictorial content. However, it will
accurately preserve straight edges on graphics, barcodes, and
text and is the preferred conversion for those types of images.
SUMMARY
Error diffusion/halftoning: Use on pictures. Image content dictates if error diffusion or
halftoning would look best. For the majority of time, error diffusion is better.
Threshold: Use on text, barcodes, line art, and simple graphics.
P1036101-002 Zebra ZXP Series 7 Card Printer User’s Manual 91
Page 100

4: Printer Settings and Adjustments
Printing Preferences
Color (YMC) Optimization Tab
These color adjustments modify only how the pictures print. These adjustments have no effect
on the image files. (That type of adjustment would be made in an image processing application
program.) These adjustments are not available for Monochrome or KrO ribbons.
• Full color printing:
- Brightness and Contrast adjustments range from -25 to +25, default = 0. Changes
are reflected in the preview image.
- Sharpening filter options are None, Low, Normal (default), and High. Adjustments
are not reflected in the preview image.
By default, the image file is automatically sharpened; i.e., edges are enhanced within
the image. If sharpening has already been done, this function can be turned off
(None). The Low and High options are available if additional sharpening adjustment
is required.
- Preheat adjustment ranges from -50 to 50, default = 0. Increasing the preheat value
will darken up edges of fonts, fine lines, and color edges that are against a white or
very near white background.
In some cases, increasing the preheat value too much can cause the white or near
white images to print with a light color cast. Increasing the preheat might also
improve color-to-color mis-registration that may occur.
92 Zebra ZXP Series 7 Card Printer User’s Manual P1036101-002
 Loading...