

Page 1

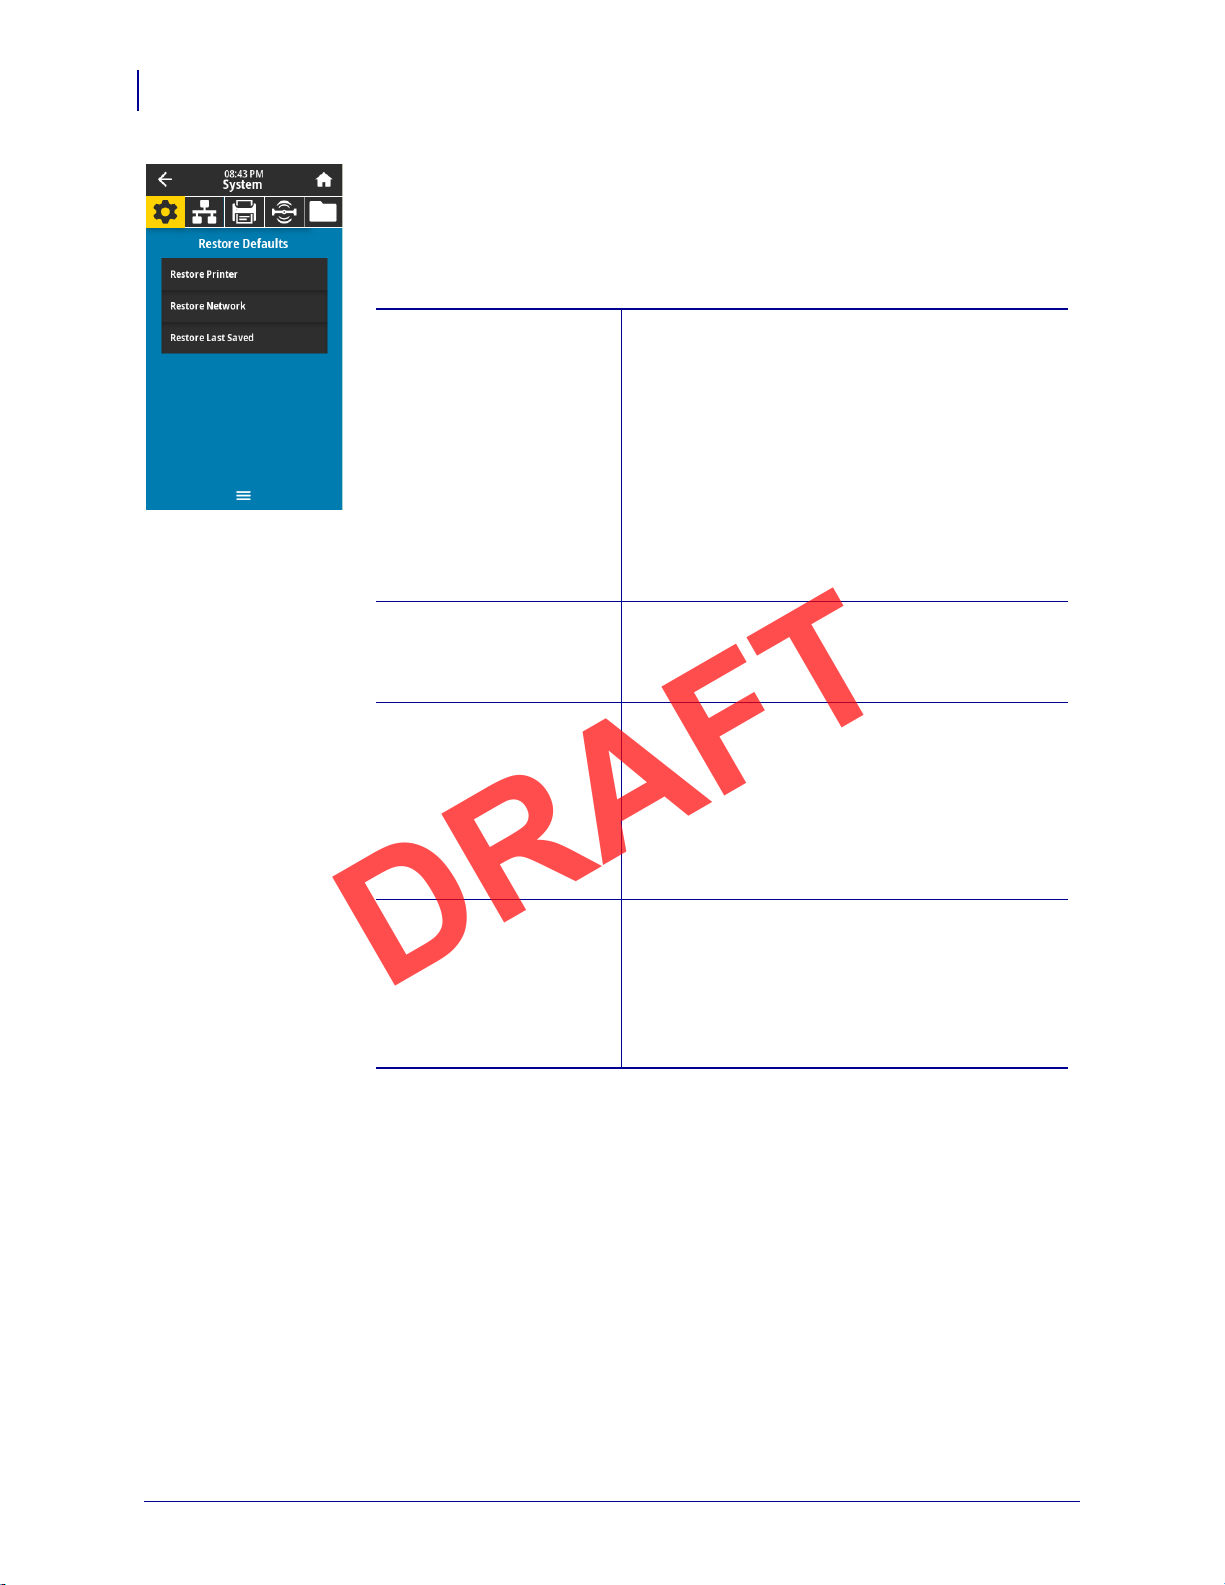
System > Settings > Screen Calibration
DRAFT
Touch each crosshair to calibrate the screen.
Printer Configuration and Adjustment
User Menus
61
5/9/19 ZT411/ZT421 Color Touch User Guide P1106464-001
Page 2
Printer Configuration and Adjustment
Accepted values: PRINTER—Restores all printer settings other than
the network settings back to the factory
defaults. Use care when loading defaults
because you will need to reload all settings
that you changed manually.
NETWORK—Reinitializes the printer’s wired or
wireless print server. With a wireless print
server, the printer also reassociates with your
wireless network.
LAST SAVED—Loads settings from the last
permanent save.
Related ZPL command(s):
PRINTER—^JUF
NETWORK
—^JUN
LAST SAVED
—^JUR
Control panel key(s): PRINTER—Hold FEED + PAUSE during printer
power-up to reset the printer parameters to
factory values.
NETWORK—Hold CANCEL + PAU S E during
printer power-up to reset the network
parameters to factory values.
LAST SAVED: N/A
Printer web page:
PRINTER—View and Modify Printer Settings >
Restore Default Configuration
NETWORK—Print Server Settings > Reset Print
Server
LAST SAVED—View and Modify Printer Settings
> Restore Saved Configuration
DRAFT
62
User Menus
System > Settings > Restore Defaults
Restore specific printer, print server, and network settings back to the factory
defaults. Use care when loading defaults because you will need to reload all
settings that you changed manually. This menu item is available through two user
menus with different default values for each.
P1106464-001 ZT411/ZT421 Color Touch User Guide 5/9/19
Page 3
Printer Configuration and Adjustment
Related ZPL command(s): ~WC *
Control panel key(s): Do one of the following:*
• Hold CANCEL during printer power-up.
(Formerly called a CANCEL self test.
• Hold FEED + CANCEL for 2 seconds when
the printer is in the Ready state.
Printer web page: View and Modify Printer Settings >
Print Listings on Label *
Related ZPL command(s): ~WC
Control panel key(s): Do one of the following:*
• Hold CANCEL during printer power-up.
(Formerly called a CANCEL self test.
• Hold FEED + CANCEL for 2 seconds when
the printer is in the Ready state.
Printer web page: View and Modify Printer Settings >
Print Listings on Label *
* Prints a printer configuration label and a network configuration label.
DRAFT
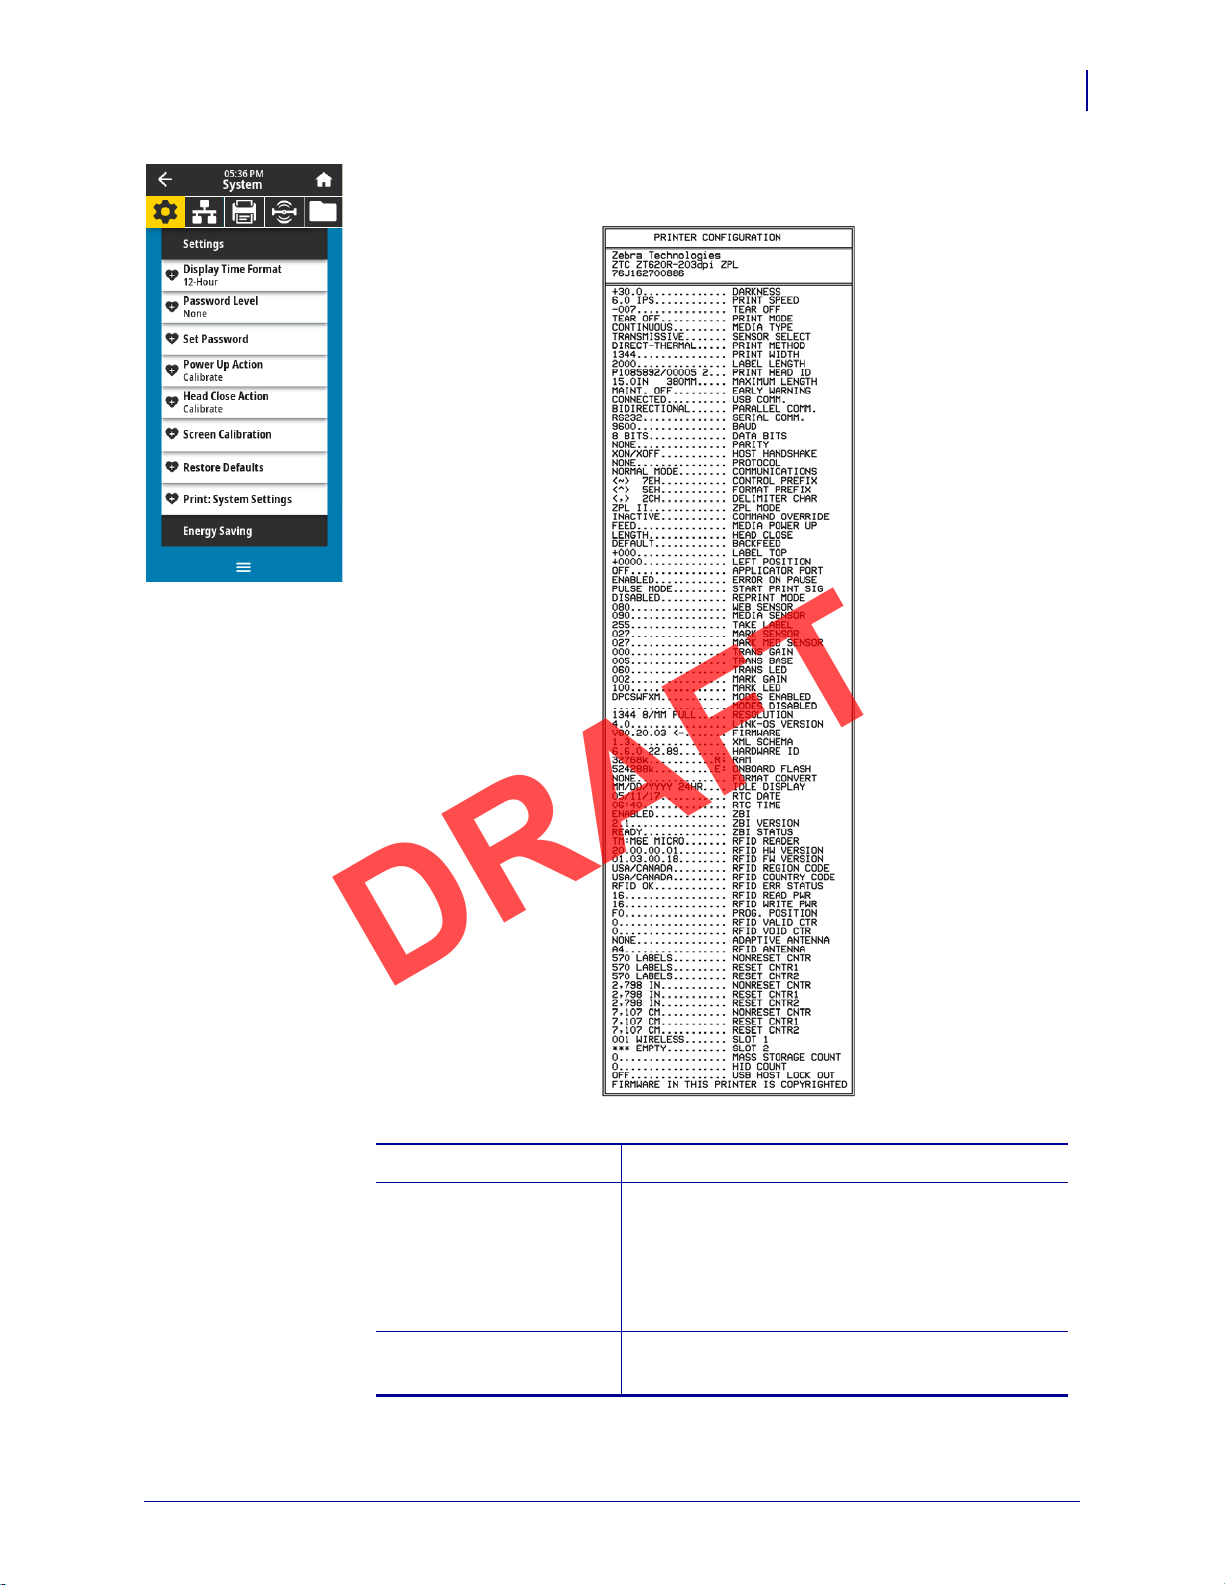
System > Settings > Print: System Settings
Prints a printer configuration label. The following is a sample label.
User Menus
63
5/9/19 ZT411/ZT421 Color Touch User Guide P1106464-001
Page 4
Printer Configuration and Adjustment
Accepted values: • ON
• OFF
SGD command used:
power.energy_star.enable
power.energy_star_timeout
(to set the amount of idle time before Energy
Star is invoked)
Important • You must reset the print server to allow changes to the
network settings to take effect.
Related ZPL command(s):
~WR
SGD command used:
device.reset
Printer web page: Print Server Settings > Reset Print Server
Accepted values: • Wired
• WLAN
Related ZPL command(s):
^NC
SGD command used:
ip.primary_network
DRAFT
64
User Menus
Connection Menu
System > Energy Saving > Energy Star
When Energy Star mode is enabled, the printer goes into a “sleep” mode after a
timeout period, thereby lowering power consumption. Press any button on the
control panel to bring the printer back to an active state.
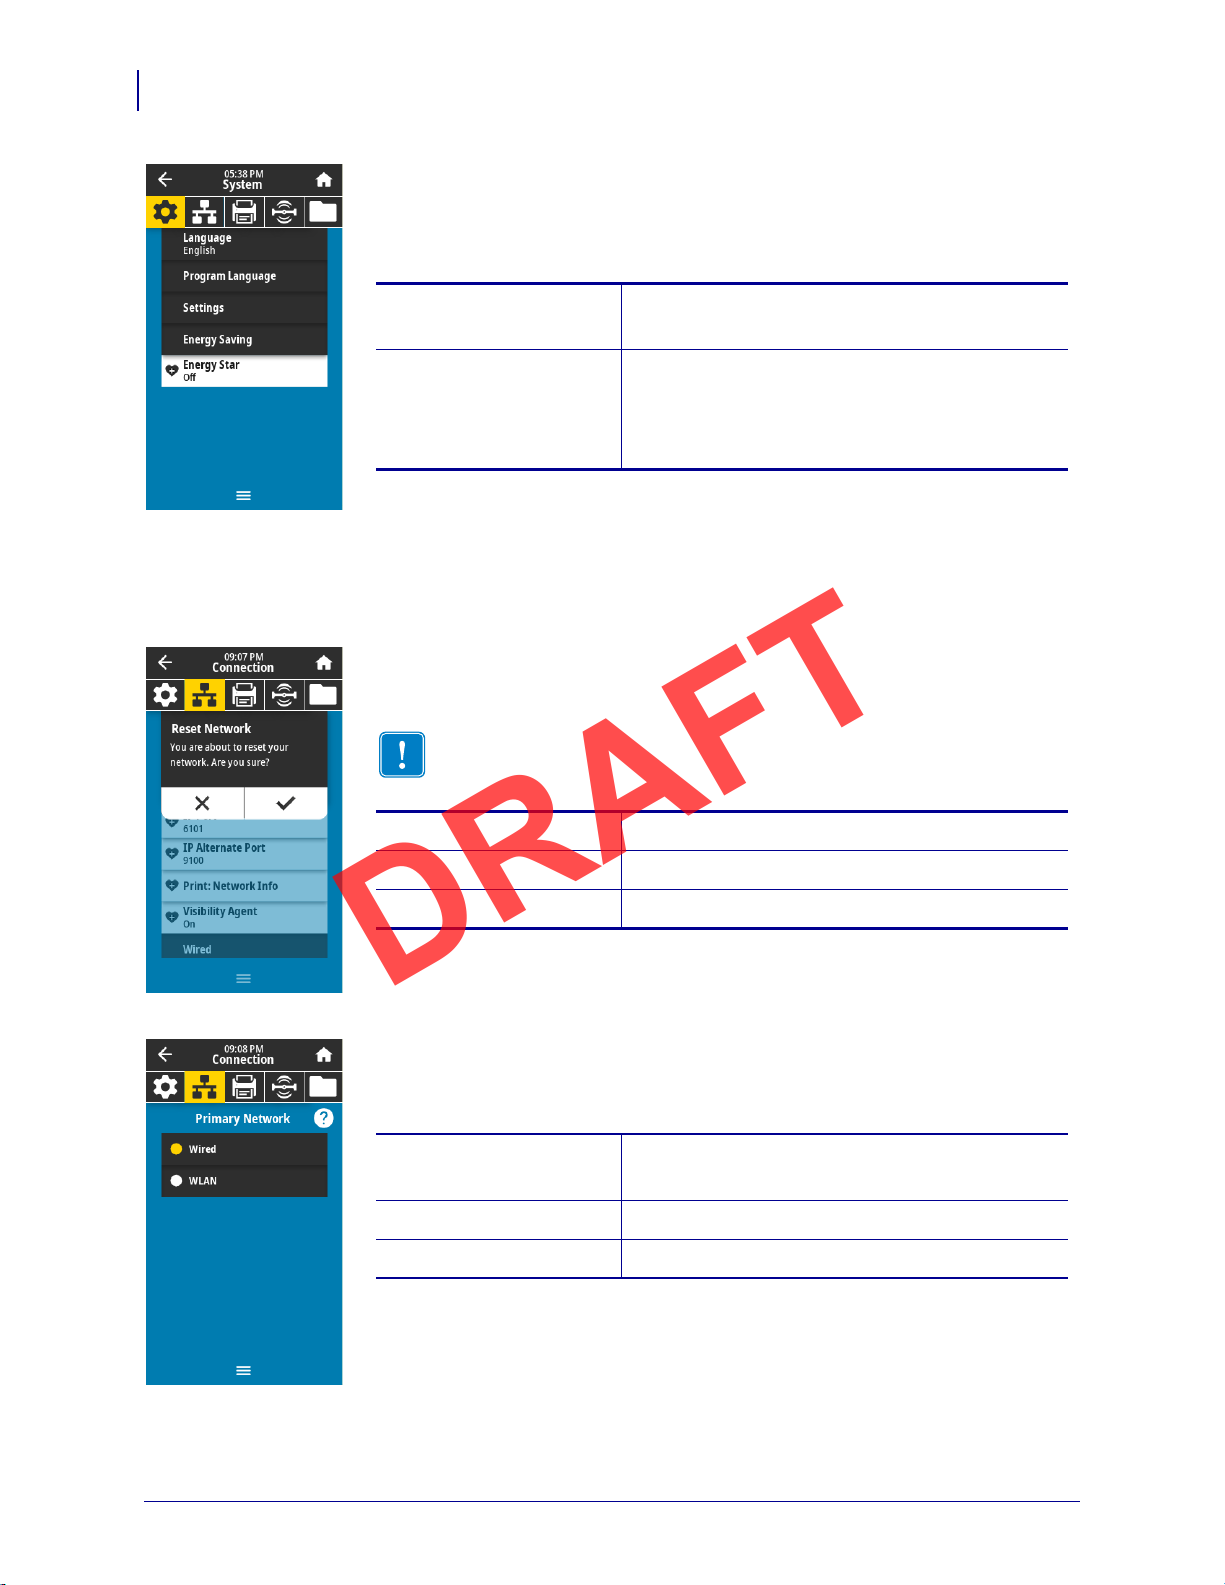
Connection > Networks > Reset Network
This option resets the wired or wireless print server and saves any changes that you
made to any network settings.
Connection > Networks > Primary Network
View or modify whether the wired or wireless print server is considered primary.
You may select which one is primary.
P1106464-001 ZT411/ZT421 Color Touch User Guide 5/9/19
Page 5
Printer Configuration and Adjustment
SGD command used: internal_wired.ip.port
wlan.ip.port
Printer web page: View and Modify Printer Settings >
Network Communications Setup >
TCP/IP Settings
SGD command used: internal_wired.ip.port_alternate
wlan.ip.port_alternate
Printer web page: View and Modify Printer Settings >
Network Communications Setup >
TCP/IP Settings
DRAFT
User Menus
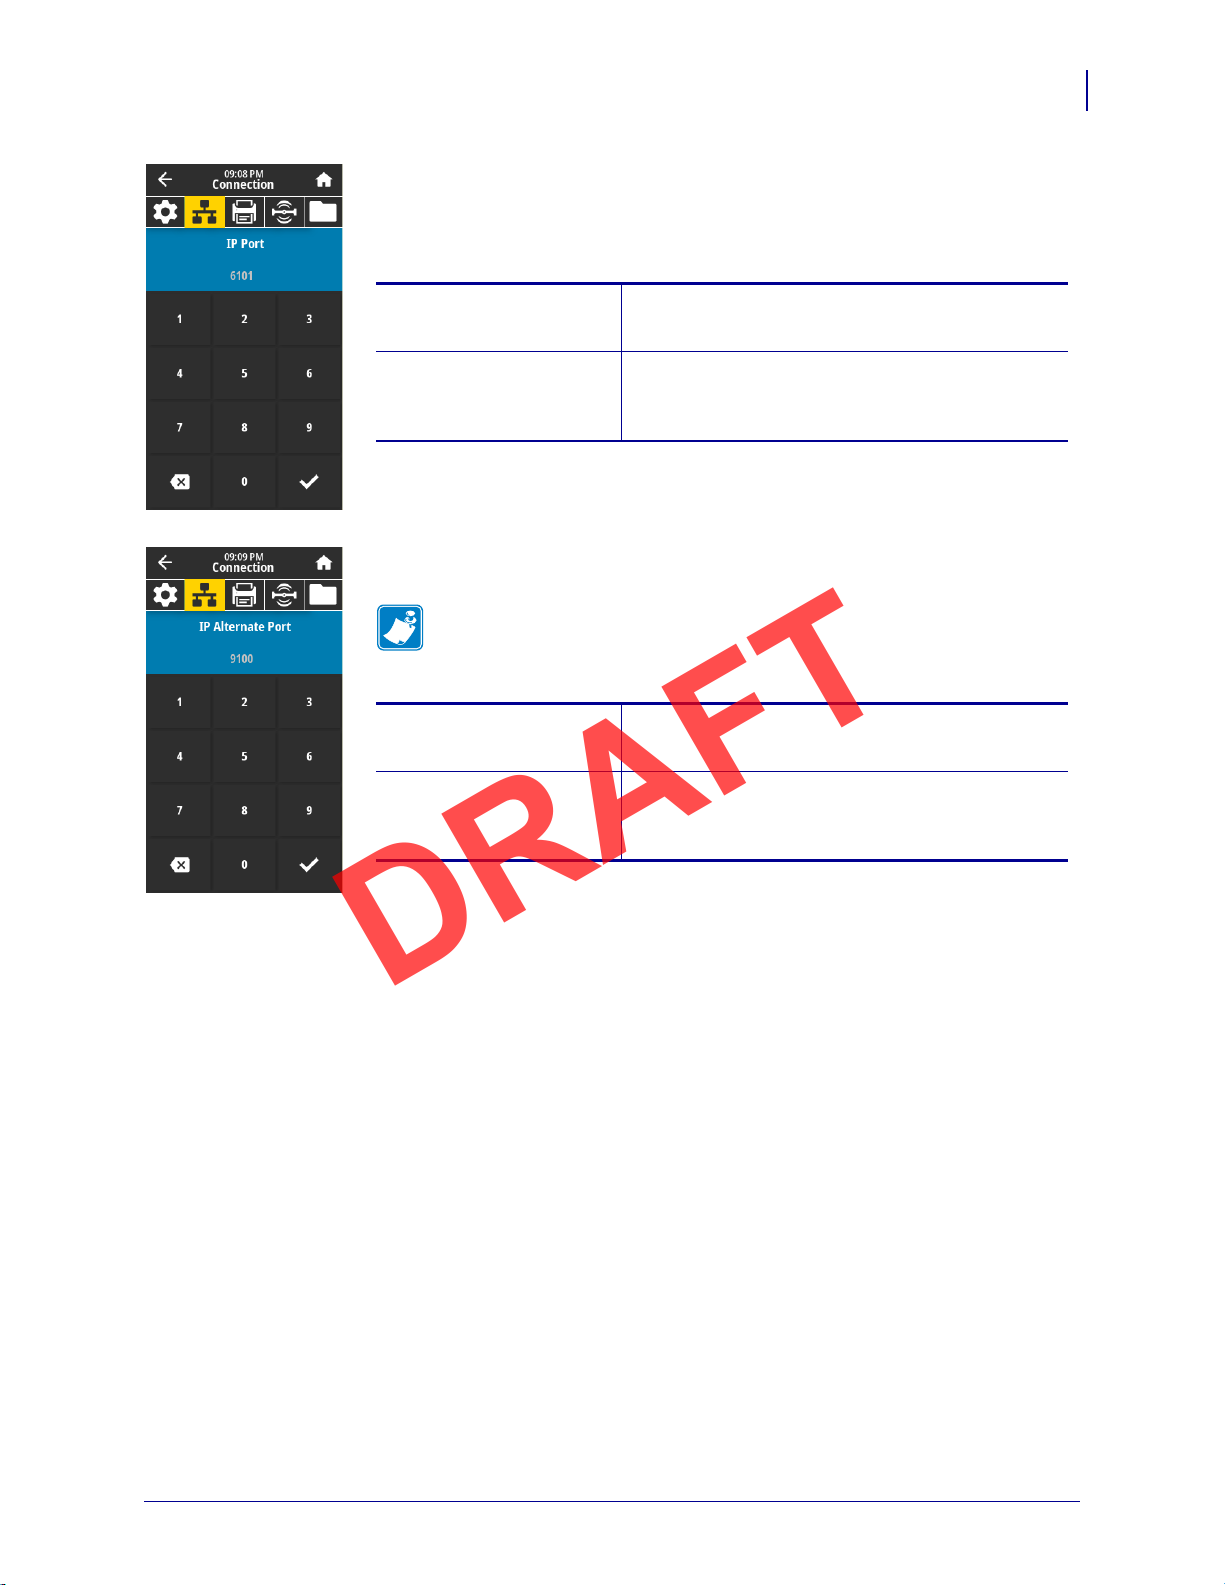
Connection > Networks > IP Port
This printer setting refers to the internal wired print servers port number that the
TCP print service is listening on. Normal TCP communications from the host
should be directed to this port.
Connection > Networks > IP Alternate Port
This command sets the port number of the alternate TCP port.
Note • Print servers supporting this command will monitor both the
primary port and the alternate port for connections at the same time.
65
5/9/19 ZT411/ZT421 Color Touch User Guide P1106464-001
Page 6
Printer Configuration and Adjustment
Related ZPL command(s): ~WL
Control panel key(s): Do one of the following:*
• Hold CANCEL during printer power-up.
(Formerly called a CANCEL self test.
• Hold FEED + CANCEL for 2 seconds when
the printer is in the Ready state.
Printer web page: View and Modify Printer Settings >
Print Listings on Label *
* Prints a printer configuration label and a network configuration label.
DRAFT
66
User Menus
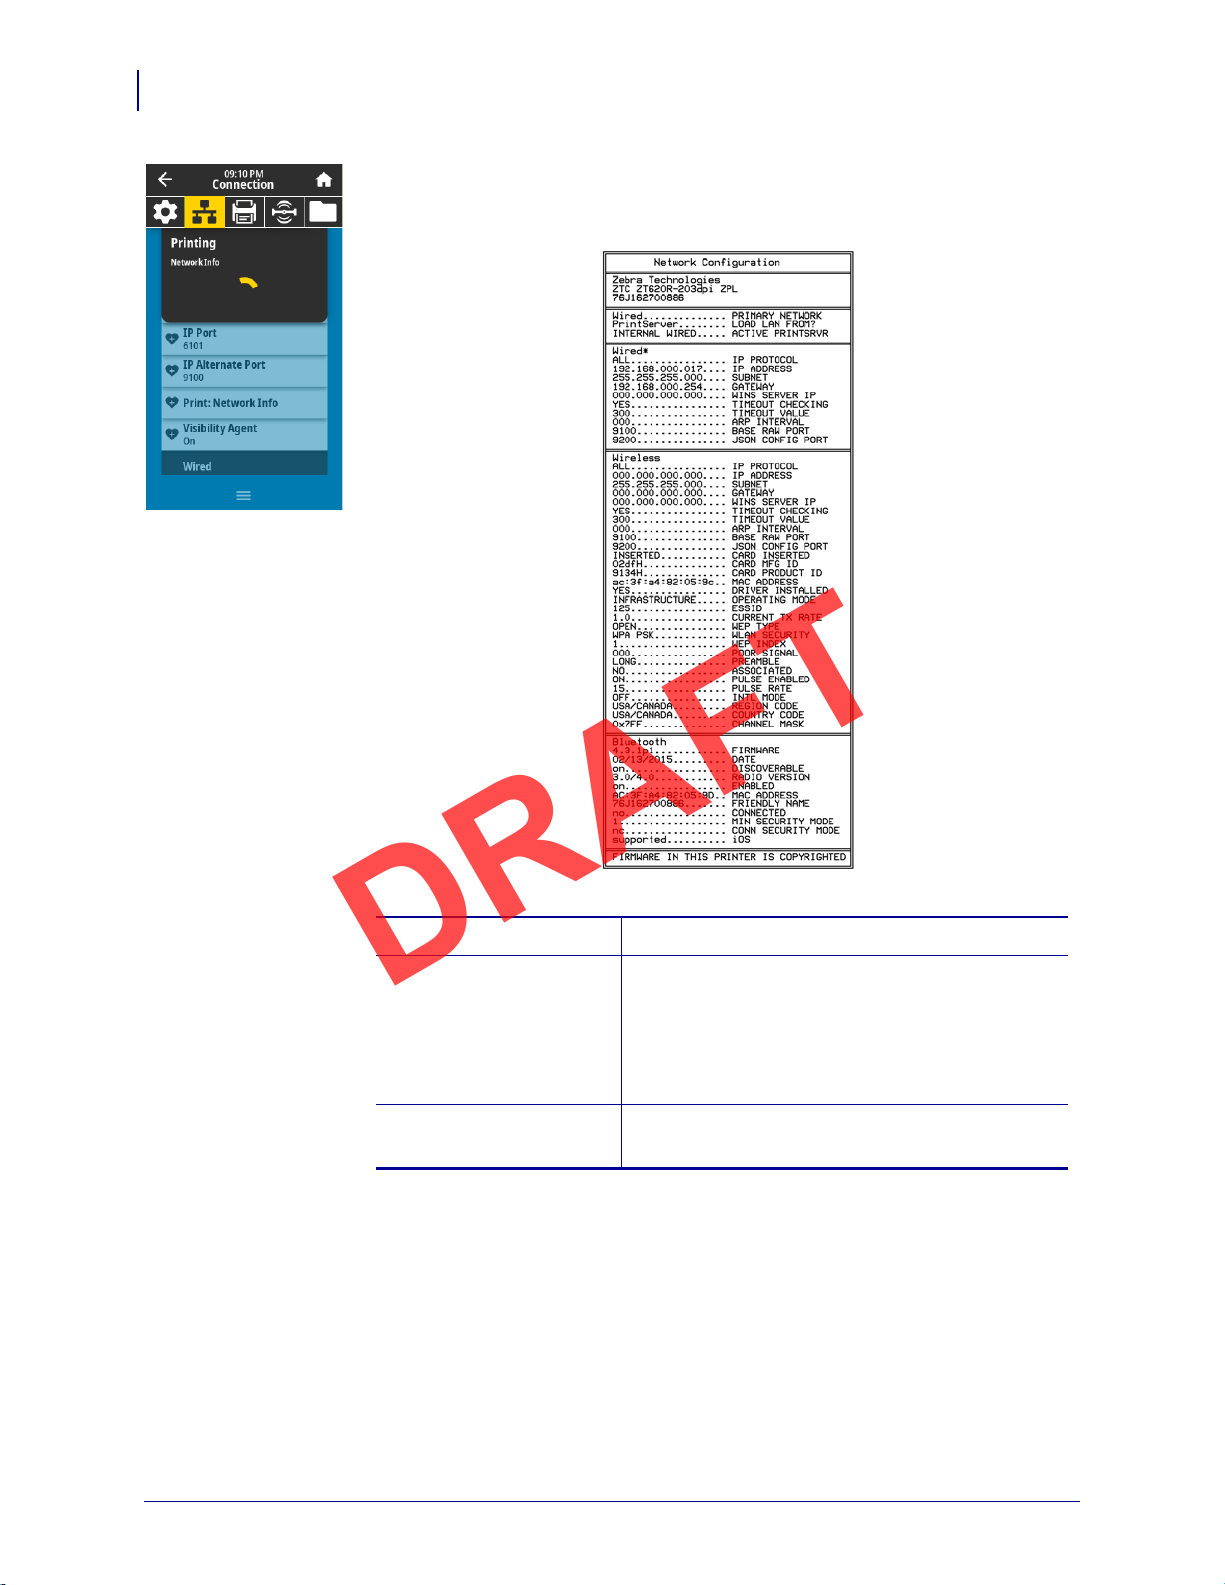
Connection > Networks > Print: Network Info
Prints the settings for any print server or Bluetooth device that is installed. The
following is a sample label.
P1106464-001 ZT411/ZT421 Color Touch User Guide 5/9/19
Page 7
Printer Configuration and Adjustment
Accepted values: • ON
• OFF
SGD command used:
weblink.zebra_connector.enable
Printer web page: View and Modify Printer Settings > Network
Configuration > Cloud Connect Settings
Accepted values: • ALL
• GLEANING ONLY
• RARP
• BOOTP
• DHCP
• DHCP & BOOTP
• PERMANENT
Related ZPL command(s):
^ND
SGD command used:
internal_wired.ip.protocol
Printer web page: View and Modify Printer Settings >
Network Communications Setup >
TCP/IP Settings
DRAFT
User Menus
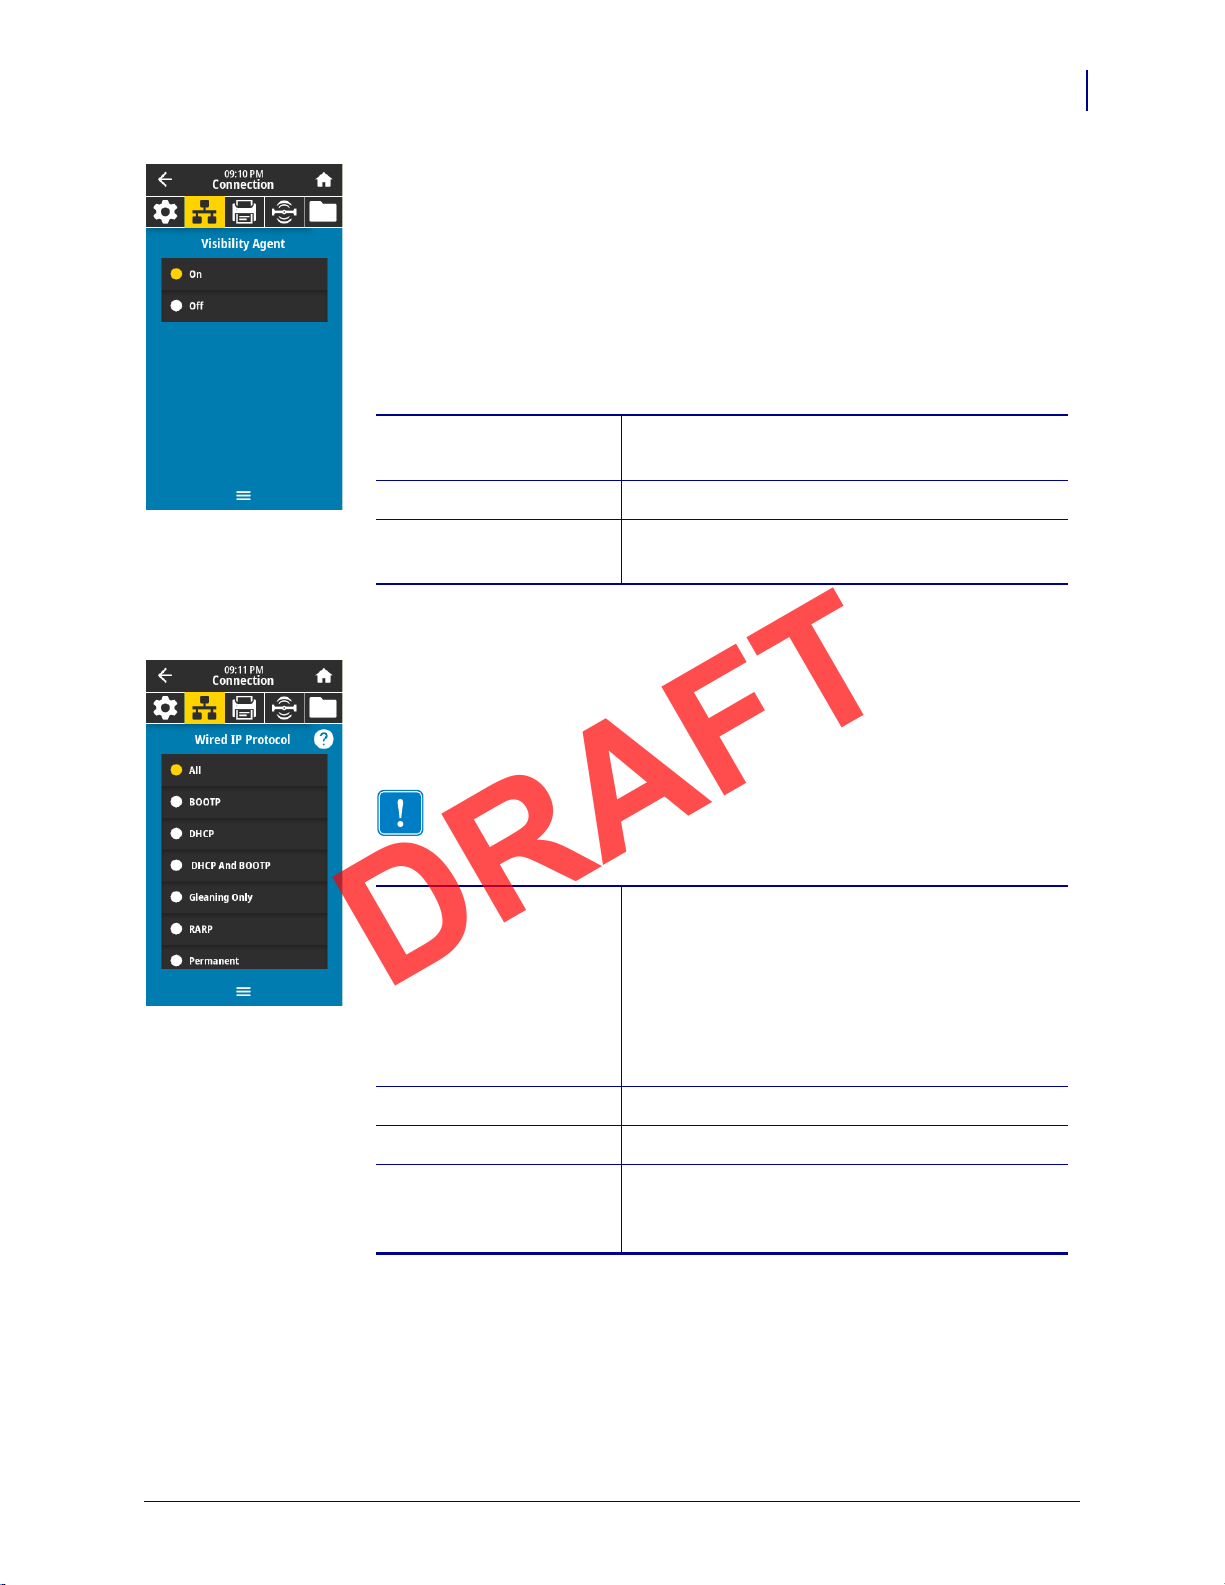
Connection > Networks > Visibility Agent
When the printer is connected to a wired or wireless network, it will attempt to
connect to Zebra’s Asset Visibility Service via the Cloud-based Zebra Printer
Connector using an encrypted, certificate-authenticated web socket connection.
The printer sends Discovery Data and Settings and Alerts Data. Data printed via
any label formats is NOT transmitted.
To opt out of this feature, disable this setting. For more information, see the
“Opting Out of the Asset Visibility Agent” application note at
http://www.zebra.com.
67
Connection > Wired > Wired IP Protocol
This parameter indicates if the user (permanent) or the server (dynamic) selects the
wired print server’s IP address. When a dynamic option is chosen, this parameter
tells the method(s) by which this print server receives the IP address from the
server.
Important • You must reset the print server to allow changes to the network
settings to take effect. See Connection > Networks > Reset Network
on page 64.
5/9/19 ZT411/ZT421 Color Touch User Guide P1106464-001
Page 8

Printer Configuration and Adjustment
Accepted values: 000 to 255 for each field
Related ZPL command(s):
^ND
SGD command used:
internal_wired.ip.addr
Printer web page: View and Modify Printer Settings >
Network Communications Setup >
TCP/IP Settings
Accepted values: 000 to 255 for each field
Related ZPL command(s):
^ND
SGD command used:
internal_wired.ip.netmask
Printer web page: View and Modify Printer Settings >
Network Communications Setup >
TCP/IP Settings
Accepted values: 000 to 255 for each field
Related ZPL command(s):
^ND
SGD command used:
internal_wired.ip.gateway
Printer web page: View and Modify Printer Settings >
Network Communications Setup >
TCP/IP Settings
DRAFT
68
User Menus
Connection > Wired > Wired IP Address
View and, if necessary, change the printer’s wired IP address.
To save changes to this setting, set Connection > Wired > Wired IP Protocol
on page 67 to
Networks > Reset Network on page 64).
Connection > Wired > Wired Subnet
View and, if necessary, change the wired subnet mask.
To save changes to this setting, set Connection > Wired > Wired IP Protocol
on page 67 to
Networks > Reset Network on page 64).
PERMANENT, and then reset the print server (see Connection >
PERMANENT, and then reset the print server (see Connection >
Connection > Wired > Wired Gateway
View and, if necessary, change the default wired gateway.
To save changes to this setting, set Connection > Wired > Wired IP Protocol
on page 67 to
Networks > Reset Network on page 64).
P1106464-001 ZT411/ZT421 Color Touch User Guide 5/9/19
PERMANENT, and then reset the print server (see Connection >
Page 9
Printer Configuration and Adjustment
SGD command used: internal_wired.mac_addr
Printer web page: View and Modify Printer Settings >
Network Communications Setup >
TCP/IP Settings
Accepted values: • ALL
• GLEANING ONLY
• RARP
• BOOTP
• DHCP
• DHCP & BOOTP
• PERMANENT
Related ZPL command(s):
^ND
SGD command used:
wlan.ip.protocol
Printer web page: View and Modify Printer Settings >
Network Communications Setup >
Wireless Setup
DRAFT
User Menus
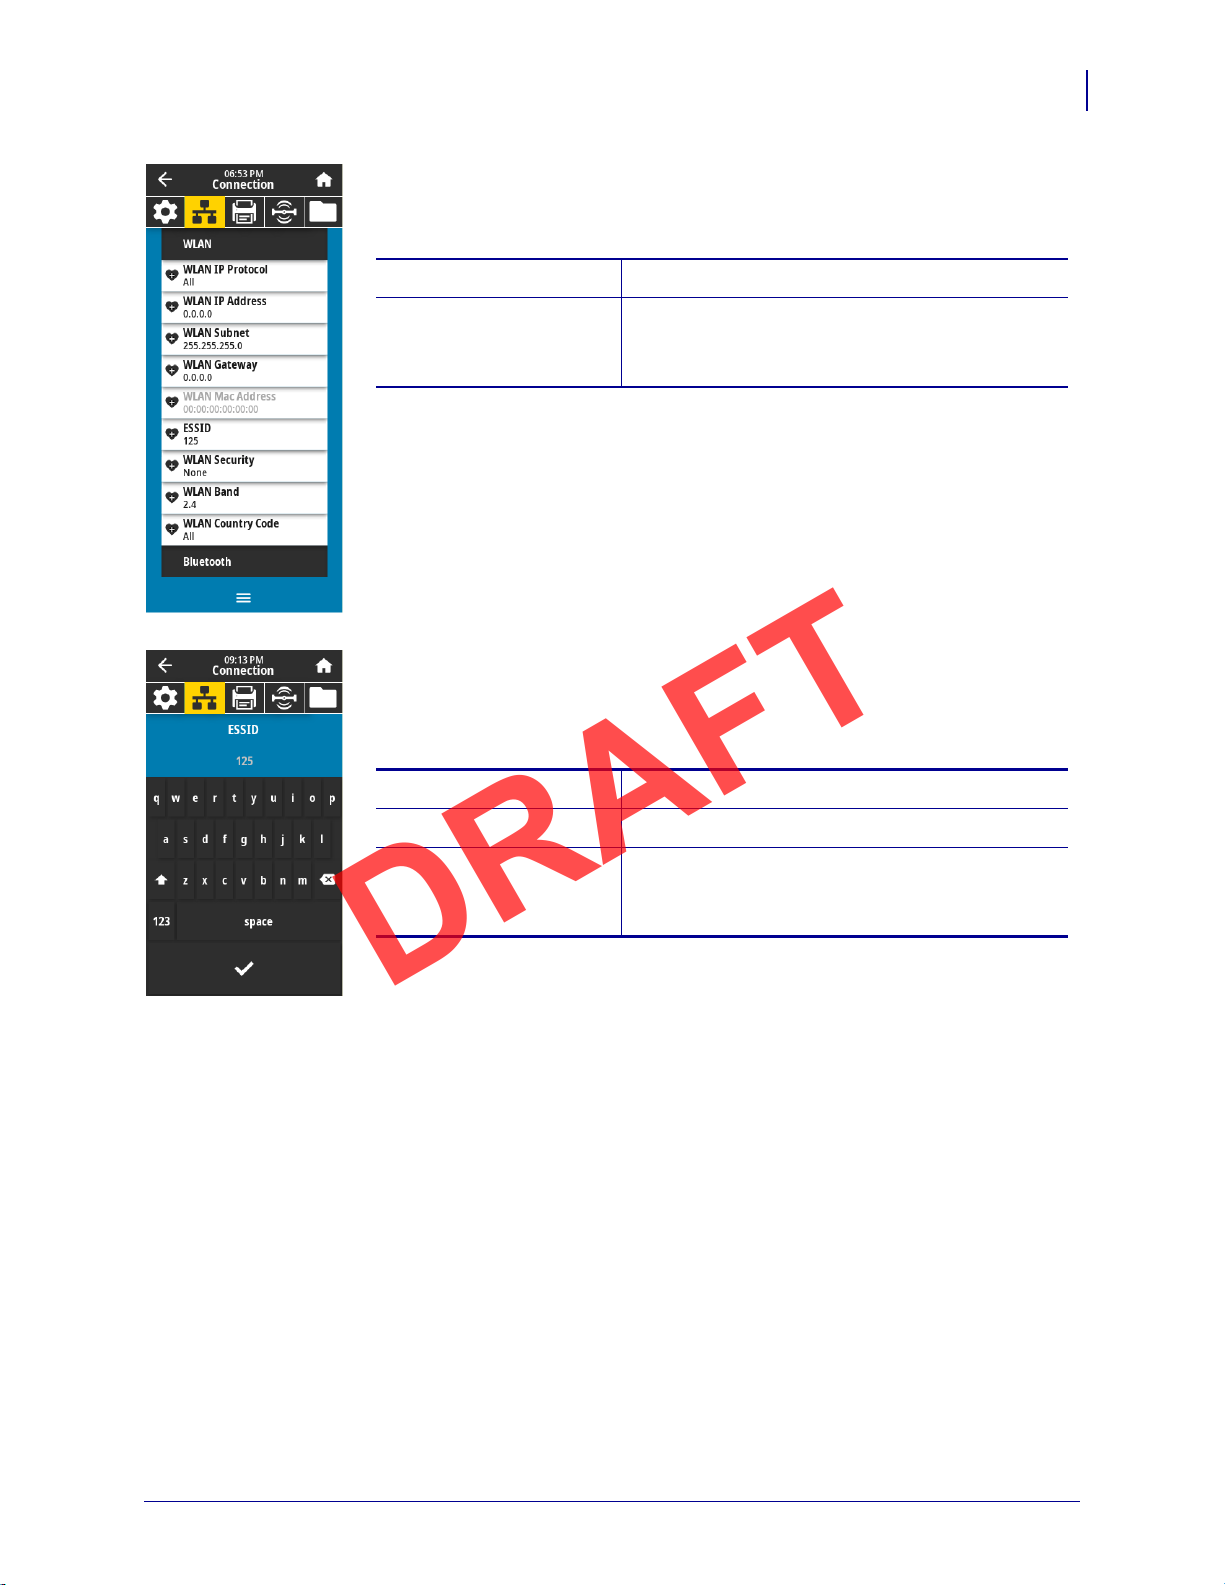
Connection > Wired > Wired Mac Address
View the Media Access Control (MAC) address of the wired print server. This
value cannot be modified.
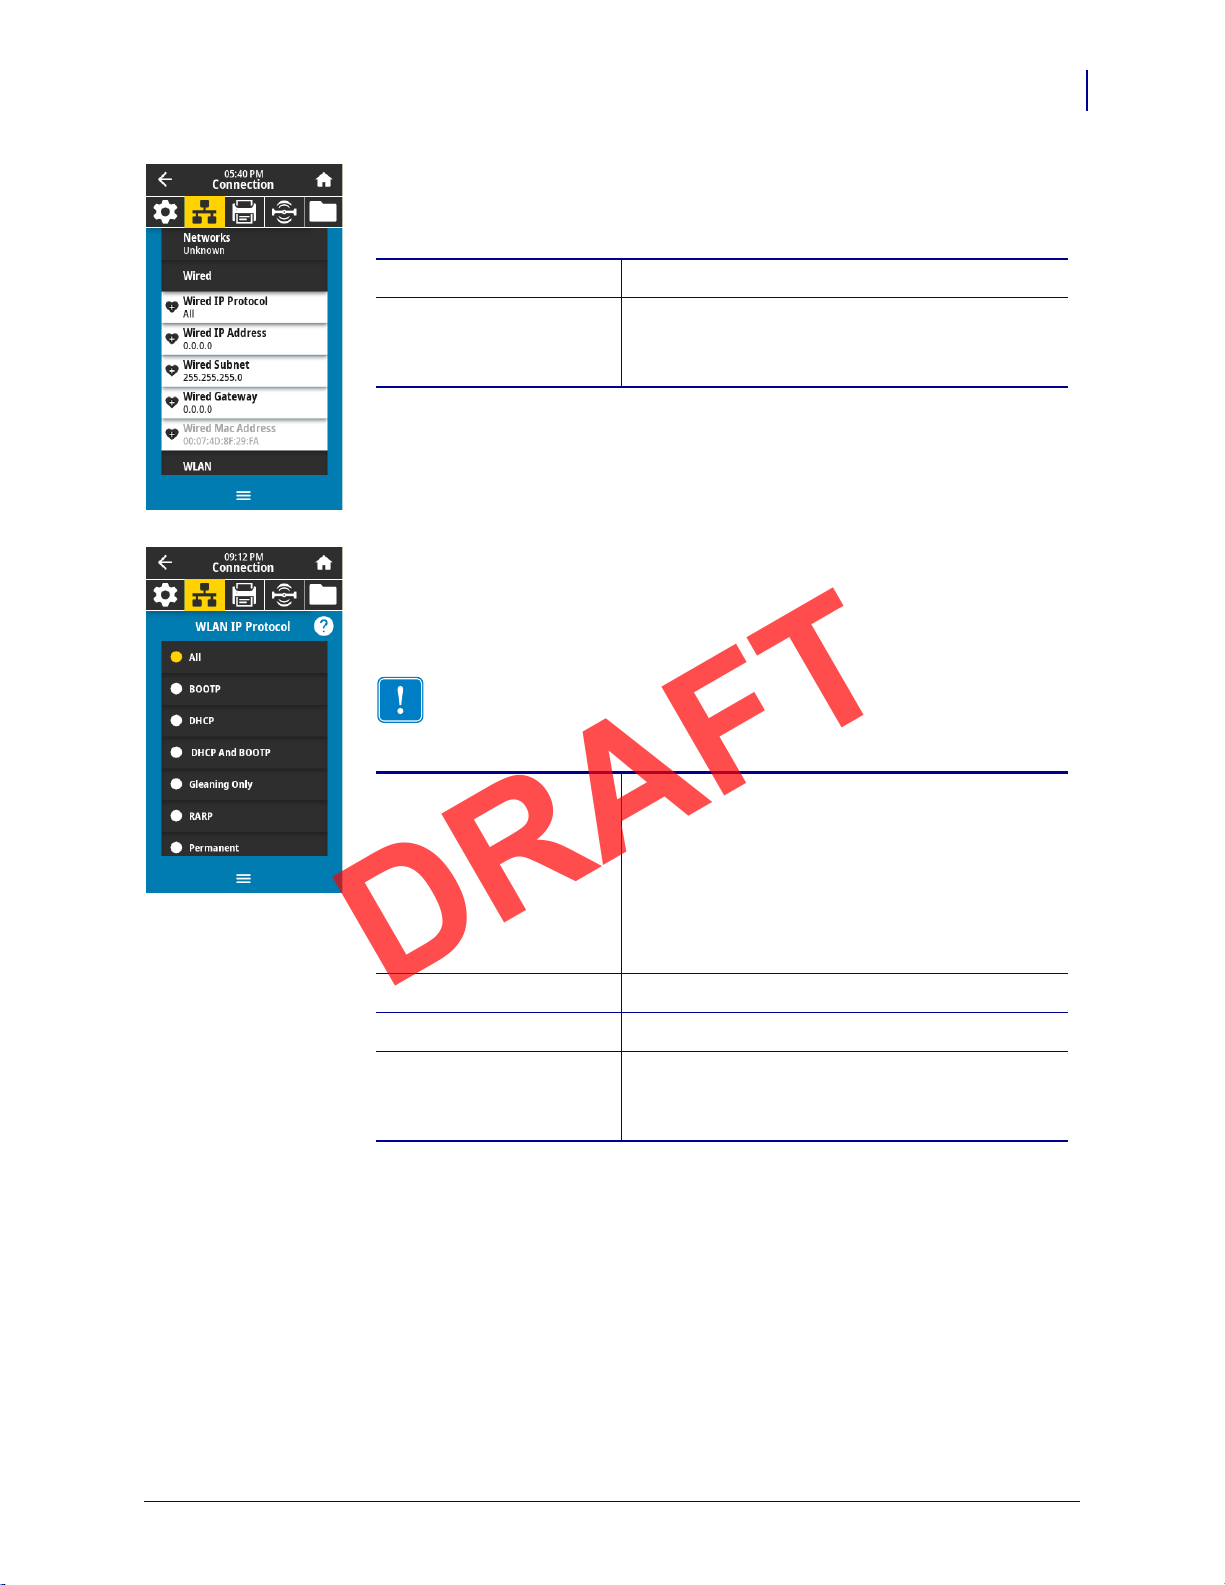
Connection > WLAN > WLAN IP Protocol
This parameter indicates if the user (permanent) or the server (dynamic) selects the
wireless print server’s IP address. When a dynamic option is chosen, this parameter
tells the method(s) by which this print server receives the IP address from the
server.
Important • You must reset the print server to allow changes to the network
settings to take effect. See Connection > Networks > Reset Network
on page 64.
69
5/9/19 ZT411/ZT421 Color Touch User Guide P1106464-001
Page 10
Printer Configuration and Adjustment
Accepted values: 000 to 255 for each field
Related ZPL command(s):
^ND
SGD command used:
ip.addr, wlan.ip.addr
Printer web page: View and Modify Printer Settings >
Network Communications Setup >
Wireless Setup
Accepted values: 000 to 255 for each field
Related ZPL command(s):
^ND
SGD command used:
wlan.ip.netmask
Printer web page: View and Modify Printer Settings >
Network Communications Setup >
Wireless Setup
Accepted values: 000 to 255 for each field
Related ZPL command(s):
^ND
SGD command used:
wlan.ip.gateway
Printer web page: View and Modify Printer Settings >
Network Communications Setup >
Wireless Setup
DRAFT
70
User Menus
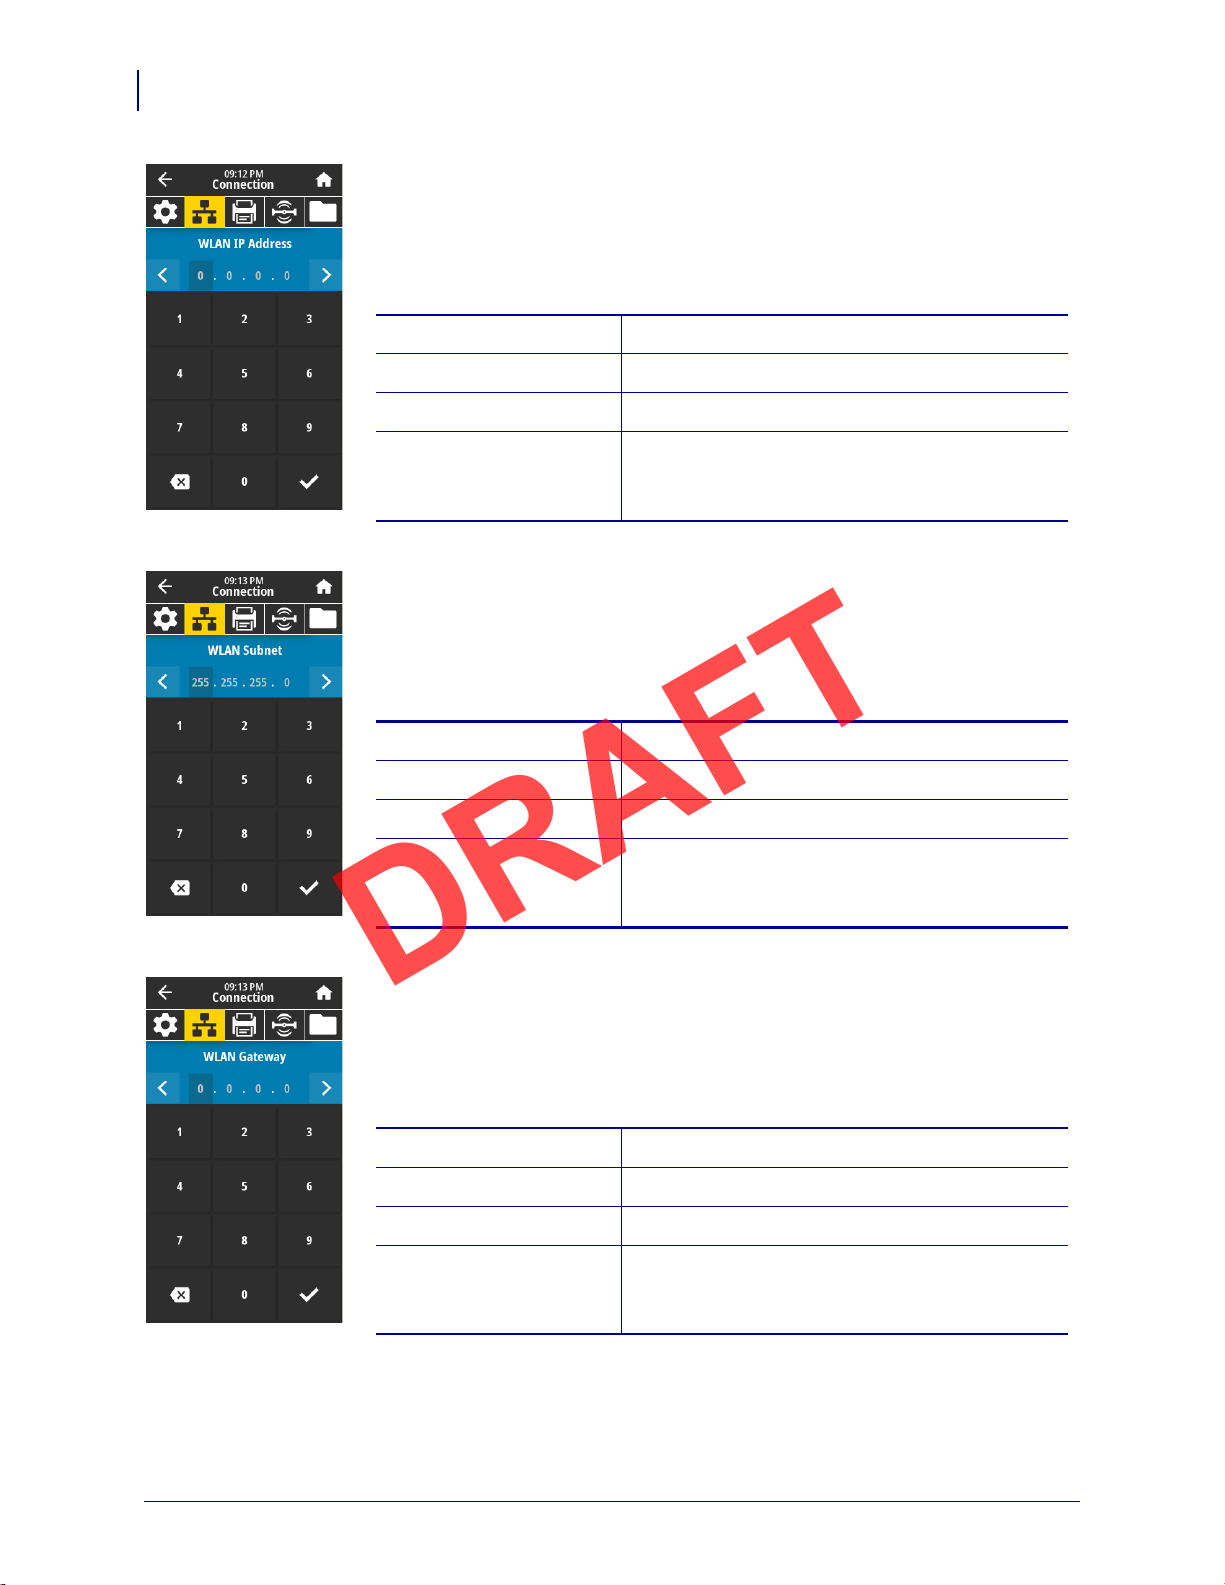
Connection > WLAN > WLAN IP Address
View and, if necessary, change the printer’s wireless IP address.
To save changes to this setting, set Connection > WLAN > WLAN IP Protocol
on page 69 to
Networks > Reset Network on page 64).
Connection > WLAN > WLAN Subnet
View and, if necessary, change the wireless subnet mask.
To save changes to this setting, set Connection > WLAN > WLAN IP Protocol
on page 69 to
Networks > Reset Network on page 64).
PERMANENT, and then reset the print server (see Connection >
PERMANENT, and then reset the print server (see Connection >
Connection > WLAN > WLAN Gateway
View and, if necessary, change the default wireless gateway.
To save changes to this setting, set Connection > WLAN > WLAN IP Protocol
on page 69 to
Networks > Reset Network on page 64).
P1106464-001 ZT411/ZT421 Color Touch User Guide 5/9/19
PERMANENT, and then reset the print server (see Connection >
Page 11
Printer Configuration and Adjustment
SGD command used: wlan.mac_addr
Printer web page: View and Modify Printer Settings >
Network Communications Setup >
Wireless Setup
Accepted values: 32-character alphanumeric string (default 125)
SGD command used:
wlan.essid
Printer web page: View and Modify Printer Settings >
Network Communications Setup >
Wireless Setup
DRAFT
User Menus
Connection > WLAN > WLAN Mac Address
View the Media Access Control (MAC) address of the wireless print server. This
value cannot be modified.
Connection > WLAN > ESSID
The Extended Service Set Identification (ESSID) is an identifier for your wireless
network. This setting, which cannot be modified from the control panel, gives the
ESSID for the current wireless configuration.
71
5/9/19 ZT411/ZT421 Color Touch User Guide P1106464-001
Page 12
Printer Configuration and Adjustment
Related ZPL command(s): ^WX
SGD command used:
wlan.security
Printer web page: View and Modify Printer Settings >
Network Communications Setup >
Wireless Encryption Setup
Accepted values: ???
SGD command used:
???
Printer web page: View and Modify Printer Settings >
Network Communications Setup >
Wireless Setup
DRAFT
72
User Menus
Connection > WLAN > WLAN Security
Select the security type being used on your WLAN.
Connection > WLAN > WLAN Band
???
P1106464-001 ZT411/ZT421 Color Touch User Guide 5/9/19
Page 13
Printer Configuration and Adjustment
SGD command used: wlan.country_code
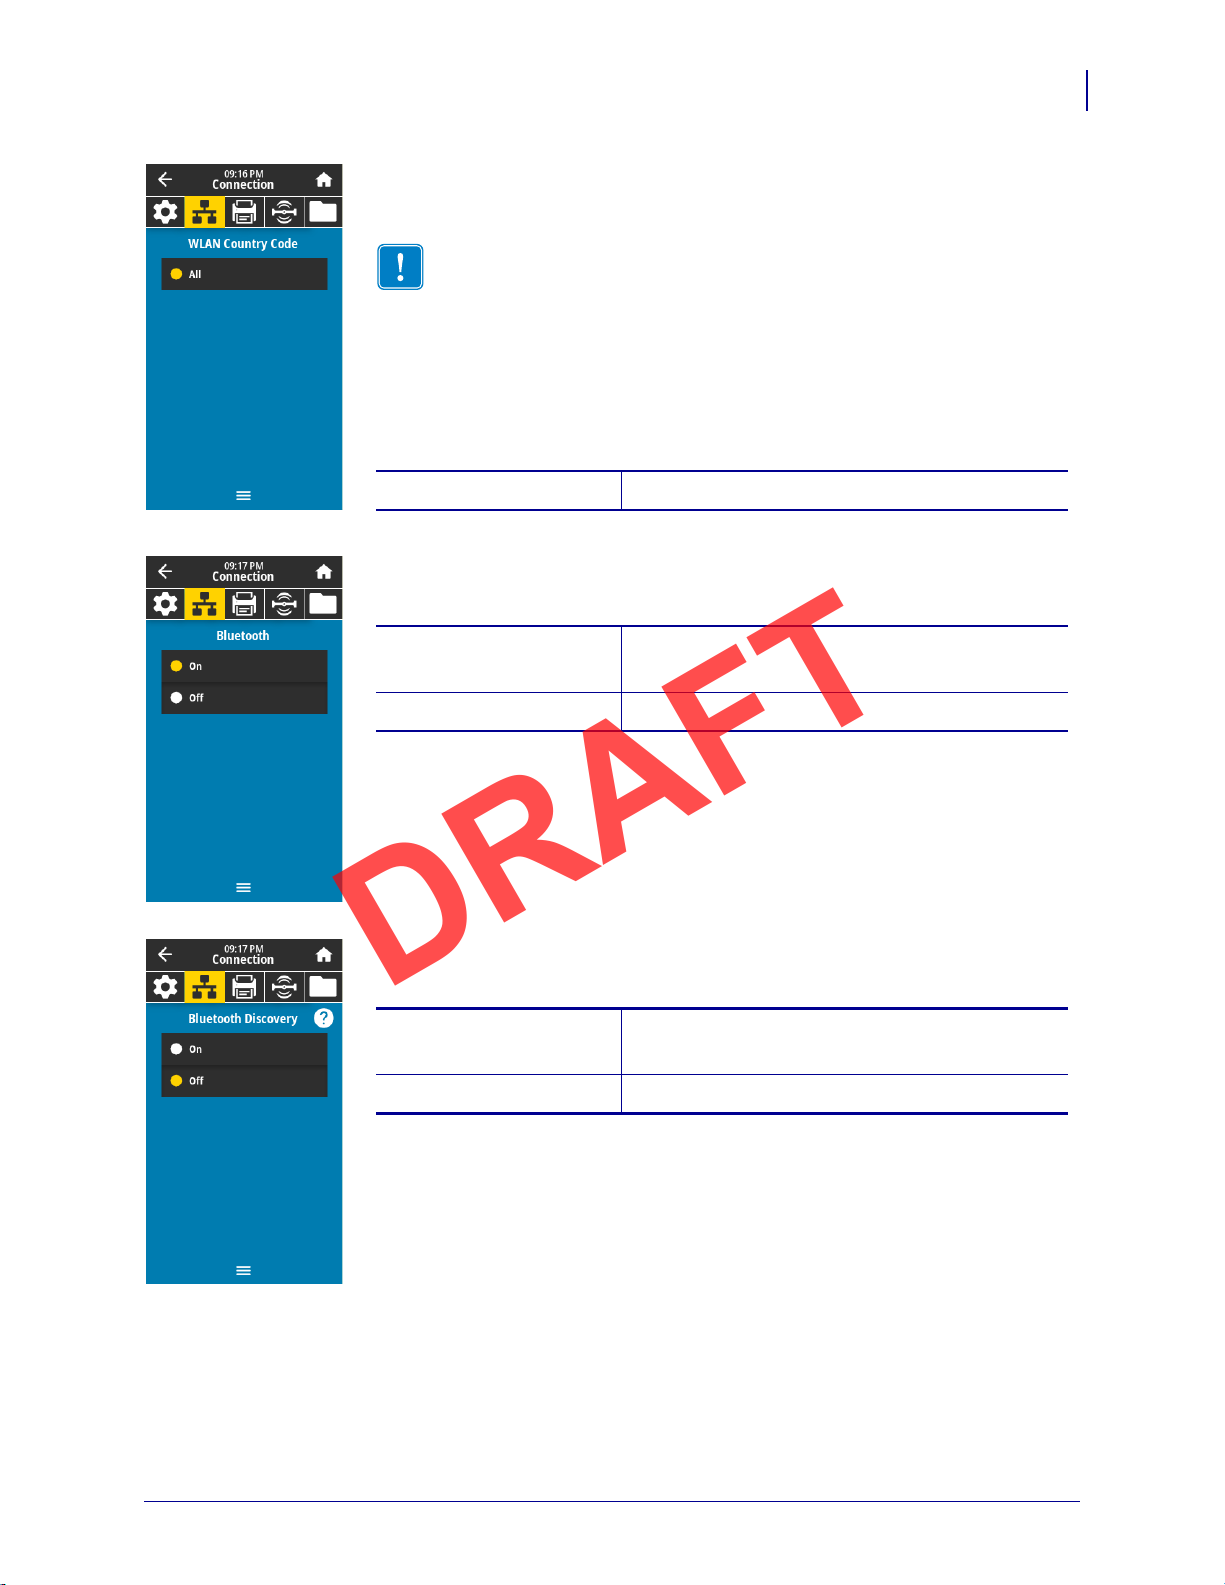
Accepted values: • ON—Enables the Bluetooth radio.
• OFF—Disables the Bluetooth radio.
SGD command used:
bluetooth.enable
Accepted values: • ON—Enables Bluetooth discoverable mode.
• OFF—Disables Bluetooth discoverable mode.
SGD command used:
bluetooth.discoverable
DRAFT
User Menus
Connection > WLAN > WLAN Country Code
The country code defines the regulatory country for which the wireless radio is
currently configured.
Important • The list of country codes is specific to each printer and
depends on the printer model and its wireless radio configuration. The list is
subject to change, addition, or deletion with any firmware update, at any
time, without notice.
To determine the country codes available on your printer, issue the
! U1 getvar "wlan" command to return all commands related to
WLAN settings. Locate the
results and view the country codes available for your printer.
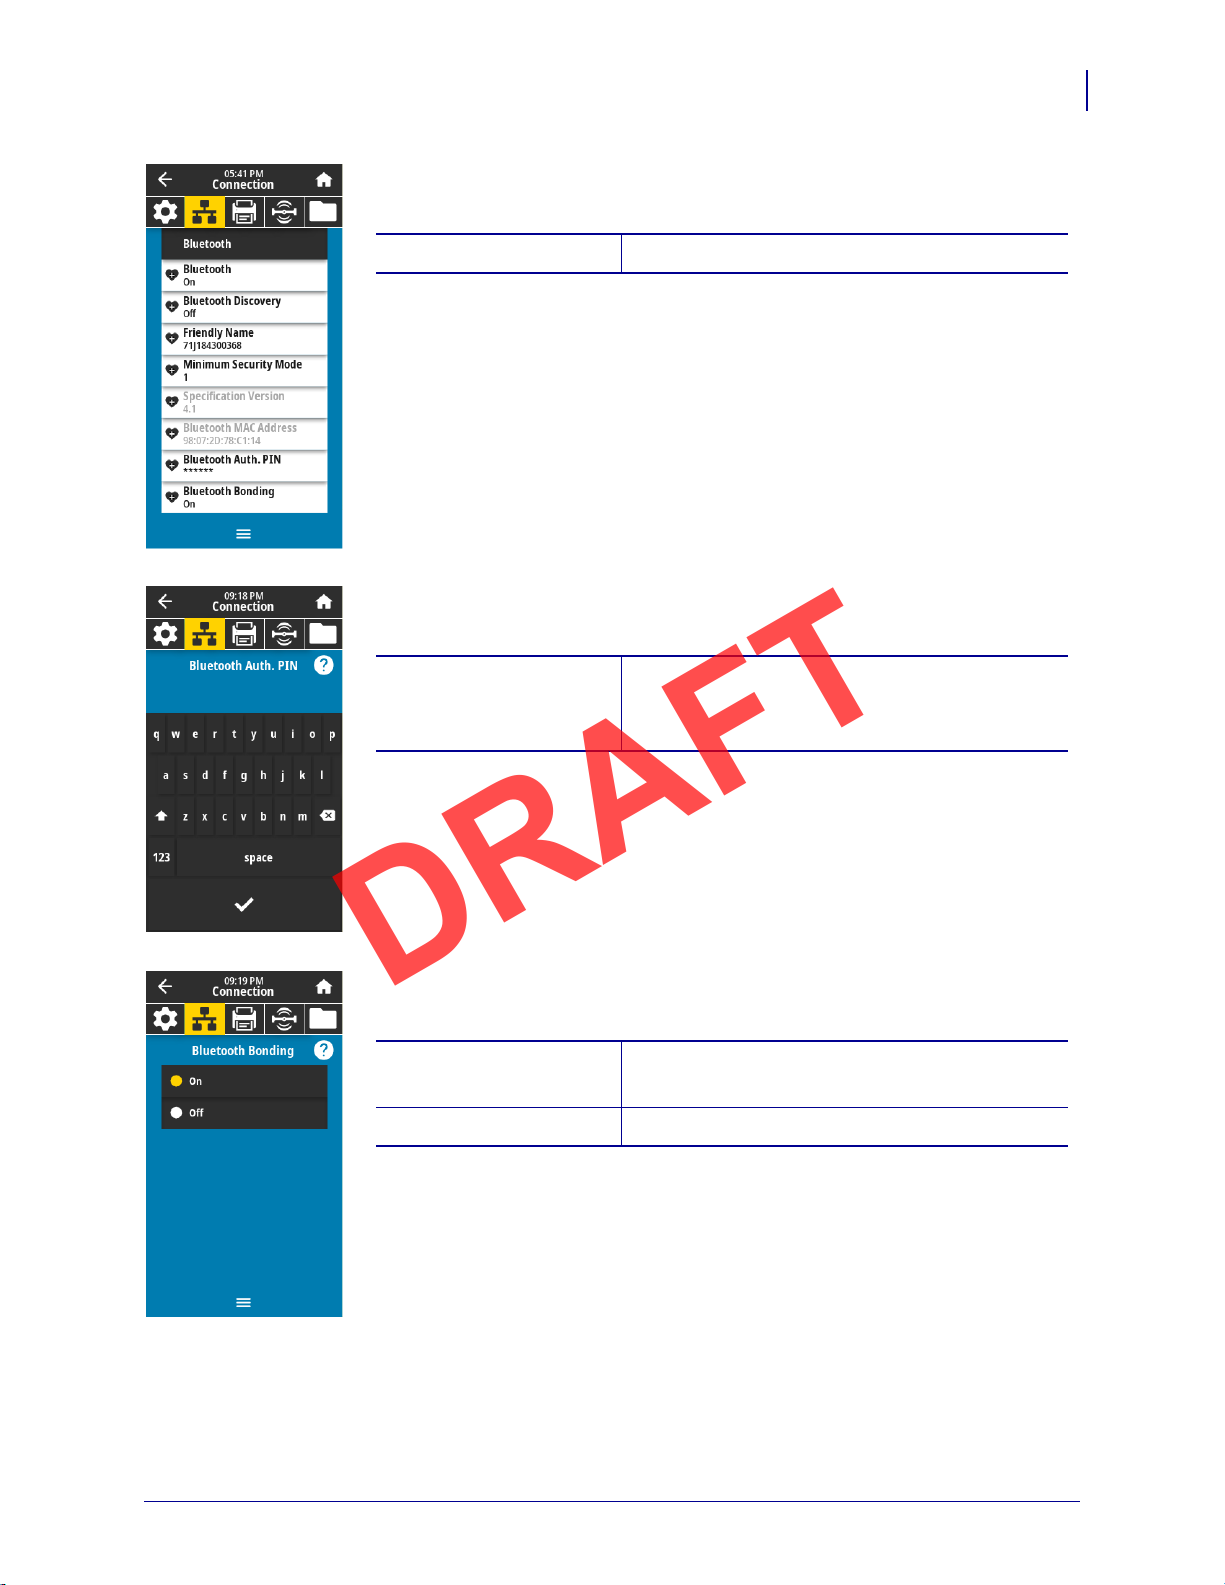
Connection > Bluetooth > Bluetooth
Select if the printer is “Discoverable” for Bluetooth device pairing.
wlan.country.code command in the
73
Connection > Bluetooth > Bluetooth Discovery
Select if the printer is “Discoverable” for Bluetooth device pairing.
5/9/19 ZT411/ZT421 Color Touch User Guide P1106464-001
Page 14
Printer Configuration and Adjustment
Accepted values: 17-character text string
SGD command used:
bluetooth.friendly_name
Accepted values: 1, 2, 3, 4
SGD command used:
bluetooth.minimum_security_mode
SGD command used: bluetooth.version
DRAFT
74
User Menus
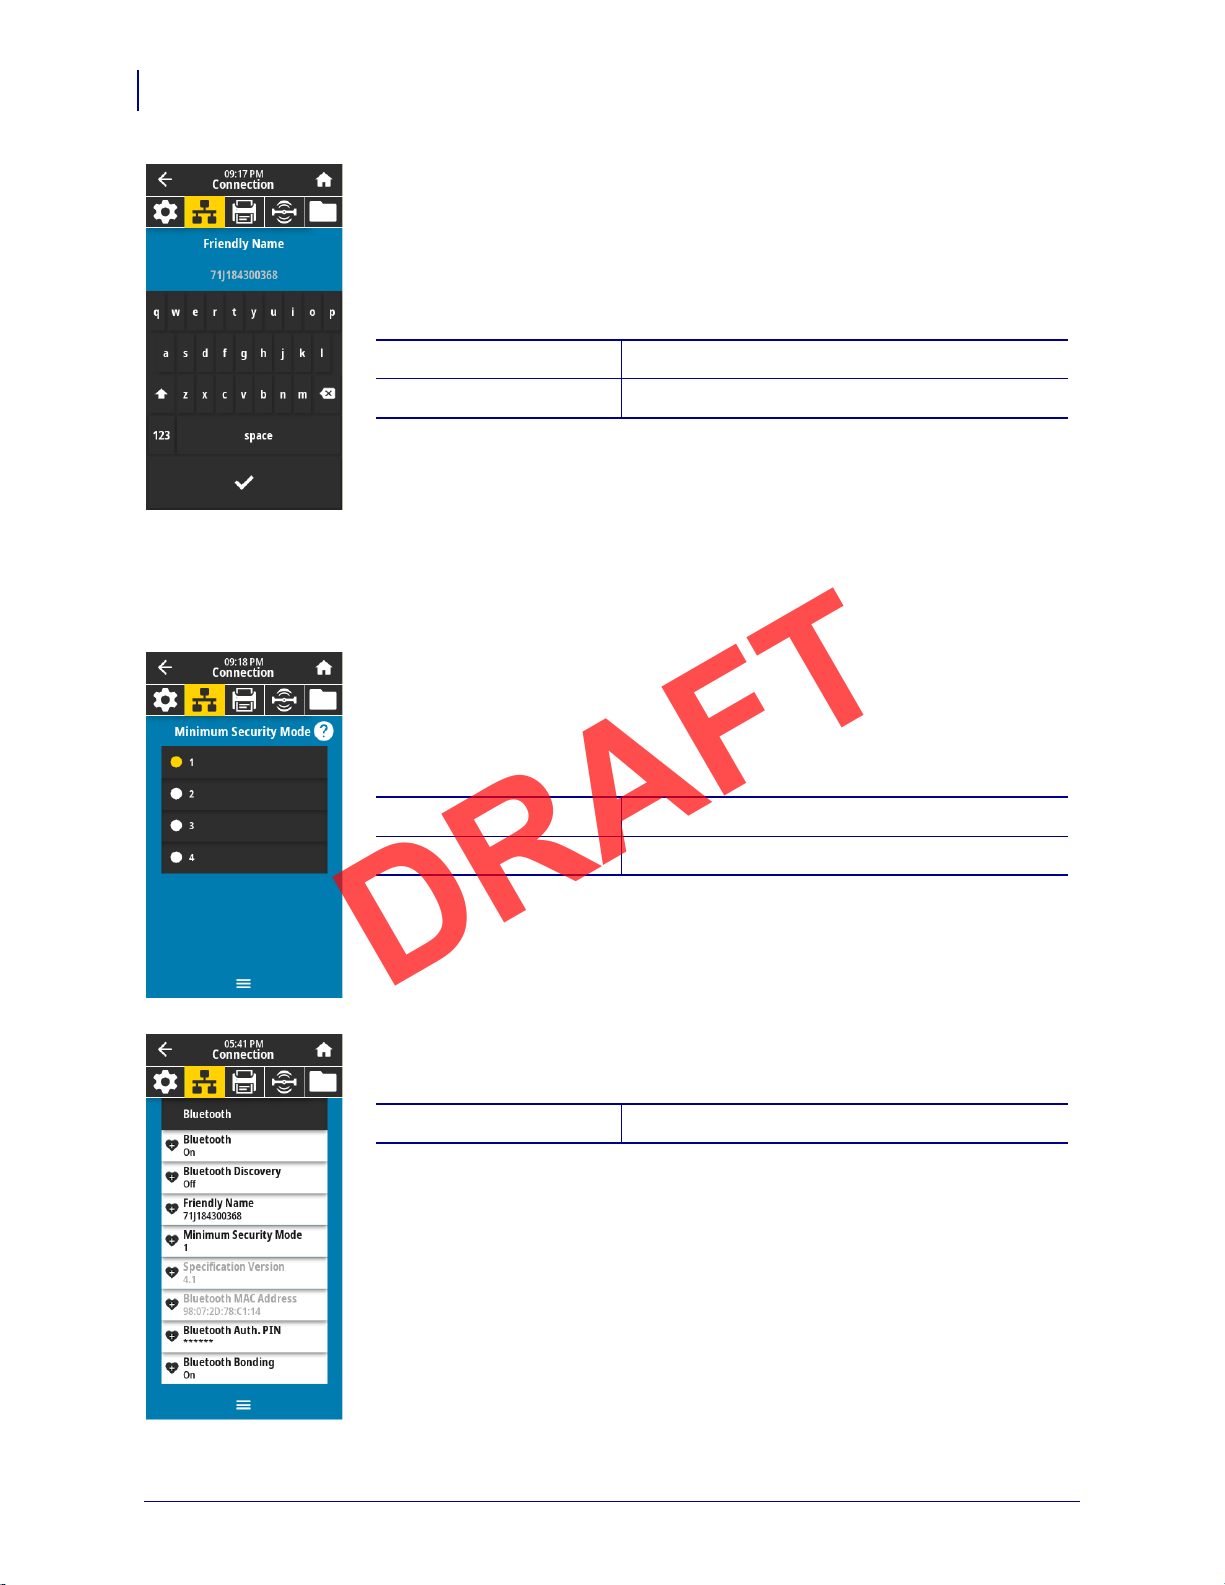
Connection > Bluetooth > Friendly Name
This command sets the friendly name, which is used during service discovery. For
changes to take effect, you must power cycle the printer or issue the
device.reset command (see Connection > Networks > Reset Network
on page 64).
If you do not set a friendly name, it will default to the printer serial number.
Connection > Bluetooth > Minimum Security Mode
This printer setting parameter sets the Bluetooth Minimum Security mode.
Minimum Security Mode provides for different levels of security, depending on the
printer radio version and printer firmware. See the Zebra Programming Guide at
http://www.zebra.com/manuals for more information.
Connection > Bluetooth > Specification Version
This parameter displays the Bluetooth library version number.
P1106464-001 ZT411/ZT421 Color Touch User Guide 5/9/19
Page 15
Printer Configuration and Adjustment
SGD command used: bluetooth.address
SGD command used: bluetooth.bluetooth_pin (to set the PIN)
bluetooth.authentication (to enable
authentication)
Accepted values: • ON—Enables Bluetooth bonding.
• OFF—Disables Bluetooth bonding.
SGD command used:
bluetooth.???
DRAFT
Connection > Bluetooth > MAC Address
This parameter displays the Bluetooth device address.
Connection > Bluetooth > Bluetooth Auth. PIN
Set the PIN used when Bluetooth authentication is enabled.
User Menus
75
Connection > Bluetooth > Bluetooth Bonding
???
5/9/19 ZT411/ZT421 Color Touch User Guide P1106464-001
Page 16
Printer Configuration and Adjustment
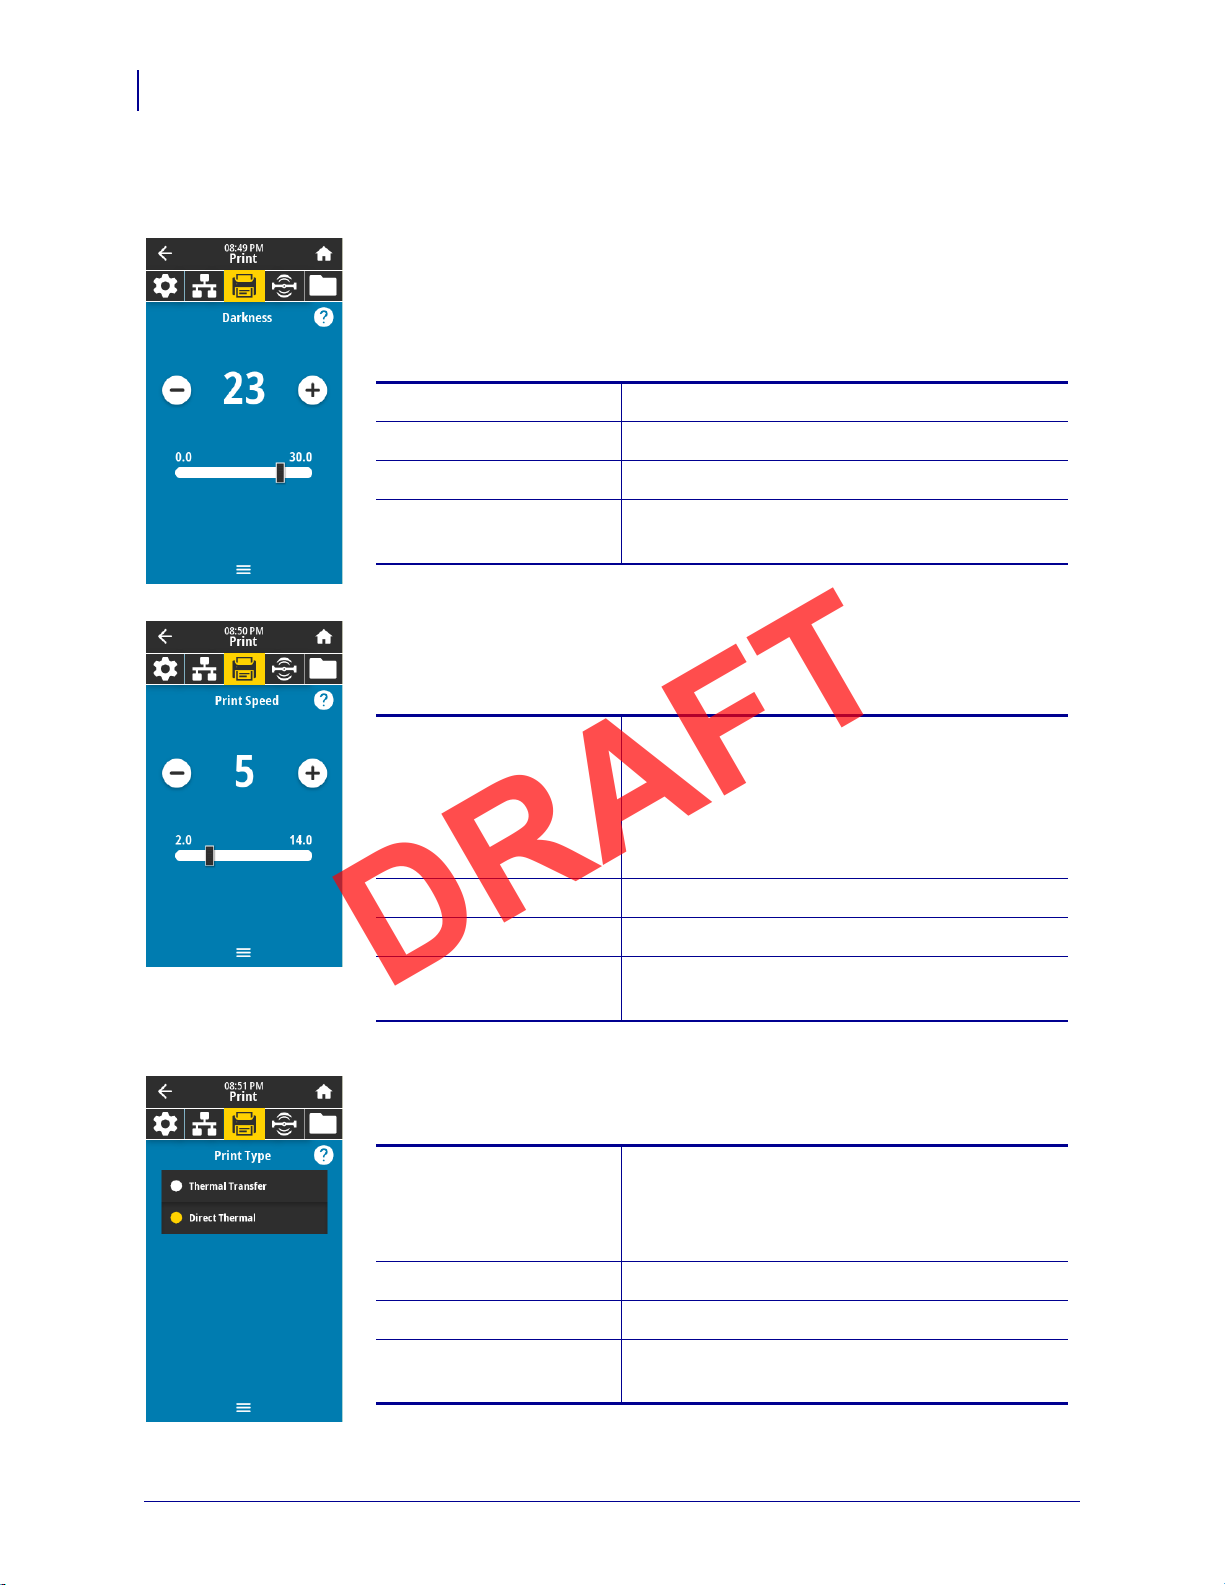
Accepted values: 0.0 to 30.0
Related ZPL command(s): ^MD, ~SD
SGD command used:
print.tone
Printer web page: View and Modify Printer Settings > General Setup
> Darkness
Accepted values: ZT610 203 dpi = 2 to 14 ips
ZT610 300 dpi =
2 to 12 ips
ZT610 600 dpi = 1 to
6 ips
ZT620 203 dpi = 2 to 12 ips
ZT620 300 dpi =
2 to 8 ips
Related ZPL command(s):
^PR
SGD command used:
media.speed
Printer web page: View and Modify Printer Settings > General Setup
> Print Speed
Accepted values: • THERMAL TRANS—Uses ribbon and thermal
transfer media.
• DIRECT THERMAL—Uses direct thermal
media and no ribbon.
Related ZPL command(s):
^MT
SGD command used:
ezpl.print_method
Printer web page: View and Modify Printer Settings > Media Setup >
Print Method
DRAFT
76
User Menus
Print Menu
Print > Print Quality > Darkness
Set the print darkness to the lowest setting that provides good print quality. If you
set the darkness too high, the label image may print unclearly, barcodes may not
scan correctly, the ribbon may burn through, or the printhead may wear
prematurely.
Print > Print Quality > Print Speed
Select the speed, in inches per second (ips), for printing a label. Slower print speeds
typically yield better print quality.
Print > Print Quality > Print Type
Specify if the printer needs to use ribbon for printing.
P1106464-001 ZT411/ZT421 Color Touch User Guide 5/9/19
Page 17
Printer Configuration and Adjustment
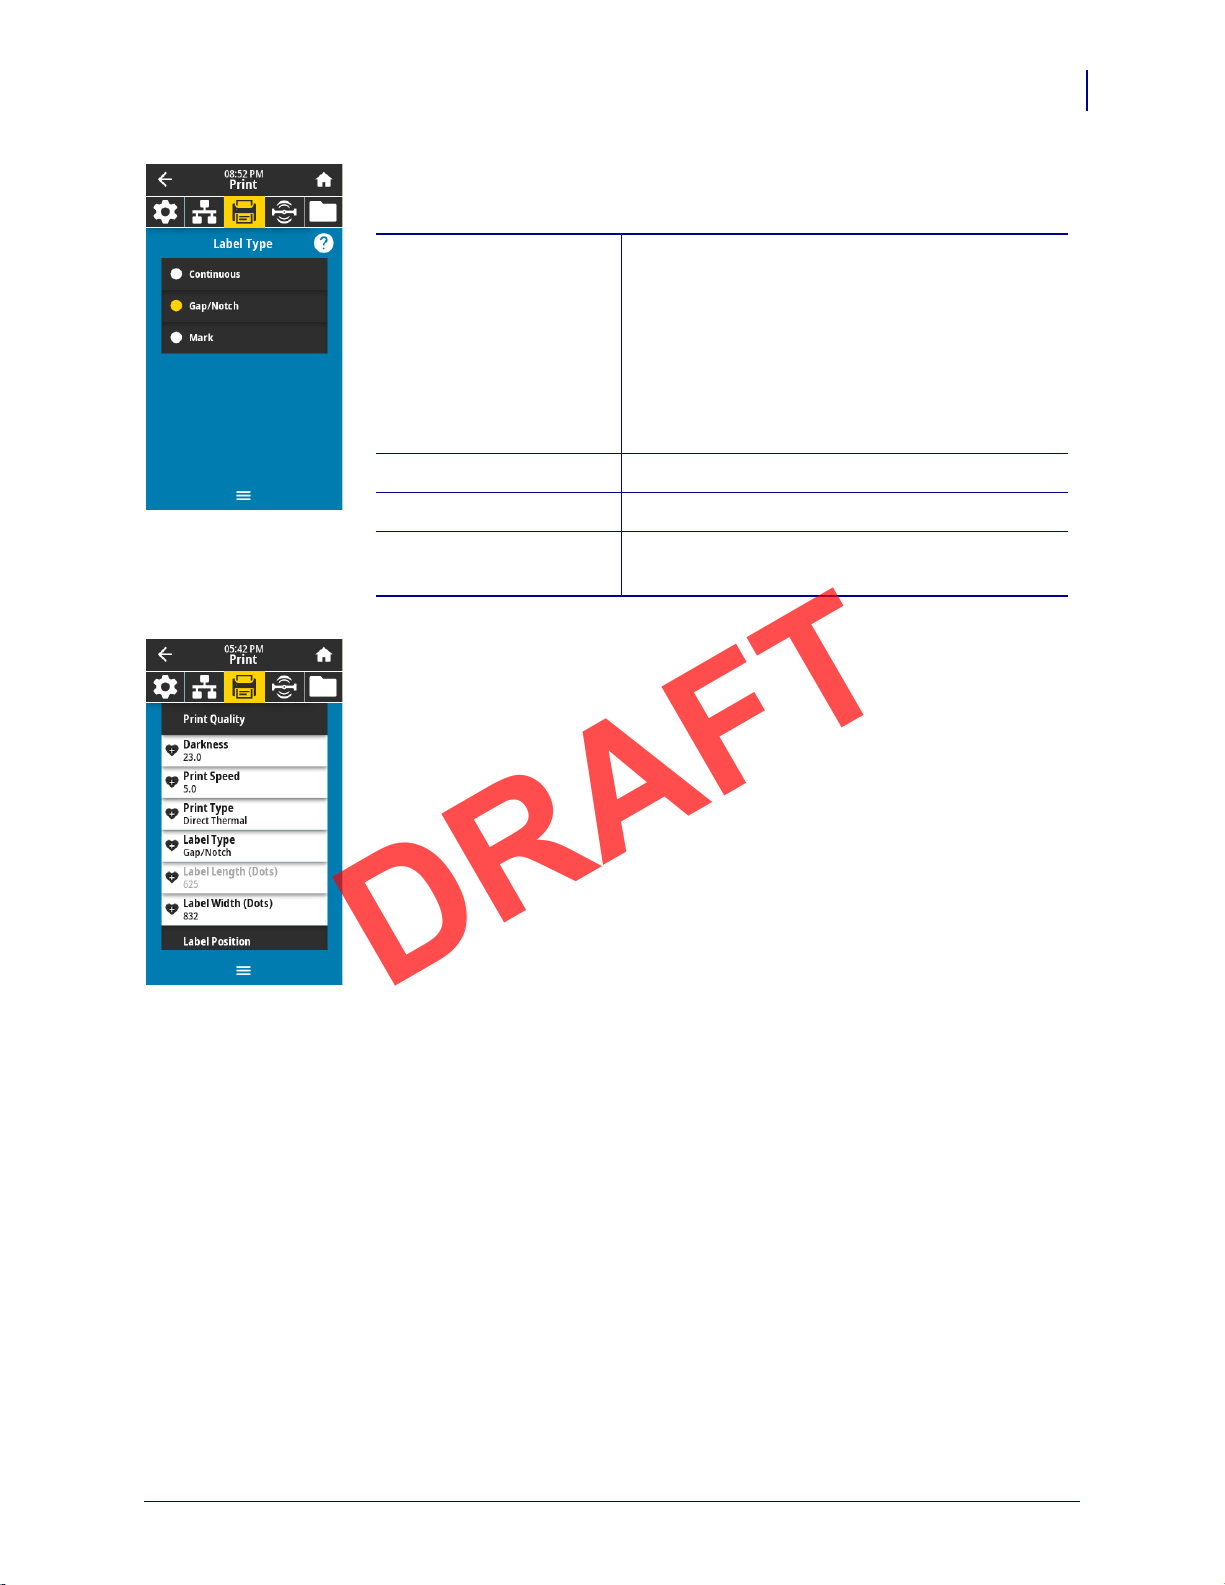
Accepted values: • CONTINUOUS
• GAP/NOTCH
• MARK
If you select
CONTINUOUS, you must include a
label length in your label format (
^LL if you are
using ZPL). If you select
GAP/NOTCH or MARK for
various noncontinuous media, the printer feeds
media to calculate the label length.
Related ZPL command(s): ^MN
SGD command used:
ezpl.media_type
Printer web page: View and Modify Printer Settings > Media Setup >
Media Type
DRAFT
Print > Print Quality > Label Type
Select the type of media that you are using.
Print > Print Quality > Label Length
View the calibrated label length in dots. This value cannot be modified.
User Menus
77
5/9/19 ZT411/ZT421 Color Touch User Guide P1106464-001
Page 18
Printer Configuration and Adjustment
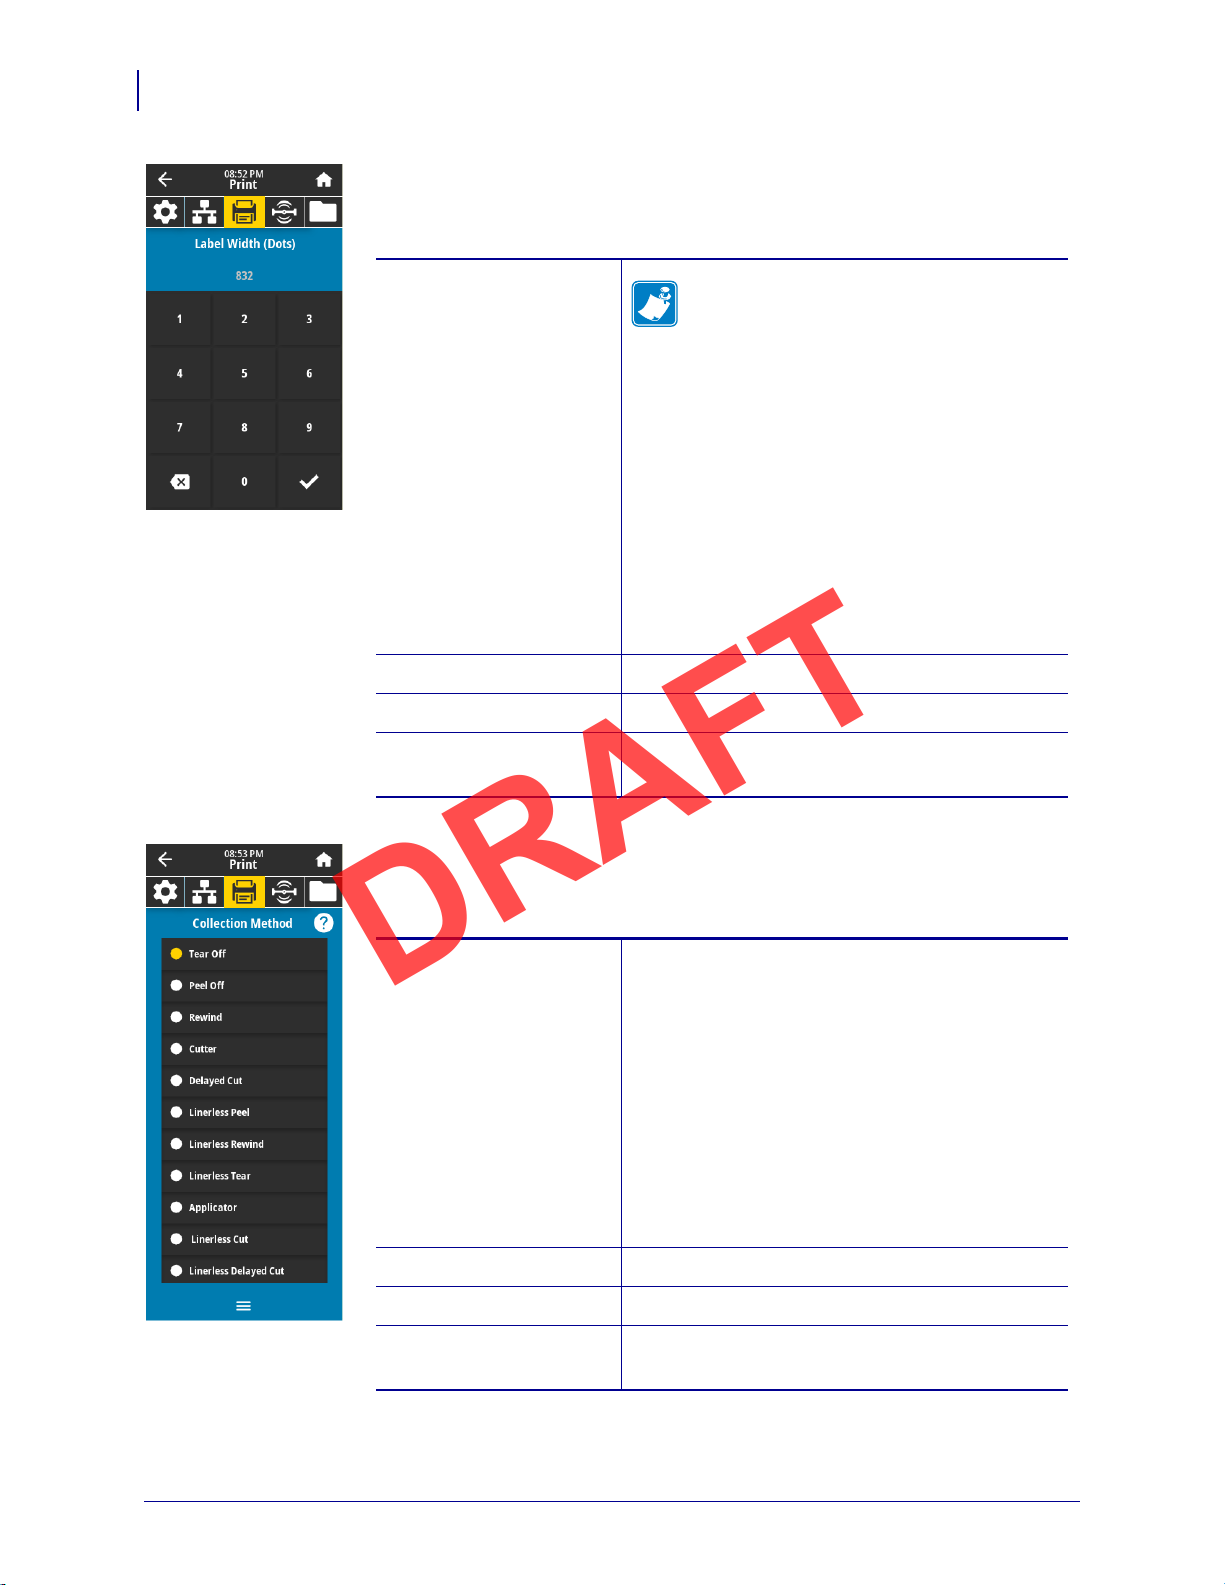
Accepted values:
Note • Setting the width too narrow can
result in portions of a label format not
being printed on the media. Setting the
width too wide wastes formatting memory
and can cause the printer to print off of the
label and onto the platen roller. This setting
can affect the horizontal position of the
label format if the image was inverted
using the
^POI ZPL II command.
ZT610 203 dpi = 0002 to 832
ZT610 300 dpi = 0002 to 1248
ZT610 600 dpi = 0002 to 2496
ZT620 203 dpi = 0002 to 1344
ZT620 300 dpi = 0002 to 1984
Related ZPL command(s): ^PW
SGD command used:
ezpl.print_width
Printer web page: View and Modify Printer Settings > Media Setup >
Print Width
Accepted values: • Tear Off
• Peel-off
• Rewind
• Cutter
• Delayed Cut
• Linerless Peel
• Linerless Rewind
• Linerless Tear
• Applicator
• Linerless Cut
• Linerless Delayed Cut
Related ZPL command(s):
^MM
SGD command used:
media.printmode
Printer web page: View and Modify Printer Settings > General Setup
> Print Mode
DRAFT
78
User Menus
Print > Print Quality > Label Width (Dots)
Specify the width of the labels being used, in dots. The default value is the
maximum width for the printer, based on the printhead’s DPI value.
Print > Label Position > Collection Method
Select a collection method that is compatible with the options available on your
printer.
P1106464-001 ZT411/ZT421 Color Touch User Guide 5/9/19
Page 19

Printer Configuration and Adjustment
Accepted values: –120 to +120
Related ZPL command(s): ~TA
SGD command used: ezpl.tear_off
Printer web page: View and Modify Printer Settings > General Setup
> Tear Off
DRAFT
User Menus
Print > Label Position > Tear Line Offset
If necessary, shift the position of the media over the tear-off bar after printing.
• Lower numbers move the media into the printer by the specified number of dots
(the tear line moves closer to the edge of the label just printed).
• Higher numbers move the media out of the printer (the tear line moves closer to
the leading edge of the next label).
79
5/9/19 ZT411/ZT421 Color Touch User Guide P1106464-001
Page 20

Printer Configuration and Adjustment
Accepted values: –9999 to 9999
Related ZPL command(s): ^LS
SGD command used:
zpl.left_position
Printer web page: View and Modify Printer Settings >
Advanced Setup > Left Position
Accepted values: –120 to +120
Related ZPL command(s): ^LT
Printer web page: View and Modify Printer Settings > General Setup
> Label Top
DRAFT
80
User Menus
Print > Label Position > Label Offset
If necessary, shift the position of the image horizontally or vertically on the label.
Horizontal
• Negative numbers move the left edge of the image toward the left edge of the
label by the number of dots selected.
• Positive numbers move the edge of the image toward the right edge of the label.
Ve rt ic a l
• Lower numbers move the image higher on the label (toward the printhead).
• Higher numbers move the image farther down on the label (away from the
printhead) by the specified number of dots.
P1106464-001 ZT411/ZT421 Color Touch User Guide 5/9/19
Page 21

Printer Configuration and Adjustment
Related ZPL command(s): ~JC
SGD command used:
ezpl.manual_calibration
Control panel key(s): Hold
PAUSE + FEED + CANCEL for 2 seconds to
initiate calibration.
Printer web page: The calibration procedure cannot be initiated
through the web pages. See the following web
page for settings that are set during sensor
calibration:
View and Modify Printer Settings > Calibration
Important • Do not change these settings
unless you are told to do so by Zebra
Technical Support or by an authorized
service technician.
Accepted values: 0 to 255
SGD command used:
ezpl.label_sensor
Printer web page: View and Modify Printer Settings > Calibration
Accepted values: • TRANSMISSIVE
• REFLECTIVE
Related ZPL command(s):
^JS
SGD command used:
device.sensor_select
Printer web page: View and Modify Printer Settings > Media Setup
DRAFT
User Menus
Print > Sensors > Manual Calibration
Calibrate the printer to adjust the sensitivity of the media and ribbon sensors.
81
Print > Sensors > Label Sensor
Set the sensitivity of the label sensor.
Important • This value is set during sensor calibration. Do not change these
settings unless you are told to do so by Zebra Technical Support or by an
authorized service technician.
Print > Sensors > Sensor Type
Select the media sensor that is appropriate for the media that you are using. The
reflective sensor typically is used only for black mark media. The transmissive
sensor typically is used for other media types.
5/9/19 ZT411/ZT421 Color Touch User Guide P1106464-001
Page 22

Printer Configuration and Adjustment
Accepted values: • TRANSMISSIVE
• REFLECTIVE
Related ZPL command(s):
~JG
Control panel key(s): Hold
FEED + CANCEL during printer power-up.
Printer web page: View and Modify Printer Settings >
Print Listings on Label
SGD command used: usb.host.keyboard_input
(must be set to ON)
usb.host.template_list
usb.host.fn_field_list
usb.host.fn_field_data
usb.host.fn_last_field
usb.host.template_print_amount
DRAFT
82
User Menus
Print > Sensors > Print: Sensor Profile
Shows the sensor settings compared to actual sensor readings. To interpret the
results, see Sensor Profil e on page 122.
Print > Print Station
Use this menu item to fill in variable fields in a label format and print the label
using a Human Input Device (HID), such as a USB keyboard, scale, or barcode
scanner. A suitable label format must be stored on the E: drive of the printer to use
this option.
When you plug an HID into one of the printer’s USB host ports, use this user menu
to select a form on the printer’s E: drive. After you have been prompted to fill in
each variable
to print.
For more information about using the
to this feature, see the Zebra Programming Guide at
http://www.zebra.com/manuals for more information.
* This menu item can be used only if a USB Flash drive with a suitable label format is inserted
into a USB host port on the printer.
^FN field on the form, you can specify the desired quantity of labels
^FN command or the SGD commands related
P1106464-001 ZT411/ZT421 Color Touch User Guide 5/9/19
Page 23

Printer Configuration and Adjustment
Accepted values: Off
1 = End Print signal normally high, and low only
when the printer is moving the label forward.
2 = End Print signal normally low, and high only
when the printer is moving the label forward.
3 = End Print signal normally high, and low for
20 ms when a label has been printed and
positioned.
4 = End Print signal normally low, and high for
20 ms when a label has been printed and
positioned.
Related ZPL command(s): ^JJ
SGD command used:
device.applicator.end_print
Accepted values: • Pulse—Start Print signal must be deasserted
before it can be asserted for the next label.
• Level—Start Print signal does not need to be
deasserted to print the next label. As long as
the Start Print signal is low and a label is
formatted, a label prints.
Related ZPL command(s):
^JJ
SGD command used:
device.applicator.start_print
Accepted values: • ENABLED
• DISABLED
SGD command used:
device.applicator.error_on_pause
Printer web page: View and Modify Printer Settings > Advanced
Setup > Error on Pause
DRAFT
User Menus
Print > Applicator > Applicator Port Mode
Controls the way in which the applicator port’s “End Print” signal functions.
83
Print > Applicator > Start Print Mode
Determines if the applicator port’s “Start Print” signal is in level mode or pulse
mode.
Print > Applicator > Error on Pause
Determines how applicator port errors are treated by the printer. Enabling this
feature also causes the “Service Required” pin to be asserted.
5/9/19 ZT411/ZT421 Color Touch User Guide P1106464-001
Page 24

Printer Configuration and Adjustment
Related ZPL command(s): ^JJ and ~PR
SGD command used: device.applicator.reprint
Related ZPL command(s): ^HL or ~HL
SGD command used: rfid.error.response
DRAFT
84
User Menus
Print > Applicator > Applicator Reprint
Specifies if a high or low value is required for an applicator to reprint a label.
Enables or disables the ~PR command, which when enabled reprints the last
printed label. It also enables the Reprint button on the Home screen.
RFID Menu
RFID > RFID Status
Display the status of the RFID subsystem of the printer.
P1106464-001 ZT411/ZT421 Color Touch User Guide 5/9/19
Page 25

Printer Configuration and Adjustment
SGD command used: rfid.tag.test.content and
rfid.tag.test.execute
Related ZPL command(s): ^HR
SGD command used:
rfid.tag.calibrate
DRAFT
User Menus
RFID > RFID Test
During the RFID test, the printer attempts to read and write to a transponder. No
printer movement occurs with this test.
To test an RFID label:
1. Position the RFID label with its transponder over the RFID antenna array.
2. Touch Start.
The results of the test are shown on the display.
85
RFID > RFID Calibrate
Initiate tag calibration for RFID media. (Not the same as media and ribbon
calibration.) During the process, the printer moves the media, calibrates the RFID
tag position, and determines the optimal settings for the RFID media being used.
These settings include the programming position, the antenna element to use, and
the read/write power level to use. See the RFID Programming Guide 3 for more
information.
Important • Before running this command, load the printer with RFID
media, calibrate your printer, close the printhead, and feed at least one label
to make sure that tag calibration will begin from the correct position.
Leave all transponders before and after the tag that is being calibrated. This
allows the printer to determine RFID settings which do not encode the
adjacent tag. Allow a portion of media to extend out the front of the printer
to allow for backfeed during the tag calibration procedure.
5/9/19 ZT411/ZT421 Color Touch User Guide P1106464-001
Page 26

Printer Configuration and Adjustment
Accepted values: 0 to 30
Related ZPL command(s): ^RW
SGD command used:
rfid.reader_1.power.read
Printer web page: View and Modify Printer Settings > RFID Setup >
RFID READ PWR
Accepted values: 0 to 30
Related ZPL command(s): ^RW
SGD command used:
rfid.reader_1.power.write
Printer web page: View and Modify Printer Settings > RFID Setup >
RFID WRITE PWR
Accepted values:
A1, A2, A3, A4
B1, B2, B3, B4
C1, C2, C3, C4
D1, D2, D3, D4
E1, E2, E3, E4
Related ZPL command(s):
^RW
SGD command used:
rfid.reader_1.antenna_port
Printer web page: View and Modify Printer Settings > RFID Setup >
RFID ANTENNA
DRAFT
86
User Menus
RFID > Read Power
If the desired read power is not achieved through RFID tag calibration, a value may
be specified.
RFID > Write Power
If the desired write power is not achieved through RFID tag calibration, a value
may be specified.
RFID > RFID Antenna
If the desired antenna is not achieved through RFID tag calibration, a value may be
specified.
P1106464-001 ZT411/ZT421 Color Touch User Guide 5/9/19
Page 27

RFID > RFID Valid Count
Related ZPL command(s): ~RO
SGD command used:
odometer.rfid.valid_resettable
Related ZPL command(s): ~RO
SGD command used:
odometer.rfid.void_resettable
DRAFT
Resets the RFID valid label counter to zero.
RFID > RFID Void Count
Resets the RFID void label counter to zero.
Printer Configuration and Adjustment
User Menus
87
5/9/19 ZT411/ZT421 Color Touch User Guide P1106464-001
Page 28

Printer Configuration and Adjustment
Accepted values: F0 to Fxxx (where xxx is the label length in
millimeters or
999, whichever is less)—The
printer feeds the label forward for the
specified distance and then begins
programming.
B0 to B30—The printer backfeeds the label for the
specified distance and then begins
programming. To account for the backfeed,
allow empty media liner to extend out of the
front of the printer when using a backward
programming position.
Related ZPL command(s):
^RS
SGD command used:
rfid.position.program
Printer web page: View and Modify Printer Settings > RFID Setup >
PROGRAM POSITION
DRAFT
88
User Menus
RFID > RFID Program Position
If the desired programming position (read/write position) is not achieved through
RFID tag calibration, a value may be specified.
P1106464-001 ZT411/ZT421 Color Touch User Guide 5/9/19
Page 29

Printer Configuration and Adjustment
Related ZPL command(s): ^RF
SGD command used:
rfid.tag.read.content
rfid.tag.read.execute
DRAFT
User Menus
RFID > Read RFID Data
Read and return the specified tag data from the RFID tag located over the RFID
antenna. No printer movement occurs while tag data is being read. The printhead
can be open or closed.
To read and display the information stored on an RFID tag:
1. Position the RFID label with its transponder over the RFID antenna.
2. Touch Read RFID Data.
The results of the test are shown on the display.
89
5/9/19 ZT411/ZT421 Color Touch User Guide P1106464-001
Page 30

Printer Configuration and Adjustment
SGD command used: usb.host.write_list
SGD command used: usb.host.read_list
Related ZPL command(s): ^HH—Returns the printer configuration
information returned to the host computer.
Printer web page: Printer Home Page > View Printer Configuration
(to view printer configuration information
on your web browser)
View and Modify Printer Settings > Print Listings
on Label
(to print the configuration information on
labels)
DRAFT
90
User Menus
Storage Menu
Storage > USB > Copy: Files to USB
Select files from the printer to store on a USB Flash drive.
To copy files from the printer to a USB Flash drive:
1. Insert a USB flash drive into the printer’s USB host port.
The printer lists available files.
2. Touch the box next to the desired files. Select All is also available.
3. Touch the check mark to copy the selected files.
Storage > USB > Copy: Files to Printer
Select files to copy to the printer from a USB Flash drive.
To copy files to the printer from a USB Flash drive:
1. Insert a USB flash drive into the printer’s USB host port.
The printer lists available files.
2. Touch the box next to the desired files. Select All is also available.
3. Touch the check mark to copy the selected files.
Storage > USB > Copy: Configuration to USB
Use this function to copy the printer’s configuration information to a USB mass
storage device, such as a USB Flash drive, that is plugged into one of the printer’s
USB host ports. This makes the information accessible without having to print
physical labels.
P1106464-001 ZT411/ZT421 Color Touch User Guide 5/9/19
Page 31

Printer Configuration and Adjustment
SGD command used: usb.host.read_list
Accepted values: • FORMATS—Prints the available formats stored
in the printer’s RAM, Flash memory, or
optional memory card.
• IMAGES—Prints the available images stored in
the printer’s RAM, Flash memory, or optional
memory card.
• FONTS—Prints the available fonts in the
printer, including standard printer fonts plus
any optional fonts. Fonts may be stored in
RAM or Flash memory.
• BARCODES—Prints the available barcodes in
the printer. Barcodes may be stored in RAM or
Flash memory.
• ALL—Prints the previous labels plus the
printer configuration label and the network
configuration label.
Related ZPL command(s):
^WD
Printer web page: View and Modify Printer Settings >
Print Listings on Label
DRAFT
Storage > USB > Print: From USB
Select files to print from a USB Flash drive.
To print files from a USB Flash drive:
1. Insert a USB flash drive into the printer’s USB host port.
The printer lists available files.
2. Touch the box next to the desired files. Select All is also available.
3. Touch the check mark to print the selected files.
Storage > Print Asset Lists
Print the specified information on one or more labels.
User Menus
91
5/9/19 ZT411/ZT421 Color Touch User Guide P1106464-001
Page 32

Printer Configuration and Adjustment
DRAFT
92
Calibrate the Ribbon and Media Sensors
Calibrate the Ribbon and Media Sensors
Use the procedure in this section to calibrate the printer, which adjusts the sensitivity of the
media and ribbon sensors.
To perform sensor calibration, complete these steps:
1. Touch Print > Sensors > Manual Calibration.
2. Touch Start Calibration.
3. Follow the steps in the calibration procedure.
Important • Follow the calibration procedure exactly as presented. You may press and
CANCEL at any step in the procedure to cancel the calibration process.
hold
4. When calibration is complete, press PAUSE to exit pause mode and enable printing.
P1106464-001 ZT411/ZT421 Color Touch User Guide 5/9/19
Page 33

Adjust the Printhead Pressure
21
DRAFT
You may need to adjust printhead pressure if printing is too light on one side, if you use thick
media, or if the media drifts from side to side during printing. Use the lowest printhead
pressure necessary to produce good print quality.
See Figure 2. The printhead pressure adjustment dials have setting marks from 1 to 4.
Figure 2 • Printhead Pressure Adjustment Dials
Printer Configuration and Adjustment
Adjust the Printhead Pressure
93
Inside dial
1
Outside dial
2
See Tab le 3. Begin with the following pressure settings, based on your printer and media
width, and make adjustments as necessary.
Table 3 • Pressure Setting Starting Points
Printer Media Width
ZT411 1 in. (25 mm) 4 1
2 in. (51 mm) 3 1
3 in. (76 mm) 2.5 1.5
≥ 3.5 in. (89 mm) 2 2
ZT421 2 in. (51 mm) 4 1
3 in. (76 mm) 3.5 1
4 in. (102 mm) 3 2
≥ 5 in. (127 mm) 2.5 2.5
Inside Dial Setting Outside Dial Setting
5/9/19 ZT411/ZT421 Color Touch User Guide P1106464-001
Page 34

Printer Configuration and Adjustment
DRAFT
94
Adjust the Printhead Pressure
If necessary, adjust the printhead pressure adjustment dials as follows:
If the media... Then...
Requires higher pressure to print
well
Prints too lightly on the left side
of the label.
Increase both dials one position.
Increase the inside dial setting one position.
Prints too lightly on the right side
of the label.
Increase the outside dial setting one position.
P1106464-001 ZT411/ZT421 Color Touch User Guide 5/9/19
Page 35

Printer Configuration and Adjustment
DRAFT
Adjust the Printhead Pressure
If the media... Then...
Shifts left while printing Increase the outside dial setting one position.
OR
Decrease the inside dial setting one position.
95
5/9/19 ZT411/ZT421 Color Touch User Guide P1106464-001
Page 36

Printer Configuration and Adjustment
DRAFT
96
Adjust the Printhead Pressure
If the media... Then...
Shifts right while printing Increase the inside dial setting one position.
OR
Decrease the outside dial setting one position.
P1106464-001 ZT411/ZT421 Color Touch User Guide 5/9/19
Page 37

Routine Maintenance
DRAFT
This section provides routine cleaning and maintenance procedures.
3
Contents
Cleaning Schedule and Procedures. . . . . . . . . . . . . . . . . . . . . . . . . . . . . . . . . . . . . . . . . 98
Clean the Exterior, the Media Compartment, and the Sensors . . . . . . . . . . . . . . . . . . 99
Clean the Printhead and Platen Roller. . . . . . . . . . . . . . . . . . . . . . . . . . . . . . . . . . . . 102
Clean and Lubricate the Cutter Module . . . . . . . . . . . . . . . . . . . . . . . . . . . . . . . . . . . 110
Replacing Printer Components . . . . . . . . . . . . . . . . . . . . . . . . . . . . . . . . . . . . . . . . . . . 115
Ordering Replacement Parts . . . . . . . . . . . . . . . . . . . . . . . . . . . . . . . . . . . . . . . . . . . 115
Recycling Printer Components . . . . . . . . . . . . . . . . . . . . . . . . . . . . . . . . . . . . . . . . . 115
Lubrication . . . . . . . . . . . . . . . . . . . . . . . . . . . . . . . . . . . . . . . . . . . . . . . . . . . . . . . . . . . 115
5/9/19 P1106464-001
Page 38

Routine Maintenance
DRAFT
98
Cleaning Schedule and Procedures
Cleaning Schedule and Procedures
Routine preventive maintenance is a crucial part of normal printer operation. By taking good
care of your printer, you can minimize the potential problems that you might have with it and
help to achieve and to maintain your standards for print quality.
Over time, the movement of media or ribbon across the printhead wears through the protective
ceramic coating, exposing and eventually damaging the print elements (dots). To avoid
abrasion:
• Clean the printhead frequently.
• Minimize printhead pressure and burn temperature (darkness) settings by optimizing the
balance between the two.
• When using Thermal Transfer mode, ensure that the ribbon is as wide or wider than the
media to prevent exposing the printhead elements to the more abrasive label material.
Important • Zebra is not responsible for damage caused by the use of cleaning fluids on this
printer.
Specific cleaning procedures are provided on the following pages. Table 4 shows the
recommended cleaning schedule. These intervals are intended as guidelines only. You may
have to clean more often, depending upon your application and media.
Table 4 • Recommended Cleaning Schedule
.
Area Method Interval
Printhead Solvent* Direct Thermal Mode: After every roll of
Platen roller Solvent*
Media sensors Air blow
Ribbon sensor Air blow
Media path Solvent*
Ribbon path Solvent*
Pinch roller (part of Peel-Off option) Solvent*
Cutter
module
Tear-off/peel-off bar Solvent* Once a month.
Take-label sensor Air blow Once every six months.
* Zebra recommends using the Preventive Maintenance Kit (p/n 47362 or p/n 105950-035 - multipack). In place of this kit,
you may use a clean swab dipped in 99.7% isopropyl alcohol.
For 600 dpi printers, use Save-a-Printhead cleaning film. This specially coated material removes contamination buildup
without damaging the printhead. Call your authorized reseller or distributor for more information.
If cutting continuous,
pressure-sensitive media
If cutting tag stock or label
liner material
Solvent* After every roll of media (or more often,
Solvent* and
air blow
media (or 500 feet of fanfold media).
Thermal Transfer Mode: After every roll of
ribbon.
depending upon your application and media).
After every two or three rolls of media.
P1106464-001 ZT411/ZT421 Color Touch User Guide 5/9/19
Page 39

Routine Maintenance
1
2 3
DRAFT
Cleaning Schedule and Procedures
Clean the Exterior, the Media Compartment, and the Sensors
Over time, dust, grime, and other debris may build up on the outside and inside of your printer,
particularly in a harsh operating environment.
Printer Exterior
You may clean the exterior surfaces of the printer with a lint-free cloth and a small amount of a
mild detergent, if necessary. Do not use harsh or abrasive cleaning agents or solvents.
Important • Zebra is not responsible for damage caused by the use of cleaning fluids on this
printer.
Media Compartment and Sensors
To clean the sensors, complete these steps:
1. Brush, air blow, or vacuum any accumulated paper lint and dust away from the media and
ribbon paths.
99
2. Brush, air blow, or vacuum any accumulated paper lint and dust away from the sensors.
Take-label sensor
1
Ribbon sensor
2
Media sensor
3
5/9/19 ZT411/ZT421 Color Touch User Guide P1106464-001
Page 40

100
DRAFT
Printer Configuration and Adjustment
Remove Used Ribbon
Remove Used Ribbon
At minimum, remove used ribbon from the ribbon take-up spindle each time you change the
roll of ribbon. With ribbon that is half or less the width of the printhead, remove used ribbon
each time you load a new roll of media. This ensures that uneven pressure on the ribbon
take-up spindle does not interfere with the ribbon release bars on the spindle.
To remove used ribbon, complete these steps:
1. Has the ribbon run out?
If the ribbon... Then
Ran out Continue with the next step.
Did not run out Cut or break the ribbon before the ribbon take-up spindle.
Caution • Do not cut the ribbon directly on the ribbon
take-up spindle. Doing so may damage the spindle.
2. While holding the ribbon take-up spindle, turn the ribbon release knob to the left until it
stops.
The ribbon release bars pivot down, easing the spindle’s grip on the used ribbon.
P1106464-001 ZT411/ZT421 Color Touch User Guide 5/9/19
Page 41

Printer Configuration and Adjustment
DRAFT
Remove Used Ribbon
3. After the ribbon release bars have pivoted down, if possible, turn the ribbon take-up
spindle one full to the right to help loosen the ribbon on the spindle.
4. Slide the used ribbon off of the ribbon take-up spindle and discard.
101
5/9/19 ZT411/ZT421 Color Touch User Guide P1106464-001
Page 42

102
DRAFT
Routine Maintenance
Cleaning Schedule and Procedures
Clean the Printhead and Platen Roller
Inconsistent print quality, such as voids in the bar code or graphics, may indicate a dirty
printhead. For the recommended cleaning schedule, see Table 4 on pa ge 98 .
Caution • While performing any tasks near an open printhead, remove all rings, watches,
hanging necklaces, identification badges, or other metallic objects that could touch the
printhead. You are not required to turn off the printer power when working near an open
printhead, but Zebra recommends it as a precaution. If you turn off the power, you will lose
all temporary settings, such as label formats, and you must reload them before you resume
printing.
-
Note • For printers with a peel assembly, keep the peel assembly closed while cleaning the
platen roller to reduce the risk of bending the tear-off/peel-off bar.
Caution • The printhead may be hot and could cause severe burns. Allow the printhead
to cool.
Caution • Before touching the printhead assembly, discharge any built-up static electricity
by touching the metal printer frame or by using an antistatic wriststrap and mat.
To clean the printhead and platen roller, complete these steps:
1. Raise the media door.
P1106464-001 ZT411/ZT421 Color Touch User Guide 5/9/19
Page 43

Routine Maintenance
DRAFT
Cleaning Schedule and Procedures
2.
Caution • The printhead may be hot and could cause severe burns. Allow the
printhead to cool.
Open the printhead assembly by rotating the printhead-open lever.
103
3.
Remove the ribbon (if used) and the media.
4. Using the swab from a Zebra Preventive Maintenance Kit, wipe along the brown strip on
the printhead assembly from end to end. In place of the Preventive Maintenance Kit, you
may use a clean swab dipped in 99.7% isopropyl alcohol. Allow the solvent to evaporate.
5/9/19 ZT411/ZT421 Color Touch User Guide P1106464-001
Page 44

104
DRAFT
Routine Maintenance
Cleaning Schedule and Procedures
5. While manually rotating the platen roller, clean it thoroughly with the swab. Allow the
solvent to evaporate.
6. Reload the ribbon (if used) and the media. For instructions, see Load the Ribbon
on page 43 or Load the Media on page 17.
7. Rotate the printhead-open lever downward until it locks the printhead in place.
P1106464-001 ZT411/ZT421 Color Touch User Guide 5/9/19
Page 45

8. Close the media door.
DRAFT
Routine Maintenance
Cleaning Schedule and Procedures
105
The printer is ready to operate.
9. Press PAUSE to exit pause mode and enable printing.
The printer may perform a label calibration or feed a label, depending on your settings.
Note • If performing this procedure does not improve print quality, try cleaning the
printhead with Save-A-Printhead cleaning film. This specially coated material removes
contamination buildup without damaging the printhead. Call your authorized Zebra
reseller for more information.
5/9/19 ZT411/ZT421 Color Touch User Guide P1106464-001
Page 46

106
DRAFT
Routine Maintenance
Cleaning Schedule and Procedures
Clean the Peel Assembly
The peel assembly, which is part of the Peel-Off and Liner Take-Up options, consists of
several spring-loaded rollers to ensure the proper roller pressure. Clean the pinch roller and
tear-off/peel-off bar if adhesive buildup begins to affect peel performance.
Caution • Do not use your left hand to assist in closing the Peel assembly. The top edge of
the Peel roller/assembly could pinch your fingers.
If adhesive buildup affects peel-off performance, complete these steps:
1. Raise the media door.
2.
Caution • The printhead may be hot and could cause severe burns. Allow the
printhead to cool.
Open the printhead assembly by rotating the printhead-open lever.
P1106464-001 ZT411/ZT421 Color Touch User Guide 5/9/19
Page 47

Routine Maintenance
DRAFT
Cleaning Schedule and Procedures
3. Push down the peel-off mechanism release lever to open the peel assembly.
107
4. Remove any media liner to expose the pinch roller.
5. While manually rotating the pinch roller, clean it thoroughly with the swab from the
Preventive Maintenance Kit (part number 47362). In place of the Preventive Maintenance
Kit, you may use a clean swab dipped in 99.7% isopropyl alcohol. Allow the solvent to
evaporate.
6. Use the swab to remove excess adhesive from the tear-off/peel-off bar. Allow the solvent
to evaporate.
Important • Apply minimum force when cleaning the tear-off/peel-off bar. Excessive
force can cause the tear-off/peel-off bar to bend, which could have a negative effect on
peel performance.
7. Reload the media liner through the peel mechanism. For instructions, see Final Steps for
Peel-Off Mode (with or without Liner Take-Up) on page 25.
5/9/19 ZT411/ZT421 Color Touch User Guide P1106464-001
Page 48

108
DRAFT
Routine Maintenance
Cleaning Schedule and Procedures
8.
Caution • Use the peel release lever and your right hand to close the peel assembly.
Do not use your left hand to assist in closing. The top edge of the peel roller/assembly
could pinch your fingers.
Close the peel assembly using the peel-off mechanism release lever.
Rotate the printhead-open lever downward until it locks the printhead in place.
9.
P1106464-001 ZT411/ZT421 Color Touch User Guide 5/9/19
Page 49

10. Close the media door.
DRAFT
Routine Maintenance
Cleaning Schedule and Procedures
109
The printer is ready to operate.
11. Press PAUSE to exit pause mode and enable printing.
The printer may perform a label calibration or feed a label, depending on your settings.
5/9/19 ZT411/ZT421 Color Touch User Guide P1106464-001
Page 50

110
DRAFT
Routine Maintenance
Cleaning Schedule and Procedures
Clean and Lubricate the Cutter Module
If the cutter is not cutting the labels cleanly or if it jams with labels, clean the cutter blades.
After cleaning the blades, apply lubrication to them to help extend the life of your cutter
module.
To clean the cutter module, complete these steps:
1.
Caution • Turn off (O) the printer and disconnect it from the power source before
performing the following procedure.
Turn off (O) the printer and disconnect the AC power cord.
2.
Raise the media door.
3. Remove media that is loaded through the cutter module.
4. Loosen and remove the thumbscrew and lock washer on the cutter shield.
P1106464-001 ZT411/ZT421 Color Touch User Guide 5/9/19
Page 51

Routine Maintenance
1
DRAFT
Cleaning Schedule and Procedures
5.
Caution • The cutter blade is sharp. Do not touch or rub the blade with your fingers.
Remove the cutter shield.
111
6.
If necessary, rotate the cutter motor thumbscrew to fully expose the V-shaped cutter
1).
blade (
5/9/19 ZT411/ZT421 Color Touch User Guide P1106464-001
Page 52

112
DRAFT
Routine Maintenance
Cleaning Schedule and Procedures
7. Using the swab from the Preventive Maintenance Kit (part number 47362), wipe along the
upper cutting surface and the cutter blade. In place of the Preventive Maintenance Kit, you
may use a clean swab dipped in 99.7% isopropyl alcohol. Allow the solvent to evaporate.
8. When the solvent has evaporated, soak a clean swab in a general-purpose, higher-viscosity
silicone or PTFE oil lubricant.
P1106464-001 ZT411/ZT421 Color Touch User Guide 5/9/19
Page 53

Routine Maintenance
1
2
DRAFT
Cleaning Schedule and Procedures
9. Apply an even layer along all exposed surfaces of both cutter blades. Remove any excess
oil so that none of it comes in contact with the printhead or platen roller.
113
10.
Caution • The cutter blade is sharp. For operator safety, replace the cutter shield.
Replace the cutter shield (1) and secure it with the thumbscrew and lock washer that you
removed earlier (
2).
5/9/19 ZT411/ZT421 Color Touch User Guide P1106464-001
Page 54

114
DRAFT
Routine Maintenance
Cleaning Schedule and Procedures
11. Close the media door.
12. Plug the printer into its power source, and then turn on (I) the printer.
The cutter blade returns to its operating position.
13. If the cutter continues to perform unsatisfactorily, contact an authorized service
technician.
P1106464-001 ZT411/ZT421 Color Touch User Guide 5/9/19
Page 55

Replacing Printer Components
DRAFT
Some printer components, such as the printhead and platen roller, may wear out over time and
can be replaced easily. Regular cleaning may extend the life of some of these components. See
Table4 onpage98 for the recommended cleaning intervals.
Ordering Replacement Parts
Zebra™ printers are designed to work only with genuine Zebra printheads, thus maximizing
safety and print quality. Contact your authorized Zebra reseller for part ordering information.
Recycling Printer Components
The majority of this printer’s components are recyclable. The printer’s main logic board may
include a battery that you should dispose of properly.
Do not dispose of any printer components in unsorted municipal waste. Please dispose of the
battery according to your local regulations, and recycle the other printer components
according to your local standards. For more information, see
http://www.zebra.com/environment.
Routine Maintenance
Replacing Printer Components
115
Storing the Printer
If you are not placing the printer into immediate operation, repackage it using the original
packing materials. You may store the printer under the following conditions:
• Temperature: –40°F to 140°F (–40° to 60°C)
• Relative humidity: 5% to 85% non-condensing
Lubrication
No lubrication is needed for this printer.
Caution • Some commercially available lubricants will damage the finish and the
mechanical parts if used on this printer.
5/9/19 ZT411/ZT421 Color Touch User Guide P1106464-001
Page 56

116
DRAFT
Routine Maintenance
Lubrication
P1106464-001 ZT411/ZT421 Color Touch User Guide 5/9/19
Page 57

4
DRAFT
Diagnostics and
Troubleshooting
This section provides diagnostic tests and other information that may help you to optimize
printing or to troubleshoot issues with your printer.
Go to www.zebra.com/zt600-info for access to videos and additional online information
designed to assist you.
Contents
Judging Barcode Quality . . . . . . . . . . . . . . . . . . . . . . . . . . . . . . . . . . . . . . . . . . . . . . . . 118
Configuration Labels . . . . . . . . . . . . . . . . . . . . . . . . . . . . . . . . . . . . . . . . . . . . . . . . . . . 120
PAUSE Self Test . . . . . . . . . . . . . . . . . . . . . . . . . . . . . . . . . . . . . . . . . . . . . . . . . . . . . . 121
Sensor Profile. . . . . . . . . . . . . . . . . . . . . . . . . . . . . . . . . . . . . . . . . . . . . . . . . . . . . . . . . 122
Communication Diagnostics Mode. . . . . . . . . . . . . . . . . . . . . . . . . . . . . . . . . . . . . . . . . 123
Load Defaults or Last Saved Values . . . . . . . . . . . . . . . . . . . . . . . . . . . . . . . . . . . . . . . 124
Alert and Error States. . . . . . . . . . . . . . . . . . . . . . . . . . . . . . . . . . . . . . . . . . . . . . . . . . . 125
Alerts and Error Messages . . . . . . . . . . . . . . . . . . . . . . . . . . . . . . . . . . . . . . . . . . . . 126
Indicator Lights. . . . . . . . . . . . . . . . . . . . . . . . . . . . . . . . . . . . . . . . . . . . . . . . . . . . . . 129
Troubleshooting . . . . . . . . . . . . . . . . . . . . . . . . . . . . . . . . . . . . . . . . . . . . . . . . . . . . . . . 131
Printing or Print Quality Issues. . . . . . . . . . . . . . . . . . . . . . . . . . . . . . . . . . . . . . . . . . 131
Ribbon Issues . . . . . . . . . . . . . . . . . . . . . . . . . . . . . . . . . . . . . . . . . . . . . . . . . . . . . . 136
RFID Issues . . . . . . . . . . . . . . . . . . . . . . . . . . . . . . . . . . . . . . . . . . . . . . . . . . . . . . . . 138
Communications Issues. . . . . . . . . . . . . . . . . . . . . . . . . . . . . . . . . . . . . . . . . . . . . . . 141
Miscellaneous Issues. . . . . . . . . . . . . . . . . . . . . . . . . . . . . . . . . . . . . . . . . . . . . . . . . 142
Service the Printer . . . . . . . . . . . . . . . . . . . . . . . . . . . . . . . . . . . . . . . . . . . . . . . . . . . . . 146
Ship the Printer . . . . . . . . . . . . . . . . . . . . . . . . . . . . . . . . . . . . . . . . . . . . . . . . . . . . . 146
5/9/19 P1106464-001
Page 58

118
DRAFT
Diagnostics and Troubleshooting
Judging Barcode Quality
Judging Barcode Quality
Figure 3 shows how printer settings such as darkness and print speed can affect the quality of
barcodes. Set the print darkness to the lowest setting that provides good print quality. The Print
Quality Assistant in Run the Print Wizard and Print a Test Label on page 49 can help you
determine the best settings.
Figure 3 • Barcode Darkness Comparison
Too Dark Labels that are too dark are fairly obvious. They may be readable but not
“in-spec.”
• The normal barcode bars increase in size.
• The openings in small alphanumeric characters may fill in with ink.
• Rotated barcode bars and spaces run together.
Slightly Dark Slightly dark labels are not as obvious.
• The normal barcode will be “in-spec.”
• Small character alpha numerics will be bold and could be slightly filled in.
• The rotated barcode spaces are small when compared to the “in-spec” code, possibly
making the code unreadable.
P1106464-001 ZT411/ZT421 Color Touch User Guide 5/9/19
Page 59

Diagnostics and Troubleshooting
DRAFT
Judging Barcode Quality
“In-Spec” The “in-spec” barcode can only be confirmed by a verifier, but it should exhibit
some visible characteristics.
• The normal barcode will have complete, even bars and clear, distinct spaces.
• The rotated barcode will have complete, even bars and clear, distinct spaces. Although it
may not look as good as a slightly dark barcode, the barcode will be “in-spec.”
• In both normal and rotated styles, small alphanumeric characters look complete.
Slightly Light Slightly light labels are, in some cases, preferred to slightly dark ones for
“in-spec” barcodes.
• Both normal and rotated barcodes will be in spec, but small alphanumeric characters may
not be complete.
Too Light Labels that are too light are obvious.
• Both normal and rotated barcodes have incomplete bars and spaces.
• Small alphanumeric characters are unreadable.
119
5/9/19 ZT411/ZT421 Color Touch User Guide P1106464-001
Page 60

120
Printer Configuration Label Network Configuration Label
DRAFT
Diagnostics and Troubleshooting
Configuration Labels
Configuration Labels
Some of the most commonly used diagnostic items are the printer configuration label and the
network configuration label. Sample labels are shown in Figure 4. Analyzing the information
on these labels can help you to troubleshoot potential issues.
To print a printer configuration label, touch Menu > Settings > Print: System Settings.
To print a network configuration label, touch Menu > Networks > Print: Network Info.
Figure 4 • Sample Labels
P1106464-001 ZT411/ZT421 Color Touch User Guide 5/9/19
 Loading...