

Zebra ZXP Series 1 Card Printer ZXP Series 1 and ZXP Series 3 RHEL 6.5 Driver User's Manual (en)

P1075318-001
ZXP Series 1 and ZXP Series 3
RHEL 6.5 Driver
User’s Manual

Copyright Notice
© 2014 ZIH Corp.
This document contains information proprietary t
document and the information contained within is Copyrighted by Zebra Technologies
Corporation and may not be duplicated in ful l or in part by any person without written
approval from Zebra.
While every effort has been made to keep t
accurate as of the date of publication, no guarantee is given that the document is error-free or
that it is accurate with regard to any specification. Zebra Technologies Corporation reserves
the right to make changes, for the purpose of product improvement, at any time.
Trademarks
ZXP Series 1 and ZXP Series 3 are trademarks, and Zebra is a registered trademark of Zebra
Technologies Corporation. All other trademarks or registered trademarks are marks of their
respective holders.
Product Disposal
Product Disposal Information • Do not dispose of this product in unsorted municipal
waste. This product is recyclable, and should be
standards. For more information, please our web site at:
www.zebra.com/environment
o Zebra Technologies Corporation. This
he information contained within current and
recycled according to your local
2 P1075318-001P1075318-001

Contents
1 • Getting Started . . . . . . . . . . . . . . . . . . . . . . . . . . . . . . . . . . . . . . . 3
Introduction . . . . . . . . . . . . . . . . . . . . . . . . . . . . . . . . . . . . . . . . . . . . . . . . 3
Overview . . . . . . . . . . . . . . . . . . . . . . . . . . . . . . . . . . . . . . . . . . . . . . . . . . 3
Prerequisite . . . . . . . . . . . . . . . . . . . . . . . . . . . . . . . . . . . . . . . . . . . . . . . . 3
Extracting files using GUI. . . . . . . . . . . . . . . . . . . . . . . . . . . . . . . . . . . . . . 4
Installation Wizard . . . . . . . . . . . . . . . . . . . . . . . . . . . . . . . . . . . . . . . . . . . 4
Prerequisite . . . . . . . . . . . . . . . . . . . . . . . . . . . . . . . . . . . . . . . . . . . . . 4
USB Printer Driver Installation . . . . . . . . . . . . . . . . . . . . . . . . . . . . . . . 7
Ethernet Printer Driver Installation. . . . . . . . . . . . . . . . . . . . . . . . . . . . 8
Adding a Printer Manually . . . . . . . . . . . . . . . . . . . . . . . . . . . . . . . . . . . . . 9
Extracting files using Terminal . . . . . . . . . . . . . . . . . . . . . . . . . . . . . . . . . .11
Uninstall . . . . . . . . . . . . . . . . . . . . . . . . . . . . . . . . . . . . . . . . . . . . . . . .11
2 • Setup . . . . . . . . . . . . . . . . . . . . . . . . . . . . . . . . . . . . . . . . . . . . . . 13
Printing Preferences. . . . . . . . . . . . . . . . . . . . . . . . . . . . . . . . . . . . . . . . . 13
Printer Options . . . . . . . . . . . . . . . . . . . . . . . . . . . . . . . . . . . . . . . . . . . . . 14
Device Info. . . . . . . . . . . . . . . . . . . . . . . . . . . . . . . . . . . . . . . . . . . . . 16
Encoding Options. . . . . . . . . . . . . . . . . . . . . . . . . . . . . . . . . . . . . . . . 17
Tools. . . . . . . . . . . . . . . . . . . . . . . . . . . . . . . . . . . . . . . . . . . . . . . . . . 19
About . . . . . . . . . . . . . . . . . . . . . . . . . . . . . . . . . . . . . . . . . . . . . . . . . 20
Printer Properties: Test Print Card . . . . . . . . . . . . . . . . . . . . . . . . . . . . . . 20
Printing From Libre Office . . . . . . . . . . . . . . . . . . . . . . . . . . . . . . . . . . . . 21
Changing Printer Options. . . . . . . . . . . . . . . . . . . . . . . . . . . . . . . . . . . . . 21
3 • Magnetic Encoding. . . . . . . . . . . . . . . . . . . . . . . . . . . . . . . . . . . 25
Introduction . . . . . . . . . . . . . . . . . . . . . . . . . . . . . . . . . . . . . . . . . . . . . . . 25
Magnetic Encoding Using Open Office . . . . . . . . . . . . . . . . . . . . . . . . . . 25
Magnetic Encoding Using Libre Office. . . . . . . . . . . . . . . . . . . . . . . . . . . 26
P1075318-001 Zebra ZXP Series 1 and Series 3 Linux Driver User’s Manual i

Contents
4 • Error Codes . . . . . . . . . . . . . . . . . . . . . . . . . . . . . . . . . . . . . . . . . 29
Out of Cards. . . . . . . . . . . . . . . . . . . . . . . . . . . . . . . . . . . . . . . . . . . . 29
Check Ribbon. . . . . . . . . . . . . . . . . . . . . . . . . . . . . . . . . . . . . . . . . . . 30
Cover Open . . . . . . . . . . . . . . . . . . . . . . . . . . . . . . . . . . . . . . . . . . . . 30
Encoding Error . . . . . . . . . . . . . . . . . . . . . . . . . . . . . . . . . . . . . . . . . . 31
Lid Open. . . . . . . . . . . . . . . . . . . . . . . . . . . . . . . . . . . . . . . . . . . . . . . 31
Mechanical Error . . . . . . . . . . . . . . . . . . . . . . . . . . . . . . . . . . . . . . . . 32
Out of Ribbon . . . . . . . . . . . . . . . . . . . . . . . . . . . . . . . . . . . . . . . . . . . 32
Job Complete . . . . . . . . . . . . . . . . . . . . . . . . . . . . . . . . . . . . . . . . . . . 33
Low Ribbon. . . . . . . . . . . . . . . . . . . . . . . . . . . . . . . . . . . . . . . . . . . . . 33
5 • Worldwide Support . . . . . . . . . . . . . . . . . . . . . . . . . . . . . . . . . . . 35
ii Zebra ZXP Series 1 and Series 3 Linux Driver User’s Manual P1075318-001

Introduction
The purpose of this document is describe how to install a Zebra ZXP Series 1and ZXP Series 3
printer driver for Red Hat Enterprise Linux (R HEL) in detail. The document provides
information on installation of ZXP Series 1 and ZXP Series 3 Printer on RHEL 6.5 operating
systems on 32-bit and 64 Bit environments.
1
Getting Started
Overview
The Zebra ZXP Series 1 and ZXP Series 3 printer driver for RHEL supports color printing,
dual side printing, magnetic encoding, and provides information about the printer and ribbon
details.
Prerequisite
The Zebra ZXP Series 1 and ZXP Series 3 printer driver for RHEL has been tested on the
following distributions of Linux:
• Red Hat Enterprise Linux 6.5 32 bit
• Red Hat Enterprise Linux 6.5 64 bit
P1075318-001 Zebra ZXP Series 1 and Series 3 Linux Driver User’s Manual 3

1: Getting Started
Extracting files using GUI
Extracting files using GUI
T o install the Zebra ZXP Series 1 and ZXP Series 3 Printer Driver for RHEl by means of GUI,
the user needs to be a root user.
Click on the Zebra ZXP3 Series Card Printer Driv
to untar the setup for installation of the driver to a desired directory location.
Note • In the FireFox web browser the setup will be downloaded inside the download. Right
click Open Containing folder; Right click Open with Archive Manager; R ight click Extract or
click Extract; select the desired location; Click Extract.
Installation Wizard
Prerequisite
The installation can be performed only from terminal with administrator mode. Type the
Administrator password when prompted.
Open the terminal by clicking the menu Applications—System Tools—Terminal
Navigate to the directory where the dri
press the Enter key.
Enter the root password when prompted
Type the following commands in the terminal:
er-0.0.0.xx-Linux-x86-Install.tar archive file
ver files are extracted and enter su in the terminal and
4 Zebra ZXP Series 1 and Series 3 Linux Driver User’s Manual P1075318-001

To install 64 bit driver
./Unified_Zebra_ZXP3_Series_Card_Printer_Driver-0.0.0.48-Linux-x86_64-Install
To install 32 bit driver
./Unified_Zebra_ZXP3_Series_Card_Printer_Driver-0.0.0.48-Linux-x86-Install
1: Getting Started
Installation Wizard
To install the driver, click Ye
s; click No to cancel the installation.
The License Agreement page appears. Select the radio button next to I accept the terms of the
license agreement to continue the installation and click Next.
Note • The license agreement must be accepted to continue installation. Selecting I do not
accept the terms of the license agr eement and clicking Next will cancel the installation; as will
clicking Cancel.
After accepting the license agreement, the Printer Model selection screen is displayed. From
the pull-down menu, select the printer model to be installed and click Next.
P1075318-001 Zebra ZXP Series 1 and Series 3 Linux Driver User’s Manual 5

1: Getting Started
Installation Wizard
Select the type of printer to be installed: USB or Ethernet.
6 Zebra ZXP Series 1 and Series 3 Linux Driver User’s Manual P1075318-001

USB Printer Driver Installation
Note • Do not plug in the USB Printer before the Installation is complete.
1: Getting Started
Installation Wizard
Upon selecting the USB printer type and clicking next, the installation progress will be
splayed. The driver files will be copied into the following directories:
di
• /usr/lib/cups/filter/rastertozxp3
• /usr/lib/cups/filter/pstozxp3ps
After the copying is complete, the final Install Jammer Wizard page shows that the driver has
een installed successfully.
b
Click Finish into complete the installation and exit the Installer.
P1075318-001 Zebra ZXP Series 1 and Series 3 Linux Driver User’s Manual 7

1: Getting Started
Installation Wizard
Ethernet Printer Driver Installation
Upon selecting the Ethernet printer type and clicking Next, a window will display the IP
addresses of the connected ZXP Series 3 card printers.
Select the IP address of the printer and click Next. The driver files will be copied into the
following directories:
• /usr/lib/cups/filter/rastertozxp3
• /usr/lib/cups/filter/pstozxp3ps
• /usr/local/ZebraZXP3Driver/
After the copying is complete, the final Install Jammer Wizard page shows that the driver has
een installed successfully.
b
Click Finish into complete the installation and exit the Installer.
8 Zebra ZXP Series 1 and Series 3 Linux Driver User’s Manual P1075318-001

Adding a Printer Manually
To add the printer manually, select the menu System—Administration—Printing. The printer
properties window will open. Select the New from the Prin ter properties as shown in below.
1: Getting Started
Adding a Printer Manually
Enter the root password. Then select the printer to install.
Select the printer to install and provide the root password if prompted.
Select the driver from the installed driver list.
P1075318-001 Zebra ZXP Series 1 and Series 3 Linux Driver User’s Manual 9

1: Getting Started
Adding a Printer Manually
Select the Zebra printer.
Click Forward to add the printer. The new printer will be updated in the Printer properties
window.
10 Zebra ZXP Series 1 and Series 3 Linux Driver User’s Manual P1075318-001

Extracting files using Terminal
Launch the terminal by selecting Applications—System Tools—Terminal.
Locate the Zebra Linux Driver tar file: Unified_Zebra_ZXP3_S eries_Card_Printer_Driver-
.0.x-Linux-x-Install.tar.gz.
0.0
Extract the Binary file using the following command:
1: Getting Started
Extracting files using Terminal
Uninstall
tar -xvf Unified_Zebra_ZXP3_Series_Card_Pri
Run the Installation inside
su ./Unified_Zebra_ZXP3_Series_Card_Printer_Driver-0.0.0.48-Linux-x86_64-Install
Proceed with the installation using the setup wizard.
To Remove the Zebra ZXP Series 3 Printer Application:
Launch the terminal by selecting Applications—System Tools—Terminal.
Change the Directory: cd /
Run the Uninstall program using the following command:
./uninstall
the extracted directory using the following command:
usr/local/ZebraZXP3Driver
nter_Driver-0.0.0.x-Linux-x-Install.tar.gz
Click Yes to continue, otherwise click No to cancel the uninstall.
P1075318-001 Zebra ZXP Series 1 and Series 3 Linux Driver User’s Manual 11

1: Getting Started
Extracting files using Terminal
Click OK.
Click Finish.
12 Zebra ZXP Series 1 and Series 3 Linux Driver User’s Manual P1075318-001
2
Setup
Note • The following instruction are for the USB interface. If you are using the Ethernet
interface, the corresponding screens will refer to the Network Printer.
Printing Preferences
Go to the menu System—Administration—Printing to display all the available installed
printers. Select the printer and click Select to open the Printer Preferences menu.
The Printing Preferences application will launch will display the available installed printers.
Select the printer and click on the Select button to open the Printer Preferences page of the
corresponding printer.
P1075318-001 Zebra ZXP Series 1 and Series 3 Linux Driver User’s Manual 13

2: Setup
Printer Options
Select the Printer click Select.
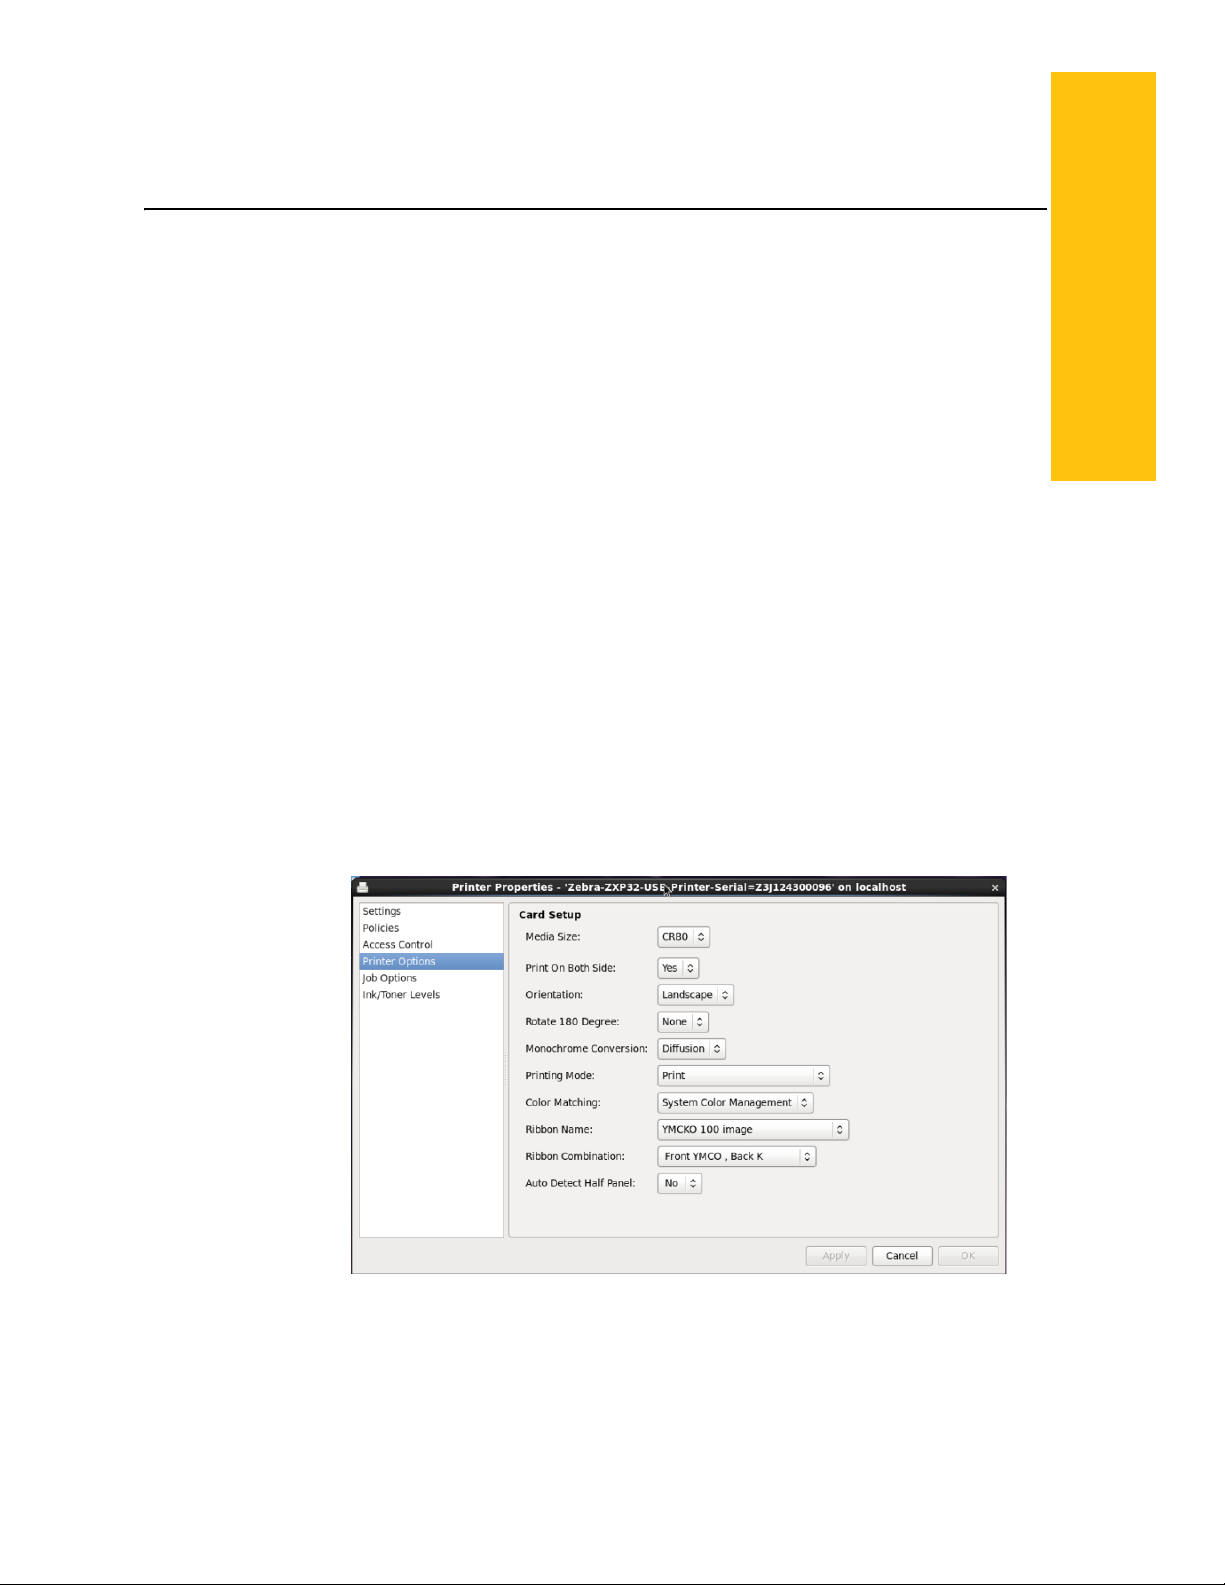
Printer Options
• Orientation: Selection for portrait or landscape printing.
• Rotate 180 Degree: Selection for rotating the image 180°.
• Print on both sides: Selection for single-sided or dual-sided printing.
• Monochrome Conversion: Specifies the method of monochrome conversion used in
rinting. Different selections have di fferent effects on the way the image is printed.
p
• Printing Mode: Sets the type of printing required:
•Print
• Encode only (Use this when magnetic encoding is the only function desired, printing
ll not occur).
wi
14 Zebra ZXP Series 1 and Series 3 Linux Driver User’s Manual P1075318-001

• Print and Encode on same side.
• Ribbon type: The supported ribbons are displayed.
• Ribbon combinations: Are based on ribbon type; for example:
• YMCKO 100 Images, YMCKO 200 Images, YMCKO 280 Images
• Front YMCO, Back K
• Front YMCKO, Back YMCKO
• Front YMC, Back KO
•Front YMCKO
• 1/2 YMCKO 250,1/2 YMCKO 400
• Front YMCO, Back K
• Front YMCKO, Back YMCKO
• Front YMC, Back KO
•Front YMCKO
• YMCKOK 165,YMCKOK 230
• Front YMCKO, Back YMCKO
• Front YMC, Back KO
• Front YMCK ,Back K
• Front YMCKO, Back K
•Front YMCKO
2: Setup
Printer Options
• YMCKOKO
• Front YMCO ,Back K
• Front YMCKO, Back YMCKO
• Front YMC, Back KO
• Front YMCK ,Back K
• Front YMCKO, Back K
• Front YMCKO, Back KO
• Front YMCO ,Back KO
• Front YMCK ,Back KO
•Front YMCKO
• 1/2 YMCKOKO 250
• Front YMCO ,Back K
• Front YMCKO, Back YMCKO
• Front YMC, Back KO
• Front YMCK, Back K
• Front YMCKO, Back K
• Front YMCKO, Back KO
• Front YMCO ,Back KO
• Front YMCK ,Back KO
•Front YMCKO
•K Resin
• Front K / Back K
P1075318-001 Zebra ZXP Series 1 and Series 3 Linux Driver User’s Manual 15

2: Setup
Printer Options
• Auto detect Half panel: Insert the Half panel ribbon in to the printer Auto detects check
Device Info
•Front K
• KDO 500 image, KDO 700 image
• Front KdO /Back KdO
•Front KdO
• KRO 500 image, KRO 700 image
• Front KrO / Back KrO
•Front KrO
• Std Mono chrome, High capacity mono chrome
•Front K / Back K
•Front K
ox is checked automatically.
b
• Printer Model: Displays the current Printer Model
• FW V
• Se
• Ri
• He
• Ma
• Panels Printed:
16 Zebra ZXP Series 1 and Series 3 Linux Driver User’s Manual P1075318-001
ersion: Displays the Current firmware version in the Printer
rial Number: Displaying the Printer Serial Number
bbon Type: Displaying the Current Ribbon Information
ad Resistance: Displaying the Head Resistance Information
g Encode: Mag encoding Option is support and Not supported Option
The number of Panels are printed status information.

• Remaining Count: The Ribbon Remaining count status information
art Card Type: The smart card supported status information
• Sm
Encoding Options
2: Setup
Printer Options
• Track 1 encoding mode: The following options are displayed.
•ISO1
•ISO2
•ISO3
• T
rack 1 Bit Density: The following options are displayed.
• 210 bpi
•75 bpi
• T
rack 2 encoding mode: The following options are displayed.
•ISO1
•ISO2
•ISO3
• Track 2 Bit Density: The following options are displayed.
• 210 bpi
P1075318-001 Zebra ZXP Series 1 and Series 3 Linux Driver User’s Manual 17

2: Setup
Printer Options
• Track 3 encoding mode: The following options are displayed.
• Track 3 Bit Density: The following options are displayed.
• Coercivity: Select the type of coercivity of magnetic stripe cards to be used. The list of
• Encoding Position: The default encoder position normal is displayed.
•75 bpi
•ISO1
•ISO2
•ISO3
• 210 bpi
•75 bpi
options is displayed.
• High coercivity
• Low coercivity
• Encoder Type: The default encoder Type ISO /jis is getting displayed..
Direct Encoding
• Track 1: Allowed Characters are $ ^ ( ) . / - <space> and Caps (Alphabets), Numeric.
Length: 76
• Track 2: Allowed characters are Numbers and Symbol = and Length: 37
• Track 3: Allowed characters are Numbers and Symbol = and Length: 104
• Encode: Enter the Mag track value in the Text box field and click Encode Button
• Read: Encode the mag track details and insert the card in to the printer and click read
button
• Eject Card: The card Eject from the Printer
• Restore Defaults: Settings are restored.
• Apply: Selected settings are applied successfully..
18 Zebra ZXP Series 1 and Series 3 Linux Driver User’s Manual P1075318-001

Tools
2: Setup
Printer Options
• Command to send to printer: Enter the command in the Command to send to printer text
box and click Execute.
• Print T
list:
• Cl
• O
Offset setting. Test card should be printed with the change the printer offset value.
• Si
Card feeder, Single feeder slot, and Auto feed.
• FW Do
downloading successfully .
est card: The following options are displayed in the Print Test card drop-down
•Standard
• Encoder Parameters
• Printer Parameters
eaning: The following options are displayed in the cleaning drop-down list.
•Printer Only
• Magnetic Encoder
ffset Setting: Enter the X and Y offset values and click the “Set Offset” button on the
ngle feed Options: Current Status displays the current card feed method; choices are
wnload: Browse and select the Firmware file and click downloa d button the FW is
P1075318-001 Zebra ZXP Series 1 and Series 3 Linux Driver User’s Manual 19
2: Setup
Printer Properties: Test Print Card
• Send PRN File: Browse the Saved PRN file and click Send file file button. The PRN file
Printed Successfully.
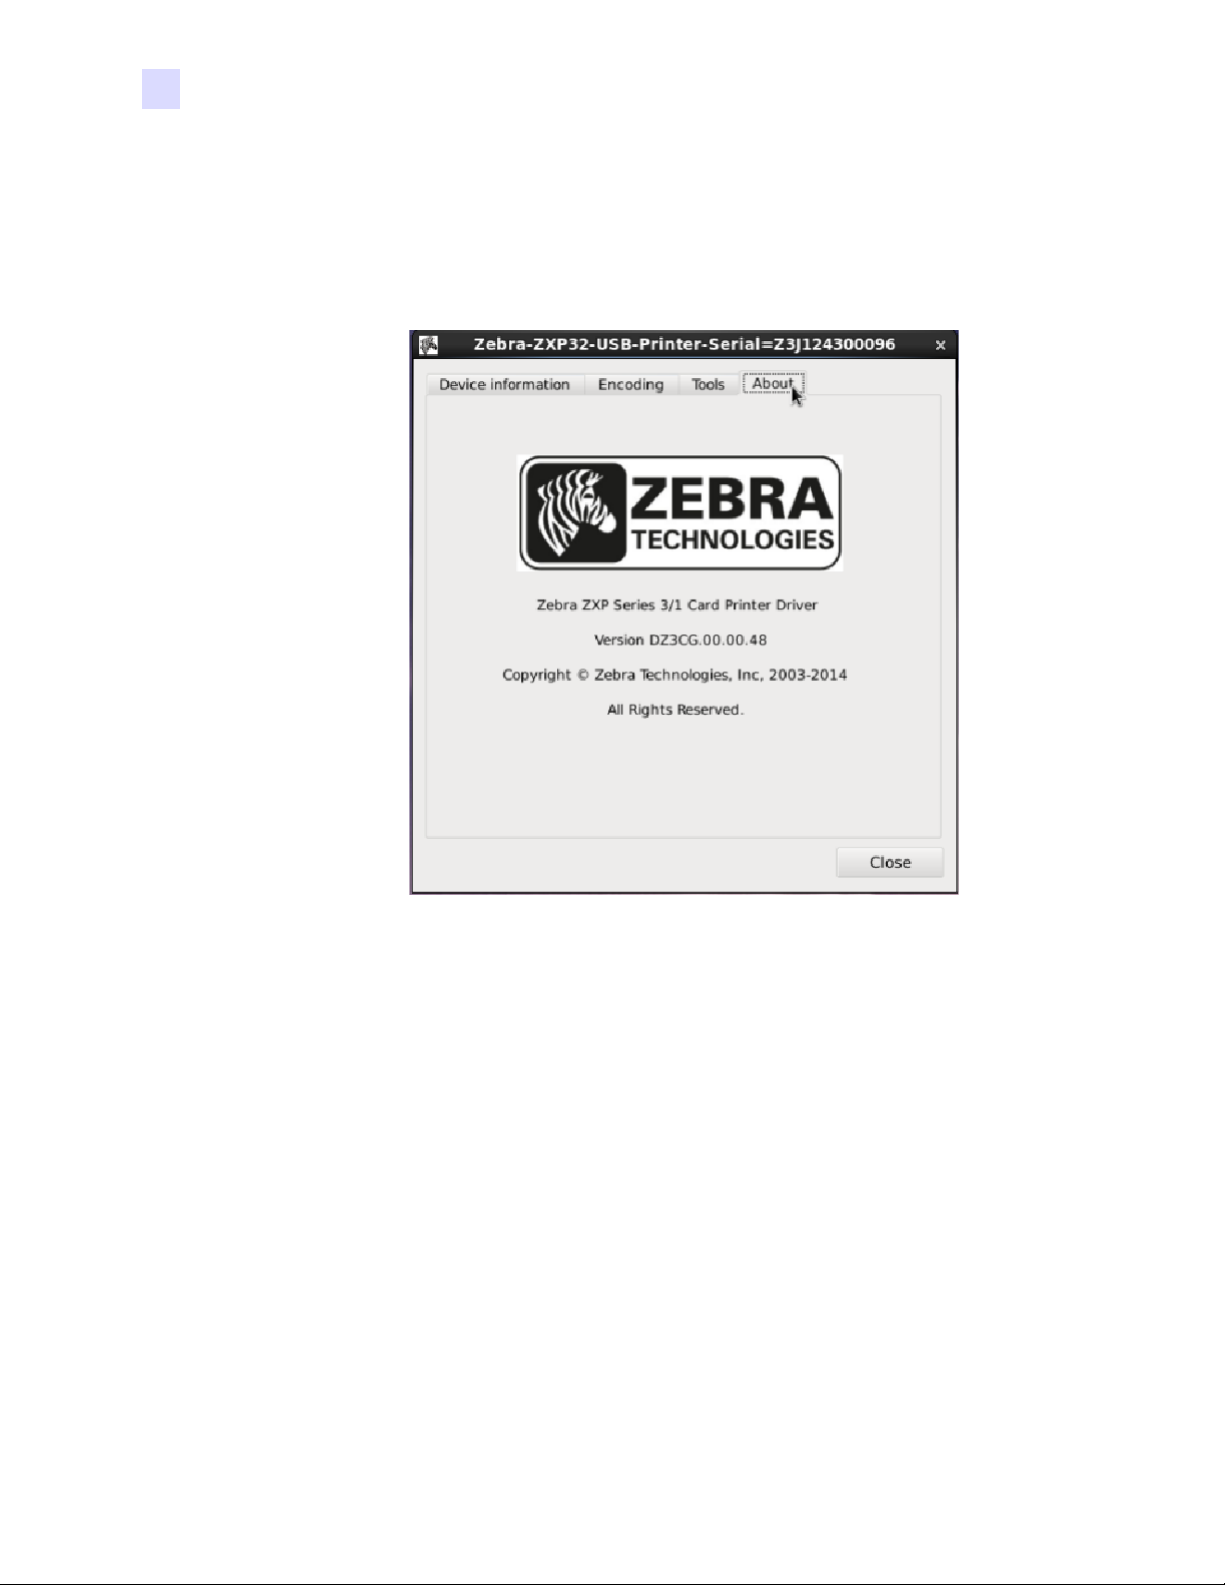
About
The About tab displays the Printer Model and Driver Version information.
Printer Properties: Test Print Card
The Printing Properties will list all the available printers. Right click on the available printer
and select Properties and click Test Print.
20 Zebra ZXP Series 1 and Series 3 Linux Driver User’s Manual P1075318-001

Printing From Libre Office
Open the suitable document. Click on the File menu and then select Print. Select the
appropriate printer and click Print. The print job will be sent to the printer.
2: Setup
Printing From Libre Office
Changing Printer Options
T o change the printer options go to Application—Zebra ZXPS 3 Printer Driver—Zebra ZXPS
3 Printer Driver Properties screen. The installed printers will be displayed; select the
appropriate printer.
To change the printer options go to System Tools—Admin—Printing, then it will show the
installed printers. From that select the appropriate printer. Then following screen will appear.
P1075318-001 Zebra ZXP Series 1 and Series 3 Linux Driver User’s Manual 21

2: Setup
Changing Printer Options
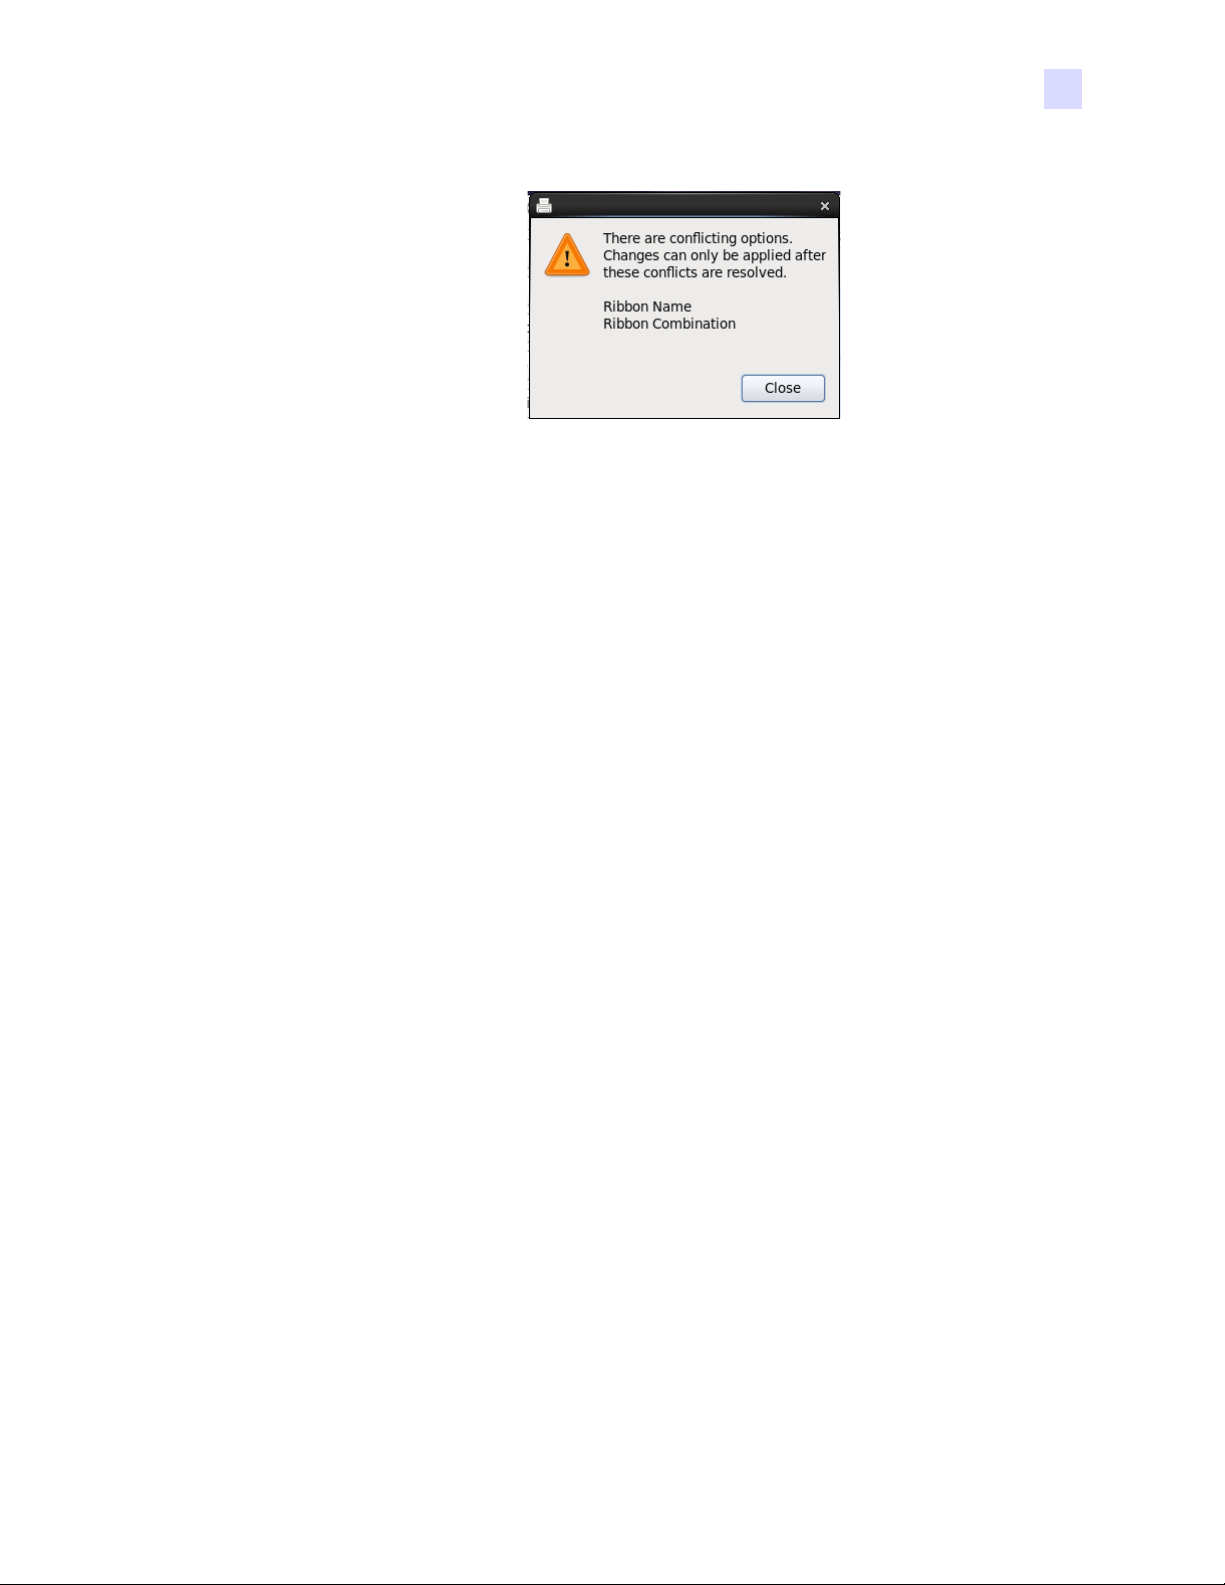
Select the appropriate printing option and click Apply; enter the root password to save the
settings.
A warning icon will be displayed next to an incorrect setting. A warning dialog box will
appe
ar advising the user to correct the errors to be able to save the changes.
22 Zebra ZXP Series 1 and Series 3 Linux Driver User’s Manual P1075318-001
2: Setup
Changing Printer Options
P1075318-001 Zebra ZXP Series 1 and Series 3 Linux Driver User’s Manual 23

24 Zebra ZXP Series 1 and Series 3 Linux Driver User’s Manual P1075318-001

Introduction
The purpose of this document is to describe how to perform magnetic enc oding with the Zebra
ZXP Series 1 and ZXP Series 3 printer driver for Linux, using Libre Office, in detail. The
document provides information on magnetic encoding with ZXP Series 1 and ZXP Series 3
Printer on 32-bit and 64-bit Linux operating systems tested on RHEL 6.5 environment.
3
Magnetic Encoding
Magnetic Encoding Using Open Office
Open any existing document with magnetic encoding data or create a new do cument.
P1075318-001 Zebra ZXP Series 1 and Series 3 Linux Driver User’s Manual 25

3: Magnetic Encoding
Magnetic Encoding Using Libre Office
Click the File menu and select Print. Select the desired printer from the available printers list
and print the document.
Magnetic Encoding Using Libre Office
Open any existing document with magnetic encoding data or create a new document.
Click the File menu and select Print. Select the desired printer from the available printers list
and click Properties.
26 Zebra ZXP Series 1 and Series 3 Linux Driver User’s Manual P1075318-001

3: Magnetic Encoding
Magnetic Encoding Using Libre Office
Click the Device tab. From the Printer Language type drop -d own select t he Post Script (Level
from driver) and click OK.
Note • In Open office the print job will use the Postscript Pre-filter but the Libre office uses
the PDF Pre-filter. The PDF data is in encrypted format so we are not able to extract the
Magnetic Encoding data from the file. In order to do the Magnetic encoding successfully using
Libre Office the above setting is required.
Track 1 will accept only 76 charac
ters. And it should accept Uppercase, Numbers and the
special characters like " $,^,-,(,),space,.,/,
P1075318-001 Zebra ZXP Series 1 and Series 3 Linux Driver User’s Manual 27

3: Magnetic Encoding
Magnetic Encoding Using Libre Office
Track 2 will accept only 37 characters. It should accept only numbers and " = " sign.
Track 3 will accept only 104 characters. It should accept only numbers and " = " sign.
28 Zebra ZXP Series 1 and Series 3 Linux Driver User’s Manual P1075318-001

Out of Cards
The printer is out of cards. Load cards to continue the print job, or click Cancel to cancel the
job.
4
Error Codes
P1075318-001 Zebra ZXP Series 1 and Series 3 Linux Driver User’s Manual 29

4: Error Codes
Check Ribbon
No ribbon or incorrect ribbon is installed. Load the correct ribbon to continue the print job. or
click Cancel to cancel the job.
Cover Open
The card feeder cover is open. Close the cover to continue the print job. or click Cancel to
cancel the job.
30 Zebra ZXP Series 1 and Series 3 Linux Driver User’s Manual P1075318-001

Encoding Error
The error has occurred during the Encoding process. Inspect the cards for proper type and
orientation. Replace or re-orient as necessary to continue the print job. or click Cancel to
cancel the job. If the problem persists, clean the magnetic encoder.
4: Error Codes
Lid Open
The printer lid is open. Close the lid to continue the print job. or click Cancel to cancel the job.
P1075318-001 Zebra ZXP Series 1 and Series 3 Linux Driver User’s Manual 31
4: Error Codes
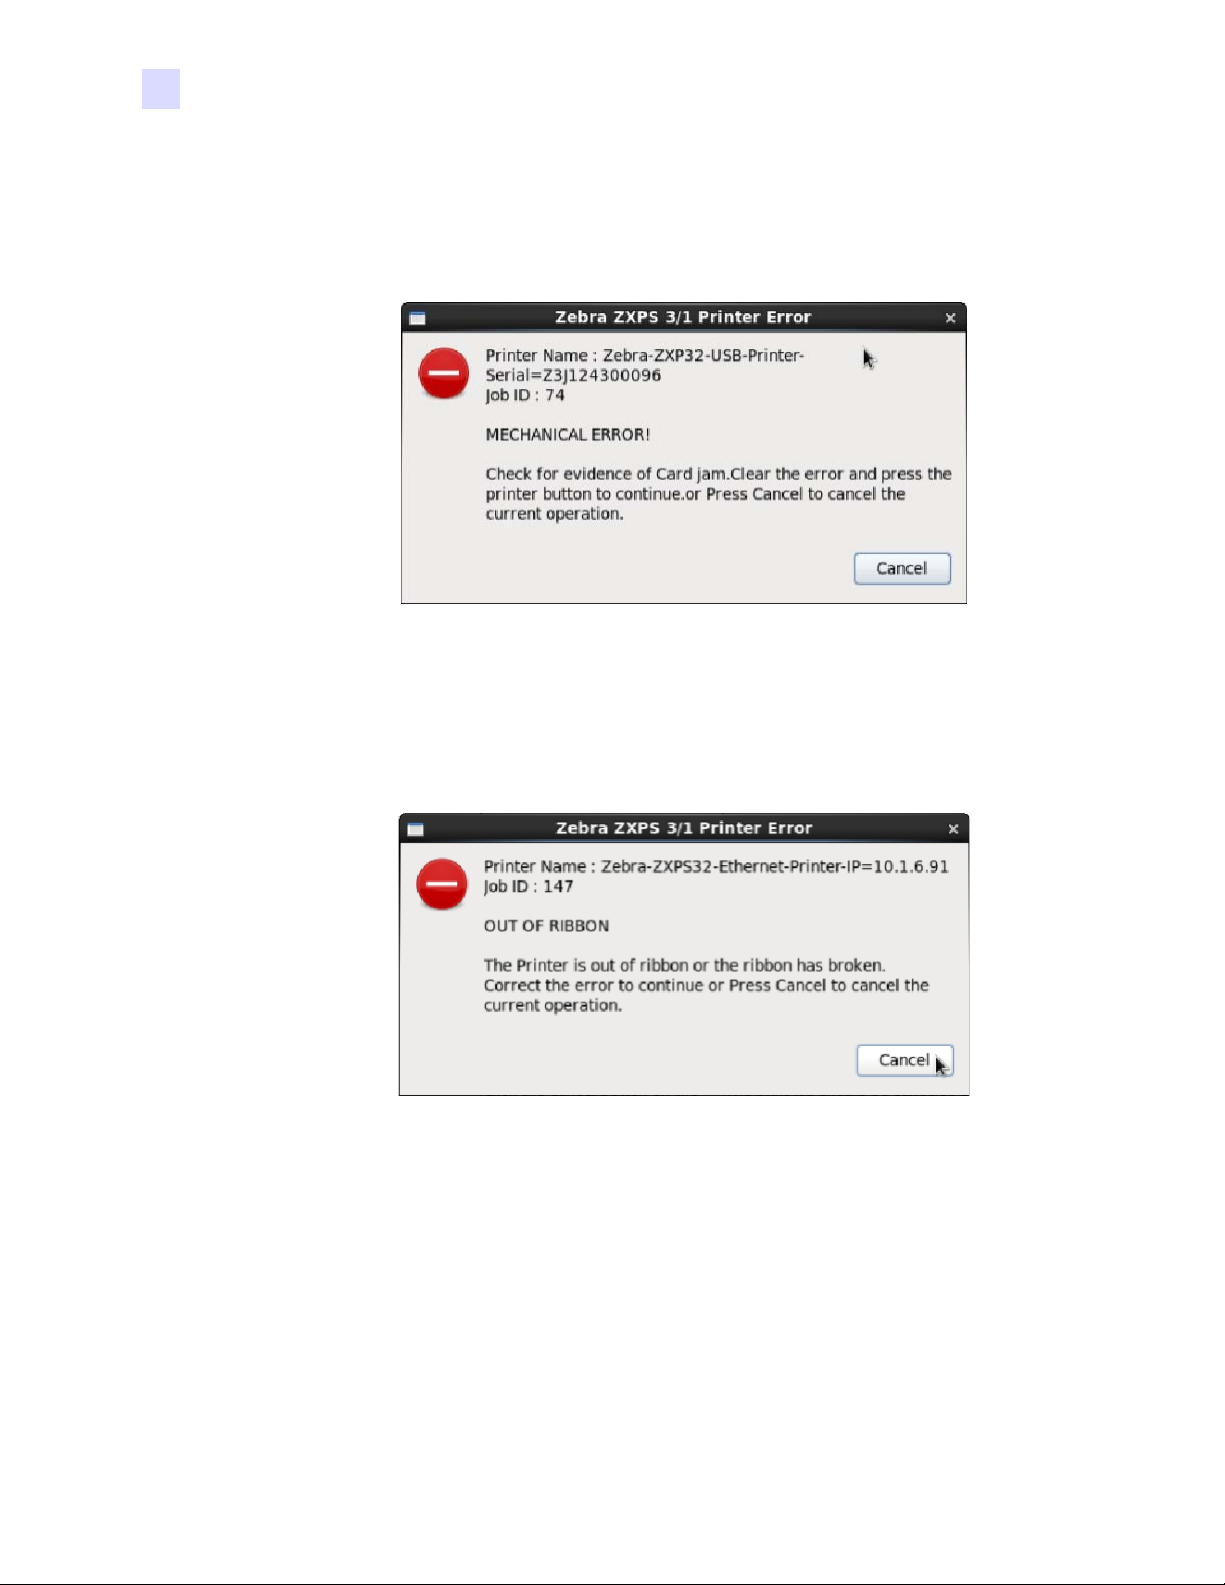
Mechanical Error
Check for evidence of Card Jam. Clear the error and press the printer button to continue the
print job. or click Cancel to cancel the job.
Out of Ribbon
The printer is out of ribbon or the ribbon has broken. Correct th e error to continue the print job.
or click Cancel to cancel the job.
32 Zebra ZXP Series 1 and Series 3 Linux Driver User’s Manual P1075318-001
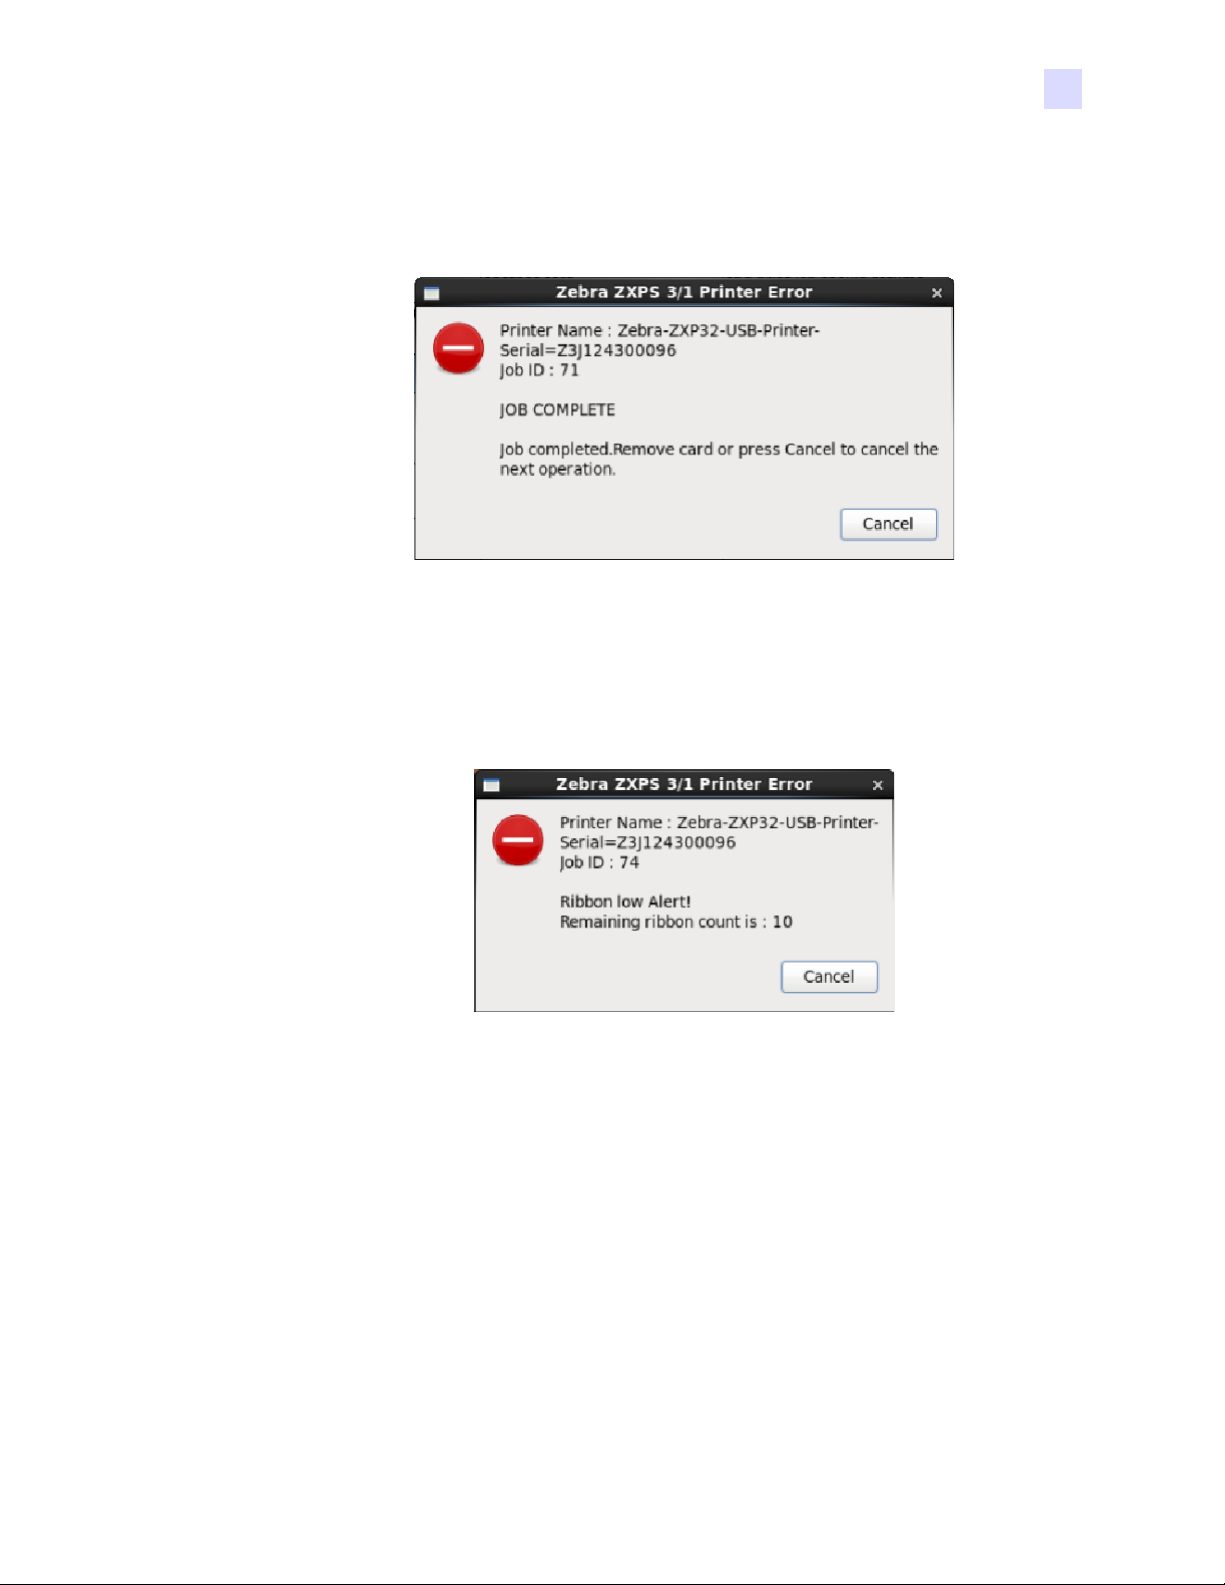
Job Complete
Job completed. Remove card to continue the print job. or click Cancel to cancel the job.
Low Ribbon
4: Error Codes
The alert is displayed in the when the Ribbon is low and needs to be replaced. Replace the
ribbon to continue the print job. or click Cancel to cancel the job.
P1075318-001 Zebra ZXP Series 1 and Series 3 Linux Driver User’s Manual 33

34 Zebra ZXP Series 1 and Series 3 Linux Driver User’s Manual P1075318-001

Appendix 5
Worldwide Support
For Technical Support or Repair Services, contact the appropriate facility listed below.
North America and Latin America - Technical Support
T: +1 877 ASK ZEBRA (877 275 9327)
+1 847 913 2259
E: ts1@zebra.com
North America and Latin America - Repair Services
Before returning any equipment to Zebra Technologies Corporation for in-warranty or out-ofwarranty repair, contact Repair Services for a Repair Order (RO) number. Mark the RO number
clearly on the outside of the box. Ship the equipment, freight prepaid, to the address listed below:
Zebra Technologies Repair Services
333 Corporate Woods Parkway
Vernon Hills, IL 60061
webform: www.zebra.com/repair
T: +1 877 ASK ZEBRA (877 275 9327)
E: repair@zebra.com
P1075318-001 Zebra ZXP Series 1 and Series 3 Linux Driver User’s Manual 35

5: Worldwide Support
Europe, Middle East, and Africa - Technical Support
Language Phone Email
Arabic +971 (0)46058220 zebraCareUAE@zebra.com
Dutch +31 (0)33 450 50 48 ZebraCareBNL@zebra.com
English (UK) +44 (0)1628 556 225 zebraCareUK@zebra.com
(Sweden) +46 (0)8 594 709 88 zebraCareUK@zebra.com
(South Africa)
French +33 (0) 1 53 48 12 74 zebraCareFR@zebra.com
German +49 (0) 2159 676 870 zebraCareDE@zebra.com
Hebrew +97 236 498 140 ZebraCareIL@zebra.com
Italian +39 0 2 575 06388 ZebraCareIT@zebra.com
Polish +48 223 801 980 zebraCarePL@zebra.com
Russian +7 495 739 5993 ZebraCareRU@zebra.com
Spanish +34 (0) 917 992 896 zebraCareES@zebra.com
Turkish +90 212 314 1010 zebraCareTR@zebra.com
+27 (0)11 201 7712 /
0860 393272
zebracareSA@zebra.com
For further assistance, contact:
Zebra Technologies Card Printer Solutions
Dukes Meadow
Millboard Road, Bourne End
Buckinghamshire SL8 5XF, UK
T: +44 (0) 1628 556 025
F: +44 (0) 1628 556 001
E: cardts@zebra.com
36 Zebra ZXP Series 1 and Series 3 Linux Driver User’s Manual P1075318-001

Europe, Middle East, and Africa - Repair Services
Before returning any equipment to Zebra Technologies Corporation for in-warranty or out-ofwarranty repair, contact your supplier for a Return Materials Authorization (RMA) number, or
contact one ot the following repair centers for support and instructions:
Type of repair and location Phone Email
Depot Repair in Germany,
Austria, Switzerland
Depot Repair in France +33 (0) 1 53 48 12 74 zebracareFR@zebra.com
+49 (0) 2159 676 870 zebracareDE@zebra.com
5: Worldwide Support
Depot and On-Site Repair in
UK and
Depot Repair in South Africa +27 (0) 11 201 7777 -
Depot Repair in Middle East +971 (0) 46058220 support_dxb@emitac.ae
Ireland
+44 (0) 1628 556 225 zebracareUK@zebra.com
For further assistance, contact:
For assistance anywhere in the EMEA, contact After Sales Customer Services at:
T: + 44 (0) 177 2 69 3069
E: ukrma@zebra.com
P1075318-001 Zebra ZXP Series 1 and Series 3 Linux Driver User’s Manual 37

5: Worldwide Support
Asia Pacific - Technical Support
Zebra Technologies Asia Pacific Pte. Ltd.
120 Robinson Road
#06-01 Parakou Building
Singapore 068913
T: +65 6858 0722
F: +65 6885 0838
E: tsasiapacific@zebra.com
Asia Pacific - Repair Services
Before returning any equipment to Zebra Technologies Corporation for in-warranty or out-of
warranty repair, contact Repair Services for a Return Materials Authorization (RMA) number.
Repack the equipment in the original packing material, and mark the RMA number clearly on the
outside. Ship the equipment, freight prepaid, to either address listed below:
Zebra Technologies Asia Pacific Pte. Ltd.
No.5 Changi North Way Level 3
Singapore 498771
Agility Building
T: +65 6546 2670 ext 3203 and 3204
F: +65 6546 5328
E: APACRepair@zebra.com
Zebra Website
www.zebra.com
km.zebra.com (Knowledge Base)
38 Zebra ZXP Series 1 and Series 3 Linux Driver User’s Manual P1075318-001
 Loading...