


ShowCase
User Guide


ShowCase User Guide
72E-79050-01
Revision A
February 2006

© 2006 by Symbol Technologies, Inc. All rights reserved.
No part of this publication may be reproduced or used in any form, or by any electrical or mechanical means, without permission in writing from
Symbol. This includes electronic or mechanical means, such as photocopying, recording, or information storage and retrieval systems. The material
in this manual is subject to change without notice.
The software is provided strictly on an “as is” basis. All software, including firmware, furnished to the user is on a licensed basis. Symbol grants
to the user a non-transferable and non-exclusive license to use each software or firmware program delivered hereunder (licensed program). Except
as noted below, such license may not be assigned, sublicensed, or otherwise transferred by the user without prior written consent of Symbol. No
right to copy a licensed program in whole or in part is granted, except as permitted under copyright law. The user shall not modify, merge, or
incorporate any form or portion of a licensed program with other program material, create a derivative work from a licensed program, or use a
licensed program in a network without written permission from Symbol. The user agrees to maintain Symbol’s copyright notice on the licensed
programs delivered hereunder, and to include the same on any authorized copies it makes, in whole or in part. The user agrees not to decompile,
disassemble, decode, or reverse engineer any licensed program delivered to the user or any portion thereof.
Symbol reserves the right to make changes to any software or product to improve reliability, function, or design.
Symbol does not assume any product liability arising out of, or in connection with, the application or use of any product, circuit, or application
described herein.
No license is granted, either expressly or by implication, estoppel, or otherwise under any Symbol Technologies, Inc., intellectual property rights.
An implied license only exists for equipment, circuits, and subsystems contained in Symbol products.
Symbol, Spectrum One, and Spectrum24 are registered trademarks of Symbol Technologies, Inc. Bluetooth is a registered trademark of Bluetooth
SIG. Microsoft, Windows and ActiveSync are either registered trademarks or trademarks of Microsoft Corporation. Other product names mentioned
in this manual may be trademarks or registered trademarks of their respective companies and are hereby acknowledged.
Symbol Technologies, Inc.
One Symbol Plaza
Holtsville, New York 11742-1300
http://www.symbol.com
Patents
This product is covered by one or more of the patents listed on the web site: www.symbol.com/patents

Revision History
Changes to the original manual are listed below:
Change Date Description
-01 Rev A February 2006 Initial Release
-


Contents
Revision History . . . . . . . . . . . . . . . . . . . . . . . . . . . . . . . . . . . . . . . . . . . . . . . . . . . . . . . . . . . . . . . . . . . . . . . . . . . iii
About This Guide
Introduction . . . . . . . . . . . . . . . . . . . . . . . . . . . . . . . . . . . . . . . . . . . . . . . . . . . . . . . . . . . . . . . . . . . . . . . . . . . . . ix
Chapter Descriptions . . . . . . . . . . . . . . . . . . . . . . . . . . . . . . . . . . . . . . . . . . . . . . . . . . . . . . . . . . . . . . . . . . . . . . . ix
Notational Conventions . . . . . . . . . . . . . . . . . . . . . . . . . . . . . . . . . . . . . . . . . . . . . . . . . . . . . . . . . . . . . . . . . . . . . ix
Related Documents and Software . . . . . . . . . . . . . . . . . . . . . . . . . . . . . . . . . . . . . . . . . . . . . . . . . . . . . . . . . . . . . ix
Service Information . . . . . . . . . . . . . . . . . . . . . . . . . . . . . . . . . . . . . . . . . . . . . . . . . . . . . . . . . . . . . . . . . . . . . . . . x
Symbol Support Center . . . . . . . . . . . . . . . . . . . . . . . . . . . . . . . . . . . . . . . . . . . . . . . . . . . . . . . . . . . . . . . . . x
Chapter 1. Getting Started
Introduction . . . . . . . . . . . . . . . . . . . . . . . . . . . . . . . . . . . . . . . . . . . . . . . . . . . . . . . . . . . . . . . . . . . . . . . . . . . . 1-3
System Requirements . . . . . . . . . . . . . . . . . . . . . . . . . . . . . . . . . . . . . . . . . . . . . . . . . . . . . . . . . . . . . . . . . . . . .1-3
Prerequisites. . . . . . . . . . . . . . . . . . . . . . . . . . . . . . . . . . . . . . . . . . . . . . . . . . . . . . . . . . . . . . . . . . . . . . . . . . . . .1-3
Supported Readers. . . . . . . . . . . . . . . . . . . . . . . . . . . . . . . . . . . . . . . . . . . . . . . . . . . . . . . . . . . . . . . . . . . . . . . .1-3
Chapter 2. Installation
Introduction . . . . . . . . . . . . . . . . . . . . . . . . . . . . . . . . . . . . . . . . . . . . . . . . . . . . . . . . . . . . . . . . . . . . . . . . . . . . 2-3
Download the ShowCase Software. . . . . . . . . . . . . . . . . . . . . . . . . . . . . . . . . . . . . . . . . . . . . . . . . . . . . . . . . . .2-3
Installing ShowCase. . . . . . . . . . . . . . . . . . . . . . . . . . . . . . . . . . . . . . . . . . . . . . . . . . . . . . . . . . . . . . . . . . . . . . .2-3

ShowCase User Guidevi
Chapter 3. ShowCase Set-Up
Introduction. . . . . . . . . . . . . . . . . . . . . . . . . . . . . . . . . . . . . . . . . . . . . . . . . . . . . . . . . . . . . . . . . . . . . . . . . . . . . 3-3
ShowCase Console View . . . . . . . . . . . . . . . . . . . . . . . . . . . . . . . . . . . . . . . . . . . . . . . . . . . . . . . . . . . . . . . . . . .3-5
Add a Reader . . . . . . . . . . . . . . . . . . . . . . . . . . . . . . . . . . . . . . . . . . . . . . . . . . . . . . . . . . . . . . . . . . . . . . . . . . . .3-6
View a Zone . . . . . . . . . . . . . . . . . . . . . . . . . . . . . . . . . . . . . . . . . . . . . . . . . . . . . . . . . . . . . . . . . . . . . . . . . . . .3-13
View Templates . . . . . . . . . . . . . . . . . . . . . . . . . . . . . . . . . . . . . . . . . . . . . . . . . . . . . . . . . . . . . . . . . . . . . . . . .3-15
Configuration Management . . . . . . . . . . . . . . . . . . . . . . . . . . . . . . . . . . . . . . . . . . . . . . . . . . . . . . . . . . . . . . . .3-17
Reader Firmware Management . . . . . . . . . . . . . . . . . . . . . . . . . . . . . . . . . . . . . . . . . . . . . . . . . . . . . . . . .3-17
Chapter 4. Using ShowCase
Introduction. . . . . . . . . . . . . . . . . . . . . . . . . . . . . . . . . . . . . . . . . . . . . . . . . . . . . . . . . . . . . . . . . . . . . . . . . . . . . 4-3
Open ShowCase . . . . . . . . . . . . . . . . . . . . . . . . . . . . . . . . . . . . . . . . . . . . . . . . . . . . . . . . . . . . . . . . . . . . . . . . . .4-3
ToolBar Dropdown Menus . . . . . . . . . . . . . . . . . . . . . . . . . . . . . . . . . . . . . . . . . . . . . . . . . . . . . . . . . . . . . .4-3
Select A Reader . . . . . . . . . . . . . . . . . . . . . . . . . . . . . . . . . . . . . . . . . . . . . . . . . . . . . . . . . . . . . . . . . . . . . . . . . .4-4
Read Tags . . . . . . . . . . . . . . . . . . . . . . . . . . . . . . . . . . . . . . . . . . . . . . . . . . . . . . . . . . . . . . . . . . . . . . . . . . .4-6
Unique Tags View. . . . . . . . . . . . . . . . . . . . . . . . . . . . . . . . . . . . . . . . . . . . . . . . . . . . . . . . . . . . . . . . . . . . .4-9
Exporting Tag Data . . . . . . . . . . . . . . . . . . . . . . . . . . . . . . . . . . . . . . . . . . . . . . . . . . . . . . . . . . . . . . . . . . .4-10
Name a Tag . . . . . . . . . . . . . . . . . . . . . . . . . . . . . . . . . . . . . . . . . . . . . . . . . . . . . . . . . . . . . . . . . . . . . . . .4-11
Exit Read Tags View. . . . . . . . . . . . . . . . . . . . . . . . . . . . . . . . . . . . . . . . . . . . . . . . . . . . . . . . . . . . . . . . . .4-13
Functions Dropdown Menu. . . . . . . . . . . . . . . . . . . . . . . . . . . . . . . . . . . . . . . . . . . . . . . . . . . . . . . . . . . . . . . . .4-13
Chapter 5. Repair / Remove / Update
Introduction. . . . . . . . . . . . . . . . . . . . . . . . . . . . . . . . . . . . . . . . . . . . . . . . . . . . . . . . . . . . . . . . . . . . . . . . . . . . . 5-3
Download the ShowCase Software . . . . . . . . . . . . . . . . . . . . . . . . . . . . . . . . . . . . . . . . . . . . . . . . . . . . . . . . . . .5-3
Repair ShowCase . . . . . . . . . . . . . . . . . . . . . . . . . . . . . . . . . . . . . . . . . . . . . . . . . . . . . . . . . . . . . . . . . . . . . . . . .5-3
Remove ShowCase. . . . . . . . . . . . . . . . . . . . . . . . . . . . . . . . . . . . . . . . . . . . . . . . . . . . . . . . . . . . . . . . . . . . . . . .5-6
Update ShowCase . . . . . . . . . . . . . . . . . . . . . . . . . . . . . . . . . . . . . . . . . . . . . . . . . . . . . . . . . . . . . . . . . . . . . . . .5-9
Index
Tell Us What You Think

About This Guide
Introduction . . . . . . . . . . . . . . . . . . . . . . . . . . . . . . . . . . . . . . . . . . . . . . . . . . . . . . . . . . . . . . . . . . . . . . . . . . . . . ix
Chapter Descriptions . . . . . . . . . . . . . . . . . . . . . . . . . . . . . . . . . . . . . . . . . . . . . . . . . . . . . . . . . . . . . . . . . . . . . . . ix
Notational Conventions . . . . . . . . . . . . . . . . . . . . . . . . . . . . . . . . . . . . . . . . . . . . . . . . . . . . . . . . . . . . . . . . . . . . . ix
Related Documents and Software . . . . . . . . . . . . . . . . . . . . . . . . . . . . . . . . . . . . . . . . . . . . . . . . . . . . . . . . . . . . . ix
Service Information . . . . . . . . . . . . . . . . . . . . . . . . . . . . . . . . . . . . . . . . . . . . . . . . . . . . . . . . . . . . . . . . . . . . . . . . x
Symbol Support Center . . . . . . . . . . . . . . . . . . . . . . . . . . . . . . . . . . . . . . . . . . . . . . . . . . . . . . . . . . . . . . . . . x

ShowCase User Guideviii

Introduction
This User Guide describes how to install the ShowCase tool, and how to use the system to view an RFID reader.
Chapter Descriptions
Topics covered in this guide are as follows:
• Chapter 1, Getting Started provides a description of ShowCase and its features.
• Chapter 2, Installation describes the recommended requirements for ShowCase and how to install ShowCase on the host
computer.
• Chapter 3, ShowCase Set-Up describes how to set up a reader on the ShowCase application.
• Chapter 4, Using ShowCase describes how to use ShowCase to manage tags, view tag activity, and log tag information.
• Chapter 5, Repair / Remove / Update describes how to repair, remove and update the ShowCase software.
Notational Conventions
Conventions used in this document:
• Italics are used to highlight the following:
• Chapters and sections in this and related documents
• Dialog box, window and screen names
• Drop-down list and list box names
• Check box and radio button names
• Icons on a screen.
• Bold text is used to highlight the following:
• Key names on a keypad
• Button names on a screen.
• Bullets (•) indicate:
• Action items
• Lists of alternatives
• Lists of required steps that are not necessarily sequential.
• Sequential lists (e.g., those that describe step-by-step procedures) appear as numbered lists.
ix
Related Documents and Software
For more information about the AR and XR RFID Readers refer to:
• XR400/XR480 Series RFID Readers Quick Reference Guide, p/n 72-71466-xx
• XR Series Integrator Guide, p/n 72E-71773-xx
• XR Series Readers Interface Control Guide, p/n 72E-71803-xx
• XR400 Reader C API Programmer Reference Guide, p/n 72E-73028-xx
• DC600 Portal Integrator Guide, p/n 72E-71772-xx
• AR400 Readers, refer to: http://www.symbol.com/AR400.
For the latest version of this guide and related guides, go to: http://www.symbol.com/manuals.

ShowCase User Guidex
Service Information
If an equipment problem occurs, contact the appropriate regional Symbol Support Center. Before calling, locate the product model
number and serial number. Call the Support Center from a phone near the equipment so that the service person can try to talk through
the problem.
If the Symbol product was purchased from a Symbol Business Partner, contact that Business Partner for service
Symbol Support Center
For service information, warranty information or technical assistance contact or call the Symbol Support Center listed below. For the
latest service information go to http://www.symbol.com.:
United States
Symbol Technologies, Inc.
One Symbol Plaza
Holtsville, New York 11742-1300
1-800-653-5350
Asia/Pacific
Symbol Technologies Asia, Inc (Singapore Branch)
230 Victoria Street #12-06/10
Bugis Junction Office Tower
Singapore 188024
Tel: +65-6796-9600
Fax: +65-6337-6488
Denmark/Danmark
Symbol Technologies AS
Dr. Neergaardsvej 3
2970 Hørsholm
7020-1718 (Inside Denmark)
+45-7020-1718 (Outside Denmark)
France
Symbol Technologies France
Centre d'Affaire d'Antony
3 Rue de la Renaissance
92184 Antony Cedex, France
01-40-96-52-21 (Inside France)
+33-1-40-96-52-50 (Outside France)
Canada
Symbol Technologies Canada, Inc.
2540 Matheson Boulevard East
Mississauga, Ontario, Canada L4W 4Z2
905-629-7226
Australia
Symbol Technologies Pty. Ltd.
432 St. Kilda Road
Melbourne, Victoria 3004
1-800-672-906 (Inside Australia)
+61-3-9866-6044 (Outside Australia)
Europe/Mid-East Distributor Operations
Contact your local distributor or call
+44 118 945 7360
Germany/Deutschland
Symbol Technologies GmbH
Waldstrasse 66
D-63128 Dietzenbach, Germany
6074-49020 (Inside Germany)
+49-6074-49020 (Outside Germany)
United Kingdom
Symbol Technologies
Symbol Place
Winnersh Triangle, Berkshire RG41 5TP
United Kingdom
0800 328 2424 (Inside UK)
+44 118 945 7529 (Outside UK)v
Austria/Österreich
Symbol Technologies Austria GmbH
Prinz-Eugen Strasse 70 / 2.Haus
1040 Vienna, Austria
01-5055794-0 (Inside Austria)
+43-1-5055794-0 (Outside Austria)
Finland/Suomi
Oy Symbol Technologies
Kaupintie 8 A 6
FIN-00440 Helsinki, Finland
9 5407 580 (Inside Finland)
+358 9 5407 580 (Outside Finland)
Italy/Italia
Symbol Technologies Italia S.R.L.
Via Cristoforo Columbo, 49
20090 Trezzano S/N Navigilo
Milano, Italy
2-484441 (Inside Italy)
+39-02-484441 (Outside Italy)
Latin America Sales Support
2730 University Dr.
Coral Springs, FL 33065 USA
1-800-347-0178 (Inside United States)
+1-954-255-2610 (Outside United States)
954-340-9454 (Fax)
Mexico/México
Symbol Technologies Mexico Ltd.
Torre P i casso
Boulevard Manuel Avila Camacho No 88
Lomas de Chapultepec CP 11000
Mexico City, DF, Mexico
5-520-1835 (Inside Mexico)
+52-5-520-1835 (Outside Mexico)
Netherlands/Nederland
Symbol Technologies
Kerkplein 2, 7051 CX
Postbus 24 7050 AA
Varsseveld, Netherlands
315-271700 (Inside Netherlands)
+31-315-271700 (Outside Netherlands)

xi
Norway/Norge
Symbol’s registered and mailing address:
Symbol Technologies Norway
Hoybratenveien 35 C
N-1055 OSLO, Norway
Symbol’s repair depot and shipping address:
Symbol Technologies Norway
Enebakkveien 123
N-0680 OSLO, Norway
+47 2232 4375
Sweden/Sverige
“Letter” address:
Symbol Technologies AB
Box 1354
S-171 26 SOLNA
Sweden
Visit/shipping address:
Symbol Technologies AB
Solna Strandväg 78
S-171 54 SOLNA
Sweden
South Africa
Symbol Technologies Africa Inc.
Block B2
Rutherford Estate
1 Scott Street
Waverly 2090 Johannesburg
Republic of South Africa
11-809 5311 (Inside South Africa)
+27-11-809 5311 (Outside South Africa)
Spain/España
Symbol Technologies S.L.
Avenida de Bruselas, 22
Edificio Sauce
Alcobendas, Madrid 28108
Spain
91 324 40 00 (Inside Spain)
+34 91 324 40 00 (Outside Spain)
Fax: +34.91.324.4010
Switchboard: 08 445 29 00 (domestic)
Call Center: +46 8 445 29 29 (international)
Support E-Mail: Sweden.Support@se.symbol.com

ShowCase User Guidexii

Getting Started
Introduction . . . . . . . . . . . . . . . . . . . . . . . . . . . . . . . . . . . . . . . . . . . . . . . . . . . . . . . . . . . . . . . . . . . . . . . . . . . . 1-3
System Requirements . . . . . . . . . . . . . . . . . . . . . . . . . . . . . . . . . . . . . . . . . . . . . . . . . . . . . . . . . . . . . . . . . . . . .1-3
Prerequisites. . . . . . . . . . . . . . . . . . . . . . . . . . . . . . . . . . . . . . . . . . . . . . . . . . . . . . . . . . . . . . . . . . . . . . . . . . . . .1-3
Supported Readers. . . . . . . . . . . . . . . . . . . . . . . . . . . . . . . . . . . . . . . . . . . . . . . . . . . . . . . . . . . . . . . . . . . . . . . .1-3

ShowCase User Guide1-2

Getting Started 1-3
Introduction
ShowCase is a tool which allows a host computer running the ShowCase application to connect to Symbol RFID readers. ShowCase
uses the reader interface not only to read tags, but to monitor multiple readers. It also allows the reader software to be upgraded
through the ShowCase interface.
ShowCase features:
• Connection to Multiple Readers: ShowCase allows monitoring multiple readers (connecting in multiple modes) in the
environment from a single host.
• Simplifies Software Upgrade: ShowCase allows the reader(s) software to be upgraded using ShowCase.
• Local Tag Naming: ShowCase allows the tag to be re-named locally.
• Ready to Use: The ShowCase default configuration matches reader settings, so installation and configuration of the system
and readers is quick and simple.
Screens and windows pictured in this guide are for illustration purposes and may differ from actual screens.
The applications described in this guide are not available on (or applicable to) all devices.
Procedures provided in this guide are not device specific and are intended to provide the application developers with an
overview of how the application works.
System Requirements
The minimum recommended configuration for a host computer is:
• Microsoft
• Minimum resolution of 1024x768 on a 24bit color
• 20 MB free disk space
• .NET Framework 1.1
• Minimum resolution: Include 96 dpi (normal font size).
• ShowCase requires an external ftp server for firmware upgrades.
®
Windows XP/2000 operating system with a Pentium 200Mhz processor and 128 MB RAM
Prerequisites
The following items are required for ShowCase:
• XR or AR reader with power supply
• Laptop (or other host computer)
• If using the LAN Update procedure, a Cat5 ethernet cable is required
• If using the Direct-Connect update procedure a Cat5 Crossover cable is required
• Null modem serial cable (optional)
• An (optional) ftp server on the host computer
Supported Readers
The ShowCase software currently supports the four port XR400 readers. The following readers are not supported:
•AR400
• XR480 (8 port functionality is not supported)

ShowCase User Guide1-4

Installation
Introduction . . . . . . . . . . . . . . . . . . . . . . . . . . . . . . . . . . . . . . . . . . . . . . . . . . . . . . . . . . . . . . . . . . . . . . . . . . . . 2-3
Download the ShowCase Software. . . . . . . . . . . . . . . . . . . . . . . . . . . . . . . . . . . . . . . . . . . . . . . . . . . . . . . . . . .2-3
Installing ShowCase. . . . . . . . . . . . . . . . . . . . . . . . . . . . . . . . . . . . . . . . . . . . . . . . . . . . . . . . . . . . . . . . . . . . . . .2-3

ShowCase User Guide2-2
Installation 2-3
Introduction
The ShowCase InstallShield Wizard enables quick and easy installation on the host computer.
Download the ShowCase Software
The ShowCase software is available for download from RFID Products downloads on the Symbol Developer Zone.
1. Create a folder on a host computer and name it: \ShowCaseInstall.
2. Login to the Symbol Developer Zone at http://www.devzone.symbol.com.
3. From the Developers Downloads page, select RFID Products and select the ShowCase Software download page. Download
the software zip file onto the host computer (\ShowCaseInstall directory) and unzip the file.
Installing ShowCase
The ShowCase software is included in the Symbol - ShowCase.exe file. Follow the steps to install the ShowCase
software.
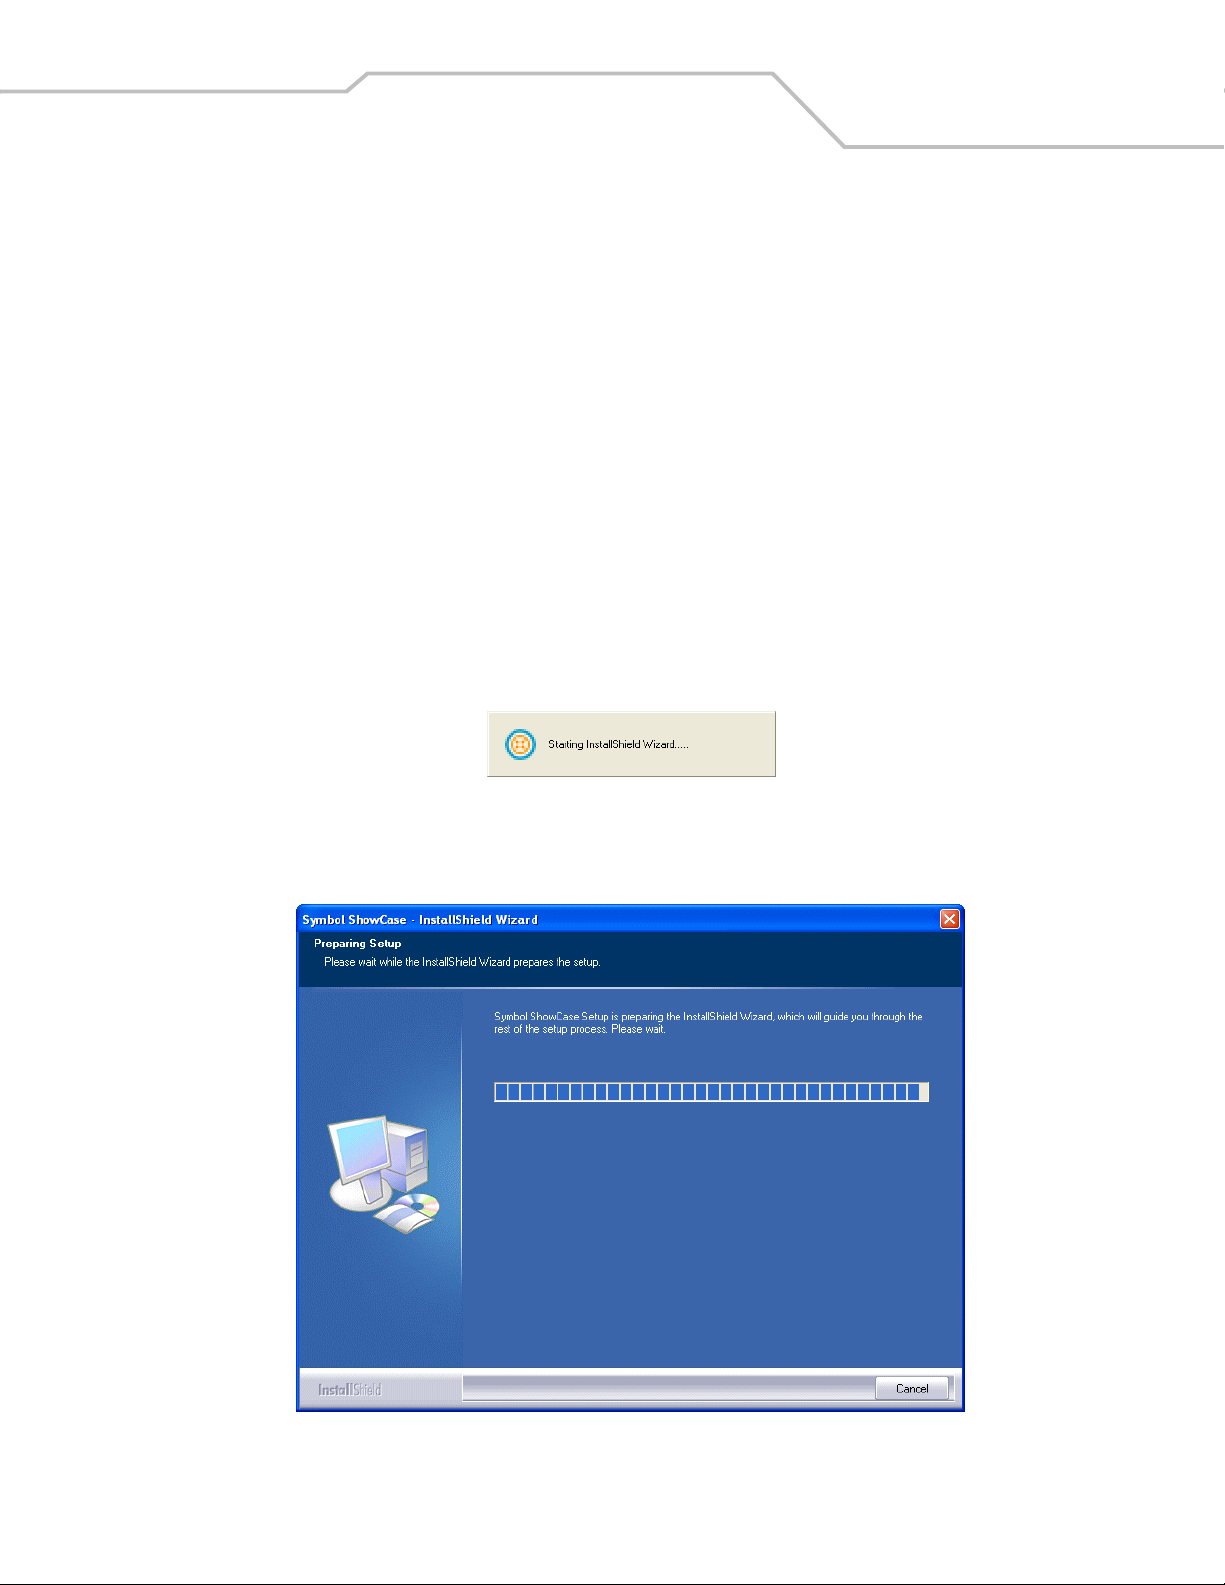
1. Double click the ShowCaseInstall.exe file to launch the setup wizard. The ShowCase InstallShield Wizard automatically
launches the Preparing Setup window (see Figure 2-2).
Figure 2-1. ShowCase InstallShield Startup Window
2. The Preparing Setup window automatically launches the ShowCase Welcome window (see Figure 2-3).
Figure 2-2. Preparing Setup Window
ShowCase User Guide2-4
If ShowCase was previously installed the ShowCase Modify, Repair or Remove window appears (see Figure
5-8 on page 5-7). Complete the Remove ShowCase on page 5-6, and re-start the installation procedure from
the beginning.
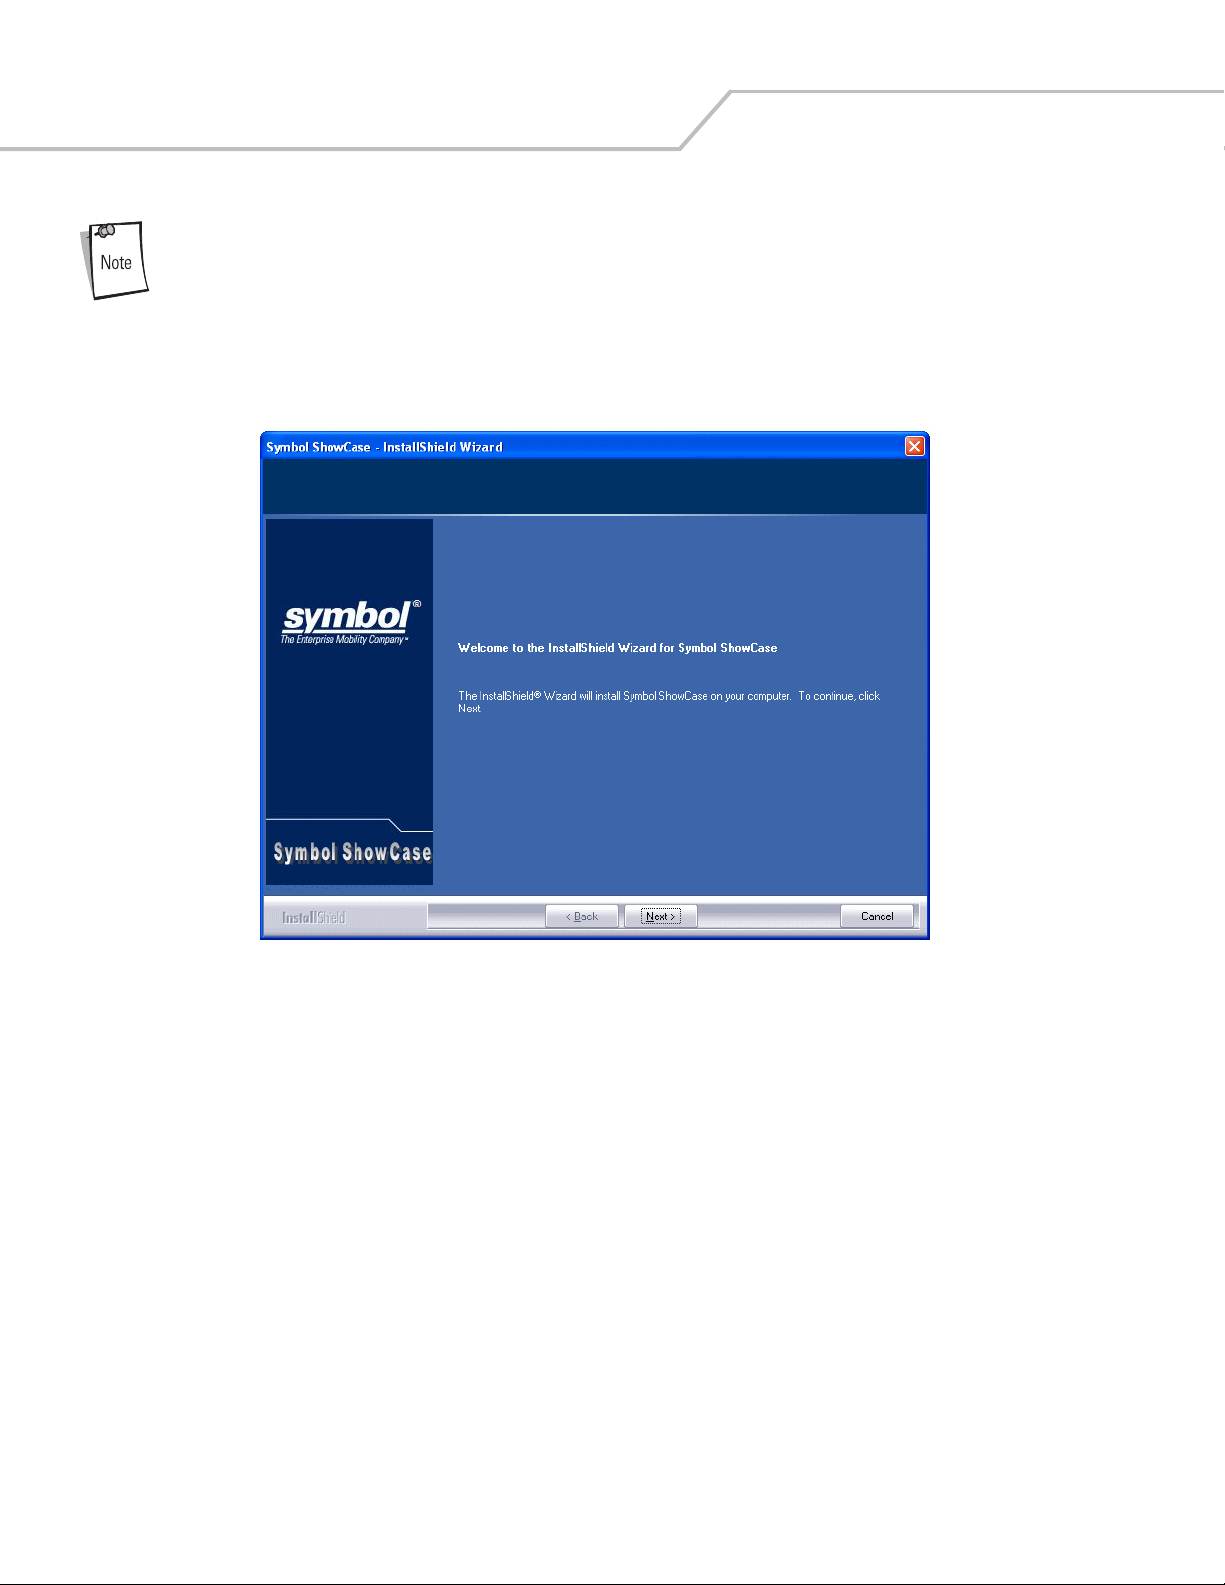
3. Click Next on the ShowCase Welcome window and the Licence Agreement window appears (see Figure 2-4).
Figure 2-3. ShowCase Welcome Window

4. Click Yes to accept the licence agreement and continue, the Destination window appears (see Figure 2-5).
Installation 2-5
Figure 2-4. Software License Agreement Window
5. Click Browse to select a different installation folder, or click Next to accept the default location and continue with the
installation, the Setup Status window appears (see Figure 2-6).
Figure 2-5. Destination Window

ShowCase User Guide2-6
6. The Setup Status window automatically launches Installation Complete window (see Figure 2-7).
Figure 2-6. Setup Status Window
7. Click Finish to complete the installation.
Figure 2-7. Installation Complete Window
8. Double click the ShowCase icon (on the computer desktop) to launch the ShowCase software.

ShowCase Set-Up
Introduction . . . . . . . . . . . . . . . . . . . . . . . . . . . . . . . . . . . . . . . . . . . . . . . . . . . . . . . . . . . . . . . . . . . . . . . . . . . . 3-3
ShowCase Console View . . . . . . . . . . . . . . . . . . . . . . . . . . . . . . . . . . . . . . . . . . . . . . . . . . . . . . . . . . . . . . . . . . .3-5
Add a Reader . . . . . . . . . . . . . . . . . . . . . . . . . . . . . . . . . . . . . . . . . . . . . . . . . . . . . . . . . . . . . . . . . . . . . . . . . . . .3-6
View a Zone . . . . . . . . . . . . . . . . . . . . . . . . . . . . . . . . . . . . . . . . . . . . . . . . . . . . . . . . . . . . . . . . . . . . . . . . . . . .3-13
View Templates . . . . . . . . . . . . . . . . . . . . . . . . . . . . . . . . . . . . . . . . . . . . . . . . . . . . . . . . . . . . . . . . . . . . . . . . . 3-15
Configuration Management . . . . . . . . . . . . . . . . . . . . . . . . . . . . . . . . . . . . . . . . . . . . . . . . . . . . . . . . . . . . . . . . 3-17
Reader Firmware Management . . . . . . . . . . . . . . . . . . . . . . . . . . . . . . . . . . . . . . . . . . . . . . . . . . . . . . . . .3-17

ShowCase User Guide3-2

ShowCase Set-Up 3-3
Introduction
This chapter describes how to set up the ShowCase application, how to add a reader, how to view zones, how to view templates. It
also discusses how to view the readers. Table 3-1 provides the ShowCase icon descriptions and Table 3-2 on page 3-4 provides the
ShowCase button descriptions.
When showcase is started the ShowCase Console View on page 3-5 appears.
Table 3-1. Icon Names and Functions
Accessible
Icon Name Function
Delete Item This command deletes the selected reader. Yes
Add New Item This command adds a new item to the application, the item added is dependant on the location. Yes
Edit/View Edit/View reader properties. Yes
Reboot Reader Reboots reader, requires user to wait for some time while the reader reboots. No
By Right
Mouse Click
Display Unique
Ta gs
Read Point On On- Read-Point icons represent the Autonomous (XML Based) or OnCommand 1 mode antenna (read point) status. No
Read Point Off Off- Read-Point icons represent the Autonomous (XML Based) or OnCommand 1 mode antenna (read point) status. No
Export Export tags data to a file, ShowCase opens the window Select/Enter File Name to Export Data window and prompts
Start Starts the tag read in one of the following manners:
Stop Stop reading from selected reader.
Return to
Console View
Uninstall Uninstalls the ShowCase software No
Disconnected Red: Indicates that the reader is not connected. No
Connected Green: Indicates that the reader is connected. No
Displays unique tags, from all readers. No
No
the user to enter the file name and the location to save.
Yes
Autonomous (XML) Notification: Uses notification from reader to report tags read to the user.
Autonomous (XML) Continuous: It queries the readers database to get tags information.
OnCommand (Byte Stream) Continuous: Sends ReadFull command to get the tags read
OnCommand (Byte Stream) For Number of Read Cycles: Sends ReadFull command to get the tags read for the specified
number of read cycles by the user.
When the All Readers selection is highlighted. Starts all connected readers.
Yes
When the All Readers selection is highlighted. Stops all connected readers.
Home, return to main menu. No

ShowCase User Guide3-4
Table 3-2. Button Functions
Button Function
Can connect the selected reader in Autonomous (XML) / OnCommand (Byte Stream) mode.
Once connected user can not modify the mode before disconnecting.
Can connect all selected readers in Autonomous (XML) / OnCommand (Byte Stream) mode.
Once connected user can not modify the mode before disconnecting.
Can disconnect in Autonomous (XML) / OnCommand (Byte Stream) mode.
Can disconnect all in Autonomous (XML) / OnCommand (Byte Stream) mode.
Purges the tag data from the screen.
Allows the host directories to be browsed.
Downloads selected files.
Turns off the specific read point power.
Turns on the specific read point power.
Saves the ShowCase parameters.
Cancels the ShowCase parameters inputs.
Retrieves configuration information from the reader.
View advanced configuration parameters.
Hides the advanced configuration parameters.
Applies the selected function.
Available only when the All Readers selection is highlighted. Connects all defined readers.
Available only when the All Readers selection is highlighted. Disconnects all defined readers.

ShowCase Set-Up 3-5
ShowCase Console View
To Start ShowCase double click the ShowCase icon (on the computer desktop) or select Start - Programs - Symbol - Symbol RFID
ShowCase - ShowCase. The ShowCase Console View window appears. The console view provides access to:
• Readers - Add/delete readers, and edit ShowCase options.
• Zones - View zones.
• Templates - View templates.
• Configuration Management - Used to update the reader firmware and software to the latest configuration.
Figure 3-1. ShowCase Console View

ShowCase User Guide3-6
Add a Reader
The readers must be added to the ShowCase tool.
To add a new reader to ShowCase:
1. From the ShowCase Console View (see Figure 3-1 on page 3-5) click Readers, the All Readers screen appears.
2. Click the Add New Reader icon (or right-click on All Readers), the Add/Edit Reader window appears.
Figure 3-2. All Readers Screen

ShowCase Set-Up 3-7
3. Enter the required configuration information into the Add/Edit Readers window (see Table 3-3 for input descriptions).
Figure 3-3. Add/Edit Readers Window
Table 3-3. Add/Edit Readers Window Inputs
Input Name Input Description
Reader Name Enter a unique reader name.
TCP/IP Address Enter the Reader TCP/IP address.
User Name Enter the user name that has been set in the reader.
Configuration Options Select the method of adding the reader.
Add Manually The user enters all the information manually.
Fetch Config From Reader Select this option to retrieve the committed configuration from a reader and automatically
populates the reader properties.
Enter a valid reader TCP/IP address and select the Fetch Config from Reader radio button, the
Fetch button appears. Click Fetch, ShowCase retrieves the configuration from the reader.
ShowCase does not validate the TCP/IP address but it notifies user if its not able to retrieve
the configuration.
Mode Select the mode of operation.
OnCommand Selects the ByteStream mode of operation and sends the command for performing the
operation to the reader.
Autonomous Selects the XML mode of operation and sends the command for performing the operation to
the reader.
Enable Motion Detector Displays the motion detector enable status.
Password Enter the password for the reader.
Application Type Displays the application type.
Add/Delete Displays the status of the Add/Delete check box.

ShowCase User Guide3-8
Table 3-3. Add/Edit Readers Window Inputs (Continued)
Input Name Input Description
Antenna Name Displays the antenna name.
Zone Displays the read point zone.
Template Displays the template.
Antenna Enable Displays the antenna enable status.
4. Click Save to save the ShowCase settings or click Cancel to exit the Add/Edit Readers window.
5. Click Advanced Configuration to view the advanced configuration options. The Add/Edit Readers, Advanced
Configuration window appears (see Table 3-4 for advanced configuration descriptions).
Figure 3-4. Add/Edit Readers, Advanced Configuration Window, Event Notifications Tab

ShowCase Set-Up 3-9
Figure 3-5. Add/Edit Readers, Advanced Configuration Window, Antenna Check Tab

ShowCase User Guide3-10
Table 3-4. Add/Edit Readers Advanced Configuration Window Inputs
Input Name Input Description
Add/Edit Readers, Advanced Configuration Window, Event Notifications Tab (see Figure 3-4 on page 3-8)
Event Types (display only) Displays the reader generated events:
• Visibility and Threshold events report tag activity
• Network Status and Exception events report device/system activity.
Visibility Events Changes in tag visibility can generate three types of visibility events:
• New Tag Event - A special case event generated when a new tag (not known by the
reader) appears for the first time. Process this event promptly for best results. The default
Notify option is Immediate for this event. To disable notification when this event occurs,
set the Notify option to Never using the Administrator Console. The event is then
promoted to a generic Visibility Changed Event. Note, that the Notify option must be set
to Never (from the Administrator Console).
•Tag Not Visible Event - A special case event generated when a visible tag disappears
from all read points. For example, if a tagged item is removed from a shelf, is out of RF
range and is not visible to any read point. The event reports where the tag was located
when last visible to the system. During normal operation, a tag can experience transient
periods when it can not be read reliably in the system. To overcome this issue, set the
Notify option for this event to Moderated. The system then generates an event only when
the tag is not read for a period of time longer than the specified moderate time-out. The
system remembers the tag, but it is not visible to any read point. To disable notification
when this event occurs, set the Notify option to Never; the event is then promoted to a
generic Visibility Changed Event.
• Visibility Changed Event - An event generated when the visibility of a tag changes, such
as due to the change of the set, or the number of read points at which the RFID tag is
visible. For example, a Visibility Changed Event occurs when a tagged item moves from
a shelf on aisle 2 to another shelf on aisle 4 (visibility changes from one read point to
another). Note, that if the Tag Not Visible Event is enabled, a previously visible tag that
becomes not visible to any read points generates the more specific Tag Not Visible Event.
A New Tag Event occurs for the first visibility change when applicable. Process this event
promptly for best results. The default Notify option is immediate.
Threshold A Threshold Event occurs when the number of visible tags satisfies the threshold rule for the
tag group. The default Notify option setting for this event is Never. To activate the threshold
condition, specify user-defined IDs and relevant threshold rules through an import tag list.
Also Enable the Notify option to generate event notification for this event. During normal
operation, a tag can experience transient periods when it is changing visibility in the system.
To overcome this issue, set the Notify option for this event to Moderated
event only when the tag is not experiencing temporary invisibility.
Exception Exception Events provide (via XML) the same type of information available via SNMP. An
Exception Event provides information when a device goes off-line; polling is turned off, etc.
Select this option if SNMP not being used but feedback is still required for changes in the
device or program state. To enable XML, in the Event Notifications window, set the Notify
option for Exception Events to Immediate in the Notify column.
Notify (display only) To receive notification when particular events occur, choose (subscribe to) the events using
the Notifications window. To receive event notifications, enter a valid link for the Host
Notification Link. The system tests the validity using the Te st option. To specify the event
notifications to receive, select the appropriate Notify option for each event type.
Never Event notifications are not sent.
Immediate Event Notifications are sent immediately (providing they are not filtered out).
, and generate an

ShowCase Set-Up 3-11
Table 3-4. Add/Edit Readers Advanced Configuration Window Inputs (Continued)
Input Name Input Description
Add/Edit Readers, Advanced Configuration Window, Event Notifications Tab (see Figure 3-4 on page 3-8) (Continued)
Moderated Specify the duration (in seconds), for which reader should send an event notification. The
system retests this condition, up to the time-out value. If the condition still exists and an
intervening event has not occurred, the system generates notifications for this event type
(providing they are not filtered out).
Time (display only) Displays the Time value. When Moderated notification is selected, the system retests this
condition, up to the set time-out value. If the condition still exists and an intervening event
has not occurred, the system generates notifications for this event type (providing they are not
filtered out).
Add/Edit Readers, Advanced Configuration Window, Antenna Check Tab (see Figure 3-5 on page 3-9)
Antenna Check Select radio button to enable/disable the antenna check function. When the Antenna Check
is enabled it checks for a standard 10KOhm load and if it does not find then it generates an
exception. When the Antenna Check is disabled the exception is not generated.
Enable Enable the reader antenna check.
Disable Disable the reader antenna check.
6. Click Save to save the configuration inputs, the Configured Reader screen appears.

ShowCase User Guide3-12
Figure 3-6. Configured Reader Screen

ShowCase Set-Up 3-13
View a Zone
A zone (or a read point zone) is a virtual grouping of antenna(s) used to configure the expected antenna position within the specified
area. This allows the user to track tags read in the particular area.
Zones are used to configure read point setup information the zones must be set up for all readers and antenna. The zones are defined
to group tag data from multiple antennas (belonging to the same or different readers) together. This allows collective data across
readers (that may be deployed in non-overlapping zones) to be viewed.
To view a zone:
1. From the ShowCase Console View (see Figure 3-1 on page 3-5) click Zones, the Zones screen appears.
2. Select All Zones, the tag data for all the zones is displayed.
Figure 3-7. Zones Screen

ShowCase User Guide3-14
3. Click on the “+” to display the available Zones.
4. Select a zone to view the tag data for that zone.
Figure 3-8. New Zone Screen
5. Click on the “+” to display the available readers for the zone.
6. Select a reader to view the reader tag data for that zone.

ShowCase Set-Up 3-15
View Templates
Antenna Templates are a set of reader independent configuration parameters that can be applied to various antennas on different or
same readers. The template maps to Read Point Class in Admin Console and used to define antenna properties. ShowCase also
allows the use of one template to configure multiple antennas from same and/or different readers.
Antenna template parameters include EPC type to be read (class-0, class-1, Gen-2, etc.) power levels of the antenna, read retry counts
etc. Once the templates are defined and configured they can be applied to antennas in the Reader Properties feature.
To view a template:
1. From the ShowCase Console View (see Figure 3-1 on page 3-5) click Templates, the View Template screen appears.
Figure 3-9. Add Template Screen
When a configuration is fetched from reader the name of the fetched configuration is compared to the
names of the already saved templates (in ShowCase). If the name of the fetched template matches the
name of an already saved template, the new fetched template will automatically update the existing
ShowCase template.
If the ShowCase is being used with multiple readers that have the same Read Point Class name but different
properties, the template used by ShowCase is from the last reader connected.

ShowCase User Guide3-16
Table 3-5. View Template Configuration Window Inputs
Name Description
Name View the unique template name.
Type View the template type.
AREA Identifies an area template type.
SHELF Identifies a shelf template type.
COMBINED1 Identifies a combined1 template type.
COMBINED2 Identifies a combined1 template type.
Scan Period View the scan period.
Polled Polled to issues read commands continuously, back-to-back.
OnDemand The user to decide when to read tags.
5 Minutes Issues a read command every five minutes.
10 Minutes Issues a read command every ten minutes.
30 Minutes Issues a read command every 30 minutes.
1 Hour Issues a read command once every hour.
2 Hour Issues a read command once every two hours.
8 Hour Issues a read command once every eight hours.
12 Hour Issues a read command once every 12 hours.
Gain (in %) The read gain in % of full power.
The gain for the read/write operations are set as separate parameters. The read operations take less energy than write operations, to
balance the gains to the point that the RF field is comparable reduce the read gain to match the effective write gain range. The read gain
should typically be reduced to about 1/3 (depending on the tag type and environment).
Retry Count The retry count (not applicable to Gen2 tags) between 1 and 25.
The value represents the number of additional frequencies to use, when traversing the tag tree. All the tags found, regardless of which pass
they were found are reported as replies to the single read command.
To optimize the Retry Count setting for the application set the value to as low as possible (0 or AR or XR) if the tag is moving (to achieve
the quickest results) and set the value higher (typically around 8) if the tag is stationary. The higher Retry Count increases both the individual
read times and the number of tags harvested on each pass.
Air Protocol The air protocol types to be read.
All Read all air protocol read types.
Class 1, Class 0 Read only the class 1 and class 0 protocols.
Gen2 Read only the Gen2 protocol.
Gen2, Class 0 Read only the Gen2 and class 0 protocols.
Gen2, Class 1 Read only the Gen2 and class 1 protocols.
Tag Selection ALL
Write Gain (in %) Displays the write gain setting.
The gain for the read/write operations are set as separate parameters. The write operations take more energy than read operations, so to
balance the gains to the point that the RF field is comparable reduce the read gain to match the effective write gain range. The read gain
should typically be reduced to about 1/3 (depending on the tag type and environment).

ShowCase Set-Up 3-17
Configuration Management
Configuration Management is used to update the firmware and software to the latest configuration using a valid Config.xml file.
Reader Firmware Management
Reader Firmware Management is used to update the firmware for the selected reader. Required ftp server information (where the
firmware directory is located) includes the Directory Path, User Name and Password. To update the reader software using ShowCase:
1. Create a folder on a local ftp server and name it: \XR400UPDT\ReleaseXXX.
2. Download the firmware files from http://www.devzone.symbol.com into the local ftp server \XR400UPDT\ReleaseXXX
directory and unzip the files if they are zipped.
3. Ensure that the readers can be pinged from the host computer. If they cannot, consult with the network administrator.
4. From the ShowCase Console View (see Figure 3-1 on page 3-5) click Configuration Management, the Configuration
Management View appears.
5. Click the “+”to expand the Readers selection and select a reader to update.
6. Enter the ftp server IP address in the URL Directory text box and enter the user name and password in the appropriate text
boxes.
7. Click Download to start the software update.
Figure 3-10. Configuration Management View

ShowCase User Guide3-18
8. The green LED on the reader flashes while the update is in progress. The reader application software first downloads
osupxr400.exe, FlashUpdateUtility.dll, and Response.txt files, starts running Osupdate, and shuts itself down. Osupdate then
downloads all the files specified in the Response.txt file into RAM, and if the download is successful, starts writing the files
to flash. If the ftp is not successful for any reason, none of the files will be written into flash.
9. The update can take up to 15 minutes. Do not remove power to the reader or reboot the reader while update is in progress.
10. The reader reboots itself when the update is complete.
11. If the reader had been set up with a static IP address, it restores the static IP address and reboots again.
During the FPGA update, all the LEDs is turned OFF for about 90 seconds.
12. Verify that the new upgrade version is now running.

Using ShowCase
Introduction . . . . . . . . . . . . . . . . . . . . . . . . . . . . . . . . . . . . . . . . . . . . . . . . . . . . . . . . . . . . . . . . . . . . . . . . . . . . 4-3
Open ShowCase . . . . . . . . . . . . . . . . . . . . . . . . . . . . . . . . . . . . . . . . . . . . . . . . . . . . . . . . . . . . . . . . . . . . . . . . . . 4-3
ToolBar Dropdown Menus . . . . . . . . . . . . . . . . . . . . . . . . . . . . . . . . . . . . . . . . . . . . . . . . . . . . . . . . . . . . . .4-3
Select A Reader . . . . . . . . . . . . . . . . . . . . . . . . . . . . . . . . . . . . . . . . . . . . . . . . . . . . . . . . . . . . . . . . . . . . . . . . . . 4-4
Read Tags. . . . . . . . . . . . . . . . . . . . . . . . . . . . . . . . . . . . . . . . . . . . . . . . . . . . . . . . . . . . . . . . . . . . . . . . . . . 4-6
Unique Tags View . . . . . . . . . . . . . . . . . . . . . . . . . . . . . . . . . . . . . . . . . . . . . . . . . . . . . . . . . . . . . . . . . . . .4-9
Exporting Tag Data. . . . . . . . . . . . . . . . . . . . . . . . . . . . . . . . . . . . . . . . . . . . . . . . . . . . . . . . . . . . . . . . . . . 4-10
Name a Tag . . . . . . . . . . . . . . . . . . . . . . . . . . . . . . . . . . . . . . . . . . . . . . . . . . . . . . . . . . . . . . . . . . . . . . . . 4-11
Exit Read Tags View. . . . . . . . . . . . . . . . . . . . . . . . . . . . . . . . . . . . . . . . . . . . . . . . . . . . . . . . . . . . . . . . . .4-13
Functions Dropdown Menu . . . . . . . . . . . . . . . . . . . . . . . . . . . . . . . . . . . . . . . . . . . . . . . . . . . . . . . . . . . . . . . . 4-13

ShowCase User Guide4-2

Using ShowCase 4-3
Introduction
This chapter describes how to use ShowCase to manage readers, tags, view tag activity, and log tag information. Prior to
using ShowCase perform the setup procedures listed in Chapter 3, ShowCase Set-Up.
Open ShowCase
To assign a name to a tag, open ShowCase the ShowCase Console View appears (see Figure 3-1 on page 3-5).
ToolBar Dropdown Menus
The File and the Help menus are used to exit the application or to view the About window.
File Menu
Use the File menu to exit the application. Tap File - Exit. To exit the application.
Help Menu
Use the Help menu to display the About window.
1. Tap Help - About. The application About window appears.
2. From the About window, tap OK to close the About window and return to the application.

ShowCase User Guide4-4
Select A Reader
1. From the ShowCase Console View click Readers, the Configured Readers window appears (see Figure 3-6 on page 3-12).
2. Click a reader to select (the readers were entered during the ShowCase setup, in this example XR400-Reader-1) the reader
is highlighted. Table 4-1 provides the reader settings selection descriptions.
Figure 4-1. XR400-Reader-1 Window
Table 4-1. Reader Settings
Selection Description
OnCommand - Continuous: Selecting this mode sends ReadFull commands synchronously and updates the tags read. If a tag is read more than
once, the tag count is incremented.
OnCommand - #of Read Cycles: Selecting this mode sends ReadFull commands synchronously for specified number of read cycles and updates the
tags read. If a tag is read more than once, the tag count is incremented.
Autonomous - Notification: Selecting this mode sends QueryEvents commands and reads only the new tags seen by the reader for the first time.
At the start of read operation, it purges all the tags inside reader database and reads the tags so that all tags flashed
in front of antenna are seen as new tags.
Autonomous - Continuous: Selecting this mode sends QueryTags commands and updates the tags read. If a tag is read more than once in this
process the tag count is incriminated.
Purge Tags: This operation clears the current tags for the selected items. If a reader is selected (out of 'n' configured readers)
then execution of this command only deletes tags for the selected reader.

Using ShowCase 4-5
3. Click to select OnCommand or Autonomous from the first drop down menu (see Table 4-1 on page 4-4 for selection
descriptions). For the OnCommand mode, click to select Continuous or # of Read Cycles from the second drop down menu.
Enter the number of read cycles, if that option was selected.
4. Click Connect the reader connected window appears, click OK. The XR400-Reader-1 connection bullet turns to green to
indicate that the reader is now connected and the XR400-Reader-1 Connected window appears.
5. Click OK when the reader has successfully connected, the XR400-Reader-1 Connected window appears (see Figure 4-3).
Figure 4-2. Reader Specific Screen and Reader Connected Window

ShowCase User Guide4-6
Read Tags
1. Click the start icon to read tags, the XR400-Reader-1 Tag Data window appears (see Figure 4-4).
Figure 4-3. XR400-Reader-1 Connected Screen

Using ShowCase 4-7
2. Click OK on the read completed successfully window. The example shown is for the OnCommand mode, with the # of Read
Cycles set to 8.
Figure 4-4. XR400-Reader-1 Tag Data Screen

ShowCase User Guide4-8
3. Click the + on the XR400-Reader-1 entry to expand the read points.
4. Drag the Read Gain slide bar to adjust the read gain.
The Tag Type selections are only available in OnCommand mode of operation.
5. Click the Tag Type drop down menu and select the tag type
All ISO
Class 1 ISO, Class 0
Class 0 ISO, Class 1
Class 1, Class 0 ISO, Class 1, Class 0
Gen2 ISO, Gen2
Gen2, Class 0 ISO, Gen2, Class 0
Gen2, Class 1 ISO, Gen2, Class 1
Gen2, Class 1, Class 0
(s) to read:
6. Click stop to stop the tag read.
Figure 4-5. Read Point Settings Window

Using ShowCase 4-9
Unique Tags View
1. Click the Unique Tags View icon to display the Unique Tags View window. The Unique Tags View window displays all of the
unique tag information. The tag type totals are listed along the bottom of the window.
2. Click the “X” to exit the Unique Tags View window.
Figure 4-6. Unique Tags View Window

ShowCase User Guide4-10
Exporting Tag Data
To export the tag data:
1. From the Read Successfully Completed window (see Figure 4-4 on page 4-7), click the Export icon. The Select/Enter File
Name to Export Data window appears.
Figure 4-7. Select/Enter File Name to Export Data Window
2. Select a location, enter a file name and click OK.
3. A confirmation window appears confirming the filename and the location, click OK to proceed.
4. From the selected location, open the *.txt file to view the contents, the Tag Data Text window appears.
Figure 4-8. Tag Data Text Window

Name a Tag
To name a tag:
1. From the ShowCase Tags View, right click on a tag ID to display the Tag Properties window.
Do not select the tag before the right click. Right clicking a selected tag provides a different dropdown menu.
2. Click in the Tag Properties window to launch the Tag Name Edit window (see Figure 4-10 on page 4-12).
Using ShowCase 4-11
Figure 4-9. Tag Properties Window

ShowCase User Guide4-12
3. Enter the tag name in the Tag Properties window, Tag Name field (the example tag name used is TagName1).
4. Click Save Name to save the tag name.
Figure 4-10. Tag Name Edit Window
5. The example tag name (TagName1) appears in the Tag Na m e column on the Tag Named window.
Figure 4-11. Tag Named Window

Using ShowCase 4-13
Exit Read Tags View
1. Click Purge Tags to clear the tag read information from the selected view.
2. Click Power Off (if required) to turn off the read point power.
3. Click Disconnect (if required) to disconnect the reader.
4. Click the home icon to return to the ShowCase console screen.
Functions Dropdown Menu
To activate the functions dropdown menu:
1. From the ShowCase Tags View, select the tag and right click on a tag ID to display the Functions Dropdown Menu window.
The tag must be selected before the right click. Right clicking a non-selected tag provides a different menu.
Not all of the menu items are available for all field selections.
Figure 4-12. Functions Dropdown Menu Window

ShowCase User Guide4-14
2. Click a menu item to perform the function, see Table 4-2 for function descriptions.
Table 4-2. Functions Dropdown Menu
Function Description
Undo Removes the last change to the selected field.
Cut Deletes the selected item from the selected field and copies the item into
computer memory.
Copy Copies the selected text into computer memory.
Paste Pastes text from computer memory into selected field. Note that the function
is not enabled for fields that cannot accept inputs.
Delete Deletes the selected item.
Select All Function is not enabled
Right to Left Reading Order Switches to right justify.
Show Unicode control characters The show unicode control characters function is not enabled.
Insert Unicode control characters The insert unicode control characters function is not enabled.

Repair / Remove / Update
Introduction . . . . . . . . . . . . . . . . . . . . . . . . . . . . . . . . . . . . . . . . . . . . . . . . . . . . . . . . . . . . . . . . . . . . . . . . . . . . 5-3
Download the ShowCase Software. . . . . . . . . . . . . . . . . . . . . . . . . . . . . . . . . . . . . . . . . . . . . . . . . . . . . . . . . . .5-3
Repair ShowCase . . . . . . . . . . . . . . . . . . . . . . . . . . . . . . . . . . . . . . . . . . . . . . . . . . . . . . . . . . . . . . . . . . . . . . . . . 5-3
Remove ShowCase. . . . . . . . . . . . . . . . . . . . . . . . . . . . . . . . . . . . . . . . . . . . . . . . . . . . . . . . . . . . . . . . . . . . . . . . 5-6
Update ShowCase . . . . . . . . . . . . . . . . . . . . . . . . . . . . . . . . . . . . . . . . . . . . . . . . . . . . . . . . . . . . . . . . . . . . . . . .5-9

ShowCase User Guide5-2

Repair / Remove / Update 5-3
Introduction
The ShowCase InstallShield Wizard enables repair and/or removal of ShowCase. This chapter describes how to repair
and/or remove ShowCase.
Download the ShowCase Software
The ShowCaseInstall.exe file is required for the Repair / Remove / Update procedures. If the original version is no longer available or
for the latest update of the ShowCaseInstall.exe file, download the file from RFID downloads on the Symbol Developer Zone.
1. Create a folder on a host computer and name it: \ShowCaseInstall.
2. Login to the Symbol Developer Zone at http://www.devzone.symbol.com.
3. From the Developers Downloads page, select RFID Products and select the ShowCase Software download page. Download
the software zip file onto the host computer (\ShowCaseInstall directory) and unzip the file.
Repair ShowCase
The ShowCase repair software is included in the Symbol - ShowCaseInstall.exe file. Download the ShowCaseInstall.exe
file (see Figure on page 5-3) and follow the provided steps to repair the ShowCase software.
1. Launch the setup wizard: Symbol - ShowCaseInstall.exe. The ShowCase InstallShield Startup window appears and
automatically launches the Preparing Setup window.
Figure 5-1. ShowCase InstallShield Startup Window
2. The Preparing Setup window automatically launches the ShowCase Modify, Repair or Remove window (see Figure 5-3 on
page 5-4).
Figure 5-2. Preparing Setup Window

ShowCase User Guide5-4
3. When the setup is complete the ShowCase Modify, Repair or Remove window appears.
Figure 5-3. ShowCase Modify, Repair, or Remove Window
4. To repair, select the Repair radio button and click Next the ShowCase Repair window appears.
Figure 5-4. ShowCase Repair Window

5. When the repair is complete the ShowCase Maintenance Complete window appears.
Repair / Remove / Update 5-5
Figure 5-5. ShowCase Maintenance Complete Window
6. Click Finish to complete the repair.

ShowCase User Guide5-6
Remove ShowCase
The ShowCase remove software is included in the Symbol - ShowCaseInstall.exe file. Download the ShowCaseInstall.exe
file (see Download the ShowCase Software on page 5-3) and follow the provided steps to uninstall the ShowCase
software.
1. Double click the ShowCaseInstall.exe file to launch the setup wizard. The ShowCase InstallShield Wizard automatically
launches the Preparing Setup window.
Figure 5-6. ShowCase InstallShield Startup Window
2. The Preparing Setup window automatically launches the ShowCase Modify, Repair or Remove window (see Figure 5-8 on
page 5-7).
Figure 5-7. Preparing Setup Window

3. When the setup is complete the ShowCase Modify, Repair or Remove window appears.
Repair / Remove / Update 5-7
Figure 5-8. ShowCase Modify, Repair, or Remove Window
4. To remove, select the Remove radio button and click Next the ShowCase Remove Confirmation window appears.
Figure 5-9. ShowCase Remove Confirmation Window
5. Click Yes to continue. The ShowCase InstallSheild launches the uninstall application.

ShowCase User Guide5-8
6. The Uninstall window appears.
Figure 5-10. Uninstall Window
7. The Uninstall window automatically launches the Uninstall Complete window when the uninstall is completed.
Figure 5-11. Uninstall Complete Window
8. Click Finish to complete the removal.

Repair / Remove / Update 5-9
Update ShowCase
To update ShowCase:
1. Download the new ShowCaseInstall.exe file (see Download the ShowCase Software on page 2-3).
2. Follow the provided steps to install the updated version of ShowCase software (see Installing ShowCase on page 2-3).

ShowCase User Guide5-10

Index
A
add reader . . . . . . . . . . . . . . . . . . . . . . . . . . . . . . . . . 3-6
advanced configuration . . . . . . . . . . . . . . . . . . . . . . .3-8
autonomous mode . . . . . . . . . . . . . . . . . . . . . . . . . . .4-5
B
bullets . . . . . . . . . . . . . . . . . . . . . . . . . . . . . . . . . . . . . ix
C
configuration
readers . . . . . . . . . . . . . . . . . . . . . . . . . . . . . . .3-3
configuration management . . . . . . . . . . . . . . . . . . .3-17
configuration options . . . . . . . . . . . . . . . . . . . . . . . . .3-7
connect to reader . . . . . . . . . . . . . . . . . . . . . . . . . . . .4-5
console view . . . . . . . . . . . . . . . . . . . . . . . . . . . . . . .3-5
continuous mode . . . . . . . . . . . . . . . . . . . . . . . . . . . .4-5
conventions
notational . . . . . . . . . . . . . . . . . . . . . . . . . . . . . . ix
copy . . . . . . . . . . . . . . . . . . . . . . . . . . . . . . . . . . . . .4-14
cut . . . . . . . . . . . . . . . . . . . . . . . . . . . . . . . . . . . . . . 4-14
D
delete . . . . . . . . . . . . . . . . . . . . . . . . . . . . . . . . . . . .4-14
disconnect all . . . . . . . . . . . . . . . . . . . . . . . . . . . . . . 4-13
download ShowCase . . . . . . . . . . . . . . . . . . . . . 2-3, 5-3
E
exporting tag data . . . . . . . . . . . . . . . . . . . . . . . . . .4-10
F
features . . . . . . . . . . . . . . . . . . . . . . . . . . . . . . . . . . 1-3
file menu . . . . . . . . . . . . . . . . . . . . . . . . . . . . . . . . . 4-3
firmware management . . . . . . . . . . . . . . . . . . . . . . 3-17
functions . . . . . . . . . . . . . . . . . . . . . . . . . . . . . . . . . 4-13
H
help menu . . . . . . . . . . . . . . . . . . . . . . . . . . . . . . . . . 4-3
home icon . . . . . . . . . . . . . . . . . . . . . . . . . . . . . . . . 4-13
host computer . . . . . . . . . . . . . . . . . . . . . . . . . . . . . 1-3
I
information
service . . . . . . . . . . . . . . . . . . . . . . . . . . . . . . . . i-x
install ShowCase . . . . . . . . . . . . . . . . . . . . . . . . . . . 2-3
M
minimum system requirements . . . . . . . . . . . . . . . . 1-3
N
name a tag . . . . . . . . . . . . . . . . . . . . . . . . . . . . . . . 4-11
number of read cycles . . . . . . . . . . . . . . . . . . . . 4-5, 4-7
O
OnCommand . . . . . . . . . . . . . . . . . . . . . . . . . . . . . . . 4-5

MC3000 User GuideIN-2
P
paste . . . . . . . . . . . . . . . . . . . . . . . . . . . . . . . . . . . .4-14
power off . . . . . . . . . . . . . . . . . . . . . . . . . . . . . . . . .4-13
prerequisites . . . . . . . . . . . . . . . . . . . . . . . . . . . . . . .1-3
R
read cycles . . . . . . . . . . . . . . . . . . . . . . . . . . . . . 4-5, 4-7
read gain slide bar . . . . . . . . . . . . . . . . . . . . . . . . . . .4-8
read point zone . . . . . . . . . . . . . . . . . . . . . . . . . . . .3-13
read points . . . . . . . . . . . . . . . . . . . . . . . . . . . . . . . . .4-8
readers
setting up . . . . . . . . . . . . . . . . . . . . . . . . . . . . .3-3
viewing . . . . . . . . . . . . . . . . . . . . . . . . . . . . . . .1-3
remove ShowCase . . . . . . . . . . . . . . . . . . . . . . . . . . .5-6
repair ShowCase . . . . . . . . . . . . . . . . . . . . . . . . . . . .5-3
right justify . . . . . . . . . . . . . . . . . . . . . . . . . . . . . . . .4-14
run . . . . . . . . . . . . . . . . . . . . . . . . . . . . . . . . . . . . . . .4-6
S
select all . . . . . . . . . . . . . . . . . . . . . . . . . . . . . . . . . .4-14
service information . . . . . . . . . . . . . . . . . . . . . . . . . . i-x
setup
readers . . . . . . . . . . . . . . . . . . . . . . . . . . . . . . .3-3
ShowCase . . . . . . . . . . . . . . . . . . . . . . . . . . . . .2-3
software upgrade . . . . . . . . . . . . . . . . . . . . . . . . . . . .1-3
support center . . . . . . . . . . . . . . . . . . . . . . . . . . . . . . i-x
symbol support center . . . . . . . . . . . . . . . . . . . . . . . . . x
system requirements . . . . . . . . . . . . . . . . . . . . . . . . .1-3
T
tag naming . . . . . . . . . . . . . . . . . . . . . . . . . . . . . . . .4-11
tag types . . . . . . . . . . . . . . . . . . . . . . . . . . . . . . . . . .4-8
toolbar dropdowns . . . . . . . . . . . . . . . . . . . . . . . . . . .4-3
U
undo . . . . . . . . . . . . . . . . . . . . . . . . . . . . . . . . . . . . .4-14
unicode control characters . . . . . . . . . . . . . . . . . . .4-14
uninstall ShowCase . . . . . . . . . . . . . . . . . . . . . . . . . .5-6
update ShowCase . . . . . . . . . . . . . . . . . . 1-3, 3-17, 5-9
V
view template . . . . . . . . . . . . . . . . . . . . . . . . . . . . .3-15
view zone . . . . . . . . . . . . . . . . . . . . . . . . . . . . . . . . .3-13
viewing readers . . . . . . . . . . . . . . . . . . . . . . . . . . . . .1-3
Z
zone . . . . . . . . . . . . . . . . . . . . . . . . . . . . . . . . . . . . .3-13

Tell Us What You Think...
We’d like to know what you think about this Manual. Please take a moment to fill out this questionnaire and fax this form
to: (631) 738-3318, or mail to:
Symbol Technologies, Inc.
One Symbol Plaza M/S B-4
Holtsville, NY 11742-1300
Attention: Technical Publications Manager
IMPORTANT: If you need product support, please call the appropriate customer support number provided. Unfortunately,
we cannot provide customer support at the fax number above.
Manual Title:________________________________________________________________________
(please include revision level)
How familiar were you with this product before using this manual?
Very familiar Slightly familiar Not at all familiar
Did this manual meet your needs? If not, please explain.
__________________________________________________________________________________
__________________________________________________________________________________
What topics need to be added to the index, if applicable?
__________________________________________________________________________________
__________________________________________________________________________________
What topics do you feel need to be better discussed? Please be specific.
__________________________________________________________________________________
__________________________________________________________________________________
What can we do to further improve our manuals?
__________________________________________________________________________________
__________________________________________________________________________________
Thank you for your input—We value your comments.


Symbol Technologies, Inc.
One Symbol Plaza
Holtsville, New York 11742-1300
http://www.symbol.com
72E-79050-01
Revision A - February 2006
 Loading...