

Yamaha XT225S, XT225SC Owner's Manual

OWNER’S MANUAL
5RK-28199-12
XT225SC
LIT-11626-17-31
XT225S
5RK-9-12_hyoushi2&3 4/22/03 10:03 PM Page 1

INTRODUCTION
EAU10080
EAU10130
EWA10010
IMPORTANT MANUAL INFORMATION
EAU10191
AFFIX DEALER
LABEL HERE
XT225S/XT225SC
OWNER’S MANUAL
All rights reserved.
Printed in Japan.
P/N LIT-11626-17-31

Cleaning the spark arrester ..... 6-16
Adjusting the carburetor ..........6-17
Adjusting the throttle cable free
play ....................................... 6-17
Adjusting the valve
clearance .............................. 6-18
Tires ........................................ 6-18
Spoke wheels .......................... 6-20
Accessories and replacement
parts ...................................... 6-21
Adjusting the clutch lever free
play ....................................... 6-21
Adjusting the brake lever free
play ....................................... 6-22
Adjusting the brake pedal
position and free play ............ 6-23
Adjusting the rear brake light
switch .................................... 6-24
Checking the front brake pads
and rear brake shoes ............ 6-25
Checking the brake fluid
level ....................................... 6-25
Changing the brake fluid ......... 6-26
Drive chain slack .....................6-27
Lubricating the drive chain ...... 6-28
Checking and lubricating the
cables .................................... 6-29
TABLE OF CONTENTS

1-1
●
Ride where other motorists can
see you. Avoid riding in another
motorist’s blind spot.
●
Many accidents involve inexperienced operators. In fact, many operators who have been involved in
accidents do not even have a current motorcycle license.
●
Make sure that you are qualified
and that you only lend your motorcycle to other qualified operators.
●
Know your skills and limits.
Staying within your limits may
help you to avoid an accident.
●
We recommend that you practice riding your motorcycle
where there is no traffic until you
have become thoroughly familiar with the motorcycle and all of
its controls.
●
Many accidents have been caused
by error of the motorcycle operator. A typical error made by the operator is veering wide on a turn
due to EXCESSIVE SPEED or un-
SAFETY INFORMATION
1-2
1
●
Passengers should also observe
the precautions mentioned above.
Modifications
Modifications made to this motorcycle
not approved by Yamaha, or the removal of original equipment, may render the motorcycle unsafe for use and
may cause severe personal injury.
Modifications may also make your motorcycle illegal to use.
Loading and accessories
Adding accessories or cargo to your
motorcycle can adversely affect stability and handling if the weight distribution
of the motorcycle is changed. To avoid
the possibility of an accident, use extreme caution when adding cargo or
accessories to your motorcycle. Use
extra care when riding a motorcycle
that has added cargo or accessories.
Here are some general guidelines to
follow if loading cargo or adding accessories to your motorcycle:
Loading
The total weight of the operator, passenger, accessories and cargo must
1-3
namic changes. If accessories
are added to the handlebar or
front fork area, they must be as
lightweight as possible and
should be kept to a minimum.
●
Bulky or large accessories may
seriously affect the stability of
the motorcycle due to aerodynamic effects. Wind may attempt to lift the motorcycle, or
the motorcycle may become unstable in cross winds. These accessories may also cause
instability when passing or being
passed by large vehicles.
●
Certain accessories can displace the operator from his or
her normal riding position. This
improper position limits the freedom of movement of the operator and may limit control ability,
therefore, such accessories are
not recommended.
●
Use caution when adding electrical accessories. If electrical accessories exceed the capacity of the
SAFETY INFORMATION
1-4
1
eyes, see your doctor immediately. If any gasoline spills on your
skin or clothing, immediately wash
the affected area with soap and
water and change your clothes.
1-5
EAU10381
1
23
SAFETY INFORMATION
1-6
1
WARNING
q
8
8
This unit contains high pressure nitrogen gas.
Mishandling can cause explosion.
Read owner's manual for instructions.
Do not incinerate, puncture or open.
4AA-22259-00
TIRE INFORMATION
3MH-21668-A0
Cold tire normal pressure should be set as
follows.
8 Up to 90kg (198 lbs) load
FRONT : 125 kPa, {1.25 kgf /cm
2
}, 18 psi
FRONT : 150 kPa, {1.50 kgf /cm
2
}, 22 psi
REAR : 150 kPa, {1.50 kgf/cm
2
}, 22 psi
REAR : 175 kPa, {1.75 kgf/cm
2
}, 25 psi
8 90kg (198 lbs)
~
maximum load
43 California only
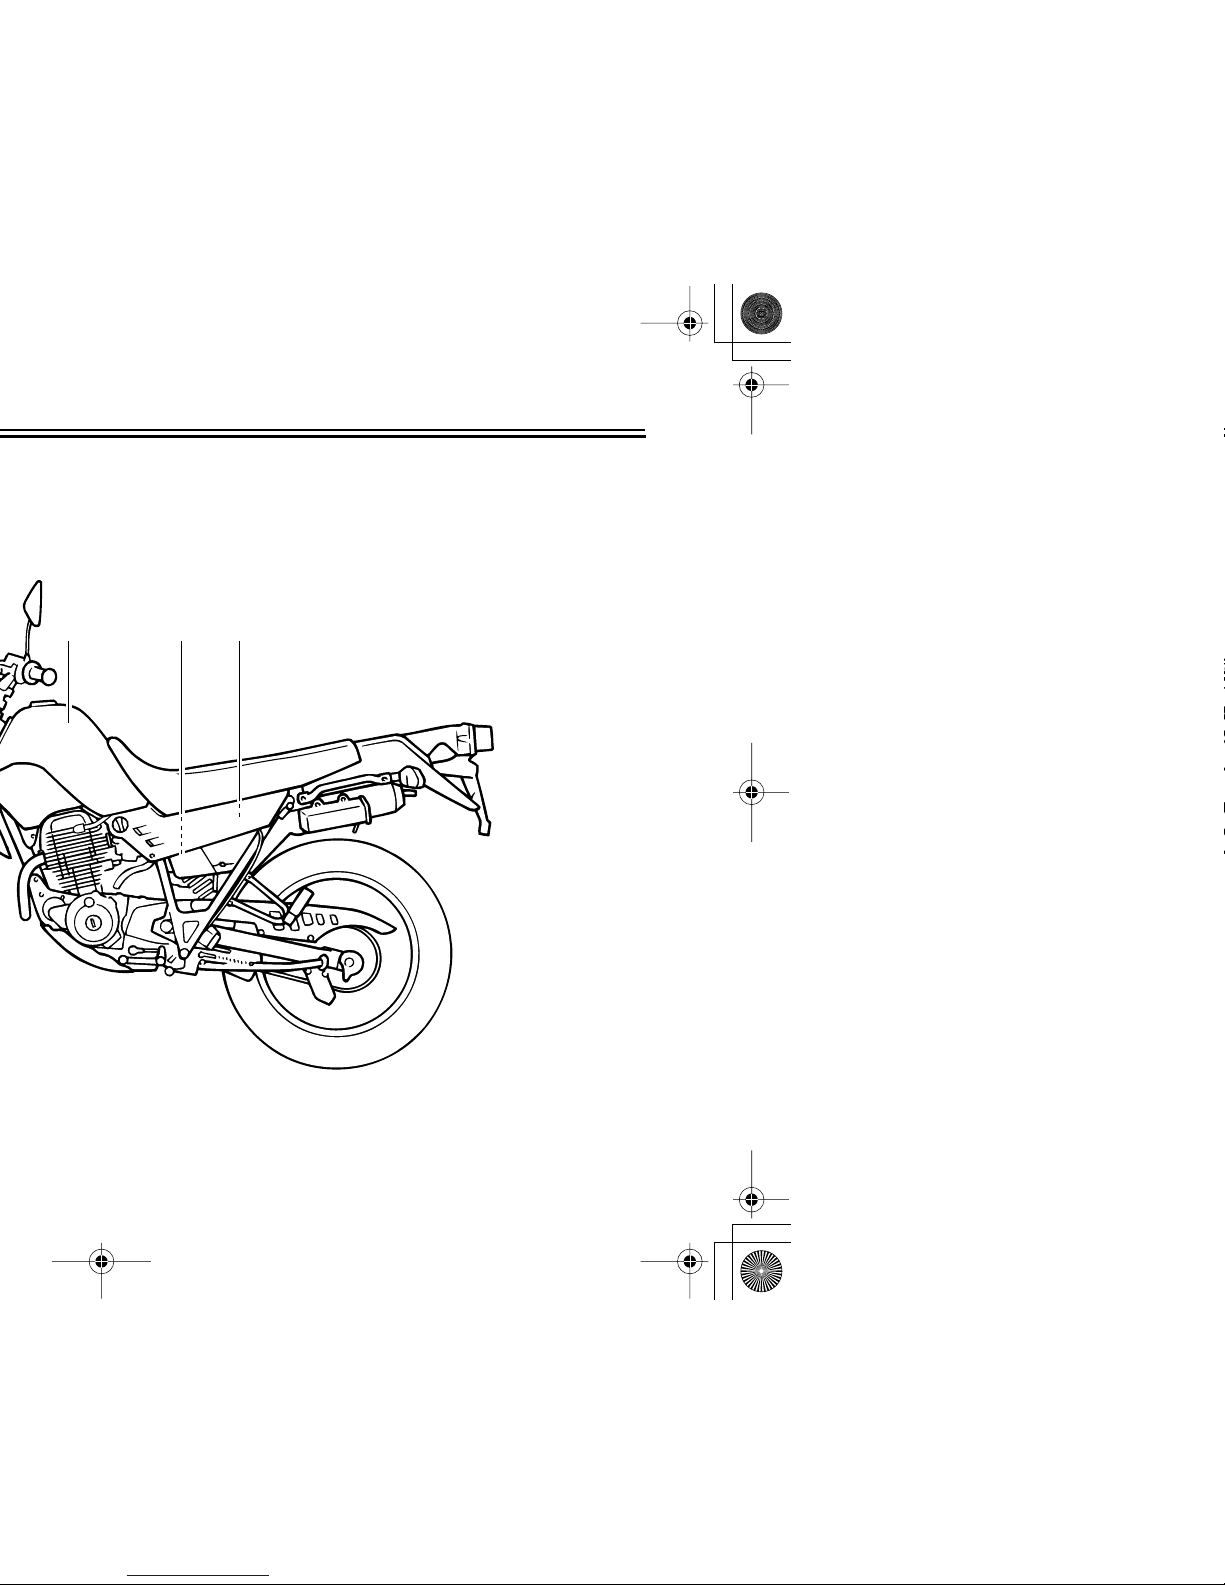
2-1
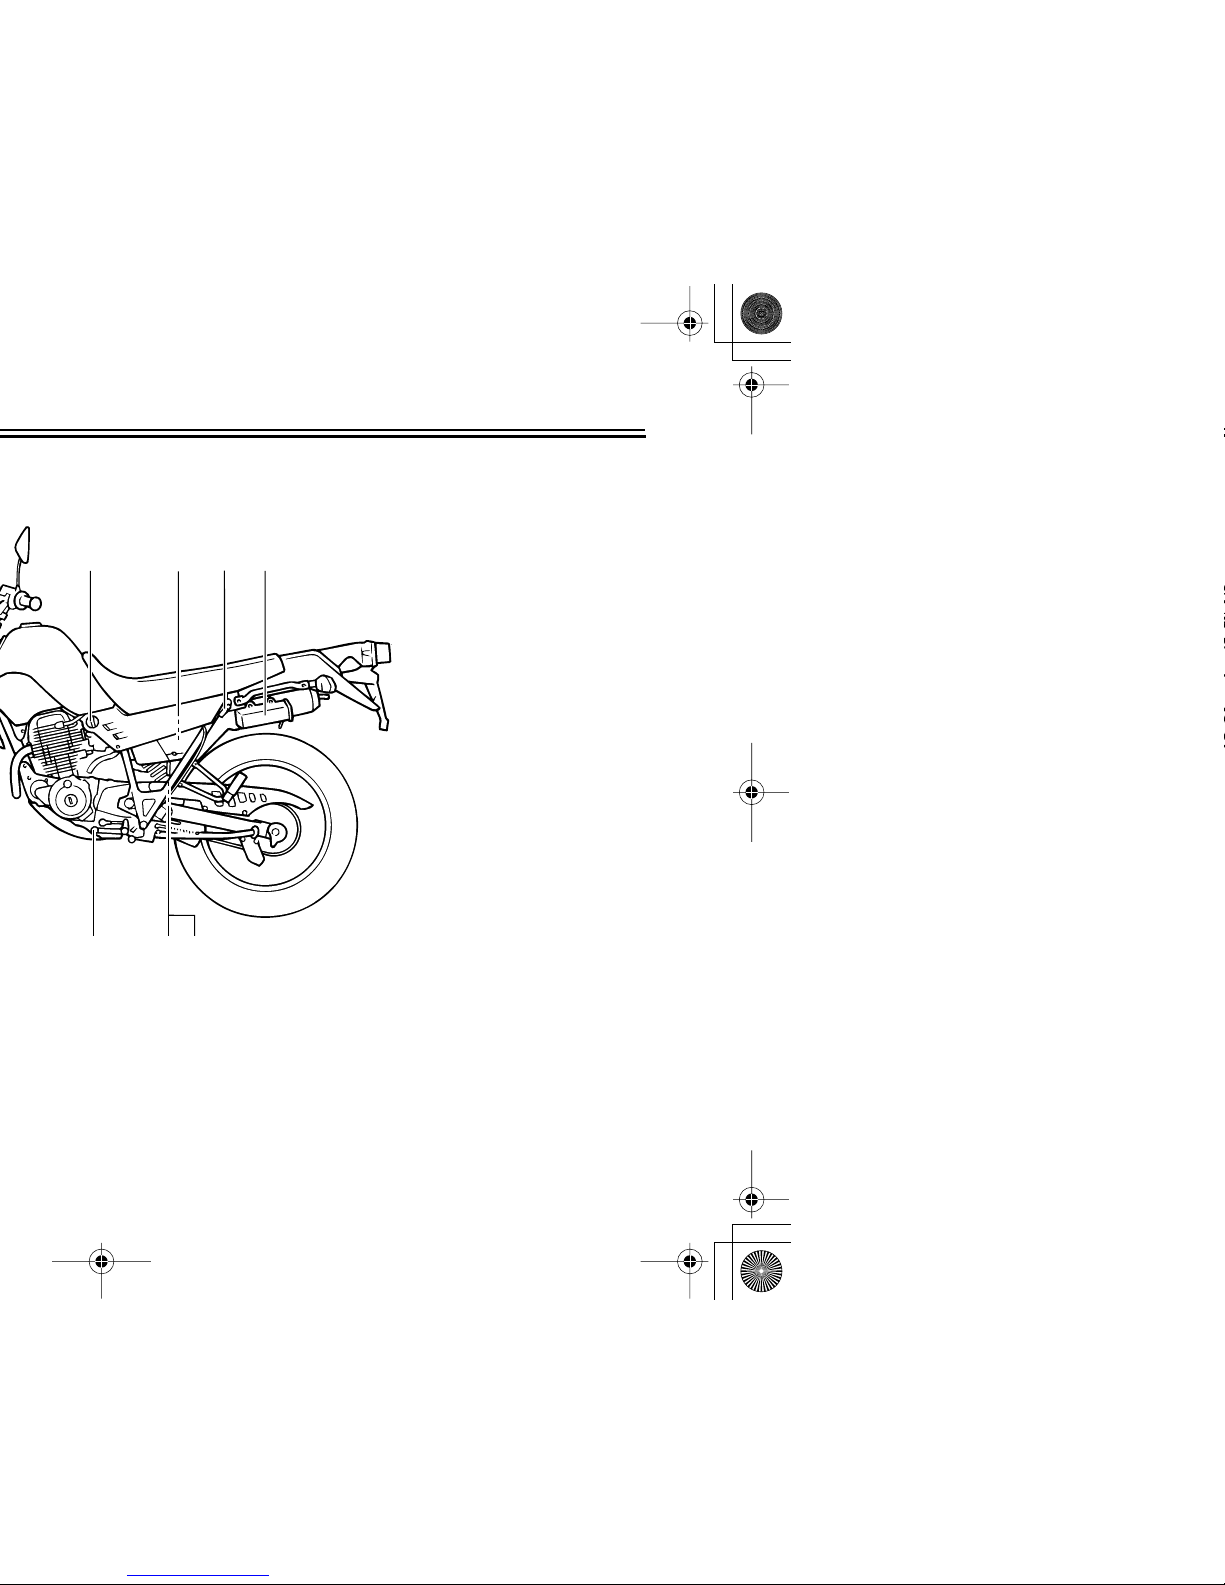
EAU10410
5
7
6
8
3
4
8. Shift pedal (page 3-4)
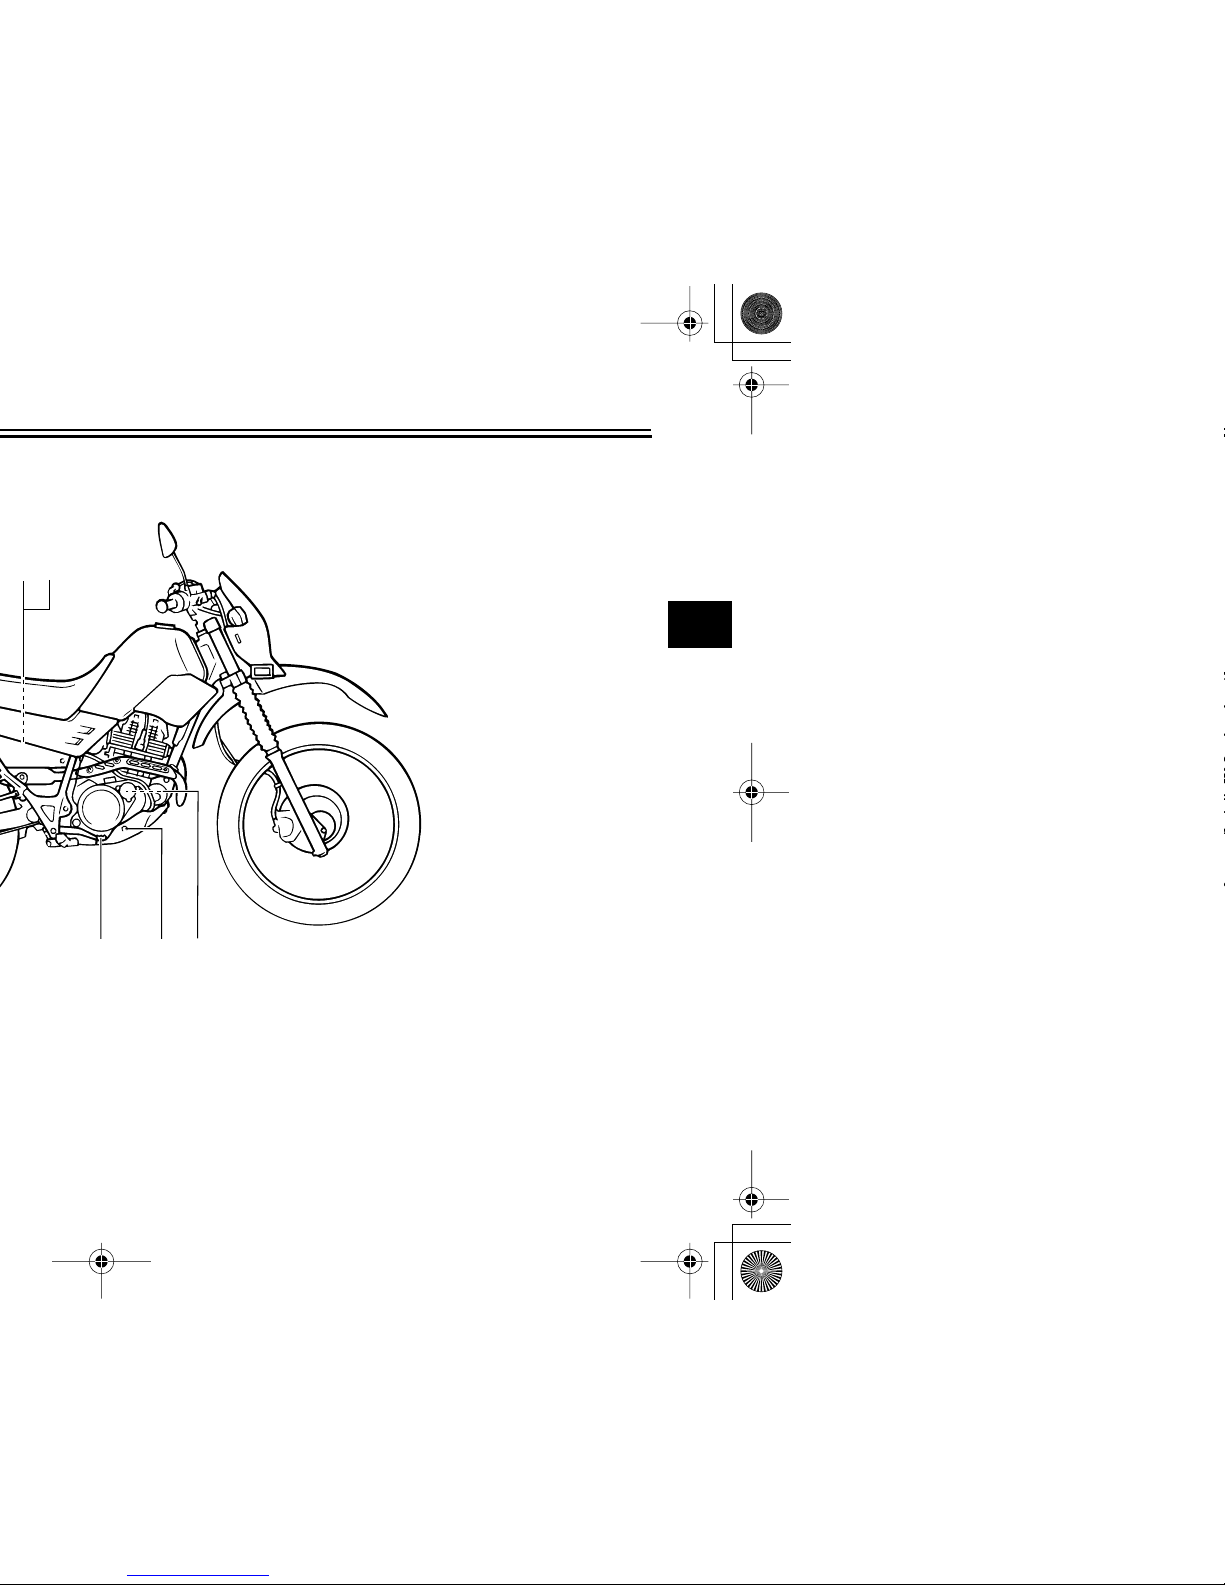
DESCRIPTION
2-2
2
3
4
5
6
7
8
9
EAU10420
56
1
2
34
2-3
EAU10430
45
6
7
8
9
3
9. Fuel tank cap (page 3-5)
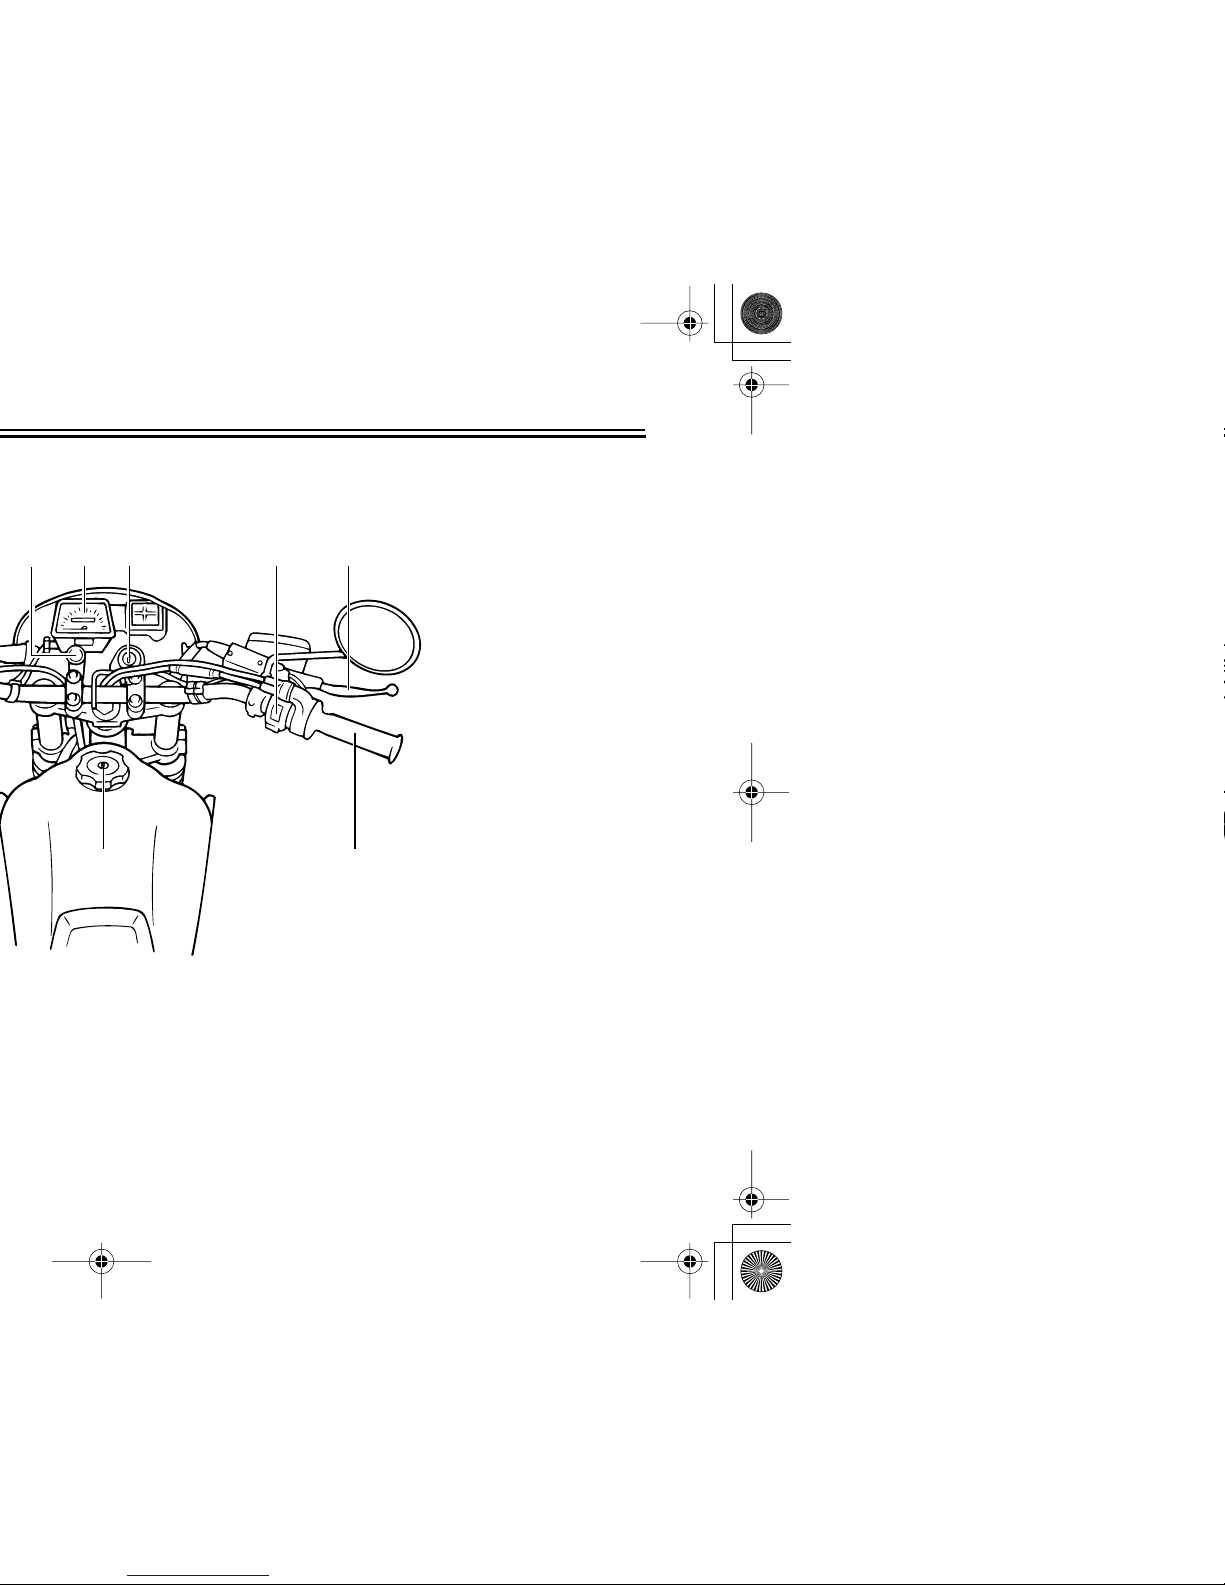
3-1
2
3
4
5
6
7
8
9
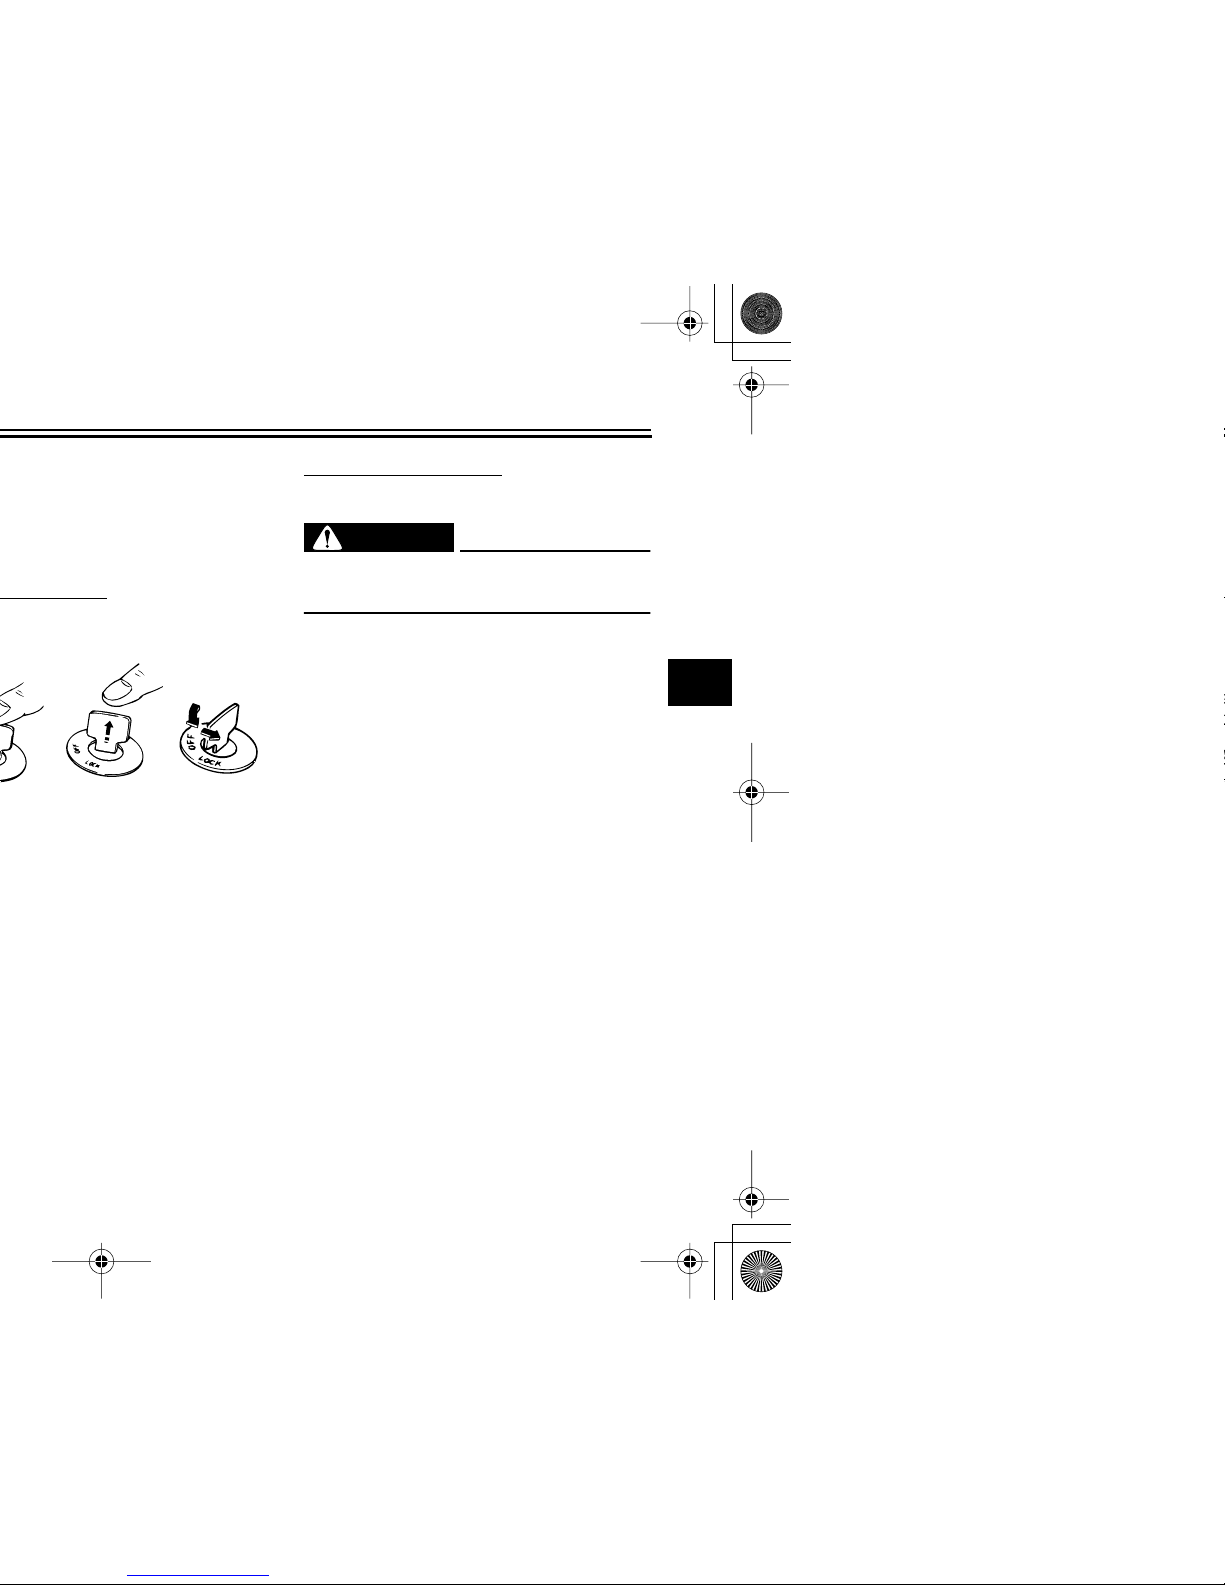
EAU10710
To unlock the steering
Insert the key and turn it to “OFF”.
WARNING
EWA10070
Never turn the key to “LOCK” while
the motorcycle is moving.
3-2
EAU11080
EAU11630
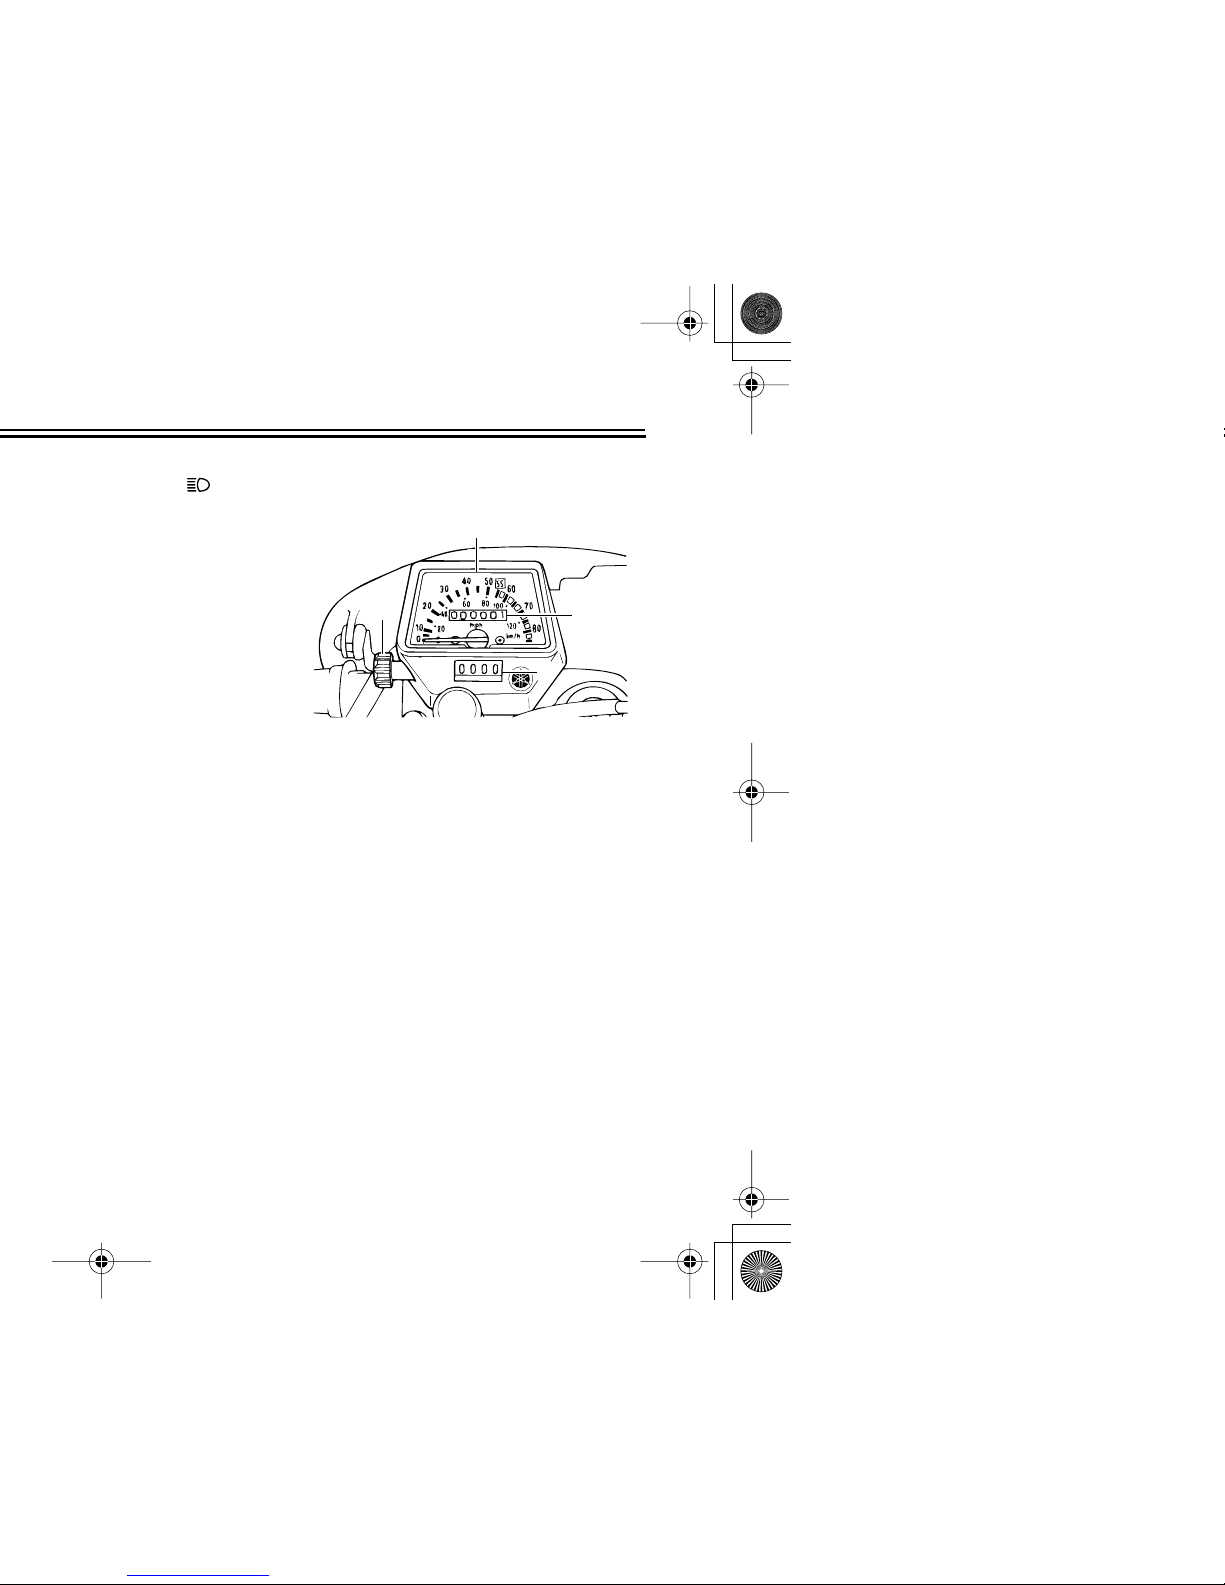
Speedometer unit
The speedometer unit is equipped with
a speedometer, an odometer and a
tripmeter. The speedometer shows
riding speed. The odometer shows the
total distance traveled. The tripmeter
shows the distance traveled since it
was last set to zero with the reset knob.
The tripmeter can be used to estimate
the distance that can be traveled with a
full tank of fuel. This information will enable you to plan future fuel stops.
1. Speedometer
2. Odometer
3. Tripmeter
4. Reset knob
1
2
3
4
3-3
2
3
4
5
6
7
8
9
EAU12400
EAU12460
EAU12500
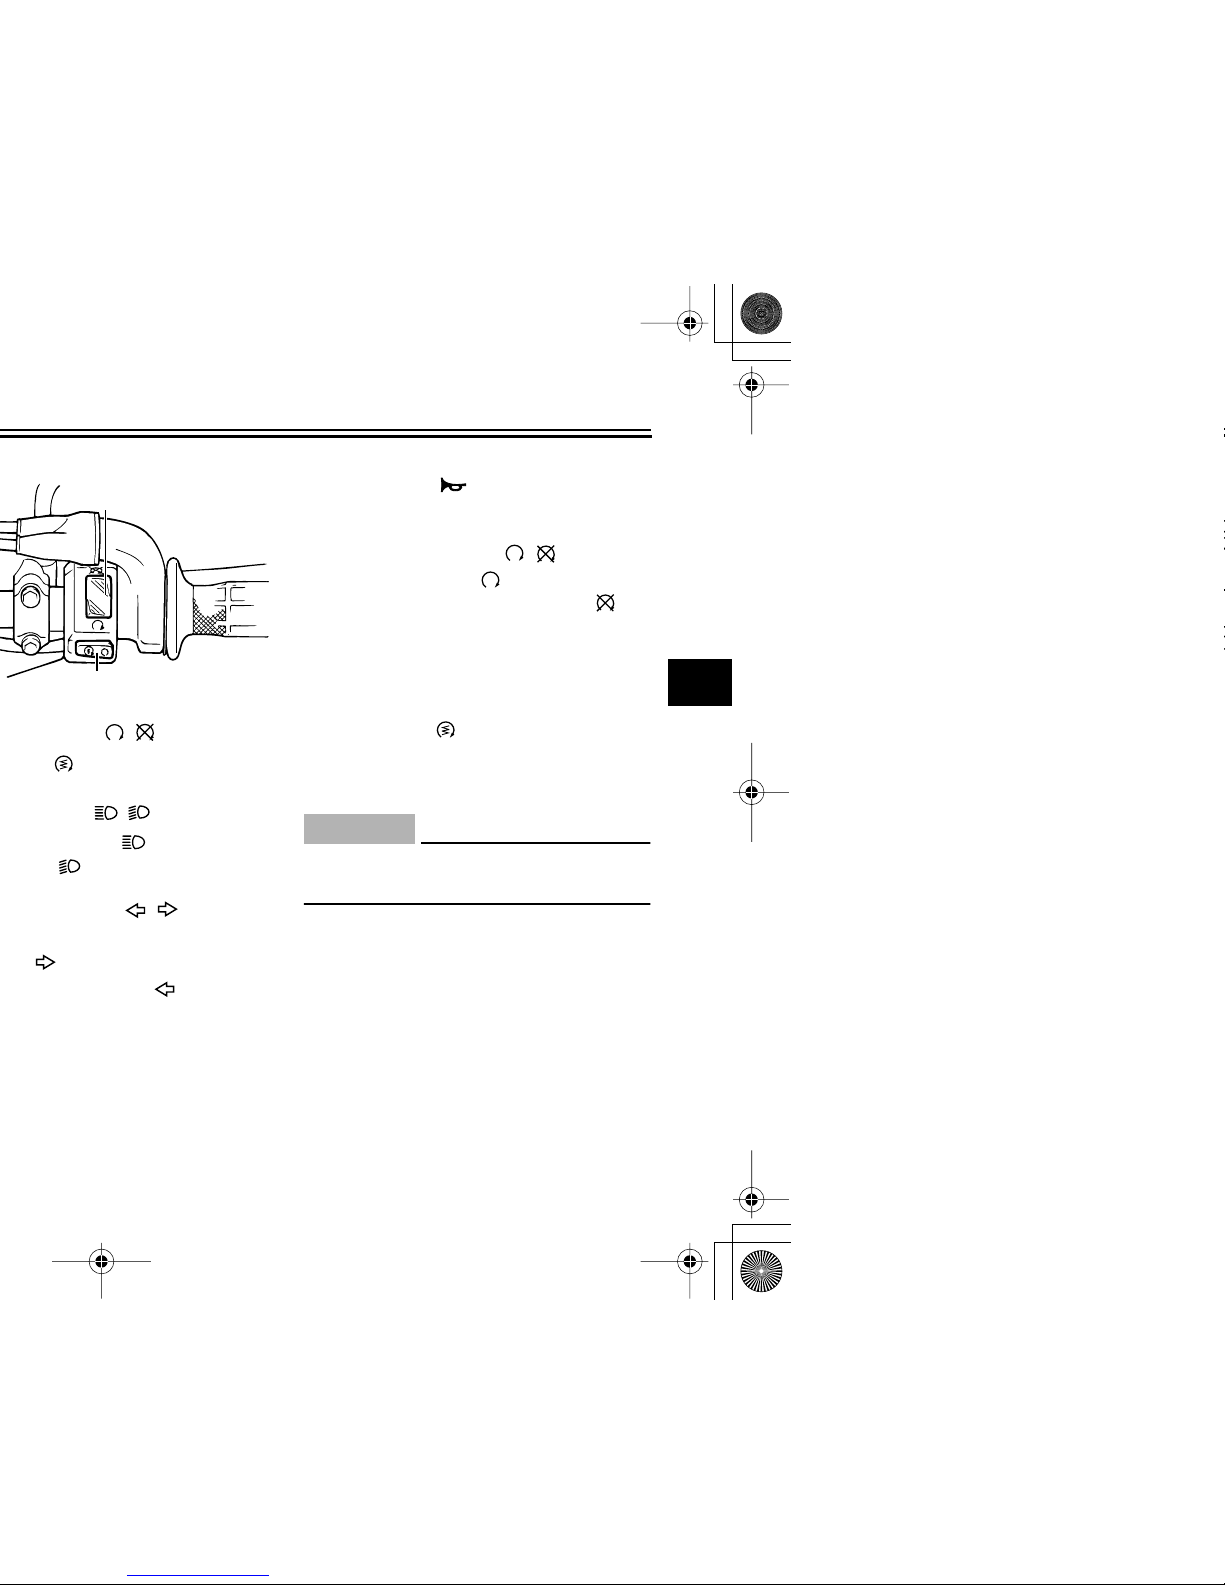
Horn switch “”
Press this switch to sound the horn.
EAU12660
Engine stop switch “ / ”
Set this switch to “ ” before starting
the engine. Set this switch to “ ” to
stop the engine in case of an emergency, such as when the vehicle overturns
or when the throttle cable is stuck.
EAU12710
Start switch “”
Push this switch to crank the engine
with the starter.
CAUTION:
ECA10050
See page 5-1 for starting instructions prior to starting the engine.
1
2
3-4
EAU12870
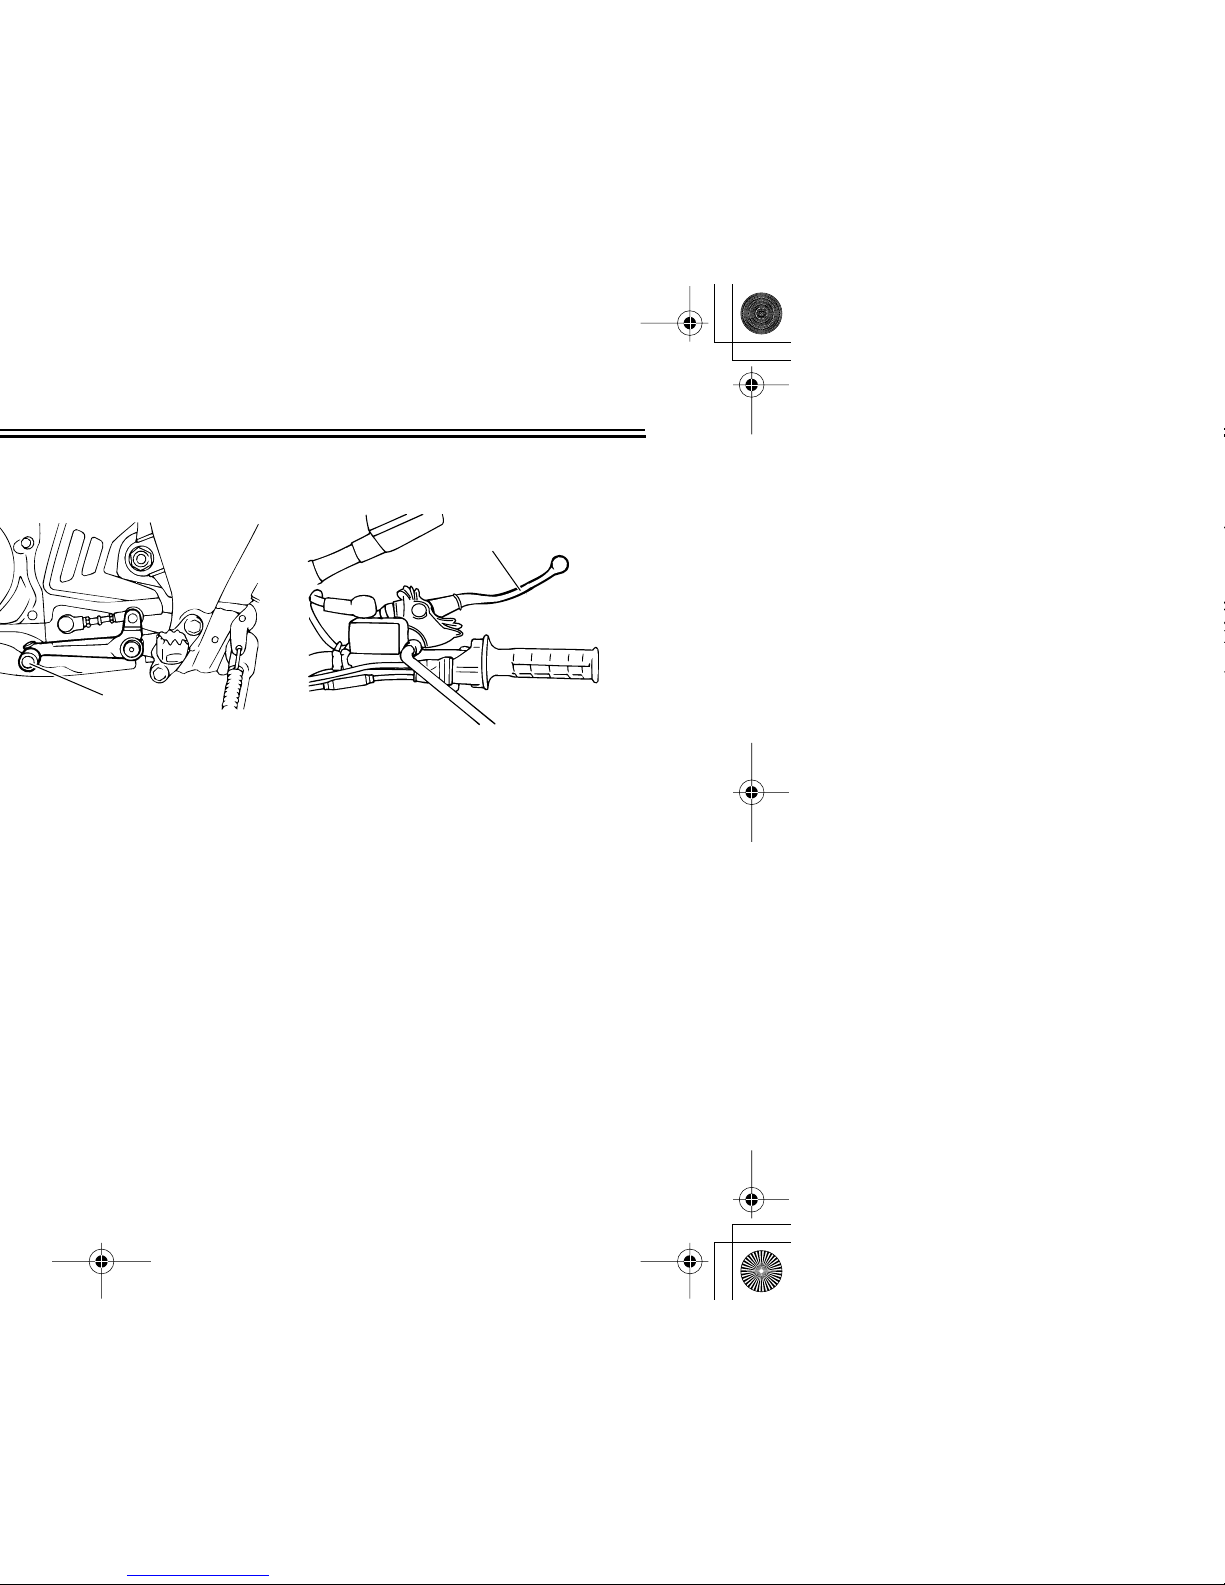
EAU12890
Brake lever
The brake lever is located at the right
handlebar grip. To apply the front
brake, pull the lever toward the handlebar grip.
1
1. Brake lever
1
3-5
2
3
4
5
6
7
8
9
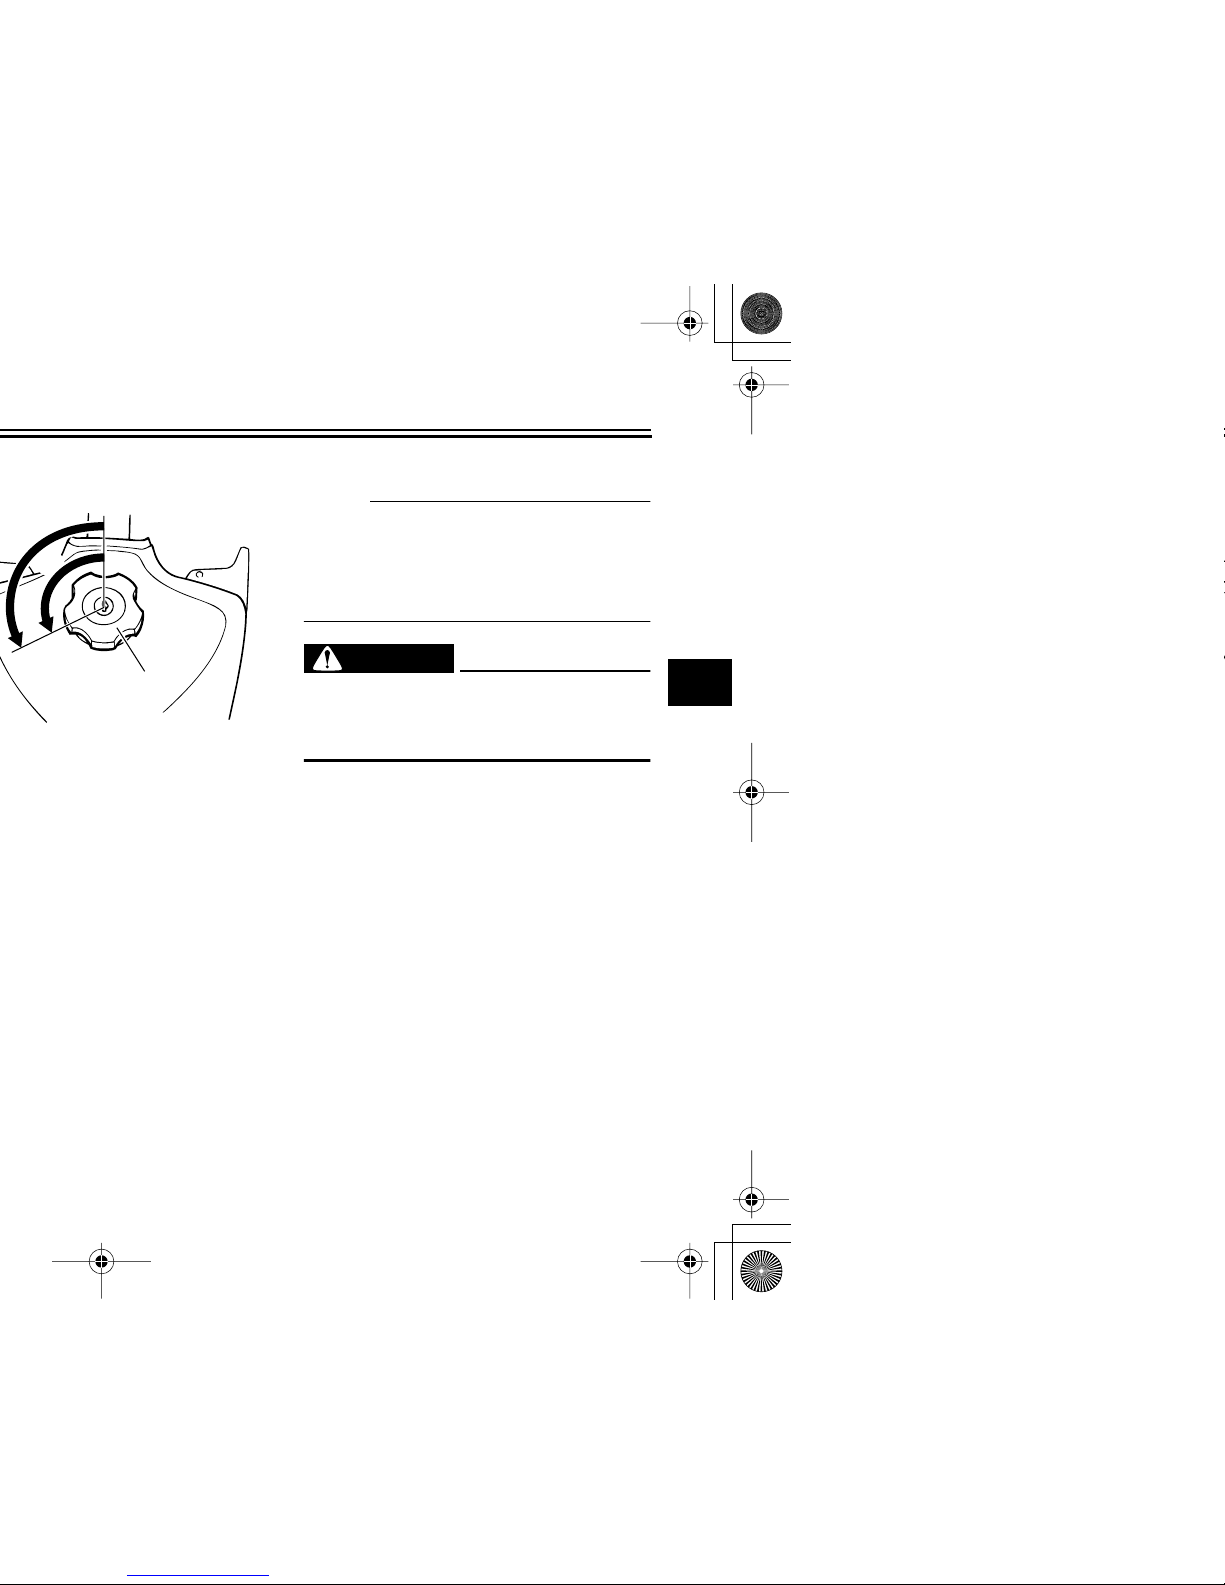
EAU32280
and then remove it.
NOTE:
The fuel tank cap cannot be installed
unless the key is in the lock. In addition,
the key cannot be removed if the cap is
not properly installed and locked.
WARNING
EWA10120
Make sure that the fuel tank cap is
properly closed and locked before
riding.
1
2
3
3-6
EAU13300
ECA11400
gasoline of a different brand or premium unleaded fuel. Use of unleaded fuel
will extend spark plug life and reduce
maintenance costs.
Gasohol
There are two types of gasohol: gasohol containing ethanol and that containing methanol. Gasohol containing
ethanol can be used if the ethanol content does not exceed 10%. Gasohol
containing methanol is not recommended by Yamaha because it can
cause damage to the fuel system or vehicle performance problems.
3-7
2
3
4
5
6
7
8
9
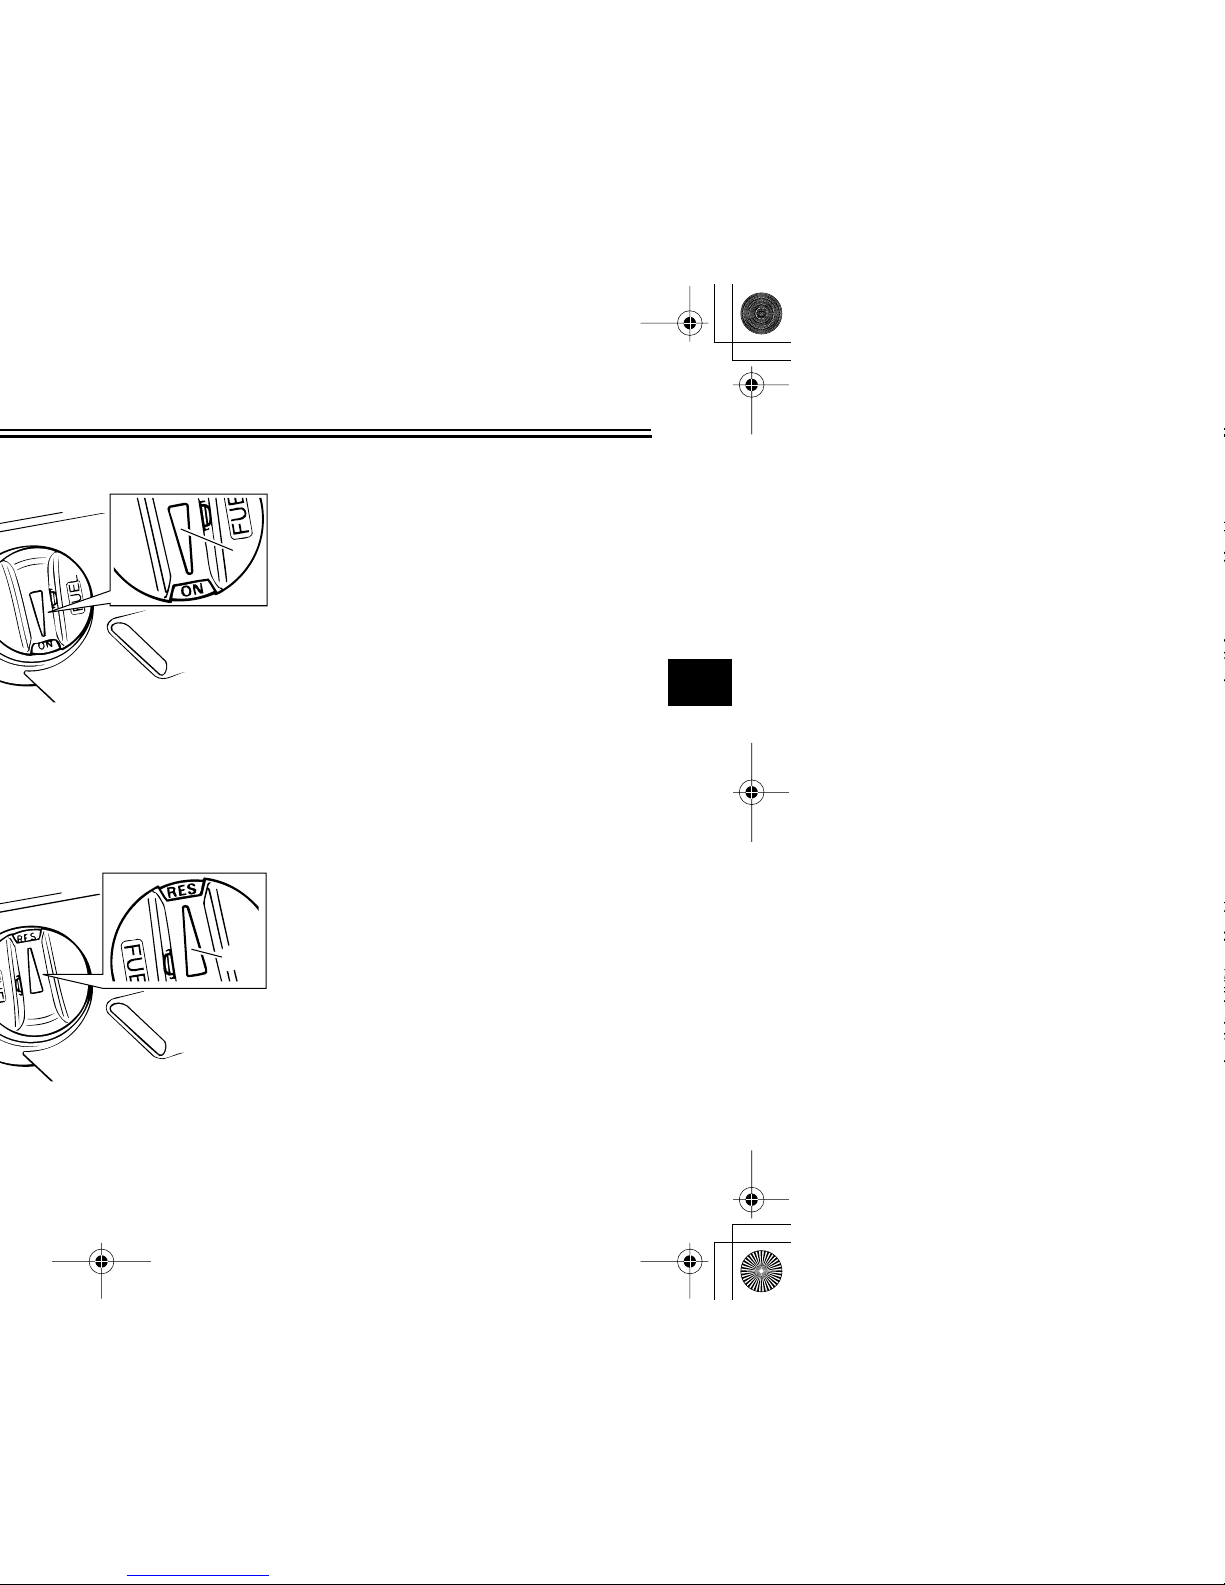
fuel while riding, move the lever to this
position. Fill the tank at the first opportunity. Be sure to set the lever back to
“ON” after refueling!
1
1
3-8
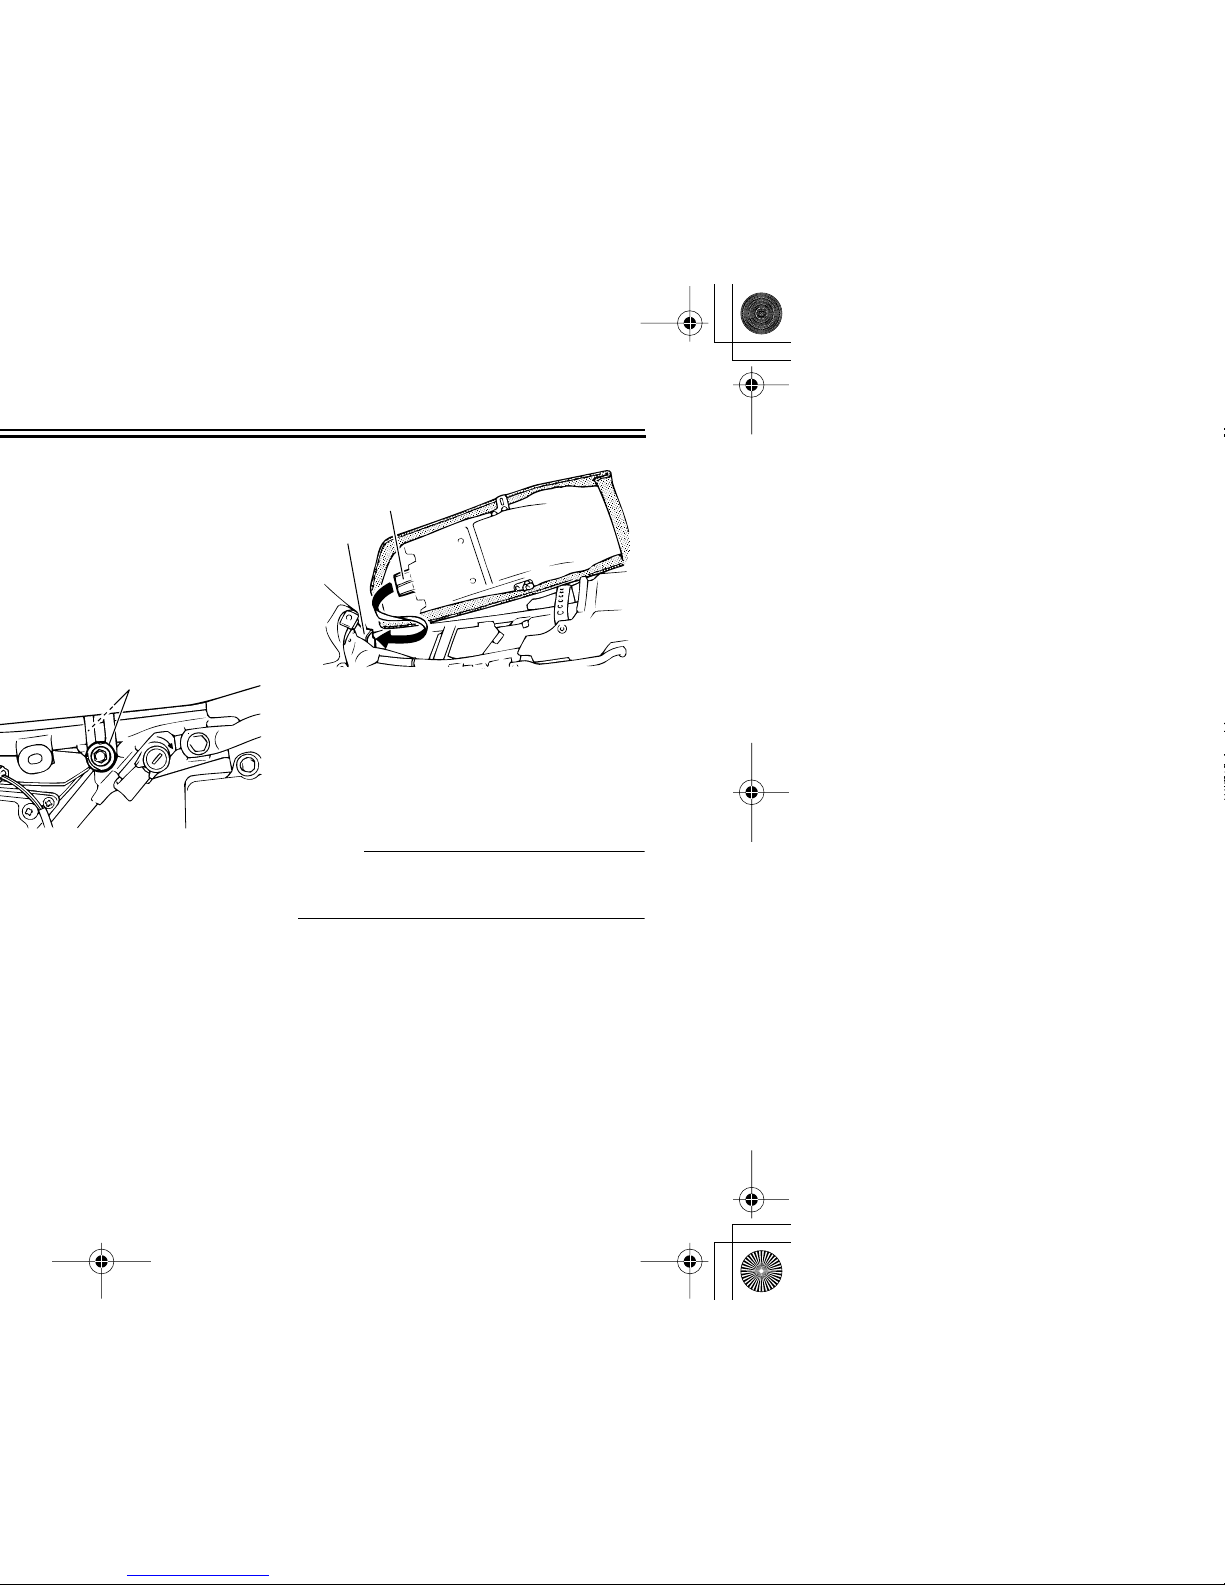
EAU13981
2. Place the seat in the original posi-
tion, and then tighten the bolts.
3. Install the panels.
NOTE:
Make sure that the seat is properly secured before riding.
1(×2)
1. Projection
2. Seat holder
1
2
3-9
2
3
4
5
6
7
8
9
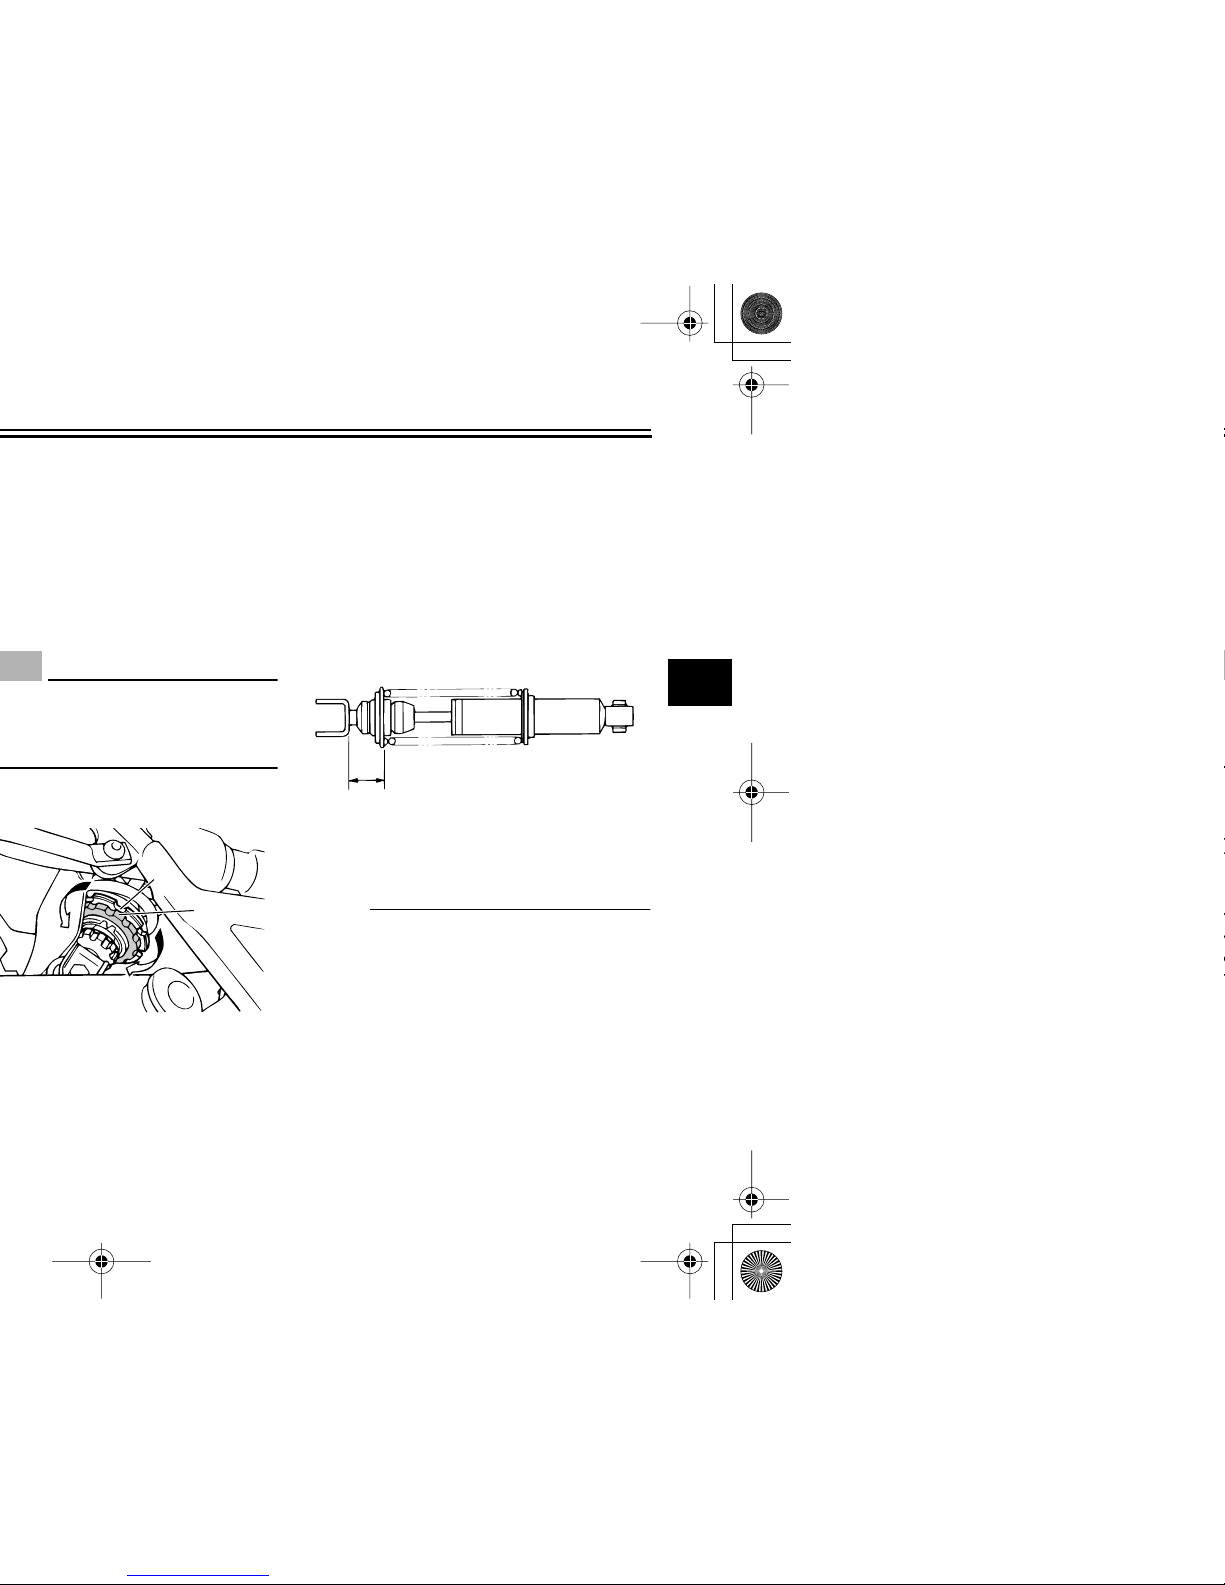
EAU14930
ECA10100
thereby harden the suspension,
turn the adjusting nut in direction
(a). To decrease the spring preload and thereby soften the suspension, turn the adjusting nut in
direction (b).
NOTE:
●
Use the special wrench included in
the owner’s tool kit to make the adjustment.
●
The spring preload setting is determined by measuring distance A,
shown in the illustration. The longer distance A is, the higher the
spring preload; the shorter distance A is, the lower the spring
1
2
(a)
(b)
1. Distance A
1
3-10
NOTE:
Although the total number of clicks of
the damping force adjusting mechanism may not exactly match the above
specifications due to small differences
in production, the actual number of
clicks always represents the entire adjusting range. To obtain a precise adjustment, it would be advisable to check
the number of clicks of the damping
force adjusting mechanism and to modify the specifications as necessary.
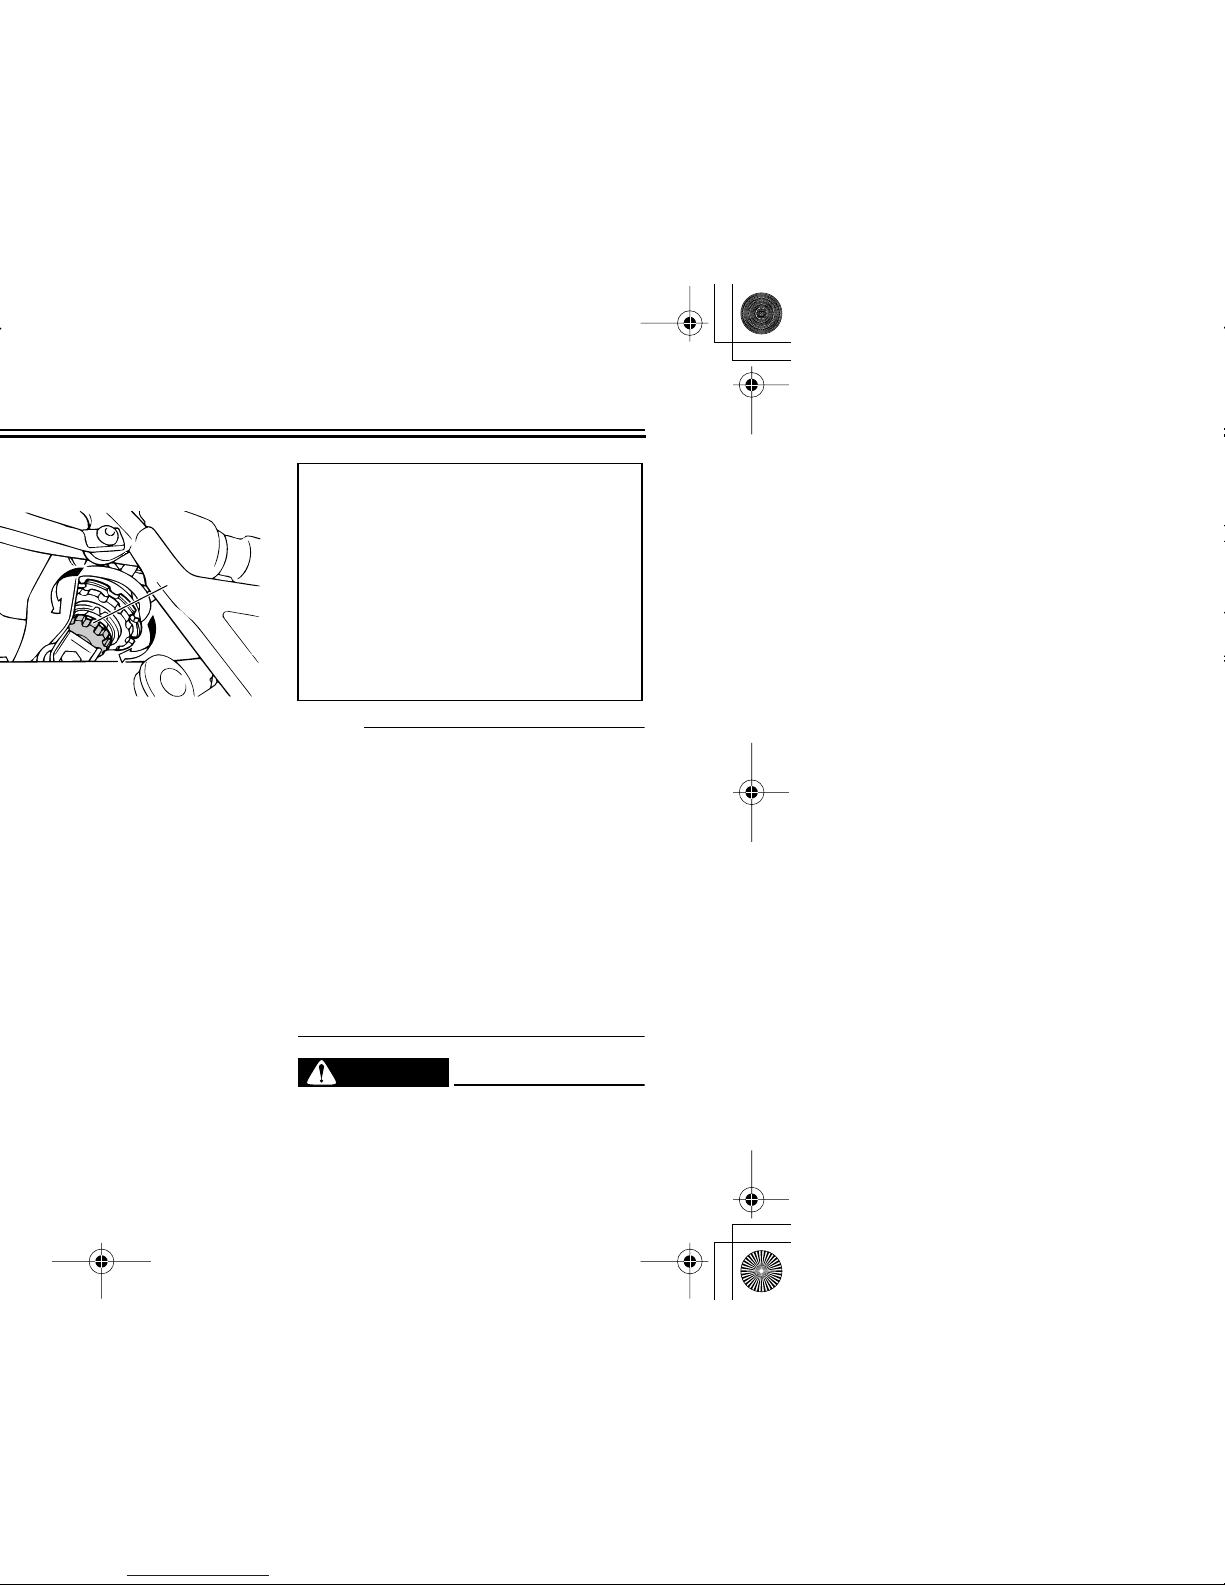
WARNING
EWA10220
This shock absorber contains highly
pressurized nitrogen gas. For proper handling, read and understand
1
(a)
(b)
Rebound damping setting:
Minimum (soft):
20 clicks in direction (b)*
Standard:
9 clicks in direction (b)*
Maximum (hard):
1 click in direction (b)*
* With the adjusting dial fully turned
in direction (a)
3-11
2
3
4
5
6
7
8
9
EAU15300
EWA10240
this system regularly as described
below and have a Yamaha dealer repair it if it does not function properly.

3-12
3-13
2
3
4
5
6
7
8
9
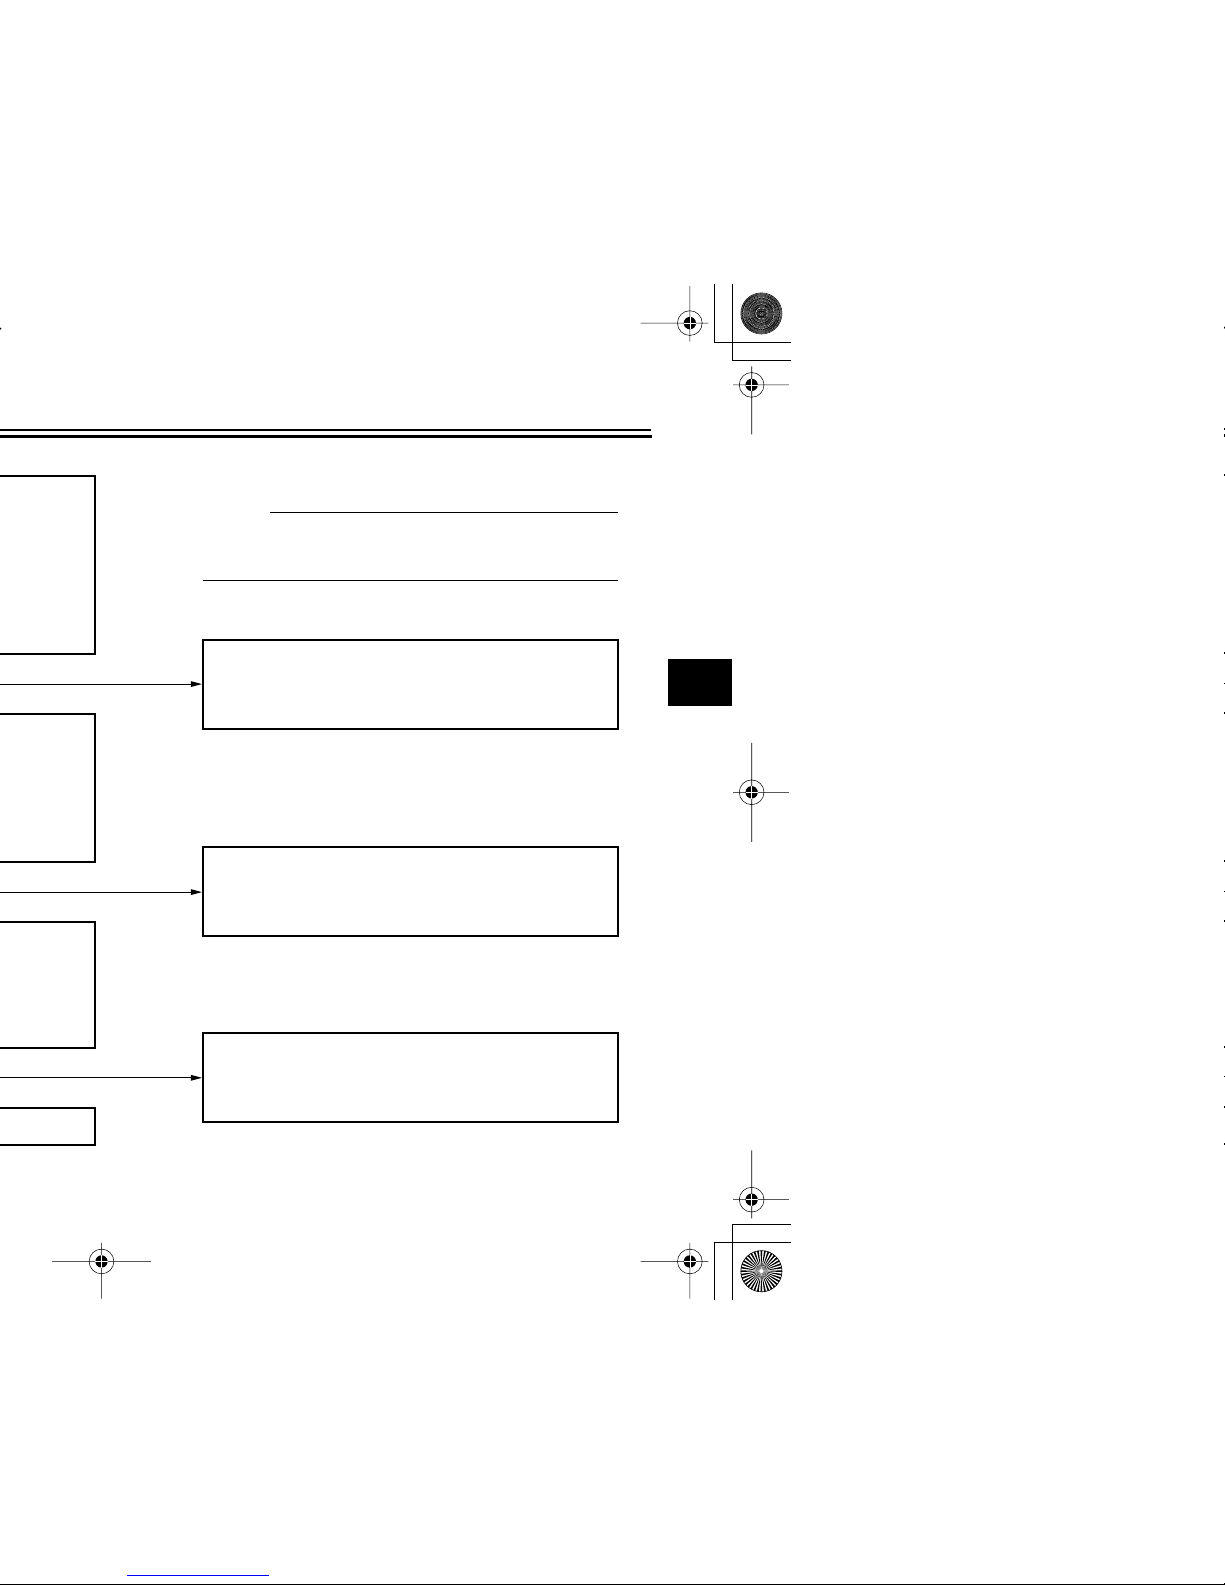
This check is most reliable if performed with
a warmed-up engine.
The neutral switch may be defective.
The motorcycle should not be ridden until
checked by a Yamaha dealer.
The sidestand switch may be defective.
The motorcycle should not be ridden until
checked by a Yamaha dealer.
The clutch switch may be defective.
The motorcycle should not be ridden until
checked by a Yamaha dealer.
NOTE:
 Loading...