

Page 1
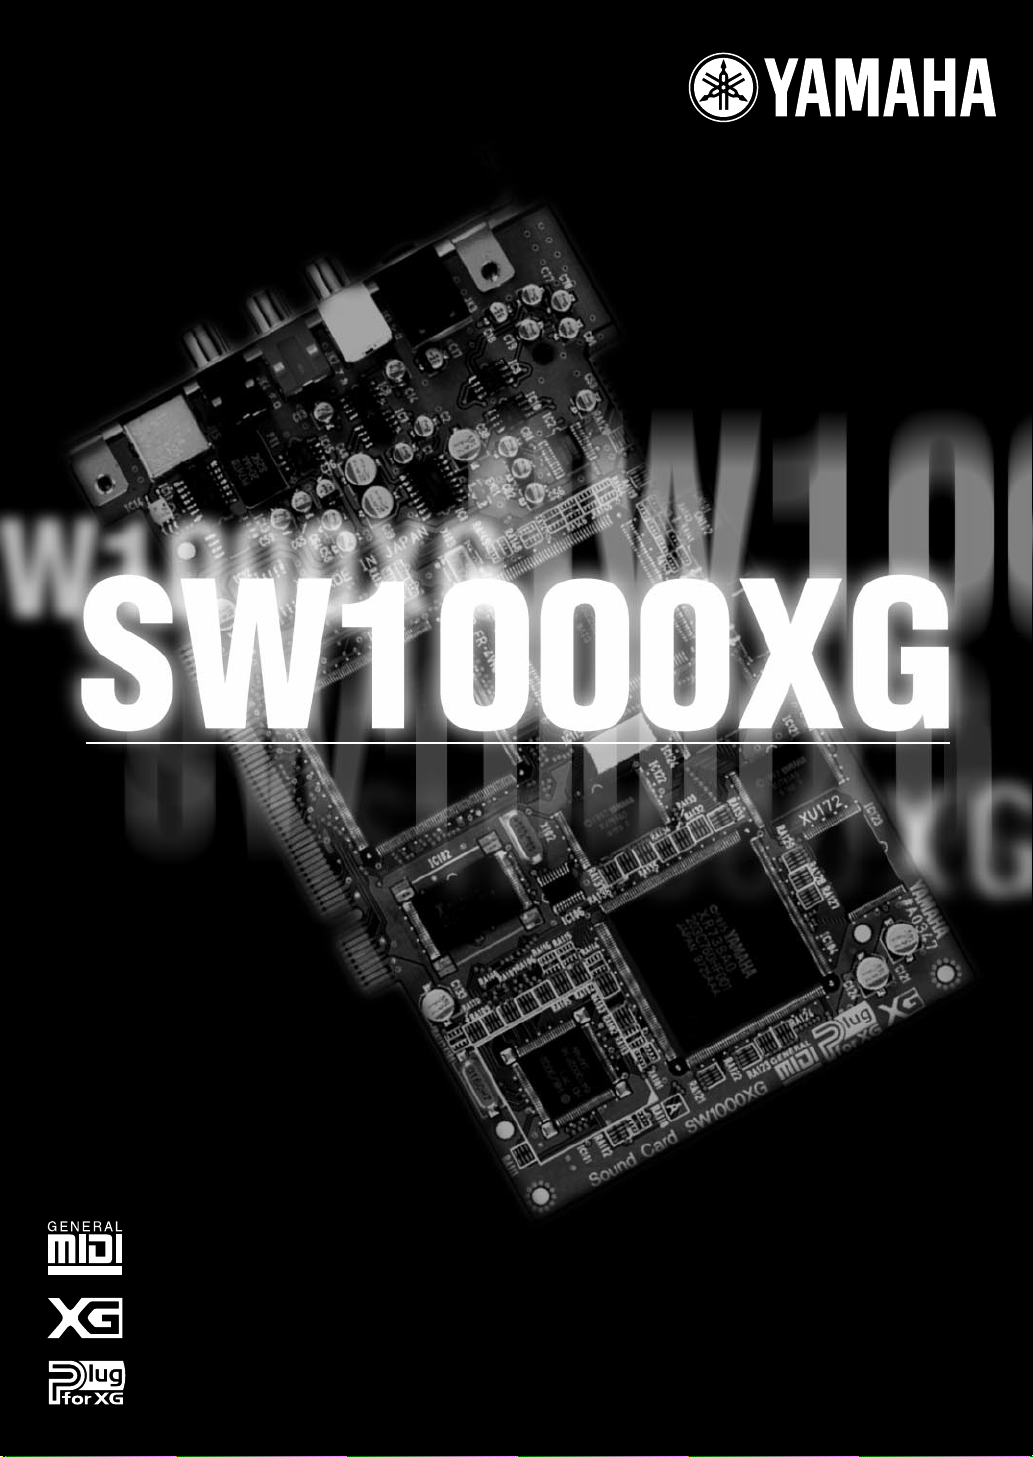
PCI AUDIO MIDI CARD
OWNER'S MANUAL
Page 2
FCC INFORMATION (U.S.A.)
1. IMPORTANT NOTICE: DO NOT MODIFY
THIS UNIT!
This product, when installed as indicated in the
instructions contained in this manual, meets FCC
requirements. Modifications not expressly approved
by Yamaha may void your authority, granted by the
FCC, to use the product.
2. IMPORTANT: When connecting this product to
accessories and/or another product use only high
quality shielded cables. Cable/s supplied with this
product MUST be used. Follow all installation instructions. Failure to follow instructions could void your
FCC authorization to use this product in the USA.
3. NOTE: This product has been tested and found to
comply with the requirements listed in FCC
Regulations, Part 15 for Class “B” digital devices.
Compliance with these requirements provides a reasonable level of assurance that your use of this product in a residential environment will not result in
harmful interference with other electronic devices.
This equipment generates/uses radio frequencies
and, if not installed and used according to the
instructions found in the users manual, may cause
interference harmful to the operation of other elec-
* This applies only to products distributed by YAMAHA CORPORATION OF AMERICA.
tronic devices. Compliance with FCC regulations
does not guarantee that interference will not occur in
all installations. If this product is found to be the
source of interference, which can be determined by
turning the unit “OFF” and “ON”, please try to eliminate the problem by using one of the following measures:
Relocate either this product or the device that is
being affected by the interference.
Utilize power outlets that are on different branch (circuit breaker or fuse) circuits or install AC line filter/s.
In the case of radio or TV interference,
relocate/reorient the antenna. If the antenna lead-in
is 300 ohm ribbon lead, change the lead-in to coaxial type cable.
If these corrective measures do not produce satisfactory results, please contact the local retailer
authorized to distribute this type of product. If you
can not locate the appropriate retailer, please contact Yamaha Corporation of America, Electronic
Service Division, 6600 Orangethorpe Ave, Buena
Park, CA90620
The above statements apply ONLY to those products
distributed by Yamaha Corporation of America or its
subsidiaries.
CANADA
This Class B digital apparatus complies with Canadian ICES-003.
Cet appareil numérique de la classe B est conforme à la norme NMB-003 du Canada.
• This applies only to products distributed by Yamaha Canada Music Ltd.
• Ceci ne s’applique qu’aux produits distribués par Yamaha Canada Musique Ltée.
2
Page 3

Precautions
● Do not expose the soundcard to direct sunlight, excessive
humidity, high temperatures, excessive dust or strong vibrations.
● Before handling the soundcard, be sure to touch a metal surface
to discharge any static electricity which may be in your body.
● When holding the soundcard, do not touch the inside area of the
circuit board or apply excessive pressure to the card, and be
sure to protect the card from contact with water or other liquids.
● Before installing the soundcard in the computer, unplug the
power connector of your computer.
● Before connecting the computer to other devices, turn off the
power switches of all devices.
● It is possible that computer malfunctions or operator actions
might destroy data that was created with the included application
software. We recommend that you back up all important data
onto floppy disks. Yamaha is not responsible for loss of data
through computer malfunctions or operator actions.
● The soundcard contains no user-serviceable parts, so never
touch the inside area of the circuit board or tamper with the electronic circuitry in any way. Doing so may result in electrical shock
or damage to the soundcard.
YAMAHA CANNOT BE HELD RESPONSIBLE FOR
DAMAGE CAUSED BY IMPROPER CARE AND USE
OF THE SOUNDCARD AND SOFTWARE.
Introduction
Thank you very much for purchasing Yamaha’s SW1000XG.
In this package you will find a sound card that offers both high quality XG sound and a complete digital audio environment. To help you take utmost advantage of the advanced features of
your new SW1000XG, we have packed it together with a variety of applications that work together with your sound card to help you bring your musical ideas to reality. Since the SW1000XG
puts this remarkable MIDI + audio music control environment right inside your computer, you
can do everything right from your PC—even mastering compact disks.
Read this manual carefully before using your SW1000XG to make sure you get the most enjoyment out of your investment in quality sound.
After you finish reading your owner’s manual, be sure to keep it someplace safe where you can
refer to it whenever you have a question about your sound card.
Special Notices
• The SW1000XG software and this owner’s manual are exclusive copyrights of Yamaha
Corporation.
• Copying of the software or reproduction of this manual in whole or in part by any means is
expressly forbidden without the written consent of the manufacturer.
• Yamaha makes no representations or warranties with regard to the use of the software and
documentation and cannot be held responsible for the results of the use of this manual and
the software.
• This disk is a CD-ROM. Do not attempt to play the disk on an audio CD player. Doing so
may result in irreparable damage to your audio CD player.
• Copying of the commercially available music sequence data and/or digital audio files is strictly prohibited except for your personal use.
• The company names and product names in this Owner’s Manual are the trademarks or registered trademarks of their respective companies.
• The screen displays as illustrated in this Owner’s Manual are for instructional purposes, and
may appear somewhat different from the screens which appear on your computer.
• Future upgrades of application and system software and any changes in specifications and
functions will be announced separately.
Windows Operation
This owner’s manual assumes that you are already familiar with basic Windows operation. If you
are not, please refer to the owner’s manual which came with your Windows software before
using SW1000XG.
3
Page 4

SW1000XG Features
AWM Wave Table
• Using the AWM2 (Advanced Wave Memory 2) tone generator, the wave table built into the SW1000XG
offers high quality sound with 1267 normal voices and 46 drum kits playing with 32 part/64 polyphony
(the maximum number of simultaneous sounds). The quality of sound rivals that of Yamaha’s MU100 tone
generator, which is top-class, even among tone generators for personal computer-based music system.
Full Array of Effects
• The SW1000XG comes equipped with a total of six effect blocks: reverb (12 types), chorus (14 types),
variation (70 types), insertion 1/2 (43 types for each), and five band multi EQ (four types). The
SW1000XG does more than offer effects for an ensemble as a whole. It also lets you craft detailed
effect settings for each instrument part, creating an elaborate world of sound using just one sound card.
The effects can be applied not only to the internal tone generator, but also to input from external
audio sources such as wave data (digital audio) or to microphone input.
GM/XG Compatible
• Because the SW1000XG sound card is compatible with the GM standard and Yamaha’s exclusive XG
extensions to GM, you can enjoy playing commercially available GM and XG song collections with
high quality sound.
GM
GM (General MIDI System Level 1) is an addition to the MIDI standard which ensures that any
GM-compatible music data can be accurately played by any GM-compatible tone generator,
regardless of maker. With the GM standard, you can assign any of the 128 GM-compatible voices
to each of the 16 parts, or MIDI channels. (Channel 10 is fixed as the drum part.)
XG
XG is a new MIDI format created by Yamaha which significantly improves and expands upon the
General MIDI standard by providing a greater variety of high-quality voices plus considerably
enhanced effect operation—while being fully compatible with GM.
MIDI Interface Function
• You can connect your sound card to an external MIDI keyboard or other MIDI device using the MIDI
adapter cable that was included with your SW1000XG.
Expanded Capability with an XG Plug-In Board
• You can add expanded functions like a VL (physical model) tone generator to the standard AWM2 tone
generator in your SW1000XG sound card by simply connecting an XG Plug-In System compatible plugin option board (PLG100 series).
Digital Audio Recording/Playback
• The SW1000XG features six stereo wave playback devices and two stereo wave recording devices.
Among the two stereo recording devices, one is for external audio input (A/D input) only, and the
other mixes external audio input (A/D input), AWM2 tone generator sound, and wave tracks in the
sequence software.
Using the included XGworks for SW1000XG software as an example, wave data on multiple tracks can
be sent to the SW1000XG sound card audio parts (maximum 12 parts), and played simultaneously with
each part having effects applied.
Mic/Line input can be recorded on a wave track (in either stereo or mono) in time with playback of
MIDI tracks (or MIDI tracks and wave tracks). With this feature, it’s easy to lay down multiple recordings for things like vocals, with the AWM2 tone generator of the SW1000XG playing in the background.
When you make a song using this feature, you can play back all the MIDI tracks and wave tracks
simultaneously, then record the entire output together on a single wave track. When you do this, all
the tracks of a song can be united into one as wave data, then mastered. The mastered audio data can
then be used as a file for writing on a CD-R disk.
Digital Output
• Stereo digital out (S/PDIF) connector is equipped on the SW1000XG. Also, when you connect an
optional digital mixing card (DS2416), you can send digital output from the SW1000XG to the DS2416
on one pair of stereo outputs and six individual outputs. This means that even if no external digital
mixer is available, you can control every aspect of your music, including digital mixing, from within
your computer.
4
Page 5

Table of Contents
Introduction .......................................................................................................3
Special Notices ..............................................................................................................................3
Windows Operation......................................................................................................................3
SW1000XG Features ...........................................................................................4
Before Using .......................................................................................................6
Package Contents ..........................................................................................................................6
Items You Will Need that Are Not Included ...............................................................................6
Introducing the Included Software ..................................................................7
SW1000XG Sound Card Connections ...............................................................9
The Terminals on the SW1000XG................................................................................................9
Installing Your Sound Card ........................................................................................................10
Installing the Plug-In Board .......................................................................................................12
Installing the Digital Mixing Card ..............................................................................................12
Installation of the Driver.................................................................................13
Installing the driver for Windows95 OSR2 (4.00.950B)............................................................13
Installing the driver for Windows95 (4.00.950 or 4.00.950A) ..................................................15
Installation of the Software.............................................................................16
Installing XGworks for SW1000XG and Wave Editor TWE......................................................16
Installing XG Plug-In Software...................................................................................................19
SW1000XG Overview and Features.................................................................22
Sound Module Modes .................................................................................................................22
Voices ...........................................................................................................................................22
Selecting Voices ...........................................................................................................................23
Effect Types .................................................................................................................................23
A/D Input ....................................................................................................................................24
About the Plug-In System...........................................................................................................24
Supplementary Items for XGworks 2.0..........................................................25
Simultaneous Playback of Multiple Wave Tracks and Playback Part-Way Through ..............25
System Setup Dialog ...................................................................................................................25
Track View Window ...................................................................................................................28
XG Editor Window......................................................................................................................29
Wave Data Can Also Be Saved in a Song .................................................................................31
Opening the Wave Editor TWE..................................................................................................31
SW1000XG Mixer ........................................................................................................................32
MIDI Implementation Chart............................................................................40
Specifications of the SW1000XG Sound Card ................................................42
Troubleshooting...............................................................................................43
* The screen displays as illustrated in this manual are for instructional purposes, and may appear somewhat different from
the screens which appear on your computer.
5
Page 6

Before Using
Package Contents
Before using your new SW1000XG, check that all the items below are included in the package. In
the rare case that some item is missing, contact the store where you purchased your sound card
as soon as possible.
SW1000XG sound card
• MIDI adapter cable (1)
• Plug-in board connection cable (1)
• Spacers for plug-in board (4)
CD-ROM
Owner’s Manual (this book)
Items You Will Need that Are Not Included
To use your SW1000XG sound card and the included software, you will also need the following
hardware and software:
Computer: CPU/Memory An IBM compatible personal computer
with a 166 MHz or higher Pentium CPU,
and at least 32 MB of memory.
Hard Disk To use the software included with
SW1000XG, the software and drivers must
be installed. To install and use the software, at least 20 MB of hard disk space is
required.
CD-ROM Drive All the software that came with your sound
card is included on the supplied CD-ROM.
To install the software and to read the
demo songs, a CD-ROM drive is required.
Mouse Operations in the included software are
mainly done using a mouse.
PCI Expansion Slot To install the sound card, an empty PCI
slot is required.
Operating System Windows 95 is required.
If the Windows 95 version installed on your computer is OSR2 or higher, you can use IRQ sharing. Because versions of Windows 95 earlier than that do not allow IRQ sharing, conflicts with
other boards may happen or installation may not be possible. Should this occur, change the IRQ
settings or remove the conflicting board.
n You can check which version of Windows 95 is installed on your computer by clicking [My Computer], then
[Control Panel], then [System]. If the version number displayed on the [General] page is 4.00.950 B, you have OSR2.
If the number is 4.00.950 or 4.00.950 A, you have a previous version of Windows 95.
6
Page 7

Introducin
g
the
Included Software
The software programs that are included in this package are introduced here. For information
about installing each of them, see “Installation of the Software” on page 16.
• XGworks for SW1000XG
This is MIDI sequence software for Windows 95. Besides letting you enter and edit MIDI data,
XGworks supports digital recording and features an XG Editor that makes it easy to edit the XG
voices. These and other advanced features are just the tools you need to enjoy creating high
quality music. For details about XGworks, see the included XGworks 2.0 Owner’s Manual (PDF
file in the supplied CD-ROM’s “Document” folder).
n To view PDF files, you must first install the Acrobat Reader. A program for doing this has been provided in the
Acrobat folder on the CD-ROM that came with your SW1000XG sound card. To install Acrobat Reader, doubleclick on the ar32e301.exe installation program in that folder.
Because the version of XGworks in this package is an upgrade specially developed for
your SW1000XG sound card, some important supplemental information has been
included in this manual, starting from page 25. Please read this information together
with your XGworks manual.
• Wave Editor TWE
This software lets you edit the waveform data in wave files (extension .WAV) that have been
recorded onto WAVE tracks in XGworks. Wave files can also be recorded using Wave Editor
TWE. For detailed information about using this program after installation, click on the [Start]
button in Windows 95, then select [YAMAHA XGworks for SW1000XG] from the [Program]
menu. Selecting [WAVE Editor TWE Manual] will display the online manual for the wave editor
(PDF file).
n To view PDF files, you must first install the Acrobat Reader. A program for doing this has been provided in the
Acrobat folder on the CD-ROM that came with your SW1000XG sound card. To install Acrobat Reader, doubleclick on the ar32e301.exe installation program in that folder.
n Besides wave files with the extension .WAV, the Wave Editor TWE software also supports recording and editing
AIFF files. However, these files cannot be used in XGworks.
• VL Visual Editor
The VL Visual Editor is editing software for the optional PLG100-VL board (→ P. 24) sold separately. For detailed information on using it, install the software, then start the VL Visual Editor
in XGworks. Select [Contents] from the [Help] menu to read the online help.
• VH Effect Editor
The VH Effect Editor is editing software for the optional PLG100-VH board (→ P. 24) sold separately. For detailed information on using it, install the software, then start the VH Effect Editor
in XGworks. Select [Contents] from the [Help] menu to read the online help.
• DX Easy Editor
The DX Easy Editor is simple editing software for the optional PLG100-DX board (→ P. 24) sold
separately. For detailed information on using it, install the software, then start the DX Easy
Editor in XGworks. Select [Contents] from the [Help] menu to read the online help.
7
Page 8

• DX Simulator
The DX Simulator is editing software for the optional PLG100-DX board (→ P. 24) sold separately. Using exactly the same user interface as the famous Yamaha DX7, you can create finelycrafted sounds. For detailed information on using this program, install the software, then start
the DX Simulator in XGworks. Select [Contents] from the [Help] menu to read the online help.
• SW1000XG Windows95 Driver
This driver is necessary for playing sounds using the SW1000XG sound card. See page 13 for
instructions on installing this driver.
• SW1000XG Demo Songs
The SW1000XG demo songs showcase the high quality expressive power of the SW1000XG
sound card. Since they feature both MIDI and audio tracks, you can enjoy them by playing
them in XGworks for SW1000XG.
They are included in the supplied CD-ROM’s “Demo” folder.
n Besides the SW1000XG demo songs with both MIDI and audio tracks, other demo songs that are standard MIDI
files have also been provided in this package. These standard MIDI files will be installed together with XGworks.
• SW1000XG Data Lists
The voice list, materials about the effects, and the MIDI data format for your SW1000XG sound
card have all been provided in PDF file format for your reference. They are collected in the file
“Data_E.PDF,” which is in the Document folder of the CD-ROM that came with your sound
card.
n To view PDF files, you must first install the Acrobat Reader. A program for doing this has been provided in the
Acrobat folder on the CD-ROM that came with your SW1000XG sound card. To install Acrobat Reader, doubleclick on the ar32e301.exe installation program in that folder.
8
Page 9

SW1000XG Sound
Card Connections
The Terminals on the SW1000XG
Before handling the sound card, make sure to eliminate any static electricity in your clothes or body by touching a
metal surface that is definitely grounded. Also, be careful to avoid touching any parts on the sound card’s circuit
board, or any of the connectors.
To XG plug-in board connector
To Serial In Connector
Powered speakers
MIDI Keyboard
Plug-In Board (PLG 100 series)
Microphone, etc.
DAT
00:00:00
DAT, etc.
MIDI KEYBOARD CBX-K1
MIDI IN
MIDI OUT
MIDI OUT
MIDI IN
MIDI adapter cable (included)
1
2
3
4
5 6
Digital Mixing Card (DS2416)
SW1000XG
1 External Audio Input (A/D input) Terminal
This terminal is stereo line input for audio signals from external devices such as a mike, guitar, bass, or CD player. It connects to a stereo mini-jack cable.
2 Line Out L/R Terminal
This terminal is for external output of audio signals in stereo. It connects to an audio device
or mixer with RCA pin jack cables.
The white terminal is L (left) and the red terminal is R (right).
3 Digital Out Terminal
This terminal is for digital output of audio signals in stereo. It connects to a digital audio
device or mixer with digital input through a S/PDIF type cable.
4 MINI DIN 6 Pin Terminal
This terminal is for connecting to an external MIDI device such as a keyboard, using the
included MIDI adapter cable.
5 Plug-In Board (PLG100 Series) Connector
This terminal connects to an optional plug-in board compatible with the XG plug-in system
(PLG100 series). These boards can be used to expand the functions of the XG tone generator
that is standard on the SW1000XG sound card.
6 Digital Mixing Card (DS2416) Connector
This terminal connects to the digital mixing card (DS2416) sold separately. Output from the
SW1000XG can be sent to a digital mixing card equivalent to the Yamaha O2R digital mixer
over a pair of stereo outputs and six individual outputs. Even when no external digital mixer
is available, you can control every aspect of your music including digital mixing — all from
within your computer.
9
Page 10

Installing Your Sound Card
The SW1000XG sound card can be installed in your computer by simply following these steps:
n Before installing your sound card, check to be sure that there is an empty PCI card slot in your computer. If you
are going to use a slot where there is already a PCI card installed, uninstall the driver software for that card, then
turn off the power to the computer and remove the card. Restarting the computer after doing this will cause it to
recognize that the card that was in that slot has been completely removed. After completing this series of operations, turn off the power to your computer again before following the installation procedure below.
n If you will be installing a plug-in board (PLG100 series) or digital mixing card (DS2416) on your sound card, be
sure to also read the instructions for doing that (→ P. 12).
1. Unplug the computer power cord from the electrical outlet.
There is a serious danger of electric shock if you attempt to install the sound card while the computer power is
turned on. Be absolutely sure to turn OFF the power and unplug the computer before proceeding with the installation.
2. Remove the cover from the main body of the computer.
n The method for removing the cover and the location of the PCI slots varies for each computer model. Refer
to the owner’s manual for your computer to obtain this information.
3. Remove the cover for the PCI slot.
10
Page 11

4. Remove the sound card from its anti-static bag.
Before handling the sound card, make sure to eliminate any static electricity in your clothes or body by touching a metal surface that is definitely grounded. Also, be careful to avoid touching any parts on the sound
card’s circuit board, or any of the connectors.
5. Insert the connector on the sound card into the connector on the computer. Hold the card
by both ends with both hands, and slowly push the card into the computer slot. When doing
this, make sure that you are not installing the card upside down.
6. Secure the sound card with the screw if this is required in your computer, then reinstall the
cover for the main body of the computer.
n The method for securing the PCI expansion card, and for reinstalling the cover varies for each computer
model. Refer to the owner’s manual for your computer to obtain this information.
7. Connect the external devices you will use with your sound card (such as speakers, mixer, or
MIDI keyboard) to the appropriate connectors on the SW1000XG.
n When removing your sound card, follow the steps above in reverse order.
11
Page 12

Installing the Plug-In Board
Refer to the illustration below to install an optional plug-in board (PLG100 series).
Making sure that the plug-in board is facing in the correct direction, carefully press the cable
from the plug-in board into the plug-in board connector on the sound card.
SW1000XG sound card
Connector to SW1000XG
Spacer
n This should be done before the sound card is installed in the computer.
n For information about each plug-in board, see page 24 and the owner’s manual that comes with each board.
Connector to plug-in board
Yellow line
Hooks To plug-in board
To SW1000XG
Make sure that the flat cable is
facing in the correct direction.
Flat cable's
connector
First, put the four spacers in
the SW1000XG, then fit
the plug-in board above
the sound card.
Yellow line
Spacer
Plug-in board
Installing the Digital Mixing Card
Refer to the illustration below to install an optional digital mixing card (DS2416).
Making sure that the flat cable from the digital mixing card (DS2416) is facing in the correct
direction, carefully press the cable into the digital mixing card connector on the sound card.
Green line
Connector to SW1000XG
Connector to DS2416
SW1000XG sound card
Make sure that
the flat cable from
the DS2416 is
facing in the
correct direction.
DS2416
Green line
Serial out Connector
Serial In Connector
n This should be done before the sound card is installed in the computer.
n For information about the digital mixing card (DS2416), refer to the owner’s manual that comes with the card.
Output from the SW1000XG to the DS2416 digital mixing card
In the initial setting, all parts of the SW1000XG are mixed in stereo and sent to the DS2416.
However, you can send a specific part as an individual output to the DS2416, apart from the
stereo output.
The SW1000XG is equipped with 6 individual outputs and each part (either MIDI multi part
or audio part) can be assigned to any of the individual out 1 to 6, 1+2, 3+4 or 5+6.
For details, see MIDI Data Format tables <1-6> and <1-7>(MIDI Parameter Change tables),
descriptions on “Output Select”.
The Output Select can be set using the XGworks’ XG Editor Window (The properties dialog
box which opens when clicking on the [DETAIL] button of the part unit). If you are opening
the multi part’s properties dialog box, the Output Select can be set in the General page of
the Detail screen.
12
Page 13

Installation of the
Driver
To use SW1000XG sound card, the appropriate driver (SW1000XG Windows95 Driver) should be
properly installed in your computer. The driver can be installed from the supplied CD-ROM by
following the steps described below.
n Before installing the driver, make sure that the sound card itself is installed in the computer. (→ P. 10)
n Open the “General” page of the System Properties in your Windows’ Control Panel. If your Windows95 version is
shown as “4.00.950B”, refer to “Installing the driver for Windows95 OSR2 (4.00.950B)”. If your Windows95 version
is shown as “4.00.950” or “4.00.950A”, refer to “Installing the driver for Windows95 (4.00.950 or 4.00.950A)”.
Installing the driver for Windows95 OSR2 (4.00.950B)
1. Turn on the power of your computer. If you turn on it for the first time after installing the
sound card in your computer, the Updated Device Driver Wizard will appear automatically.
2. Insert the supplied CD-ROM in the CD-ROM drive and click [Next]. The message saying
“Windows was unable to locate a driver for this device” will be displayed.
13
Page 14

3. Click [Other Locations]. Select Other Location dialog box will be displayed.
4. Type the name of the CD-ROM drive (E:\, F:\, etc.) and the folder (Win95drv) in the
“Location” box.
e.g. E:\Win95drv, F:\Win95drv
5. Click [OK]. The message saying “Windows found the following updated driver for this
device” will be displayed.
6. Click [Finish]. Insert Disk dialog box will be displayed.
14
Page 15

7. Click [OK]. Copying Files dialog box will be displayed.
8. Type the name of the CD-ROM drive and the folder in the “Copy files from:” box, as you did
in step 4.
e.g. E:\Win95drv, F:\Win95drv\
9. Click [OK]. Files will be copied.
10.
Restart the computer.
This completes the installation of the driver.
Installing the driver for Windows95 (4.00.950 or 4.00.950A)
1. Turn on the power of your computer. If you turn on it for the first time after installing the
sound card in your computer, the New Hardware Found window will appear automatically.
2. Insert the supplied CD-ROM in the CD-ROM drive, select “Driver from disk provided by
hardware manufacturer” and click [OK]. Install From Disk dialog box will be displayed.
3. Type the name of the CD-ROM drive (E:\, F:\, etc.) and the folder (Win95drv) in the “Copy
manufacturer’s files from:” box.
e.g. E:\Win95drv, F:\Win95drv
4. Click [OK]. Insert Disk dialog box will be displayed.
5. Click [OK]. Copying Files dialog box will be displayed.
6. Type the name of the CD-ROM drive and the folder in the “Copy files from:” box, as you did
in step 3.
e.g. E:\Win95drv, F:\Win95drv\
7. Click [OK]. Files will be copied.
8. Restart the computer.
This completes the installation of the driver.
15
Page 16

Installation of the
Software
This package contains software which can bring out full advantage of the SW1000XG sound card,
including MIDI sequence software XGworks for SW1000XG, Wave Editor TWE and various XG
plug-in software.
This section explains you how to install them from the supplied CD-ROM.
Installing XGworks for SW1000XG and Wave
Editor TWE
The following software can be installed by following the steps described below. For information
on each software, see page 7.
• XGworks for SW1000XG
• SW1000XG Mixer
• Wave Editor TWE
n SW1000XG Mixer is a plug-in software for XGworks for SW1000XG, which can control mixing of audio parts when
you record wave data to XGworks’ wave track and/or when you play back XGworks’ wave track.
1. Insert the supplied CD-ROM in the CD-ROM drive.
2. Open “My Computer” by double-clicking its icon.
3. Double-click the CD-ROM icon and then double-click Setup.exe contained in the CD-ROM’s
“XGworks” folder. Welcome dialog box will appear.
16
Page 17

4. Click [Next]. Software License Agreement dialog box will appear. Read this thoroughly before
moving on to the next step.
5. Click [Yes]. Choose Destination Location dialog box will appear. If you want to change the
destination, click [Browse] and select the destination.
6. Click [Next]. Setup Type dialog box will appear. You can select the type of installation.
n Selecting “Typical” is recommended for most users.
17
Page 18

7. Click [Next]. Select Components dialog box will appear. You can select the preferred applica-
tion language version.
8. Click [Next]. Select Program Folder dialog box will appear. You can change the folder name
to which the program will be installed.
9. Click [Next]. Files will be copied.
10.
Restart the computer.
This completes the installation of XGworks for SW1000XG, SW1000XG Mixer and Wave Editor TWE.
18
Page 19

Installing XG Plug-In Software
The following software can be installed by following the steps described below. For information
on each software, see page 7.
• VL Visual Editor
• VH Effect Editor
• DX Easy Editor & DX Simulator
n Before installing the XG plug-in software, make sure that the XGworks for SW1000XG is installed in the computer.
1. Insert the supplied CD-ROM in the CD-ROM drive.
2. Open “My Computer” by double-clicking its icon.
3. Double-click the CD-ROM icon and then double-click Setup.exe contained in the CD-ROM’s
“Plug” folder. Welcome dialog box will appear.
4. Click [Next]. Software License Agreement dialog box will appear. Read this thoroughly before
moving on to the next step.
19
Page 20

5. Click [Yes]. Before Setup dialog box will appear. Read this thoroughly before moving on to the next step.
6. Click [Yes]. Language dialog box will appear. You can select the preferred application lan-
guage version.
7. Click [Next]. Programs dialog box will appear. You can select which plug-in software to be
installed.
20
Page 21

8. Click [Next]. Choose Destination Location dialog box will appear. If you want to change the
destination, click [Browse] and select the destination.
n To use XG plug-in software on XGworks, these plug-ins should be installed in the folder containing
XGworks.exe. (Normally, “XGworks for SW1000XG” folder located in the Program Files’ Yamaha folder.)
9. Click [Next]. Files will be copied and then the message saying “Setup is completed” will
appear.
10.
Click [OK].
This completes the installation of XG plug-in software.
21
Page 22

SW1000XG Overview
and Features
Sound Module Modes
The SW1000XG features both XG and TG300B sound module modes. Normally, the SW1000XG
plays in XG mode. However, since it automatically recognizes which mode to select based on
incoming MIDI data, you can easily change the mode by MIDI System Exclusive messages that
you program in sequencer data, at the head of your composition.
n Turning on the power of your computer with the SW1000XG sound card installed will automatically initialize all
SW1000XG settings, or parameter values.
n Since the SW1000XG requires about half a second to change modes when it receives a mode change message, be
sure to insert at least one blank measure at the top in order to allow enough time for the mode to change before
your actual music data begins.
XG Mode
In XG mode the SW1000XG will play XG-compatible multitimbral data, as well as multitimbral
data created for the GM System Level 1 format.
In XG mode the SW1000XG can:
• Play up to 32 Parts + 14 Audio Parts.
• Choose from 1,074 Normal Voices and 36 Drum Voices.
TG300B Mode
In TG300B mode the SW1000XG will play multitimbral music data created for TG300B-compatible
tone generators. TG300B mode also provides compatibility with the GM System Level 1 format.
In TG300B mode the SW1000XG can:
• Play up to 32 Parts + 14 Audio Parts.
• Choose from 614 Normal Voices and 10 Drum Voices.
Voices
An SW1000XG Voice can be made up of one or two elements (i.e., sounds), depending on the
complexity of the Voice. Many Voices are made up of only one element. Two-element Voices are
made up of two one-element Voices, and may be configured in a variety of ways.
The number of elements in use determines the maximum number of simultaneous notes
(polyphony) which the SW1000XG can play at any given time, depending on the amount of
incoming MIDI Note data. For details about the number of elements used in each Voice, see the
XG/TG300B Normal Voice Lists of the “Data_E.pdf” file contained in the supplied CD-ROM’s
“Document” folder.
Normal Voices and Drum Voices
The SW1000XG has two types of Voices—Normal Voices and Drum Voices. (In this Owner’s
Manual, in general the word Voice refers to a Normal Voice.)
The distinction between a Normal Voice and a Drum Voice is as follows:
• A Normal Voice is simply a pitched Voice which can be played on a musical scale from low to
high, such as a piano or trumpet. The SW1000XG has 1,267 Normal Voices.
• A Drum Voice is a complete set of drum and other percussion sounds, each sound having a
fixed pitch. Each sound is assigned to a specific MIDI Note number (which also corresponds to
a key on a MIDI keyboard). The SW1000XG has 46 Drum Voices.
22
Page 23

Maximum Polyphony
The SW1000XG can play a maximum of 64 notes polyphony at once. However, the actual number of notes that will play at any given time is determined by the number of elements in use
across the 32 Parts.
For example, if you use only one-element Voices, you can achieve the full 64 notes maximum
polyphony. If you use one or more two-element Voices, however, maximum polyphony will be
reduced accordingly.
The SW1000XG is a last-note-priority tone generator, which means that if it receives more than 64
notes of MIDI Note data at any time, earlier (first) notes will automatically cut off to accommodate the most recent (last) incoming notes.
Part Priority
Each of the SW1000XG’s 32 Parts corresponds to each of the 32 MIDI channels. If incoming Note
data exceeds the maximum polyphony, the SW1000XG will prioritize which Parts are played first,
in the following order, from higher priority to lower:
Channel 10 (Drum Part), 1, 2, 3, 4, 5, 6, 7, 8, 9, 11, 12, 13, 14, 15, 16, 26 (Drum Part), 17, 18,
19, 20, 21, 22, 23, 24, 25, 27, 28, 29, 30, 31, 32
Therefore, if you are creating your own music data using sequencer software, you should assign
your most important Parts (such as melody and bass) to higher priority MIDI channels (i.e., lower
MIDI channel numbers) in order to preserve the integrity of your composition. Note that with the
GM System Level 1, the Drum Part is always assigned to MIDI channel 10.
Selecting Voices
The SW1000XG not only contains the 128 basic GM Voices and GM drum set, but many variation
Voices as well—to give you access to a total of 1,267 Normal Voices and 46 Drum Voices.
In XG mode, the basic 128 GM Voices can be accessed by selecting Program numbers 1 – 128.
Other Voices can be accessed by selecting both bank numbers and Program numbers. The Voice
bank can be selected via MIDI Control Change Bank Select (MSB and LSB) messages. In XG
mode, the MSB value determines the Voice type (Normal, Drum), while the LSB value actually
selects the bank (excluding the SFX bank).
When the SW1000XG is in TG300B mode, the Voice banks can be selected with appropriate MSB
numbers, as LSB is fixed.
Lists of all available Voices along with bank and program numbers are provided on the Voice
Lists of the “Data_E.pdf” file contained in the supplied CD-ROM’s “Document” folder.
Note that the 128 MIDI Program Change numbers consist of 0 through 127, whereas the 128
SW1000XG program numbers consist of 1 through 128. Depending on the sequencing hardware
and software you use, you may have to convert the SW1000XG program numbers to the appropriate Program Change numbers.
Effect Types
The SW1000XG features dozens of extremely versatile digital effects generated by Yamaha’s
advanced Digital Signal Processing (DSP) technology—which add a completely new dimension to
your SW1000XG’s sound.
These effects are configured, or routed, in one of two ways—to be either a System Effect or an
Insertion Effect. The difference is as follows:
SYSTEM EFFECT Applies the designated effect to all 32 Parts.
INSERTION EFFECT Applies the designated effect to only one specific Part.
Reverb and Chorus are “System Effects”, and Insertion 1 and 2 are “Insertion Effects”. The
Variation effect can be configured as either a “System Effect” or an “Insertion Effect”.
* Effects can be applied to Audio Parts as well as the internal AWM2 voices of the SW1000XG.
23
Page 24

A/D Input
The SW1000XG features A/D Input jack for connection of external audio sources such as a microphone, guitar, bass, or CD player.
Audio signal received via A/D INPUT jack is processed through the effect sections and mixed
with the internal AWM2 voices of the SW1000XG.
If you use the supplied “XGworks for SW1000XG”, you can record audio signal via A/D INPUT
jack to its WAVE tracks.
About the Plug-In System
Your SW1000XG sound card is compatible with the “XG Plug-In System.” When you install one of
the optional XG Plug-In Boards on the SW1000XG, the functions of the SW1000XG and the XG
Plug-In board will be organically combined, just as though the XG Plug-In Board had been built
right into the SW1000XG circuits.
If one of the tone generator-type XG Plug-In Boards is installed on the SW1000XG, one part of
the SW1000XG will be assigned to the tone generator on the plug-in board, while the parts of the
SW1000XG itself will remain exactly the same. All effects—system effects, insertion effects, system
EQ, and others—can be applied.
When an effect-type plug-in board is mounted on the SW1000XG, its effects will function as XG
insertion effects.
About Optional XG Plug-In Boards
PLG100-VL
This XG Plug-In Board is equipped with an S-VA tone generator, which generates sounds based
on physical models. There are 256 voices built in, from realistic orchestral instrument voices to
voices for instruments that exist only in the imagination. You can perform with the same awesome expressive power as the VL70-m virtual acoustic tone generator.
Using the VL Visual Editor included on the CD-ROM that came with your sound card, it’s easy
and fun to create your own sounds, even without knowing the physical models.
PLG100-VH
This XG Plug-In Board is equipped with harmonic effects optimized for vocals. Four effects are
built in, letting you do things like add harmony voices to vocals input from the A/D input terminal just by playing the desired notes on the keyboard (vocoder harmony), or adding the harmony that corresponds to a specified chord (chordal harmony). In addition, you can change the
tone of the input, and have fun with unique effects like chorus effects and voice change effects.
You can edit the harmony effects with the VH Effect Editor that is included on the CD-ROM
that came with your sound card.
PLG100-DX
This XG Plug-In Board is equipped with a 16 polyphony FM tone generator that works just like
the well-known Yamaha DX7. This board lets you feature the flashy sounds of an FM tone generator in your song.
You can enjoy creating the FM tone generator sounds on your computer screen using the DX
Easy Editor and DX Simulator that are included on the CD-ROM that came with your sound
card.
24
 Loading...