

Page 1
Wall Mounting Unit
model
PWK-242
Thank you for purchasing the Wall Mounting Unit.
To ensure correct usage, please read this instruction manual thoroughly. After reading, please store this
manual in a safe place for future reference.
This pedestal is for use only with the following models:
• PDM-4210
• PDM-4210E
When installing the plasma monitor using this wall mounting unit, all installation work must be performed
by a qualified contractor or dealer personnel. The customer should never attempt to perform this installation work.
• Before installing the wall mounting unit, please read these instructions and the plasma monitor user’s
manual carefully to ensure installation is carried out correctly.
• After installation, please give the instructions to the customer for future reference.
Installation Instructions
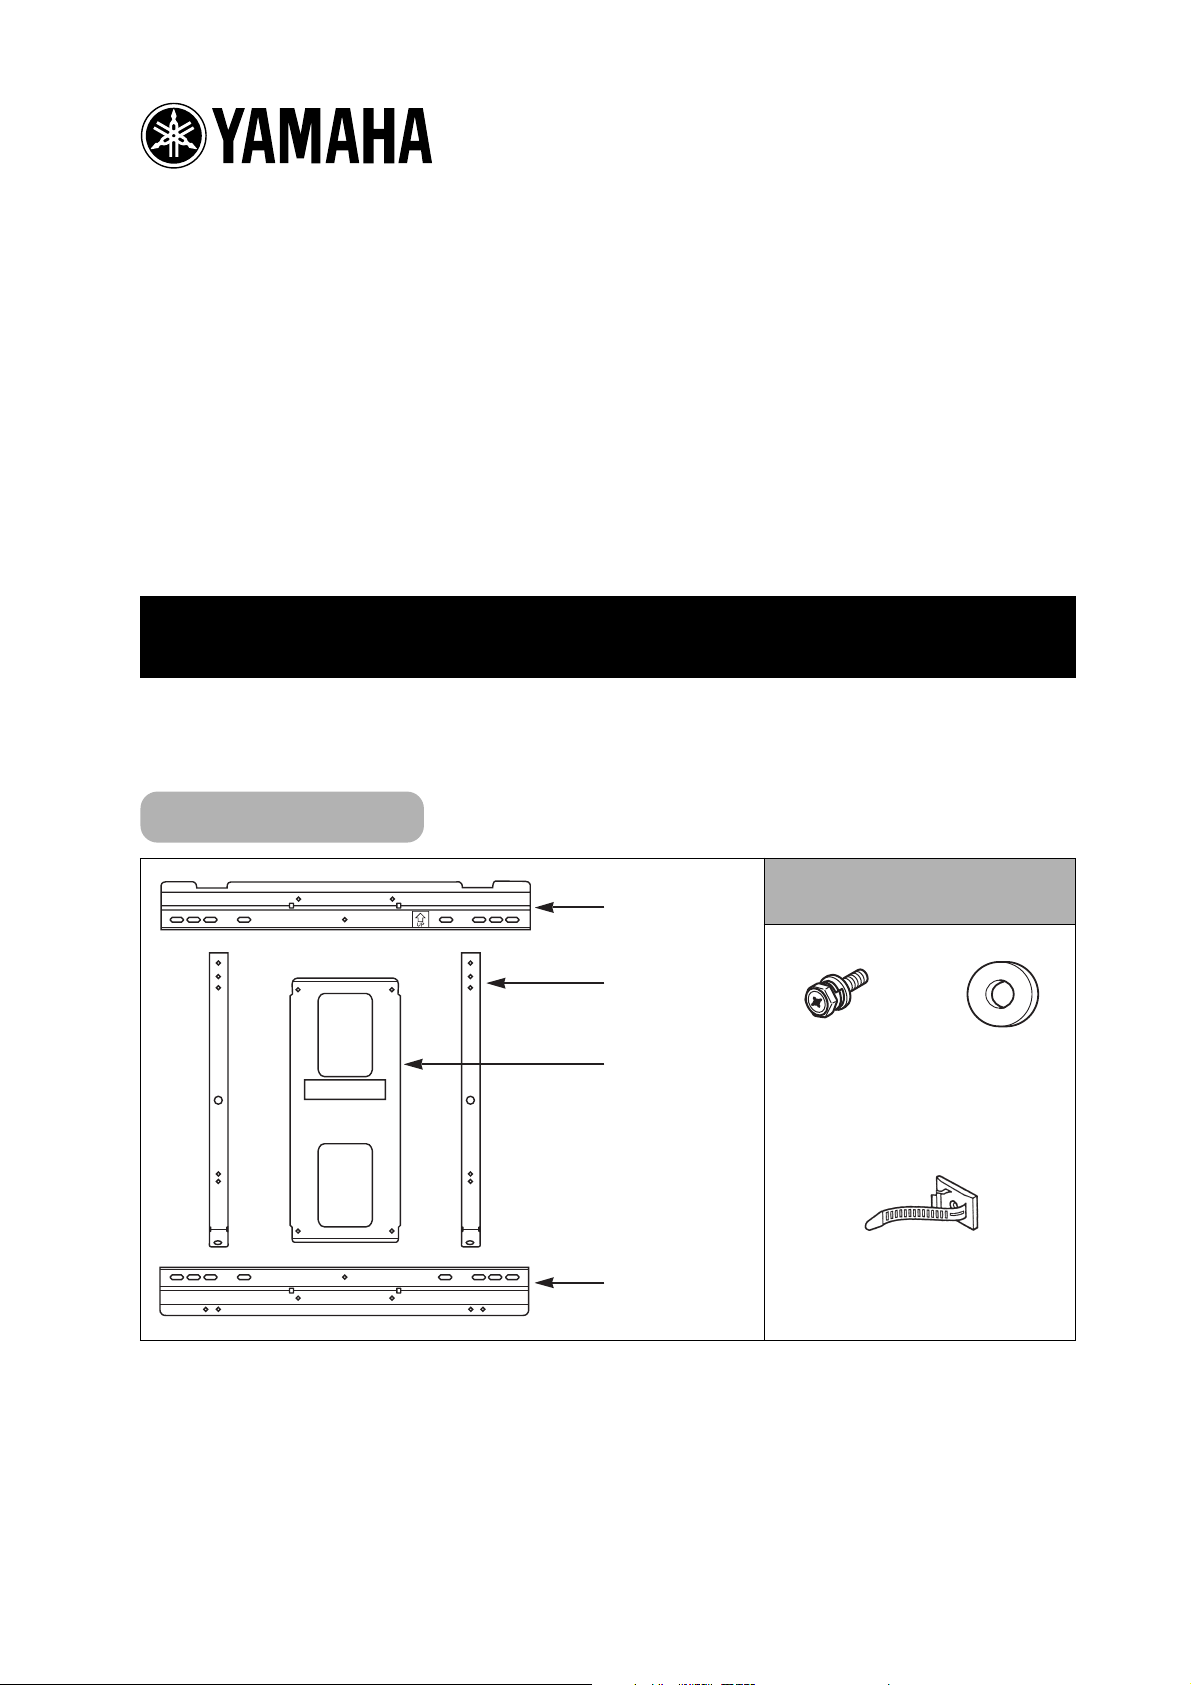
Component list
Included in the component
Wall mounting unit
(A)
bag
Plasma monitor
mounting bracket
Wall mounting unit
(B)
Wall mounting unit
(C)
M6x18 screws
x 10
Flat washer for
M5–6 screws
x 8
Cable clamp
x 2
1
Page 2

Component list
SAFETY INSTRUCTIONS
1. Always follow the instructions set forth in this manual when installing the plasma monitor using this
wall mounting unit.
Improper or inadequate installation could cause the plasma monitor to fall and injure someone.
2. Two or more persons are required to install and remove the plasma monitor.
If two or more persons are not present, the plasma monitor may fall and injure someone.
3. The installation must be secure enough to bear the weight of the plasma monitor, the wall mounting
unit, and other hardware indefinitely, and must also be secure enough to withstand vibration. (Total
weight of the plasma monitor and wall mounting unit is approximately 37kg.)
The plasma display may fall and injure someone if the installation is inadequate.
4. To ensure safety, tighten all bolts and screws securely.
Loose screws could cause the plasma monitor to fall and injure someone.
5. Use only the parts provided with the wall mounting unit, and any other parts that are specified in this
manual.
Using other parts could cause the plasma monitor to fall and injure someone.
6. Do not modify the wall mounting unit or the parts provided with the mounting unit.
Modifying the wall mounting unit or the other parts could cause the plasma monitor to fall and injure
someone.
7. Be sure to leave enough open space around the unit to allow heat generated by the plasma monitor.
Maintain at least 10cm (3 15/16 inches) at the top, bottom and sides of the plasma monitor.
The plasma monitor has air intake holes and outlet holes. Failure to provide adequate space around
the unit may cause a fire.
8. Do not install the plasma monitor in a location near an air conditioning vent or in a location subject to
vibration.
Such conditions could have an adverse effect on the monitor, and could cause a fire or electric shock.
9. Do not install the plasma monitor in a location that is subject to high levels of dust or humidity.
Dust accumulating inside the plasma monitor could cause a short circuit that in turn could cause a fire
or electric shock.
10. Do not install the plasma monitor face up, sideways or upside down, or inclined on an angle.
Doing so may cause heat to build up inside the monitor, and may cause a fire.
Precautions for installation
• The wall mounting unit is for use in installing the plasma monitor on a vertical wall. Do not install the unit
on an inclined surface.
•To ensure correct operation of the plasma monitor, do not install it in any of the following places.
–Next to sprinklers or sensors
– Locations subject to vibration or shocks
– Close to high–voltage wires or electric motors
– Locations in direct contact with air expelled from heating devices
• When installing this wall mounting unit, use a fixing method appropriate to the type of wall.
• Do not install plasma monitor in locations with a temperature above.
2
Page 3

Installation
Assembling the Wall mounting unit
10 M6x18 screws
Using 4 M6x18 screws, assemble the wall mounting unit.
Notch
Wall mounting unit
(A)
Wall mounting unit
(B)
Wall mounting unit
(C)
Attaching the wall mounting unit to a wall
1. Prepare 4 sets of screws or anchors (commercially available) to suit the wall you wish to mount the
unit on.
2. Read this installation manual thoroughly, then decide on a suitable location for the plasma monitor.
3. The position of the outer edge and screen of the plasma monitor and screw holes on the wall mounting unit are depicted in the diagram below. Anchor the wall mounting unit and drill screw holes as indicated in the diagram.
• Check that the wall and screws you want to mount this unit on are strong enough to hold the plasma
monitor unit.
Screw holes 7x20
Plasma monitor
external dimensions
Screen
center
3
Page 4

4. Attach the wall mounting unit firmly to the
surface of the wall.
• When attaching the wall mounting unit,
drill at least 2 deep holes in the wall for
the mounting screws to a balanced
mounting.
Arranging cables
• When arranging power and signal cables on
the rear of the unit, use cable clips to prevent
damage to the cables.
Notch
Wall mounting unit
Ensure that you are
attaching the
mounting unit to a
strong support.
Use the washers
included as necessary.
Cable clip
Attaching mounting fixtures to the plasma display monitor
1. Remove the stand
(1) Remove the 4 screws from the rear of
the plasma display monitor and then
remove the stand.
(2) Remove the 4 continuous thread
screws attaching the earth on the rear
cover.
2. Attaching the plasma monitor bracket.
• Use 4 M6x18 screws to attach the moni-
tor mounting rack to the plasma monitor.
Remove the 4 screws
and the stand
Remove the 4 continous
thread screws
Second hole from
the top of the monitor mounting bracket
Fifth hole from the
top of the monitor
mounting bracket
4
Page 5

Mounting the plasma display monitor to the wall mounting unit
(1) Insert the hooked section on the top of the plasma monitor mounting bracket into the notch in the
top of the wall mounting unit and pull it down.
(2) Using 2 M6x18 screws, fix the mounting bracket firmly to the wall mounting unit.
(3) Check that the plasma display monitor is firmly attached to the wall, then connect the cables.
Notch
Wall mounting unit
Check that the
hooked section is
firmly seated in the
wall mounting unit.
Hooked section
Note
Connect speaker cables to the speaker terminals on the rear of the plasma display monitor prior to mounting it in the wall mounting unit. Connect the speaker
cables to the speakers after mounting the monitor in the mounting unit. For
instructions on attaching the speakers, refer to the speaker owner’s manual.
• Always use at least 2
people to carry the
plasma display monitor.
• Remove all the cables
and cords from the
plasma display monitor
before mounting it in the
wall mounting unit.
2 M6x18 screws
Plasma display monitor
mounting bracket
Item specifications
Weight : 2.6 kg
Main construction material : Steel plate
Surface treatment : Black electrostatic painting
Angle adjustment: Vertical screen position
5
 Loading...