

Page 1

DVD PLAYER
LECTEUR DE DVD
DVD-S550
OWNER’S MANUAL
MODE D’EMPLOI
BEDIENUNGSANLEITUNG
BRUKSANVISNING
GEBRUIKSAANWIJZING
ИНСТРУКЦИЯПОЭКСПЛУАТАЦИИ
G
DIGITAL VIDEO
Page 2

Important notes for users in the
U.K.
Mains plug
This apparatus is fitted with an approved 13
Amp plug. To change a fuse in this type of plug
proceed as follows:
Remove fuse cover and fuse.
1
Fix new fuse which should be a BS1362 5 Amp,
2
A.S.T.A. or BSI approved type.
Refit the fuse cover.
3
If the fitted plug is not suitable for your jack
outlets, it should be cut off and an appropriate
plug fitted in its place.
If the mains plug contains a fuse, this should
have a value of 5 Amp. If a plug without a fuse
is used, the fuse at the distribution board should
not be greater than 5 Amp.
Note: The severed plug must be disposed to avoid
a possible shock hazard should it be inserted into
a 13 Amp jack elsewhere.
How to connect a plug
The wires in the mains lead are coloured with
the following code: blue = neutral (N),
brown = live (L).
●
As these colours may not correspond with the
colour markings identifying the terminals in your
plug, proceed as follows:
– Connect the blue wire to the terminal
marked N or coloured black.
– Connect the brown wire to the terminal
marked L or coloured red.
– Do not connect either wire to the earth
terminal in the plug, marked E (or e) or
coloured green (or green and yellow).
Before replacing the plug cover, make certain
that the cord grip is clamped over the sheath of
the lead - not simply over the two wires.
Copyright in the U.K.
Recording and playback of material may require
consent. See Copyright Act 1956 and The
Performer’s Protection Acts 1958 to 1972.
VAROITUS
Muiden kuin tässä esitettyjen toimintojen säädön tai
asetusten muutto saattaa altistaa vaaralliselle säteilylle
tai muille vaarallisille toiminnoille.
DK
Advarsel: Usynlig laserstråling ved åbning når
sikkerhedsafbrydere er ude af funktion. Undgå
utsættelse for stråling.
Bemærk: Netafbryderen STANDBY/ON er
sekundært indkoblet og ofbryder ikke strømmen fra
nettet. Den indbyggede netdel er derfor tilsluttet til
lysnettet så længe netstikket sidder i stikkontakten.
N
Observer: Nettbryteren STANDBY/ON er sekundert
innkoplet. Den innebygdenetdelen er derfor ikke
frakoplet nettet så lenge apparatet er tilsluttet
nettkontakten.
S
Klass 1 laseraparat
Varning! Om apparaten används på annat sätt än i
denna bruksanvisning specificerats, kan användaren
utsättas för osynlig laserstrålning, som överskrider
gränsen för laserklass 1.
Observera! Strömbrytaren STANDBY/ON är
sekundärt kopplad och inte bryter inte strömmen från
nätet. Den inbyggda nätdelen är därför ansluten till
elnätet så länge stickproppen sitter i vägguttaget.
SF
Luokan 1 laserlaite
Varoitus! Laitteen käyttäminen muulla kuin tässä
käyttöohjeessa mainitulla tavalla saattaa altistaa
käyttäjän turvallisuusluokan 1 ylittävälle
näkymättömälle lasersäteilylle.
Oikeus muutoksiin varataan. Laite ei saa olla alttiina
tippu-ja roiskevedelle.
Toiminnanvalitsin STANDBY/ON on kytketty
toisiopuolelle, eikä se kytke laitetta irti sähköverkosta.
Sisäänrakennettu verkko-osa on kytkettynä
sähköverkkoon aina silloin, kun pistoke on
pistorasiassa.
VARO!
AVATTAESSA JA SUOJALUKITUS
OHITETTAESSA OLET ALTTIINA
NÄKYMÄTTÖMÄLLE LASERSÄTEILYLLE.
ÄLÄ KATSO SÄ TEESEEN.
VARNING
OSYNLIG LASERSTRÅLNING NÄR DENNA
DEL ÄR ÖPPNAD OCH SPÄRREN ÄR
URKOPPLAD. BETRAKTA EJ STRÅLEN.
!
i
Page 3
CAUTION
Use of controls or adjustments or performance
of procedures other than those specified herein
may result in hazardous radiation exposure.
ATTENTION
L’emploi de commandes, de réglages ou un
choix de procédures différents des
spécifications de cette brochure peut entraîner
une exposition à d’éventuelles radiations
pouvant être dangereses.
ACHTUNG
Die Verwendung von Bedienungselementen
oder Einstellungen oder die Durchführung von
Bedienungsvorgängen, die nicht in dieser
Anleitung aufgeführt sind, kann zu einem
Kontakt mit gefährlichen Laserstrahlen führen.
OBSERVERA
Användning av kontroller och justeringar eller
genomförande av procedurer andra än de som
specificeras i denna bok kan resultera i att du
utsätter dig för farlig strålning.
VOORZICHTIG
Gebruik van bedieningsorganen of instellingen,
of uitvoeren van handelingen anders dan staan
beschreven in deze handleiding kunnen leiden
tot blootstelling aan gevaarlijke stralen.
ПРЕДУПРЕЖДЕНИЕ
Использование органов управления или
настроек или выполнение процедур, отличных
от описанных в данном руководстве, могут
привести к опасному облучению.
INVISIBLE LASER RADIATION WHEN OPEN
CAUTION:
DO NOT STARE INTO BEAM
INVISIBLE LASER RADIATION WHEN OPEN
DANGER:
AVOID DIRECT EXPOSURE TO THE BEAM
The unit is not disconnected from the AC power source
as long as it is connected to the wall outlet, even if this unit
itself is turned off. This state is called the standby mode. In
this state, this unit is designed to consume a very small
quantity of power.
L’appareil n’est pas isolé de la source d’alimentation aussi
longtemps qu’il reste branché sur une prise murale, même
lorsqu’il est éteint. Il est alors dit en mode «Veille». Dans
ce mode, l’appareil consomme très peu de courant.
Das Gerät ist nicht vom Netz getrennt, solange der
Netzstecker noch mit der Wandsteckdose verbunden ist,
selbst wenn das Gerät ausgeschaltet wurde. Dieser
Betriebszustand wird als Bereitschaftsmodus bezeichnet. In
diesem Zustand nimmt das Gerät eine sehr geringe Menge
Strom auf.
Enheten är inte urkopplad från nätet så länge som den är
ansluten till vägguttaget även om enheten i sig självt är
avstängd. Detta kallas för beredskapsläge och i detta
tillstånd konsumerar apparaten minimalt med ström.
De stroomtoevoer naar het toestel is niet afgesloten
zolang de stekker nog in het stopcontact zit, zelfs niet als
het toestel zelf uitgeschakeld is. Deze toestand wordt
“standby” (waak- of paraatstand) genoemd. Het toestel is
ontworpen om in deze toestand.
Данное устройство не отсоединено от источника
переменного напряжения до тех пор, пока оно
подключено к настенной розетке, даже если само
данное устройство выключено. Это состояние
называется режимом готовности. В этом
состоянии данное устройство потребляет очень
малое количество электроэнергии.
CAUTION
VISIBLE AND INVISIBLE LASER RADIATION WHEN
OPEN. AVOID EXPOSURE TO BEAM.
ADVARSEL
SYNLIG OG USYNLIG LASERSTRÅLING VED ÅBNING.
UNDGÅ UDSÆTTELSE FOR STRÅLING.
ADVARSEL
SYNLIG OG USYNLIG LASERSTRÅLING NÅR DEKSEL
ÅPNES. UNNGÅ EKSPONERING FOR STRÅLEN.
VARNING
SYNLIG OCH OSYNLIG LASERSTRÅLNING NÄR
DENNA DEL ÄR ÖPPNAD. BETRAKTA EJ STRÅLEN.
VARO!
AVATTAESSA OLET ALTTIINA NÄKYVÄLLE JA
NÄKYMÄTTÖMÄLLE LASER SÄ TEILYLLE. ÄLÄ KATSO
SÄTEESEEN.
VORSICHT
SICHTBARE UND UNSICHTBARE LASERSTRAHLUNG
WENN ABDECKUNG GEÖFFNET. NICHT DEM
STRAHL AUSSETSEN.
DANGER
VISIBLE AND INVISIBLE LASER RADIATION WHEN
OPEN. AVOID DIRECT EXPOSURE TO BEAM.
ATTENTION
RAYONNEMENT LASER VISIBLE ET INVISIBLE EN CAS
D’OUVERTURE. EXPOSITION DANGEREUSE AU
FAISCEAU.
ПРЕДУПРЕЖДЕНИЕ
ПРИ ОТКРЫТИИ УСТРОЙСТВА ВЫ МОЖЕТЕ
ПОДВЕРГНУТЬСЯ ВОЗДЕЙСТВИЮ ВИДИМОГО
И НЕВИДИМОГО ЛАЗЕРНОГО ИЗЛУЧЕНИЯ.
ИЗБЕГАЙТЕ ВОЗДЕЙСТВИЯ ЛУЧА.
ii
Page 4

CAUTION: READ THIS BEFORE OPERATING YOUR UNIT.
To assure the finest performance, please read this
manual carefully. Keep it in a safe place for future
reference.
Install this sound system in a well ventilated, cool,
dry, clean place — away from direct sunlight, heat
sources, vibration, dust, moisture, or cold. In a
cabinet, allow about 2.5cm (1 inch) of free space
all around this unit for adequate ventilation.
Locate this unit away from other electrical
appliances, motors, or transformers to avoid
humming sounds.
Do not expose this unit to sudden temperature
changes from cold to hot, nor locate this unit in
an environment with high humidity (i.e., a room
with a humidifier) to prevent condensation inside
this unit, which may cause an electrical shock, fire,
damage to this unit, and/or personal injury.
Avoid installing this unit in a location where
foreign objects may fall onto this unit or where
this unit may be exposed to liquid dripping or
splashing. On the top of this unit, do not place:
– Other components, as they may cause damage
and/or discoloration on the surface of this unit.
– Burning objects (i.e., candles), as they may
cause fire, damage to this unit, and/or personal
injury.
– Containers with liquid in them, as they may fall,
spilling the liquid and causing an electrical
shock to the user and/or damage to this unit.
Do not cover this unit with a newspaper,
tablecloth, curtain, etc. in order not to obstruct
heat radiation. If the temperature inside this unit
rises, it may cause fire, damage to this unit, and/or
personal injury.
Do not plug in this unit to a wall outlet until all
connections are complete.
Do not operate this unit upside-down. It may
overheat, possibly causing damage.
Do not use excessive force on switches, knobs
and/or cords.
When disconnecting the power cord from the
wall outlet, grasp the plug; do not pull the cord.
Do not clean this unit with chemical solvents; this
might damage the finish. Use a clean, dry cloth.
Use only the voltage specified on this unit. Using
this unit with a higher voltage than specified is
dangerous and may cause fire, damage to this
unit, and/or personal injury. YAMAHA will not be
held responsible for any damage resulting from
use of this unit with a voltage other than as
specified.
To prevent damage by lightning, disconnect the
power cord from the wall outlet during an
electrical storm.
Do not attempt to modify or fix this unit. Contact
qualified YAMAHA service personnel when any
service is needed. The cabinet should never be
opened for any reason.
When not planning to use this unit for long
periods of time (i.e., vacation), disconnect the AC
power plug from the wall outlet.
16
Be sure to read the “TROUBLESHOOTING”
section on common operating errors before
concluding that this unit is faulty.
17
Before moving this unit, press STANDBY/ON to
set the unit in standby mode, then disconnect the
AC power plug from the wall outlet.
WARNING
TO REDUCE THE RISK OF FIRE OR ELECTRIC
SHOCK, DO NOT EXPOSE THIS UNIT TO
RAIN OR MOISTURE.
When playing DTS encoded CDs, excessive noise will
be heard from the analog stereo outputs. To avoid
possible damage to the audio system, the consumer
should take proper precautions when the analog
stereo outputs of the player are connected to an
amplification system. To enjoy DTS Digital
Surround™ playback, an external 5.1-channel DTS
Digital Surround™ decoder system must be
connected to the digital output of the player.
LASER SAFETY
This unit employs a laser. Due to possible eye injury,
only a qualified service person should remove the
cover or attempt to service this device.
DANGER
This unit emits visible laser radiation when open.
Avoid direct eye exposure to beam.
When this unit is plugged into a wall outlet, do not
place your eyes close to the opening of the disc tray
and other openings or look inside.
1
2
3
4
5
6
7
8
9
10
11
12
13
14
15
iii
Page 5

Contents
Introduction
Region Codes....................................................................2
Supplied accessories........................................................ 2
Notes about discs............................................................2
Cleaning discs....................................................................2
Patent information........................................................... 2
Functional Overview
Front and Rear Panels.....................................................3
Remote Control...............................................................4
Preparation
General Notes on connections ....................................5
Digital Connections.........................................................5
Analog Connections........................................................ 5
Video Connections.......................................................... 6
S-Video terminal <A>..............................................................6
Composite Video terminal <B>.........................................6
Component Video terminal <C>......................................6
SCART Connection <D>......................................................6
Getting Started
Inserting batteries into the Remote Control............7
Using the remote control .......................................................7
Turning on the power ....................................................7
Selecting the color system that corresponds
to your TV.........................................................................7
Setting language preference...........................................8
Setting the OSD Language.....................................................8
Setting the Audio, Subtitle and Disc menu
language.............................................................................................9
Disc Operations
Basic Playback .................................................................10
General Operation........................................................10
Pausing playback........................................................................10
Selecting track/chapter...........................................................10
Searching backward/forward..............................................10
Stopping playback..................................................................... 10
Selecting various repeat/shuffle functions ................11
Repeat and Shuffle...................................................................11
Repeating a section within a chapter/track................11
Operations for video playback (DVD/VCD/SVCD) ..11
Using the Disc Menu ..............................................................11
Zooming in...................................................................................11
Resuming playback from the last stopped point.....11
On-Screen Display (OSD)..................................................12
Special DVD Features...................................................13
Playing a Title ..............................................................................13
Camera Angle.............................................................................13
Audio...............................................................................................13
Subtitles..........................................................................................13
Special VCD & SVCD Features.................................. 13
Playback Control (PBC) ....................................................... 13
Preview Function......................................................................13
Playing MP3/DivX/JPEG/Kodak Picture CD...............14
General Operation.................................................................. 14
Selecting a folder and track/file......................................... 15
Repeat and Shuffle................................................................... 15
Special picture disc features .......................................15
Preview Function (JPEG)...................................................... 15
Zoom picture.............................................................................16
Playback with multi-angles................................................... 16
Scan Effect....................................................................................16
Playing MP3 music and JPEG picture
simultaneously............................................................................16
Setup Menu
General Setup menu..................................................... 17
Locking/Unlocking the disc for viewing........................ 17
Dimming player’s front panel display............................17
Programming disc tracks (not for Picture CD/
MP3)................................................................................................17
OSD Language........................................................................... 18
Screen Saver................................................................................ 18
Sleep Timer ................................................................................. 18
®
VOD registration code ........................................ 19
DivX
Audio Setup Menu ........................................................19
Setting the analog output.................................................... 19
Setting the Digital output..................................................... 20
CD Upsampling......................................................................... 20
Night Mode................................................................................. 21
Video Setup Menu......................................................... 21
TV Type......................................................................................... 21
Setting the TV Display........................................................... 21
Progressive...................................................................................22
Picture Setting............................................................................ 22
Switching the YUV/RGB....................................................... 23
Preference Setup Menu ...............................................24
Audio, Subtitle, Disc Menu.................................................24
Restricting playback by Parental Control.................... 24
PBC (Playback Control) ....................................................... 24
MP3/JPEG Menu ....................................................................... 25
Changing the Password ........................................................ 25
Restoring to original settings.............................................. 25
Language Code .......................... 26
Troubleshooting ........................ 28
Glossary ...................................... 30
Specifications ............................. 31
English
1
Page 6
Introduction
Thank you for purchasing this unit. This
Owner’s Manual explains the basic
operation of this unit.
Region Codes
DVD discs must be labeled for
ALL regions or Region 2 in
ALL
order to play on this Player. You
cannot play Discs that are
labeled for other regions.
2
Supplied accessories
– Remote control
– Batteries (two AA size) for remote
control
– Audio pin cable
– Video pin cable
– Owner’s Manual
Notes about discs
– This unit is designed for use with DVD
video, Video CD, Super video CD, Audio CD,
CD-R, CD-RW, DVD+RW, DVD+R, DVD-R
and DVD-RW.
This unit can play:
– MP3, picture (Kodak, JPEG) files on CD-
R(W).
– JPEG/ISO 9660 format
– Maximum 30 characters display.
®
– DivX
– CD-R and CD-RW cannot be played unless
– Some discs cannot be played depending on
– Be sure to use only CD-R and CD-RW discs
– Do not use any non standard shaped discs
– Do not use disc with tape, scals, or paste on
disc on CD-R[W]/DVD+R[W]/
DVD-R[W] (3.11, 4.x and 5.x)
finalized.
the recording conditions such as PC
environment and application software. The
characteristics and condition of the discs;
materials, scratches, curvature, and etc.,
may result in failure.
made by reliable manufacturers.
(heart, etc.)
it, damage to the unit may result.
– Do not use a disc printed on its surface by
a commercially available label printer.
Cleaning discs
• When a disc becomes dirty, clean it
with a cleaning cloth. Wipe the disc
from the centre out. Do not wipe in a
circular motion.
• Do not use solvents such as benzine,
thinner, commercially available cleaners,
or antistatic spray intended for analog
records.
Patent information
Manufactured under license from
Dolby Laboratories. “Dolby” and
the double-D symbol are
trademarks of Dolby
Laboratories.
”DTS” and “DTS Digital Out” are
trademarks of Digital Theater
Systems, Inc.
DivX, DivX Certified, and
associated logos are trademarks
of DivXNetworks, Inc and are
used under license.
This product incorporates copyright protection
technology that is protected by method claims of
certain U.S. patents and other intellectual property
rights owned by Macrovision Corporation and
other rights owners. Use of this copyright
protection technology must be authorized by
Macrovision Corporation, and is intended for home
and other limited viewing uses only unless
otherwise authorized by Macrovision Corporation.
Reverse engineering or disassembly is prohibited.
2
Page 7
Functional Overview
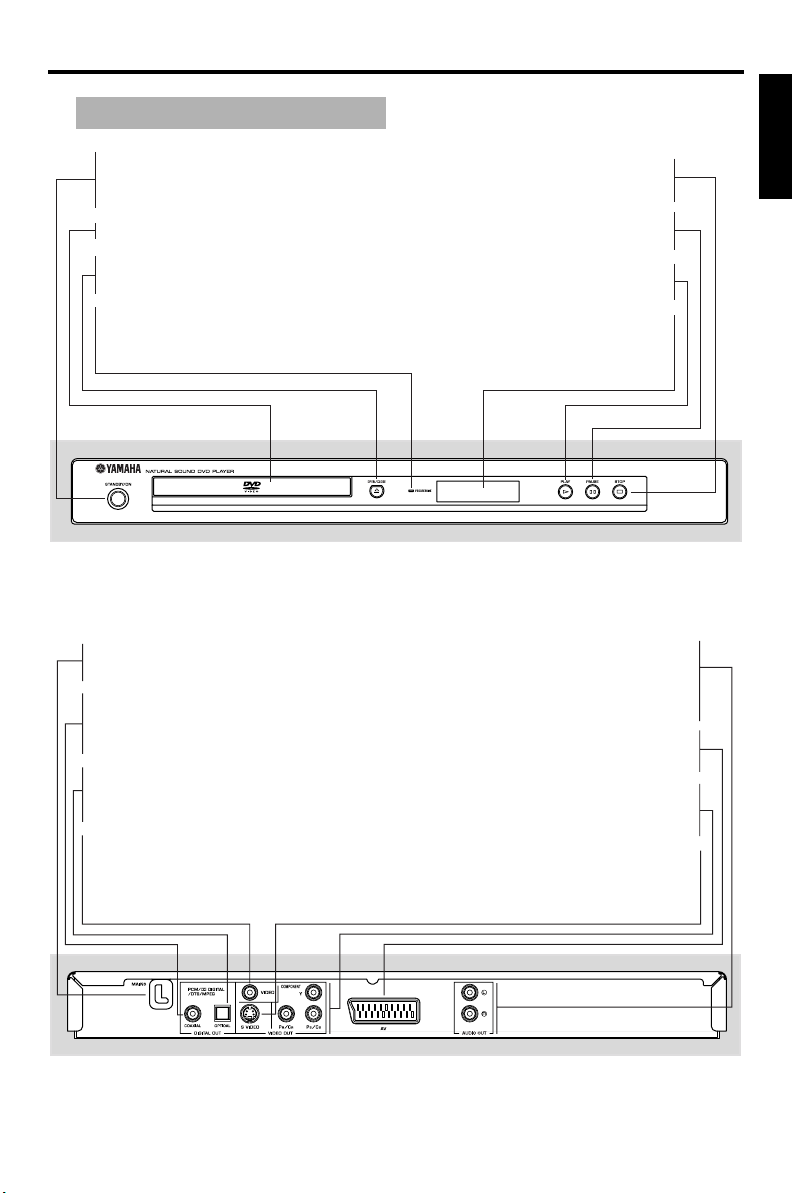
Front and Rear Panels
STANDBY/ON
– turns on this unit or sets it to the
standby mode
Disc tray
/ OPEN/CLOSE
– opens or closes the disc tray
PROGRESSIVE indicator
– lights up when the unit enters
Progressive mode
* Press button for about two seconds.
AC Power Cord
– connects to a standard AC outlet
COAXIAL digital audio output
– connects to a digital (coaxial) input of
your AV receiver or stereo system
OPTICAL digital audio output
– connects to a digital (optical) input of
your AV receiver or stereo system
VIDEO output
(composite video out)
– connects to a video input on your AV
receiver
English
9 STOP
– stops playback
; PAUSE
– pauses playback
B PLAY
– starts playback
Front panel display
– shows information about the
operational status of the unit
AUDIO OUT (Left/Right)
– connect to AUDIO inputs
of your AV receiver
or stereo system
AV terminal
– connects to a SCART cable
COMPONENT video outputs
– connect to an AV receiver with Y
PB/CB PR/CR inputs
S VIDEO output
– connects to an S-Video input on
your AV receiver
Caution: Do not touch the inner pins of the jacks on the rear panel.
Electrostatic discharge may cause permanent damage to the unit.
3
Page 8
Functional Overview
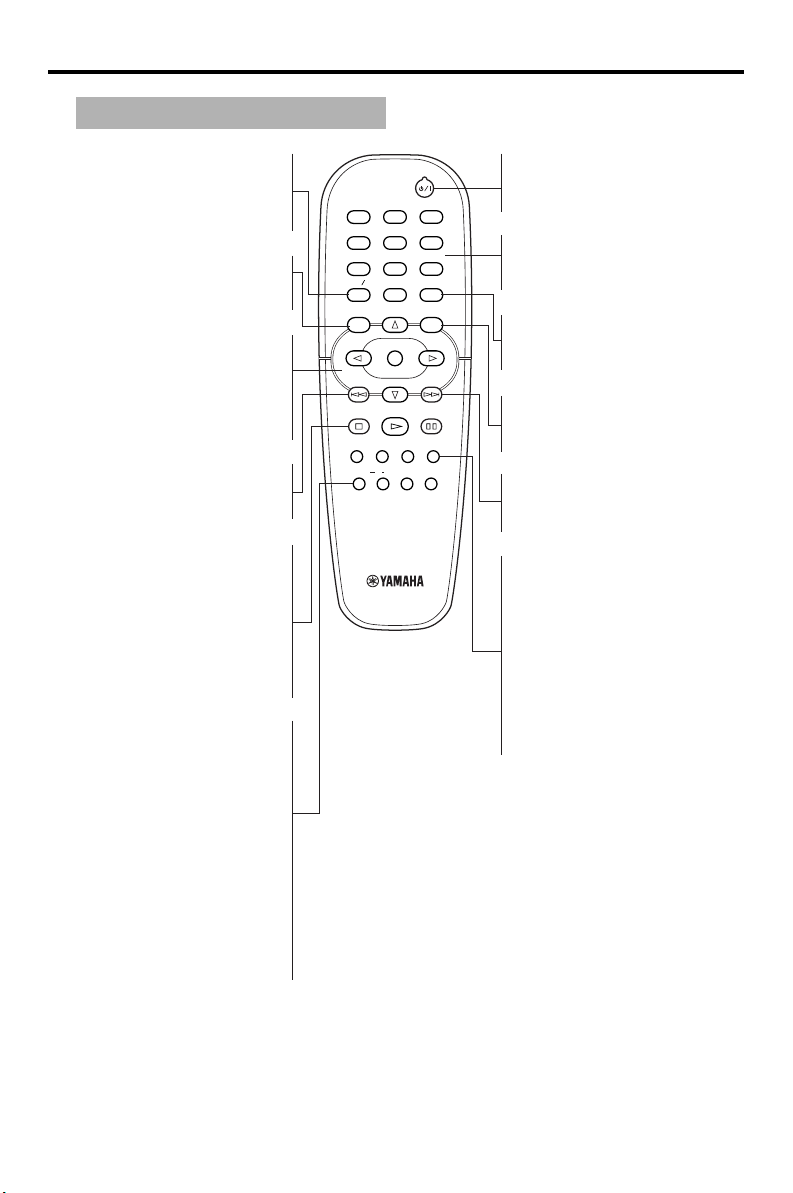
Remote Control
TOP MENU/RETURN
– display the top-level disc menu
(DVD) / go back to previous
menu (VCD)
MENU
– access menu of a disc (DVD) /
switch PBC on/off (VCD)
1 2 3 4
– (left/right/up/down) select an
item in the menu
ENTER/OK
– acknowledge menu selection
S
– search backward* / go to a
previous chapter or track
STOP ( 9 )
– stop playback
PLAY ( B )
– start playback
PAUSE ( ; )
– pause playback temporarily /
frame-by-frame playback
REPEAT
– repeat chapter, track, title, disc
/ shuffle chapter, track
A-B
– repeat a specific segment
SCAN
– preview the content of a track
or whole disc (VCD) / play the
first 6 seconds or less of each
track (CD)
MUTE
– disable or enable sound output
23
1
546
8079
TOP MENU RETURN
MENU SETUP
ENTER
OK
STOP
PLAY
ZOOM AUDIO
SUBTITLE
ANGLE
AB
REPEAT
DVD
ON SCREEN
PAUSE
MUTESCAN
|
B/
– turn this unit ON or go to
standby-on mode
0-9 numeric keypad
– select numbered items in a
menu
ON SCREEN
– access or remove player’s On
Screen Display menu
SETUP
– access or remove player’s
setup menu
T
– search forward* / next chapter
or track
SUBTITLE
– subtitle language selector
ANGLE
– select DVD camera angle
ZOOM
– enlarge video image
AUDIO
– audio language and format
selector
* Press and hold button for about two seconds.
4
Page 9
Preparation
General Notes on connections
Never make or change connections with
the power switched on.
• Depending on the equipment you wish
to connect, there are various ways you
could connect this unit. Possible
connections are shown in the following
drawings.
• Please refer to the manuals of other
equipment as necessary to make the
best connections.
• Do not connect this unit via your VCR.
The video quality could be distorted by
the copy protection system.
• Do not connect this unit’s audio out
jack to the phono in jack of your audio
system.
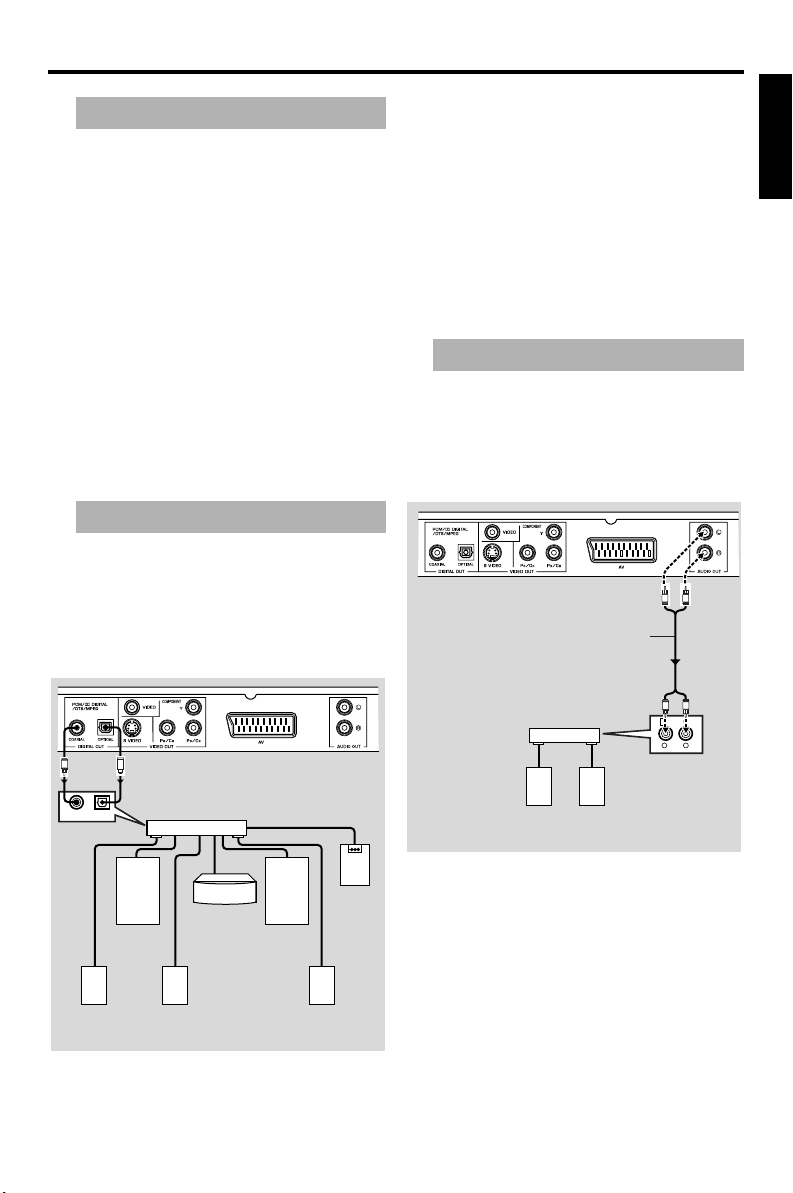
Digital Connections
This unit has COAXIAL and OPTICAL
digital out jacks. Connect one or both of
them to your AV receiver equipped with
Dolby digital, DTS, or MPEG decoder
using each specific cable (separate
purchase).
Note:
– If the audio format of the digital output
does not match the capabilities of your
receiver, the receiver will produce a strong,
distorted sound or no sound at all. Make
sure to select the appropriate audio format
at menu screen included on the disc.
Pressing AUDIO once or more may change
not only audio languages but also audio
formats, and the selected format appears
for several seconds on the status window.
Analog Connections
Use audio/video cable supplied with this
unit to connect AUDIO OUT L (left) and
R (right) jacks of this unit to corresponding
input jacks of your audio equipment such
as Stereo amplifier.
L
R
(supplied)
English
C
O
Left front
speaker
back speaker
AV receiver
Surround
Center
speaker
Right front
speaker
Right surround
Subwoofer
speaker
COAXIALINOPTICAL
IN
Left surround
speaker
You will need to set this unit’s digital
output to ALL (see page 20
“DIGITAL OUTPUT”).
Left
speaker
Stereo
amplifier
Right
speaker
R
1 CD/DVD
RL
L
5
Page 10
Preparation
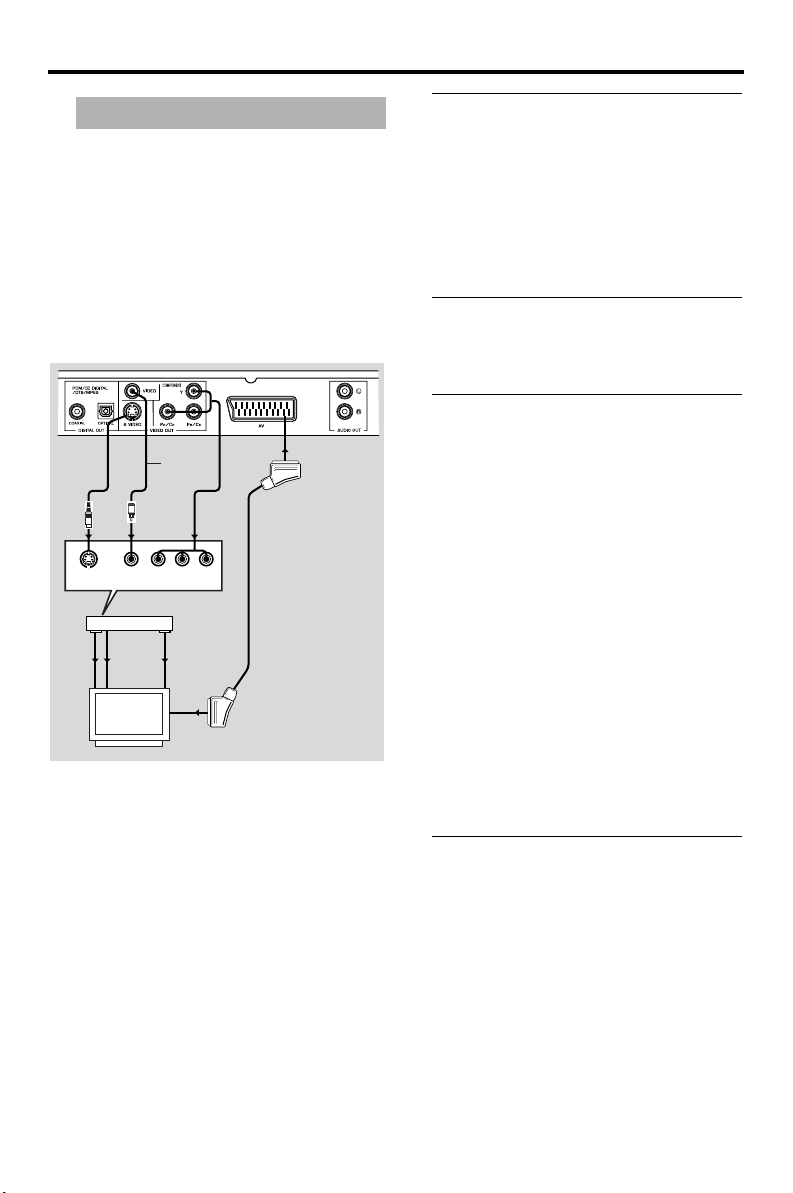
Video Connections
If your AV receiver has video output jacks,
connect your receiver (and then to your
TV) so that you can use one TV for several
different video sources (LD, VCR etc.) by
simply switching the input source selector
of your receiver.
The player has three types of video output
jacks. Use one of them in accordance with
the input jacks of the equipment to be
connected.
(supplied)
S VIDEO
INPUT
VIDEO
OUT
VIDEO
S
IN
V
VIDEO
AV receiver
COMPONENT
VIDEO OUT
COMPONENT
VIDEO IN
YPBCB PRCR
COMPONENT
VIDEO IN
S VIDEO
OUT
S VIDEO
IN
<C><A> <B> <D>
S-Video terminal <A>
S (separate) video connection achieves a
clearer picture than composite video
connection by separating color and
luminance when transmitting signals. Use
commercially available S-video cable.
Receiver (and TV) with S-video input is
required.
Composite Video terminal <B>
Use audio/video cable supplied with this
unit when connecting the player to a TV.
Component Video terminal <C>
Component video connection achieves
high fidelity in reproducing colors (better
performance than S-video connection),
separating video signal into luminance (Y,
terminal color-coded as green), and color
difference (Pb, blue/Pr, red). Use
commercially available coaxial cables.
Receiver (and TV) with component input is
required. Observe the color of each jack
when connecting. If your receiver does not
have component output jacks, connecting
the player’s component output directly to
your TV’s component input can reproduce
better video image.
Note:
– You need to set this unit’s component
output to YUV (see page 23 “Switching the
YUV/RGB”).
SCART Connection <D>
If your TV has only terminal for video
input, and you want to connect it directly
to this unit, you can use this unit’s SCART
output jack.
Note:
– Ensure that the “TV” indication on SCART
cable is connected to the TV set and “DVD”
indication on SCART cable is connected to
this unit.
6
Page 11
Getting Started
Step1: Inserting batteries into the Remote Control
3
1
2
2
1 Open the battery compartment.
2 Insert two batteries type R06 or AA,
following the indications (+ –) inside the
compartment.
3 Close the cover.
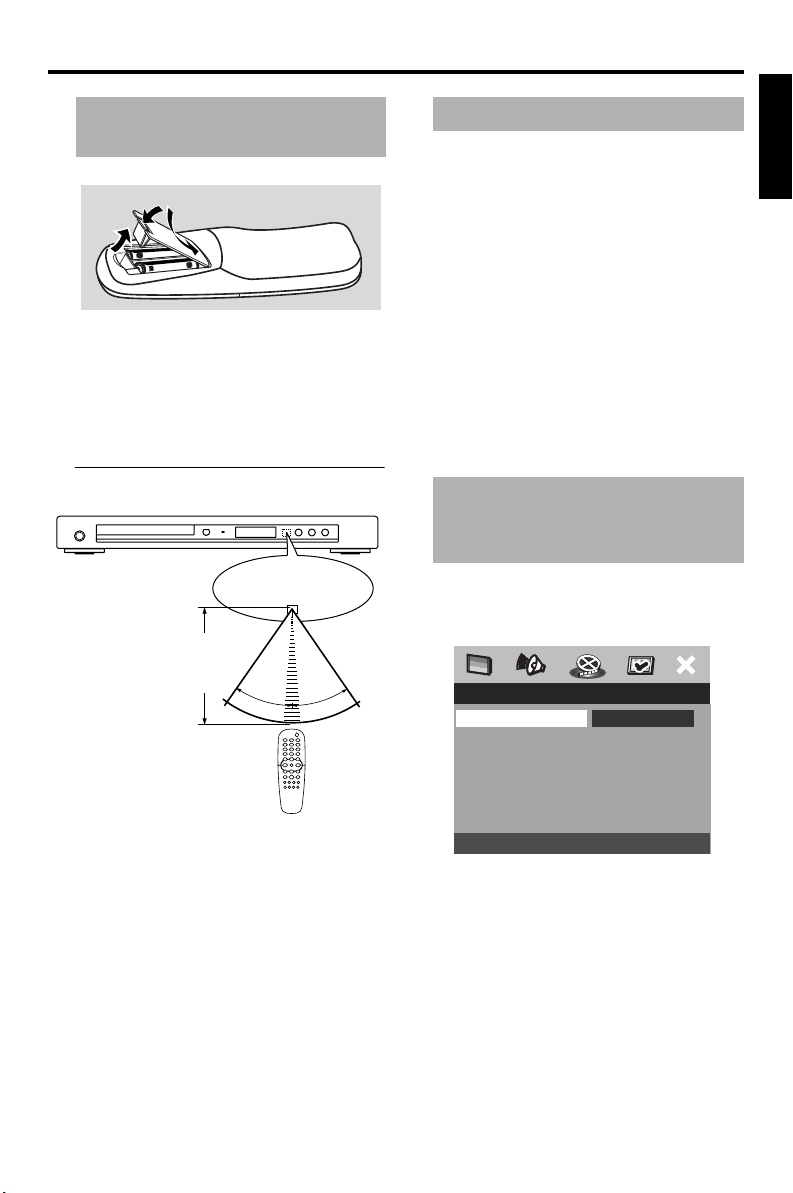
Using the remote control
Remote control
sensor
Point the remote control
at the sensor, within
approximately 6 m
(20 feet) of the unit.
30°
30°
Step2: Turning on the power
1 Connect the AC power cord to the power
outlet.
2 Turn on the TV and your AV receiver.
3 Select the appropriate input source at the
AV receiver that was used to connect to
this unit. Refer to the equipment owner’s
manual for detail.
4 Turn this unit on.
5 Set the TV to the correct Video IN
channel. (eg. EXT1, EXT2, AV1, AV2,
AUDIO/VIDEO, etc. Refer to your TV
owner’s manual for detail)
➜ The front display lights up and the
default screen appears on the TV.
Step3: Selecting the color system that corresponds to your TV
This DVD Player is compatible with both
NTSC and PAL. Select the color system
that matches your TV.
VIDEO SETUP PAGE
TV TYPE PAL
TV DISPLAY NTSC
PROGRESSIVE MULTI
PICTURE SETTING
COMPONENT
English
Handling the remote control
• Do not spill water or other liquids on
the remote control.
• Do not drop the remote control.
• Do not leave or store the remote
control in the following types of
conditions:
– high humidity such as near a bath
– high temperature such as near a heater
or stove
– extremely low temperature
– dusty places
1 Press SETUP.
2 Press 2 repeatedly to select {VIDEO
SETUP PAGE}.
3 Press 34 to highlight {TV TYPE}, then
press 2.
7
Page 12
Getting Started
4 Press 34 to highlight one of the options
below:
PAL
Select this if the connected TV is PAL
system. It will change the video signal of a
NTSC disc and output in PAL format.
NTSC
Select this if the connected TV is NTSC
system. It will change the video signal of a
PAL disc (VCD only) and output in NTSC
format.
MULTI
Select this if the connected TV is
compatible with both NTSC and PAL
(multi-system). The output format will be
in accordance with the video signal of the
disc.
5 Select an item and press ENTER/OK.
Helpful Hint:
– Before changing the current TV
Standard setting, ensure that your TV
supports the ‘selected TV Type’
system.
– If there is not proper picture on your
TV, wait for 15 seconds for auto
recover.
CHANGING PAL TO NTSC
1. ENSURE THAT YOUR TV SYSTEM SUPPORTS
NTSC STANDARD.
2. IF THERE IS A DISTORTED PICTURE
DISPLAYED ON THE TV, WAIT 15 SECONDS
FOR AUTO RECOVER.
CancelOK
Step4: Setting language preference
You can select your own preferred
language settings.This DVD Player will
automatically switch to the language for
you whenever you load a disc. If the
language selected is not available on the
disc, the disc’s default language will be used
instead. The OSD language in the system
menu, will remain once selected.
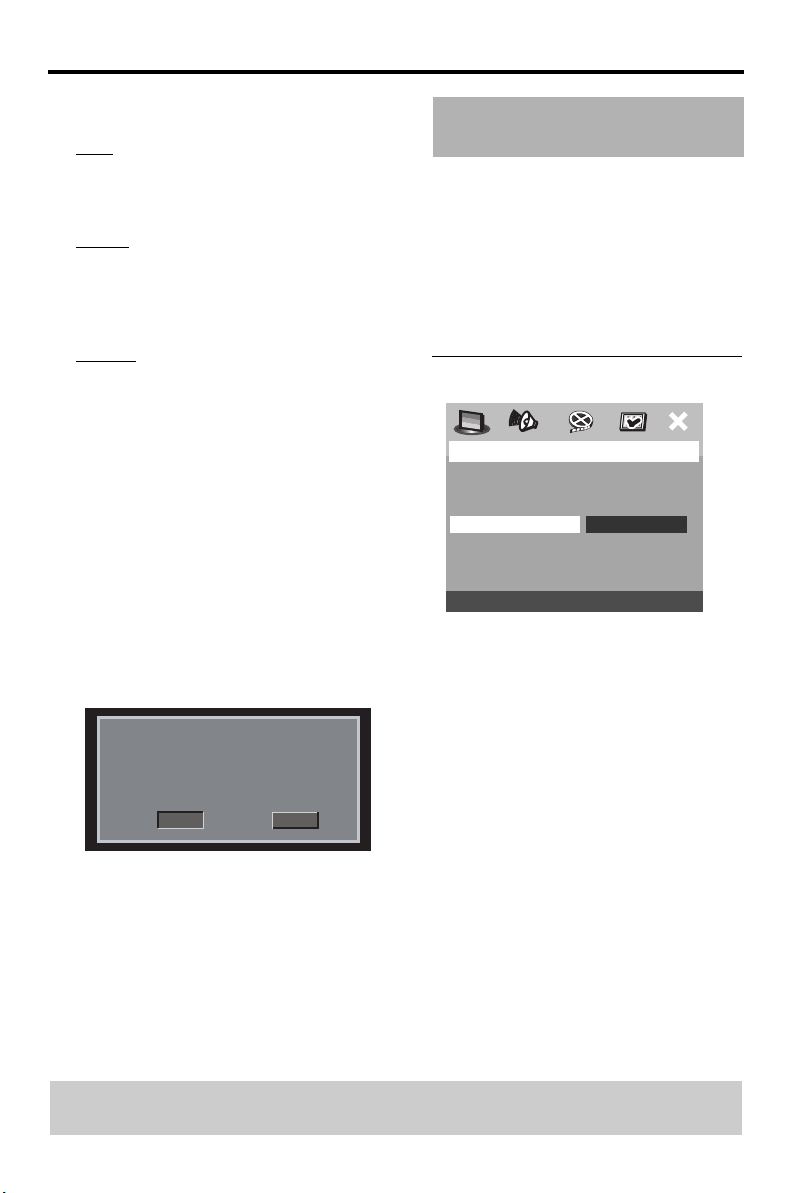
Setting the OSD Language
GENERAL SETUP PAGE
DISC LOCK
DISPLAY DIM
PROGRAM
OSD LANGUAGE ENGLISH
SCREEN SAVER DANISH
SLEEP GERMAN
DIVX(R) VOD CODE SPANISH
1 Press SETUP.
2 Press 1 2 to select {GENERAL SETUP
PAGE}.
3 Press 34 to highlight {OSD LANGUAGE},
then press 2.
4 Press 34 to select a language and press
ENTER/OK.
FRENCH
TIPS: To return to the previous menu, press 1.
To remove the menu, press SETUP.
8
Page 13

Getting Started
Setting the Audio, Subtitle and Disc menu language
PREFERENCE PAGE
AUDIO ENGLISH
SUBTITLE DANISH
DISC MENU GERMAN
PARENTAL SPANISH
PBC FRENCH
MP3/JPEG NAV ITALIAN
PASSWORD DUTCH
DEFAULT
1 Press STOP 9 twice, then press SETUP.
2 Press 2 repeatedly to select
{PREFERENCE PAGE}.
3 Press 34 to highlight one of the options
below at a time, then press 2.
– ‘Audio’ (disc’s soundtrack)
– ‘Subtitle’ (disc’s subtitles)
– ‘Disc Menu’ (disc’s menu)
4 Press 34 to select a language and press
ENTER/OK.
If the language you want is not in the
list, then select {OTHERS},
then use the numeric keypad (0-9) on
the remote to enter the 4-digit language
code (see page 26 “Language Code”) and
press ENTER/OK.
5 Repeat steps 3–4 for other language
settings.
English
TIPS: To return to the previous menu, press 1.
To remove the menu, press SETUP.
9
Page 14

Disc Operations
IMPORTANT!
– If the inhibit icon ( or X) appears
on the TV screen when a button is
pressed, it means the function is
not available on the current disc or
at the current time.
– Depending on the DVD or VIDEO
CD, some operations may be
different or restricted.
– Do not push on the disc tray or put
any objects other than disc on the
disc tray. Doing so may cause the
disc player malfunction.
Basic Playback
1 Press STANDBY/ON on the front panel
to turn on the DVD player.
2 Press OPEN/CLOSE / on the front
panel to open disc loading tray.
3 Place the chosen disc in the tray, with the
label facing up.
4 Press OPEN/CLOSE / again to close
the tray.
➜ After recognizing this disc, the player
begin to playback automatically.
➜ If you press PLAY B when the tray is
open, this unit closes the tray and starts
playback.
General Operation
Unless otherwise stated, all operations
described are based on Remote Control
use.
Pausing playback
1 During playback, press PAUSE ;.
➜ Playback will pause and sound will be
muted.
2 Press PAUSE ; again to select the next
picture frame.
3 To resume normal playback, press
PLAY B.
Selecting track/chapter
• Press S / T or use the numeric
keypad (0-9) to key in a track/chapter
number.
➜ If repeat mode is active, pressing S /
T will replay the same track/chapter.
Searching backward/forward
• Press and hold S / T, then press
PLAY B to resume normal playback.
➜ While searching, pressing S / T
again will decrease/increase the search
speed.
Stopping playback
• Press STOP 9.
TIPS: The operating features described here might not be possible for certain discs. Always refer to
the instructions supplied with the discs.
10
Page 15

Disc Operations
Selecting various repeat/shuffle functions
Repeat and Shuffle
• While playing a disc, press REPEAT
continuously to choose a ‘Play Mode’.
DVD
➔ RPT ONE (repeat chapter)
➔ RPT TT (repeat title)
➔ SHUFFLE (shuffle)
➔ RPT SHF (shuffle repeat)
➔ RPT OFF (repeat off)
VCD/SVCD/CD
➔ RPT ONE (repeat track)
➔ RPT ALL (repeat disc)
➔ SHUFFLE (shuffle)
➔ RPT SHF (shuffle repeat)
➔ RPT OFF (repeat off)
MP3/DivX
➔ RPT ONE (repeat track)
➔ RPT FLD (repeat folder)
➔ SHUFFLE (random play)
➔ RPT OFF (repeat off)
Helpful Hint:
– For VCD, repeat playback is not possible if
the PBC mode is switched on.
Operations for video playback (DVD/VCD/SVCD)
Using the Disc Menu
Depending on the disc, a menu may appear
on the TV screen once you load in the disc.
To select a playback feature or item
• Use 1 234 or numeric keypad
(0-9) on the remote, then press
ENTER/OK to start playback.
To access or remove the menu
• Press MENU on the remote.
Zooming in
This function allows you to enlarge the
picture on the TV screen and to pan
through the enlarged picture.
1 During playback, press ZOOM repeatedly
to display the picture with different scales.
➜ Use 1 234 to pan through the
enlarged picture.
➜ Playback will continue.
2 Press ZOOM repeatedly to return to the
original size.
English
Repeating a section within a chapter/track
1 While playing a disc, press A-B at your
chosen starting point.
2 Press A-B again at your chosen end point.
➜ The section A and B can be set only
within the same chapter/track.
➜ The section will now repeat
continuously.
3 To exit the sequence, press A-B.
Resuming playback from the last stopped point
Resume playback of the last 10 discs is
possible, even if the disc was ejected or the
power switched off.
• Load one of the last 10 discs.
➜ “LOADING” appears.
• Press PLAY B and the disc will be
played back from the last point.
To cancel resume mode
• In stop mode, press STOP 9 again.
TIPS: The operating features described here might not be possible for certain discs. Always refer to
the instructions supplied with the discs.
11
Page 16

Disc Operations
On-Screen Display (OSD)
OSD menu shows the disc playback
information (for example, title or chapter
number, elapsed playing time, audio/
subtitle language), a number of operations
can be done without interrupting disc
playback.
1 During playback, press ON SCREEN.
➜ A list of available disc information
appears on the TV screen.
DVD
MENU
TITLE 02/14
CHAPTER 02/14
AUDIO 5.1CH
SUBTITLE ENG
BITRATE
VCD/SVCD
MENU
TRACK 02/14
DISC TIME 0:49:17
TRACK TIME 0:03:43
REPEAT OFF
BITRATE
2 Press 34 to view the information and
press ENTER/OK to access.
3 Use the numeric keypad (0-9) to input
the number/time or press
selection, then press ENTER/OK to
confirm.
➜ Playback will change to the chosen time
or to the selected title/chapter/track.
Title/Chapter/Track selection (DVD/
VCD)
1 Press 34 to select {TITLE} or
{CHAPTER} (DVD) or {TRACK} (VCD).
2 Press ENTER/OK.
3 Select a title, chapter or track number
using the numeric buttons.
34 to make the
Time Search (DVD/VCD)
1 Press 34 to select {TT TIME} or {CH
TIME} (DVD) or {TRACK TIME} or {DISC
TIME} (VCD).
➜ {TT TIME} refers to the total time of the
current title, and the {CH TIME} refers
to the total time of the current chapter.
2 Press ENTER/OK.
3 Enter hours, minutes and seconds from left
to right using the numeric buttons. (e.g.
0:34:27)
Audio/Subtitle/Angle (DVD)
You can change {AUDIO}, {SUBTITLE} or
{ANGLE} if available on the disc you are
playing.
1 Press 34 to select {AUDIO}, {SUBTITLE}
or {ANGLE}.
2 Press ENTER/OK.
3 For Audio and Subtitle,
Press 34 to highlight your selection and
press ENTER/OK.
or
For Angle,
Select an angle using the numeric buttons.
Repeat/Time Display (DVD/VCD)
1 Press 34 to select {REPEAT} or {TIME
DISP.}.
2 Press ENTER/OK.
3 Press 34 to highlight your selection and
press ENTER/OK.
Time display (CD)
Each time you press ON SCREEN, the
time display changes as follows;
Total Elapsed Total Remain
Single Remain Single Elapsed
TIPS: The operating features described here might not be possible for certain discs. Always refer to
the instructions supplied with the discs.
12
Page 17

Disc Operations
Special DVD Features Special VCD & SVCD Features
Playing a Title
1 Press MENU.
➜ The disc title menu appears on the TV
screen.
2 Use 1 234 or numeric keypad (0-9)
to select a play option.
3 Press ENTER/OK to confirm.
Camera Angle
• Press ANGLE repeatedly to select
different desired angle.
Audio
Changing the Audio Language and/or
format
• Press AUDIO repeatedly to select
different audio languages.
Playback Control (PBC)
For VCD with Playback Control
(PBC) feature (version 2.0 only)
• Press MENU to toggle between ‘PBC
ON’ and ‘PBC OFF’.
➜ If you select ‘PBC ON’, the disc menu (if
available) will appear on the TV.
➜ Use the S / T or the numeric
keypad (0-9) to select a play option.
• During playback, pressing TOP
MENU/RETURN will return to the
menu screen (if PBC is on).
If you want to skip the index menu
and playback directly from the
beginning,
• Press MENU on the remote control to
switch to PBC off.
Preview Function
Subtitles
• Press SUBTITLE repeatedly to select
different subtitle languages.
1 Press SCAN.
2 Press 34 to highlight {TRACK DIGEST},
{DISC INTERVAL} or {TRACK
INTERVAL}.
3 Press ENTER/OK to open one option.
English
SELECT DIGEST TYPE:
TRACK DIGEST
DISC INTERVAL
TRACK INTERVAL
Note:
– You can select {TRACK INTERVAL} only
during playback, with PBC Off.
TIPS: The operating features described here might not be possible for certain discs. Always refer to
the instructions supplied with the discs.
13
Page 18
Disc Operations
TRACK DIGEST
This function will minimize the picture of
every track in order to display every six of
these tracks on the screen to help you
know the content of every track on the
disc.
DISC INTERVAL
This function is used to divide a disc into
six parts by regular intervals and display
them on one page to preview the whole
disc.
TRACK INTERVAL
This function is used to divide a single track
into six parts by regular intervals and
display them on one page to help you
preview the selected track.
(example for 6 thumbnail pictures display)
4 Use 1 234 to select a track or use
numeric keypad (0-9) to input the
selected track number next to {SELECT}.
5 Press S / T to open the previous or
next page.
6 Press ENTER/OK to confirm.
To quit preview function
• Use 1 234 to highlight {EXIT} and
press ENTER/OK to confirm.
To return to preview menu
• Use 1 234 to highlight {MENU} and
press ENTER/OK to confirm.
For CD
• At stop mode, press SCAN on the
remote control.
➜ Each track will be played for a few
seconds.
Playing MP3/DivX/JPEG/Kodak Picture CD
General Operation
1 Load a disc.
➜ The disc reading time may exceed 30
seconds due to the complexity of the
directory/file configuration.
➜ The data disc menu appears on the TV
screen.
2 Playback will start automatically. If not
press PLAY B.
00:00 00:00
001/020
Favorite
MP3
Piano
Cello
MP3
MP3
Jazz
MP3
Live
During playback, you can;
• Press S / T to select another
track/file in the current folder.
• Press ; to pause playback.
Helpful Hint:
– It may not be possible to play certain MP3/
JPEG/DivX/MPEG-4 disc due to the
configuration and characteristics of the disc
or condition of the recording.
TIPS: The operating features described here might not be possible for certain discs. Always refer to
the instructions supplied with the discs.
14
Page 19
Disc Operations
Selecting a folder and track/file
1 Press 34 to select the folder and press
ENTER/OK to open the folder.
2 Press 34 to select a track/file.
3 Press ENTER/OK to confirm.
➜ Playback will start from the selected file
to the end of the folder.
Repeat and Shuffle
When the Picture CD/MP3 CD menu is
shown on the screen;
• Press REPEAT continuously to access
different ‘Play Mode’.
➜ FOLDER: files will be played back once.
➜ REPEAT ONE: one file being played
repeatedly.
➜ REPEAT FOLDER: all files in one folder
being played repeatedly.
➜ SHUFFLE: all files in the current folder
being played at random order.
Special picture disc features
1 Load a Picture disc (Kodak Picture CD,
JPEG).
➜ For Kodak disc, the slide show will
begin.
➜ For JPEG disc, the picture menu appears
on the TV screen.
2 Press PLAY B to start the slide-show
playback.
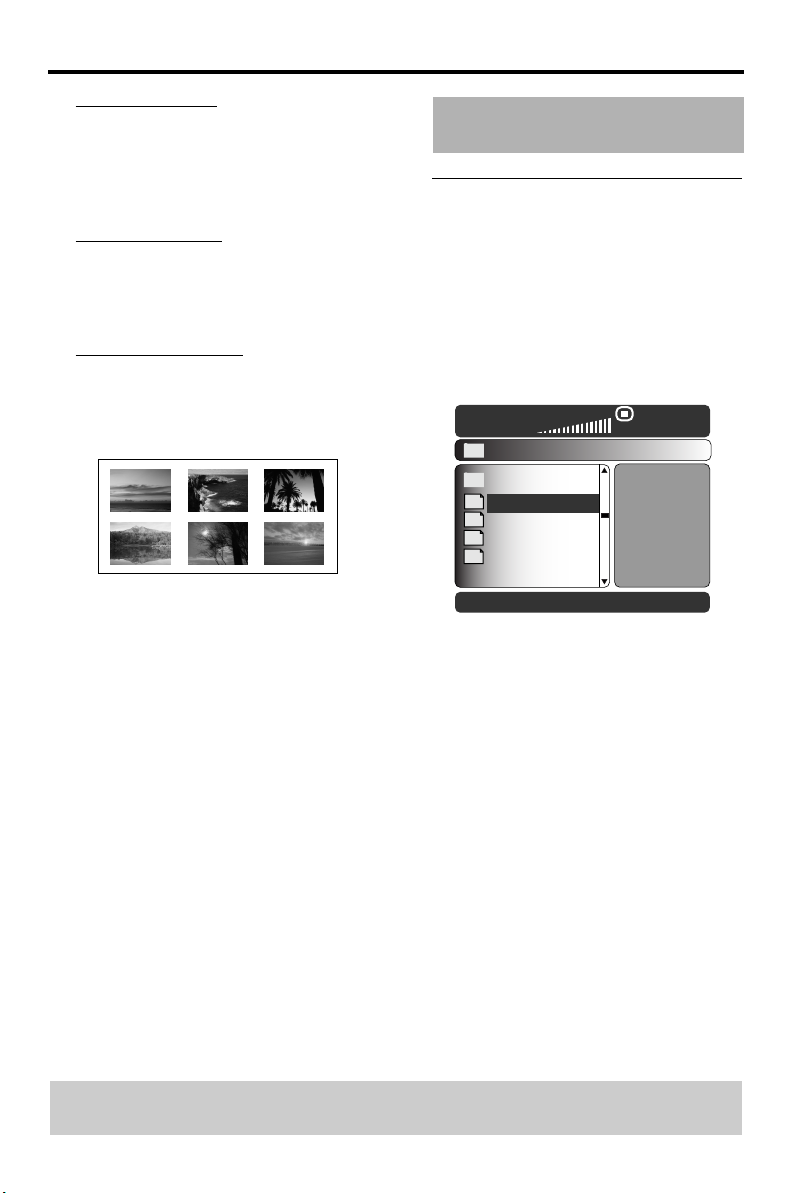
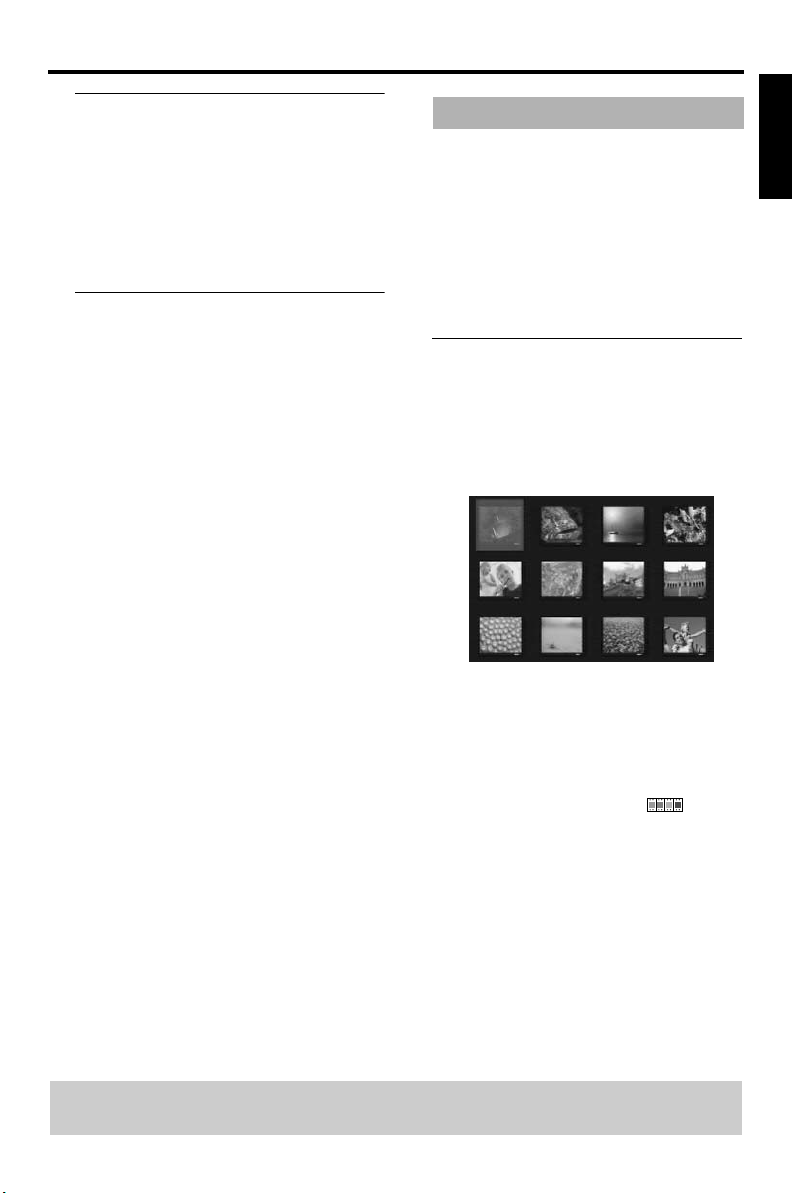
Preview Function (JPEG)
This function shows the content of the
current folder or the whole disc.
1 Press STOP 9 during playback.
➜ 12 thumbnail pictures will appear on the
TV screen.
English
2 Press S / T to display the other
pictures on the previous/next page.
3 Use 1 234 to highlight one of the picture
and press ENTER/OK to start playback
OR
Move the cursor to highlight on the
bottom of the page to start playback from
the first picture on the current page.
4 Press MENU to return to Picture CD
menu.
TIPS: The operating features described here might not be possible for certain discs. Always refer to
the instructions supplied with the discs.
15
Page 20

Disc Operations
Zoom picture
1 During playback, press ZOOM repeatedly
to display the picture with different scales.
2 Use 1 234 to view the zoomed picture.
Playback with multi-angles
• During playback, press 1 234 to
rotate the picture on the TV screen.
1: rotate the picture anti-clockwise
2: rotate the picture clockwise
3: flip the picture vertically
4: flip the picture horizontally
Scan Effect
• Press ANGLE repeatedly to choose
different scan effect.
➜ Various of scan effect appears on the
top left hand corner on the TV screen.
Playing MP3 music and JPEG picture simultaneously
1 Load a disc that contains music and
picture.
➜ The disc menu appears on the TV
screen.
2 Select an MP3 track.
3 During MP3 music playback, select a
picture from the TV screen and press
PLAY B.
➜ The picture files will be played back one
after another until end of the folder.
4 To quit simultaneous playback, press
MENU followed by STOP 9.
Helpful Hint:
– Some files on Kodak or JPEG disc may be
distorted during playback due to the
configuration and characteristics of the disc.
TIPS: The operating features described here might not be possible for certain discs. Always refer to
the instructions supplied with the discs.
16
Page 21
Setup Menu
The setup is carried out via the TV,
enabling you to customize the DVD Player
to suit your particular requirements.
General Setup menu
1 Press SETUP.
2 Press 1 2 to select ‘General Setup’ icon.
3 Press ENTER/OK to confirm.
GENERAL SETUP PAGE
DISC LOCK
DISPLAY DIM
PROGRAM
OSD LANGUAGE
SCREEN SAVER
SLEEP
DIVX(R) VOD CODE
Locking/Unlocking the disc for viewing
Not all discs are rated or coded by the disc
maker. You can prevent a specific disc
from playing by locking the disc. Up to 40
discs can be locked.
1 In ‘GENERAL SETUP PAGE’, press 34 to
highlight {DISC LOCK}, then press 2.
LOCK
Select this to block the playback of the
current disc. Subsequent access to a
locked disc requires six-digit password.
The default password is ‘000 000’ (see
page 25 “Changing the Password”).
UNLOCK
Select this to unlock the disc and allow
future playback.
2 Press 34 to select a setting, then press
ENTER/OK to confirm your selection.
Dimming player’s front panel display
You can select different levels of
brightness for the front panel display.
1 In ‘GENERAL SETUP PAGE’, press 34 to
highlight {DISPLAY DIM}, then press 2.
100%
Select this for full brightness.
70%
Select this for medium brightness.
40%
Select this for dimming the display.
2 Press 34 to select a setting, then press
ENTER/OK to confirm your selection.
Programming disc tracks (not for Picture CD/MP3)
You can play the contents of the disc in the
order you want by programming the tracks
to be played. Up to 20 tracks can be
stored.
1 In ‘GENERAL SETUP PAGE’, press 34 to
highlight {PROGRAM}, then press 2 to
select {INPUT MENU}.
2 Press ENTER/OK to confirm.
1 04
2 10
3 11
4 __
5 __
6 __
7 __
8 __
9 __
10 __
English
TIPS: To return to the previous menu, press 1.
To remove the menu, press SETUP.
17
Page 22

Setup Menu
To input your favorite tracks/chapter
3 Use the numeric keypad (0-9) to enter
a valid track/chapter number.
4 Use 1 234 to move the cursor to the
next position.
➜ If the track number is more than ten,
press T to open the next page and
proceed with programming or,
➜ Use 1 234 to highlight {NEXT} on the
program menu, then press ENTER/
OK.
5 Repeat steps 3–4
chapter number.
If you want to remove a track
6 Use 1 234 to move the cursor to the
track you want to remove.
7 Press ENTER/OK to remove this track
from the program menu.
To start program playback
8 Use 1 234 to highlight {START} on the
program menu, then press ENTER/OK.
➜ Playback will start with the selected
tracks under the programmed
sequence.
To exit program playback
9 Use 1 234 to highlight {EXIT} on the
program menu, then press ENTER/OK.
to input another track/
OSD Language
This menu contains various language
options for display language on the screen.
For details, see page 8.
Screen Saver
This function is used to turn the screen
saver on or off.
1 In ‘GENERAL SETUP PAGE’, press 34 to
highlight {SCREEN SAVER}, then press 2.
ON
Select this if you wish to turn off the TV
screen when disc playback is stopped or
paused for more than 15 minutes.
OFF
Select this to disable the screen saver
function.
2 Press 34 to select a setting, then press
ENTER/OK to confirm your selection.
Sleep Timer
This feature automatically sets the DVD
player in standby mode after the amount of
time you have set.
1 In ‘GENERAL SETUP PAGE’, press 34 to
highlight {SLEEP}, then press 2.
2 Press 34 to select a setting.
➜ You can select from 15, 30, 45 and 60
minutes. Select {OFF} to cancel the
sleep timer function.
3 Press ENTER/OK to confirm your
selection.
TIPS: To return to the previous menu, press 1.
To remove the menu, press SETUP.
18
Page 23

Setup Menu
DivX® VOD registration code
Yamaha provide you with the DivX® VOD
(Video On Demand) registration code that
allows you to rent and purchase videos
using the DivX
For more information, visit at
www.divx.com/vod.
1 In ‘GENERAL SETUP PAGE’, press 34 to
highlight {DIVX(R) VOD CODE}, then
press 2.
➜ The registration code will appear.
2 Press ENTER/OK to exit.
3 Use the registration code to purchase or
rent the videos from DivX
at www.divx.com/vod. Follow the
instructions and download the video onto
a CD-R for playback on this DVD player.
Helpful Hints:
– All the downloaded videos from DivX
VOD can only be played back on this DVD
player.
– Time search feature is not available during
DivX movie playback.
®
VOD service.
®
VOD service
®
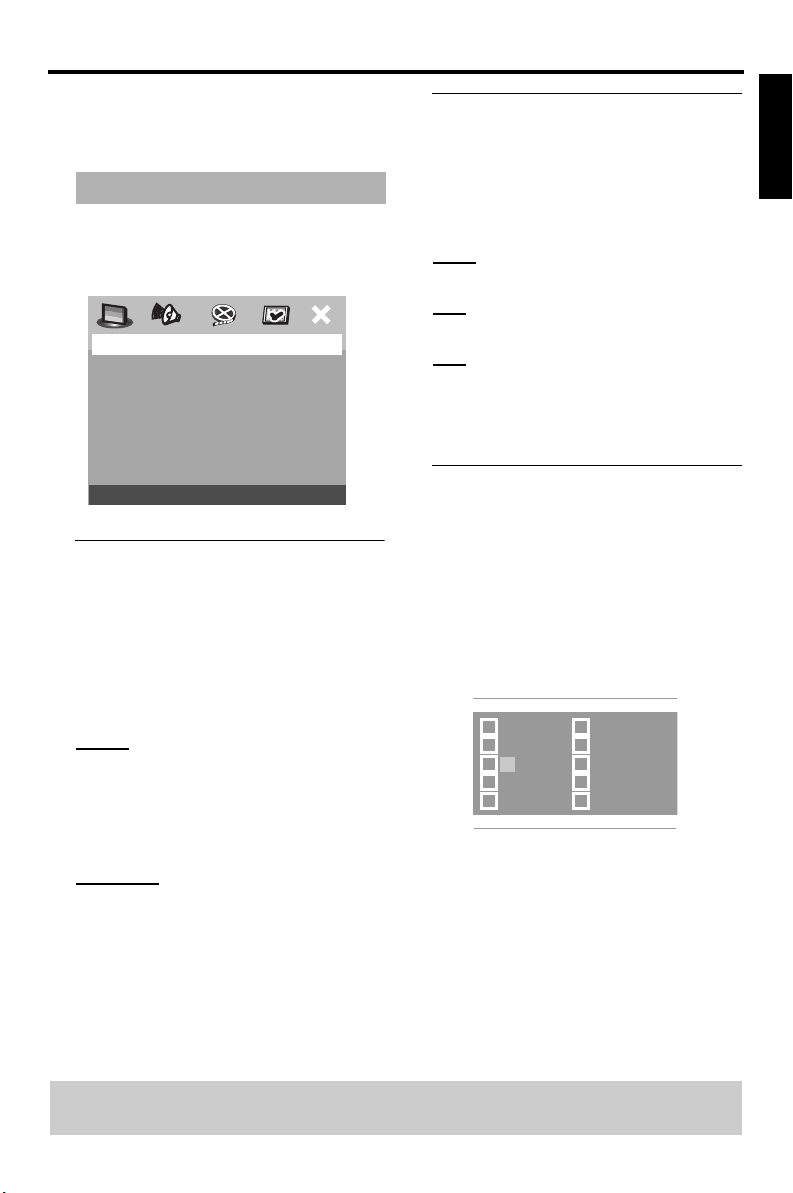
Audio Setup Menu
1 Press SETUP.
2 Press 1 2 to select ‘Audio Setup’ icon.
3 Press ENTER/OK to confirm.
AUDIO SETUP PAGE
ANALOG OUTPUT
DIGITAL AUDIO
CD UPSAMPLING
NIGHT MODE
Setting the analog output
Set Analog Output to match your DVD
Player’s playback capability.
1 In ‘AUDIO SETUP PAGE’, press 34 to
highlight {ANALOG OUTPUT}, then press
2.
STEREO
Select this to change channel output to
stereo which delivers sound from only the
two front speakers.
LT/RT
Select this if your DVD player is connected
to a Dolby Prologic decoder.
VIRTUAL SURROUND
Select this to reproduce the surround
channels virtually.
2 Press 34 to select a setting, then press
ENTER/OK to confirm your selection.
English
TIPS: To return to the previous menu, press 1.
To remove the menu, press SETUP.
19
Page 24

Setup Menu
Setting the Digital output
The options included in Digital Audio are:
‘Digital Output’ and ‘LPCM Output’.
1 In ‘AUDIO SETUP PAGE’, press 34 to
highlight {DIGITAL AUDIO}, then press 2.
2 Press the 34 to highlight an option.
3 Enter its submenu by pressing 2.
4 Move the cursor by pressing the 34 to
highlight the selected item.
DIGITAL OUTPUT
Set the Digital output according to your
optional audio equipment connection.
OFF
Turn off the digital output.
ALL
If you have connected your DIGITAL
AUDIO OUT to a multi-channel decoder/
receiver.
PCM ONLY
Only if your receiver is not capable of
decoding multi-channel audio.
LPCM OUTPUT
If you connect the DVD Player to a PCM
compatible receiver via the digital
terminals, such as coaxial or optical etc.,
you may need to adjust ‘LPCM Output’.
Discs are recorded at a certain sampling
rate. The higher the sampling rate, the
better the sound quality.
48K
Playback a disc recorded at the sampling
rate of 48kHz. 96kHz (if available on disc)
PCM data stream will be converted to
48kHz.
96K
Playback a disc recorded at the sampling
rate of 96kHz. If the 96kHz disc is copy
protected, the digital output will be muted
to comply with the standards.
CD Upsampling
This feature allows you to convert your
music CD to a higher sampling rate using
sophisticated digital signal processing for
better sound quality. If you have activated
the upsampling, the player will
automatically switch to stereo mode.
1 In ‘AUDIO SETUP PAGE’, press 34 to
highlight {CD UPSAMPLING}, then press
2.
OFF
Select this to disable CD-upsampling.
88.2 kHz (X2)
Select this to convert the sampling rate of
the CDs twice higher than the original.
176.4 kHz (X4)
Select this to convert the sampling rate of
the CDs four times higher than the
original.
2 Press 34 to select a setting, then press
ENTER/OK to confirm your selection.
Note:
– This setting is only applicable for the signals
output from the analog jacks.
TIPS: To return to the previous menu, press 1.
To remove the menu, press SETUP.
20
Page 25
Setup Menu
Night Mode
In this mode, the high volume outputs are
softened and low volume outputs are
brought upward to an audible level. It is
useful for watching your favorite action
movie without disturbing others at night.
1 In ‘AUDIO SETUP PAGE’, press 34 to
highlight {NIGHT MODE}, then press 2.
ON
Select this to level out the volume. This
feature is only available for movies with
Dolby Digital mode.
OFF
Select this when you want to enjoy the
surround sound with its full dynamic range.
2 Press 34 to select a setting, then press
ENTER/OK to confirm your selection.
Video Setup Menu
1 Press SETUP.
2 Press 1 2 to select ‘Video Setup’ icon.
3 Press ENTER/OK to confirm.
VIDEO SETUP PAGE
TV TYPE
TV DISPLAY
PROGRESSIVE
PICTURE SETTING
COMPONENT
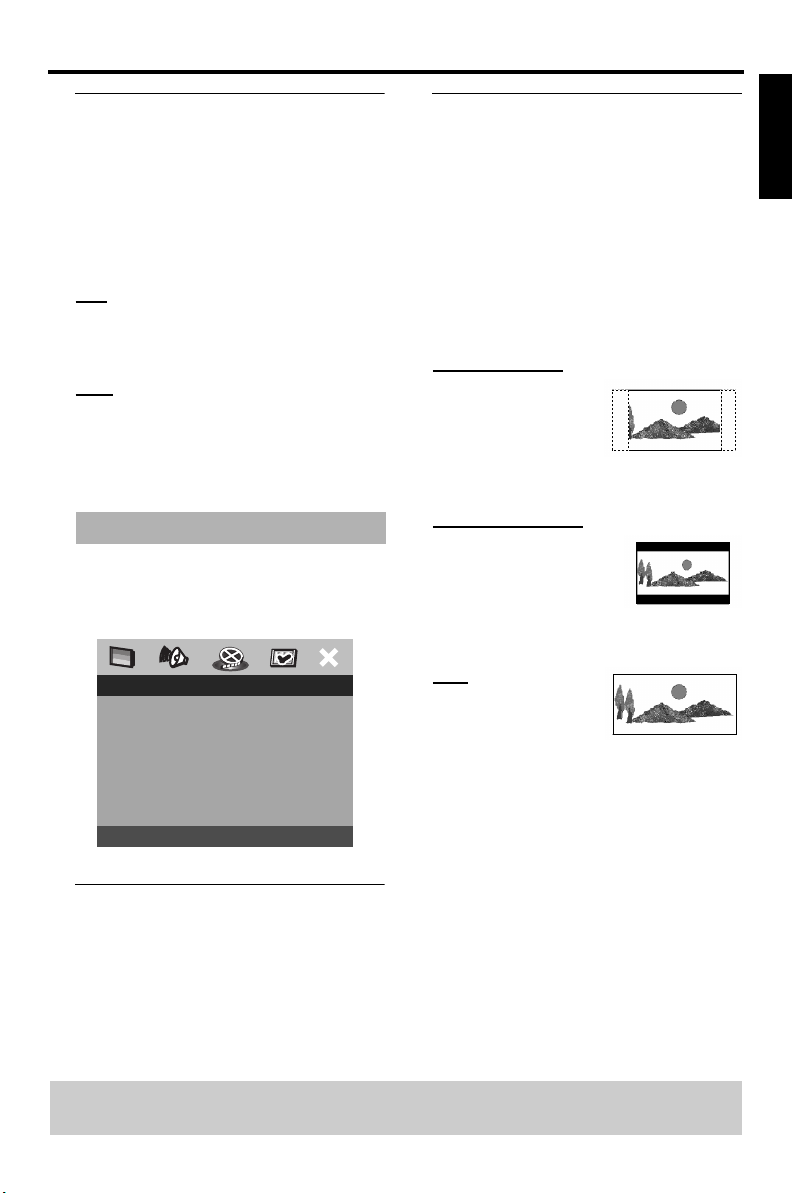
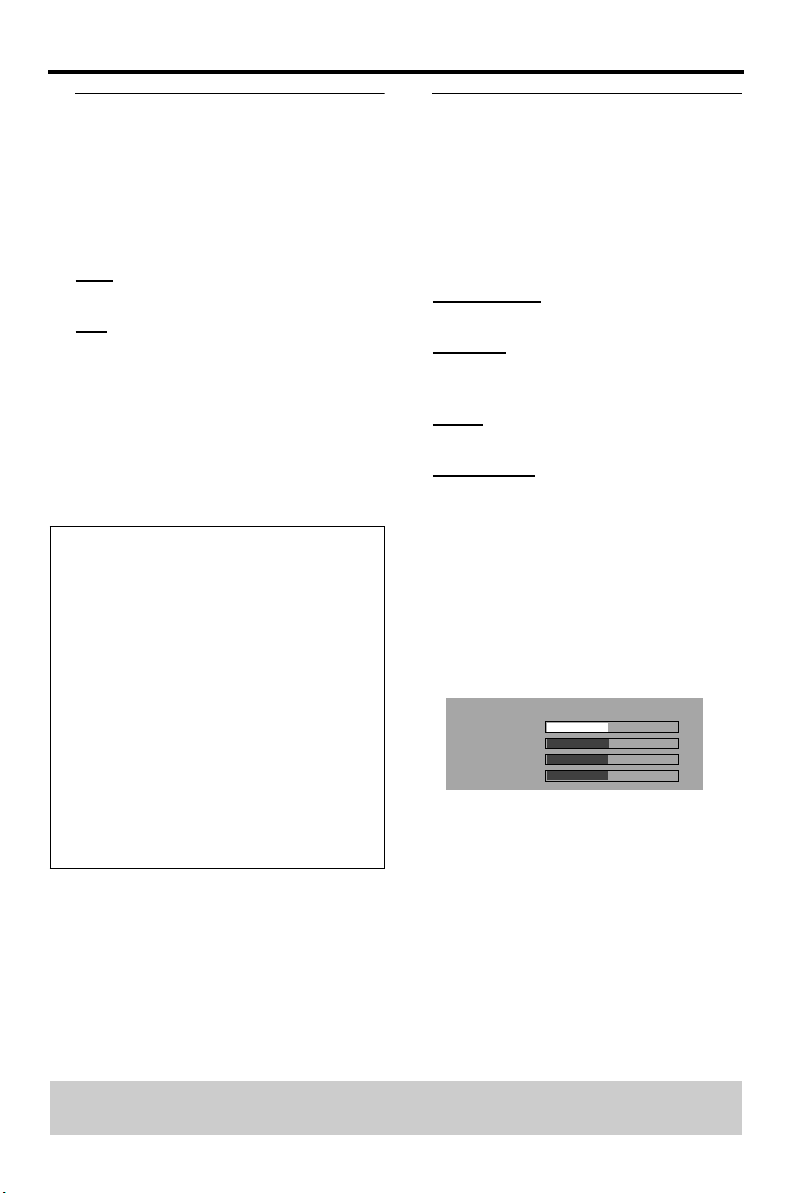
Setting the TV Display
Set the aspect ratio of the DVD Player
according to the TV you have connected.
The format you select must be available on
the disc. If it is not, the setting for TV
display will not affect the picture during
playback.
1 In ‘VIDEO SETUP PAGE’, press 34 to
highlight {TV DISPLAY}, then press 2.
2 Press 34 to highlight one of the options
below:
4:3 PAN SCAN
Select this if you have
a normal TV and want
both sides of the
picture to be trimmed
or formatted to fit
your TV screen.
4:3 LETTER BOX
Select this if you have a
normal TV. In this case, a
wide picture with black
bands on the upper and
lower portions of the TV screen will be
displayed.
16:9
Select this if you have
a widescreen TV.
3 Select an item and press ENTER/OK.
English
TV Type
This menu contains the options for
selecting the color system that matches
the connected TV. For details, see page 7.
TIPS: To return to the previous menu, press 1.
To remove the menu, press SETUP.
21
Page 26
Setup Menu
Progressive
This feature is only applicable if you have
connected this DVD Player to a
Progressive Scan TV through the Y Pb Pr
jacks (see page 6).
1 In ‘VIDEO SETUP PAGE’, press 34 to
highlight {PROGRESSIVE}, then press 2.
OFF
To disable Progressive Scan function.
ON
To enable Progressive Scan function.
2 Press 34 to select a setting, then press
ENTER/OK to confirm your selection.
Notes on activating Progressive:
– Ensure that your TV has progressive
scan.
– Connect with YPbPr video cable.
CONSUMERS SHOULD NOTE THAT NOT ALL
HIGH DEFINITION TELEVISION SETS ARE
FULLY COMPATIBLE WITH THIS PRODUCT
AND MAY CAUSE ARTIFACTS TO BE
DISPLAYED IN THE PICTURE. IN CASE OF 525
OR 625 PROGRESSIVE SCAN PICTURE
PROBLEMS, IT IS RECOMMENDED THAT THE
USER SWITCH THE CONNECTION TO THE
“STANDARD DEFINITION” OUTPUT. IF THERE
ARE QUESTIONS REGARDING OUR VIDEO
MONITOR COMPATIBILITY WITH THIS
MODEL 525P AND 625P DVD PLAYER, PLEASE
CONTACT OUR CUSTOMER SERVICE
CENTER.
This unit is compatible with the complete line of
YAMAHA products, including the projectors DPX1000, LPX-510 and the plasma monitor PDM4210E.
Picture Setting
This DVD Player provides three
predefined sets of picture color settings
and one personal setting which you can
define yourself.
1 In ‘VIDEO SETUP PAGE’, press 34 to
highlight {PICTURE SETTING}, then press
2.
STANDARD
Select this for standard picture setting.
BRIGHT
Select this will make the TV picture
brighter.
SOFT
Select this will make the TV picture softer.
PERSONAL
Select this to personalize your picture
color by adjusting the brightness, contrast,
tint and color (saturation).
2 Press 34 to select a setting, then press
ENTER/OK to confirm your selection.
3 If you select {PERSONAL}, then proceed
to steps 4–7.
➜ The ‘PERSONAL PICTURE SETUP’
menu appears.
PERSONAL PICTURE SETUP
BRIGHTNESS
CONTRAST
TINT
COLOR
0
0
0
0
TIPS: To return to the previous menu, press 1.
To remove the menu, press SETUP.
22
Page 27

Setup Menu
4 Press 34 to highlight one of the following
options.
BRIGHTNESS
Increase the value will brighten the picture
or vice versa. Choose zero (0) for average
setting.
CONTRAST
Increase the value will sharpen the picture
or vice versa. Choose zero (0) to balance
the contrast.
TINT
Increase the value will darken the picture
or vice versa. Choose zero (0) for average
setting.
COLOR
Increase the value will enhance the color in
your picture or vice versa. Choose zero
(0) to balance the color.
5 Press 1 2 to adjust the setting that best
suit your personal preference.
6 Repeat steps 4–5
features.
7 Press ENTER/OK to confirm.
for adjusting other color
Switching the YUV/RGB
This setting allows you to toggle the
output of the video signal between RGB
(on scart) and Y Pb Pr (YUV).
1 In ‘VIDEO SETUP PAGE’, press 34 to
highlight {COMPONENT}, then press 2.
YUV
Select this for Y Pb Pr connection.
RGB
Select this for Scart connection.
2 Press 34 to select a setting, then press
ENTER/OK to confirm your selection.
English
TIPS: To return to the previous menu, press 1.
To remove the menu, press SETUP.
23
Page 28

Setup Menu
Preference Setup Menu
1 Press STOP 9 twice to stop playback (if
any), then press SETUP.
2 Press 1 2 to select the ‘Preference Setup’
icon.
3 Press ENTER/OK to confirm.
PREFERENCE PAGE
AUDIO
SUBTITLE
DISC MENU
PARENTAL
PBC
MP3/JPEG NAV
PASSWORD
DEFAULT
Audio, Subtitle, Disc Menu
These menus contain various language
options for audio, subtitle and disc menu
which may be recorded on the DVD. For
details, see page 9.
Restricting playback by Parental Control
Some DVDs may have a parental level
assigned to the complete disc or to certain
scenes on the disc. This feature lets you set
a playback limitation level.
The rating levels are from 1 to 8 and are
country dependent. You can prohibit the
playing of certain discs that are not suitable
for your children or have certain discs
played with alternative scenes.
1 In ‘PREFERENCE PAGE’, press 34 to
highlight {PARENTAL}, then press 2.
PREFERENCE PAGE
AUDIO 1 KID SAFE
SUBTITLE 2 G
DISC MENU 3 PG
PARENTAL 4 PG 13
PBC 5 PGR
MP3/JPEG NAV 6 R
PASSWORD 7 NC 17
DEFAULT 8 ADULT
2 Press 34 to highlight a rating level for the
disc inserted and press ENTER/OK.
➜ To disable Parental controls and have all
Discs play, select {8 ADULT}.
3 Use the numeric keypad (0-9) to enter
the six-digit password (see page 25
“Changing the Password”).
➜ DVDs that are rated above the level you
selected will not play unless you enter
your six-digit password.
Helpful Hints:
– VCD, SVCD, CD have no level indication, so
parental control function has no effect on
these type of discs. This applies to most
illegal DVD discs.
– Some DVDs are not encoded with a rating
though the movie rating may be printed on
the Disc cover. The rating level feature does
not work for such Discs.
PBC (Playback Control)
You can set the PBC to ON or OFF. This
feature is available only on Video CD 2.0
with playback control (PBC) feature. For
details, see page 13.
TIPS: To return to the previous menu, press 1.
To remove the menu, press SETUP.
24
Page 29

Setup Menu
MP3/JPEG Menu
MP3/JPEG Navigator can be set only if the
disc is recorded with menu. It allows you
to select different display menus for easy
navigation.
1 In ‘PREFERENCE PAGE’, press 34 to
highlight {MP3/JPEG NAV}, then press 2.
WITHOUT MENU
Select this to display all the files contained
in the MP3/Picture CD.
WITH MENU
Select this to display only the folder menu
of the MP3/Picture CD.
2 Press 34 to select a setting, then press
ENTER/OK to confirm your selection.
Changing the Password
The same password is used for both
Parental Control and Disc Lock. Enter
your six-digit password when prompted
on the screen. The default password is 000
000.
1 In ‘PREFERENCE PAGE’, press 34 to
highlight {PASSWORD}, then press 2 to
select {CHANGE}.
PREFERENCE PAGE
AUDIO
SUBTITLE
DISC MENU
PARENTAL
PBC
MP3/JPEG NAV
PASSWORD CHANGE
DEFAULT
2 Press ENTER/OK to enter the ‘Password
Change Page’.
OLD PASSWORD
NEW PASSWORD
CONFIRM PWD
OK
3 Use the numeric keypad (0-9) to enter
your old six-digit password.
➜ When doing this for the first time, key
in ‘000 000’.
➜ If you forget your old six-digit
password, key in ‘000 000’.
4 Enter the new six-digit password.
5 Enter the new six-digit password a second
time to confirm.
➜ The new six-digit password will now
take effect.
6 Press ENTER/OK to confirm.
Restoring to original settings
Setting the DEFAULT function will reset all
options and your personal settings to the
factory defaults, except your password for
Parental Control and Disc Lock.
1 In ‘PREFERENCE PAGE’, press 34 to
highlight {DEFAULT}, then press 2 to
select {RESET}.
2 Press ENTER/OK to confirm.
➜ All settings will now reset to factory
defaults.
English
TIPS: To return to the previous menu, press 1.
To remove the menu, press SETUP.
25
Page 30

Language Code
These pages can be used to select other languages.This does not affect the
options in “AUDIO”, “SUBTITLE” or “DISC MENU”.
Abkhazian 6566 German 6869
Afar 6565 Gikuyu; Kikuyu 7573
Afrikaans 6570 Greek, 6976
Albanian 8381 Guarani 7178
Amharic 6577 Gujarati 7185
Arabic 6582 Hausa 7265
Armenian 7289 Hebrew 7269
Assamese 6583 Herero 7290
Avestan 6569 Hindi 7273
Aymara 6589 Hiri Motu 7279
Azerbaijani 6590 Hungarian 7285
Bashkir 6665 Icelandic 7383
Basque 6985 Ido 7379
Belarusian 6669 Indonesian 7368
Bengali 6678 Interlingua (International) 7365
Bihari 6672 Interlingue 7369
Bislama 6673 Inuktitut 7385
Bokmål, Norwegian 7866 Inupiaq 7375
Bosnian 6683 Irish 7165
Breton 6682 Italian 7384
Bulgarian 6671 Japanese 7465
Burmese 7789 Javanese 7486
Castilian, Spanish 6983 Kalaallisut 7576
Catalan 6765 Kannada 7578
Chamorro 6772 Kashmiri 7583
Chechen 6769 Kazakh 7575
Chewa; Chichewa; Nyanja 7889 Khmer 7577
Chichewa; Chewa; Nyanja 7889 Kikuyu; Gikuyu 7573
Chinese 9072 Kinyarwanda 8287
Chuang; Zhuang 9065 Kirghiz 7589
Church Slavic; Slavonic; 6785 Komi 7586
Church Slavonic; Church 6785 Korean 7579
Chuvash 6786 Kuanyama; Kwanyama 7574
Cornish 7587 Kurdish 7585
Corsican 6779 Kwanyama; Kuanyama 7574
Croatian 7282 Lao 7679
Czech 6783 Latin 7665
Danish 6865 Latvian 7686
Dutch 7876 Letzeburgesch; 7666
Dzongkha 6890 Limburgan; Limburger; 7673
English 6978 Limburger; Limburgan; 7673
Esperanto 6979 Limburgish; Limburger; 7673
Estonian 6984 Lingala 7678
Faroese 7079 Lithuanian 7684
Fijian 7074 Luxembourgish; 7666
Finnish 7073 Macedonian 7775
French 7082 Malagasy 7771
Frisian 7089 Malay 7783
Gaelic; Scottish Gaelic 7168 Malayalam 7776
Gallegan 7176 Maltese 7784
Georgian 7565 Manx 7186
26
Page 31

Language Code
These pages can be used to select other languages.This does not affect the options in
“AUDIO”, “SUBTITLE” or “DISC MENU”.
Maori 7773 Sotho, Southem 8384
Marathi 7782 South Ndebele 7882
Marshallese 7772 Spanish; Castilian 6983
Moldavian 7779 Sundanese 8385
Mongolian 7778 Swahili 8387
Nauru 7865 Swati 8383
Navaho, Navajo 7886 Swedish 8386
Navajo; Navaho 7886 Tagalog 8476
Ndebele, North 7868 Tahitian 8489
Ndebele, South 7882 Tajik 8471
Ndonga 7871 Tamil 8465
Nepali 7869 Tatar 8484
Northern Sami 8369 Telugu 8469
North Ndebele 7868 Thai 8472
Norwegian 7879 Tibetan 6679
Norwegian Bokmål; Bokmål, 7866 Tigrinya 8473
Norwegian Nynorsk; 7878 Tonga (Tonga Islands) 8479
Nyanja; Chichewa; Chewa 7889 Tsonga 8483
Nynorsk, Norwegian; 7878 Tswana 8478
Occitan (post 1500); Proven 7967 Turkish 8482
Old Bulgarian; Old Slavonic; 6785 Turkmen 8475
Old Church Slavonic; Old 6785 Twi 8487
Old Slavonic; Church 6785 Uighur 8571
Oriya 7982 Ukrainian 8575
Oromo 7977 Urdu 8582
Ossetian; Ossetic 7983 Uzbek 8590
Ossetic; Ossetian 7983 Vietnamese 8673
Pali 8073 Volapük 8679
Panjabi 8065 Walloon 8765
Persian 7065 Welsh 6789
Polish 8076 Wolof 8779
Portuguese 8084 Xhosa 8872
Provençal; Occitan (post) 7967 Yiddish 8973
Pushto 8083 Yoruba 8979
Quechua 8185 Zhuang; Chuang 9065
Raeto-Romance 8277 Zulu 9085
Romanian 8279
Rundi 8278
Russian 8285
Samoan 8377
Sango 8371
Sanskrit 8365
Sardinian 8367
Scottish Gaelic; Gaelic 7168
Serbian 8382
Shona 8378
Sindhi 8368
Sinhalese 8373
Slovak 8375
Slovenian 8376
Somali 8379
English
27
Page 32

Troubleshooting
Refer to the chart below when this unit does not function properly. If the
problem you are experiencing is not listed below or if the instruction below does
not help, set this unit to the standby mode, disconnect the power cord, and
contact the nearest authorized YAMAHA dealer or service center.
Problem Solution
No power – Check if the AC power cord is properly connected.
No picture – Refer to your TV’s manual for correct Video In channel
Distorted picture – Sometimes a small amount of picture distortion may appear
Completely distorted picture
or black/white picture with
DVD
No sound or distorted sound – Adjust the volume.
No audio at digital output
No sound and picture – Check that the RGB/SCART cable is connected to the
Disc can’t be played – The DVD+R/RW, DVD-R/RW, CD-R/RW must be
Picture freezes momentarily
during playback
The player does not respond to
the Remote Control
Buttons do not work – To completely reset the player, unplug the AC cord from
– Press the STANDBY/ON on the front of the DVD system
to turn on the power.
selection. Change the TV channel until you see the DVD
screen.
– Check if the TV is switched on.
depending on the disc being played back. This is not a
malfunction.
– Make sure the disc is compatible with the DVD Player.
– Ensure that the DVD Player’s TV Type is set to match that
of the Disc and your TV.
– Check that the speakers are connected correctly.
– Check the digital connections.
– Check if your receiver can decode MPEG-2 or DTS and if
not, please make sure the digital output is set to
PCM ONLY.
– Check if the audio format of the selected audio language
matches your receiver capabilities.
correct device (See “Video Connections”).
finalized.
– Ensure the disc label is facing up.
– Check if the disc is defective by trying another disc.
– If you have recorded a Picture CD or MP3 CD yourself,
ensure that your disc contains at least 10 pictures or 5 MP3
tracks.
– Region code incorrect.
– Check the disc for fingerprints/scratches and clean with a
soft cloth wiping from centre to edge.
– Aim the Remote Control directly at the sensor on the front
of the player.
– Reduce the distance to the player.
– Replace the batteries in the Remote Control.
– Re-insert the batteries with their polarities (+/– signs) as
indicated.
the AC outlet for 5-10 seconds.
28
Page 33

Troubleshooting
Problem Solution
Player does not respond to
some operating commands
during playback.
DVD Player cannot read CDs/
DVDs
Menu items cannot be selected – Press STOP twice before selecting System Menu.
Unable to play DivX movies – Check that the DivX file is encoded in ‘Home Theater’
Unable to select Progressive
Scan on/off
No sound during DivX movies
playback
– Operations may not be permitted by the disc. Refer to the
instructions of the disc jacket.
– Use a commonly available cleaning CD/DVD to clean the
lens before sending the DVD Player for repair.
– Depending on the disc availability, some menu items cannot
be selected.
mode with DivX 5.x encoder.
– Check that the output of the video signal is switch to ‘YUV’.
– The audio code may not be supported by the DVD player.
English
29
Page 34

Glossary
Analog: Sound that has not been turned into num-
bers. Analog sound varies, while digital sound has
specific numerical values. These jacks send audio
through two channels, the left and right.
Aspect ratio:
sizes of a displayed image. The horizontal vs. vertical
ratio of conventional TVs. is 4:3, and that of widescreens is 16:9.
A
UDIO OUT Jacks: Jacks on the back of the
DVD System that send audio to another system (TV,
Stereo, etc.).
Bit Rate:
length of music; measured in kilobits per seconds, or
kbps. Or, the speed at which you record. Generally,
the higher the bit rate, or the higher the recording
speed, the better the sound quality. However, higher
bit rates use more space on a Disc.
Cha
pter: Sections of a picture or a music piece on
a DVD that are smaller than titles. A title is composed of several chapters. Each chapter is assigned a
chapter number enabling you to locate the chapter
you want.
Component
of the DVD System that send high-quality video to a
TV that has Component Video In jacks (R/G/B, Y/Pb/
Pr, etc.).
Disc men
selection of images, sounds, subtitles, multi-angles,
etc. recorded on a DVD.
Digital:
numerical values. Digital sound is available when you
use the DIGITAL AUDIO OUT COAXIAL or OPTICAL jacks. These jacks send audio through multiple
channels, instead of just two channels as analog
does.
DivX 3.11/4x/5x:
ing, MPEG-4 based video compression technology,
developed by DivXNetworks, Inc., that can shrink
digital video to sizes small enough to be transported
over the internet, while maintaining high visual quality.
Dolb
oped by Dolby Laboratories containing up to six
channels of digital audio (front left and right, surround left and right, center and subwoofer).
DTS:
sound system, but it is different from Dolby Digital.
The formats were developed by different companies.
JPEG:
still-picture data compression system proposed by
the Joint Photographic Expert Group, which features small decrease in image quality in spite of its
high compression ratio.
The ratio of vertical and horizontal
The amount of data used to hold a given
Video Out Jacks: Jacks on the back
u: A screen display prepared for allowing
Sound that has been converted into
The DivX code is a patent pend-
y Digital: A surround sound system devel-
Digital Theatre Systems. This is a surround
A very common digital still picture format. A
MP3:
A file format with a sound data compression
system. “MP3” is the abbreviation of Motion Picture
Experts Group 1 (or MPEG-1) Audio Layer 3. By
using MP3 format, one CD-R or CD-RW can contain about 10 times as much data volume as a regular CD can.
P
arental Control: A function of the DVD to limit
playback of the disc by the age of the users according to the limitation level in each country. The limitation varies from disc to disc; when it is activated,
playback will be prohibited if the software’s level is
higher than the user-set level.
PCM (Pulse Code Modulation):
converting analog sound signal to digital signal for
later processing, with no data compression used in
conversion.
Pla
yback control (PBC): Refers to the signal
recorded on video CDs or SVCDs for controlling
reproduction. By using menu screens recorded on a
Video CD or SVCD that supports PBC, you can
enjoy interactive-type software as well as software
having a search function.
Pr
ogressive Scan: It displays all the horizontal
lines of a picture at one time, as a signal frame. This
system can convert the interlaced video from DVD
into progressive format for connection to a progressive display. It dramatically increases the vertical resolution.
Region code:
played back only in the region designated beforehand. This unit will only play discs that have compatible region codes. You can find the region code of
your unit by looking on the product label. Some
discs are compatible with more than one region (or
ALL regions).
S-Video:
rate signals for the luminance and the color. You can
use S-Video only if your TV has S- video In jack.
Sur
round: A system for creating realistic three
dimensional sound fields full of realism by arranging
multiple speakers around the listener.
Title:
ture on DVD, music, etc., in video software, or the
entire album in audio software. Each title is assigned
a title number enabling you to locate the title you
want.
VIDEO OUT jack:
System that sends video to a TV.
A system for allowing discs to be
Produces a clear picture by sending sepa-
The longest section of a picture or music fea-
Jack on the back of the DVD
A system for
30
Page 35

Specifications
PLAYBACK SYSTEM
DVD Video
Video CD & SVCD
CD
PICTURE CD
CD-R, CD-RW
DVD+R, DVD+RW
DVD-R, DVD-RW
VIDEO PERFORMANCE
Video (CVBS) Output 1 Vpp into 75 ohm
S-Video output Y: 1 Vpp into 75 ohm
C: 0.3 Vpp into 75 ohm
RGB (SCART) output 0.7 Vpp into 75 ohm
Component video output Y: 1 Vpp into 75 ohm
Pb/Cb Pr/Cr: 0.7 Vpp into
75 ohm
AUDIO FORMAT
Digital Mpeg/ Dolby Digital/ Compressed Digital
DTS
PCM 16, 20, 24 bits
fs, 44.1, 48, 96 kHz
MP3(ISO 9660) 24, 32, 56, 64, 96, 128,
256 kbps
fs, 16, 22.05, 24, 32,
44.1, 48 kHz
WMA 32 kbps–192 kbps, mono,
stereo
Analog Sound Stereo
LASER
Type Semiconductor laser GaAlAs
Wave length 650 nm (DVD)
780 nm (VCD/CD)
Output Power 7 mW (DVD)
10 mW (VCD/CD)
Beam divergence 60 degree
AUDIO PERFORMANCE
DA Converter 24bit
Signal-Noise (1 kHz) 105dB
Dynamic range (1 kHz) 100dB
DVD fs 96 kHz 2Hz- 44kHz
fs 48 kHz 2Hz- 22kHz
SVCD fs 48 kHz 2Hz- 22kHz
fs 44.1kHz 2Hz- 20kHz
CD/VCD fs 44.1kHz 2Hz- 20kHz
Distortion and Noise (1 kHz) 0.003%
TV STANDARD (PAL/50Hz) (NTSC/60Hz)
Number of lines 625 525
Playback Multistandard (PAL/NTSC)
CONNECTIONS
SCART Euroconnector
Y Output Cinch (green)
Pb/Cb Output Cinch (blue)
Pr/Cr Output Cinch (red)
S-Video Output Mini DIN, 4 pins
Video Output Cinch
Audio Output (L+R) Cinch
Digital Output 1 coaxial, 1 optical
IEC60958 for CDDA / LPCM/
MPEG1
IEC61937 for MPEG 2, Dolby Digital
and DTS
CABINET
Dimensions (w x d x h) 435 x 310 x 51 mm
Weight Approx. 2.6 Kg
POWER SUPPLY
Power inlet 230V, 50Hz
Power usage Approx. 14W
Power usage standby < 1W
English
Specifications subject to change without prior
notice
31
Page 36

ATTENTION :TENIR COMPTE DES PRECAUTIONS CI-
DESSOUS AVANT DE FAIRE FONCTIONNER L’APPAREIL.
1 Afin de garantir un fonctionnement correct, il est
impératif de lire ce manuel. Conservez-le pour
toute référence ultérieure.
2 Veillez à installer cette unité à un endroit bien
ventilé, frais, sec et propre. Evitez de le placer en
plein soleil, à proximité d’une source de chaleur,
de l’exposer à des vibrations, à de la poussière, à
l’humidité ou au froid. Si vous le logez dans une
armoire, veillez à laisser ±2,5cm autour de l’unité
pour assurer une bonne ventilation.
3 Evitez de placer cette unité à proximité d’autres
appareils électriques, de moteurs ou de
transformateurs pour ne pas l’exposer à des
interférences.
4 Evitez des sauts de température drastiques
(froid–chaud) et n’utilisez jamais cette unité à un
endroit humide (dans une pièce avec
humidificateur, par exemple) pour éviter tout
risque de condensation à l’intérieur de l’unité.
Cela pourrait produire des électrocutions, un
incendie, d’endommager l’unité et/ou de
provoquer des blessures.
5 N’installez jamais cette unité à un endroit où des
objets ou des éclaboussures pourraient tomber
sur son boîtier. Ne placez jamais les objets
suivants sur l’unité:
– D’autres appareils de votre installation; ils
pourraient en effet endommager et/ou
provoquer une décoloration du boîtier.
– Des objets brûlants (bougies, etc.); ils
pourraient provoquer un incendie,
endommager l’unité et/ou causer des
dommages corporels.
Tout objet contenant un liquide; il pourrait en
–
effet être renversé et être à l’origine d’une
électrocution ou de l’endommagement de l’unité.
6 Evitez de couvrir l’unité au moyen d’un journal,
d’une nappe, d’un rideau, etc., afin de garantir une
bonne ventilation. Une température trop élevée
à l’intérieur du boîtier peut provoquer un
incendie, l’endommagement de l’unité et/ou des
blessures corporelles.
7 Veillez à ne relier l’unité à une prise secteur
qu’après avoir établi toutes les connexions requises.
8 Il convient de ne jamais utiliser l’unité dans une
position renversée, car cela pourrait provoquer
une surchauffe et d’éventuels dommages.
9 Maniez les touches, commandes et/ou câbles
avec soin.
10 Pour déconnecter l’unité de la prise murale, il
convient de tirer sur la fiche – jamais sur le câble
d’alimentation.
11 Ne nettoyez jamais le boîtier avec des solvants
chimiques. Ils pourraient en effet attaquer la
finition. Utilisez plutôt un chiffon propre et sec.
12 Veillez à ne brancher l’unité qu’à une prise murale
répondant aux exigences de voltage mentionnées
en face arrière. L’utilisation de cette unité avec un
voltage plus élevé est dangereux et peut provoquer
un incendie ou, pour le moins, endommager l’unité.
YAMAHA décline toute responsabilité pour des
dommages causés par l’utilisation d’un voltage autre
que celui figurant en face arrière.
13 Afin d’éviter des dommages causés par la foudre,
il convient de déconnecter l’unité de la prise
murale en cas d’orage.
14 N’essayez jamais de modifier ou de réparer cet
appareil. Adressez-vous à un SAV reconnu par
YAMAHA en cas de besoin. Le boîtier ne peut en
aucun cas être ouvert par l’utilisateur.
15 Si vous pensez ne pas utiliser cette unité pendant
un certain temps (lorsque vous partez en
vacances, par exemple), débranchez le cordon
d’alimentation de la prise secteur.
16 Veillez à lire “GUIDE DE DÉPANNAGE” et à
prendre les mesures qui s’imposent avant de
conclure que cette unité ne fonctionne plus
correctement.
17 Avant de transporter cette unité, il convient
d’appuyer sur STANDBY/ON pour placer l’unité
en état de veille et d’ensuite débrancher le
cordon d’alimentation de la prise secteur.
ATTENTION
AFIN DE REDUIRE LES RISQUES D’INCENDIE ET
DE DECHARGE ELECTRIQUE, NE PAS EXPOSER
CET APPAREIL A LA PLUIE OU A L’HUMIDITE.
Lors de la lecture de CD codés DTS, un bruit excessif
sera reproduit par les sorties stéréo analogiques. Pour
éviter tout dommage possible de la chaîne audio,
l’utilisateur doit prendre les mesures de précautions
appropriées si les sorties stéréo analogiques sont
raccordées à un système d’amplification. Pour pouvoir
obtenir une lecture DTS Digital Surround™, il faudra
raccorder un décodeur DTS Digital Surround™ 5,1
canaux externe à la sortie numérique du lecteur
SECURITE LASER
L’appareil utilise un laser. En raison des risques de
blessure des yeux, le retrait du couvercle ou les
réparations de l’appareil devront être confiés
exclusivement à un technicien d’entretien qualifié.
DANGER
Risque d'exposition au laser en cas d'ouverture. Eviter
toute exposition au faisceau.
Lorsque cet appareil est branché à la prise de courant,
ne pas approcher les yeux de l'ouverture du plateau
changeur et des autres ouvertures pour regarder à
l'intérieur.
Page 37

ZUR BEACHTUNG: BITTE LESEN SIE DIESE
BEDIENUNGSANLEITUNG VOR INBETRIEBNAHME DES GERÄTES
1 Um eine einwandfreie Funktion zu gewährleisten,
müssen Sie sich diese Bedienungsanleitung
vollständig durchlesen. Bewahren Sie sie für die
spätere Bezugnahme an einem sicheren Ort auf.
2 Installieren Sie die Anlage an einem ausreichend
belüfteten, kühlen, trockenen und staubfreien Ort
– meiden Sie direkte Sonneneinstrahlung,
Wärmequellen, Erschütterungen, Staub,
Feuchtigkeit oder Kälte. Beim Einbau in einen
Schrank muss an allen Seiten des Gerätes ein
Freiraum von mindestens 2,5cm gelassen werden.
3 Stellen Sie dieses Gerät niemals in die Nähe
anderer elektrischer Geräte, Motoren oder
Transformatoren, um Brummen zu vermeiden.
4 Setzen Sie das Gerät niemals starken
Temperatursprüngen (von kalt zu warm) aus und
meiden Sie feuchte Orte (z.B. die Nähe eines
Luftbefeuchtigers), um Kondensbildung zu
vermeiden. Das könnte nämlich zu
Stromschlägen, Brand, anderen Schäden und/
oder Verletzungen führen.
5 Stellen Sie dieses Gerät niemals an Orte, wo die
Gefahr besteht, dass andere Gegenstände darauf
fallen bzw. Flüssigkeiten darauf tropfen können.
Folgende Dinge dürfen niemals auf die
Geräteoberseite gestellt werden:
– Andere Bausteine, weil sie das Gehäuse
beschädigen und/oder zu Verfärbungen führen
können.
Brennende Gegenstände (z.B. Kerzen), weil sie
–
einen Brand verursachen, das Gerät beschädigen
und/oder zu Verletzungen führen können.
–
Flüssigkeitsbehälter, weil die Gefahr besteht, dass
sie umgestoßen werden, so dass die Flüssigkeit ins
Geräteinnere gelangt. Das kann zu Kurzschlüssen
und/oder anderen Schäden führen.
6 Decken Sie das Gerät niemals mit einer Zeitung,
Tischdecke, Gardine o.ä. ab, weil dann keine
ausreichende Lüftung mehr gewährleistet ist. Ein
eventueller Wärmestau im Geräteinneren kann zu
Brand, Schäden und/oder Verletzungen führen.
7 Schließen Sie das Gerät erst ans Netz an,
nachdem Sie alle notwendigen Verbindungen
hergestellt haben.
8 Stellen Sie das Gerät für den Betrieb immer
richtig herum auf, um eine Überhitzung und damit
einhergehende Schäden zu vermeiden.
9 Behandeln Sie die Tasten, Regler und/oder Kabel
immer mit der gebührenden Umsicht.
10 Ziehen Sie beim Lösen des Netzanschlusses
immer am Stecker – niemals am Kabel selbst.
11 Reinigen Sie das Gehäuse niemals mit
chemischen Lösungsmitteln. Diese könnten
nämlich die Gehäuseoberfläche angreifen.
Verwenden Sie ein sauberes, trockenes Tuch.
12 Betreiben Sie das Gerät nur mit der auf dem
Typenschild erwähnten Netzspannung. Die
Verwendung einer anderen Netzspannung kann
zu Stromschlägen, Brand und/oder Verletzungen
führen. YAMAHA haftet nicht für Schäden, die
sich aus der Verwendung einer unsachgemäßen
Netzspannung ergeben.
13 Um Schäden durch Blitzeinschlag zu vermeiden,
müssen Sie im Falle eines Gewitters den
Netzanschluss lösen.
14 Nehmen Sie keine Änderungen bzw.
Reparaturversuche an dem Gerät vor. Überlassen
Sie alle erforderlichen Wartungsarbeiten einer
von YAMAHA anerkannten Kundendienststelle.
Öffnen Sie unter keinen Umständen das Gehäuse.
15 Wenn Sie das Gerät längere Zeit nicht
verwenden möchten (z.B. weil Sie in Urlaub
fahren), sollten Sie den Netzanschluss lösen.
16 Bitte lesen Sie sich im Falle einer Störung zuerst
das Kapitel „Störungsbeseitigung” durch.
17 Vor dem Transport dieses Gerätes müssen Sie
STANDBY/ON drücken, um den
Bereitschaftsbetrieb zu wählen und den
Netzanschluss lösen.
ACHTUNG
UM FEUER UND STROMSCHLÄGE ZU
VERMEIDEN, SOLLTE DAS GERÄTWEDER REGEN
NOCH FEUCHTIGKEIT AUSGESETZT WERDEN.
Während der Wiedergabe von CDs mit DTSCodierung geben die Analog-Ausgänge ein ziemlich
starkes Rauschen aus. Um Ihre Anlage nicht unnötig zu
beschädigen, müssen Sie die notwendigen
Vorkehrungen treffen, sofern Sie die AnalogAusgänge mit einem Verstärker o.ä. verbunden haben.
Für die Wiedergabe von DTS Digital Surround™Signalen brauchen Sie einen externen 5.1-Kanal DTS
Digital Surround™-Decoder, den Sie mit dem DigitalAusgang des Gerätes verbinden müssen.
VORSICHT MIT DEM LASER
Dieses Gerät enthält einen Laser. Um unnötige
Augenverletzungen zu vermeiden, sollten Sie alle
Wartungs- und Reparaturarbeiten einem qualifizierten
Wartungstechniker überlassen.
GEFAHR
Sichtbare Laserstrahlen bei geöffneter Abdeckung.
Achten Sie darauf, nicht direkt in den Laserstrahl zu
blicken.
Wenn das Gerät an die Wandsteckdose angeschlossen
ist, halten Sie die Augen von der Öffnung des DiscFachs oder anderen Öffnungen fern, und blicken Sie in
diesem Fall nicht in das Innere des Geräts.
Page 38

Table des matières
Introduction
Code de zone..........................................................................2
Accessoires fournis................................................................2
Remarques à propos des disques .......................................2
Entretien des disques............................................................. 2
Marques déposées et brevets.............................................. 2
Aperçu des fonctions
Façade et panneau arrière....................................................3
Télécommande........................................................................ 4
Opérations préalables
Généralités concernant les connexions ............................5
Connexions numériques.......................................................5
Connexions analogiques .......................................................5
Connexions vidéo...................................................................6
Prise S-vidéo <A> ..............................................................................6
Prise vidéo composite <B>...........................................................6
Prise vidéo composante <C>......................................................6
Connexion Péritel <D>..................................................................6
Mise en route
Installation des piles dans la télécommande..................... 7
Utilisation de la télécommande...................................................7
Mise sous tension ...................................................................7
Sélection du système de codage couleur qui
correspond à votre téléviseur .......................................7
Sélection de la langue ............................................................8
Choix de la langue menu................................................................8
Choix de la audio, sous-titres et menu disque...................9
Utilisation des disques
Opérations de lecture élémentaires ................................10
Fonctions générales..............................................................10
Interruption de la lecture .............................................................10
Sélection d’une plage/ d’un chapitre...................................... 10
Recherche en arrière/en avant.................................................. 10
Arrêt de la lecture............................................................................ 10
Sélection des diverses fonctions de répétition/lecture
aléatoire..................................................................................11
8Répétition (Repeat) et mode aléatoire (Shuffle)......... 11
Répétition d’un passage ................................................................11
Opérations de lecture vidéo (DVD/VCD/SVCD) .............11
Utilisation du menu du disque ..................................................11
Zoom sur image................................................................................ 11
Reprise de la lecture à partir du dernier point
d’arrêt......................................................................................................11
Affichage à l’écran (OSD)............................................................ 12
Fonctions spéciales DVD.................................................... 13
Lecture d’un titre ..............................................................................13
Angle de caméra...............................................................................13
Audio.......................................................................................................13
Sous-titres .............................................................................................13
Fonctions spéciales CD-Vidéo & SVCD......................... 13
Contrôle de lecture (PBC).......................................................... 13
Prévisualisation ...................................................................................13
Lecture d’un CD MP3/ DivX/ JPEG/ Kodak Picture........14
Généralités............................................................................................ 14
Sélection d’un dossier et d’une plage/ d’un fichier ........15
Répétition (Repeat) et mode aléatoire (Shuffle)............ 15
Fonctions spéciales des disques d’images....................... 15
Prévisualisation ...................................................................................15
Zoom sur image................................................................................ 16
Lecture multi-angle..........................................................................16
Effets de balayage .............................................................................16
Lecture simultanée de fichiers de musique MP3 et
d’images JPEG .....................................................................................16
Menu Setup
Menu d’installation générale.............................................. 17
Verrouillage/déverrouillage de lecture des DVD...........17
Réglage de luminosité de l’écran utilisateur....................... 17
Programme (non disponible pour les CD d’images/
MP3)......................................................................................................... 17
Choix de la langue OSD..............................................................18
Économiseur d’écran......................................................................18
Arrêt progr........................................................................................... 18
Code d’inscription DivX
Menu Réglages Audio.......................................................... 19
Réglage de la sortie analogique ................................................19
Réglage de la sortie numérique................................................ 20
Augmentation de fréquence d’échantillonnage du
CD............................................................................................................. 20
Mode nocturne.................................................................................. 21
Menu Réglages vidéo...........................................................21
Type TV.................................................................................................21
Affichage TV........................................................................................21
Progressif ...............................................................................................22
Réglages couleur................................................................................22
Commutation YUV/RGB ............................................................. 23
Menu relatif aux réglages préférentiels...........................24
Choix de la langue doublage, sous-titres et menu
disque ......................................................................................................24
Limitation de lecture en configurant le Contrôle
parental................................................................................................... 24
Playback Control (PBC)................................................................ 24
Navigateur MP3/JPEG ....................................................................25
Modification du mot de passe................................................... 25
Restauration des réglages d’origine........................................25
®
VOD.............................................. 19
Codes de langue......................... 26
Guide de dépannage.................. 28
Glossaire ..................................... 30
Caractéristiques techniques..... 31
Français
1
Page 39

Introduction
Nous vous remercions d’avoir opté pour
cette unité. Le présent manuel vous en
expliquera le fonctionnement de base.
Code de zone
Les DVD doivent être étiquetés
pour toutes les zones (ALL) ou
ALL
pour la zone 2 pour être lus par
ce lecteur de DVD. Vous ne
pourrez pas lire des disques
2
étiquetés pour d’autres zones.
Accessoires fournis
– Télécommande
– Piles (deux piles format AA) pour la
télécommande
– Câble RCA/cinch audio
– Câble RCA/cinch vidéo
– Mode d’emploi
Remarques à propos des disques
– Cette unité peut lire des disques DVD vidéo,
CD vidéo, CD super vidéo, CD audio, CD-R,
CD-RW, DVD+RW, DVD+R, DVD-R et
DVD-RW.
Cet appareil peut lire:
– Fichiers MP3, Fichiers Picture (Kodak, JPEG)
sur CD-R(W):
– Format JPEG/ISO 9660
– Affichage maximum de 30 caractères.
– Fichier DivX® sur CD-R[W]/DVD+R[W]/
DVD-R[W]: (DivX 3.11, 4,x et 5,x)
– Il ne lira cependant que des CD-R et CD-
RW finalisés.
– Selon les conditions de gravure
(configuration du PC et logiciel utilisé), il se
pourrait que certains disques que vous avez
gravés vous-même ne puissent pas être lus.
En outre, les caractéristiques (matériau) et
l’état (griffes, déformation, etc.) des disques
pourraient rendre leur lecture impossible.
– Veillez à ne charger que des CD-R et CD-
RW proposés par des fabricants fiables.
– N’utilisez jamais de disques de formes non
standardisées (en forme de cœur, etc.).
– N’insérez jamais de disques contenant du
papier collant, une décalcomanie ou tout
autre object adhésif. Cela pourrait
endommager l’unité.
– N’insérez jamais de disque avec une
étiquette confectionnée avec une
imprimante grand public.
Entretien des disques
• Lorsqu’un disque est sale, nettoyez-le
avec un chiffon en le frottant du centre
vers la périphérie. Ne faites pas de
mouvements circulaires.
• N’utilisez pas de solvants comme
l’essence, les diluants, les produits de
nettoyage disponibles dans le
commerce ou les vaporisateurs
antistatiques destinés aux disques
analogiques.
Marques déposées et brevets
Fabriqué sous licence de Dolby
Laboratories. “Dolby” et le
symbole double-D sont des
marques commerciales de Dolby
Laboratories.
“DTS” et “DTS Digital Out”, sont
des marques commerciales de
Digital Theater Systems, Inc,.
DivX, DivX Certified et les logos
associés sont des marques
commerciales de DivXNetworks,
Inc. et sont utilisés sous licence.
Ce produit incorpore une technologie de
protection des droits d’auteur couverte par des
revendications de méthode de certains brevets
américains et par d’autres droits de propriété
intellectuelle de Macrovision Corporation et
d’autres détenteurs de droits. L’utilisation de cette
technologie de protection des droits d’auteur doit
être autorisée par Macrovision Corporation. Elle
n’est destinée qu’à un usage privé ou autre
visionnement limité sauf autorisation contraire de
Macrovision Corporation. L’analyse par
rétrotechnique et le désossage de cette
technologie sont interdits.
2
Page 40

Façade et panneau arrière
Aperçu des fonctions
STANDBY/ON
– met l’appareil sous tension ou en mode
de veille (Standby).
Tiroir
/ OPEN/CLOSE
– ouvre et referme le tiroir.
Témoin PROGRESSIVE
– s’allume quand le lecteur passe en
mode Progressive.
– arrête la lecture.
– interrompt momentanément la lecture.
– affiche diverses informations liées au
fonctionnement du lecteur.
9 STOP
; PAUSE
B PLAY
– lance la lecture.
* Appuyez sur la touche et maintenez-la enfoncée pendant deux secondes environ.
Cordon d’alimentation
– relier à une prise secteur
Sortie audio numérique COAXIAL
– branchez cette prise à l’entrée numérique
(coaxiale) d’un récepteur AV ou chaîne HiFi.
Sortie audio numérique OPTICAL
– branchez cette prise à l’entrée numérique
(optique) d’un récepteur AV ou chaîne HiFi.
Sortie VIDEO (composite)
– branchez cette prise à l’entrée vidéo d’un
récepteur AV.
AUDIO OUT (gauche/droite)
– branchez cette prise à l’entrées AUDIO
d’un récepteur AV ou chaîne HiFi.
– branchez cette prise à un autre
appareil via un câble péritel.
Sortie vidéo COMPONENT
– branchez ces prises aux entrées Y P
CB PR/CR d’un récepteur AV.
Sortie S VIDEO
– branchez cette prise à l’entrée S-Video
d’un récepteur AV.
Français
Ecran
Prise AV
B/
Attention: Ne pas toucher les broches des connecteurs situés sur le panneau
arrière. Une décharge électrostatique peut endommager irrémédiablement
l’appareil.
3
Page 41

Aperçu des fonctions
Télécommande
TOP MENU/RETURN
– afficher le menu de disque
principal (DVD) / revenir au
menu précédent (VCD)
MENU
– pour accéder au menu d’un
disque (DVD) / activer/couper la
fonction PBC (VCD)
1 2 3 4
– (gauche/droite/haut/bas) opérer
une sélection dans le menu
ENTER/OK
– accepter la sélection du menu
S
– pour rechercher en arrière* /
passer à un chapitre ou à une
plage précédents
STOP ( 9 )
– pour arrêter la lecture
PLAY ( B )
– pour débuter la lecture
PAUSE ( ; )
– pour interrompre
momentanément la lecture /
pour lire image par image
REPEAT
– pour répéter chapitre, plage, titre
ou disque / lancer la lecture
aléatoire de chapitres ou plages
A-B
– répéter une séquence spécifique
SCAN
– pour vérifier le contenu d'une
plage ou du disque entier (VCD)
/ lire les premières 6 secondes
ou moins de chaque plage (CD)
MUTE
– activer ou couper le son
23
1
546
8
79
TOP MENU RETURN
0
MENU SETUP
ENTER
OK
STOP
PLAY
ZOOM AUDIO
SUBTITLE
ANGLE
AB
REPEAT
DVD
ON SCREEN
PAUSE
MUTESCAN
|
B/
– mise sous tension de l’unité ou
activation du mode de veille
(Standby)
Touches chiffrées (0-9)
– permet de sélectionner des
options chiffrées dans le menu
ON SCREEN
– pour accéder au menu de
langue d'affichage du lecteur
ou le supprimer
SETUP
– pour accéder au menu Setup
du lecteur ou le supprimer
T
– pour procéder à une
recherche en avant* / vers un
chapitre ou une plage
précédents
SUBTITLE
– pour sélectionner la langue de
sous-titrage
ANGLE
– pour sélectionner l’angle de la
caméra DVD
ZOOM
– pour agrandir l’image vidéo
AUDIO
– pour sélectionner la langue de
doublage et le format
* Appuyez sur la touche et maintenez-la enfoncée pendant deux secondes environ.
4
Page 42

Opérations préalables
Généralités concernant les connexions
N’effectuez jamais de connexion tant que
l’appareil est sous tension.
• Suivant l’appareil que vous possédez et
celui que vous voulez connecter, vous
pouvez procéder de différentes façons
au branchement de l’unité. Les
illustrations ci-après indiquent les
possibilités de branchement.
• Veuillez vous référer, si nécessaire, au
mode d’emploi des appareils respectifs
afin de réaliser les connexions
optimales.
• Ne connectez pas l’unité via votre
magnétoscope car la qualité vidéo
pourrait être déformée par le système
de protection contre la copie.
• Ne pas connecter la sortie audio de l’unité
à l’entrée phono de la chaîne stéréo.
Connexions numériques
Cette unité dispose de prises de sortie
numériques COAXIAL et OPTICAL.
Raccorder une ou les deux prises à un
récepteur AV avec décodeur Dolby
Digital, DTS ou MPEG à l’aide des câbles
respectifs (vendus séparément).
Remarque:
– Si le format audio de la sortie numérique ne
correspond pas aux capacités du récepteur,
le récepteur produira un son puissant et
déformé ou pas de son du tout.
Sélectionnez bien le format audio qui
convient à l’écran de menu prévu sur le
disque. Si vous appuyez une ou plusieurs
fois sur AUDIO, vous risquez de changer
non seulement la langue audio mais
également les formats audio, et le format
sélectionné s’affiche pendant quelques
secondes sur la fenêtre d’état.
Connexions analogiques
Utilisez le câble audio/vidéo fourni pour
établir la connexion entre les prises
AUDIO OUT L (gauche) et R (droite) de
l’unité et les entrées de votre sono
(amplificateur stéréo etc.).
L
R
(fourni)
Français
C
O
IN
Enceinte
avant
gauche
surround arrière
Récepteur AV
Enceinte
centrale
Enceinte
Enceinte
avant
droite
Enceinte
surround droite
Subwoofer
COAXIALINOPTICAL
Enceinte
surround gauche
Vous devrez placer la sortie numérique
de l’unité sur ALL (voir page 20
“SORTIE NUMÉRIQUE”).
amplificateur
stéréo
Enceinte
gauche
Enceinte
droite
R
1 CD/DVD
RL
L
5
Page 43

Opérations préalables
Connexions vidéo
Si votre récepteur AV possède des prises
de sortie vidéo, raccordez-le (puis
raccordez le télévisieur) de façon à
pouvoir utiliser le même téléviseur pour
plusieurs sources vidéo différentes
(laserdisc, magnétoscope, etc.) simplement
en réglant le sélecteur d’entrée de source
de votre récepteur.
Le lecteur de DVD possède trois types de
prises de sortie vidéo. Utilisez celle qui
correspond aux prises d’entrée de
l’appareil que vous voulez raccorder.
(fourni)
S VIDEO
INPUT
VIDEO
OUT
VIDEO
S
IN
V
VIDEO
Récepteur AV
COMPONENT
VIDEO OUT
COMPONENT
VIDEO IN
YPBCB PRCR
COMPONENT
VIDEO IN
S VIDEO
OUT
S VIDEO
IN
<C><A> <B> <D>
Prise S-vidéo <A>
La connexion vidéo S (séparée) permet
une image plus claire que la connexion
vidéo composite en séparant la
chrominance et la luminance lors de la
transmission des signaux. Utilisez un câble
S-vidéo vendu dans le commerce. Le
récepteur (et le téléviseur) devra être
équipé d’une entrée S-vidéo.
Prise vidéo composite <B>
Utilisez le câble audio/vidéo fourni avec
ceette unité pour raccorder ce lecteur à
un téléviseur.
Prise vidéo composante <C>
La connexion vidéo composante permet
d’obtenir une haute fidélité de restitution
des couleurs (meilleure qu’avec une
connexion S-vidéo), en séparant les signaux
vidéo en signaux de luminance (Y, code de
couleur de prise verte), et différence de
couleur (Pb, bleu/Pr, rouge). Utilisez des
câbles coaxiaux vendus dans le commerce.
Votre récepteur (et le téléviseur) devra
être équipé d’une entrée à composantes.
Observez la couleur de chaque prise pour
les connexions. Si votre récepteur ne
possède pas de prises de sortie à
composantes, vous obtiendrez une
meilleure restitution des images en
raccordant directement la sortie vidéo à
composantes du lecteur de DVD vidéo à
l’entrée à composantes de votre téléviseur.
Remarque :
– Vous devrez placer la sortie composante de
l’unité sur YUV (voir page 23
“Commutation YUV/RGB”).
Connexion Péritel <D>
Si l’on désire raccorder correctement
l’appareil à un téléviseur qui comporte
seulement une borne comme entrée
vidéo, utiliser la prise de sortie Péritel de
l’appareil. Cette connexion offre la
meilleure qualité d’image.
Remarque :
– Assurez-vous que le câble SCART avec
l’indication “TV” est bien connecté au
téléviseur et que le câble SCART avec
l’indication “DVD” est relié au lecteur de
DVD.
6
Page 44

Mise en route
Step1: Installation des piles dans la télécommande
3
1
2
2
1 Ouvrez le compartiment des piles.
2 IInsérez deux piles de type R06 ou AA, en
suivant les indications (+ –) situées à
l’intérieur du compartiment.
3 Refermez le compartiment.
Utilisation de la télécommande
Capteur de
télécommande
Pointez la télécommande
vers le capteur et utilisez-
la à une distance maximum
d’enviroÒn 6m (20 pieds)
de l’appareil.
30°
30°
Step2: Mise sous tension
1 Reliez le câble d’alimentation à une prise
secteur.
2 Mettez votre télévsion et votre ampli-
tuner AV sous tension.
3 Sur l’ampli-tuner AV, choisissez la source
de signal branchée à cette unité. Voyez le
mode d’emploi de l’appareil en question
pour davantage de renseignements.
4 Mettez cette unité sous tension.
5 Choisissez le bon canal vidéo sur votre
télévision (exemples: EXT1, EXT2, AV1,
AV2, AUDIO/VIDEO, etc. Voyez aussi le
mode d’emploi de la télévision.)
➜ L’écran en face avant s’allume et le
poste de télévision affiche la page par
défaut.
Step3: Sélection du système de codage couleur qui correspond à votre téléviseur
Ce lecteur de DVD est compatible avec
NTSC et PAL. Sélectionnez le système de
couleur correspondant à votre TV.
Français
Précautions d’utilisation pour la
télécommande
• Ne renversez jamais d’eau ou d’autres
liquides sur la télécommande.
• Ne laissez jamais tomber la
télécommande.
• N’utilisez et ne rangez jamais la
télécommande dans des endroits:
– très humides, comme à proximité d’une
baignoire;
– très chauds, comme à proximité d’un
radiateur ou d’un poêle;
– soumis à des températures très basses;
– poussiéreux.
PAGE RÉGLAGES VIDÉO
TYPE TV PAL
AFFICHAGE TV NTSC
PROGRESSIF MULTISTANDARD
RÉGLAGE COUL.
COMPONENT
1 Appuyez sur la touche SETUP.
2 Appuyez à plusieurs reprises sur 2 pour
sélectionner {PAGE RÉGLAGES VIDÉO}.
3 Appuyez sur 34 pour sélectionner {TYPE
TV}, et appuyez sur 2.
7
Page 45

Mise en route
4 Appuyez sur 34 pour sélectionner l’une
des options ci-dessous:
PAL
Si votre téléviseur ne peut décoder que le
système PAL, choisissez ce mode. Dans ce
cas, le signal vidéo d’un disque enregistré
en NTSC sera transcodé en PAL.
NTSC
Si votre téléviseur ne peut décoder que le
système NTSC, choisissez ce mode. Dans
ce cas, le signal vidéo d’un disque
enregistré en PAL (VCD uniquement) sera
transcodé en NTSC.
MULTISTANDARD
Si le téléviseur connecté est compatible
avec NTSC et PAL (multisystème),
sélectionnez ce mode. Le codage de sortie
dépendra du codage couleur du signal
vidéo du disque.
5 Sélectionnez un élément et appuyez sur
ENTER/OK.
Conseil:
– Avant de modifier le réglage de
norme TV, vérifiez que votre
téléviseur est compatible avec le
système de la norme TV sélectionnée.
– Si le téléviseur n’affiche pas d’image
correcte, attendez pendant 15
secondes pour qu’elle soit récupérée
automatiquement.
Step4: Sélection de la langue
Vous pouvez choisir votre langue préférée
de façon à ce que ce lecteur de DVD
sélectionne automatiquement cette langue
quand vous chargerez un disque. Si la
langue choisie n’est pas disponible sur le
disque, la langue par défaut du disque sera
utilisée à la place. La langue de l’affichage
sur l’écran (OSD) du menu de système ne
changera plus après être sélectionnée.
Choix de la langue menu
PAGE RÉGLAGES GÉNÉRAUX
VERR.DISQUE ENGLISH
LUM. AFFICHAGE DANSK
PROGRAMME DEUTSCH
LANGUE OSD ESPAÑOL
ÉCONOM. ÉCRAN FRANÇAIS
VEILLE ITALIANO
CODE VÀD DIVX(R) NEDERLANDS
1 Appuyez sur la touche SETUP.
2 Appuyez sur 1 2 pour sélectionner {PAGE
RÉGLAGES GÉNÉRAUX}.
3 Appuyez sur 34 pour sélectionner
{LANGUE OSD}, et appuyez sur 2.
4 Appuyez sur 34 pour sélectionner une
langue et appuyez sur ENTER/OK.
NORSK
REMPLACEMENT PAL PAR NTSC:
1. VÉRIF.QUE TÉLÉ EST COMAT.
NORME NTSC
2. SI IMAGE SUR LE TÉLÉVISEUR
EST DÉFORMÉE, ATTENDEZ
15 SEC. POUR L’AUTOREPRISE.
CONSEILS: Pour retourner au menu précédent, appuyez sur 1.
Pour quitter le menu, appuyez sur SETUP.
8
SUPPRIMEROK
Page 46

Choix de la audio, sous-titres et menu disque
Mise en route
PAGE PRÉFÉRENCES
DOUBLAGE ANGLAIS
S-TITRES CHINOIS
MENU DISQUE FRANÇAIS
PARENTAL ESPAGNOL
PBC PORTUGAIS
NAV. MP3/JPEG ITALIEN
MOT DE PASSE TURC
RÉGL. PAR DÉFAUT
1 Appuyez deux fois sur STOP 9, puis
appuyez sur SETUP.
2 Appuyez à plusieurs reprises sur 2 pour
sélectionner {PAGE PRÉFÉRENCES}.
3 Appuyez sur 34 pour sélectionner l’une
des options ci-dessous, et appuyez sur 2.
– ‘DOUBLAGE’ (Doublage - son du
disque)
– ‘S-TITRES’ (Sous-titres du disque)
– ‘MENU DISQUE’
4 Appuyez sur 34 pour sélectionner une
langue et appuyez sur ENTER/OK.
Si la langue que vous voulez n’est pas
dans la liste, sélectionnez {AUTRES},
Utilisez le touches numériques (0-9) de
la télécommande pour saisir le code de
langue à 4 chiffres (page 26 “Codes de
langue”) et appuyez sur ENTER/OK pour
confirmer.
5 Répétez les étapes 3–4 pour les autres
réglages.
Français
CONSEILS: Pour retourner au menu précédent, appuyez sur 1.
Pour quitter le menu, appuyez sur SETUP.
9
Page 47

Utilisation des disques
IMPORTANT!
– Si l’icône ( ou X) de fonction
interdite s’affiche sur l’écran du
téléviseur lorsque vous appuyez
sur une touche, cela signifie que
cette fonction n’est pas disponible
sur le disque en cours de lecture ou
à ce moment-là.
– Selon les DVD ou les CD vidéo,
certaines opérations peuvent être
différentes ou limitées.
– N’appuyez pas sur le tiroir du
disque et ne placez pas d’autre
objet qu’un CD dans ce tiroir. Vous
pourriez provoquer un
dysfonctionnement.
Opérations de lecture élémentaires
1 Appuyez sur le bouton STANDBY/ON
du panneau avant pour mettre le lecteur
de DVD sous tension.
2 Appuyez sur le bouton OPEN/CLOSE /
du panneau avant pour ouvrir le tiroir du
disque.
3 Posez le disque voulu dans le tiroir en
orientant la face avec l’étiquette vers le
haut.
4 Appuyez à nouveau sur le bouton OPEN/
CLOSE / pour refermer le tiroir.
➜ Le lecteur identifie le disque chargé puis
démarre automatiquement la lecture.
➜ Si vous appuyez sur PLAY B lorsque le
tiroir est ouvert, l’appareil ferme le
tiroir et lance la lecture.
Fonctions générales
Sauf spécification contraire, toutes les
opérations décrites sont basées sur
l’utilisation de la télécommande.
Interruption de la lecture
1 Durant la lecture, appuyez sur PAUSE ;.
➜ La lecture sera interrompue et le son
sera coupé.
2 Appuyez à nouveau sur PAUSE ; pour
sélectionner l’image suivante.
3 Pour revenir à la lecture normale, appuyez
sur PLAY B.
Sélection d’une plage/ d’un chapitre
• Appuyez sur S / T ou servez-
vous des touches numériques (0-9)
pour taper directement le numéro de
piste ou de chapitre.
➜ Si la fonction de répétition a été activée,
un appui sur les touches S / T
provoque une nouvelle lecture de la
même piste ou du même chapitre.
Recherche en arrière/en avant
• Tenez enfoncée la touche S / T,
puis appuyez sur PLAY B pour
reprendre la lecture normale.
➜ Pour accélérer la vitesse de recherche,
tenez la touche S / T enfoncée.
Arrêt de la lecture
• Appuyez sur STOP 9.
CONSEILS: Avec certains disques, les fonctions décrites ici peuvent ne pas être accessibles.
10
Reportez-vous toujours aux instructions fournies avec les disques.
Page 48

Utilisation des disques
Sélection des diverses fonctions de répétition/lecture aléatoire
8Répétition (Repeat) et mode aléatoire (Shuffle)
• Pendant la lecture d’un disque, tenez
enfoncé le bouton REPEAT pour
choisir un mode de lecture.
DVD
➔ RPT ONE (répétition chapitre)
➔ RPT TT (répétition titre)
➔ SHUFFLE (aléatoire)
➔ RPT SHF (aléatoire répétition)
➔ RPT OFF (désactivation répétition)
VCD/SVCD/CD
➔ RPT ONE (répétition plage)
➔ RPT ALL (répétition disque)
➔ SHUFFLE (aléatoire)
➔ RPT SHF (aléatoire répétition)
➔ RPT OFF (désactivation répétition)
MP3/DivX
➔ RPT ONE (répétition unique)
➔ RPT FLD (répétition dossier)
➔ SHUFFLE (répétition aléatoire)
➔ RPT OFF (désactivation répétition)
Conseil utiles:
– Pour les VCD, si le mode PBC est actif, la
répétition de la lecture est impossible.
Répétition d’un passage
1 Pendant la lecture d’un disque, appuyez sur
A-B de la télécommande au point de
départ.
2 Appuyez à nouveau sur A-B au point de fin
désiré du passage.
➜ Les points A et B ne peuvent être définis
qu’à l’intérieur d’un même chapitre ou
d’une même piste.
➜ Ce passage se répète alors en continu.
3 Appuyez à nouveau sur A-B pour
reprendre la lecture normale.
Opérations de lecture vidéo (DVD/VCD/SVCD)
Utilisation du menu du disque
Lorsque vous insérez certains disques, un
menu apparaîtra sur le téléviseur.
Pour sélectionner une fonction de
lecture ou un élément
• Utilisez 1 234 ou les touches
numériques (0-9) de la
télécommande puis appuyez sur
ENTER/OK pour lancer la lecture.
Pour entrer dans le menu ou en sortir
• Appuyez sur la touche MENU de la
télécommande.
Zoom sur image
Cette fonction permet d’agrandir l’image
sur l’écran du téléviseur et d’effectuer un
panoramique dans l’image agrandie.
1 Pendant la lecture d’un disque, appuyez sur
ZOOM à plusieurs reprises pour
sélectionner le facteur de zoom.
➜ Utilisez les touches 1 234 pour voir le
rfsde de l’image.
➜ La lecture continuera.
2 Appuyez sur ZOOM à plusieurs reprises
pour rétablir la taille originale de l’image.
Reprise de la lecture à partir du dernier point d’arrêt
Vous pouvez relancer la lecture des 10
derniers disques, même si le disque a été
éjecté.
• Chargez l’un des 10 derniers disques.
➜ «INSÉRER» s’affiche.
• Appuyez sur la touche PLAY B pour
que la lecture du disque reprenne au
dernier point d’arrêt.
Pour annuler le mode de reprise
• En mode arrêt, appuyez de nouveau sur
la touche STOP 9.
Français
CONSEILS: Avec certains disques, les fonctions décrites ici peuvent ne pas être accessibles.
Reportez-vous toujours aux instructions fournies avec les disques.
11
Page 49

Utilisation des disques
Affichage à l’écran (OSD)
Le menu OSD affiche les informations de
lecture du disque (numéro de titre ou de
chapitre, temps de lecture écoulé, langue
de doublage/sous-titres, etc.). Plusieurs
opérations peuvent être effectuées sans
interrompre la lecture du disque.
1 Pendant la lecture du disque, appuyez sur
ON SCREEN.
➜ La liste des informations disponibles sur
le disque apparaît sur l’écran du
téléviseur.
DVD
MENU
TITRE 02/14
CHAPITRE 02/14
DOUBLAGE 5.1CH
S-TITRES ENG
BITRATE
VCD/SVCD
MENU
PLAGE 02/14
DUR. DISQ. 0:49:17
DUR. PLAGE 0:03:43
RÉPÉTITION NON
BITRATE
2 Appuyez sur 34 pour afficher les
informations, puis appuyez sur ENTER/
OK pour y accéder.
3 Utilisez le touches numériques (0-9)
pour saisir le numéro/ l’heure ou appuyez
sur 34 pour faire une sélection, puis
appuyez sur ENTER/OK pour confirmer.
➜ La lecture continuera à l’heure choisie
ou au titre/ au chapitre/ à la plage
sélectionné(e).
Choix des titres/chapitres/plages
(DVD/VCD)
1 Appuyez sur 34 pour choisir {TITRE} ou
{CHAPITRE} (DVD) ou {PLAGE} (VCD).
2 Appuyez sur ENTER/OK.
3 Choisissez le numéro du titre, du chapitre
ou de la plage voulu avec les touches
numériques.
Recherche temporelle (DVD/VCD)
1 Appuyez sur 34 pour choisir {DURÉE TT}
ou {DURÉE CH} (DVD) ou {DUR. PLAGE}
ou {DUR. DISQ.} (VCD).
➜ {DURÉE TT} indique la durée totale du
titre en cours de lecture et {DURÉE
CH} la durée totale du chapitre actuel.
2 Appuyez sur ENTER/OK.
3 Entrez la position voulue en heures,
minutes et secondes (de gauche à droite)
avec les touches numériques. (Exemple:
0:34:27)
Doublage/sous-titres/angle (DVD)
Vous pouvez choisir la langue de la bandeson avec {DOUBLAGE}, celle des soustitres avec {S-TITRES} et l’angle de prise de
vue avec {ANGLE} (à condition que le
disque propose ces fonctions).
1 Appuyez sur 34 pour choisir
{DOUBLAGE}, {S-TITRES} ou {ANGLE}.
2 Appuyez sur ENTER/OK.
3 Pour la doublage et les sous-titres:
Choisissez l’option voulue avec 34 et
appuyez sur ENTER/OK.
ou
Pour l’angle de prise de vue (Angle):
Choisissez l’angle voulu avec les touches
numériques.
Affichage de répétition/de la durée
(DVD/VCD)
1 Appuyez sur 34 pour choisir
{RÉPÉTITION} ou {AFF.DURÉE}.
2 Appuyez sur ENTER/OK.
3 Choisissez l’option voulue avec 34 et
appuyez sur ENTER/OK.
Affichage de la durée (CD)
Chaque pression sur ON SCREEN
change l’affichage de la durée comme suit:
TOTAL ÉCOULÉ TOTAL RESTANT
SIMPLE RESTANT SIMPLE ÉCOUÉL
CONSEILS: Avec certains disques, les fonctions décrites ici peuvent ne pas être accessibles.
12
Reportez-vous toujours aux instructions fournies avec les disques.
Page 50

Utilisation des disques
Fonctions spéciales DVD
Lecture d’un titre
1 Appuyez sur MENU.
➜ Le menu titres du disque s’affiche sur
l’écran du téléviseur.
2 Appuyez sur les touches 1 234 ou sur les
touches numériques (0-9) pour
sélectionner une option de lecture.
3 Appuyez sur ENTER/OK pour
confirmer.
Angle de caméra
• Appuyez à plusieurs reprises sur
ANGLE pour sélectionner l’angle
désiré.
Audio
Changer la langue et/ou le format de
la bande-so
• Appuyez à plusieurs reprises sur
AUDIO pour sélectionner la langue de
doublage désirée.
Sous-titres
• Appuyez à plusieurs reprises sur
SUBTITLE pour sélectionner la
langue de sous-titres désirée.
Fonctions spéciales CD-Vidéo & SVCD
Contrôle de lecture (PBC)
Pour les VCD avec fonction contrôle de
lecture (PBC) (version 2.0 uniquement)
• Appuyez sur MENU pour alterner
entre ‘PBC ACTIVÉ’ et ‘PBC
DÉSACTIVÉ’.
➜ Si ‘PBC ACTIVÉ’ est sélectionné, le
menu du disque (s’il existe) s’affiche sur
l’écran du téléviseur.
➜ Servez-vous du S / T ou sur une
des touches numériques (0-9) pour
choisir une option de lecture.
• Pendant la lecture, appuyez sur TOP
MENU/RETURN pour revenir au
menu (si PBC a été activé).
Si vous voulez omettre le menu
d’index et commencer directement
la lecture à partir du début :
• Appuyez sur la touche MENU de la
télécommande pour désactiver cette
fonction.
Prévisualisation
1 Appuyez sur SCAN.
2 Appuyez sur 34 pour sélectionner
{APERÇU PLAGE}, {INTERVALLE
DISQUE} ou {INTERVALLE PLAGE}.
3 Appuyez sur ENTER/OK pour ouvrir une
option.
SÉLECTION TYPE APERÇU:
APERÇU PLAGE
INTERVALLE DISQUE
INTERVALLE PLAGE
Français
Remarque:
– L’option {INTERVALLE PLAGE} est
uniquement disponible pendant la lecture,
quand la fonction PBC est coupée (Off).
CONSEILS: Avec certains disques, les fonctions décrites ici peuvent ne pas être accessibles.
Reportez-vous toujours aux instructions fournies avec les disques.
13
Page 51

Utilisation des disques
APERÇU PLAGE
Cette fonction réduit l’image de chaque
plage pour afficher à l’écran une mosaïque
de six images et vous aider à identifier le
contenu des plages du disque.
INTERVALLE DISQUE
Cette fonction sert à diviser un disque en
six parties par des intervalles réguliers ; ces
parties sont affichées sur une seule page
pour vous aider à prévisualiser tout le
disque.
INTERVALLE PLAGE
Cette fonction sert à diviser une plage en
six parties par des intervalles réguliers; ces
parties sont affichées sur une seule page
pour vous aider à prévisualiser toute la
plage.
(exemple d’affichage de 6 vignettes)
4 Utilisez les touches 1 234 pour
sélectionner une plage, ou le touches
numériques (0-9) pour saisir le numéro
de plage sélectionné à côté de
{SÉLECTIONNER}.
5 Appuyez sur S / T pour ouvrir la
page précédente ou suivante.
6 Appuyez sur ENTER/OK pour
confirmer.
Pour quitter la fonction de
prévisualisation
• Utilisez les touches 1 234 pour
sélectionner {SORTIR} et appuyez sur
ENTER/OK pour confirmer.
Pour retourner au menu de
prévisualisation
• Utilisez les touches 1 234 pour
sélectionner {MENU} et appuyez sur
ENTER/OK pour confirmer.
Pour les CD
• En mode arrêt, appuyez sur SCAN sur
la télécommande.
➜ Chaque plage sera lue pendant quelques
secondes.
Lecture d’un CD MP3/ DivX/ JPEG/ Kodak Picture
Généralités
1 Insérez un disque.
➜ Le temps de lecture de la table des
matières du CD peut être supérieur à
30 secondes si la configuration du
répertoire/fichier est compliquée.
➜ Le menu de disque apparaît sur l’écran
du téléviseur.
2 La lecture commencera automatiquement.
Sinon, appuyez sur PLAY B.
00:00 00:00
001/020
Favorite
MP3
Piano
Cello
MP3
MP3
Jazz
MP3
Live
Durant la lecture, vous pouvez;
• Appuyez sur la touche S / T pour
sélectionner un autre titre ou une autre
photo dans le répertoire sélectionné.
• Appuyez sur PAUSE ; pour
interrompre la lecture.
Conseil utiles:
– Certains disques contenant des fichiers
MP3/ JPEG/ DivX/ MPEG4 peuvent être
incompatibles en raison de la configuration
et des caractéristiques du disque ou des
conditions d’enregistrement.
CONSEILS: Avec certains disques, les fonctions décrites ici peuvent ne pas être accessibles.
14
Reportez-vous toujours aux instructions fournies avec les disques.
Page 52

Utilisation des disques
Sélection d’un dossier et d’une plage/ d’un fichier
1 Appuyez sur 34 pour sélectionner le
dossier et appuyez sur ENTER/OK pour
l’ouvrir.
2 Appuyez sur 34 pour sélectionner une
option.
3 Appuyez sur ENTER/OK pour
confirmer.
➜ La lecture commencera à partir du
fichier sélectionné jusqu’à la fin du
dossier.
Répétition (Repeat) et mode aléatoire (Shuffle)
Quand le menu Picture CD/MP3 CD est à
l’écran;
• Appuyez un long moment sur la touche
REPEAT pour accéder à un «Mode
lecture» différent.
➜ DOSSIER: lire tous les fichiers du
dossier sélectionné.
➜ RÉPÉTITION UNIQUE: conserver
l’image JPEG fixe sur l’écran ou lire un
fichier MP3 en boucle.
➜ RÉPÉTITION DOSSIER: lire en boucle
tous les fichiers du dossier sélectionné.
➜ LECT. ALÉAT.: lire tous les fichiers du
dossier sélectionné en ordre aléatoire.
Fonctions spéciales des disques d’images
1 Insérez un disque d’image (CD Kodak
Picture, JPEG).
➜ Si c’est un disque Kodak, le panorama
sera activé.
➜ Si c’est un disque JPEG, le menu image
s’affichera sur l’écran du téléviseur.
2 Appuyez sur PLAY B pour démarrer la
lecture du diaporama.
Prévisualisation
Cette fonction vous permet de connaître
le contenu du dossier en cours ou du
disque complet.
1 Appuyez sur la touche STOP 9 durant la
lecture des images JPEG.
➜ 12 images miniatures s’affichent sur
l’écran du téléviseur.
2 Appuyez sur S / T pour afficher les
autres images à la page suivante ou
précédente.
3 Appuyez sur les touches 1 234 pour
mettre en surbrillance une des images et
appuyez sur ENTER/OK pour l’afficher
ou
Déplacez le curseur pour mettre en
surbrillance au bas de la page. La
lecture commence à partir de la première
image de la page en cours.
4 Appuyez sur MENU pour retourner au
menu CD d’images.
Français
CONSEILS: Avec certains disques, les fonctions décrites ici peuvent ne pas être accessibles.
Reportez-vous toujours aux instructions fournies avec les disques.
15
Page 53

Utilisation des disques
Zoom sur image
1 Pendant la lecture d’un disque, appuyez sur
ZOOM à plusieurs reprises pour
sélectionner le facteur de zoom.
2 Utilisez les touches 1 234 pour visualiser
l’image grossie.
Lecture multi-angle
• Durant la lecture, appuyez sur les
touches 1 234 pour faire pivoter
l’image sur l’écran du téléviseur.
Touche 1: Faire pivoter l’image dans le
sens antihoraire.
Touche 2: Faire pivoter l’image dans le
sens horaire.
Touche 3: Inverser l’image
verticalement.
Touche 4: Inverser l’image
horizontalement.
Effets de balayage
• Appuyez sur la touche ANGLE à
plusieurs reprises pour choisir parmi
différents effets de balayage.
➜ Les variations d’effets de balayage
apparaissent dans l’angle supérieur
gauche de l’écran du téléviseur.
Lecture simultanée de fichiers de musique MP3 et d’images JPEG
1 Insérez un disque contenant de la musique
et des images.
➜ Le menu du disque s’affiche sur l’écran
du téléviseur.
2 Sélectionnez une plage MP3.
3 Durant la lecture de fichiers de musique
MP3, sélectionnez un dossier d’images sur
l’écran du téléviseur, puis appuyez sur
PLAY B.
➜ Les fichiers d’image seront lus les uns à
la suite des autres jusqu’à la fin du
dossier.
4 Pour arrêter la lecture simultanée,
appuyez sur MENU et ensuite sur
STOP 9.
Conseil:
– La lecture de certains disques Kodak ou
JPEG peut subir une distorsion en raison de
la configuration et des caractéristiques du
disque.
CONSEILS: Avec certains disques, les fonctions décrites ici peuvent ne pas être accessibles.
16
Reportez-vous toujours aux instructions fournies avec les disques.
Page 54

Menu Setup
Le DVD se configure via l’écran du
téléviseur, vous permettant de modifier la
configuration de votre lecteur de DVD
selon vos goûts.
Menu d’installation générale
1 Appuyez sur SETUP.
2 Sélectionnez l’icône “General Setup” en
appuyant sur 1 2:
3 Appuyez sur ENTER/OK pour
confirmer.
PAGE RÉGLAGES GÉNÉRAUX
VERR.DISQUE
LUM. AFFICHAGE
PROGRAMME
LANGUE OSD
ÉCONOM. ÉCRAN
VEILLE
CODE VÀD DIVX(R)
Verrouillage/déverrouillage de lecture des DVD
Certains DVD ne sont pas codés ou
classés par le fabricant. Vous pouvez
toutefois empêcher la lecture de certains
DVD en les verrouillant ou déverrouillant,
sans tenir compte de leur classification. Le
lecteur de DVD peut mémoriser les
réglages de 40 disques.
1 Sur la ‘PAGE RÉGLAGES GÉNÉRAUX’,
appuyez sur 34 pour mettre
{VERR.DISQUE}, et appuyez sur 2.
VERROUILLER
Sélectionnez cette option pour bloquer la
lecture du disque sélectionné. Pour
accéder à un disque bloqué, il faudra saisir
un mot de passe de 6 chiffres. Le mot de
passe par défaut est ‘000 000’ (voir page 25
“Modification du mot de passe”).
DÉVERROUILLER
Sélectionnez cette option pour
déverrouiller le disque et permettre sa
lecture future.
2 Appuyez sur 34 pour sélectionner un
réglage, puis appuyez sur ENTER/OK
pour confirmer.
Réglage de luminosité de l’écran utilisateur
Vous pouvez sélectionner différents
niveaux de luminosité de l’écran.
1 Sur la ‘PAGE RÉGLAGES GÉNÉRAUX’,
appuyez sur 34 pour mettre {LUM.
AFFICHAGE}, et appuyez sur 2.
100%
Luminosité maximale
70%
Luminosité moyenne
40%
Luminosité faible
2 Appuyez sur 34 pour sélectionner un
réglage, puis appuyez sur ENTER/OK
pour confirmer.
Programme (non disponible pour les CD d’images/MP3)
Vous pouvez écouter le contenu du disque
dans l’ordre qui vous convient, en
programmant l’ordre de lecture des pistes.
Vous pouvez mémoriser jusqu’à 20 pistes.
1 Sur la ‘PAGE RÉGLAGES GÉNÉRAUX’,
appuyez sur 34 pour mettre
{PROGRAMME}, en surbrillance, puis
appuyez sur 2 pour sélectionner {MENU
ENTRÉE}.
2 Appuyez sur ENTER/OK pour
confirmer.
1 04
2 10
3 11
4 __
5 __
6 __
7 __
8 __
9 __
10 __
Français
CONSEILS: Pour retourner au menu précédent, appuyez sur 1.
Pour quitter le menu, appuyez sur SETUP.
17
Page 55

Menu Setup
Introduction d’une plage/chapitre
favorite
3 Tapez le numéro de la plage/chapitre à
l’aide des touches numériques (0-9).
4 Utilisez les touches 1 234 pour placer le
curseur sur la position sélectionnée
suivante.
➜ Si le numéro de plage/chapitre est
supérieur au chiffre dix, appuyez sur
T pour ouvrir la page suivante et
poursuivre la programmation, ou
➜ Appuyez sur 1 234 pour mettre en
surbrillance l’option {SUIV.} et appuyez
ensuite sur ENTER/OK.
5 Répétez les étapes 3–4 si vous voulez saisir
un autre numéro de plage/chapitre.
Suppression d’une plage/chapitre
6 Utilisez les touches 1 234 pour placer le
curseur sur la plage/chapitre à supprimer.
7 Appuyez sur ENTER/OK pour supprimer
la plage/chapitre du menu programme.
Lecture de plages
8 Après avoir terminé la programmation,
utilisez les touches 1 234 pour mettre en
surbrillance l’option {DÉBUTER}, et
appuyez sur ENTER/OK.
➜ Le lecteur de DVD lit les plages
sélectionnées dans l’ordre programmé.
Quitter la lecture du programme
9 Dans le menu ‘Programme’, utilisez les
touches 1 234 pour mettre en
surbrillance l’option {SORTIR} et appuyez
sur ENTER/OK.
Choix de la langue OSD
Ce menu contient diverses options de
langue d’affichage à l’écran. Pour plus de
renseignements, voir page 8.
Économiseur d’écran
Cette option permet d’activer ou de
couper la fonction d’économiseur d’écran.
1 Sur la ‘PAGE RÉGLAGES GÉNÉRAUX’,
appuyez sur 34 pour mettre {ÉCONOM.
ÉCRAN}, et appuyez sur 2.
OUI
Cette option permet d’éteindre l’écran du
téléviseur lorsque la lecture est arrêtée ou
interrompue pendant plus de 15 minutes.
NON
L’économiseur d’écran est inactivé.
2 Appuyez sur 34 pour sélectionner un
réglage, puis appuyez sur ENTER/OK
pour confirmer.
Arrêt progr.
Cette fonction place automatiquement le
DVD en mode de veille une fois que le laps
de temps programmé s’est écoulé.
1 Sur la ‘PAGE RÉGLAGES GÉNÉRAUX’,
appuyez sur 34 pour mettre {VEILLE}, et
appuyez sur 2.
2 Appuyez sur 34 pour choisir un réglage.
➜ Vous avez le choix entre 15, 30, 45 et 60
minutes. Sélectionnez {NON} pour
annuler la fonction d’arrêt de
programme.
3 Appuyez sur ENTER/OK pour confirmer
votre choix.
CONSEILS: Pour retourner au menu précédent, appuyez sur 1.
18
Pour quitter le menu, appuyez sur SETUP.
Page 56

Menu Setup
Code d’inscription DivX® VOD
Yamaha fournit un code d’inscription
®
VOD (Video On Demand) qui vous
DivX
permet de louer et d’acheter des vidéos en
utilisant le service DivX
Pour en savoir plus, voyez www.divx.com/
vod.
1 Sur la ‘GENERAL SETUP PAGE’, appuyez
sur 34 pour mettre {CODE VÀD
DIVX(R)}, et appuyez sur 2.
➜ Le code d’inscription apparaît.
2 Appuyez sur ENTER/OK pour quitter.
3 Utilisez le code d’inscription pour acheter
ou louer les vidéos du service DivX
sur le site www.divx.com/vod. Suivez les
instructions et téléchargez la vidéo sur un
CD-R pour la lire avec ce lecteur de DVD.
Conseils utiles:
– Les vidéos provenant du service DivX
VOD ne peuvent être lues que sur ce
lecteur DVD.
– La recherche temporelle n’est pas
disponible durant la reproduction d’un film
DivX.
®
VOD.
®
VOD
®
Menu Réglages Audio
1 Appuyez sur SETUP.
2 Sélectionnez l’icône “Régl. audio” en
appuyant sur 1 2.
3 Appuyez sur ENTER/OK pour
confirmer.
PAGE RÉGLAGES AUDIO
SORTIE ANALOGIQUE
RÉGL. AUDIONUMÉRIQUE
SURÉCHANTILLONN. CD
MODE NUIT
Réglage de la sortie analogique
Sélectionnez la sortie analogique qui
convient le mieux à la lecture du lecteur de
DVD.
1 Sur la ‘PAGE RÉGLAGES AUDIO’,
appuyez sur 34 pour mettre {SORTIE
ANALOGIQUE}, et appuyez sur 2.
STÉRÉO
Permet de sélectionner la sortie de canal
stéréo, le son ne sortant que des deux
enceintes avant.
G/D
Choisissez cette option uniquement si
votre lecteur de DVD est branché à un
décodeur Dolby Prologic.
SURR. V
Cette option recrée virtuellement les
canaux Surround.
2 Appuyez sur 34 pour sélectionner un
réglage, puis appuyez sur ENTER/OK
pour confirmer.
Français
CONSEILS: Pour retourner au menu précédent, appuyez sur 1.
Pour quitter le menu, appuyez sur SETUP.
19
Page 57

Menu Setup
Réglage de la sortie numérique
Les options comprises dans le menu
Réglage Audionumérique sont : ‘Digital
Output’ (Sortie numérique) et ‘LPCM
Output’ (Sortie LPCM).
1 Sur la ‘PAGE RÉGLAGES AUDIO’,
appuyez sur 34 pour mettre {RÉGL.
AUDIONUMÉRIQUE}, et appuyez sur 2.
2 Appuyez les touches 34 pour mettre une
option en surbrillance.
3 Accédez au sous-menu en appuyant sur la
touche 2.
4 Déplacez le curseur à l’aide des touches
34 pour mettre en surbrillance l’option
de votre choix.
SORTIE NUMÉRIQUE
Réglez la sortie numérique en fonction de
votre connexion audio en option.
NON
Désactive la sortie numérique.
TOUT
Si vous avez connecté DIGITAL AUDIO
OUT à un décodeur/ récepteur
multicanaux.
MIC
Only if your receiver is not capable of
decoding multi-channel audio.
Seulement si votre récepteur est incapable
de décoder le son multicanaux.
SORTIE LPCM
Si vous connectez le lecteur de DVD à un
récepteur compatible LPCM via les sorties
numériques (coaxiales, etc.), vous devrez
peut-être sélectionner la ‘SORTIE LPCM’.
Les disques étant enregistrés à une
certaine fréquence d’échantillonnage, plus
cette fréquence est élevée, meilleur est le
son.
48K
Lecture d’un disque enregistré à la
fréquence d’échantillonnage de 48 kHz.
Les données numériques PCM de 96kHz
(si le disque en contient) sont converties à
48kHz.
96K
Lecture d’un disque enregistré à la
fréquence d’échantillonnage de 96 kHz. En
présence d’un disque de 96kHz protégé
contre la copie, la sortie numérique est
coupée, conformément à la norme.
Augmentation de fréquence d’échantillonnage du CD
Basée sur un procédé de traitement
numérique sophistiqué, cette fonction
permet d’augmenter la fréquence
d’échantillonnage de vos CD lors de la
lecture. Lorsque vous activez le
suréchantillonnage, le lecteur passe
automatiquement en mode stéréo.
1 Sur la ‘PAGE RÉGLAGES AUDIO’,
appuyez sur 34 pour mettre
{SURÉCHANTILLONN. CD}, et appuyez
sur 2.
DÉSACTIVÉ
Sélectionnez cette option pour désactiver
le suréchantillonnage du CD.
88.2 kHz (X2)
Sélectionnez cette option pour convertir
la fréquence d’échantillonnage des CD en
la multipliant par 2.
176.4 kHz (X4)
Sélectionnez cette option pour convertir
la fréquence d’échantillonnage des CD en
la multipliant par 4.
2 Appuyez sur 34 pour sélectionner un
réglage, puis appuyez sur ENTER/OK
pour confirmer.
Remarque :
– Ce cadre est seulement applicable pour les
signaux sort des crics analogues.
CONSEILS: Pour retourner au menu précédent, appuyez sur 1.
20
Pour quitter le menu, appuyez sur SETUP.
Page 58

Menu Setup
Mode nocturne
Lorsqu’il est activé, les sorties de volume
hautes sont adoucies et les sorties de
volume basses sont élevées à un niveau
audible. Ce mode vous permet de regarder
votre film d’action préféré la nuit, sans
gêner les autres.
1 Sur la ‘PAGE RÉGLAGES AUDIO’,
appuyez sur 34 pour mettre {MODE
NUIT}, et appuyez sur 2.
OUI
Sélectionnez cet élément pour diminuer
les écarts de volume. Cette fonction n’est
disponible que pour les films dotés du
mode dolby numérique.
NON
Sélectionnez cet élément quand vous
voulez profiter du son surround avec sa
piste dynamique complète.
2 Appuyez sur 34 pour sélectionner un
réglage, puis appuyez sur ENTER/OK
pour confirmer.
Menu Réglages vidéo
1 Appuyez sur SETUP.
2 Sélectionnez l’icône “Régl. vidéo” en
appuyant sur 1 2.
3 Appuyez sur ENTER/OK pour confirmer.
PAGE RÉGLAGES VIDÉO
TYPE TV
AFFICHAGE TV
PROGRESSIF
RÉGLAGE COUL.
COMPONENT
Affichage TV
Permet de régler l’aspect de l’image du
lecteur de DVD en fonction du téléviseur
connecté. Le format que vous sélectionnez
doit être disponible sur le disque. S’il ne
l’est pas, les réglages de configuration de
votre téléviseur n’adapteront pas l’image
au cours de la lecture.
1 Sur la ‘PAGE RÉGLAGES VIDÉO’, appuyez
sur 34 pour mettre {AFFICHAGE TV}, et
appuyez sur 2.
2 Appuyez sur 34 pour sélectionner l’une
des options ci-dessous :
4:3 PAN SCAN
Si vous avez un
téléviseur normal et
que vous voulez que
les deux côtés de
l’image soient coupés
ou formatés pour tenir dans l’écran.
4:3 LETTER BOX
Si vous avez un
téléviseur normal.
L’image sera alors
affichée sur toute la
largeur de l’écran, avec des bandes noires
au-dessus et en dessous de l’image.
16:9
Si vous avez un
téléviseur à écran
large.
3 Sélectionnez un élément et appuyez sur
ENTER/OK.
Français
Type TV
Ce menu contient des options pour
sélectionner la norme de couleur qui
correspond au téléviseur connecté. Pour
plus de renseignements, voir page 7.
CONSEILS: Pour retourner au menu précédent, appuyez sur 1.
Pour quitter le menu, appuyez sur SETUP.
21
Page 59

Menu Setup
Progressif
Cette fonction ne s’applique que si vous
avez connecté le lecteur de DVD à un
téléviseur Progressive Scan en utilisant les
jacks composant Y Pb Pr (voir page 6).
1 Sur la ‘PAGE RÉGLAGES VIDÉO’, appuyez
sur 34 pour mettre {PROGRESSIF}, et
appuyez sur 2.
NON
Pour désactiver la fonction de balayage
progressif.
ON
Pour activer la fonction de balayage
progressif.
2 Appuyez sur 34 pour sélectionner un
réglage, puis appuyez sur ENTER/OK
pour confirmer.
Remarques sur l’activation de la
fonction Progressif:
– Vérifiez que votre téléviseur est
compatible Balayage progressif (à
balayage progressif).
– Branchez votre téléviseur avec un câble
vidéo composantes YPbPr.
AVIS AUX UTILISATEURS: TOUS LES
TÉLÉVISEURS HAUTE DÉFINITION NE SONT
PAS ENTIÈREMENT COMPATIBLES AVEC CE
PRODUIT, CE QUI POURRAIT ENGENDRER
DES DÉFAUTS DANS L’IMAGE. EN CAS DE
PROBLÈME AVEC LE MODE DE BALAYAGE
PROGRESSIF DE 525 OU 625 LIGNES, NOUS
RECOMMANDONS DE CHANGER LES
CONNEXIONS ET DE CHOISIR LA SORTIE
“STANDARD DEFINITION”. POUR TOUTE
QUESTION RELATIVE À LA COMPATIBILITÉ
ENTRE NOS MONITEURS ET LES LECTEURS DE
DVD 525P ET 625P, VEUILLEZ VOUS
RENSEIGNER AUPRÈS DE NOTRE CENTRE
D’ASSISTANCE TECHNIQUE.
Cet appareil est compatible avec la gamme
complète de produits YAMAHA, y compris les
projecteurs DPX-1000, LPX-510 et l’écran plasma
PDM-4210E.
Réglages couleur
Ce lecteur de DVD propose trois réglages
de couleur prédéfinis et un réglage que
vous pouvez personnaliser.
1 Sur la ‘PAGE RÉGLAGES VIDÉO’, appuyez
sur 34 pour mettre {RÉGLAGE COUL.},
et appuyez sur 2.
STANDARD
Sélectionnez cette option pour choisir une
norme d’image.
LUMINEUX
Sélectionnez cette option pour rendre
l’image du téléviseur plus lumineuse.
DOUX
Sélectionnez cette option pour rendre
l’image du téléviseur plus douce.
PERSONNEL
Sélectionnez cette option pour
personnaliser les réglages couleur en
réglant la luminosité, le contraste, la teinte
et la couleur (saturation).
2 Appuyez sur 34 pour sélectionner un
réglage, puis appuyez sur ENTER/OK
pour confirmer.
3 Si vous sélectionnez {PERSONNEL},
passez aux étapes 4–7.
➜ Le menu ‘RÉGLAGE IMAGE
PERSONNEL’ s’affiche.
RÉGLAGE IMAGE PERSONNEL
LUMINEUX
CONTRASTE
TEINTE
COULEUR
0
0
0
0
CONSEILS: Pour retourner au menu précédent, appuyez sur 1.
22
Pour quitter le menu, appuyez sur SETUP.
Page 60

Menu Setup
4 Appuyez sur 34 pour sélectionner l’une
des options ci-dessous :
LUMINEUX
Augmentez la valeur pour augmenter la
luminosité de votre image ou vice versa.
Choisissez zéro (0) pour obtenir un
réglage moyen.
CONTRASTE
Augmentez la valeur pour augmenter la
netteté de votre image ou vice versa.
Choisissez zéro (0) pour équilibrer le
contraste.
TEINTE
Augmentez la valeur pour rendre l’image
plus sombre ou vice versa. Choisissez zéro
(0) pour obtenir un réglage moyen.
COULEUR
Augmentez la valeur pour rehausser la
couleur de votre image ou vice versa.
Choisissez zéro (0) pour équilibrer la
couleur.
5 Appuyez sur 1 2 pour ajuster les valeurs
de ces paramètres à votre préférence
personnelle.
6 Répétez les étapes 4–5 pour régler
d’autres options de couleur.
7 Appuyez sur ENTER/OK pour
confirmer.
Commutation YUV/RGB
Ce réglage vous permet de régler la sortie
du signal vidéo soit sur RGB (et Péritel),
soit sur Y Pb Pr (YUV).
1 Sur la ‘PAGE RÉGLAGES VIDÉO’, appuyez
sur 34 pour mettre {COMPONENT}, et
appuyez sur 2.
YUV
Sélectionnez cette option pour obtenir
une connexion Y Pb Pr.
RGB
Sélectionnez cette option pour obtenir
une connexion Péritel.
2 Appuyez sur 34 pour sélectionner un
réglage, puis appuyez sur ENTER/OK
pour confirmer.
Français
CONSEILS: Pour retourner au menu précédent, appuyez sur 1.
Pour quitter le menu, appuyez sur SETUP.
23
Page 61

Menu Setup
Menu relatif aux réglages préférentiels
1 Appuyez deux fois sur STOP 9 pour
interrompre la lecture (si elle est en cours)
et appuyez sur SETUP.
Sélectionnez “Régl. Préf. “ en appuyant sur
2
1 2.
3 Appuyez sur ENTER/OK pour
confirmer.
PAGE PRÉFÉRENCES
DOUBLAGE
S-TITRES
MENU DISQUE
PARENTAL
PBC
NAV. MP3/JPEG
MOT DE PASSE
RÉGL. PAR DÉFAUT
Choix de la langue doublage, sous-titres et menu disque
Ces menus contiennent plusieurs options
de langue de doublage, sous-titres et menu
disque, qui peuvent être enregistrées sur le
DVD. Pour plus de renseignements, voir
page 9.
Limitation de lecture en configurant le Contrôle parental
Les films sur DVD peuvent comporter des
scènes non adaptées aux enfants. C’est la
raison pour laquelle certains disques sont
dotés de la fonction de « contrôle parental
» s’appliquant à la totalité du disque ou à
certaines scènes. Les scènes sont classées
par degrés allant de 1 à 8 et des scènes de
substitution, plus appropriées, sont
également prévues sur le disque. Le
classement dépend du pays. La fonction de
« contrôle parental » vous permet
d’empêcher vos enfants de voir certains
films ou de leur montrer des films avec des
scènes de substitution.
1 Sur la ‘PAGE PRÉFÉRENCES’, appuyez sur
34 pour mettre {PARENTAL}, et appuyez
sur 2.
PAGE PRÉFÉRENCES
DOUBLAGE 1 POUR ENFANT
S-TITRES 2 TOUS PUBLICS
MENU DISQUE 3 ACCORD PAR.
PARENTAL 4 PAS MOINS 13
PBC 5 PAR.INDISP.
NAV. MP3/JPEG 6 ADULTES
MOT DE PASSE 7 PPAS MOINS17
RÉGL. PAR DÉFAUT 8 PUBLIC AV.
2 Appuyez sur 34 pour sélectionner un
niveau de classification pour le disque
inséré et appuyez sur ENTER/OK.
➜ Pour désactiver le contrôle parental et
pouvoir regarder tous les disques,
choisissez {8 PUBLIC AV.}.
3 Utilisez le touches numériques (0-9)
pour saisir le code à six chiffres (voir
page 25 “Modification du mot de passe”).
➜ Les DVD classés au-dessus du niveau
que vous avez sélectionné ne pourront
pas être regardés, sauf si vous tapez
votre mot de passe de six chiffres.
Conseils utiles:
– Les disques CD-Vidéo, SVCD et CD n’ont
pas d’indication de niveau : le contrôle
parental est donc sans effet sur ces disques
comme sur la plupart des DVD illégaux.
– Certains DVD ne sont pas codés selon un
niveau de contrôle parental, bien que la
classification du film soit imprimée sur la
jaquette. Dans ce cas, la fonctionnalité de
contrôle parental ne peut pas être utilisée.
Playback Control (PBC)
Cette option peut être PBC ACTIVÉE ou
PBC DÉSACTIVÉ seulement pour les VCD
(version 2.0 uniquement) ayant une
fonction de contrôle de lecture. Pour plus
de renseignements, voir page 13.
CONSEILS: Pour retourner au menu précédent, appuyez sur 1.
24
Pour quitter le menu, appuyez sur SETUP.
Page 62

Menu Setup
Navigateur MP3/JPEG
Le navigateur MP3/JPEG peut être réglé
seulement si un menu est enregistré sur le
disque. Il vous permet de sélectionner
différents menus d’affichage pour naviguer
facilement.
1 Sur la ‘PAGE PRÉFÉRENCES’, appuyez sur
34 pour mettre {NAV. MP3/JPEG}, et
appuyez sur 2.
SANS MENU
Sélectionnez cette option pour afficher
tous les fichiers contenus sur le CD MP3/
images.
AVEC MENU
Sélectionnez cette option pour afficher le
menu de dossiers du CD MP3/ images.
2 Appuyez sur 34 pour sélectionner un
réglage, puis appuyez sur ENTER/OK
pour confirmer.
Modification du mot de passe
Le même mot de passe est utilisé pour le
Contrôle parental et le Verrouillage
disque. Entrez votre mot de passe de six
chiffres lorsque vous y êtes invité à l’écran.
Le mot de passe par défaut est 000 000.
1 Sur la ‘PAGE PRÉFÉRENCES’, appuyez sur
34 pour mettre {MOT DE PASSE}, en
surbrillance, puis appuyez sur 2 pour
sélectionner {CHANGER}.
PAGE PRÉFÉRENCES
DOUBLAGE
S-TITRES
MENU DISQUE
PARENTAL
PBC
NAV. MP3/JPEG
MOT DE PASSE CHANGER
RÉGL. PAR DÉFAUT
2 Appuyez sur ENTER/OK pour ouvrir la
page ‘Page Modification Mot Passe’.
ANCIEN MOT P.
NOUV. MOT P.
CONFIR.MOT P.
OK
3 Utilisez le touches numériques (0-9)
pour saisir votre ancien code à 6 chiffres.
➜ La première fois, tapez le code ‘000
000’.
➜ Si vous avez oublié votre code à 6
chiffres, tapez ‘000 000’.
4 Saisissez votre nouveau code de 6 chiffres.
5 Saisissez votre nouveau code de 6 chiffres
une seconde fois pour confirmer.
➜ Le nouveau code à 6 chiffres entre en
vigueur.
6 Appuyez sur ENTER/OK pour
confirmer.
Restauration des réglages d’origine
Si vous sélectionnez la fonction ‘RÉGL.
PAR DÉFAUT’, toutes les options et vos
réglages personnels reviendront aux
réglages d’usine par défaut, sauf votre mot
de passe Code parental.
1 Sur la ‘PAGE PRÉFÉRENCES’, appuyez sur
34 pour mettre {RÉGL. PAR DÉFAUT},
en surbrillance, puis appuyez sur 2 pour
sélectionner {RÉINITIALIS.}.
2 Appuyez sur ENTER/OK pour
confirmer.
➜ Tous les éléments du menu de
configuration reviennent à leurs
réglages par défaut.
Français
CONSEILS: Pour retourner au menu précédent, appuyez sur 1.
Pour quitter le menu, appuyez sur SETUP.
25
Page 63

Codes de langue
Ces pages permettent de choisir d’autres langues. Ce réglage n’affecte pas les
options choisies avec “DOUBLAGE”, “S-TITRES” ou “MENU DISQUE”.
Abkhazian 6566 German 6869
Afar 6565 Gikuyu; Kikuyu 7573
Afrikaans 6570 Greek, 6976
Albanian 8381 Guarani 7178
Amharic 6577 Gujarati 7185
Arabic 6582 Hausa 7265
Armenian 7289 Hebrew 7269
Assamese 6583 Herero 7290
Avestan 6569 Hindi 7273
Aymara 6589 Hiri Motu 7279
Azerbaijani 6590 Hungarian 7285
Bashkir 6665 Icelandic 7383
Basque 6985 Ido 7379
Belarusian 6669 Indonesian 7368
Bengali 6678 Interlingua (International) 7365
Bihari 6672 Interlingue 7369
Bislama 6673 Inuktitut 7385
Bokmål, Norwegian 7866 Inupiaq 7375
Bosnian 6683 Irish 7165
Breton 6682 Italian 7384
Bulgarian 6671 Japanese 7465
Burmese 7789 Javanese 7486
Castilian, Spanish 6983 Kalaallisut 7576
Catalan 6765 Kannada 7578
Chamorro 6772 Kashmiri 7583
Chechen 6769 Kazakh 7575
Chewa; Chichewa; Nyanja 7889 Khmer 7577
Chichewa; Chewa; Nyanja 7889 Kikuyu; Gikuyu 7573
Chinese 9072 Kinyarwanda 8287
Chuang; Zhuang 9065 Kirghiz 7589
Church Slavic; Slavonic; 6785 Komi 7586
Church Slavonic; Church 6785 Korean 7579
Chuvash 6786 Kuanyama; Kwanyama 7574
Cornish 7587 Kurdish 7585
Corsican 6779 Kwanyama; Kuanyama 7574
Croatian 7282 Lao 7679
Czech 6783 Latin 7665
Danish 6865 Latvian 7686
Dutch 7876 Letzeburgesch; 7666
Dzongkha 6890 Limburgan; Limburger; 7673
English 6978 Limburger; Limburgan; 7673
Esperanto 6979 Limburgish; Limburger; 7673
Estonian 6984 Lingala 7678
Faroese 7079 Lithuanian 7684
Fijian 7074 Luxembourgish; 7666
Finnish 7073 Macedonian 7775
French 7082 Malagasy 7771
Frisian 7089 Malay 7783
Gaelic; Scottish Gaelic 7168 Malayalam 7776
Gallegan 7176 Maltese 7784
Georgian 7565 Manx 7186
26
Page 64

Codes de langue
Ces pages permettent de choisir d’autres langues. Ce réglage n’affecte pas les
options choisies avec “DOUBLAGE”, “S-TITRES” ou “MENU DISQUE”.
Maori 7773 Sotho, Southem 8384
Marathi 7782 South Ndebele 7882
Marshallese 7772 Spanish; Castilian 6983
Moldavian 7779 Sundanese 8385
Mongolian 7778 Swahili 8387
Nauru 7865 Swati 8383
Navaho, Navajo 7886 Swedish 8386
Navajo; Navaho 7886 Tagalog 8476
Ndebele, North 7868 Tahitian 8489
Ndebele, South 7882 Tajik 8471
Ndonga 7871 Tamil 8465
Nepali 7869 Tatar 8484
Northern Sami 8369 Telugu 8469
North Ndebele 7868 Thai 8472
Norwegian 7879 Tibetan 6679
Norwegian Bokmål; Bokmål, 7866 Tigrinya 8473
Norwegian Nynorsk; 7878 Tonga (Tonga Islands) 8479
Nyanja; Chichewa; Chewa 7889 Tsonga 8483
Nynorsk, Norwegian; 7878 Tswana 8478
Occitan (post 1500); Proven 7967 Turkish 8482
Old Bulgarian; Old Slavonic; 6785 Turkmen 8475
Old Church Slavonic; Old 6785 Twi 8487
Old Slavonic; Church 6785 Uighur 8571
Oriya 7982 Ukrainian 8575
Oromo 7977 Urdu 8582
Ossetian; Ossetic 7983 Uzbek 8590
Ossetic; Ossetian 7983 Vietnamese 8673
Pali 8073 Volapük 8679
Panjabi 8065 Walloon 8765
Persian 7065 Welsh 6789
Polish 8076 Wolof 8779
Portuguese 8084 Xhosa 8872
Provençal; Occitan (post) 7967 Yiddish 8973
Pushto 8083 Yoruba 8979
Quechua 8185 Zhuang; Chuang 9065
Raeto-Romance 8277 Zulu 9085
Romanian 8279
Rundi 8278
Russian 8285
Samoan 8377
Sango 8371
Sanskrit 8365
Sardinian 8367
Scottish Gaelic; Gaelic 7168
Serbian 8382
Shona 8378
Sindhi 8368
Sinhalese 8373
Slovak 8375
Slovenian 8376
Somali 8379
Français
27
Page 65

Guide de dépannage
Si l’unité ne semble pas se comporter de la manière escomptée, vérifiez les
points suivants. Si le problème ne peut pas être résolu, voire s’il ne figure même
pas dans la liste, mettez l’unité en mode de veille et adressez-vous à votre
revendeur YAMAHA ou un SAV agréé.
Problème Solution
Pas d’alimentation – Vérifiez que le cordon d’alimentation est correctement
Pas d’image – Reportez-vous au mode d’emploi du téléviseur pour
Image déformée – Il se peut que l’image présente une légère distorsion, suivant
Image complètement
déformée ou image noir et
blanc avec un disque DVD
Pas de son ou son déform
Pas de son sur la sortie
numérique
Absence de son et d’image – Vérifiez que les câbles SCART (PÉRITEL) sont connectés à
Le disque ne peut être lu – Le DVD+R/RW, DVD-R/RW, CD-R/RW doit être finalisé.
L’image s’arrête
momentanément pendant la
lecture du disque
Le lecteur ne réagit pas à
certaines touches de la
télécommande
branché.
– Appuyez sur STANDBY/ON sur la façade du lecteur de
DVD pour l’allumer.
sélectionner le canal d’entrée vidéo adéquat. Faites défiler
les canaux du téléviseur jusqu’à ce que vous voyiez les
images du DVD.
– Vérifiez que le téléviseur est bien sous tension.
le type de disque lu. Ce n’est pas un dysfonctionnement.
– Vérifiez que le disque est compatible avec le lecteur de
DVD.
– Vérifiez que le réglage de la norme TV du lecteur de DVD
correspond au disque et à votre téléviseur.
– Réglez le volume.
– Vérifiez que les enceintes sont correctement branchées.
– Vérifiez les branchements numériques.
– Vérifiez que votre récepteur peut décoder MPEG-2 ou DTS;
à défaut, assurez-vous que la sortie numérique est réglée sur
MIC (PCM ONLY).
– Vérifiez que le format audio de la langue sélectionnée
correspond aux capacités de votre récepteur.
l’appareil approprié (voir le paragraphe “Connexions
vidéo”).
– Vérifiez que l’étiquette du disque est orientée vers le haut.
– Essayez un autre disque : le premier est peut-être
défectueux.
– Si vous gravez vous-même un CD d’images ou un CD MP3,
assurez-vous qu’il contient au moins 10 images ou 5
morceaux de musique MP3, respectivement.
– Code de région incorrect.
– Nettoyer le disque avec un chiffon doux (toujours à partir
du centre du disque vers l’extérieur) pour supprimer
d’éventuelles traces de doigts ou de rayures.
– Orientez la télécommande directement vers le capteur situé
en façade du lecteur.
– Rapprochez-vous du lecteur.
– Remplacez les piles de la télécommande.
– Vérifiez que la polarité des piles (signes +/–) est conforme
aux indications.
28
Page 66

Problème Solution
Les boutons ne fonctionnent
pas
Le lecteur ne réagit pas à
certaines commandes pendant
la lecture
Le lecteur de DVD-Vidéo ne
peut lire les CD/DVD
Le lecteur ne réagit pas à
certaines commandes de
fonctionnement pendant la
lecture
Impossible de lire le format de
fichier DivX
Impossible de sélectionner
l’activation ou la désactivation
du balayage progressif
Aucun son durant la lecture de
films DivX
Guide de dépannage
– Pour réinitialiser complètement le lecteur, débranchez la
pendant 5 à 10 secondes du secteur.
– Ces opérations ne sont peut-être pas permises par le disque.
Consultez les instructions du disque.
Français
– Utilisez un CD/DVD de nettoyage, disponible dans le
commerce, pour nettoyer la lentille avant d’envoyer le
lecteur de DVD-Vidéo en réparation.
– Appuyez 2 fois “STOP” avant d’appuyer sur “Menu Setup”.
– Ces commandes ne sont pas autorisées par le disque.
Reportez-vous aux instructions du disque.
– Vérifiez que le fichier DivX a été codé en mode Home
Theater avec un codeur DivX 5.x.
– Vérifiez que la sortie du signal vidéo est réglée sur « YUV ».
– Il est possible que ce codec audio ne soit pas compatible
avec le lecteur de DVD.
29
Page 67

Glossaire
Analogique: Son qui n’a pas été transformé en nom-
bres. Le son analogique varie, alors que le son numérique a des valeurs numériques spécifiques. Ces jacks
envoient le son à travers deux canaux, le gauche et le
droit.
yage progressif: Ce système affiche toutes les
Bala
lignes horizontales d’une image en même temps, sous
forme de trame de signaux. Il peut convertir le balayage
entrelacé du lecteur de DVD en format progressif pour
le connecter à un écran progressif. Il augmente considérablement la résolution verticale.
pitre: Sections d’une image ou d’un morceau de
Cha
musique sur un DVD plus petites que les titres. Un titre
est composé de plusieurs chapitres. Chaque chapitre est
doté d’un numéro de chapitre qui permet de le situer.
Code de z
ques seulement dans la zone pour laquelle ils ont été
conçus. Cet appareil ne lira que des disques ayant un
code de zone compatible. Vous trouverez le code de
zone à l’arrière de votre appareil. Certains disques sont
compatibles avec plusieurs zones (ou toutes les zones :
ALL).
Contrôle de la lectur
enregistré sur des CD vidéo ou SVCD pour contrôler la
reproduction. En utilisant des écrans de menu enregistrés sur un CD vidéo ou un SVCD compatible PBC,
vous pouvez utiliser aussi bien des disques de type interactif que des disques ayant une fonction de recherche.
Contrôle par
limiter la lecture du disque selon l’âge des utilisateurs et
le niveau de limitation de chaque pays. Cette limitation
varie selon les disques : quand elle est activée, la lecture
sera interdite si le niveau du logiciel est supérieur au
niveau choisi par l’utilisateur.
Débit de transmission:
sées pour une longueur de musique précise, mesurée en
kilobits par seconde, soit kbps. Ou bien vitesse à
laquelle vous enregistrez. Généralement, plus le débit
de transmission ou plus la vitesse d’enregistrement est
élevé(e), plus la qualité du son est bonne. Cependant,
les débits de transmission élevés utilisent davantage
d’espace disque.
DivX 3.11/4x/5x:
de compression vidéo basée sur MPEG-4, en attente de
brevet, mise au point par DivXNetworks, Inc., qui peut
comprimer la vidéo numérique pour l’envoyer sur Internet, tout en conservant sa qualité visuelle.
Dolb
par Dolby Laboratories, contenant jusqu’à six canaux de
son numérique (avant gauche et droit, surround gauche
et droit et subwoofer).
DTS: Digital Theater Systems. Système de son surround, différent de Dolby Digital. Ces formats ont été
mis au point par des fabricants différents.
one: Système permettant de lire des dis-
e (PBC): Se rapporte au signal
ental: Une des fonctions du DVD est de
Quantité de données utili-
Le code DivX est une technologie
y Digital: Système de son surround mis au point
Jacks AUDIO OUT: Jacks situés à l’arrière du lecteur
de DVD qui envoient le son à un autre appareil (téléviseur, stéréo, etc.).
Jacks de sor
l’arrière du lecteur de DVD qui envoient une image de
haute qualité à un téléviseur ayant deux jacks d’entrée
vidéo composant (R/G/B, Y/Pb/Pr, etc.).
Jack
DVD qui envoie les images à un téléviseur.
JPEG:
tème de compression de données de photos, proposé
par Joint Photographic Expert Group, qui permet un
rapport de compression élevé avec une faible perte de
qualité.
Men
les réglages d’image, de son, de sous-titres, de mutiangles, etc. enregistrés sur un DVD.
MP3:
sion de données de son. “MP3” est l’abréviation de
Motion Picture Experts Group 1 (soit MPEG-1) Audio
Layer 3. En utilisant le format MP3, un CD-R ou un CDRW peut contenir environ 10 fois autant de données
qu’un CD ordinaire.
Numérique:
numériques. Pour obtenir un son numérique, vous
devez utiliser les jacks DIGITAL AUDIO OUT
COAXIAL ou OPTICAL. Ces jacks envoient le son à
travers plusieurs canaux, au lieu de seulement deux avec
le son analogique.
PCM (Pulse Code Modulation):
vertit le signal de son analogique en signal numérique
pour être traité par la suite, conversion effectuée sans
compression des données.
pport hauteur/largeur: Rapport de la verticale et
Ra
de l’horizontale d’une image affichée. Le rapport horizontal / vertical des téléviseurs conventionnels est 4:3,
et celui des écrans larges 16:9.
Sur
sonores en trois dimensions très réalistes, en disposant
plusieurs enceintes autour de l’utilisateur.
S-Vidéo:
signaux de luminance et de couleur séparés. Vous pouvez utiliser S-vidéo seulement si votre téléviseur a un
jack d’entrée S-vidéo.
Titr
musique ou album entier sur disque audio. Chaque titre
est doté d’un numéro de titre qui permet de le situer.
tie vidéo composant: Jacks situés à
VIDEO OUT: Jack situé à l’arrière du lecteur de
Format de photo numérique très courant. Sys-
u du disque: Ecran permettant de sélectionner
Format de fichier avec un système de compres-
Son qui a été transformé en valeurs
Système qui con-
round: Système permettant de créer des champs
Produit une image claire en envoyant des
e: Section la plus longue d’un DVD de film ou de
30
Page 68

Caractéristiques techniques
SYSTÈME DE LECTURE
DVD-Vidéo
CD-Vidéo et SVCD
CD
PICTURE CD
CD-R, CD-RW
DVD+R, DVD+RW
DVD-R, DVD-RW
PERFORMANCES VIDÉO
Sortie vidéo (CVBS) 1 V c-à-c en 75 ohms
Sortie S-Vidéo Y: 1 V c-à-c en 75 ohms
C: 0,3 V c-à-c en 75 ohms
Sortie RVB (SCART) 0,7 V c-à-c en 75 ohms
Sortie vidéo à composantes Y: 1 V c-à-c en 75 ohms
Pb/Cb Pr/Cr: 0,7 V c-à-c en
75 ohms
FORMAT AUDIO
Digital Mpeg/ Dolby Digital/ Numérique compressé
DTS
PCM 16, 20, 24 bits
fs, 44,1, 48, 96 kHz
MP3(ISO 9660) 24, 32, 56, 64, 96, 128,
256 kbps
fs, 16, 22.05, 24, 32,
44,1, 48 kHz
WMA 32 kbps–192 kbps, mono,
stereo
Son stéréo analogique
LASER
Type: Laser à semiconducteur GaAIAs
Longueur d’onde: 650 nm (DVD)
Puissance de sortie: 7 mW (DVD)
Divergence du faisceau
780 nm (VCD/CD)
10 mW (VCD/CD)
:60 degrés
PERFORMANCES AUDIO
Convertisseur NA 24bits
Signal/Bruit (1kHz) 105dB
Gamme dynamique (1kHz) 100dB
DVD fréq.d’éch. 96 kHz 2 Hz - 44 kHz
fréq.d’éch. 48 kHz 2 Hz - 22 kHz
SVCD fréq.d’éch. 48 kHz 2 Hz - 22 kHz
CD/VCD
Bruit de distorsion (1kHz) 0,003%
fréq.d’éch. 44,1 kHz
fréq.d’éch. 44,1 kHz
2 Hz - 20 kHz
2 Hz - 20 kHz
STANDARD TV (PAL/50Hz) (NTSC/60Hz)
Nombre de lignes 625 525
Lecture Multistandard (PAL/NTSC)
CONNEXIONS
SCART Prise péritélévision
Sortie Y RCA/Cinch (vert)
Sortie Pb/Cb RCA/Cinch (bleu)
Sortie Pr/Cr RCA/Cinch (rouge)
Sortie S-vidéo Mini DIN, 4 broches
Sortie vidéo RCA/Cinch
Sortie audio G+D RCA/Cinch
Sortie numérique 1 coaxiale, 1 optique
IEC60958 pour
CDDA / LPCM/
MPEG1
IEC61937 pour MPEG 2,
Dolby Digital et DTS
BOÎTIER
Dimensions (l x p x h) 435 x 310 x 51 mm
Poids environ 2,6 Kg
Alimentation
Alimentation 230V, 50Hz
Consommation environ 14W
Consommation en standby < 1W
Français
Caractéristiques susceptibles d’être modifiées
sans préavis.
31
Page 69

ZUR BEACHTUNG: BITTE LESEN SIE DIESE
BEDIENUNGSANLEITUNG VOR INBETRIEBNAHME DES GERÄTES
1 Um eine einwandfreie Funktion zu gewährleisten,
müssen Sie sich diese Bedienungsanleitung
vollständig durchlesen. Bewahren Sie sie für die
spätere Bezugnahme an einem sicheren Ort auf.
2 Installieren Sie die Anlage an einem ausreichend
belüfteten, kühlen, trockenen und staubfreien Ort
– meiden Sie direkte Sonneneinstrahlung,
Wärmequellen, Erschütterungen, Staub,
Feuchtigkeit oder Kälte. Beim Einbau in einen
Schrank muss an allen Seiten des Gerätes ein
Freiraum von mindestens 2,5cm gelassen werden.
3 Stellen Sie dieses Gerät niemals in die Nähe
anderer elektrischer Geräte, Motoren oder
Transformatoren, um Brummen zu vermeiden.
4 Setzen Sie das Gerät niemals starken
Temperatursprüngen (von kalt zu warm) aus und
meiden Sie feuchte Orte (z.B. die Nähe eines
Luftbefeuchtigers), um Kondensbildung zu
vermeiden. Das könnte nämlich zu
Stromschlägen, Brand, anderen Schäden und/
oder Verletzungen führen.
5 Stellen Sie dieses Gerät niemals an Orte, wo die
Gefahr besteht, dass andere Gegenstände darauf
fallen bzw. Flüssigkeiten darauf tropfen können.
Folgende Dinge dürfen niemals auf die
Geräteoberseite gestellt werden:
– Andere Bausteine, weil sie das Gehäuse
beschädigen und/oder zu Verfärbungen führen
können.
Brennende Gegenstände (z.B. Kerzen), weil sie
–
einen Brand verursachen, das Gerät beschädigen
und/oder zu Verletzungen führen können.
–
Flüssigkeitsbehälter, weil die Gefahr besteht, dass
sie umgestoßen werden, so dass die Flüssigkeit ins
Geräteinnere gelangt. Das kann zu Kurzschlüssen
und/oder anderen Schäden führen.
6 Decken Sie das Gerät niemals mit einer Zeitung,
Tischdecke, Gardine o.ä. ab, weil dann keine
ausreichende Lüftung mehr gewährleistet ist. Ein
eventueller Wärmestau im Geräteinneren kann zu
Brand, Schäden und/oder Verletzungen führen.
7 Schließen Sie das Gerät erst ans Netz an,
nachdem Sie alle notwendigen Verbindungen
hergestellt haben.
8 Stellen Sie das Gerät für den Betrieb immer
richtig herum auf, um eine Überhitzung und damit
einhergehende Schäden zu vermeiden.
9 Behandeln Sie die Tasten, Regler und/oder Kabel
immer mit der gebührenden Umsicht.
10 Ziehen Sie beim Lösen des Netzanschlusses
immer am Stecker – niemals am Kabel selbst.
11 Reinigen Sie das Gehäuse niemals mit
chemischen Lösungsmitteln. Diese könnten
nämlich die Gehäuseoberfläche angreifen.
Verwenden Sie ein sauberes, trockenes Tuch.
12 Betreiben Sie das Gerät nur mit der auf dem
Typenschild erwähnten Netzspannung. Die
Verwendung einer anderen Netzspannung kann
zu Stromschlägen, Brand und/oder Verletzungen
führen. YAMAHA haftet nicht für Schäden, die
sich aus der Verwendung einer unsachgemäßen
Netzspannung ergeben.
13 Um Schäden durch Blitzeinschlag zu vermeiden,
müssen Sie im Falle eines Gewitters den
Netzanschluss lösen.
14 Nehmen Sie keine Änderungen bzw.
Reparaturversuche an dem Gerät vor. Überlassen
Sie alle erforderlichen Wartungsarbeiten einer
von YAMAHA anerkannten Kundendienststelle.
Öffnen Sie unter keinen Umständen das Gehäuse.
15 Wenn Sie das Gerät längere Zeit nicht
verwenden möchten (z.B. weil Sie in Urlaub
fahren), sollten Sie den Netzanschluss lösen.
16 Bitte lesen Sie sich im Falle einer Störung zuerst
das Kapitel „Störungsbeseitigung” durch.
17 Vor dem Transport dieses Gerätes müssen Sie
STANDBY/ON drücken, um den
Bereitschaftsbetrieb zu wählen und den
Netzanschluss lösen.
ACHTUNG
UM FEUER UND STROMSCHLÄGE ZU
VERMEIDEN, SOLLTE DAS GERÄTWEDER REGEN
NOCH FEUCHTIGKEIT AUSGESETZT WERDEN.
Während der Wiedergabe von CDs mit DTSCodierung geben die Analog-Ausgänge ein ziemlich
starkes Rauschen aus. Um Ihre Anlage nicht unnötig zu
beschädigen, müssen Sie die notwendigen
Vorkehrungen treffen, sofern Sie die AnalogAusgänge mit einem Verstärker o.ä. verbunden haben.
Für die Wiedergabe von DTS Digital Surround™Signalen brauchen Sie einen externen 5.1-Kanal DTS
Digital Surround™-Decoder, den Sie mit dem DigitalAusgang des Gerätes verbinden müssen.
VORSICHT MIT DEM LASER
Dieses Gerät enthält einen Laser. Um unnötige
Augenverletzungen zu vermeiden, sollten Sie alle
Wartungs- und Reparaturarbeiten einem qualifizierten
Wartungstechniker überlassen.
GEFAHR
Sichtbare Laserstrahlen bei geöffneter Abdeckung.
Achten Sie darauf, nicht direkt in den Laserstrahl zu
blicken.
Wenn das Gerät an die Wandsteckdose angeschlossen
ist, halten Sie die Augen von der Öffnung des DiscFachs oder anderen Öffnungen fern, und blicken Sie in
diesem Fall nicht in das Innere des Geräts.
Page 70

Inhalt
Vorweg
Regionalcodes.......................................................................... 2
Mitgeliefertes Zubehör.......................................................... 2
Anmerkungen über die Disks..............................................2
Reinigen der Disks..................................................................2
Patentrechtliche Hinweise.................................................... 2
Übersicht über die
Gerätefunktionen
Vorder- und Rückseite..........................................................3
Fernbedienung.........................................................................4
Vorbereitung
Allgemeine Anschlusshinweise ............................................5
Digitalanschluss .......................................................................5
Analog-Verbindungen ............................................................ 5
Videoanschluss ........................................................................ 6
S-Videoanschluss <A> .....................................................................6
Composite-Videoanschluss <B>................................................6
Component-Video-Anschluss <C>..........................................6
SCART-Buchse <D> ........................................................................6
Erste Schritte
Einlegen von Batterien in die Fernbedienung................... 7
Verwendung der Fernbedienung................................................7
Einschalten................................................................................ 7
Wahl des Ihrem Fernsehgerät entsprechenden
Farbsystems .............................................................................7
Einstellung der bevorzugten Sprache.................................8
Festlegen der OSD-Sprache..........................................................8
Festlegen der Audio-, Untertitel- und Disk-Menü-
Sprache......................................................................................................9
CD-Betrieb
Grundlegende Wiedergabefunktionen ............................10
Allgemeine Bedienung .........................................................10
Unterbrechung der Wiedergabe (‘Pause’)......................... 10
Wahl eines anderen Titels/Kapitels ........................................10
Rückwärts-/Vorwärtssuche.......................................................... 10
Anhalten der Wiedergabe........................................................... 10
Auswahl diverser Wiederhol-/ Zufallswiedergabe-
Funktionen .............................................................................11
Wiederholung und Zufallswiedergabe .................................11
Wiederholung eines Abschnitts ...............................................11
Abläufe bei Video-Wiedergabe (DVD/VCD/SVCD) .........11
Benutzung des Disk-Menüs......................................................... 11
Vergrößern...........................................................................................11
Fortsetzung der Wiedergabe ab dem letzten Halte-
Punkt........................................................................................................11
Bildschirmanzeige (OSD).............................................................12
Spezielle DVD-Funktionen .................................................13
Abspielen eines Titels..................................................................... 13
Kamerawinkel...................................................................................... 13
Audio.......................................................................................................13
Untertitel................................................................................................13
Spezielle VCD- und SDVD-Funktionen ..........................13
Wiedergabe-Steuerung (PBC).................................................. 13
Peview-Vorschau-Funktion.......................................................... 13
Abspielen einer MP3/ DivX/ JPEG/ Kodak Picture CD ..14
Hauptfunktionen ............................................................................... 14
Wahl eines Ordners und einer Spur/ Datei...................... 15
Wiederholung und Zufallswiedergabe.................................15
Spezielle Bild-CD-Funktionen ...........................................15
Peview-Vorschau-Funktion.......................................................... 15
Zoom-Bild............................................................................................. 16
Wiedergabe mit verschiedenen
Bildwiedergabewinkeln..................................................................16
Scan-Effekt ............................................................................................16
Gleichzeitiges Abspielen von MP3 Musik und JPEG
Bildern.....................................................................................................16
„Setup”-Menü
Allgemeinen Setup-Menü.................................................... 17
Sicherung/Freigabe der anzuschauenden Disk................. 17
Anzeigefeld des Spielers abdunkeln.......................................17
Programm (nicht verfügbar für Foto-CD/MP3)..............17
Festlegen der OSD-Sprache....................................................... 18
Bildschirmschoner............................................................................. 18
Schlummer-Timer............................................................................. 18
®
DivX
VOD-Registriercode......................................................19
Audio Setup Menü ............................................................... 19
Einstellung des Analogausgangs................................................19
Einstellung des Digitalausgang.................................................... 20
CD Upsampling.................................................................................20
Nachtmodus........................................................................................ 21
Video Setup Menü................................................................ 21
TV Typ.................................................................................................... 21
TV Bildschirm...................................................................................... 21
Progressive............................................................................................ 22
Bildeinstellung...................................................................................... 22
Auf YUV/ RGB schalten................................................................ 23
Vorzugseinstellungen Setup Menü.................................... 24
Festlegen der Audio-, Untertitel- und Disk-Menü-
Sprache................................................................................................... 24
Wiedergabeeinschränkung durch Festlegung der
Kindersicherungsstufe.....................................................................24
PBC (Wiedergabesteuerung) ....................................................24
MP3-/JPEG-Navigator..................................................................... 25
Ändern des Passwortes ................................................................ 25
Grundeinstellungen.......................................................................... 25
Sprachcode................................. 26
Störungsbeseitigung .................. 28
Glossar ........................................ 30
Technische Daten...................... 31
Deutsch
1
Page 71

Vorweg
Wir beglückwünschen Sie zu Ihrer
Entscheidung für diesen DVD-Spieler von
YAMAHA. In dem vorliegenden Handbuch
finden Sie eine Anleitung zur grundsätzlichen
Bedienung Ihres neuen Geräts.
Regionalcodes
DVDs müssen für alle Regionen
(ALL) oder für Region 2
ALL
markiert sein, um auf diesem
DVD-System abgespielt zu
werden. Disks, die für andere
2
Regionen markiert sind, können
nicht abgespielt werden.
Mitgeliefertes Zubehör
– Fernbedienung
– Batterien (2 x Größe AA) für die
Fernbedienung
– Audio-Kabel
– Videokabel
– Bedienungsanleitung
Anmerkungen über die Disks
– Dieses Gerät erlaubt das Abspielen von Vi-
deo-DVDs, Video-CDs, Super Video-CDs, Au-
dio-CDs, CD-Rs, CD-RWs sowie DVD+RWs,
DVD+Rs, DVD-Rs und DVD-RWs.
Dieses Gerät kann folgende Datenträger
abspielen:
– MP3-Disk, Picture (Kodak, JPEG) auf CD-
R[W]:
– JPEG/ISO 9660 Format.
– Maximal 30 Zeichen-Display.
®
– DivX
– CD-R- und CD-RW-Scheiben können erst
– Bestimmte Discs können aufgrund der
– Bitte legen Sie nur CD-Rs und CD-RWs
– Legen Sie niemals Scheiben mit
Disk auf CD-R[W]/ DVD+R[W]/
DVD-R[W] (DivX 3.11, 4.x und 5.x)
abgespielt werden, nachdem sie finalisiert
worden sind.
Aufnahmebedingungen des PCs oder des
verwendeten Programms nicht abgespielt
werden. Die Merkmale und der Zustand
der Discs, das Material, eventuelle Kratzer
oder Wellen können Fehler verursachen.
vertrauenswürdiger Hersteller ein.
ausgefallenen Formen (herzförmig usw.) ein.
– Legen Sie niemals Scheiben ein, die mit
einem Klebestreifen, Abziehbildern oder
anderen Materialien versehen sind, weil
diese das Gerät beschädigen könnten.
– Legen Sie niemals Scheiben ein, die Sie mit
einem Etikett eines handelsüblichen
Druckers versehen haben.
Reinigen der Disks
• Wenn eine Disk verschmutzt ist,
reinigen Sie sie mit einem weichen
Tuch. Wischen Sie dabei von der Mitte
zu den Rändern hin. Wischen Sie nicht
in einer kreisförmigen Bewegung.
• Verwenden Sie keine Lösungsmittel wie
Waschbenzin, Verdünner, im Handel
erhältliche Reinigungsmittel oder
Antistatik-Sprays für herkömmliche
Schallplatten.
Patentrechtliche Hinweise
Hergestellt unter Lizena von
Dolby Laboratories. „Dolby” und
das Doppel-D-Symbol sind
Warenzeichen von Dolby
Laboratories:
„DTS” und „DTS Digital Out”
sind Warenzeichen von Digital
Theater Systems, Inc.
DivX, DivX Certified und die
damit zusammenhängenden
Logos sind Warenzeichen der
DivXNetworks, Inc. und werden
in Lizenz verwendet.
Dieses Produkt ist mit einer UrheberschutzVorrichtung ausgestattet, deren Technologie durch
US-Patente und geistige Eigentumsrechte im Besitz
von Macrovision Corporation und anderen
Inhabern von Urheberrechten geschützt ist. Der
Gebrauch dieser Urheberschutz-Vorrichtung muss
durch Macrovision Corporation genehmigt werden
und ist ausschließlich für die private Nutzung
vorgesehen, sofern dem Benutzer keine
weitergehende Genehmigung von Macrovision
erteilt worden ist. Untersuchungen dieses Gerätes
zum Zweck eines unbefugten Nachbaus und
Zerlegung sind untersagt.
2
Page 72

Übersicht über die Gerätefunktionen
Vorder- und Rückseite
STANDBY/ON
– Einschalten des Gerätes bzw. Wechseln in
den Bereitschaftsbetrieb.
Disc-Schlitten
/ OPEN/CLOSE
– Öffnen und schließen des Disc-Schlittens.
PROGRESSIVE-Anzeige
– Leuchtet im „Progressive”-Modus.
* Ungefähr 2 Sekunden gedrückt halten.
Anschließen des Netzkabels
– zum Verbinden mit einer normalen Steckdose
Digitaler COAXIAL-Ausgang
– Verbinden Sie ihn mit dem Koax-Eingang eines
AV-Receivers oder einer Stereoanlage.
Digitaler OPTICAL-Ausgang
– Verbinden Sie ihn mit dem Glasfaser-Eingang
eines AV-Receivers oder einer Stereoanlage.
VIDEO-Ausgang (Kompositvideo)
– Verbinden Sie ihn mit dem Komposit-Eingang
eines AV-Receivers.
– Anhalten der Wiedergabe.
– Aktivieren der Wiedergabepause.
– Starten der Wiedergabe.
Frontplatten-Display
– Zeigt den aktuellen Betriebszustand
AUDIO OUT (Left/Right)
– Verbinden Sie ihn mit dem AUDIO-
Eingängen eines AV-Receivers oder einer
– Schließen Sie hier ein SCART-Kabel an.
COMPONENT Video-Ausgänge
– Verbinden Sie sie mit den Y P
CR-Eingängen eines AV-Receivers.
– Verbinden Sie ihn mit dem S-Video-
Eingang eines AV-Receivers.
9 STOP
; PAUSE
B PLAY
des Gerätes an.
Stereoanlage.
AV-Anschluss
B/CB PR/
S VIDEO-Ausgang
Deutsch
Achtung: Die Stifte der Buchsen auf der Rückeite nicht mit den Fingern
berühren. Statische Entladungen können zu irreparablen Schäden am Gerät
führen.
3
Page 73

Übersicht über die Gerätefunktionen
Fernbedienung
TOP MENU/RETURN
– Aufrufen des obersten Menüs
(DVD) / Zum Zurückkehren zum
vorhergehenden Menüschritt (VCD)
MENU
– Zum Einblenden des Menüs einer
Disk (DVD) / Ein-/Ausschalten von
PBC (VCD)
1 2 3 4
– (nach links/rechts/oben/unten)
Zum Auswählen einer Menü-Option
ENTER/OK
– Zum Bestätigen der Menü-
Auswahl
S
– Suchlauf rückwärts* /
vorhergehendes Kapitel oder Stück
STOP ( 9 )
– Zum Stoppen der Wiedergabe
PLAY ( B )
– Zum Starten der Wiedergabe
PAUSE ( ; )
– Zum zeitweiligen Unterbrechen
der Wiedergabe / zum Umschalten
auf Bild-für-Bild-Wiedergabe
REPEAT
– Zum Wiederholen eines Kapitels,
Stück, Titels oder der kompletten
Disk /Zufallswiedergabe
Kapitel/CD-Titel
A-B
– Zum Wiederholen einer Passage
SCAN
– Vorschau eines Titels oder einer
Disc (VCD) /Abspielen der ersten
6 Sekunden oder weniger (CD)
MUTE
– Stummschaltung an/aus
23
1
546
8
79
TOP MENU RETURN
0
MENU SETUP
ENTER
OK
STOP
PLAY
ZOOM AUDIO
SUBTITLE
ANGLE
AB
REPEAT
DVD
ON SCREEN
PAUSE
MUTESCAN
|
B/
– zum Einschalten des Geräts
bzw. zur Anwahl des
Bereitschaftsbetriebes
0-9 numerisches Tastenfeld
– Zum Auswählen von
nummerierten Menü-Optionen
ON SCREEN
– Zum Ein-oder Ausblenden des
Bildschirmmenüs des Spielers
SETUP
– Zum Ein-oder Ausblenden des
„Setup”-Menüs des Spielers
T
– Suchlauf vorwärts* / nächstes
Kapitel oder Stück
SUBTITLE
– Zum Wählen der Sprache für
Untertitel
ANGLE
– Zum Wählen der DVD-
Kameraperspektive
ZOOM
– Zum Vergrößern des
Videobildes
AUDIO
– Anwahl der Sprache und des
Audioformates
* Halten Sie die Taste etwa zwei Sekunden lang gedrückt.
4
Page 74

Vorbereitung
Allgemeine Anschlusshinweise
Stellen Sie niemals Verbindungen her bzw.
ändern Sie sie niemals, solange das Gerät
eingeschaltet ist.
• Die Anschlussart ist je nach den
verwendeten Geräten unterschiedlich.
Die folgenden Abbildungen zeigen
einige Anschlußbeispiele.
• Um die Geräte optimal anzuschließen,
lesen Sie bitte auch die Anleitungen der
Geräte durch.
• Schließen Sie dieses Gerät nicht über Ihren Videorecorder an. Die Videoqualität kann durch das Kopierschutzsystem
beeinträchtigt werden.
• Den Audio-Ausgang dieses Gerätes
niemals mit dem Phono-Eingang eines
Audio-Systems verbinden.
Digitalanschluss
Diese Gerät ist mit koaxialen (COAXIAL)
und optischen (OPTICAL) Digitalausgangsbuchsen ausgestattet. Verbinden Sie eine
oder beide Buchsen über ein (separat erhältliches) Spezialkabel mit einem AV-Receiver, der mit einem Dolby Digital-, DTSoder MPEG-Decoder ausgestattet ist.
Hinweis:
– Das digitale Ausgangssignal muss ein
Format besitzen, mit dem der Receiver
kompatibel ist. Ansonsten liefert der
Receiver Verzerrungen oder gar keinen
Ton. Wählen Sie mit Hilfe des Menüs der
Disk ein geeignetes Audioformat. Durch
einmaliges oder mehrmaliges Drücken von
AUDIO können Sie außer der Sprache auch
das Audioformat umschalten. Das gewählte
Format wird einige Sekunden im
Statusfenster angezeigt.
Analog-Verbindungen
Verwenden Sie das zum Lieferumfang des
Gerätes gehörige audio/Video-Kabel, um
die Buchsen AUDIO OUT L (links) und R
(rechts) des Players mit den
entsprechenden Eingangsbuchsen des
externen Audiogerätes – beispielsweise
eines Stereo-Verstärkers– zu verbinden.
L
R
(liegt bei)
Deutsch
C
O
Linker
Front-
sprecher
AV-Receiver
Centerautspr
Surround
hinten-sprecher
echer
Subwoofer
Rechter
Front-
sprecher
Rechter Surround-
sprecher
COAXIALINOPTICAL
IN
Linker Surround-
sprecher
Der digitale Ausgang des Gerätes
muss auf ALL gestellt werden (siehe
Seite 20 „DIGITALAUSGANG”).
Verstärker
Linker
sprecher
Stereo-
Rechter
sprecher
R
1 CD/DVD
RL
L
5
Page 75

Vorbereitung
Videoanschluss
Wenn Ihr AV-Receiver mit
Videoausgängen ausgestattet ist, schließen
Sie den Receiver (und dann den Fernseher)
so an, dass Sie am Eingangswähler des
Receivers die Videoquelle für den
Fernseher umschalten können.
Dieses Gerät besitzt drei Arten von
Videoausgangsbuchsen. Welche dieser
Buchsen verwendet werden müssen, hängt
vom Typ der Eingangsbuchse des
anzuschließenden Geräts ab.
(liegt bei)
S VIDEO
INPUT
VIDEO
OUT
VIDEO
S
IN
V
VIDEO
AV-Receiver
COMPONENT
VIDEO OUT
COMPONENT
VIDEO IN
YPBCB PRCR
COMPONENT
VIDEO IN
S VIDEO
OUT
S VIDEO
IN
<C><A> <B> <D>
S-Videoanschluss <A>
Ein S-Videoanschluss liefert eine bessere
Bildqualität, als der Composite-Videoanschluss da Farb- und Luminanzsignale nicht
gemeinsam, sondern getrennt übertragen
werden (S bedeutet „separat”). Ein S-Videoanschluss kann nur vorgenommen werden, wenn Ihr Receiver (und Fernseher) SVideoeingangsbuchsen besitzt. Zum Anschließen benötigen Sie handelsübliche SVideokabel.
Composite-Videoanschluss <B>
Verbinden Sie dieses Gerät über das
mitgelieferte Videokabel mit dem AVReceiver oder Fernseher.
Component-Video-Anschluss <C>
Eine Component-Videoverbindung
garantiert eine ausgezeichnete
Farbwiedergabe (besser noch als S-Video),
weil die Farben nach Leuchtintensität (Y,
grüner Anschluss) und farblichen
Unterschieden (Pb, blau/Pr, rot)
ausgegeben werden. Hierfür benötigen Sie
handelsübliche Koaxkabel. Die Verbindung
ist für Receiver (und Fernseher) mit
Component-Eingängen belegt. Beachten
Sie beim Anschließen die Farben der
Buchsen und Stecker. Wenn Ihr Receiver
keine Component-Buchsen aufweist,
könnten Sie eventuell über eine
Direktverbindung mit dem Fernseher eine
bessere Bildqualität erzielen.
Hinweis:
– Der Component-Ausgang des Gerätes muss
auf YUV gestellt werden (siehe Seite 23
„Auf YUV/ RGB schalten”).
SCART-Buchse <D>
Auch ein Fernseher mit
Videoeingangsbuchse kann direkt an den
Spieler angeschlossen werden. Dieses
Gerät besitzt zu diesem Zweck eine
SCART-Ausgangsbuchse. Dieser
Verbindungstyp garantiert eine optimale
Bildqualität.
Hinweis:
– Stellen Sie sicher, dass der mit „TV” ge-
kennzeichnete Stecker am SCART-Kabel
an das Fernsehgerät und der mit „DVD”
gekennzeichnete Stecker am SCART-Kabel
an dieses Gerät angeschlossen wurde.
6
Page 76

Erste Schritte
Step1: Einlegen von Batterien in die Fernbedienung
3
1
2
2
1 Das Batteriefach öffnen.
2 Zwei Batterien vom Typ R06 oder AA
einlegen, wobei die Anzeigen (+ –) im Fach
zu beachten sind.
3 Den Deckel schließen.
Verwendung der Fernbedienung
Fernbedienungs-
sensor
Richten Sie die Fernbedie-
nung auf den Sensor. Der
Abstand sollte dabei nicht
mehr als 6m betragen.
30°
30°
Step2: Einschalten
1 Verbinden Sie das Netzkabel mit einer
geeigneten Steckdose.
2 Schalten sie den Fernseher und AV-
Receiver ein.
3 Wählen Sie auf dem AV-Receiver die
Eingangsquelle, die den verwendeten
Anschlussbuchen entspricht. Siehe auch
die Bedienungsanleitung der anderen
beteiligten Geräte.
4 Schalten Sie dieses Gerät ein.
5 Wählen Sie auf dem Fernseher den
geeigneten Videokanal (z.B. EXT1, EXT2,
AV1, AV2, AUDIO/VIDEO usw.; siehe die
Bedienungsanleitung des Fernsehers).
➜ Das Display auf der Frontplatte leuchtet
und auf dem Bildschirm erscheint die
Ausgangsseite.
Step3:
Wahl des Ihrem
Fernsehgerät entsprechenden
Farbsystems
Dieses DVD-System ist sowohl mit NTSC
als auch PAL kompatibel. Wählen Sie das
Ihrem Fernseher entsprechende
Farbsystem.
Deutsch
Umgang mit der Fernbedienung
• Sorgen Sie dafür, dass keine
Flüssigkeiten auf oder in die
Fernbedienung gelangen.
• Lassen Sie die Fernbedienung nicht
hinfallen.
• Setzen Sie die Fernbedienung nicht
folgenden Bedingungen aus:
– Hohe Luftfeuchtigkeit (z.B. im
Badezimmer)
– Hohe Temperaturen (z.B. neben
Heizung oder Herd)
– Extrem niedrige Temperaturen
– Staubige Orte
VIDEO-SETUP
TV-TYP PAL
TV-BILDSCHIRM NTSC
PROGRESSIVE MULTI
FARBEINSTELLUNG
COMPONENT
1 Drücken Sie SETUP.
2 Drücken Sie 2 wiederholt, um {VIDEO-
SETUP}.
3 Drücken Sie 34 um {TV-TYP},
hervorzuheben und drücken Sie 2.
7
Page 77

Erste Schritte
4 Drücken Sie 34, um eine der
nachstehenden Optionen hervorzuheben:
PAL
Wählen Sie dies, wenn das angeschlossene
Fernsehgerät das PAL-System aufweist.
Dadurch wird das Videosignal einer NTSC
Disk geändert und im PAL-Format
ausgegeben.
NTSC
Wählen Sie dies, wenn das angeschlossene
Fernsehgerät das NTSC-System aufweist.
Dadurch wird das Videosignal einer PAL
Disk geändert (nur VCD) und im NTSCFormat ausgegeben.
MULTI
Wählen Sie dies, wenn das angeschlossene
Fernsehgerät sowohl mit NTSC als auch
PAL kompatibel ist (Multisystem). Das
Ausgabeformat entspricht dem Videosignal
der Disk.
5 Wählen Sie ein Element und drücken Sie
ENTER/OK.
Nützlicher Hinweis:
– Vergewissen Sie sich vor dem Ändern
der aktuellen TV-Norm-Einstellung,
dass Ihr Fernsehgerät das ‚gewählte
TV Norm‘-System unterstützt.
– Wenn kein richtiges Bild auf Ihrem
Fernsehgerät erscheint, warten Sie
15 Sekunden auf die automatische
Wiederherstellung [Auto Recover].
Step4: Einstellung der bevorzugten Sprache
Sie können Ihre eigenen bevorzugten
Spracheinstellungen wählen. Dieses DVDSystem schaltet jedes Mal, wenn Sie eine
Disk einlegen, automatisch für Sie auf die
Sprache. Wenn die gewählte Sprache nicht
auf der Disk verfügbar ist, wird stattdessen
die Grundsprache der Disk benutzt. Die
OSD-Sprache im Systemmenü bleibt nach
erfolgter Auswahl erhalten.
Festlegen der OSD-Sprache
ALLGEMEINES SETUP-MENÜ
DISK-SPERRE ENGLISH
DISPLAY DIM DANSK
PROGRAMM DEUTSCH
OSD SPRACHE ESPAÑOL
BILDS.SCHONER FRANÇAIS
SLEEP ILATIANO
DIVX(R) VOD-CODE NEDERLANDS
1 Drücken Sie SETUP.
2 Drücken Sie 1 2 um {ALLGEMEINES
SETUP-MENÜ}.
3 Drücken Sie 34 um {OSD SPRACHE},
hervorzuheben und drücken Sie 2.
4 Drücken Sie 34 um zum wählen Sie eine
Sprache und drücken Sie ENTER/OK.
NORSK
PAL IN NTSC ABÄNDERN:
1. TV MUSS EIN VERZERRTES, AUF
NTSC-NORM.
2. WENN DAS BILD VERZERRT IST
WARTEN SIE 15 SEK.
AUF AUTOM.WIEDERHERRST.
TIPSS: Zur Rückkehr zum vorigen Menü drücken Sie 1.
Zum Entfernen des Menüs drücken Sie SETUP.
8
ABBRECHENOK
Page 78

Festlegen der Audio-, Untertitelund Disk-Menü-Sprache
VORZUGSEINSTELLUNGEN
AUDIO ENGLISCH
UNTERTITEL CHINESISCH
DISK-MENÜ FRANZÖSISCH
KI.SICHERUNG SPANISCH
PBC PORTUGIESISCH
MP3/JPEG-NAV POLNISCH
PASSWORT ITALIENISCH
GRUNDEINST. TüRKISCH
1 Drücken STOP 9 zweimal, anschließend
drücken Sie SETUP.
2 Drücken Sie 2 um
{VORZUGSEINSTELLUNGEN} zu
wählen.
3 Drücken Sie 34, um jeweils eine der
nachstehenden Optionen hervorzuheben,
drücken Sie anschließend 2.
– ‘AUDIO’ (Disk-Soundtrack)
– ‘UNTERTITEL’ (CD-Untertitel)
– ‘DISK-MENÜ’
4 Drücken Sie 34 um zum wählen Sie eine
Sprache und drücken Sie ENTER/OK.
Wenn die von Ihnen gewünschte
Sprache nicht in der Liste ist, wählen
Sie anschließend {SONSTIGE},
Benutzen Sie die nummerische
Tastatur (0-9) auf der Fernbedienung zur
Eingabe des 4-stelligen Sprachencodes
(siehe Seite 26 „Sprachcode”) und drücken
Sie zur Bestätigung ENTER/OK.
5 Wiederholen Sie Schritt 3–4 für weitere
Einstellungen.
Erste Schritte
Deutsch
TIPSS: Zur Rückkehr zum vorigen Menü drücken Sie 1.
Zum Entfernen des Menüs drücken Sie SETUP.
9
Page 79

CD-Betrieb
WICHTIGER HINWEIS!
– Wenn beim Drücken einer Taste
das Sperrsymbol ( oder X) auf
dem TV-Bildschirm erscheint,
heißt dies, dass die Funktion auf
der vorliegenden Disk oder zum
gegenwärtigen Zeitpunkt nicht
verfügbar ist.
– DVDs und Spieler sind mit
regionalen Einschränkungen
konzipiert. Vor dem Abspielen
einer Disk vergewissern Sie sich,
dass die Disk zur selben Zone wie
Ihr Spieler gehört.
– Nicht auf die Disk-Lade drücken
oder andere Objekte als Disks in
die Disk-Lade geben, weil dies
Fehlfunktion des Disk-Spielers
verursachen kann.
Grundlegende Wiedergabefunktionen
1 Drücken Sie STANDBY/ON auf der
Frontplatte, um den DVD-Player
einzuschalten.
2 Drücken Sie OPEN/CLOSE / auf der
Frontplatte, um den Schlitten zu öffnen.
3 Legen Sie die gewünschte Disc mit dem
Etikett nach oben in den Schlitten.
4 Drücken Sie OPEN/CLOSE / noch
einmal, um den Schlitten zu schließen.
➜ Sobald die Inhaltsangabe ausgewertet
ist, beginnt die Wiedergabe
automatisch.
➜ Wenn Sie die PLAY B-Taste bei
geöffnetem Schlitten drücken, schließt
das Gerät den Schlitten und startet die
Wiedergabe.
Allgemeine Bedienung
Sofern nicht anders erwähnt, beziehen sich
alle Bedienhinweise auf die Fernbedienung.
Unterbrechung der Wiedergabe (‘Pause’)
1 Während der Wiedergabe drücken Sie
PAUSE ;.
➜ Die Wiedergabe wird unterbrochen
und der Klang stummgeschaltet.
2 Drücken Sie PAUSE ; erneut, um das
nächste Einzelbild zu wählen.
3 Zur Rückkehr zur normalen Wiedergabe
drücken Sie PLAY B.
Wahl eines anderen Titels/ Kapitels
• Drücken Sie S / T oder benutzen
Sie die nummerische Tastatur
(0-9), um eine Titel-/Kapitelnummer
einzugeben.
➜ Wenn die Wiederholfunktion
eingestellt wurde, wird durch Drücken
von S / T derselbe Titel/ dasselbe
Kapitel wiedergegeben.
Rückwärts-/Vorwärtssuche
• Drücken und halten Sie S / T,
anschließend drücken Sie PLAY B, um
die normale Wiedergabe fortzusetzen.
➜ Bei der Suche erhöht erneutes Drücken
von S / T die
Suchgeschwindigkeit.
Anhalten der Wiedergabe
• Drücken Sie STOP 9.
TIPSS: Die hier beschriebenen Bedienfunktionen sind bei bestimmten Disks u.U. nicht möglich.
Beziehen Sie sich stets auf die den Disks beiliegenden Anweisungen.
10
Page 80

CD-Betrieb
Auswahl diverser Wiederhol-/ Zufallswiedergabe-Funktionen
Wiederholung und Zufallswiedergabe
• Drücken Sie beim Abspielen einer Disk
REPEAT kontinuierlich, um einen
Abspielmodus zu wählen.
DVD
➔ RPT ONE (Kapitel wiederholen)
➔ RPT TT (Titel wiederholen)
➔ SHUFFLE (Zufälliges Abspielen)
➔ RPT SHF (Zufallswiedergabe
➔ RPT OFF (Wiederholen aus)
VCD/SVCD/CD
➔ RPT ONE (Spur wiederholen)
➔ RPT ALL (Wiederholen Alle)
➔ SHUFFLE (Zufälliges Abspielen)
➔ RPT SHF (Zufallswiedergabe
➔ RPT OFF (Wiederholen aus)
MP3/DivX
➔ RPT ONE (Spur wiederholen)
➔ RPT FLD (Ordner wiederholen)
➔ SHUFFLE (Zufälliges Abspielen)
➔ RPT OFF (Wiederholen aus)
Nützlicher Hinweis:
– Bei VCDs ist, bei eingeschaltetem PBC-
Modus, wiederholtes Abspielen nicht
möglich.
wiederholen)
wiederholen)
1 Drücken Sie beim Abspielen einer Disk
2 Drücken Sie ZOOM erneut betätigen, um
Abläufe bei Video-Wiedergabe (DVD/VCD/SVCD)
Benutzung des Disk-Menüs
Je nach Disk kann ein Menü auf dem TVBildschirm erscheinen, sobald Sie die Disk
einlegen.
Wiedergabefunktion oder -element wählen
• Benutzen Sie den 1 234 oder die
nummerische Tastatur (0-9) auf
der Fernbedienung, anschließend
drücken Sie ENTER/OK um mit der
Deutsch
Wiedergabe zu beginnen.
Menüzugriff oder -wegnahme
• Drücken Sie MENU auf der Fernbedienung.
Vergrößern
Diese Funktion erlaubt Ihnen, das Bild auf
dem Fernsehgerät-Bildschirm zu
vergrößern und durch das vergrößerte
Bild zu schwenken.
wiederholt ZOOM, um einen anderen
Zoomfaktor zu wählen.
➜ Benutzen Sie 1 234 kann über den
Bildschirm geschwenkt werden.
➜ Die Wiedergabe wird fortgesetzt.
zur Original-Bildgröße zurückzukehren.
Wiederholung eines Abschnitts
1 Beim Abspielen einer Disk drücken Sie A-
B auf der Fernbedienung am
Ausgangspunkt.
2 Drücken Sie A-B erneut am Endpunkt des
Abschnitts.
➜ Die Punkte A und B können nur
innerhalb desselben Kapitels/Titels
festgelegt werden.
➜ Der Abschnitt wird jetzt
ununterbrochen wiederholt.
3 Drücken Sie A-B erneut, um die normale
Wiedergabe fortzusetzen.
TIPSS: Die hier beschriebenen Bedienfunktionen sind bei bestimmten Disks u.U. nicht möglich.
Beziehen Sie sich stets auf die den Disks beiliegenden Anweisungen.
Fortsetzung der Wiedergabe ab dem letzten Halte-Punkt
Fortsetzung der Wiedergabe der letzten
10 Disks ist möglich, selbst wenn die Disk
ausgeworfen.
• Legen Sie eine der letzten 10 Disks ein.
➜ „LADEN” erscheint.
• Drücken Sie PLAY B, und die Disk
wird ab dem letzten Halte-Punkt
wiedergegeben.
Fortsetzungsmodus (Resume) aufheben
• Im Stop-Modus drücken Sie STOP 9
erneut.
11
Page 81

CD-Betrieb
Bildschirmanzeige (OSD)
Das OSD-Menü zeigt die Disk-Wiedergabedaten (z.B. Titel- oder Kapitelnummer,
abgelaufene Abspielzeit, Audio-/ Untertitelsprache); eine Reihe von Vorgängen
kann ohne Unterbrechung der Disk-Wiedergabe erfolgen.
1 Drücken Sie ON SCREEN beim
Abspielen einer Disk.
➜
Eine Liste verfügbarer Disk-Informationen
erscheint auf dem Fernsehbildschirm.
DVD
MENÜ
TITEL 02/14
KAPITEL 02/14
AUDIO 5.1CH
UNTERTITEL ENG
BITRATE
Springen zu einer bestimmten
Position (DVD/VCD)
1 Drücken Sie 34, um {TT DAUER}, {KP
DAUER} (DVD), {STCK DAUER} oder
{DISK DAUER} (VCD) zu wählen.
➜ {TT DAUER} verweist auf die
Spieldauer des aktuellen Titels {KP
DAUER} vertritt die Spieldauer des
aktuellen Kapitels.
2 Drücken Sie ENTER/OK.
3 Geben Sie die Stunden, Minuten und
Sekunden (von rechts) mit den
Zifferntasten ein. (Beispiel: 0:34:27)
Audio/Untertitel/Winkl (DVD)
Sofern die eingelegte Disc diese
Funktionen unterstützt, können Sie auch
{AUDIO}, {UNTERTITEL} oder {WINKL}
wählen.
VCD/SVCD
MENÜ
STÜCK 02/14
DISK DAUER 0:49:17
STCK DAUER 0:03:43
WIEDERH. AUS
BITRATE
2 Drücken Sie 34, um die Informationen zu
betrachten, und für den Zugriff drücken Sie
ENTER/OK.
1 Drücken Sie 34, um {AUDIO},
{UNTERTITEL} oder {WINKL} zu wählen.
2 Drücken Sie ENTER/OK.
3 Für „Audio” und „Untertitel’
Treffen Sie Ihre Wahl mit 34 und
bestätigen Sie mit ENTER/OK.
oder
Für „Winkl’
Wählen Sie mit den Zifferntasten den
gewünschten Blickwinkel.
3 Benutzen Sie die nummerische
Tastatur (0-9) zur Eingabe der Nummer/
Zeit oder drücken Sie 34, um die Auswahl
vorzunehmen. Anschließend drücken Sie
zur Bestätigung ENTER/OK.
➜ Die Wiedergabe beginnt ab der
gewählten Position bzw. dem
eingegebenen Titel/Kapitel/CD-Titel.
Titel-/Kapitel-/CD-Titel-Anwahl
(DVD/VCD)
1 Drücken Sie 34, um {TITEL}, {KAPITEL}
(DVD) oder {STÜCK} (VCD) zu wählen.
2 Drücken Sie ENTER/OK.
3 Wählen Sie mit den Zifferntasten die
Nummer des gewünschten Titels, Kapitels
oder CD-Titels.
TIPSS: Die hier beschriebenen Bedienfunktionen sind bei bestimmten Disks u.U. nicht möglich.
Beziehen Sie sich stets auf die den Disks beiliegenden Anweisungen.
Wiederholung/Zeitanzeige (DVD/VCD)
1 Drücken Sie 34, um {WIEDERH.} oder
{ZEITANZ.} zu wählen.
2 Drücken Sie ENTER/OK.
3 Treffen Sie Ihre Wahl mit 34 und
bestätigen Sie mit ENTER/OK.
Zeitanzeige (CD)
Bei wiederholtem Drücken von ON
SCREEN ändert sich die Zeitanzeige
folgendermaßen:
GES ABGEL GES RESET
EINZEL
RESTSPIELDAUER
EINZEL ABGEL.
SPIELD.
12
Page 82

CD-Betrieb
Spezielle DVD-Funktionen
Abspielen eines Titels
1 Drücken Sie MENU.
➜ Das Disk-Titelmenü erscheint auf dem
Fernsehbildschirm.
2 Benutzen Sie die Tasten 1 234 oder die
nummerische Tastatur (0-9) zur Wahl
einer Abspieloption.
3 Drücken Sie zur Bestätigung die Taste
ENTER/OK.
Kamerawinkel
• Drücken Sie ANGLE wiederholt, um
einen anderen Winkel wunschgemäß zu
wählen.
Audio
Ändern der Dialogsprache und/oder
des Formats
• Drücken Sie AUDIO wiederholt, um
verschiedene Audiosprachen zu wählen.
Untertitel
• Drücken Sie SUBTITLE wiederholt,
um verschiedene Untertitelsprachen zu
wählen.
➜ Wenn Sie ‘PBC EIN’ wählen, erscheint
das Disk-Menü (falls verfügbar) auf dem
Fernsehgerät.
➜ Benutzen Sie den S / T oder
benutzen Sie die nummerische
Tastatur (0-9) zur Wahl einer
Abspieloption.
• Drücken von TOP MENU/RETURN
während der Wiedergabe führt zum
Menü-Bildschirm zurück (wenn PBC
‘ein’ ist).
Wenn Sie das Index-Menü
überspringen und die Wiedergabe
am Anfang starten möchten:
• Drücken Sie die Taste MENU auf der
Fernbedienung, um die Funktion
abzuschalten.
Peview-Vorschau-Funktion
1 Drücken Sie SCAN.
2 Drücken Sie 34 drücken, um
{STÜCKAUSWAHL}, {DISC INTERVALL}
oder {STÜCK INTERVALL} anzusteuern.
3 Drücken Sie ENTER/OK, um eine
Option auszuwählen.
AUSWAHLTYP WÄHLEN:
STÜCKAUSWAHL
DISC INTERVALL
STÜCK INTERVALL
Deutsch
Spezielle VCD- und SDVDFunktionen
Achtung:
– {STÜCK INTERVALL} kann nur bei
laufender Wiedergabe gewählt werden,
wenn PBC ausgeschaltet ist.
Wiedergabe-Steuerung (PBC)
Bei VCDs mit der
Wiedergabekontroll- (PBC-)
Funktion, nur bei Version 2.0
• Drücken Sie MENU, um zwischen
‘PBC EIN’ und ‘PBC AUS’ zu wechseln.
TIPSS: Die hier beschriebenen Bedienfunktionen sind bei bestimmten Disks u.U. nicht möglich.
Beziehen Sie sich stets auf die den Disks beiliegenden Anweisungen.
13
Page 83

CD-Betrieb
STÜCKAUSWAHL
Diese Funktion verkleinert das Bild jedes
Abschnitts, so dass jeweils sechs dieser
Abschnitte auf dem Bildschirm erscheinen
können, damit sich Sie über den Inhalt aller
auf der Disk aufgezeichneten Abschnitte
orientieren können.
DISC INTERVALL
Diese Funktion wird dazu benutzt, eine
Disk in regelmäßigen Intervallen in sechs
Teile aufzugliedern und diese auf einer
Seite darzustellen, so dass Sie sich über den
Inhalt der ganzen Disk orientieren können.
STÜCK INTERVALL
Diese Funktion wird dazu benutzt, einen
einzelnen Abschnitt in regelmäßigen
Intervallen in sechs Teile aufzugliedern und
diese auf einer Seite darzustellen, so dass
Sie sich über den Inhalt des gewählten
Abschnitts orientieren können.
(Beispiel für 6 Miniatur- [Thumbnail] Bilder-Display)
4 Benutzen Sie die Tasten 1 234 zur Wahl
einer Spur oder benutzen Sie die
nummerische Tastatur (0-9) zur
Eingabe der gewählten Spurnummer neben
{WÄHLEN}.
5 Drücken Sie S / T zum Öffnen der
vorigen oder nächsten Seite.
6 Drücken Sie zur Bestätigung die Taste
ENTER/OK.
Zum Beenden der Voransichtsfunktion:
• Benutzen Sie die Tasten 1 234, um
{ENDE} hervorzuheben, und drücken
Sie zur Bestätigung ENTER/OK.
Zur Rückkehr zum Voransichtsmenü:
• Benutzen Sie die Tasten 1 234, um
{MENÜ} hervorzuheben, und drücken
Sie zur Bestätigung ENTER/OK.
Bei CDs
• Im Stop-Modus drücken Sie SCAN auf
der Fernbedienung.
➜ Jede Spur wird einige Sekunden lang
angespielt.
Abspielen einer MP3/ DivX/ JPEG/ Kodak Picture CD
Hauptfunktionen
1 Legen Sie eine Disk.
➜ Die Disk-Lesezeit kann, wegen der
Komplexität der Verzeichnis/DateiKonfiguration, mehr als 30 Sekunden
betragen.
➜ Das Disk-Menü erscheint auf dem
Fernsehbildschirm.
2 Die Wiedergabe beginnt automatisch.
Wenn nicht, drücken Sie PLAY B.
00:00 00:00
001/020
Favorite
MP3
Piano
Cello
MP3
MP3
Jazz
MP3
Live
Während der Wiedergabe können
Sie;
• S / T drücken, um einen anderen
Titel/ ein anderes Bild im aktuellen
Ordner zu wählen.
• Drücken Sie PAUSE ;, um die
Wiedergabe zu unterbrechen.
Nützlicher Hinweis:
– Aufgrund der Konfiguration und Kenndaten
der Disk oder des Zustands der Aufnahme
ist es u.U. nicht möglich, bestimmte MP3/
JPEG/ DivX/ MPEG4 Disks abzuspielen.
TIPSS: Die hier beschriebenen Bedienfunktionen sind bei bestimmten Disks u.U. nicht möglich.
Beziehen Sie sich stets auf die den Disks beiliegenden Anweisungen.
14
Page 84

CD-Betrieb
Wahl eines Ordners und einer Spur/ Datei
1 Drücken Sie 34 zur Wahl des Ordners
und drücken Sie ENTER/OK, um den
Ordner zu öffnen.
2 Drücken Sie 34 um eine Option
hervorzuheben.
3 Drücken Sie zur Bestätigung die Taste
ENTER/OK.
➜ Die Wiedergabe beginnt ab der
gewählten Datei und wird bis zum Ende
des Ordners fortgesetzt.
Wiederholung und Zufallswiedergabe
Wenn das Menü der Bild- oder MP3-CD
auf dem Bildschirm angezeigt wird;
• Drücken Sie REPEAT kontinuierlich,
um auf ‚Wiedergabe’ unterschiedlicher
Art
➜ ORDNER: Abspielen aller Dateien im
gewählten Ordner.
➜ WIEDERH. 1: Stillhalten eines JPEG-
Bildes auf dem Bildschirm oder
wiederholtes Abspielen einer MP3Datei.
➜ ORDN. WIEDERH.: Wiederholtes
Abspielen aller Dateien im gewählten
Ordner.
➜ ZUFALL: Abspielen aller Dateien im
gewählten Ordner in zufälliger
Reihenfolge.
Spezielle Bild-CD-Funktionen
1 Legen Sie eine Bild-Disk (Kodak Picture
CD, JPEG), ein.
➜ Bei einer Kodak Disk beginnt die Dia-
Show.
➜ Bei einer JPEG Disk erscheint das
Bildmenü auf dem Fernsehbildschirm.
2 Drücken Sie PLAY B, um mit der Dia-
Show-Wiedergabe zu beginnen.
Peview-Vorschau-Funktion
Mit dieser Funktion kann der Inhalt des
aktuellen Ordners oder der ganzen Disk
dargestellt werden.
1 Taste STOP 9 während der Wiedergabe
von JPEG-Bildern drücken.
➜ Thumbnails von 12 Bildern erscheinen
auf dem Fernsehbildschirm.
2 Taste S / T drücken, um die
anderen Bilder auf der nächsten oder
vorigen Seite anzuzeigen.
3 Tasten 1 234 drücken, um eines dieser
Bilder anzusteuern, und Taste ENTER/
OK drücken, um es abzuspielen.
oder
mit dem Cursor das Feld unten auf
der Seite ansteuern, um die Wiedergabe
beim ersten Bild der aktuellen Seite zu
starten.
4 Drücken Sie MENU, um zum „Bild-CD”-
Menü zurückzukehren.
Deutsch
TIPSS: Die hier beschriebenen Bedienfunktionen sind bei bestimmten Disks u.U. nicht möglich.
Beziehen Sie sich stets auf die den Disks beiliegenden Anweisungen.
15
Page 85

CD-Betrieb
Zoom-Bild
1 Drücken Sie beim Abspielen einer Disk
wiederholt ZOOM, um einen anderen
Zoomfaktor zu wählen.
2 Benutzen Sie 1 234 zum Betrachten des
Zoombildes.
Wiedergabe mit verschiedenen Bildwiedergabewinkeln
• Während der Wiedergabe drücken Sie
1 234, um das Bild auf dem
Fernsehbildschirm zu drehen.
1 -Taste: Bild entgegen dem
Uhrzeigersinn drehen.
2 -Taste: Bild im Uhrzeigersinn drehen.
3 -Taste: Bild um die vertikale Achse
spiegeln.
4 -Taste: Bild um die horizontale Achse
spiegeln.
Scan-Effekt
• Taste ANGLE mehrmals drücken, um
verschiedene Scan-Effekte (Perspektive)
zu wählen.
➜ Diverse Anspieleffekte erscheinen in
der oberen linken Ecke des
Fernsehbildschirms.
Gleichzeitiges Abspielen von MP3 Musik und JPEG Bildern
1 Legen Sie eine Disk ein, die Musik und
Bilder enthält.
➜ Das Disk-Menü erscheint auf dem
Fernsehbildschirm.
2 Wählen Sie eine MP3-Spur.
3 Wählen Sie, während der MP3-
Musikwiedergabe, einen Bildordner auf
dem Fernsehbildschirm und drücken Sie
PLAY B.
➜ Die Bilddateien werden bis zum Ende
des Ordners, eine nach der anderen,
abgespielt.
4 Zum Beenden der Simultanwiedergabe
drücken Sie MENU, gefolgt von STOP 9.
Nützlicher Hinweis:
– Einige Kodak- oder JPEG-Disks können -
aufgrund der Konfiguration und
Eigenschaften der Disk - bei der
Wiedergabe verzerrt sein.
TIPSS: Die hier beschriebenen Bedienfunktionen sind bei bestimmten Disks u.U. nicht möglich.
Beziehen Sie sich stets auf die den Disks beiliegenden Anweisungen.
16
Page 86

„Setup”-Menü
Mit den über den Fernseher vorgenommenen Einstellungen können Sie den DVDPlayer wunschgemäß einrichten.
Allgemeinen Setup-Menü
1 Drücken Sie SETUP.
2 Drücken Sie 1 2, um das „Allgem. Einst.”-
Symbol zu wählen.
3 Taste ENTER/OK zur Bestätigung Ihrer
Auswahl drücken.
ALLGEMEINES SETUP-MENÜ
DISK-SPERRE
DISPLAY DIM
PROGRAMM
OSD SPRACHE
BILDS.SCHONER
SLEEP
DIVX(R) VOD-CODE
Sicherung/Freigabe der anzuschauenden Disk
Nicht alle Discs werden vom Hersteller
mit einer Bewertung bzw. einem Code
versehen. Solche Discs können Sie von
Hand sperren. Es können bis zu 40 Discs
gesperrt werden.
1 In ‘ALLGEMEINES SETUP-MENÜ’, drü-
cken Sie 34, um {DISK-SPERRE} hervorzuheben, anschließend drücken Sie 2.
SPERREN
Wählen Sie dies, um die Wiedergabe der
aktuellen Disk zu blockieren. Folglicher
Zugriff auf eine gesperrte Disk erfordert
ein sechsstelliges Passwort. Das
standardmäßige Passwort lautet ‘000 000’
(Seite 25 „Ändern des Passwortes”)
FREIGEBEN
Wählen Sie dies, um die Disk freizugeben
und künftige Wiedergabe zu erlauben.
2 Drücken Sie 34, um eine Einstellung zu
wählen, und drücken Sie zur Bestätigung
ENTER/OK.
Anzeigefeld des Spielers abdunkeln
Sie können verschiedene Helligkeitsstufen
für den Displaybildschirm wählen.
1 In ‘ALLGEMEINES SETUP-MENÜ’, drü-
cken Sie 34, um {DISPLAY DIM} hervorzuheben, anschließend drücken Sie 2.
100%
Wählen Sie dies für höchste Helligkeit.
70%
Wählen Sie dies für mittlere Helligkeit.
40%
Wählen Sie dies zum Dimmen des Displays.
2 Drücken Sie 34, um eine Einstellung zu
wählen, und drücken Sie zur Bestätigung
ENTER/OK.
Programm (nicht verfügbar für Foto-CD/MP3)
Sie können den Inhalt der Disk in der von
Ihnen gewünschten Reihenfolge abspielen,
indem die Reihenfolge der abzuspielenden
Titel programmiert wird. Bis zu 20 Titel
können gespeichert werden.
1 In ‘ALLGEMEINES SETUP-MENÜ’, drü-
cken Sie 34, um {PROGRAMM} hervorzuheben, anschließend drücken Sie 2, um
{EINGABE} zu wählen..
2 Drücken Sie zur Bestätigung die Taste
ENTER/OK.
1 04
2 10
3 11
4 __
5 __
6 __
7 __
8 __
9 __
10 __
Deutsch
TIPSS: Zur Rückkehr zum vorigen Menü drücken Sie 1.
Zum Entfernen des Menüs drücken Sie SETUP.
17
Page 87

„Setup”-Menü
Eingabe des gewünschten Abschnitts
3 Mit Hilfe der nummerische Tastatur
(0-9) eine gültige Titel-/Kapitelnummer
eingeben.
4 Tasten 1 234 drücken, um den Cursor
auf die nächste zu wählende Position zu
steuern.
➜ Wenn die nummer über 10 liegt, mit
Hilfe der Taste T die nächste Seite
öffnen und die Programmierung
fortsetzen, oder mit
➜ Benutzen Sie die Tasten 1 234 das
Feld {NÄCH} ansteuern und durch
Drücken von ENTER/OK bestätigen.
5 Wiederholen Sie Schritt 3–4 zur Eingabe
einer anderen Titel-/ Kapitelnummer.
Löschen eines Abschnitts
6 Benutzen Sie die Tasten 1 234, um den
Cursor auf den Abschnitt zu steuern, den
Sie löschen wollen.
7 Drücken Sie ENTER/OK, um diesen
Abschnitt aus dem Programm-Menü zu
löschen.
Wiedergabe programmierter
Abschnitte
8 Nach Abschluss der Programmierung
drücken Sie 1 234, um den Cursor zum
Button {START} zu führen und drücken Sie
ENTER/OK.
➜ Jetzt startet der DVD-Spieler die
gewählten Abschnitte in der
programmierten Reihenfolge.
Verlassen des
Programmwiedergabe-Menüs
9 Im Menü ‚Programm’ benutzen Sie 1 234
um den Cursor zum Button {ENDE} zu
führen und drücken Sie ENTER/OK.
Festlegen der OSD-Sprache
Dieses Menü enthält diverse
Sprachenoptionen für die Display-Sprache
auf dem Bildschirm. Einzelheiten siehe
Seite 8.
Bildschirmschoner
Mit dieser Funktion kann der
Bildschirmschoner ein- und ausgeschaltet
werden.
1 In ‘ALLGEMEINES SETUP-MENÜ’,
drücken Sie 34, um {BILDS.SCHONER}
hervorzuheben, anschließend drücken Sie
2.
EIN
Wählen Sie dies, wenn Sie den
Fernsehbildschirm abschalten wollen,
wenn das Abspielen eingestellt oder mehr
als 15 Minuten lang unterbrochen wird.
AUS
Der Bildschirmschoner ist ausgeschaltet.
2 Drücken Sie 34, um eine Einstellung zu
wählen, und drücken Sie zur Bestätigung
ENTER/OK.
Schlummer-Timer
Diese Funktion aktiviert automatisch den
Bereitschaftsbetrieb des DVD-Players,
sobald die eingestellte Frist verstrichen ist.
1 In ‘ALLGEMEINES SETUP-MENÜ’,
drücken Sie 34, um {SLEEP}
hervorzuheben, anschließend drücken Sie
2.
2 Wählen Sie mit 34 eine Einstellung.
➜ Die Möglichkeiten lauten: 15, 30, 45 und
60 Minuten. Wählen Sie {AUS}, um den
Timer zu deaktivieren.
3 Drücken Sie ENTER/OK, um Ihre Wahl
zu bestätigen.
TIPSS: Zur Rückkehr zum vorigen Menü drücken Sie 1.
Zum Entfernen des Menüs drücken Sie SETUP.
18
Page 88

„Setup”-Menü
DivX® VOD-Registriercode
Yamaha bietet Ihnen einen DivX® VODRegistriercode (Video On Demand) an,
mit dem Sie Videos des DivX
Dienstes mieten oder kaufen können.
Siehe auch www.divx.com/vod.
1 In ‘ALLGEMEINES SETUP-MENÜ’,
drücken Sie 34, um {DIVX(R) VODCODE} hervorzuheben, anschließend
drücken Sie 2.
➜ Der Registriercode erscheint.
2 Drücken Sie ENTER/OK, um diese
Funktion zu beenden.
3 Verwenden Sie den Registriercode, wann
immer Sie ein Video von DivX
unter www.divx.com/vod kaufen oder
mieten. Befolgen Sie die Anweisungen, um
den Film herunterzuladen und auf eine
CD-R zu brennen, um ihn mit diesem
DVD-Player abspielen zu können.
Nützliche Hinweise:
– Alle heruntergeladenen DivX
können nur mit diesem DVD-Player
abgespielt werden.
– Die Positionssuche ist während der
Wiedergabe eines DivX-Films nicht belegt.
®
VOD-
®
VOD
®
VOD-Filme
Audio Setup Menü
1 Drücken Sie SETUP.
2 Drücken Sie 1 2, um das „Audio-Einst.”-
Symbol zu wählen.
3 Drücken Sie zur Bestätigung die Taste
ENTER/OK.
AUDIO-SETUP-MENÜ
ANALOGAUSGANG
DIGITAL AUDIO EINSTELLE
CD-UPSAMPLING
NACHTMODUS
Einstellung des Analogausgangs
Stellen Sie den Analogausgang der
Wiedergabeleistung Ihres DVD-Spieler
entsprechend ein.
1 In ‘AUDIO-SETUP-MENÜ’, drücken Sie
34, um {ANALOGAUSGANG}
hervorzuheben, anschließend drücken Sie
2.
STEREO
Wählen Sie dies, um den Kanalausgang in
Stereo abzuändern, wodurch Sound nur
aus den beiden vorderen Lautsprechern
und dem Subwoofer kommt.
L/R
Wählen Sie diese Option sollte nur
gewählt werden, wenn Sie den DVDPlayer an einen Dolby Prologic-Decoder
angeschlossen haben.
V SURR
Wählen Sie diese Einstellung erzeugt eine
virtuelle Surround-Wiedergabe.
2 Drücken Sie 34, um eine Einstellung zu
wählen, und drücken Sie zur Bestätigung
ENTER/OK.
Deutsch
TIPSS: Zur Rückkehr zum vorigen Menü drücken Sie 1.
Zum Entfernen des Menüs drücken Sie SETUP.
19
Page 89

„Setup”-Menü
Einstellung des Digitalausgang
Die in Digital Audio enthaltenen Optionen
lauten: ‘Digital Output’ (Digitalausgang)
und ‘LPCM Output’ (LPCM-Ausgang).
1 In ‘AUDIO-SETUP-MENÜ’, drücken Sie
34, um {DIGITAL AUDIO EINSTELLE}
hervorzuheben, anschließend drücken Sie
2.
2 Drücken Sie die Tasten 34, um eine
Option hervorzuheben.
3 Das Untermenü durch Drücken der Taste
2 aufrufen.
4 Mit Hilfe der Tasten 34 den Cursor auf
die gewünschte Position steuern.
DIGITALAUSGANG
Stellen Sie den Digitalausgang Ihren
optionalen Audiogeräte-Anschlüssen
entsprechend ein.
AUS
Den Digitalausgang abschalten.
ALLE
Wenn Sie DIGITAL AUDIO OUT an einen
mehrkanaligen Decoder/ Empfänger
angeschlossen haben.
NUR PCM
Nur wenn Ihr Empfänger nicht imstande
ist, Mehrkanal-Audio zu decodieren.
LPCM-AUSGANG
Wenn Sie den DVD-Spieler über die
Digitalausgänge (z.B. koaxial oder optisch)
an einen PCM-kompatiblen Receiver
anschlieben, müssen Sie möglicherweise
die ‘LPCM-AUSGANG’ wählen. Disks
werden mit einer bestimmten SamplingRate aufgenommen. Je höher die SamplingRate, desto besser die Tonqualität.
48K
Zur Wiedergabe einer Disk, die mit einer
Sampling-Rate von 48 kHz aufgenommen
wurde. 96kHz-Daten (sofern auf der Disk
vorhanden) werden zu PCM-Daten im
48kHz-Format gewandelt.
TIPSS: Zur Rückkehr zum vorigen Menü drücken Sie 1.
Zum Entfernen des Menüs drücken Sie SETUP.
96K
Zur Wiedergabe einer Disk, die mit einer
Sampling-Rate von 96 kHz aufgenommen
wurde. Wenn die 96kHz-Disc mit einem
Kopierschutz versehen ist, wird die
Digital-Ausgabe deaktiviert. Es erfolgt dann
keine Wandlung.
CD Upsampling
Mit dieser Funktion kann die Sampling-Frequenz von Musik-CDs dank einer digitalen
Signalbearbeitung erhöht werden, was eine
bessere Klangqualität zur Folge hat. Wenn
Sie diese Funktion aktivieren, wechselt der
Player automatisch in den Stereo-Modus.
1 In ‘AUDIO-SETUP-MENÜ’, drücken Sie
34, um {CD-UPSAMPLING}
hervorzuheben, anschließend drücken Sie
2.
AUS
Wählen Sie dies zum Deaktivieren von
CD-Upsampling.
88.2 kHz (X2)
Wählen Sie dies, um die Sampling-Rate der
CDs zweimal höher das Original
einzustellen.
176.4 kHz (X4)
Wählen Sie dies, um die Sampling-Rate der
CDs viermal höher das Original
einzustellen.
2 Drücken Sie 34, um eine Einstellung zu
wählen, und drücken Sie zur Bestätigung
ENTER/OK.
Hinweis:
– Diese Einstellung ist nur zutreffend für die
Signalausgabe von den
Analogwagenhebern.
20
Page 90

„Setup”-Menü
Nachtmodus
Bei aktiviertem Nachtmodus werden die
lauten Ausgänge gedämpft und die leisen
Ausgänge auf ein hörbares Niveau
gebracht – besonders vorteilhaft, wenn Sie
sich Ihren Lieblings-Actionfilm anschauen,
ohne andere nachts zu stören.
1 In ‘AUDIO-SETUP-MENÜ’, drücken Sie
34, um {NACHTMODUS} hervorzuheben,
anschließend drücken Sie 2.
EIN
Wählen Sie dies zum Ausbalancieren der
Lautstärke. Diese Funktion ist nur bei
Movies mit Dolby Digital-Modus verfügbar.
AUS
Wählen Sie dies, wenn Sie den Surround
Sound mit seinem vollen Dynamikbereich
genießen wollen.
2 Drücken Sie 34, um eine Einstellung zu
wählen, und drücken Sie zur Bestätigung
ENTER/OK.
Video Setup Menü
1 Drücken Sie SETUP.
2 Drücken Sie 1 2, um das „Video-Einst.”-
Symbol zu wählen.
3 Drücken Sie zur Bestätigung die Taste
ENTER/OK.
VIDEO-SETUP
TV-TYP
TV-BILDSCHIRM
PROGRESSIVE
FARBEINSTELLUNG
COMPONENT
TV Bildschirm
Stellen Sie das Seitenverhältnis des DVDSpielers je nach angeschlossenem
Fernsehgerät ein. Stellen Sie das
Seitenverhältnis des DVD-Spielers je nach
angeschlossenem Fernsehgerät ein. Das
von Ihnen gewählte Format muss auf der
Disk verfügbar sein. Ist dies nicht der Fall,
haben die Bildformat-Einstellungen keinen
Einfluss auf das Bild während der
Wiedergabe.
1 In ‘VIDEO-SETUP’, drücken Sie 34, um
{TV-BILDSCHIRM} hervorzuheben,
anschließend drücken Sie 2.
2 Drücken Sie 34, um eine der
nachstehenden Optionen hervorzuheben:
4:3 PAN SCAN
Wenn Sie ein
normales
Fernsehgerät haben
und wollen, dass
beide Seiten des
Bildes für Ihren Fernsehbildschirm passend
zugeschnitten oder formatiert werden.
4:3 LETTER BOX
Wenn Sie ein normales
Fernsehgerät haben. In
diesem Fall wird ein
Breitbild mit schwarzen
Streifen im oberen und unteren Abschnitt
des Fernsehbildschirms angezeigt.
16:9
Wenn Sie ein
BreitbildFernsehgerät haben.
Deutsch
3 Wählen Sie ein Element und drücken Sie
TV Typ
Dieses Menü enthält die Optionen für die
Auswahl des Farbsystems, das zum
angeschlossenen Fernsehgerät passt.
Einzelheiten siehe Seite 7.
TIPSS: Zur Rückkehr zum vorigen Menü drücken Sie 1.
Zum Entfernen des Menüs drücken Sie SETUP.
ENTER/OK.
21
Page 91

„Setup”-Menü
Progressive
Diese Funktion trifft nur zu, wenn Sie
diesen DVD-Spieler an ein Progressive
Scan-Fernsehgerät durch die Y Pb PrBuchsen angeschlossen haben (siehe
Seite 6).
1 In ‘VIDEO-SETUP’, drücken Sie 34, um
{PROGRESSIVE} hervorzuheben,
anschließend drücken Sie 2.
AUS
Deaktivieren der Progressive ScanFunktion.
EIN
Aktivieren der Progressive Scan-Funktion.
2 Drücken Sie 34 um zum wählen Sie eine
Sprache und drücken Sie ENTER/OK.
Anmerkungen zur ProgressiveAusgabe:
– Ihr Fernseher muss die
Progressivabtastung unterstützen.
– Verwenden Sie für die Verbindung ein
YPbPr-Kabel.
BEDENKEN SIE, DASS NICHT ALLE HOCH
AUFLÖSENDEN FERNSEHER VOLLSTÄNDIG
ZU DIESEM PRODUKT KOMPATIBEL SIND. DAS
KANN ZU ARTEFAKTEN IN DER
BILDWIEDERGABE FÜHREN. WENN IM
„PROGRESSIVE”-BETRIEB (525 oder 625)
PROBLEME AUFTAUCHEN, EMPFEHLEN WIR
DIE VERWENDUNG DES STANDARD
DEFINITION-AUSGANGS. BITTE WENDEN SIE
SICH MIT FRAGEN BEZÜGLICH DER
KOMPATIBILITÄT IHRES BILDSCHIRMS ZU
DIESEM DVD-PLAYER AN EINE ANERKANNTE
KUNDENDIENSTSTELLE.
Dieser Player unterstützt alle YAMAHA-Produkte,
darunter auch die Projektoren DPX-1000, LPX510 sowie den Plasmabildschirm PDM-4210E.
Bildeinstellung
Dieses DVD-System bietet drei
vordefinierte Gruppen von
Bildfarbeinstellungen und eine persönliche
Einstellung, die Sie für sich selbst definieren
können.
1 In ‘VIDEO-SETUP’, drücken Sie 34, um
{FARBEINSTELLUNG} hervorzuheben,
anschließend drücken Sie 2.
STANDARD
Wählen Sie dies für die StandardBildeinstellung.
HELL
Wählen Sie dies, um das Fernsehbild heller
zu machen.
WEICH
Wählen Sie dies, um das Fernsehbild
weicher zu machen.
PERSÖNLICH
Wählen Sie dies, um Ihre Bildfarbe
persönlich einzustellen, indem Sie
Helligkeit, Kontrast, Färbung und Farbe
(Sättigung) verändern.
2 Drücken Sie 34, um eine Einstellung zu
wählen, und drücken Sie zur Bestätigung
ENTER/OK.
3 Wenn Sie {PERSÖNLICH} wählen, gehen
Sie anschließend zu Schritt 4–7 über.
➜ Das Menü ‘PERSÖNLICHE
BILDEINRICHTUNG’ erscheint.
PERSÖNLICHE BILDEINRICHTUNG
HELL
KONTRAST
FARB
FARBE
0
0
0
0
TIPSS: Zur Rückkehr zum vorigen Menü drücken Sie 1.
Zum Entfernen des Menüs drücken Sie SETUP.
22
Page 92

„Setup”-Menü
4 Drücken Sie 34, um eine der
nachstehenden Optionen hervorzuheben:
HELL
Erhöhung des Wertes erhellt das Bild oder
umgekehrt. Wählen Sie null (0) für eine
durchschnittliche Einstellung.
KONTRAST
Erhöhung des Wertes macht das Bild
schärfer oder umgekehrt. Wählen Sie null
(0), um den Kontrast auszubalancieren.
FARB
Erhöhung des Wertes verdunkelt das Bild
oder umgekehrt. Wählen Sie (0) für die
durchschnittliche Einstellung.
FARBE
Erhöhung des Wertes optimiert die Farbe
in Ihrem Bild oder umgekehrt. Wählen Sie
null (0), um die Farbe auszubalancieren.
5 Drücken Sie 1 2, um die Werte dieser
Parameter, die am besten zu Ihrem
individuellen Vorzug passen, einzustellen:
6 Wiederholen Sie Schritt 4–5 zur
Einstellung anderer Farbmerkmale.
7 Drücken Sie zur Bestätigung die Taste
ENTER/OK.
Auf YUV/ RGB schalten
Diese Einstellung ermöglicht Ihnen, den
Ausgang des Videosignals zwischen RGB
(Scart) und Y Pb Pr (YUV) umzuschalten.
1 In ‘VIDEO-SETUP’, drücken Sie 34, um
{COMPONENT} hervorzuheben,
anschließend drücken Sie 2.
YUV
Wählen Sie dies für den Y Pb PrAnschlusss.
RGB
Wählen Sie dies für den Scart-Anschlusss.
2 Drücken Sie 34 um zum wählen Sie eine
Sprache und drücken Sie ENTER/OK.
Deutsch
TIPSS: Zur Rückkehr zum vorigen Menü drücken Sie 1.
Zum Entfernen des Menüs drücken Sie SETUP.
23
Page 93

„Setup”-Menü
Vorzugseinstellungen Setup Menü
1 Drücken Sie STOP 9 zweimal, um die
Wiedergabe zu stoppen (falls zutreffend),
drücken Sie anschließend SETUP.
2 Drücken Sie 1 2, um das „Preference-
Einst.”-Symbol zu wählen.
3 Drücken Sie zur Bestätigung die Taste
ENTER/OK.
VORZUGSEINSTELLUNGEN
AUDIO
UNTERTITEL
DISK-MENÜ
KI.SICHERUNG
PBC
MP3/JPEG-NAV
PASSWORT
GRUNDEINST.
Festlegen der Audio-, Untertitelund Disk-Menü-Sprache
Diese Menüs enthalten diverse
Sprachenoptionen für Audio, Untertitel
und Disk-Menü, die auf der DVD
aufgezeichnet werden können.
Einzelheiten siehe Seite 9.
Wiedergabeeinschränkung durch Festlegung der Kindersicherungsstufe
Einige DVDs haben u. U. eine
Kindersicherungsstufe, die der gesamten
Disk oder bestimmten Szenen auf der Disk
zugeordnet ist. Diese Funktion ermöglicht
Ihnen die Festlegung einer WiedergabeEinschränkungsstufe. Die Einstufungen
lauten von 1 bis 8 und sind
landesspezifisch. Sie können das Abspielen
bestimmter, für Ihre Kinder ungeeigneter
Disks verhindern oder bestimmte Disks
mit alternativen Szenen abspielen lassen.
In ‘VORZUGSEINSTELLUNGEN’, drücken
1
Sie 34, um {KI.SICHERUNG}
hervorzuheben, anschließend drücken Sie 2.
VORZUGSEINSTELLUNGEN
AUDIO 1 KIND.-SICH.
UNTERTITEL 2 O. ALTERSB.
DISK-MENÜ 3 FREIG AB 6
KI.SICHERUNG 4 FREIG AB 12
PBC 5 FREIG AB 16
MP3/JPEG-NAV 6 N.FREI U.16
PASSWORT 7 N.FREI U.16
GRUNDEINST. 8 ERWACHSENE
2 Benutzen Sie 34, um eine Einstufung für
die eingelegte Disk hervorzuheben und
drücken Sie ENTER/OK.
➜ Um die Kindersicherung zu deaktivieren
und alle Disks abspielen zu lassen,
wählen Sie {8 ERWACHSENE}.
3 Benutzen Sie die nummerische
Tastatur (0-9) zur Eingabe des 6-stelligen
Codes (siehe Seite 25 „Ändern des
Passwortes”).
➜ DVDs über der von Ihnen gewählten
Einstufung werden nicht abgespielt, es
sei denn, Sie geben Ihr sechsstelliges
Passwort ein und wählen eine höhere
Einstufung.
Nützlicher Hinweis:
– VCD-, SVCD- oder CD-Disks sind nicht mit
einer Bewertung versehen. Dies trifft auch
auf die meisten illegalen DVD-Disks zu.
– Einige DVDs sind nicht mit einer Einstufung
versehen, obwohl die Filmeinstufung auf die
Disk-Hülle aufgedruckt ist. Die
Einstufungsfunktion funktioniert bei
derartigen Disks nicht.
PBC (Wiedergabesteuerung)
Diese Funktion kann nur dann auf EIN
oder AUS eingestellt werden, wenn VCDs
(nur Version 2.0) mit
Wiedergabekontrollfunktion vorliegen.
Einzelheiten siehe Seite 13.
TIPSS: Zur Rückkehr zum vorigen Menü drücken Sie 1.
Zum Entfernen des Menüs drücken Sie SETUP.
24
Page 94

„Setup”-Menü
MP3-/JPEG-Navigator
MP3/JPEG Navigator kann nur dann
eingestellt werden, wenn die DiskAufnahme mit Menü erfolgt. Er erlaubt
Ihnen die Wahl verschiedener DisplayMenüs zur einfachen Navigation.
1 In ‘VORZUGSEINSTELLUNGEN’,
drücken Sie 34, um {MP3/JPEG-NAV}
hervorzuheben, anschließend drücken Sie
2.
OHNE MENÜ
Wählen Sie dies, um alle in der MP3/
Picture CD enthaltenen Dateien
anzuzeigen.
MIT MENÜ
Wählen Sie dies, um lediglich das OrdnerMenü der MP3/ Picture CD anzuzeigen.
2 Drücken Sie 34, um eine Einstellung zu
wählen, und drücken Sie zur Bestätigung
ENTER/OK.
Ändern des Passwortes
Dasselbe Passwort wird sowohl zur Kindersicherung als auch Disk-Sperre benutzt.
Geben Sie Ihr sechsstelliges Passwort ein,
wenn ein entsprechender Hinweis auf dem
Bildschirm angezeigt wird. Das standardmäßige Passwort lautet 000 000.
1 In ‘VORZUGSEINSTELLUNGEN’,
drücken Sie 34, um {PASSWORT}
hervorzuheben, anschließend drücken Sie
2, um {ÄNDERN} zu wählen.
VORZUGSEINSTELLUNGEN
AUDIO
UNTERTITEL
DISK-MENÜ
KI.SICHERUNG
PBC
MP3/JPEG-NAV
PASSWORT ÄNDERN
GRUNDEINST.
2 Taste ENTER/OK drücken, um das Menü
‘Passwort Andern’ zu öffnen.
ALTES PASSW.
NEUES PASSW.
PW BESTÄTIGEN
OK
3 Benutzen Sie die nummerische
Tastatur (0-9) zur Eingabe Ihres alten 6-
stelligen Code.
➜ Wenn dies erstmals geschieht, geben
Sie ‘000 000’ ein.
➜ Wenn Sie Ihr altes sechsstelliges
Passwort vergessen haben, geben Sie
‘000 000’ ein.
4 Geben Sie den neuen 6-stelligen Code ein.
5 Geben Sie den neuen 6-stelligen Code zur
Bestätigung ein zweites Mal ein.
➜ Der neue sechsstellige Code ist jetzt
gültig.
6 Drücken Sie zur Bestätigung die Taste
ENTER/OK.
Grundeinstellungen
Einstellen der GRUNDEINST. Funktion
stellt alle Optionen und Ihre persönlichen
Einstellungen, mit Ausnahme Ihres
Kindersicherung-Passwortes, auf die
werksseitigen Einstellungen rück.
1 In ‘VORZUGSEINSTELLUNGEN’,
drücken Sie 34, um {GRUNDEINST.}
hervorzuheben, anschließend drücken Sie
2, um {RÜCKSTELLEN} zu wählen.
2 Drücken Sie zur Bestätigung die Taste
ENTER/OK.
➜ Ehren alle Punkte im Einrichtmenü
wieder zur Standardeinstellung zurück.
Deutsch
TIPSS: Zur Rückkehr zum vorigen Menü drücken Sie 1.
Zum Entfernen des Menüs drücken Sie SETUP.
25
Page 95

Sprachcode
Nachstehend finden Sie die Sprachcodes. Dies hat keinen Einfluss auf die
„AUDIO”-, „UNTERTITEL”- und „DISK-MENÜ”-Optionen.
Abkhazian 6566 German 6869
Afar 6565 Gikuyu; Kikuyu 7573
Afrikaans 6570 Greek, 6976
Albanian 8381 Guarani 7178
Amharic 6577 Gujarati 7185
Arabic 6582 Hausa 7265
Armenian 7289 Hebrew 7269
Assamese 6583 Herero 7290
Avestan 6569 Hindi 7273
Aymara 6589 Hiri Motu 7279
Azerbaijani 6590 Hungarian 7285
Bashkir 6665 Icelandic 7383
Basque 6985 Ido 7379
Belarusian 6669 Indonesian 7368
Bengali 6678 Interlingua (International) 7365
Bihari 6672 Interlingue 7369
Bislama 6673 Inuktitut 7385
Bokmål, Norwegian 7866 Inupiaq 7375
Bosnian 6683 Irish 7165
Breton 6682 Italian 7384
Bulgarian 6671 Japanese 7465
Burmese 7789 Javanese 7486
Castilian, Spanish 6983 Kalaallisut 7576
Catalan 6765 Kannada 7578
Chamorro 6772 Kashmiri 7583
Chechen 6769 Kazakh 7575
Chewa; Chichewa; Nyanja 7889 Khmer 7577
Chichewa; Chewa; Nyanja 7889 Kikuyu; Gikuyu 7573
Chinese 9072 Kinyarwanda 8287
Chuang; Zhuang 9065 Kirghiz 7589
Church Slavic; Slavonic; 6785 Komi 7586
Church Slavonic; Church 6785 Korean 7579
Chuvash 6786 Kuanyama; Kwanyama 7574
Cornish 7587 Kurdish 7585
Corsican 6779 Kwanyama; Kuanyama 7574
Croatian 7282 Lao 7679
Czech 6783 Latin 7665
Danish 6865 Latvian 7686
Dutch 7876 Letzeburgesch; 7666
Dzongkha 6890 Limburgan; Limburger; 7673
English 6978 Limburger; Limburgan; 7673
Esperanto 6979 Limburgish; Limburger; 7673
Estonian 6984 Lingala 7678
Faroese 7079 Lithuanian 7684
Fijian 7074 Luxembourgish; 7666
Finnish 7073 Macedonian 7775
French 7082 Malagasy 7771
Frisian 7089 Malay 7783
Gaelic; Scottish Gaelic 7168 Malayalam 7776
Gallegan 7176 Maltese 7784
Georgian 7565 Manx 7186
26
Page 96

Sprachcode
Nachstehend finden Sie die Sprachcodes. Dies hat keinen Einfluss auf die
„AUDIO”-, „UNTERTITEL”- und „DISK-MENÜ”-Optionen.
Maori 7773 Sotho, Southem 8384
Marathi 7782 South Ndebele 7882
Marshallese 7772 Spanish; Castilian 6983
Moldavian 7779 Sundanese 8385
Mongolian 7778 Swahili 8387
Nauru 7865 Swati 8383
Navaho, Navajo 7886 Swedish 8386
Navajo; Navaho 7886 Tagalog 8476
Ndebele, North 7868 Tahitian 8489
Ndebele, South 7882 Tajik 8471
Ndonga 7871 Tamil 8465
Nepali 7869 Tatar 8484
Northern Sami 8369 Telugu 8469
North Ndebele 7868 Thai 8472
Norwegian 7879 Tibetan 6679
Norwegian Bokmål; Bokmål, 7866 Tigrinya 8473
Norwegian Nynorsk; 7878 Tonga (Tonga Islands) 8479
Nyanja; Chichewa; Chewa 7889 Tsonga 8483
Nynorsk, Norwegian; 7878 Tswana 8478
Occitan (post 1500); Proven 7967 Turkish 8482
Old Bulgarian; Old Slavonic; 6785 Turkmen 8475
Old Church Slavonic; Old 6785 Twi 8487
Old Slavonic; Church 6785 Uighur 8571
Oriya 7982 Ukrainian 8575
Oromo 7977 Urdu 8582
Ossetian; Ossetic 7983 Uzbek 8590
Ossetic; Ossetian 7983 Vietnamese 8673
Pali 8073 Volapük 8679
Panjabi 8065 Walloon 8765
Persian 7065 Welsh 6789
Polish 8076 Wolof 8779
Portuguese 8084 Xhosa 8872
Provençal; Occitan (post) 7967 Yiddish 8973
Pushto 8083 Yoruba 8979
Quechua 8185 Zhuang; Chuang 9065
Raeto-Romance 8277 Zulu 9085
Romanian 8279
Rundi 8278
Russian 8285
Samoan 8377
Sango 8371
Sanskrit 8365
Sardinian 8367
Scottish Gaelic; Gaelic 7168
Serbian 8382
Shona 8378
Sindhi 8368
Sinhalese 8373
Slovak 8375
Slovenian 8376
Somali 8379
Deutsch
27
Page 97

Störungsbeseitigung
Wenn sich das Gerät nicht erwartungsgemäß verhält, lesen Sie sich bitte zuerst
folgende Punkte durch. Falls Ihr Problem in dieser Übersicht nicht erwähnt wird
bzw. wenn der Lösungsvorschlag keine Abhilfe schafft, aktivieren Sie bitte den
Bereitschaftsbetrieb, lösen den Netzanschluss und wenden sich an eine von
YAMAHA anerkannte Kundendienststelle.
Problem Lösung
Kein Strom. – Überprüfen, ob das Wechselstromnetzkabel richtig
Kein Bild. – Korrekte Videoeingangskanalwahl siehe Fernsehgerät-
Verzerrtes Bild – Manchmal kann geringfügige Bildverzerrung je nach
Vollständig verzerrtes Bild oder
Schwarz-Weiß-Bild bei einer
DVD oder Video-CD
Kein Ton oder verzerrter Ton
Kein Tonsignal am DigitalAusgang
Kein Ton und Bild – Kontrollieren, ob das SCART-Kabel an das richtige Gerät
Disk kann nicht abgespielt
werden
Bild friert hin und wieder
während der Wiedergabe ein
Keine Rückkehr zur
Startanzeige, wenn die Disk
entnommen wird
angeschlossen ist.
– STANDBY/ON vorne am DVD-System drücken, um den
Strom einzuschalten.
Handbuch. Fernsehgerätkanal ändern, bis der DVDBildschirm zu sehen ist.
– Kontrollieren, ob das Fernsehgerät eingeschaltet ist.
wiedergegebener Disk auftreten. Hierin besteht keine
Fehlfunktion.
– Sicherstellen, dass die Disk mit der DVD dem Spieler
kompatibel ist.
– Vergewissern Sie sich, dass die TV-Norm des DVD-Spielers
für die Disk und Ihr Fernsehgerät passend eingestellt ist.
– Lautstärke anpassen.
– Kontrollieren, ob die Lautsprecher korrekt angeschlossen
sind.
– Die Digital-Anschlüsse kontrollieren.
– Kontrollieren, ob Ihr Receiver MPEG-2 oder DTS
decodieren kann; wenn das nicht der Fall ist, muss der
Digital-Ausgang auf NUR PCM eingestellt werden.
– Kontrollieren, ob der Receiver für das Audio-Format der
gewählten Audio-Sprache geeignet ist.
angeschlossen ist (Siehe “Videoanschluss”).
– Die DVD+R/RW, DVD-R/RW, CD-R/RW muss finalisiert
sein.
– Kontrollieren, ob die Disk mit der bedruckten Seite nach
oben eingelegt wurde.
– Kontrollieren, ob die Disk defekt ist; probieren Sie dazu eine
andere Disk aus.
– Wenn Sie die Foto-CD bzw. MP3-CD selbst erstellt haben,
stellen Sie sicher, dass lhre Disk mindestens 10 Fotos oder 5
MP3-Titel enthält.
– Falscher Regionalcode.
– Kontrollieren Sie die Disk bezüglich Fingerabdrücke/Kratzer
und reinigen Sie die Disk mit einem weichen Tuch von der
Mitte zu den Rändern hin.
28
Page 98

Störungsbeseitigung
Problem Lösung
Der Spieler reagiert nicht auf
bestimmte Funktionen der
Fernbedienung
Tasten funktionieren nicht – Das Gerät ganz neu starten. Hierzu das Netzkabel aus der
Spieler reagiert während der
Wiedergabe nicht auf alle
Befehle
DVD-Video-Spieler kann CDs/
DVDs nicht korrekt lesen
Spieler reagiert während der
Wiedergabe nicht auf alle
Befehle
DivX-Dateiformat kann nicht
abgespielt werden
Progressive Scan ein/ aus kann
nicht gewählt werden
Kein Sound bei DivX MovieWiedergabe
– Die Fernbedienung direkt auf den Sensor an der Vorderseite
des Spielers richten.
– Den Abstand zum Spieler verringern.
– Die Batterien in der Fernbedienung erneuern.
– Die Batterien wie angegeben einlegen; dabei auf die Polarität
(+/– Zeichen) achten.
Wandsteckdose ziehen, 5 bis 10 Sekunden warten und den
Stecker wieder in die Steckdose stecken.
– Die Disk lässt bestimmte Bedienungsfunktionen eventuell
nicht zu. Beachten Sie das Begleitheft der Disk.
– Benutzen Sie eine im Handel erhältlich Reinigungs-CD/DVD,
um die Abtastlinse zu reinigen, bevor Sie den DVD-Video-
Spieler zur Reparatur bringen.
– Die Disk lässt bestimmte Bedienungsfunktionen eventuell
nicht zu. Beachten Sie das Begleitheft der Disk.
– Zweimal STOP drücken bevor „Setup- Menü” zu drücken.
– Überprüfen, dass die DivX-Datei im ‚Home Theater‘-Modus
mit DivX 5.x Encoder verschlüsselt ist.
– Überprüfen Sie, dass der Ausgang des Videosignals auf ‚YUV’
geschaltet ist.
– Der Audio-Codec wird evtl. nicht vom DVD-Spieler
unterstützt.
Deutsch
29
Page 99

Glossar
Analog: Sound, der nicht in Zahlen verwandelt wurde.
Analoger Sound variiert, wogegen digitaler Sound spezifische nummerische Werte hat. Diese Buchsen senden
Audio durch zwei Kanäle, links und rechts.
UDIO OUT Buchsen: Buchsen auf der Rückseite
A
des DVD-Systems, die Audio an ein anderes System
(Fernsehgerät, Stereo usw.) schicken.
Die zur Aufnahme einer gegebenen Musiklänge
Bitrate:
benutzte Datenmenge; in Kilobit pro Sekunde oder
kbps gemessen. Oder die Geschwindigkeit, mit der Sie
aufzeichnen. Im Allgemeinen gilt: je höher die Bitrate
oder je höher die Aufzeichnungsgeschwindigkeit, desto
besser die Klangqualität. Höhere Bitraten nehmen
jedoch mehr Raum auf einer Disk in Anspruch.
Das horiz
len Fernsehgeräten lautet 4:3, und das von Breitbildschirmen lautet 16:9.
Digital:
wurde. Digitalsound ist verfügbar, wenn Sie die DIGITAL
AUDIO OUT COAXIAL oder OPTICAL Buchsen
benutzen. Diese Buchsen senden Audio durch mehrere
Kanäle, anstelle von bloß zwei Kanälen, wie bei Analog
der Fall ist.
Disk-Menü:
gezeichneten Bildern, Klängen, Untertiteln, mehreren
Winkeln usw. vorbereitetes Bildschirmdisplay.
DivX 3.11/4x/5x:
angemeldete, auf MPEG-4 basierende Videokomprimierungstechnologie. Sie wurde von DivXNetworks, Inc.,
entwickelt und kann Digitalvideo klein genug für den
Transport über das Internet machen, wobei hohe visuelle Qualität erhalten bleibt.
Dolb
tes Surround Sound-System, das bis zu sechs Digital
Audio-Kanäle (vorne links und rechts, Surround links
und rechts, Mitte und Subwoofer) aufweist.
DTS:
Sound-System, unterscheidet sich aber von Dolby Digital. Die Formate wurden von unterschiedlichen Unternehmen entwickelt.
JPEG:
Ein Stehbild-Datenkomprimierungssystem, von der Joint
Photographic Expert Group vorgeschlagen, welches
trotz seines hohen Komprimierungsverhältnisses geringes Nachlassen der Bildqualität mit sich bringt.
Ka
auf einer DVD, die kleiner als Titel sind. Ein Titel setzt
sich aus mehreren Kapiteln zusammen. Jedem Kapitel
wird eine Kapitelnummer zugeordnet, die es Ihnen
ermöglicht, das von Ihnen gewünschte Kapitel zu finden.
Kindersicherung:
Beschränkung der Wiedergabe der Disk nach Alter des
Benutzers gemäß landesspezifischer Einschränkungsstufe. Die Einschränkung schwankt von Disk zu Disk;
ontal : vertikal-Verhältnis von konventionel-
Sound, der in nummerische Werte umgesetzt
Ein für die Auswahl von auf einer DVD auf-
Der DivX-Code ist eine zum Patent
y Digital: Ein von Dolby Laboratories entwickel-
Digital Theatre Systems. Dies ist ein Surround
Ein häufig verwendetes digitales Festbildformat.
pitel: Abschnitte eines Bildes oder eines Musikstücks
Eine Funktion der DVD zur
30
wenn sie aktiviert ist, wird die Wiedergabe verhindert,
wenn die Softwarestufe höher als die vom Benutzer
festgelegte Stufe ist.
omponenten-Videoausgangsbuchsen: Buchsen
K
auf der Rückseite des DVD-Systems, die hochwertige
Videosignale an ein Fernsehgerät, das KomponentenVideoeingangsbuchsen (R/G/B, Y/Pb/Pr usw.) hat, senden.
Ein Dateiformat mit einem Sounddaten-Kompri-
MP3:
mierungssystem. „MP3” ist die Abkürzung von Motion
Picture Experts Group 1 (oder MPEG-1) Audio Layer 3.
Durch Benutzung des MP3-Formats kann eine CD-R
oder CD-RW etwa 10-mal mehr Datenmengen als eine
reguläre Disk enthalten.
Wiedergabekontrolle: Bezieht sich auf das
PBC –
zur Wiedergabekontrolle auf Video CDs oder SVCDs
aufgezeichnete Signal. Durch Benutzung von auf einer PBC unterstützenden - Video CD oder SVCD aufgezeichneten Menübildschirmen können Sie interaktive
Software sowie Software mit einer Suchfunktion vorteilhaft benutzen.
PCM (Pulse Code Modulation):
Umsetzung von analogen Tonsignalen in digitale Signale
zur späteren Verarbeitung, ohne dass Datenkomprimierung bei der Umsetzung benutzt wird.
ogressive Scan: Zeigt alle horizontalen Zeilen eines
Pr
Bildes auf einmal, als Signalrahmen [Frame], an. Dieses
System kann das Zeilensprung-Video vom DVD-Format
ins Progressive-Format – für den Anschluss an ein Progressive-Display – konvertieren. Dadurch wird die vertikale Auflösung dramatisch erhöht.
Regionalcode:
zuvor designierten Region abgespielt werden können.
Dieses Gerät spielt nur Disks ab, die kompatible Regionalcodes haben. Sie können den Regionalcode Ihres
Gerätes finden, indem Sie auf die Rückwand schauen.
Einige Disks sind mit mehr als einer Region (oder allen
Regionen – ALL) kompatibel.
Seiten
horizontalen Größen eines angezeigten Bildes.
round: Ein System zur Schaffung dreidimensionaler
Sur
Klangfelder voller Realismus durch Anordnung mehrerer
Lautsprecher um den Zuhörer herum.
S-Video:
für die Leuchtdichte und die Farbe gesendet werden. Sie
können S-Video nur dann benutzen, wenn Ihr Fernsehgerät eine S-Video-Eingangsbuchse hat.
Titel:
tion von DVDs, Musik usw. bei Videosoftware, oder das
gesamte Album bei Audiosoftware. Jedem Titel wird eine
Titelnummer zugeordnet, damit Sie den von Ihnen
gewünschten Titel finden können.
VIDEO OUT Buchse:
DVD-Systems, die Videosignale an ein Fernsehgerät
schickt.
Ein System, mit dem Disks nur in der
verhältnis: Das Verhältnis von vertikalen und
Erzeugt ein klares Bild, indem separate Signale
Der längste Abschnitt einer Bild- oder Musikfunk-
Buchse auf der Rückseite des
Ein System zur
Page 100

Technische Daten
ABSPIELFORMATE
DVD-Video
Video-CD und SVCD
CD
PICTURE CD
CD-R, CD-RW
DVD+R, DVD+RW
DVD-R, DVD-RW
VIDEO-SPEZIFIKATION
Video (CVBS)-Ausgang 1 Vss an 75 Ohm
S-Video-Ausgangsleistung Y: 1 Vss an 75 Ohm
C: 0,3 Vss an 75 Ohm
RGB-Ausgangsleistung (SCART)
0,7 Vss an 75 Ohm
Component Video-Ausgang Y: 1 Vss an 75 Ohm
Pb/Cb Pr/Cr: 0,7 Vss an
75 Ohm
AUDIO-FORMAT
Digital Mpeg/ Dolby Digital/ Compressed Digital
DTS
PCM 16, 20, 24 bits
fs, 44,1, 48, 96 kHz
MP3(ISO 9660) 24, 32, 56, 64, 96, 128,
256 kbps
fs, 16, 22.05, 24, 32,
44,1, 48 kHz
WMA 32 kbps–192 kbps, mono,
stereo
Analoge Stereowiedergabe
LASER
Typ Halbleiter-Laser GaAIAs
Wellenlänge 650nm (DVD)
780nm (VCD/CD)
Ausgangsleistung 7mW (DVD)
10mW (VCD/CD)
Strahlungswinkel 60 Grad
AUDIO-SPEZIFIKATION
D/A-Wandler 24Bit
Störabstand (1 kHz) 105dB
Dynamikumfang (1 kHz) 100dB
DVD fs 96 kHz 2Hz- 44kHz
fs 48 kHz 2Hz- 22kHz
SVCD fs 48 kHz 2Hz- 22kHz
fs 44,1kHz 2Hz- 20kHz
CD/VCD fs 44,1kHz 2Hz- 20kHz
Verzerrung und Rauschen (1 kHz) 0,003%
FERNSEHNORM (PAL/50 Hz)(NTSC/60 Hz)
Anzahl Bildzeilen 625 525
Wiedergabe Multinorm (PAL/NTSC)
ANSCHLÜSSE
SCART Eurokonnektor
Y-Ausgang RCA/Cinch (grün)
Pb/Cb-Ausgang RCA/Cinch (blau)
Pr/Cr-Ausgang RCA/Cinch (rot)
S-Video-Ausgang Mini-DIN, 4 Pins
Video-Ausgang Cinch
Audio-Ausgang L+R Cinch
Digital-Ausgang 1 koaxial, 1 optisch
IEC 60958 für CDDA /
LPCM/ MPEG1
IEC61937 für MPEG 2,
Dolby Digital und DTS
CABINET
Abmessungen (B x T x H) 435 x 310 x 51 mm
Gewicht ca. 2,6 kg
BETRIEBSSPANNUNG
Stromversorgung 230V, 50Hz
Leistungsaufnahme ca. 14W
Standby-Leistungsaufnahme < 1W
Deutsch
Änderungen der technischen Daten ohne
Vorankündigung vorbehalten.
31
 Loading...