

Yamaha CH-500 User Manual
CHIMES
CH-500
日本語
CHIMES STAND
CHS-520 / CHS-506
取扱説明書
Owner’s Manual
Руководство пользователя
使用手册
사용설명서
『安全へのこころがけ』(2 ページ)および『ご使用にあたって』(3 ページ)を必ずお読みください。
Make sure to read the “PRECAUTIONS” on page 6 and the “Before you use” on page 7.
Обязательно прочтите разделы «МЕРЫ ПРЕДОСТОРОЖНОСТИ» на стр. 10 и «Перед началом использования»
на стр. 11.
务请阅读第 14 页“注意事项”和第 15 页“使用之前”。
18 페이지의 “주의사항” 및 19 페이지의 “사용하기 전에” 를 반드시 읽어 주십시오 .
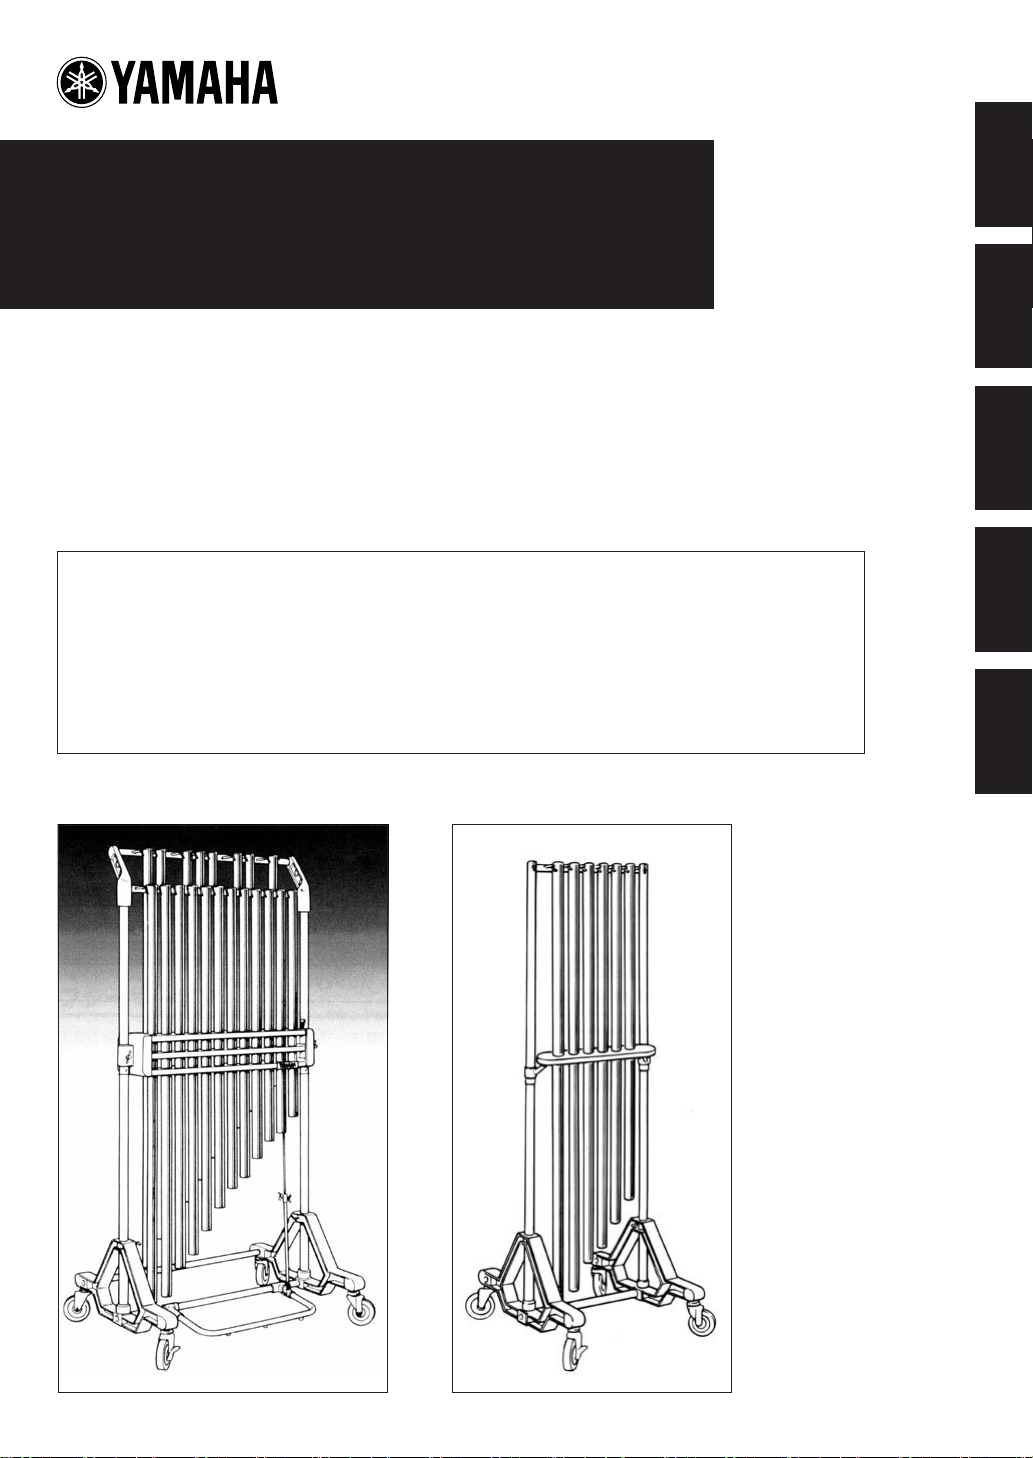
CH-500
CHS-506
English
Русский
中文한국어
*
別売サウンドコラム取り付け時
* Shown with the sound columes
(sold separately) attached.
*
Показана с прикрепленными звуковыми
колоннами (продаются отдельно).
*
图中音柱为选购产品。
*
사운드 컬럼 ( 별매 ) 이 부착된 상태 .
安全へのこころがけ
チャイムを安全にご利用いただくためのご注意
チャイムはご家庭や学校内で、お子様から専門家まで幅広い方々にご愛用いただいております。
チャイムは大きくて重い楽器です。
室内での置き場所や日常の取り扱いについて、安全にご使用いただくため、下記の注意を必ず守ってください。
特に小さなお子様には、最初にご家族の方、または指導者から取り扱い方法を指導してください。
〜以下の指示を必ず守ってください〜
人身傷害の危険を防止するには
この「安全へのこころがけ」は製品を安 全
絵表示に
ついて
に正しくお使いいただき、お客様や他の人々
への危害や財産への損害を未然 に防止する
ために、いろいろな絵表示を使って説明 し
ています。絵表示の意味をよく理解して か
ら、本文をお読みください。
警告
チャイムを使用する前に、以下の指示と取扱説明書をよく読んでください。
人が死亡又は重傷を負う危険の恐れがある内容を示しています。
この表示を無視して誤った取扱いをすると、
注意(危険・警告を含む)を促す内容があることを告げるものです。
禁止の行為を告げるものです。 例 : →分解禁止
行為を強制したり指示する内容を告げるものです。
設置上の注意
楽器をぐらついた台の上や傾いた所など、不安定な場所に置かないでください。落ちたり倒れたりして、けがの原因となります。
取扱い上の注意
楽器にもたれかかったり、乗ったりしないでください。楽器が倒れて、大けがをすることがあります。
楽器のまわりで遊ばないでください。身体をぶつけてけがをする恐れがあります。楽器の転倒の原因にもなります。
お子様が楽器のまわりで遊ばないよう注意してください。
地震による強い揺れにより、楽器が移動したり転倒する恐れがあります。地震の際は楽器に近づかないようにしてください。
移動の際の注意
チャイムを移動する場合は、必ずダンパーをかけ、キャスターのロックをすべて解除
してください。
キャスタ−のロックがかかったままで動かすと、転倒することがあります。
● キャスターを利用しての移動は、滑らかな平坦面でのみ行なってください。
傾いた所や凹凸のある道、じゃり道は避けてください。チャイムが倒れたり暴走し
て大けがをします。
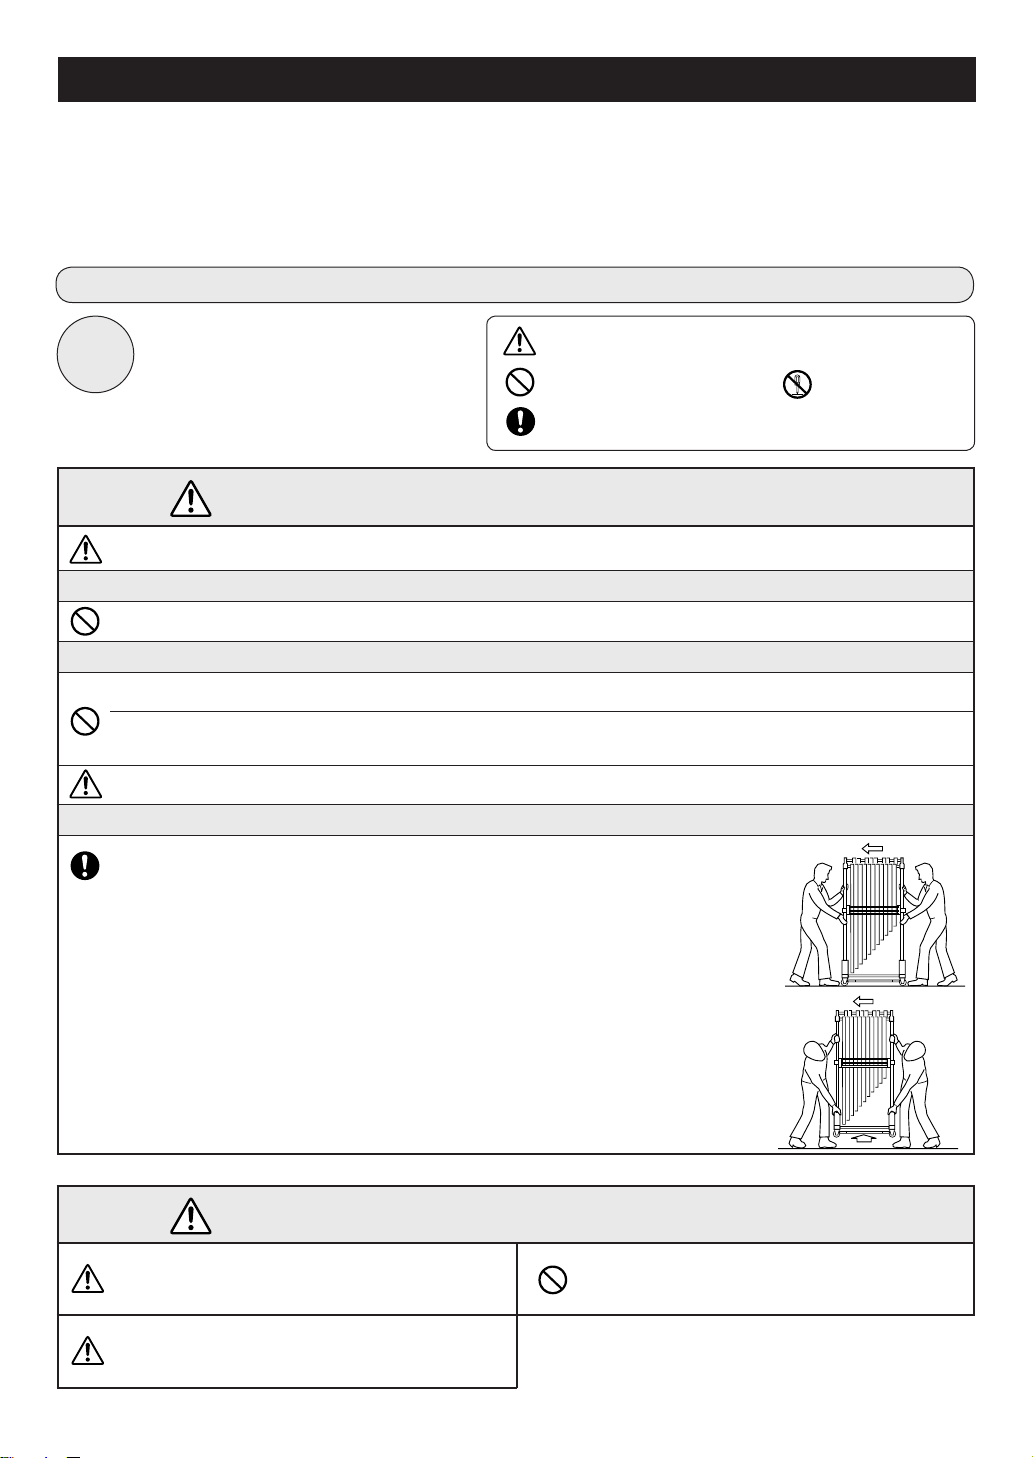
2 人で右図のようにサイドコラムをささえ、間口の方向へゆっくりと押してください。
走らないでください。楽器が止まらなくなり、壁にぶつかるなどして大けがをします。
● CH-500 の重量は、およそ 84kg です。持ち上げて移動しなければならない時は、
できるだけ多人数で、ケガ等のないよう十分に注意してください。その際は、必ず
ベース部分を持ちサイドコラムを支えながら、ハンガー部 ( サウンドコラムの吊る
してある側 ) が上になるようにして持ち上げます。ベースがハンガー部より上にな
るような持ち上げ方は、絶対に避けていください。サウンドコラムが落ちます。
● 楽器を組立てた状態で、階段を登り降りをして運ばないでください。部品が落下し
たり、バランスを崩して倒れたりして危険です。必ず分解した状態で運んでください。
キャスター使用時
持ち上げる場合
この表示を無視して誤った取扱いをすると、人が障害を負ったり、
注意
組み立てや分解の際、金属部品の角や端面で指などをケガし
ないように注意してください。
頻繁に移動するような場合は、各部のボルト類がゆるむこと
があります。移動後には、ゆるみをチェックし、ゆるんでい
る場合は締めてください。
財産が損害を受ける危険の恐れがある内容を示しています。
ハンマーは演奏以外には使用しないでください。けがや事故
の原因となります。お子様が人の身体をたたくなど、危険な
行為をしないように注意してください。
2
ヤマハチャイムをお買い上げいただきまして誠にありがとうございます。
取扱説明書をご一読いただき、末長くご愛用いただきますようお願い申し上げます。
ご使用にあたって
1 サウンドコラムに、金属製のハンマーやマレットを
使用することは、絶対に避けてください。サウンド
コラムが破損します。
2 床が水平な場所で使用してください。水平でない場
所では、機能が十分に発揮されません。
3 スタンドを組み立てる時は、各部の取り付けをしっ
かり行なって、ねじれやゆがみがないように、また
各蝶ネジ部も確実に締め付けてください。
4 ダンパーペダルは、つま先で操作します。体重をか
けたり、乗ることは避けてください。破損の原因に
なります。
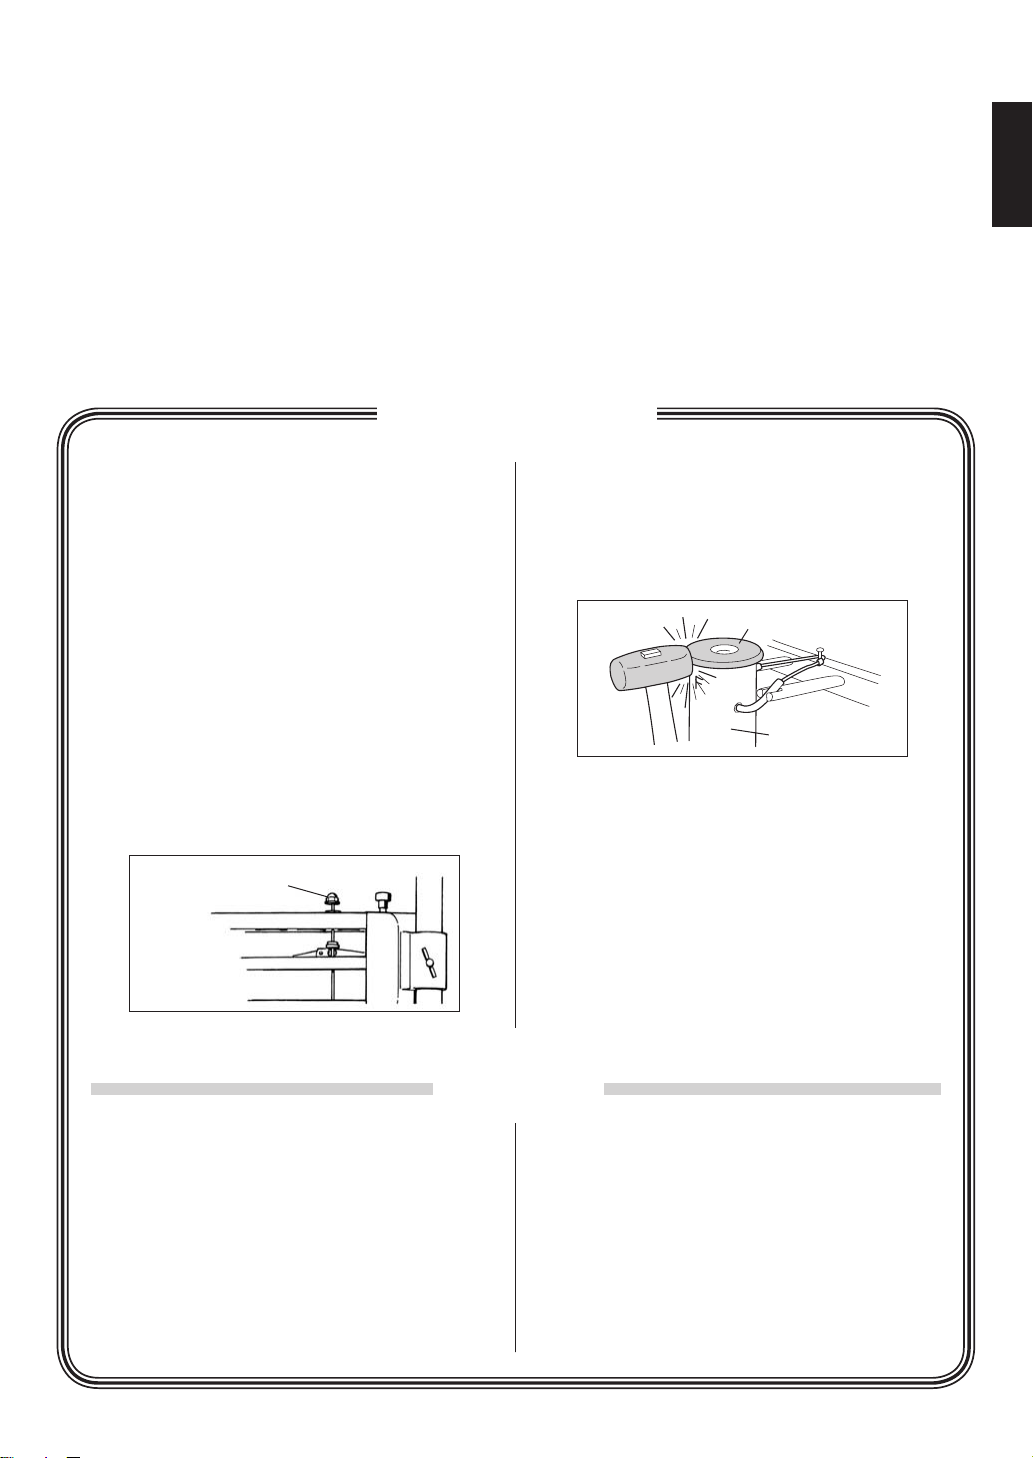
5 ダンパーアジャスターには、触れないようにしてく
ださい。工場出荷時に調整してあります。ダンパー
アジャスターを動かすと、ダンパーが作動しなくな
ることがあります。
ダンパーアジャスター
6 演奏使用する時は、キャスターにしっかりとブレー
キをかけ、動き出さないようにしてください。
7 演奏の際は、ヘッドプラグを叩いてください。サウ
ンドコラム(パイプ部)はハンマーで叩かないでく
ださい。
ヘッドプラグ
サウンドコラム
8 高音・多湿の場所で保管すると、楽器の寿命を縮め
ますので避けてください。
9 普段の手入れは、柔らかい布でカラ拭きしてくださ
い。シンナーやミガキ粉等で拭くことは、絶対に避
けてください。
運搬上の注意
1 運搬・移動の際には、楽器に衝撃 を与えないよう、
十分に注意してください。
2 サウンドコラム ( 音管 ) に傷がついたり、曲がった
りすると、音程・音色が損なわれますので特にご注
意してください。
3 長時間の移動、特に車両等での移動の際は、必ずサ
ウンドコラムをスタンドから外して行なってくださ
い。スタンドが変形したり、サウンドコラムのワイ
ヤーが切れることがあります。
4 サウンドコラムの取り付け・取り外しは、スタンド
や他 の物に当た ら ないよう、広い 場所で慎重 に 行
なってください。
5 取り外したサウンドコラムは、傷がつかないように
柔らかい布等でくるんで運搬してください。
3

CH-500/CHS-520
組立方法
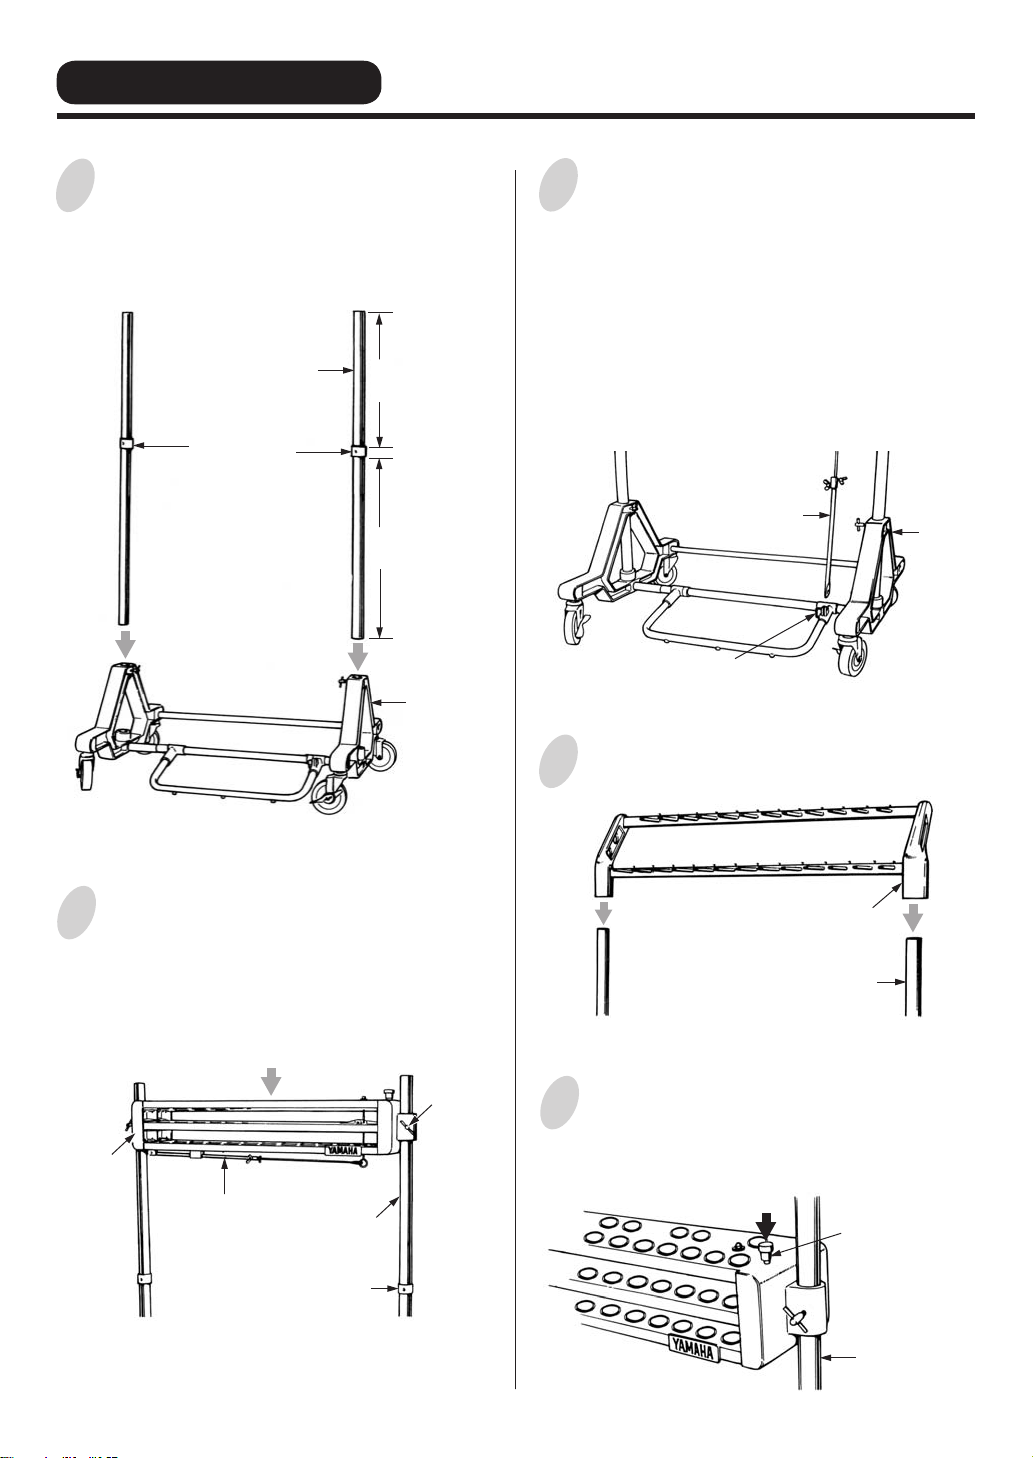
サイドコラムをベースに差し込みます。
1
この時、サイドコラムの中ほどに付いている金具 ( ダ
ンパーレスト ) から先端までの長さ が短い 方を上向
きにします。
サイドコラム
ダンパーレスト
短
長
ベース
ダンパー の下部に保 持されてい るダンパーステーを
3
外し、蝶ネジを緩めてペダルフックにス テーを固定
します。ペダルの位置は、ステーの 2 ケ所の蝶ネジ
で長さを 調節します。こ の時、上 側の蝶 ネジを先に
締めた後、下側の蝶ネジを締めます。
ペダルを踏み込んで止まる位置が床面より少し
浮いた状態が最適です。
ダンパーステー
ペダルフック
ハンガーをサイドコラムに差し込みます。
4
ベース
4
サイドコ ラムにダンパーをはめ込み、ダンパー レス
2
トの位置まで下げます。次にダンパーの 締付ボルト
を締め、固定します。この時サイ ドコラ ムとベース
を固定する締付ボルトも締め付けます。
ダンパー
ダンパーステー
サイドコラム
ダンパーレスト
締付ボルト
ハンガー
サイドコラム
ダンパー ストッパーは、ペダルを踏み込んだ状 態で
5
下に押さえ、そのままペダルから離すと ストッパー
がかかります。
ダンパーストッパー
サイドコラム

サウンドコラム ( 音管 ) をハンガーに掛ける時は、ま
6
ずダンパーストッパーを固定します。
サウンドコラムは、音名の刻印を前面にして、片方の
ハンガーピンの溝にワイヤーを掛け、次にハンガー上
部の丸リベットに掛けてから、もう一方のハンガーピ
ンの溝にワイヤーを通します。
サウンドコラムをハンガーに掛ける手順は、派生
音 (C#53 〜 F#70) の列から先に掛け、その後
幹音 (C52 〜 G71) の列を掛ける方が便利です。
※分解する時は、組み立てる時と反対の手順で行ないます。
CH-500
サウンドコラム
ハンガーピン
テフロンチューブ
ワイヤー
丸リベット
ハンガーピン
CHS-506
ベースバ ーの固定穴 をベースの ネジ穴と合わせるよ
1
うに 接 続 し、 ブ ロ ッ ク ネジを締め付け固定し ま す。
( サイドコラムの上端がブロックネジ固定用の工具に
なっています。)
ベース
ブロックネジを固定した後、サイドコラムのハンガー
2
バー取付部を上にして、ベースに差し込みます。
組立方法
サイドコラム
ハンガーバー取付部
固定穴
ベースバー
ブロックネジ
ガイドボードを、ボードレストまではめ込みます。
3
ガイドボード
ボードレスト
ハンガー バーをサイドコラム上端にはめ込み、 蝶ネ
4
ジで固定 します。この時、サイド コラム とベースを
固定する蝶ネジも締め付けます。
ハンガーバー
サイドコラム
サイドコラム
ベースバー
サイドコ ラムの刻印を前面にして、ハンガーに 固定
5
します。
サウンドコラム
※分解する時は、組み立てる時と反対の手順で行ないます。
ハンガーピン
テフロンチューブ
ワイヤー
丸リベット
ハンガーピン
5

PRECAUTIONS
Using the Chimes Safely
The chimes are a large and heavy instrument that gets used in various places by persons of all ages,
so please obey the following instructions regarding their regular care and placement.
Especially in the case of children, a responsible adult should provide proper instruction on
how to use and treat the chimes before use.
Preventing Injuries
Ic ons a re u sed i n thi s secti on t o
About
the
Icons
promote the safe use of this product,
and to prevent you and others from
harm and property damage. Please
fully understand the meaning of the
icons before reading the manual.
Warning
Before you use the chime, carefully read the instructions listed below and the owner’s manual.
—Make sure that all precautions described below are obeyed—
This icon urges you to pay caution (includes dangers and warnings).
This icon indicates actions that are prohibited.
This icon indicates special instructions that should be strictly followed.
Disregard of the warnings with this mark or misuse may
result in death or personal injury.
Cautions when setting the instrument.
Never place the instrument on an sloping, unstable, etc., platform. The instrument may fall or overturn and result in injury.
Cautions for treatment of the instrument.
Never lean on or climb onto the instrument. The instrument may fall and result in injury.
Do not play
It may also cause the instrument to fall over. Keep children away from the instrument.
If an earthquake occurs, strong shocks caused by the earthquake may overturn the instrument or cause it to move about.
Stay away from the instrument during earthquakes.
or roughhouse around the instrument. Bumping into the instrument may result in injury.
Cautions when moving the instrument.
When transporting the chimes, make sure that the damper is engaged and all caster
locks are released.
The chimes can overturn if moved with the caster locks engaged.
• The chimes should
Never move the chimes on a sloped, unstable, or gravel surface. Doing so can cause the
chimes to overturn or run out of control resulting in serious injury.
Always move the chimes
shown in the illustration on the right. Never run. Doing so can result in the chimes running out of control and hitting an obstacle or wall causing serious injury.
The weight of the CH-500 is approximately 84kg.
•
being moved, lift them carefully, using as many persons as possible to avoid injury. At
this time,
making sure that the hanger section (from which the sound columns hang) remains in an
upright position. Never lift the base section higher than the hanger section. Doing so can
result in the sound columns coming off the hanger.
• Moving the instrument up or down stairs should never be done with the instrument as-
sembled. Doing so is a danger as parts can fall off, or you can loose balance causing the
instrument to fall over. Only move the instrument after it has been disassembled.
only be moved across smooth, flat surfaces
slowly
, with two persons supporting the side columns as
If the chimes must be lifted when
lift the chimes by holding the base section
when using the casters.
and supporting the side column
When
using the
casters
When lifting
For example:
Do not disassemble.
Caution
When assembling or disassembling the instrument, be
careful around the sides or ends of metal parts so as to
prevent injury to fingers, etc.
If the instrument is often moved, bolts, parts, etc., may
become loose. After moving the instrument, check and
make sure all bolts, parts, etc., are firmly fastened. Firmly
tighten all loose items.
Injury or handicaps to persons caused by the disregard of warnings with this mark
or, misuse of the instrument, may result in the loss of personal property.
Do not use the hammer for anything other than playing
the instrument. It may be the cause of injury or accidents.
Do not let children strike other, etc., with the hammer. Do
not allow such dangerous behavior to take place.
6

Thank you for selecting the YAMAHA chimes.
Please read this owner’s manual carefully, and truly enjoy this instrument for
years to come.
Before you use
1
Never use a metal type hammer or mallets to
strike the sound column with. The sound column
will break.
2
Always use the instrument on a flat, level sur-
face. The instrument will not function properly on
a sloped surface.
3
When assembling the stand, make sure each
part is firmly attached, and there is no twisting or
disfigurement in the frame. Also, make sure that
all wing nuts are firmly tightened.
4
Use your toes to operate the damper pedal. Do
not stand on or put your weight on the pedal. Doing so may cause the pedal to break.
5
Do not touch the damper adjuster. The adjuster
has been adjusted at the factory. Moving the adjuster may result in the damper not functioning
properly.
Damper Adjuster
6
When playing the chime, make sure the caster
brakes are firmly set and the chime stand does
not move about.
7
Hit the Head Plug when playing the chime. Never
hit the sound column (pipe) with the hammer.
Head Plug
Sound Column
8
Do not keep the chime in a place where high temperatures and high humidity are present. Doing so
will result in the shor tening of the instruments life.
9
For regular cleaning, wipe with a soft, dry cloth.
Never wipe with thinner, or polishing preparations.
Be careful when transporting
1
When transpor ting or moving the instrument, do
not subject it to strong shocks.
2
T h e s o und colum n ’s pitc h and / or t one may
change if the columns are scratched or bent. Be
careful.
3
When the instrument is to be transported over
long distances, especially by vehicle, do so with
the sound columns removed from the stand. The
shape of the stand may change and the column’s
wire/strings may be cut if the columns are not removed.
4
When attaching or removing the sound columns,
do so in a place where there is sufficient room so
that the columns do not come into contact with
other objects.
5
After the sound columns are removed, wrap
them in a soft cloth, etc., to prevent scratching,
and then transport.
7
CH-500/CHS-520
ASSEMBLY PROCEDURE
Insert the side columns into the base. At this
1
time, make sure that the damper rest, attached at the center of the column, and the
short section of the column is positioned upright.
Side Column
Damper Rest
Short Section
Long Section
Base
Remove the damper stay, attached to the
3
bottom of the damper, loosen the wing bolt
on the damper stay, and attach the stay to
the p edal hoo k. The pe dal’s position ca n
be controlled by adjusting the length of the
pedal stay with its two wing bolts. At this time,
tighten the upper wing bolt first, then go on to
tighten the lower bolt.
Adjust the pedal position so that the pedal
stops slightly above the floor when fully depressed.
Damper Stay
Pedal Hook
Slide the hanger onto the side columns.
4
Base
8
Fit the damper onto the side columns and
2
lower the damper onto the damper rest. Next,
secure the damper in its position with the
damper fixing bolts. At this time, tighten the
fixing bolts that secure the side column to the
base as well.
Damper
Damper Stay
Side Column
Damper Rest
Fixing Bolt
Hanger
Side Column
To activate the damper stopper, depress the
5
pedal and press the stopper. When the pedal
is released, the stopper will hold the damper
in place.
Damper Stopper
Side Column
 Loading...