

Page 1

Compact Disc Player
Lecteur Compact Disque
G
OWNER’S MANUAL
MODE D’EMPLOI
BEDIENUNGSANLEITUNG
BRUKSANVISNING
MANUALE DI ISTRUZIONI
MANUAL DE INSTRUCCIONES
GEBRUIKSAANWIJZING
ИНСТРУКЦИЯ ПО ЭКСПЛУАТАЦИИ
Page 2
CAUTION
Use of controls or adjustments or performance of
procedures other than those specified herein may result
in hazardous radiation exposure.
AVERTISSEMENT
L’utilisation de commandes et l’emploi de réglages ou
de méthodes autres que ceux décrits ci-dessous,
peuvent entraîner une exposition à un rayonnement
dangereux.
VORSICHT
Die Verwendung von Bedienelementen oder die
Einstellung bzw. die Ausführung von anderen als in
dieser Anleitung beschriebenen Vorgängen kann zu
Gefährdung durch gefährliche Strahlung führen.
OBSERVERA
Användning av reglage eller justeringar eller utförande
av åtgärder på annat sätt än så som beskrivs häri kan
resultera i farlig strålning.
ATTENZIONE
L’uso di controlli, regolazioni, operazioni o procedure
non specificati in questo manuale possono risultare in
esposizione a radiazioni pericolose.
VARO!
AVATTAESSA OLET ALTTIINA NÄKYVÄLLE JA
NÄKYMÄTTÖMÄLLE LASER SÄ TEILYLLE. ÄLÄ
KATSO SÄTEESEEN.
VORSICHT
SICHTBARE UND UNSICHTBARE
LASERSTRAHLUNG WENN ABDECKUNG
GEÖFFNET. NICHT DEM STRAHL AUSSETSEN.
DANGER
VISIBLE AND INVISIBLE LASER RADIATION
WHEN OPEN. AVOID DIRECT EXPOSURE TO
BEAM.
ATTENTION
RAYONNEMENT LASER VISIBLE ET INVISIBLE EN
CAS D’OUVERTURE. EXPOSITION DANGEREUSE
AU FAISCEAU.
ПРЕДУПРЕЖДЕНИЕ
ПPИ OTKPЫTИИ УCTPOЙCTBA BЫ MOЖETE
ПОДBEPГHУTБСЯ ВОЗДЕЙСТВИЮ BИДИMOГO И
HEBИДИMOГO ЛAЗEPHOГO ИЗЛУЧEHИЯ.
ИЗБЕГAИTE BOЗДЕЙСТВИЯ ЛУЧA.
PRECAUCIÓN
El uso de los controles, los ajustes o los procedimientos
que no se especifican enste manual pueden causar una
exposición peligrosa a la radiación.
LET OP
Gebruik van bedieningsorganen, instellingen of
procedures anders dan beschreven in dit document kan
leiden tot blootstelling aan gevaarlijke stralen.
ЕРЕЖЕНИЕ
Использование органов управления или произведение
настроек или выполнение процедур, не указанных в
данной инструкции, может отразиться на выделении
опасной радиации.
CAUTION
VISIBLE AND INVISIBLE LASER RADIATION
WHEN OPEN. AVOID EXPOSURE TO BEAM.
ADVARSEL
SYNLIG OG USYNLIG LASERSTRALING VED
ÅBNING. UNDGÅ UDSÆTTELSE FOR STRÅLING.
ADVARSEL
SYNLIG OG USYNLIG LASERSTRÅLING NÅR
DEKSEL ÅPNES. UNNGÅ EKSPONERING FOR
STRÅLEN.
VARNING
SYNLIG OCH OSYNLIG LASERSTRÅLNING NÄR
DENNA DEL ÄR ÖPPNAD. BETRAKTA EJ
STRÅLEN.
i
Page 3

VAROITUS
Muiden kuin tässä esitettyjen toimintojen säädön tai
asetusten muutto saattaa altistaa vaaralliselle säteilylle tai
muille vaarallisille toiminnoille.
DK
Advarsel: Usynlig laserstråling ved åbning når
sikkerhedsafbrydere er ude af funktion. Undgå utsættelse
for stråling.
Bemærk: Netafbryderen POWER er sekundært indkoblet
og ofbryder ikke strømmen fra nettet. Den indbyggede
netdel er derfor tilsluttet til lysnettet så længe netstikket
sidder i stikkontakten.
N
Observer: Nettbryteren POWER er sekundert innkoplet.
Den innebygdenetdelen er derfor ikke frakoplet nettet så
lenge apparatet er tilsluttet nettkontakten.
S
Klass 1 laseraparat
Varning! Om apparaten används på annat sättþän i denna
bruksanvisning specificerats, kan användaren utsättas för
osynlig laserstrålning, som överskrider gränsen för
laserklass 1.
VARO!
AVATTAESSA JA SUOJALUKITUS
OHITETTAESSA OLET ALTTIINA
NÄKYMÄTTÖMÄLLE LASERSÄTEILYLLE.
ÄLÄ KATSO SÄTEESEEN.
VARNING!
OSYNLIG LASERSTRÅLNING NÄR DENNA DEL
ÄR ÖPPNAD OCH SPÄRREN ÄR URKOPPLAD.
BETRAKTA EJ STRÅLEN.
Observera! Strömbrytaren POWER är sekundärt kopplad
och inte bryter inte strömmen från nätet. Den inbyggda
nätdelen är därför ansluten till elnätet så länge
stickproppen sitter i vägguttaget.
SF
Luokan 1 laserlaite
Varoitus! Laitteen käyttäminen muulla kuin tässä
käyttöohjeessa mainitulla tavalla saattaa altistaa käyttäjän
turvallisuusluokan 1 ylittävälle näkymättömälle
lasersäteilylle.
Oikeus muutoksiin varataan. Laite ei saa olla alttiina
tippu-ja roiskevedelle.
Huom. Toiminnanvalitsin POWER on kytketty
toisiopuolelle, eikä se kytke laitetta irti sähköverkosta.
Sisäänrakennettu verkko-osa on kytkettynä
sähköverkkoon aina silloin, kun pistoke on pistorasiassa.
ii
Page 4

CAUTION: READ THIS BEFORE OPERATING YOUR UNIT.
1 To assure the finest performance, please read this manual
carefully. Keep it in a safe place for future reference.
2 Install this sound system in a well ventilated, cool, dry, clean
place – away from direct sunlight, heat sources, vibration,
dust, moisture, and/or cold. Allow ventilation space of at least
10 cm (3 15/16 in) on the top, 10 cm (3 15/16 in) on the left
and right, and 10 cm (3 15/16 in) on the back of this unit.
3 Locate this unit away from other electrical appliances, motors,
or transformers to avoid humming sounds.
4 Do not expose this unit to sudden temperature changes from
cold to hot, and do not locate this unit in an environment with
high humidity (i.e. a room with a humidifier) to prevent
condensation inside this unit, which may cause an electrical
shock, fire, damage to this unit, and/or personal injury.
5 Avoid installing this unit where foreign objects may fall onto
this unit and/or this unit may be exposed to liquid dripping or
splashing. On the top of this unit, do not place:
– Other components, as they may cause damage and/or
discoloration on the surface of this unit.
– Burning objects (i.e. candles), as they may cause fire,
damage to this unit, and/or personal injury.
– Containers with liquid in them, as they may fall and liquid
may cause electrical shock to the user and/or damage to
this unit.
6 Do not cover this unit with a newspaper, tablecloth, curtain,
etc. in order not to obstruct heat radiation. If the temperature
inside this unit rises, it may cause fire, damage to this unit,
and/or personal injury.
7 Do not plug in this unit to a wall outlet until all connections
are complete.
8 Do not operate this unit upside-down. It may overheat,
possibly causing damage.
9 Do not use force on switches, knobs and/or cables.
10 When disconnecting the power cable from the wall outlet,
grasp the plug; do not pull the cable.
11 Do not clean this unit with chemical solvents; this might
damage the finish.
12 Only voltage specified on this unit must be used. Using this
unit with a higher voltage than specified is dangerous and may
cause fire, damage to this unit, and/or personal injury.
Yamaha will not be held responsible for any damage resulting
from use of this unit with a voltage other than specified.
13 To prevent damage by lightning, keep the power cable
disconnected from a wall outlet or the unit during a lightning
storm.
14 Do not attempt to modify or fix this unit. Contact qualified
Yamaha service personnel when any service is needed. The
cabinet should never be opened for any reasons.
15 When not planning to use this unit for long periods of time
(i.e. vacation), disconnect the power cable from the wall
outlet.
16 Install this unit near the wall outlet and where the power cable
can be reached easily.
17 Be sure to read the “TROUBLESHOOTING” section in this
manual on common operating errors before concluding that
this unit is faulty.
18 Before moving this unit, press POWER to turn off this unit
and then disconnect the power cable from the wall outlet.
19 The batteries shall not be exposed to excessive heat such as
sunshine, fire or like.
20 VOLTAGE SELECTOR (Asia and General models only)
The VOLTAGE SELECTOR on the rear panel of this unit
must be set for your local main voltage BEFORE plugging
into the wall outlet. Voltages are:
.....................................AC 110/120/220/230-240 V, 50/60 Hz
As long as this unit is connected to the wall outlet, it is
not disconnected from the AC power source even if
you turn off this unit by POWER.
WARNING
TO REDUCE THE RISK OF FIRE OR ELECTRIC
SHOCK, DO NOT EXPOSE THIS APPLIANCE TO
RAIN OR MOISTURE.
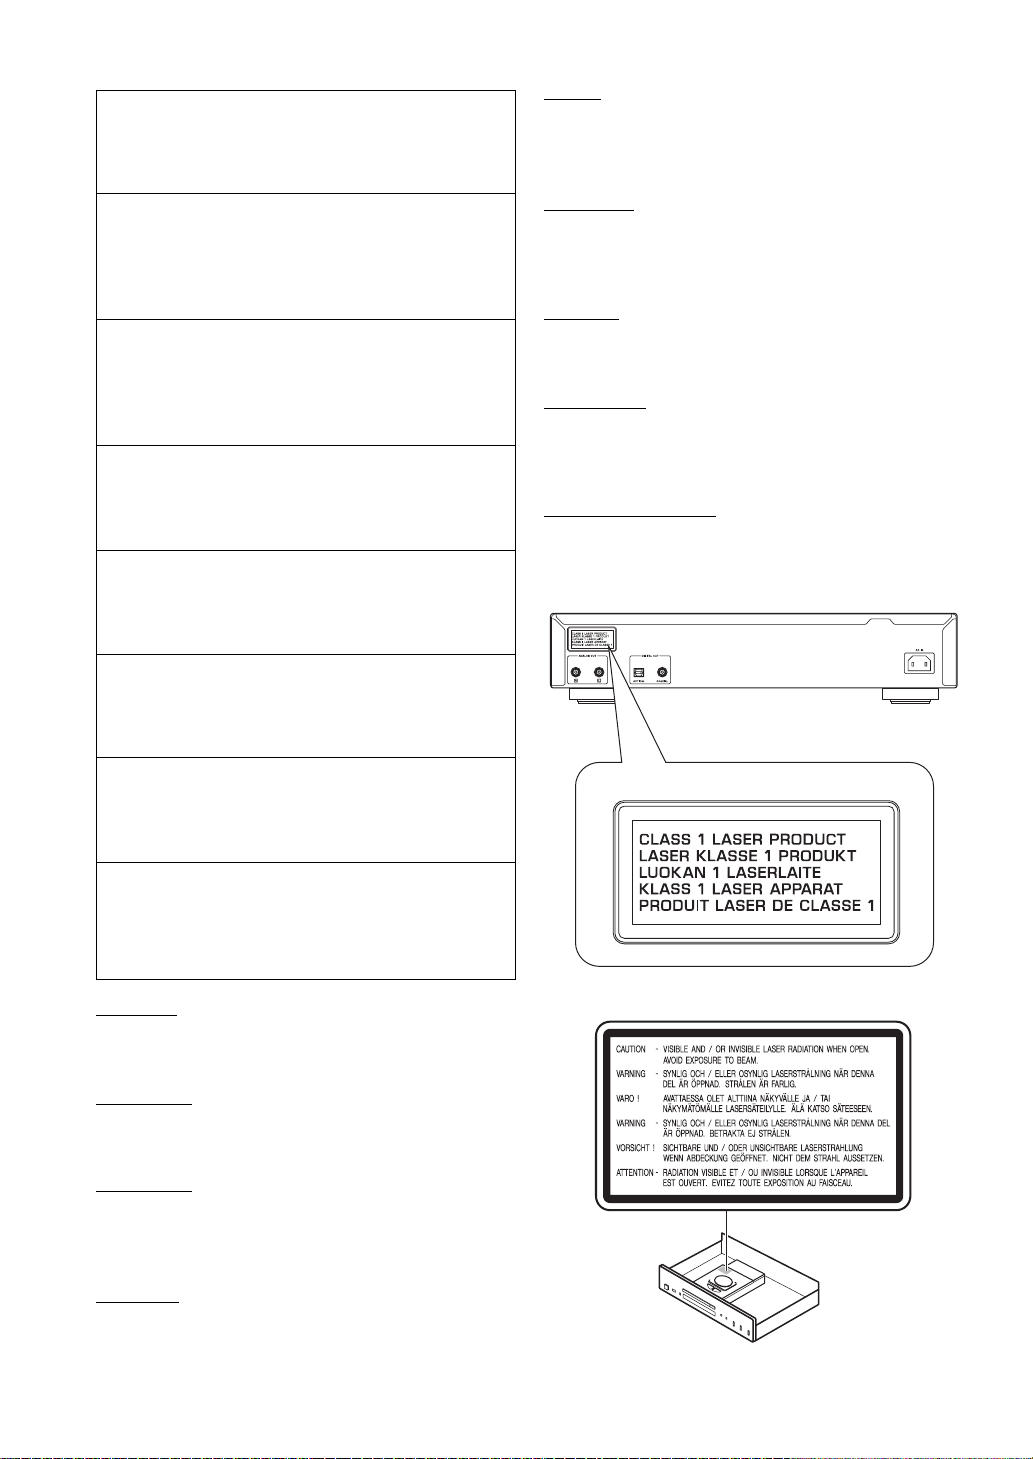
LASER SAFETY
This unit employs a laser. Due to possible eye injury, only a qualified
service person should remove the cover or attempt to service this
device.
DANGER
This unit emits visible laser radiation when open. Avoid direct eye
exposure to beam. When this unit is plugged into the wall outlet, do
not place your eyes close to the opening of the disc tray and other
openings to look into inside.
The laser component in this product is capable of
emitting radiation exceeding the limit for Class 1.
iii En
Page 5

INTRODUCTION
FEATURES............................................................. 2
SUPPLIED ACCESSORIES ................................. 2
CONTROLS AND FUNCTIONS .........................3
Front panel................................................................. 3
Front panel display ....................................................4
Remote control...........................................................5
Installing batteries in the remote control...................6
Using the remote control ........................................... 6
PREPARATION
CONNECTIONS .................................................... 7
Connecting your amplifier.........................................7
Connecting the supplied power cable........................8
Connecting USB devices........................................... 8
CONTENTS
PREPARATIONINTRODUCTION
OPERATION
BASIC OPERATION............................................. 9
Starting playback....................................................... 9
Pausing playback..................................................... 10
Stopping playback ...................................................10
Turning off the power.............................................. 10
Playing back a desired track.................................... 10
To improve audio quality (PURE DIRECT mode)
............................................................................. 10
Skipping to the beginning of a desired track ........... 11
Advancing or reversing playback rapidly................ 11
Changing front panel display...................................12
Changing the brightness of the front panel display
............................................................................. 12
RANDOM-SEQUENCE PLAY .......................... 13
REPEAT PLAY .................................................... 13
Repeating a selected item ........................................ 13
Repeat A-B .............................................................. 14
PROGRAM PLAY ............................................... 15
Stopping program playback..................................... 16
Clearing programmed track ..................................... 16
ADDITIONAL INFORMATION
NOTES ABOUT DISCS/MP3, WMA FILES .... 17
TROUBLESHOOTING....................................... 19
SPECIFICATIONS .............................................. 20
OPERATION
INFORMATION
ADDITIONAL
■ About this manual
• y indicates a tip for your operation.
• In this manual, audio CDs are referred to as “Audio CD”, MP3/WMA discs as “Data Disc”, and MP3/WMA files
stored on the USB device as “USB”.
• This manual is printed prior to production. Design and specifications are subject to change in part as a result of
improvements, etc. In case of differences between the manual and the product, the product has priority.
English
1 En
Page 6
INTRODUCTION
FEATURES
◆ Optical Digital Output
◆ Coaxial Digital Output
◆ CD-R, CD-RW Disc Playability
(For details, refer to page 17.)
◆ MP3, WMA Disc Playability
◆ MP3, WMA File Playability Stored on USB Device
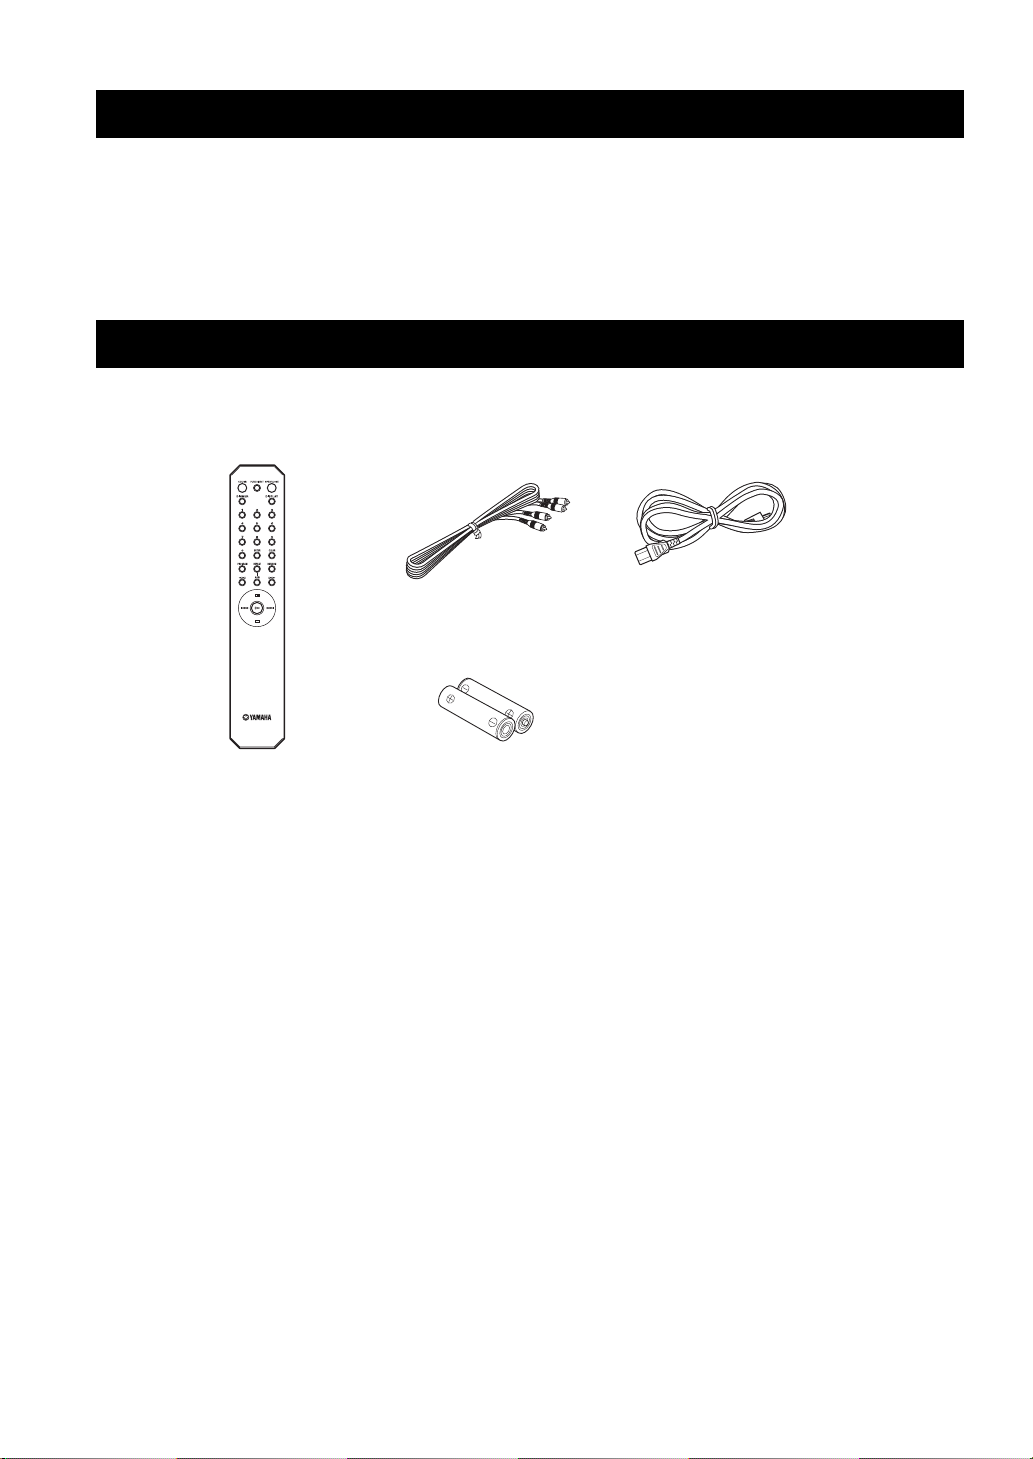
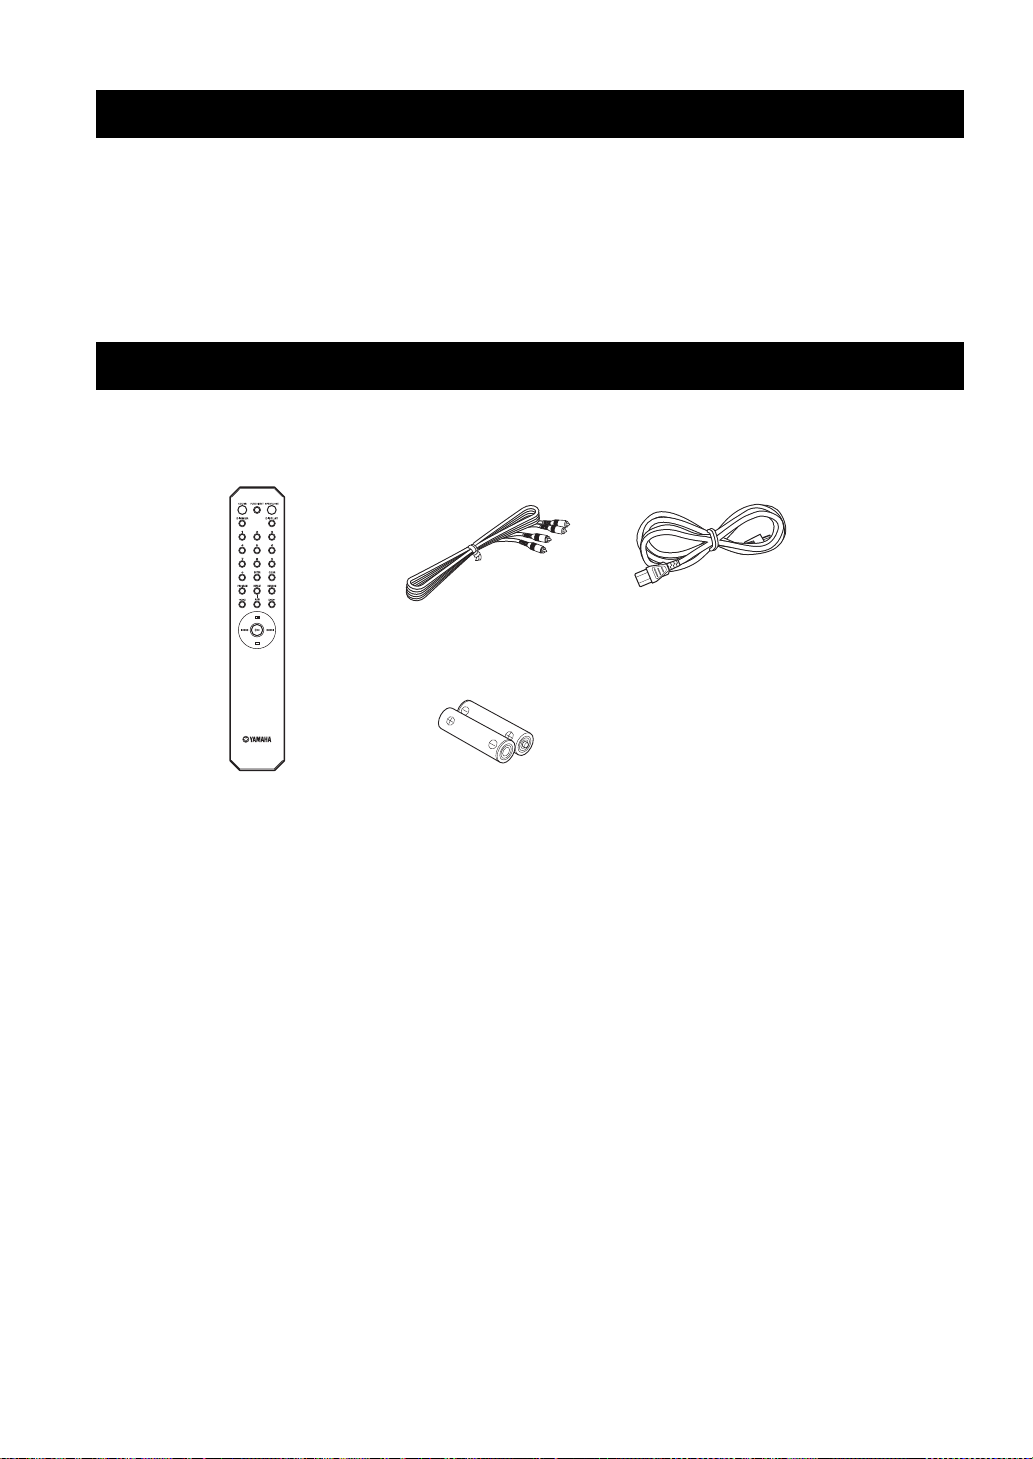
SUPPLIED ACCESSORIES
Please check that you received all of the following parts:
Remote control RCA stereo cable
Batteries (× 2)
(AA, R6, UM-3)
◆ Program Play (Audio CD only)
◆ Random-Sequence Play
◆ Single Track/Entire Disc Repeat Play
◆ Repeat A-B Play (Audio CD only)
◆ Adjustable Display Information and Brightness
◆ PURE DIRECT Function
Power cable
2 En
Page 7
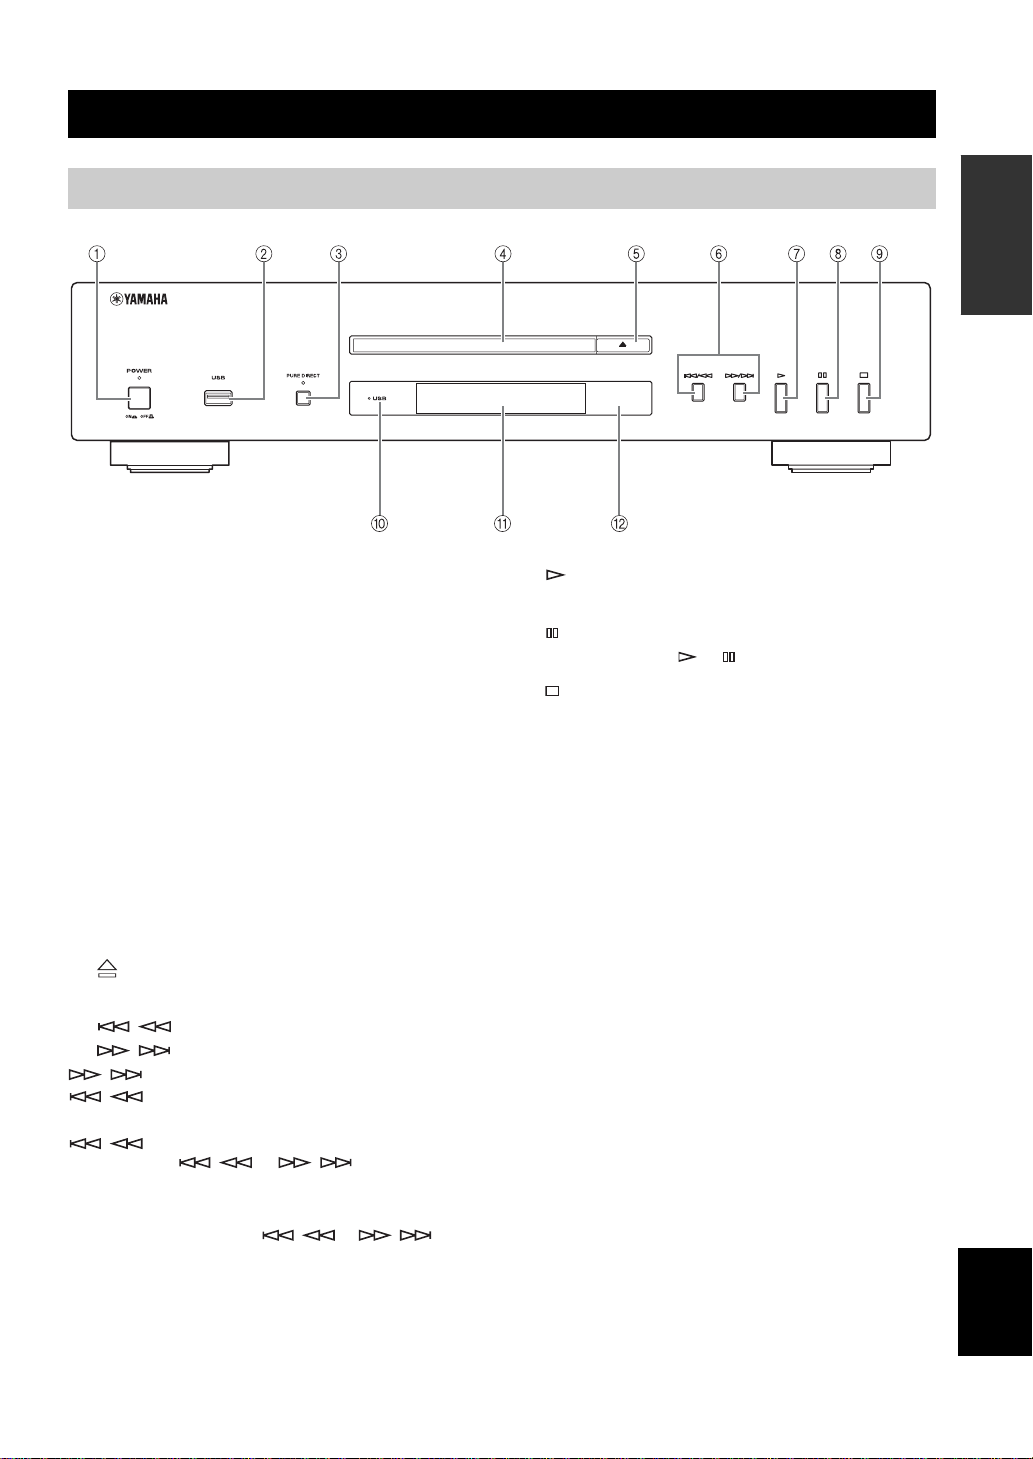
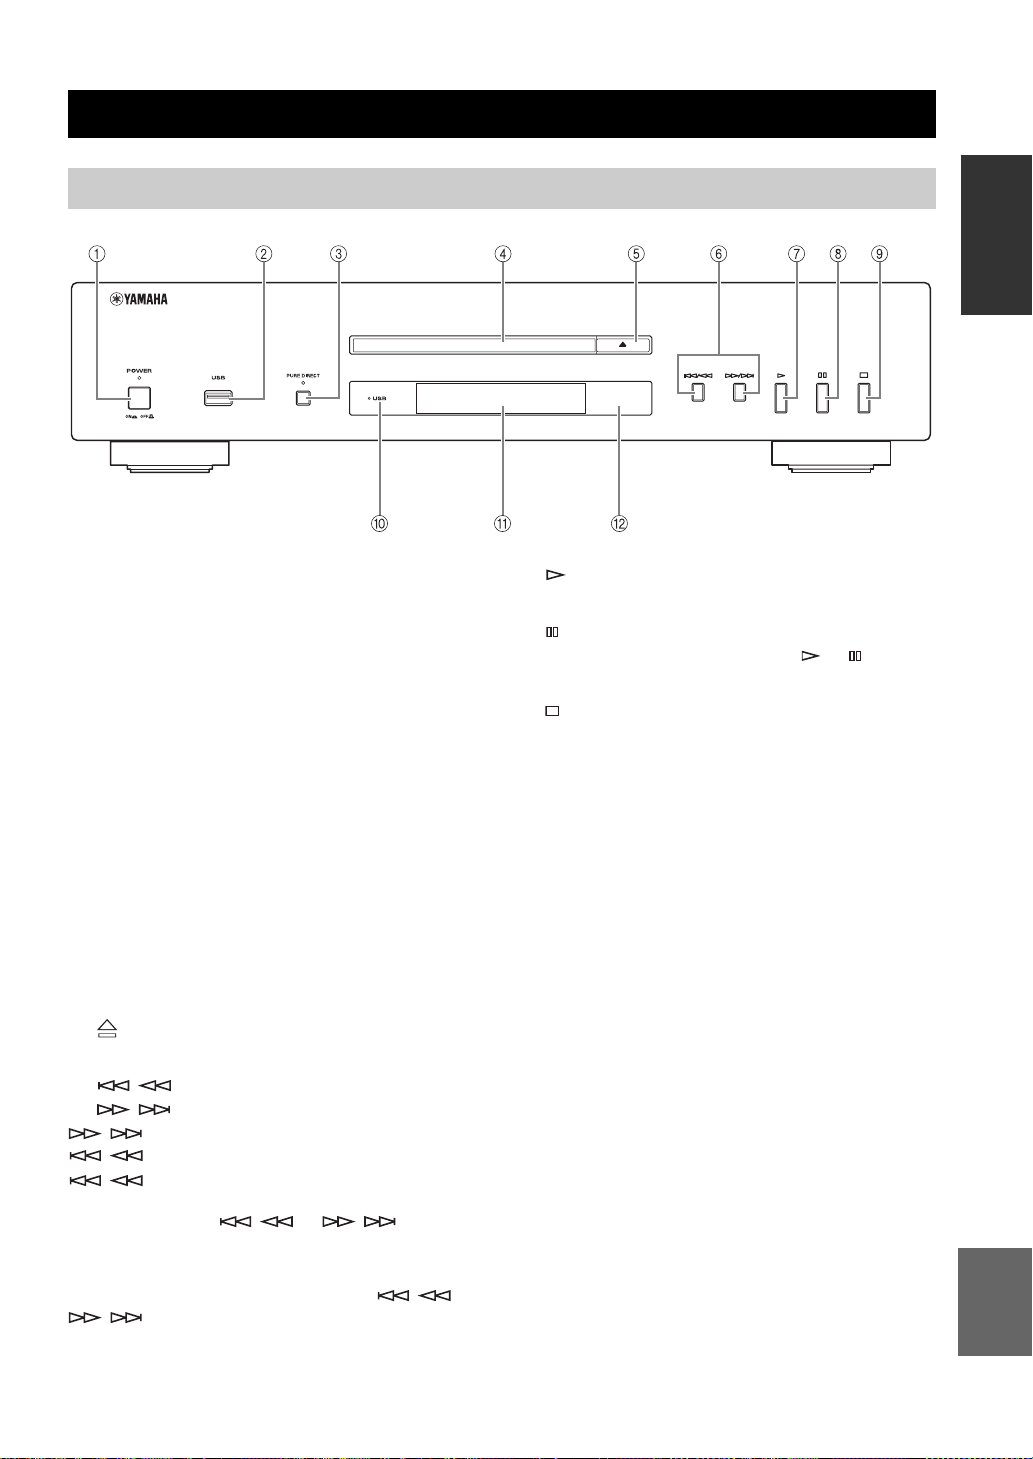
Front panel
CONTROLS AND FUNCTIONS
INTRODUCTION
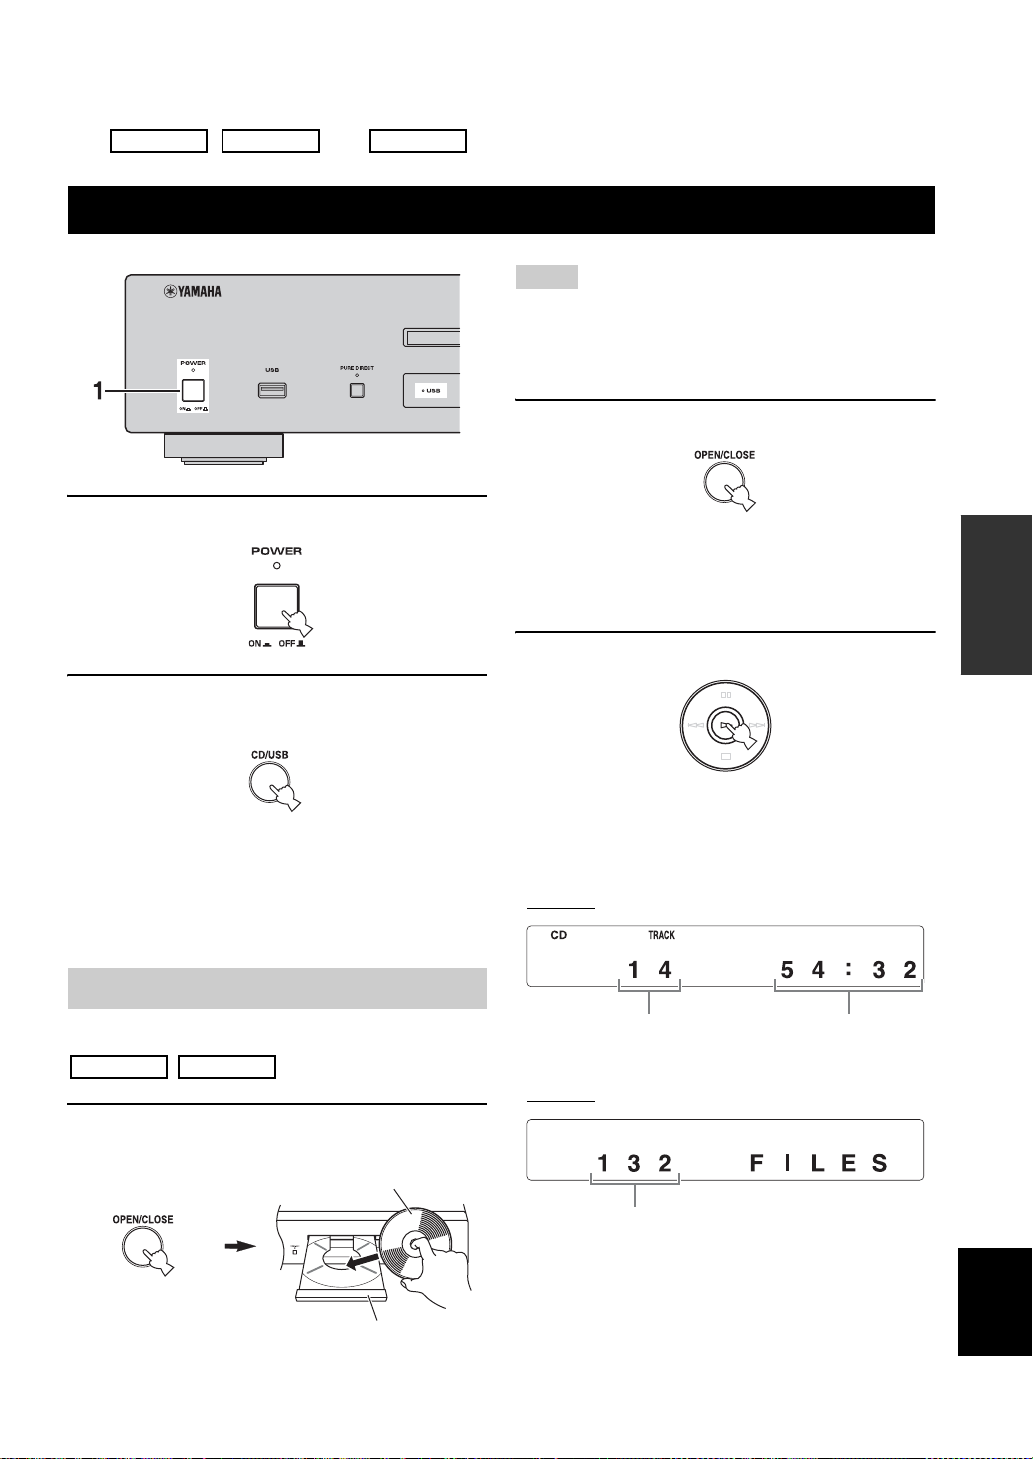
1 POWER
Press to turn the power to ON/OFF.
y
The POWER indicator above lights up when this unit is turned
on.
2 USB port
Connect your USB device. See page 8 for details.
3 PURE DIRECT
Turn PURE DIRECT mode on or off to improve audio
quality.
y
The PURE DIRECT indicator above lights up when this unit is in
PURE DIRECT mode. See page 10 for details.
4 Disc tray
Load a disc.
5 (Open/Close)
Open or close the disc tray.
6 / (Skip/Search backward),
/ (Skip/Search forward)
/ : Skip to the next track.
/ : Skip back to the beginning of the current
track.
/ (twice): Skip to the previous track.
Press and hold / or / to search
backward/ forward.
y
Each time you press and hold / or / , the
search speed increases by 2 levels.
7 (Play)
Start playback.
8 (Pause)
Pause playback. Press or to resume playback.
9 (Stop)
Stop playback.
0 USB indicator
Lights on/off when this unit is in USB/disc mode, and
blinks when this unit is reading the USB device.
A Front panel display
Shows the current status of this unit.
B Remote control sensor
Receives signals from the remote control.
English
3 En
Page 8
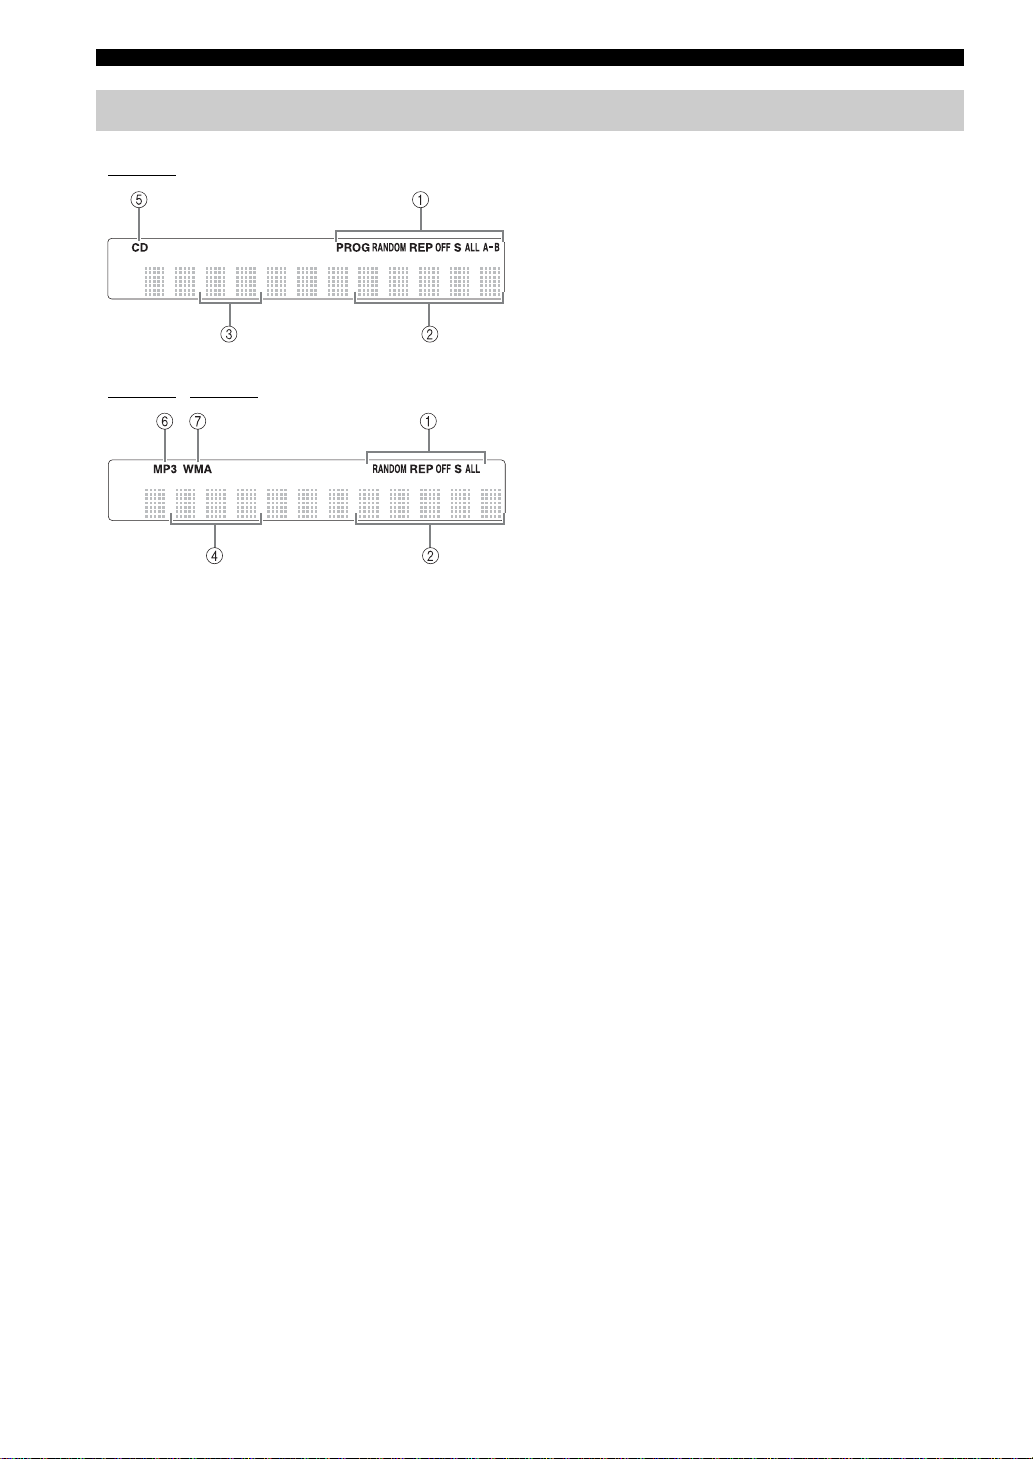
CONTROLS AND FUNCTIONS
Front panel display
Audio CD
Data Disc USB
1 Lights up the icon for the selected playback mode.
2 Shows the time displays. (Refer to page 12.)
3 Shows the track number selected or being played back.
4 Shows the file number.
5 Lights up when this unit is in disc mode (refer to page 9) and
also when an Audio CD is recognized on the tray.
6 Lights up when MP3 file is played back.
7 Lights up when WMA file is played back.
4 En
Page 9
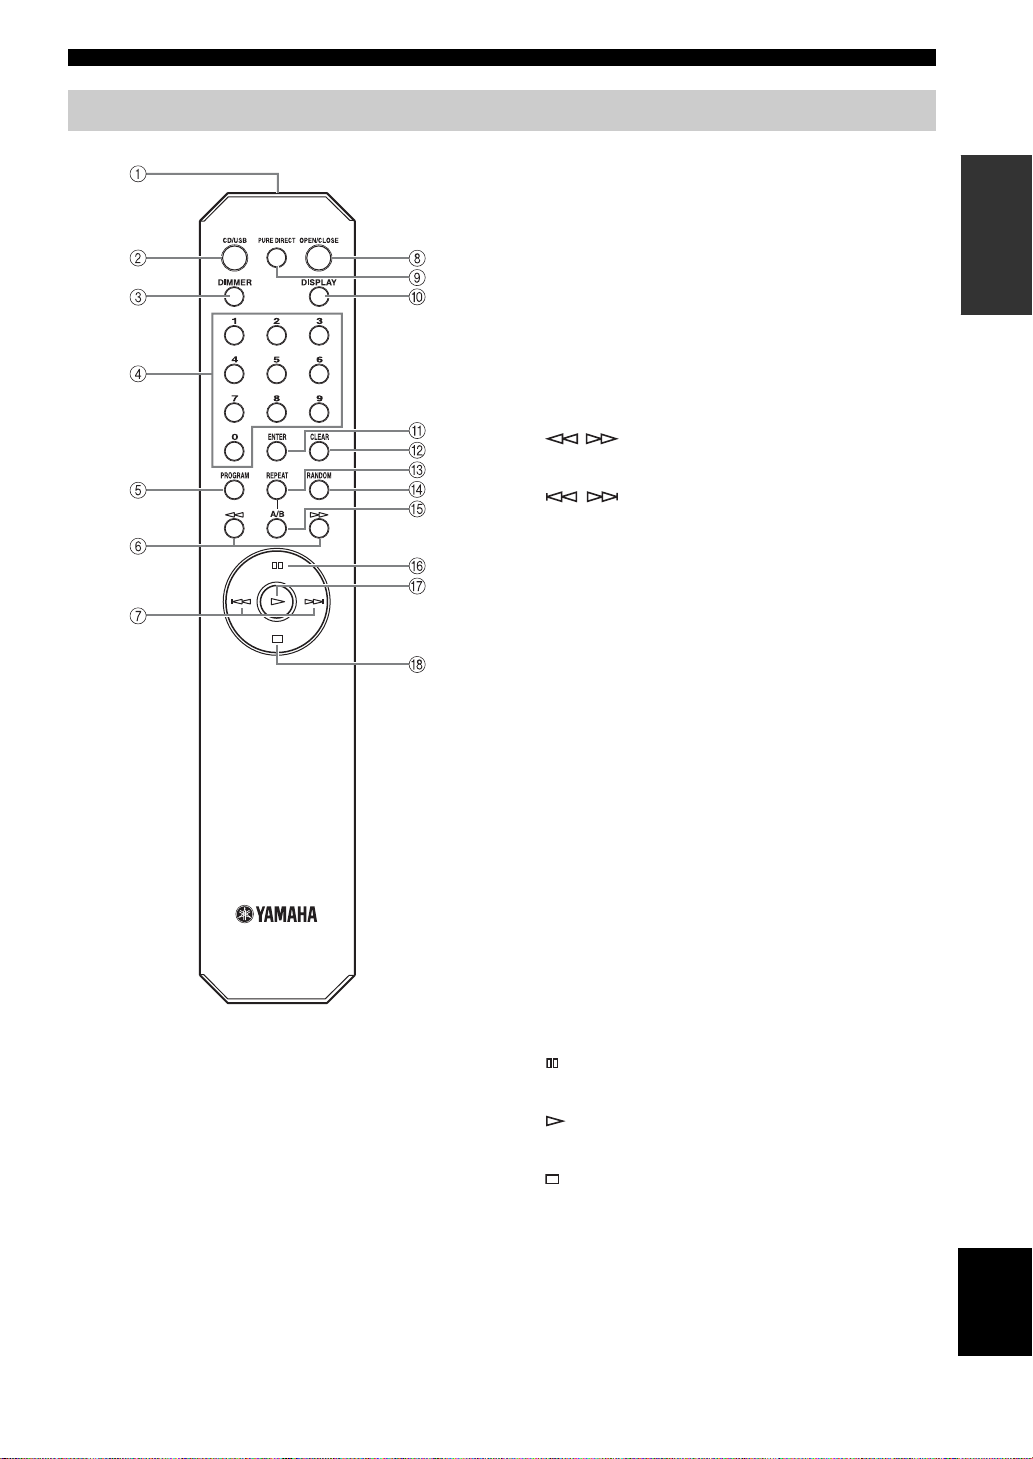
Remote control
CONTROLS AND FUNCTIONS
1 Infrared signal transmitter (p. 6)
Send infrared signals to this unit.
2 CD/USB (p. 9)
Switch between disc mode and USB mode.
3 DIMMER (p. 12)
Select brightness level for the front panel display.
4 Numeric buttons (p. 10)
Select a track directly.
5 PROGRAM (p. 15)
Turn program mode on or off.
6 / (Search backward/forward) (p. 11)
Search tracks backward/forward.
7 / (Skip backward/forward) (p. 11)
Skip to the next/previous track or skip back to the
beginning of the current track.
8 OPEN/CLOSE (p. 9)
Open or close the disc tray.
9 PURE DIRECT (p. 10)
Turn PURE DIRECT mode on or off.
0 DISPLAY (p. 12)
Switch the time display.
A ENTER (p. 15)
Confirm the track number when this unit is in program
input mode.
INTRODUCTION
B CLEAR (p. 16)
Clear programmed track.
C REPEAT (p. 13)
Repeat playback of a single track or all tracks.
D RANDOM (p. 13)
Set random-sequence play.
E A/B (p. 14)
Set repeat A-B.
F (Pause) (p. 10)
Pause playback.
G (Play) (p. 9)
Start playback.
H (Stop) (p. 10)
Stop playback.
English
5 En
Page 10

CONTROLS AND FUNCTIONS
Installing batteries in the remote control
1 Press the part and slide the battery
compartment cover off.
2 Insert two supplied batteries (AA, R6, UM-3)
according to the polarity markings (+ and –)
on the inside of the battery compartment.
3 Slide the cover back until it snaps into place.
■ Notes on batteries
• Change both batteries when the operation range of the
remote control decreases.
• Use AA, R6, UM-3 batteries.
• Make sure that the polarities are correct. See the
illustration inside the battery compartment.
• Remove the batteries if the remote control is not to be
used for an extended period of time.
• Do not use old batteries together with new ones.
• Do not use different types of batteries (such as alkaline
and manganese batteries) together. Read the packaging
carefully as these different types of batteries may have
the same shape and color.
• If the batteries have leaked, dispose of them
immediately. Avoid touching the leaked material or
letting it come into contact with clothing, etc. Clean the
battery compartment thoroughly before installing new
batteries.
• Do not throw away batteries with general house waste;
dispose of them correctly in accordance with your local
regulations.
Using the remote control
The remote control transmits a directional infrared beam.
Be sure to aim the remote control directly at the remote
control sensor on the front panel of this unit during
operation.
Within 6 m
(20 ft)
■ Handling the remote control
• The area between the remote control and this unit must
be clear of large obstacles.
• Do not spill water or other liquids on the remote
control.
• Do not drop the remote control.
• Do not leave or store the remote control in the
following types of conditions:
– high humidity, such as near a bath
– high temperature, such as near a heater or a stove
– extremely low temperatures
– dusty places
• Do not expose the remote control sensor to strong
lighting, in particular, an inverter type fluorescent
lamp; otherwise, the remote control may not work
properly. If necessary, position the unit away from
direct lighting.
6 En
Page 11
PREPARATION
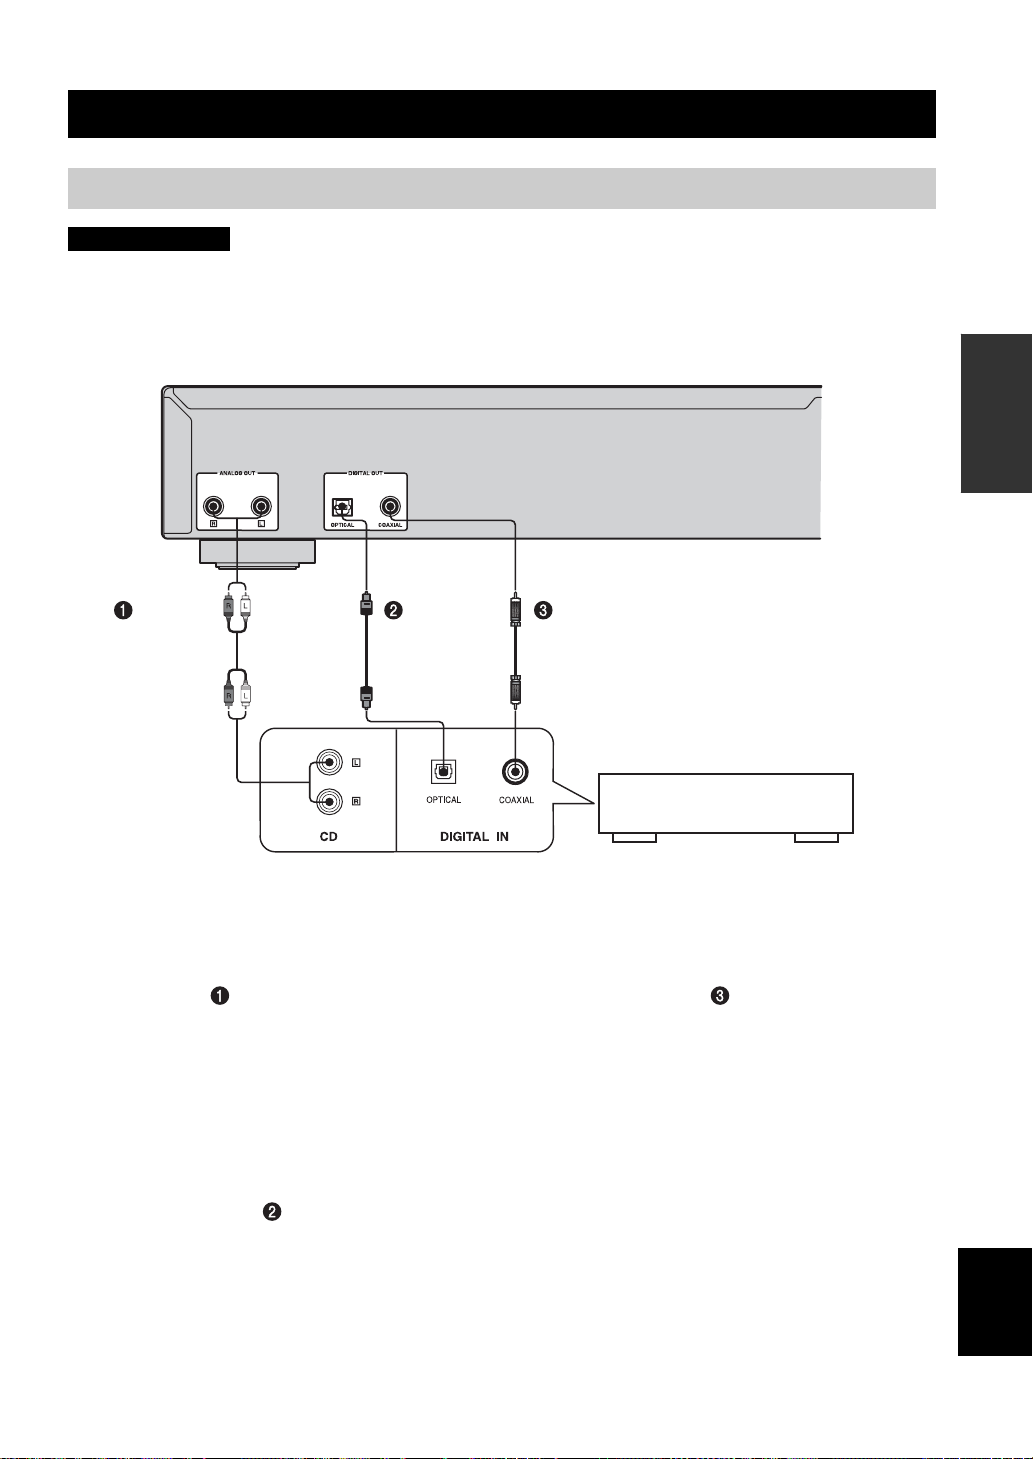
CONNECTIONS
Connecting your amplifier
CAUTION
• Before making any connection, switch OFF the power to the unit, the amplifier and any other component.
• Connections should be made to the correct input terminals of the amplifier or another component.
• If the placement of this unit causes noise to another equipment, such as a tuner, move them further away from each
other.
PREPARATION
RCA stereo
cable
(supplied)
• The digital output is turned off when this unit is in PURE DIRECT mode.
To connect this unit to your amplifier, choose one of the ways listed below.
When the ANALOG OUT terminals of this
unit are used ( )
Connect these terminals to the CD (or AUX) terminals of
the amplifier by using a supplied RCA stereo cable. For
details concerning these connections, refer to the
operation instructions of the amplifier being used.
• Be sure that the left (L) and right (R) of these terminals
are connected to the corresponding (left and right)
terminals of the amplifier or other component.
Coaxial cableOptical cable
When the DIGITAL OUT (COAXIAL) terminal
of this unit is used ( )
Connect this terminal to the digital input terminal of an
amplifier with a commercially available coaxial cable.
When the DIGITAL OUT (OPTICAL) terminal
of this unit is used ( )
Connect this terminal to the optical input terminal of an
amplifier with a commercially available optical cable.
• Use a reliable optical cable.
Amplifier
English
7 En
Page 12
CONNECTIONS
Connecting the supplied power cable
Asia and General models
only
Europe and U.K. models
To the wall outlet with the
supplied power cable
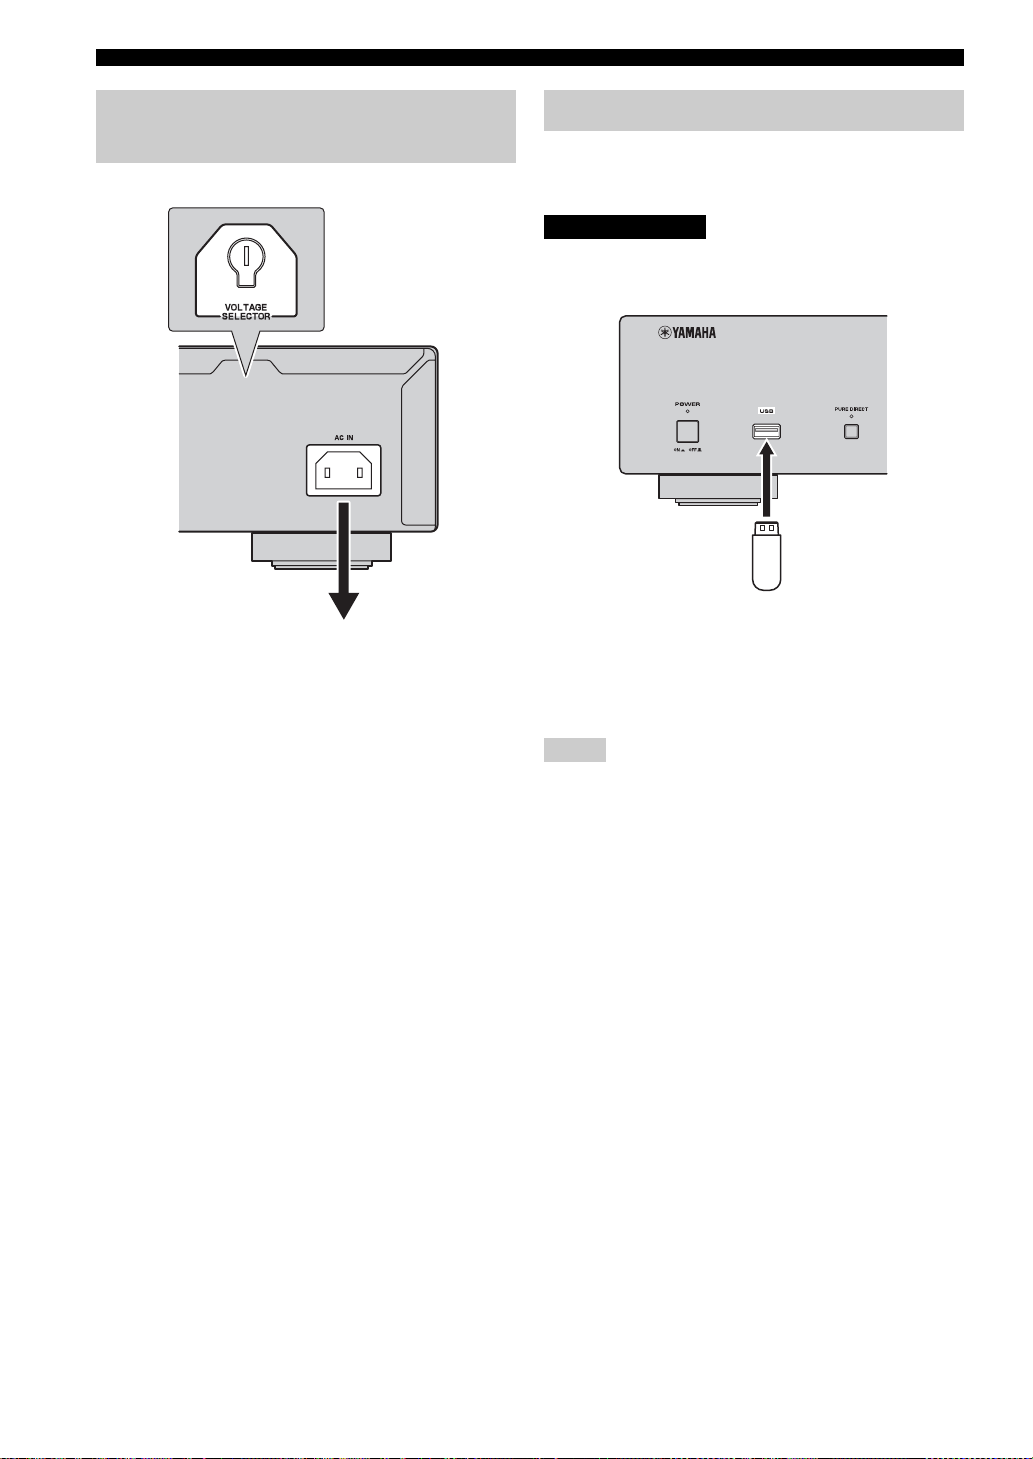
■ VOLTAGE SELECTOR
(Asia and General models only)
The VOLTAGE SELECTOR on the rear panel of this unit
must be set for your local main voltage BEFORE plugging
the supplied power cable into the wall outlet.
Improper setting of the VOLTAGE SELECTOR may
cause damage to this unit and create a potential fire
hazard.
Rotate the VOLTAGE SELECTOR clockwise or
counterclockwise to the correct position using a straight
slot screwdriver.
Voltages are as follows:
.............................. AC 110/120/220/230-240 V, 50/60 Hz
■ Connecting this unit to the wall outlet
Plug the supplied power cable into the AC IN on the rear
panel of this unit and then plug the power cable into the
wall outlet after all other connections are complete.
Connecting USB devices
This unit has a USB port and can access MP3 or WMA
files saved on your USB device. Connect your USB
device to the USB port on the front panel of this unit.
CAUTION
Do not disconnect your USB device while playing back
from the USB device, or when the USB indicator blinks.
■ Supported USB devices
This unit supports USB mass storage class devices (e.g.,
flash memories, card readers or portable audio players)
that use FAT16 or FAT32 format.
Notes
• Some devices may not work properly even if they meet the
requirements.
• Do not connect devices other than USB mass storage class
devices: USB chargers, USB hubs, PCs, external HDD, etc.
• When you insert two or more memory cards at the same time
into a card reader connected to the USB port on this unit, only
one of the memory cards is recognized.
• Yamaha and suppliers accepts no liability for the loss of data
saved on the USB devices connected to this unit. As a
precaution, it is recommended that the files are made backup
copies.
• Playability of and power supply to all kind of USB devices are
not guaranteed.
8 En
Page 13
OPERATION
This manual describes how to operate this unit by using the remote control.
To operate this unit from the front panel, use the corresponding buttons on the front panel.
The , and icons indicate music data formats that can be
Audio CD Data Disc USB
used in the operation.
BASIC OPERATION
Notes
• When you load a disc, set the disc on the inside of the disc
guides (4 marks on the disc tray).
• The disc may not be read correctly, if it is set incorrectly. In this
case, open the disc tray and set the disc again.
2 Press OPEN/CLOSE to close the disc tray.
1 Press POWER to turn on the power.
y
You can also close the disc tray by pressing h, a numeric button,
or by pressing the front edge of the disc tray gently. If the tray is
closed in one of these ways, playback starts automatically.
OPERATION
2 Press CD/USB to switch between disc mode
and USB mode.
When USB mode is selected, the USB indicator lights
up, and when disc mode is selected, the USB
indicator lights off.
y
This setting is retained even if you turn off this unit.
Starting playback
■ Playing back discs
Audio CD Data Disc
1 Press OPEN/CLOSE to open the disc tray,
and load a disc.
Label side up.
3 Press h to start playback.
For an Audio CD, playback starts from the first track,
and for a Data Disc, in alphanumeric order by
filename.
Display information in step 2
Audio CD
Total number of tracks Total recorded time of a disc
Data Disc
Total number of files
Disc tray
English
9 En
Page 14
BASIC OPERATION
■ Playing back USB devices
USB
Turning off the power
Connect your USB device to the USB port on the
front panel. (For details, refer to page 8.)
When USB mode is selected (USB indicator lights up),
first filename is displayed in the front panel display (refer
to page 12), and playback starts automatically in order by
date and time of creation if playable files are in the USB
device.
To disconnect USB devices
Press to stop playback, and then disconnect the USB
device.
Note
Do not disconnect your USB device while playing back from the
USB device, or when the USB indicator blinks.
Pausing playback
USBAudio CD Data Disc
Press e.
To resume playback, press e again (or press h).
Press POWER again.
If you turn off the power when disc mode is selected, the
next time you turn the power on, playback starts
automatically of the disc on the tray. If you turn off the
power when USB mode is selected, playback will start
automatically of the USB device connected.
Playing back a desired track
Audio CD
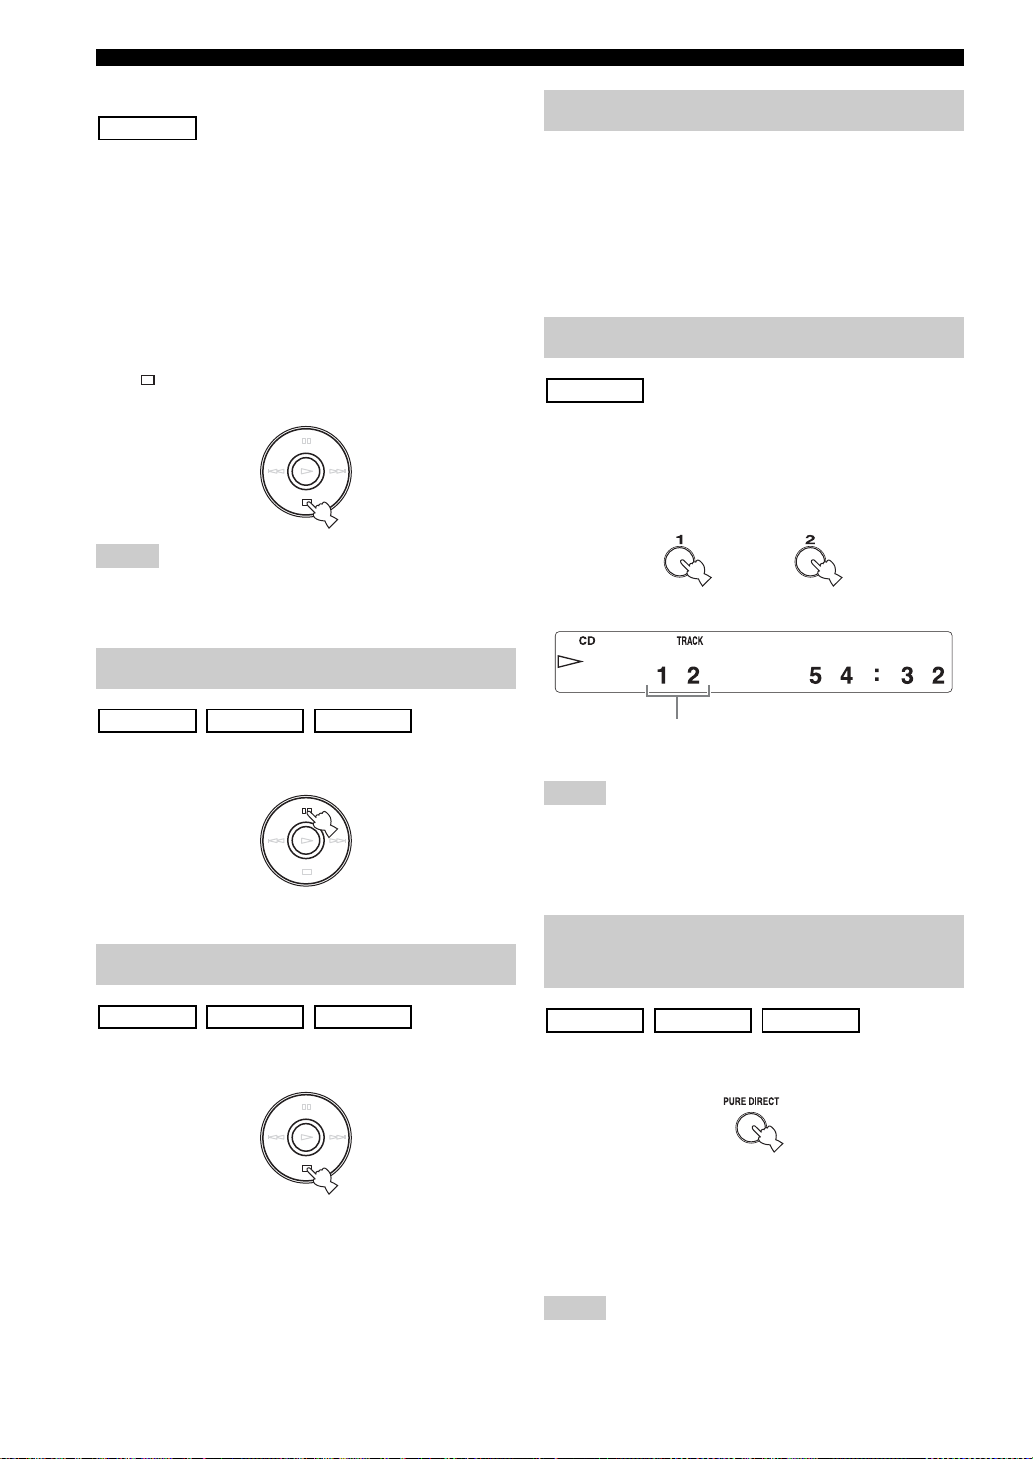
Select a desired track by using the numeric
buttons.
Example: To select track number 12
Press “1”, and then press “2”.
+
Following information is displayed.
The selected track number
Playback starts in 2 seconds.
Note
This operation is not available for Data Disc and USB.
y
You can also select and playback a desired track during playback.
Stopping playback
USBAudio CD Data Disc
Press s.
If you press h again, playback starts from the first track.
10 En
To improve audio quality (PURE DIRECT mode)
USBAudio CD Data Disc
Press PURE DIRECT.
This unit is set to PURE DIRECT mode.
• The PURE DIRECT indicator lights up.
• The digital output is turned off.
• The front panel display is turned off and only the minimum
required indicators and messages are displayed during
playback.
Note
Connect using the ANALOG OUT terminals when you use
PURE DIRECT mode (refer to page 7).
Page 15
y
• Press PURE DIRECT again to turn off PURE DIRECT mode.
• This setting is retained even if you turn off this unit.
BASIC OPERATION
Advancing or reversing playback rapidly
Skipping to the beginning of a desired track
USBAudio CD Data Disc
To play back from the beginning of the next
track, press once.
To play back from the beginning of the current
track, press once.
To play back from the beginning of the previous
track, press twice.
y
• These operations can also be performed for Data Disc/USB.
• These operations can also be performed when the unit is
paused.
• These operations can also be performed using b/w and
f/a on the front panel.
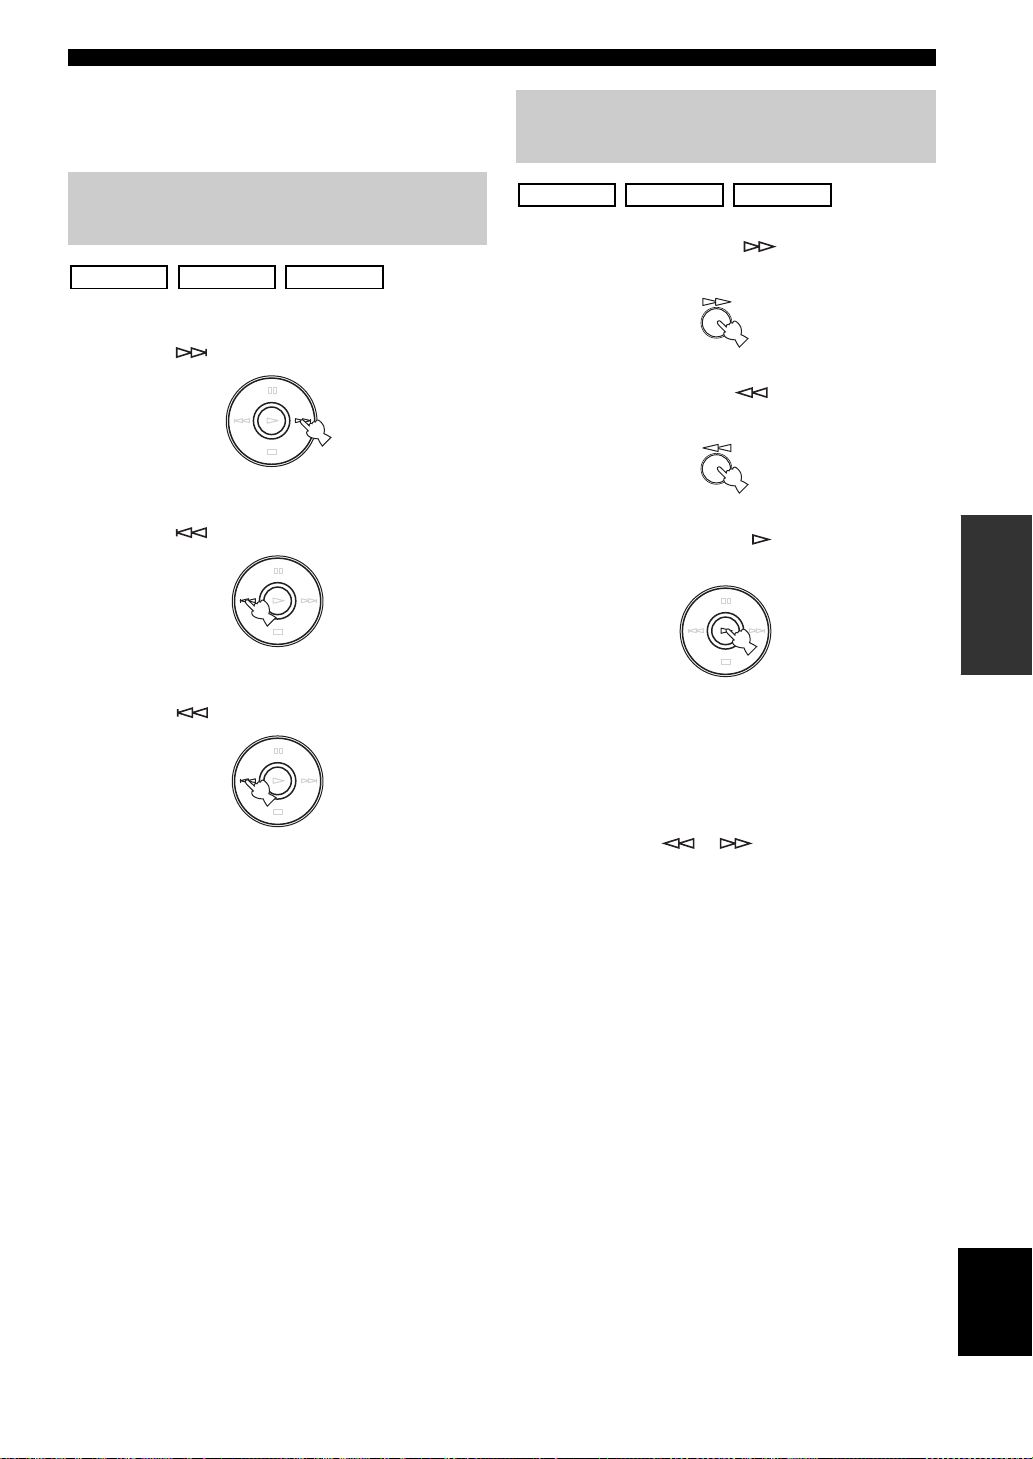
USBAudio CD Data Disc
To advance rapidly, press once during
playback.
To reverse rapidly, press once during
playback.
To resume playback, press at the desired
point.
y
• These operations can also be performed for Data Disc/USB.
• The sound can be heard (although slightly garbled) during these
operation in either direction. This is convenient for locating a
precise position within a track, or for reviewing the contents
quickly. Sound may not be heard depending on the MP3/WMA
file.
• Each time you press or , the search speed increases
by 2 levels.
• These operations can also be performed pressing and holding
b/w or f/a on the front panel for more than 2
seconds.
OPERATION
11 En
English
Page 16

BASIC OPERATION
Changing front panel display
■ When playing back an Audio CD
Audio CD
You can select the following front panel displays (1 - 3) by pressing DISPLAY.
1 Elapsed time of the current track (Default)
2 Remaining time of the current track
3 Remaining time of the disc
■ When playing back a Data Disc or USB device
USBData Disc
You can temporarily display the filename by pressing DISPLAY.
These front panel display examples are for an MP3 file.
1 Elapsed time of the current track
Returns to the normal display after displaying
2 Filename*
* 28 characters maximum
Note
This unit can only show alphanumeric characters.
a filename.
Changing the brightness of the front panel display
Press DIMMER to change the brightness level for
the front panel display.
Each time you press DIMMER, the brightness level
changes in the following order:
Max (brightest) J Level1 (default) J Level2 J Level3
(darkest) J Max
Notes
• Brightness is slightly decreased during playback, except when
the level is set to maximum.
• Brightness may temporarily be decreased for some operations,
except when the level is set to maximum.
• This setting is retained even if you turn off this unit.
12 En
Page 17
RANDOM-SEQUENCE PLAY
USBAudio CD Data Disc
You can play back the tracks in random sequence.
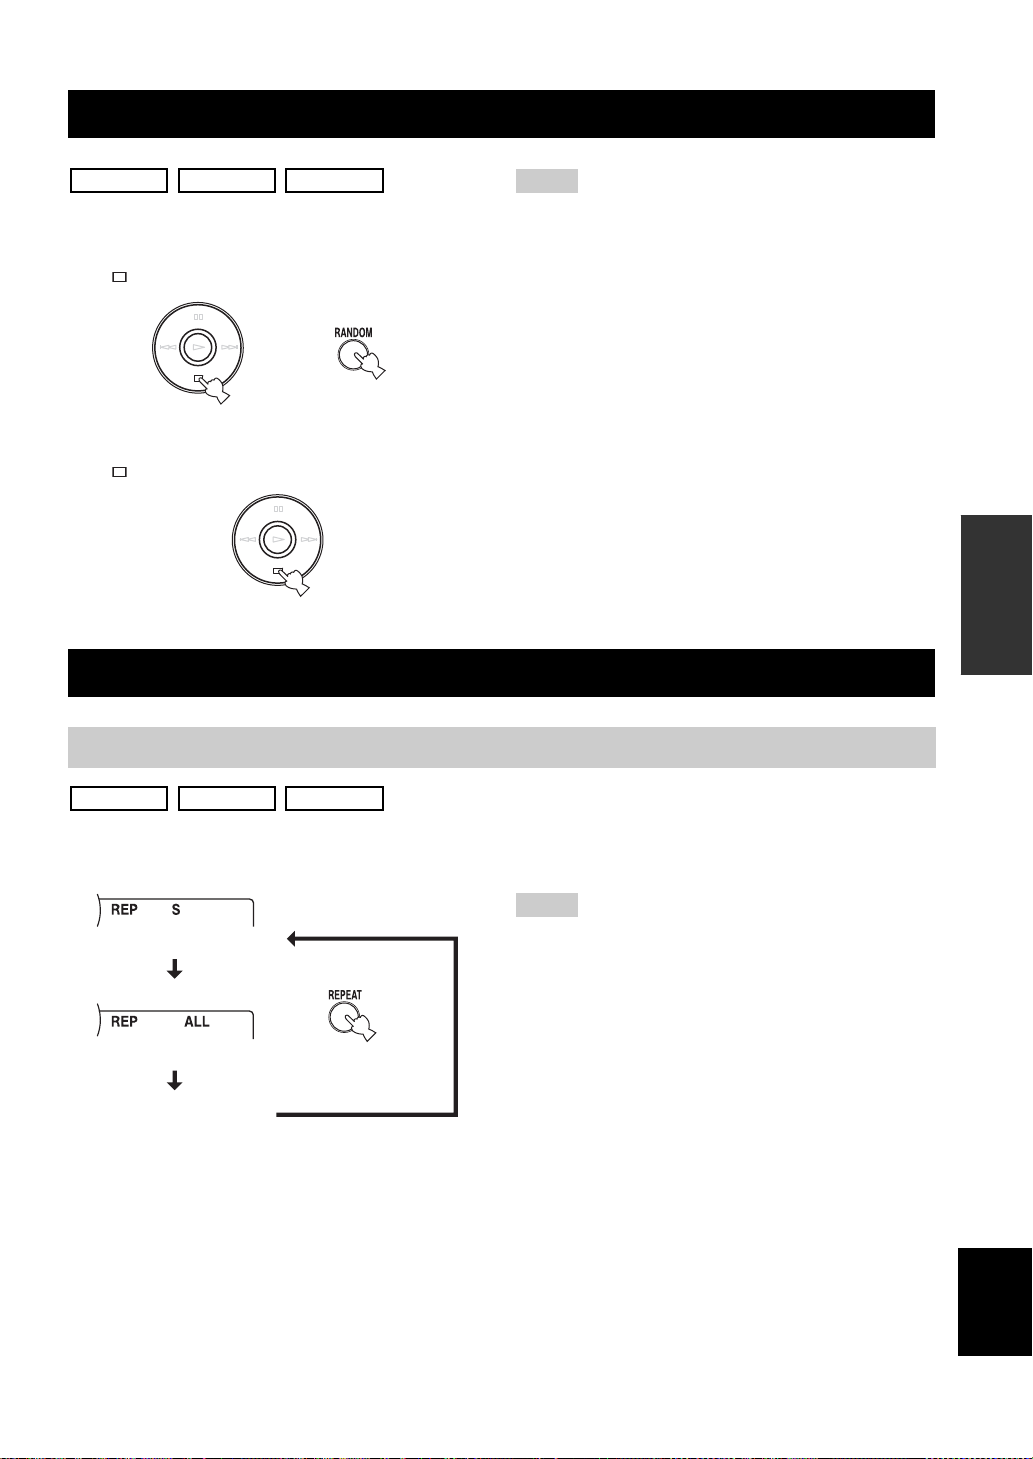
To perform random-sequence play
Press , and then, RANDOM.
+
To cancel random-sequence play
Press .
REPEAT PLAY
Repeating a selected item
Note
These operations can also be performed for Data Disc/USB.
OPERATION
USBAudio CD Data Disc
You can play back a single track or all tracks repeatedly
by pressing REPEAT during playback. The repeat
playback mode changes each time you press REPEAT.
(Single repeat)
(Full repeat)
(off)
S (Single repeat)
A single track is played back repeatedly.
ALL (Full repeat)
All tracks (the entire disc) are played back repeatedly.
Note
These operations can also be performed for Data Disc/USB.
y
Repeat play also works for program play and random-sequence
play.
English
13 En
Page 18
REPEAT PLAY
Repeat A-B
Audio CD
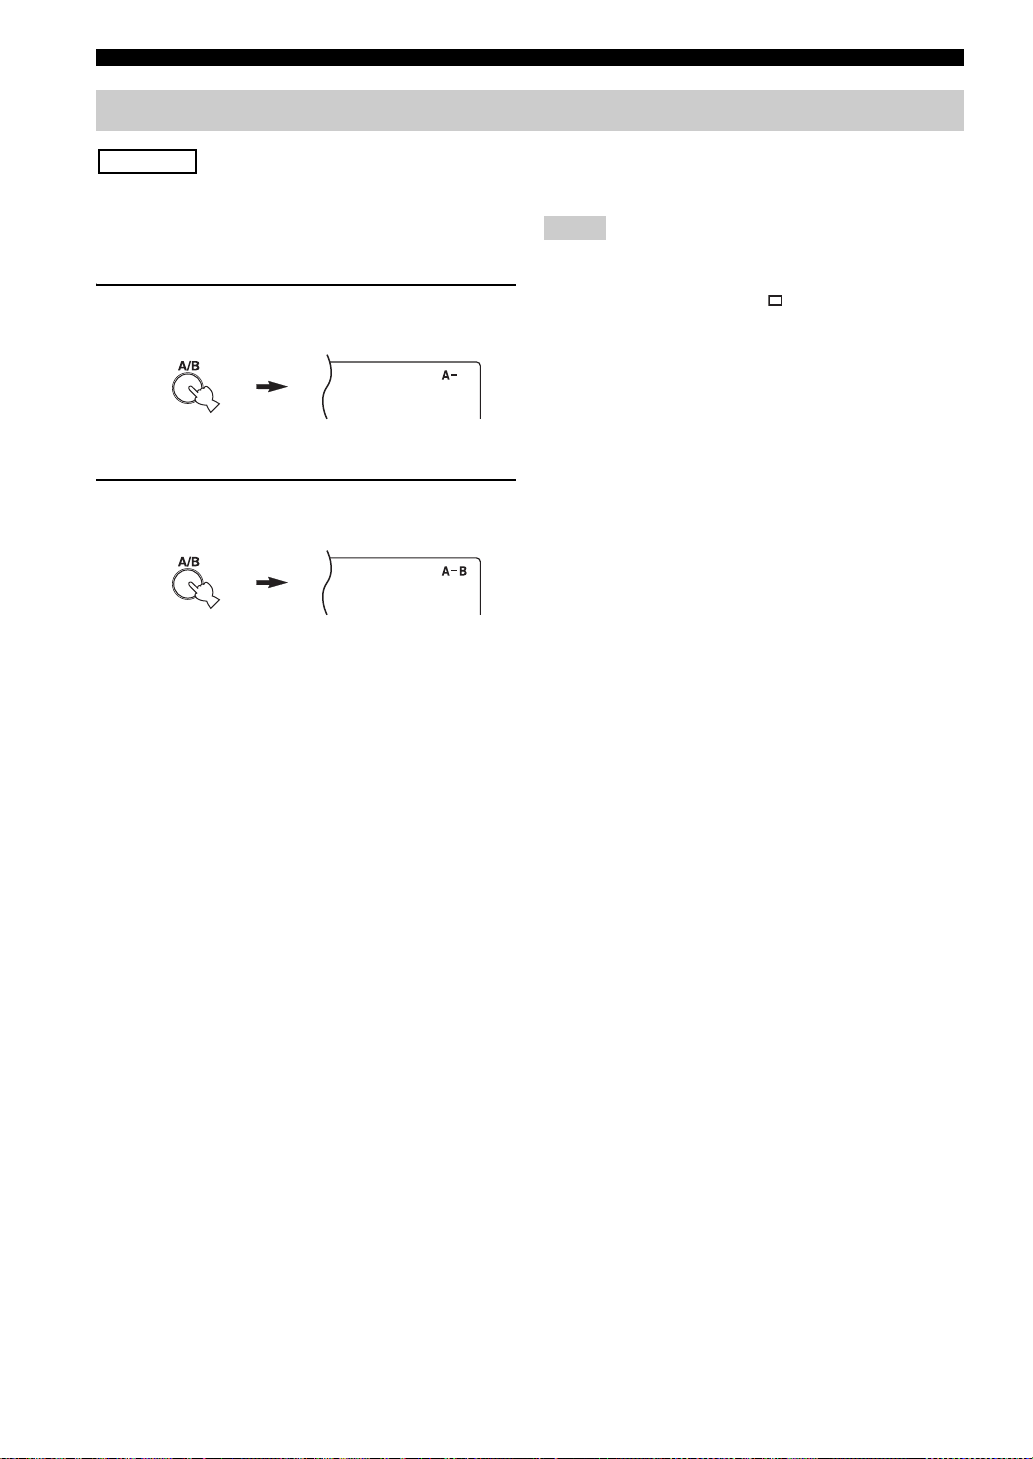
You can repeat a specified section of a track by pressing
A/B during playback to set two points (start and end
points).
1 Press A/B to select the start point of repeat
play.
“A-” lights up.
2 Press A/B to select the end point of repeat
play.
“A-B” lights up.
The selected section is played back repeatedly.
To cancel repeat A-B
Press A/B again to make “A-B” disappear from the front
panel display.
Notes
• You cannot set repeat A-B from one track to another track.
• This operation is not available for Data Disc and USB.
• If you stop playback by pressing , repeat A-B is canceled.
• You cannot use repeat A-B when this unit is in PURE DIRECT
mode.
14 En
Page 19
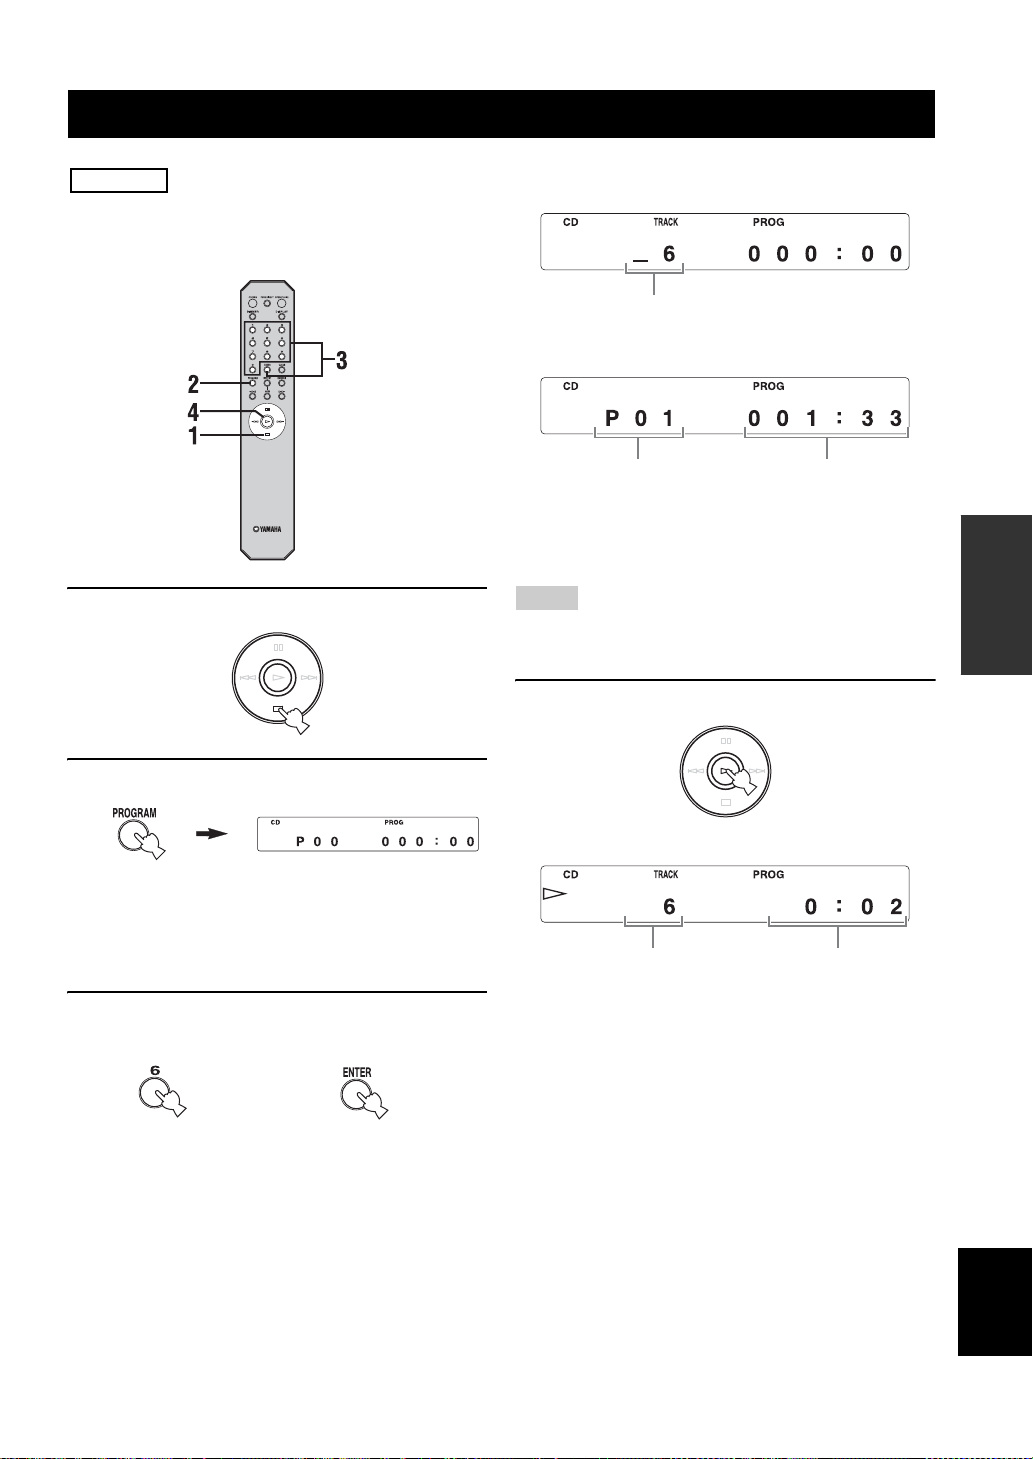
PROGRAM PLAY
Audio CD
You can customize the playback order of up to 50 tracks
stored on an Audio CD. This operation is not available for
Data Disc and USB.
1 Press s to stop playback.
Following information is displayed.
When you press “6”:
The selected track number
When you press ENTER:
Total number of tracks
currently programmed
Repeat this operation to program more tracks.
You can select the same track again.
Note
Pressing PROGRAM in program input mode exits to normal
playback mode, though programmed tracks are stored.
Total time of the tracks
currently programmed
4 Press h to start program play.
OPERATION
2 Press PROGRAM.
• In this mode, the front panel
display shows as normally, even
when this unit is in PURE
DIRECT mode.
This unit is set to program input mode.
3 Program a desired track by pressing the
corresponding numeric button and ENTER.
+
Following information is displayed.
Current track
Elapsed time of the
current track
English
15 En
Page 20
PROGRAM PLAY
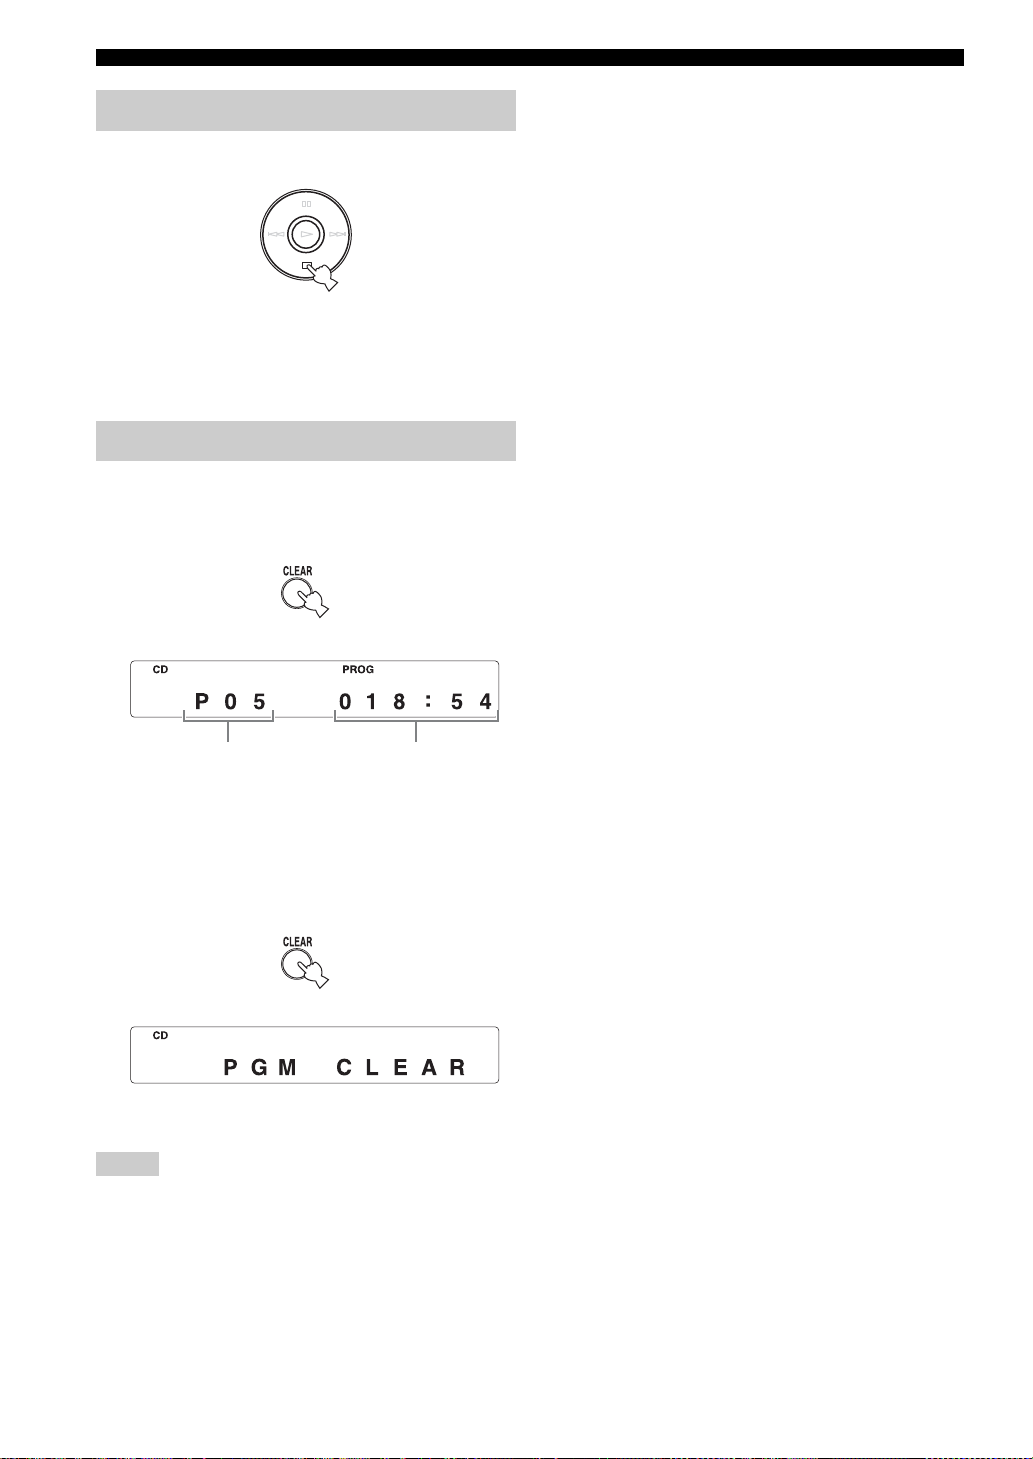
Stopping program playback
Press s.
To restart program play, press h after pressing
PROGRAM.
Playback starts from the first programmed track number.
Clearing programmed track
There are several methods, as described below.
■ Clearing the last programmed track
Press CLEAR during program input mode.
Following information is displayed.
Total number of the
tracks currently
programmed
The last programmed track is cleared.
Total time of the
tracks currently
programmed
■ Clearing all programmed tracks
Press CLEAR after exiting program input
mode.
Following information is displayed.
All programmed tracks are cleared.
The display is turned off after 2 seconds.
Note
Switching to USB mode, opening the disc tray or switching off
the POWER clears all programmed tracks.
16 En
Page 21
ADDITIONAL INFORMATION
NOTES ABOUT DISCS/MP3, WMA FILES
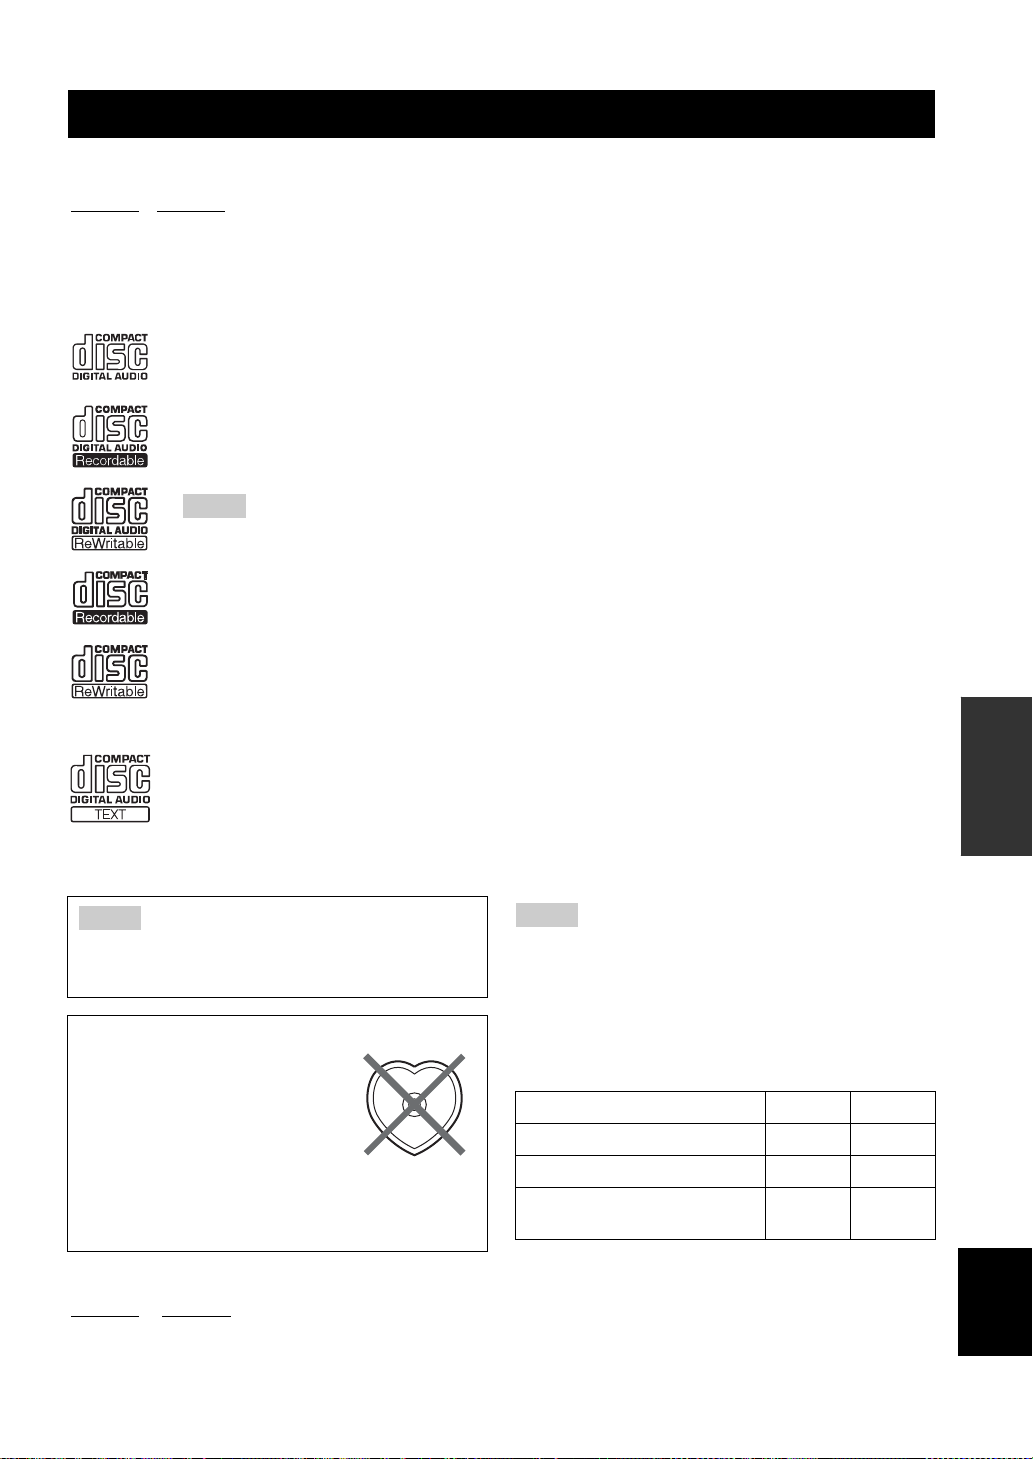
■ Discs playable with this unit
Audio CD Data Disc
This player is designed for playing back compact discs
bearing the marks shown below. Never attempt to load
any other type of disc into the unit. The unit can also play
back 8-cm (3-inch) compact discs.
....
Compact discs (digital audio)
The most popular discs for commercially
available audio CDs.
....
CD-R,CD-RW digital audio discs
Music CDs made by copying onto a CD-R
or CD-RW (including MP3 or WMA
format files).
Notes
• Be sure to use a CD-R or CD-RW disc made
by a reliable manufacture.
• Be sure to use a CD-R or CD-RW disc which
has at least one of the following phrases on
the disc or disc case.
FOR CONSUMER
FOR CONSUMER USE
FOR MUSIC USE ONLY
• Be sure to use a finalized CD-R or CD-RW
disc.
....
CD-TEXT discs
The discs recorded with text data such as
album titles, track titles and artist names.
Though these discs can be played back
with ordinary CD players, the text data is
not displayed.
MP3
MP3 is a standard technology and format for compressing
an audio sequence into a small-sized file. However, the
original level of sound quality is preserved during
playback.
The playable formats are:
• MPEG-1 Audio Layer-3
Bitrate*: 32-320 kbps
Sampling frequency: 44.1/48/32 kHz
• MPEG-2 Audio Layer-3, 2
Bitrate*: 8-160 kbps
Sampling frequency: 24/22.05/16 kHz
• MPEG-2.5 Audio Layer-2
Bitrate*: 8-160 kbps
Sampling frequency: 12/11.025/8 kHz
* Variable bitrate is supported.
WMA
“WMA (Windows Media Audio)” is a Microsoft file
format for encoding digital audio files similar to MP3
though can compress files at a higher rate than MP3.
The playable formats are:
•Version 8
• Version 9 (Standard and variable bitrates are
supported. Professional and Lossless are not
supported.)
• High Profile
Bitrate*: 32-320 kbps
Sampling frequency: 48/44.1/32 kHz
• Mid Profile
Bitrate: 16-32 kbps
Sampling frequency: 22.05/16 kHz
* Both constant and variable bitrates are supported.
INFORMATION
ADDITIONAL
Note
This compact disc player may not be able to play back some
CD-RW discs or discs on which recording was not made
correctly.
To prevent a malfunction of this unit:
• Do not use any nonstandard
shaped disc (heart, etc.) available
on the market because it might
damage the unit.
• Do not use a disc with tape, stickers, or paste on it. If
you use such a disc, the disc may get stuck in the
unit, or damage to the unit may result.
■ About MP3 and WMA files
Data Disc USB
You can play back MP3 and WMA files recorded on a
CD-R/CD-RW and those stored on a USB device.
Notes
• Playback for Data Disc starts in alphanumeric order.
• Playback for USB starts in order by date and time of creation.
• Copyright-protected WMA (DRM) files cannot be played back
by this unit.
• The disc must be ISO9660 compatible.
• Text data contained in files is not displayed on this unit.
• The maximum file and folder numbers are as follows.
Data Disc USB
Maximum file number
Maximum folder number
Maximum file number per
folder
512 999
255 255
511 255
(continued on the next page)
17 En
English
Page 22
NOTES ABOUT DISCS/MP3, WMA FILES
■ Notes about handling compact discs
• Always handle a disc with care so that its surface is not
scratched.
• Compact discs are not subjected to wear during
playback, but damage to the disc surface when the disc
is being handled can adversely affect the disc playback.
• Be sure to use a felt-tip pen or similar writing tool
when writing on the label side of the disc. Do not use a
ballpoint pen, pencil, or other hard-tipped writing tool,
as these may damage the disc and may adversely affect
the disc playback.
• Do not warp discs.
• When a disc is not being used, remove it from the unit
and store in an appropriate case.
• When removing or storing a disc, be careful not to
scratch the playing surface.
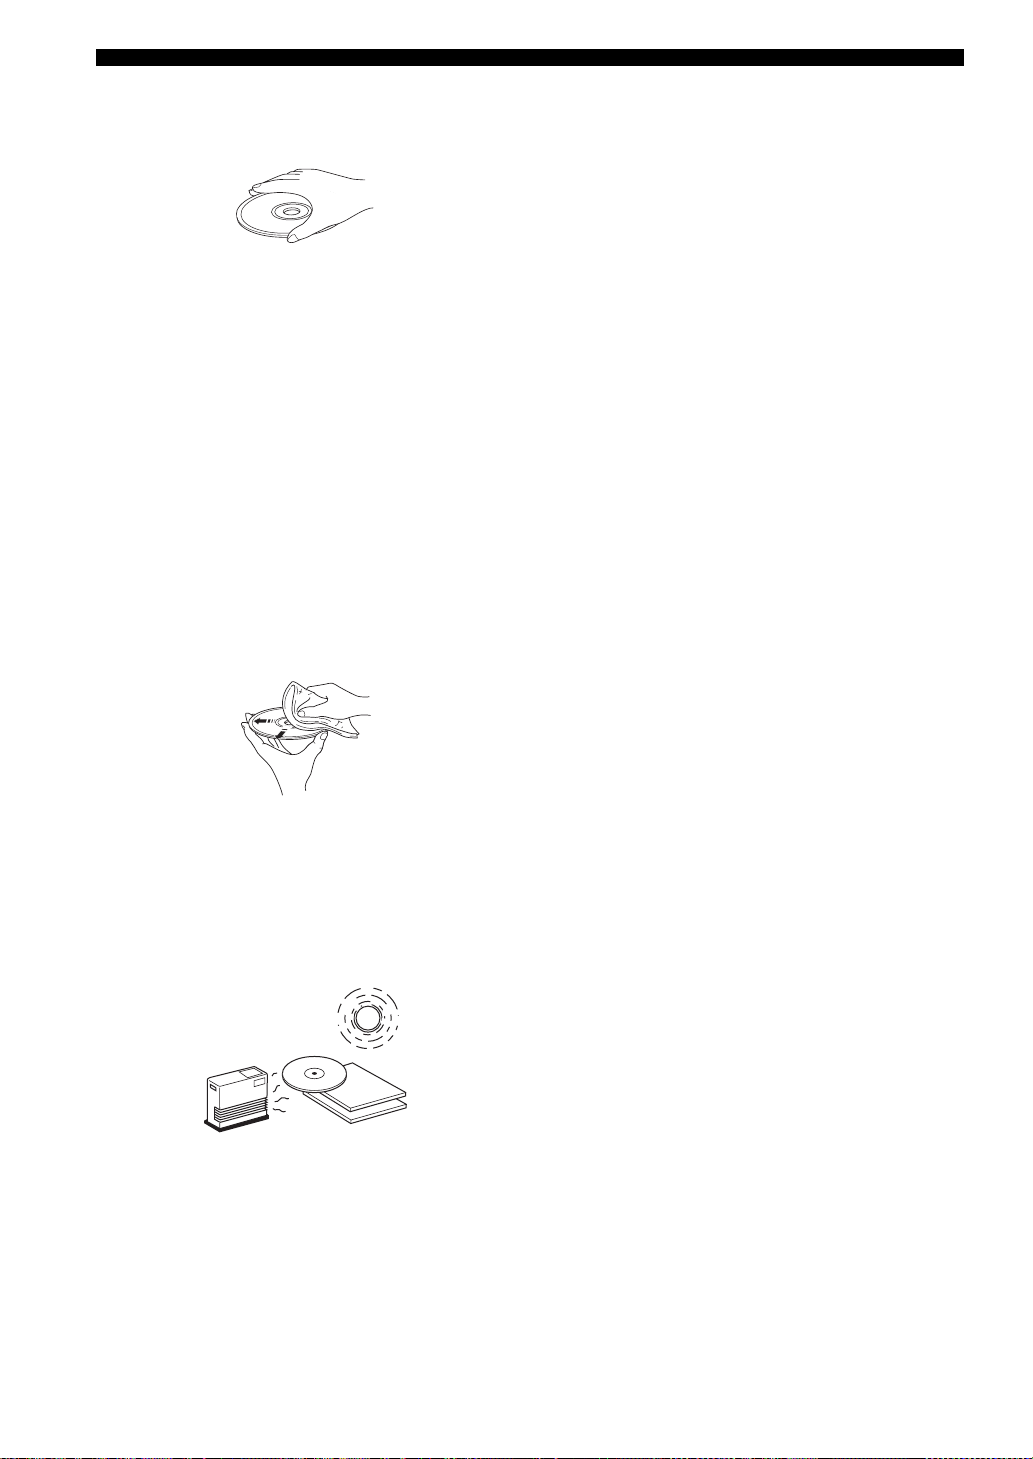
• Compact discs are not affected by small particles of
dust or fingerprints on their playing surface, but even
so they should be kept clean. Wipe by using a clean,
dry cloth.
Do not wipe with a circular motion; wipe straight
outward from the center.
To play back an 8-cm (3-inch) CD
Place it in the inner recessed area of the disc tray. Do not
put a normal (12-cm) CD on top of an 8-cm (3-inch) CD.
• Do not try to clean the disc’s surface by using any type
of disc cleaner, record spray, anti-static spray or liquid,
or any other chemical-based liquid because such
substances might irreparably damage the disc’s
surface.
• Do not expose discs to direct sunlight, high
temperature or high humidity for a long period of time,
as these might warp or otherwise damage the disc.
No!
18 En
Page 23
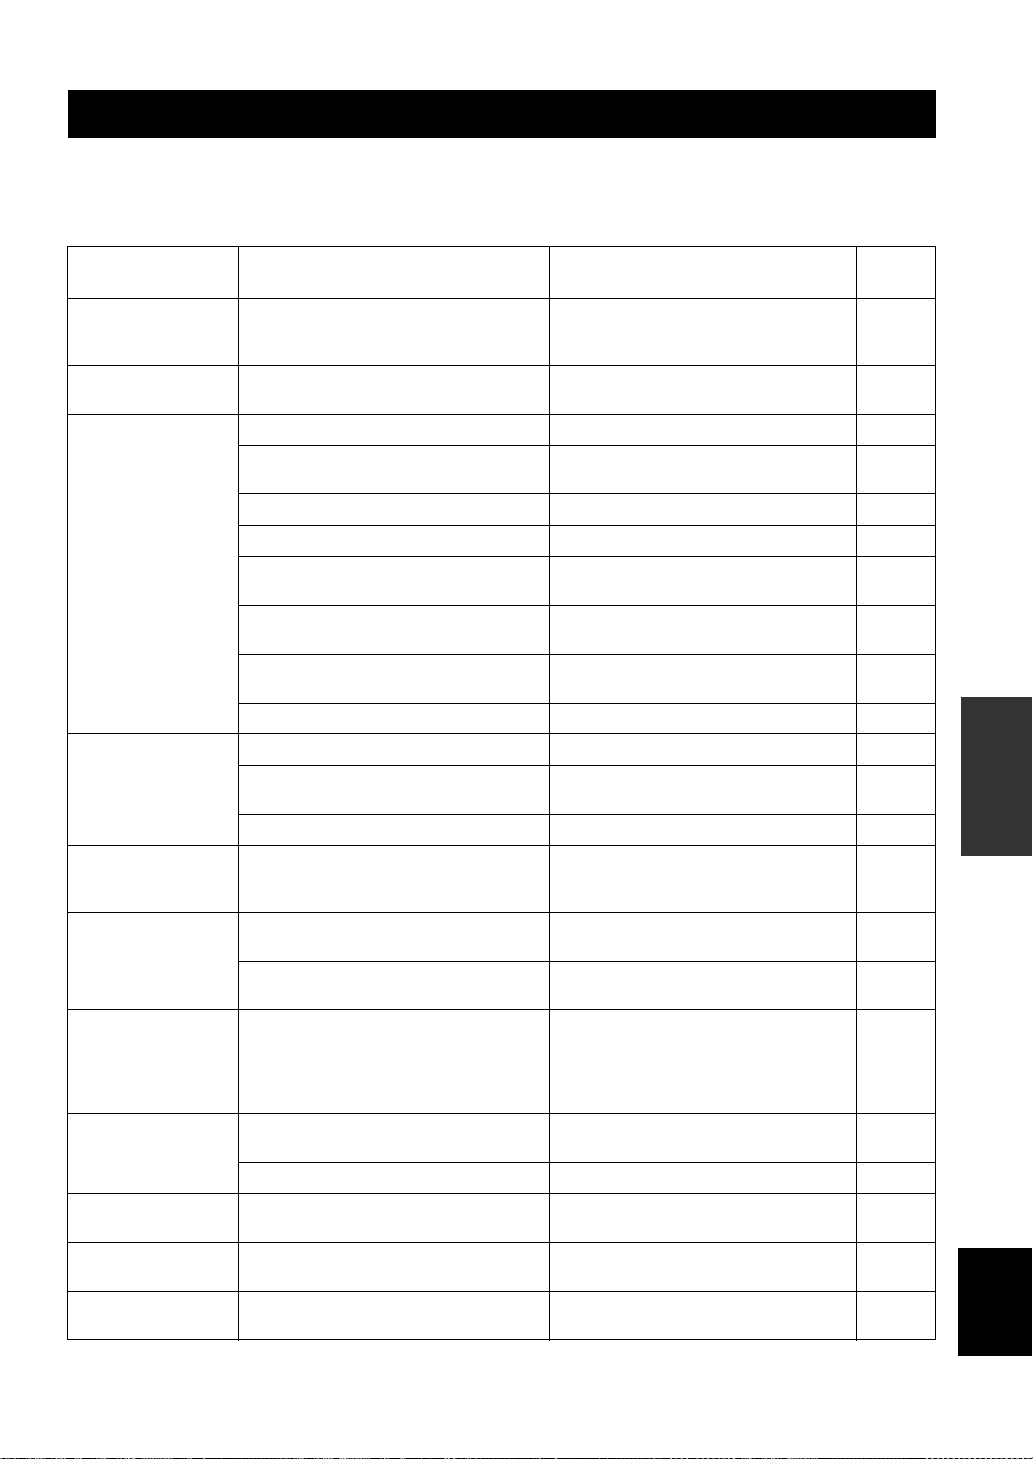
TROUBLESHOOTING
If the unit fails to operate normally, check the following points to determine whether the problem can be corrected by the
simple measures suggested. If it cannot be corrected, or if the problem is not listed in the Problems column, disconnect
the power cable and contact your authorized Yamaha dealer or service center for help.
Problems Possible Causes Solutions
This unit fails to turn
on.
The disc tray does
not close completely.
Disc playback does
not start.
USB playback does
not start.
Playback is delayed,
or begins at the
wrong place.
No sound. Improper output cable connections. Connect the cables properly. If the problem
Sound of a
component
connected to the
DIGITAL OUT jacks
is not played.
Sound “skips”. This unit is being subjected to vibrations or
Sound “hums”. Improper cable connections. Securely connect the audio cables. If the
Noise from a nearby
tuner.
Noise from inside of
the disc tray.
The power cable is not connected to the AC IN
inlet on the rear panel or not plugged in the wall
outlet.
A foreign object is obstructing the tray. Carefully check the disc tray and remove the
The disc is damaged. Check the disc carefully; replace it if necessary. —
There is moisture on the laser pickup. Wait 20 to 30 minutes after switching on the
The disc is loaded upside down. Reload the disc with the label side up. 9
The disc is dirty. Clean the disc. 18
The format of the MP3 or WMA file is not
compatible with this unit.
The CD-RW (ReWritable) disc is not recorded
correctly.
The disc is a non-standard disc not playable with
this unit.
This unit is in USB mode. Switch to disc mode by pressing CD/USB.5, 9
Improper USB device connections. Connect the USB device again. 8
The format of the MP3 or WMA file is not
compatible with this unit.
This unit is in disc mode. Switch to USB mode by pressing CD/USB.5, 9
The disc may be scratched or damaged. Check the disc carefully; replace it if necessary.
Improper amplifier operation. Set the amplifier controls to the correct input
PURE DIRECT is turned on. Turn PURE DIRECT off. Or make an analog
impacts.
The disc is dirty. Clean the disc. 18
The tuner is too close to this unit. Move the tuner and this unit farther apart.
The disc may be warped. Replace the disc.
Connect the power cable firmly.
foreign object.
unit ON before trying to play back a disc.
Replace the disc with a correctly recorded disc
playable with this unit.
Replace the disc with a correctly recorded disc
playable with this unit.
Replace the disc with a correctly recorded disc
playable with this unit.
Replace the file with a correctly recorded file
playable with this unit.
persists, the cables may be defective.
selection.
connection.
Relocate this unit.
problem persists, the cables may be defective.
Refer to
page
8
—
—
17
17
17
17
18
7
—
10
—
7
—
—
INFORMATION
English
ADDITIONAL
19 En
Page 24

TROUBLESHOOTING
Problems Possible Causes Solutions
The remote control
does not work or
function properly.
Wrong distance or angle. The remote control functions within a
Direct sunlight or lighting (from an inverter type
of fluorescent lamp, etc.) is striking the remote
control sensor of this unit.
The batteries are weak. Replace all batteries. 6
maximum range of 6 m (20 ft) and no more than
30 degrees off-axis from the front panel.
Reposition this unit.
SPECIFICATIONS
Audio Section
• Frequency response......................................2 Hz - 20 kHz, ± 0.5 dB
• Harmonic distortion + noise (1 kHz) .........................0.002 % or less
• S/N ratio ....................................................................110 dB or more
• Dynamic ................................................................... 100 dB or more
• Output voltage (1 kHz, 0 dB)...........................................2.0 ± 0.3 V
Laser Diode Properties
• Material.................................................................................GaAlAs
• Wavelength ............................................................................ 790 nm
• Laser Output.............................................................. max. 1.23 μW*
* This output is the value measured at a distance of about 200 mm
from the objective lens surface on the Optical Pick-up Block.
General
• Power requirements
U.S.A. and Canada models...............................AC 120 V, 60 Hz
Australia model ................................................AC 240 V, 50 Hz
Europe and U.K. models .......................... AC 220-240 V, 50 Hz
Asia and General models.......AC 110-120/220-240 V, 50/60 Hz
Korea model .....................................................AC 220 V, 60 Hz
China model......................................................AC 220 V, 50 Hz
• Power consumption ...................................................................16 W
• Dimensions (W × H × D) ................................... 435 × 96 × 300 mm
• Weight ......................................................................................6.2 kg
Please note that all specifications are subject to change
without notice.
Refer to
page
6
—
20 En
Page 25
Limited Guarantee for European Economic Area (EEA) and Switzerland
Thank you for having chosen a Yamaha product. In the unlikely event that your Yamaha product needs guarantee service, please contact the dealer from
whom it was purchased. If you experience any difficulty, please contact Yamaha representative office in your country. You can find full details on our
website (http://www.yamaha-hifi.com/ or http://www.yamaha-uk.com/ for U.K. resident).
The product is guaranteed to be free from defects in workmanship or materials for a period of two years from the date of the original purchase. Yamaha
undertakes, subject to the conditions listed below, to have the faulty product or any part(s) repaired, or replaced at Yamaha’s discretion, without any charge
for parts or labour. Yamaha reserves the right to replace a product with that of a similar kind and/or value and condition, where a model has been
discontinued or is considered uneconomic to repair.
Conditions
1. The original invoice or sales receipt (showing date of purchase, product code and dealer’s name) MUST accompany the defective product, along with a
statement detailing the fault. In the absence of this clear proof of purchase, Yamaha reserves the right to refuse to provide free of charge service and the
product may be returned at the customer’s expense.
2. The product MUST have been purchased from an AUTHORISED Yamaha dealer within the European Economic Area (EEA) or Switzerland.
3. The product must not have been the subject of any modifications or alterations, unless authorised in writing by Yamaha.
4. The following are excluded from this guarantee:
a. Periodic maintenance and repair or replacement of parts due to normal wear and tear.
b. Damage resulting from:
(1) Repairs performed by the customer himself or by an unauthorised third party.
(2) Inadequate packaging or mishandling, when the product is in transit from the customer. Please note that it is the customer’s responsibility to
ensure the product is adequately packaged when returning the product for repair.
(3) Misuse, including but not limited to (a) failure to use the product for its normal purpose or in accordance with Yamaha’s instructions on the
proper use, maintenance and storage, and (b) installation or use of the product in a manner inconsistent with the technical or safety standards in
force in the country where it is used.
(4) Accidents, lightning, water, fire, improper ventilation, battery leakage or any cause beyond Yamaha’s control.
(5) Defects of the system into which this product is incorporated and/or incompatibility with third party products.
(6) Use of a product imported into the EEA and/or Switzerland, not by Yamaha, where that product does not conform to the technical or safety
standards of the country of use and/or to the standard specification of a product sold by Yamaha in the EEA and/or Switzerland.
(7) Non AV (Audio Visual) related products.
(Products subject to “Yamaha AV Guarantee Statement” are defined in our website at http://www.yamaha-hifi.com/ or
http://www.yamaha-uk.com/ for U.K. resident.)
5. Where the guarantee differs between the country of purchase and the country of use of the product, the guarantee of the country of use shall apply.
6. Yamaha may not be held responsible for any losses or damages, whether direct, consequential or otherwise, save for the repair or replacement of the
product.
7. Please backup any custom settings or data, as Yamaha may not be held responsible for any alteration or loss to such settings or data.
8. This guarantee does not affect the consumer’s statutory rights under applicable national laws in force or the consumer’s rights against the dealer arising
from their sales/purchase contract.
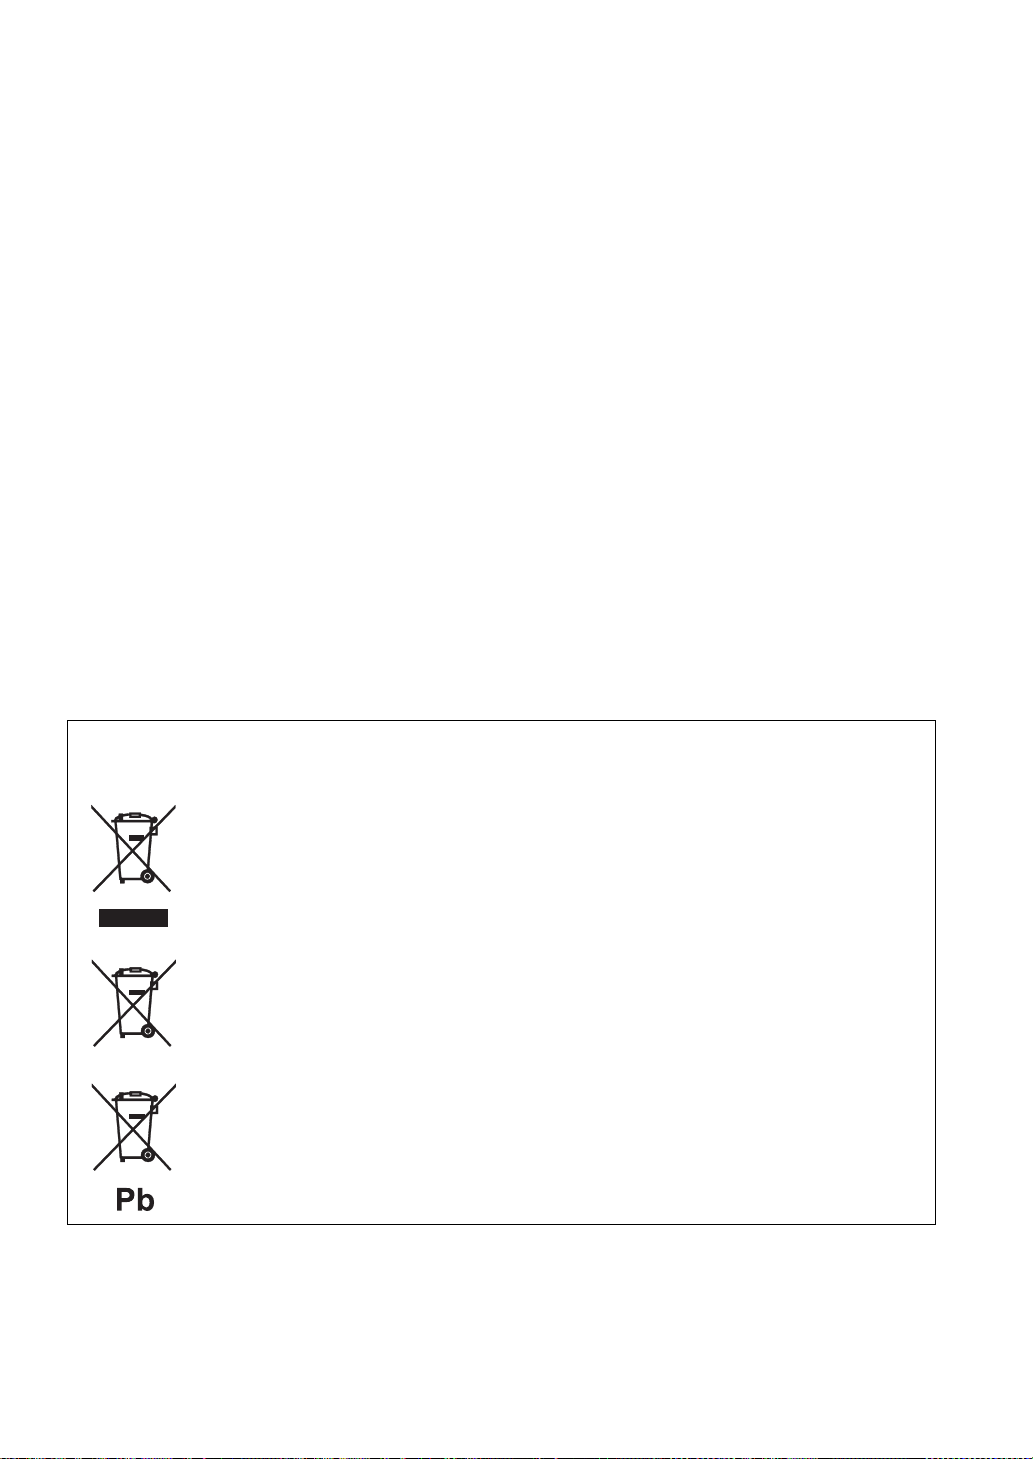
Information for Users on Collection and Disposal of Old Equipment
and Used Batteries
These symbols on the products, packaging, and/or accompanying documents mean that used electrical and
electronic products and batteries should not be mixed with general household waste.
For proper treatment, recovery and recycling of old products and used batteries, please take them to
applicable collection points, in accordance with your national legislation and the Directives 2002/96/EC
and 2006/66/EC.
By disposing of these products and batteries correctly, you will help to save valuable resources and prevent
any potential negative effects on human health and the environment which could otherwise arise from
inappropriate waste handling.
For more information about collection and recycling of old products and batteries, please contact your
local municipality, your waste disposal service or the point of sale where you purchased the items.
[Information on Disposal in other Countries outside the European Union]
These symbols are only valid in the European Union. If you wish to discard these items, please contact
your local authorities or dealer and ask for the correct method of disposal.
Note for the battery symbol (bottom two symbol examples):
This symbol might be used in combination with a chemical symbol. In this case it complies with the
requirement set by the Directive for the chemical involved.
Page 26

ATTENTION : VEUILLEZ LIRE CE QUI SUIT AVANT D’UTILISER L’APPAREIL.
1 Pour utiliser l’appareil au mieux de ses possibilités, lisez
attentivement ce mode d’emploi. Conservez-le soigneusement
pour référence.
2 Installez cet appareil audio dans un endroit bien aéré, frais,
sec et propre – à l’abri de la lumière directe du soleil, des
sources de chaleur ou de vibration, des poussières, de
l’humidité et du froid. Ménagez un espace libre d’au moins
10 cm au-dessus, 10 cm sur la gauche et la droite et 10 cm à
l’arrière de l’appareil pour qu’il soit bien ventilé.
3 Placez l’appareil loin des équipements, moteurs et
transformateurs électriques, pour éviter les ronflements
parasites.
4 N’exposez pas l’appareil à des variations brutales de
température, ne le placez pas dans un environnement très
humide (par exemple dans une pièce contenant un
humidificateur) car cela peut entraîner la condensation
d’humidité à l’intérieur de l’appareil qui elle-même peut être
responsable de secousse électrique, d’incendie, de dommage à
l’appareil ou de blessure corporelle.
5 Evitez d’installer l’appareil dans un endroit où des objets
peuvent tomber, ainsi que là où l’appareil pourrait être exposé
à des éclaboussures ou des gouttes d’eau. Sur le dessus de
l’appareil, ne placez pas :
– D’autres appareils qui peuvent endommager la surface de
l’appareil ou provoquer sa décoloration.
– Des objets se consumant (par exemple, une bougie) qui
peuvent être responsables d’incendie, de dommage à
l’appareil ou de blessure corporelle.
– Des récipients contenant des liquides qui peuvent être à
l’origine de secousse électrique ou de dommage à
l’appareil.
6 Ne couvrez pas l’appareil d’un journal, d’une nappe, d’un
rideau, etc. car cela empêcherait l’évacuation de la chaleur.
Toute augmentation de la température intérieure de l’appareil
peut être responsable d’incendie, de dommage à l’appareil ou
de blessure corporelle.
7 Ne branchez pas la fiche du cordon d’alimentation de
l’appareil sur une prise secteur aussi longtemps que tous les
raccordements n’ont pas été effectués.
8 Ne pas faire fonctionner l’appareil à l’envers. Il risquerait de
chauffer et d’être endommagé.
9 N’exercez aucune force excessive sur les commutateurs, les
boutons et les cordons.
10 Pour débrancher la fiche du cordon d’alimentation au niveau
de la prise secteur, saisissez la fiche et ne tirez pas sur le
cordon.
11 Ne nettoyez pas l’appareil au moyen d’un solvant chimique,
ce qui pourrait endommager la finition.
12 N’alimentez l’appareil qu’à partir de la tension prescrite.
Alimenter l’appareil sous une tension plus élevée est
dangereux et peut être responsable d’incendie, de dommage à
l’appareil ou de blessure corporelle. Yamaha ne saurait être
tenue responsable des dommages résultant de l’alimentation
de l’appareil sous une tension autre que celle prescrite.
13 Pour éviter les dommages dus à la foudre, débranchez le
cordon d’alimentation de la prise secteur ou de l’appareil
pendant les orages électriques.
14 Ne tentez pas de modifier ni de réparer l’appareil. Consultez
le service Yamaha compétent pour toute réparation qui serait
requise. Le coffret de l’appareil ne doit jamais être ouvert,
quelle que soit la raison.
15 Si vous envisagez de ne pas vous servir de l’appareil pendant
une longue période (par exemple, pendant les vacances),
débranchez la fiche du cordon d’alimentation au niveau de la
prise secteur.
16 Installez cet appareil à proximité de la prise secteur et à un
emplacement où la fiche d’alimentation est facilement
accessible.
17 Lisez la section intitulée « GUIDE DE DÉPANNAGE » où
figurent une liste d’erreurs de manipulation ordinaires avant
de conclure à une anomalie une anomalie de l’appareil.
18 Avant de déplacer cet appareil, appuyez sur POWER pour le
mettre hors tension, puis débranchez la fiche câble
d’alimentation de la prise murale.
19 Les piles ne doivent pas être exposées à une chaleur extrême,
par exemple au soleil, à une flamme, etc.
20 VOLTAGE SELECTOR
(Modèles pour l’Asie et Standard uniquement)
Le commutateur VOLTAGE SELECTOR placé sur le
panneau arrière de cet appareil doit être convenablement
positionné AVANT de brancher la fiche du cordon
d’alimentation secteur. Les tensions d’alimentation possibles
sont :
....................................CA 110/120/220/230–240 V, 50/60 Hz
L’appareil est relié au bloc d’alimentation tant qu’il
reste branché à la prise de courant murale, même si
vous mettez l’appareil hors tension en appuyant sur
POWER.
AVERTISSEMENT
POUR RÉDUIRE LES RISQUES D’INCENDIE OU
DE SECOUSSE ÉLECTRIQUE, N’EXPOSEZ PAS
CET APPAREIL À LA PLUIE OU À L’HUMIDITÉ.
SÉCURITÉ LASER
L’appareil utilise un laser. En raison des risques de blessure des yeux,
le retrait du couvercle ou les réparations de l’appareil devront être
confiés exclusivement à un technicien d’entretien qualifié.
DANGER
Risque d’exposition au laser en cas d’ouverture. Eviter toute
exposition au faisceau. Lorsque cet appareil est branché à la prise de
courant, ne pas approcher les yeux de l’ouverture du plateau changeur
et des autres ouvertures pour regarder à l’intérieur.
Le laser de cet appareil peut émettre un rayonnement
dépassant les limites de la calsse 1.
i Fr
Page 27

TABLE DES MATIÈRES
INTRODUCTION
CARACTÉRISTIQUES......................................... 2
ACCESSOIRES FOURNIS................................... 2
COMMANDES ET FONCTIONS ........................ 3
Panneau avant............................................................3
Afficheur du panneau avant....................................... 4
Télécommande...........................................................5
Installation des piles dans la télécommande.............. 6
Utilisation de la télécommande .................................6
PRÉPARATIONS
RACCORDEMENTS............................................. 7
Raccordement de votre amplificateur........................7
Raccordement du cordon d’alimentation fourni........ 8
Raccordement de périphériques USB........................ 8
OPÉRATIONS
FONCTIONNEMENT DE BASE ......................... 9
Lancement de la lecture.............................................9
Suspension de la lecture...........................................10
Arrêt de la lecture.................................................... 10
Mise hors tension..................................................... 10
Lecture de la plage souhaitée................................... 10
Pour améliorer la qualité audio (mode PURE
DIRECT) ............................................................. 11
Retour au début d’une plage souhaitée....................11
Avance ou retour rapide........................................... 11
Modification de l’afficheur du panneau avant......... 12
Modification de la luminosité de l’afficheur du
panneau avant...................................................... 12
LECTURE EN SÉQUENCE ALÉATOIRE ......13
LECTURE RÉPÉTÉE ......................................... 13
Répétition d’un élément sélectionné........................ 13
Répétition A-B......................................................... 14
LECTURE PROGRAMMÉE..............................15
Arrêt de la lecture programmée ............................... 16
Effacement d’une plage programmée......................16
INTRODUCTION
PRÉPARATIONS OPÉRATIONS
COMPLÉMENTAIRES
INFORMATIONS
INFORMATIONS COMPLÉMENTAIRES
REMARQUES CONCERNANT LES DISQUES/
FICHIERS MP3, WMA................................... 17
GUIDE DE DÉPANNAGE .................................. 19
CARACTÉRISTIQUES TECHNIQUES ........... 20
■ À propos de ce manuel
•Le symbole y appelle votre attention sur un conseil d’utilisation.
• Dans ce manuel, les CD audio sont appelés « Audio CD », les disques MP3/WMA sont appelés « Data Disc » et les
fichiers MP3/WMA enregistrés sur le périphérique USB sont appelés « USB ».
• Ce mode d’emploi a été imprimé avant la fabrication de l’appareil. Les caractéristiques et la présentation ont pu être
modifiées à fin d’amélioration, etc. En cas de divergence entre le mode d’emploi et l’appareil, ce dernier prime.
1 Fr
Français
Page 28
INTRODUCTION
CARACTÉRISTIQUES
◆ Sortie numérique optique
◆ Sortie numérique coaxiale
◆ Possibilité d’utiliser les disques CD-R, CD-RW
(Pour plus de détails, reportez-vous à la page 17.)
◆ Possibilité d’utiliser les disques MP3, WMA
◆ Possibilité d’utiliser les fichiers MP3, WMA stockés
sur un périphérique USB
ACCESSOIRES FOURNIS
Vérifiez que vous avez reçu tous les articles suivants :
Télécommande Câble stéréo RCA
Piles (× 2)
(AA, R6, UM-3)
◆ Lecture programmée (Audio CD uniquement)
◆ Lecture en séquence aléatoire
◆ Lecture répétée de plage unique/disque entier
◆ Lecture répétée A-B (Audio CD uniquement)
◆ Réglage des informations affichées et de la luminosité
◆ Fonction PURE DIRECT
Cordon d’alimentation
2 Fr
Page 29
Panneau avant
COMMANDES ET FONCTIONS
INTRODUCTION
1 POWER
Appuyez sur cette touche pour mettre l’appareil sous
tension ou hors tension (ON/OFF).
y
Le témoin POWER situé au-dessus de cette touche s’allume
lorsque l’appareil est sous tension.
2 Port USB
Raccordez votre périphérique USB. Pour plus de détails,
voir page 8.
3 PURE DIRECT
Activez ou désactivez le mode PURE DIRECT pour
améliorer la qualité audio.
y
Le témoin PURE DIRECT situé au-dessus de cette touche
s’allume lorsque l’appareil est en mode
plus de détails, voir page 11.
4 Plateau du disque
Pour charger un disque.
5 (Ouvrir/Fermer)
Pour ouvrir ou fermer le plateau du disque.
6 / (Sauter/Rechercher en arrière),
/ (Sauter/Rechercher en avant)
/ : Pour passer à la plage suivante.
/ : Pour revenir au début de la plage en cours.
/ (à deux reprises) : Pour revenir à la plage
précédente.
Maintenez la touche / ou / enfoncée
pour effectuer une recherche vers l’arrière/avant.
y
Chaque fois que vous maintenez la touche / ou
/ enfoncée, la vitesse de recherche augmente de
2 niveaux.
PURE DIRECT. Pour
7 (Lire)
Pour lancer la lecture.
8 (Pause)
Pour suspendre la lecture. Appuyez sur ou pour
reprendre la lecture.
9 (Arrêter)
Pour arrêter la lecture.
0 Témoin USB
S’allume/s’éteint lorsque cet appareil est en mode USB/
disque, et clignote si la lecture du périphérique USB est en
cours.
A Afficheur du panneau avant
Indique l’état actuel de l’appareil.
B Capteur de télécommande
Reçoit les signaux émis par la télécommande.
Français
3 Fr
Page 30

COMMANDES ET FONCTIONS
Afficheur du panneau avant
Audio CD
Data Disc USB
1 Allume l’icône du mode de lecture sélectionné.
2 Indique les affichages de temps.
(Pour plus de détails, reportez-vous à la page 12.)
3 Indique le numéro de la plage sélectionnée ou lue.
4 Indique le numéro de fichier.
5 S’allume lorsque cet appareil est en mode disque (reportez-
vous à la page 9) et lorsqu’il reconnaît un Audio CD dans le
plateau.
6 S’allume lors de la lecture d’un fichier MP3.
7 S’allume lors de la lecture d’un fichier WMA.
4 Fr
Page 31

Télécommande
COMMANDES ET FONCTIONS
1 Émetteur de signal infrarouge (p. 6)
Envoie des signaux infrarouges à cet appareil.
2 CD/USB (p. 9)
Pour basculer entre le mode disque et le mode USB.
3 DIMMER (p. 12)
Pour sélectionner le niveau de luminosité de l’afficheur du
panneau avant.
4 Touches numériques (p. 10)
Pour sélectionner directement une plage.
5 PROGRAM (p. 15)
Pour activer ou désactiver le mode de lecture
programmée.
6 / (Rechercher en arrière/en avant)
(p. 11)
Pour effectuer une recherche en arrière/en avant.
7 / (Sauter en arrière/en avant) (p. 11)
Pour passer à la plage suivante/précédente ou pour revenir
au début de la plage en cours.
8 OPEN/CLOSE (p. 9)
Pour ouvrir ou fermer le plateau du disque.
9 PURE DIRECT (p. 11)
Pour activer ou désactiver le mode PURE DIRECT.
INTRODUCTION
0 DISPLAY (p. 12)
Pour changer le mode d’affichage du temps.
A ENTER (p. 15)
Pour confirmer le numéro de plage lorsque cet appareil est
en mode d’entrée de lecture programmée.
B CLEAR (p. 16)
Pour effacer la plage programmée.
C REPEAT (p. 13)
Pour répéter la lecture d’une plage unique ou de toutes les
plages.
D RANDOM (p. 13)
Pour activer la lecture en séquence aléatoire.
E A/B (p. 14)
Pour activer la répétition A-B.
F (Pause) (p. 10)
Pour suspendre la lecture.
G (Lire) (p. 9)
Pour lancer la lecture.
H (Arrêter) (p. 10)
Pour arrêter la lecture.
Français
5 Fr
Page 32

COMMANDES ET FONCTIONS
Installation des piles dans la télécommande
1 Appuyez sur la partie et faites glisser le
couvercle du logement des piles pour le
retirer.
2 Insérez deux piles fournies (AA, R6, UM-3) en
respectant les polarités (+ et –) indiquées
dans le logement.
3 Faites glisser le couvercle pour le remettre
en place jusqu’à ce qu’il s’encliquette.
■ Remarques concernant les piles
• Changez les deux piles lorsque vous remarquez que la
portée de la télécommande est plus courte.
• Utilisez des piles AA, R6, UM-3.
• Assurez-vous que les pôles sont correctement orientés.
Voir l’illustration à l’intérieur du logement des piles.
• Retirez les piles si la télécommande n’est pas utilisée
pendant un certain temps.
• N’utilisez pas tout à la fois des piles neuves et des piles
usagées.
• N’utilisez pas non plus des piles de deux types
différents (par exemple, des piles alcalines et des piles
au manganèse). Lisez attentivement les indications
indiquées sur l’emballage, car leur forme et leur
couleur peuvent être identiques alors que leur type
diffère.
• Si les piles ont fui, mettez-les au rebut immédiatement.
Dans la mesure du possible, ne touchez pas le produit
qui a fui et évitez qu’il ne vienne en contact avec vos
vêtements, etc. Nettoyez soigneusement le logement
des piles avant de mettre en place des piles neuves.
• Ne vous débarrassez pas des piles comme s’il s’agissait
ordures ménagères ; traitez-les conformément à la
réglementation locale.
Utilisation de la télécommande
La télécommande émet un faisceau infrarouge
directionnel.
Veillez à diriger la télécommande directement vers le
capteur de télécommande situé sur le panneau avant de cet
appareil pendant le fonctionnement.
Maximum 6 m
■ Manipulation de la télécommande
• Entre la télécommande et l’appareil, l’espace doit être
libre d’obstacle.
• Ne renversez pas d’eau ou d’autre liquide sur la
télécommande.
• Ne laissez pas tomber la télécommande.
• Ne conservez pas ou ne rangez pas la télécommande
dans les endroits suivants :
– très humides, par exemple près d’un bain
– très chauds, par exemple près d’un appareil de
chauffage ou d’un poêle
– exposés à des températures très basses
– poussiéreux
• N’exposez pas le capteur de télécommande à une
lumière puissante, en particulier à une lampe
fluorescente à onduleur, sinon la télécommande ne
fonctionnera pas correctement. Le cas échéant, faites
en sorte que le boîtier ne soit pas directement éclairé.
6 Fr
Page 33

PRÉPARATIONS
RACCORDEMENTS
Raccordement de votre amplificateur
ATTENTION
• Avant d’établir une connexion, veillez à ce que l’appareil, l’amplificateur et tous les autres composants soient hors
tension.
• Lors des connexions, veillez à ce que les bornes d’entrée de l’amplificateur ou de tout autre composant soient celles
appropriées.
• Il se peut que des parasites soient évidents si cet appareil est proche d’un autre élément tel qu’un tuner. Dans une telle
situation, éloigner les appareils les uns des autres afin d’éliminer ces parasites.
PRÉPARATIONS
Câble
stéréo RCA
(fourni)
• La sortie numérique est désactivée lorsque cet appareil est en
mode PURE DIRECT.
Pour raccorder cet appareil à votre amplificateur, choisissez l’une des méthodes ci-dessous.
Lors de l’utilisation des bornes ANALOG
OUT de cet appareil ( )
Raccordez ces bornes aux bornes CD (ou AUX) de
l’amplificateur à l’aide du câble stéréo RCA fourni. Pour
plus de détails concernant ces connexions, reportez-vous
au mode d’emploi de l’amplificateur utilisé.
• Veillez à ce que le câble provenant des bornes de sortie
gauche (L) et droite (R) soit raccordé aux bornes
correspondantes (gauche et droite) de l’amplificateur
ou de l’autre composant.
Câble coaxialCâble optique
Amplificateur
Lors de l’utilisation de la borne DIGITAL
OUT (COAXIAL) de cet appareil ( )
Raccordez cette borne à la borne d’entrée numérique d’un
amplificateur à l’aide d’un câble coaxial disponible sur le
marché.
Lors de l’utilisation de la borne DIGITAL
OUT (OPTICAL) de cet appareil ( )
Raccordez cette borne à la borne d’entrée optique d’un
amplificateur à l’aide d’un câble optique disponible sur le
marché.
• Utilisez un câble optique fiable.
Français
7 Fr
Page 34

RACCORDEMENTS
Raccordement du cordon d’alimentation fourni
Modèles pour l’Asie et
Standard uniquement
Modèles pour l’Europe
et le Royaume-Uni
Vers la prise murale avec le
cordon d’alimentation fourni
Raccordement de périphériques USB
Cet appareil est équipé d’un port USB et peut accéder aux
fichiers MP3 ou WMA enregistrés sur votre périphérique
USB. Raccordez votre périphérique USB au port USB
situé sur le panneau avant de cet appareil.
ATTENTION
Ne débranchez pas votre périphérique USB lors de la
lecture des données du périphérique USB, ou lorsque le
témoin USB clignote.
■ VOLTAGE SELECTOR
(Modèles pour l’Asie et Standard
uniquement)
Le sélecteur VOLTAGE SELECTOR situé sur le panneau
arrière de cet appareil doit être réglé sur votre tension
secteur locale AVANT le raccordement du câble
d’alimentation fourni à la prise murale.
Un réglage incorrect du sélecteur VOLTAGE
SELECTOR peut endommager l’appareil et créer un
risque d’incendie.
Tournez le sélecteur VOLTAGE SELECTOR dans le sens
horaire ou antihoraire pour le mettre en position correcte à
l’aide d’un tournevis.
Les tensions sont les suivantes :
.............................. CA 110/120/220/230-240 V, 50/60 Hz
■ Raccordement de cet appareil à la prise
murale
Branchez le cordon d’alimentation fourni sur la prise AC
IN située sur le panneau arrière de cet appareil, puis sur la
prise murale une fois les autres connexions établies.
■ Périphériques USB pris en charge
Cet appareil prend en charge les périphériques de stockage
de masse USB (tels que les mémoires flash, les lecteurs de
carte ou les lecteurs audio portables) qui utilisent le format
FAT16 ou FAT32.
Remarques
• Il se peut que certains appareils ne fonctionnent pas
correctement même s’ils répondent aux conditions requises.
• Ne raccordez pas de périphériques autres que des périphériques
de stockage de masse USB : chargeur USB, concentrateurs
USB, PC, disques durs externes, etc.
• Lorsque vous insérez plusieurs cartes mémoire simultanément
dans un lecteur de carte raccordé au port USB, une seule des
cartes mémoire est reconnue.
• Yamaha et ses fournisseurs ne peuvent être tenus responsables
de la perte de données enregistrées sur les périphériques USB
raccordés à cet appareil. Par précaution, il est recommandé de
créer des copies de sauvegarde des fichiers.
• La possibilité d’utiliser et d’alimenter tous les types de
périphériques USB n’est pas garantie.
8 Fr
Page 35

OPÉRATIONS
Ce mode d’emploi décrit la manière de faire fonctionner cet appareil au moyen de la
télécommande.
Pour faire fonctionner cet appareil au moyen des commandes du panneau avant, utilisez les
touches correspondantes du panneau avant.
Les icônes , et indiquent les formats de données
Audio CD Data Disc USB
musicales pouvant être utilisés lors de l’opération.
FONCTIONNEMENT DE BASE
Remarques
• Lorsque vous chargez un disque, installez-le à l’intérieur des
guides de disque (4 repères indiqués sur le plateau du disque).
• Si le disque n’est pas correctement installé, l’appareil ne peut
pas le lire. Dans ce cas, ouvrez le plateau du disque et
réinstallez le disque.
2 Appuyez sur OPEN/CLOSE pour fermer le
plateau du disque.
1 Appuyez sur la touche POWER pour mettre
l’appareil sous tension.
OPÉRATIONS
2 Appuyez sur CD/USB pour basculer entre le
mode disque et le mode USB.
Lorsque le mode USB est sélectionné, le témoin USB
s’allume et lorsque le mode disque est sélectionné, le
témoin USB s’éteint.
y
Ce réglage est conservé, même si vous mettez cet appareil hors
tension.
Lancement de la lecture
■ Lecture de disques
Audio CD Data Disc
1 Appuyez sur OPEN/CLOSE pour ouvrir le
plateau du disque et charger un disque.
Étiquette vers le haut.
y
Vous pouvez également fermer le plateau du disque en appuyant
sur h ou sur une touche numérique, ou encore en appuyant
délicatement sur le bord avant du plateau du disque. Si vous avez
refermé le plateau de l’une de ces manières, la lecture commence
automatiquement.
3 Appuyez sur h pour lancer la lecture.
Pour les Audio CD, la lecture commence à la
première plage et pour les Data Disc, elle s’effectue
par ordre alphanumérique des noms de fichier.
Informations affichées à l’étape 2
Audio CD
Nombre total de plages Durée totale d’enregistrement
du disque
Data Disc
Français
Plateau du disque
Nombre total de fichiers
9 Fr
Page 36

FONCTIONNEMENT DE BASE
■ Lecture de périphériques USB
USB
Mise hors tension
Raccordez votre périphérique USB au port USB
situé sur le panneau avant. (Pour plus de détails,
reportez-vous à la page 8.)
Lorsque le mode USB est sélectionné (le témoin USB
s’allume), le premier nom de fichier apparaît sur
l’afficheur du panneau avant (reportez-vous à la page 12)
et la lecture démarre automatiquement dans l’ordre, selon
la date et l’heure de création si le périphérique USB
contient des fichiers lisibles.
Pour débrancher les périphériques USB
Appuyez sur pour arrêter la lecture, puis débranchez le
périphérique USB.
Remarque
Ne débranchez pas votre périphérique USB lors de la lecture des
données du périphérique USB, ou lorsque le témoin USB
clignote.
Suspension de la lecture
USBAudio CD Data Disc
Appuyez à nouveau sur POWER.
Si vous mettez l’appareil hors tension alors que le mode
disque est sélectionné, à la prochaine mise sous tension, la
lecture du disque inséré dans le plateau démarre
automatiquement. Si vous mettez l’appareil hors tension
alors que le mode USB est sélectionné, la lecture du
périphérique USB raccordé démarre automatiquement.
Lecture de la plage souhaitée
Audio CD
Sélectionnez une plage de votre choix à l’aide
des touches numériques.
Exemple : Pour sélectionner la plage numéro 12
Appuyez sur « 1 », puis sur « 2 ».
+
Les informations suivantes s’affichent.
Numéro de la plage sélectionnée
La lecture démarre dans les 2 secondes.
Appuyez sur e.
Pour reprendre la lecture, appuyez à nouveau sur e
(ou appuyez sur h).
Arrêt de la lecture
USBAudio CD Data Disc
Appuyez sur s.
Si vous appuyez à nouveau sur h, la lecture commence à
partir de la première plage.
Remarque
Cette opération n’est pas disponible pour les Data Disc et les
USB.
y
Vous pouvez également sélectionner et lire une plage de votre
choix pendant la lecture.
10 Fr
Page 37

Pour améliorer la qualité audio
(mode PURE DIRECT)
USBAudio CD Data Disc
Appuyez sur PURE DIRECT.
Cet appareil est en mode PURE DIRECT.
• Le témoin PURE DIRECT s’allume.
• La sortie numérique est désactivée.
• L’afficheur du panneau avant est désactivé seuls les témoins et
les messages minimum requis sont affichés pendant la lecture.
Remarque
Effectuez le raccordement aux bornes ANALOG OUT lorsque
vous utilisez le mode PURE DIRECT (reportez-vous à la page 7).
y
• Appuyez à nouveau sur PURE DIRECT pour désactiver le
mode PURE DIRECT.
• Ce réglage est conservé, même si vous mettez cet appareil hors
tension.
FONCTIONNEMENT DE BASE
y
• Ces opérations peuvent également être exécutées pour les Data
Disc/USB.
• Ces opérations peuvent également être effectuées lorsque
l’appareil est en mode pause.
• Ces opérations peuvent également être effectuées à l’aide des
touches b/w et f/a du panneau avant.
Avance ou retour rapide
USBAudio CD Data Disc
Pour avancer rapidement, appuyez à une reprise
sur pendant la lecture.
Pour reculer rapidement, appuyez à une reprise
sur pendant la lecture.
OPÉRATIONS
Retour au début d’une plage souhaitée
USBAudio CD Data Disc
Pour lancer la lecture à partir du début de la
plage suivante, appuyez à une reprise sur .
Pour lancer la lecture à partir du début de la
plage en cours, appuyez à une reprise sur .
Pour lancer la lecture à partir du début de la
plage précédente, appuyez à deux reprises sur
.
Pour reprendre la lecture, appuyez sur au
point souhaité.
y
• Ces opérations peuvent également être exécutées pour les Data
Disc/USB.
• Pendant ces opérations, le son peut être reproduit (même s’il est
légèrement brouillé) dans l’un ou l’autre sens. Cela peut être
utile pour repérer une position précise dans une plage, ou pour
vérifier rapidement le contenu. Selon le fichier MP3/WMA, il
se peut qu’aucun son ne soit reproduit.
• Chaque fois que vous appuyez sur la touche ou , la
vitesse de recherche augmente de 2 niveaux.
• Ces opérations peuvent également être effectuées en maintenant
les touches b/w ou f/a du panneau avant
enfoncées pendant plus de 2 secondes.
Français
11 Fr
Page 38

FONCTIONNEMENT DE BASE
Modification de l’afficheur du panneau avant
■ Lors de la lecture d’un Audio CD
Audio CD
Vous pouvez sélectionner les affichages suivants du panneau avant (1 - 3) en appuyant sur DISPLAY.
1 Temps écoulé de la plage en cours (par défaut)
2 Temps restant de la plage en cours
3 Temps restant du disque
■ Lors de la lecture d’un Data Disc ou d’un périphérique USB
USBData Disc
Vous pouvez afficher temporairement le nom du fichier en appuyant sur DISPLAY.
Ces exemples d’affichages du panneau avant s’appliquent à un fichier MP3.
1 Temps écoulé de la plage en cours
Revient en mode d’affichage normal après
2 Nom de fichier*
* 28 caractères maximum
Remarque
Cet appareil ne peut afficher que des caractères alphanumériques.
l’affichage d’un nom de fichier.
Modification de la luminosité de l’afficheur du panneau avant
Appuyez sur DIMMER pour modifier le niveau de
luminosité de l’afficheur du panneau avant.
Chaque fois que vous appuyez sur DIMMER, le niveau
de luminosité change dans l’ordre suivant :
Max (le plus lumineux) J Level1 (par défaut) J Level2
J Level3 (le plus sombre) J Max
Remarques
• La luminosité est légèrement réduite pendant la lecture, sauf si
le niveau est réglé au maximum.
• La luminosité peut être temporairement réduite pendant
certaines opérations, sauf si le niveau est réglé au maximum.
• Ce réglage est conservé, même si vous mettez cet appareil hors
tension.
12 Fr
Page 39

LECTURE EN SÉQUENCE ALÉATOIRE
USBAudio CD Data Disc
Vous pouvez lire les plages en séquence aléatoire.
Pour effectuer une lecture en séquence aléatoire
Appuyez sur , puis sur RANDOM.
+
Pour annuler la lecture en séquence aléatoire
Appuyez sur .
LECTURE RÉPÉTÉE
Remarque
Ces opérations peuvent également être exécutées pour les Data
Disc/USB.
OPÉRATIONS
Répétition d’un élément sélectionné
USBAudio CD Data Disc
Vous pouvez lire une plage unique ou l’ensemble des
plages de manière répétée en appuyant sur REPEAT
pendant la lecture. Le mode de lecture répétée change à
chaque appui de la touche REPEAT.
(Répétition d’une
seule plage)
(Répétition complète)
(désactivée)
S (Répétition d’une seule plage)
Une même plage est lue de manière répétée.
ALL (Répétition complète)
Toutes les plages (le disque entier) sont lues de manière
répétée.
Remarque
Ces opérations peuvent également être exécutées pour les Data
Disc/USB.
y
La lecture répétée fonctionne également pour la lecture
programmée et la lecture en séquence aléatoire.
Français
13 Fr
Page 40

LECTURE RÉPÉTÉE
Répétition A-B
Audio CD
Vous pouvez répéter une section particulière d’une plage
en appuyant sur la touche A/B pendant la lecture afin de
définir deux points (points de départ et de fin).
1 Appuyez sur A/B pour sélectionner le point
de départ de la lecture répétée.
« A- » s’allume.
2 Appuyez sur A/B pour sélectionner le point
de fin de la lecture répétée.
« A-B » s’allume.
La section sélectionnée est lue de manière répétée.
Pour annuler la répétition A-B
Appuyez à nouveau sur A/B pour que l’indication « A-B »
disparaisse de l’afficheur du panneau avant.
Remarques
• Vous ne pouvez pas sélectionner la répétition A-B d’une plage à
une autre.
• Cette opération n’est pas disponible pour les Data Disc et les
USB.
• Si vous arrêtez la lecture en appuyant sur , la répétition A-B
est annulée.
• Vous ne pouvez pas utiliser la répétition A-B lorsque cet
appareil est en mode PURE DIRECT.
14 Fr
Page 41

LECTURE PROGRAMMÉE
Audio CD
Vous pouvez personnaliser l’ordre de lecture de 50 plages
maximum enregistrées sur un CD audio. Cette opération
n’est pas disponible pour les Data Disc et les USB.
1 Appuyez sur s pour arrêter la lecture.
2 Appuyez sur PROGRAM.
Les informations suivantes s’affichent.
Lorsque vous appuyez sur « 6 »:
Numéro de la plage sélectionnée
Lorsque vous appuyez sur ENTER :
Nombre total de plages
actuellement
programmées
Durée totale des plages
actuellement
programmées
Répétez cette opération pour programmer d’autres
plages.
Vous pouvez sélectionner à nouveau la même plage.
Remarque
Si vous appuyez sur PROGRAM en mode d’entrée de lecture
programmée, l’appareil revient en mode de lecture normale, mais
les plages programmées sont mémorisées.
4 Appuyez sur h pour lancer la lecture
programmée.
OPÉRATIONS
• Dans ce mode, l’afficheur du
panneau avant indique les
informations habituelles, même
si cet appareil est en mode PURE
DIRECT.
Cet appareil est en mode d’entrée de lecture
programmée.
3 Programmez la plage souhaitée en
sélectionnant la touche numérique
correspondante et en appuyant sur ENTER.
+
Les informations suivantes s’affichent.
Plage en cours
Temps écoulé de la
plage en cours
Français
15 Fr
Page 42

LECTURE PROGRAMMÉE
Arrêt de la lecture programmée
Appuyez sur s.
Pour redémarrer la lecture programmée, appuyez
sur PROGRAM, puis sur h.
La lecture commence à partir du premier numéro de plage
programmé.
Effacement d’une plage programmée
Vous disposez de différentes méthodes (voir description
ci-dessous).
■ Effacement de la dernière plage
programmée
Appuyez sur CLEAR en mode d’entrée de
lecture programmée.
Remarque
Le passage en mode USB, l’ouverture du plateau du disque ou la
mise hors tension de l’appareil à l’aide de la touche POWER
entraînent l’effacement de l’ensemble des plages programmées.
Les informations suivantes s’affichent.
Nombre total de
plages actuellement
programmées
La dernière plage programmée est effacée.
Durée totale des
plages actuellement
programmées
■ Effacement de toutes les plages
programmées
Appuyez sur CLEAR lorsque vous avez
quitté le mode d’entrée de lecture
programmée.
Les informations suivantes s’affichent.
Toutes les plages programmées sont effacées.
L’affichage s’éteint après 2 secondes.
16 Fr
Page 43

INFORMATIONS COMPLÉMENTAIRES
REMARQUES CONCERNANT LES DISQUES/FICHIERS MP3, WMA
■ Disques pouvant être lus sur cet
appareil
Audio CD Data Disc
Cet appareil est destiné exclusivement à la lecture de
disque compact portant les marques indiquées ci-dessous.
Aucun autre disque ne doit être mis en place dans ce
lecteur. L’appareil peut aussi lire des disques compacts de
8cm.
....
Disques compacts
(audionumériques)
CD audio les plus couramment utilisés
disponibles sur le marché.
....
Disques audionumériques
CD-R,CD-RW
CD de musique réalisés par copie de
fichiers (y compris MP3 ou WMA) sur un
CD-R ou CD-RW.
Remarques
• Veillez à utiliser un disque CD-R ou CD-RW
provenant d’un fabricant fiable.
• Veillez à utiliser un disque CD-R ou CD-RW
portant au moins une des phrases suivantes
sur le disque ou sur le boîtier du disque.
FOR CONSUMER
FOR CONSUMER USE
FOR MUSIC USE ONLY
• N’oubliez pas de finaliser vos CD-R ou
CD-RW.
....
Disques CD-TEXT
Disques enregistrés avec des données
textuelles telles que le titre des albums, le
titre des plages et le nom des artistes.
Ces disques peuvent être lus avec des
lecteurs de disque compact ordinaires ;
toutefois, les données textuelles ne
peuvent pas être affichées.
Remarque
Il est possible que ce lecteur de disque compact ne puisse pas
effectuer la lecture de certains disques CD-RW ou de disques
sur lesquels l’enregistrement n’a pas été effectué
correctement.
■ À propos des fichiers MP3 et WMA
Data Disc USB
Vous pouvez lire des fichiers MP3 et WMA enregistrés
sur un CD-R/CD-RW et ceux stockés sur un périphérique
USB.
MP3
Le format MP3 est une technologie standardisée et un
format permettant de compresser les fichiers audio en
fichiers de plus petite taille, tout en préservant la qualité
originale du son lors de la lecture. Cependant, le niveau de
qualité audio d’origine est préservé pendant la lecture.
Les formats lisibles sont les suivants :
• MPEG-1 Audio Layer-3
Débit binaire* : 32-320 kbits/s
Fréquence d’échantillonnage : 44,1/48/32 kHz
• MPEG-2 Audio Layer-3, 2
Débit binaire* : 8-160 kbits/s
Fréquence d’échantillonnage : 24/22,05/16 kHz
• MPEG-2.5 Audio Layer-2
Débit binaire* : 8-160 kbits/s
Fréquence d’échantillonnage : 12/11,025/8 kHz
* Débit binaire variable pris en charge.
WMA
« WMA (Windows Media Audio) » est un format de
fichier audio mis au point par Microsoft similaire au MP3,
mais compressant les fichiers à un débit supérieur au MP3.
Les formats lisibles sont les suivants :
•Version 8
• Version 9 (débits binaires standard et variable pris en
charge, formats Professional et Lossless non pris en
charge.)
• High Profile
Débit binaire* : 32-320 kbits/s
Fréquence d’échantillonnage : 48/44,1/32 kHz
• Mid Profile
Débit binaire : 16-32 kbits/s
Fréquence d’échantillonnage : 22,05/16 kHz
* Débits binaires standard et variable pris en charge.
COMPLÉMENTAIRES
INFORMATIONS
Pour éviter toute anomalie de fonctionnement
sur cet appareil :
• N’utilisez pas de disques de
formes non standard (cœur, etc.)
en vente sur le marché, car ils
risquent d’abîmer l’appareil.
• N’utilisez pas de disques
comportant du ruban adhésif, des joints ou de la
colle. Sinon, ce disque risque de se coincer dans
l’appareil et de l’endommager.
Français
(suite à la page suivante)
17 Fr
Page 44

REMARQUES CONCERNANT LES DISQUES/FICHIERS MP3, WMA
Remarques
• La lecture du Data Disc démarre par ordre alphanumérique.
• La lecture de l’USB démarre dans l’ordre, selon la date et
l’heure de création.
• Cet appareil ne peut pas lire les fichiers WMA (DRM) protégés
par les droits d’auteur.
• Le disque doit être compatible ISO9660.
• Cet appareil ne peut pas afficher les données textuelles
contenues dans les fichiers.
• Nombre maximal de fichiers et de dossiers.
Data Disc USB
Nombre maximal de fichiers
Nombre maximal de dossiers
Nombre maximal de fichiers
par dossier
512 999
255 255
511 255
■ Remarques concernant la manipulation
des disques compacts
• Manipulez avec soin le disque afin de ne pas rayer la
surface de lecture.
• N’utilisez jamais de nettoyeur pour disque ordinaire,
d’atomiseurs pour disque, d’atomiseur antistatique, de
liquides ou de solution chimique pour nettoyer la
surface des disques, car vous risqueriez de
l’endommager irrémédiablement.
• Évitez d’exposer les disques directement au soleil, à
des températures élevées ou à une forte humidité
pendant une période de temps prolongée, car cela
risque de voiler les disques.
Non !
Pour lire un disque compact de 8 cm
Placez-le dans le renfoncement du plateau du disque. Ne
mettez pas de disque compact de taille normale (12 cm)
sur un disque compact de 8 cm.
• Bien que les disques compacts ne soient pas soumis à
l’usure pendant la lecture, un endommagement de la
surface de lecture causé par une manipulation
incorrecte risque de provoquer des irrégularités dans la
lecture.
• Pour écrire sur la face portant l’étiquette, utilisez un
feutre ou un instrument similaire. N’utilisez ni stylo à
bille, ni crayon, ni aucun instrument pointu qui peuvent
endommager le disque et sérieusement affecter la
lecture du disque.
• Ne voilez pas les disques.
• Lorsque le disque n’est plus utilisé, retirez-le de
l’appareil et rangez-le dans son coffret.
• Lorsque vous retirez ou rangez un disque, veillez à ne
pas rayer la surface de lecture.
• Bien que de minuscules particules de poussière ou des
empreintes digitales n’aient aucun effet sur la lecture, il
est préférable de nettoyer la surface de lecture du
disque compact. Pour ce faire, essuyez avec un chiffon
propre et sec.
N’essuyez pas la surface du disque en un mouvement
circulaire, mais en allant du centre vers la périphérie.
18 Fr
Page 45

GUIDE DE DÉPANNAGE
Si l’appareil ne fonctionne pas correctement, vérifiez les points suivants afin de déterminer si le problème peut être
résolu à l’aide des mesures simples proposées. Si ce n’est pas le cas, ou si le problème n’est pas répertorié dans la
colonne Anomalies, débranchez le cordon d’alimentation et prenez contact avec le revendeur ou le service après-vente
agréé Yamaha le plus proche pour obtenir une assistance.
Anomalies Causes possibles Solutions
Impossible de mettre
cet appareil sous
tension.
Le plateau du disque
ne se referme pas
complètement.
La lecture du disque
ne démarre pas.
La lecture du
périphérique USB ne
démarre pas.
La lecture est
retardée ou
commence au
mauvais endroit.
Aucun son. Raccordement incorrect des câbles de sortie. Raccordez correctement les câbles. Si le
Impossible de lire le
son provenant d’un
composant raccordé
aux prises DIGITAL
OUT.
Le cordon d’alimentation n’est pas raccordé à la
prise d’entrée AC IN située sur le panneau
arrière ou à la prise murale.
Un objet obstrue le plateau. Vérifiez attentivement le plateau et retirez
Le disque est endommagé. Vérifiez attentivement le disque et remplacez-le
Présence d’humidité sur le bloc optique. Attendez 20 à 30 minutes après la mise sous
Le disque est inséré à l’envers. Rechargez le disque en orientant l’étiquette vers
Le disque est sale. Nettoyez le disque. 18
Le format du fichier MP3 ou WMA n’est pas
compatible avec cet appareil.
Le disque CD-RW (réinscriptible) n’est pas
correctement enregistré.
Il s’agit d’un disque non standard ne pouvant pas
être lu par cet appareil.
Cet appareil est en mode USB. Passez en mode disque en appuyant sur
Raccordement incorrect du périphérique USB. Procédez à nouveau au raccordement de votre
Le format du fichier MP3 ou WMA n’est pas
compatible avec cet appareil.
Cet appareil est en mode disque. Passez en mode USB en appuyant sur CD/USB.5, 9
Le disque est peut-être rayé ou endommagé. Vérifiez attentivement le disque et remplacez-le
Utilisation incorrecte de l’amplificateur. Réglez les commandes de l’amplificateur sur la
Le mode PURE DIRECT est activé. Désactivez le mode PURE DIRECT ou
Raccordez fermement le cordon d’alimentation.
l’objet. —
le cas échéant.
tension de l’appareil, puis essayez de lire le
disque.
le haut.
Remplacez le disque par un disque
correctement enregistré pouvant être lu par cet
appareil.
Remplacez le disque par un disque
correctement enregistré pouvant être lu par cet
appareil.
Remplacez le disque par un disque
correctement enregistré pouvant être lu par cet
appareil.
CD/USB.
périphérique USB.
Remplacez le fichier par un fichier
correctement enregistré pouvant être lu par cet
appareil.
le cas échéant.
problème persiste, il se peut que les câbles
soient défectueux.
sélection d’entrée correcte.
établissez une connexion analogique.
Voir la
page
8
—
—
9
17
17
17
5, 9
8
17
18
7
—
11
COMPLÉMENTAIRES
INFORMATIONS
Français
19 Fr
Page 46

GUIDE DE DÉPANNAGE
Anomalies Causes possibles Solutions
Existence de
«sauts».
Existence de
« ronflement ».
Parasites provenant
d’un tuner proche.
Parasites provenant
de l’intérieur du
plateau du disque.
La télécommande ne
fonctionne pas
correctement ou
fonctionne
anormalement.
Cet appareil est soumis à des vibrations ou à des
impacts.
Le disque est sale. Nettoyez le disque. 18
Raccordement incorrect des câbles. Raccordez fermement les câbles audio. Si le
Le tuner est trop près de l’appareil. Éloignez le tuner de cet appareil.
Le disque est peut-être voilé. Remplacez le disque.
Distance ou angle incorrects. La télécommande fonctionne jusqu’à une portée
Les rayons directs du soleil ou un éclairage
direct (provenant d’une lampe fluorescente à
changement de fréquence, etc.) frappent le
capteur de télécommande de cet appareil.
Les piles sont épuisées. Remplacez toutes les piles. 6
Déplacez cet appareil.
problème persiste, il se peut que les câbles
soient défectueux.
de 6 m et à un axe de 30 degrés maximum par
rapport au panneau avant.
Repositionnez cet appareil.
CARACTÉRISTIQUES TECHNIQUES
Voir la
page
—
7
—
—
6
—
Section audio
• Réponse en fréquence ..................................2 Hz - 20 kHz, ± 0,5 dB
• Distorsion harmonique + bruit (1 kHz) .................0,002 % ou moins
• Rapport signal/bruit....................................................110 dB ou plus
• Dynamique ................................................................. 100 dB ou plus
• Tension de sortie (1 kHz, 0 dB) .......................................2,0 ± 0,3 V
Caractéristiques de la diode laser
• Matériau ................................................................................GaAlAs
• Longueur d’onde .................................................................... 790 nm
• Puissance du laser ............................................. 1,23 μW* maximum
* Cette puissance est la valeur mesurée à une distance d’environ
200 mm à partir de la surface objective de la lentille sur le bloc de
lecteur optique.
Générales
• Alimentation
Modèles pour les États-Unis et le Canada....... CA 120 V, 60 Hz
Modèle pour l’Australie ...................................CA 240 V, 50 Hz
Modèles pour l’Europe et le Royaume-Uni
............................................................... CA 220-240 V, 50 Hz
Modèles pour l’Asie et Standard
............................................CA 110-120/220-240 V, 50/60 Hz
Modèle pour la Corée .......................................CA 220 V, 60 Hz
Modèle pour la Chine .......................................CA 220 V, 50 Hz
• Consommation........................................................................... 16 W
• Dimensions (L × H × P) .....................................435 × 96 × 300 mm
• Poids.........................................................................................6,2 kg
Noter que toutes les caractéristiques techniques sont
modifiables sans préavis.
20 Fr
Page 47

Garantie Limitée pour l’Espace Économique Européenne et la Suisse
Merci d’avoir porté votre choix sur un produit Yamaha. Dans l’hypothèse où vous devriez recourir au service de notre garantie après-vente, veuillez
contacter votre revendeur Yamaha. Si vous rencontrez la moindre difficulté, n’hésitez pas à contacter directement Yamaha dans votre pays de résidence.
Vous pouvez trouver toutes informations complémentaires sur notre site Web (http://www.yamaha-hifi.com/ ou http://www.yamaha-uk.com/ pour
les résidents au Royaume-Uni).
Yamaha garantit votre produit contre tout défaut de fabrication, pièces et main d’oeuvre, pour une durée de 2 ans à compter de la première date de vente au
détail. Yamaha s’engage, dans les conditions décrites ci-après, à procéder à la réparation du produit défectueux (ou d’un quelconque de ses composants) ou
à son remplacement à l’appréciation de Yamaha en prenant à sa charge les coûts relatifs aux pièces détachées et à la main d’oeuvre. Yamaha se réserve le
droit de remplacer le produit par un modèle semblable, de par sa valeur et ses caractéristiques, dès lors que la commercialisation dudit produit a cessé ou
bien lorsque sa réparation s’avère économiquement injustifiée.
Conditions
1. La facture d’achat originelle ou un justificatif d’achat correspondant (indiquant la date d’achat, la référence du produit et le nom du revendeur) DOIT
accompagner le produit défectueux, ainsi qu’une description précise du dysfonctionnement constaté. En l’absence de cette preuve d’achat, Yamaha se
réserve le droit de refuser le service de la garantie et le produit peut être restitué aux frais du consommateur.
2. Le produit DOIT avoir été acheté par un distributeur agréé Yamaha au sein de l’Espace Economique Européen ou en Suisse.
3. Le produit doit n’avoir fait l’objet d’aucune modification ou altération, sauf accord écrit de Yamaha.
4. Les cas suivants font obstacle à l’application de la garantie :
a. Entretien périodique et réparation ou remplacement de pièces ayant subi une usure ou défaillance normale.
b. Dommages résulótant de :
(1) Réparation effectuée par le consommateur lui-même ou par un tiers non autorisé.
(2) Emballage ou manutention inadéquats lors du transport du produit pour réparation. Veuillez noter qu’il est de la responsabilité de l’expéditeur de
s’assurer que le produit est correctement emballé.
(3) Utilisation non-conforme du produit, correspondant aux cas non limitatifs (a) d’utilisation non-conforme à l’objet normal du produit ou
nonconforme aux instructions d’utilisation, de maintenance ou d’installation publiées par Yamaha, (b) ou d’utilisation du produit incompatible
avec les normes techniques ou de sécurité en vigueur au sein du pays d’utilisation.
(4) Accidents, foudre, dégât des eaux, incendie, ventilation incorrecte, fuite de pile ou toute autre cause échappant au contrôle de Yamaha.
(5) Les défauts de la configuration dans laquelle ce produit est incorporé et/ou l’incompatibilité avec des produits tiers.
(6) Produit importé au sein de l’EEE , et/ou en Suisse, par une autre entité que Yamaha, dès lors que ce produit n’est pas conforme aux norms
techniques ou de sécurité du pays d’utilisation et/ou aux normes des produits commercialisés par Yamaha au sein de l’EEE et/ou en Suisse.
(7) Produits non audiovisuels.
(Les produits soumis à une « Déclaration de Garantie AV de Yamaha » sont indiqués sur notre site Web à l’adresse
http://www.yamaha-hifi.com/ ou http://www.yamaha-uk.com/ pour les résidents au Royaume-Uni.)
5. Lorsque la garantie diffère entre le pays d’achat et le pays d’utilisation du produit, la garantie du pays d’utilisation est applicable.
6. Yamaha ne saurait être tenu pour responsable de quelconques pertes ou dommages, directs, consécutifs ou autres, sa responsabilité au titre de la
garantie étant strictement limitée à la réparation ou au remplacement du produit.
7. Nous vous invitons à sauvegarder toutes les données ou réglages personnalisés de votre produit, Yamaha ne pouvant être tenu responsable de leur
modification ou perte.
8. La présente garantie laisse intégralement subsister les droits que le consommateur peut détenir au titre de la garantie légale en vigueur ou au titre du
contrat de vente conclu avec son revendeur.
Information concernant la Collecte et le Traitement des piles usagées et
des déchets d’équipements électriques et électroniques
Les symboles sur les produits, l’emballage et/ou les documents joints signifient que les produits électriques ou
électroniques usagés ainsi que les piles ne doivent pas être mélangés avec les déchets domestiques habituels.
Pour un traitement, une récupération et un recyclage appropriés des déchets d’équipements électriques et
électroniques et des piles usagées, veuillez les déposer aux points de collecte prévus à cet effet, conformément à la
réglementation nationale et aux Directives 2002/96/EC et 2006/66/EC.
En vous débarrassant correctement des déchets d’équipements électriques et électroniques et des piles usagées,
vous contribuerez à la sauvegarde de précieuses ressources et à la prévention de potentiels effets négatifs sur la
santé humaine qui pourraient advenir lors d’un traitement inapproprié des déchets.
Pour plus d’informations à propos de la collecte et du recyclage des déchets d’équipements électriques et
électroniques et des piles usagées, veuillez contacter votre municipalité, votre service de traitement des déchets ou
le point de vente où vous avez acheté les produits.
[Information sur le traitement dans d’autres pays en dehors de l’Union Européenne]
Ces symboles sont seulement valables dans l’Union Européenne. Si vous souhaitez vous débarrasser de déchets
d’équipements électriques et électroniques ou de piles usagées, veuillez contacter les autorités locales ou votre
fournisseur et demander la méthode de traitement appropriée.
Note pour le symbole « pile » (deux exemples de symbole ci-dessous) :
Ce symbole peut être utilisé en combinaison avec un symbole chimique. Dans ce cas il respecte les exigences
établies par la Directive pour le produit chimique en question.
Page 48

VORSICHT: VOR DER BEDIENUNG DIESES GERÄTES DURCHLESEN.
1
Um optimales Leistungsvermögen sicherzustellen, lesen Sie
bitte die Anleitung aufmerksam durch. Bewahren Sie die
Anleitung danach für spätere Nachschlagzwecke sorgfältig auf.
2 Diese Anlage muß an einem gut belüfteten, kühlen, trockenen
und sauberen Ort aufgestellt werden – geschützt vor direkter
Sonnenbestrahlung, Wärmequellen, Vibrationen, Staub,
Feuchtigkeit und sehr niedrigen Temperaturen. Um eine
einwandfreie Wärmeableitung zu gewährleisten, muß an der
Oberseite ein Abstand von mindestens 10 cm, rechts und links
mindestens 10 cm und ebenfalls 10 cm an der Geräterückseite
eingehalten werden.
3 Stellen Sie dieses Gerät entfernt von anderen elektrischen
Haushaltgeräten, Motoren oder Transformatoren auf, um
Brummgeräusche zu vermeiden.
4 Setzen Sie dieses Gerät keinen plötzlichen
Temperaturänderungen von kalt auf warm aus, und stellen Sie
dieses Gerät nicht an Orten mit hoher Luftfeuchtigkeit auf
(z.B. in Räumen mit Luftbefeuchtern), um Kondensation im
Inneren des Gerätes zu vermeiden, da es anderenfalls zu
elektrischen Schlägen, Feuer, Beschädigung dieses Gerätes
und/oder zu persönlichen Verletzungen kommen kann.
5 Vermeiden Sie die Aufstellung dieses Gerätes an Orten, an
welchen Fremdkörper in das Gerät fallen können bzw. an
welchen Flüssigkeiten auf das Gerät verschüttet werden
können. Stellen Sie auf der Oberseite des Gerätes niemals
folgendes auf:
– Andere Komponenten, da diese Beschädigung und/oder
Verfärbung der Oberfläche dieses Gerätes verursachen
können.
– Brennende Objekte (z.B. Kerzen), da diese Feuer,
Beschädigung des Gerätes und/oder persönliche
Verletzungen verursachen können.
– Mit Flüssigkeiten gefüllte Behälter, da diese umfallen und
die Flüssigkeit auf das Gerät verschütten können, wodurch
es zu elektrischen Schlägen für den Anwender und/oder zu
Beschädigung des Gerätes kommen kann.
6 Decken Sie dieses Gerät niemals mit Zeitungen, Tischdecken,
Vorhängen usw. ab, damit die Wärmeabfuhr nicht behindert
wird. Falls die Temperatur im Inneren des Gerätes ansteigt,
kann es zu Feuer, Beschädigung des Gerätes und/oder zu
persönlichen Verletzungen kommen.
7 Schließen Sie dieses Gerät erst an eine Wandsteckdose an,
nachdem alle anderen Anschlüsse ausgeführt wurden.
8 Stellen Sie dieses Gerät niemals mit der Unterseite nach oben
auf, da es sonst beim Betrieb zu Überhitzung mit möglichen
Beschädigungen kommen kann.
9 Wenden Sie niemals Gewalt bei der Bedienung der Schalter,
Knöpfe und/oder Kabel an.
10 Wenn Sie das Netzkabel von der Wandsteckdose abtrennen,
fassen Sie immer den Netzstecker an; ziehen Sie niemals an
dem Kabel.
11 Reinigen Sie dieses Gerät niemals mit chemisch behandelten
Tüchern; anderenfalls kann das Finish beschädigt werden.
12
Verwenden Sie nur die für dieses Gerät vorgeschriebene
Netzspannung. Falls Sie eine höhere als die vorgeschriebene
Netzspannung verwenden, kann es zu Feuer, Beschädigung
dieses Gerätes und/oder zu persönlichen Verletzungen kommen.
Yamaha kann nicht verantwortlich gemacht werden für Schäden,
die auf die Verwendung dieses Gerätes mit einer anderen als der
vorgeschriebenen Spannung zurückzuführen sind.
13 Um Schäden durch Blitzeinschlag zu vermeiden, ziehen Sie
das Netzkabel bei Gewitter ab.
14 Versuchen Sie niemals ein Modifizieren oder Ändern dieses
Gerätes. Falls eine Wartung erforderlich ist, wenden Sie sich
bitte an einen Yamaha-Kundendienst. Das Gehäuse sollte
niemals selbst geöffnet werden.
15 Falls Sie das Gerät für längere Zeit nicht verwenden (z.B.
während der Ferien), ziehen Sie den Netzstecker von der
Netzdose ab.
16 Stellen Sie dieses Gerät in der Nähe der Steckdose und so,
dass der Netzstecker gut zugänglich ist.
17 Lesen Sie unbedingt den Abschnitt
„STÖRUNGSBEHEBUNG“ in dieser Anleitung durch, um
zu erfahren, wie Sie zunächst im Hinblick auf häufige
Bedienfehler prüfen, bevor Sie entscheiden, dass das Gerät
defekt ist.
18 Bevor Sie dieses Gerät an einen anderen Ort transportieren,
drücken Sie die POWER-Taste, um das Gerät auszuschalten,
und ziehen Sie danach den Netzstecker von der Netzdose ab.
19 Die Batterien dürfen nicht zu starker Hitze ausgesetzt werden,
wie durch Sonnenlicht, Feuer o.ä.
20 VOLTAGE SELECTOR
(Nur Modell für Asien und internationales Modell)
Der VOLTAGE SELECTOR an der Rückseite dieses Gerätes
muss auf Ihre örtliche Netzspannung eingestellt werden,
BEVOR Sie den Netzstecker in die Steckdose einstecken. Die
folgenden Netzspannungen werden verwendet:
...................110/120/220/230–240 V Netzspannung, 50/60 Hz
Dieses Gerät ist nicht vom Netz abgetrennt, solange
der Netzstecker eingesteckt ist, auch wenn Sie das
Gerät selber mit dem Schalter POWER ausschalten.
WARNUNG
UM DIE GEFAHR EINES FEUERS ODER EINES
ELEKTROSCHOCKS ZU VERMEIDEN, DARF
DAS GERÄT WEDER REGEN NOCH
FEUCHTIGKEIT AUSGESETZT WERDEN.
VORSICHT MIT DEM LASER
Dieses Gerät enthält einen Laser. Um unnötige Augenverletzungen zu
vermeiden, sollten Sie alle Wartungs- und Reparaturarbeiten einem
qualifiziertem Wartungstechniker überlassen.
GEFAHR
Sichtbare Laserstrahlen bei geöffneter Abdeckung. Achten Sie darauf,
nicht direkt in den Laserstrahl zu blicken. Wenn dieses Gerät an eine
Netzdose angeschlossen ist, blicken Sie niemals in die Öffnung der
Disc-Schublade oder in andere Öffnungen.
Die Laser-Komponente in diesem Produkt kann eine
Strahlung abgeben, die den Grenzwert der Klasse 1
übersteigt.
i De
Page 49

INHALT
EINFÜHRUNG
MERKMALE..........................................................2
MITGELIEFERTES ZUBEHÖR .........................2
BEDIENELEMENTE UND IHRE
FUNKTIONEN ................................................... 3
Vorderseite................................................................. 3
Display an der Vorderseite ........................................ 4
Fernbedienung ........................................................... 5
Einlegen der Batterien in die Fernbedienung............ 6
Verwenden der Fernbedienung..................................6
VORBEREITUNGEN
ANSCHLÜSSE ....................................................... 7
Anschließen des Verstärkers...................................... 7
Anschließen des mitgelieferten Netzkabels............... 8
Anschließen von USB-Geräten..................................8
BETRIEB
GRUNDFUNKTIONEN ........................................9
Starten der Wiedergabe..............................................9
Unterbrechen der Wiedergabe (Pause)....................10
Stoppen der Wiedergabe.......................................... 10
Ausschalten des Geräts............................................10
Wiedergeben eines bestimmten Titels..................... 10
So verbessern Sie die Tonqualität
(Modus PURE DIRECT)..................................... 11
Ansteuern des Anfangs eines bestimmten Titels..... 11
Schneller Vor- oder Rücklauf während der
Wiedergabe.......................................................... 11
Wechseln der Informationen im Display an der
Vorderseite .......................................................... 12
Ändern der Helligkeit im Display
an der Vorderseite................................................12
WIEDERGABE IN WILLKÜRLICHER
REIHENFOLGE .............................................. 13
WIEDERHOLTE WIEDERGABE ....................13
Wiederholen eines ausgewählten Elements ............. 13
A-B-Wiederholung.................................................. 14
PROGRAMMWIEDERGABE ........................... 15
Stoppen der Programmwiedergabe..........................16
Löschen eines programmierten Titels......................16
WEITERE INFORMATIONEN
HINWEISE ZU DISCS BZW. MP3-, WMA-
DATEIEN...........................................................17
STÖRUNGSBEHEBUNG ....................................19
TECHNISCHE DATEN .......................................20
EINFÜHRUNG
VORBEREITUNGEN
BETRIEB
INFORMATIONEN
WEITERE
■ Hinweise zu dieser Anleitung
• y weist auf einen Tipp für die Bedienung hin.
• In dieser Anleitung werden Audio-CDs als „Audio CD“, MP3-/WMA-Discs als „Data Disc“ und auf dem USB-Gerät
gespeicherte MP3-/WMA-Dateien als „USB“ bezeichnet.
• Diese Anleitung wird vor der Produktion gedruckt. Änderungen des Designs und der technischen Daten im Sinne
ständiger Verbesserungen usw. vorbehalten. Im Fall einer Differenz zwischen der Anleitung und dem Produkt weist
das Produkt Priorität auf.
1 De
Deutsch
Page 50

EINFÜHRUNG
MERKMALE
◆ Optischer Digitalausgang
◆ Koaxialer Digitalausgang
◆ Wiedergabe von CD-Rs und CD-RWs möglich
(Einzelheiten dazu finden Sie auf Seite 17.)
◆ Wiedergabe von MP3- und WMA-Discs möglich
◆ Wiedergabe von auf einem USB-Gerät gespeicherten
MP3- und WMA-Dateien möglich
MITGELIEFERTES ZUBEHÖR
Bitte überprüfen Sie, ob Sie alle folgenden Teile erhalten haben:
Fernbedienung Stereo-Cinchkabel
Batterien (× 2)
(AA, R6, UM-3)
◆ Programmwiedergabe (nur Audio CD)
◆ Wiedergabe in willkürlicher Reihenfolge
◆ Wiederholte Wiedergabe eines einzelnen Titels/der
ganzen Disc
◆ Wiederholte A-B-Wiedergabe (nur Audio CD)
◆ Informationen im Display und Helligkeit einstellbar
◆ PURE DIRECT-Funktion
Netzkabel
2 De
Page 51

Vorderseite
BEDIENELEMENTE UND IHRE FUNKTIONEN
EINFÜHRUNG
1 POWER
Zum Ein-/Ausschalten des Geräts (ON/OFF).
y
Die Anzeige POWER oben leuchtet auf, wenn das Gerät
eingeschaltet wird.
2 USB-Anschluss
Zum Anschließen eines USB-Geräts. Einzelheiten dazu
finden Sie auf Seite 8.
3 PURE DIRECT
Zum Verbessern der Tonqualität können Sie den Modus
PURE DIRECT ein- oder ausschalten.
y
Die Anzeige PURE DIRECT oben leuchtet auf, wenn sich dieses
Gerät im Modus PURE DIRECT befindet. Einzelheiten dazu
finden Sie auf Seite 11.
4 Disc-Fach
Legen Sie hier eine Disc ein.
5 (Öffnen/Schließen)
Zum Öffnen bzw. Schließen des Disc-Fachs.
6 / (Überspringen/Suchen rückwärts),
/ (Überspringen/Suchen vorwärts)
/ : Weiter zum nächsten Titel.
/ : Zurück an den Anfang des aktuellen Titels.
/ (zweimal): Zurück zum vorherigen Titel.
Halten Sie / bzw. / zum
Rückwärtssuchen/Vorwärtssuchen gedrückt.
y
Jedes Mal, wenn Sie / oder / drücken
und gedrückt halten, erhöht sich die Suchgeschwindigkeit
um 2 Stufen.
7 (Wiedergabe)
Zum Starten der Wiedergabe.
8 (Pause)
Zum Unterbrechen der Wiedergabe. Setzen Sie die
Wiedergabe mit oder fort.
9 (Stopp)
Zum Stoppen der Wiedergabe.
0 Anzeige USB
Leuchtet im USB-Modus, erlischt im Disc-Modus und
blinkt, wenn dieses Gerät Daten vom USB-Gerät liest.
A Display an der Vorderseite
Zum Anzeigen des aktuellen Status dieses Geräts.
B Fernbedienungssensor
Empfängt die Signale von der Fernbedienung.
Deutsch
3 De
Page 52

BEDIENELEMENTE UND IHRE FUNKTIONEN
Display an der Vorderseite
Audio CD
Data Disc USB
1 Hier leuchtet das Symbol für den ausgewählten
Wiedergabemodus.
2 Hier werden die Zeitangaben angezeigt. (Einzelheiten dazu
finden Sie auf Seite 12.)
3 Hier wird die Nummer des Titels angezeigt, der ausgewählt
wurde oder wiedergegeben wird.
4 Hier wird die Dateinummer angezeigt.
5 Leuchtet, wenn sich das Gerät im Disc-Modus befindet (siehe
Seite 9) oder wenn eine Audio CD im Fach erkannt wird.
6 Leuchtet bei der Wiedergabe einer MP3-Datei.
7 Leuchtet bei der Wiedergabe einer WMA-Datei.
4 De
Page 53

Fernbedienung
BEDIENELEMENTE UND IHRE FUNKTIONEN
1 Infrarotsender (S. 6)
Zum Senden von Infrarotsignalen an dieses Gerät.
2 CD/USB (S. 9)
Zum Umschalten zwischen Disc-Modus und USB-Modus.
3 DIMMER (S. 12)
Zum Auswählen der Helligkeitseinstellung für das
Display an der Vorderseite.
4 Zahlentasten (S. 10)
Zum direkten Auswählen eines Titels.
5 PROGRAM (S. 15)
Programmiermodus aufrufen/beenden.
6 / (Suchen rückwärts/vorwärts) (S. 11)
Zum Rückwärts- bzw. Vorwärtssuchen von Titeln.
7 / (Überspringen rückwärts/vorwärts)
(S. 11)
Zum Ansteuern des nächsten/vorherigen Titels bzw. des
Anfangs des aktuellen Titels.
EINFÜHRUNG
8 OPEN/CLOSE (S. 9)
Zum Öffnen bzw. Schließen des Disc-Fachs.
9 PURE DIRECT (S. 11)
Zum Aktivieren bzw. Deaktivieren des Modus PURE
DIRECT.
0 DISPLAY (S. 12)
Zum Wechseln der Zeitangaben.
A ENTER (S. 15)
Zum Bestätigen der Titelnummer, wenn sich dieses Gerät
im Programmeingabemodus befindet.
B CLEAR (S. 16)
Zum Löschen eines programmierten Titels.
C REPEAT (S. 13)
Zum wiederholten Wiedergeben eines einzelnen Titels
oder aller Titel.
D RANDOM (S. 13)
Zum Einstellen der Wiedergabe in willkürlicher
Reihenfolge.
E A/B (S. 14)
Zum Einstellen der A-B-Wiederholung.
F (Pause) (S. 10)
Zum Unterbrechen der Wiedergabe.
G (Wiedergabe) (S. 9)
Zum Starten der Wiedergabe.
H (Stopp) (S. 10)
Zum Stoppen der Wiedergabe.
Deutsch
5 De
Page 54

BEDIENELEMENTE UND IHRE FUNKTIONEN
Einlegen der Batterien in die Fernbedienung
1 Drücken Sie auf den Bereich mit der
Markierung und schieben Sie die
Abdeckung des Batteriefachs auf.
2 Legen Sie die beiden mitgelieferten Batterien
(AA, R6, UM-3) polaritätsrichtig, d. h. gemäß
den Markierungen (+ und –) im Inneren des
Batteriefachs, ein.
3 Schieben Sie die Abdeckung wieder zurück,
so dass sie einrastet.
■ Hinweise zu Batterien
• Tauschen Sie beide Batterien aus, wenn die Reichweite
der Fernbedienung abnimmt.
• Verwenden Sie AA-, R6-, UM-3-Batterien.
• Achten Sie auf korrekte Polarität. Beachten Sie dazu
die Abbildung im Inneren des Batteriefachs.
• Nehmen Sie die Batterien aus der Fernbedienung
heraus, wenn Sie sie längere Zeit nicht benutzen
wollen.
• Verwenden Sie alte Batterien nicht zusammen mit
neuen.
• Verwenden Sie keine unterschiedlichen Batterietypen
(wie z. B. Alkali- und Manganbatterien) zusammen.
Achten Sie sorgfältig auf die Aufschrift bzw.
Verpackung dieser verschiedenen Batterietypen, da sie
die gleiche Form und Farbe haben können.
• Wenn Batterien ausgelaufen sind, entsorgen Sie sie
bitte umgehend. Berühren Sie die ausgelaufene
Flüssigkeit nicht und lassen Sie sie nicht mit Kleidern
usw. in Kontakt kommen. Reinigen Sie das
Batteriefach gründlich, bevor Sie neue Batterien
einlegen.
• Werfen Sie Batterien nicht in den Hausmüll. Batterien
müssen vorschriftsmäßig entsorgt werden.
Verwenden der Fernbedienung
Die Fernbedienung gibt einen gerichteten Infrarotstrahl
aus.
Achten Sie darauf, die Fernbedienung zum Steuern des
Geräts direkt auf den Fernbedienungssensor an der
Vorderseite des Geräts zu richten.
Reichweite
6 m
■ Umgang mit der Fernbedienung
• Zwischen der Fernbedienung und diesem Gerät dürfen
sich keine großen Hindernisse befinden.
• Verschütten Sie kein Wasser oder andere Flüssigkeiten
auf die Fernbedienung.
• Lassen Sie die Fernbedienung nicht fallen.
• Lassen Sie die Fernbedienung nicht an einem Ort, an
dem sie folgenden Bedingungen ausgesetzt ist:
– hoher Luftfeuchtigkeit, z. B. in einem Badezimmer
– hohen Temperaturen, z. B. in der Nähe eines
Heizgeräts oder eines Ofens
– extrem niedrigen Temperaturen
–Staub
• Schützen Sie den Fernbedienungssensor vor allem vor
starken Lichtquellen, wie z. B. einer Leuchtstoffröhre.
Andernfalls funktioniert die Fernbedienung
möglicherweise nicht richtig. Stellen Sie das Gerät
gegebenenfalls weiter von der starken Lichtquelle weg.
6 De
Page 55

VORBEREITUNGEN
ANSCHLÜSSE
Anschließen des Verstärkers
VORSICHT
• Bevor Sie irgendwelche Anschlüsse vornehmen, schalten Sie das Gerät, den Verstärker und alle anderen
Komponenten aus.
• Schließen Sie das Gerät an die richtigen Eingänge am Verstärker oder einer anderen Komponente an.
• Wenn dieses Gerät zu Interferenzen bei einem anderen Gerät, z. B. einem Tuner, führt, stellen Sie die Geräte weiter
voneinander entfernt auf.
VORBEREITUNGEN
StereoCinchkabel
(mitgeliefert)
Wählen Sie zum Anschließen des Geräts an den Verstärker eine der folgenden Möglichkeiten.
Kabel
• Der Digitalausgang wird deaktiviert, wenn sich dieses Gerät im
Bei Verwendung der Anschlüsse ANALOG
OUT an diesem Gerät ( )
Verbinden Sie diese Anschlüsse über das mitgelieferte
Stereo-Cinchkabel mit den Anschlüssen CD (oder AUX)
am Verstärker. Weitere Informationen zu diesen
Anschlüssen finden Sie in der Bedienungsanleitung zum
verwendeten Verstärker.
• Achten Sie darauf, dass Sie den linken (L) und den
rechten (R) Anschluss an die entsprechenden
Anschlüsse (links und rechts) des Verstärkers oder
einer anderen Komponente anschließen.
KoaxialkabelOptisches
Verstärker
Modus PURE DIRECT befindet.
Bei Verwendung des Anschlusses DIGITAL
OUT (COAXIAL) an diesem Gerät ( )
Verbinden Sie diesen Anschluss über ein handelsübliches
Koaxialkabel mit dem digitalen Eingangsanschluss des
Verstärkers.
Bei Verwendung des Anschlusses DIGITAL
OUT (OPTICAL) an diesem Gerät ( )
Verbinden Sie diesen Anschluss über ein handelsübliches
optisches Kabel mit dem optischen Eingangsanschluss des
Verstärkers.
• Verwenden Sie ein zuverlässiges optisches Kabel.
Deutsch
7 De
Page 56

ANSCHLÜSSE
Anschließen des mitgelieferten Netzkabels
Nur Modell für Asien und
internationales Modell
Modelle für Europa und
Großbritannien
Über das mitgelieferte
Netzkabel an eine
Netzsteckdose
■ VOLTAGE SELECTOR
(nur Modell für Asien und
internationales Modell)
Der VOLTAGE SELECTOR an der Rückseite dieses
Geräts muss auf die lokale Netzspannung eingestellt
werden, BEVOR Sie das mitgelieferte Netzkabel an eine
Netzsteckdose anschließen.
Wenn der VOLTAGE SELECTOR nicht richtig
eingestellt ist, kann dieses Gerät beschädigt werden und es
besteht Feuergefahr.
Drehen Sie den VOLTAGE SELECTOR mit einem
Schlitzschraubenzieher im oder gegen den Uhrzeigersinn
in die richtige Position.
Folgende Spannungen stehen zur Verfügung:
.............110/120/220/230-240 V Netzspannung, 50/60 Hz
■ Anschließen des Geräts an eine
Netzsteckdose
Wenn alle anderen Anschlüsse vorgenommen wurden,
schließen Sie das mitgelieferte Netzkabel an AC IN an der
Rückseite dieses Geräts und dann an eine Netzsteckdose
an.
Anschließen von USB-Geräten
Dieses Gerät verfügt über einen USB-Anschluss und kann
auf MP3- oder WMA-Dateien, die auf einem USB-Gerät
gespeichert sind, zugreifen. Schließen Sie das USB-Gerät
an den Anschluss USB an der Vorderseite dieses Geräts
an.
VORSICHT
Trennen Sie nicht das USB-Gerät von diesem Gerät,
solange die Wiedergabe vom USB-Gerät läuft oder wenn
die Anzeige USB blinkt.
■ Unterstützte USB-Geräte
Dieses Gerät unterstützt Geräte der USBMassenspeicherklasse (z. B. Flash-Speicher, Kartenleser
oder tragbare Audioplayer), die das Format FAT16 oder
FAT32 verwenden.
Hinweise
• Manche Geräte funktionieren möglicherweise nicht
einwandfrei, auch wenn sie den Voraussetzungen entsprechen.
• Schließen Sie keine anderen Geräte als Geräte der USBMassenspeicherklasse an: USB-Ladegeräte, USB-Hubs, PCs,
externe Festplatten usw.
• Wenn Sie gleichzeitig zwei oder mehr Speicherkarten in einen
Kartenleser einschieben, der an den USB-Anschluss an diesem
Gerät angeschlossen ist, wird nur eine der Speicherkarten
erkannt.
• Yamaha und seine Zulieferer übernehmen keine Haftung für
den Verlust von Daten, die auf USB-Geräten gespeichert sind,
die an dieses Gerät angeschlossen werden. Als
Vorsichtsmaßnahme empfiehlt es sich, Sicherungskopien
anzulegen.
• Die Wiedergabe und die Stromversorgung sind nicht bei allen
Arten von USB-Geräten gewährleistet.
8 De
Page 57

BETRIEB
In dieser Anleitung wird die Bedienung des Geräts mit der Fernbedienung erläutert.
Wenn Sie das Gerät mit den Bedienelementen an der Vorderseite steuern wollen,
verwenden Sie die entsprechenden Tasten auf dem Bedienfeld vorne.
Die Symbole , und weisen auf Musikdatenformate hin, die
Audio CD Data Disc USB
für die jeweilige Funktion verwendet werden können.
GRUNDFUNKTIONEN
Hinweise
• Achten Sie beim Einlegen der Disc darauf, die Disc gemäß den
Disc-Führungen einzulegen (4 Markierungen auf dem DiscFach).
• Die Disc lässt sich möglicherweise nicht richtig lesen, wenn sie
falsch eingelegt wird. Öffnen Sie in diesem Fall das Disc-Fach
und legen Sie die Disc erneut ein.
2 Schließen Sie mit OPEN/CLOSE das Disc-
1 Schalten Sie das Gerät mit der Taste POWER
ein.
Fach.
BETRIEB
2 Schalten Sie mit CD/USB zwischen dem
Disc- und dem USB-Modus um.
Wenn der USB-Modus ausgewählt ist, leuchtet die
Anzeige USB. Wenn der Disc-Modus ausgewählt ist,
erlischt die Anzeige USB.
y
Diese Einstellung bleibt gespeichert, auch wenn das Gerät
ausgeschaltet wird.
Starten der Wiedergabe
■ Wiedergeben von Discs
Audio CD Data Disc
1 Drücken Sie OPEN/CLOSE, um das Disc-
Fach zu öffnen, und legen Sie eine Disc ein.
Mit der beschrifteten Seite nach oben.
y
Sie können das Disc-Fach auch schließen, indem Sie h oder eine
Zahlentaste drücken oder indem Sie behutsam vorne gegen das
Disc-Fach drücken. Wenn Sie das Fach auf eine dieser Arten
schließen, startet die Wiedergabe automatisch.
3 Starten Sie mit h die Wiedergabe.
Bei einer Audio CD beginnt die Wiedergabe ab dem
ersten Titel und bei Data Disc werden die Titel in
alphabetischer Reihenfolge wiedergegeben.
Informationen im Display in Schritt 2
Audio CD
Gesamtzahl der Titel Gesamtspieldauer der Disc
Data Disc
Disc-Fach
Deutsch
Gesamtzahl der Dateien
9 De
Page 58

GRUNDFUNKTIONEN
■ Wiedergeben von Musik von USBGeräten
Ausschalten des Geräts
USB
Schließen Sie das USB-Gerät an den Anschluss
USB an der Vorderseite an. (Einzelheiten dazu
finden Sie auf Seite 8.)
Im USB-Modus (USB-Anzeige leuchtet) wird der erste
Dateiname auf dem Bedienfelddisplay angezeigt (siehe
Seite 12), und wenn auf dem USB-Gerät abspielbare
Dateien gespeichert sind, startet die Wiedergabe
automatisch in der Reihenfolge von Speicherdatum und zeit der Dateien.
Zum Abtrennen des USB-Geräts
Drücken Sie , um die Wiedergabe zu beenden und
trennen Sie anschließend das USB-Speichermedium vom
Gerät ab.
Hinweis
Trennen Sie nicht das USB-Gerät von diesem Gerät, solange die
Wiedergabe vom USB-Gerät läuft oder wenn die Anzeige USB
blinkt.
Drücken Sie POWER erneut.
Wenn der Disc-Modus ausgewählt ist und Sie das Gerät
ausschalten, wird beim nächsten Einschalten automatisch
die Wiedergabe der Disc im Fach gestartet. Wenn der
USB-Modus ausgewählt ist und Sie das Gerät aus- und
wieder einschalten, startet automatisch die Wiedergabe
vom angeschlossenen USB-Gerät.
Wiedergeben eines bestimmten Titels
Audio CD
Wählen Sie mit den Zahlentasten den
gewünschten Titel aus.
Beispiel: Auswählen von Titelnummer 12
Drücken Sie „1“ und dann „2“.
+
Die folgenden Informationen werden angezeigt.
Unterbrechen der Wiedergabe (Pause)
USBAudio CD Data Disc
Drücken Sie e.
Zum Fortsetzen der Wiedergabe drücken Sie e erneut
(oder drücken Sie h).
Stoppen der Wiedergabe
USBAudio CD Data Disc
Drücken Sie s.
Wenn Sie h erneut drücken, startet die Wiedergabe ab
dem ersten Titel.
Nummer des ausgewählten Titels
Die Wiedergabe startet nach 2 Sekunden.
Hinweis
Diese Funktion steht bei Data Disc und USB nicht zur
Verfügung.
y
Während der Wiedergabe können Sie auch einen beliebigen Titel
auswählen und wiedergeben.
10 De
Page 59

So verbessern Sie die Tonqualität
(Modus PURE DIRECT)
USBAudio CD Data Disc
Drücken Sie PURE DIRECT.
GRUNDFUNKTIONEN
y
• Diese Funktionen können Sie auch bei Data Disc/USB
ausführen.
• Diese Funktionen können Sie auch ausführen, wenn sich das
Gerät im Pausemodus befindet.
• Diese Funktionen können Sie auch mit b/w und
f/a an der Vorderseite des Geräts ausführen.
Schneller Vor- oder Rücklauf während der Wiedergabe
Das Gerät wechselt in den Modus PURE DIRECT.
• Die Anzeige PURE DIRECT leuchtet auf.
• Der Digitalausgang wird deaktiviert.
• Die meisten Anzeigen im Display an der Vorderseite werden
ausgeblendet und nur die unbedingt erforderlichen Anzeigen
und Meldungen sind während der Wiedergabe zu sehen.
Hinweis
Nehmen Sie die Verbindung über die Anschlüsse ANALOG
OUT vor, wenn Sie den Modus PURE DIRECT verwenden
(siehe Seite 7).
y
• Drücken Sie PURE DIRECT erneut, um den Modus PURE
DIRECT auszuschalten.
• Diese Einstellung bleibt gespeichert, auch wenn das Gerät
ausgeschaltet wird.
Ansteuern des Anfangs eines bestimmten Titels
USBAudio CD Data Disc
Wenn die Wiedergabe am Anfang des nächsten
Titels beginnen soll, drücken Sie einmal .
Wenn die Wiedergabe am Anfang des aktuellen
Titels beginnen soll, drücken Sie einmal .
USBAudio CD Data Disc
Zum schnellen Vorlauf drücken Sie während der
Wiedergabe einmal .
Zum schnellen Rücklauf drücken Sie während
der Wiedergabe einmal .
Zum Fortsetzen der Wiedergabe drücken Sie an
der gewünschten Stelle .
y
• Diese Funktionen können Sie auch bei Data Disc/USB
ausführen.
• Der Ton ist im schnellen Vorlauf und Rücklauf zu hören, wenn
auch leicht verzerrt. Damit können Sie eine bestimmte Stelle in
einem Titel genau ansteuern oder aber den Inhalt rasch
überprüfen. Abhängig von der MP3/WMA-Datei wird u.U. kein
Ton wiedergegeben.
• Jedes Mal, wenn Sie oder drücken, erhöht sich die
Suchgeschwindigkeit um 2 Stufen.
• Diese Funktionen können Sie auch ausführen, indem Sie
b/w oder f/a an der Vorderseite des Geräts
länger als 2 Sekunden gedrückt halten.
BETRIEB
Wenn die Wiedergabe am Anfang des vorherigen
Titels beginnen soll, drücken Sie zweimal .
Deutsch
11 De
Page 60

GRUNDFUNKTIONEN
Wechseln der Informationen im Display an der Vorderseite
■ Bei der Wiedergabe einer Audio CD
Audio CD
Mit der Taste DISPLAY können Sie die folgenden Anzeigen (1 - 3) im Display an der Vorderseite auswählen.
1 Verstrichene Spieldauer des aktuellen Titels (Standard)
2 Restspieldauer des aktuellen Titels
3 Restspieldauer der Disc
■ Bei der Wiedergabe einer Data Disc oder von einem USB-Gerät
USBData Disc
Mit der Taste DISPLAY können Sie kurz den Dateinamen anzeigen lassen.
Diese Beispiele für Anzeigen im Display an der Vorderseite stammen von einer MP3-Datei.
1 Verstrichene Spieldauer des aktuellen Titels
Kehrt nach der Anzeige des Dateinamens zur
2 Dateiname*
* Maximal 28 Zeichen
Hinweis
Mit diesem Gerät können nur alphanumerische Zeichen angezeigt werden.
normalen Anzeige zurück.
Ändern der Helligkeit im Display an der Vorderseite
Sie können mit DIMMER die Helligkeit des
Displays an der Vorderseite ändern.
Mit jedem Tastendruck auf DIMMER wechselt die
Helligkeit folgendermaßen:
Max. (am hellsten) J Stufe1 (Standard) J Stufe2 J
Stufe3 (am dunkelsten) J Max.
Hinweise
• Die Helligkeit wird während der Wiedergabe leicht verringert,
außer wenn die höchste Stufe eingestellt ist.
• Die Helligkeit wird bei manchen Funktionen vorübergehend
verringert, außer wenn die höchste Stufe eingestellt ist.
• Diese Einstellung bleibt gespeichert, auch wenn das Gerät
ausgeschaltet wird.
12 De
Page 61

WIEDERGABE IN WILLKÜRLICHER REIHENFOLGE
USBAudio CD Data Disc
Sie können die Titel in willkürlicher Reihenfolge
wiedergeben lassen.
So starten Sie die Wiedergabe in willkürlicher
Reihenfolge
Drücken Sie und dann RANDOM.
+
So beenden Sie die Wiedergabe in willkürlicher
Reihenfolge
Drücken Sie .
WIEDERHOLTE WIEDERGABE
Hinweis
Diese Funktionen können Sie auch bei Data Disc/USB ausführen.
BETRIEB
Wiederholen eines ausgewählten Elements
USBAudio CD Data Disc
Sie können einen einzelnen oder alle Titel wiederholt
wiedergeben lassen, indem Sie während der Wiedergabe
REPEAT drücken. Der Modus für die wiederholte
Wiedergabe wechselt mit jedem Tastendruck auf
REPEAT.
(Einzeltitel wiederholen)
(Alles wiederholen)
(aus)
S (Einzeltitel wiederholen)
Ein einzelner Titel wird wiederholt wiedergegeben.
ALL (Alles wiederholen)
Alle Titel (die ganze Disc) werden wiederholt
wiedergegeben.
Hinweis
Diese Funktionen können Sie auch bei Data Disc/USB ausführen.
y
Die wiederholte Wiedergabe steht auch bei der
Programmwiedergabe und der Wiedergabe in willkürlicher
Reihenfolge zur Verfügung.
Deutsch
13 De
Page 62

WIEDERHOLTE WIEDERGABE
A-B-Wiederholung
Audio CD
Sie können eine bestimmte Passage eines Titels
wiederholt wiedergeben lassen, wenn Sie während der
Wiedergabe mit der Taste A/B zwei Stellen (Anfangs- und
Endpunkt) festlegen.
1 Wählen Sie mit A/B den Anfangspunkt der zu
wiederholenden Passage aus.
„A-“ leuchtet auf.
2 Wählen Sie mit A/B den Endpunkt der zu
wiederholenden Passage aus.
„A-B“ leuchtet auf.
Die ausgewählte Passage wird wiederholt
wiedergegeben.
So beenden Sie die A-B-Wiederholung
Drücken Sie erneut auf A/B, damit die Anzeige von
„A-B“ auf dem Bedienfelddisplay erlischt.
Hinweise
• Die A-B-Wiederholung kann nicht über mehrere Titel hinweg
festgelegt werden.
• Diese Funktion steht bei Data Disc und USB nicht zur
Verfügung.
• Wenn Sie die Wiedergabe mit stoppen, wird die A-BWiederholung deaktiviert.
• Sie können die A-B-Wiederholung nicht verwenden, wenn sich
dieses Gerät im Modus PURE DIRECT befindet.
14 De
Page 63

PROGRAMMWIEDERGABE
Audio CD
Sie können die Wiedergabereihenfolge von bis zu
50 Titeln auf einer Audio CD festlegen. Diese Funktion
steht bei Data Disc und USB nicht zur Verfügung.
1 Stoppen Sie mit s die Wiedergabe.
Die folgenden Informationen werden angezeigt.
Wenn Sie „6“ drücken:
Nummer des ausgewählten Titels
Wenn Sie ENTER drücken:
Gesamtzahl der
momentan
programmierten Titel
Gesamtspieldauer der
momentan
programmierten Titel
Gehen Sie zum Programmieren weiterer Titel wie in
diesen Schritten erläutert vor.
Sie können einen Titel auch zwei- oder mehrmals
auswählen.
Hinweis
Wenn Sie im Programmeingabemodus auf PROGRAM drücken,
kehrt das Gerät in den normalen Wiedergabemodus zurück.
Programmierte Titel werden dabei gespeichert.
BETRIEB
2 Drücken Sie PROGRAM.
• In diesem Modus ist im Display
an der Vorderseite die normale
Anzeige zu sehen, auch wenn sich
das Gerät im Modus PURE
DIRECT befindet.
Das Gerät wechselt in den Programmeingabemodus.
3 Programmieren Sie einen gewünschten Titel,
indem Sie die entsprechende Zahlentaste
und ENTER drücken.
+
4 Starten Sie mit h die Programmwiedergabe.
Die folgenden Informationen werden angezeigt.
Aktueller Titel
Verstrichene Spieldauer
des aktuellen Titels
Deutsch
15 De
Page 64

PROGRAMMWIEDERGABE
Stoppen der Programmwiedergabe
Drücken Sie s.
Zum erneuten Starten der Programmwiedergabe
drücken Sie PROGRAM und dann h.
Die Wiedergabe startet mit dem ersten programmierten
Titel.
Löschen eines programmierten Titels
Sie haben dazu die im Folgenden beschriebenen
Möglichkeiten.
■
Löschen des zuletzt programmierten Titels
Drücken Sie im Programmeingabemodus
CLEAR.
Die folgenden Informationen werden angezeigt.
Gesamtzahl der
momentan
programmierten Titel
Der zuletzt programmierte Titel wird gelöscht.
Gesamtspieldauer der
momentan
programmierten Titel
■ Löschen aller programmierten Titel
Nach Beendigung des
Programmeingabemodus drücken Sie auf
CLEAR.
Die folgenden Informationen werden angezeigt.
Alle programmierten Titel werden gelöscht.
Die Anzeige wird nach 2 Sekunden ausgeblendet.
Hinweis
Wenn Sie in den USB-Modus wechseln, das Disc-Fach öffnen
oder das Gerät mit POWER ausschalten, werden alle
programmierten Titel gelöscht.
16 De
Page 65

WEITERE INFORMATIONEN
HINWEISE ZU DISCS BZW. MP3-, WMA-DATEIEN
■ Mit diesem Gerät abspielbare Discs
Audio CD Data Disc
Dieser Player kann CDs mit den unten dargestellten
Markierungen abspielen. Versuchen Sie nicht, andere
Discs in das Gerät einzulegen. Das Gerät kann auch 8-cmCDs (Single-CDs) wiedergeben.
....
CDs (digitaler Ton)
Das gängigste Format bei handelsüblichen
Audio CDs.
....
CD-Rs, CD-RWs mit digitalen
Audiosignalen
Musik-CDs, die durch Kopieren auf eine
CD-R oder CD-RW (mit Dateien im MP3oder WMA-Format) erstellt wurden.
Hinweise
• Achten Sie darauf, eine CD-R oder CD-RW
von einem zuverlässigen Hersteller zu
verwenden.
• Verwenden Sie unbedingt eine CD-R oder
CD-RW, bei der sich zumindest eine der
folgenden Angaben auf der Disc oder der
Disc-Hülle befindet.
FOR CONSUMER
FOR CONSUMER USE
FOR MUSIC USE ONLY
• Verwenden Sie unbedingt eine
abgeschlossene CD-R oder CD-RW.
....
CD-TEXT-Discs
Discs, die Textdaten wie Namen von
Alben, Titeln und Interpreten enthalten.
Diese Discs können mit normalen CDPlayern wiedergegeben werden, dabei
werden die Textdaten allerdings nicht
angezeigt.
Hinweis
Mit diesem CD-Player können CD-RWs oder Discs, die nicht
korrekt bespielt wurden, möglicherweise nicht abgespielt
werden.
■ Informationen zu MP3- und WMADateien
Data Disc USB
Sie können MP3- und WMA-Dateien wiedergeben, die
auf einer CD-R/CD-RW aufgezeichnet bzw. auf einem
USB-Gerät gespeichert wurden.
MP3
MP3 ist eine Standardtechnologie und ein Standardformat
zum Komprimieren von Audiodaten in eine Datei kleiner
Größe. Dabei bleibt bei der Wiedergabe jedoch die
ursprüngliche Tonqualität erhalten.
Folgende Formate können abgespielt werden:
• MPEG-1 Audio Layer-3
Bitrate*: 32-320 Kbps
Abtastfrequenz: 44,1/48/32 kHz
• MPEG-2 Audio Layer-3, 2
Bitrate*: 8-160 Kbps
Abtastfrequenz: 24/22,05/16 kHz
• MPEG-2.5 Audio Layer-2
Bitrate*: 8-160 Kbps
Abtastfrequenz: 12/11,025/8 kHz
* Variable Bitraten werden unterstützt.
WMA
„WMA (Windows Media Audio)“ ist ein Dateiformat von
Microsoft und dient wie MP3 zum Codieren digitaler
Audiodateien. Die Dateien können aber mit einer höheren
Rate komprimiert werden als bei MP3.
Folgende Formate können abgespielt werden:
•Version 8
• Version 9 (Standard- und variable Bitraten werden
unterstützt. Professional und Lossless werden nicht
unterstützt.)
• High Profile
Bitrate*: 32-320 Kbps
Abtastfrequenz: 48/44,1/32 kHz
• Mid Profile
Bitrate: 16-32 Kbps
Abtastfrequenz: 22,05/16 kHz
* Konstante und variable Bitraten werden unterstützt.
INFORMATIONEN
WEITERE
So verhindern Sie Fehlfunktionen des Geräts:
• Verwenden Sie nur Discs in
Standardform. Anders geformte
Discs (z. B. Herzen), die auf dem
Markt erhältlich sind, können das
Gerät beschädigen.
• Verwenden Sie keine Disc, auf der sich Aufkleber,
Klebstoff o. Ä. befindet. Wenn Sie eine solche Disc
verwenden, kann sie im Gerät stecken bleiben oder
das Gerät beschädigen.
Deutsch
(Fortsetzung auf der nächsten Seite)
17 De
Page 66

HINWEISE ZU DISCS BZW. MP3-, WMA-DATEIEN
Hinweise
• Die Wiedergabe erfolgt bei einer Data Disc in
alphanumerischer Reihenfolge.
• Die Wiedergabe erfolgt bei USB in der Reihenfolge von Datum
und Uhrzeit der Dateierstellung.
• WMA-Dateien mit Urheberrechtsschutzsignalen (DRM)
können mit diesem Gerät nicht wiedergegeben werden.
• Die Disc muss mit ISO9660 kompatibel sein.
• In Dateien enthaltene Textdaten werden mit diesem Gerät nicht
angezeigt.
• Für Dateien und Ordner gelten folgende Höchstzahlen.
Data Disc USB
Höchstzahl an Dateien
Höchstzahl an Ordnern
Höchstzahl an Dateien pro
Ordner
512 999
255 255
511 255
■ Hinweise zum Umgang mit CDs
• Behandeln Sie Discs immer mit Sorgfalt, so dass die
Oberfläche nicht zerkratzt wird.
• Reinigen Sie die Oberfläche der Disc nicht mit DiscReinigungsmitteln, Schallplatten-Spray, AntistatikSpray oder -Flüssigkeit oder anderen Chemikalien, da
solche Mittel die Oberfläche der Disc irreparabel
beschädigen können.
• Setzen Sie Discs nicht über einen längeren Zeitraum
direktem Sonnenlicht, hohen Temperaturen oder hoher
Luftfeuchtigkeit aus. Andernfalls können sie sich
verformen oder anderweitig beschädigt werden.
Nein!
So lassen Sie eine 8-cm-CD (Single-CD)
wiedergeben
Legen Sie sie in die innere Vertiefung des Disc-Fachs.
Legen Sie keine normale 12-cm-CD auf eine 8-cm-CD.
• CDs werden bei der Wiedergabe nicht abgenutzt.
Wenn beim Umgang mit CDs jedoch die Oberfläche
beschädigt wird, kann die Wiedergabequalität der CDs
beeinträchtigt werden.
• Verwenden Sie zum Schreiben auf der beschrifteten
Disc-Seite unbedingt einen Filzstift o. Ä. Verwenden
Sie keinen Kugelschreiber, Bleistift oder anderes
Schreibutensil mit harter Spitze. Andernfalls kann die
Disc beschädigt und die Wiedergabe beeinträchtigt
werden.
• Achten Sie darauf, dass sich die Disc nicht verformt.
• Wenn eine Disc nicht mehr abgespielt werden soll,
nehmen Sie sie aus dem Gerät heraus und bewahren
Sie sie in einer geeigneten Hülle auf.
• Achten Sie beim Herausnehmen und Aufbewahren von
Discs darauf, die Seite mit den Daten nicht zu
zerkratzen.
• CDs werden durch kleine Staubpartikel oder
Fingerabdrücke auf der Seite mit den Daten nicht
beeinträchtigt. Trotzdem sollten sie möglichst sauber
sein. Reinigen Sie sie mit einem sauberen, trockenen
Tuch.
Wischen Sie nicht in kreisförmigen Bewegungen über
die CD, sondern immer von der Mitte nach außen.
18 De
Page 67

STÖRUNGSBEHEBUNG
Wenn das Gerät nicht ordnungsgemäß arbeitet, lesen Sie bitte in der folgenden Tabelle nach und überprüfen Sie, ob Sie
den Fehler anhand der vorgeschlagenen Abhilfemaßnahmen selbst beheben können. Bleibt der Fehler bestehen oder ist
er in der Spalte mit den Problemen nicht aufgeführt, ziehen Sie den Netzstecker heraus und wenden Sie sich an Ihren
autorisierten Yamaha-Händler oder -Kundendienst.
Problem Mögliche Ursachen Abhilfemaßnahmen
Das Gerät lässt sich
nicht einschalten.
Das Disc-Fach
schließt nicht
vollständig.
Die Wiedergabe der
Disc beginnt nicht.
Die USB-Wiedergabe
wird nicht gestartet.
Die Wiedergabe
beginnt verzögert
oder an der falschen
Stelle.
Es ist kein Ton zu
hören.
Das Netzkabel ist nicht an den Netzeingang AC
IN an der Rückseite des Geräts angeschlossen
oder der Netzstecker steckt nicht in der
Netzsteckdose.
Ein Fremdkörper blockiert das Fach. Überprüfen Sie das Disc-Fach sorgfältig und
Die Disc ist beschädigt. Überprüfen Sie die Disc sorgfältig und tauschen
Auf dem Laser-Abtaster hat sich Feuchtigkeit
niedergeschlagen.
Die Disc wurde falsch herum eingelegt. Legen Sie die Disc mit der Beschriftung nach
Die Disc ist verschmutzt. Reinigen Sie die Disc. 18
Das Format der MP3- oder WMA-Datei ist mit
diesem Gerät nicht kompatibel.
Die CD-RW (wiederbeschreibbar) wurde nicht
korrekt bespielt.
Bei der Disc handelt es sich um eine Disc mit
außergewöhnlicher Form, die mit diesem Gerät
nicht abgespielt werden kann.
Das Gerät befindet sich im USB-Modus. Wechseln Sie mit der Taste CD/USB in den
Das USB-Gerät ist nicht richtig angeschlossen. Schließen Sie das USB-Gerät erneut an. 8
Das Format der MP3- oder WMA-Datei ist mit
diesem Gerät nicht kompatibel.
Das Gerät befindet sich im Disc-Modus. Wechseln Sie mit der Taste CD/USB in den
Die Disc ist möglicherweise zerkratzt oder
beschädigt.
Die Ausgangskabel sind nicht richtig
angeschlossen.
Der Verstärker ist nicht richtig eingestellt. Stellen Sie am Verstärker den richtigen Eingang
Schließen Sie das Netzkabel fest an.
entfernen Sie den Fremdkörper. —
Sie sie gegebenenfalls aus.
Warten Sie nach dem Einschalten des Geräts 20
bis 30 Minuten, bevor Sie erneut versuchen,
eine Disc wiederzugeben.
oben ein.
Tauschen Sie die Disc gegen eine korrekt
bespielte Disc aus, die mit diesem Gerät
abgespielt werden kann.
Tauschen Sie die Disc gegen eine korrekt
bespielte Disc aus, die mit diesem Gerät
abgespielt werden kann.
Tauschen Sie die Disc gegen eine korrekt
bespielte Disc aus, die mit diesem Gerät
abgespielt werden kann.
Disc-Modus.
Tauschen Sie die Datei gegen eine korrekt
aufgezeichnete Datei aus, die mit diesem Gerät
abgespielt werden kann.
USB-Modus.
Überprüfen Sie die Disc sorgfältig und tauschen
Sie sie gegebenenfalls aus.
Schließen Sie die Kabel richtig an. Wenn das
Problem bestehen bleibt, sind die Kabel
möglicherweise defekt.
ein.
Siehe
Seite
8
—
—
9
17
17
17
5, 9
17
5, 9
18
7
—
INFORMATIONEN
WEITERE
Deutsch
19 De
Page 68

STÖRUNGSBEHEBUNG
Problem Mögliche Ursachen Abhilfemaßnahmen
Der Ton von einer
Komponente, die an
die Buchsen
DIGITAL OUT
angeschlossen ist,
wird nicht
wiedergegeben.
Der Ton setzt aus. Das Gerät ist Erschütterungen oder Stößen
Ein Brummen ist zu
hören.
Störgeräusche von
einem nahen Tuner.
Störgeräusche aus
dem Disc-Fach.
Die Fernbedienung
funktioniert nicht
oder nicht richtig.
PURE DIRECT wurde aktiviert. Schalten Sie PURE DIRECT aus. Oder nehmen
ausgesetzt.
Die Disc ist verschmutzt. Reinigen Sie die Disc. 18
Die Kabel sind nicht richtig angeschlossen. Schließen Sie die Audiokabel fest an. Wenn das
Der Tuner befindet sich zu nahe an diesem
Gerät.
Die Disc ist möglicherweise verformt. Legen Sie eine andere Disc ein.
Falscher Abstand oder Winkel. Die Fernbedienung funktioniert innerhalb einer
Der Fernbedienungssensor am Gerät ist direktem
Sonnenlicht oder starkem Licht (z. B. einer
Leuchtstoffröhre) ausgesetzt.
Die Batterien sind zu schwach. Tauschen Sie alle Batterien aus. 6
Sie eine analoge Verbindung vor.
Stellen Sie das Gerät an einem anderen Ort auf.
Problem bestehen bleibt, sind die Kabel
möglicherweise defekt.
Stellen Sie den Tuner und dieses Gerät weiter
voneinander entfernt auf.
Reichweite von 6 m und bei maximal 30 Grad
Winkelabweichung gegenüber der Vorderseite
des Geräts.
Stellen Sie das Gerät an einer anderen Stelle
auf. —
Siehe
Seite
11
—
7
—
—
6
TECHNISCHE DATEN
Audioteil
• Frequenzgang...............................................2 Hz - 20 kHz, ± 0,5 dB
• Klirrfaktor + Rauschen (1 kHz) .........................weniger als 0,002 %
• Störspannungsabstand..............................................mehr als 110 dB
• Dynamikbereich.......................................................mehr als 100 dB
• Ausgangsspannung (1 kHz, 0 dB)....................................2,0 ± 0,3 V
Eigenschaften der Laserdiode
• Material.................................................................................GaAlAs
• Wellenlänge............................................................................ 790 nm
• Laserausgang.................................................... Maximum 1,23 μW*
* Dieser Ausgang entspricht dem Messwert in einem Abstand von ca.
200 mm von der Linsenoberfläche im optischen Abtaster.
Allgemeines
• Spannungsversorgung
Modelle für USA und Kanada........ 120 V Netzspannung, 60 Hz
Modell für Australien ..................... 240 V Netzspannung, 50 Hz
Modelle für Europa und Großbritannien
.............................................. 220-240 V Netzspannung, 50 Hz
Modell für Asien und internationales Modell
.......................... 110-120/220-240 V Netzspannung, 50/60 Hz
Modell für Korea ............................ 220 V Netzspannung, 60 Hz
Modell für China ............................ 220 V Netzspannung, 50 Hz
• Leistungsaufnahme.................................................................... 16 W
• Abmessungen (B × H × T) ............................... 435 × 96 × 300 mm
• Gewicht.....................................................................................6,2 kg
Änderungen bei Design und technischen Daten bleiben
vorbehalten.
20 De
Page 69

Begrenzte Garantie für den Europäischen Wirtschaftsraum (EWR) und die Schweiz
Herzlichen Dank, dass Sie sich für ein Yamaha Produkt entschieden haben. In dem unwahrscheinlichen Fall, dass die Garantie für das Yamaha-Produkt in
Anspruch genommen werden muss, wenden Sie sich bitte an den Händler, bei dem es gekauft wurde. Sollten Sie auf Schwierigkeiten stoßen, wenden Sie
sich bitte and die Yamaha Repräsentanz in Ihrem Land. Auf unserer Internetseite (http://www.yamaha-hifi.com/ oder http://www.yamaha-uk.com/ für
Einwohner Großbritanniens) finden Sie alle Einzelheiten.
Wir garantieren für einen Zeitraum von zwei Jahren ab ursprünglichem Kaufdatum, dass dieses Produkt frei von Verarbeitungs- oder Materialfehlern ist.
Yamaha verpflichtet sich, gemäß der nachstehend angeführten Bedingungen, ein fehlerhaftes Produkt (oder Teile desselben) kostenfrei (gilt für Teile und
Arbeit) zu reparieren oder auszutauschen. Diese Entscheidung obliegt ausschließlich Yamaha. Yamaha behält sich vor, das Produkt gegen ein in Art und/
oder Wert und Zustand ähnliches Produkt auszutauschen, wenn das entsprechende Modell nicht mehr erzeugt wird, oder die Reparatur als unrentabel
angesehen wird.
Bedingungen
1. Dem defekten Produkt MUSS die Originalrechnung oder der Originalkaufbeleg (der Beleg muss das Kaufdatum, den Produkt-Code und den Namen
des Händlers aufweisen) beigelegt werden, ebenso eine Fehlerbeschreibung. Bei Fehlen einer eindeutigen Kaufbestätigung behält sich Yamaha das
Recht vor, den kostenfreien Service abzulehnen und das Produkt auf Kosten des Kunden zu retournieren.
2. Das Produkt MUSS von einem AUTORISIERTEN Yamaha-Händler innerhalb des Europäischen Wirtschaftsraums (EWR) oder der Schweiz gekauft
worden sein.
3. Es wurden keine wie auch immer gearteten Änderungen am Produkt vorgenommen, außer diese wurden von Yamaha schriftlich genehmigt.
4. Folgendes ist von der Garantie ausgeschlossen:
a. Regelmäßige Wartung und Reparatur oder Austausch von Verschleißteilen.
b. Schaden durch:
(1) Vom Kunden selber oder von nichtbefugten Dritten ausgeführte Reparaturen.
(2) Unsachgemäße Verpackung oder Handhabung während des Transports vom Kunden. Beachten Sie bitte, dass die sachgerechte Verpackung des
zur Reparatur gebrachten Produkts in der Verantwortung des Retournierenden liegt.
(3) Unsachgemäße Verwendung, einschließlich der, jedoch nicht beschränkt auf, (a) die Verwendung des Produkts zu anderen als den normalen
Zwecken oder Behandlung entgegen die Anweisungen Yamahas zur korrekten Handhabung, Wartung oder Lagerung und (b) die Installierung
oder Verwendung des Produkts auf andere Weise als dies den technischen oder Sicherheitsstandards jenes Landes entspricht, in dem das Produkt
verwendet wird.
(4) Unfälle, Blitzschlag, Wasser, Feuer, ungeeignete Belüftung, Auslaufen der Batterie oder jedem anderen Grund, den Yamaha nicht beeinflussen
kann.
(5) Defekte an jenem System, an welches dieses Produkt angeschlossen wird und/oder die Inkompatibilität mit Produkten anderer Hersteller.
(6) Die Verwendung eines nicht von Yamaha in den EWR und/oder die Schweiz importierten Produkts, wenn dieses Produkt nicht den technischen
oder Sicherheitsstandards jenes Landes, in dem es verwendet wird, und/oder der standardisierten Produktspezifikation für von Yamaha im EWR
und/oder der Schweiz vertriebene Produkte, entspricht.
(7) Andere als fur den AV- (audio-visuellen) Bereich bestimmte Produkte.
(Produkte, die der „Yamaha AV-Garantieerklärung“ unterliegen, sind auf unserer Website bei http://www.yamaha-hifi.com/ oder
http://www.yamaha-uk.com/ für Einwohner Großbritanniens definiert.)
5. Wenn es Unterschiede in den Garantiebedingungen zwischen jenem Land in dem das Produkt gekauft wurde, und jenem in dem das Produkt verwendet
wird, finden die Garantiebedingungen jenes Landes Anwendung, in dem das Produkt verwendet wird.
6. Yamaha kann für keinerlei Verluste oder Schäden, ob direkt, in Konsequenz oder anderweitig, verantwortlich gemacht werden, außer bezüglich der
Reparatur oder des Ersatzes eines Produkts.
7. Legen Sie bitte Kopien aller persönlichen Einstellungen und Daten an, da Yamaha weder für irgendwelche Änderungen noch für den Verlust solcher
Daten verantwortlich gemacht werden kann.
8. Diese Garantie beeinflusst nicht die gesetzlichen Verbraucherrechte unter dem geltenden nationalen Recht oder die Verbraucherrechte gegenüber dem
Händler, die durch einen Kaufvertrag entstehen.
Verbraucherinformation zur Sammlung und Entsorgung alter
Elektrogeräte und Benutzter Batterien
Befinden sich diese Symbole auf den Produkten, der Verpackung und/oder beiliegenden Unterlagen, so
sollten benutzte elektrische Geräte und Batterien nicht mit dem normalen Haushaltsabfall entsorgt werden.
In Übereinstimmung mit Ihren nationalen Bestimmungen und den Richtlinien 2002/96/EC und 2006/66/
EC, bringen Sie alte Geräte und benutzte Batterien bitte zur fachgerechten Entsorgung, Wiederaufbereitung
und Wiederverwendung zu den entsprechenden Sammelstellen.
Durch die fachgerechte Entsorgung der Elektrogeräte und Batterien helfen Sie, wertvolle Ressourcen zu
schützen und verhindern mögliche negative Auswirkungen auf die menschliche Gesundheit und die
Umwelt, die andernfalls durch unsachgerechte Müllentsorgung auftreten könnten.
Für weitere Informationen zum Sammeln und Wiederaufbereiten alter Elektrogeräte und Batterien,
kontaktieren Sie bitte Ihre örtliche Stadt- oder Gemeindeverwaltung, Ihren Abfallentsorgungsdienst oder
die Verkaufsstelle der Artikel.
[Entsorgungsinformation für Länder außerhalb der Europäischen Union]
Diese Symbole gelten nur innerhalb der Europäischen Union. Wenn Sie solche Artikel ausrangieren
möchten, kontaktieren Sie bitte Ihre örtlichen Behörden oder Ihren Händler und fragen Sie nach der
sachgerechten Entsorgungsmethode.
Anmerkung zum Batteriesymbol (untere zwei Symbolbeispiele):
Dieses Symbol kann auch in Kombination mit einem chemischen Symbol verwendet werden. In diesem
Fall entspricht dies den Anforderungen der Direktive zur Verwendung chemischer Stoffe.
Page 70

OBSERVERA: LÄS DETTA INNAN ENHETEN TAS I BRUK.
1 Läs noga denna bruksanvisning för att kunna ha största
möjliga nöje av enheten. Förvara bruksanvisningen nära till
hands för framtida referens.
2 Installera denna ljudanläggning på ett väl ventilerat, svalt,
torrt, rent ställe, och håll den borta från ställen som utsätts för
solsken, värmekällor, vibrationer, damm, fukt och/eller kyla.
Lämna ett fritt utrymme på minst 10 cm ovanför enheten,
minst 10 cm på höger och vanter sida och minst 10 cm på
baksidan.
3 Placera enheten på behörigt avstånd från andra elapparater,
motorer, transformatorer och annat som kan orsaka
störningar.
4 Utsätt inte enheten för hastiga temperaturväxlingar och
placera den inte på ett ställe där luftfuktigheten är hög (t.ex.
nära en luftfuktare) då fuktbildning i enheten skapar risk för
brand, elstötar, skador på enheten eller personskador.
5 Placera inte enheten på ett ställe där främmande föremål kan
tränga in i den eller där den kan utsättas för droppar eller
vattenstänk. Placera aldrig det följande ovanpå enheten:
– Övriga apparater då sådana kan orsaka skador och/eller
missfärgning av enhetens hölje.
– Brännbara föremål (t.ex. stearinljus) då sådana skapar risk
för brand, skador på enheten och/eller personskador.
– Vätskebehållare som kan falla och spilla vätska över
enheten, vilket skapar risk för elstötar och/eller skador på
enheten.
6 Täck aldrig över enheten med en tidning, duk, gardin el.dyl.
då detta skapar risk för överhettning. En alltför hög
temperatur inuti enheten kan leda till brand, skador på enheten
och/eller personskador.
7 Anslut inte enheten till ett vägguttag förrän samtliga övriga
anslutningar slutförts.
8 Använd aldrig enheten vänd upp och ned. Detta kan leda till
överhettning som orsakar skador.
9 Hantera inte tangenter, reglage och kablar onödigt hårdhänt.
10 Fatta tag i själva kontakten när nätkabeln kopplas bort från
vägguttaget; dra aldrig i kabeln.
11 Använd aldrig några kemiska lösningar för rengöring då dessa
kan skada ytbehandlingen.
12 Använd endast den spänning som står angiven på enheten.
Anslutning till en strömkälla med högre spänning än den
angivna kan orsaka brand, skador på enheten och/eller
personskador. Yamaha åtar sig inget ansvar för skador
beroende på att enheten används med en spänning utöver den
angivna.
13 Koppla vid åskväder loss nätkabeln från nätuttaget eller
förstärkaren för att skydda förstärkaren från skador på grund
av åsknerslag.
14 Försöka aldrig att utföra egna reparationer. Kontakta en
kvalificerad tekniker från Yamaha om servicebehov
föreligger. Du får inte under några omständigheter ta av
höljet.
15 Koppla bort nätkabeln från vägguttaget om enheten inte ska
användas under en längre tid (t.ex. under semestern).
16 Installera denna enhet nära ett vägguttag och där
stickkontakten lätt kan kommas åt.
17 Läs avsnittet ”FELSÖKNING” i bruksanvisningen för vanliga
driftsproblem innan du förutsätter att enheten är söndrig.
18 Innan enheten flyttas ska du trycka på POWER nedåt för att
stänga av denna enhet och sedan koppla bort nätkabeln från
vägguttaget.
19 Utsätt inte batterierna för kraftig värme från exempelvis
solljus, eld eller liknande.
20 VOLTAGE SELECTOR
(Endast modell till Asien och allmänna modeller)
VOLTAGE SELECTOR (spänningsomkopplare) på denna
enhets bakpanel måste ställas in på den lokala nätspänningen
FÖRE anslutning till nätuttaget. Spänningarna är:
...................... 110/120/220/230–240 V nätspänning, 50/60 Hz
Så länge den här enheten är ansluten till vägguttaget, är
den inte bortkopplad från nätströmmen, även om
enheten stängs av med POWER.
VARNING
UTSÄTT INTE ENHETEN FÖR REGN ELLER
FUKT DÅ DETTA SKAPAR RISK FÖR BRAND
ELLER ELSTÖTAR.
LASERSÄKERHET
Apparaten använder sig av en laser. På grund av risken för
ögonskador bör ingen annan än en kvalificerad reparatör öppna höljet
eller försöka reparera apparaten.
FARA!
Apparaten avger slig laserstrålning i öppet läge. Undvik direkt
ögonkontakt med strålen. Placera inte ögonen i närheten av skivfacket
eller någon annan öppning för att titta in i apparaten, medan apparaten
är ansluten till ett nätuttag.
Laserkomponenten i denna apparat kan avge en
strålning som överskrider gränsvärdet för klass 1.
OBSERVERA
Apparaten kopplas inte bort från växelströmskällan
(nätet) så länge som den är ansluten till vägguttaget,
även om själva apparaten har stängts av.
ADVARSEL
Netspæendingen til dette apparat er IKKE afbrudt,
sålæenge netledningen siddr i en stikkontakt, som er
t endt – også selvom der or slukket på apparatets
afbryder.
VARO ITUS
Laitteen toisiopiiriin kytketty käyttökytkin ei irroita
koko laitetta verkosta.
i Sv
Page 71

INTRODUKTION
FUNKTIONER ....................................................... 2
MEDFÖLJANDE TILLBEHÖR .......................... 2
REGLAGE OCH FUNKTIONER........................3
Frontpanel.................................................................. 3
Teckenfönster ............................................................ 4
Fjärrkontroll...............................................................5
Isättning av batterier i fjärrkontrollen........................ 6
Använda fjärrkontrollen.............................................6
FÖRBEREDELSE
ANSLUTNINGAR.................................................. 7
Ansluta förstärkaren...................................................7
Anslutning av medföljande nätkabel .........................8
Ansluta USB-enheter.................................................8
ANVÄNDNING
GRUNDLÄGGANDE MANÖVRERING............ 9
Starta uppspelning .....................................................9
Tillfällig paus...........................................................10
Stoppa uppspelning.................................................. 10
Stänga av apparaten................................................. 10
Direkt uppspelning från önskat spår........................ 10
Förbättra ljudkvaliteten (PURE DIRECT-läge)
............................................................................. 11
Hoppa tillbaka till början av önskat spår................. 11
Snabbspelning framåt eller bakåt............................. 11
Byte av display ........................................................ 12
Ändring av displayens ljusstyrka.............................12
SLUMPMÄSSIG SKIVSPELNING ................... 13
REPETERAD AVSPELNING ............................ 13
Val av önskat repeteringssätt................................... 13
Repetering A-B........................................................ 14
PROGRAMMERAD SPELNING ......................15
Stoppa programmerad spelning............................... 16
Radera programmerat spår....................................... 16
INNEHÅLL
INTRODUKTION
FÖRBEREDELSE
ANVÄNDNING
YTTERLIGARE
INFORMATION
YTTERLIGARE INFORMATION
ATT OBSERVERA OM SKIVOR/MP3-, WMA-
FILER................................................................ 17
FELSÖKNING ..................................................... 19
TEKNISKA DATA............................................... 20
■ Angående denna bruksanvisning
• y indikerar tips för användningen.
• I denna bruksanvisning betecknas ljud-CD-skivor som ”Audio CD”, MP3/WMA-skivor som ”Data Disc”, och MP3/
WMA-filer lagrade på USB-enhet som ”USB”.
• Denna bruksanvisning är tryckt före tillverkningen av produkten. Utförande och tekniska data kan delvis ändras på
grund av förbättringar etc. Om någon skillnad mellan bruksanvisningen och produkten skulle förekomma, så har
produkten företräde.
1 Sv
Svenska
Page 72

INTRODUKTION
FUNKTIONER
◆ Optisk digitalutgång
◆ Koaxial digitalutgång
◆ CD-R-, CD-RW-skivor kan spelas
(Se sidan 17 för ytterligare upplysningar.)
◆ MP3-, WMA-skivor kan spelas
◆ MP3, WMA-filer lagrade på USB-enhet kan spelas
◆ Programmerad spelning (endast Audio CD)
◆ Slumpmässigt melodival
◆ Repeterad skivspelning av en melodi/hela skivan
◆ Repeterad A-B-spelning (endast Audio CD)
◆ Justerbar ljusstyrka för displayen
◆ PURE DIRECT-funktion
MEDFÖLJANDE TILLBEHÖR
Var god kontrollera att följande delar finns med i förpackningen:
Fjärrkontroll RCA-stereokabel
Batterier (× 2)
(AA, R6, UM-3)
Nätkabel
2 Sv
Page 73

Frontpanel
REGLAGE OCH FUNKTIONER
INTRODUKTION
1 POWER
Tryck för att växla mellan power ON/OFF.
y
POWER-indikatorn tänds när enheten är påslagen.
2 USB-port
Anslut USB-enheten. Se sidan 8 för mer information.
3 PURE DIRECT
Ställ PURE DIRECT i läge på eller av för bättre
ljudkvalitet.
y
PURE DIRECT-indikatorn ovan tänds när enheten befinner sig i
PURE DIRECT-läge. Se sidan 11 för mer information.
4 Skivfack
Sätt i en skiva.
5 (Öppna/Stäng)
Öppna eller stäng skivfacket.
6 / (Hoppa över/Sök bakåt),
/ (Hoppa över/Sök framåt)
/ : Hoppa till nästa spår.
/ : Hoppa tillbaka till början av aktuellt spår.
/ (två gånger): Hoppa till föregående spår.
Tryck och håll / eller / intryckt för att
söka bakåt/framåt.
y
Varje gång du håller / eller / intryckt
ökas sökhastigheten två nivåer.
7 (Spela upp)
Starta uppspelning.
8 (Paus)
Pausa uppspelning. Tryck på eller för att återuppta
uppspelning.
9 (Stopp)
Stoppa uppspelning.
0 USB-indikator
Tänds/släcks när apparaten befinner sig i USB-/skivläge
och blinkar när apparaten läser från USB-enheten.
A Displaypanel
Visar apparatens aktuella status.
B Fjärrkontrollsensor
Sensorn tar emot signaler från fjärrkontrollen.
3 Sv
Svenska
Page 74

REGLAGE OCH FUNKTIONER
Teckenfönster
Audio CD
Data Disc USB
1 Indikeringen för valt uppspelningssätt visas.
2 Visar de olika tidsindikeringarna. (Se sidan 12 för ytterligare
upplysningar.)
3 Visar spårnumret som har valts eller som just spelas.
4 Aktuellt filnummer visas.
5 Tänds när denna enhet är i skivläge (se sidan 9) och när en
Audio CD identifieras i skivfacket.
6 Denna indikering visas vid uppspelning av en MP3-skiva.
7 Denna indikering visas vid uppspelning av en WMA-skiva.
4 Sv
Page 75

Fjärrkontroll
REGLAGE OCH FUNKTIONER
1 Sändare för infraröda signaler (sid. 6)
Sänd infraröda signaler till apparaten.
2 CD/USB (sid. 9)
Växla mellan skivläge och USB-läge.
3 DIMMER (sid. 12)
Välj ljusstyrka för teckenfönstret.
4 Sifferknappar (sid. 10)
Välj ett spår direkt.
5 PROGRAM (sid. 15)
Sätta på och stänga av programläget.
6 / (Sök bakåt/framåt) (sid. 11)
Sök spår bakåt/framåt.
7 / (Hoppa bakåt/framåt) (sid. 11)
Hoppa till nästa/föregående spår eller hoppa till början av
aktuellt spår.
8 OPEN/CLOSE (sid. 9)
Öppna eller stäng skivfacket.
9 PURE DIRECT (sid. 11)
PURE DIRECT-läge på eller av.
0 DISPLAY (sid. 12)
Växla tidvisning.
A ENTER (sid. 15)
Bekräfta spårnumret när enheten befinner sig i
programinmatningsläge.
INTRODUKTION
B CLEAR (sid. 16)
Radera programmerat spår.
C REPEAT (sid. 13)
Repetera uppspelning av ett enskilt spår eller alla spår.
D RANDOM (sid. 13)
Ställ in slumpmässig avspelning.
E A/B (sid. 14)
A-B-repetering.
F (Paus) (sid. 10)
Pausa uppspelning.
G (Spela upp) (sid. 9)
Starta uppspelning.
H (Stopp) (sid. 10)
Stoppa uppspelning.
Svenska
5 Sv
Page 76

REGLAGE OCH FUNKTIONER
Isättning av batterier i fjärrkontrollen
1 Tryck på och skjut upp batterifackets
lock.
2 Sätt i de två medföljande batterierna (AA, R6,
UM-3) enligt polmarkeringarna (+ och –) inuti
batterifacket.
3 Skjut tillbaka locket tills det klickar på plats.
■ Anmärkningar angående batterier
• Byt ut båda batterierna när du upptäcker att
fjärrkontrollens räckvidd minskar.
• Använd batterier av storlek och typ AA, R6, UM-3.
• Kontrollera att batteripolerna är vända åt rätt håll.
Se illustrationen inuti batterifacket.
• Ta ur batterierna om fjärrkontrollen inte ska användas
under en längre tid.
• Använd inte gamla batterier tillsammans med nya.
• Använd inte olika typer av batterier (t.ex. alkaliska
batterier och manganbatterier) tillsammans. Läs noga
vad som står på batteriförpackningen, eftersom dessa
olika typer av batterier kan ha samma form och färg.
• Gör dig av med batterierna omedelbart om de skulle ha
läckt. Undvik att vidröra det ämne som har läckt ut,
och försök undvika att det kommer i kontakt med
kläder etc. Rengör batterifacket noggrant innan nya
batterier sätts i.
• Kasta inte batterier tillsammans med vanliga sopor,
utan avyttra dem i enlighet med lokala bestämmelser.
Använda fjärrkontrollen
Fjärrkontrollen sänder en riktad infraröd stråle.
Se till att rikta fjärrkontrollen direkt mot
fjärrkontrollsensorn på apparatens framsida, när
fjärrkontrollen används för manövrering.
Inom 6 m
■ Hantering av fjärrkontrollen
• Inga stora hinder får förekomma mellan fjärrkontrollen
och förstärkaren.
• Spill inte vatten eller andra vätskor på fjärrkontrollen.
• Tappa inte fjärrkontrollen.
• Fjärrkontrollen får inte läggas eller förvaras på platser
där följande förhållanden råder:
– hög luftfuktighet, som t.ex. nära ett bad
– hög temperatur, som t.ex. nära ett värmeelement
eller en kamin
–extrem kyla
– mycket dammigt
• Utsätt inte fjärrkontrollsensorn för stark belysning,
eftersom det kan göra att fjärrkontrollen inte fungerar
ordentligt. Undvik särskilt inverterat ljus från en
lysrörslampa. Flytta vid behov förstärkaren för att
skydda den från direkt ljus.
6 Sv
Page 77

FÖRBEREDELSE
ANSLUTNINGAR
Ansluta förstärkaren
OBSERVERA
• Se till att samtliga apparaters nätströmbrytare står i ”OFF”-läge innan någon anslutning görs.
• Anslutningarna skall göras till de rätta ingångarna på förstärkaren eller en annan komponent.
• Om störningar uppstår i anläggningen, t. ex. i en tuner, försök ändra placeringen av apparaterna.
FÖRBEREDELSE
RCAstereokabel
(medföljer)
• Den digitala utgången är avstängd när enheten befinner sig i PURE DIRECT-läge.
Välj det anslutningssätt nedan som bäst passar för anslutning av denna enhet till din förstärkare.
När utgångarna ANALOG OUT på denna
apparat används ( )
Anslut dessa uttag till CD (eller AUX)-uttagen på
förstärkaren med medföljande RCA-stereokabel. För
ytterligare detaljer om dessa anslutningar, se
bruksanvisningen för den förstärkare som används.
• Se till att anslutningarna från vänster (L) utgångsuttag
och från höger (R) uttag görs till motsvarande (vänster
och höger) uttag på förstärkaren eller annan
komponent.
KoaxialkabelOptisk kabel
Förstärkare
När utgången DIGITAL OUT (COAXIAL) på
denna apparat används ( )
Anslut detta uttag till det digitala ingångsuttaget på en
förstärkare med en kommersiellt tillgänglig koaxialkabel.
När utgången DIGITAL OUT (OPTICAL) på
denna apparat används ( )
Anslut detta uttag till det optiska ingångsuttaget på en
förstärkare med en kommersiellt tillgänglig optisk kabel.
• Använd en pålitlig optisk kabel.
Svenska
7 Sv
Page 78

ANSLUTNINGAR
Anslutning av medföljande nätkabel
Endast modell till Asien
och allmänna modeller
Modeller till Europa, inkl.
Storbritannien
Till vägguttag med
medföljande nätkabel
■ VOLTAGE SELECTOR
(Endast modell till Asien och allmänna
modeller)
VOLTAGE SELECTOR på enhetens bakpanel måste
ställas in på den lokala huvudspänningen INNAN
nätkabeln ansluts till ett vägguttag.
Felaktig inställning av nätspänningsväljaren VOLTAGE
SELECTOR kan medföra skada på enheten och orsaka
brandfara.
Använd en platt skruvmejsel för att vrida
nätspänningsväljaren VOLTAGE SELECTOR medurs
eller moturs till korrekt läge.
Följande spänningar gäller:
.................110/120/220/230-240 V nätspänning, 50/60 Hz
■ Ansluta apparaten till vägguttaget
Anslut den medföljande nätkabeln till nätuttaget AC IN på
apparatens baksida när samtliga anslutningar har slutförts,
och anslut sedan nätkabeln till ett lämpligt vägguttag.
Ansluta USB-enheter
Apparaten har en USB-port och kan hämta MP3- eller
WMA-filer som sparats på USB-enheten. Anslut USBenheten till USB-porten på apparatens frontpanel.
OBSERVERA
Avlägsna inte USB-enheten när USB-uppspelning pågår
eller när USB-indikatorn blinkar.
■ Understödda USB-enheter
Denna apparat understöder USB-masslagringsenheter
(t.ex. flashminnen, kortläsare eller bärbara musikspelare)
som använder formatet FAT16 eller FAT32.
Anmärkningar
• Vissa enheter kanske inte fungerar ordentligt även om de
uppfyller kraven.
• Anslut inte andra enheter än USB-masslagringsenheter: USBladdare, USB-hubbar, datorer, hårddiskar etc.
• Om du sätter i två eller fler minneskort samtidigt i kortläsaren
som är ansluten till apparatens USB-port så identifieras endast
ett av korten.
• Yamaha och dess underleverantörer ansvarar inte för förlorade
data som lagrats på USB-enheter som är anslutna till denna
apparat. Som en försiktighetsåtgärd rekommenderas att du tar
säkerhetskopior.
• Spelbarhet och strömförsörjning till alla slags USB-enheter
garanteras inte.
8 Sv
Page 79

ANVÄNDNING
Denna bruksanvisning beskriver hur apparaten skall manövreras med fjärrkontrollen.
Om du vill manövrera apparaten med kontrollerna på framsidan, skall du använda
motsvarande knappar på framsidan.
Audio CD Data Disc USB
, och -ikonerna anger musikdataformat som kan användas.
GRUNDLÄGGANDE MANÖVRERING
Anmärkningar
• När du sätter i en skiva måste den placeras inom
skivstyrningarna (4 markeringar på skivtallriken).
• Om skivan sätts i fel kan den kanske inte läsas korrekt. Öppna i
så fall skivfacket och sätt i skivan på nytt.
2 Tryck in OPEN/CLOSE för att stänga
skivfacket.
1 Tryck in POWER för att sätta på apparaten.
2 Tryck på CD/USB för att växla mellan
skivläge och USB-läge.
När USB-läge valts tänds USB-indikatorn och när
man väljer skivläge släcks USB-indikatorn.
y
Denna inställning bibehålls även om du stänger av apparaten.
Starta uppspelning
■ Spela upp skivor
Audio CD Data Disc
1 Tryck in OPEN/CLOSE för att öppna
skivfacket och sätt i en skiva.
Etiketten vänd uppåt.
ANVÄNDNING
y
Det går också att stänga skivfacket med genom att trycka in h,
eller genom att försiktigt skjuta in skivfackets framkant. Om
skivfacket stängs på ett av dessa sätt startar avspelningen
automatiskt.
3 Tryck på h för att starta uppspelning.
För en Audio CD startar uppspelningen från det
första spåret och för en Data Disc görs uppspelning i
alfabetisk ordning enligt filnamn.
Visningsinformation i steg 2
Audio CD
Totalt antal spår Total inspelad tid
på skivan
Data Disc
Skivfack
Totalt antal filer
Svenska
9 Sv
Page 80

GRUNDLÄGGANDE MANÖVRERING
■ Spela upp från USB-enheter
USB
Stänga av apparaten
Anslut USB-enheten till USB-porten på
apparatens frontpanel. (För mer information, se
sidan 8.)
När USB-läget är valt (USB-indikatorn tänds), visas först
filnamnet i frontpanelens display (se sidan 12), och
uppspelning startar automatiskt i ordning enligt datum och
tid då filen skapades om det finns uppspelningsbara filer
på USB-enheten.
Koppla bort USB-enheter
Tryck på för att stoppa uppspelning och koppla
därefter bort USB-enheten.
Anmärkning
Avlägsna inte USB-enheten när USB-uppspelning pågår eller när
USB-indikatorn blinkar.
Tillfällig paus
USBAudio CD Data Disc
Tryck in POWER igen.
Om du stänger av strömmen i skivläge och sätter på
strömmen igen startar uppspelningen automatiskt från
aktuellt ställe på skivan. Om du stänger av strömmen i
USB-läge startar uppspelning automatiskt med ansluten
USB-enhet.
Direkt uppspelning från önskat spår
Audio CD
Välj önskat spår med sifferknapparna.
Exempel: Val av spår nummer 12
Tryck på ”1”, och därefter på ”2”.
+
Följande information visas.
Valt spårnummer
Uppspelning startar inom 2 sekunder.
Tryck in e.
Återuppta skivspelningen genom att trycka in e igen
(eller trycka in h).
Stoppa uppspelning
USBAudio CD Data Disc
Tryck in s.
Vid tryckning på h igen startar uppspelning från och med
det första spåret.
Anmärkning
Denna funktion finns inte för Data Disc och USB.
y
Du kan även välja och spela upp ett önskat spår under
uppspelning.
10 Sv
Page 81

Förbättra ljudkvaliteten (PURE
DIRECT-läge)
USBAudio CD Data Disc
GRUNDLÄGGANDE MANÖVRERING
y
• Dessa funktioner kan även utföras med Data Disc/USB.
• Dessa funktioner kan även utföras när enheten är i pausläge.
• Funktionerna kan även utföras med b/w och f/a
på frontpanelen.
Tryck på PURE DIRECT.
Apparaten ställs i PURE DIRECT-läge.
• PURE DIRECT-indikatorn tänds.
• Den digitala utgången stängs av.
• Frontpanelens teckenfönster släcks och endast minimalt antal
indikatorer och meddelanden visas under pågående avspelning.
Anmärkning
Anslut med ANALOG OUT-utgångar när du använder PURE
DIRECT-läge (se sidan 7).
y
•Tryck på PURE DIRECT igen för att stänga av PURE
DIRECT-läge.
• Denna inställning bibehålls även om du stänger av apparaten.
Hoppa tillbaka till början av önskat spår
USBAudio CD Data Disc
Tryck en gång på för att spela från början av
nästa spår.
Tryck en gång på för att spela från början av
aktuellt spår.
Snabbspelning framåt eller bakåt
USBAudio CD Data Disc
Tryck en gång på för snabbspelning framåt.
Tryck en gång på för snabbspelning bakåt.
ANVÄNDNING
Tryck på i önskat läge för att återuppta
avspelningen.
y
• Dessa funktioner kan även utföras med Data Disc/USB.
• Musiken kan höras (i ett något förvanskat skick) under manuell
sökning i båda riktningarna. Detta gör det enkelt att exakt finna
det önskade läget på ett spår eller för att få en uppfattning om
skivans innehåll. För vissa MP3/WMA-filer kanske det inte
hörs något ljud.
• Varje gång du trycker på eller ökas sökhastigheten
två nivåer.
• Funktionerna kan även utföras genom att man trycker ner och
håller kvar b/w eller f/a på frontpanelen under
mer än 2 sekunder.
Tryck två gånger på för att spela från början
av föregående spår.
Svenska
11 Sv
Page 82

GRUNDLÄGGANDE MANÖVRERING
Byte av display
■ Vid uppspelning av Audio CD-skivor
Audio CD
Följande visningssätt (1 - 3) kan väljas genom att trycka på DISPLAY.
1 Förfluten speltid för aktuellt spår (grundinställning)
2 Återstående speltid för aktuellt spår
3 Återstående tid på skivan
■ Vid uppspelning från en Data Disc eller USB-enhet
USBData Disc
Du kan visa filnamnet tillfälligt genom att trycka på DISPLAY.
Dessa displayvisningar gäller en MP3-fil.
1 Förfluten speltid för aktuellt spår
2 Filnamn*
* Max. 28 tecken
Anmärkning
Apparaten kan endast visa alfanumeriska tecken.
Ändring av displayens ljusstyrka
Tryck på DIMMER för att ändra ljusstyrkan på
frontpanelens display.
Varje gång du trycker på DIMMER så ändras ljusstyrkan
enligt följande:
Max. (ljusast) J Nivå 1 (grundinställning) J Nivå 2 J
Nivå 3 (mörkast) J Max.
Anmärkningar
• Ljusstyrkan minskar en aning vid uppspelning förutom när
nivån är inställd på max. belysning.
• Ljusstyrkan kan tillfälligt minska för vissa manöverfunktioner
utom när nivån är inställd på max. belysning.
• Denna inställning bibehålls även om du stänger av apparaten.
Återgår till normal visning efter att ett
filnamn visats.
12 Sv
Page 83

SLUMPMÄSSIG SKIVSPELNING
USBAudio CD Data Disc
Du kan spela upp spåren i slumpmässig ordning.
Start av slumpmässig spelning
Tryck på , och därefter på RANDOM.
+
Avslutande av slumpmässig spelning
Tryck in .
REPETERAD AVSPELNING
Anmärkning
Dessa funktioner kan även utföras med Data Disc/USB.
ANVÄNDNING
Val av önskat repeteringssätt
USBAudio CD Data Disc
Det går att välja ett spår eller hela skivan för repeterad
spelning med en tryckning på REPEAT.
Repeteringsfunktionen byts varje gång REPEAT trycks
in.
(Spårrepetering)
(Full repetering)
(Av)
S (Spårrepetering)
Ett och samma spår spelas upprepade gånger.
ALL (Full repetering)
Alla spår (hela skivan) omspelas.
Anmärkning
Dessa funktioner kan även utföras med Data Disc/USB.
y
Denna funktion finns även under programmerad avspelning och
slumpmässig avspelning.
Svenska
13 Sv
Page 84

REPETERAD AVSPELNING
Repetering A-B
Audio CD
Genom att ange två punkter (start- och slutpunkt) är det
möjligt att välja repetering av ett specifikt avsnitt på
skivan genom att trycka på A/B vid uppspelning.
1 Tryck på A/B för att välja startpunkten för
repetering.
”A-” tänds.
2 Tryck på A/B för att välja slutpunkten för
repetering.
”A-B” tänds.
Valt avsnitt spelas upp om och om igen.
Urkoppling av repetering A-B
Tryck på A/B igen för att få ”A-B” att försvinna från
frontpanelens visning.
Anmärkningar
• Man kan inte ställa in A-B-repetering från ett spår till ett annat.
• Denna funktion finns inte för Data Disc och USB.
• Om du stoppar uppspelning med så avbryts A-B-repetering.
• A-B-repetering kan inte användas när enheten befinner sig i
PURE DIRECT-läge.
14 Sv
Page 85

PROGRAMMERAD SPELNING
Audio CD
Du kan programmera uppspelningssekvensen för upp till
50 spår från en CD-skiva. Denna funktion finns inte för
Data Disc och USB.
1 Tryck in s för att stoppa spelningen.
Följande information visas.
När du trycker på ”6”:
Valt spårnummer
När du trycker på ENTER:
Visar hur många spår
som är programmerade
för tillfället
Visar den totala
speltiden för de spår
som hittills har
programmerats
Gör om denna manöver för att programmera fler spår.
Det går bra att välja samma spår igen.
Anmärkning
Om du trycker på PROGRAM i programinmatningsläge återgår
enheten till normalt uppspelningsläge, och programmerade spår
lagras.
4 Tryck in h för att starta skivspelning.
ANVÄNDNING
2 Tryck in PROGRAM.
• I detta läge visas information i
teckenfönstret normalt även om
apparaten befinner sig i läge
PURE DIRECT.
Apparaten ställs i programinmatningsläge.
3 Programmera önskat spår genom att trycka
in motsvarande sifferknappar och tryck på
ENTER.
+
Följande information visas.
Aktuellt spår
Förfluten speltid för
aktuellt spår
Svenska
15 Sv
Page 86

PROGRAMMERAD SPELNING
Stoppa programmerad spelning
Tryck in s.
För att starta om programavspelning trycker du
på h efter att du tryckt på PROGRAM.
Spelning startar från början av programmet.
Radera programmerat spår
Det finns ett flertal metoder, såsom beskrivs nedan.
■ Radera senast programmerat spår
Tryck på CLEAR i programinmatningsläge.
Följande information visas.
Visar hur många spår
som är programmerade
för tillfället
Det senast programmerade spåret raderas.
Visar den totala
speltiden för de spår
som hittills har
programmerats
■ Radera alla programmerade spår
Tryck på CLEAR efter att du lämnat
programinmatningsläge.
Följande information visas.
Samtliga programmerade spår raderas.
Displayen slocknar efter 2 sekunder.
Anmärkning
Samtliga programmerade spår raderas när man växlar till USBläge, öppnar skivfacket eller slår av POWER.
16 Sv
Page 87

YTTERLIGARE INFORMATION
ATT OBSERVERA OM SKIVOR/MP3-, WMA-FILER
■ Skivor som kan användas med denna
apparat
Audio CD Data Disc
Denna apparat är tillverkad för avspelning av CD-skivor
märkta på nedanstående sätt. Försök aldrig att lägga i en
annan sorts skiva i apparaten. Denna apparat kan också
avspela 8 cm CD-skivor.
....
CD-skivor (digitalt ljud)
De mest populära skivorna som finns i
fackhandeln är vanliga CD-skivor för ljud.
....
CD-R,CD-RW digitala ljudskivor
Musik-CD-skiva skapad genom kopiering
på en CD-R- eller CD-RW-skiva (inkl.
MP3- eller WMA-filer).
Anmärkningar
• Var noga med att använda CD-R- eller
CD-RW-skivor som har tillverkats av en
pålitlig tillverkare.
• Var noga med att endast använda CD-R- eller
CD-RW-skivor som har minst en av följande
meningar tryckta på skivan eller skivhöljet.
FOR CONSUMER
FOR CONSUMER USE
FOR MUSIC USE ONLY
• Se till att använda en slutbehandlad CD-Reller CD-RW-skiva.
....
CD-TEXT-skivor
Skivor som har spelats in med textdata
som till exempel skivtitlar, spårtitlar och
artistnamn.
Dessa skivor kan spelas på vanliga CDspelare, men textdata visas inte.
Anmärkning
Det kan hända att denna apparat inte kan spela vissa CD-RWskivor eller andra skivor som inte har spelats in på rätt sätt.
För att förhindra felfunktion:
• Använd ingen icke-standardskiva
(hjärtformad etc.) som finns i
fackhandeln, därför att sådana kan
skada apparaten.
• Använd inte en skiva med fastsatt
tejp, etiketter eller lim. Om du använder en sådan
skiva, kan den fastna inne i apparaten och då kan
resultatet bli att apparaten skadas.
■ Om MP3- och WMA-filer
USBData Disc
Du kan spela MP3- och WMA-filer som spelats in på en
CD-R-/CD-RW-skiva, samt filer som lagrats på en USB-enhet.
MP3
MP3 är en standardteknik och ett standardformat för
komprimering av ljudsekvenser till små filer.
Ljudkvalitetens ursprungliga nivå bevaras emellertid vid
uppspelning.
Spelbara format är:
• MPEG-1 Audio Layer-3
Bithastighet*: 32-320 kbit/s
Samplingfrekvens: 44,1/48/32 kHz
• MPEG-2 Audio Layer-3, 2
Bithastighet*: 8-160 kbit/s
Samplingfrekvens: 24/22,05/16 kHz
• MPEG-2,5 Audio Layer-2
Bithastighet*: 8-160 kbit/s
Samplingfrekvens: 12/11,025/8 kHz
* Variabel bithastighet stöds.
WMA
”WMA (Windows Media Audio) ” är ett filformat från
Microsoft för kodning av digitala ljudfiler liknande MP3filer, men med högre komprimeringsgrad än MP3-filer.
Spelbara format är:
•Version 8
• Version 9 (Standard och variabla bithastigheter stöds.
Professionell och Lossless (förlustfri) stöds inte).
• High Profile
Bithastighet*: 32-320 kbit/s
Samplingfrekvens: 48/44,1/32 kHz
• Mid Profile
Bithastighet: 16-32 kbit/s
Samplingfrekvens: 22,05/16 kHz
* Både konstant och variabel bithastighet understöds.
Anmärkningar
• Uppspelning av Data Disc startar i alfanumerisk ordning.
• Uppspelning av USB-data startar enligt datum och tid.
• Kopieringsskyddade WMA- (DRM)-filer kan inte spelas på
denna apparat.
• Isatt skiva måste vara ISO9660-kompatibel.
• Textdata i filer visas inte.
• Max. antal filer och mappar är enligt följande.
Data Disc USB
Max. antal filer
Max. antal mappar
Max. antal filer per mapp
512 999
255 255
511 255
YTTERLIGARE
INFORMATION
Svenska
(fortsätter på nästa sida)
17 Sv
Page 88

ATT OBSERVERA OM SKIVOR/MP3-, WMA-FILER
■ Hantering av CD-skivor
• Behandla alltid CD-skivan försiktigt så att ytan inte
repas.
• CD-skivor nöts inte vid spelning, men skador på
skivans yta kan medföra onormal spelning.
• Se till att du använder en filtpenna eller liknande när du
vill skriva på etiketten på skivan. Använd inte
kulspetspenna, blyertspenna eller annan penna med
hård spets eftersom en dylik kan skada skivan och
påverka spelningen av skivan.
• Se till så att dina skivor inte blir skeva.
• När du inte använder en skiva ska du ta ut den ur
apparaten och bevara den i sitt konvolut.
• När du tar bort eller skall förvara en skiva, skall du
vara försiktig så att spelytan inte skadas.
• Små dammpartiklar och fingeravtryck på skivans yta
påverkar inte avspelningen, men skivan bör dock hållas
ren. Använd en ren, torr trasa.
Torka av från mitten och rakt utåt mot kanten.
Spelning av 8 cm CD-skiva
Lägg skivan i skivfackets inre nedsänkning. Lägg inte en
vanlig (12 cm) CD-skiva ovanpå en 8 cm CD-skiva.
• Använd aldrig rengöringsmedel, skiv-spray,
antistatiskt spray eller vätska eller andra kemiska
medel för rengöring av en CD-skiva, eftersom sådana
ämnen kan orsaka obotlig skada på CD-skivans yta.
• Utsätt inte skivan för direkt solsken, hög temperatur
eller fukt under en längre tid eftersom sådant kan
medföra att skivan blir skev eller skadad på annat sätt.
Fel!
18 Sv
Page 89

FELSÖKNING
Om apparaten inte fungerar normalt, bör du ta en titt på följande punkter för att se om felet kan rättas till med de enkla
åtgärder som anges. Kan felet inte rättas till eller om det inte finns upptaget i kolumnen Symptom, dra ur strömsladden
och ta kontakt med din auktoriserade Yamaha återförsäljaren eller en serviceverkstad för hjälp.
Symptom Trolig Orsak Åtgärd
Apparaten startar
inte.
CD-facket stängs
inte helt.
Ingen avspelning
börjar.
USB-avspelning
startar inte.
Avspelningen är sen
eller börjar på fel
plats.
Inget ljud hörs Felaktig anslutning av utgående kablar. Anslut kablarna på rätt sätt. Om problemet
Ljudet från en
komponent ansluten
till DIGITAL OUTuttagen hörs inte.
Ljudet ”hoppar”. Apparaten är utsatt för vibrationer eller stötar. Omplacera apparaten. —
Ljudet ”brummar”. Felaktiga kabelanslutningar. Anslut ljud-kablarna ordentligt. Om problemet
Störningar från en
närstående tuner.
Nätsladden är inte ansluten till AC IN på
baksidan eller inte isatt i vägguttaget.
Ett främmande föremål hindrar skivfacket. Kontrollera skivfacket noggrant och ta bort det
CD-skivan är skadad. Kontrollera CD-skivan noggrant och byt ut den
Fukt på laserpickupen. Vänta 20 till 30 minuter efter strömmen har
CD-skivan har lagts i med fel sida upp. Ta ut skivan och lägg i den med etiketten vänd
CD-skivan är smutsig. Rengör CD-skivan. 18
MP3- eller WMA-filens format är inte
kompatibelt med denna enhet.
Den återinspelningsbara skivan (CD-RW) har
inte spelats in på rätt sätt.
Skivan är en icke-standardskiva som inte kan
spelas på denna apparat.
Apparaten är i USB-läge. Växla till skivläge genom att trycka på
Felaktig anslutning av USB-enhet. Anslut USB-enheten igen. 8
MP3- eller WMA-filens format är inte
kompatibelt med denna enhet.
Apparaten är i skivläge. Växla till USB-läge genom att trycka på
CD-skivan är repad eller skadad. Kontrollera CD-skivan noggrant och byt ut den
Förstärkaren är felaktigt inställd. Ställ in förstärkarens kontroller på rätt
PURE DIRECT-omkopplaren är påslagen. Slå av PURE DIRECT. Eller anslut analogt.
CD-skivan är smutsig. Rengör CD-skivan. 18
Tunern står för nära apparaten. Flytta tunern och apparaten längre bort från
Anslut nätsladden ordentligt.
främmande föremålet.
om nödvändigt.
slagits på och försök sedan att avspela en skiva.
uppåt.
Byt ut skivan mot en som kan spelas på denna
apparat.
Byt ut skivan mot en som kan spelas på denna
apparat.
Byt ut skivan mot en som kan spelas på denna
apparat.
CD/USB.
Byt ut filen mot en som kan spelas på denna
apparat.
CD/USB.
om nödvändigt. 18
fortsätter kan det hända att det finns defekter på
kablarna.
ingångsval.
fortsätter kan det hända att det finns defekter på
kablarna.
varandra.
Se
sidan
5, 9
5, 9
8
—
—
—
9
17
17
17
17
7
—
11
7
—
YTTERLIGARE
INFORMATION
Svenska
19 Sv
Page 90

FELSÖKNING
Symptom Trolig Orsak Åtgärd
Buller i skivfacket. CD-skivan är skev. Byt ut CD-skivan. —
Fjärrkontrollen
fungerar inte alls
eller fungerar dåligt.
För långt avstånd eller fel vinkel. Fjärrkontrollen fungerar inom ett längsta
Direkt solljus eller ljus (inverterat lysrörsljus
eller liknande) skiner på sensorn för
fjärrkontrollen på apparaten.
Batterierna är svaga. Byt ut alla batterierna. 6
avstånd på 6 m och i högst 30 graders vinkel
mot frontpanelen.
Omplacera apparaten.
TEKNISKA DATA
Audio-del
• Frekvensomfång...........................................2 Hz - 20 kHz, ± 0,5 dB
• Harmonisk distorsion (1 kHz).......................... 0,002 % eller mindre
• Signal brusförhållande ............................................ 110 dB eller mer
• Dynamik.................................................................. 100 dB eller mer
• Utgångsspänning (1 kHz, 0 dB).......................................2,0 ± 0,3 V
Laserdiodens egenskaper
• Material.................................................................................GaAlAs
• Våglängd................................................................................790 nm
• Laserns uteffekt........................................................ högst 1,23 μW*
Allmänt
• Strömart
Modeller till U.S.A. och Kanada ....... 120 V nätspänning, 60 Hz
Modell till Australien .........................240 V nätspänning, 50 Hz
Modeller till Europa, inkl. Storbritannien
..................................................220-240 V nätspänning, 50 Hz
Modell till Asien och General-modell
.............................. 110-120/220-240 V nätspänning, 50/60 Hz
Modell till Korea ................................220 V nätspänning, 60 Hz
Modell till Kina ..................................220 V nätspänning, 50 Hz
• Effektförbrukning ...................................................................... 16 W
• Dimensioner (B × H × D)...................................435 × 96 × 300 mm
• Vikt...........................................................................................6,2 kg
Se
sidan
6
—
* Denna uteffekt är ett värde uppmätt på ett avstånd av ungefär
200 mm från objektivets yta på Optical Pick-up Block.
Rätten till ändringar förbehålles.
20 Sv
Page 91

Begränsad garanti inom EES-området och Schweiz
Tack för att du har valt en produkt från Yamaha. Var god kontakta återförsäljaren av produkten, om din Yamaha-produkt av någon oförutsedd anledning
kräver garantiservice. Var god kontakta Yamahas representantkontor i ditt land, om något problem uppstår. Fullständig information återfinns på vår
webbplats (http://www.yamaha-hifi.com/ eller http://www.yamaha-uk.com/ för boende i Storbritannien).
Produkten garanteras vara felfri när det gäller utförande och material i en period på två år från ursprungligt inköpsdatum. Yamaha åtar sig att, i enlighet med
nedanstående villkor, reparera, eller efter eget gottfinnande byta ut, en felaktig produkt eller någon av dess delar, utan att debitera för delar eller arbete.
Yamaha förbehåller sig rätten att byta ut en produkt mot en av liknande typ och/eller värde och skick, då en viss modell har upphört eller anses oekonomisk
att reparera.
Villkor
1. Ursprunglig faktura eller ursprungligt försäljningskvitto (där inköpsdatum, produktkod och återförsäljarens namn står angivet) MÅSTE följa med den
felaktiga produkten, tillsammans med uppgifter om aktuellt fel. I avsaknad av ett tydligt bevis på inköp förbehåller sig Yamaha rätten att vägra erbjuda
avgiftsfri service och produkten kan då komma att återsändas på kundens bekostnad.
2. Produkten MÅSTE vara köpt av en AUKTORISERAD Yamaha-återförsäljare i ett EES-land eller Schweiz.
3. Produkten får inte ha blivit utsatt för någon modifiering eller förändring, såvida inte skriftligt tillstånd för detta erhållits av Yamaha.
4. Denna garanti inkluderar ej följande:
a. Periodiskt underhåll och reparation eller utbyte av delar på grund av normal förslitning.
b. Skada orsakad av:
(1) Reparation utförd av kunden själv eller av en icke-auktoriserad tredje part.
(2) Bristfällig emballering eller ovarsam hantering under transporten av produkten från kunden. Observera att det är kundens ansvar att se till att
produkten är ordentligt emballerad, när produkten sänds in för reparation.
(3) Felaktig användning, inklusive men ej begränsat till (a) underlåtenhet att använda produkten för dess normala syfte eller i enlighet med Yamahas
anvisningar för korrekt användning, underhåll och förvaring och (b) installation eller användning av produkten på ett sätt som är oförenligt med
de tekniska eller säkerhetsmässiga normer som gäller i det land där produkten används.
(4) Olycka, åska, vatten, brand, dålig ventilation, batteriläckage eller någonting annat utanför Yamahas kontroll.
(5) Fel på det system som denna produkt införlivas i och/eller inkompatibilitet med tredje parts produkter.
(6) Användning av en produkt importerad till ett EES-land och/eller Schweiz, ej av Yamaha, där den produkten inte är i överensstämmelse med de
tekniska eller säkerhetsmässiga normer som gäller i användarlandet och/eller med standardspecifikationen för en produkt såld av Yamaha i EES
området och/eller Schweiz.
(7) Produkter utan audiovisuell anknytning.
(Produkter föremål för ”Yamaha AV Guarantee Statement” definieras på vår webbplats: http://www.yamaha-hifi.com/ eller
http://www.yamaha-uk.com/ för boende i Storbritannien.)
5. Om garantin skiljer sig åt mellan inköpslandet och användarlandet för produkten, så ska den garanti som gäller i användarlandet tillämpas.
6. Yamaha kan ej hållas ansvarigt för några förluster eller skador, vare sig direkta, indirekta eller av annat slag, utom reparationen eller utbytet av
produkten.
7. Se till att säkerhetskopiera eventuella egna inställningar eller data, eftersom Yamaha inte kan hållas ansvarigt för några ändringar eller förluster av
sådana inställningar eller data.
8. Denna garanti påverkar ej konsumentens lagstadgade rättigheter enligt gällande nationella lagar eller konsumentens rättigheter gentemot
återförsäljaren, vilka uppkommit genom gällande försäljnings/köpekontrakt.
Användarinformation, beträffande insamling och dumpning av gammal
utrustning och Använda batterier
De symboler, som finns på produkterna, emballaget och/eller bifogade dokument talar om att de använda
elektriska och elektroniska produkterna, samt batterierna, inte ska blandas med allmänt hushållsavfall.
För rätt handhavande, återställande och återvinning av gamla produkter och gamla batterier, vänligen
medtag dessa till lämpliga insamlingsplatser, i enlighet med din nationella lagstiftning och direktiven
2002/96/EC samt 2006/66/EC.
Genom att slänga dessa produkter och batterier på rätt sätt, kommer du att hjälpa till att rädda värdefulla
resurser och förhindra möjliga negativa effekter på mänsklig hälsa och miljö, vilka i annat fall skulle kunna
uppstå, p.g.a. felaktig sophantering.
För mer information om insamling och återvinning av gamla produkter och batterier, vänligen kontakta din
lokala kommun, ditt sophanteringsföretag eller inköpsstället för dina varor.
[Information om sophantering i andra länder utanför EU]
Dessa symboler gäller endast inom EU. Om du vill slänga dessa föremål, vänligen kontakta dina lokala
myndigheter eller försäljare och fråga efter det korrekta sättet att slänga dem.
Kommentar ang. batterisymbolen (de två nedersta symbolexemplen):
Denna symbol kan komma att användas i kombination med en kemisk symbol. I detta fall överensstämmer
den med de krav, som har ställts genom direktiven för den aktuella kemikalien.
Page 92

ATTENZIONE: PRIMA DI USARE QUEST’UNITÀ.
1 Per assicurarsi le migliori prestazioni dell’unità, leggere
questo manuale per intero. Conservarlo poi in un luogo sicuro
per poterlo riutilizzare al momento del bisogno.
2 Installare questo sistema audio in un luogo ben ventilato,
asciutto e pulito, lontano da luce solare diretta, sorgenti di
calore, vibrazioni, polvere, umidità e/o temperature estreme.
Per garantire una buona ventilazione, lasciare sempre almeno
10 cm di spazio superiormente, 10 cm sulla destra e la sinistra
e 10 cm sul retro dell’unità.
3 Installare quest’unità lontano da elettrodomestici, motori o
trasformatori, perché possono causare rombi.
4 Non esporre quest’unità a variazioni repentine della
temperatura ambiente e non installarle in stanze molto umide
(ad esempio dove è in uso un umidificatore) per evitare che in
essa si formi condensa, che a sua volta può causare
folgorazioni, incendi, guasti e/o ferite.
5 Evitare di installare l’unità in una posizione dove possa su di
essa possano cadere oggetti o liquidi. Inoltre, non posare su di
essa:
– Altri componenti, dato che possono causare danni e/o lo
scolorimento della superficie dell’apparecchio.
– Candele o altri oggetti che bruciano, dato che possono
causare incendi, danni all’unità e/o ferite a persone.
– Contenitori di liquidi, dato che possono cadere e causare
folgorazioni all’utente e guasti a quest’unità.
6 Non coprire quest’unità con giornali, tovaglie, tende o altro
per non impedirne la dispersione del calore. Se la temperatura
al suo interno dovesse salire, può causare incendi, guasti e/o
ferite.
7 Non collegare quest’unità ad una presa di corrente sino a che
tutti i suoi collegamenti sono completi.
8 Non usare l’unità capovolta. Potrebbe surriscaldarsi e
guastarsi.
9 Non agire con forza eccessiva su interruttori, manopole e/o
cavi.
10 Per scollegare un cavo, tirare la spina e mai il cavo stesso.
11 Non pulire mai quest’unità con solventi ed altre sostanze
chimiche. Essi possono danneggiarne le finiture.
12 Usare solo corrente elettrica del voltaggio indicato
sull’adesivo apposito ad esso affisso. L’uso di voltaggi
superiori è pericoloso e può causare incendi, guasti e/o ferite.
Yamaha non può venire considerata responsabile di danni
risultanti dall’uso di quest’unità con un voltaggio superiore a
quello prescritto.
13 Per evitare danni dovuti a fulmini, scollegare il cavo di
alimentazione dalla presa di corrente durante temporali.
14 Non tentare di modificare o riparare quest’unità. Affidare
qualsiasi riparazione a personale qualificato Yamaha. In
particolare, non aprirla mai per alcun motivo.
15 Se si prevede di non dover fare uso di quest’unità per qualche
tempo, ad esempio per andare in vacanza, scollegarne la spina
di alimentazione dalla presa di corrente.
16 Installare quest’unità vicino ad una presa di corrente alternata
ed in una posizione in cui la spina di alimentazione possa
venire raggiunta facilmente.
17 Accertarsi di leggere la sezione “RISOLUZIONE DEI
PROBLEMI” del manuale dell’utente sui comuni problemi di
funzionamento prima di concludere che l’unità è difettosa.
18 Prima di spostare questa unità, premere POWER in basso per
spegnere questa unità e quindi scollegare la spina di
alimentazione a corrente alternata dalla presa di rete a
corrente alternata.
19 Le batterie non devono venire esposte a calore eccessivo, ad
esempio luce solare diretta, fiamme, ecc.
20 VOLTAGE SELECTOR
(Solo per modelli Generale e per l’Asia)
Il selettore di voltaggio VOLTAGE SELECTOR sul pannello
posteriore dell’unità deve essere impostato per il voltaggio
locale PRIMA di collegarsi all’alimentazione CA.
I voltaggi sono:
.............................. C.a. da 110/120/220/230–240 V, 50/60 Hz
Fintanto che quest’unità è collegata ad una presa di
corrente alternata, non è del tutto spenta anche se la si
spegne con il comando POWER.
AVVERTENZA
PER RIDURRE IL RISCHIO DI INCENDI E
FOLGORAZIONI, NON ESPORRE QUEST’UNITÀ
A PIOGGIA O UMIDITÀ.
SICUREZZA DEL LASER
Quest’unità impiega un laser. Poiché è possibile causare lesioni agli
occhi, solo personale qualificato di assistenza tecnica deve aprire la
copertura o cercare di riparare questo dispositivo.
PERICOLO
Radiazioni laser visibili quando aperto. Evitare l’esposizione diretta al
raggio laser. Quando quest’unità è collegata ad una presa a muro, non
avvicinare gli occhi all’apertura del cassetto del disco o ad altre
aperture per guardare all’interno.
Il laser contenuto in questo prodotto è in grado di
emettere radiazioni eccedenti i limiti fissati per la
Classe 1.
i It
Page 93

INTRODUZIONE
CARATTERISTICHE ........................................... 2
ACCESSORI IN DOTAZIONE............................ 2
COMANDI E FUNZIONI ..................................... 3
Pannello anteriore......................................................3
Quadrante del pannello anteriore............................... 4
Telecomando.............................................................. 5
Installazione di batterie nel telecomando ..................6
Uso del telecomando..................................................6
PREPARAZIONE
COLLEGAMENTI................................................. 7
Collegamento all’amplificatore ................................. 7
Collegamento del cavo di alimentazione in dotazione
............................................................................... 8
Collegamento dei dispositivi USB.............................8
FUNZIONAMENTO
FUNZIONAMENTO DI BASE............................. 9
Inizio della riproduzione............................................ 9
Pausa della lettura.................................................... 10
Interruzione della lettura..........................................10
Spegnimento dell’apparecchio................................. 10
Lettura di un brano desiderato ................................. 10
Per migliorare la qualità audio (modalità PURE
DIRECT) ............................................................. 11
Salto all’inizio di un brano desiderato..................... 11
Avanzamento o inversione rapida della lettura ....... 11
Cambio del quadrante del pannello anteriore .......... 12
Modifica della luminosità del quadrante del pannello
anteriore............................................................... 12
RIPRODUZIONE IN ORDINE CASUALE ......13
RIPRODUZIONE RIPETUTA...........................13
Ripetizione di una voce selezionata......................... 13
Ripetizione A-B....................................................... 14
RIPRODUZIONE PROGRAMMATA .............. 15
Interruzione della lettura programmata ...................16
Annullamento del brano programmato.................... 16
INDICE
PREPARAZIONEINTRODUZIONE
FUNZIONAMENTO
SUPPLEMENTARI
INFORMAZIONI
INFORMAZIONI SUPPLEMENTARI
NOTE SU DISCHI/MP3, WMA FILE ...............17
RISOLUZIONE DEI PROBLEMI ..................... 19
DATI TECNICI .................................................... 20
■ Informazioni sul manuale
• y indica un suggerimento per il funzionamento.
• In questo manuale, ci si riferisce ai CD audio come “Audio CD”, ai dischi MP3/WMA come “Data Disc” e ai file
MP3/WMA memorizzati sul dispositivo USB come “USB”.
• Il manuale è stampato prima della produzione. Design e specifiche sono soggette a modifiche in parte dovute ai
miglioramenti o altro. In caso di differenze tra il manuale e il prodotto, il prodotto ha la priorità.
Italiano
1 It
Page 94

INTRODUZIONE
CARATTERISTICHE
◆ Uscita digitale ottica
◆ Uscita digitale per cavo coassiale
◆ Riproduzione dischi CD-R, CD-RW
(Per dettagli vedere pagina 17.)
◆ Riproduzione dischi MP3, WMA
◆ MP3, WMA Riproduzione dischi memorizzati sul
dispositivo USB
ACCESSORI IN DOTAZIONE
Verificare di aver ricevuto tutte le parti seguenti:
Telecomando Cavo stereo RCA
Batterie (× 2)
(AA, R6, UM-3)
◆ Riproduzione programmata (solo Audio CD)
◆ Riproduzione in ordine causale
◆ Riproduzione ripetuta di tutto il disco o di un singolo
brano
◆ Riproduzione A-B ripetuta (solo Audio CD)
◆ Informazioni e luminosità del quadrante regolabile
◆ PURE DIRECT Funzione
Cavo di alimentazione
2 It
Page 95

Pannello anteriore
COMANDI E FUNZIONI
INTRODUZIONE
1 POWER
Premere per attivare ON/OFF.
y
L’indicatore POWER sopra si illumina quando l’unità è accesa.
2 Porta USB
Collegare il dispositivo USB. Per dettagli, vedere
pagina 8.
3 PURE DIRECT
Attivare o disattivare la modalità PURE DIRECT per
migliorare la qualità audio.
y
La precedente spia PURE DIRECT si illumina quando l’unità è in
modalità PURE DIRECT. Per dettagli, vedere pagina 11.
4 Piatto portadischi
Caricare un disco.
5 (Aperto/Chiuso)
Aprire o chiudere il piatto portadischi.
6 / (Salta/Ricerca indietro),
/ (Salta/Ricerca in avanti)
/ : Salta al brano successivo.
/ : Salta indietro all’inizio del brano in corso di
lettura.
/ (due volte): Salta al brano precedente.
Tenere premuto / o / per eseguire la
ricerca indietro/avanti.
y
Ogni qual volta si tiene premuto / o / ,
la velocità di ricerca aumenta di 2 livelli.
7 (Riproduce)
Inizia riproduzione.
8 (Pausa)
Interrompe momentaneamente la riproduzione. Premere
o per riprendere la riproduzione.
9 (Interrompe)
Interrompe la riproduzione.
0 Indicatore USB
Si illumina/spegne quando l’unità è in modalità USB/
disco e lampeggia quando legge il dispositivo USB.
A Quadrante del pannello anteriore
Mostra lo stato corrente dell’unità.
B Sensore del telecomando
Riceve i segnali dal telecomando.
Italiano
3 It
Page 96

COMANDI E FUNZIONI
Quadrante del pannello anteriore
Audio CD
Data Disc USB
1 Illumina l’icona della modalità di riproduzione selezionata.
2 Mostra i quadranti dei tempi. (Per dettagli vedere pagina 12.)
3 Mostra il numero del brano selezionato o riprodotto.
4 Indica il numero di file.
5 Si illumina quando l’unità è in modalità disco (fare
riferimento a pagina 9) e anche quando riconosce un Audio
CD nel piatto.
6 Si illumina quando è riprodotto il file MP3.
7 Si illumina quando è riprodotto il file WMA.
4 It
Page 97

Telecomando
COMANDI E FUNZIONI
1 Trasmettitore dei segnali a infrarossi (p. 6)
Invia i segnali a infrarossi all’unità.
2 CD/USB (p. 9)
Passa dalla modalità disco a USB.
3 DIMMER (p. 12)
Seleziona il livello di luminosità del quadrante del
pannello anteriore.
4 Tasti numerici (p. 10)
Seleziona direttamente un brano.
5 PROGRAM (p. 15)
Attiva o disattiva la modalità di programmazione.
6 / (Ricerca indietro/avanti) (p. 11)
Ricerca brani indietro/in avanti.
7 / (Salta indietro/avanti) (p. 11)
Salta al brano precedente/successivo o salta indietro
all’inizio del brano in corso di lettura.
8 OPEN/CLOSE (p. 9)
Apre o chiude il piatto portadischi.
9 PURE DIRECT (p. 11)
Attiva o disattiva la modalità PURE DIRECT.
0 DISPLAY (p. 12)
Attiva i quadranti dei tempi.
INTRODUZIONE
A ENTER (p. 15)
Conferma il numero del brano quando l’unità è in
modalità di ingresso programmata.
B CLEAR (p. 16)
Annulla il brano programmato.
C REPEAT (p. 13)
Ripete la riproduzione di un singolo brano o di tutti i
brani.
D RANDOM (p. 13)
Imposta la riproduzione con sequenza casuale.
E A/B (p. 14)
Imposta la ripetizione A-B.
F (Pausa) (p. 10)
Interrompe momentaneamente la riproduzione.
G (Riproduzione) (p. 9)
Inizia riproduzione.
H (Interruzione) (p. 10)
Interrompe la riproduzione.
Italiano
5 It
Page 98

COMANDI E FUNZIONI
Installazione di batterie nel telecomando
1 Premere la parte e fare scorre il
coperchio del vano portabatteria.
2 Inserire le due batterie (AA, R6, UM-3) in
dotazione, facendo attenzione ad allinearle
con i contrassegni di polarità (+ e –) presenti
all’interno del vano.
3 Far scorrere indietro il coperchio finché non
scatta in posizione.
■ Note sulle batterie
• Sostituire entrambe le batterie quando la gamma delle
operazioni del telecomando si riduce.
• Utilizzare AA, R6, UM-3.
• Assicurarsi che le polarità siano corrette. Fare
riferimento all’illustrazione all’interno del vano
portabatterie.
• Togliere le batterie dal telecomando se si pensa di non
utilizzarlo per qualche tempo.
• Non utilizzare batterie vecchie con quelle nuove.
• Non utilizzare insieme tipi di batterie differenti (come
batterie alcaline e manganese). Leggere attentamente
sulla confezione poiché questi tipi di batterie
potrebbero avere la stessa forma e colore.
• Se le batterie perdono rimuoverle immediatamente.
Evitare che il liquido fuoriuscito venga a contatto con
l’epidermide, il vestiario, e simili. Pulire
meticolosamente il vano portabatterie prima di
installare nuove batterie.
• Non gettare le batterie nei rifiuti domestici, ma
smaltirle correttamente nel rispetto delle normative
locali.
Uso del telecomando
Il telecomando trasmette un fascio direzionale di raggi
infrarossi.
Assicurarsi di puntare il telecomando direttamente verso il
sensore sul pannello anteriore dell’unità durante il
funzionamento.
Entro 6 m
■ Manipolazione del telecomando
• L’area tra il telecomando e l’unità deve essere priva di
ostacoli di grandi dimensioni.
• Non versare acqua o altri liquidi sul telecomando.
• Non far cadere il telecomando.
• Non lasciare o conservare il telecomando nelle
seguenti condizioni:
– Elevata umidità, come accanto a un bagno
– Elevata temperatura, come accanto a un termosifone
o stufa
– Temperature estremamente basse
– Luoghi polverosi
• Non esporre il sensore del telecomando a luci intense,
in particolare, una lampada a fluorescenza di tipo
inverter; diversamente, il telecomando potrebbe non
funzionare correttamente. Se necessario, posizionare
l’unità distante da luce diretta.
6 It
Page 99

PREPARAZIONE
COLLEGAMENTI
Collegamento all’amplificatore
ATTENZIONE
• Prima di procedere a un collegamento qualsiasi, interrompere l’alimentazione dell’apparecchio, dell’amplificatore o
altri componenti.
• Eseguire correttamente i collegamenti ai terminali di ingresso dell’amplificatore o di altri componenti.
• Se il posizionamento di questo apparecchio è tale da subire disturbi a causa di un altro apparecchio vicino, ad esempio
un sintonizzatore, allontanarli.
PREPARAZIONE
Cavo stereo
RCA (in
dotazione)
• L’uscita digitale è disattivata quando l’unità è in modalità PURE DIRECT.
Per collegare l’unità all’amplificatore, scegliere uno dei metodi seguenti.
Quando si usano i terminali ANALOG OUT
dell’unità ( )
Collegare questi terminali ai terminali CD (o AUX)
dell’amplificatore utilizzando un cavo stereo RCA in
dotazione. Per maggiori informazioni su questi
collegamenti, vedere le istruzioni dell’amplificatore in
uso.
• Verificare che (L) a sinistra e (R) a destra di questi
terminali siano collegati ai terminali corrispondenti
(sinistro e destro) dell’amplificatore o di altro
componente.
Cavo coassialeCavo ottico
Quando si usa il terminale DIGITAL OUT
(COAXIAL) dell’unità ( )
Collegare questo terminale al terminale di ingresso
digitale di un amplificatore con un cavo coassiale
disponibile in commercio.
Amplificatore
Quando si usa il terminale DIGITAL OUT
(OPTICAL) dell’unità ( )
Collegare questo terminale al terminale di ingresso ottico
di un amplificatore con un cavo ottico disponibile in
commercio.
• Utilizzare un cavo affidabile.
Italiano
7 It
Page 100

COLLEGAMENTI
Collegamento del cavo di alimentazione in dotazione
Solo per modelli Generale
e per l’Asia
Modelli per l’Europa e
Gran Bretagna
Alla presa di rete con il cavo di
alimentazione in dotazione
■ VOLTAGE SELECTOR
(Solo per modelli Generale e per l’Asia)
Il VOLTAGE SELECTOR sul pannello posteriore di
questa unità deve essere impostato in base alla principale
tensione locale PRIMA di collegare il cavo di
alimentazione in dotazione alla presa di rete.
L’impostazione impropria del VOLTAGE SELECTOR
può causare danni all’unità e creare un potenziale rischio
di incendio.
Ruotare il VOLTAGE SELECTOR in senso orario o
antiorario nella posizione corretta mediate un giravite.
I voltaggi consentiti sono i seguenti:
.........................C.a. da 110/120/220/230-240 V, 50/60 Hz
■ Collegamento dell’unità alla presa di
rete
Inserire il cavo di alimentazione in dotazione nel AC IN
del pannello posteriore dell’unità, quindi inserire il cavo di
alimentazione alla presa di rete dopo aver completato tutti
gli altri collegamenti.
Collegamento dei dispositivi USB
L’unità ha una porta USB e può accedere a file MP3 e
WMA salvati nel dispositivo USB. Collegare il
dispositivo USB alla porta USB del pannello anteriore
dell’unità.
ATTENZIONE
Non scollegare il dispositivo USB durante la riproduzione
dal dispositivo USB o quando l’indicatore USB
lampeggia.
■ Dispositivi USB supportati
L’unità supporta USB i dispositivi di memorizzazione di
massa (ad es., memorie flash, lettori di schede o lettori
audio portatili) che utilizzano il formato FAT16 o FAT32.
Note
• Alcuni dispositivi potrebbero non funzionare correttamente
anche se soddisfano i requisiti.
• Non collegare dispositivi diversi da quelli di memorizzazione di
massa USB: USB caricatori, USB hub, PC, HDD esterni, o
altro.
• Quando si inseriscono almeno due schede di memoria
contemporaneamente in un lettore di schede collegato alla porta
USB di questa unità, solo una delle schede viene riconosciuta.
• Yamaha e i fornitori non saranno ritenuti responsabili per la
perdita di dati salvati nei dispositivi USB collegati all’unità. Per
precauzione, si consiglia di eseguire copie di backup dei file.
• La riproduzione e l’alimentazione di tutti i tipi di dispositivi
USB non è garantita.
8 It
 Loading...