

Page 1
Pack contents
• 1 x HSA6021 Pet friendly PIR detector
• 4 x wall plugs/cross head fixing
screws
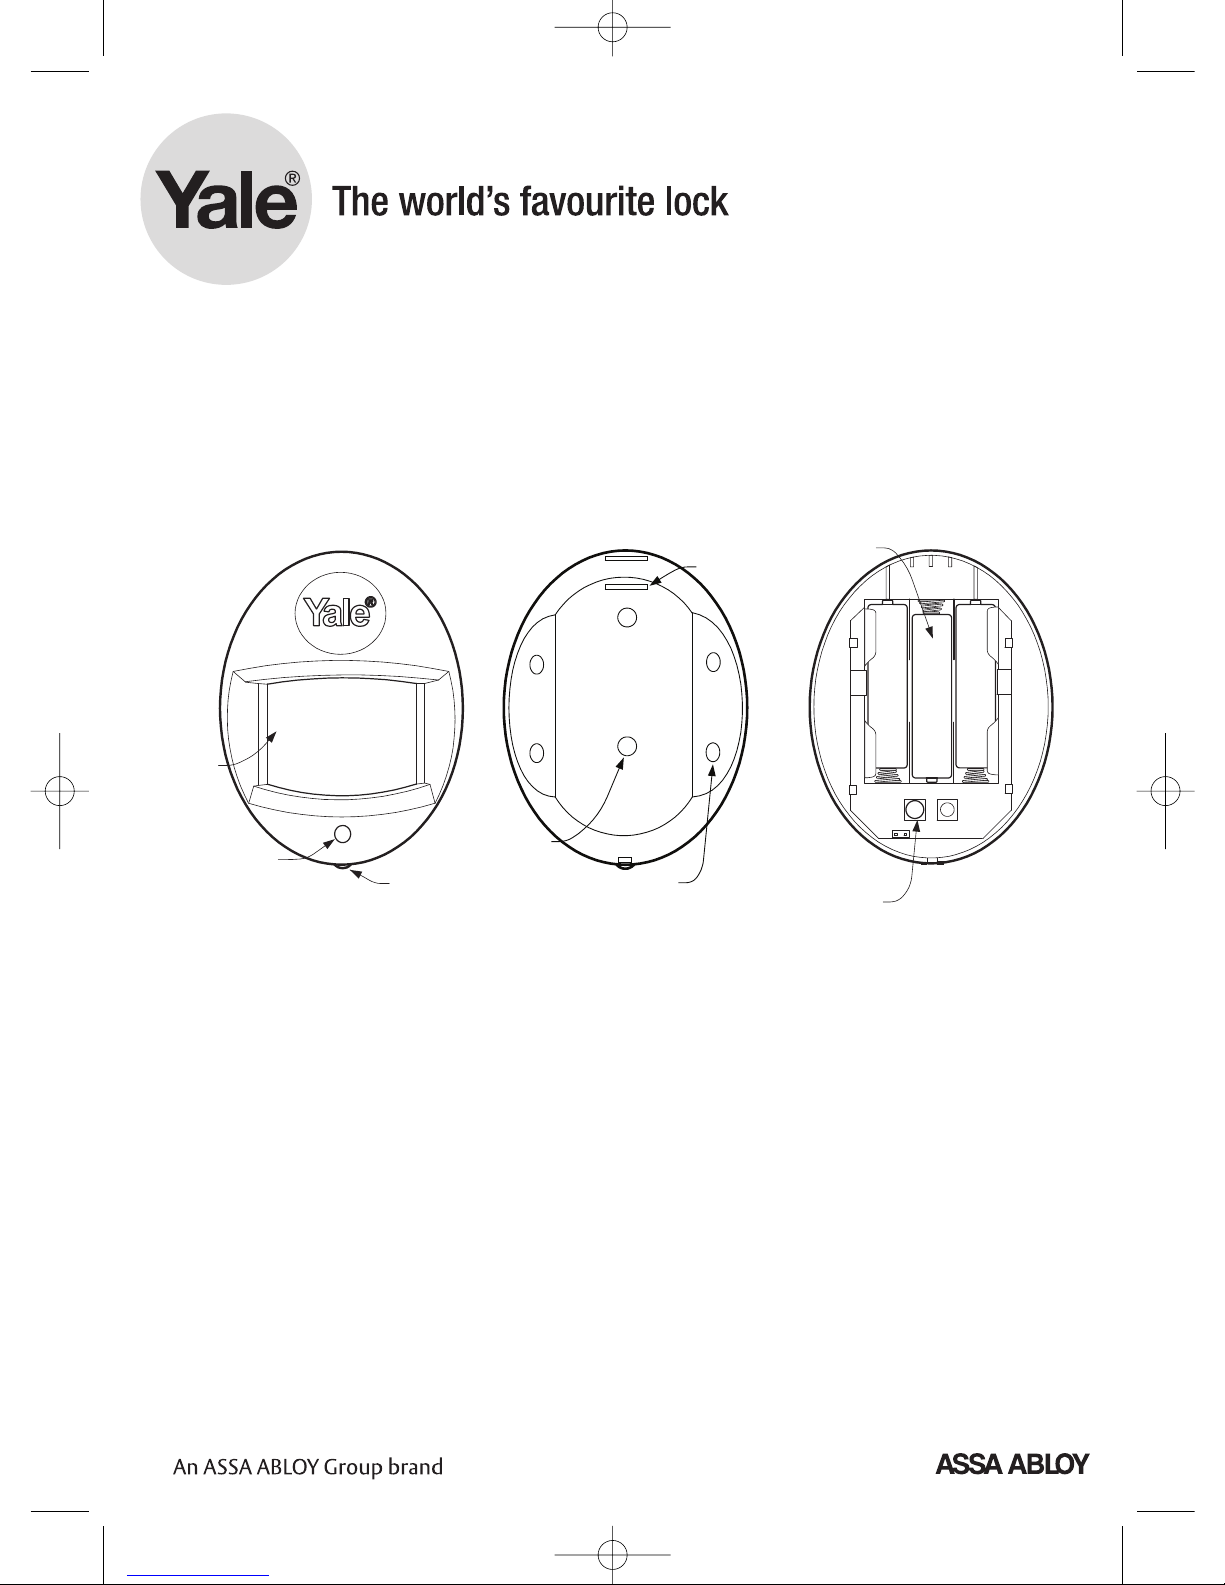
PIR detector description
Status LED: Hidden red LED shines
through lens to indicate PIR status.
Learn/Test button: Used for testing the
radio performance (No sleep time) and
for learning-in.
Cover screw: Provides access to inside
of PIR
Tamper Spring: Spring loaded switch to
protect the PIR from being opened.
Tab Slot: Pull out plastic tab to activate
battery.
Corner fixing knockouts: Punch
through to provide holes for corner
fixing.
W
all fixing knockouts:
Punch through
to provide holes for flat mounting on
walls.
Batteries X 3: Battery compartment for
three AAA 1.5V alkaline cells.
Wirefree Yale HSA6021
Pet friendly PIR detector
(Yale part number: 666021001001)
Cover screw
Learn/Test
Button
Status
LED
Corner fixing
knockouts X 4
Wall fixing
knockouts X 2
Tab slot
+
++
B
atteries X 3
Tamper spring
HSA6000 series
Pet friendly PIR Manual-SA 1/10/09 9:58 am Page 1
Page 2
Specification
Conforms to:
EN 300 220-1 / V2.1.1 (2006-04)
EN 301 489 -1, / V1.6.1 (2004-12)
EN 301 489-3, / V 1.4.1 (2002-08)
Environmental conditions:
-10°C to 40°C, relative humidity
70% non-condensing
Radio: Micro processor controlled
433.92MHz AM transmitter.
Battery: 3 X AAA alkaline cells, 2 years typical
domestic service life,
1-minute sleep timer.
Installation
• Remove the battery saver tab to activate
battery.
• The light steadily flashes for 30 seconds
while components initialise.
Programming & testing
Program your PIR before installation and test
afterwards. Please see your current system
instruction book.
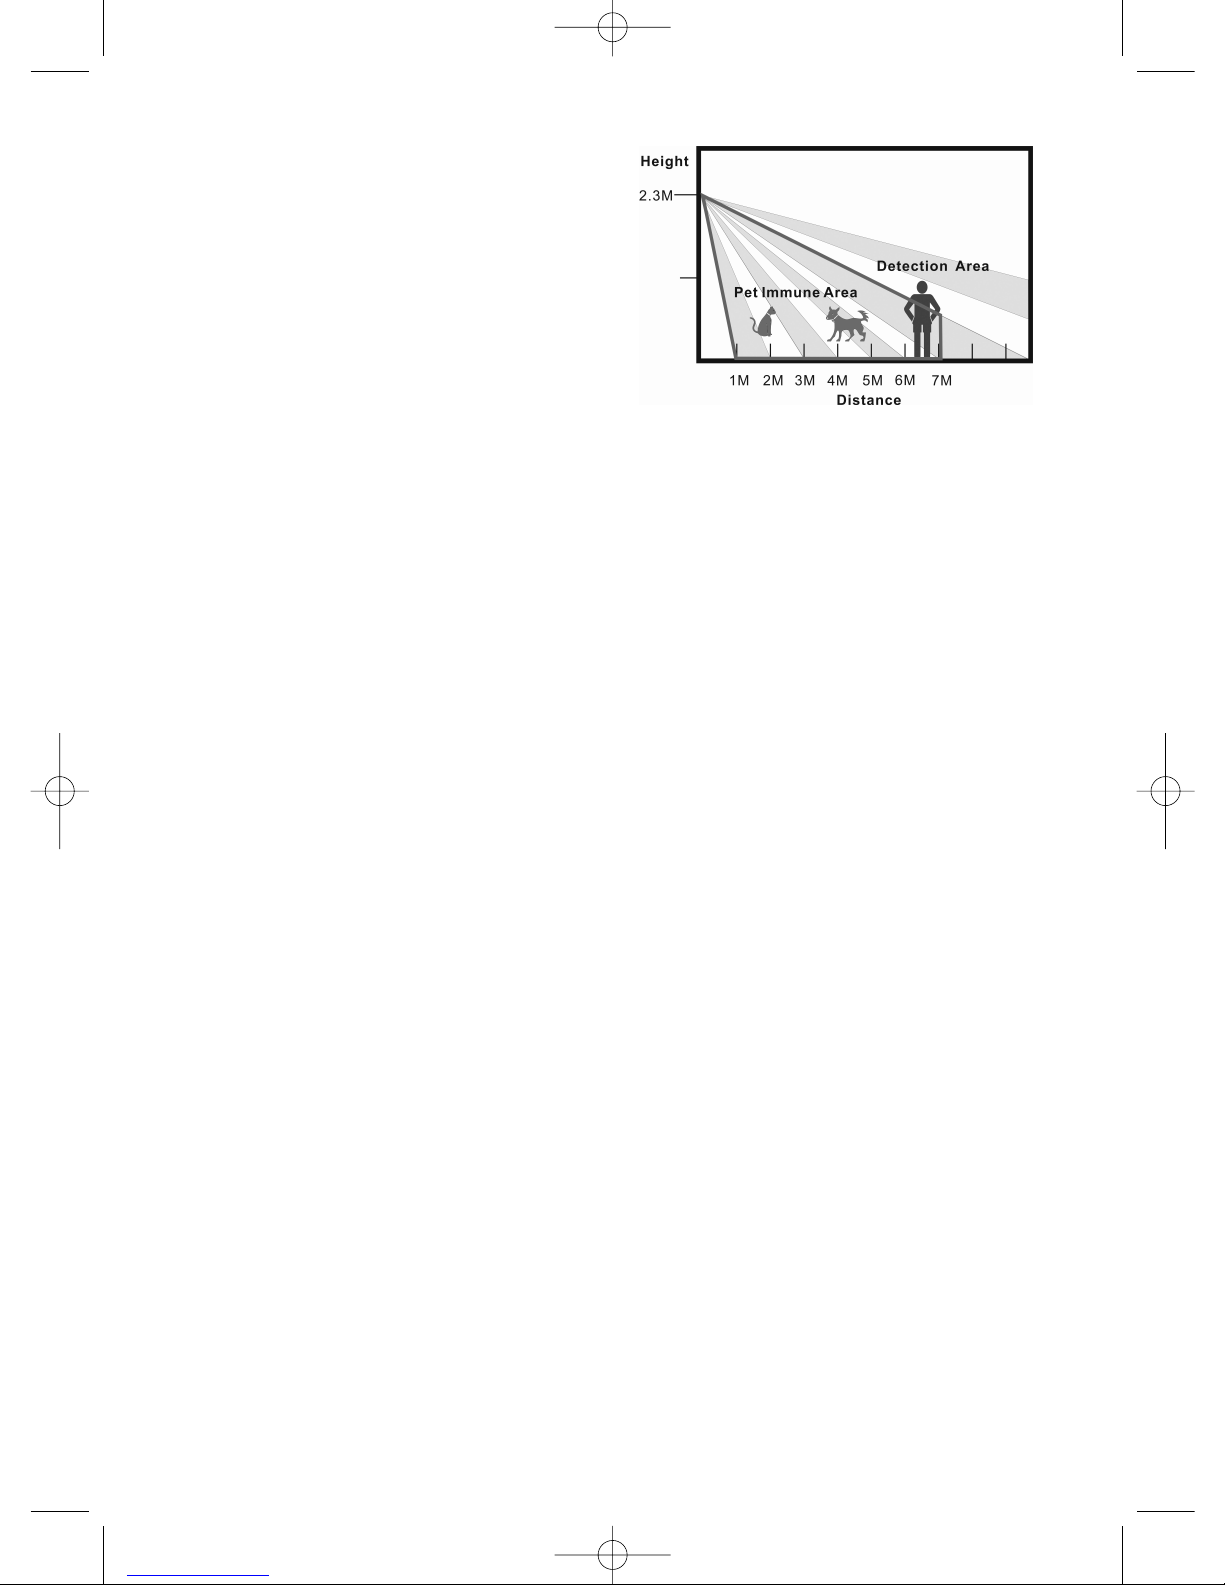
Location
The PIR is designed to give a typical
detection range of 12 meters when
mounted at 2 meters above ground. When
mounted at 2.3 meters above ground, it
gives a typical pet immune range of 7
meters. The higher the PIR is mounted
above ground, the better the pet immunity
range. It is recommended to install the PIR
at 2.1 - 2.4 m above ground for best
performance.
• The PIR will ignore a pet that weights
approx. 20-25Kg. False triggering may
occur if there are multiple pets.
• For the best performance of the PIR,
adjust the mounting height of the PIR in
accordance with the “tallest” pet in the
house. For “taller” animals, it is
recommended to install the PIR at a higher
position.
• When deciding on the height for the
mounting of the PIR, remember to take the
possible blind spot into consideration. The
blind spot underneath the PIR enlarges
proportionally to the height of the PIR (at a
height of 2.3m, detection range starts from
1m).
• Mount the PIR where animals cannot get
into close proximity of the PIR by climbing
on furniture or other objects. Do not face
the PIR at stairways that the animals have
access to.
• Mount the PIR in a position such that an
intruder would normally move across the
PIR’s field of view.
• Mount the PIR in a corner to give the
widest view.
• Mount the PIR where its field of view will
not be obstructed e.g. by curtains,
ornaments etc.
Pet friendly PIR Manual-SA 1/10/09 9:58 am Page 2
Page 3

Limitations
• Do not position the PIR to directly face a
door protected by a door contact, this
could cause the door contact and the PIR
radio signals to be transmitted at the same
time when entering, therefore possibly
canceling each other out.
• Do not install the PIR completely
exposed to direct sunlight.
• Avoid installing the PIR in areas where
devices may cause rapid changes in
temperature in the detection area, e.g. air
conditioners, heaters, etc.
• Avoid large obstacles in the detection
area.
• Do not mount the PIR directly facing
sources of heat e.g. fires, boilers or above
radiators.
• Avoid mounting the PIR in areas where
there are objects that may move e.g.
curtains etc.
Understanding the Tilt Tamper
Detection Mechanism
• When the PIR is placed on its back, and
the tilt is horizontal: a “Tamper activate"
signal will be transmitted to the control
panel. The tilt tamper will also trigger when
the PIR is rotated clockwise at an angle
equal to or greater than 45°, or if the
counter clockwise angle is equal to or
gr
eater than 135°.
O
nce the tilt angle is restored to less than
45° clockwise or 135° counter clockwise,
then a “tamper restore” signal will be
transmitted to the control panel.
• When the PIR is placed upright, and the
tilt is vertical: a “tamper activate” signal will
be transmitted to the control panel when
the “learn/test” button is rotated towards
you at an angle equal to or greater than
110°, or away from you at an angle equal
to or greater than 80°. Once the tilt angle is
restored to less than 110°/80° respectively,
a “tamper restore” signal will be
transmitted to the control panel.
The world’s favourite lock
www
.yalelock.com
E2 09/09
Tilt Tamper
T
amper restore
(close)
T
amper restore
(open)
Tamper restore (open)
Tamper restore (close)
Tamper restore (close)
Tamper restore (open)
110
o
80
o
290
o
260
o
45
o
250
o
315
o
135
o
0
o
0
o
0
o
Pet friendly PIR Manual-SA 1/10/09 9:58 am Page 3
 Loading...