

X-Micro XDVB-TCU, TV Bar User Manual

TV BAR
User Guide
ver 1.0
1
I HEREBY CERTIFY THAT :
The measurements shown in this test report were made in accordance with the
procedures given in EUROPEAN COUNCIL DIRECTIVE 89/336/EEC. The equipment was
passed the test performed according to European Standard
EN55022:1998/A1:2000/A2:2003 Class B, EN 61000-3-2:2000, EN
61000-3-3:1995/A1:2001 and EN 55024:1998/A1:2001/A2:2003 ( IEC 61000-4-2:2001,
IEC 61000-4-3:2002, IEC61000-4-4:1995/A1:2000/A2:2001, IEC61000-4-5:2001, IEC
61000-4-6:1996/A1:2000, IEC 61000-4-8:2001, IEC 61000-4-11:2001 ),
EN55013:2001/A1:2003, EN61000-3-2:2000, EN61000-3-3:1995/A1:2001 and
EN55020:2002/A1:2003. The test was carried out on Jun. 07, 2006 at SPORTON
INTERNATIONAL INC. LAB.
Herewith we guarantee of this product & responsible for it.
Product Name: X-Micro TV-BAR
Model Name : XDVB-TCU

2
Copyright
Copyright 2006 by X-Micro Technology Corp., All rights reserved. No part of
this publication may be reproduced, transmitted, transcribed, stored in a
retrieval system, or translated into any language or computer language, in any
form or by any means, electronic, mechanical, magnetic, optical, chemical,
manual or otherwise, without the prior written permission of X-Micro
Technology Corp.
Disclaimer
X-Micro Technology Corp. makes no representations or warranties, either
expressed or implied, with respect to the contents hereof and specifically
disclaims any warranties, merchantability or fitness for any particular purpose.
Any software described in this manual is sold or licensed "as is". Should the
programs prove defective following their purchase, the buyer (and not this
company, its distributor, or its dealer) assumes the entire cost of all necessary
servicing, repair, and any incidental or consequential damages resulting from
any defect in the software. Further, X-Micro Technology Corp., reserves the
right to revise this publication and to make changes from time to time in the
contents hereof without obligation to notify any person of such revision or
change.
All brand and product names mentioned in this manual are trademarks and/or
registered trademarks of their respective holders.

3
Index
English ..........................................................................P.4
German .........................................................................P.9
French...........................................................................P.14
Dutch.............................................................................P.19
Italian.............................................................................P.24
Spanish .........................................................................P.29
Portuguese....................................................................P.34
Danish...........................................................................P.39
Norwegian.....................................................................P.44
Swedish.........................................................................P.49

4
System Requirements
To successfully use the X-Micro TV BAR, please ensure that your system
meets the following requirements:
• Pentium
®
4 or AMD Athlon 2.0 GHz or faster, 2.4GHz or faster
recommended
• 256 MB RAM (minimum), 512 MB RAM recommended
• Microsoft Windows 2000 (SP4) / XP (SP2)
• 100MB available hard disk space for installation, additional space
required for recording or TimeShifting
• CD-ROM or DVD drive
• VGA card 32MB Memory or higher / chipset with full DirectX 9.0 support
• Sound card/chipset for audio playback
• DirectX 9.0c or higher installed
• Available USB 2.0 port
• Digital TV antenna
5
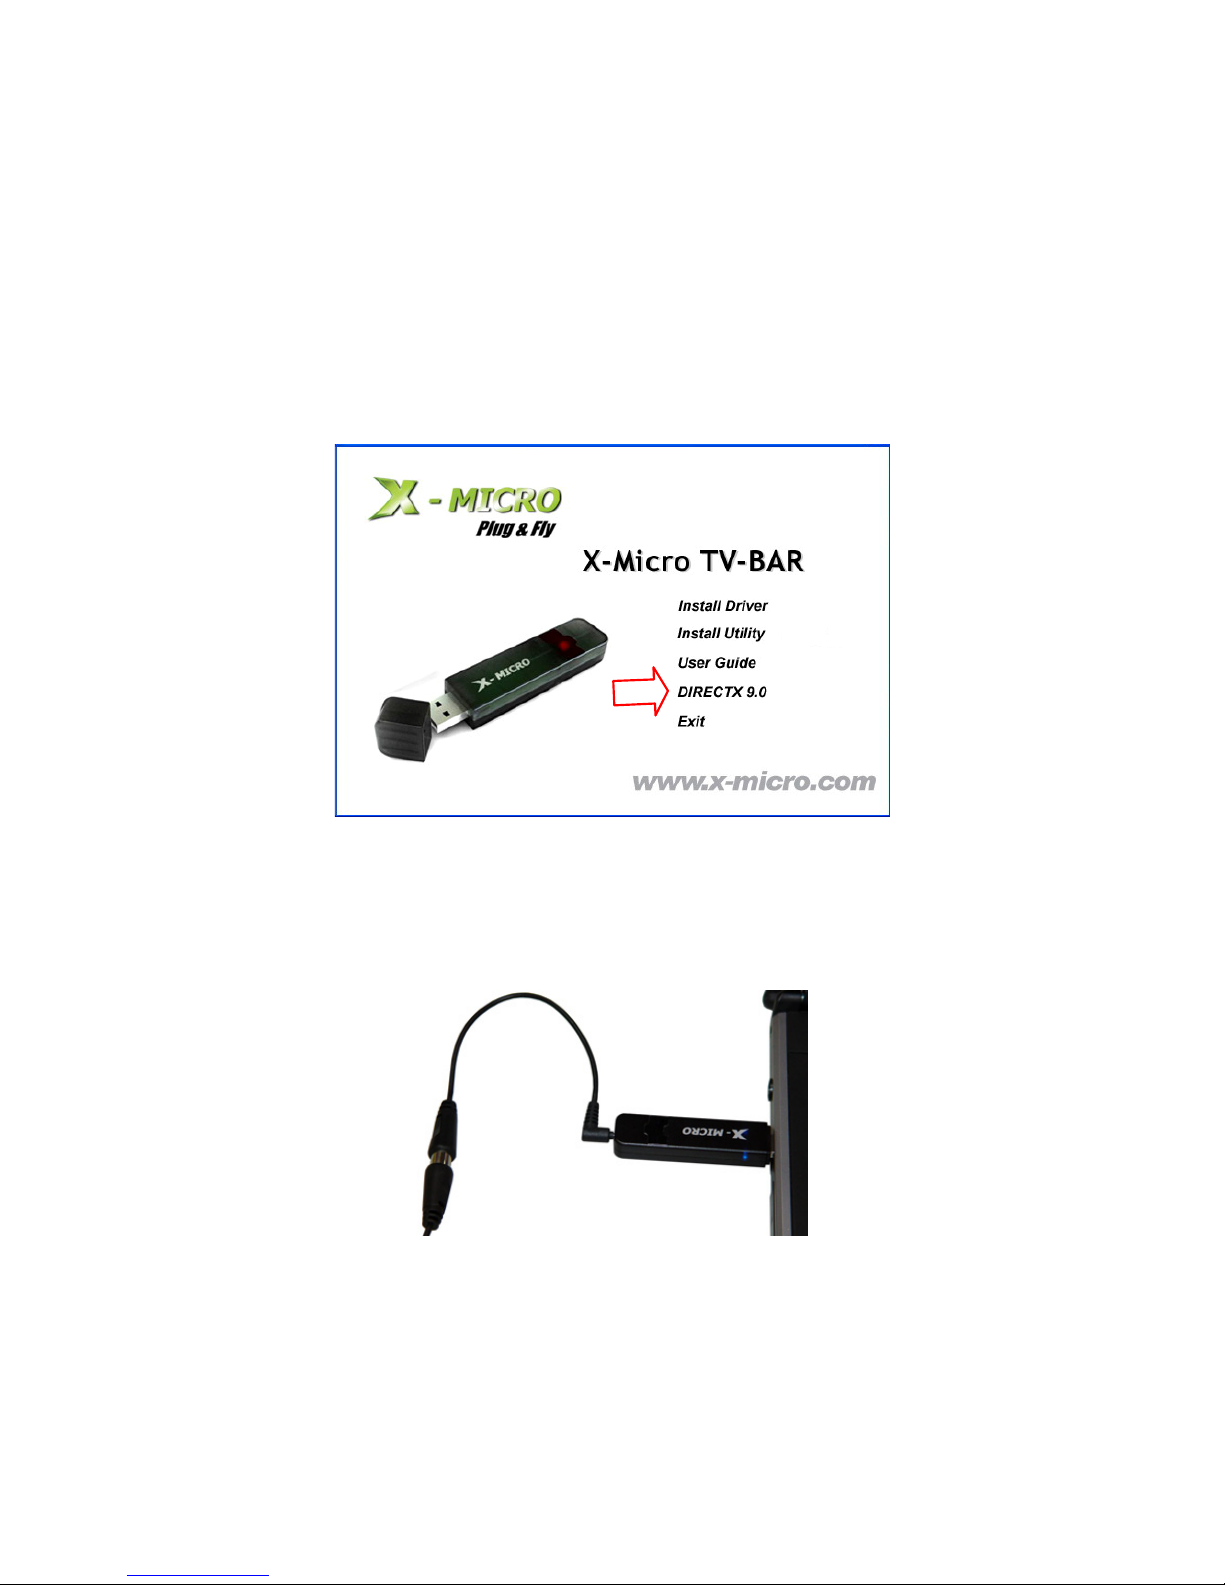
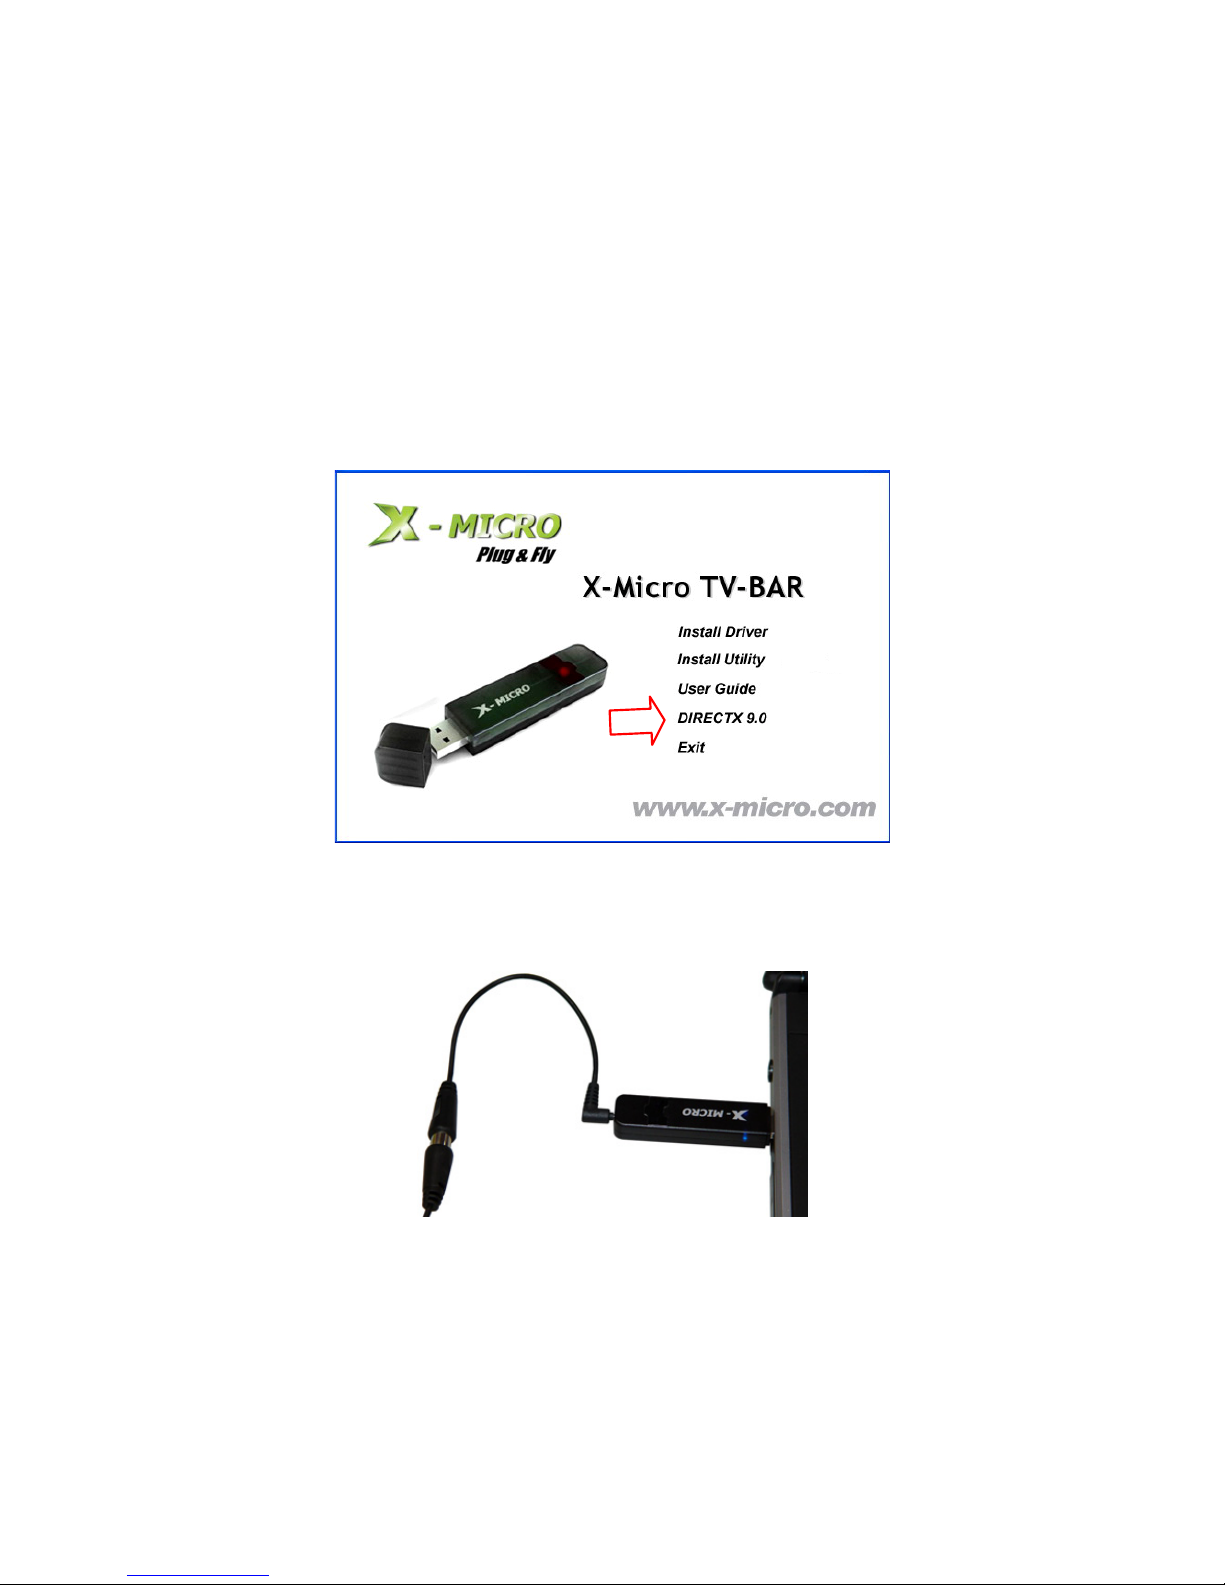
1. Before installing your X-Micro TV BAR, it is necessary to install DirectX
9.0c or higher. Insert the installation CD and an installation menu
should load automatically. Click on DIRECTX 9.0 and follow the prompts
to install DirectX.
2. Connect the Antenna to the X-Micro TV BAR and plug the X-Micro TV
BAR into an open USB 2.0 port on your PC.
6
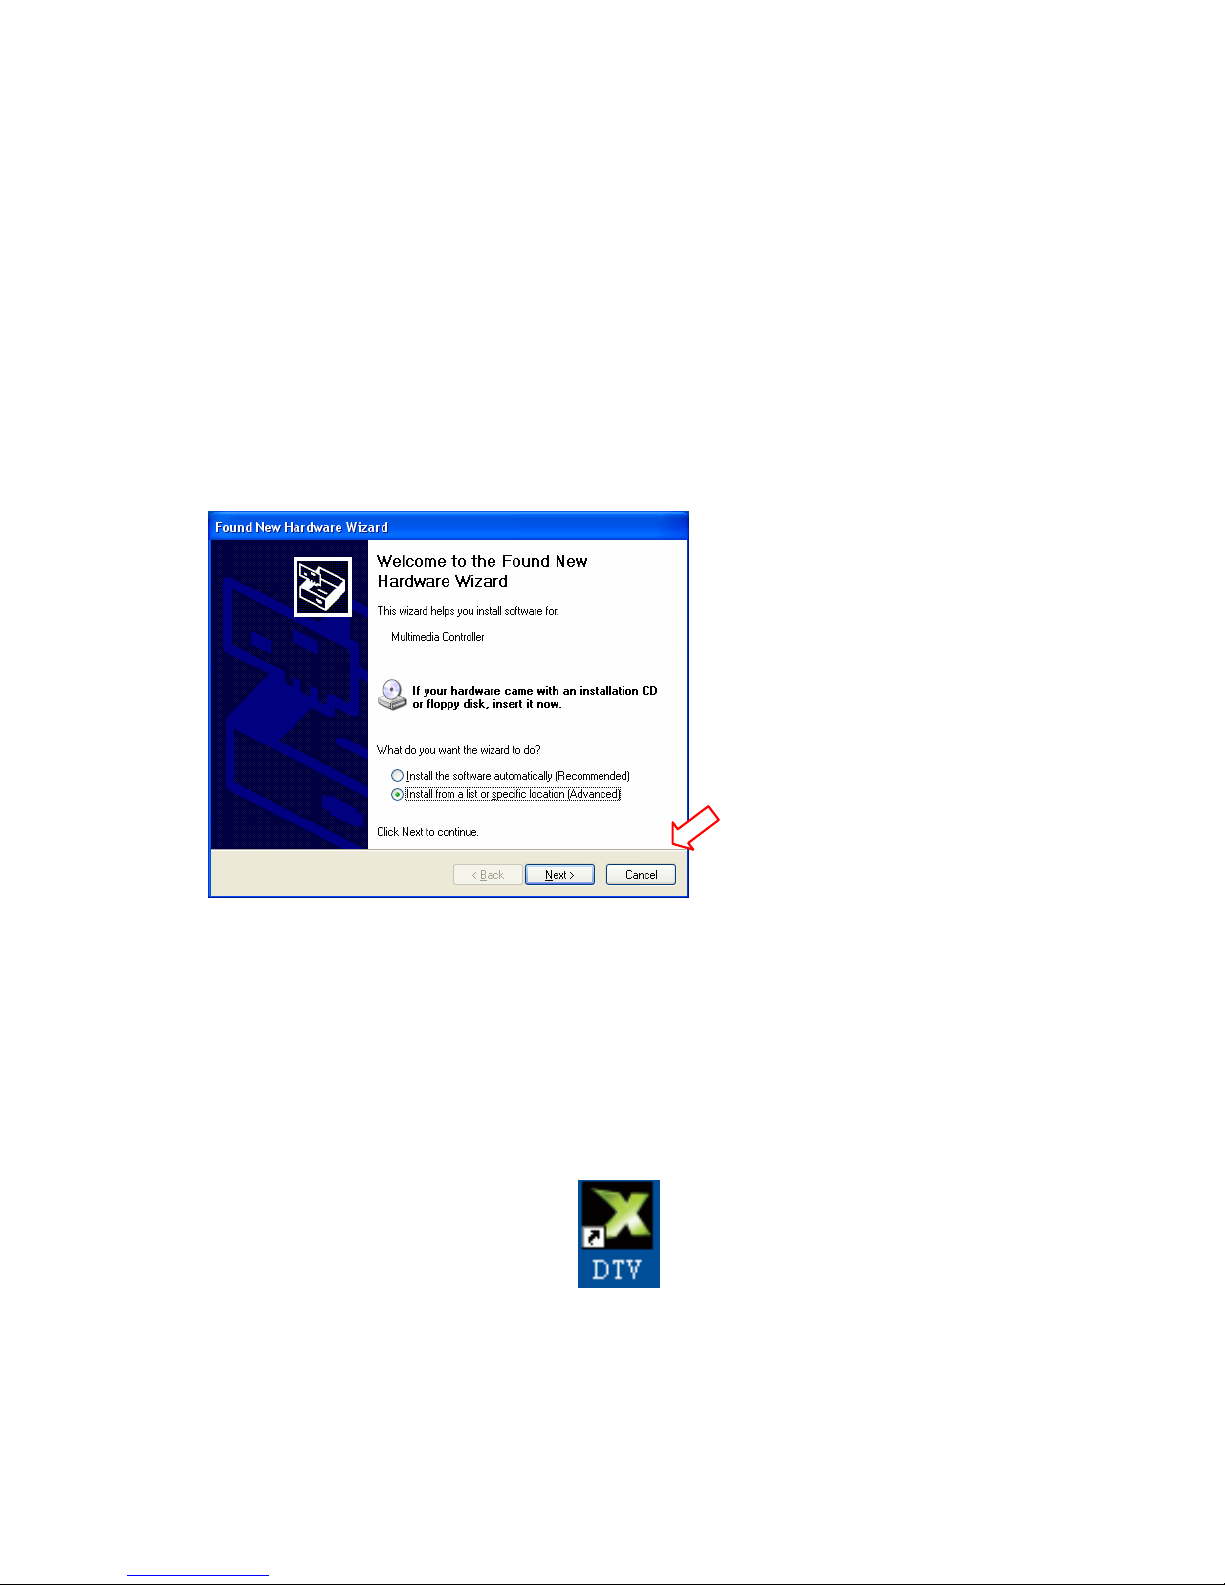
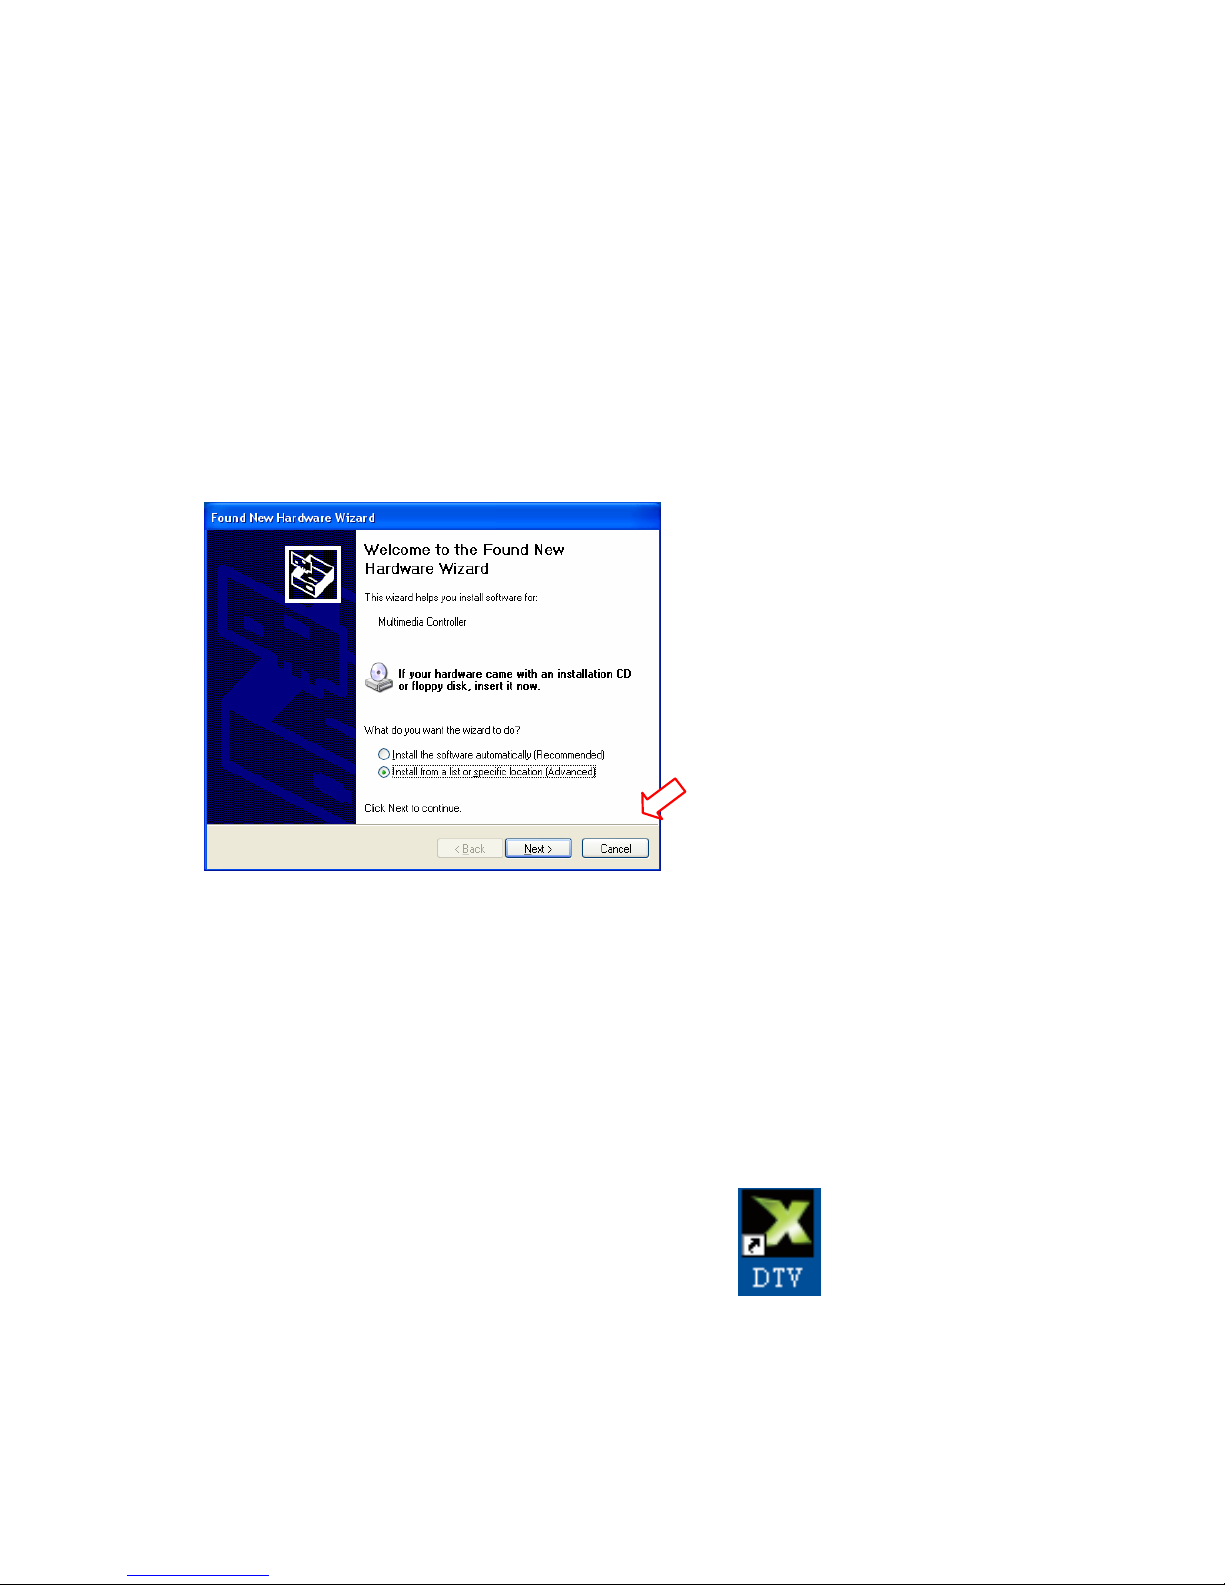
3. Windows 2000 / XP will automatically detect the X-Micro TV BAR and
will bring up the Found New Hardware Wizard window; directly click on
cancel button to close this window.
Note: During the process of driver and utility installation, please always
insert Installation CD in your CD-ROM drive.
4. Install the X-Micro TV BAR driver by clicking on Install Driver. Just
follow the prompts to complete the installation.
5. Install the DTV software by clicking on Install Utility. Just follow the
prompts to install the software.
6. Double-click the DTV icon on desktop to activate the X-Micro DTV
software to watch digital TV.
Click on cancel button to
close the window

7
7. X-Micro DTV Interface Overview
1. Change Skin 11. Skip to beginning
2. Switch to DVB TV 12. Skip to end
3. Open Scan Settings 13. Mute on/off
4. Switch to Play mode 14. Volume bar
5. Open Teletext (when available) 15. Show/hide channel list
6. Open EPG window 16. Snapshot button
7. Rewind 17. Signal Strength Meter
8. TimeShift Start/Play/Pause
18. Toggle fullscreen/windowed
viewing mode
9. Record Start 19. Fast Forward
10. Stop 20. Channel list

8
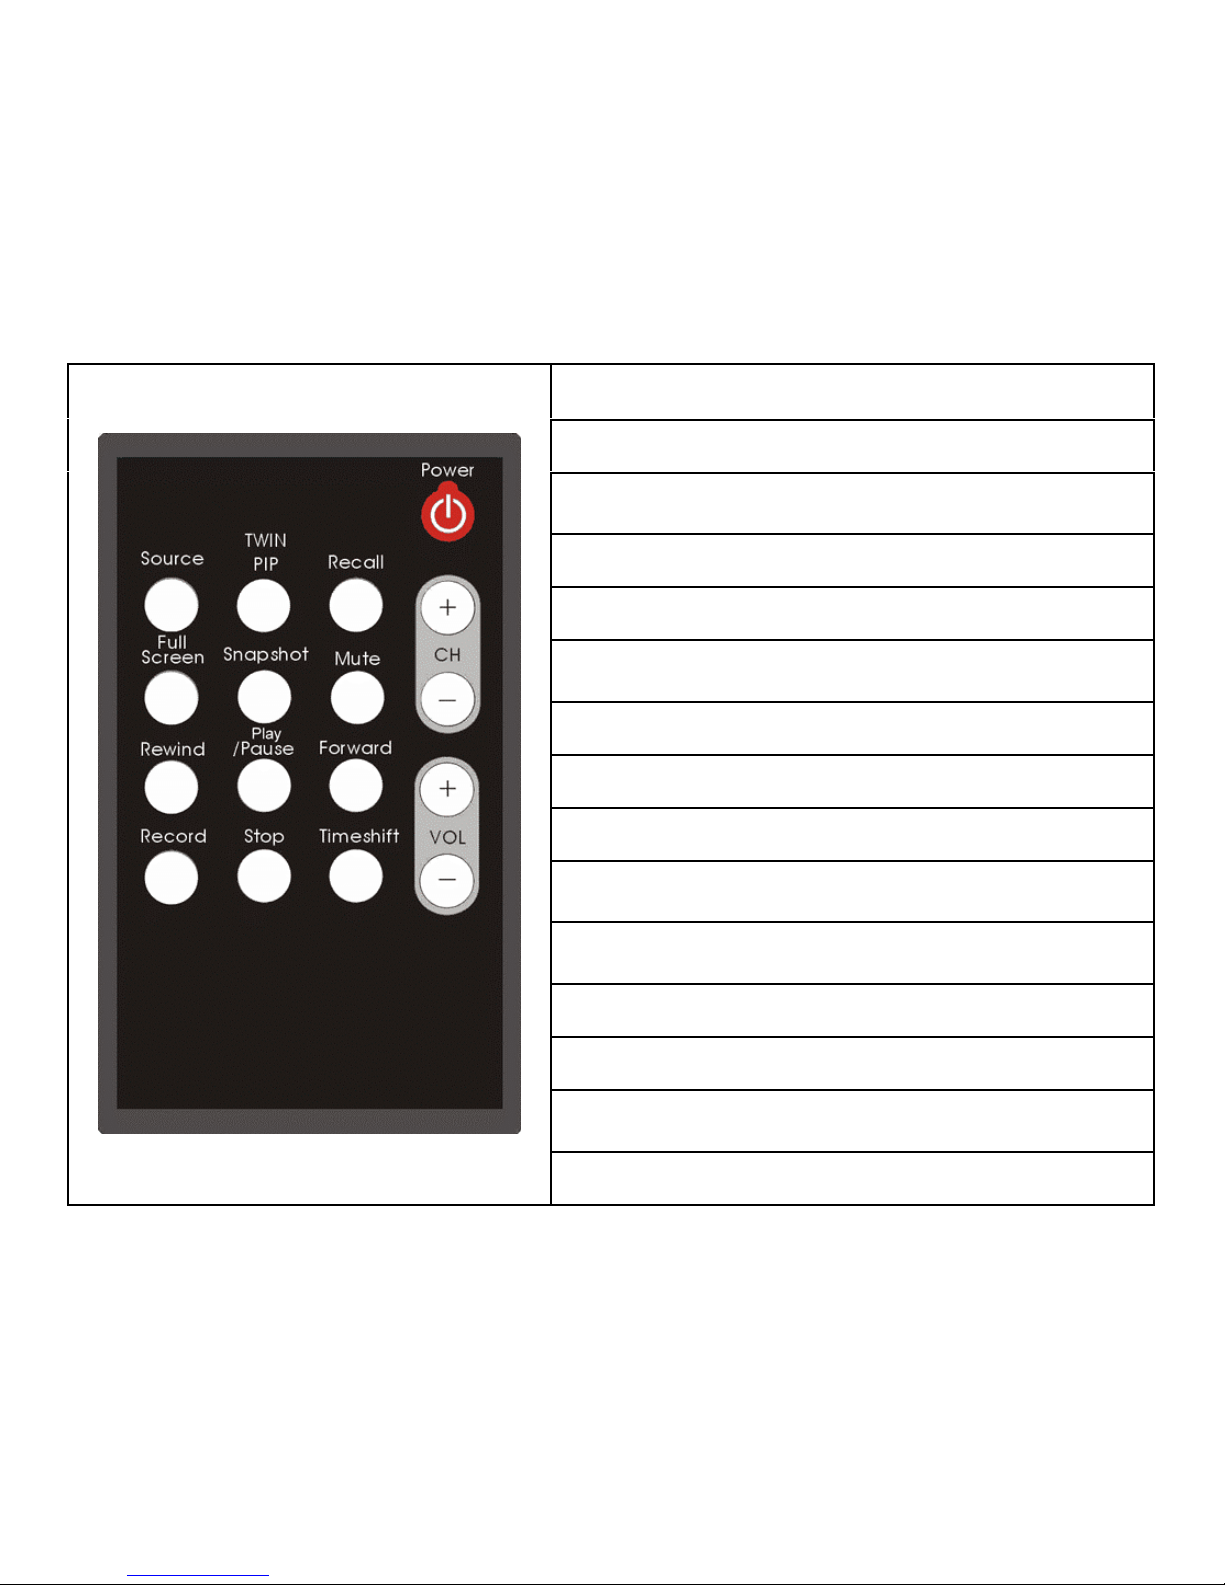
8. Remote Control Function Overview
Power: Open / Close the DTV application
CH+/CH-: Channel Up and Channel Down
VOL+/VOL-: Volume Up and Volume Down
Recall: Recall Previous Channel
Mute: Mute on / off
Forward: Forward for Timeshift or recorded
program
Timeshift: Open / Close Timeshift
TWIN PIP: No function for this model
Snapshot: Capture the still image
Play/Pause: Play or pause the playing
Timeshift or recorded TV program
Stop: Stops the playing Timeshift or recorded
TV program
Source: No function for this model
Full Screen: Full Screen Mode On / Off
Rewind: Rewind for Timeshift or recorded
program
Record: Start recording program

9
Systemvoraussetzungen
Um X-Micro TV BAR erfolgreich nutzen zu können, achten Sie bitte darauf,
dass Ihr System die folgenden Voraussetzungen erfüllt:
• Pentium
®
4 oder AMD Athlon 2,0 GHz oder schneller (2,4 GHz oder
schneller empfohlen)
• 256 MB RAM (Minimum), 512 MB RAM empfohlen
• Microsoft Windows 2000 (SP4) / XP (SP2)
• 100 MB freier Festplattenspeicherplatz zur Installation, zusätzlicher
Speicherplatz für Aufnahmen oder Timeshifting erforderlich
• CD-ROM- oder DVD-Laufwerk
• VGA-Karte mit 32 MB Speicher oder mehr / Chipsatz mit voller DirectX
9.0-Unterstützung
• Soundkarte / Chipsatz für Audiowiedergabe
• DirectX 9.0c oder aktueller installiert
• Freier USB 2.0-Port
• Digital-TV-Antenne
10
1. Bevor Sie die X-Micro TV BAR installieren, müssen Sie zunächst
DirectX 9.0c oder aktueller installieren. Legen Sie die Installations-CD
ein; ein Installationsmenü sollte sich automatisch öffnen. Klicken Sie auf
DIRECTX 9.0 und installieren Sie DirectX, indem Sie den Anweisungen
auf dem Bildschirm folgen.
2. Schließen Sie die Antenne an die X-Micro TV BAR an und stecken Sie
die X-Micro TV BAR in einen freien USB 2.0-Port Ihres PCs.

11
3. Windows 2000 / XP erkennt die X-Micro TV BAR automatisch und zeigt
das Fenster Neue Hardware gefunden an; schließen Sie dieses
Fenster gleich, indem Sie auf Abbrechen klicken.
Hinweis: Bei der Installation von Treiber und Dienstprogramm muss
sich die Installations-CD im CD-ROM-Laufwerk befinden.
4. Installieren Sie den Treiber für die X-Micro TV BAR, indem Sie auf
Treiber installieren klicken. Schließen Sie die Installation ab, indem Sie
den Anweisungen auf dem Bildschirm folgen.
5. Installieren Sie die DTV-Software durch Anklicken von
Dienstprogramm installieren. Installieren Sie die Software, indem
Sie den Anweisungen auf dem Bildschirm folgen.
6. Doppelklicken Sie auf das DTV-Symbol auf dem Desktop, um die
X-Micro DTV-Software zu starten und das digitale Fernsehen zu
genießen.
Klicken Sie zum Schließen
des Fensters auf die
A
bbrechen-Schaltfläche.

12
7. X-Micro DTV-Benutzeroberfläche – Überblick
1. Skin wechseln 11. Zum Anfang springen
2. Zu DVB TV umschalten 12. Zum Ende springen
3. Suchlaufeinstellungen öffnen 13. Stummschaltung ein/aus
4. Zum Wiedergabemodus
umschalten
14. Lautstärkebalken
5. Videotext öffnen (sofern verfügbar) 15. Kanalliste anzeigen/verbergen
6. EPG-Fenster öffnen 16. Schnappschuss-Schaltfläche
7. Rücklauf 17. Signalstärkeanzeige
8. Timeshift - Start/Wiedergabe/Pause
18. Vollbild-/Fenstermodus
umschalten
9. Aufnahme starten 19. Schneller Vorlauf
10. Stopp 20. Kanalliste
13
8. Fernbedienungsfunktionen – Überblick
Power: Öffnet/schließt die DTV-Anwendung
CH+/CH-: Kanal aufwärts, Kanal abwärts
VOL+/VOL-: Lautstärke erhöhen, Lautstärke
vermindern
Recall: Zuvor geschauten Kanal wieder aufrufen
Mute: Stummschaltung ein/aus
Forward: Vorlauf bei Timeshift oder
aufgenommenem Programm
Timeshift: Timeshift öffnen/schließen
TWIN PIP: Bei diesem Modell ohne Funktion
Snapshot: Standbild aufzeichnen
Play/Pause: Wiedergabe oder Pause bei
Timeshift oder aufgenommenem TV-Programm
Stop: Stoppt die Wiedergabe von Timeshift oder
aufgenommenem TV-Programm
Source: Bei diesem Modell ohne Funktion
Full Screen: Vollbildmodus ein/aus
Rewind: Rücklauf bei Timeshift oder
aufgenommenem Programm
Record: Startet die Aufnahme des Programms

14
Configuration requise
Pour utiliser le X-Micro TV BAR sans problèmes, vérifiez la configuration de
votre ordinateur :
• Pentium
®
4 ou AMD Athlon 2,0 GHz minimum ; 2,4GHz ou supérieur
recommandé
• 256 Mo de RAM (minimum), 512 Mo de RAM recommandé
• Microsoft Windows 2000 (SP4) / XP (SP2)
• 100 Mo disponible sur votre disque dur pour l’installation, et davantage
pour les enregistrements ou les décalages de temps.
• Un lecteur CD-ROM ou DVD
• Une carte VGA avec minimum 32 Mo / jeu de puce avec support DirectX
9.0.
• Une carte de son / jeu de puce pour la lecture audio
• Microsoft DirectX 9 ou une version plus récente
• Un port USB 2.0
• Une antenne de TV numérique

15
1. Avant d’installer votre X-Micro TV BAR, vous devez installer DirectX
9.0c ou une version plus récente sur votre ordinateur. Insérez le CD
d’installation et un menu d’installation devrait apparaître
automatiquement. Cliquez sur DIRECTX 9.0 et suivez les instructions
pour installer DirectX.
2. Branchez l’antenne sur le X-Micro TV BAR et branchez le X-Micro TV
BAR sur un port USB 2.0 de votre ordinateur.
16
3. Windows 2000/XP détectera automatiquement la présence de X-Micro
TV BAR et une fenêtre Nouveau matériel détecté s’ouvrira ; cliquez
sur le bouton Annuler pour fermer cette fenêtre.
Remarque : N’enlevez pas le CD de votre lecteur CD-ROM pendant
l’installation du pilote et de l’utilitaire.
4. Installez le pilote du X-Micro TV BAR en cliquant sur Installer pilote.
Suivez les instructions pour finir l’installation.
5. Installez le logiciel de télévision numérique (DTV) en cliquant sur
Installer utilitaire. Suivez les instructions pour installer le programme.
6. Double-cliquez sur l’icône DTV du bureau pour activer le logiciel X-Micro
DTV et regarder la télévision numérique.
Cliquez sur le bouton
A
nnuler pour fermer la
fenêtre
 Loading...