

Warning: In order to have the Three Hole printing service you
must have the Professional or Advanced Office finisher installed
on your machine. Please contact your local Xerox sales representative for details.
Fig. 1-1
Fig. 1-2
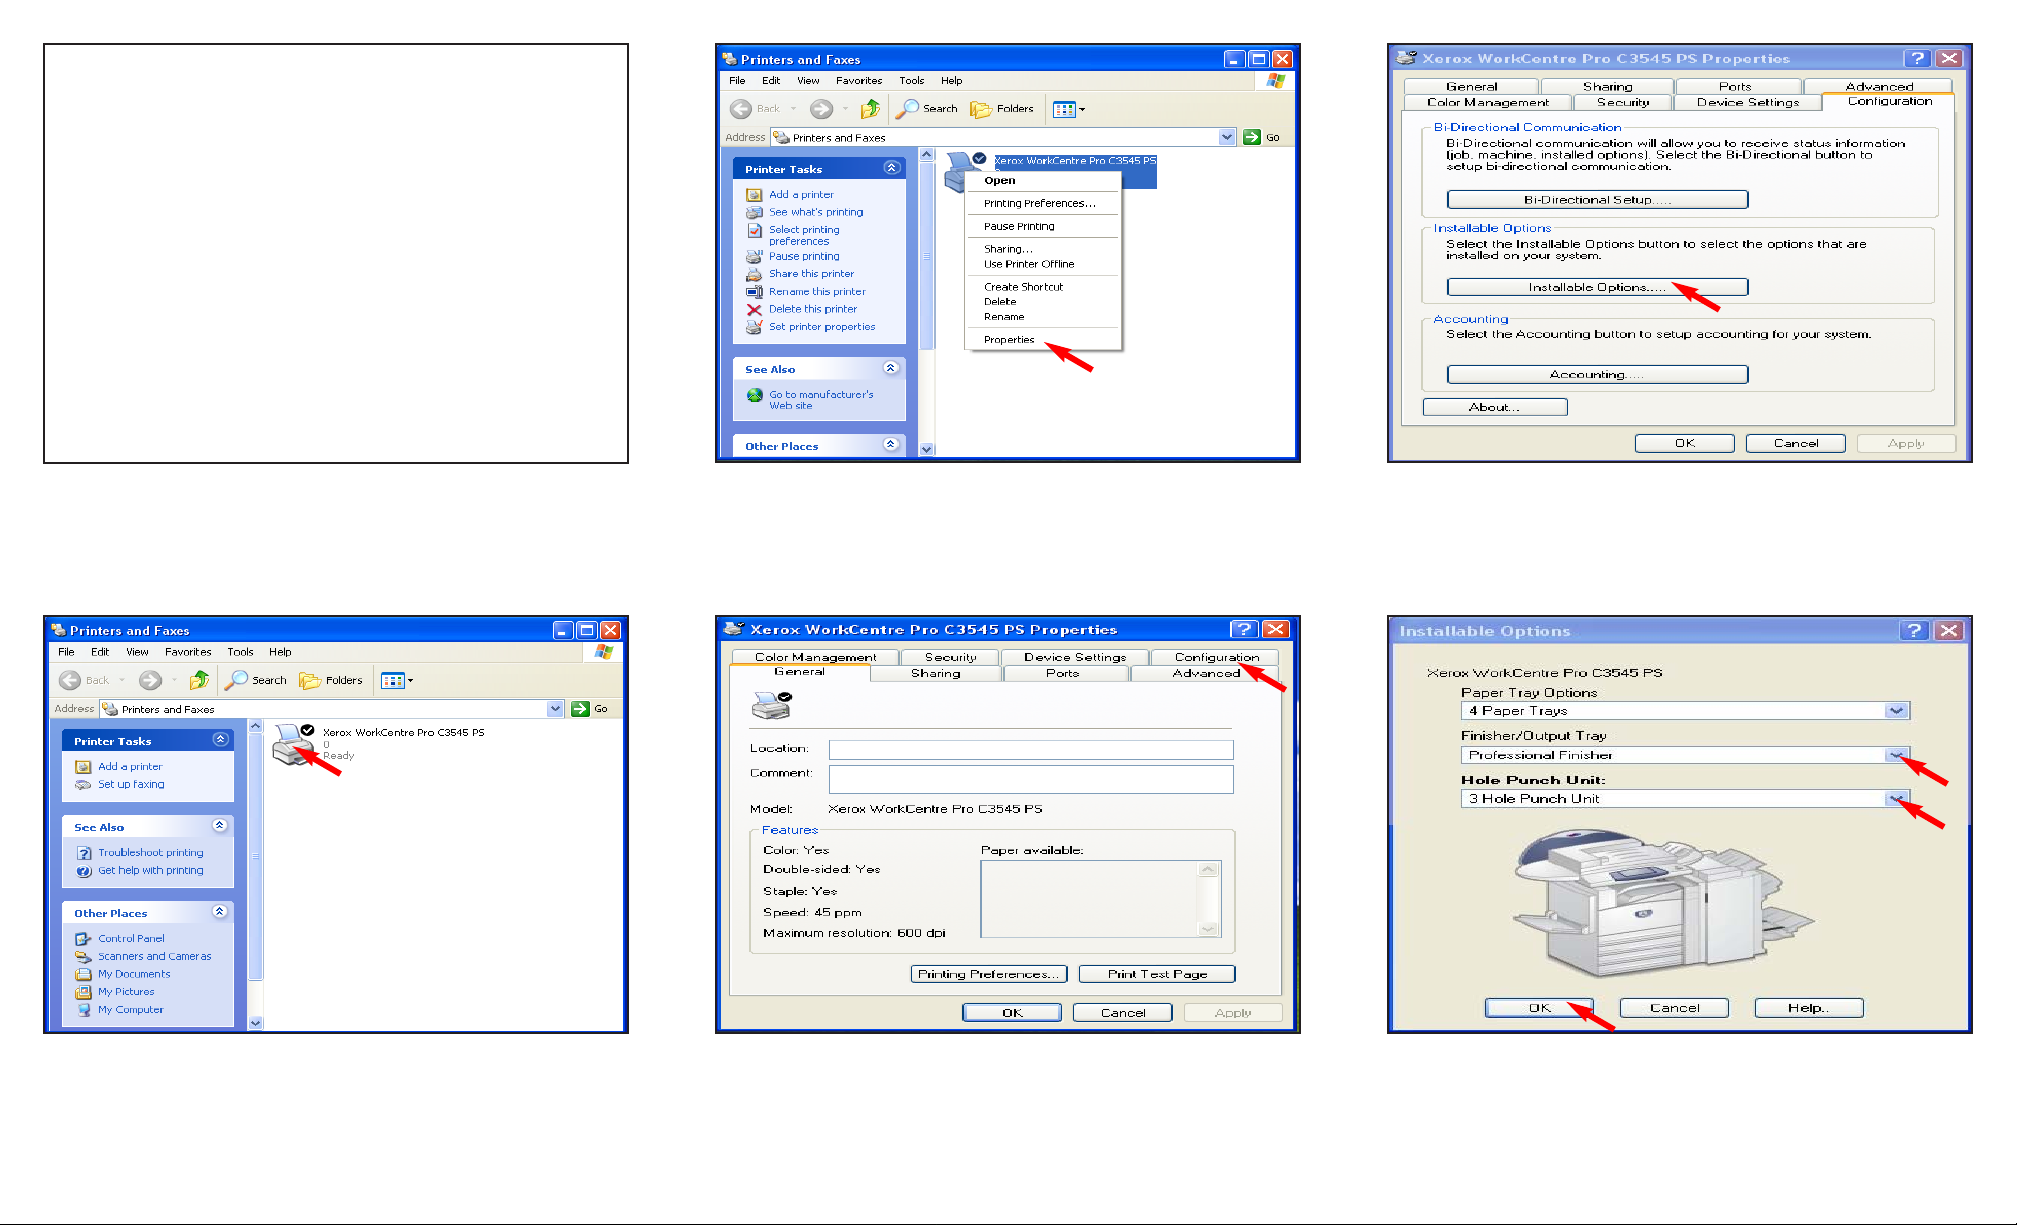
In the Printers window, right click the Xerox WorkCentre Pro
C3545 PS icon.
Note: This screen may vary depending on your Operating
System.
Fig. 1-3
Click Properties.
Fig. 1-4
Click Configuration.
Fig. 1-6
Click the down arrow Finisher/Output Tray and select
Professional Finisher from the drop down menu. Click the
down arrow and select 3 Hole Punch Unit from the drop down
menu. Click OK.
Fig. 1-5
Click Installable Options.
Three Hole Printing - 1 of 4
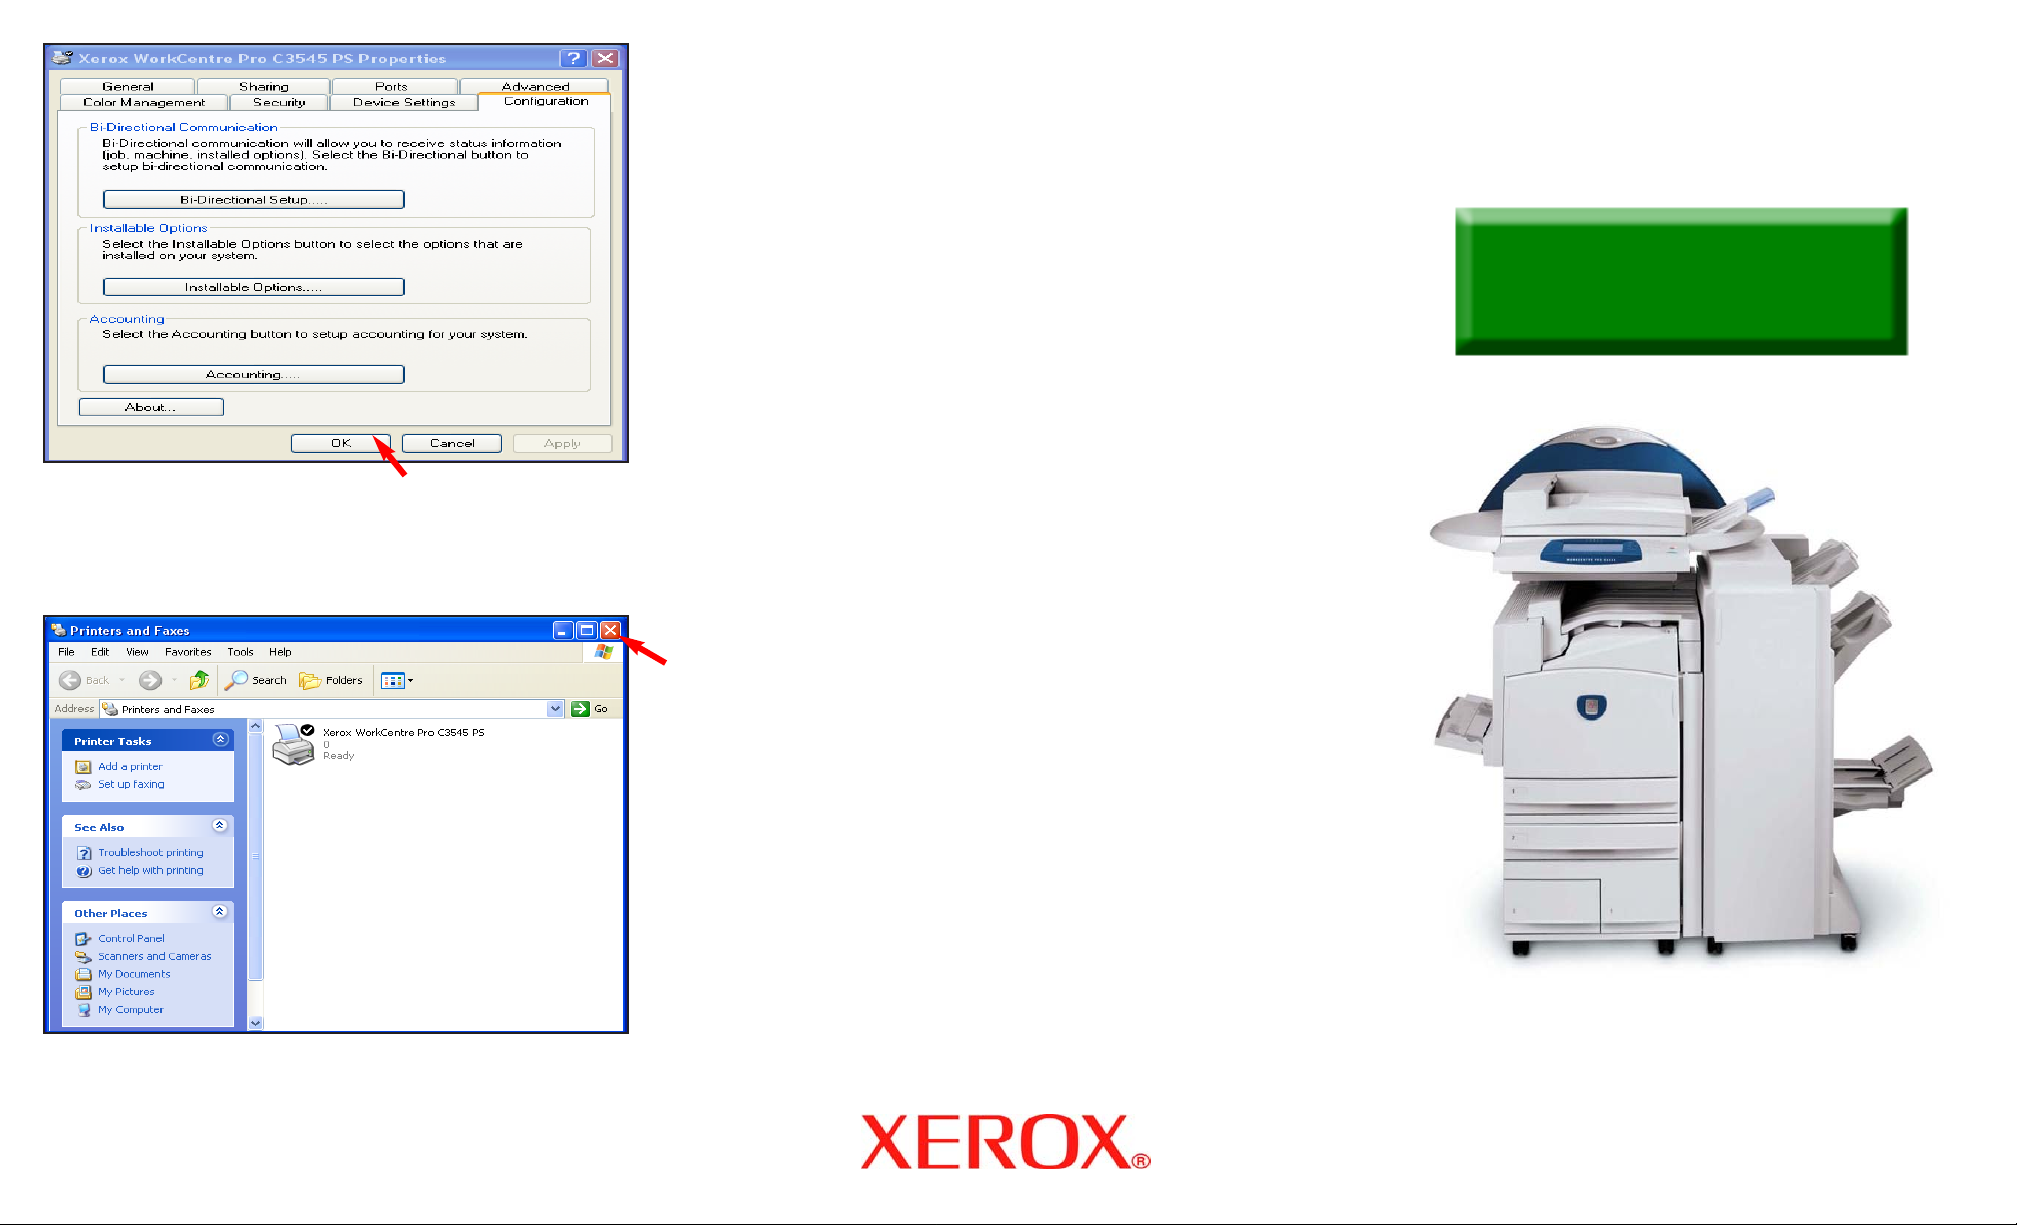
Fig. 1-7
Click OK.
Fig. 1-8
Close the window. Click the “X” in the upper right corner to
close the window.
Three Hole Printing - 2 of 4
Quick Start Guide
WorkCentre Pro
C2128/C2636/C3545
Three Hole Printing
Part 1 of 2

Fig. 2-2
Click on the File and select Print from your application.
Fig. 2-3
Verify that the correct printer is selected and click on Properties.
Fig. 2-4
Click on the Paper/Output tab.
Fig. 2-6
Click OK.
Fig. 2-5
Click on the down arrow from Select Finishing and select 3
Hole Punch. Click OK.
Note: Collated: 3 Hole Punch will be displayed in the Finishing
Summary.
Three Hole Printing - 3 of 4
Warning: In order to have the Three Hole printing service you
must have the Professional or Advanced Office finisher installed
on your machine. Please contact your local Xerox sales representative for details.
Fig. 2-1

Fig. 2-7
Print out is completed.
Three Hole Printing - 4 of 4
Quick Start Guide
WorkCentre Pro
C2128/C2636/C3545
Three Hole Printing
Part 2 of 2
 Loading...