

Page 1
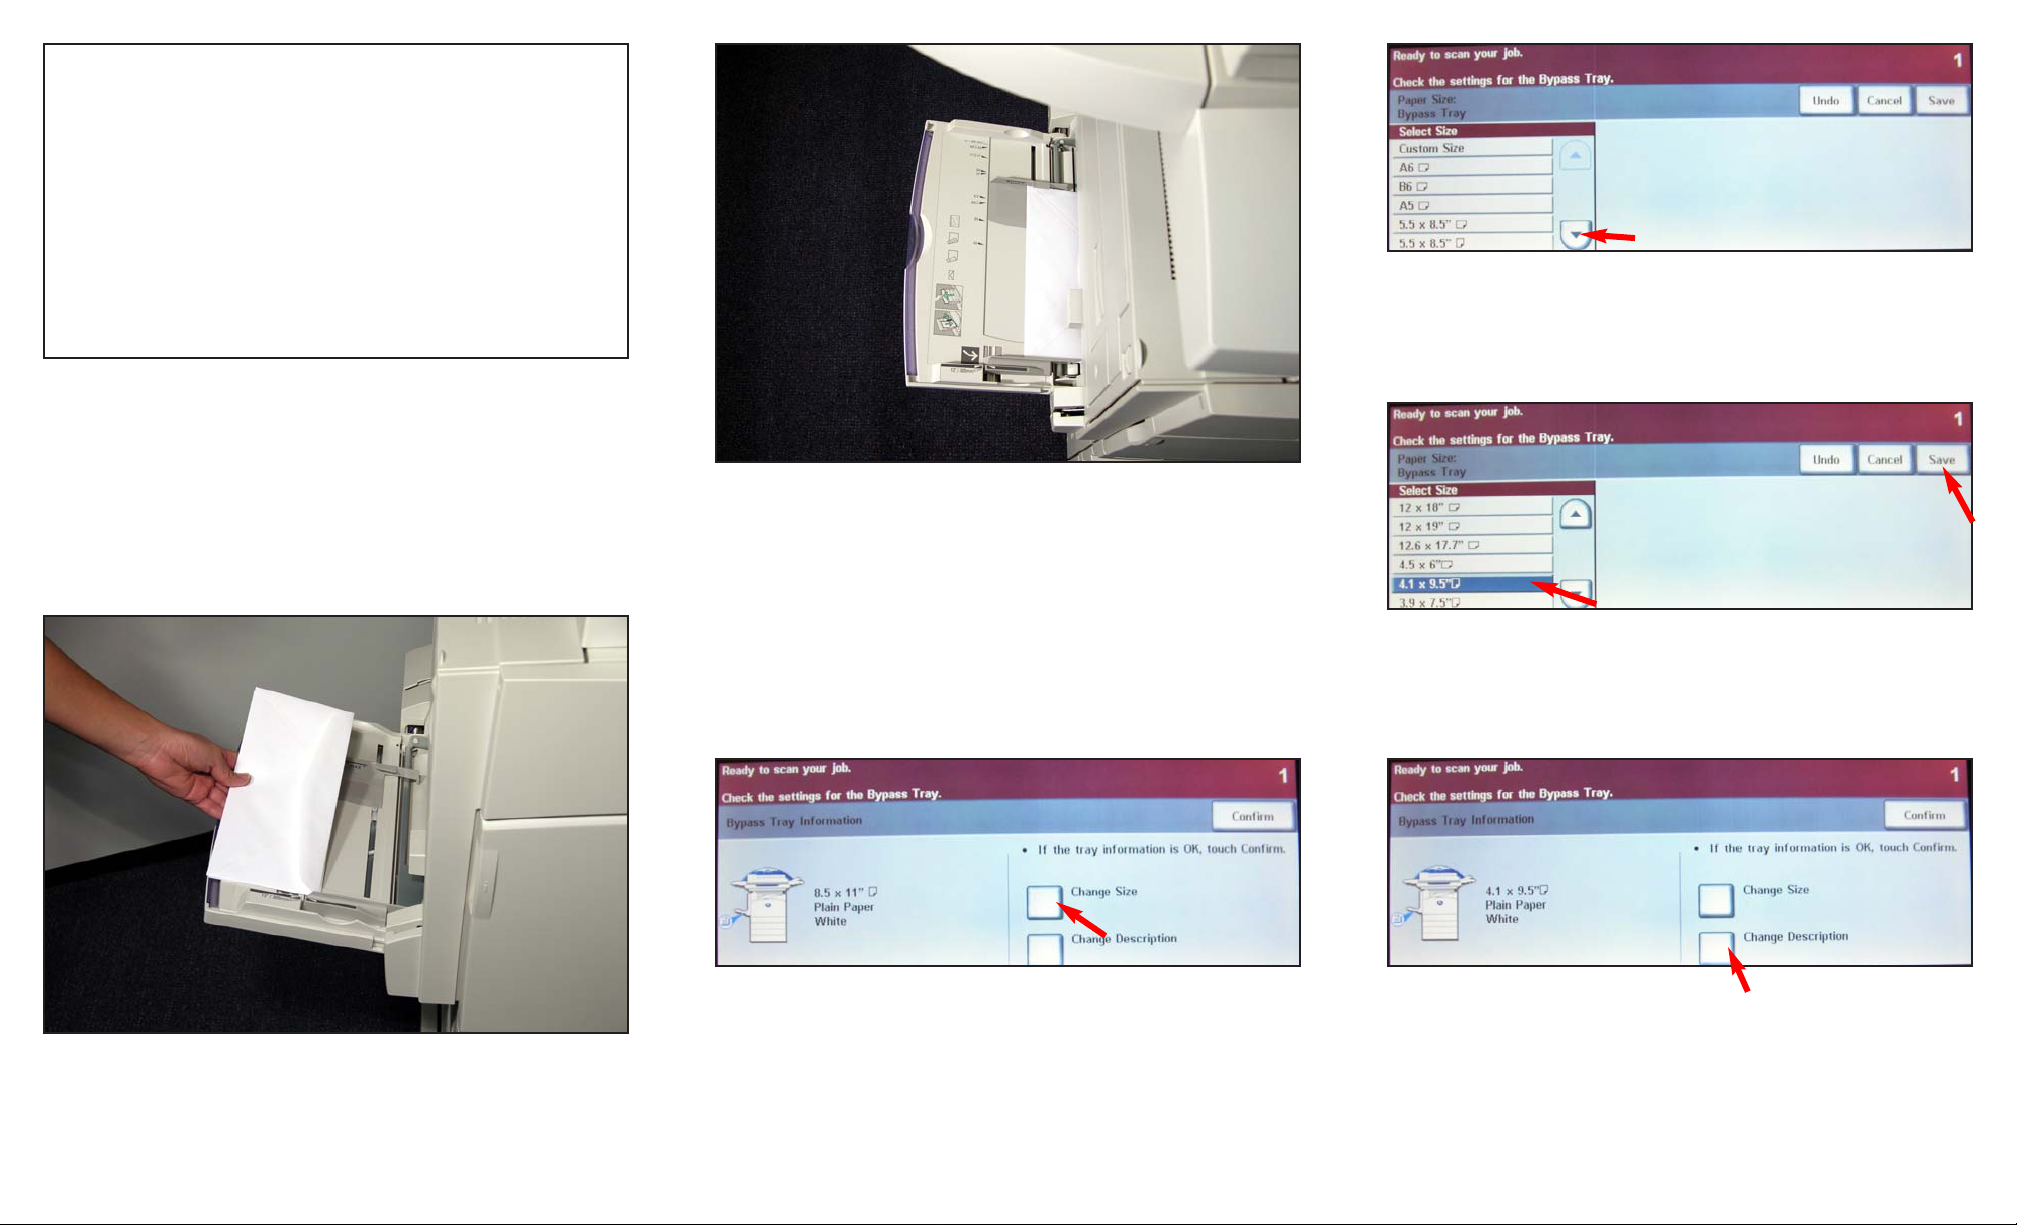
Fig. 1
Fig. 2
Place the envelopes with the flap facing up in the bypass tray as
shown.
Fig. 4
Press Change Size.
Fig. 6
Press 4.1” x 9.5” (#10 envelope). Press Save.
Fig. 7
Press Change Description.
Envelope Printing - 1 of 2
Fig. 5
Scroll until the correct envelope size is visible.
Note: Once the envelope setting has been set up as explained
in this pamphlet, you should be able to print from your application by setting envelopes as the selected output.
Fig. 3
The Envelope should be placed correctly in the bypass tray in
order to get the screen seen in Fig. 4.
Page 2
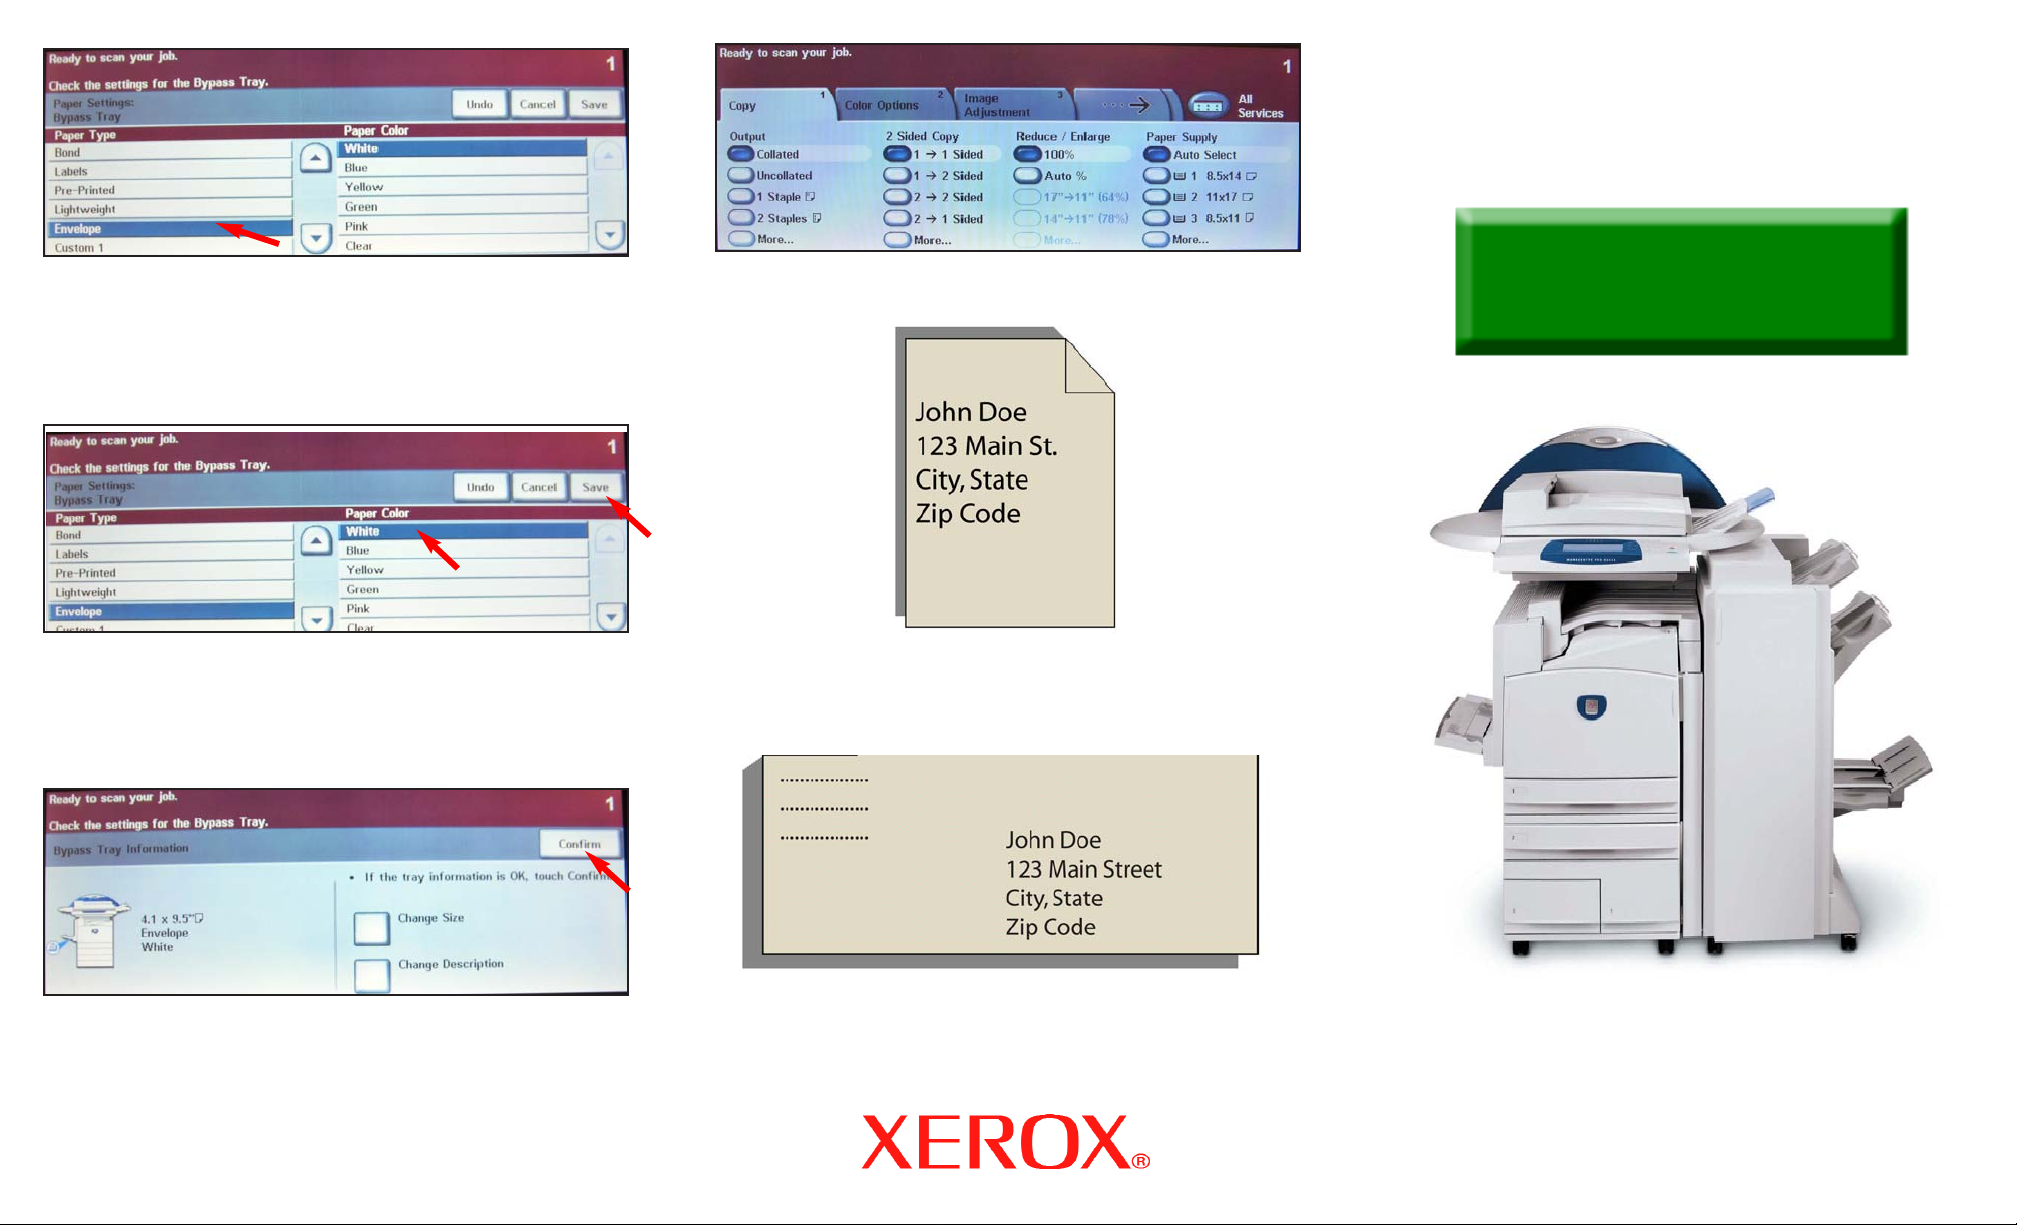
Fig. 8
Scroll until you find Envelope for paper type. Press Envelope.
Envelope Printing - 2 of 2
Quick Start Guide
WorkCentre Pro
C2128/C2636/C3545
Envelope Printing
Fig. 9
For the Paper Color press White. Press Save.
Fig. 11
You are ready to print envelope(s).
Fig. 10
Press Confirm.
Fig. 12
Enter the Name and Address for the envelope with your application and select Print.
Fig. 13
Sample of Printed Envelope.
 Loading...