

Page 1

Replacing the transfer roll
Note
1.
Note
2.
To ensure the best print quality, load the transfer roll in an area
that is free of dust and dirt.
Open the printer cover to its full upright position; lift the transfer
roll tray out of the printer and remove the four endcaps from the
used transfer roll. Discard the used transfer roll.
Negative images of all prints remain on the used transfer roll. If
this is a security risk, keep this in mind when disposing of the
used transfer roll.
Clean the printer components marked for Quick Cleaning. Refer
to the topics detailing cleaning procedures for additional
information.
Page 2
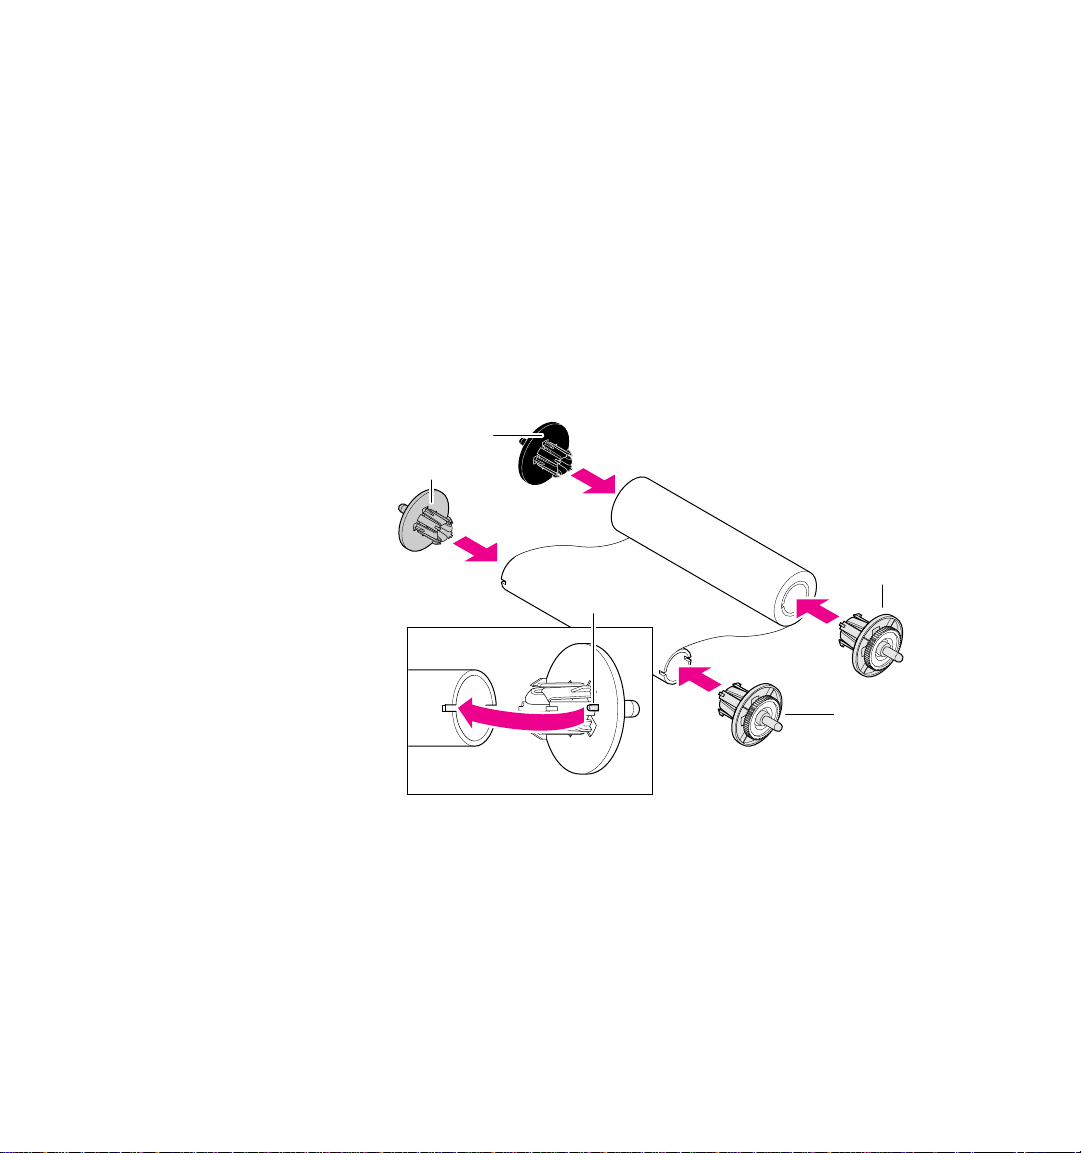
3.
Unwrap the new transfer roll and insert the four endcaps:
a.
Insert the black endcap into the left side of the supply core.
b.
Insert a green endcap into the right side of the supply core.
c.
Insert the gray endcap into the left side of the take-up core.
d.
Insert a green endcap into the right side of the take-up core.
e.
Make sure that the tabs on the endcaps fit snugly into
the notches.
3a
3d
3e
3b
3c
8849-67
Page 3

4.
Load the transfer roll into the tray: The front of the tray is marked
FRONT SIDE OF PRINTER
a.
Place the supply core into the back of the tray.
b.
Place the take-up core into the front of the tray.
c.
Make sure that the endcap axles are pressed firmly into the
.
openings on the transfer roll tray.
4b
4a
4c 4c
FRONT SIDE OF PRINTER
8849-68
Page 4

5.
Insert the transfer roll tray into the printer and push firmly on the
handles so that the axles on the transfer roll lock into place.
5
6.
To remove any slack in the transfer roll, turn an endcap toward
the front of the printer until you see that the transfer roll is taut.
6
8849-69
8849-59
Source: 070-9237-00 C4
 Loading...