

Page 1
708P88624
PHASER 3124
PHASER 3125
Service Manual
708P88624 09/06
Page 2

Service Documentation
708P88624
September 2006
Prepared by:
Xerox Europe,
Global Knowledge & Language Services,
Enterprise Centre,
P.O. Box 17,
Bessemer Road,
Welwyn Garden City,
Hertfordshire,
AL7 1BU, England.
© Copyright 2006 by Xerox Ltd.
Xerox, and all identifying numbers used in connection with the Xerox products mentioned in this
publication are registered trademarks of Xerox. Other company trademar ks are also acknowledged.
NOTICE
While every care has been taken in the preparation of this manual, no liability will be accepted by
Xerox Europe arising out of any inaccuracies or omissions.
All service documentation is supplied to Xerox external customers for informational purposes
only. Xerox service documentation is intended for use by certified, product trained service personnel only. Xerox does not warrant or represent that it will notify or provide to such customer
any future change to this documentation. Customer performed service of equipment, or modules,
components or parts of such equipment may affect whether Xerox is responsible to fix machine
defects under the warranty offered by Xerox with respect to such equipment. You should consult
the applicable warranty for its terms regarding customer or third-party provided service.
09/06 PHASER 3124 / PHASER 3125
Page 3

Introduction
Introduction
Precautions..............................................................................................................................iii
Health and Safety Incident Reporting........................................................................................x
1. Service Call Procedures
Section Contents...................................................................................................................1-1
2. Repair Analysis Procedures
Section Contents...................................................................................................................2-1
3. Image Quality
Section Contents...................................................................................................................3-1
4. Repairs/Adjustments
Section Contents...................................................................................................................4-1
5. Parts List
Section Contents...................................................................................................................5-1
6. General Procedures/Information
Section Contents...................................................................................................................6-1
7. Wiring Data
Section Contents...................................................................................................................7-1
PHASER 3124 / PHASER 3125 09/06 i
Page 4

Introduction
Page intentionally blank
ii 09/06 PHASER 3124 / PHASER 3125
Page 5

Service Manual Formats
Table 1: Service Manual Formats
Part number Format
708P88624 Hardcopy
708P88623 PDF on CD
Introduction
PHASER 3124 / PHASER 3125 09/06 iii
Page 6

Introduction
Introduction
Precautions
In order to prevent accidents and to prevent damage to the equipment, please read the precautions listed below carefully and follow them closely before servicing the machine.
Warnings, Cautions and Notes
WARNING
A warning is used whenever an operating or maintena nce procedu re, practice, cond ition or statement, if not strictly observed, could result in personal injury.
CAUTION
A caution is used whenever an operat ion or maintenance procedure, practice, condition or statement, if not strictly observed, could result in damage to the equipment.
Note: A note is used where it is essential to highlight a procedure, practice, condition or
statement.
Safety Warning
1. Only to be serviced by appropriately qualified service engineers.
High voltages and lasers i nside this product are dange rous. This machine should only be serviced
by a suitably trained and qualified service engineer.
2. Use only Xerox replacement parts
There are no user servicea ble parts in side the machin e. Do not make an y unauthor ized changes
or additions to the machine, these could cause the machine to malfunc tion and create e l ectric
shock or fire hazards.
3. Laser Safety Statement
The machine is certified in the U.S. to conform to the requirements of DHHS 21 CFR, chapter 1
Subchapter J for Class 1(1) laser products, and elsewhere, it is certified as a Class I laser product
conforming to the requirements of IEC 825. Class I laser products are not considered to be haz-
ardous. The laser system and ma chine are designed so there is never any human access to laser
radiation above a C lass I le vel du ring n orm al oper ation, u ser maint enance , or p rescrib ed ser vice
condition.
iv 09/06 PHASER 3124 / PHASER 3125
Page 7
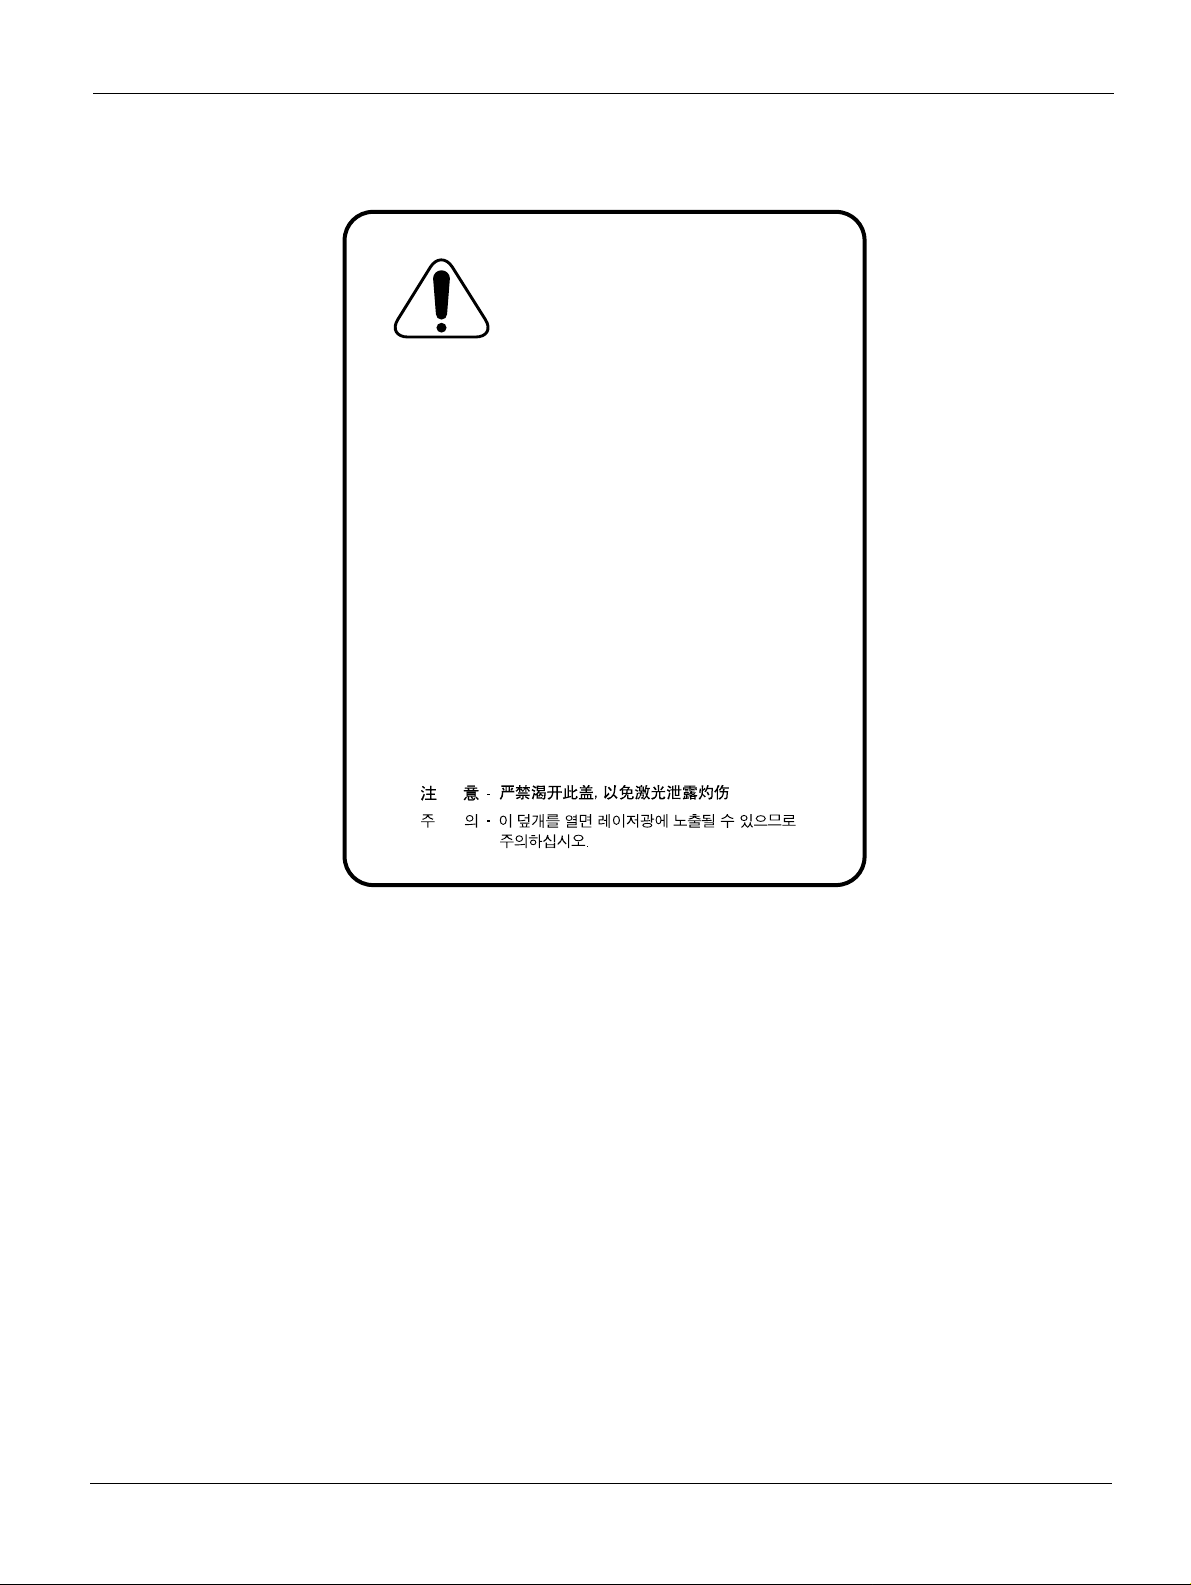
WARNING
CAUTION - INVISIBLE LASER RADIATION
WHEN THIS COVER OPEN.
DO NOT OPEN THIS COVER.
VORSICHT - UNSICHTBARE LASERSTRAHLUNG,
WENN ABDECKUNG GE FFNET .
NICHT DEM STRAHL AUSSETZEN.
ATTENTION - RAYONNEMENT LASER INVISIBLE EN CAS
D OUVERTURE. EXPOSITION DANGEREUSE
AU FAISCEAU.
ATTENZIONE - RADIAZIONE LASER INVISIBILE IN CASO DI
APERTURA. EVITARE LESPOSIZIONE AL
FASCIO.
PRECAUCION - RADIACION LASER IVISIBLE CUANDO SE ABRE.
EVITAR EXPONERSE AL RAYO.
ADVARSEL. - USYNLIG LASERSTR LNING VED BNING, N R
SIKKERHEDSBRYDERE ER UDE AF FUNKTION.
UNDG UDSAETTELSE FOR STR LNING.
ADVARSEL. - USYNLIG LASERSTR LNING N R DEKSEL
PNES. STIRR IKKE INN I STR LEN.
UNNG EKSPONERING FOR STR LEN.
VARNING - OSYNLIG LASERSTR LNING N R DENNA DEL
R PPNAD OCH SP RREN R URKOPPLAD.
BETRAKTA EJ STR LEN. STR LEN R FARLIG.
VARO! - AVATTAESSA JA SUOJALUKITUS OHITETTAESSA
OLET ALTTIINA N KYM TT M LLE LASERS TEILYLLE L KATSO S TEESEEN.
Avoid exposure to laser beam. Invisible laser radiation.
Introduction
Caution for safety
Toxic material
This product contains toxic materials that could cause illness if ingested.
1. Please keep toner cartridges away from children. Toner contained in the print cartridge may
be harmful. If swallowed, contact a doctor immediately.
Electric Shock and Fire Safety Precautions
Failure to fol low the following instructions could cause electric shock or potentially cause a fire.
1. Use only the correct voltage, failure to do so could damage the machine and potentially
2. Use only the p ower cable supplied with the machine. Use of an incorrectly s pecified cable
3. Do not overload the power socket, this could lead to overheating of the cables inside the wall
4. Do not allow water or other liquids to spill into the machine, this can cause elec tric shock. Do
PHASER 3124 / PHASER 3125 09/06 v
cause a fire or electric shock.
could cause the cable to overheat and potentially cause a fire.
and could lead to a fire.
not allow paper clips, pi ns or oth er for ei g n ob je cts to fal l int o the ma chi n e the s e, co uld cau s e
a short circuit leading to an elec tric shock or fi re hazard.
Page 8

Introduction
5. Never touch the plugs on either end of the power cable with wet hands. This can cause an
electric shock. When servicing the machine, remove the power plug from the wall socket.
6. Use caution when inserting or removing the power connector. The power connector must be
inserted completely otherwise a poor contact could cause overheating and possibly lead to a
fire. When removing the power connector grip it firmly and pull.
7. Take care of the power cable. Do not allow it to become twisted, bent sharply round corners
or otherwise damaged. Do not place objects on top of the power cable. If the power cable is
damaged, it could overheat and cause a fire or exposed cables could cause an electric
shock. Replace a damaged power cable immediately, do not reuse or repair the damaged
cable. Some chemicals can corrode the coating on the power cable, weaken the cover or
exposing cables causing fire and shock risks.
8. Ensure that the power sockets and plugs are not cracked or broken in any way. Any such
defects should be repaired immediately. Take care not to cut or damage the power cable or
plugs when moving the machine.
9. Use caution during thunder or lightning storms. Xerox recommend that this machine be disconnected from the power sou rc e when such we ath er cond it io ns ar e exp ecte d. Do not touch
the machine or the power cord if it is still connected to the wall socket in these weather conditions.
10. Avoid damp or dusty areas, install the machine in a clean well ventilated location. Do not
position the machine near a humidifier. Damp and dust build up inside the machine can lead
to overheating and cause a fire.
11. Do not position the machine in direct sunlight. This will cause the temperature inside the
machine to rise poss ib ly l ead i ng to the machine failin g to w ork p rope rl y a nd i n e xtr em e co nd itions could lead to a fire.
12. Disconnect the machine from the power supply immediately if it emits any strange odour,
smoke or strange noises. If this precaution is ignored, the machine could overheat and a fire
may occur.
13. Do not insert any metal objects into the m achine through t he ventilat or fan or other pa rt of the
casing, it could m ake co nta ct w it h a h igh vol ta ge con du c tor inside the machi ne and cause an
electric shock.
vi 09/06 PHASER 3124 / PHASER 3125
Page 9

Introduction
Handling Precautions
The following instructions are for your own personal safety, to avoid injury and so as not to damage the machine
1. Ensure t he mac hin e is in stal led on a level surface, capable of supporting its weight. Failure to
do so could cause t he machine to tip or fall.
2. The machine contains many rollers, gears and fans. Take great care to ensure that you do
not catch your fingers, hair or clothing in any of these rotating devices.
3. Do not place any small metal objects, containers of water, chemicals or other liquids close to
the machine which if spilled could get into the machine and cause damage or a shock or fire
hazard.
4. Do not install the machin e i n areas with high dust or moist ur e l eve ls, beside on open window
or close to a humidifier or heater. Damage could be caused to the machine in such areas.
5. Do not place candles, burning cigarettes, etc. on the machine, these could cause a fire.
Assembly / Disas sembly Precauti ons
Replace parts carefully , always use Xerox parts. Ta ke care to note the exact loca tion of parts and
also cable routing be fore disman tlin g any p art of the ma chine . Ensure all part s and ca bles ar e replaced correc tly.
Please carry out t he followi ng procedu res befo re disma ntling the m achine or replaci ng any part s.
1. Check the contents of the machine memory and make a note of any user settings. These will
be erased if the mainboard is replaced.
2. Ensure that power is disconnected before servicing or replacing any electrical parts.
3. Disconnect printer interface cables and power cables.
4. Be sure to remove the print cartridge before you disassemble any parts.
5. Only use approved spa re p arts. E nsure tha t pa rt nu mber , produ ct na me, a ny volt age, cu rren t
or temperature rating are correct.
6. When removing or re-fitting any parts do not use excessive force, especially when fitting
screws into plastic.
7. Take care not to drop any small parts into the machine.
8. Handling of the OPC Dr um
- The OPC Drum can be irreparably damaged if exp os ed to light.
Take care not to expose the OPC Drum either to direct sunlight or to fluorescent or incandes-
cent room lighting. Exposure for as little as 5 minutes can damage the surface’s photoconductive properties and will result in print quality degrad ation. Take extra care when servicing
the machine. Remove the OPC Drum and store it in a black bag or a lightproof container.
Take care when refitting covers as light is can be admitted through the OPC area and can
damage the OPC Drum.
- Take care not to scratch the green surface of the OPC Drum Unit.
If the green surface of the Drum Cartridge is scratched or touched, the print quality will be
compromised.
9. Remove dust and foreign matter.
PHASER 3124 / PHASER 3125 09/06 vii
Page 10

Introduction
Releasing Plastic Latches
Many of the parts are held in place with plastic latches. The latches break easily; release them
carefully.
To remove such parts, pull the hook of the latch away from the part to which it is latched.
Figure 1
Disregarding this warning may cause bodily injury
1. The fuser unit works at a high temp erature. Use caution when working on the machine. Wait
for the fuser to cool down before disassembly.
2. Do not put fingers or hair into the rotating parts (paper feeding entrance, motor, fan, etc.).
Doing so may cause injury.
3. When you move the machine.
This machine weighs 8.7kg (19.2lbs). Use safe lifting and handling techniques. Back injury
could be caused if you do not lift carefully.
4. Ensure the machine is installed safely.
The machine weighs 8.7kg (19.2lbs), ensure the machine is installed on a level surface,
capable of supporting its weight. Failure to do so could cause the machine to tip or fall possibly causing pe rsonal injury or da maging the machine.
5. Do not install the machine on a sloping or unstable surface. After installation, double c heck
that the machine is stable.
viii 09/06 PHASER 3124 / PHASER 3125
Page 11

Introduction
ESD Precaution s
Certain semiconducto r devices can be easily damaged by static electrici ty. Such components a re
commonly called “Electrostatically Sensitive (ES) Devices”, or ESDs. Examples of typical ESDs
are: integrated circuits, some field effect transistors , and semiconductor “chip” components.
The techniques outlined below should be followed to help reduc e the incidence of co mponent
damage caused by static electri city.
CAUTION
Be sure no power is applied to the chassis or circuit, and observe all other safety precautions.
1. Immediately before handling a semiconductor component or semiconductor-equipped
assembly, drain off any electrostat ic charge on your body by touching a known earth ground .
Alternatively, employ a commercially available wrist strap device, which should be removed
for your personal safety reasons prior to applying power to the unit under test.
2. After removing an electrical assembly equipped with ESDs, place the assembly on a conductive surface, such as aluminium or copper foil, or conductive foam, to prevent electrostatic
charge buildup in the vicinity of the assembly.
3. Use only a grounded tip soldering iron to solder or desolder ESDs.
4. Use only an “anti-static” solder removal device. Some solder removal devices not classified
as “anti-static” can generate electrical charges sufficient to damage ESDs.
5. Do not use Freon-prope lled chemi cals. When spr ayed, these can generate electrical charges
sufficient to damage ESDs.
6. Do not remove a replacement ESD from its protective packaging until immediately before
installing it. Most replacement ESDs are packaged with al l le ads sho rt ed toget he r by conductive foam, aluminium foil, or a comparable conductive material.
7. Immediately before removing t he protecti ve shorti ng mater ial from the leads of a re placement
ESD, touch the protect ive material to the chassis or cir cuit assembly into which the devi ce will
be installed.
8. Maintain continuous electrical contact between the ESD and the assembly into which it will be
installed, until completely plugged or solder ed into the circuit.
9. Minimize bodily motions when handling unpackaged replacement ESDs. Normal motions,
such as the brushing together of clothing fabric and lifting one’s foot from a carpeted floor,
can generate st atic electricit y sufficient to damage an ESD.
PHASER 3124 / PHASER 3125 09/06 ix
Page 12

Introduction
Toner Cartridge Service
Only toner cartridges supplied by Xerox should be used. Printing defects or set damage caused
by the use of non-approved print cartridges or un-licensed toner refills are not covered by the guarantee.
Precautions on Safe-keeping of Toner Cartridge
Excessive exposure to direct light for more than a few minutes may cause damage to the cartridge.
Service Life of Toner Cartridge
If the printed image is light due to the toner supply becoming low you can temporarily improve the
print quality by redistributing the toner (shake the print cartridge). However, you should replace
the print cartridge to solve the problem permanently.
Redistributing Toner
When the print cartr idge is near the end of i ts life, white streaks or l ight print occurs. The Er ror LED
will come on. You can temporarily re-establish the print quality by redistributing the remaining toner in the cartridge.
Note: Help the environment by recycling your used toner cartridge. Refer to the recycling
brochure packed with the toner cartridge for details.
1. Open the Front Cover.
2. Lightly push the used cartridge down, then pull it out.
3. Unpack the new ton er ca rt ri d ge an d gently shake it hor iz on ta ll y fou r or f iv e t ime s to distribute
the toner evenly inside the cartridge.
4. Save the box and the cover for shipping. Slide the new toner cartridge in until it locks into
place.
Standard of guarantee for consumable parts.
Please refer to User Manual or Instructions on Fax/Printer Consumables SVC manual for the criteria for judging the quality of consumable parts the standard of guarantee on those parts.
How to identify a refilled toner cartridge.
One way security screws are used in the manufacture of the cartridge – check if these are damaged.
x 09/06 PHASER 3124 / PHASER 3125
Page 13

Introduction
Health and Safety Incident Reporting
I. Summary
This section defines requirements for notification of health and safety incidents involving Xerox
products (equipment and materials) at customer locati ons.
II. Scope
Xerox Corporation and subsidiaries worldwide.
III. Objective
To enable prompt resolu tion of health and safety incid ents involving Xerox products and to ensure
Xerox regulatory compliance.
IV. Definitions
Incident:
An event or condition occurring in a customer account that has resulted in injury, illness or property damage. Examples of incidents include machine fires, smoke generation, physical injury to
an operator or ser vi ce r e pr ese nta tive. Alleged events and pr od uct con di tion s are i ncl ud ed in this
definition.
V. Requirements
Initial Report:
1. Xerox organisations shall establish a process for individuals to report product incidents to
Xerox Environment Health & Safety within 24 hours of becoming aware of the event.
2. The informatio n to be provided at the time of re porting i s contained in Appendix A (H ealth and
Safety Incident Report involving a Xerox product).
3. The initial notification may be made by any of the following methods:
• For incidents in North America and Developing Markets West (Brazil, Mexico, La tin Amer-
ican North and Latin American South):
- Phone* Xerox EH&S at: 1-800-828-6571.
- Electronic mail Xerox EH&S at: Doris.Bush@xerox.com.
- Fax Xerox EH&S at: 1-585-422-6449 [intelnet 8*222 6449].
• For incidents in Europe and Developing Markets East (Middle East, Africa, India, China
and Hong Kong):
- Phone* Xerox EH&S at: +44 (0) 170 7 353 434.
- Electronic mail Xerox EH&S at: Elaine.Grange@xerox.com.
- Fax Xerox EH&S at: +44 (0) 1707 353914 [intelnet 8*668 3914].
*Initial notification made by phone must be followed within 24 hours by a completed incident
report and sent to the indicated electronic mail address or fax number.
Note: If sending a fax, please also send the original via internal mail.
PHASER 3124 / PHASER 3125 09/06 xi
Page 14

Introduction
Responsibilities for Resolution:
1. Business Groups/Product Design Teams responsible for the product involved in the incident
shall:
a. Manage field bulletins, c ustomer corr espondence, product recalls, safety retrofits.
b. Fund all field retrofits.
1. Field Service Operations shall:
a. Preserve the Xerox product involved and the scene of the incident inclusive of any associ-
ated equipment located in the vicinity of the incident.
b. Return any affected equipment/part(s) to the location designated by Xerox EH&S and/or
the Business Division.
c. Implement all safety retrofits.
2. Xerox EH&S s hall:
a. Manage and report all incident in vestigation activ i ties.
b. Review and approve proposed product corrective acti ons and retrofits, if necessary.
c. Manage all communications and correspondence with government agencies.
d. Define actions to correct confirmed incidents.
VI. Appendices
The Health and Safet y Incident Report in volving a Xerox Pro duct (Form # EH&S- 700) is available
at the end of th e manual.
xii 09/06 PHASER 3124 / PHASER 3125
Page 15

Service Call Procedures
1. Service Call Procedures
SCP 1 Service Call Actions .................... ..... ............................................................ ..................1-3
SCP 2 Final Actions .................................................................................................................1-4
PHASER 3124 / PHASER 3125 09/06 1-1
Page 16

Service Call Procedures
Page intentionally blank
1-2 09/06 PHASER 3124 / PHASER 3125
Page 17

Service Call Procedures
SCP 1 Service Call Actions
Procedure
Throughout this manual, observe the following Warnings:
WARNING
Switch off the electricity to the machine. Disconnect the power cord from the customer supply
while performing tasks that do not need electricity. Electricity can cause death or injury. Moving
parts can cause injury.
WARNING
Do not touch the fuser while it is hot.
WARNING
Take care during this procedure. Sharp edges may be present that can cause injury.
1. Take note of symptoms or error messages.
2. Ask the operator to describe or demonstrate the problem.
3. Make sure that:
• The power cord is connected to the wall outlet and to the machine.
• All cables are connected correctly.
4. If available, check the mach ine service log book for any p revious action s that may be rel evant
to the call.
5. Review any defective print or copy samples.
6. Perform ‘1 Initial Checks RAP’.
PHASER 3124 / PHASER 3125 09/06 1-3
Page 18

Service Call Procedures
SCP 2 Final Actions
Final Actions are used to evaluate the to tal ope ration of t he system a nd to ide nt if y the actio ns required to complete the servic e call.
Procedure
• Exercise the machine in all modes.
• Make a proof copy or print of a customer document.
• If any of the customers selections were changed, return them to the customers preferred settings.
• Mark off any hardware/software options and modifications installed and/or enabled in the
Service Log book.
• At the first service and at any subsequent service where changes are made or options are
added, print the configuration report and store it with the machine log book. Discard any previous versions of the configuration report.
• Remove and destroy any copies of test patterns.
• Complete th e machine service log book, refer to GP 12 Service Log.
• Ensure the machine and service area are clean before leaving the customer premises.
• Provide customer training if required.
1-4 09/06 PHASER 3124 / PHASER 3125
Page 19

Status Indicator RAPs
2. Status Indicator RAPs
1 Initial Checks RAP ..................................................................................................................2-3
2 JAM 0 RAP .............................................................................................................................2-6
3 JAM 1 RAP .............................................................................................................................2-7
4 JAM 2 RAP .............................................................................................................................2-8
5 Multi-feeding RAP ..................................................................................................................2-9
6 Fuser Jam RAP ....................................................................................................................2-10
7 Toner Cartridge Jam RAP ....................................................................................................2-11
8 Blinking LED Fault RAP .......................................................................................................2-12
9 Melting Fuser Gear RAP ......................................................................................................2-13
10 Paper Empty RAP ..............................................................................................................2-14
11 Cover Open RAP ................................................................................................................2-15
12 Faulty Motor RAP ...............................................................................................................2-16
13 No Power RAP ...................................................................................................................2-17
14 Bad Software Environment RAP ................................... ..... ................................................2-18
15 Abnormal Printing RAP ......................................................................................................2-20
16 Spool Error RAP .................................................................................................................2-21
PHASER 3124 / PHASER 3125 09/06 2-1
Page 20

Status Indicator RAPs
Page intentionally blank
2-2 09/06 PHASER 3124 / PHASER 3125
Page 21

Status Indicator RAPs
1 Initial checks RAP
WARNING
Switch off the electricity to the machine. Disconnect the power cord from the customer supply
while performing tasks that do not need electricity. Electricity can cause death or injury. Moving
parts can cause injury.
Basic Check List
1. Check the power.
• Do the motors or other components initialize (listen for the main motor, fan and LSU, PL 1
sounds)?
--> If not or there are none of the normal startup sounds, check the cable, switch, SMPS and/
or HVPS, PL 1.
--> Does the wall socket work?
2. Check the online LED
• Refer to Table 1.
Table 1: LED Status Description
LED Status Description
Error Red On
• A paper jam has occurred. Refer to clearing paper jams, GP 6.
• The front cover or exit cover is open, PL 1. Close the relevant
cover/covers.
• The paper tray, PL 1 is empty. Load paper in the tray.
• The printer has stopped printing due to a major system error.
• The toner cartridge, PL 1 is not installed. Install the toner cartridge.
Blinking
• An error has occurred and the printer is waiting for the error to be
cleared. When the problem is cleared, the printer resumes
• printing.
• The toner cartridge, PL 1 is depleting. Order a new toner cartridge.
The print quality can be temporarily improved by redistributing the
toner.
• The toner cartridge, PL 1 is exhausted. Install a new toner cartridge.
• The toner cartridge, PL 1 has expired. Install a new toner cartridge.
• Refer to RAP 8.
Online Green On
• The printer is in power save mode.
• The printer is online and ready to receive data from the computer.
Blinking
• If the LED is blinking slowly, the printer is currently receiving data
from the computer.
• If the LED is blinking quickly, the machine is currently printing.
PHASER 3124 / PHASER 3125 09/06 2-3
Page 22

Status Indicator RAPs
• Does the LED come on?
--> If not, check the power cable, switch, SMPS and/or HVPS, PL 1.
--> Does the wall socket work?
--> Check the main PBA and cable harness, PL 1.
--> Check for paper jams, refer to GP 6.
3. Check the paper path
• Is there a pap er jam?
--> Remove any paper frag me nts caught in the paper path, refer to GP 6.
• Paper jam occurs repeatedly at a specific point in the paper path
--> Dismantle the machine and carefully inspect the region where the jam occurs.
Check if paper fragments are caught in the fuser, PL 3
4. Print a test page.
• Try printing a test page from a computer.
--> If there is an error, check cables and driver installation.
5. Check the print quality.
• Is there a print quality problem?
--> Go to Section 3, Image Quality.
6. Check consumables (toner etc.).
• Using the onlin e key, print a demo page, GP 3.
--> Expected life of various con sumable p arts, compar e this with the figures printed and install
new parts as required, GP 4. If necessary, install a new toner cartridge, PL 1.
Initial inspect io n
1. Check the power.
• The machine does not work no matter how long you wait.
Is the power switch (machine and wall socket) turned on?
Is the power cord connected to the machine correctly?
Is the power cord connected to the wall socket correctly?
Is the wall socket working?
Is the unit rated at the same voltage as the supply?
• Does the fan work when power is turned on?
Check the connectors on the SMPS and/or HVPS, PL 1.
Check the fuses on the SMPS and/or HVPS, PL 1.
2-4 09/06 PHASER 3124 / PHASER 3125
Page 23

Status Indicator RAPs
2. Check the installation environment.
• Ensure the installation surface is flat, level and free from vibration.
If necessary, move the machine.
• Ensure that the temperature and humidity of the surroundings are within specification
If necessary, move the machine.
• Ensure that the machin e is p ositio ned a way fro m any air con diti oning or o ther heatin g or cool-
ing equipment. Also ensure that it is not positioned in a direct draft from any air conditioning,
fan or open window.
If necessary, move the machine.
• Ensure the machine is not positioned in direct sunlight.
If unavoidable, use a curtain to shade the machine.
• Ensure the machine is installed in a clean dust free environment.
Move the machine to a clean area if necessary.
• Some industrial or cleaning processes give of fumes which can affect the machine.
Move the machine away from this type of air pollution
3. Check the paper type.
• Only use paper which is of suitable quality, weight and size.
See the user guide.
4. Check the overall condition of the machine
• Clean the paper transport areas.
Any rollers with dirt surfaces should be cleaned. If necessary, install new rollers.
PHASER 3124 / PHASER 3125 09/06 2-5
Page 24

Status Indicator RAPs
2 JAM 0 RAP
WARNING
Switch off the electricity to the machine. Disconnect the power cord from the customer supply
while performing tasks that do not need electricity. Electricity can cause death or injury. Moving
parts can cause injury.
Description
Paper is not fed from the cassette tray.
Jam 0 occurs when paper feeds into the machine.
Figure 1
Check and Cause Solution
1. Clear any paper jams in the machine. 1. Refer to clearing paper jams, GP 6.
2. Check the surface of the pi ck-up assembly,
PL 4 for contamination or damage.
2. Clean the pick-up assembly, PL 4 using a
soft cloth dampened with IPA (Isopropyl Alcohol) or water.
3. The main motor, PL 5 may be defective. 3. If the main motor is not working, refer to
RAP 14.
4. The solenoid, PL 4 is faulty. 4.Check and ins tall a new solenoid if necessary, PL 4.
5. If paper feeds into the printer and Jam 0
occurs, check the feed sensor.
Note: The feed sensor is mounted on the
5. Check and install new parts as necessary:
•SMPS, PL 1
• Main PBA, PL 1
SMPS, PL 1.
2-6 09/06 PHASER 3124 / PHASER 3125
Page 25

Status Indicator RAPs
3 JAM 1 RAP
WARNING
Switch off the electricity to the machine. Disconnect the power cord from the customer supply
while performing tasks that do not need electricity. Electricity can cause death or injury. Moving
parts can cause injury.
Description
Paper is jammed in front of or inside the fuser.
Paper is jammed in the exit roller and fuser after passing through the feed sensor actuator.
Figure 2
Check and Cause Solution
1. Clear any paper jams in the machine. 1. Refer to clearing paper jams, GP 6.
2. Paper is jammed in the exit roller and the
fuser, PL 3, after passing through the feed
sensor actuator, PL 4, the feed sensor actuator may be defective.
2. Check and install new parts as necessary:
• Feed sensor actuator, PL 4
• Feed sensor
Note: The feed sensor is mounted on the
SMPS, PL 1.
3.Paper is jammed in front of, or inside the
fuser, PL 3. The feed sensor is defective.
Note: The feed sensor is mounted on the
SMPS, PL 1.
2. Check and install new parts as necessary:
• Feed sensor actuator, PL 4
• Feed sensor
Note: The feed sensor is mounted on the
SMPS, PL 1.
PHASER 3124 / PHASER 3125 09/06 2-7
Page 26

Status Indicator RAPs
4 JAM 2 RAP
WARNING
Switch off the electricity to the machine. Disconnect the power cord from the customer supply
while performing tasks that do not need electricity. Electricity can cause death or injury. Moving
parts can cause injury.
Description
Paper is jammed in front of or inside the fuser.
Paper is jammed i n the discha rge roll er and in the fuser afte r passing th rough th e feed sen sor actuator.
Figure 3
Check and Cause Solution
1. Clear any paper jams in the machine. 1. Refer to clearing paper jams, GP 6.
2. A ‘Concertina’ jam occurs. 2. Disassemble the fuser, REP 9 and clean
the surface of the rollers with IPA (Isopropyl
Alcohol) or water. Clean the contamination
between the heat roller and thermistor, PL 3.
3. If paper is completely fed out of the
machine but Jam 2 occur s, the f eed sen sor is
defective.
3. Check and install new parts as necessary:
• Feed sensor actuator, PL 4
•SMPS, PL 1
Note: The feed sensor is mounted on the
SMPS, PL 1.
4. If the paper is rolled up in the f user, PL 3:
• The surface of the stripper fingers, PL 3
are contaminated.
• The heat roller and pressure roller, PL 3
are contaminated.
4. Disassemble the fuser, refer to REP 7.
Clean the surface of the pressure roller, heat
roller, and stripper fingers, PL 3.
Install new parts as necessary:
• Heat roller, PL 3
• Pressure roller, PL 3
• Fuser unit, PL 3
2-8 09/06 PHASER 3124 / PHASER 3125
Page 27

Status Indicator RAPs
5 Multi-feeding RAP
WARNING
Switch off the electricity to the machine. Disconnect the power cord from the customer supply
while performing tasks that do not need electricity. Electricity can cause death or injury. Moving
parts can cause injury.
Description
Multiple sheets of paper are fed at once
Check and Cause Solution
1. Clear any paper jams in the machine. 1. Refer to clearing paper jams, GP 6.
2. Paper is out of specification. 2. Use paper within specification, refer to the
User Guide. Recommend the use of good
quality ‘long grain’ paper.
3. Friction pad, PL 4 is contaminated with for-
eign matter (oil, etc.)
3. Clean using a soft cloth which is dampened
with IPA (Isopropyl Alcohol) or water.
Install a new paper path unit, PL 4 if necessary.
4. The solenoid, PL 4 may be defectiv e. 4.Check and install new parts as necessary:
• Solenoid, PL 4
• Main PBA, PL 1
PHASER 3124 / PHASER 3125 09/06 2-9
Page 28

Status Indicator RAPs
6 Fuser Jam RAP
WARNING
Switch off the electricity to the machine. Disconnect the power cord from the customer supply
while performing tasks that do not need electricity. Electricity can cause death or injury. Moving
parts can cause injury.
Description
Paper is jammed in the fuser.
Check and Cause Solution
1. Clear any paper jams in the machine. 1. Refer to clearing paper jams, GP 6.
2. Contaminat ion of the pressur e roller or heat
roller, PL 3.
3. Damaged stripper fingers, PL 3. 3. If there is a dark background on the docu-
11.
2. Disassemble the fuser, REP 13. Clean the
surface of the rollers with IPA (Isopropyl Alcohol) or water.
ment, refer to IQ 8.
Check the stripper fingers, PL 3.
Install a new fuser, PL 3 if necessary.
2-10 09/06 PHASER 3124 / PHASER 3125
Page 29

Status Indicator RAPs
7 Toner Cartridge Jam RAP
WARNING
Switch off the electricity to the machine. Disconnect the power cord from the customer supply
while performing tasks that do not need electricity. Electricity can cause death or injury. Moving
parts can cause injury.
Description
Paper is jammed in the toner cartridge.
Check and Cause Solution
1. Clear any paper jams in the machine. 1. Refer to clearing paper jams, GP 6.
2. Paper is out of specification. 2. Use paper within specification and refer to
the User Guide. Recommend the use of good
quality ‘long grain’ paper.
PHASER 3124 / PHASER 3125 09/06 2-11
Page 30

Status Indicator RAPs
8 LED blinking fault RAP
8A Fuser error
WARNING
Switch off the electricity to the machine. Disconnect the power cord from the customer supply
while performing tasks that do not need electricity. Electricity can cause death or injury. Moving
parts can cause injury.
Description
All the LEDs on the operator panel are blinking.
Check and Cause Solution
1. The fuser gear, PL 3 has melted 1. Refer to RAP 9.
2.The thermistor, PL 3 is damage d 2. Check and install a new the rmi stor, PL 3 if
necessary.
3. The halogen lamp, PL 3 may be defective. 3.Check and install a ne w halogen lamp , PL 3
if necessary.
4.The thermostat, PL 3 is damaged. 4. Check and install new parts as necessary:
• Thermostat, PL 3
• Fuser assembly, PL 1
8B Scan error
WARNING
Switch off the electricity to the machine. Disconnect the power cord from the customer supply
while performing tasks that do not need electricity. Electricity can cause death or injury. Moving
parts can cause injury.
Description
1. All LED’s on the OPE panel are blinking.
Check and Cause Solution
1. The LSU may be def ec tive, PL 1.
1. Check and install a new LSU, PL 1 if necessary.
2-12 09/06 PHASER 3124 / PHASER 3125
Page 31

Status Indicator RAPs
9 Melting Fuser Gear RAP
WARNING
Switch off the electricity to the machine. Disconnect the power cord from the customer supply
while performing tasks that do not need electricity. Electricity can cause death or injury. Moving
parts can cause injury.
Description
The fuser gear has melted. .
Check and Cause Solution
1. Problem caused due to an overheated
machine.
1. Check and install new parts as necessary:
• Halogen lamp, PL 3
• Fuser assembly, PL 3
• Main PBA, PL 1
PHASER 3124 / PHASER 3125 09/06 2-13
Page 32

Status Indicator RAPs
10 Paper Empty RAP
10A False indication error
WARNING
Switch off the electricity to the machine. Disconnect the power cord from the customer supply
while performing tasks that do not need electricity. Electricity can cause death or injury. Moving
parts can cause injury.
Description
The paper lamp on the operator panel is ON even when paper is loaded in the cassette.
Check and Cause Solution
1. The paper empty sensor actuator is dam-
aged or bent, PL 2.
2. The main PBA, PL 1 may be defective. 2. Check and install a new main PBA, PL 1 if
1. Check and install a new paper empty sensor actuator, PL 2 if necessary.
necessary.
10B No indication error
WARNING
Switch off the electricity to the machine. Disconnect the power cord from the customer supply
while performing tasks that do not need electricity. Electricity can cause death or injury. Moving
parts can cause injury.
Description
The paper lamp on the operator panel does not come ON when the paper cassette is empty.
Check and Cause Solution
1. The paper sensor actuator is damaged or
bent, PL 2.
2. The main PBA, PL 1 may be defective. 2. Check and install a new main PBA, PL 1 if
1. Check and install a new pap er sen sor actu ator, PL 2 if necessary.
necessary.
2-14 09/06 PHASER 3124 / PHASER 3125
Page 33

Status Indicator RAPs
11 Cover open RAP
11A False indication error
WARNING
Switch off the electricity to the machine. Disconnect the power cord from the customer supply
while performing tasks that do not need electricity. Electricity can cause death or injury. Moving
parts can cause injury.
Description
The ERROR lamp is ON, even when the front cover or exit cover is closed.
Check and Cause Solution
1. The exit cover, PL 1 and/or front cover
assembly, PL 1 may be damaged.
1. Check the following parts as necessary:
• Exit cover, PL 1
• Front cover, PL 1
• Exit cover open switch.
• Front cover open switch.
Note: The exit cover open switch is mounted
on the SMPS, PL 1 whil e the front co ver open
switch is mounted on the HVPS, PL 1.
Check and install new parts as necessary:
•SMPS, PL 1
• HVPS, PL 1
11B No indication error
WARNING
Switch off the electricity to the machine. Disconnect the power cord from the customer supply
while performing tasks that do not need electricity. Electricity can cause death or injury. Moving
parts can cause injury.
Description
The ERROR lamp does not come ON even when the front cover or exit cover is open
Check and Cause Solution
1.Check the front cover open switch and exit
cover open switch.
Note: The front cover ope n switch is mounted
on the HVPS, PL 1 while the exit cover open
switch is mounted on the SMPS, PL 1.
PHASER 3124 / PHASER 3125 09/06 2-15
1. Check and install new parts as necessary:
•SMPS, PL 1
• HVPS, PL 1
Page 34

Status Indicator RAPs
12 Faulty motor RAP
WARNING
Switch off the electricity to the machine. Disconnect the power cord from the customer supply
while performing tasks that do not need electricity. Electricity can cause death or injury. Moving
parts can cause injury.
Description
The main motor is not wor king during printi ng. Ther efor e, pap er does no t feed i nto the printe r, resulting 'Jam 0'.
Check and Cause Solution
1. The main motor, PL 5 may be defective. 1.Check and install new parts as necessary :
• Main drive assembly, PL 5.
• Main PBA, PL 1.
2-16 09/06 PHASER 3124 / PHASER 3125
Page 35

Status Indicator RAPs
13 No Power RAP
WARNING
Switch off the electricity to the machine. Disconnect the power cord from the customer supply
while performing tasks that do not need electricity. Electricity can cause death or injury. Moving
parts can cause injury.
Description
LED’s on the operator panel fail to come ON when the printer is turned ON.
Check and Cause Solution
1.Check the following parts:
• Power supply cord, PL 1.
•SMPS, PL 1
2. Check the LED.
Note: The LED is mounted on the HVPS, PL
1.
1.Install a new SMPS, PL 1 if necessary.
2. Check and install new parts as necessary:
• HVPS, PL 1
• Main PBA, PL 1
PHASER 3124 / PHASER 3125 09/06 2-17
Page 36

Status Indicator RAPs
14 Bad Software Environment RAP
14A The Printer is not working(1)
WARNING
Switch off the electricity to the machine. Disconnect the power cord from the customer supply
while performing tasks that do not need electricity. Electricity can cause death or injury. Moving
parts can cause injury.
Description
Printer does not work when the power is turned ON.
Check and Cause Solution
1.Print a demo page, GP 3 1. If the print is successful, the printer is not
faulty.
2. Check that the p r inter cable is directly con-
nected to the machine.
3. Printing fails due to errors in the OS. 3. Check the connection between the PC and
4. Check the following parts are properly
installed:
• Printer cable, PL 1
• Toner cartri dge, PL 1
2. If you have other devices that need to
share the printer port, try temporarily disconnecting these devices and perhaps even uninstalling their drivers to ensure the machine
works by itself. If you are using a USB hub , try
connecting directly to the back of the PC
instead.
printer port.
• If using windows, check if the printer driv-
ers are correctly installed
• Check the print setup of the program.
If printing fails for a particular program:
• Reinstall the drivers.
• Check the CMOS settings. Ensure the port
is set to ECP.
• Check the address of IRQ 7 and 378
4. Check and install the following parts as necessary:
• Printer cable, PL 1
• Toner cartridge, PL 1
2-18 09/06 PHASER 3124 / PHASER 3125
Page 37

Status Indicator RAPs
14B The printer is not working(2)
WARNING:
Switch off the electricity to the machine. Disconnect the power cord from the customer supply
while performing tasks that do not need electricity. Electricity can cause death or injury. Moving
parts can cause injury.
Description
After receiving the pr int command there is no respon se at all or the print speed is low due to wrong
setup of the env i ronment rather than malfunction of the machine it self
Check and Cause Solution
1. Ensure you have sufficient free hard disk
space for temporary wor k fi les cr ea ted du ri ng
printing.
1. The message ‘insufficient printer memory’
means there is a hard disk space problem on
the PC, rather than a printer RAM problem.
Inform the customer to secure more space on
the hard disk.
2. Printing error occurs even if there is
enough space in the hard disk.
2. The connection of the cable and printer port
is not correct. Check the cable is properly con nected and the pa rallel port in CMOS is set u p
correctly.
3. Set up the parallel port settings in CMOS
3.Select ECP or SPP.
setup.
4. Reboot the system to print. 4. If the regular font is not printing, the cable or
the printer driver may be defective.
Turn the PC and printer off, and reboot the
system to print again. If not solved, doubleclick the printer in my co mp uter. If the regular
fonts are not pri nt ed th is ti m e in stal l a n ew ca ble.
PHASER 3124 / PHASER 3125 09/06 2-19
Page 38

Status Indicator RAPs
15 Abnormal Printing
WARNING:
Switch off the electricity to the machine. Disconnect the power cord from the customer supply
while performing tasks that do not need electricity. Electricity can cause death or injury. Moving
parts can cause injury.
Description
Printing does not work even after replacing the cable.
Machine does not work at all or strange fonts are printed.
Check and Cause Solution
1. Set up the parallel port settings in CMOS
1. Select SPP (Normal) or ECP LPT Port.
setup.
2. Printer Driver Error. 2.Ensure that the correct driver is loaded.
Use the driver supplied on the CD or downloaded from Xerox.com. DO NOT use the
Microsoft driver supplied with the Windows
operating system. If the machine is a GDI
printer ensure that ALL OTHER GDI drivers
are uninstalled as W indows allows o nly 1 type
of driver to be loaded.
3. Error message “insufficient memory”.
(The printing job sometimes stops due to
3. Inform the customer to secure more space
on the hard disk.
insufficient virtual memory, this is caused by
insufficient space on the PC hard disk.)
2-20 09/06 PHASER 3124 / PHASER 3125
Page 39

Status Indicator RAPs
16 Spool Error RAP
WARNING
Switch off the electricity to the machine. Disconnect the power cord from the customer supply
while performing tasks that do not need electricity. Electricity can cause death or injury. Moving
parts can cause injury.
Description
Insufficient disk space to spool the document.
Check and Cause Solution
1. Insufficient space of the hard disk in the
directory assigned for the basic spool.
1. Ask the customer to delete the unnecessary files to provide more space to start printing job.
2. The previous printing error is not resolved. 2. There may be files from previous failed
print jobs on the hard disk with the nam e in
the form ‘*.jnl’. Delete these files and Reboot
Windows to restart the machine.
3. There may be conflict with other drivers or
programs.
4. When an application program or the printer
driver is damaged.
5. When some files related to OS are dam-
aged or virus infected.
3. Ask the customer to shut down all other
programs except the current one, if possible.
4. Uninstall the print driver. Re-install the latest driver available at Xerox.com.
5. After rebooting the computer ask the customer to check for viruses, restore the damaged files and reinstall the application
program which is not working properly.
6. Insufficient memory. 6. Ask the customer to add memory to the
PC.
How to delete the data in the spool manager.
In the spool manager, the installed drivers and the list of the documents waiting to be printed are
shown.
• Select the document to be deleted and check delete in the menu.
• If the job you are deleting is the current job, when you delete the job data that has already
been transferred to the machine’s memory will still be printed. If there is a problem with the
machine (out of toner, off-line, out of paper etc.) the job may take a long time to delete as it
must wait for a time out.
PHASER 3124 / PHASER 3125 09/06 2-21
Page 40

Status Indicator RAPs
Page intentionally blank
2-22 09/06 PHASER 3124 / PHASER 3125
 Loading...