

Page 1

Vitesse
Getting Started Guide
Page 2

Elixir Technologies Corporation
721 East Main Street
Ventura, CA 93003
Copyright
All rights reserved.
VT200604V130
To report any errors you might find, please send a note to errata@elixir.com. Please
note: e-mails are used to correct future versions of this guide and may not receive an
individual reply. For technical support, please contact Customer Support.
© 2006 by Elixir Technologies Corporation.
2 Vitesse Getting Started Guide
Page 3

Contents
Chapter 1: Introduction 7
Chapter 2: Installation 17
Who Should Use This Guide?--------------------------------------- 7
What’s in This Guide------------------------------------------------- 7
Assumptions in Creating this Guide-------------------------------- 8
Conventions------------------------------------------------------------ 8
Display Conventions----------------------------------------------- 8
Typographic Conventions-----------------------------------------8
Symbols Used in This Guide ---------------------------------------- 9
Introduction to Vitesse ----------------------------------------------- 9
Understanding the VIPP Modes------------------------------------10
What is Native Mode?--------------------------------------------10
What is Line Mode? ----------------------------------------------11
What is Database Mode?-----------------------------------------11
What is XML Mode? ---------------------------------------------11
Frequently Asked Questions-------------------------------------12
What is VIPP? -----------------------------------------------------12
How is VIPP different from traditional PostScript?----------12
Which printers can be used for printing VIPP? ---------------12
Which types of fonts are supported in Vitesse?---------------12
Which types of images are supported in Vitesse? ------------13
What is a VIPP segment? ----------------------------------------13
What is a VIPP form?---------------------------------------------13
How is Resource Caching Done on the Printer? --------------13
What is the VPC export format? --------------------------------14
Getting the Answers You Need ------------------------------------14
Customer Support----------------------------------------------------14
Elixir Website Support -------------------------------------------15
Elixir Training --------------------------------------------------------16
Using Help ------------------------------------------------------------16
Release Notes---------------------------------------------------------16
Related Guides--------------------------------------------------------16
System Requirements------------------------------------------------17
Software Requirements-------------------------------------------17
Hardware Requirements------------------------------------------17
Other Requirements-----------------------------------------------17
Contents 3
Page 4

Installing Vitesse----------------------------------------------------- 18
Registering Vitesse -------------------------------------------------- 26
Downloading a Product License-------------------------------- 27
Selecting a License Source -------------------------------------- 31
Repairing Vitesse ---------------------------------------------------- 33
Uninstalling Vitesse------------------------------------------------- 35
Chapter 3: Configuration 39
The Basic Configuration-------------------------------------------- 39
General Category ---------------------------------------------------- 39
View Category ------------------------------------------------------- 41
Workspace Category ------------------------------------------------ 41
Designer------------------------------------------------------------ 41
Tree View---------------------------------------------------------- 43
Source -------------------------------------------------------------- 44
Data----------------------------------------------------------------- 45
Print Category-------------------------------------------------------- 46
Import Category------------------------------------------------------ 47
Export Category------------------------------------------------------ 48
Legacy Fonts Category --------------------------------------------- 49
Font Map Category-------------------------------------------------- 50
Folder Category------------------------------------------------------ 52
Barcode Category---------------------------------------------------- 53
Defaults Category---------------------------------------------------- 54
Text----------------------------------------------------------------- 55
Color---------------------------------------------------------------- 56
Layout-------------------------------------------------------------- 56
Transform---------------------------------------------------------- 57
Regional------------------------------------------------------------ 59
Environment Issues-------------------------------------------------- 59
Migrating from VIPP IDEfrom VIPP IDE-------------------- 59
Display Issues ----------------------------------------------------- 60
Chapter 4: A Vitesse Tour 61
Creating a Form ------------------------------------------------------------ 62
Understanding the Application ------------------------------------------ 62
Creating a New Form ----------------------------------------------------- 64
Setting Form Properties--------------------------------------------------- 66
Adding Objects to the Form---------------------------------------------- 66
Adding an Image----------------------------------------------------- 66
Adding Drawing Objects ------------------------------------------------- 69
4 Vitesse Getting Started Guide
Page 5

Adding a Box ---------------------------------------------------------69
Adding Lines----------------------------------------------------------73
Adding a New Color to the Palette --------------------------------75
Using Copy and Paste -----------------------------------------------76
Adding Text-----------------------------------------------------------------78
Importing Text--------------------------------------------------------78
Adding Text-----------------------------------------------------------81
Copying Text Objects -----------------------------------------------84
Saving the Form------------------------------------------------------------89
Creating a Segment --------------------------------------------------------89
Setting Segment Properties -----------------------------------------92
Adding a Box ---------------------------------------------------------93
Adding Text-----------------------------------------------------------95
Setting Text Properties ----------------------------------------------96
Adding an Image -----------------------------------------------------97
Setting Image Properties --------------------------------------------97
Arranging Objects----------------------------------------------------98
Aligning Objects -----------------------------------------------------99
Saving a Segment ----------------------------------------------------99
Inserting a Segment in a Form------------------------------------ 100
Setting SegRef Properties----------------------------------------- 101
Print Preview-------------------------------------------------------- 102
Saving a Form ------------------------------------------------------ 103
Adding Data in Line Mode Using a Line Data File ----------------- 104
Creating a New Line Mode Document-------------------------- 105
Setting Paper Properties------------------------------------------- 110
Setting Page Properties-------------------------------------------- 111
Inserting an Existing Form---------------------------------------- 113
Adding Records and Fields --------------------------------------- 115
Adding Records and Fields Using Insert Options ------------- 117
Using Snap to Grid------------------------------------------------- 122
Mapping Data Using Drag and Drop---------------------------- 123
Adding Charts ------------------------------------------------------ 137
Adding Conditions------------------------------------------------- 142
Viewing Source Code --------------------------------------------- 149
Adding Data in Line Mode Using a Prefixed Data File------------- 151
Creating a New Line Mode Document-------------------------- 152
Setting Paper Properties------------------------------------------- 156
Setting Page Properties-------------------------------------------- 159
Inserting an Existing Form---------------------------------------- 161
Contents 5
Page 6

Adding Records and Fields----------------------------------------162
Adding Records and Fields using Insert Options---------------164
Using Snap to Grid -------------------------------------------------169
Mapping Data using Drag and Drop -----------------------------170
Adding Charts-------------------------------------------------------183
Adding Conditions--------------------------------------------------188
Viewing Source Code----------------------------------------------194
Adding Data in Database Mode ----------------------------------------196
Creating a New Database Mode Document---------------------196
Setting Paper Properties -------------------------------------------200
Setting Page Properties --------------------------------------------202
Inserting an Existing Form ----------------------------------------204
Adding Fields -------------------------------------------------------206
Adding Fields using Insert Options ------------------------------207
Adding Barcodes----------------------------------------------------213
Mapping Data using Drag and Drop -----------------------------216
Merging Variable Data with Static Text-------------------------219
Adding Conditions--------------------------------------------------221
Adding Data in XML Mode---------------------------------------------238
Creating a New XML Mode Document -------------------------239
Inserting a Data File------------------------------------------------243
Viewing the Data File----------------------------------------------243
Setting Paper Properties -------------------------------------------245
Setting Page Properties --------------------------------------------246
Adding Frames in the Document ---------------------------------249
Inserting an Existing Form ----------------------------------------251
Adding Records and Fields----------------------------------------253
Adding Conditions--------------------------------------------------278
Exporting Documents for Printing -------------------------------------286
Opening an Existing Document-----------------------------------287
Setting Export Preferences ----------------------------------------289
Exporting Documents----------------------------------------------290
Importing Documents----------------------------------------------293
Preparing to Import-------------------------------------------------293
Importing a Document ---------------------------------------------295
Saving the Document ----------------------------------------------296
Index 299
6 Vitesse Getting Started Guide
Page 7

Chapter 1: Introduction
Welcome to the Vitesse Getting Started Guide. This guide is designed to get you up
and running with Vitesse – an enterprise solution for a highly visual, user-friendly,
and powerful rapid-application-desig n tool f or creati n g do cuments for VIPP printing.
This guide will familiarize you with the Vitesse design environment and introduce
you to the many useful Vitesse features that will make designing VIPP applications a
breeze.
As you go through this guide and start using Vit esse’s user friendly and visual
environment, you will observe greater flexibility, ease of use, and superior
productivity. Creating VIPP applications was never this much fun!
Who Should Use This Guide?
This guide is for anyone who needs to create and edit applications for a VIPP printing
environment.
What’s in This Guide
This guide will introduce you to the basic Vitesse (Variable Data Intelligent
PostScript Printware) functions and features. It also provides assistance with system
installation and configuration and gives several exercises to help you feel confident
when using Vitesse. This guide is divided into three sections:
! Installation
Includes system requirements, along with instructions for registering and
installing your software.
! Configuration
Includes setting up system settings for Vitesse.
! A Vitesse Tour
This integrated tour leads you through each of the VIPP project modes using a set
of sample applications. Includes form and segment creation and adding data in
Line, Database, and XML modes.
Resources and completed projects for the Vitesse Tour are installed
with Vitesse. These are located in drive:\program files\elixir
technologies\vitesse\clients\gs. The tour includes exercises that are
designed to introduce you to creating forms using Line Data (Line mode
with a line data file), Line Prefix (Line mode with a prefixed line data
file),DBM (Database mode) and XML (XML mode). The resources for
each exercise are located in separate folders at the path specified
above.
Chapter 1: Introduction 7
Page 8
Assumptions in Creating this Guide
This guide assumes you are already familiar with Windows XP, Windows 2000, or
Windows NT, VIPP (formerly known as XGF), and/or PostScript printer operations
including how to use a mouse and standard menus and commands, how to open, save,
and close applications.
You should be familiar with PC devices such as disk drives, printers and modems and
have access to reference manuals for PC software and hardware, including printers.
Conventions
Conventions are the same or similar to Windows conventions, including:
! Display conventions
! Typographic conventions
Display Conventions
Elixir products adhere to Microsoft Windows conventions for using menus, menu
commands, dialog boxes, command buttons, icons, and the mouse. See your
Windows manual for more information.
Typographic Conventions
This guide uses the following typographic conventions to identify sp ecial
information:
Convention Information Type/Example
Bold type Keystrokes and user selections.
Ex: Enter
Key combinations are denoted by a plus sign
between keys.
Italic type - References to other guides.
Ex: Elixir Scout Guide.
- Dialog names.
Ex: Page Properties dialog displays.
8 Vitesse Getting Started Guide
Page 9
Symbols Used in This Guide
Look for the following symbols as you read through this guide:
Symbol Information Type
Note
This symbol calls your attention to additional
information.
Shortcut
This symbol shows a shortcut for a procedure you just
learned.
Tip
This symbol highlights a helpful tip.
Warning
This symbol emphasizes an important note and/or
warning.
Introduction to Vitesse
Vitesse is a Windows-based, visual design environment for rapid and cost-effective
creation of variable applications and resources for B/W, Highlight and Full color
VIPP printing.
You can visually map XML, database resident or host - base d line dat a o n y our
applications, design professional looking forms with the extensive drawing toolbar,
create data driven graphics and apply conditional logic on text, images and page
layout properties. Vitesse provides both a visual and a source code environment for
designing applications. Adequate support to import and modify hand-coded VIPP
applications and resources is also provided. For newly designed applications in
Vitesse or imported ones, Vitesse provides a source view of the VIPP code. For
VIPP-savvy programmers, this feature allows them to view, edit and compile code
changes in an integrated environment. You can also import Xerox native format
objects, such as forms (FRMs), fonts (FNT) and images (IMGs and LGOs) for
migration from LCDS and Metacode environments..
Chapter 1: Introduction 9
Page 10

Vitesse fully supports the creation of all VIPP project modes: Native, Database, Line
and XML, along with the creation of VIPP forms and segments. Additionally, the
VIPP application code from Vitesse can be sent to Xerox’s VIPP Thin Printer, which
is a special distiller for distilling and converting VIPP code to PDF. The VIPP Thin
Printer can be resident on the PostScript print controller or any server or client
machine running Windows NT or Windows 2000. For more information on the VIPP
Thin Printer, please contact your local Xerox Representative. For complete step-bystep instructions on creating bookmarks in Vitesse, refer to online help or the Vitesse
User Guide.
Vitesse also extends Xerox PDF workflow functionality by providing the following
features:
! Drag and drop workflow for creating P DF b o okmarks.
! PDF bookmark creation in all three VIPP modes.
! Creation of single-level bookmarks or sub-bookmarks for hierarchical bookmark
levels within a PDF.
! PDF splitting based on the bookmarks.
Understanding the VIPP Modes
Vitesse supports the following VIPP modes for designing and testing your projects:
! Native mode
! Line mode
! Database mode
! XML mode
These modes or project types are based on the various VIPP input data formats and
are discussed in the following sections.
What is Native Mode?
You can use the Native mode for creating, positioning and printing static data on a
physical page, such as text, images, lines, boxes, forms and segments.
Both Native mode and VIPP forms are used to build static designs with no merging of
variable data. A Native mode document can include one or many forms in its
definition, where a VIPP form is a single page Native mode document. In this mode,
you can create applications that support fully composed Native mode data streams.
For example, you can create application forms or promotional flyers using this mode.
Native mode is not intended for variable data handling.
10 Vitesse Getting Started Guide
Page 11

What is Line Mode?
Line mode creates and manages legacy data streams for transactional documents, such
as telephone bills, banking statements, credit card statements, insurance invoices and
sales reports. Legacy data streams can be either line data or print-ready data.
You can use Line mode to read, process and format line printer data on a line-by-line
(record) or column-by-column (field) basis. You can also import Job Descriptor
Tickets (JDT) for editing within Vitesse.
Line mode accepts line data, which can be organized in either of these two ways:
Prefixed data file
A prefixed data file contains prefixes at the beginning of each record to identify the
record contents. Vitesse uses this prefix to locate and define each record type for
printing. All records with the same prefix use the same properties for printing.
Non-prefixed data file
A non-prefixed data file does not have prefixes, so Vitesse uses a start li ne number
and end line number to locate records. Vitesse counts the records, or lines, in the data
file to locate a specific record for printing.
Either of these two file formats can use fixed or delimited records to identify field
information. Fixed records identify field information using a start byte and length,
where delimited records use a field number.
What is Database Mode?
Database mode documents are used for processing files containing field-delimited
records. Database mode can create documents such as mailers, promotional flyers
and insurance contracts. Data for these documents is extracted from a database file.
In a database file, records can be either fixed or variable length, separated by a
delimiter. The first line of the data file contains the field names. The remaining lines
contain variable data in order of the field names.
What is XML Mode?
Extensible Markup Language (XML) mode creates VIPP applications using data from
XML data files. XML mode documents process data files containing tags, attributes,
and values. Tags, attributes, and values identify the data file content. All information
is enclosed between bounding tags.
Delimited and/or prefixed data files are not supported in XML mode.
Chapter 1: Introduction 11
Page 12

Frequently Asked Questions
What is VIPP?
Variable-data Intelligent PostScript Printware (VIPP) is a Xerox proprietary print
stream. VIPP is a superset of PostScript, an open system solution allowing users to
efficiently create Xerox printer applications. It was originally called Xerox Generic
Format (XGF) as a Xerox response to customer requirements for creating dynamic
documents. The key purpose of VIPP is to enable line printer and database data to be
formatted and printed using PostScript features at production speeds using Dynamic
Document Construction (DDC). DDC is based on real time composition of the
document at the printer or imaging device. Components such as images, fonts, and
forms can be stored locally on disk drives or accessed from networked disk drives.
The DDC model also improves performance by enabling a “RIP once / Use many”
capability. In short, this functionality allows you to reuse various components of a
document with other documents.
How is VIPP different from traditional PostScript?
Unlike PostScript, the VIPP file relies on external resources such as VIPP code,
forms, Job Descriptor Tickets (JDTs), or images. These external resources must be
accessible to the PostScript interpreter through external devices, such as a disk or
cartridge, or loaded in memory when the job is processed. VIPP features and
functions provide enhanced variable data printing performance through the use of
cached object elements, dynamic text flow, data driven graphics, data formatting,
conditional processing, and workflow improvements
.
Which printers can be used for printing VIPP?
VIPP is supported on these printers:
! DocuColor
! DocuPrint
! DocuTech
! PDF viewing and printing of Vitesse generat ed VIPP applications using VIPP
Thin Printer.
Contact your Xerox representative for information about limited support on these
printers:
! DocuPrint N-series
! DocumentCenter
! Phaser printers
Which types of fonts are supported in Vitesse?
Vitesse supports True Type or PostScript Type 1 fonts. These fonts are associated
with a VIPP font name using a font map, which is editable. The VIPP font name is
used to locate the appropriate PostScript Type 1 or Type 3 font on the printer at print
time.
12 Vitesse Getting Started Guide
Page 13
Vitesse installs with the most common VIPP font names already set up
to match their True Type equivalent in the font map. You can install
PostScript fonts on your operating system and add them to the font map
so that Vitesse uses the same font for displaying as the printer uses to
print. You can also change the default mappings if necessary to match
your font usage.
If both True Type and PostScript fonts are available, Vitesse will use the
PostScript font for display.
Which types of images are supported in Vitesse?
Vitesse supports most contemporary image file formats, including BMP, JPEG, TIFF,
etc. Vitesse automatically packages formats not compatible with VIPP printing in the
correct format into the zipped VPC during the export process.
PostScript files and forms, including Encapsulated PostScript (EPS) resources, can be
inserted as a segment for use within a form or project file. You can use high-level
document processing applications (such as Word, FrameMaker, Excel and
PageMaker) to create a PostScript file for inserting into a Vitesse segment.
PostScript files and forms are not editable in Vitesse.
What is a VIPP segment?
A segment is a VIPP Native mode or a PostScript fragment intended to be reproduced
once or several times at specific locations on a page. Segments can include PostScript
files or forms and Encapsulated PostScript (EPS) files, as well as other image
formats.
What is a VIPP form?
A form is a single-page VIPP Native mode document intended to be reproduced
identically in the background on each page of a job.
How is Resource Caching Done on the Printer?
VIPP supports resource pre-rasterization and caching on the printer. CACHE is the
VIPP command to cache an object within a job. This means that as the job processes,
the first time an object is found, VIPP will cache it and the next time the object is
called, the ripped object will be used. Objects cached this way only stay active for the
length of the job.
An object that is cached, when called again within the job using different orientation,
rotation, or scale parameters, will force the object to be re-ripped and cached. So if
you use a logo in two scales on the page, you will not get the benefit of caching and
the object will be forced to rip each time it is called.
Chapter 1: Introduction 13
Page 14
All printers, assuming current software levels, with the exception of the monochrome
DocuSP controllers, the N-Series and Phasers and the Document Centers support
VIPP caching. This includes all Creo and EFI DFE's - (2045, 2060, 6060, iGEN3),
NPS 8.0 systems – both monochrome, highlight and full color. Color DocuSP
supports VIPP caching.
What is the VPC export format?
VIPP Project Container (VPC) is a mechanism that simplifies the handling of a job’s
components by logically and physically grouping components as part of a single
entity. The logical grouping is the VIPP Project. The physical grouping is referred to
as the VIPP Project Container (VPC).
When using VPC, you can track and store the files that make up the project as a single
entity. In addition, VPC can be used to identify, organize, and store the components
of a job under a single name (the project) and can also group jobs by categories (the
folder). This allows you to package all of the project components in a single file (the
container), as well as to use and transfer them among applications, devices, and
locations.
This container is the project resources and a VIPP project file zipped
into a standard ZIP container. The contents of a VPC can be
decompressed using WinZip.
Getting the Answers You Need
Elixir Technologies provides the following resources to help you learn and use
Vitesse:
! Customer Support
! Elixir Training
! Help
! Related Guides
Customer Support
If you purchased this product directly from Elixir Technologies, you can contact the
Customer Support Center for your region at the number listed below:
North and South America:
! +1 805 641 5900 ext. 3
Monday – Friday, 7:00 am to 4:00 pm Pacific Standard Time; if closed, press 2 to
reach Elixir’s extended support coverage.
! Elx_support@elixir.com
14 Vitesse Getting Started Guide
Page 15

Asia Pacific:
!
Asia_support@elixir.com
Europe:
! +44 (0) 207 993 4811
Monday – Friday, 6:00 am to 4:00 pm Central European Time
! +1 805 5900 ext. 3
Monday – Friday, 4:00 pm to 2:00 am Central European Time
!
Europe_support@elixir.com
If you have a problem with your Elixir product, contact the Elixir Customer Support
Center for your region. An Elixir Product Specialist will answer your call and ask for
the following information:
! Your name, organization, telephone number, and address.
! Elixir product name and version number.
! A complete description of the problem, including any error messages printed or
displayed on your monitor.
Elixir Website Support
You can also obtain product support by accessing the Elixir web page at
http://www.elixir.com and selecting Support.
The Elixir website allows you to:
! Select your preferred support method.
! Identify support centers.
! Access web support.
! Register Elixir products.
! Renew Elixir licenses.
! Learn through the User Group how others are using Eli xir products.
! Download the latest patches.
! Contact Elixir Partner Support.
! Ask a question to Elixir Support. To submit a question, select Questions>
Submit a Question here. Please complete the question form.
! Find answers in the list of Frequently Asked Questions.
! Access the Elixir Knowledge Base.
Chapter 1: Introduction 15
Page 16

Elixir Training
Elixir Technologies offers training for its full-range of Windows-based products. For
more information, contact:
Elixir Learning
(805) 641-5900 ext.4
Using Help
Elixir software uses the Microsoft Windows Help program to provide help for all
product functions.
What’s This? Help
Selecting a dialog control such as an input field, radio button, or drop-down list, and
then pressing Shift + F1 displays a pop-up window containing information about that
control. You can also get this information by right-clicking the control and selectin g
What’s This? from the pop-up window or clicking
available.
Help Pop-ups and Jumps
The help can be opened using Help>Contents from the application menu bar. Within
the Help topic text, words or phrases in blue are drop-down hotspots and underlined
words or phrases in blue are jumps or hyperlinks. Clicking a hotspot displays images
and links directly below the hotspot within the same topic. Clicking a jump displays
an associated Help topic within the same window.
on the dialog title bar if
Release Notes
Release Notes display at the start of product installation so you can review them
before beginning the installation process. Once installation completes, you can access
Release Notes from the product CD at drive:\relnotes. There are two formats of the
Release Notes file: relnotes.pdf and relnotes.txt. The TXT file can be viewed using
either Notepad or WordPad. The PDF file can be viewed using Adobe Reader.
Related Guides
If you require further information about a specific topic or wish to obtain product
background information, reference the Vitesse User Guide which is part of the Vitesse
documentation package.
16 Vitesse Getting Started Guide
Page 17

Chapter 2: Installation
This chapter guides you through the installation and registration process for Vitesse.
It describes the minimum system requirements necessary to install and run Vitesse on
your computer. It also lists procedures for reinstalling and uninstalling Vitesse 1.30.
System Requirements
The minimum system requirements for running Vitesse are as follows:
Software Requirements
To run Vitesse, you need one of the following operating systems installed on your
computer:
! Windows XP with Service Pack 1.0a or higher.
! Windows 2000 Professional with Service Pack 3.0 or higher.
The application also requires Internet Explorer 5.5 or above.
Hardware Requirements
You need the following minimum hardware requirements to run Vitesse on your
computer:
! Processor: Intel Pentium III
! Ram: 128 MB required, 256 MB recommended
! Hard disk space: 20 GB recommended
! CD-ROM Drive
! Any monitor that supports Windows with 1024 x 768 screen resolution
! Microsoft mouse or compatible pointing device
Other Requirements
If you would like to register Vitesse using the Internet, you will need to be connected
to the Internet at the end of installation.
Chapter 2: Installation 17
Page 18
Installing Vitesse
This section provides instructions for installing Vitesse 1.30.
To install Vitesse:
1 Insert the Vitesse CD into your CD-ROM drive.
If your computer is set up to automatically run a CD, the Vitesse – Install
Shield Wizard opens.
If your computer is not set up to automatically run a CD, you will need to run the
installation manually.
1 From the Start menu, select Run to open the Run dialog.
2 Type drive:\setup\setup.exe in the Open entry box, (replace drive with the
letter of your CD-ROM drive) and then click OK.
The Vitesse – Install Shield Wizard displays.
If you have previously installed Vitesse, you should manually delete the
drive:\program files\elixir technologies\vitesse\clients\gs folder. The
new installation will overwrite the original resources and can also install
new folders, due to changes made in the applications in this guide
between versions. If you have already worked with the applications in
this folder for the previous version, you may keep this folder, but be
aware that new folders and/or resources will be added.
It is highly recommended that you close all programs before you install
or uninstall any software.
18 Vitesse Getting Started Guide
Page 19
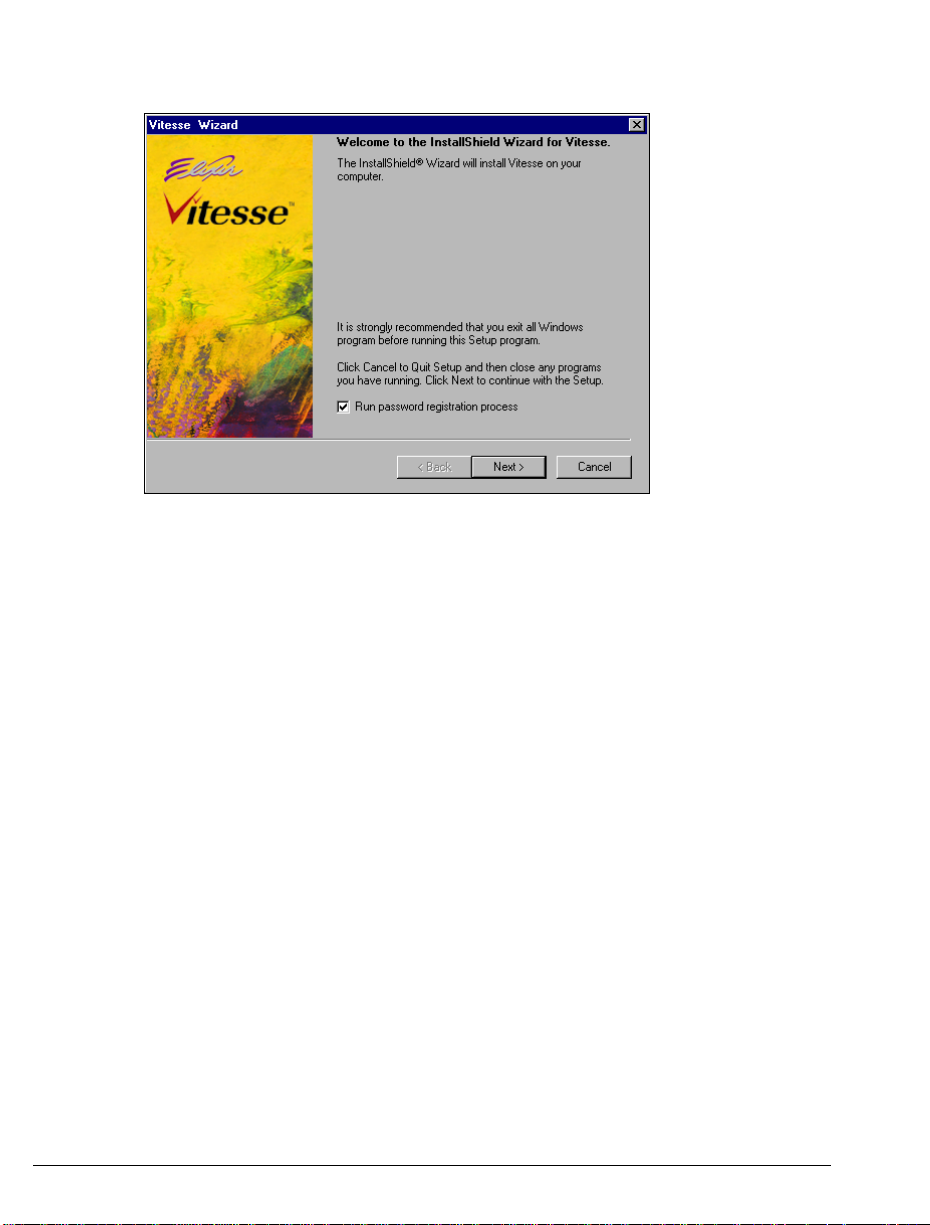
The Vitesse Wizard guides you through the install process.
3 Select Run password registration process.
Selecting this option runs the password registration process runs
automatically after the installation.
Chapter 2: Installation 19
Page 20
4 Click Next.
The License Agreement dialog displays
Read the License Agreement carefully before proceeding.
5 Read the License Agreement carefully.
6 If you agree, click Yes.
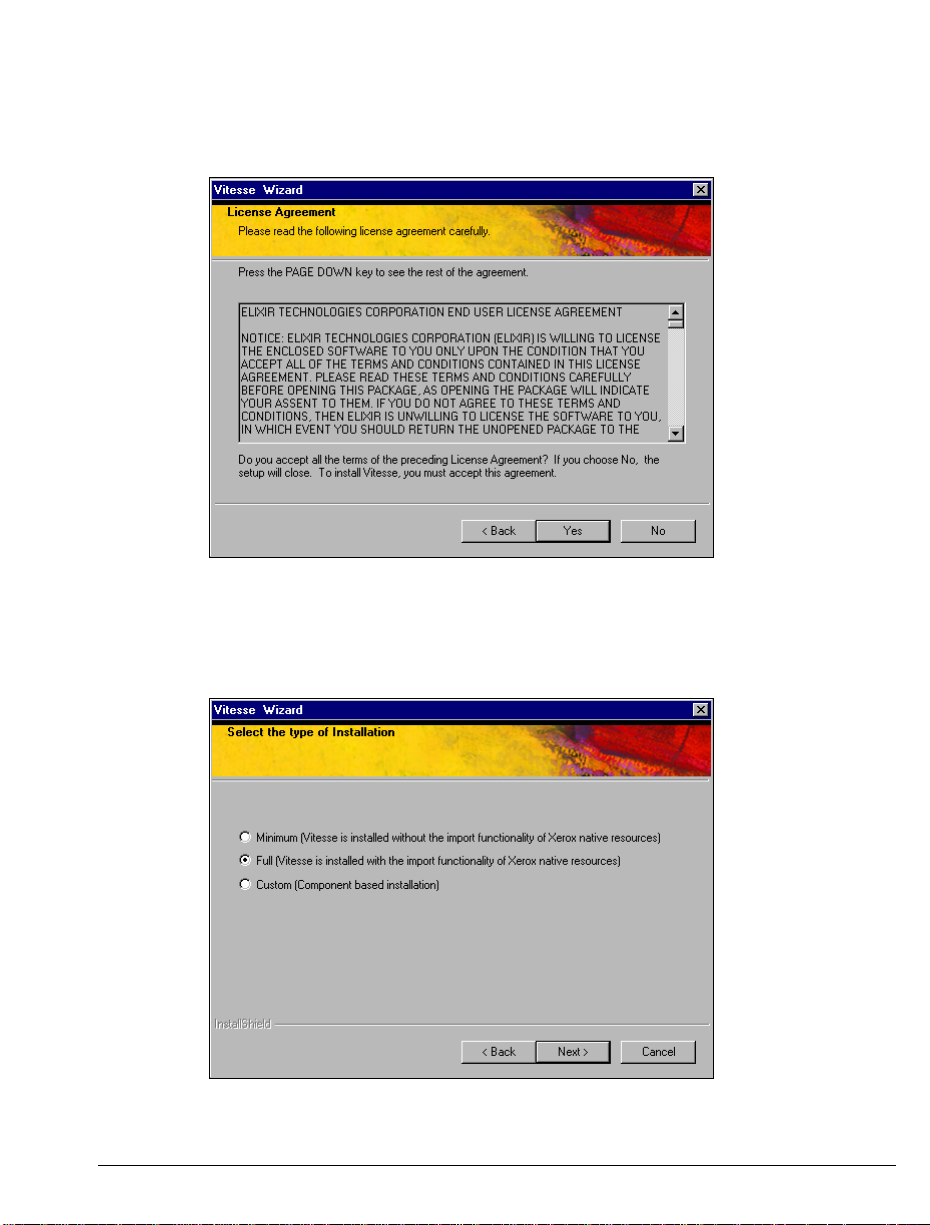
The Select the type of Installation dialog displays.
The installation options are displayed in Select the type of Installation dialog .
20 Vitesse Getting Started Guide
Page 21

7 Select Full (Vitesse is installed with the import functionality of Xerox
native resources).
Minimum installation does not accommodate Legacy resources. Full
installation includes both Vitesse and Legacy resources. You can customize
filter options by selecting the Custom option.
8 Click Next.
The Choose Destination Location dialog displays.
Choose a destination folder to install Vitesse and specify a location for its
resources.
9 Browse to select the location for installing Vitesse executable and DLLs if
you want to change the default directory.
10 Browse to select the location for Elixir resources if you want to change the
default directory.
The Elixir folder is used for storing Legacy resources, such as FRM, ELX,
etc.
Chapter 2: Installation 21
Page 22
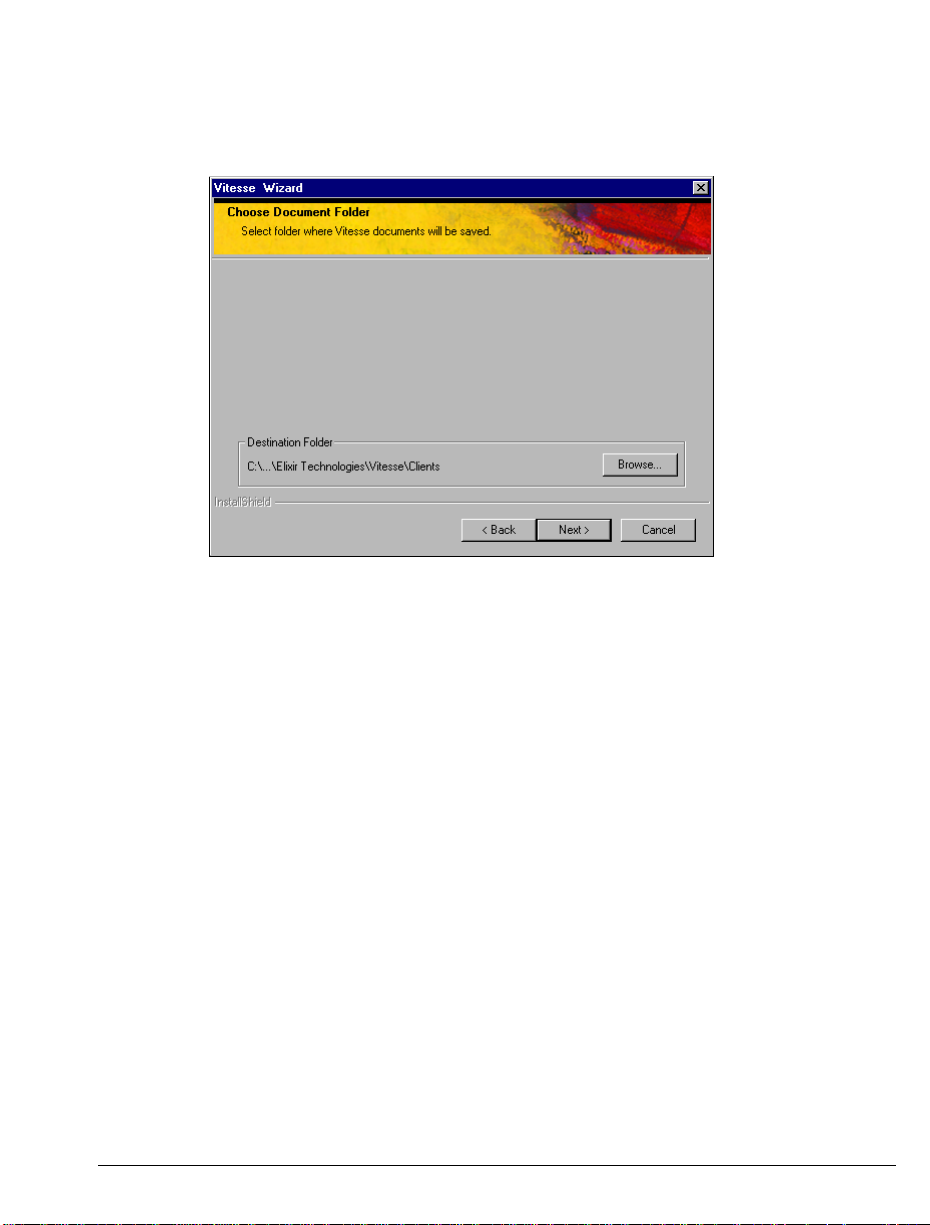
11 Click Next.
The Choose Document Folder dialog displays.
Select the program folder where you want the Vitesse documents to be saved.
12 Browse to a new location if you want to change the default location of
Vitesse documents.
13 Click Next.
The Select Program Folder dialog displays with Elixir Applications\Vitesse
set as the default folder for placing application files.
22 Vitesse Getting Started Guide
Page 23
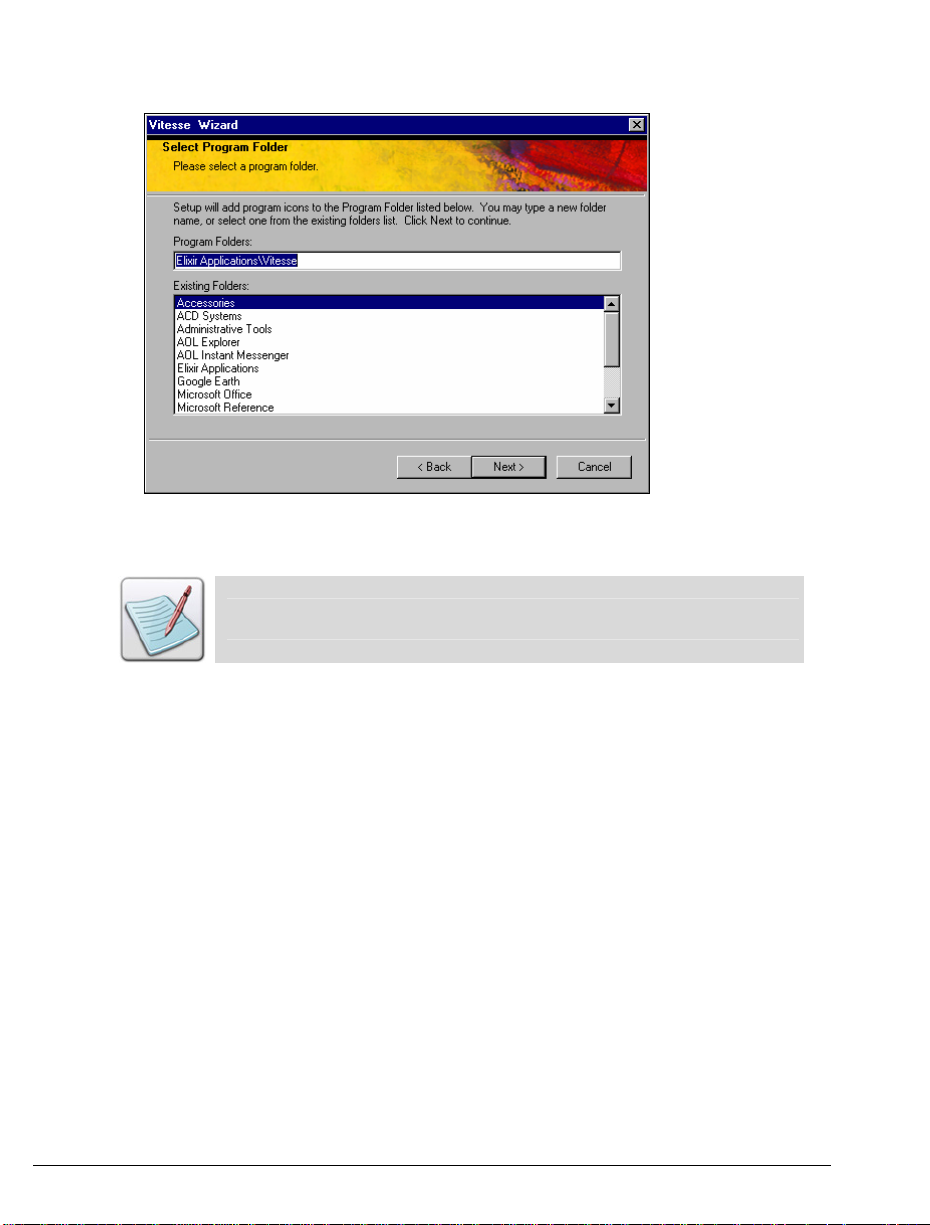
Select the program folder where you want the Vitesse shortcut to display in the
Start menu.
In this dialog, you can either create a new program folder for Vitesse
shortcut or select from the existing list of folders.
14 Select the required program folder where you want the Vitesse shortcut to
display in the Programs menu.
15 Click Next.
The Start Copying Files dialog displays, confirming the settings you have
entered.
Chapter 2: Installation 23
Page 24
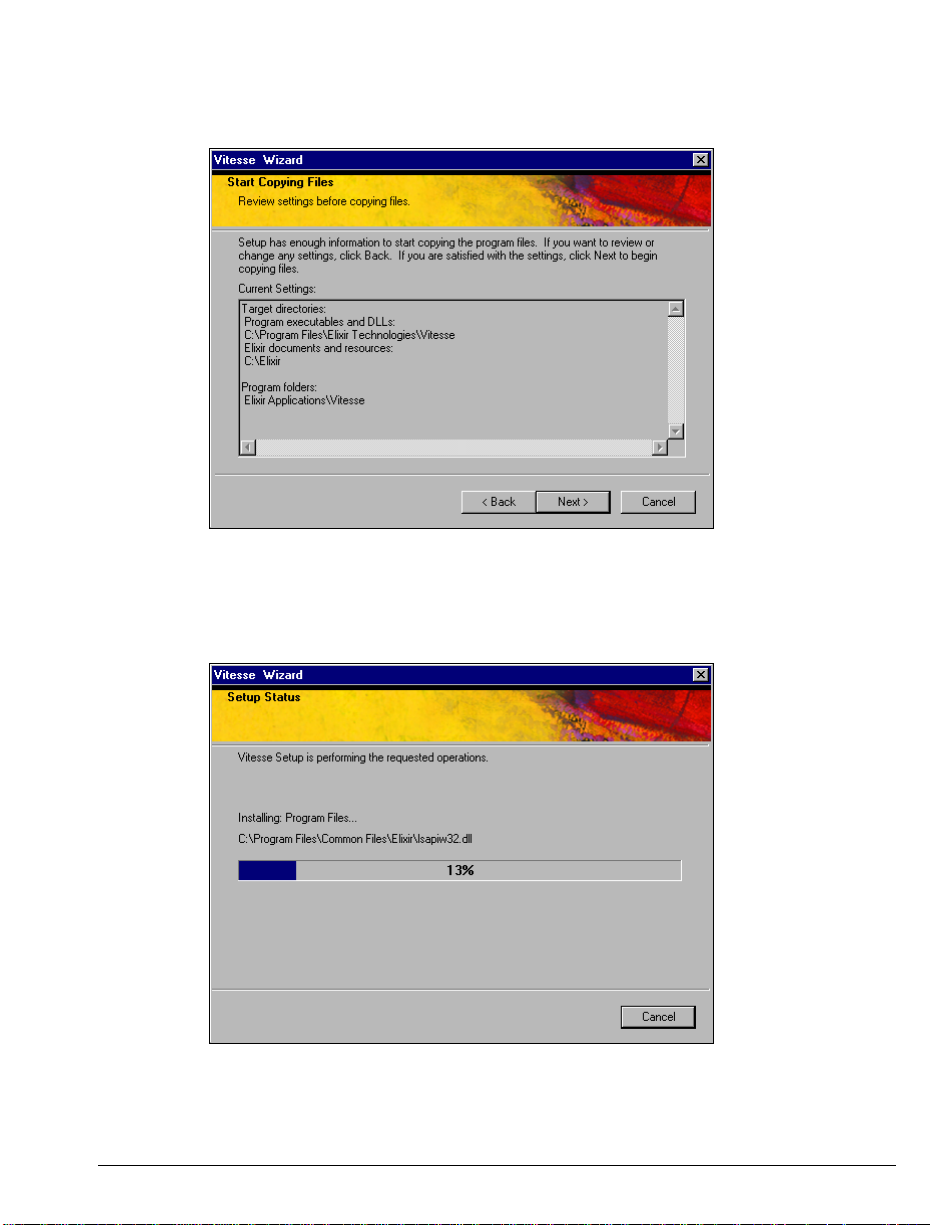
16 If you want to change any of the settings, click Back.
Review the listed install settings before beginning the installation.
17 Click Next to install Vitesse.
The Setup Status dialog displays, showing the installation progress. This
might take a few minutes.
Setup Status displays the installation progress.
24 Vitesse Getting Started Guide
Page 25

After all files have been copied into the destination folder, the InstallShield Wizard
Complete dialog displays.
The installation is complete.
Sometimes, you are prompted to restart your computer after the Vitesse
installation completes. Select Yes, I want to restart my computer now,
and then click Finish. In this case, the
open automatically and you will have to launch this dialog using
Start>All Programs>Elixir Applications>Vitesse>License Wizard.
License Wizard
dialog does not
18 Click Finish.
The License Wizard dialog displays.
Chapter 2: Installation 25
Page 26
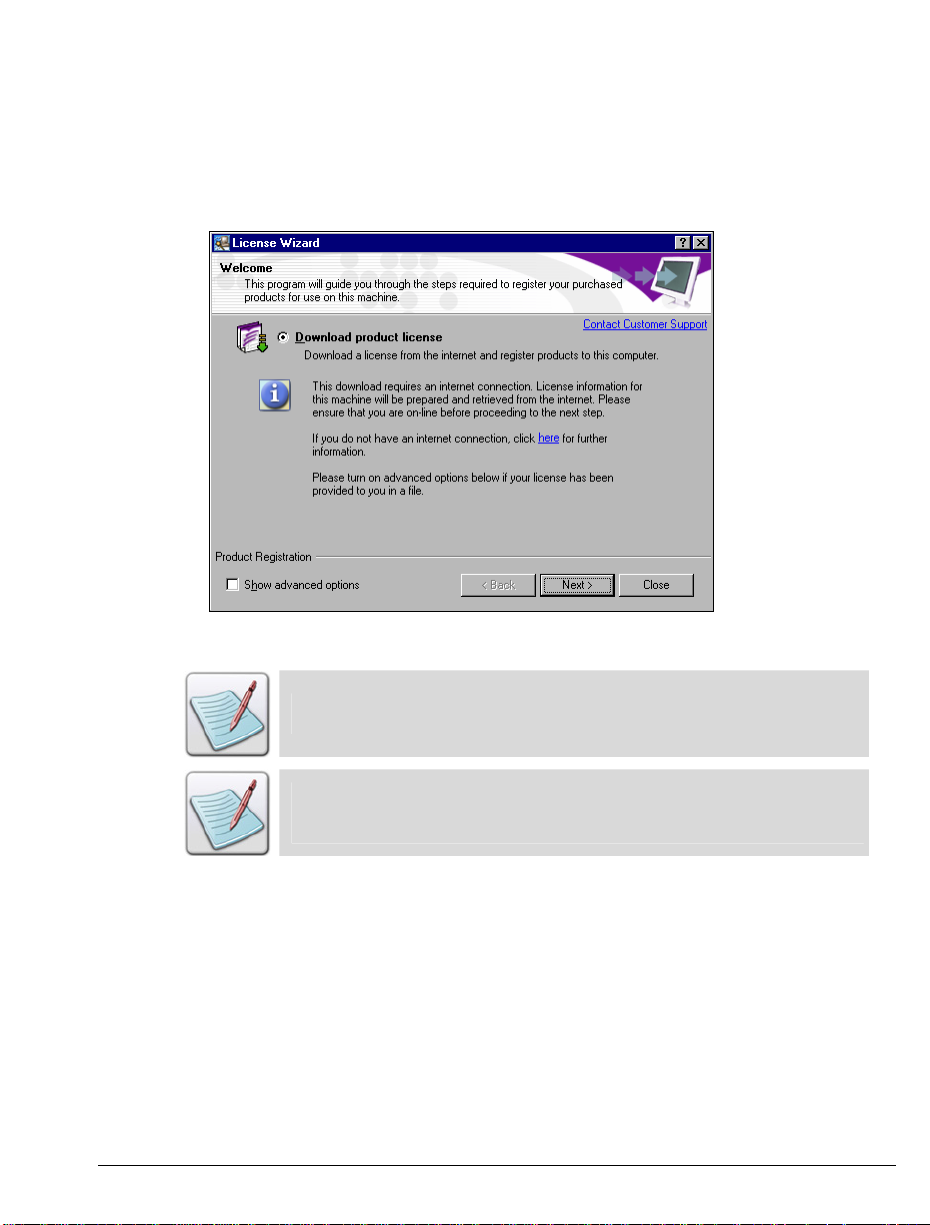
Registering Vitesse
Once the installation completes, you will be prompted to register Vitesse for use. The
License Wizard dialog displays for this purpose, which guides you through the
software registration process.
The License Wizard dialog guides you through the software registration process.
This
License Wizard
process is selected at the start of the installation process.
dialog displays only if Run password registration
If you want to run registration as a separate process, click Close. When
you are ready to register, open the Start menu and choose
Programs>Elixir Applications>Vitesse>Liscence Wizard.
26 Vitesse Getting Started Guide
Page 27
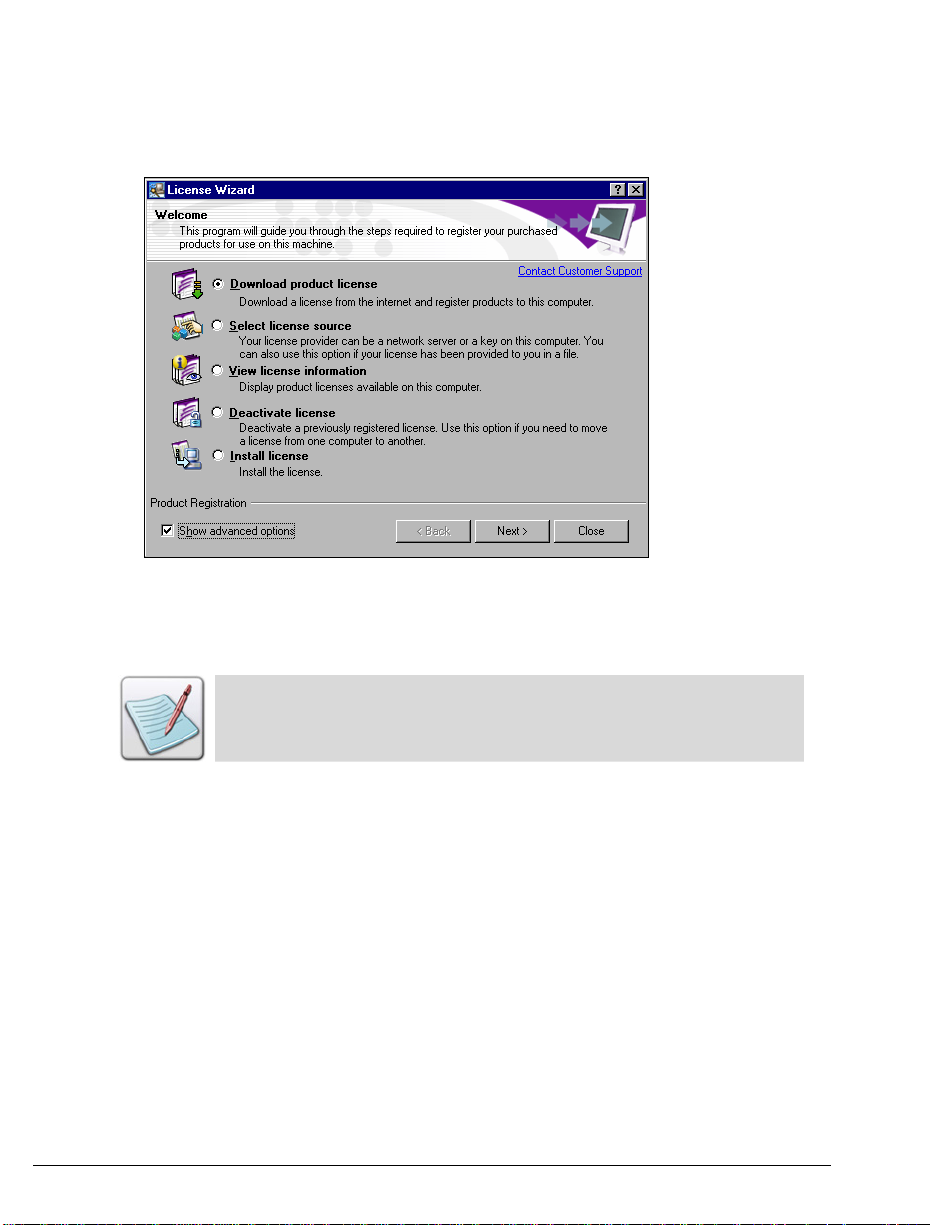
19 Select Show advanced options.
The License Wizard dialog displays all the licensing options.
The License Wizard displays all licensing options.
You can select any of the available licensing options to register Vitesse and unlock it
for use on your machine.
The View license information option displays product licenses available
on your computer. The Deactivate license option deactivates a
previously registered license. The Install license option allows you to
select a password file for installing.
Downloading a Product License
This section covers downloading a license from the Internet to register Vitesse. If
you do not want to register Vitesse on the Internet, continue on to the next section.
To download a product license using the Internet:
20 Select Download product license and click Next.
The Login information dialog displays. If you are not already connected to
the Internet, then you will need to connect before continuing with registration.
Chapter 2: Installation 27
Page 28
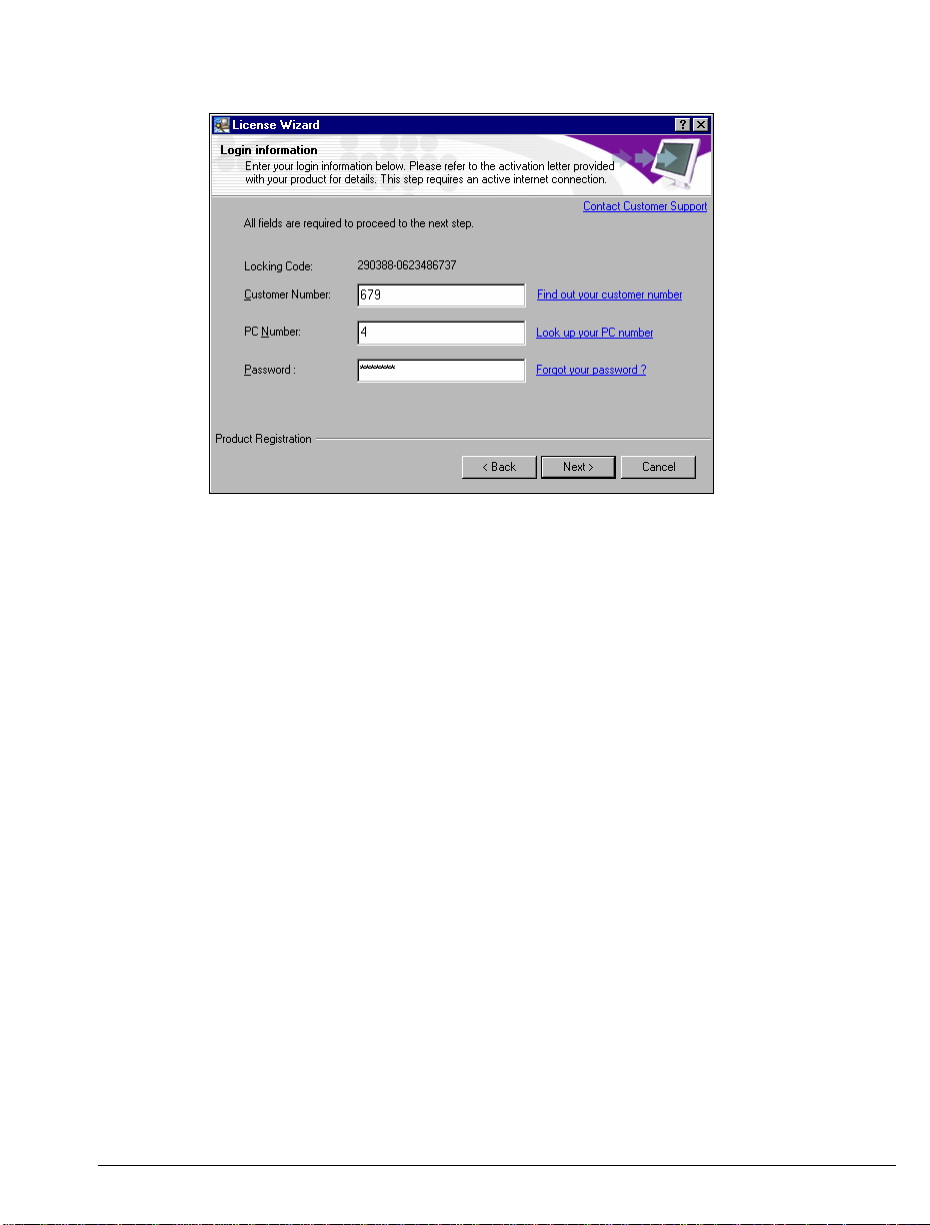
Specify your Customer Number, PC Number, and Password to continue.
21 Enter your customer number in the Customer Number entry box.
22 Enter your PC number in the PC Number entry box.
23 Enter your password in the Password entry box.
If you do not know your Customer Number or PC Number, or if you have
forgotten your password, click the links next to their respective entry boxes to
retrieve this information from the Elixir website.
24 Click Next.
The Contact Information dialog displays. Make sure all information is
correct before proceeding.
28 Vitesse Getting Started Guide
Page 29
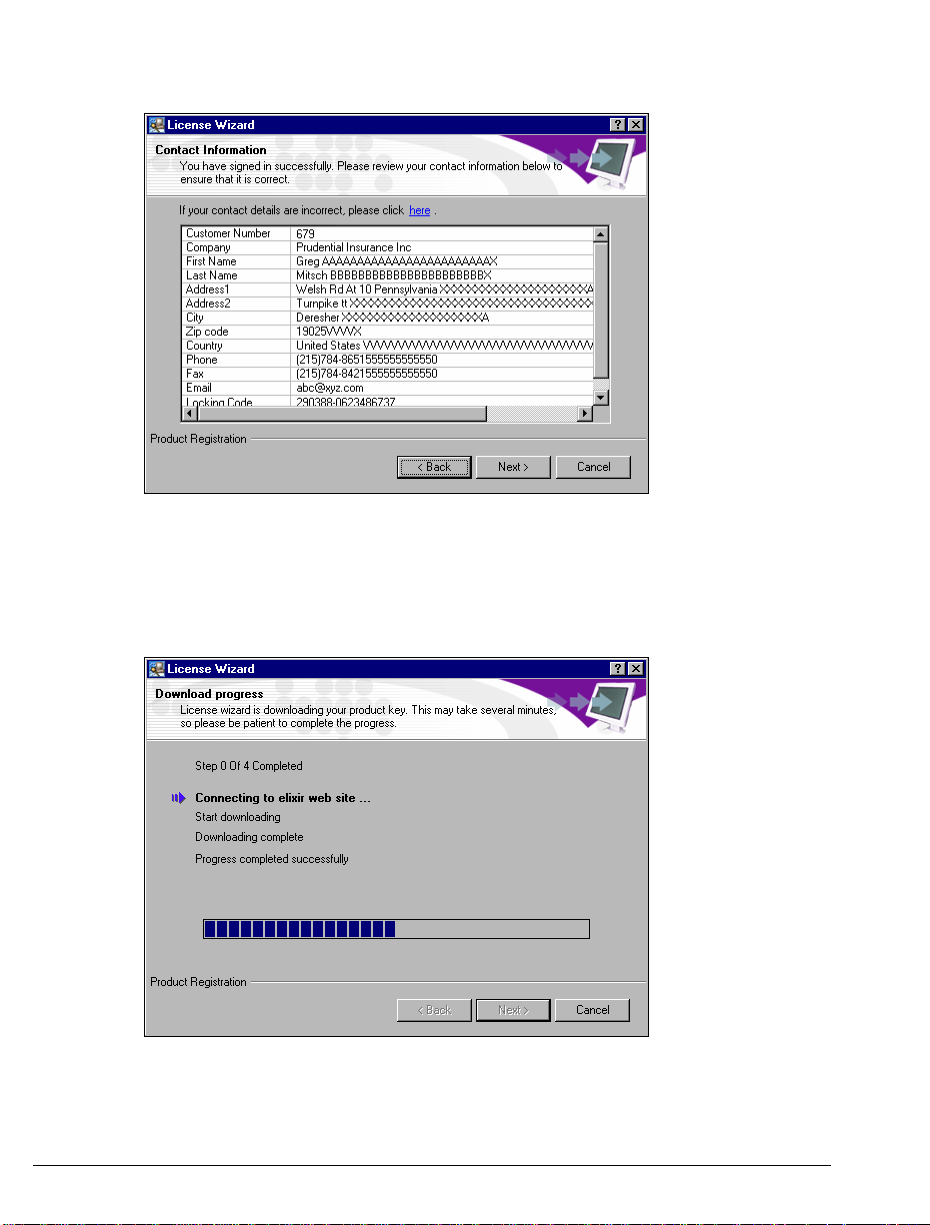
Check the Contact Information carefully before clicking Next.
25 If the information displayed in the dialog is not correct, click the link on top
of the information box, or click Back to change the information.
26 Click Next.
The Download progress dialog displays.
The dialog displays the progress of the registration process.
Once your registration has been completed, the Registration Completed dialog
displays your license information.
Chapter 2: Installation 29
Page 30
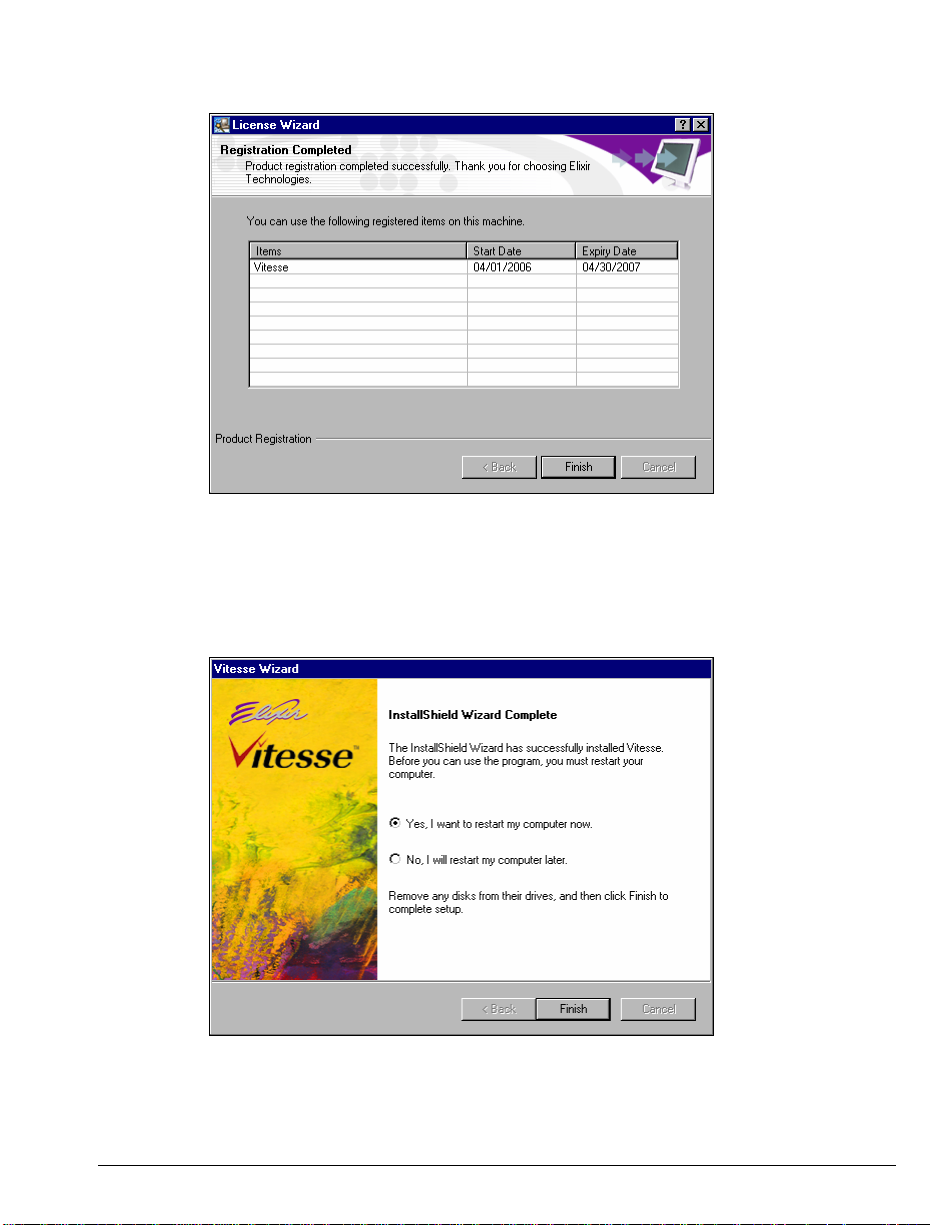
The dialog lists items unlocked by the registration process.
27 Click Finish to complete your registration.
Vitesse is registered.
28 The InstallShield Wizard Complete dialog displays and prompts you to restart
your computer to complete the installation.
Restart your computer to complete the install process.
29 Select Yes, I want to restart my computer now.
30 Click Finish.
30 Vitesse Getting Started Guide
Page 31

You have completed the Vitesse install and registration process.
Selecting a License Source
This section covers selecting an existing license or a key, from your machine or your
local network, to register Vitesse.
Selecting the Select license source option.
31 Select Select license source and click Next.
The License Key Selection dialog displays.
Selecting a license from the drop-down list.
Chapter 2: Installation 31
Page 32

32 Select Please select a license key from the drop-down list, and then click
to locate the license key.
If you already have a Legacy Softkey in your system, the path is displayed in
the drop-down list. You can then select the Legacy Softkey, password.epw
directly from the drop-down menu.
33 Click Next.
The Registration Completed dialog displays.
The dialog lists items unlocked by the registration process.
34 Click Finish to complete your registration.
Vitesse is registered.
35 The InstallShield Wizard Complete dialog displays and prompts you to restart
your computer to complete the installation.
32 Vitesse Getting Started Guide
Page 33

Restart your computer to complete the install process.
36 Select Yes, I want to restart my computer now.
37 Click Finish.
You have completed the Vitesse install and registration process.
Repairing Vitesse
To repair Vitesse or reinstall missing files, you can run the Repair procedure.
1 Insert the CD containing the Vitesse install into your CD-ROM drive.
If your computer is set up to automatically run a CD, the Vitesse –
InstallShield displays.
If your computer is not set up to automatically run CDs, you will need to run the
installation manually:
1 Open the Start menu and select Run to open the Run dialog.
2 Type drive:\setup\Setup.exe in the Open entry box, (replace drive with the
letter of your CD-ROM drive) and then click OK.
The Vitesse – InstallShield Wizard displays. The wizard searches your
computer to detect the previous Vitesse version and extracts all the files
needed to reinstall or repair Vitesse on your computer from the install
package.
Chapter 2: Installation 33
Page 34

The Modify, Repair or Remove the program dialog displays.
Select Repair to reinstall Vitesse.
3 Select Repair, and then click Next.
The Setup Status dialog displays, showing the repair progress.
Setup Status displays the repair progress.
34 Vitesse Getting Started Guide
Page 35

After missing files are copied into your Vitesse folder, the Maintenance Complete
dialog displays.
Vitesse maintenance is complete.
Sometimes, you are prompted to restart your computer after the Vitesse
maintenance process completes. Select Yes, I want to restart my
computer now, and then click Finish.
4 Click Finish to complete the maintenance process.
You have repaired or reinstalled Vitesse.
Uninstalling Vitesse
To uninstall Vitesse from your computer, you can run the Remove procedure.
1 Insert the CD containing the Vitesse install into your CD-ROM drive.
If your computer is set up to automatically run a CD, the Vitesse –
InstallShield displays.
If your computer is not set up to automatically run CDs, you will need to run the
installation manually:
1 Open the Start menu and select Run to open the Run dialog.
2 Type drive:\setup\Setup.exe in the Open entry box, (replace drive with the
letter of your CD-ROM drive) and then click OK.
The Vitesse – InstallShield Wizard displays. The wizard searches your
computer to detect if Vitesse is installed and extracts all the files needed to
uninstall Vitesse from your computer from the install package.
Chapter 2: Installation 35
Page 36

The Modify, Repair, or Remove the program dialog displays.
Select Remove to uninstall Vitesse.
3 Select Remove, and then click Next.
The Confirm Uninstall dialog displays, prompting you to confirm the removal
of Vitesse and all its components from your computer.
Clicking OK will completely remove Vitesse from your computer.
36 Vitesse Getting Started Guide
Page 37

4 Click OK to completely remove Vitesse from your computer.
The Setup Status dialog displays to show the uninstall progress.
Setup Status displays the uninstall progress.
Once all Vitesse files have been uninstalled from your computer, the Maintenance
Complete dialog displays.
Vitesse has been uninstalled.
5 Click Finish to complete uninstalling Vitesse.
You have removed Vitesse from your computer.
Chapter 2: Installation 37
Page 38

User Notes:
38 Vitesse Getting Started Guide
Page 39

Chapter 3: Configuration
In this chapter, you will configure Vitesse preferences to suit the requirements of an
individual user, workgroup, o r ent e rp ri se.
The Basic Configuration
For basic configuration settings:
1 From the Start menu, select Programs>Elixir Applications>Vitesse>Vitesse.
Vitesse opens.
2 From the menu, choose Tools>Preferences.
The Preferences dialog displays.
You can also click on the Standard toolbar to view the
dialog.
General Category
To set the preferences in the General category:
1 Browse to select a working folder in the Working Folder entry box.
This folder is the default path used for storing your application designs. You
can, of course, browse to another location during the saving process.
The working folder is the default save location.
Preferences
Chapter 3: Configuration 39
Page 40

If your project is graphic-intensive, and you are using many highresolution images, you may wish to check the Use low resolution 96 dpi
images for optimized preview in Designer option. This renders any
graphics over 96 dpi as low resolution in the design area. This
conserves memory and speeds the application processes. The actual
print job will still use the high-resolution images, even if this is checked.
2 Select Show font names in font combo box.
This option displays the font names along with the font samples in the Name
drop-down list, available in the Font tab of the Property View window.
The Show font family members in font combo box option is used to
display the regular, bold, and italicized styles for each font in the Name
drop-down list of the Font tab (depending on the font type). The B, I,
and U features in the Font tab become disabled when this option is
selected.
The Font tab with the B, I, and U options enabled as the Show font family
members in font combo box option is deselected in the Preferences dialog.
You have set up the General preferences.
All tutorials in this guide use the default path of drive:\program files\elixir
technologies\Vitesse\clients.
40 Vitesse Getting Started Guide
Page 41

View Category
Select the View category. You will not make any changes to this category at this
time.
Check all items you want to display in your workspace.
All checked items in the View category display in your workspace. You can set the
items to display according to your own preferences and change these settings at any
time.
You have finished setting up the View preferences.
Workspace Category
There are four categories under the Workspace category:
! Designer
! Tree View
! Source
! Data
Designer
To set the Designer preferences:
1 Under the Workspace category, select Designer.
The Designer preferences page displays.
2 In the Guides area, select the Color and Style of the guides. .
Guides help place and align objects in the design area accurately. You can
also set objects to Snap to Guidelines.
Chapter 3: Configuration 41
Page 42

3 In the Nudge area, set the Nudge and Super Nudge setting in inches.
If you want to choose a different unit of measurement, right-click the spin
arrow control next to the Nudge and Super Nudge options and select a unit
from the pop-up menu.
Nudge and Super Nudge options position objects with the arrow keys or
the arrow and Shift keys, respectively, on your keyboard.
4 In the Grids area, select the Color, Style, and Spacing settings of the grids.
Grids help place and align objects in the design area accurately. You can also
set objects to Snap to Grids.
5 In the View area, select all design helps you want to view in the design area.
6 Select Page Color and Page Background Color.
7 You can select objects falling outside the page boundaries to automatically be
clipped by selecting the Clip Objects Outside Page option.
8 In the Default Units drop-down list, select Inches as the default unit of
measurement.
This guide uses the default measurement of Inches throughout the
exercises.
Customizing the design tools for document creation.
42 Vitesse Getting Started Guide
Page 43

Tree View
To set the Tree view preferences
1 Under the Workspace category, select Tree View.
The Tree View preferences page displays.
2 Select Switch panel view.
This option is on by default. This displays the Switch Panel in the Project
Tree View window. The switch panel allows you to view or hide a particular
object in your application, lock a resource for modifications, or mark an
object for not printing.
3 Select Scope specific resource view.
This option is off by default. When you add new objects to your project tree,
they are added under the Resources node and sorted by the resource type, i.e.
forms, fonts, images, and segments. Selecting this option sorts the new
resources under Global, Local, or Shared nodes that defines the sharing
attributes of a particular resource.
4 From the Open resources scope drop-down list, select what node (Global,
Local, or Shared) you want new design objects to be added to.
Local resources are stored in the Clients default folder, where the application
is stored. Shared resources are stored in the fshared folder. Global resources
are stored in the resource lib folders, which include formlib, seglib, imglib,
etc.
5 Select Tree Filters and check all the graphical objects that you want listed in
the project tree.
If you uncheck any of the object types, that object’s nodes will not be visible
in the design tree.
Chapter 3: Configuration 43
Page 44

Customizing the view of the design tree.
Source
To set the Source view preferences:
1 Under the Workspace category, select Source.
The Source preferences page displays. Here you can set display settings for
different elements within the Source window.
2 From the Source area, select a source element.
Each source element refers to different types of information displayed in the
Source View of the design area.
3 Using the drop-down lists, select a Back Ground and Fore Ground color for
the selected element.
4 Select a font and point size for the selected element from the Source View
Font area.
The colors and font selected are used to display the source element in the
Source View of the design area. Sample preview of the selected settings can
be viewed in the Preview area.
44 Vitesse Getting Started Guide
Page 45

Customizing the Source window view.
Data
To set the Data view preferences
1 Under the Workspace category, select Data.
The Data preferences page displays. Here you can set display settings for the
Data View window.
2 Using the drop-down lists, select a Background and Foreground color for the
Data View window.
3 Select a Font Name and Font Size.
The colors and font selected are used to display information in the Data View
window.
Chapter 3: Configuration 45
Page 46

Customizing the Data View window view.
Print Category
You can specify your default settings for printing in the Print category.
1 Select the Print category.
The Print preferences page displays.
2 From the Paper Size drop-down list, select the default paper size for printing.
This is only a default setting; when printing, you have the option to set any
page size you want.
3 From the Orientation drop-down list, select the default orientation for
printing.
This is only a default setting; when printing, you have the option to set any
orientation you want.
4 Select Print Grids, if you would like the grids to print.
5 In the Cycle Copy entry box, specify the number of document copies to print.
46 Vitesse Getting Started Guide
Page 47

Setting default print propert i es.
You have completed setting Print properties.
Import Category
You can specify your default settings for importing projects in the Import category.
1 Select the Import category.
The Import preferences page displays.
2 In the Text Grouping area, select Group. Group enables the text grouping of
similar text objects. The other options are:
! None – disables the text grouping.
! Maximum – enables text grouping for all text objects, including those with
spaces.
3 Select Process Elixir Comments if not already selected. .
This option automatically processes the non-VIPP comments. This option is
used when importing a previously exported Vitesse design.
4 Select Process Legacy Comments if not already selected. .
This option processes the inherent comments in a legacy project. For
example, VIPP comments in a native VIPP project.
Chapter 3: Configuration 47
Page 48

Setting default import properties.
You have completed setting Import properties.
Export Category
You can specify your default settings for exporting projects in the Export category.
1 Select the Export category.
The Export preferences page displays.
2 In the Comments area, select Lightly Commented that displays Elixir
comments for selected objects in the Source View of the design area.
The No Comments option will not display comments, whereas selecting the
Heavily Commented option displays general comments in the Source View of
the design area.
3 Select Generate Elixir Comments. .
This option processes non-VIPP commands automatically. This option is
used when the project contains Elixir or non-VIPP objects. These non-VIPP
objects will be converted into VIPP objects during export.
4 Select the Default unit of your choice.
48 Vitesse Getting Started Guide
Page 49

Generally VIPP uses the Dot3 unit of measurement.
Setting default export properties.
You have completed setting Export properties.
Legacy Fonts Category
When designing projects or resources in Vitesse, you can use legacy fonts. Legacy
refers to FNTs or Elixir fonts used previously, either on printers or in the Elixir
Application Suite. If you select a legacy font for use in Vitesse, it will be used for
display and is termed a render font. When the project or resource is complete, you
will export it to VIPP format for printing. The export process uses the Legacy Fonts
table to equate the render font with a VIPP font name. The printer then uses the
VIPP font name to locate a printer font for printing.
The Legacy Fonts table associates render fonts with printer fonts. There are two
major columns in the Legacy Fonts table: Legacy and VIPP. Vitesse installs with
some common VIPP font names already set up to match legacy fonts. The Legacy
Font table is editable, allowing you to add and change the default mappings if
necessary to match your font usage. .
1 Select the Legacy Fonts category.
The Legacy Fonts preferences page displays.
2 Scroll to the bottom of the table.
3 In the Legacy Fonts table, click
A new, empty font will be added to the bottom of the list.
4 Double-click the new empty cell in the Legacy column and enter a legacy
font name.
Chapter 3: Configuration 49
Page 50

5 Double-click the cell in the VIPP column and select a font from the drop-
down list.
You have now associated the Legacy and VIPP fonts.
Mapping legacy fonts to VIPP font names.
You have finished setting up the Legacy Fonts properties.
Font Map Category
When designing projects or resources in Vitesse, you can use either True Ty peo r
PostScript Type 1 fonts. This font is termed a render font, and is used for display in
Vitesse. When the project or resource is complete, you will export it to VIPP format
for printing. The export process uses the Font Map to equate the render font with a
VIPP font name. The printer then uses the VIPP font name to locate a prin t er font f or
printing.
For example, if you use the True Type font Courier New in your project, the project
will reference the VIPP font NCR when exported for printing.
A Font Map, then, associates render fonts with printer fonts. There are three major
columns in the Font Map:
! VIPP
! PostScript
! True Type
Vitesse installs with the most common VIPP font names already set up to match their
True Type equivalent in the Font Map. The Font Map is editable, allowing you to
change the default mappings if necessary to match your font usage.
50 Vitesse Getting Started Guide
Page 51

You can install PostScript fonts on your operating system and add them to the Font
Map so that Vitesse uses the same font for rendering as the printer uses print. If both
True Type and PostScript fonts are available, Vitesse will use the PostScript fonts for
display.
1 Select the FontMap category.
The FontMap preferences page displays.
2 Scroll to the bottom of the table.
In the Font Mapping table, click
A new, empty font will be added to the bottom of the list.
3 Double-click the new empty cell in the VIPP column and enter a VIPP font
name.
4 Double-click the cell in the PostScript column and select a font from the
drop-down list.
You have now associated the VIPP and PostScript fonts. The dro p-do w n l i st
only includes PostScript fonts that have already been installed on your
operating system.
5 Double-click the True Type font and select a font from the drop-down list.
You have associated a VIPP font with True Type and PostScript fonts. If the
True Type font you select is not already bold or italicized, the ‘B’ and ‘I’
check boxes become active and you can set the font to Bold and Italic.
VIPP supports PostScript fonts either as PostScript resources or as
VIPP resources. Fonts must be accessible to the PostScript interpreter
on which VIPP is running.
Chapter 3: Configuration 51
Page 52

Mapping VIPP, Post Script, and True Type fonts.
You have finished setting up FontMap properties.
Folder Category
Under the Folder category you can specify resource directories. Vitesse will search
the folders listed here when looking for resources referenced in a Vitesse or VIPP file.
1 Under the Folder category, select Form.
The Form preferences page displays.
2 Click to add a new Form directory to the list.
3 Browse to select a folder to be added to the directory list, and click OK.
The new location is added to the folder directory list.
52 Vitesse Getting Started Guide
Page 53

List directories containing forms that you will use in document creation.
Follow the same steps to specify resource directories for Segment, Image, JDT,
Project, Encoding, and Misc resources.
You have completed setting Folder preferences.
Barcode Category
1 Select the Barcode category.
The Barcode preferences page displays. This category associates barcodes
with a True Type or PostScript font for printing. Fonts must be accessible to
the PostScript interpreter on which VIPP is running.
2 Select a True Type or Post Script font from the drop-down list to be
associated with any barcode type you will use in your projects.
Follow the same steps to associate fonts with the remaining barcode types.
Chapter 3: Configuration 53
Page 54

Mapping True Type or Post Script fonts to the listed barcodes.
You have finished setting the Barcode properties.
Defaults Category
There are six sections under the Defaults category:
! Text
! Dictionary
! Color
! Layout
! Transform
! Regional
Defaults are used for new and imported resources and projects.
Typically, VIPP resources and projects contain all the information required to print.
However, it is possible that certain pieces of information can be missing, such as the
default font or page size, because that information is available on the printer. When
imported VIPP documents or resources do not contain all the necessary information,
the defaults set in the Preferences dialog box are used. For example, if a VIPP form
does not contain page size information, the default page size set under Defaults will
be used when importing the form.
When importing, it is good practice to double-check the defaults in
Preferences. Then, if any information is missing in your imported file(s),
the replacement defaults will be correct.
54 Vitesse Getting Started Guide
Page 55

Text
1 Under the Defaults category, select Text.
The Text preferences page displays.
2 In the Text area, set the Alignment, Paragraph Spacing, Line Spacing, and
Spell Checker Depth properties to apply to all text objects.
Spell Checker Depth spell checks selected text according to the specified
spell check intensity (0-100), 0 being the lowest and 100 being the highest
level of checking.
3 In the Tab area, specify the Default Size and Alignment of the default tab.
4 In the Indentation area, specify the Left Indent, Right Indent, and First Line
Indent in your chosen default unit of measurement.
5 In the Font area, specify the font Type, Name, and Size of the Vitesse default
font.
It is recommended that you select a font that is used in your environment.
Setting default text properties.
You have finished setting Text properties.
The Dictionary category is used to specify a default dictionary for spell
checking text within text objects. You will not use this category in the
exercises explained later.
Chapter 3: Configuration 55
Page 56

Color
1 Under the Defaults category, select Color.
The Color preferences page displays.
2 In the Color area, select a Color from the color palette to apply to all objects.
3 In the Pattern area, select a default Line Pattern and a default Fill Pattern.
Setting default color properties.
You have finished setting Color properties.
Layout
1 Under the Defaults category, select Layout.
The Layout preferences page displays. This category defines defaults for
paper dimensions, media properties, and logical page margins for new
applications.
2 In the Grid area, set the number of Characters per line and Lines per page.
Characters per line and Lines per page settings apply only to Line mode data
projects.
3 In the Paper area, define the paper size either by selecting one of the listed
sizes in the Standard drop-down list, or by selecting Custom and entering the
page size manually in the W (width) and H (height) entry boxes.
4 Specify the Orientation of the page by selecting a page orientation from the
drop-down list.
5 In the Margins area, set the Top, Bottom, Left, and Right margin values in the
default unit of measurement.
6 In the Media area, define the default paper Type, Weight, and Color.
56 Vitesse Getting Started Guide
Page 57

Setting default page layout propert i es.
You have completed setting Layout properties.
Transform
Under the Transform category, you can specify number formats that will be used in
Vitesse for numeric fields. When mapping numeric fields from a data file or entering
static text, you can apply any of these formats to transform the field to the selected
format. Formats may include: currency, dates, etc.
1 Under the Defaults category, select Transform.
The Transform preferences page displays.
2 Click to add a new Transform format to the list.
A new, empty Transform format is added to the list.
3 Enter a number format and click OK to save your settings.
Chapter 3: Configuration 57
Page 58

Setting default transform propert ie s.
The Transform formats use two main symbols:
! @: denotes a number. Leading and trailing zeros will not be printed.
! #: denotes a number. Leading and trailing zeros will be printed.
Other characters are treated as literals. Some examples of Transform formats are as
follows:
Date
! Incoming data: 03042003
! Transform format: @@/@@/@@@@
! Result: 03/04/2003
Currency
! Incoming data: 1201
! Transform format: $@,@@@.@@
! Result: $1,201.00
Numeric, Example 1
! Incoming data: 1201
! Transform format: ######
! Result: 001201
Numeric, Example 2
! Incoming data: 053298443
! Transform format: ###-##-####
! Result: 053-29-8443
58 Vitesse Getting Started Guide
Page 59

You have completed setting Transform properties.
Regional
Under the Regional category, you can select numeric formats for your region.
1 Under the Defaults category, select Regional.
2 Select US, Europe, or Custom from the Region drop-down list.
US and Europe have preset numeric formats. Select Custom to set your own
formatting.
Setting default regional propert i es.
You have completed setting Regional properties.
Environment Issues
There are some issues that you may need to take into consideration when using
Vitesse:
! Migrating from VIPP IDE – If you are migrating from the VIPP IDE
environment
! Display Issues – If you are having trouble reading text within Vitesse
Migrating from VIPP IDEfrom VIPP IDE
If you are migrating from VIPP IDE, reference your resource folders within Vitesse.
Specify VIPP IDE resource directory paths by choosing Tools>Preferences from the
menu, and selecting the Folders category. This will allow you to access your
resources while working in Vitesse.
Chapter 3: Configuration 59
Page 60

VIPP IDE applications can be imported using File>Import. For VIPP applications
that are not successfully imported, Vitesse provides an error message and the line
number in the VIPP code in the Message View window.
Display Issues
Vitesse is best viewed at 1024 x 768 screen resolution. You can also customize the
Vitesse workspace to accommodate different screen resolutions.
If you find the text in the Vitesse workspace to be unreadable, customize your
Windows Display Properties to use the Windows Standard theme text specifications.
60 Vitesse Getting Started Guide
Page 61

Chapter 4: A Vitesse Tour
The situation is always the same: your client wants well-designed documents, printed
by a date that seems unrealistic. The challenge is to create quality while still meeting
the deadline.
Where to start? Every document starts with data and a mockup.
For the data, you’ll want a sample file, which is representative of the whole data file,
while not being too big. This will keep print previews, which combine the data file
with your work, from being long and cumbersome to review.
The mockup can be a pencil drawing, an idea, or a full-blown marketing layout. You
need to have an idea of the finished product before you start. Where will the data go?
What items are static, or don’t change from document to document? What items need
to change in each document? Is that information available in the data file? What
conditional logic is needed to change the look of each individual document?
You also need to gather your resources. There are three states for resources in
Vitesse: Local, Shared or Global.
Local resources are embedded in a document, and cannot be used by another
document. An example would be a segment combining information that is only
needed in one form or application. Shared resources are used for more than one
Vitesse document, such as a segment combining the company logo and address
information that is used on all company documents. Global resources are used for
documents both in and out of Vitesse, such as a bitmap image.
Once you have a mockup, you can start with the form. Vitesse can create forms from
scratch, or modify forms you already have in Xerox or VIPP format. Any Xerox
form can be imported into Vitesse.
You can also insert VIPP segments, or create new segments directly in Vitesse.
Segments are mini-forms, combining form elements for use within forms and project
modes. Segments can be scaled and rotated within forms and projects.
Once the form is complete, you can start designing with data, using one of the four
project modes: Native mode, Line mode, Database mode, or XML mode. The mode
you use depends on the data file you are using to build the application. Vitesse
supports Merged Data view, which merges the contents of your data file onscreen
while designing a project.
Once the application is complete, use print preview to simulate proofing. The entire
data file is combined with the project onscreen. You can even print the preview to
your desktop printer for a printed proof.
Chapter 4: A Vitesse Tour 61
Page 62

All the resources you have created, from forms, segments and fonts to entire projects,
can be exported to VIPP format directly in Vitesse.
What is the solution to getting to print on time, with quality materials? Vitesse.
Creating a Form
You will start your Vitesse Tour by learning how to create a form. The objective of
this portion of the Tour is to provide you with comprehensive understanding of form
design and creation in Vitesse. The form you will create is a statement for Jefferson
Bank & Trust.
For this form you will use various drawing tools such as lines and boxes, add and
import text objects and insert images. You will also create a VIPP segment and insert
it into the form. Once the form is complete, you will save the completed form under a
different name.
To create the Jefferson Bank & Trust statement form, you will:
! Add lines and boxes
! Add and import text
! Add images
! Create a segment
! Edit a previously created form
! Save your form
You will be introduced to various new properties and functionalities.
You can refer to the
option.
Vitesse User Guide
for details on each individual
Understanding the Application
Jefferson Bank & Trust (JBT) sends out a monthly statement to their clients giving
them a detailed account of their transactions throughout the month.
JBT needs a form containing static text and graphical elements, which they can use as
a background for variable data, to print and send out to their clients.
A form holds static information, such as graphics, text and drawing objects. Before
you start designing, it is a good idea to have a mockup of the form so you can see
what you are building.
62 Vitesse Getting Started Guide
Page 63

A mockup of completed form.
Chapter 4: A Vitesse Tour 63
Page 64

Creating a New Form
To create a new form using Vitesse:
1 From the Start menu, select Programs>Elixir Applications>Vitesse>Vitesse.
Vitesse opens.
2 From the menu, choose File>New.
The New Project dialog displays.
The New Project dialog displays.
3 Select Form and click New.
The Form dialog displays.
64 Vitesse Getting Started Guide
Page 65

The Form dialog displays.
4 Enter GSJBTStatement in the Name entry box.
Browse to select the working folder, where the form will save, or enter the
path to the working folder in the Path entry box.
You can also use the default path provided. This exercise uses the default
path.
5 Click OK.
The new form opens in the design area.
Chapter 4: A Vitesse Tour 65
Page 66

Setting Form Properties
You will now set up form properties. You will set the form size to match the physical
page size, which you will set when you work in project mode.
1 In the Property View window, select the General tab.
The name is already GSJBTStatement.
2 In the Standard drop-down list, select Letter.
Set the paper Orientation to Portrait.
3 Check Cache.
The Cache option loads all resources to the printer’s memory, or cache,
before printing. Resources are retrieved from the cache during printing.
Using this option speeds the printing process.
Setting up form properties in the Property View window.
You have finished setting up the GSJBTStatement form’s properties.
Adding Objects to the Form
You will now start adding objects to the form. You will add an image, a box and
several lines to create your form. You will also import and add text objects.
Adding an Image
You will begin your form design by adding the Jefferson Bank & Trust’s logo to your
statement.
Vitesse supports many different image file formats. The image you use should be
located on your PC or network.
66 Vitesse Getting Started Guide
Page 67

To add an image:
1 On the Insert toolbar, click .
The Insert Image dialog displays.
Browse to select an image on your PC or network.
2 Browse to drive:\ program files\elixir technologies\vitesse\imglib\ and
select gs_logobank.jpg.
3 Click Open to insert the image in the design area.
4 GS_logobank adds in the design area. In the Project Tree window, a new
image reference node adds and its properties are viewable in the Property
View window.
To view properties of any object, select it in either the Project Tree
window or the design area. You can define the settings of all objects
inserted in your design using the Property View window.
5 In the Property View window, enter the following:
! Name: JBTLogo
! Position:
X: 0.50 in Absolute
Y: 0.50 in Absolute
Chapter 4: A Vitesse Tour 67
Page 68

! Size:
W: 2.00 in
H: 1.20 in
The Size area shows the default size of the inserted object. If you type
in a different dimension, the image resizes. You do not need to enter
both the width and the height of the image. Vitesse maintains the
image’s aspect ratio automatically: when you change the height, the
width changes proportionally to the image's original size.
Setting the image’s position and size properties.
You can turn the grid off by clicking in the View toolbar above the
design area. This exercise has the grid turned off.
You can leave the Settings and Color tabs at their default settings. You have added
the JBT Logo to your design.
The Jefferson Bank & Trust statement form has a mockup that includes
dimension and location coordinates. You can visually match size and
location throughout the exercise, if you do not wish to enter coordinates
for each object.
You will now add drawing objects to your form.
68 Vitesse Getting Started Guide
Page 69

You have added the image to your design.
Adding Drawing Objects
You will add various drawing objects to complete your design. These drawing
objects include boxes, lines and text. You will add these to your design using the
insert object buttons on the Drawing toolbar and then assign different properties
and colors to them using the Property View window.
Adding a Box
The JBT statement needs a box in the background of the form. The statement’s
transactional data will be added within the box area.
You will now add the box to your design. This box will cover a significant area of
the form and will be filled with a color pattern.
1 On the Drawing toolbar, click .
2 Click and drag in the design area to draw a large box.
A box is added to your design area and a corresponding box node is added in
the Project Tree window. Do not worry about the exact size and location of
the box; you will add these using the Property View window.
3 In the Property View window, select the General tab and specify the
following:
Chapter 4: A Vitesse Tour 69
Page 70

! Position:
X: 0.00 in
Y: 4.00 in
! Size:
W: 8.50 in
H: 5.50 in
Setting box properties.
4 Select the Settings tab and set line specifications as follows:
! Width: 1 pt
! Style: Solid
70 Vitesse Getting Started Guide
Page 71

Setting box line style properties.
5 Select the Color tab and set the following color specification:
! Outline: Blank RGB (255,255,255)
! Background: XLBLUE RGB (229,229,255)
! Fill Pattern: Diagonal Stripes
Chapter 4: A Vitesse Tour 71
Page 72

Setting the box’s color specification.
You can click on the icons at the top left of your window to switch
between foreground and background.
You can use left-click to select a color for the selected icon (foreground
or background), or right-click to select a color for the unselected icon
(background or foreground).
6 Zoom out to view the entire box.
You have added a box object to your design.
72 Vitesse Getting Started Guide
Page 73

The box is added to your design.
Adding Lines
You will now add lines to your form. These lines will mark the top and bottom of the
box, and will also create an area at the top of the box for account summary
information.
1 On the Drawing toolbar, click .
2 Click and drag in the design area to draw a line across the top of the box.
A line is added to your design area and a corresponding node is added in the
Project Tree window.
3 In the Property View window, select the General tab and enter the start and
end point coordinates as follows:
! Start Point:
X: 0.00 in
Y: 4.00 in
! End Point:
X: 8.50 in
Y: 4.00 in
Chapter 4: A Vitesse Tour 73
Page 74

Setting the line’s position and size.
4 Select the Settings tab and select line specifications as follows:
! Width: 1 1/2 pt
! Style: Solid
Setting the line style.
74 Vitesse Getting Started Guide
Page 75

Adding a New Color to the Palette
For this application you will add a new shade of blue to the color palette. You will
use the new color for all of the lines in the form. You will also use the new color
when you create a segment.
1 Select the Color tab and click
The Color Selector dialog displays.
Define RGB values in the Color Selector dialog.
2 Select RGB from the Selected Color Model drop-down list.
3 Enter the following values for RGB:
! R: 102
! G: 123
! B: 179
4 Enter NewBlue in the Color Name entry box.
5 Click OK.
The new color is added to the color palette.
Chapter 4: A Vitesse Tour 75
Page 76

NewBlue is added to the palette.
6 Click on the Color tab to save the new color in the palette.
7 Set the following color specification:
! Outline: NewBlue RGB (102,123,179)
! Background: Blank RGB (255,255,255)
Using Copy and Paste
You have added the first line to your application. You will use copy and paste to
create the remaining lines for the form.
1 Right-click the Line node in the Project Tree window and select Copy from
the pop-up menu.
2 Right-click the design area and select Paste from the pop-up menu.
You can also use Ctrl + C to copy and Ctrl + V to paste.
3 Click the new Line node in the Project Tree window to set its properties.
76 Vitesse Getting Started Guide
Page 77

4 In the Property View window, select the General tab and enter the start and
end point coordinates as follows:
! Start Point:
X: 0.00 in
Y: 4.75 in
! End Point:
X: 8.50 in
Y: 4.75 in
5 Click in the design area and use Ctrl + V to paste another line.
6 In the Property View window, select the General tab and enter the start and
end point coordinates as follows:
! Start Point:
X: 0.00 in
Y: 9.50 in
! End Point:
X: 8.50 in
Y: 9.50 in
You have finished adding lines to your application.
You have finished adding lines to your design.
Chapter 4: A Vitesse Tour 77
Page 78

You will now add text objects to your application.
Adding Text
Next, you will add text to the application. You will first import two text objects. The
first includes the bank’s contact information, and the second is a marketing message,
which will be added at the bottom of the form.
Vitesse can only import RTF files.
Importing Text
1 On the Drawing toolbar, click .
2 Click and drag in the design area to draw a text box above the shaded box on
the right side of the form.
A new text box is added in the design area and a corresponding text node is
added in the Project Tree window.
3 Right-click the text box and select Import from the pop-up menu.
The Import Text dialog displays.
The Import Text dialog displays.
4 Browse to drive:\ program files\elixir
technologies\vitesse\clients\gs\tour_form, and select gs-contact.rtf. .
5 Click Open.
The text from the RTF file is imported into the text box.
6 Click outside the text box to place the text.
Nodes display on the edges of the text box.
78 Vitesse Getting Started Guide
Page 79

7 In the Property View window, select the General tab and enter JBTContact
in the Name entry box.
8 Specify the Position and Size specifications as follows:
! Position:
X: 6.05 in Absolute
Y: 2.58 in Absolute
! Size:
W: 2.05 in
H: 0.93 in
All other properties are imported because they were set in the RTF file.
Setting Position and Size settings for the imported RTF text.
You can enter text properties while the cursor is still active inside the
text object. The properties won’t be saved to the object, however, until
you click outside of the text object. It is recommended to finish typing
the text, then click outside the text object. This action updates the text
object with the specified properties.
You can also set the name and size specifications, then click and drag
the text box to its position on the letter. The positioning does not have
to be exact.
You have added the first text object. Now you will import the second RTF file for the
marketing message text object.
9 On the Drawing toolbar, click .
10 Click and drag in the design area below the shaded box to draw a text box.
Chapter 4: A Vitesse Tour 79
Page 80

You can use the scroll bars and the zoom to view any portion of the screen.
11 Right-click the text box and select Import from the pop-up menu.
The Import Text dialog displays.
Importing the next RTF file for the form’s design.
12 Browse to drive:\program files\elixir technologies\vitesse\clients\
gs\tour_form and select GS-Mktgmsg.rtf.
The text from the RTF file imports into the text box.
13 Click outside of the text box to place the text.
Nodes display on the edges of the text box.
14 In the Property View window, select the General tab and set the following
properties:
! Name: MktgMsg
! Position:
X: 1.80 in Absolute
Y: 9.70 in Absolute
! Size:
W: 5.50 in
You have finished importing text for this exercise. You will continue adding text
objects to complete the form.
You can also set the name and size specifications, then click and drag
the image to its position on the letter. Positioning does not have to be
exact.
80 Vitesse Getting Started Guide
Page 81

The imported text is added to the form.
Adding Text
Now you will add a text object by typing in the text directly in the design area. You
will also create a font style that can be used again on other text objects. This reduces
the formatting work needed when adding multiple text objects.
1 On the Drawing toolbar, click .
2 Click in the design area between the first two lines to start a text box.
3 Type in Account [Enter] Summary.
You may want to zoom in to view the text more easily.
4 Click outside of the text box to place the text.
5 In the Property View window, select the General tab and enter the following
specifications:
! Name: ACSum
! Position:
X: 0.05 in Absolute
Y: 4.10 in Absolute
Chapter 4: A Vitesse Tour 81
Page 82

6 Select the Font tab and specify the following font settings:
! Type: True Type
! Name: Arial
! Size: 14.00 pt
7 Click .
8 Click .
9 In the Style entry box, enter Bold14.
10 Click .
Bold14 is added to the Style drop-down list. You have saved the font style
and can apply it to other text objects using the same font specifications.
Setting a font style on the Font tab.
The BAT font option defines a pre-determined set of background colors
and formats for text. BAT stands for Background Attribute.
11 Select the Spacing tab and select Single from the Line Spacing drop-down
list.
82 Vitesse Getting Started Guide
Page 83

Setting the line spacing attributes.
You have added the Account Summary heading. You will now add sub-headings for
the Account Summary area.
12 On the Drawing toolbar, click .
13 Click to the right of Account Summary to start a text box.
14 Enter Account Type and click outside the text box to place the text.
15 In the Property View window, select the General tab and enter the following
specifications:
! Name: ACType
! Position:
X: 1.50 in Absolute
Y: 0.00 in Start Same
By selecting Start Same you have applied a relative horizontal position
to the text object. This text object will be placed in the same horizontal
position as the last text object.
Chapter 4: A Vitesse Tour 83
Page 84

You do not need to add a width for a text box when typing directly in the
design area unless you want the text to wrap to the next line, or want to
justify the text within specific dimensions. You do not need to add a
height unless you are justifying the text vertically; i.e., trying to center
the text vertically on the page. If you don’t add a specific height, the
text automatically top-justifies, and the height is added for you based on
the font size, the amount of text, etc.
16 Select the Font tab and specify the following font settings:
! Type: True Type
! Name: Arial
! Size: 12.00 pt
17 Click .
18 Click .
19 In the Style entry box, enter Bold12.
20 Click .
Bold12 is added to the Style drop-down list. You have saved the font style
and can reapply it to other text objects using the same font specifications.
Copying Text Objects
You have added the Account Type heading. You will use copy and paste to create the
remaining headings for this section of the form.
1 Right-click the text object Account Type and select Copy from the pop-up
menu.
2 Right-click the design area and select Paste from the pop-up menu.
You can also use Ctrl + C to copy and Ctrl + V to paste.
3 Double-click the new text box, delete the existing text, and enter Starting
Balance.
4 Click outside the text box to place the text.
5 In the Property View window, select the General tab and set the following
specifications:
! Name: StartBal
! Position:
X: 2.95 in Absolute
Y: 0.00 in Start Same
84 Vitesse Getting Started Guide
Page 85

6 Select the Font tab and select Bold12 from the Style drop-down list.
You have added the Starting Balance heading.
The first few headings have been added to the statement design.
7 Use Ctrl + V to paste another text object in the design area.
8 Double-click the text box, delete the existing text, and enter Credits.
9 Click outside the text box to place the text.
10 In the Property View window, select the General tab and enter the following
specifications:
! Name: Credits
! Position:
X: 4.70 in Absolute
Y: 0.00 in Start Same
11 Select the Font tab and select Bold12 from the Style drop-down list.
You have added the Credits heading.
12 Use Ctrl + V to paste another text object in the design area.
13 Double-click the text box, delete the existing text, and enter Debits.
Chapter 4: A Vitesse Tour 85
Page 86

14 In the Property View window, select the General tab and enter the following
specifications:
! Name: Debits
! Position:
X: 5.49 in Absolute
Y: 0.00 in Start Same
15 Select the Font tab and select Bold12 from the Style drop-down list.
You have added the Debits heading.
16 Scroll to view the right side of the page.
17 Use Ctrl + V to paste another text object in the design area.
18 Double-click the text box, delete the existing text, and enter Ending Balance.
19 In the Property View window, select the General tab and enter the following
specifications:
! Name: EndBal
! Position:
X: 6.55 in Absolute
Y: 0.00 in Start Same
20 Select the Font tab and select Bold12 from the Style drop-down list.
You have added the Ending Balance heading. You have completed adding
headings for the Account Summary section of the form.
The Account Summary area is complete.
Now you will add the heading and sub-headings for the transactions.
21 On the Drawing toolbar, click .
22 Click in the design area underneath the second line in the shaded box to start
a text box.
23 Enter Date and click outside the text box to place the text.
24 In the Property View window, select the General tab and enter the following
specifications:
! Name: Date
! Position:
X: 1.50 in Absolute
Y: 4.75 in Absolute
86 Vitesse Getting Started Guide
Page 87

25 Select the Font tab and specify the following:
! Type: True Type
! Name: Arial
! Size: 10.00 pt
26 Click .
27 Click .
28 In the Style entry box, enter Bold10.
29 Click .
Bold10 is added to the Style drop-down Style list. You have saved the font
style and can apply it to other text objects using the same font specifications.
You have added the Date heading.
You will use copy and paste to add the remaining headings.
30 Select the Date text object and press Ctrl + C.
31 Press Ctrl + V to paste the text object.
32 Double-click the new text box, delete the existing text, and enter Description.
33 Click outside the text box to place the text.
34 In the Property View window, select the General tab and enter the following
specifications:
! Name: Descr
! Position:
X: 2.30 in Absolute
Y: 0.00 in Start Same
35 Select the Font tab and select Bold10 from the Style drop-down list.
You have added the Description heading.
36 Press Ctrl + C and Ctrl + V to copy/ paste another copy of the Date text
object.
37 Double-click the new text box, delete the existing text, and enter Credit.
38 Click outside the text box to place the text.
39 In the Property View window, select the General tab and set the following:
! Name: Credit
! Position:
X: 6.25 in Absolute
Y: 0.00 in Start Same
40 Select the Font tab and select Bold10 from the Style drop-down list.
You have added the Credit heading.
Chapter 4: A Vitesse Tour 87
Page 88

Note that there is a Credits (plural) node and a Credit (singular) node.
The names of each node must be unique within one resource.
41 Press Ctrl + V to paste another copy of the Date text object.
42 Double-click the new text box, delete the existing text, and enter Debit.
43 Click outside the text box to place the text.
44 In the Property View window, select the General tab and set the following:
! Name: Debit
! Position:
X: 7.30 in Absolute
Y: 0.00 in Start Same
45 Select the Font tab and select Bold10 from the Style drop-down list.
You have added the Debit heading.
The transaction headings are complete.
Now you will add the heading for the marketing message at the bottom of the page.
46 Scroll to the bottom of the page.
47 On the Drawing toolbar, click .
48 Click and drag in the design area to draw a text box.
49 Click the text box and enter Important [Enter] Information.
50 Click outside the text box to place the text.
51 In the Property View window, select the General tab and specify the
following:
! Name: ImpInfo
! Position:
X: 0.05 in Absolute
Y: 9.67 in Absolute
52 Select the Font tab and select Bold14 from the Style drop-down list.
53 Select the Spacing tab and select Single from the Spacing drop-down list.
You have added the Important Information heading.
88 Vitesse Getting Started Guide
Page 89

The form is almost complete.
You have completed adding text to your application.
Saving the Form
1 On the Standard toolbar, click .
Your form saves under the name GSJBTStatement.
2 From the menu, choose File>Close.
GSJBTStatement closes.
Creating a Segment
Now you will create a segment to use on the form. A segment can be thought of as a
small form containing objects that you will use again and again. Segments can be
added to forms or projects, and can be scaled or rotated as needed.
The JBT segment contains a rounded corner box, with a watermark of their logo. It
also contains a text object for the text “Account Number” and “Statement Date”. JBT
is planning on using this design element on many of their statements, in many
different sizes. Therefore, it should be created as a segment.
Chapter 4: A Vitesse Tour 89
Page 90

The finished segment.
3 From the menu, choose File>New.
The New Project dialog displays.
Opening a new segment.
4 Select Segment and click New.
The Segment dialog displays.
90 Vitesse Getting Started Guide
Page 91

The Segment dialog displays.
5 Enter GSJBTSeg in the Name entry box.
6 Browse to select the working folder where the segment will be saved, or enter
the path to the working folder in the Path entry box.
This exercise uses the default folder. The new segment opens.
The new segment opens.
Chapter 4: A Vitesse Tour 91
Page 92

Setting Segment Properties
To set the segment properties:
1 In the Property View window, select the General tab.
The name is already GSJBTSeg.
2 Set the Size specifications as follows:
! W: 2.10 in
! H: 2.10 in
Setting segment properties in the Property View window.
3 Select the Settings tab and specify the following:
! Origin:
X: 0.00 in
Y: 0.00 in
! Clip and Cache: Checked
Clipping truncates any object that is off the page. Caching loads resources to the
printer’s memory so they can be retrieved locally during printing.
92 Vitesse Getting Started Guide
Page 93

The Settings tab for a new segment.
You have finished setting up segment properties. You will now add objects to create
your segment.
Adding a Box
The segment includes a rounded corner box. You will start the segment by adding
this box.
1 On the Drawing toolbar, click .
2 Click and drag in the design area to draw a box.
A box is added to your design area and a corresponding node is added in the
Project Tree window.
3 In the Property View window, select the General tab and set the position and
size specifications as follows:
! Position:
X: 0.10 in
Y: 0.10 in
! Size:
W: 1.90 in
H: 1.90 in
Chapter 4: A Vitesse Tour 93
Page 94

4 Select the Settings tab and select line specifications as follows:
! Width: 1/2 pt
! Style: Solid
5 Check Rounded Box and enter 0.30 in the Radius entry box.
Setting a Radius creates a rounded corner b ox.
6 Select the Color tab and click .
NewBlue RGB (102,123,179) adds to the color palette.
7 Specify the following color settings:
! Outline: NewBlue RGB (102,123,179)
! Background: Blank RGB (255,255,255)
94 Vitesse Getting Started Guide
Page 95

Setting NewBlue as the Box’s color.
The box object is complete.
Adding Text
You will now add the text object for the segment. This text object will be justified in
the middle of the box.
1 On the Drawing toolbar, click .
2 Click in the design area to start a text box.
A new text box is added in the design area and a corresponding text node is
added in the Project Tree window.
3 Enter the following text:
Account Number [Enter]
[Enter]
[Enter]
[Enter]
Statement Date
4 Click once outside the text box to place the text.
You have added the text object.
Chapter 4: A Vitesse Tour 95
Page 96

Setting Text Properties
To set the text properties:
1 In the Property View window, select the General tab and enter the following
specifications:
! Name: SegText
! Position:
X: 0.10 in Absolute
Y: 0.20 in Absolute
! Size:
W: 1.90 in
2 Select the Font tab and specify the following:
! Type: True Type
! Name: Arial
! Size: 12.00 pt
3 Click .
4 Select the Spacing tab and click .
5 In the Line Spacing drop-down list, select Single.
You have set properties for the segment text.
A box and text add to the segment.
96 Vitesse Getting Started Guide
Page 97

Adding an Image
The last step in creating the segment is to add the image. This is a screened back
version of the JBT logo that will act as a watermark.
1 On the Insert toolbar, click .
The Insert Image dialog displays.
2 Browse to drive:\program files\elixir technologies\vitesse\imglib and select
GS_LogoOnly.jpg.
LogoOnly adds in the design area. In the Project Tree window, a new image
reference node adds and its properties are viewable in the Property View
window.
Setting Image Properties
1 In the Property View window, select the General tab and enter the following
specifications:
! Name: JBTWM
! Position:
X: 0.25 in Absolute
Y: 0.25 in Absolute
! Size:
W: 1.60 in
H: 1.61 in
Chapter 4: A Vitesse Tour 97
Page 98

You are resizing the image to fit your application design.
You do not need to enter both the width and the height of the image.
Vitesse automatically retains the aspect ratio of the image.
Setting the image properties of the watermark.
You can leave the Settings and Color tabs at their default settings.
You have added the JBT watermark to your segment.
Arranging Objects
The image is placed over the box and text because it was added last. You need to
arrange the objects to send the image to the background of the segment, so the text
becomes visible.
1 Select the image by clicking either the image in the design area or by clicking
the JBTWM node in the Project Tree window.
2 On the Arrangement toolbar, make sure is selected.
The image is sent to the background of your segment and the text object
becomes visible in the foreground.
98 Vitesse Getting Started Guide
Page 99

Aligning Objects
Now you will align the objects to make them appear neater and more defined.
You will align the box and the image first.
1 In the Project Tree window, make a multiple selection of the Box and
JBTWM nodes by clicking on each node while holding down the Ctrl key on
the keyboard.
You cannot select them by clicking in the design area because you have sent
the image to the background.
2 On the Alignment toolbar, click .
The box and image are aligned vertically.
3 Click .
The box and image are aligned horizontally.
You have completed designing your segment.
Saving a Segment
1 On the Standard toolbar, click .
Your segment saves as GSJBTSeg. To save the segment under a different
name, choose File>Save As from the menu.
2 From the menu, choose File>Close.
GSJBTSeg closes and you return to the Vitesse workspace.
The segment saves using the internal Vitesse format (EVS). However,
printing requires that the segment be exported to VIPP format (SEG).
The export process is covered later in the Tour.
Chapter 4: A Vitesse Tour 99
Page 100

Inserting a Segment in a Form
The last step in this exercise is modifying the form you created earlier in the section.
You will add the new segment to the form and save the form under a different name.
1 From the menu, choose File>Open.
The New Project dialog displays with the Existing tab selected.
2 Browse to drive:\program files\elixir technologies\vitesse\formlib and
select GSJBTStatement.evf.
3 Click Open.
The GSJBTStatement form loads in the workspace.
The statement loads.
4 On the Insert toolbar click .
The Insert Segment dialog displays.
5 Select the Existing tab and browse to drive:\program files\elixir
technologies\vitesse\seglib.
6 Select gsjbtseg.evs and click Open.
GSJBTSeg segment adds to the GSJBTStatement form.
100 Vitesse Getting Started Guide
 Loading...