

Page 1

Maintenance
Maintenance
This section includes:
■ "Adding Ink" on page 7-32
■ "Emptying the Waste Tray" on page 7-36
■ "Replacing the Maintenance Kit" on page 7-39
■ "Cleaning the Paper Release Blade" on page 7-41
■ "Cleaning the Maintenance Kit Wiper Blade" on page 7-45
■ "Cleaning the Outside of the System" on page 7-47
■ "Cleaning the Document Glass and Document Feeder" on page 7-47
For safety information, see Appendix A of this guide.
Your system needs little maintenance to keep it producing quality prints. Besides adding ink,
you will eventually need to replace the maintenance kit. Order an extra maintenance kit
(standard capacity or extended capacity) when the control panel displays a warning that the
maintenance kit is nearing the end of its life. You must replace the kit when the control panel
displays an error message to replace the maintenance kit.
To view the life remaining and installation date of the maintenance kit:
1. On the control panel, press the System Setup button.
2. In the menu, select Information, then press the Enter button.
3. Select Supplies Info, then press the Enter button.
4. Select Maintenance Kit Life, then press the Enter button.
For information about supplies, go to www.xerox.com/office/c2424supplies
includes installation instructions with the packaging.
. Each supply
WorkCentre® C2424 Copier-Printer
7-31
Page 2

Maintenance
Adding Ink
You can load ink any time the system is idle, or when the control panel displays the Ink low or
Add Ink message.
Videos are available with instructions for adding ink. Videos are located on the
User Documentation CD-ROM and at www.xerox.com/office/c2424support
Note
To minimize waste ink and optimize performance, leave the printer on all the time.
■ Keep ink in its packaging until you are ready to use it.
■ Identify ink by shape, not color.
■ To avoid ink jams, never insert broken ink sticks into the ink-loading bins.
Caution
Use of other than Genuine Xerox WorkCentre C2424 Solid Ink may affect print quality
and system reliability. It is the only ink designed and manufactured under strict quality
controls by Xerox for specific use with this system. The Xerox Warranty, Service
Agreements, and Total Satisfaction Guarantee do not cover damage, malfunction, or
degradation of performance caused by use of non-Xerox supplies, or the use of Xerox
supplies not specified for this system.
.
Note
The Total Satisfaction Guarantee is available in the United States and Canada.
Coverage may vary outside these areas; please contact your local representative for
details.
WorkCentre® C2424 Copier-Printer
7-32
Page 3
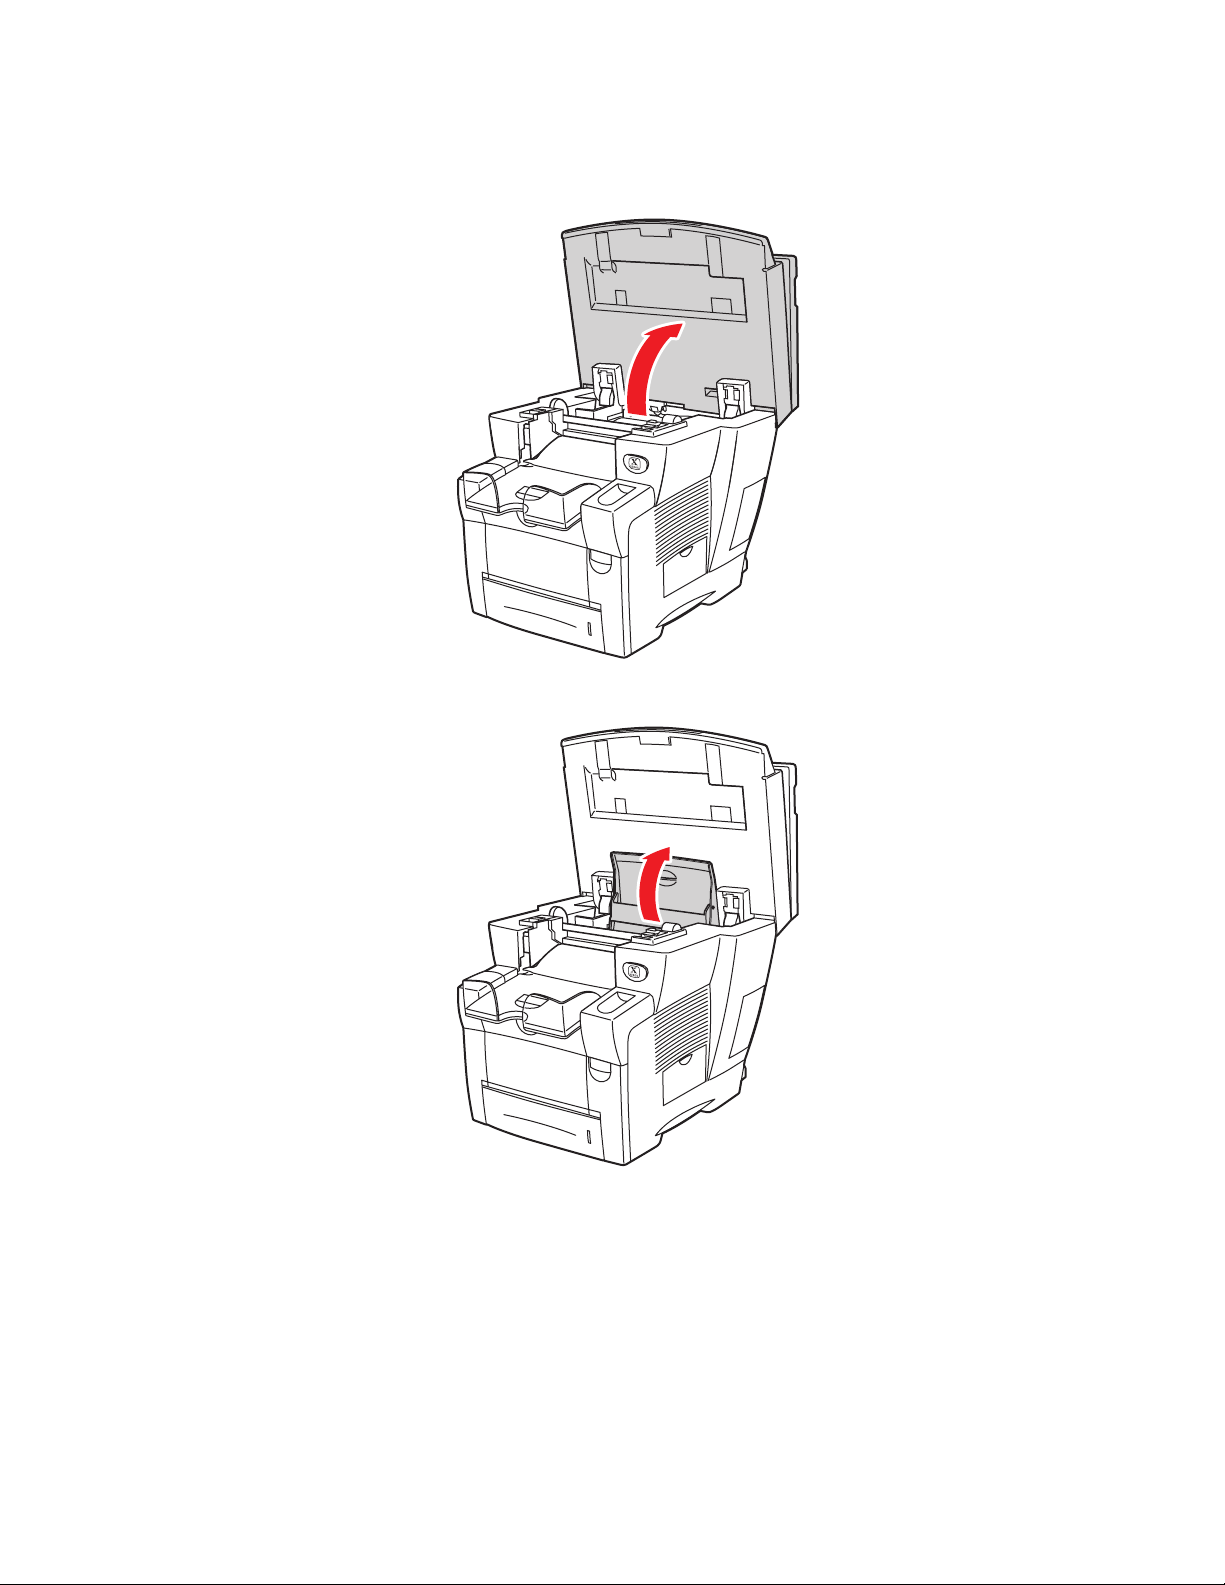
Follow these steps to load ink.
2
1. Lift the control panel.
Maintenance
2424-01
2. Open the ink cover.
2424-013
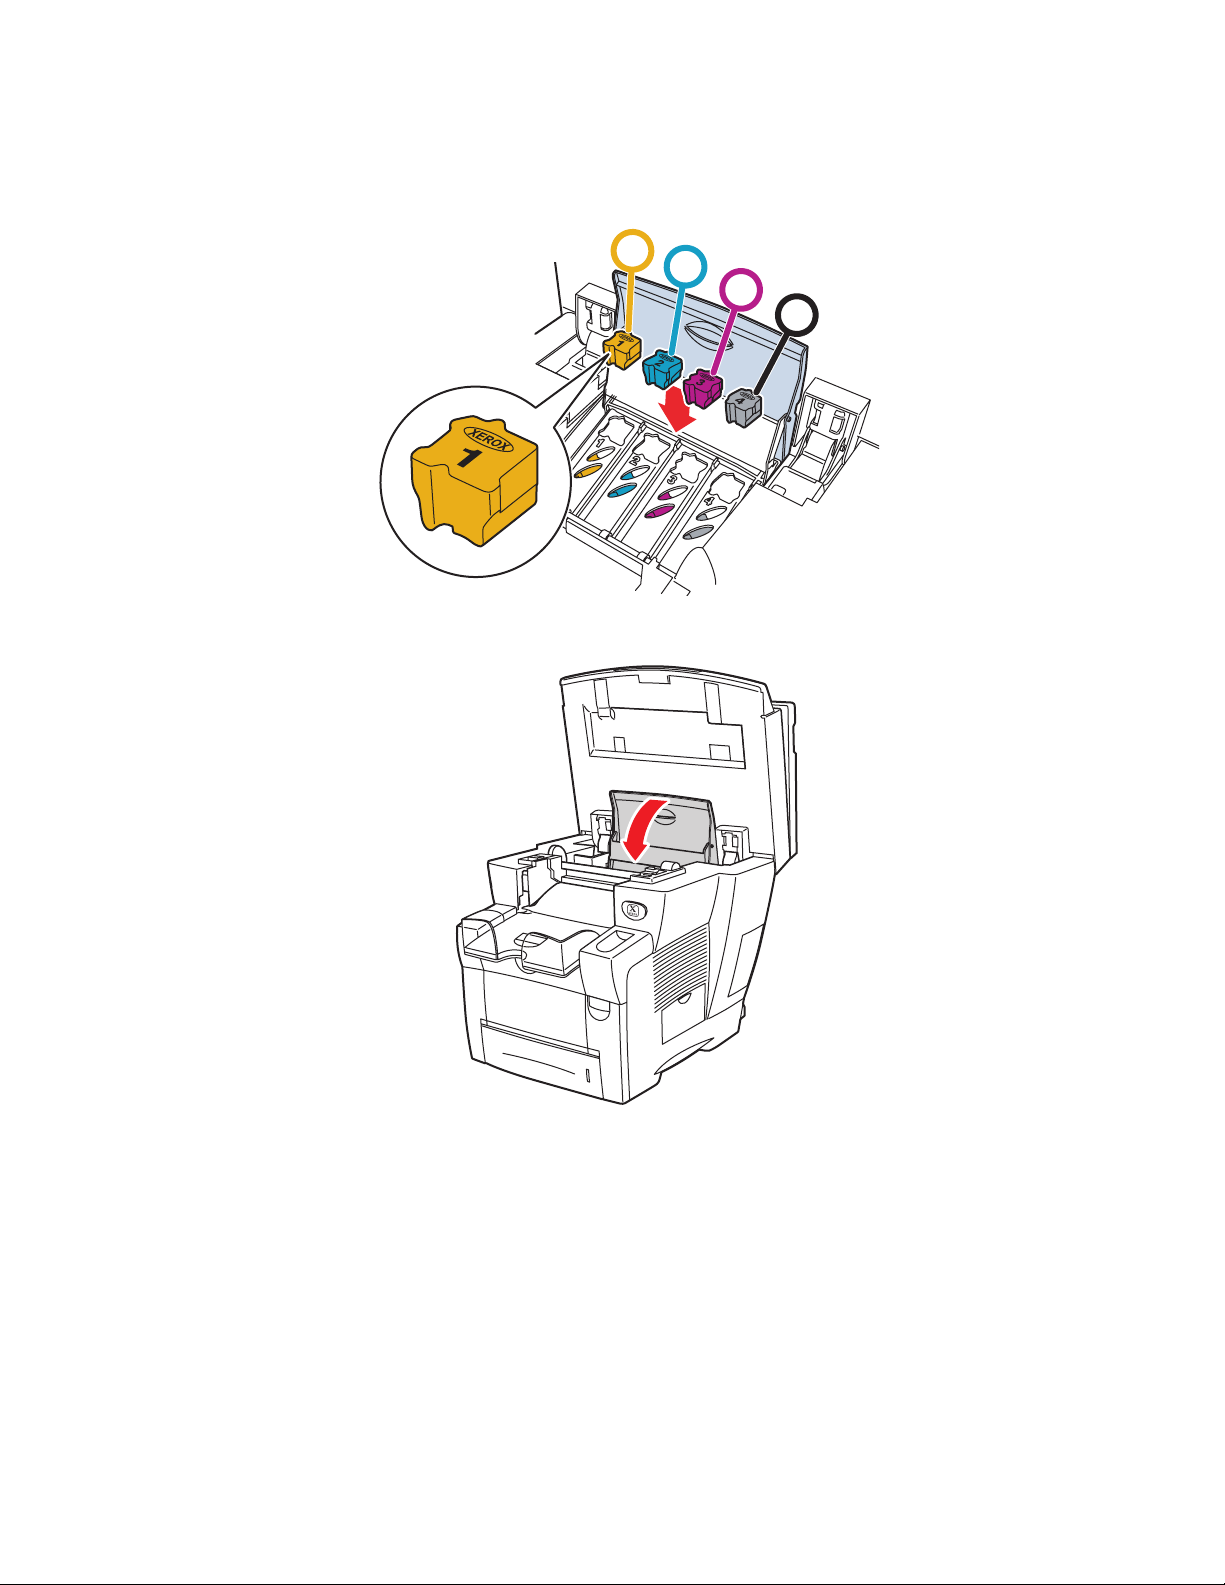
3. Determine which ink-loading bin appears low. A label above each bin indicates the color
of ink in that bin.
4. Remove the ink stick from its packaging.
WorkCentre® C2424 Copier-Printer
7-33
Page 4
Maintenance
5. Place the ink stick into the opening of the appropriate ink-loading bin. Each ink stick is
uniquely shaped to fit into the correct ink-loading bin. Do not force the ink stick into the
ink-loading bin.
1
2
3
4
2424-014
6. Close the ink cover.
2424-015
WorkCentre® C2424 Copier-Printer
7-34
Page 5
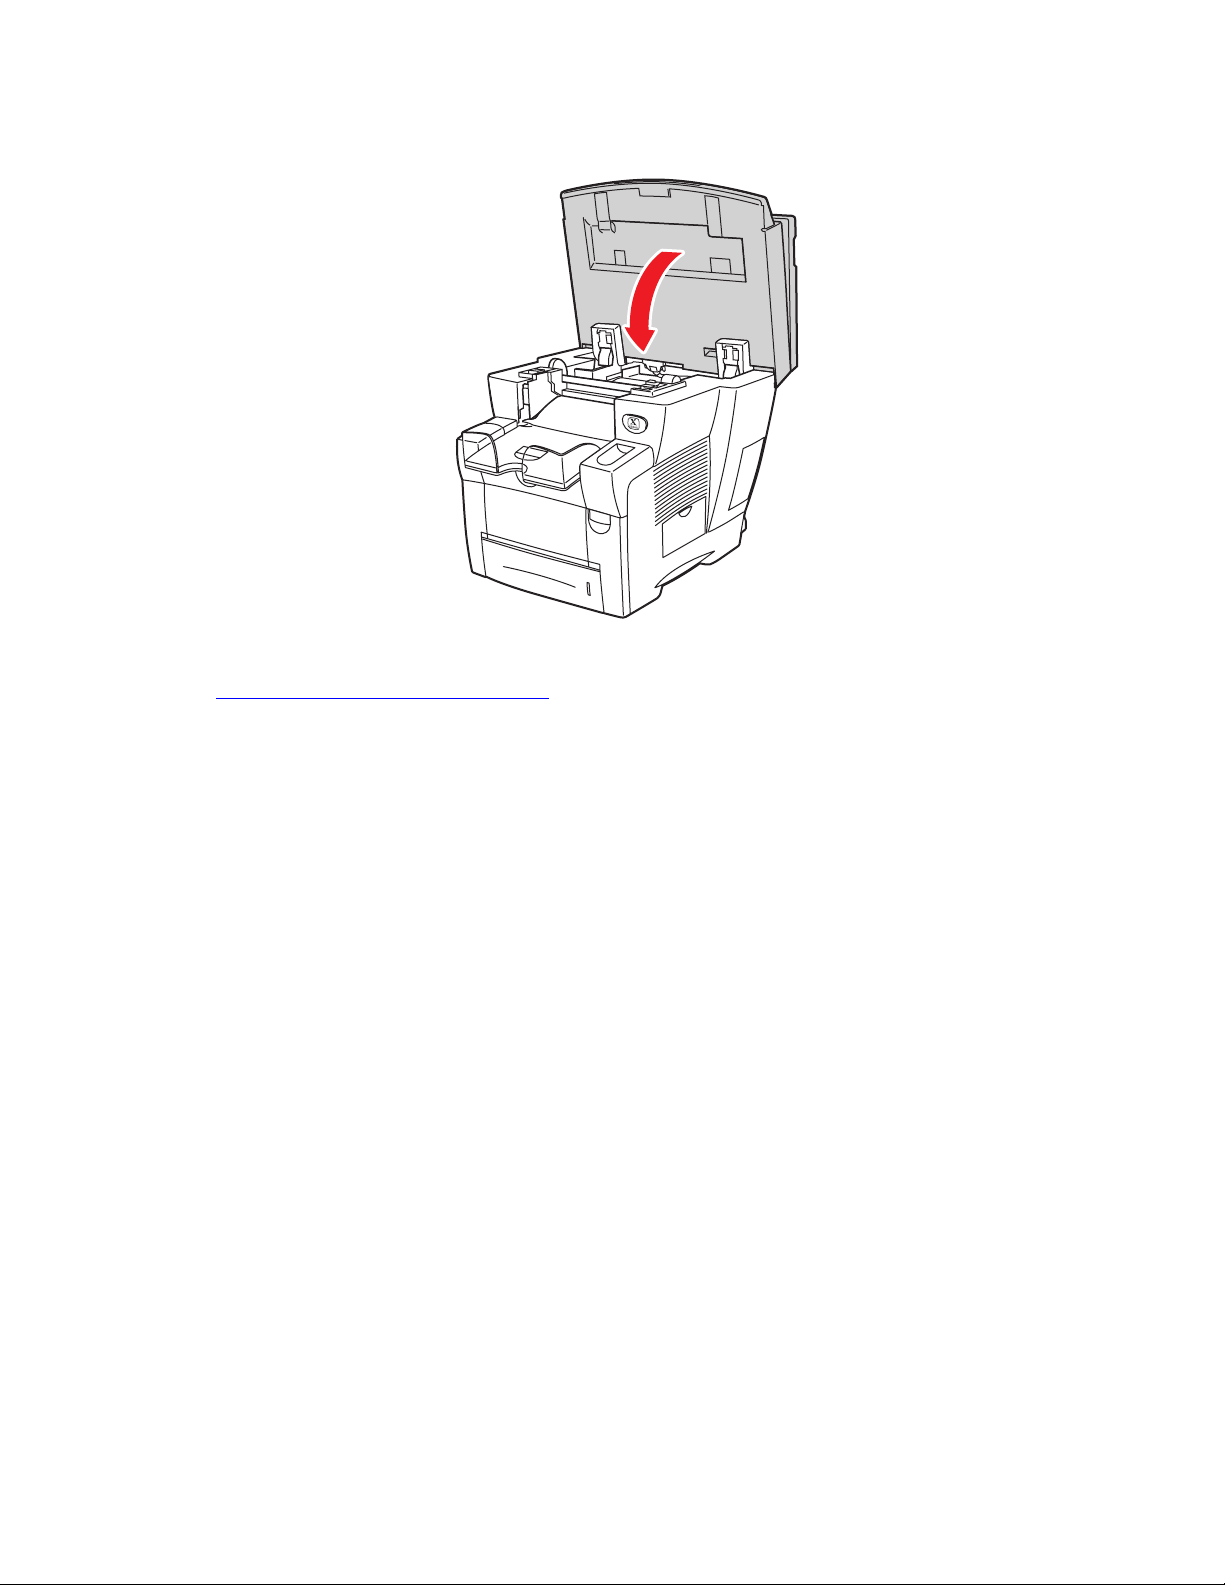
7. Close the control panel.
6
Maintenance
2424-01
To order ink, contact your local reseller or visit the Xerox web site at
www.xerox.com/office/c2424supplies
. Instructions are included on the package.
WorkCentre® C2424 Copier-Printer
7-35
Page 6
Maintenance
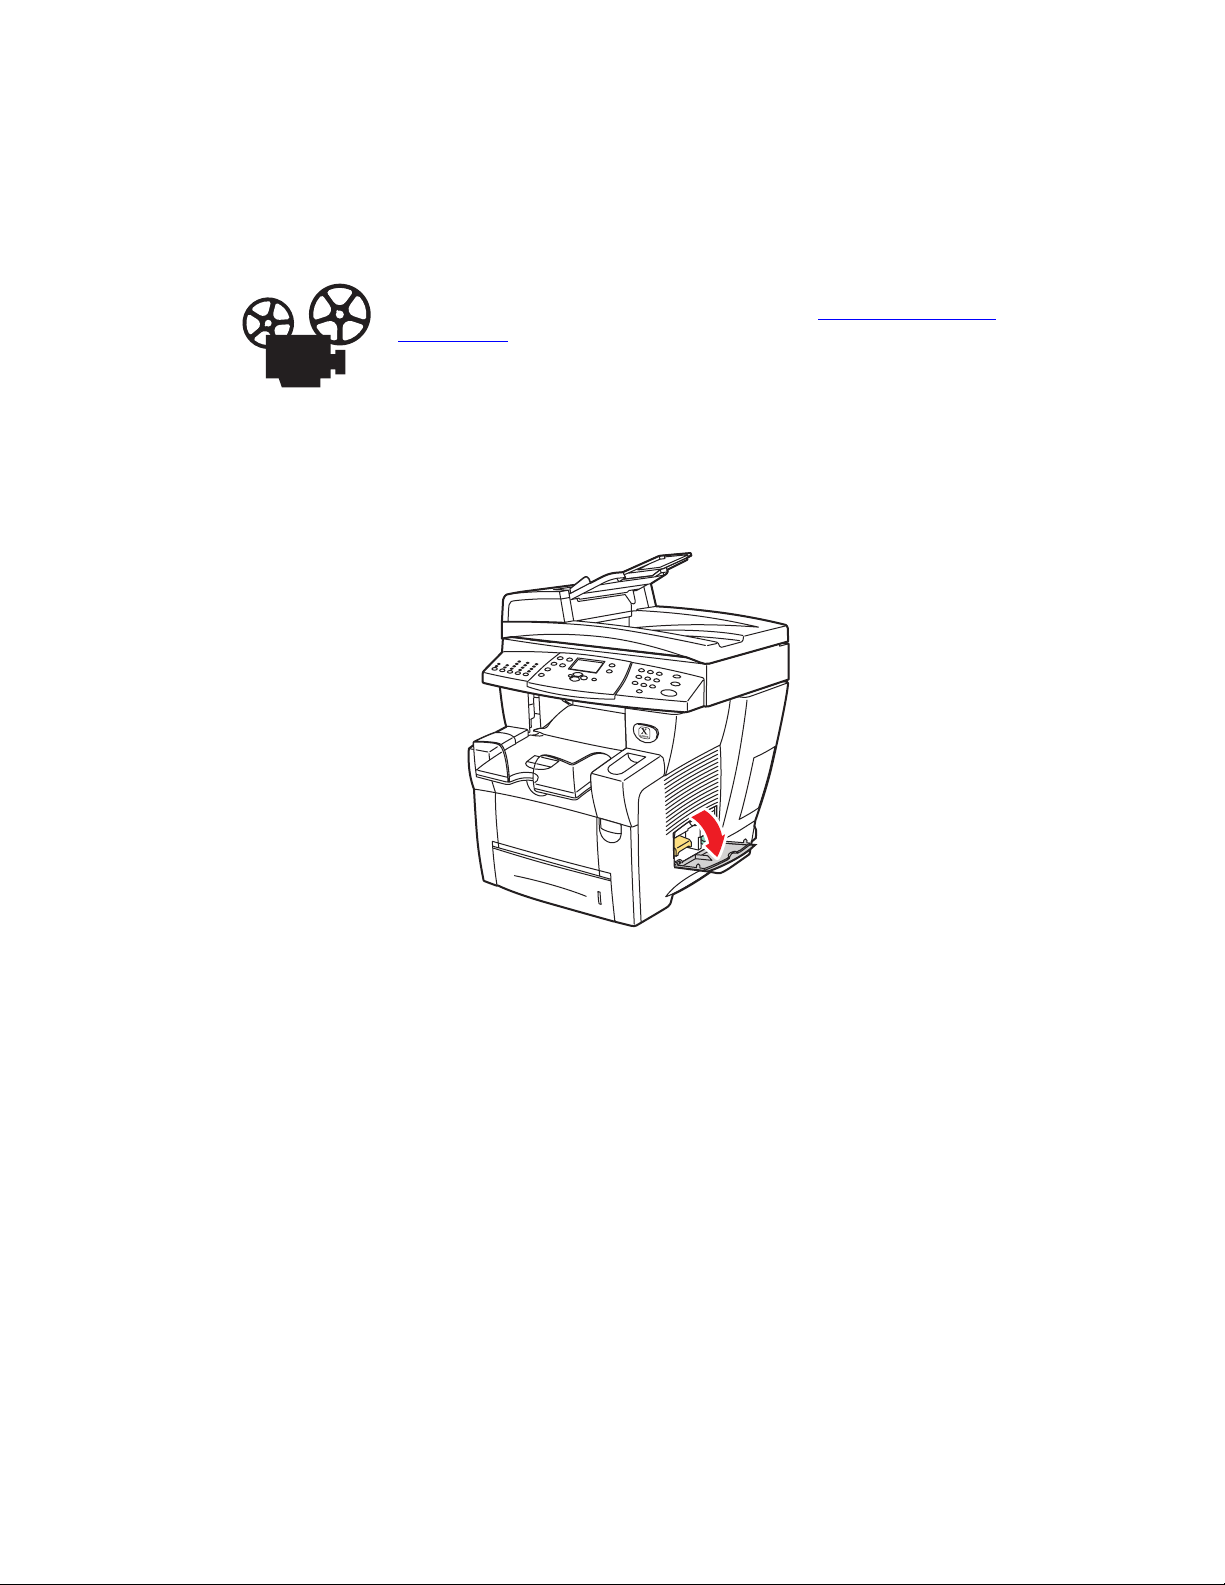
Emptying the Waste Tray
Empty the green waste tray (labeled B) when the control panel displays a message stating that
the waste tray is full.
Videos are available with instructions for emptying the waste tray. Videos are
located on the User Documentation CD-ROM and at www.xerox.com/office/
c2424support.
Caution
The system’s interior may be hot. Do not touch the hot surfaces!
1. Open the side door.
2424-035
WorkCentre® C2424 Copier-Printer
7-36
Page 7

2. Pull the green waste tray (labeled B) completely out of the system.
Caution
The waste tray may be hot; handle it carefully!
Maintenance
2424-036
3. Empty the waste tray into a waste container. Waste ink can be discarded as normal office
waste.
2424-037
WorkCentre® C2424 Copier-Printer
7-37
Page 8

4. Insert the waste tray and push it completely into the system.
2424-038
Note
The waste tray must be out of the system for more than 5 seconds or you will continue
to receive a Empty Waste Tray message on the control panel.
Maintenance
5. Close the side door.
2424-039
Caution
Do not attempt to reuse the waste ink in the printer; it may damage the printer. This
damage is not covered under the printer warranty.
WorkCentre® C2424 Copier-Printer
7-38
Page 9

Maintenance
Replacing the Maintenance Kit
The orange maintenance kit (labeled A) contains a maintenance roller that keeps the surface of
the imagining drum clean and oiled.
Videos are available with instructions for replacing the maintenance kit. Videos
are located on the User Documentation CD-ROM and at www.xerox.com/office/
c2424support.
Note
Order a new maintenance kit when the control panel displays a message telling you that
the maintenance kit is nearing the end of its life. To order a new maintenance kit, contact
your local reseller or visit the Xerox web site at www.xerox.com/office/c2424supplies.
Instructions are included with the new maintenance kit.
Caution
The system’s interior may be hot. Do not touch the hot surfaces!
The system stops printing and displays an error message when the maintenance kit needs
replacement.
To replace the maintenance kit:
1. Open the side door.
2424-035
WorkCentre® C2424 Copier-Printer
7-39
Page 10

2. Pull the orange maintenance kit (labeled A) completely out of the system.
2424-033
3. Insert a new maintenance kit.
Maintenance
2424-034
WorkCentre® C2424 Copier-Printer
7-40
Page 11

4. Close the side door.
Cleaning the Paper Release Blade
Maintenance
2424-039
1. Lift the control panel.
2424-189
WorkCentre® C2424 Copier-Printer
7-41
Page 12

2. Remove paper from the output tray.
8
3. Open the exit cover.
Maintenance
2424-01
2424-019
WorkCentre® C2424 Copier-Printer
7-42
Page 13

Maintenance
4. Tilt up the green paper guide toward the front of the system.
8400-042
5. Clean the white plastic paper release blade on the green paper guide by wiping it with a
pre-soaked alcohol cloth (using 90 percent isopropyl alcohol).
2424-156
6. After the paper release blade is clean, put the green paper guide back in its original
position.
2424-159
WorkCentre® C2424 Copier-Printer
7-43
Page 14

7. Close the exit cover.
6
Maintenance
2424-022
8. Close the control panel.
2424-01
WorkCentre® C2424 Copier-Printer
7-44
Page 15

Cleaning the Maintenance Kit Wiper Blade
0
The maintenance kit contains a wiper blade that removes excess ink.
1. Open the side door.
2424-035
Maintenance
2. Pull the orange maintenance kit (labeled A) completely out of the system.
2424-033
3. Use a lint-free cloth to clean the top and upper edges of the flexible plastic wiper blade
located next to the roller.
2424-16
WorkCentre® C2424 Copier-Printer
7-45
Page 16

4. Reinstall the maintenance kit.
5. Close the side door.
Maintenance
2424-034
2424-039
WorkCentre® C2424 Copier-Printer
7-46
Page 17

Maintenance
Cleaning the Outside of the System
You can clean the outside of the system with a soft, damp, cloth. You can use a cloth
moistened with a mild neutral detergent to remove stains; do not spray detergent directly onto
the system.
Warning
To prevent electric shock, turn the system off and unplug the power cord from the
electrical outlet before cleaning the system.
Do not use a vacuum cleaner to clean the system. Do not lubricate the system with oil.
Cleaning the Document Glass and Document Feeder
Periodically clean the document glass and document feeder to remove debris or paper residue,
which may affect the quality of your copies and scanned images.
To clean the document glass:
1. Lift the document feeder.
2424-048
2. Dampen a soft cloth or cotton swab with isopropyl alcohol (using 90 percent isopropyl
alcohol).
WorkCentre® C2424 Copier-Printer
7-47
Page 18

3. Wipe the document glass with the cloth or cotton swab.
Maintenance
2424-050
4. Close the document feeder.
WorkCentre® C2424 Copier-Printer
7-48
Page 19

Maintenance
To clean the document feeder:
1. Dampen a soft cloth or cotton swab with isopropyl alcohol (using 90 percent isopropyl
alcohol).
2. Open the jam access door on the document feeder.
2424-045
3. Wipe the feeding roller and inside the document feeder with the cloth or cotton swab.
2424-161
WorkCentre® C2424 Copier-Printer
7-49
Page 20

4. Close the jam access door.
2424-047
5. Lift the document feeder.
6. Wipe the underside of the document feeder with the cloth or cotton swab.
Maintenance
7. Close the document feeder.
WorkCentre® C2424 Copier-Printer
2424-162
7-50
 Loading...