


AccXES Account Management Tool
Administrator’s Guide
Version 10.0
701P41531 May 2004

Trademark Acknowledgments
XEROX®, AccXES, The Document Company, and the identifying product names
and numbers herein are trademarks of XEROX CORPORATION.
InstallAnywhere is a registered trademark of Zero G Software Inc.
Mac OS X is a registered trademark of Apple Computer, Inc.
Pentium is a registered trademark of the Intel Corporation.
Red Hat Linux is a registered trademark of Red Hat, Inc.
Sun Sparc is a registered trademark of Solaris.
Windows® 95/98, Windows® NT, Windows ®XP, and Windows® 2000 are
registered trademarks of Microsoft Corporation.
AccXES Account Management Tool Administrator’s Guide 2

Table of Contents
Trademark Acknowledgments........................................................................................2
Table of Contents.............................................................................................................3
Overview............................................................................................................................6
System Requirements .....................................................................................................8
Supported Platforms.....................................................................................................8
Minimum Requirements ............................................................................................ 8
Installing the AccXES Account Management Tool.....................................................9
From the Web................................................................................................................9
From the CD-ROM........................................................................................................9
Windows and Unix .....................................................................................................9
Mac OS X..................................................................................................................10
RedHat......................................................................................................................11
Clean Installation.........................................................................................................12
Tutorial.............................................................................................................................13
Before Using the Account Management Tool.........................................................13
Using the Account Management Tool......................................................................14
Accounts Tab..................................................................................................................23
Overview.......................................................................................................................23
How to Use the Accounts Tab ..................................................................................23
Add an account to the Accounts Database.........................................................23
Delete an account in the AMT Accounts Database...........................................24
Find an account in the Accounts Database.........................................................25
Status.........................................................................................................................25
Users Tab........................................................................................................................26
Overview.......................................................................................................................26
How to Use the User Tab ..........................................................................................26
View a list of currently defined users....................................................................26
Add a User to the Users Database.......................................................................26
Delete a user in the Users Database...................................................................27
Find a user in the Users Database.......................................................................28
AccXES Account Management Tool Administrator’s Guide 3

Status.........................................................................................................................28
Printers Tab.....................................................................................................................29
Overview.......................................................................................................................29
How to Use the Printers Tab.....................................................................................29
View the list of currently defined printers.............................................................29
Add a printer to the Printers Database.................................................................29
Edit a printer in the Printers Database.................................................................30
Delete a printer in the Printers Database............................................................31
Find a printer in the Printers Database................................................................31
Perform validation, update, and data purge maintenance for columns that
contain checkmarks................................................................................................31
Meaning of the Other Columns in the Printers List................................................33
Status.........................................................................................................................33
Edit Account Associations.............................................................................................34
Edit Account Associations Windows.......................................................................34
How to Connect Accounts - Printers - Users on the Edit Account Associations
Dialog............................................................................................................................35
Printer Job Accounting Tab ..........................................................................................37
Overview.......................................................................................................................37
How to Use the Printer Job Accounting Tab ...........................................................37
Importing Data from printers using pre - 7.0 AccXES firmware.......................37
Viewing AMT Job Accounting Data ......................................................................37
Selecting printer job options and how long data records remain in the AMT
Raw Database..........................................................................................................38
Retrieving (Collecting) Job Accounting Data from the Printers and Updating
the AMT Raw Job Accounting Database.............................................................38
Creating Data in the AMT Tallied Job Accounting Database...........................39
Deleting Records Manually....................................................................................39
Exporting Data from the Raw or Tallied Database.............................................40
Status.........................................................................................................................40
Job Accounting Options ................................................................................................41
Select the following Job Accounting Options..........................................................41
Importing Data into AMT ...............................................................................................44
Importing a Pre 7.5 AccXES File..............................................................................45
AccXES Account Management Tool Administrator’s Guide 4

Importing a Non-AccXES File................................................................................46
Writing (Exporting) Tallied or Raw Data to a File......................................................49
Overview.......................................................................................................................49
How to Export Data.....................................................................................................49
Uninstalling the AccXES Account Management Tool...............................................51
Windows .......................................................................................................................51
Unix...............................................................................................................................52
Mac OS X .....................................................................................................................52
RedHat..........................................................................................................................52
Appendix 1.......................................................................................................................54
1. Enabling Job Accounting ...................................................................................54
From the Web PMT.................................................................................................54
From the AccXES Compliant Scanner.................................................................54
From the Printer User Interface ( 8825/8830/8850 )..........................................54
2. Saving Each Printer's Media Usage Data to a File Before Loading 7.0
AccXES Firmware...................................................................................................55
Appendix 2.......................................................................................................................57
Data Field Descriptions..............................................................................................57
AMT Database Resolution.........................................................................................62
Raw Job Accounting Database.............................................................................62
Tallied Job Accounting Database.........................................................................63
Appendix 3.......................................................................................................................64
Menu Commands........................................................................................................64
File Menu......................................................................................................................64
View Menu....................................................................................................................64
Configuration Menu....................................................................................................64
Transaction Menu.......................................................................................................65
Help Menu....................................................................................................................65
Index.................................................................................................................................66
AccXES Account Management Tool Administrator’s Guide 5

Overview
The AccXES Account Management Tool (AMT) application provides a means of
retrieving job accounting data from multiple printers that use AccXES version 7.0,
or greater, firmware. This application replaces the Accounting Tab functionality of
the AccXES Client Tools. It is recommended that the AMT software be loaded on
only one workstation that is password protected.
Ÿ The AMT Administrator can import the account identifiers and sub-
account/user identifiers, and also data from a file of saved pre -7.0
AccXES firmware data. The account identifier will be converted into the
Account ID. The sub -account/user identifiers will be converted into a
UserID, or as part of the Account ID, depending on the AMT
Administrator’s choice at the time of import.
Ÿ The AMT Master Database consists of the following database tables:
Accounts, Users, Printers, Associations, Raw Job Accounting Database,
and the Tallied Job Accounting Database.
Ÿ The AMT Administrator defines the accounts on the Accounts Tab. They
are stored in the Accounts table. The defined users are stored in the
Users table. The defined printers are stored in the Printers table. On the
Edit Account Associations Tab, the AMT Administrator links specific users
and printers to the defined accounts. The associations are stored in the
Associations table.
NOTE: The maximum number of AMT records allowed are: 9999
accounts, 9999 users, 999 printers, and 12,000 associations (for 128 MB
minimum of memory. For example, if you have 200 accounts and 25 users
on one printer, or 100 accounts and 25 users on 2 printers, there will be
5000 associations created if you select the global associat ions feature.
If AMT is reaching its associations limit, a popup message will warn that
the associations cannot be created. Delete unused or obsolete accounts,
users, or printers in the database to reduce the number of associations,
which will also delete any associations that reference that
account/user/printer.
Ÿ The AMT Administrator will issue an AMT command to each printer to
retrieve a copy of the media usage data, which is in the job log file in the
printer's controller. The AMT then sends a command to each printer to
purge the original data. The retrieved data will remain in the AMT Raw Job
Accounting Database until it is deleted manually, or until the specified
number of “Keep Raw Printer Record Intervals” days is reached.
Ÿ The raw data can be export ed, or tallied first and then exported from the
Tallied Job Accounting Database into another software, such as
Microsoft® Excel, for analysis.
NOTE: When the tally or raw data is written to a file, give each file a
AccXES Account Management Tool Administrator’s Guide 6

unique name. If the same file name already exists, instead of replacing
the file, it appends to the existing file.
Ÿ See Appendix 2 for a list of the AMT data fields.
AccXES Account Management Tool Administrator’s Guide 7
System Requirements
Supported Platforms
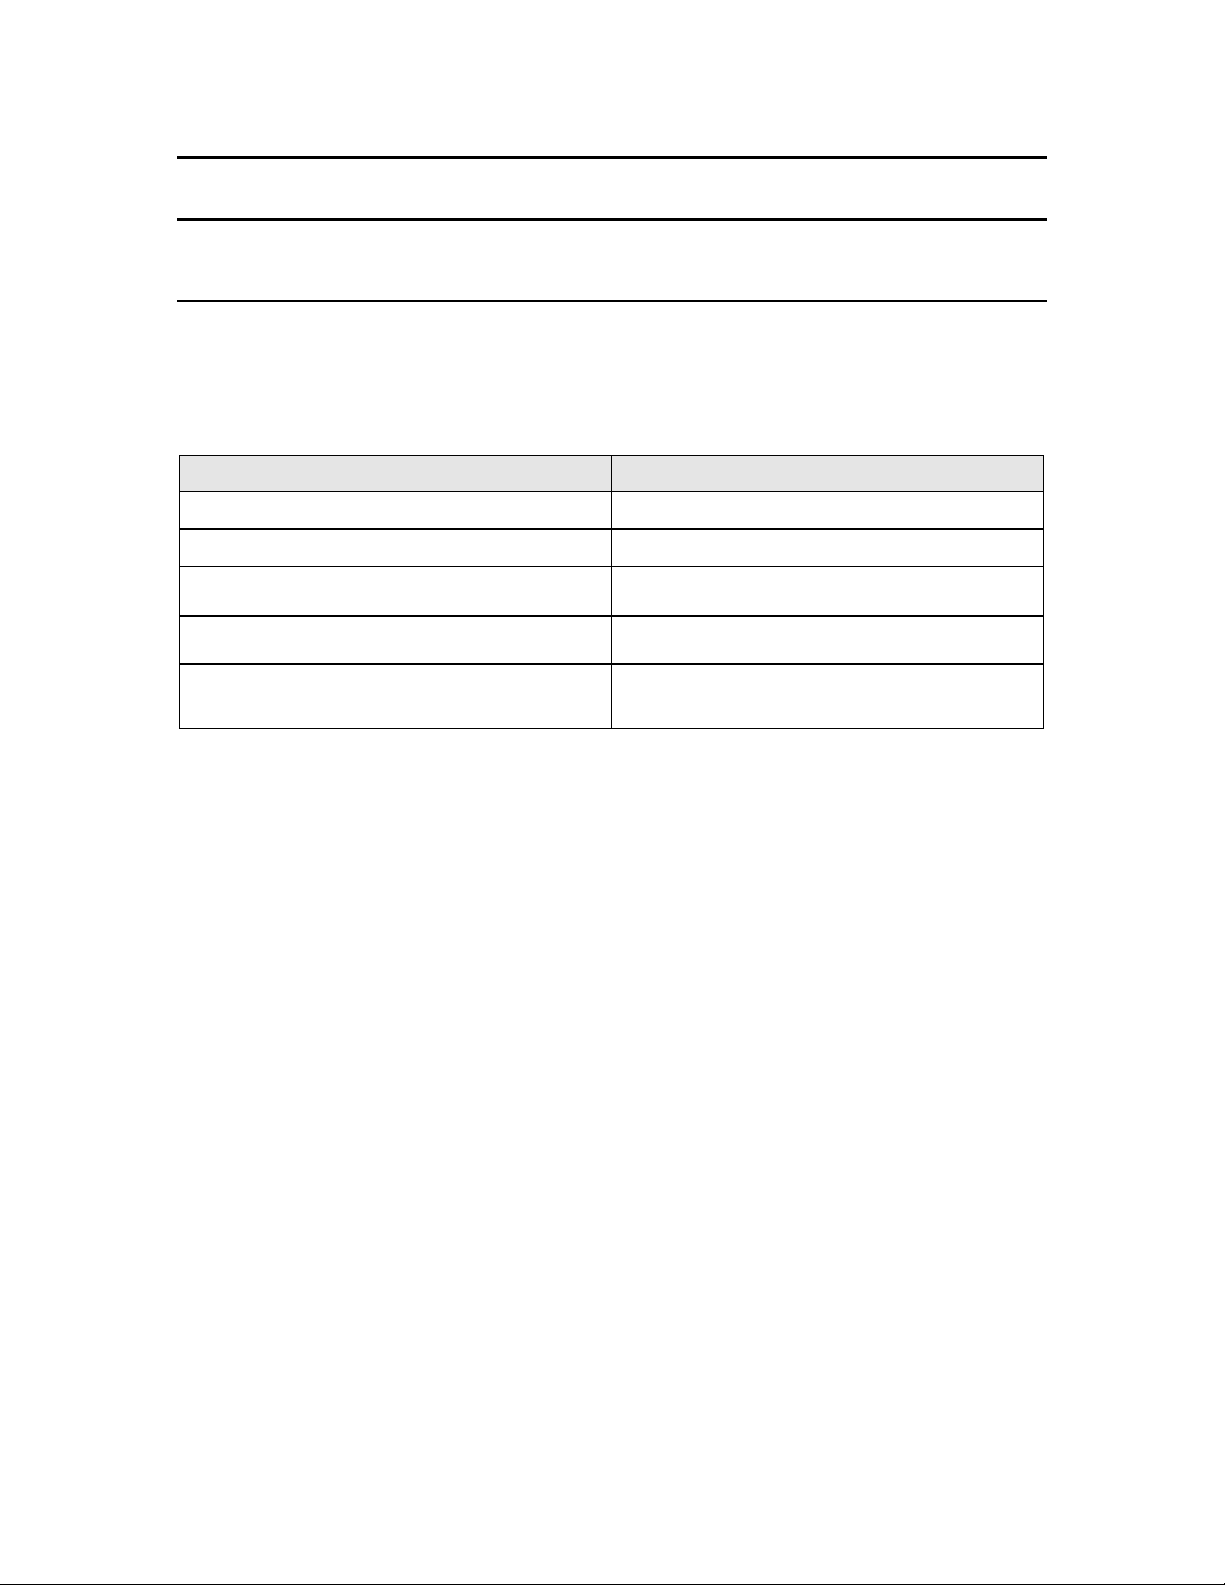
The AccXES Account Management Tool is supported on the following hardware
and operating systems:
Hardware Operating System
Intel-based PC, Pentium 1 Ghz or greater Windows NT Version 4.0
Intel-based PC, Pentium 1 Ghz or greater Windows 2000, XP
Intel-based PC, Pentium 1 Ghz or greater Red Hat Linux
Apple G3/G4/G5 MacOS X 10.2.x
Sun w/ SPARC processor, minimum 333
MHz
NOTE: Windows 95/98 are no longer officially supported.
Minimum Requirements
Ÿ AccXES Firmware 6.2 – 10.0
Ÿ 30 megabytes of available disk space
Ÿ 128 megabytes of memory minimum with a recommendation of 256
megabytes
Ÿ For PC platforms minimum 1 GHz Pentium
Ÿ For Solaris platforms minimum 333 MHz
Ÿ CD ROM for installation
Ÿ Mouse or other pointing device
Ÿ 800 by 600 resolution display
Ÿ TCP/IP network capability
Solaris Version 2.6/2.7/2.8
AccXES Account Management Tool Administrator’s Guide 8
Installing the AccXES Account
Management Tool
The Account Management Tool and the AccXES Client Tools software are
installed during the same installation process. The installation can be done from
the Xerox website, or from a CD-ROM.
WARNING: Prior to uninstalling the AccXES Client Tools (ACT), if you will
be upgrading to AccXES firmware 7.0, or greater, retrieve the job accounting
data first by using the ACT Accounting Tool, then save it to a file. Otherwise, the
data will be lost.
From the Web
Ÿ First uninstall any present version of the AccXES Client Tools software on
your PC.
Download the AccXES Client Tools from the Xerox website as follows.
Ÿ Go to http://www.xerox.com.
Ÿ Choose Support & Drivers.
Ÿ Go to the Wide Format section.
Ÿ Select the hyperlink that refers to “AccXES 88xx/ X2-Tech/ 510/ 721P”.
Ÿ Under your type of driver, select Drivers & Downloads.
Ÿ Select your Operating System and Language. Press the Go button.
Ÿ In the Utilities & Applications section, choose the “AccXES Client Tools
(ACT) & AccXES Account Management Tool (AMT) hyperlink.
Ÿ Select the Start button.
Ÿ Select the Open or Save button to start the zip file download, which may
take an hour.
Ÿ Double click on the downloaded zip file. For Windows, double click on the
install.exe file that is listed. The installation file for Solaris is install.bin, and
for RedHat it is setup.bin. Select OK.
Ÿ On the AccXES Client Tools screen, select your language and OK , then
follow the screen prompts
From the CD-ROM
Windows and Unix
1. Start Windows on your PC or start your UNIX workstation and log on to your
AccXES Account Management Tool Administrator’s Guide 9

desktop.
2. Insert the AccXES Client Tools CD-ROM into your CD-ROM drive.
For Windows: Select setup.exe to begin the installation.
For Unix: In a command window, type the following:
cd "cd-rom mount point"
./setup.bin
NOTE: In all cases "cd-rom mount point" is the directory where the CDROM is mounted.
3. The Install Anywhere software will load.
4. At the bottom of the "AccXES Client Tools" screen, select your language from
the drop down menu. Click the OK button.
5. Enter the install password AMTPASSWORD to proceed with the Account
Management Tool and AccXES Client Tools installation. Select the NEXT
button.
6. Read the Introduction, License Agreement, and information screens, clicking
the Next button to get to the next screen.
7. On the "Updating your XES Software" screen, read the message and select
the Install button.
8. If the current version of the AMT software already exists on your machine, or
if the version that you have on your machine is too old to get updated, then an
"Update Failed" screen will appear. You will need to select the Done button to
stop the installation. See the "Uninstalling..." page on how to uninstall your
AMT software before continuing with the current installation.
9. On the "Choose Install Folder" screen, click on the Choose button to select
where you want the software installed. The default location in Windows is
C:\Program Files\ AccXES. Click the Next button.
10. On the "Choose Shortcut Location" screen, select On the Desktop, if you
want an AccXES Client Tools shortcut to show on your desktop. You can also
select the "Create Icons for All Users" feature. Select the Next button.
11. On the "Choose Install Set" screen, select the ACT&AMT button. Select the
Next button.
12. The installing process will take place.
13. On the "Install Complete" screen, click the Done button.
Mac OS X
1. To install this application on a MacOSX system, insert the CD-ROM into
the CD-ROM drive and enter the following commands:
* At the top level of the install CD, right click on "setup.zip".
* Select "Copy "setup.zip".
* Right click on the Desktop and select "Paste item".
AccXES Account Management Tool Administrator’s Guide 10

* Double click on "setup.zip" on the Desktop.
* After the archive is expanded, double click on "install" on the Desktop.
2. To install the application on a MacOSX system using a web browser, insert
the CD-ROM into the CD-ROM drive and load /AccXES/install.htm into the
browser. Follow the instructions on the web page. (In all cases is the directory
where the CD-ROM is mounted. Note that these commands may differ from
that shown above, depending on the version of MacOSX being used. The
commands shown here are for MacOSX 10.3.x.)
RedHat
1. To install an application on a RedHat 8 system, insert the CD-ROM into the
CD-ROM drive and enter the following commands:
* cd /AccXES/InstData/Linux/VM/
* ./install.bin
or
* cd
* ./setup.bin
2. To install the application on a Linux system using a web browser, insert
the CD-ROM into the CD-ROM drive and load /AccXES/install.htm into the
browser. Follow th e instructions on the web page. (In all cases is the
directory where the CD-ROM is mounted. Note that these commands may
differ from that shown above, depending on the version of Linux used. The
commands shown here are for a RedHat 8 system.)
NOTE: If you want to install another language version of the ACT- AMT
application to the same directory, you must first uninstall the existing ACT- AMT
application.
AccXES Account Management Tool Administrator’s Guide 11
Clean Installation
A clean installation is like a first time new installation. To perform a clean
installation of the Account Management Tool, both the AMT and ACT
applications must be first uninstalled and the XES preferences directory must be
manually removed. The XES preferences directory was created while using the
previously installed AMT. The uninstaller does not remove it.
WARNING: Uninstalling the Account Management Tool will leave the
saved AMT data files. However, if you manually delete files, create a backup
copy of the saved AMT data files first.
It is important to do a manual backup of th e AMT database files on a regular
basis. The names of the AMTdatabase files are: AccXESjadb.backup,
AccXESjadb.data, AccXESjadb.script, AccXESjadb.properties. In the
Windows environment, the default location of these data files is C:\ Program Files
\AccXES\ AMTdatabase. If you accidentally corrupt or delete the saved AMT
data files, they cannot be recovered. Your manually backed up files would then
need to be copied into the AMT database folder.
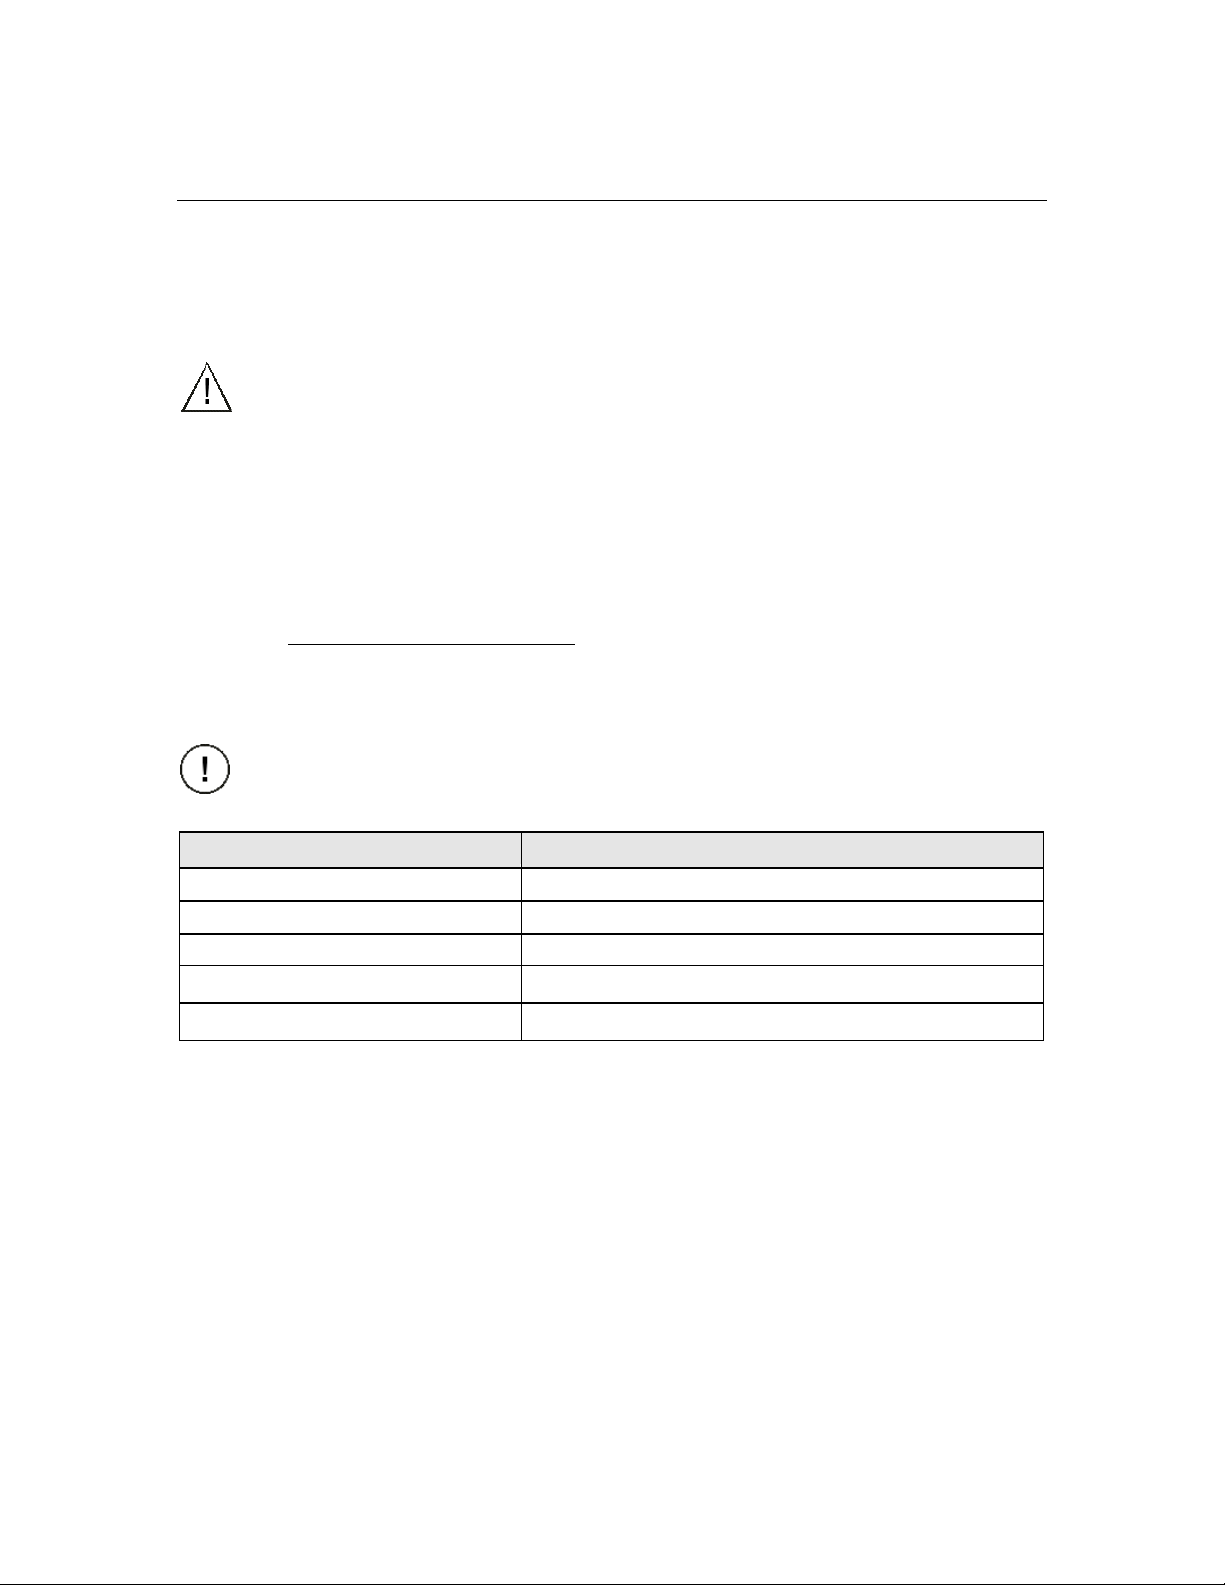
The following table describes where the XES preferences directory is located on
various platforms.
CAUTION: Removal of the directory will cause loss of all ACT user device
settings.
Type of Platform
Windows NT C:\WINNT\Profiles\<User Name> \XES
Windows 2000 /NP C:\Documents and Settings\<User Name>\XES
Solaris 2.6-2.8 <home directory>/.XES
Location of XES Preferences Directory
RedHat Linux 8.0 <home directory>/.XES
MacOS X 10.2.x <home directory>/.XES
AccXES Account Management Tool Administrator’s Guide 12

Tutorial
NOTE: To view any help screens while still interacting with the Account
Management Tool, select Help > Default Web Browser. To view this tutorial
electronically, select Help > Help Topics > Tutorial. Then minimize the Tutorial to
see the AMT screens.
Before Using the Account Management Tool
1. Turn on each printer and scanner with which the Account Management Tool
will be interacting.
2. Enable job accounting at each printer as follows.
Ÿ Open your web browser, such as Microsoft Internet Explorer.
Ÿ In the Address field, type in your printer’s IP address, such as
13.10.144.8. This will open the Web PMT software, which manages
the printer settings.
Ÿ In the Web PMT, select Session Setup.
Ÿ Enter your password, or 0 as the default password.
Ÿ Press the Submit button.
Ÿ Click on ACCOUNTING to display the Accounting Page.
Ÿ Copy down the Machine Name, which will be needed later in this
tutorial.
Ÿ Click on the Enabled or Optional radio button. Selecting Enabled will
require every user to enter an Account ID and User ID into the scanner
or Document Submit Tool before every print or scan job. Selecting
Optional gives each user the choice of using, or not using, an Account
ID and User ID. When these identifiers are not used, the job
accounting data will be logged in the controller’s job log file as
GenericAccountID and GenericUserID.
Ÿ Press the Update Printer button to set th e mode. The Controller will
send a message back indicating the success of your request.
NOTE: Job Accounting can also be enabled on the scanner, or on the
printer user interface. See Appendix 1 for details.
3. Save the data from each printer controller's job log file that is using pre- 7.0
AccXES firmware, or the data will be lost when AccXES firmware 7.0, or
greater, is loaded. If you do not need to do this, go to the step entitled “Install
the 8.0 AccXES firmware”.
Ÿ On the Web PMT Main Menu toolbar, select ACCOUNTING.
Ÿ Select Reports.
Ÿ On the Reports Page put in the account and sub-account for which you
want to retrieve media usage data. To retrieve system account data,
AccXES Account Management Tool Administrator’s Guide 13
use 0 for the account number and 1 for the sub -account number.
Ÿ Select if the display values should be in square decimeters or square
feet.
Ÿ Select the Query button.
Ÿ Select the Export button. You will be prompted with the standard
Windows file saving dialog.
NOTE: Pre 7.0 AccXES firmware accounting data can also be saved by
using the AccXES Client Tools' Accounting Tab, the DST prior to the
AccXES Client Tools, or it can be saved to a floppy disk. See Appendix 1
for details.
Using the Account Management Tool
1. At the computer where the only copy of the Account Management Tool will
reside, install the AMT software. See the "Installing..." page for details.
2. Import the account identifiers, and sub-account/user identifiers that were
saved to a file from printers. AccXES generated account data can also be
imported. See the “Importing Accounting File” page for details.
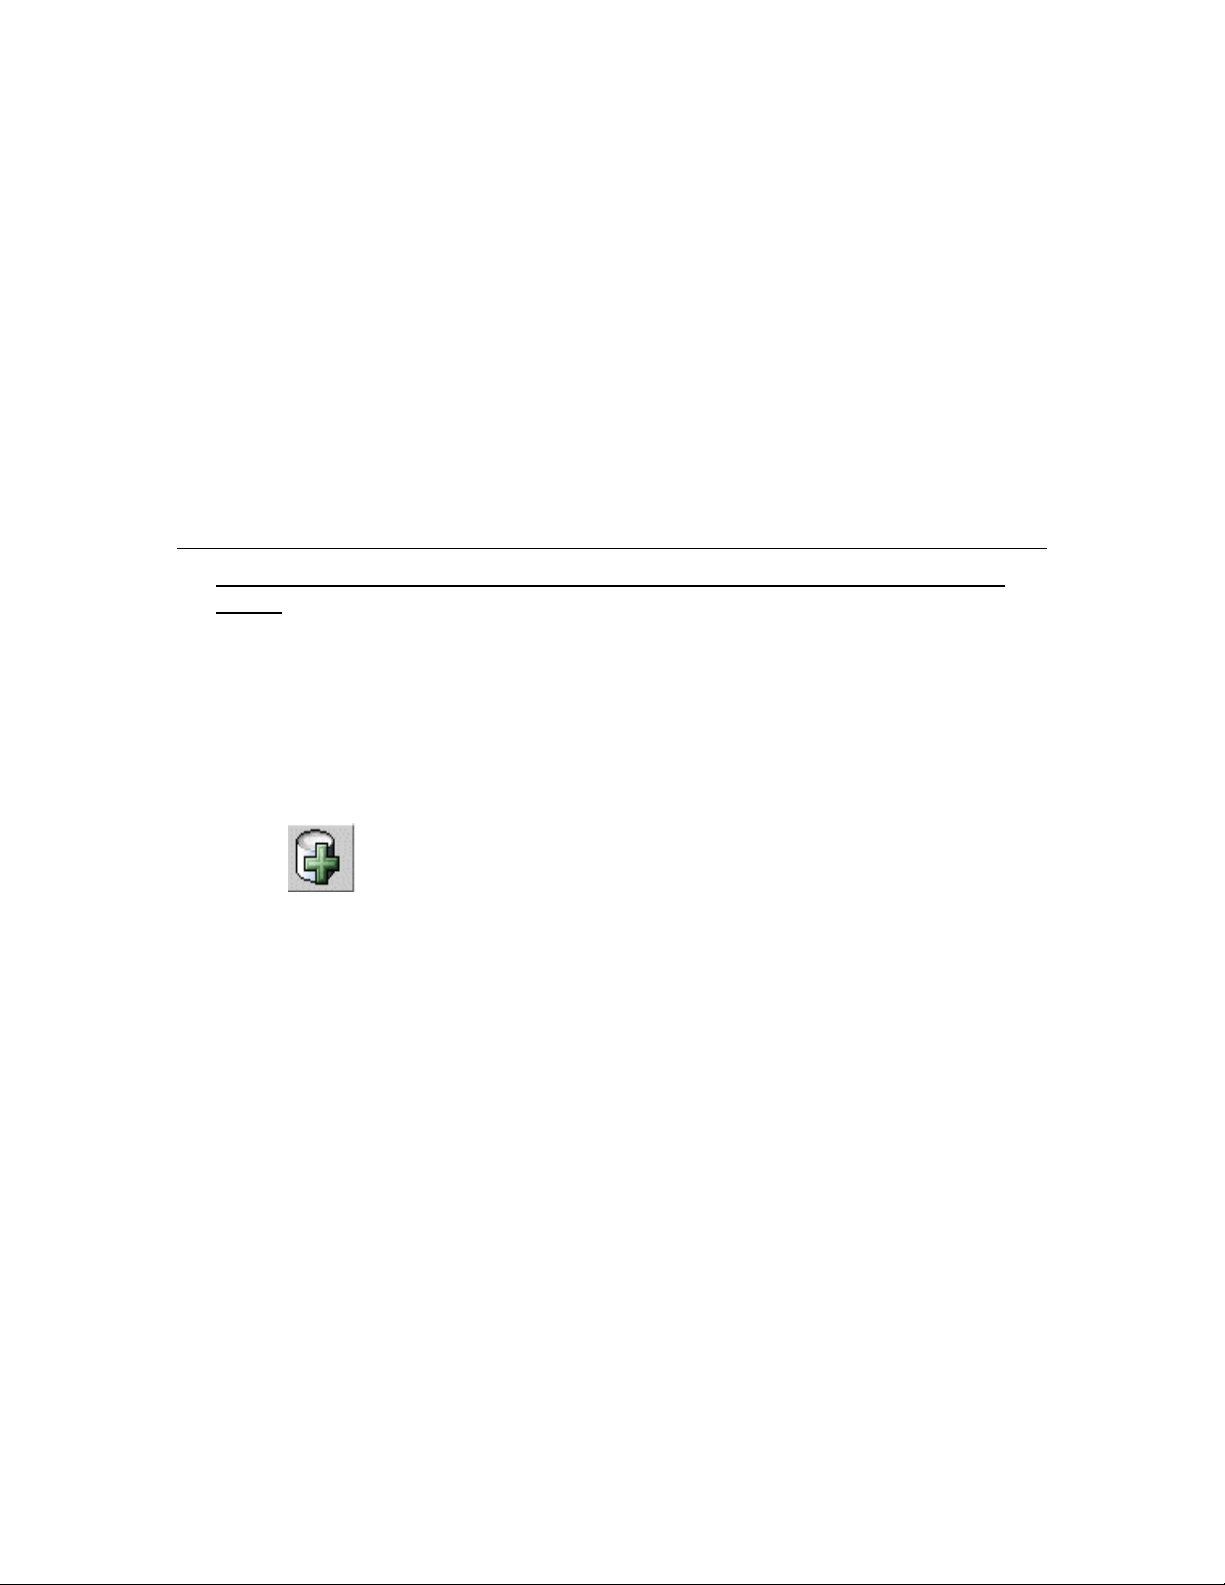
3. Add Accounts on the Account Tab as follows.
Ÿ Select the Accounts Tab.
Ÿ Select this toolbar button, or select Configuration > Add >
Account. You will be creating accounts on the “Add Accounts” dialog.
NOTE: It is easiest for the user if you make the Account IDs and User
IDs with as few characters as possible, and use numbers as much as
possible instead of letters. This is because the scanner’s keypad has
numbers and letters on the same keys. On the scanner, one keypad
button may need to be pressed several times to locate the desired
letter, and the Next button needs to be selected in between numbers, if
the same number is sequential, such as 66.
Ÿ On the "Add Accounts" dialog, type in the account identifier into the
Account ID field. The Account ID is an alphanumeric character string
(A-Z, 0-9), with a maximum of 32 characters.
A decimal point . and minus sign - are allowed. Lower case characters
are converted to upper case letters on entry.
If you use sub -account numbers, they would need to be added as User
IDs, or they can become part of the Account ID. For example, if you
want to add account 3 and sub-account 2, you would type in 3.2 as the
Account ID.
AccXES Account Management Tool Administrator’s Guide 14
Ÿ Press this toolbar button after each new Account ID. The
Account ID will be added to the window at the bottom of the screen.
Ÿ If you change your mind about adding an account, highlight the
account name from the list and select this toolbar button to delete it.
Ÿ To associate the listed accounts to all printers and all users that are
currently defined in the AMT database, select the checkbox in front of
“Enable these accounts for all printers and users”. The associations
will be made to the AMT database, and the “Authorization Needed”
checkmark will be checked on the Printers Tab.
Ÿ You must select this toolbar button after the new Account IDs
have been added, in order to place the listed Account IDs into the AMT
Accounts Database.
Ÿ Press the Close button. The Account ID and Creation Date will
become visible on the Accounts Tab list.
4. Add Users on the Users Tab.
Ÿ Select the Users Tab.
Ÿ Select this toolbar button, or select Configuration > Add >
Users. Type the user name into the User ID field. The User ID is an
alphanumeric character string (A-Z, 0-9), with a maximum of 32
characters. A decimal point . and minus sign - are allowed. Lower case
characters are converted to upper case letters on entry.
Ÿ Press this toolbar button. The user name will be added to the
window below. Repeat for each added user.
Ÿ If you change your mind about adding a user, highlight the user
name from the list and select this toolbar button to delete it.
Ÿ To associate the listed users to all printers and all accounts that are
currently defined in the AMT database, select the checkbox in front of
“Enable these users for all printers and accounts”. The associations
will be made to the AMT database, and the “Authorization Needed”
checkmark will be checked on the Printers Tab.
AccXES Account Management Tool Administrator’s Guide 15
Ÿ You must select this toolbar button after the new User names
have been added, in order to place the User ID into the AMT Users
Database.
Ÿ Press the Close button.
5. Add Printers on the Printers Tab.
Ÿ Select the Printers Tab.
Ÿ Select this toolbar button. The "Add Printers" dialog window will
appear.
Ÿ Type the printer name into the Printer Name text field. This Printer
Name information will show on the Printers Tab. However, it is best to
type in the Machine Name that you see on the Web PMT’s Accounting
page. The reason is that then the Printers Name on the Printers Tab
will match the Printer Name which will show on the Printer Job
Accounting Tab after you retrieve data from the printer controllers. The
printer name is limited to a maximum of 20 alphanumeric characters
(A-Z, 0-9). The dash (-) and period (.) symbols are allowed. Duplicate
printer names are not allowed.
Ÿ Add your Printer Description into the 80-character text field. The field
may be left blank. Duplicate descriptions are allowed.
Ÿ Add your IP Address, such as "13 142 199 3".
Ÿ Press this toolbar button. The information will be cleared from
the Printer Name, Printer Description, and IP Address fields; the
defined printer will be moved to the bottom window as the AMT
connects to the printer. You can continue to add printers in the same
manner.
Ÿ If you change your mind about adding a printer, highlight the
printer name from the list and select this toolbar button to delete it.
Ÿ To associate the listed printers with all of the accounts and all of the
users that are currently defined in the AMT database, select the
checkbox in fr ont of "Enable all accounts and users on these printers".
The associations will be made to the AMT database, and the
“Authorization Needed” checkmark will be checked.
NOTE: Press this button to edit the Printer Name, Printer
Description, or IP Address.
AccXES Account Management Tool Administrator’s Guide 16
Ÿ You must select this toolbar button after the new printers have
been added, in order to place the defined printers into the AccXES
Printers Database.
Ÿ Select the Close button to close out of this screen.
6. Edit Account Associations
NOTE: If you already associated all of the accounts, users, and printers on
the Add dialogs, you can skip this step.
Now that you have added accounts, users, and printers to AMT, you need to
specify which accounts and users are authorized to use which printers. AMT
calls this making “associations”. This is done on the Edit Account
Associations Tab. The following explains how to connect your AMT defined
accounts with your defined users and defined printers.
Ÿ Select the Edit Account Associations Tab. The dialog has 4
windows: Accounts, Users, Printers, and Current associations….
Ÿ In the Accounts window, click on the account whose associations you
want to edit. The first account that you selected will now appear in the
Account ID field.
Ÿ In the Printers window, click on the printers that you wish to associate
with this account.
Ÿ Look in the "Current associations …" window at the bottom of the
screen. It lists all of the current associations for the selected accounts,
selected printers, and their users. If the window is blank, then there
are no current user associations.
NOTE: Anytime that you want to be reminded of what users are
currently authorized to use which accounts and printers, in the toolbar
select View > View Associations to "refresh" the “Current
associations…” window.
Ÿ In the Users window, select additional Users that you want to be
associated with the selected Account and the selected Printers.
Ÿ Select this toolbar button to place these defined association
into the "Current associations…" window. A checkmark will appear in
the "Database Status" box to indicate that the associations that you
just made have not yet been placed into the AMT Associations
Database. The checkmark in the "Printers Status" column means that
AccXES Account Management Tool Administrator’s Guide 17
the affected printers have not yet been notified of the associations. The
printer is also marked on the Printers Tab as "Authorization Needed".
Ÿ You must select this toolbar button after creating the new
associations, in order to apply the updated associations to the AMT
Associations Database. The checkmark will be cleared from the
"Database Status" column.
Ÿ Now that you have told the AMT which accounts and users are
authorized to use which printers/scanners, you need to send the same
associations information to the printers. This will allow the AMT and
printers to communicate with each other, using the same accounting
information.
Ÿ Select this toolbar button to also send the updated associations
to each printer’s controller, where the job accounting file is located.
This toolbar button is also available on the Printers Tab. When the
printer is updated with the associations, the checkmark will be
removed from the “Printers Status” column. It will also be removed
from the "Authorization Needed" column on the Printers Tab.
Ÿ Select the Close button to close out of this screen.
Ÿ Go to the Printers Tab. The “Last Authorized” column will show the
date and time that the authorization was accepted by the printer.
Ÿ To delete an association, select it in the "Current
associations…" window. Then select th is toolbar button to remove the
selected association from the AMT Associations Database. Multiple
selections are allowed. A verification dialog will appear before deleting
the associations.
Click on this toolbar button to update the printers with the updated
(deleted) associations.
7. Select the Printers Tab. Notice if there are any checkmarks in the
"Unvalidated", “Configuration Needed”, "Authorization Needed", or "Purge
Needed" columns. If there are checkmarks, then do the following. If there are
no checkmarks, go to the step entitled “Scan and print…”.
Ÿ If there is a checkmark in the "Unvalidated" column, then go to
the printer and be sure that it is on, that a job accounting license is
present, and that job accounting is set to Enabled or Optional. Then
AccXES Account Management Tool Administrator’s Guide 18
select this toolbar button to revalidate the AMT connection with the
printer. The checkmark will be removed.
Ÿ If there is a checkmark in the “Configuration Needed” column,
Job Option selections have been made on the "Select Job Accounting
Options" dialog (accessible from a toolbar button on the Printer Job
Accounting Tab). However, AMT couldn’t connect to the printers.
These selections still need to be sent to the printers' controllers to
update the configuration of data being collected in the job log file.
Select this toolbar button to send the Job Options to the printers'
controllers.
Ÿ If there is a checkmark in the “Authorization Needed” column,
then choose this toolbar button to update each printer's authorized
accounts and users. The authorization command will be sent to each
of the AMT defined printers whose "Authorization Needed" field shows
a checkmark and whose "Unvalidated" box does not have a checkmark
in it. When the authorizations have been successful ly sent to a printer,
the "Authorization Needed" box will be empty and the "Last Authorized"
date will be modified on the Printers Tab.
Ÿ If there is a checkmark in the "Purge Needed" column, then
select this toolbar button. It will issue a command to each of the AMT
defined printers whose "Purge Needed" field is checked on the Printers
Tab, and whose "Unvalidated" field does not show a checkmark on the
Printers Tab. The printers will have the job log file purged in ascending
alphabetical order by printer name. Each printer's transaction will be
completed before moving on to the next printer. If the AMT is unable to
complete a printer connection (for example, the printer is off -line) the
AMT will leave a checkmark in the "Purge Needed" box. After
successful completion of the transaction with the printer, the "Purge
Needed" field will not show a checkmark.
8. Scan and print some images at several printers, using some of the UserIDs
and AccountIDs that you created in the AMT. You can also send some
documents from the AccXES Client Tools' Document Submit Tool to the
printer. Job accounting data will be created in each printer controller's job log
file.
9. Retrieve the job accounting data that you created as follows.
Ÿ Go to the Printer Job Accounting Tab.
AccXES Account Management Tool Administrator’s Guide 19
WARNING: Before selecting the following toolbar button to
collect the
job log file data from each printer, you may want to export the present
AMT data. Any AMT Raw Database record that is older than the
specified keep interval will be deleted the next time that you select the
following toolbar button.
Ÿ Select this toolbar button to collect the job log file data from
each printer.
Ÿ The AMT will store the data in the Raw Job Accounting Database. The
Raw Job Accounting Data will now be visible on the Printer Job
Accounting Tab. A message will appear at the bottom of the screen
showing the number of raw and tallied records. The tallied records are
deleted each time that the AMT retrieves data from the printers’
controllers. It will be explained later in this tutorial how to create the
Tallied Database. On the Printers Tab, the Last Collection date and
time will also be updated.
Ÿ After the retrieved data is in the Raw Job Accounting Database, the
AMT will then submit a command to each printer's controller to delete
(purge) the original data. If you go to the Printers Tab, there will be no
checkmark in the “Purge” column.
Ÿ See Appendix 2 for the meaning of the data fields.
10. Repeat the above process in the step entitled “Select the Printers Tab” to see
if there are any checkmarks on the Printers Tab, and how to resolve them.
11. Selecting the Printer Job Accounting Options:
Ÿ On the Printer Job Accounting Tab, select this toolbar
button to access the "Select Job Accounting Options" dialog.
Ÿ In the "Keep Raw Printer Records Interval" field, enter the number of
days that you want each raw job accounting data record to be kept in
the Raw Job Accounting Database before it is automatically deleted.
The maximum keep interval is 90 days (2160 hours). The default keep
interval for the raw accounting database is 30 days.
Ÿ The default value of the “Halt Printer When Job Log is Full” field is
checked, or “ON”. If you check this field then the printer will stop
printing when the job log file is full until the AMT Administrator retrieves
the data into the AMT.
If the field is unchecked, or “Off”, it will cause the printer’s controller to
stop logging media usage data when the job log file is full, but allow
printing/scanning to continue with not logging the media usage data.
AccXES Account Management Tool Administrator’s Guide 20
Make other job options now if you want. See the “Select Job Accounting
Options” page for an explanation of the choices.
Ÿ Select the Apply button to send the keep interval and other job options
to the printers.
NOTE: Any record older than this specified keep interval will
be deleted the next time that you select the toolbar button which
retrieves data from the printers.
12. Tally the Retrieved Data. This is a process for creating a summary of the raw
job accounting data, which can then be exported to another file for analysis
and billing purposes.
13. On the Printer Job Accounting Tab, select this toolbar button. A
progress bar will show at the bottom of the screen to tell you the % of data
that has been tallied. The tallied data summary will show on the Printer Job
Accounting Tab. A message will appear at the bottom of the screen showing
how many records are in the Raw and Tallied Job Accounting Databases.
WARNING: You can only generate a tally of the data that is
currently in the Raw Job Accounting Database. Each time that you
retrieve the raw data from the printers, the tallied database will be
deleted. If you have not written the tallied data to a file by the time
that data is deleted from the Raw Job Accounting Database
(manually or due to the keep interval time being met), then the
deleted raw data cannot be re-tallied.
14. To view the Raw Job Accounting Database again, select this toolbar
button.
15. To view the Tallied Job Accounting Database again, select this toolbar
button.
16. Export media usage data from the Raw or Tallied Job Accounting Database
to an external software as follows.
Ÿ To export data, select whichever “View” toolbar button will display the
data that you want to export (raw or tallied database data).
Ÿ To export the currently displayed data, select this toolbar
button.
AccXES Account Management Tool Administrator’s Guide 21

Ÿ On the "Write Displayed Data to a File" dialog, select the Delimiter and
Quotes values for exporting the currently viewed Job Accounting
Database. The Delimiter options are tab, space, or comma, with the
default being "Tab". The options for Quotes are single quotes, double
quotes, or none. The default is None.
Ÿ In the Output File field, type in the file name to use when saving the
exported file, or select the Browse button. On the “Save Account
Information” screen, in the “Look I n” field, double click on the directory
where you want the data saved. In the “File Name” field, type in the
file name with the file extension. For example, Data1.txt for a text file,
or Data1.xls for an Excel file. Select the OK button. On the "Write
Displayed Data to a File" dialog, select Save to confirm your choice.
NOTE: Be sure to save your newly tallied data to a new file. This will
avoid overwriting the previously saved data file, which contains
different values.
Ÿ There will be a message at the bottom of the Printer Job Accounting
Tab that “Writing the data file was successful”.
Ÿ The saved file can now be used to create reports, etc.
CAUTION: After exporting the tallied data, the same data will be exported
again if the records are not deleted fir st from the Raw Job Accounting Database
before being re-tallied. Data is automatically deleted in the Raw Job Accounting
Database when the "Keep Raw Printer Records Interval" (days), which is set on
the Select Job Accounting Options dialog, is reached the next time that the AMT
Administrator retrieves data from the printers' job log files.
This completes the tutorial. The rest of the pages/files are copies of the
individual Help files.
Go to the Index or Table of Contents to locate other AMT features.
AccXES Account Management Tool Administrator’s Guide 22

Accounts Tab
Overview
The Accounts Tab displays a list of accounts that have been defined in the
AccXES Account Management Tool's (AMT) Accounts Database by the AMT
Administrator. You can add, delete, or find an account.
The maximum number of defined accounts supported by AccXES AMT is 9,999.
For system performance reasons, it is recommended that the AMT Administrator
limit the number of accounts to 1,000.
How to Use the Accounts Tab
Add an account to the Accounts Database
Ÿ Select this toolbar button, or select Configuration > Add >
Accounts.
Ÿ On the "Add Accounts" dialog, type the account identifier into the Account
ID field. The Account ID is an alphanumeric character string (A-Z, 0-9),
with a maximum of 32 characters. A decimal point . and minus sign - are
allowed. If you use sub -account numbers, they would need to be added as
User IDs, or they can become part of the Account ID. For example, if you
want to add account 3 and sub-account 2, you would type in 3.2 as the
Account ID. Lower case characters are converted to upper case letters on
entry. When accounting is set to "optional" on the printer or scanner, any
job log file data that does not have an Account ID will be assigned the
"GenericAccountID". The Account ID is checked for valid characters when
first entered into the AMT. Duplicate account numbers are not allowed.
Ÿ Press this toolbar button after adding each Account ID. The
Account ID will be added to the window at the bottom of the dialog screen.
Any duplicate Account IDs will be flagged prior to updating the database.
Duplicate Account IDs are not allowed and will not be added to the
database list.
Ÿ To associate the listed accounts to all printers and all users that are
currently defined in the AMT database, select the checkbox in front of
"Enable these accounts for all printers and users". The associations will
be made to the AMT database, and the "Authorization Needed"
checkmark will be checked on the Printers Tab.
AccXES Account Management Tool Administrator’s Guide 23

Ÿ Select this toolbar button to apply the listed Account IDs to the
AMT Accounts Database.
Ÿ Press the Close button. The Account ID and Creation Date will become
visible on the Accounts Tab list. Account IDs may exist in the AMT
Accounts Database without associations to users or printers.
Ÿ Select this toolbar button on the Printers Tab to also send the
associations to the printers.
Ÿ To associate the added accounts with specific users and printers, select
the Edit Account Associations Tab.
NOTE: If you already associated all of the accounts, users, and printers on
the Add dialogs, you can skip this step.
Delete an account in the AMT Accounts Database
NOTE:
It is recommended that before accounts, printers, or users are deleted,
that the Account Administrator selects this toolbar button on the Printer Job
Accounting Tab to retrieve the job log file data from each Printer's controller. It is
also recommended that the Account Administrator only perform printer updates
when the printers are in an idle state.
1. Select the accounts to delete in the AMT Accounts list. You can press the
Ctrl or Shift keyboard keys to make multiple selections.
2. Select this toolbar button, or select Configuration > Delete >
Accounts. The AMT will show a verification dialog.
3. Select the OK button. Selected accounts will be deleted from the AMT
Accounts Database and the AMT Associations Database. This
disassociates the accounts from all of the printers and users currently
defined to have access to those accounts. The affected printers will be
updated when the AMT Administrator verifies the deletion.
AccXES Account Management Tool Administrator’s Guide 24

Find an account in the Accounts Database
1. Select this toolbar button, or select Configuration > Find
Accounts. The "Find Account" dialog window will appear.
2. Type in the Account ID to search for that account in the AMT Accounts
Database and press the Search button. The located Account will show as
highlighted on the Accounts Tab.
Status
The status bar at the bottom of the screen displays the status of database
operations, as well as the status of connection to the printer during connection
attempts and data transfer.
AccXES Account Management Tool Administrator’s Guide 25

Users Tab
Overview
The Users Tab displays a list of job accounting users that are defined in the
AccXES Account Management Tool (AMT) Users Database. You can add,
delete, or find a user.
The defined users must be associated with accounts and printers before the
users can charge media usage to a system account or printer.
The maximum number of defined users supported by AccXES AMT is 9,999. For
system performance reasons, it is recommended that the AMT Administrator limit
the number of us ers to 1,000.
How to Use the User Tab
View a list of currently defined users
Select this toolbar button, or select View > Users.
Add a User to the Users Database
1. Select this toolbar button, or select Configuration > Add > Users.
2. In the "Add Users" dialog, type the user name into the User ID field. The
User ID is an alphanumeric character string (A-Z, 0-9), with a maximum of
32 characters. A decimal point . and minus sign - are allowed. Lower case
characters are converted to upper case letters on ent ry. When accounting
is set to "optional" on the printer or scanner, any job log file data that does
not have a User ID will be assigned the "GenericUserID". The User ID is
checked for valid characters when first entered into the AMT.
3. Press this toolbar button. The user name will be added to the
window below. Repeat for each added user. Any duplicate user names will
be flagged prior to updating the database. Duplicate User IDs are not
allowed and will not be added to the database.
4. If you change your mind about adding a user, highlight the user
from the list and select this toolbar button.
AccXES Account Management Tool Administrator’s Guide 26

5. To associate the listed users to all printers and all accounts that are
currently defined in the AMT database, select the checkbox in front of
"Enable these users for all printers and accounts". The associations will
be made to the AMT database, and the "Authorization Needed"
checkmark will be checked on the Printers Tab.
6. Select this toolbar button to place the User ID into the AMT Users
database.
7. Press the Close button.
8. Select this toolbar button on the Printers Tab to also send the
associations to the printers.
9. To associate a user with printers and accounts, go to the Edit Account
Associations Tab
NOTE: If you already associated all of the accounts, users, and printers
on the Add dialogs, you can skip this step.
Delete a user in the Users Database
NOTE:
It is recommended that before accounts, printers, or users are deleted,
that the Account Administrator selects this toolbar button on the Printer Job
Accounting Tab to retrieve the job log file data from each Printer's controller. It is
also recommended that the Account Administrator only perform printer updates
when the printers are in an idle state.
1. In the user list, select the users to delete.
2. Select this toolbar button, or select Configuration > Delete >
Users. The AMT will prompt the AMT Administrator with a verification
dialog before the users are deleted. Deleting users from the Users
Database also deletes those users from the AMT Associations Database
and updates the printers. This means that the users will become
disassociated from all of the printers and accounts which are currently
associated with the user being able to charge media usage to accounting.
AccXES Account Management Tool Administrator’s Guide 27

Find a user in the Users Database
1. Select this toolbar button, or select Configuration > Find >
Users. The Find User dialog window will appear.
2. Type in the User ID for which to search.
3. Press the Search button. The match will be highlighted in the User List
window. If no match is found, the AMT Administrator will be notified by an
information dialog.
Status
The status bar at the bottom of the screen displays the status of database
operations, as well as the status of connection to the printer during connection
attempts and data transfer.
AccXES Account Management Tool Administrator’s Guide 28

Printers Tab
Overview
A TCP/IP connection is needed for the AccXES Account Management Tool's
(AMT) host computer to have bi-directional communication with the defined
printers from which accounting data will be collected. The Printers Tab displays a
Printers List of the currently defined printers. Column boxes will be checked to
flag your attention to the fact that changes need to be transmitted to the printer
that were already made to the AMT Master Database.
You can add, delete, edit, or find a printer. When a printer is deleted from the
Raw Accounting Job Accounting Database, the database references to that
printer are removed. Deleting the printer does not affect job accounting
operations on the indicated printer.
Associating defined printers with specific accounts and users is done on the Edit
Account Associations Tab.
The maximum number of printers supported by the AccXES AMT is 999. For
system performance reasons it is recommended that the AMT Administrator limit
the number of printers to 100.
How to Use the Printers Tab
View the list of currently defined printers.
Select this toolbar button to view the current list of defined Printers.
Add a printer to the Printers Database.
1. Select this toolbar button. The "Add Printers" dialog window will
appear.
2. Type the printer name into the Printer Name text field. The printer name
is limited to a maximum of 20 alphanumeric characters (A-Z, 0-9). The
dash (-) and period (.) symbols are allowed. Duplicate printer names are
not allowed. The printer name in the Raw Job Accounting records is the
printer name set by the Web PMT or by a PJL command. It is
recommended that you add the same printer name into this text field.
3. Add your Printer Description into the 80-character text field. The field
may be left bl ank. Duplicate descriptions are allowed.
4. Add your IP Address, such as "13 142 199 3".
AccXES Account Management Tool Administrator’s Guide 29

5. Press this toolbar button. The information will be cleared from the
printer name, printer description, and IP Address fields. The defined
printer will be moved to the bottom window as the connection to the printer
is being made. When a printer is added, a command will be sent to the
AccXES controller to start job accounting data logging in the printer. If job
based accounting cannot be validated, you will be asked if you would still
like to add the printer.
6. To associate the listed printers with all of the accounts and all of the users
that are currently defined in the AMT database, select the checkbox in
front of "Enable all accounts and users on these printers". The
associations will be made to the AMT database, and the "Authorization
Needed" checkmark will be checked on the Printers Tab.
7. Select this toolbar button to place the defined printers into the
AccXES Printers Database.
8. Press the Close button.
9. On the Printers Tab, choose this toolbar button to update each
printer's authorized accounts and users. The authorization command will
be sent to each of the AMT defined printers whose "Authorization Needed"
field shows a checkmark and whose "Unvalidated" box does not have a
checkmark in it. When the authorizations have been successfully sent to a
printer, the "Authorization Needed" box will be empty and the "Last
Authorized" date will be modified.
10. For each added printer, job accounting needs to be set to "Enabled" or
"Optional" for the job accounting data to be stored in the controller's job
log file, from which the AMT will be retrieving the data. The Accounting
Mode cannot be enabled on the AMT. It needs to be enabled at each
printer or scanner by any of the following methods.
Ÿ In the Web Printer Manager Tool: Select Accounting > Enabled or
Optional > Update Printer toolbar button.
Ÿ On the scanner: Press the Menu key > System Administration >
Enter password > Job Accounting Mode > Accounting Mode >
Enabled or Opt ional >Enter key.
Ÿ In the printer user interface: Select the Online key > Enter key >
System Administration > Enter Password > Accounting
Administration > Printer Accounting Mode > Enable or Disable >
Enter key > Online key.
Edit a printer in the Printers Database
Ÿ In the printer list, select the printer to be edited.
AccXES Account Management Tool Administrator’s Guide 30

Ÿ Press this button to edit the Printer Name, Printer Description, or IP
Address.
Ÿ Press the Save button, or select Cancel to cancel the changes.
Delete a printer in the Printers Database.
NOTE:
It is recommended that before accounts, printers, or users are deleted,
that the Account Administrator selects this toolbar button on the Printer Job
Accounting Tab to retrieve the job log file data from each Printer's controller. It is
also recommended that the Account Administrator only perform printer updates
when the printers are in an idle state.
1. Select the printers in the printer list, then select this toolbar button, or
Configuration > Delete > Printer. The AMT will show a verification dialog
before the printers are deleted. This dialog warns the AMT Administrator to
collect the printers' job log file prior to deleting the printer. Deleting a printer
removes it from the AMT Printers Database and it will no longer show in the
Associations Database. The command does not remove the defined accounts
and users from the printer.
2. The AMT does not have a means to disable job accounting. Therefore you
must set the Account Mode to DISABLED at the scanner, on the Web PMT
Accounting Page, or in the printer user interface, to disable it on both the
printer and scanner.
Find a printer in the Printers Database.
1. Select this toolbar button. The Find Printer dialog window will
appear.
2. Type in the Printer Name that you are searching for and press the Search
button.
Perform validation, update, and data purge maintenance for columns that
contain checkmarks.
Notice if any of the columns have checkmarks in them. If they do, then you need
to make the updates indicated below.
AccXES Account Management Tool Administrator’s Guide 31

Unvalidated Column - If there is a checkmark in this column it means that the
AMT cannot determine if the right kind of job accounting exists on the printer.
Check that the printer is on and that the job accounting license is present. Also
check that job accounting is enabled on the printer. See Appendix 1 for how to
enable job accounting.
Select this toolbar button to reconnect to the defined printer. If job based
accounting is enabled on the printer, the checkmark will be removed when the
connection is made.
Configuration Needed Column - If there is a checkmark in the "Configuration
Needed" column, Job Option selections have been made on the "Select Job
Accounting Options" dialog (accessible from a toolbar button on the Printer Job
Accounting Tab). However, AMT couldn’t connect to the printers. These
selections still need to be sent to the printers' controllers to update the
configuration of data being collected in the job log file.
Select this toolbar button to send the Job Options to the printers'
controllers.
Authorization Needed Column - A change has been made in the AMT Master
Database printer's associations, but it has not been transmitted to the printer.
Select this toolbar button to update the printers with the AMT account
associations. This will tell each defined printer which users and accounts are
authorized for use for that printer and its attached scanner.
Purge Needed Column - The printer's job accounting data was collected, but the
printer's data was not successfully purged.
Select this toolbar button to issue a command to each of the AMT defined
printers whose "Purge Needed" field is checked, and whose "Unvalidated" field
does not show a checkmark. The printers will have the job log file purged in
ascending alphabetical order by printer name. Each printer's transaction will be
completed before moving on to the next printer. If the AMT is unable to complete
a printer connection (for example, the printer is off-line) the AMT will leave the
checkmark in the "Purge Needed" box. After successful completion of the
transaction with the printer, the "Purge Needed" field will not show a checkmark.
AccXES Account Management Tool Administrator’s Guide 32

Meaning of the Other Columns in the Printers List
Printer Name - This is the printer name that the AMT Administrator put into the
Add Prin ter dialog.
Description - This is the printer description that the AMT Administrator put into
the Add Printer dialog.
IP Address - The IP address field displays the IP Address of the defined
networked printer.
Last Edited- The date that the printer record was created in the AMT Database,
or the last date that the selected printer's IP Address, name, or description were
edited on the “Edit Printer” dialog.
Last Configuration Update - The last date and time that the Job Options were
sent to the printers. The Job Options are made on the "Select Job Accounting
Options" dialog, which the AMT Administrator accesses from a toolbar button on
the Printer Job Accounting Tab.
Last Authorized - This data field displays the date and time when the last
command that defined accounts and users was sent to the printer. This field will
be blank for printers that have not been issued the authorization command (for
example, after printer creation, but prior to being associated with accounts and
users). If a printer's auth orization needs to be updated, there will be a checkmark
in the "Authorization Needed " column.
Last Collection - This data field displays the date and time that the job log file
data was last collected from the printer's controller. This field will be bl ank for the
printers whose data has never been collected. (For example, the printer has
been added to the AMT Printers Database, but it has not been associated yet
with AMT Accounts and AMT Users, or prior to pulling the printers' data for the
first time.) If a printer's data needs to be deleted because it was already retrieved
to the AMT Raw Job Accounting Database, then there will be a checkmark in the
"Purge Needed" column.
Status
The status bar at the bottom of the screen displays the status of database
operations, as well as the status of connection to the printer during connection
attempts and data transfer.
AccXES Account Management Tool Administrator’s Guide 33

Edit Account Associations
Use this tab to specify the accounts and users that you want associated
with the printers that you defined in the Acc XES Account Management Tool
(AMT). Account Associations are the links between users, accounts, and
printers. Use this tab to specify the account associations.
Edit Account Associations Windows
The following are the various sections of the Edit Account Associations window.
Account ID - When you select an account in the Accounts window, it will show in
the Account ID field. If multiple accounts are selected, the first account will be
displayed.
Accounts window - This is a scrolling list window that contains all of the
Account IDs that are currently defined in the AMT Accounts Database table. Use
this window to select the accounts, whose associations you want to edit.
Multiple selections are allowed. Once accounts are selected, their currently
defined associations will be displayed in the “Current associations…”
window.Users window - This is a scrolling list window that contains all of the
User IDs that are currently defined in the AMT Users Database table. Use this
window to select users to associate with the selected accounts and selected
printers. Multiple selections are allowed.
Printers window - This is a scrolling list window that contains all of the printer
names that are currently defined in the AMT Printers Database table. Select a
printer from the list to modify its defined account associations. Multiple selections
are allowed.
Current associations window - This window is a scrolling list of the current
users and printers that are associated with the selected account. If the account
does not yet exist on that printer, you will be notified by a message in the dialog's
status bar at the bottom of the screen. The AMT Administrator may delete
account associations by selecting the association to delete from this window and
clicking on the dialog's Delete button.
AccXES Account Management Tool Administrator’s Guide 34

How to Connect Accounts - Printers - Users on
the Edit Account Associations Dialog
1. In the Edit Account Associations window, click on the account whose user
and printer associations you want to edit. The name will now appear in the
Account ID field.
2. In the Printers window, click on the printers that you wish to associate with
this account. Multiple selections are allowed.
3. Look in the "Current associations" window at the bottom of the screen. It
lists all of the associations for the currently selected accounts and users.
If the window is blank, then there are no current associations.
NOTE: To refresh the current association window, in the toolbar menus,
select View > Associations.
4. In the Users window, select any additional Users that you want to be
associated with the selected Account and selected Printers.
5. Select this toolbar button to place the defined associations into the
"Current associations" window. A checkmark will appear in the "Database
Status" box to indicate that the associations that you just made have not
yet been placed into the AMT Associations Database. The checkmark in
the "Printers Status" column means that the affected printers have not yet
been notified of the associations. The printer is also marked on the
Printers Tab as "Authorization Needed".
6. Select this toolbar button to apply the updated associations,
whose “Database Status” box has a checkmark in it, to the AMT
Associations Database. The checkmark will be removed from the
“Database Status” column. A checkmark will now appear in the "Printers
Status" column, which means the affected printers have not yet been
notified of the associations. The printer is also marked on the Printers Tab
as "Authorization Needed".
NOTE: If you exit the AMT application, or the Edit Account Associations
dialog without saving the changes to the database, you will receive a
warning message.
7. Click on this toolbar button to update the printers with the updated
associations. The button is available from both the Edit Account
Associations Tab and from the Printer Job Accounting Tab. When the
printer is updated with the associations, the checkmark will be removed
AccXES Account Management Tool Administrator’s Guide 35

from the “Printers Status” column. It will also be removed from the
"Authorization Needed" column on the Printers Tab.
8. Select this toolbar button to remove a selected association from
the AMT Associations Database. Multiple selections are allowed. A
verification dialog will appear before deleting the associations.
Click on this toolbar button to update the printers with the updated
(deleted) associations.
NOTE:
It is recommended that before accounts, printers, or users are deleted,
that the Account Administrator selects this toolbar button on the Printer Job
Accounting Tab to retrieve the job log file data from each Printer's controller.
- Exiting the dialog without updating the printers will generate a warning
message, but won't cause loss of data. In this case, the next time you press this
toolbar button, the modified printers will be updated.
- If the AccXES AMT Master Database is unable to complete a printer connection
(for example, if the printer is off -line), the AMT will prompt the AMT Administrator
with a dialog. The dialog will give the option of skipping the printer and continuing
with the remaining printers, retrying the printer, or canceling the printer update.
- If the AMT Administrator chooses to skip the printer, a checkmark will remain in
the “Printers Status” column within the "Current Associations..." window. Also,
that printer's "Authorization Needed” field will show a checkmark on the Printers
Tab.
AccXES Account Management Tool Administrator’s Guide 36

Printer Job Accounting Tab
Overview
This tab is used to send a command to each defined printer to retrieve a copy of
the job accounting data from its controller's job log file. The data is retrieved into
the AMT Raw Job Accounting Database and remains there until the records are
manually deleted, or until your specified keep interval time limit is reached. After
the retrieval of the data is complete, the AMT sends a delete command to the job
log file to purge the original data. The tallied data is deleted each time that the
AMT retrieves data from the printers' job log files.
There are toolbar buttons on this tab that you can select to view either the Raw
or Tallied Job Accounting Data.
When a toolbar button is selected on this tab to create a tally of the raw data, the
Tallied Job Accounting Database will show the media usage for each
user/account by printer. The tallied data will be a summation of the media square
area field and scan usage records that are currently in the Raw Job Accounting
Database at the time of the tally. If "metric units" is selected on the Job Options
dialog, the raw database units are square mm and become square dm in the
tallied database. If "english units" is selected, the raw database units are square
inches and the tallied data is in square feet. The raw and tallied data can be
written to a file.
This tab is where the AMT Administrator can import AccXES Controller
generated accounting data, account identifiers, and sub-account/user identifiers
from a file.
See Appendix 2 for a description of the data fields that are present in the AMT
database.
How to Use the Printer Job Accounting Tab
Importing Data from printers using pre - 7.0 AccXES firmware
Select this toolbar button, or select File > Import accounting file. For
details see the Tutorial page, or the page entitled "Importing Accounting File".
Viewing AMT Job Accounting Data
Select this toolbar button to view the data records in the Raw Job
Accounting Database. (To view the current list of sizes for your printer, in the
Web PMT, select Processing Defaults > Media > Media Size and Media Type
AccXES Account Management Tool Administrator’s Guide 37

drop down menus.) If multiple images were used for the same print or scanned
job, only the first image's data will show in the Raw Job Accounting table.
However, you can double click on the row within the following three columns to
view the additional image's data: Media Type, Scan Destination, Scan Time.
Select this toolbar button to view the Tallied Job Accounting data.
Press the Previous and Next arrow toolbar buttons to view the
previous or next 1000 data records.
Selecting printer job options and how long data records remain in the AMT
Raw Database.
Ÿ Select this toolbar button to access the "Select Job Accountin g
Options" dialog.
Ÿ In the "Keep Raw Printer Records Interval" field, enter the number of days
(based on the data record’s Time Stamp) that you want each raw job
accounting data record to be kept in the Raw Job Accounting Database
before it is automatically deleted. This is a numeric, 2 character field to
indicate the number of days to keep the data in the Raw Job Accounting
Database. The minimum keep interval is 1 day (24 hours) and the
maximum keep interval is 90 days (2160 hours). The default keep interval
is 30 days.
NOTE: The options selections chosen on this dialog will determine what
data is collected from the printers’ controllers, and shown on the Printer
Job Accounting Tab.
Ÿ Select the Apply button.
Ÿ Any record older than this specified keep interval will be deleted from the
Raw Job Accounting Database the next time that the raw data is retrieved
from the printers job log file. To reset the interval back to the default,
select the Reset button.
Retrieving (Collecting) Job Accounting Data from the Printers and Updating
the AMT Raw Job Accounting Database
The AMT Administrator needs to retrieve a copy of the data from the job log file,
which exists in the controller at each of the defined printers. The data will remain
in the Raw Job Accounting Database until it is manually deleted or until the Keep
Interval is reached. The "Last Collection" date on the Printers table is updated.
AccXES Account Management Tool Administrator’s Guide 38

The data in the Tallied Job Accounting Database is deleted when raw data is
retrieved from the printers.
Ÿ Click on this toolbar button. For each printer listed on the Printers
Tab, whose "Unvalidated" box is not checked, the AMT will contact each
printer's controller to collect the job accounting data in its job log file. The
data will be copied to the Raw Job Accounting Database. The AMT will
then issue a purge command to remove the original data from the
controller's job log file.
Ÿ Go to the Printers Tab. Look at the "Purge Needed" column to see if there
are any checkmarks there. If yes, then the data was not purged on the
listed printer and you must purge it before you can retrieve additional job
log file data.
Creating Data in the AMT Tallied Job Accounting Database
The purpose of the Tallied Job Accounting Database is to provide a summation
of the media usage records that are currently in the Raw Job Accounting
Database at the time of the tally. Accounts and Users that show zero media
usage will be listed with zeros in the tallied data. If an account or user is defined
on more than one machine, then a line for each machine's accounts and users
appears in the tallied data.
Ÿ Select this toolbar button. The tallied data summary will show on
the Printer Job Accounting Tab. A progress bar will show at the bottom of
the screen to tell you the % of data that has been tallied.
Ÿ Each time that you retrieve the raw data from the printers, the tallied
database will be deleted.
WARNING: You can only generate the tally of the data that is
currently in the Raw Job Accounting Database. If you have not written
the tallied data to a file by the time that the data is deleted from the Raw
Job Accounting Database (manually or due to the keep interval time
being met), then the deleted raw data cannot be re-tallied.
Deleting Records Manually
Records can be manually deleted from the Raw or T allied Job Accounting
Database as follows.
Ÿ Press this toolbar button to view the raw database records, or
Ÿ Press this button to view the tallied database records.
AccXES Account Management Tool Administrator’s Guide 39

Ÿ Select the records to delete in the database record list.
Ÿ Click on this toolbar button. To delete all raw records, select
Transaction > Delete Raw Accounting Data from the database.
Exporting Data from the Raw or Tallied Database
Ÿ Select this toolbar button to start creating a file of the currently
displayed raw, or tallied, AMT database records. For details see the
Tutorial or the page entitled "Write Displayed Data to a File"
CAUTION: After exporting the tallied data, the same data will be
exported again if the records are not deleted first from the Raw Job Accounting
Database before being re-tallied. Data is automatically deleted in the Raw Job
Accounting Database when the "Keep Raw Printer Records Interval" (days),
which is set on the Select Job Accounting Options dialog, is reached the next
time that the AMT Administrator retr ieves data from the printers' job log files.
Status
The status bar at the bottom of the screen displays the status of database
operations, as well as the status of connection to the printer during connection
attempts and data transfer.
AccXES Account Management Tool Administrator’s Guide 40

Job Accounting Options
Navigational Path: Go to the Printer Job Accounting Tab.
Select this toolbar button, or select Configuration > Job Accounting
Options.
Ÿ Use this dialog to select printer job accounting options.
Ÿ Select the Apply button to send the job options to the printers.
Ÿ If checkmarks appear in the “Configuration Needed” column on the
Printers Tab, this indicates that AMT couldn’t connect to the printers and that
the configuration selections need to be been resent to the printers by pressing
this button.
Ÿ The date in the “Last Configuration Update” column on the Printers Tab will
be updated, which indicates the date that the configuration changes were
received by the printers’ controllers.
NOTE: The same job options are sent to additional printers when you add
them to AMT.
Ÿ The setting selections are described below.
Select the following Job Accounting Options
Finisher Data - Select this check box to enable the collection of finishing data
from the AccXES printers. The default will be ENABLED. The defined printer job
finisher types are: None, Folded, Dual-punched, Triple-punched, Quad-punched,
Tabbed, and Reinforced.
Completion State - Select this check box to collect job completion information
from the AccXES printers. The default will be ENABLED. When selected, the
Completion State values will be as follows:
Completed, normal - The job completed normally and the Job Record is
logged to the controller's job log file.
Terminated - The job was terminated because of a system error.
This occurs when the controller is rebooted due to power being cycled or from
power loss.
AccXES Account Management Tool Administrator’s Guide 41

The controller will attempt to recover any Job Record data from the active job
and any held jobs.
Deleted - The job was deleted or cancelled by a system user. Any
accumulated Job Record data will be logged to the controller's Job Log File.
Track Scanned Image Count - Select this check box to get scanner usage data
from the AccXES printers. The scan data will include information from the
following data fields: Scan Count, Scan Time, Scan Image File Size, Scan Media
Length, Scan Media Width. The default will be ENABLED.
Halt Printer When Job Log is Full (15,000 entries) - When this check box
selected, it sets the AccXES configuration parameter which indicat es to the
AccXES controller to stop to all jobs. If the controller's job log file has reached its
maximum entries, or if the controller's continuous storage or disk is full. This will
stop the printer. The job accounting data log must be collected before the printer
will resume processing jobs and logging job accounting data if this checkbox is
selected. The default will be ENABLED.
If this checkbox is selected it causes the AccXES controller to disable account
logging if the log becomes full, but allow the controller to continue to operate.
Accounting data in this case is lost. This configuration is sent to the printers after
you select the Set the Printers Job Accounting Options toolbar button.
CAUTION: New job accounting data will not be saved in the printer
controller’s job log file until the AMT Administrator retrieves the data from the full
job log file.
Completion Time - This check box, when selected, enables collection of the
completion time of print jobs from the AccXES printers. The time shall be
dependent upon your settable controller clock. The default will be ENABLED.
Sets Completed - Select this check box to enable the collection of the number of
completed document sets that were sent form the AccXES Document Submit
Tool to the AccXES prin ters. The default will be ENABLED.
Track Scan to Net Destinations - Select this check box for the AMT to obtain
the network destination for each scan-to-net job and to enable the retrieval of
image data from each of the defined AccXES printer's controller . The values will
contain a colon, quotes, and the number of images, which is currently one for
scan-to-net images. The default will be ENABLED. An example of retrieved scanto-net data is: "13.142.199.11:/my-images,1".
Maximum Printer Job Log Length - Enter the maximum number of log entries
to be allowed in the AccXES controller's accounting job log file. The maximum
log size is 15000 entries. The minimum log size is 1 entry. The default log size is
15000 entries. This configuration is sent to the printers after you select the Set
the Printers Job Accounting Options toolbar button.
AccXES Account Management Tool Administrator’s Guide 42

Keep Raw Printer Records Interval (days) - Enter the number of days after the
record Time Stamp that a raw job accounting data record will be maintained in
the Raw Job Accounting Database before it is automatically deleted. Any record
older than this specified keep interval will be deleted when you select the Collect
the Job Accounting Data toolbar button on the Printer Job Accounting Tab.
This is a numeric, 2 character field. The minimum keep interval is 1 day (24
hours) and the maximum keep interval is 90 days (2160 hours). The default keep
interval for the raw accounting database is 30 days (720 hours). The Keep
Interval is set on the Select Job Accounting Options dialog, which is accessed
from a toolbar button on the Printer Job Accounting Tab.
Display Units - Select either metric or English to indicate in which units the data
should be displayed. The default is metric.
AccXES Account Management Tool Administrator’s Guide 43

Importing Data into AMT
AccXES controller generated account and sub-account/user identifiers can be
imported into the AccXES Account Management Tool if they are in the following
format:
Ÿ Column 1 is the account identifier and Column 2 is the sub-account/user
identifier.
Ÿ The columns must be separated by a tab or comma or space.
Ÿ The characters in each column can have a 'single quote', "double quotes",
or no quotes.
AccXES Controller generated ASCII text format accounting data can also be
imported if created from the following:
Ÿ AccXES V2.0 through V6.1
Ÿ Web PMT tool V4.0 - V6.1
Ÿ Accounting enabled versions of DST
Ÿ 6.00.03 ACT
NOTES: The scan to net area data cannot be imported. The maximum number
of AMT records allowed are: 9999 accounts, 9999 users, 999 printers, and
12,000 associations (for 128 MB minimum memory). For example, if you have
200 accounts and 25 users on one printer, or 100 accounts and 25 users on 2
printers, there will be 5000 associations created if you select the global
associations feature. If AMT is reaching its associations limit, a popup message
will warn that the associations cannot be created. Delete unused or obsolete
accounts, users, or printers in the database to reduce the number of
associations, which will also delete any associations that reference that
account/user/printer.
Non-AccXES generated account and/or sub-account identifiers can be imported
if:
Ÿ The import file must be an ASCII text only format file containing no binary
code, and no control characters other than CRLF (Carriage Return Line
Feed).
Ÿ Identifiers are a maximum 32 alphanumeric characters
Ÿ Identifiers can have a 'single quote', "double quotes", or no quotes.
Ÿ If both accounts and users are being imported, they are treated as pairs;
the first identifier will be imported as the account, followed by user,
account, user, etc.
NOTES: The maximum number of AMT records allowed are: 9999 accounts,
9999 users, 999 printers, and 12,000 associations (for 128 MB minimum
AccXES Account Management Tool Administrator’s Guide 44

memory). For example, if you have 200 accounts and 25 users on one printer,
or 100 accounts and 25 users on 2 printers, there will be 5000 associations
created if you select the global associations feature.
When AMT is reaching its associations limit, a popup message will warn that
the associations cannot be created. Delete unused or obsolete accounts,
users, or printers in the database to reduce the number of associations, which
will also delete any associations that reference that account/user/printer.
Importing a Pre 7.5 AccXES File
Example of Pre 7.5 AccXES File:
Meaning: Column 1 = Account, Column 2 = Sub-account, Columns 3-5 are the
amount of bond, vellum, film used. The Column 6 scan to net area data cannot
be imported.
1. Select this toolbar button on the Printer Job Accounting Tab, or
select File > Import Accounting File.
2. On the "Import Accounting File" dialog, select "Import pre 7.5 AccXES
file".
NOTE: If you are importing Non-AccXES generated identifiers, go to the
next section of this file.
3. Choose how you want your legacy sub-account identifiers to be imported.
If you are importing data to an account that already exists, the data will be
imported to the existing account.
The Accounts will be imported as the Account IDs, but the sub-accounts
can be imported as eit her User IDs or as an extension of the AMT's
Account ID.
NOTE: The "0.x" system account numbers will not be imported.
For example, if you want to import a legacy account 3 and sub-account
04, the following would be the results.
Ÿ If you choose the "Account.Sub-account" radio button to import this
legacy data, the data will be imported into AMT to become Account ID
3.04.
AccXES Account Management Tool Administrator’s Guide 45

Ÿ If you choose the other radio button, then this data will be imported into
AMT as Account ID 3 and User ID 04.
4. If you want to associate all of your imported Account IDs to all of your
AMT User IDs and printers, select the box in front of "Create global
associations for the imported accounts and users." The associations will
be made to the AMT database, and the "Authorization Needed"
checkmark will be checked on the Printers Tab.
5. If you want to also import the data from the file, select the box in front of
"Import the file data to the raw database."
6. Select the existing "File Units" format of the data that will be imported.
7. After making your choices, select the Browse button.
8. On the "Import Accounting File" dialog, in the "Look In" field, select the
directory of the file to be imported.
9. From the list of files, select the file to be imported. The name will appear in
the "File name" field.
10. Select the OK button.
11. On the "Import Accounting File" dialog, press the Import button. The data
will be imported to AMT. You can view the Account IDs on the Accounts
Tab, the User IDs on the Users Tab, and the accounting data on the
Printer Job Accountin g Tab.
NOTE: If erroneous data is found in the import file, that data will not be
imported. Instead, the following error message appears listing the first
100 errors. "Import errors were detected. The lines below that display a
single value represent accounts or sub-accounts that are invalid and were
not imported. Lines which display multiple values represent entries that
contained a valid account/sub-account which were imported but illegal or
missing media data which was not imported."
12. If you did not select the "Create global associations.." feature before
importing your file, you will next need to associate each Account ID and
User ID with the printers that you have defined in the AMT. See the Edit
Account Association page for details.
13. Select this toolbar button on the Printers Tab to also send the
associations to the printers.
Importing a Non-AccXES File
The account and/or sub-account identifiers can be imported if:
Ÿ In ASCII text format file containing acco unt and sub-account/user
identifiers, no binary code, and no control characters except CRLF
(Carriage Return Line Feed).
Ÿ Identifiers are a maximum 32 alphanumeric characters
AccXES Account Management Tool Administrator’s Guide 46

Ÿ Identifiers can have a 'single quote', "double quotes", or no quotes.
Ÿ Column form at can be used, as explained above.
1. Choose the "Import Non -AccXES File" radio button.
2. You need to choose how you want your account and user/sub-account
identifiers to be imported.
Ÿ Select "Import as Account" if all of the data in the import file are
alphanumeric account identifiers. They will become Accounts in the
AMT database.
Example of import account data format:
Ÿ Select "Import as Users" if all of the data in the import file should
become Users in the AMT database.
Example of import user data format:
Ÿ Select "Import Accounts and Users" if both accounts and users are
being imported from the file. They are treated as pairs; the first
identifier will be imported as the account, followed by user, account,
user, etc.
Example of import account and u ser data format:
3. If you want to associate all of your import file identifiers to all of your AMT
Account, User, and printer identifiers, select the box in front of "Create
global associations for the imported accounts and users."
4. In the "Import File" field, enter the path and name of your import file, using
the Browse button to locate it.
5. Select the Import button. The imported accounts will show on the
Accounts Tab and the imported users on the Users Tab.
AccXES Account Management Tool Administrator’s Guide 47

NOTE: If erroneous data is found in the import file, that data will not be
imported.
6. If you did not select the "Create global associations.." feature before
importing your file, you will next need to associate each Account ID and
User ID with the printers that you have defined in the AMT. See the Edit
Account Associations page for details.
7. Select this toolbar button on the Printers Tab to also send the
associations to the printers.
AccXES Account Management Tool Administrator’s Guide 48

Writing (Exporting) Tallied or Raw Data
to a File
Navigational Path: Select the Printer Job Accounting Tab.
To export the currently display data of the Raw, or Tallied Job
Accounting Database, select this toolbar button or select Transaction > Write
tallied data to a file, or Write raw data to a file.
Overview
This function provides the AMT Administrator with the means to export the
currently displayed Tallied or Raw Job Accounting Database to a file that may
then be imported into another application.
NOTE:
When the tally or raw data is written to a file, give each file a unique name. If the
same file name already exists, instead of replacing the file, it appends to the
existing file.
CAUTION: After exporting the AMT data, the same data will be exported
again if the records are not deleted first from the Databases, on the Printer Job
Accounting Tab. Data is automatically deleted in the Raw Job Accounting
Database when the “Keep Raw Printer Records Interval” (days), which is set on
the Select Job Accounting Options dialog, is reached the next time that the AMT
Administrator retrieves data from the printers’ job log files.
How to Export Data
Ÿ To export the tallied data, select this toolbar button to view the
data that is in the Tallied Database.
NOTE: The tallied data gets emptied whenever the raw data is retrieved
from the printer into the Raw Job Accounting Database.
Ÿ To export the raw data, select this toolbar button to first display the
data.
AccXES Account Management Tool Administrator’s Guide 49

Ÿ To export the currently displayed data select this toolbar button.
Ÿ On the Write Displayed Data to a File dialog, select the Delimiter and
Quotes values for exporting the currently viewed Tallied Job Accounting
Database. The Delimiter options are tab, space, or comma, with the
default being Tab. The options for Quotes are single quotes, double
quotes, or none. The default is None.
Ÿ In the Output File field, type in the file name to use when saving the
exported file, or select the Browse button. On the “Save Account
Information” screen, in the “Look In” field, double click on the directory
where you want the data saved. In the “File Name” field, type in the file
name with the file extension. For example, Data1.txt for a text file, or
Data1.xls for an Excel file. Select the OK button. On the "Write
Displayed Data to a File", select Save to confirm your choice.
NOTE: Be sure to save your newly tallied data to a new file. If you try
saving the data to a previously saved data file, you will be asked if you
want to overwrite the file.
Ÿ The saved file can now be opened, or imported into another application to
create reports, etc. The column headers will show in the exported file.
AccXES Account Management Tool Administrator’s Guide 50

Uninstalling the AccXES Account
Management Tool
NOTES:
Ÿ Close the AccXES Client Tools and Account Management Tool software
before running the uninstall software.
Ÿ Always run the uninstaller from out side the install directories.
Ÿ Uninstalling ACT or AMT will uninstall both.
Ÿ Uninstalling the AccXES Client Tools (ACT) software will delete only those
files that were installed by the software. Files, images, data, user
preferences, etc., that are created by the user or application will remain.
Ÿ Uninstalling the Account Management Tool (AMT) will leave the saved
AMT data files. However, if you manually delete files, create a backup
copy of the saved AMT data files first, which are located in the
AMTdatabase folder. The default location of this folder is in C: \Program
Files\AccXES\AMTdatabase.
WARNING: If you accidentally manually delete the saved AMT database
files, they cannot be recovered. It is recommended to make a backup copy of
them on a regular basis.
Windows
To uninstall the Account Management Tools and the AccXES Client Tools
software for Windows 2000/Xp and NT 4.0:
1. Select Start > Settings > Control Panel > Add/Remove Programs.
2. In the software list, select AccXES. Click the Add/Remove button.
3. The InstallAnywhere Uninstaller screen will come up. Click the Uninstall
button.
4. An "Uninstall Complete" message will appear when the uninstall is
complete. Click the Quit button.
NOTES:
Ÿ Uninstaller deletes the current working directory and will uninstall both the
AccXES Client Tools and the Account Management Tools.
Ÿ Read the above warning message about losing your AMT data files if you
manually remove files.
AccXES Account Management Tool Administrator’s Guide 51

Unix
Always run the uninstaller from outside the install directories. If you run the
Uninstall_AccXES program within the AccXES/Uninstaller Data directory in Unix,
the current AccXES work directory, and the subdirectory that you are in, will get
deleted. Normal directory functions also will not work (i.e., ls or cd).
To uninstall the Account Management Tool software:
Ÿ In a command (shell) window, execute the following commands:
cd "application install directory"/Uninstaller Data/
./Uninstall_AccXES
where "application install directory" is the directory in which you originally
placed the AMT and ACT application.
NOTES:
Ÿ Uninstaller deletes the current working directory and will uninstall both the
AccXES Client Tools and the Account Management Tools.
Ÿ Read the above warning message about losing your AMT data files if you
manually remove files.
Mac OS X
To uninstall the application on a UNIX system, execute the following commands:
* cd <application install directory>/UninstallerData/
* ./Uninstall_AccXES
or
* Navigate to the AccXES install directory using Apple's OSX user interface.
* Double click on the "Uninstall_AccXES" icon inside of UninstallerData.
(Where <application install directory> is the directory in which
InstallAnywhere originally placed the Java application. Note that these
commands may differ from that shown above, depending on the version of
MacOSX being used. The commands shown here are for MacOSX 10.2.8
system.)
NOTES:
Ÿ Uninstaller deletes the current working directory and will uninstall both the
AccXES Client Tools and the Account Management Tools.
Ÿ Read the above warning message about losing your AMT data files if you
manually remove files.
RedHat
To uninstall the application on a UNIX system, execute the following commands:
AccXES Account Management Tool Administrator’s Guide 52

* cd <application install directory>/UninstallerData/
* ./Uninstall_AccXES
(Where <application install directory> is the directory in which InstallAnywhere
originally placed the Java application. Note that these commands may differ from
that shown above, depending on the version of Linux is used. The commands
shown here are for a RedHat 8.0 system.)
NOTES:
Ÿ Uninstaller deletes the current working directory and will uninstall both the
AccXES Client Tools and the Account Management Tools.
Ÿ Read the above warning message about losing your AMT data files if you
manually remove files
AccXES Account Management Tool Administrator’s Guide 53

Appendix 1
1. Enabling Job Accounting
From the Web PMT
Ÿ Log on to the Web PMT and enter your password. Press the Submit
button.
Ÿ After notification of the successful submission of your password, click on
ACCOUNTING.
Ÿ Click on the Enabled, or Optional radio button. (Selecting Enabled will
require every person to enter an Account ID and User ID before using the
scanner or printer).
Ÿ Press the Update Printer button to set the mode. The Controller will send
a message back indicating the success or failure of your request.
From the AccXES Compliant Scanner
Ÿ Press the Menu key, on the printer control panel.
Ÿ Press the Next key until SYSTEM ADMINISTRATION is displayed.
Ÿ Press the Entry key.
Ÿ Enter the administrator password.
Ÿ Press the Next key until JOB ACCOUNTING is displayed. Press the Enter
key.
Ÿ Press the Next key until ACCOUNTING MODE is displayed. Press the
Enter key.
Ÿ Press the Next key until ENABLED or OPTIONAL is displayed. Press the
Enter key.
From the Printer User Interface ( 8825/8830/8850 )
Ÿ Press the On-line key.
Ÿ Press the Enter key.
Ÿ Press the Next key until SYSTEM ADMINISTRATOR is displayed.
Ÿ Press the Enter key. The display shows ENTER PASSWORD.
Ÿ Enter the administrator password using the numeric keypad on the printer.
Ÿ Press the Enter key. The display shows ACCOUNTING
ADMINISTRATION.
Ÿ Press the Next key until PRINTER ACCOUNTING MODE is displayed.
Ÿ Press the Enter key.
Ÿ Press the Next key until the desired mode is displayed (ENABLE,
AccXES Account Management Tool Administrator’s Guide 54

DISABLE, OPTIONAL).
Ÿ Press the Enter key.
Ÿ Press the On-line key to return to normal operation.
2. Saving Each Printer's Media Usage Data to a File Before Loading 7.0
AccXES Firmware.
WARNING: Each controller's job accounting data must be saved to a file
before the 7.0 AccXES firmware is loaded onto a printer, or the data will be lost.
The saved data can then be imported into another software for analysis. The
account and sub-account numbers can be imported into the AccXES Account
Management Tool.
Any of the following methods can be used to save the accounting data from
printers that are using AccXES firmware less than version 7.0.
Web PMT
Ÿ On the Main Menu toolbar, select ACCOUNTING.
Ÿ Select Reports.
Ÿ On the Reports Page, put in the account and sub-account for which you
want to retrieve media usage data. To retrieve system account data, 0 for
the account number and 1 for the sub-account number. Putting -1 in the
Account field, will display all accounting data.
Ÿ Select if the display values should be in square decimeters or square feet.
Ÿ Select the Query button.
Ÿ Select the Export button. You will be prompted with the standard
Windows file saving dialog.
AccXES Client Tools (ACT)
Ÿ Select the Accounting Tab.
Ÿ Type in the account and sub-account number for which you want to
retrieve media usage data, such as 3.0. Putting -1 in the Account field,
will display all accounting data.
Ÿ Select if you want the data in square feet or square decimeters.
Ÿ Press the Query button. The media usage data will appear for the account
and sub-account that you specified.
Ÿ To save this retrieved data, select the Write Account Data to File toolbar
button to invoke the Accounting Report dialog. This dialog is used to
specify the file format of the accounting data to be saved for generating a
report. This dialog is where you also specify the data filename, and where
you want the data file to be saved.
Ÿ Select the Save button.
AccXES Account Management Tool Administrator’s Guide 55

Document Submit Tool (DST) - prior to the AccXES Client Tools (ACT)
Ÿ Select the Accounting toolbar button.
Ÿ Type in the Account Number and Password.
Ÿ Click on the Decimeters check box to change the usage measurement
from square feet to decimeters.
Ÿ Select the Query button. The media usage data will appear in the Account
Usage window.
Ÿ Select the Report button to bring up the Accounting Report dialog.
Ÿ Select the Delimiters and Quotes options.
Ÿ Select the Output file name and location, using the Browse button if
necessary. Select the Save button.
Writing account data to a floppy disk from printer controllers (N5T, CNG, or
VP8 )
Ÿ Check that a floppy disk drive exists on the printer's controller. If yes, do
the following.
Ÿ Ensure that a 3.5-inch floppy disk with MS-DOS formatting is available.
Ÿ Insert the floppy disk into the disk drive of the controller.
Ÿ At the scanner, select the Menu button > System Administration.
Ÿ Enter the Password.
Ÿ Select Job Accounting > Reports.
Ÿ On the Reports screen, select WRITE TO DISK. The WRITE TO DISK
screen is displayed.
Ÿ Enter up to a 4-digit file number for the name of the file to be created. The
first number must be within the range 1-9. Do not use zero.
Ÿ Press the Enter key.
Ÿ The file is written to the disk, with "Acct" added before your file number.
The message WRITING TO DISK is displayed. An example of the file
name that would be created if you choose 1 as your file number is
Acct1.txt.
AccXES Account Management Tool Administrator’s Guide 56

Appendix 2
Data Field Descriptions
The following is a list of data fields for the AccXES Account Management Tool
Master Database. This data comes from the job accounting records that are
collected by the AMT from the defined printers. These records are displayed
when the View ... toolbar buttons are selected on the Printer Job Accounting
Tab, where the data is listed first by printer, then account, then user.
Account ID - This is an alphanumeric character string (A-Z, 0-9), with a
maximum of 32 characters. A decimal point . and minus sign - are allowed.
Lower case characters are converted to upper case letters on entry. The Account
ID is defined in the AMT by the AMT Administrator and then sent to the printer's
controller. Only AMT defined users can use an AMT defined Account ID when
interacting with the defined printer/scanner. The Account ID field is input on the
Add Accounts dialog. When accounting is set to "optional" on the printer or
scanner, any job log file data that does not have an Account ID will be assigned
the "GenericAccountID". Multiple users can be associated with the same Account
ID.
Description (Printers) - Input this information on the Add Printers dialog. It can
be viewed in the Description field on the Printers Tab.
Finishing - This data field specifies the type of finishing applied to the print job.
The following data will be tracked if a finisher/folder is attached to the printer and
if finishing is enabled on the printer. (To verify if a folder is enabled, go to the
Web PMT and select Printer Defaults > Processing Defaults > Finishing.)
None
Folded
Dual-punched
Triple-punched
Quad-punched
Tabbed
Reinforced
AccXES Account Management Tool Administrator’s Guide 57

NOTE: When a user specifies that a job is to be folded, the job is logged as
"Folded" even if the fold job does not complete the fold process.
IP Address of the Defined Network Printer - Input this address on the Add
Printers dialog. It can be viewed on the Printers Tab.
Job Completion Time - It is the time that the print or scanned job finished.
Job Sets - The number of sets of a job that were produced. For example, a four
page document with 3 job copies completed means that 3
sets of 4 pages each were produced. A job set of images, or
documents, can be sent to the printer from the Document
Submit Tool, or scanned images can be created into a job
set at the scanner. If multiple media types or media sizes
are used for the same job, the first will be listed on the Raw
Job Accounting Data list on the Printer Job Accounting Tab.
However, if you double click on the row in the Media Type
column, the additional data will show.
Job ID - This is a unique alphanumeric job number which has a maximum of 256
characters.
Job Name - This is the alphanumeric name of the job which is assigned by the
user or the printer. If not defined, it will default to print, scan,
or copy.
Job State - The following printer job completion states will be reported.
Completed-normal - job completed normally
Terminated - job was terminated due to a system error
Deleted - job was deleted by the system user
Job Type - The following are defined printer job types: print, copy, scan, walkup-
report (test print), auto-report (diagnostic error pages or power-on
configuration sheets), other. The data is generated by the scanner
and printer.
AccXES Account Management Tool Administrator’s Guide 58

Last Authorized - This is the date and time when the last authorization
command was sent to the printer's controller to tell it what
authorized accounts and users can be used at that
printer/scanner. It shows on the Printers Tab.
The authorization command is sent to the printer's
controller by selecting this toolbar button on the Edit Account
Associations Tab, or on the Printers Tab.
Last Collected - This is the date and time when the printer's job log file data was
last collected from the printer's controller. It shows on the
Printers Tab.
The printer's job log file data is collected when the AMT
Administrator selects this toolbar button on the Printer Job
Accounting Tab.
Last Configuration Update - The last date and time that the Job Options were
sent to the printers. This shows on the Printers Tab. The Job
Options are made on the "Select Job Accoun ting Options"
dialog, which the AMT Administrator accesses from a toolbar
button on the Printer Job Accounting Tab.
Last Edited - The date that the printer record was created in the AMT Database,
or the last date that the selected printer's IP Address, name, or description were
edited on the "Edit Printer" dialog. This shows on the Printers Tab.
Media Area - Numeric, in square mm. The data is generated by the printer.
Media Sheets - The total number of sheets printed in a job.
Media Size - The size of the media (mm), which is based on which selected
media size is loaded in the printer. If multiple media types or media
sizes are used for the same job, the first will be listed on the Raw
Job Accounting Data list on the Printer Job Accounting Tab.
However, if you double click on the row in the Media Type column,
the additional data will show.
AccXES Account Management Tool Administrator’s Guide 59

Media Type - It is based on which selected media type is loaded in the printer.
(To view the current list of sizes for your printer, in the Web PMT,
select Processing Defaults > Media > Media Size and Media
Type drop down menus.) If multiple media types or media sizes are
used for the same job, the first will be listed on the Raw Job
Accounting Data list on the Printer Job Accounting Tab. However,
if you double click on the row in the Media Type column, the
additional data will show.In the Tallied Job Accounting Database,
there will be a separate column for each media type.
Printer Name - 20 characters maximum. The AMT Administrator inputs the
Printer Name on the Add Printers dialog. It can be seen on the
Printers Tab and the Edit Account Associations dialog. However,
the Printer Name in the Raw Job Accounting Database is the
printer name set by the Web PMT or by a PJL command.
Record ID - This is the Raw Job Accounting data record identifier that is
generated by the Account Management Tool.
Scan Destination - This identifies the machine and the directory on the AccXES
controller where the scanned image was stored. If a job set
was created on the scanner, then double click on this field to
view the data for each of the scanned documents that were
in the job set.
Scan File Size - Image size (Kbytes) for copy jobs and disk file size for scan-to-
net jobs.
Scanned to Net Count - The total number of scanned images sent to scan-tonet destinations listed in the job record.
Scan Media Length - Length (mm) of the media being scanned.
Scan Media Width - Width (mm) of the media being scanned.
Scan Time - This is the amount of time (seconds) that it took for the image to be
scanned, from the start to the finish of the scan. If a job set
was created on the scanner, then double click on this field to
view the data for each of the scanned documents that were
in the job set.
AccXES Account Management Tool Administrator’s Guide 60

Tally ID - This is the Tallied Job Accounting dat a record identifier that is
generated by the Account Management Tool.
Time Stamp - Each newly created raw record and tally record will be marked
with the date and time that the data record entered the Raw
or Tallied Database.
User ID - Alphanumeric character string (A-Z, 0-9), maximum 32 characters. This
is defined in the AMT by the AMT Administrator. A decimal
point . and minus sign - are allowed. Lower case characters
are converted to upper case letters on entry. It is input on the
Add Users dialog. When accounting is set to "optional" on
the printer or scanner, any job log file data that does not
have a User ID will be assigned the "GenericUserID".
Multiple users can be associated with the same Account ID.
AccXES Account Management Tool Administrator’s Guide 61

AMT Database Resolution
NOTE: If "metric units" is selected on the Job Options dialog, the raw database
units are square mm and become square dm in the tallied database. If "english
units" is selected, the raw database units are square inches and the tallied data
is in square feet.
Raw Job Accounting Database
The Raw Job Accounting Database shows on the Printer Job Accounting Tab
and consists of the following data columns.
Record ID, Printer Name, Account ID, User ID, Job Name, Job ID, Job Type, Job
State, Job Sets, Job Completion Time, Media Ty pe, Media Size, Media Area,
Media Sheets, Scan Time, Scan File Size, Scan Media Width, Scan Media
Length, Scan Destination, Scan to Net Count, Time Stamp
Optional data selections will influence what is collected from the printers’
controllers and therefore what is retrieved and shown on the Printer Job
Accounting Tab.
This database will be updated whenever the AMT Administrator retrieves the job
accounting data from each AccXES AMT defined printer's job log file, which is
located in each printer's controll er. The data will remain in the database until it is
manually deleted, or until the Keep Raw Printer Records Interval is reached.
Go to the Printer Job Accounting Tab to view the data that is currently in this
database and to collect the job accounting data from the controllers to update the
Raw Job Accounting Database. The data records will be sorted for each Printer,
in the following order:
Ÿ Record ID
Ÿ Printer Name (numbered printers, followed by alphanumeric printers)
Ÿ Account ID (numbered accounts, foll owed by alphanumeric accounts)
Ÿ User IDs for each Account ID (numbered users, followed by
alphanumeric users, including GenericAccountID and GenericUserID)
Ÿ Time Stamp
Within the same printer, for the same account/user, the most recent records
will be listed first (per the time stamp).
After the AccXES AMT has completed the copying of the controller's job
accounting data and has made updates to the Raw Job Accounting Database, it
will issue a purge command to the printer to remove the original data from the job
log file in the printer's controller. If the data does not purge, a checkmark will
AccXES Account Management Tool Administrator’s Guide 62

appear on the Printers Tab, in the "Purge Needed" column. A toolbar button can
then be selected on the Printers Tab to send another purge command to delete
the controller's original copy of the transferred data. The Tallied Job Accounting
Database is emptied when the raw data is retrieved from the printers.
Tallied Job Accounting Database
The purpose of the Tallied Job Accounting Database is to provide a summation
of the media square area field and scan usage records that are currently in the
Raw Job Accounting Database at the time of the tally. The tallied job accounting
data will be listed for each defined user, account, and printer. Accounts and
Users that show zero media usage will not be listed in the tallied data. If an
account or user is defined on more than one machine, a line for each machine's
accounts and users appears in the tallied data.
Go to the Printer Job Accounting Tab to select the toolbar buttons to view the
data that is currently in this database and to generate a tally of the following data
fields that comprise the Tallied Job Accounting Database.
Tallied Data Fields - Tally ID, Printer Name, Account ID, User ID, a column for
each media type, Scan Time, Scan File Size, Total Scan to Net Count, Time
Stamp
WARNING: If you have not written the tallied data to a file by the time that
the data is deleted from the Raw Job Accounting Database (manually or due to
the keep interval time being met), then the deleted raw data cannot be re-tallied .
You can only generate a tally of data that is currently in the Raw Job Accounting
Database.
AccXES Account Management Tool Administrator’s Guide 63

Appendix 3
Menu Commands
The menu commands are located in the toolbar at the top of each AMT tab. The
commands that are not valid from the currently viewed tab will be grayed out.
File Menu
Import Accounting File - Import account and sub-account identifiers into the
AMT Raw Database, which was generated from AccXES
firmware versions 2.0 through 6.1 or import a Non-AccXES
file.
Exit - Close the Main Window and exit from the AccXES Account Management
Tool software.
View Menu
Accounts - View the currently defined list of AccXES AMT job accounts.
Users - View the currently defined list of AccXES AMT job accounting users.
Printers - View the currently defined list of AccXES printer/copiers from which to
collect job accounting data.
Associations – Refreshes the “Current Associations…” window to show the
current associations for the selected accounts.
Raw Job Accounting Data - Displays the raw job accounting database records.
Tallied Job Accounting Data - Displays the tallied job accounting database
records.
Configuration Menu
Add - Open the "Add Accounts", "Add Users", or "Add Printers" dialog.
Delete - Delete the selected accounts, users, or printers from the account
database.
Find - Open the "Find Account", "Find User", or "Find Printer" dialog.
AccXES Account Management Tool Administrator’s Guide 64

Edit Printer - Edit the Printer Name, Printer Description, or IP Address
Printer Job Accounting Options - Open the dialog for selecting what data will be
collected in the job log file at each defined printer.
Printer Job Accounting Options - Open the dialog for selecting what data will
be collected in the job log file at each defined printer.
Transaction Menu
Write Tallied Data to a File - Writes tallied data to a file.
Write Raw Data to a File – Writes raw data to a file.
Update AccXES Printer(s) Configuration Database – Sends the currently
defined job options to the selected printers
Send Account Associations to the Printers - Sends the list of authorized
accounts and users to the printers.
Delete Raw Job Accounting Data from the Printers - Deletes the controller's
job log file data from the printers whose "Purge Needed"
field is checked on the Printers Tab.
Collect Job Accounting Data from the Printers - Collects the controller's job
log file data from each of the defined printers and puts it in
the Raw Job Accounting Database. The tallied data is also
emptied from the Tallied Job Accounting Database.
Tally the Raw Accounting Data - Tallies the Raw Job Accounting Database to
create the latest Tallied Job Accounting Database.
Delete Selected Accounting Data from the database - Deletes the selected
records from the displayed database.
Delete All Raw Accounting Data from the Database - Deletes all records from
the raw database.
Help Menu
Help Topics - Invokes online help.
About... - Displays the version number of the Account Management Tool
application.
Internal Help Viewer (Solaris/Mac OS X) - Select this to view the Help files
within the Account Management Tool program.
Default Web Browser - Windows platform users can choose the Default Web
Browser for viewing the Help files simultaneously while using
the Account Management Tool.
AccXES Account Management Tool Administrator’s Guide 65

Index
Look in the Help Files Index file to access the hyperlinks to the items in this Index
list.
A
Account Associations
Account ID, Add an account to the AMT Database
Account ID Data Field
Accounts Tab
Add an Account
Add a Printer
Add a User
Appendix 1
Appendix 2
Appendix 3
Associations, to edit
Authorization Needed
C
Configuration Menu Commands
Configuration Needed
D
Delete an Account
Data Field Descriptions
Data Files
Delete a Printer
Delete a User
E
Edit Account Associations
Exporting (Writing) Media Usage Data to Third Party Software
F
File Menu Commands
Find an Account
Find a Printer
Find a User
Finishing Data Field
AccXES Account Management Tool Administrator’s Guide 66

G
GenericAccountID - see Account ID
GenericUserID - see User ID
H
Help Menu Commands
I
Importing Data From Printers Using Less Than 7.0 AccXES Firmware
Installing the AccXES Account Management Tool
IP Address of the Printer
J
Job Accounting, Enabling
Job Completion Time
Job ID
Job Name
Job Options
Job Sets
Job State
Job Type
K
Keep Interval
M
Media Type
Media Area
Media Length
Media Width
Media Sheets
Menu Commands (All)
O
Overview
AccXES Account Management Tool Administrator’s Guide 67

P
Printer Description
Printer Name
Printers Tab
Printer Job Accounting Tab
Purge Data from the Printer's Job Log File
Purge Needed
R
Raw Job Accounting Database
Record ID
Retrieving Job Accou nting Data from Printers
S
Save Pre 7.0 Firmware Media Usage Data
Scan Destination
Scan File Size
Scan Media Length
Scan Media Width
Scanned to Net Count
Scan Time
Sets Completed - see Job Sets
System Requirements
T
Table of Contents
Tallied Job Accounting Database
Tally ID
Time Stamp
Transaction Menu Commands
Tutorial
U
Uninstalling the AccXES Account Management Tool
Unvalidated
Update AMT Raw Job Accounting Database
Update (Create) AMT Tallied Job Accounting Database
Update Printer
User ID
Users Tab
AccXES Account Management Tool Administrator’s Guide 68

V
View Defined Accounts
View Defined Printers
View Defined Users
View Menu Commands
AccXES Account Management Tool Administrator’s Guide 69

Prepared by:
Xerox Corporation
Global Knowledge & Language Services
800 Phillips Road
Building 845 -17S
Webster, New York 14580-9791
USA
Printed in the United States of America
AccXES is a trademark of the Xerox Corporation 200 4. All other product names mentioned
herein are trademarks of their respective companies. All rights reserved.
701P41531 May 2004
 Loading...