

Page 1
Welcome to Xara3D. Xara3D is designed solely to create the highest quality 3D text and graphics, such
Getting started
These pages help you when you first
install Xara3D.
The basics
The design types
Purchasing Xara3D
What's new in version 6
Resources on the CD
License terms
New design types
It's not just buttons anymore. Find out
how one design now has many different
results.
How do I...?
Use these pages
if you want to find out how to do
something in Xara3D.
What does this
do?
Use these pages
to find out more about the menu options
or the dialog boxes
Other
information
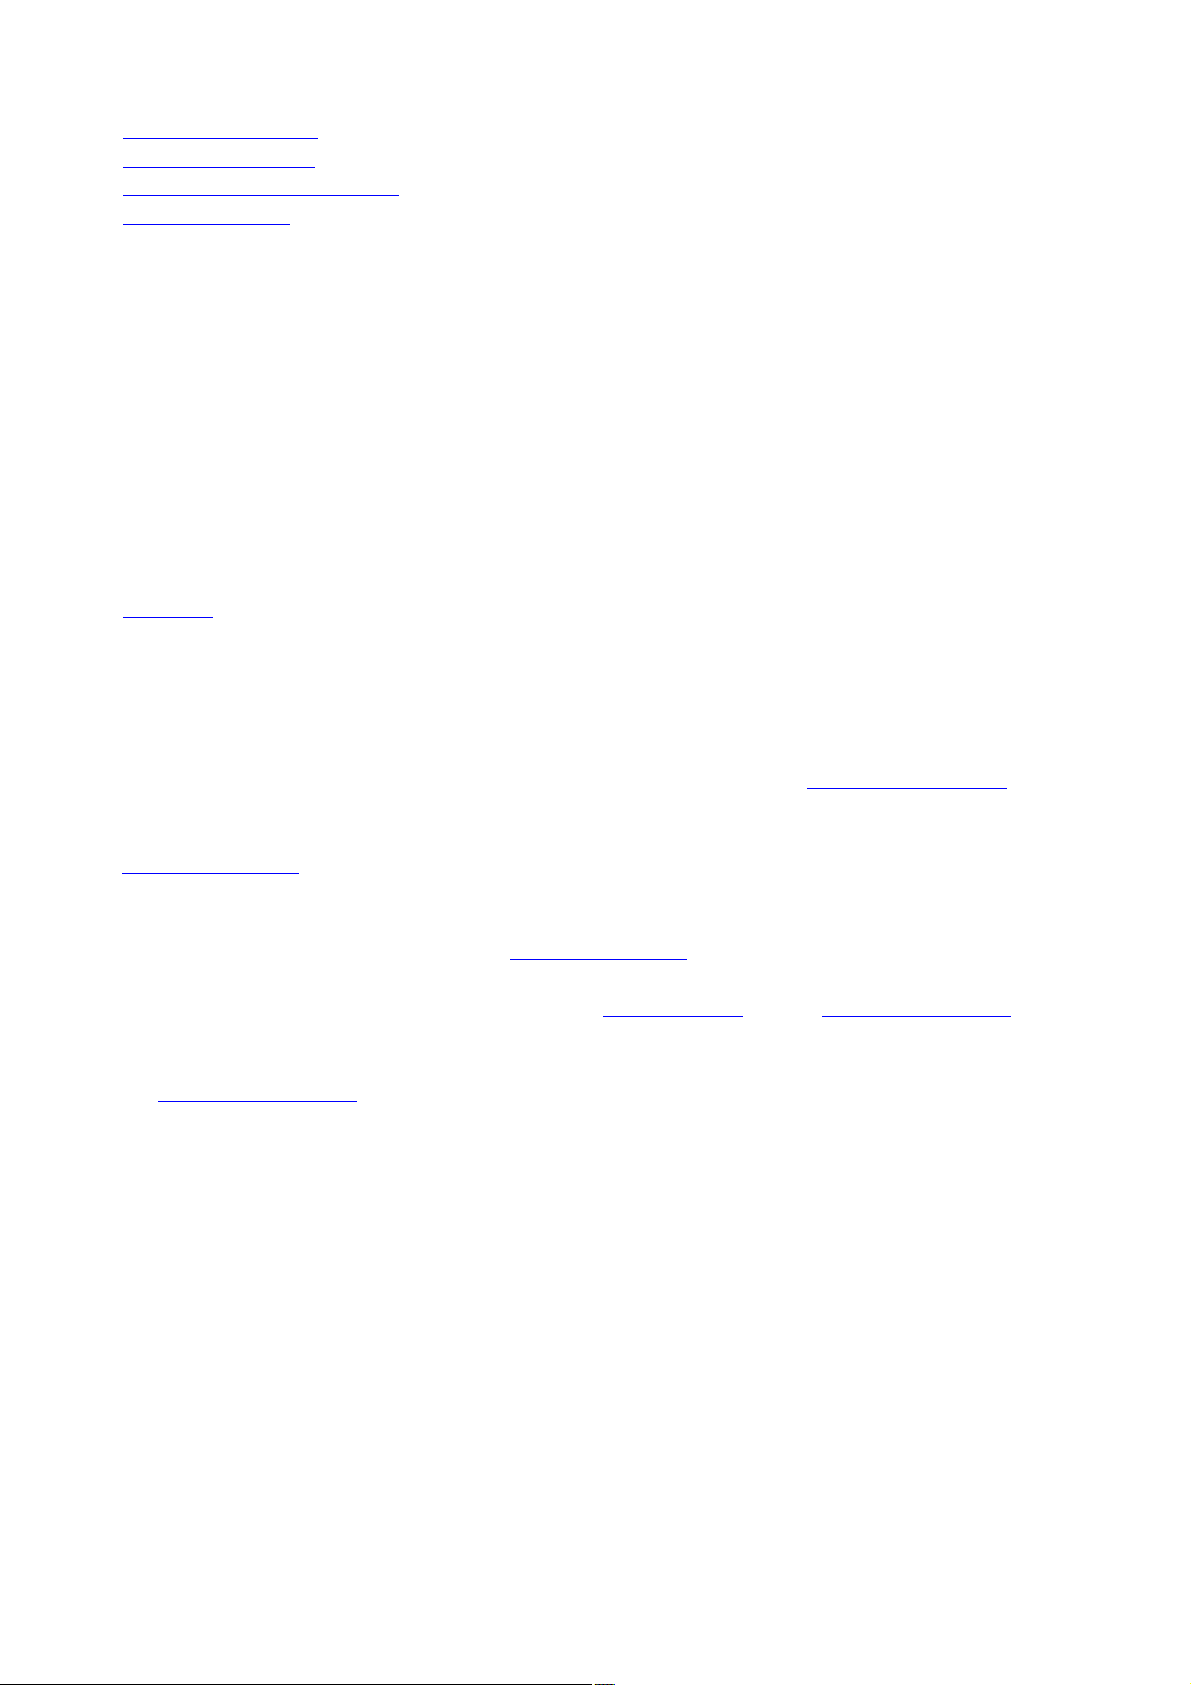
Using Xara3D
Learn how to get the best out of Xara3D's interface, with
information on moving toolbars and docking windows. More
information
.
Help font size
If you find the text in this guide too small, you can alter it by
holding the Ctrl key and moving your mouse wheel up and
down. Please note: this will also change your Internet Explorer
font sizes, so you may have to do the same thing when using
IE to change the font size back to normal.
as logos, titles, headings and buttons. All images are fully anti-aliased for that smooth, professional
quality, making them ideal for web pages and presentations. Xara3D can also create high quality
animated GIFs, AVIs and simple Flash movie sequences in seconds, and any animation can even be
saved as a screensaver!
An introduction to Xara3D
Before you read this help guide, we highly recommend viewing the Xara3D introduction movie. It is the
ideal way to get to know Xara3D and get an overview of its features, allowing you to make the most of
the program. Information on how to view the movie
.
Page 1
Page 2
Customizing Xara3D
Keyboard short cuts
Hidden and advanced options
Technical support
Copyright
information
Version 6.0 February 2005
Copyright ©1997–2005 Xara Group
Ltd.
Xara Group Ltd.
Gaddesden Place
Hemel Hempstead
HP2 6EX
United Kingdom
xara.com
All trademarks acknowledged.
Xara, Xara X, Xara Webster, Menu Maker and Xara3D are trademarks of Xara Group Ltd.
Flash is a trademark of Macromedia Inc.
Adobe and Photoshop are either trademarks or registered trademarks of Adobe Systems Incorporated
Frankfurter Venetian, Geotype, Greek Diner, Haxton, Russel Write, Steppes, Whimsy, Bouton
International and Huxley Titling kindly provided by Gary David Bouton, see www.theboutons.com
.
Other fonts are from a collection created by Fontbank Inc., which can be purchased from our web site
www.buyfonts.com
Many of the WMF symbols on the CD are letters from EFF fonts—Creatures, Chess, Symphony,
Picturesque, Birdie and ArrowPi - which are some of the variety of quality fonts from the EFF range
which can be purchased from our web site www.buyfonts.com
Other WMF symbols are courtesy of James Parry or come from the Publish Art CD produced by Ekits.
Details about this graphical resource can be found at: ekitsonline.com or from jim@ekitsonline.com
Still more WMF symbols were produced from Gary David Bouton's symbolic fonts Geotype, Haxton
and Sympols. GeoType and Haxton are included on this CD, Sympols can be downloaded from Gary's
site www.theboutons.com
Last updated February 18 2005–9.32
Page 2
Page 3
What's new in version 6
Xara3D 6 is our quickest, easiest and most useful Xara3D yet. Here's why.
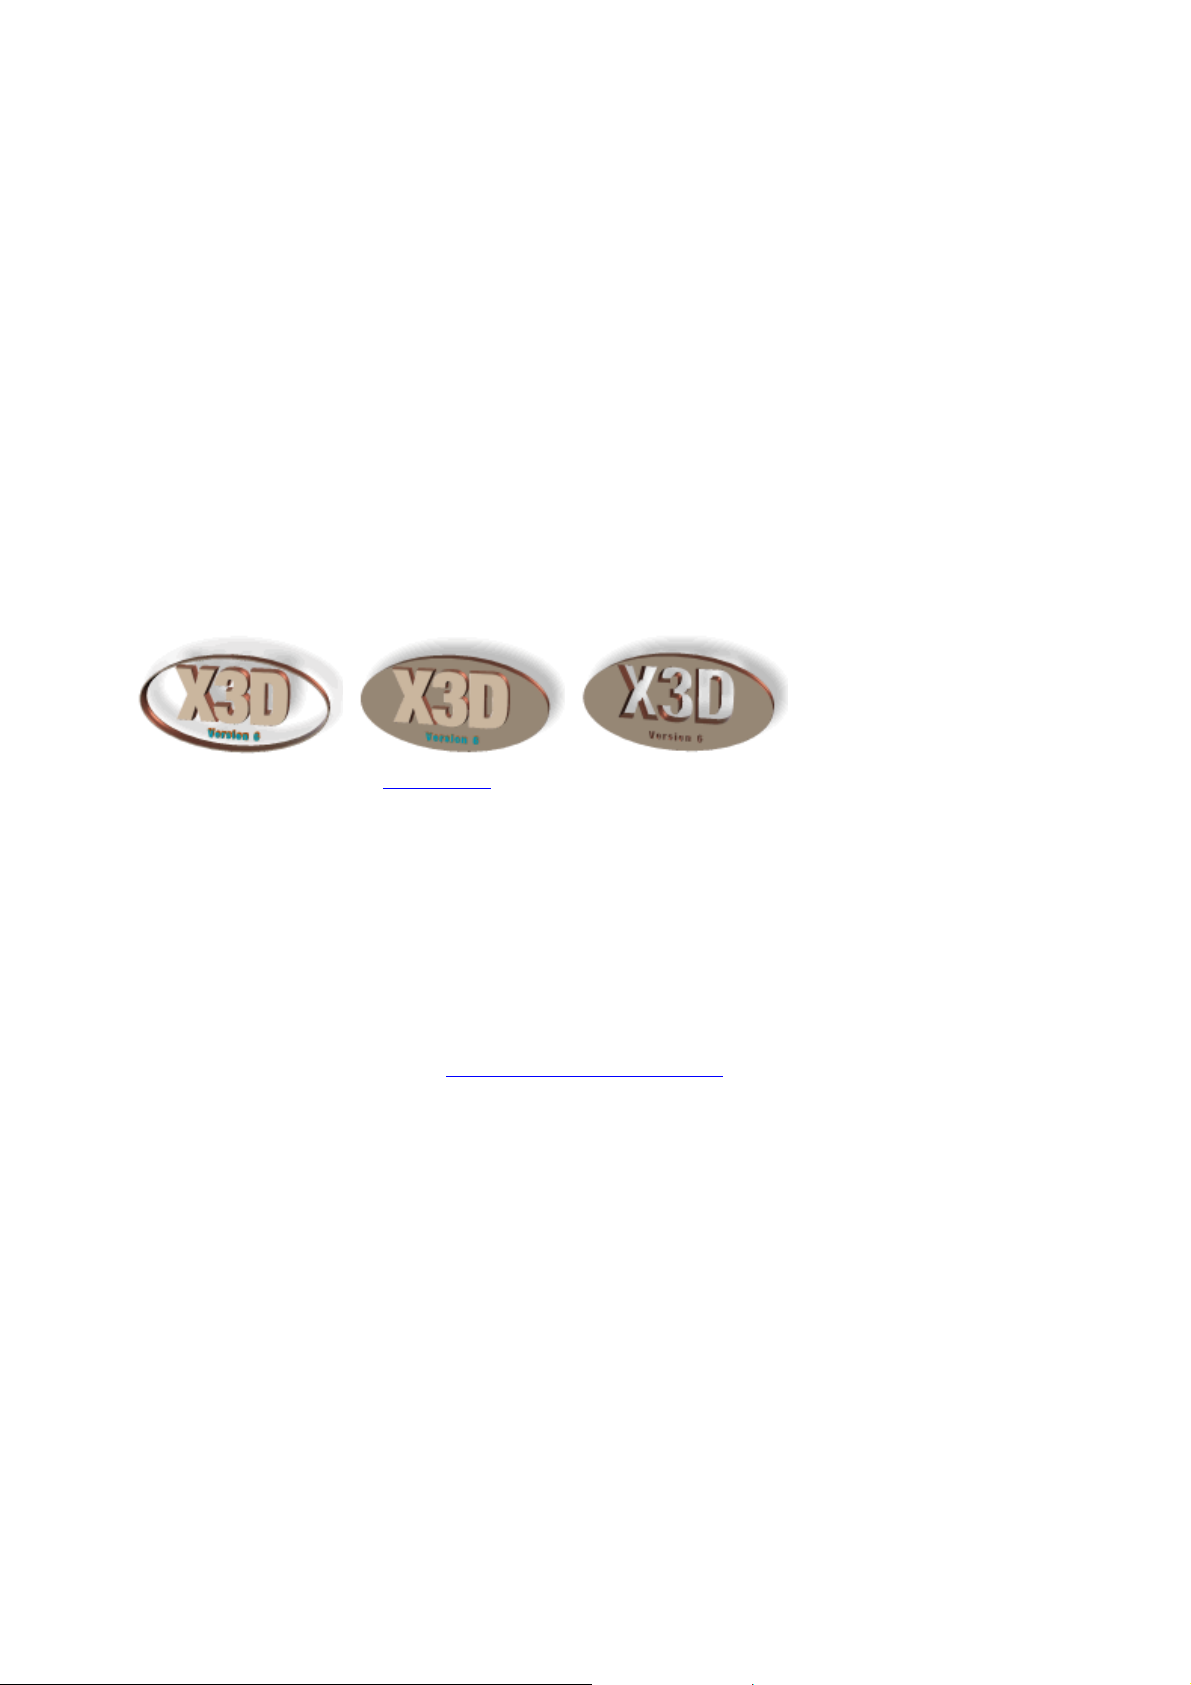
New design types
Xara3D 5's automatic 3D button maker proved very popular, so we've taken the same concept to offer
other one-click transformations—enormously increasing the type of graphics you can create.
Borders. Adds a customizable border around your heading, giving it instant added impact.
Boards. Sits your heading on a solid customizable board, so the image appears to emerge from a
solid background.
Boards and holes. The reverse of boards—gives an impression of a cut-out image.
There are also two new bevel types
from which to choose.
New easier-to-use look and feel
The new UI brings Xara3D right up to date and makes it significantly quicker and easier to use,
including:
A new, modern look and feel.
Convenient and time saving docking windows and toolbars
.
New context sensitive menus, all fully customizable.
More interactive tools
Current Xara3D users will know how easy it is to move objects and change shadows in Xara3D just by
clicking and dragging. We've now applied the same ease of use to extrusion, bevel depth and moving text
on a design—simply drag on the image, and see the result instantly! It's far more intuitive, and a real time
saver—great for experimentation.
Greater control over movie export
You can now select to save a 3D animation in any AVI format. So, for example if you have the correct
codec installed you can create DivX or MPEG4 movies of your favorite 3D animations, and you can
control the compression and other settings for each movie type.
Page 3
Page 4

Compatible with Xara X¹
Thanks to cut and paste compatibility with Xara X¹ (or later) you can now paste shapes from Xara X¹
into Xara3D 6, extrude and edit in Xara3D, then paste your 3D designs back into Xara X¹ as bitmaps.
Easier than ever to use
Xara3D has always been popular due to its ease of use. With the totally new interface, new easier to use
help guide, and many other small enhancements (many requested by existing owners of Xara3D) we're
confident that this is our easiest to use Xara3D yet!
Page 4
Page 5
Purchasing Xara3D
This page applies if you are running the time-limited trial version of Xara3D.
This version of the software displays a background message, which you cannot change. (With the full
version you can use any color or bitmap as a background.)
When you start up Xara3D a screen will appear reminding you that you are running the trial
version—click
Buy Xara3D now on that dialog box. This lets you purchase Xara3D using a fully secure transaction
process, 24 hours a day, 7 days a week.
We also have resellers around the world who offer local sales and support - for a current list see
xara.com/ordering/world.asp
As soon as you purchase Xara3D, you can download and install a full (unlocked) version. We also
automatically mail you a CD,
which contains a full version of the program. Please make sure you enter your correct address when
purchasing Xara3D. You should receive the CD within 28 days.
Page 5
Page 6

Resources on the CD version
If you ordered Xara3D from Xara a CD will be mailed to you . The CD contains a copy of Xara3D and
extra examples, textures, and fonts.
Example 3D graphics
Example 2D graphics
Textures
Fonts: over 60 in total.
Page 6
Page 7

Support
We highly recommend viewing the Xara3D introduction movie. It is the ideal way to get to know
Xara3D and get an overview of its features, allowing you to make the most of the program. Information
on how to view the movie
.
Our support site which offers comprehensive FAQs, constantly updated and available 24 hours, is often
the best source for instant answers. You can also contact our technical support staff from here. The site
can be found at xara.com/support/xara3D
There is also a Xara3D forum at TalkGraphics.com
, allowing you to discuss the program with other users.
Page 7
Page 8

License terms
IMPORTANT NOTICE: The Xara3D software ("Software") is the copyright of Xara Group Limited
("Xara") whose principal place of business is at Gaddesden Place, Hemel Hempstead, Herts, HP2 6EX,
United Kingdom and may not be stored on any computer or copied without the license of Xara. You are
offered a license on the terms of the End User License Agreement ("EULA") set out below.
If you accept the terms of the License Agreement, select "Yes".
Selecting I ACCEPT and installing the Software constitutes acceptance of the terms of the EULA. Please
read carefully and accept the terms and conditions of the EULA before installing the Software. Do not
install the Software if you do not agree to the terms and conditions of the EULA.
If you do not accept these terms and you have purchased the Software you may within 14 days of
purchase return the CD-ROM containing the Software, unused and intact or in the case of a download a
Letter of Destruction to your supplier together with proof of purchase for a full refund.
XARA3D END USER LICENSE AGREEMENT ("EULA")
You are permitted to:
(1) load or download the Software and use it only on a single client computer which is under your
personal control;
(2) transfer the Software from one computer to another provided it is used on only one computer at any
one time;
(3) make one copy of the Software for back-up purposes only in support of the permitted use. The
copies must reproduce and include Xara’s copyright notices;
(4) transfer the Software (complete with all its associated documentation) and this license to another
person provided he has agreed to accept the terms of this Agreement and you contemporaneously
transfer all copies of the Software you have made to that person or destroy all copies not transferred. If
any transferee does not accept such terms then this license shall automatically terminate. The transferor
does not retain any rights under this Agreement in respect of the transferred Software or license.
You are not permitted:
(a) to use the Software on any computer or system which permits electronic access to it by more than
one user;
(b) to rent, lease, sub-license, loan, copy (except as expressly provided in this Agreement), modify
adapt, merge, translate, reverse engineer, decompile, disassemble or create derivative works based on
the whole or any part of the Software or its associated documentation except as permitted by law;
(c) except as expressly provided in this Agreement, to use, reproduce or deal in the Software in any
way.
TERM
The license is effective until you terminate it by destroying the Software and its documentation together
with all copies. It will also terminate if you fail to abide by this Agreement. Upon termination you agree to
destroy all copies of the Software and its documentation including any Software stored on the hard disk
of any computer under your control. If you are using the trial version of the Software then any rights to
use the Software or images created with it terminates with the expiration of the trial period.
OWNERSHIP
You own only any CD-ROM (or authorized replacement) upon which the Software was supplied where
it was not downloaded. You may retain such CD-ROM on termination provided the Software has been
erased. Xara shall at all times retain ownership of the Software as recorded on the original CD-ROM
and all subsequent copies thereof regardless of form. This Agreement applies to the grant of the license
only and not to the contract of sale of the CD-ROM.
RESTRICTIONS
This license gives you the right to use images created with this Software with the following limitations:
1. The textures and fonts cannot be redistributed, sold or published in any form, commercial or
Page 8
Page 9
otherwise.
2. Some fonts are provided by third parties who retain the copyright. In all cases copyright is reserved by
Xara or its licensors and is protected by international copyright law.
3. You may not use the images for any purpose which is prohibited by law.
WARRANTIES AND REMEDIES
1 Xara warrants that the storage media on which the Software may have been supplied will be free from
defects in materials and workmanship under normal use for a period of 90 days after the date of original
purchase. If a defect in any CD occurs during such period you may return it with proof of purchase to
your supplier who will replace it free of charge.
2 Xara warrants that the Software will perform substantially in accordance with its accompanying
documentation (provided that the Software is properly used on the computer and with the operating
system for which it was designed) and that the documentation correctly describes the operation of the
Software in all material respects. If Xara is notified of any significant error in the Software during the
period of 90 days after the date of original purchase it will correct any such error within a reasonable time
(by replacement if it chooses) or, at its option, refund the price of the Software (against return of the
Software and its documentation).
3 The warranties set out in paragraphs 1 and 2 above are your sole warranties and are in place of all
warranties conditions or other terms expressed or implied by statute or otherwise, all of which are hereby
excluded to the fullest extent permitted by law. Paragraphs 1 and 2 also set out your sole remedies for
any breach of Xara’s warranties
4 In particular Xara does not warrant that the Software will meet your requirements or that the operation
of the Software will be uninterrupted or error free or that all errors in the Software can be corrected.
You load and use the Software at your own risk and in no event will Xara be liable to you for any loss or
damage of any kind (except personal injury or death resulting from Xara’s negligence) including lost
profits or any indirect or consequential loss arising from the use of or inability to use the Software or from
errors or deficiencies in it whether caused by negligence or otherwise, except as expressly provided in
this Agreement.
CONSUMERS
Nothing in this Agreement shall affect your statutory rights as a consumer .
LAW
This Agreement shall be governed by English law.
If you have any questions concerning this Agreement please write to Xara Group Limited, Gaddesden
Place, Hemel Hempstead, Herts, HP2 6EX, United Kingdom.
The bundled fonts and textures cannot be redistributed, sold or published in any form, commercial or
otherwise. Haxton Logos, Geotype, Greek Diner, Russel Write, Bouton International, Huxley Titling and
Whimsy fonts are provided by kind permission of Gary Bouton and remain © Gary Bouton, see
www.theboutons.com/
. In all cases copyright is reserved by Xara or its licensors and is protected by international copyright
law.
Page 9
Page 10
Getting started
We highly recommend viewing the Xara3D introduction movie. It is the ideal way to get to know
Xara3D and get an overview of its features, allowing you to make the most of the program. Information
on how to view the movie
.
To create a 3D heading is easy:
1.
Start typing to enter the text you want. You can delete existing text using backspace.
1.
2.
Select the font for the heading.
2.
3.
Change the bevel and extrude
3.
if you wish.
3.
4.
Drag the text to get the angle you want.
4.
5.
Change the color
5.
of the text or background.
5.
6.
Resize the Xara3D window to set the size of the text.
6.
7.
Select
7.
export bitmap on the file menu to save the heading as a BMP, PNG, GIF, JPEG, Flash SWF,
7.
ICO (icon) or CUR (cursor).
Want an animated heading?
Simple. After step 4 change the animation options. You can preview the animation by clicking the start
animation button. Then in step 7, select
export animation on the file menu to save as an AVI movie or Animated GIF, Flash SWF or ANI
cursor.
Want to change the lighting angles or colors?
Simple. Click the light bulb button. This displays the three lights that color the text (and a special striped
light that creates the shadow). Drag the lights to change the angles or double-click on a light to display
the color picker.
Want to copy styles from an existing Xara3D heading?
You can import the settings (lighting, colors, and so on) from any existing X3D file by using import style
on the file menu. Or you can import animation settings from an X3D file by using
import animation, also on the file menu.
Want to import your own 2D graphic?
You can import Windows metafiles (EMF or WMF) or Xara XAR/WEB files. Then you can convert
them to extruded 3D graphics. More details
.
Detailed information on using Xara3D
Page 10
Page 11
How do I...?
Use these pages if you want to find out how to do something in Xara3D.
The basics
Text & 2D objects
positioning & rotating
changing the size
changing the wording
changing text spacing
changing the font
changing the color
changing the bevel (edges)
changing the 3D extrude (depth)
changing the effects applied to selected characters
changing the lighting
creating hollow text
shiny & matt surfaces
selecting text
typing international (accented) characters
importing styles from an existing heading
importing animation settings from an existing heading
importing 2D objects
creating 3D buttons, boards and border designs
Colors
changing the text color
changing the background color
changing the colors of the lights
changing the shadow color
changing the texture color (tint)
Shadows
moving the shadow
creating and deleting shadows
changing the shadow color
changing the shadow style/type
changing the shadow transparency
changing the shadow blur
shadows and backgrounds
Textures
and text
and the background
changing the texture color (tint)
The lights
changing their color
changing their position
Page 11
Page 12
Buttons, boards and borders
creating buttons, boards and border designs
moving the text on a design
making the designs wider or narrower
changing the curvature of the corners
changing the size of buttons
Animation
creating an animation/movie
creating a multipage animation
step animation
previewing an AVI movie
importing animation settings from an existing heading
the Time Line
Saving
saving for reloading later
saving a graphic
saving screensavers
creating an animation/movie
previewing an AVI movie
Correcting mistakes
Undo & Redo
Customizing Xara3D
changing the default document
displaying Toolbars
docking dialog boxes
Page 12
Page 13
Other Xara products
There are trial versions and demo movies for many of these products on the Xara3D product CD. If you
have the Xara3D CD, just put it into your CD-ROM drive and the Xara3D splash screen should appear.
From there, you can choose the program in which you are interested.
Xara X is a fully featured illustration package that lets you create original artwork. The perfect
complement to Xara Webstyle when you need to create still and animated graphics from scratch and
require more advanced print and illustration features. For full details xara.com/xarax
.
Whether you're a time-pressed designer or a complete novice, you
can create professional-quality graphics and photos for the web with just the click of a button.
Webstyle's customizable professionally-designed templates give you almost limitless possibilities, from
button bars and banner ads to photo albums and complete page layouts. For full details
xara.com/webstyle
.
Menu Maker lets you create DHTML NavBars and Menus. You do not
need Menu Maker as this feature is already available in Webstyle's NavBar options. But if you wish to,
you can find full details if you visit xara.com/menumaker
.
A 3D screensaver maker that's fast, fun and easy to use. Create
animated 3D text message screensavers with your own personalized message. Or put any images of your
choice onto the sides of a 3D, tumbling cubes screensaver—ScreenMaker 3D accepts a wide variety of
image formats, even AVI movies. For more information, and to download example screensavers, visit
xara.com/screenmaker3d
Webstyle includes a selection of fonts from the BuyFonts.com range of over 1000 fonts. With prices
starting at $2, BuyFonts.com meets all your font needs. For full details see our BuyFonts.com website
Xara Online offers a range of online Web Services from animated photo and text effects to complete
email, form and database management solutions. Add just a single line of HTML to your page, all the
Page 13
Page 14
hard work is done on Xara Online's servers. For full details visit xaraonline.com
Page 14
Page 15
Text options
Ways to display text options
Click the text options button on the toolbar (see the icon above left).
Click the options menu, then select text.
Press Alt-T.
If you have some text selected
, any changes you make apply only to the selection. Otherwise changes apply to all text.
Bold - make the text bold. This button duplicates the Bold button on the Text Toolbar. Has no effect on
2D objects
.
Italic - make the text
italic. This button duplicates the Italic button on the Text Toolbar. Also slants any 2D objects.
Outline - select for outline text
. This button duplicates the Outline button on the Text Toolbar.
Size - this lets you make 3D objects larger or smaller. Its main use is to change the size of selected
characters. Size is relative so if you change
Font Size (on the Text Toolbar) the characters scale in proportion.
Aspect Ratio - change the width relative to the height. This duplicates Aspect Ratio on the Text
Toolbar.
Alignment - change the alignment (justification) of two or more lines of text. Has no effect for a single line
of text. Duplicates the Alignment button on the Text Toolbar.
Line Spacing - changes the vertical space between lines of text (more details
). This duplicates Line Spacing on the Text Toolbar.
Tracking - changes the horizontal space between characters (more details
). This duplicates Tracking on the Text Toolbar.
Baseline Shift - move the selected text vertically. Keyboard short cuts: F7 shift up; F8 shift down.
Kerning - change the horizontal space between two characters. Dimmed if there is selected text.
Keyboard short cuts: F5 reduce spacing; F6 increase spacing.
Note the difference between Kerning (which affects a pair of characters) and Tracking (which affects
several characters).
Page break (CTRL+ENTER) - create a new page in a Multipage animation
.
Font list - this lets you select the font (typeface). If you click on a font name, you can then scroll up and
down the list using the arrow keys on the keyboard. The preview (on the right) then shows you how the
text looks in the current font.
Preview window - shows you the text. You can select text in this preview (by dragging or using the
arrow keys) and then apply any of the options in this dialog box to just the selection.
More - this displays the Character Map, which lets you select any character in the selected font. For
more information see Typing international characters
.
Right-click menu
Right-click on the text preview to display a menu.
Zoom to fit - display all the text in the preview window.
Zoom in - enlarge your view onto the text.
Zoom out - display more of the text in the preview window.
Page 15
Page 16

These options just change your view onto the text. They have no effect on the actual size of the text.
Page 16
Page 17

Color options
Color options lets you select any hue and any shade of color.
Ways to display color options
Click the color options button on the toolbar (see the icon above left).
Click the color options tab on the right of your screen (don't see this?
).
Click the options menu, then color.
To select a color for editing
Select from the drop-down list at the top of this dialog box.
Note that you have three options for the text: edit both the faces and the sides, the faces only, or the
sides only.
The current color is displayed in the square on the right of the dialog box. This square shows hatching if
the text uses multiple colors.
To adjust the shade
Click or drag on the central area of the color picker. You'll see the exact color in the square to the right.
To alter the hue
Click or drag on the rainbow strip along the lower part of the dialog box.
HSV and RGB
If you want an exact color type in values:
HSV (Hue, Saturation, Value) Hue is a color wheel with values in the range 0-360 degrees. Saturation
and Value are percentages.
RGB (Red, Green, Blue) Enter values in the range 0-255 or 0-FF (see Hex below.)
You can create the same range of colors using either HSV or RGB - use the one you are familiar with.
Hex
You can define RGB colors as either 0-255 (Hex off) or 0-FF (
Hex on.) These are identical (256 steps), just different ways of showing the same value.
Many color lists show RGB colors as six characters such as FF057F. You can type this directly into the
# field.
Texture
Select this if you want to display a bitmap texture on the face of the text or the background. You can
also use texture options to select a texture and achieve the same result. Macromedia Flash vector format
does not support textures. Selecting display as Flash
dims all texture options.
Tint
(Dimmed unless texture selected. You can also use texture options
to select tint and achieve the same result.)
Unselected: display the original colors of the texture bitmap.
Selected: tint (modify) the bitmap colors by the color selected in this dialog box. Note that dark
Page 17
Page 18

colors can hide detail in the bitmap.
Page 18
Page 19

Extrusion options
Extrusion is basically the depth of your object—the more extrude, the deeper the object. An object with
a high level of extrude will have a very large 3D effect.
Interactive extrusion tool
For quick, interactive extrusion on your design just hover your mouse over the side of your object so
that your mouse pointer changes to the extrusion tool (see left). You can then just click and drag the
extrusion of the object. For more detailed settings, bring up the extrusion options (see below).
Ways to display extrusion options
Click the extrusion options button on the toolbar (see the icon above left).
Click the extrusion options tab on the right of your screen (don't see this?
).
Click the options menu, then select extrude.
Press Alt-E.
Apply to
These options are grayed out unless you are using a board or border design (see design options
for more information).
This allows you to alter the extrusion on the board or border separately to the text, or you can select
both to apply the same settings to both.
Gloss/matt
Gloss make the object surface reflective, matt non-reflective. The best results with glossy requires
careful positioning of the lights. See altering the text color
for more details.
Front face
Switching off display of the front face creates hollow objects and can give interesting effects. See hollow
text
for more details.
Back face
Similar to front face but controls display of the back of the objects. This has no effect unless you also
turn off
front Face or rotate animated text through 360 degrees
Outline
Produces outline objects. This is different to switching off face display. See hollow text
for more details.
Page 19
Page 20

Outline width
Controls the thickness of the outline. See hollow text
for more details.
Depth
Controls the extrude depth.
Page 20
Page 21

Design options
Design options allow you change the shape of your design.
Ways to display design options
Click the design options button on the toolbar (see the icon above left).
Click the design options tab on the right of your screen (don't see this?
).
Click the options menu, then select design.
Press Alt-U.
Macromedia Flash vector format does not support button, so if display as Flash
is selected the button option will not work.
Design type
Select what design you wish to create. You can choose from:.
Button:
creates a button with the text flat on it.
Board:
simiar to a button, but the text is 3D as well as the board.
Board + holes:
with this option the text is cut out of the board.
Border:
the board is now hollow, and the 3D text is suspended within it.
Design shape
Select the required shape for your design.
Stretch
At 100% the button has the same width as height. Below 100% the width is less than the height. More
details
.
Corners
Check Corners if you want rounded corners for the design (this is only applicable on some designs, this
option will be grayed out if not applicable). You can then change the radius by typing into the text field.
100% is the default radius for the selected button type. More details
.
Size
(Not applicable for text-only designs)
Change the size of the text relative to the button, board or border design.
Angle
Page 21
Page 22

(Not applicable for text-only designs)
Change the angle of the text on the button, board or border design.
X/Y
(Not applicable for text-only designs)
Changes the position of the text on the button, board or border design.
Design picker
Import a 2D shape (Windows metafile WMF/EMF, Xara WEB/XAR) or Xara3D XAR file as the
design shape. You can then select different design types (see above) and see how the imported shape
looks.
Page 22
Page 23

Bevel options
Notes:
Bevels go along the sides, not the face. So, for example, selecting the 'Curved' bevel produces a
budge effect to the extruded part. This also means the bevel takes the color of the sides. (The
color of the face can be different to the color of the sides.)
Square faced & square cornered bevels are particularly effective when the sides are a different
color to the face. This can give the effect of a two-colored face to the text.
Beveled objects are slower to display than objects with no bevel.
The bevel is the type of corner applied to edges of 3D objects.
Interactive bevel tool
For quick, interactive bevels on your design just hover your mouse over the side of your object and hold
the shift key so that your mouse pointer changes to the bevel tool (see left). You can then just click and
drag the bevels on the object. For more detailed settings, bring up the bevel options (see below).
Ways to display bevel options
Click the bevel options button on the toolbar (see the icon above left).
Click the bevel options tab on the right of your screen (don't see this?
).
Click the options menu, then select bevels.
Press Alt-B.
Apply to
These options are grayed out unless you are using a board or border design (see design options
for more information).
This allows you to alter the bevel on the board or border separately to the text, or you can select both to
apply the same settings to both.
Bevel types
Select from the list for different bevel effects. Please note: Macromedia Flash vector format does not
support all bevel types so click the 'display as Flash' button (the lightning symbol at the top of your
screen) or press Ctrl-F to show a smaller list of bevel types.
Miter/Round
These affect the corners of the letters. Miter gives square edges; Round rounded edges. Which you use
depends on the effect you want. (Selecting Display as Flash dims these buttons as Flash vector format
supports only Miters—more on creating Flash files
.)
Depth
This is the depth (size) of the bevel.
Page 23
Page 24

The miter and round options affect the corners of objects. Usually text has sharp mitered
corners, but you can round the corners by selecting round. This is usually only obvious for fonts
that have sharp corners or serifs. (Selecting display as flash dims these buttons as Flash vector
format supports only Miters—more on creating Flash files
.)
You can apply a different bevel to a part of the text. Select the characters
you want and then change the bevel.
Page 24
Page 25

Shadow options
Notes:
GIFs with shadows are usually larger than with no shadow. Also the further the shadow is away
from the text, or the more blurred, the larger the file. To get the most realistic shadow effects on
your web page, ensure the Xara3D background matches that of the web page. See shadows
and backgrounds
for details.
Selecting display as Flash disables shadow options because Macromedia Flash vector format
does not support shadows. More details
.
Flash vector format does not support shadows. Selecting display as Flash
on the View menu dims all shadow options.
Xara3D includes an advanced shadow tool that can give a very realistic effect of the object hanging in
front of a surface. The position of the shadow is controlled by one of the arrows in the lighting control.
The shadow blur and darkness is controlled from the shadow options. You can even control the color of
the shadow for special effects. Note that if display as Flash
is selected, this entire section is grayed out as the Flash format does not support shadows.
Ways to display shadow options
Click the shadow options button on the toolbar (see the icon above left).
Click the shadow options tab on the right of your screen (don't see this?
).
Click the options menu, then select shadow.
Press Alt-S.
Shadow
Select this to display a shadow.
Style
1 is a blurred copy of the objects. Artistically this is not a true shadow but it looks "correct" for simple
drop shadows (the most common type on web pages).
2 is a true shadow, thrown by the shadow light. This type looks best in animations where the eye is more
aware of the shape of a shadow.
Transparency
Controls how much of the background color or texture shows through the shadow. Semitransparent
shadows are more realistic than solid shadows.
Blur
This can give the effect of either a pin-point light source (little blur) or diffuse light source (greater blur).
For best results we suggest always blurring the shadow slightly—in real-life shadows don't have sharp
edges.
Page 25
Page 26

Texture options
You can use bitmap textures to give an interesting effect to objects and/or the background. You can
easily drag a bitmap on to the background, text face or text sides. You can use any BMP, ICO, PNG,
JPEG or GIF file. Textures can also be set for buttons, boards and borders with the options below.
For light colored textures you can use the normal lighting. Darker textures need bright lights (white or
pale colors) to give the best results.
If you select individual characters
, then you can apply the texture to just the selected text.
You can change the size, position and angle of the texture from texture options. If you make the bitmap
smaller than the heading, you see multiple copies of the bitmap.
Ways to display texture options
Click the texture options button on the toolbar (see the icon above left).
Click the texture options tab on the right of your screen (don't see this?
).
Click the options menu, then select texture.
Press Alt-X.
Drop-down list
Normally the options are for text, text faces, text side and background.
If you are creating a button, board or border
design there will be specific options relating to them too.
Texture
Select this to display a texture on the option listed in the drop-down list (see above).
Tint
(Dimmed unless texture selected. This duplicates the tint button in color options
.)
Select this if you want to tint (slightly recolor) the texture. You can then use color options
to modify the color of the texture.
Size
Scales the texture bitmap. Only you know the best size for a particular heading. At large scalings, the
individual pixels that make up the bitmap may become noticeable—this can create interesting effects. At
smaller scalings you see multiple copies of the bitmap.
X
Move the bitmap sideways. This lets you position the bitmap precisely. Movement is relative to the
bitmap size—for a small bitmap (as you get with low values of
Size), movement is less noticeable. Note that if you rotate the texture, you also rotate the angle of X
movement.
Y
Move the bitmap (or button text) vertically. Similar to
X.
Page 26
Page 27

Angle
Rotate the texture.
Load texture
Opens the load texture dialog box.
Note: Flash vector format does not support textures. Selecting display as Flash
dims all texture options.
Page 27
Page 28

Animation options
You can create Animated GIFs and AVI movies using Xara3D. More details
of creating animations.
You can preview the effect of the current Animation settings by clicking start/stop animation button or
pressing Ctrl-Space..
Ways to display animation options
Click the animation options button on the toolbar (see the icon above left).
Click the animation options tab on the right of your screen (don't see this?
).
Click the options menu, then select animate.
Press Alt-A.
Frames per cycle
Dimmed for step animations, typewriter animations and pulse animations
.
This is the number of frames for each complete cycle through the animation sequence. The greater the
number of frames the smoother the animation. The drawback is that the file is bigger - this is a big
disadvantage for web graphics. You may need to try different values to get the best results.
Multipage animations: this is the number of frames for each page
.
Frames per second
Dimmed for step animations, typewriter animations and pulse animations
.
The animation speed. Slow speeds can give jerky movement. High speeds can also give jerky movement
as the program displaying the animation may not be able to keep up. Again you may need to try different
values.
Pause
You can pause Animated GIFs, screensavers and Flash movies but not AVI movies.
This pauses the first frame before continuing the rest of the animation. Type in a value in centiseconds
(1/100ths of a second) - a 2 second pause is 200 cs. Note that this applies only to the first frame; use
frames per cycle and
frames per second to control the overall speed of the animation.
Multipage animations: Pause applies to each page
in the animation.
Loop
This applies to animated GIFs only. This lets you specify how many times the animation should repeat
itself. Note that some browsers take any value other than 1 to mean 'loop forever'. Therefore, your
animation either plays once or forever. Other browsers may display the animation correctly.
Apply to
These options are grayed out unless you are using a border design (see design options
for more information).
Page 28
Page 29

This allows you to alter the animation on the border separately to the text, or you can select both to apply
the same settings to both.
Animation picker
Import from a number of pre-defined animation styles. A preview of each animation is available before
clicking open.
Style
Choose from a number of standard animation types, or import an animation using the animation picker
button (see above).
Please note: pulse and typewriter animations do not work on the board with holes
design.
Rotate options:
Rotate 1 rotates all the text as one;
Rotate 2 rotates each character. (Buttons have a single Rotate option.)
Front face only—normally the animation shows only the front face of the text and not the back.
This looks better and makes the exported file smaller (because there's only half the number of
frames.)
Rotate text/Rotate lights—select whether you want the text to rotate or the lights or both. You
cannot rotate the shadow as this would create very large files.
Direction—selects the direction of rotation.
Swing options:
Swing 1 swings all the text as one;
Swing 2 swings each character. (Designs have a single Swing option.)
Angle—how much you want the heading to swing.
Angle check box—when selected the heading rotates through 180º. This button mainly applies to
multipage animations. With Angle selected, the animation moves to the next page after each
complete rotation (a complete left & right or up & down cycle). With Angle unselected, the
change to the next page is at the start of each swing (for example, as the heading starts to swing
left and then again as it starts to swing right). This means you can create animations with half the
number of frames as with
Angle selected.
Pulsate options:
Pulsate 1 pulsates all the text as one;
Pulsate 2 pulsates each character. (Buttons have a single Pulsate option.)
Minimum text size—how far back to pulsate the text.
Shrink+Grow &
Grow+Shrink—sets whether the animation begins be shrinking or growing.
Page 29
Page 30

Overlap page— this applies to multipage animations. With Overlap pages unchecked, you see
each page separately in sequence. When checked, each page pulsate out of the previous page.
Ripple options:
This gives the effect of the text bobbing up and down character by character when in text mode.
In other design modes (such as button) the entire design moves.
Amplitude—sets how far the characters or design go up and down.
Direction— sets the direction in which the animation starts (most noticeable on text designs).
Fade options:
Fade in—the heading emerges from the background color.
Fade out—the heading merges into the background color.
Step options:
This displays a series of static (non-rotation) headings in a multipage animation.
Frame duration—how long to display each page in the animation.
Typewriter options:
The text appears as sequential characters, the same effect as you would get by typing in the
characters.
Frame duration—the delay between characters.
Pulse options:
This enlarges or shrinks each character in turn through the text message.
Frame duration—how long to display each character for.
Size—the percentage size of the pulsed character. 100% is no change.
Wave options:
An option for Rotate 2, Swing, and Pulsate animation types. Wave is particularly effective with
Pulsate.
Wave looks best with longer lines of text. The effect is that of a wave flowing along the text.
%—how large to make the wave.
Direction—the wave direction for single line headings is only horizontal. (Both buttons dimmed.)
The wave direction for multiple line headings wave is either horizontal or vertical
Page 30
Page 31

File menu
New
Open a new document. You are warned if the existing document has unsaved changes.
Open
Open (reload) an existing Xara3D .X3D file. (A file previously saved using save or
save as.) You cannot reload GIFs, JPEGs, AVIs, or PNGs exported from Xara3D.
Save
Save the document as an .X3D file. This lets you reload it back into Xara3D in the future.
Save as
Save the document under a different name.
Save as default
The default document is the document you see when you select new. If you want a customized default
document, make the required changes then select s
ave as default.
Import
Lets you import a 2D object (Windows metafile WMF/EMF or Xara WEB/XAR.) Xara3D can then
turn it into a 3D heading (more details
.)
Import animation
Opens the import animation dialog box
. Lets you import a X3D file and apply the animation settings in that file to the current heading.
Import design
Lets you import a Xara3D file (X3D), Xara WEB/XAR or Windows metafile and use that as a button,
board or border shape. Any existing text appears on the face of the design (more details
).
Import style
Opens the import style dialog box
. This lets you copy features (such as colors and lighting) from an existing X3D heading into the current
heading.
Export bitmap
Create a GIF, JPEG, or PNG bitmap file of the current document. Note that you cannot reload bitmaps
back into Xara3D (except as background or text textures) so if you want to make further edits in the
future, save the document as an .X3D file. (See save and s
ave as above.)
Export animation
Create an Animated GIF or AVI movie of the current document.
Page 31
Page 32

Export to screensaver
Create a SCR screensaver file
Recent file list
A list of the last few files edited. Advanced users can change the number of files in this list—see hidden
options
.
Exit
Quit Xara3D
Page 32
Page 33

Edit menu
Edit
Display the text caret (the line that indicates where you are in the text) ready for on-screen editing of the
text. More details
of editing text.
Undo
Undo the last edit. More details
of undo & redo.
Redo
Undo the last Undo operation. More details
of undo & redo.
Cut
Grayed out unless specific characters are selected
. Cutting the text removes it from the design and places it on the clipboard. This text then can be pasted
into a different part of the design (see paste below for more information).
Copy
If specific characters are selected
it is similar to cut (above) except that this doesn't delete the text. If you select copy without selecting
text, it copies the entire design. This can then be easily pasted into Xara X¹ or later.
Paste
Paste is different depending on what you have on the clipboard:
If you have the cursor
turned on, and have text on the clipboard, the text will be pasted at the cursor position.
If you have the cursor
turned off, and have text on the clipboard, the text will overwrite all text in the design.
If you have an object copied from Xara X¹ or later, a shape will be created by pasting the object
in Xara3D. The result depends on what design type you are in: in button, board or border
designs
the object will be applied to the design's shape. In just text mode, the object will be pasted as a
text character.
If the option is grayed out Xara3D cannot interpret the clipboard contents (for example, if the
clipboard contains a bitmap).
Page 33
Page 34

Delete
Discard the selected text.
Select all
Select all the 3D objects on all pages
ready for editing.
Select page
Select all the 3D objects on this page
ready for editing. Objects on other pages remain unselected.
Select line
Select the line containing the text cursor. (By default the bottom line.) For a single line of text this is the
same as
select all.
Insert page break
Page breaks separate pages
in an animation that shows a sequence of messages.
Edit comment
Lets you add comments
(notes) to X3D files. These comments are just for information—they do not change the appearance of
the 3D design. You see these comments in the save, open and import dialog boxes.
Page 34
Page 35

View menu
Text color
Display the color options ready to edit the color of the text of the design. More details on the color
options
.
Text texture
Select a bitmap texture to display on the text of your design. More details
of using textures.
Face color
Display the color options ready to edit the color of the face of the design. More details on the color
options
.
Face texture
Select a bitmap texture to display on the face of your design. More details
of using textures.
Side color
Display the color options ready to edit the color of the sides of the design. More details on the color
options
.
Side texture
Select a bitmap texture to display on the sides of your design. More details
of using textures.
Background color
Display the color options ready to edit the color of the background. More details
of changing the background color.
Background texture
Select a bitmap texture to display as the background. More details
of using textures.
Button text color
(Dimmed unless you are creating a button
)
Display the color options ready to edit the color of the text on a button. More details on the color options
.
Display lighting
Show the three colored lights. You can then change their positions or, by double-clicking, their color.
More details
on the lights.
Page 35
Page 36

Light source 1
Display the color options ready to edit the color of Light 1. More details
on the lights.
Light source 2
Display the color options ready to edit the color of Light 2. More details
on the lights.
Light source 3
Display the color options ready to edit the color of Light 3. More details
on the lights.
Shadow color
Display the color options ready to edit the color of the shadow. More details
on shadows.
Display as Flash
Some Xara3D features do not exist in Macromedia Flash format. More details
.
Display hotspot
This is used by cursor files (CUR & ANI) to denote the active part of the cursor—more details
.
Start/stop animation
Start or stop the on-screen animation. More details
on animation options.
Page 36
Page 37

Design menu/toolbar
Whereas Xara3D only used to be able to offer button designs, with Xara3D 6 the new design menu and
design toolbar both allow you to access a variety of design types. More advanced design settings can be
found under design options
.
Text
This design is plain text, with no special shape.
Button
As with previous versions, places your text on a button.
Board
Creates 3D text as if it's coming out the top of a board.
Board+holes
With this option, the text is cut out of the board and you can see through the holes..
Border
Creates a border around your text, and text can look as if it's suspended in the air.
Note: you can load a sample design using the design picker
, and it will look different depending on what option you have chosen above. One design template, many
different combinations!
Page 37
Page 38

Options menu
Text
Open the text options dialog box. This dialog box provides a range of options for changing the
appearance of text. More details
on this dialog box.
Color
Open the color options dialog box. This dialog box lets you change the text, background, shadow, and
lights colors. More details
on this dialog box.
Extrude
Open the extrusion options dialog box. This lets you change the depth of the 3D extrude. More details
on this dialog box.
Design
Open the design options dialog box. This lets you create 3D text buttons, boards and borders. More
details
.
Bevels
Open the bevel options dialog box. More details
on this dialog box.
Shadow
Open the shadow options dialog box. More details
on this dialog box.
Texture
Open the texture options dialog box. More details
on this dialog box.
Animate
Open the animation options dialog box. More details
on this dialog box.
Page 38
Page 39

Window menu
Display frame
Display the image in a separate window (the frame). This duplicates the
show/hide frame button on the standard toolbar. The frame is a convenient way of viewing small images.
Frame size
Open the frame size
dialog box. This lets you precisely set the frame (and hence image) size.
Quality settings
Change the on-screen viewing quality. More details
.
Standard toolbar
Display the toolbar at the top of the window.
Design toolbar
Offers quick access to the different design types
.
Options toolbar
The icons to the left of the screen which offer quick access to various options.
Text toolbar
Display the text toolbar at the bottom of the window.
Time line
Display the time line
.
Status bar
Display the status bar at the bottom of the window.
Option bars
Where, by default on the right of the screen, the various Xara3D options can be found.
Customize
For advanced users to customize
how Xara3D's toolbars, menus and right-click menus.
Reset user interface
Resets all toolbars and windows
to their default positions.
Page 39
Page 40

Animation picker (import
Notes
By default, after installing from the CD, Xara3D will open the animation picker in a folder of over
70 animation examples. But you can copy an animation style from any X3D file, even one you
have created yourself.
To save your own animation styles for easy access, you can save the X3D files into the
animations folder within your Xara3D program folder.
animation)
This lets you copy the animation style of an existing X3D file to your current design.
Your design and its text won't be changed, just your animation style. It’s a great time saver if you want
to copy a particular animation style from one graphic to another, particularly if it’s a complicated style
with, for example, different animation types applied to alternate lines or characters.
Ways to display the animation picker
Click the animation picker button under the animation options tab on the right of your screen (don't see
this?
).
Click the file menu, then select import animation.
Click the animation picker button on the standard toolbar.
Press Ctrl-Shift-A.
Then just select the required X3D file, and if you like the results shown in the preview window, click
open.
Page 40
Page 41

Design picker (import design)
Notes
By default, after installing from the CD, Xara3D will open the design picker in a folder of over
80 examples. But you can copy a design style from any X3D file, even one you have created
yourself.
To save your own designs for easy access, you can save the X3D files into the designs folder
within your Xara3D program folder.
When importing X3D file with text in them, the first character is used as the design shape. All
other information is ignored.
There are some points to note when importing WEB/XAR files and Metafiles
.
As well as the range of predefined design shapes, you can also use imported shapes to create button,
board, board with holes and border designs
. Suitable formats are Xara3D X3D files, Xara WEB/XAR files and Windows metafiles WMF/EMF
(see notes).
Your current text won't be changed, just the design features that you select to import.
Ways to display the design picker
Click the design picker button under the design options tab on the right of your screen (don't see this?
).
Click the file menu, then select import design.
Press Ctrl-Shift-B.
Just select the required X3D file and click open. The imported shape will then be used as the design's
shape.
Note: if you are in text design mode, importing a shape will automatically switch you to a button design
.
If you are using Xara X¹ or later
You can design your own shapes in Xara X then easily import them into Xara3D
1.
In Xara X copy the object you wish to use (Ctrl-C, or select edit then copy).
1.
2.
Switch to Xara3D and paste the object (Ctrl-V, or select edit then paste).
2.
If you wish, you can then copy the 3D design and easily paste it back into Xara X.
Note: if you are in text design mode, the shape will be used as a text character and
not as a design.
Page 41
Page 42

Style picker (import style)
Notes
By default, after installing from the CD, Xara3D will open the style picker in a folder of hundreds
of examples. But you can copy styles from any X3D file, even one you have created yourself.
To save your own styles for easy access, you can save the X3D files into the samples folder
within your Xara3D program folder.
This lets you import features of an existing X3D file into your current design.
You can select which parts of the design you wish to copy—everything from the colors, lighting or bevel
to the animation.
Your current text won't be changed, just the design features that you select to copy. It’s a great time
saver if you have created a style that you want to copy across other graphics.
Ways to display the style picker
Click the file menu, then select import style.
Click the style picker button on the standard toolbar.
Press Ctrl-Shift-Y.
Just select the required X3D file, check or uncheck the required features in the left hand side of the style
picker, and if you like the results show in the preview window, click open.
Page 42
Page 43

Export options for animated cursors (ANI)
To learn more about creating cursors see creating cursor (CUR & ANI) files
.
Because animated cursors can be quite large, you may find that a 16 color, optimized palette per frame,
produces the best results for the smallest file size. However you might need to experiment.
Dithering always makes cursors look better, but also makes them larger. When outputting at 256 colors
you may find that there is no need to turn dithering on.
Current window size
lets you export just the area surrounding the text (crop on) or the entire window area (crop off).
User defined lets you specify the dimensions of the bitmap. With
fit to width (on the text toolbar) selected, the text and the background scales to suit the values you type
in. If you specified a font size, the size of the text does not change but the background scales to the
values you type in. This is useful if you want to create several headings, all the same height and width.
Page 43
Page 44

Export options for animated GIFs
To learn more about exporting animated GIFs see creating animations and movies
.
Because animated GIFs can be quite large, you may find that a 16 or 32 color, optimized palette per
frame, produces the best results for the smallest file size. However you might need to experiment.
Dithering always makes GIFs look better, but also makes them larger. When outputting at 256 colors
you may find that there is no need to turn dithering on.
Current window size lets you export just the area surrounding the text (crop on) or the entire window
area (crop off).
User defined lets you specify the dimensions of the bitmap. With
fit to width (on the text toolbar) selected, the text and the background scales to suit the values you type
in. If you specified a font size, the size of the text does not change but the background scales to the
values you type in. This is useful if you want to create several headings, all the same height and width.
Page 44
Page 45

Export options for AVI movies
Color depth.
Choose between the different amount of colors in your video. True color will give more accurate results,
but may create a large file. Try exporting at both color depths to se what results work best.
Current window size lets you export just the area surrounding the text (crop on) or the entire window
area (crop off).
User defined lets you specify the dimensions of the bitmap. With f
it to width (on the Text Toolbar) selected, the text and the background scales to suit the values you type
in. If you specified a font size, the size of the text does not change but the background scales to the
values you type in. This is useful if you want to create several headings, all the same height and width.
AVI options.
Clicking this will allow you to choose from any of the movie codecs on your system. A movie codec is
basically the system used to create the movie file itself, and some formats are better than others. Use the
default, or select a codec of your choice. For some codecs you can also set the quality percentage and
how often key frames are set, and you can click configure for more options.
Page 45
Page 46

Export options for Flash
bitmap format (SWF) files
These options apply to both static and animated SWF files. More information on creating Flash files. To
learn more about exporting movies see creating animations and movies
.
Current window size lets you export just the area surrounding the text (crop on) or the entire window
area (crop off.)
User defined lets you specify the dimensions of the bitmap. With
fit to width (on the text toolbar) selected, the text and the background scales to suit the values you type
in. If you specified a font size, the size of the text does not change but the background scales to the
values you type in. This is useful if you want to create several headings, all the same height and width.
Color depth: the more colors, the larger the file size. For animations where each image appears for only
a short period you may find
256 colors gives satisfactory results.
Dithering (dimmed except for 256-colors).
None creates the smallest files but you may see bands of colors instead of smooth color graduations.
Transparent (dimmed for High-color): select this for a transparent background to the animation. Deselect
for a solid background.
Lossless and quality (dimmed except for true-color): quality values below 100% give smaller files but at
a lower quality.
Lossless is equivalent to 100% quality. You may need to experiment to get the best tradeoff between
quality and file size.
Page 46
Page 47

Export options for Flash
vector format (SWF) files
These options apply to both static and animated SWF files. more information on creating Flash files. To
learn more about exporting movies see creating a movie or animated GIF
.
Note that Flash vector format does not support some Xara3D features (such as shadows and textures).
You can use Xara3D features not supported in vector format except shadows but these get exported as
bitmaps within the Flash file and can make the file much larger. If you intend to output in SWF format, we
suggest using the display as Flash option on the
View menu.
Current window size lets you export just the area surrounding the text (crop on) or the entire window
area (crop off.)
User defined lets you specify the dimensions of the bitmap. With
fit to width (on the text toolbar) selected, the text and the background scales to suit the values you type
in. If you specified a font size, the size of the text does not change but the background scales to the
values you type in. This is useful if you want to create several headings, all the same height and width.
Quality: the higher the quality, the larger the file. You may need to experiment to get the best tradeoff
between quality and file size.
Page 47
Page 48

Exporting GIF, PNG or BMP
files
GIF export is the most common and probably the best format for use on the web. GIF images can have
no more than 256 colors, which you might think is a limitation. However, using Xara3D’s advanced
dithering and palette optimization features, you can get near perfect quality images using only 256 colors.
Indeed you'll be surprised at how good GIFs with just 16 colors can be.
For all export formats you have control over not only the number of colors but also whether the image is
dithered and has an optimized palette. These are techniques to improve the image quality while using a
reduced number of colors. For example using only 16 color GIF nearly always produces the smallest file
size, but with no dithering the shading can be poor. By using an optimized palette and diffusion dithering
you can substantially increase the quality of the result.
There are no hard and fast rules as to which combination of export options is best—it depends on the
image and your requirements. Therefore we recommend exporting in a number of different formats to see
which is the best and has the smallest file size. Typical options to try include 16 color with diffusion
dithering, or 256 color with no dithering.
When exporting as a GIF or PNG you have the option of making it interlaced (progressive rendering as
it’s downloaded) and whether the image is transparent. For more information on the available export
options, including help with printing, see export dialog box
.
BMP export formats
Many other Windows programs can import BMP files but often they do not support the full range of
color depths available in Xara3D. For example Adobe Photoshop cannot import High-color (16 bit)
BMPs. This is beyond the control of Xara3D. If you have problems importing BMPs, try a different
color depth.
Additional quality control
If you bought the CD version of Xara3D you will have received a free copy of Webster (or details on
how to obtain it). Webster provides even more advanced color reduction facilities and can be used to
further reduce the size of files by selecting intermediate numbers of colors. To do this, export the image
as a True color 24-bit BMP image and use Webster to color reduce the file to a specific number of
colors.
Also available from Xara is Xara X, an enhanced and updated version of Xara Webster. More details
on Xara X
.
Page 48
Page 49

Exporting JPEG files
JPEG bitmaps are always 24-bit, true color, but the JPEG compression system means that the quality is
often not as good as a GIF. The
quality setting determines how small the resultant file is—the higher the quality, the larger the file. Quality
settings less than 80% usually produce inferior images to those available from using palette optimized
GIFs.
A progressive JPEG is similar to an interlaced GIF. The JPEG displays first as blurred (low resolution)
image. As more of the file loads, the image comes into focus. Note that some older browsers do not
support progressive JPEGs—the image displays when all the JPEG has loaded.
For more information on the available export options, including help with printing, see export dialog box
.
Page 49
Page 50

Export as screensaver (SCR)
Tips
To create a smooth screensaver animation it's recommended you have create an animation with a
fast animation speed (15 to 20 frames per second) and between 50 and 100 frames in each
You can export Xara3D graphics as a Windows screensaver (SCR) file. Screensavers prevent a static
image from burning the screen, so we would suggest:
Use a black or dark colored background, not white or light colored.
Create the animation such that there are not light-colored static areas.
To create a screensaver
1.
Create the animation in the regular way or select from one of the sample screensaver animations
1.
in the examples folder.
2.
Choose
2.
export screensaver on the file menu.
2.
3.
There are a number of preset options. Low is one third of your current screen resolution, medium
3.
is half, high is three quarters and full is your full screen resolution. You can also choose from a
number of standard resolutions by choosing other. We recommend selecting a value half the
screen area. (For example 512x384 for a 1024x769 screen area.) This should give a good
quality image without creating a large file size. Sizes larger than this require a faster computer to
animate smoothly
.
3.
4.
AVI options. Xara3D screensavers are effectively movies within a sceensaver. Clicking this will
4.
allow you to choose from any of the movie codecs on your system. A movie codec is basically
the system used to create the movie file itself, and some formats are better than others. Use the
default, or select a codec of your choice. For some codecs you can also set the quality
percentage and how often key frames are set, and you can click configure for more options.
Please note: if distributing the screensaver to others, they will also need that codec.
5.
You have two options as to where to save the file:
5.
Install—this saves the screensaver into the Windows system folder and makes it the default
5.
screensaver. (You can save to a different folder but we recommend using the default system
folder as screensaver files in this folder are easier to reinstall in the future.)
Save—this saves the screensaver to a folder of your choice. This does not make this screensaver
5.
the Windows default.
6.
Enter a name for the screensaver file.
6.
7.
Click
7.
Save.
7.
Because Xara 3D has to generate each frame of the animation, this process can take a few minutes.
Page 50
Page 51

cycle.
Windows stretches the animation to fill the screen. If you want the text to partially fill the screen,
select a point size, such as 72pt from the text size drop down, instead of
Fit to width.
Previewing a screensaver file
1.
Browse to the screensaver (SCR) file.
1.
2.
Right-click on the file. This pops-up a menu.
2.
3.
Click
3.
Test to preview.
3.
Using a screensaver file
If, in step 4, you installed the new screensaver as the default, everything is already set up for you. No
further action is necessary.
If you saved the screensaver to the Windows system folder:
1.
Click
1.
Start on the Taskbar. If you are using Windows XP, go to step 3.
1.
2.
Choose
2.
Settings.
2.
3.
Choose
3.
Control Panel.
3.
4.
Double-click
4.
Display.
4.
5.
Click the
5.
ScreenSaver tab.
5.
6.
The screensaver drop-down list shows all screensavers in the system folder. Choose the
6.
screensaver you want.
7.
Click
7.
OK to make the selected screensaver the default.
7.
If you saved the screensaver to a different folder:
1.
Browse to the screensaver file.
1.
2.
Right-click on the file. This pops-up a menu.
2.
3.
Click Install to select the screensaver. Then click
3.
OK to make the screensaver the default.
3.
Page 51
 Loading...