

Wolfgang Puck BEBB0030 Use And Care Manual
LIFE IS ABOUT BALANCE
AND EATING WELL
1400 Watt Electronic
Programmable Power Blender
with Slider Control
I M P O R T A N T N O T I C E
If you have any problems with this unit, contact
Consumer Relations for service PHONE: 1-800-275-8273
or visit our website at wphousewares.com
Please read operating instructions before using this
product. Please keep original box and packing materials
in the event that service is required.
W.P. APPLIANCES, INC. Toll Free (800) 275-8273
Model BEBB0030 Printed In China REV 1.0
USE AND CARE
Photos throughout this manual may differ slightly from actual product.

IMPORTANT SAFEGUARDS
SAVE THESE INSTRUCTIONS
HOUSEHOLD USE ONLY
Read all instructions carefully.
To protect against the risk of electrical shock, do not put plug,
cord, or motor base of blender in water or other liquid.
Close supervision is necessary when any appliance is used by or
near children.
Unplug from outlet when not in use, before putting on or taking
off parts, and before cleaning or removing contents from blender
jar.
Warning: When the Start/Cancel icon is flashing in red color it
indicates that the blender is ready to operate. Avoid any contact
with blades or movable parts.
Do not operate any appliance with a damaged cord or plug or
after the appliance malfunctions, or is dropped or damaged in
any manner. Call W.P. Appliances consumer services at 800275-8273 for examination, repair, and/or mechanical or electrical
adjustment.
The use of attachments, including canning or ordinary jars,
not recommended or sold by W.P. Appliances may cause fire,
electrical shock, or risk of injury to persons.
Do not use outdoors.
Do not let cord hang over edge of counter or table or touch hot
surfaces.
Do not place the blender on or near a hot gas
Keep hands and utensils out of container while blending to
reduce the risk of severe injury to persons or damage to the
blender. A scraper may be used but must be used only when the
blender is not running.
BLADES ARE SHARP. HANDLE CAREFULLY.
Always operate blender with the cover in place.
Blender JAR must be properly in place before operating
appliance.
1
2
3
4
5
6
7
8
9
10
11
12
13
14
Additional Safety Information
Before Your First Use
Carefully unpack the blender and accessories, and remove all
packaging materials. Wash the blender according to the Cleaning
Your Blender section of this manual.
GROUNDING INSTRUCTIONS: This appliance must be grounded.
It is equipped with a 3-prong cord having a grounded plug. The
plug must be plugged into an outlet which is properly installed
and grounded.
Warning: Improper use of the grounded cord can result in the risk
of electric shock. Consult a qualified electrician if necessary. Do
not attempt to defeat this safety feature by modifying plug.
A short power-supply cord is provided to reduce the hazards
resulting from entanglement or tripping over a longer cord. If it is
necessary to use an extension cord, it should be positioned such
that it does not drape over the counter or tabletop where it can
be pulled on by children or tripped over and:
A. Use only 3-prong extension cord with 3-blade grounding plug.
B. The marked rating of the extension cord must be equal to or
greater then the rating of this appliance. The electrical rating of
this product is 1400 watts.
2 3
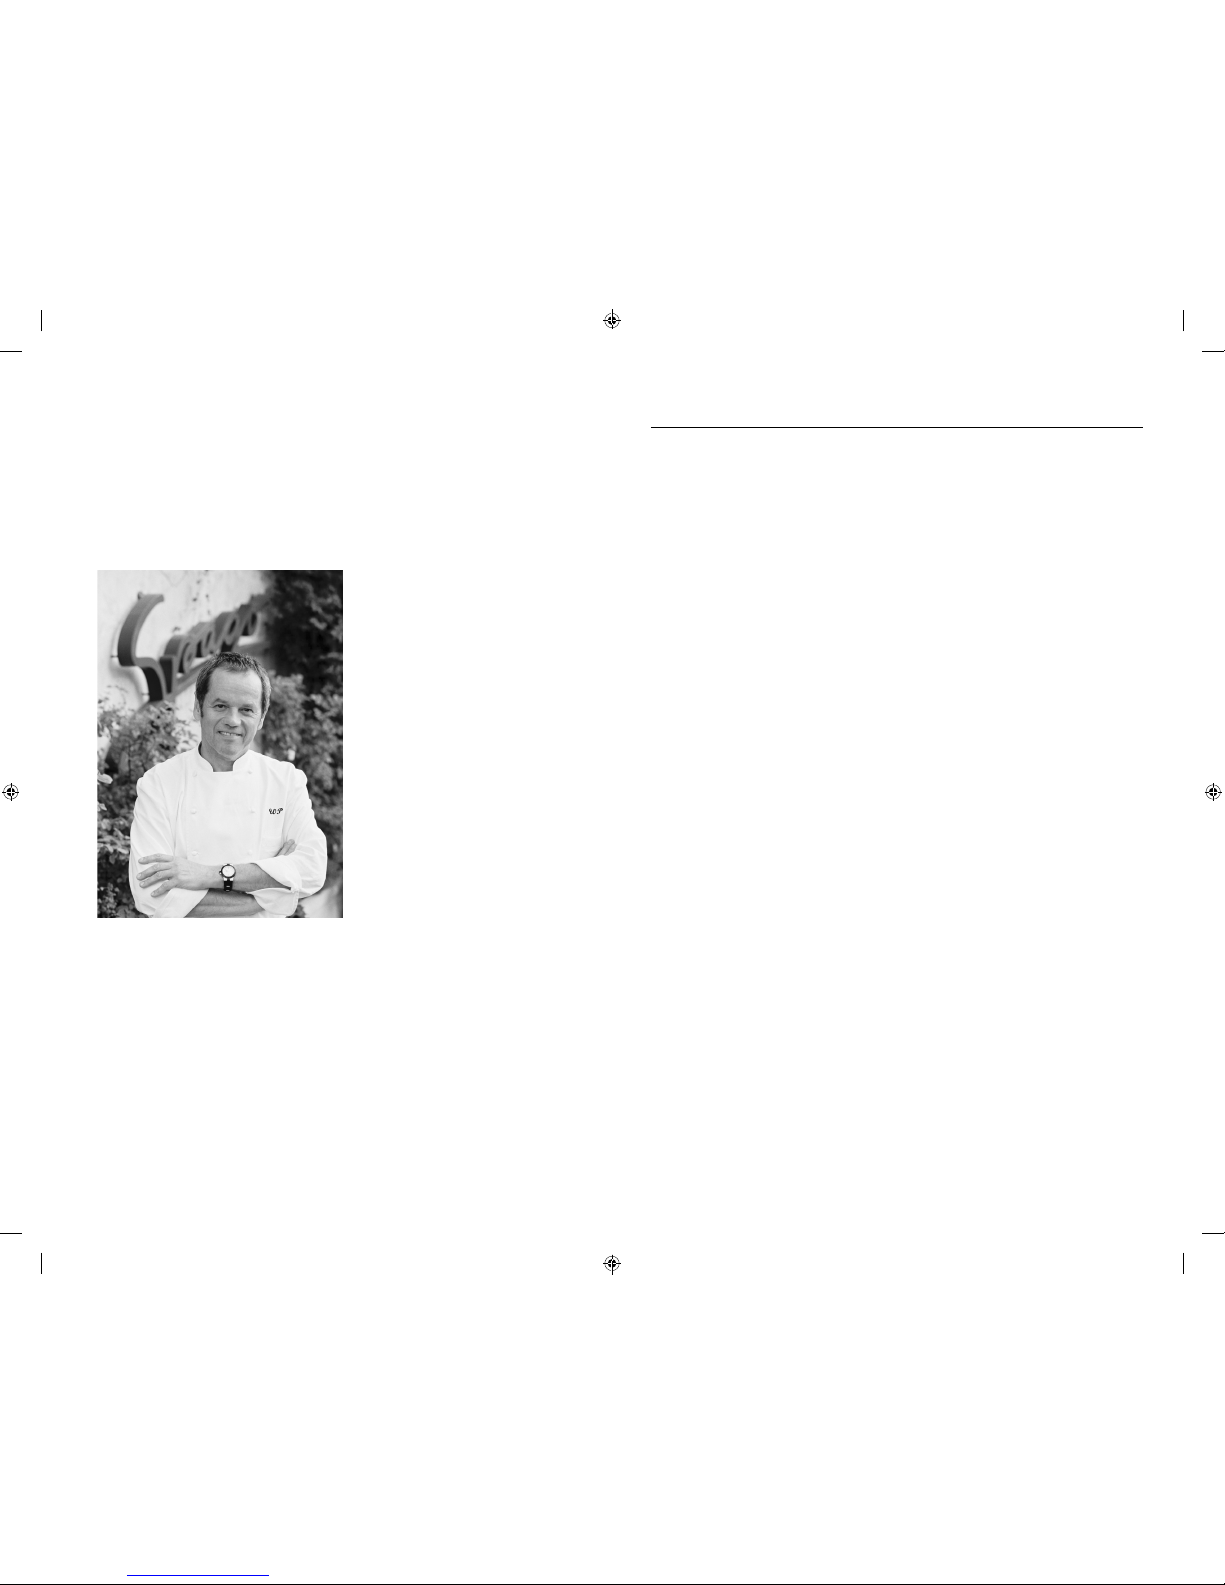
Wolfgang Puck,
owner of the famous
Spago restaurants and
one of the most influential
chef-restauranteurs in
America, is credited with
reviving California’s rich
culinary heritage. His
cooking innovations, a
result of blending fresh
California ingredients
with his classical French
techniques, are enjoyed by
world leaders, stars and fellow chefs alike. He established other
trend-setting restaurants like Postrio in San Francisco, Chinois
on Main in Santa Monica, Trattoria del Lupo, Cut, and his latest
creation, Jai, an Asian fusion restaurant in San Diego. Home chefs
can also share Mr. Puck’s talents through his cookbooks, cutlery,
cookware and, of course, through his appliances!
Table of Contents
Important Safeguards
Additional Safety Information
Before Your First Use
About Wolfgang Puck
Know Your Blender
Using Your Blender in Manual Mode
Using Your Blender in Automatic Mode
Using Your Tamper
Helpful Hints
Care & Cleaning
Recipes
Limited Warranty
Contact Information
2
3
3
4
6
8
9
10
11
12
13
35
Back
4 5
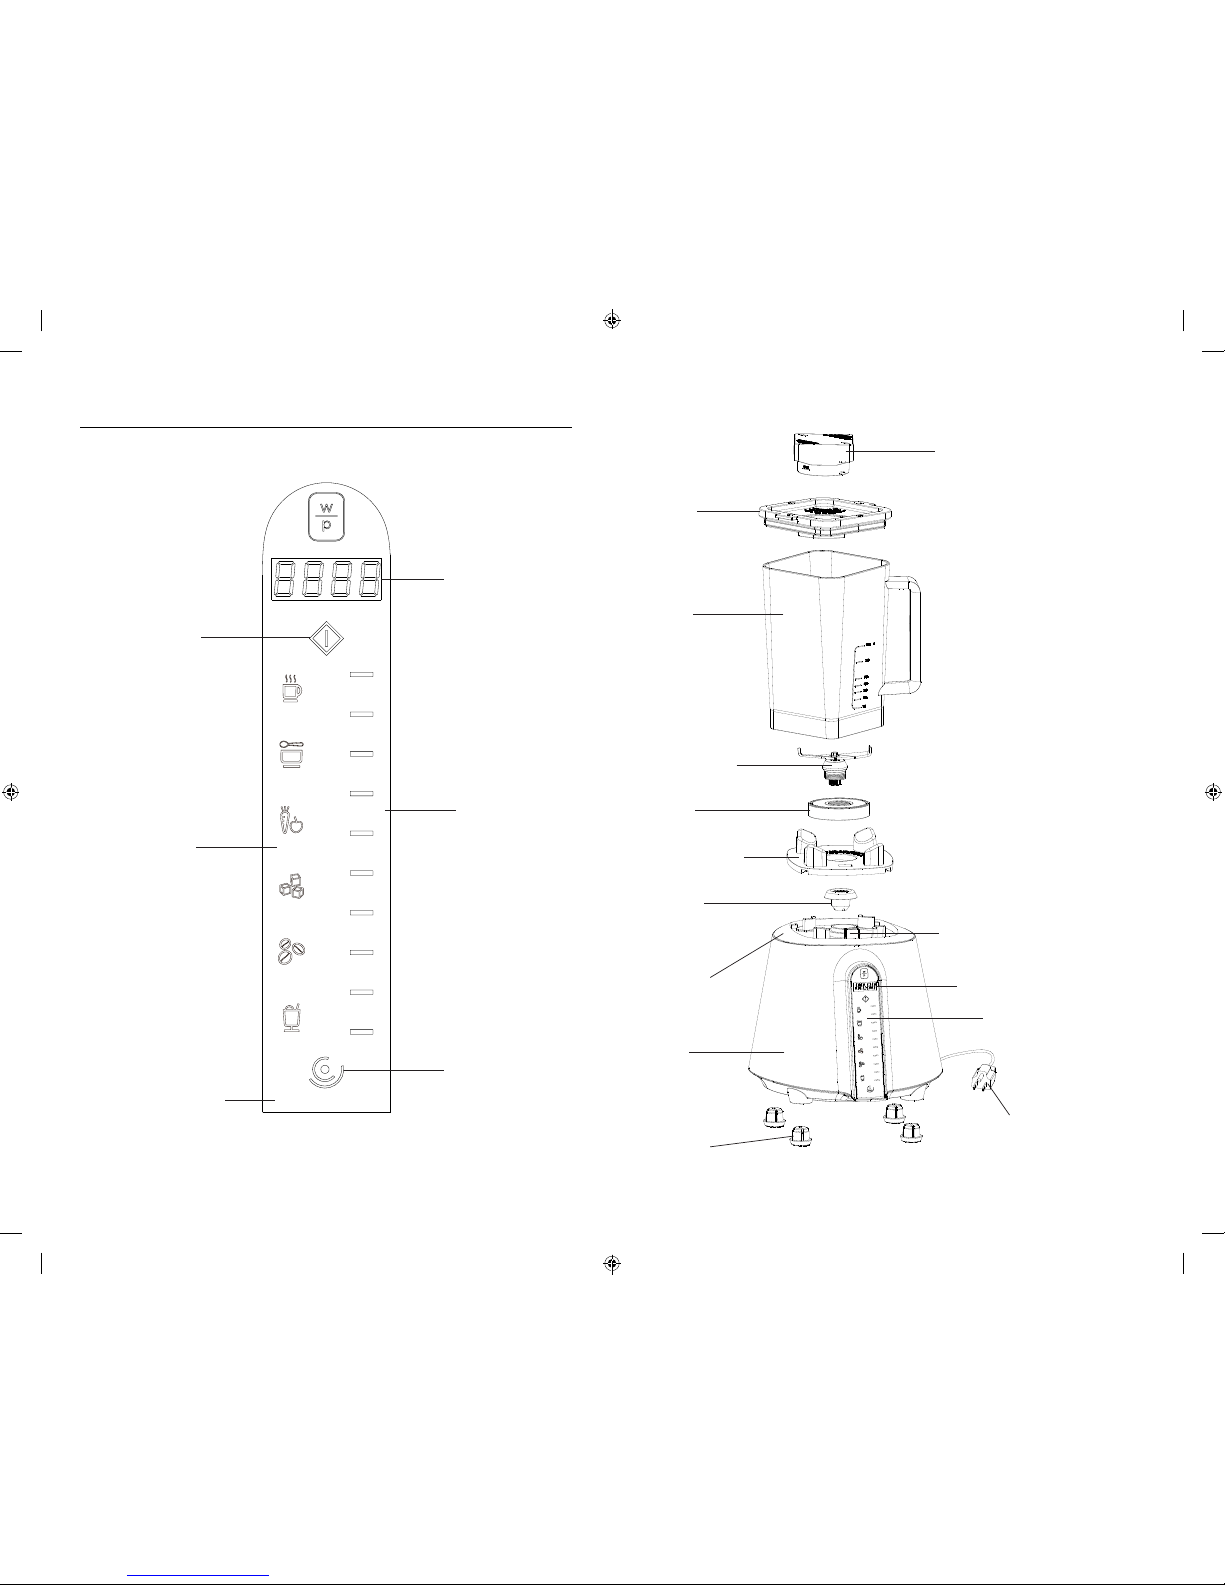
Know Your Blender
Actual product may differ slightly from illustrations on this page
6 7
1. Filler Cap
2. Lid
3. Blender Jar
4. Blade Assembly
(non removable)
5. Blade Mount
6. Blender Jar Mat
7. Drive Coupling
8. Safety Switch
9. Blender Jar Base
10. Motor Base
11. Control Panel
12. LED Display
13. Power Cord
14. Anti-Skid Rubber Feet
Start/Cancel
Preset
Program
Selections
Speed Control
Timer Display
Sensor Touch Area
Pulse
1
2
3
4
5
6
7
8
9
12
11
10
13
14
Using Your Blender in
Manual Mode
Put ingredients in jar. Always add liquid ingredients first followed by
solid ingredients.
Place the filler cap insert into the blender lid opening and turn filler cap
clockwise until tight. Firmly attach assembled lid to the blender jar.
Plug the blender into a 120-volt 60 Hz AC-only outlet. Place the blender
jar on the motor base. All icons will display briefly for 1 second and the
blender will be in stand-by mode. The timer will display “00:00”.
The timer display shows elapsed time.
This blender has 10 speeds plus a Pulse function. Select the speed that
best suits your blending task. We recommend always starting on Low
speed and gradually increase to your desired speed. The speed range
low to high can be set by sliding your finger from the lowest speed
bar to the highest. The speed can also be adjusted when the blender is
operating.
When the SPEED has been set, touch the START/CANCEL icon to start
blending. The color of the icon will change from red to white. To turn off
the blender, touch the START/CANCEL icon while blending. The blender
will turn off and the START/CANCEL icon will change back to a red
color.
To add ingredients while the blender is on, remove the filler cap insert
and drop ingredients through the lid opening. Replace the filler cap
securely when done. Do not place your hands into the blender jar with
the blender plugged in.
The blender can also be used in PULSE mode without setting the
SPEED. To use the PULSE mode, touch the PULSE icon once to activate
the PULSE mode (the light will be blinking). Touch and hold the PULSE
icon within 5 seconds to start blending in PULSE mode. To stop the
PULSE mode, simply release the PULSE icon. The blender always
operates on the highest speed in PULSE mode regardless of the preset
program selected. When using the PULSE mode, the timer will display
“00:00” and show elapsed time when in operation.
WARNING: When blending hot liquids ensure the lid is securely in place.
Place the filler cap into lid and turn clockwise until it stops (about a
quarter turn). Always start in low speed and then increase speed to
desired setting. Use caution with hot liquids. Spraying from under the
filler cap can occur, or escaping steam may cause scalding. Only use the
lid provided with your blender.
1
2
3
4
5
6
7
8
Using Your Blender in
Automatic Mode
Put ingredients in the Blender Jar. Always add liquid ingredients first
followed by solid ingredients unless a recipe states otherwise.
Place the filler cap insert into the blender lid opening and turn filler cap
clockwise until tight. Firmly attach assembled lid to the blender jar.
Plug the blender into a 120-volt 60 Hz AC-only outlet. Place the blender
jar on the motor base. All icons will display briefly for 1 second and the
blender will be in stand-by mode. The timer will display “00:00”.
Select the desired preset program selection then touch the START/
CANCEL icon. The blender will run in the mode according to the
selected program. To stop the blender at any time during operation,
touch the START/CANCEL icon and the blender will go back to standby
mode.
1
2
3
4
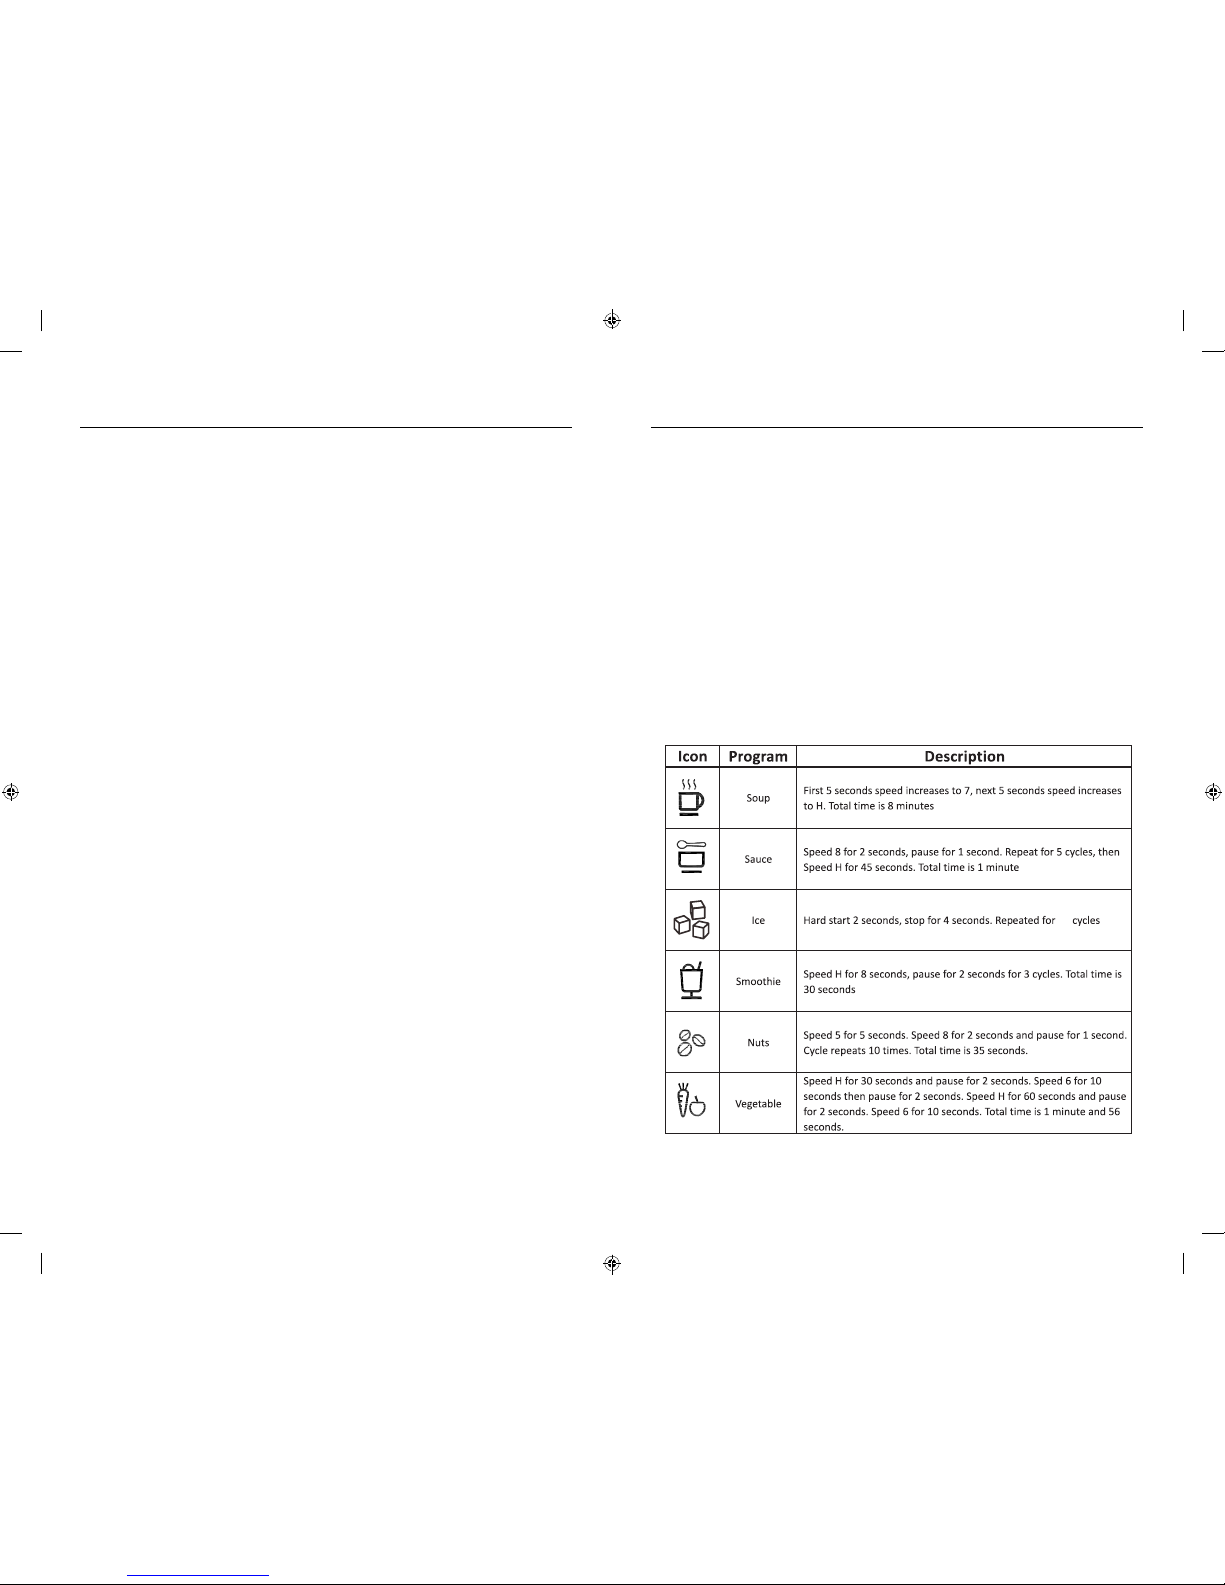
Your blender has 6 preprogrammed modes that automatically set the
speed and blending cycle. See reference chart below. Follow the below
instructions to use automatic mode.
5
8 9
Helpful Hints
If you need to scrape ingredients from the sides of the jar ensure your
blender is off unplug from the wall outlet.
When blending solid foods, always cut them into no larger than 1/2-inch
to 1-inch pieces before placing them into the jar. Blend no more than 1/2
cup of these foods at a time for uniform blending.
We do not recommend blending herbs or spices in the blender jar. They
can permanently discolor the blender jar and release strong odors into
the container which will affect the flavor of other foods.
Remember that ice cubes vary in size and shape. Smaller ice cubes can
be chopped or crushed faster than larger ones. To add ice cubes to
mixtures while the blender is operating, remove the filler cap and drop
through the opening.
If too much food is blended at one time, the motor may stall. If this
happens, stop the blender and unplug from the wall outlet. Remove a
portion of the food and then continue the blending process.
For more consistent results, always add liquid ingredients first, followed
by solid ingredients.
To add food or liquid while the blender is operating, remove the filler
cap from the blender jar cover and drop the ingredients through the
opening, however DO NOT remove the filler cap or lid if blending hot
liquids to avoid a potential burn injury. Remember to replace the filler
cap when finished adding ingredients. Avoid over-blending. Usually, you
will need to blend for only a few seconds, not minutes.
This blender is NOT intended to grind meat, mash potatoes, knead
dough, whip egg whites, or serve as a juice extractor.
Never place any of the following ingredients into the blender jar: bones
or large pieces of solidly frozen foods. If a food cannot be cut with a
knife, do not place it in the blender jar.
When making peanut butters or other nut butters or oil based foods
do not process for more than 1 minute. Over-processing can cause
overheating.
Your blender motor is equipped with a overheat protection system.
Should the motor overheat it will turn itself off. If your blender should
overheat unplug from the wall outlet and let it cool down for 45 minutes.
1
2
3
4
5
6
7
8
9
10
11
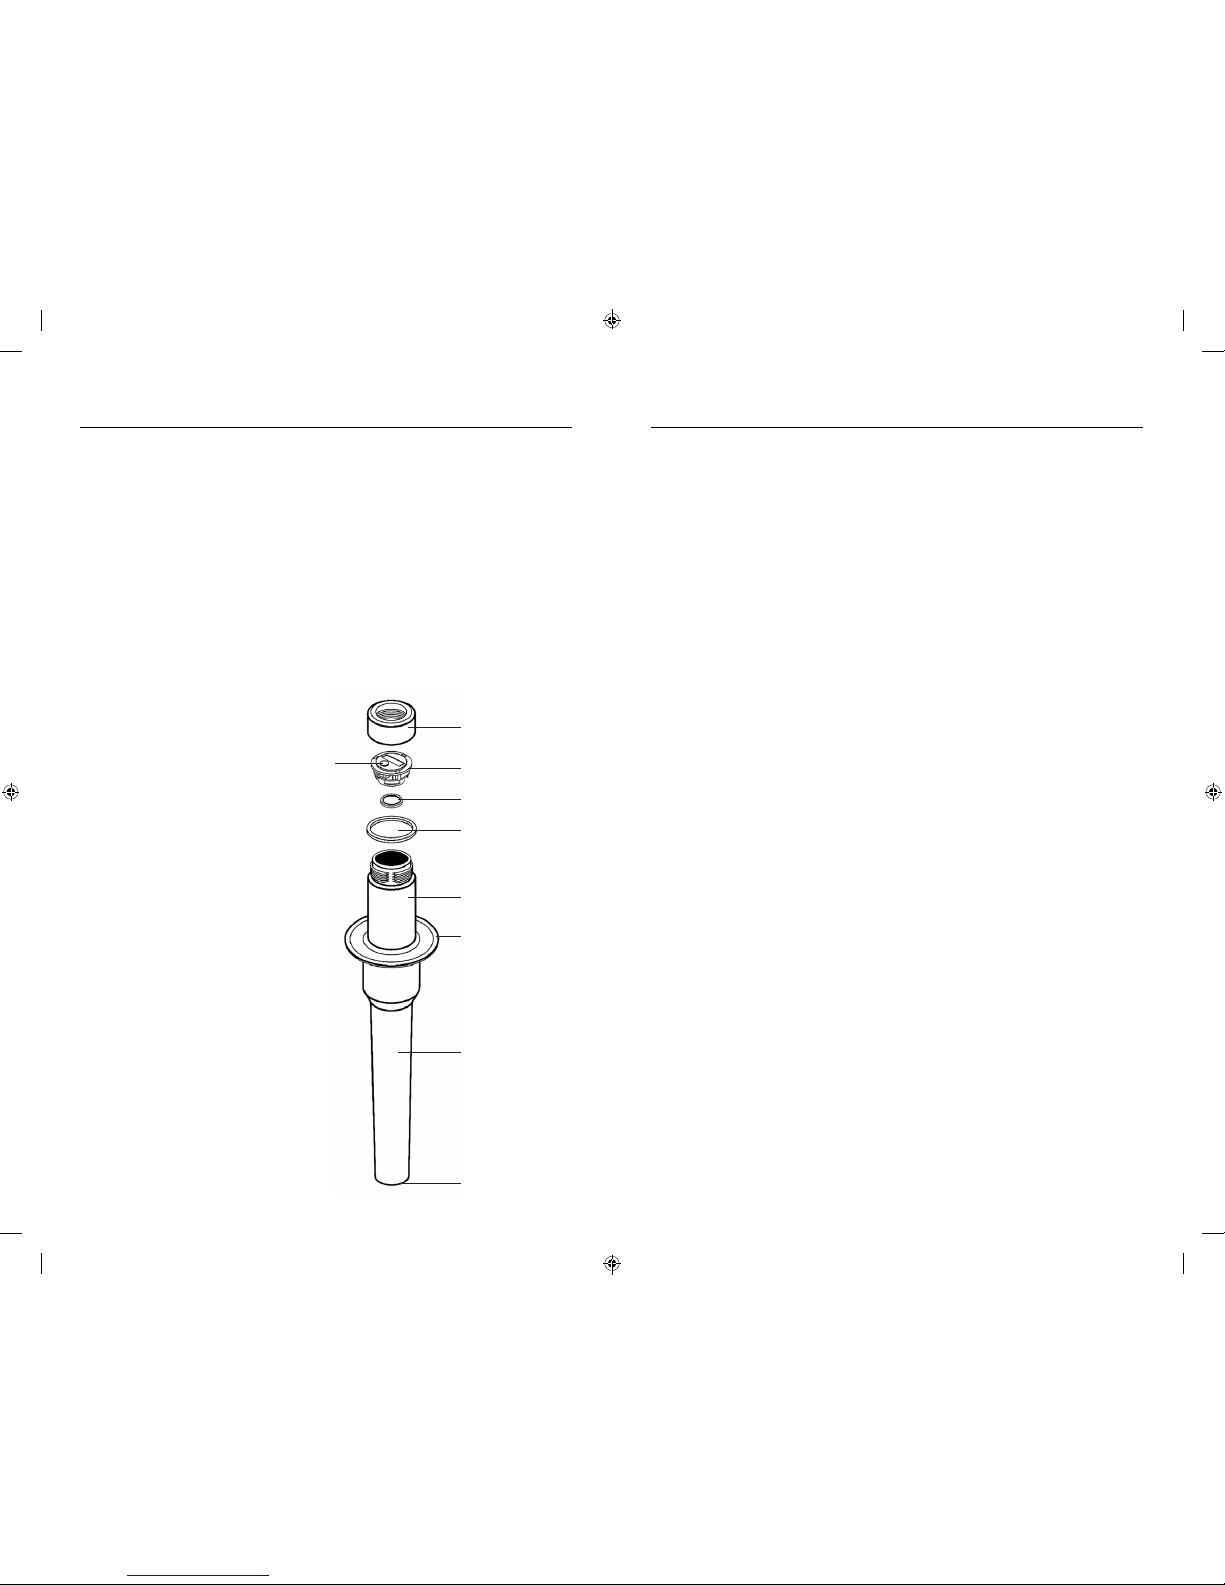
Using Your Tamper
Open the
Top Cover by
turning counterclockwise.
Remove the
PCB Assembly
from the Tamper
being careful not
to pull the wire
connector.
Locate the
battery on
the underside
of the PCB
Assembly. Slide
out the battery
from under the
bracket. Slide a
new battery into
the bracket and
replace the PCB
Assembly and
Top Cover. Use
only battery type
CR2032.
1
2
3
The tamper is to be used for stirring food and reading the food
temperature in the blender jar.
Never use the tamper without the lid in place. Remove the filler cap from
the lid and slide tamper into the Blender Jar. The tamper has a splash
guard located near the top that prevents the tamper from coming in
contact with the blade assembly.
The maximum temperature for the tamper is 212ºF. To take a
temperature reading simply press the temperature button located on
top of the tamper. The temperature is read by a sensor located at the
bottom of the tamper.
You can turn the temperature sensor off by pressing the temperature
button; otherwise it will automatically shut off after 120 seconds.
Changing the
Tamper Battery
10 11
Top Cover
Temperature
Button
Battery
PCB
Assembly
Decorative
Ring
Splash
Guard
Tamper
Stem
Temperature
Sensor
(located
underneath)
Handle
 Loading...