

Wolfgang Puck BDFR0030 Instruction
Wolfgang Puck
IMPORTANT NOTICE
PLEASE DO NOT RETURN TO STORE.
If you have any problems with this unit,
contact Consumer Relations for service
PHONE: 1-800-275-8273.
Please read operating instructions
before using this product.
Please keep original box and packing materials
in the event that service is required.
W.P. APPLIANCES, INC.
Toll Free (800) 275-8273 Website: www.wppotsandpans.com
All trademarks, service marks and trade names (collectively the “Marks”) are proprietary
to Wolfgang Puck World Wide.
Model BDFR0030 Printed in China REV 2.0
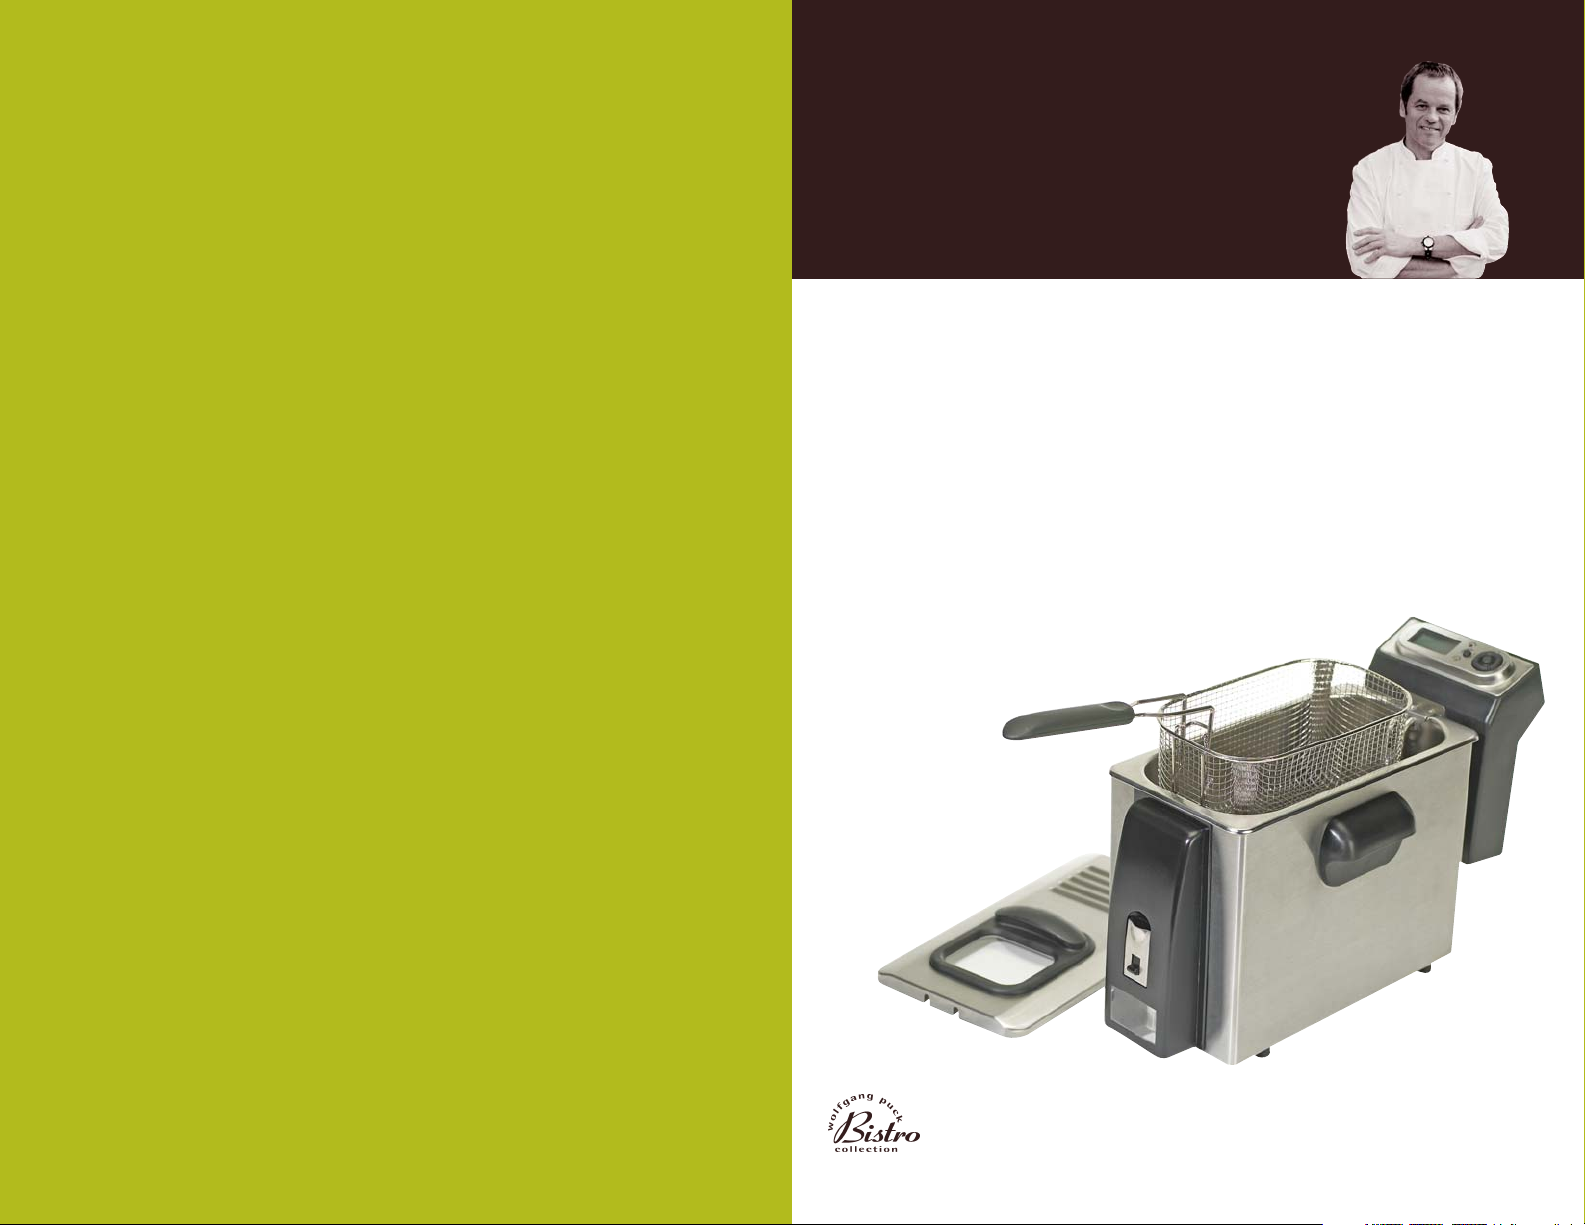
Electronic Deep Fryer
manual

Important Safeguards
When using electrical appliances, basic safety precautions should always
be followed, including the following:
1 Read all instructions carefully.
2 Do not touch hot surfaces. Use handles or knobs.
3 To protect against risk of electric shock, do not immerse the control
panel
or plug in water or any other liquid.
4 Close supervision is necessary when any appliance is used by or
near children.
5 Unplug from outlet when not in use and before cleaning. Allow to
cool before putting on or taking off parts, and before cleaning the
appliance.
6 Do not operate any appliance with a damaged cord or plug or after
the appliance malfunctions or is dropped or damaged in any manner.
Return the appliance to an authorized service facility for examination, repair, or electrical or mechanical adjustment.
7 The use of accessory attachments not recommended or sold by the
appliance manufacturer may cause fire, electric shock, or injury.
8 Do not use outdoors.
9 Do not let cord hang over edge of table or counter or touch hot
surfaces, including the stove.
10 Do not place on or near a hot gas or electric burner or in a heated
oven.
11 Extreme caution must be used when moving an appliance
containing hot oil or other hot liquids.
12 Be sure the handle is properly assembled to the basket and locked in
place. See detailed assembly instructions.
13 Always attach plug to appliance first, then plug cord into wall outlet.
To disconnect, remove plug from wall outlet.
14 Do not use this appliance for other than intended use.
This appliance is for household use only.
Save These Instructions
1
Important Safeguards 1
About Wolfgang Puck 2
Warning 4
Before Your First Use 5
Know Your Deep Fryer 6
Operating the Control Panel 8
Setting the Temperature 9
Using the Countdown Timer 10
Operating the Control Panel 11
Frying Guide 12
Guidelines for Deep Frying 13
Preparing for Frying 14
Care and Cleaning 15
Troubleshooting Guide 16
Recipes 17
Limited Warranty 35
Table of Contents
2
Wolfgang Puck,
owner of the famous
Spago restaurants and
one of the most influential
chef-restauranteurs in
America, is credited
with reviving California’s
rich culinary heritage.
His cooking innovations,
a result of blending
fresh California ingredients with his classical French techniques, are
enjoyed by world leaders, stars and fellow chefs alike. He established
other trend-setting restaurants like Postrio in San Francisco, Chinois
on Main in Santa Monica, Granita, Vert and Trattoria del Lupo. Home
chefs can also share Mr. Puck’s talents through his cookbooks and,
of course, through his appliances!

Warning
1 This Fryer has a polarized plug (one blade is wider than the other).
As a safety feature, this plug will fit in a polarized outlet only one
way. If the plug does not fit fully in the outlet, reverse the plug. If it
still does not fit, contact a qualified electrician. Do not attempt to
defeat this safety feature. A short power-supply cord is provided to
reduce the hazards resulting from entanglement or tripping over a
longer cord. Do not use this appliance with an extension cord.
2 Do not use the Fryer without oil. The Fryer will be severely damaged
if heated dry. Only use oil in your Deep Fryer. Fat that is not melted
will cause your Deep Fryer to overheat.
3 This Fryer is equipped with a safety reset button in order to prevent
operation of the appliance in the event of improper use, or irregular
operation. Once your Deep Fryer has completely cooled press the
Reset button on the back of the control panel. If your Deep Fryer
does not operate after using the reset button contact our customer
service department for repair.
4 Before using your Fryer for the first time wash the oil pot, lid, and
frying basket in warm soapy water and dry thoroughly. It is
important that your Fryer is completely dry prior to use as water will
cause the hot oil to spatter. Do not immerse the control panel or
power cord in water. Wipe with damp cloth only.
5 Prior to use ensure that your tap is in the closed position
(See figure 10 on page 15). With the tap in the closed position ensure
that your Fryer is not leaking from the tap by placing a small amount
of water in the pan. Empty water from the pan after checking the
tap and dry the oil pan thoroughly prior to adding oil. Should the tap
leak immediately stop use and contact our customer service
center for repair.
6 Do not place oversized foods or utensils not recommended by the
manufacturer in the Fryer.
7 This product should never be used unsupervised by children or
infirm persons.
8 To prevent burns do not touch any metal parts of the Deep Fryer as
they are very hot. Always use heat resistant gloves
9 DO NOT OPEN THE OIL DRAIN SYSTEM WHEN THE OIL IS HOT.
10 Always disconnect the power cord when not in use or when cleaning
your Fryer.
Before Your First Use
Carefully unpack the Deep Fryer and remove all packaging materials. Remove
the Deep Fryer lid, oil pan, frying basket and control panel. Wash the Fryer lid,
basket, oil pan and housing in warm soapy water. Never immerse the Control
Panel and Power Cord, simply wipe with a damp cloth. Do not use harsh or
abrasive cleansers on any part of the Deep Fryer. Always ensure all components are completely dry prior to first use as water will cause severe
spattering of the oil.
Warning: Do not clean the Deep Fryer by heating soapy water in it because
there is danger that the water could overflow. Do not immerse the control
panel or power cord in water. Reassemble the unit after cleaning.
11 This Deep Fryer is designed with a Magnetic Release Power Cord
that will break away from the Fryer base if the power cord is pulled.
This safety feature will prevent the appliance from tipping and the
hazardous spillage of hot oil.
a. WARNING: Always attach the cord to the Fryer first, then plug into
the proper wall receptacle. Never leave the Magnetic Release
Power Cord plugged into the wall without having it plugged into
the appliance.
12 Do not use an extension cord with this appliance.
4 5
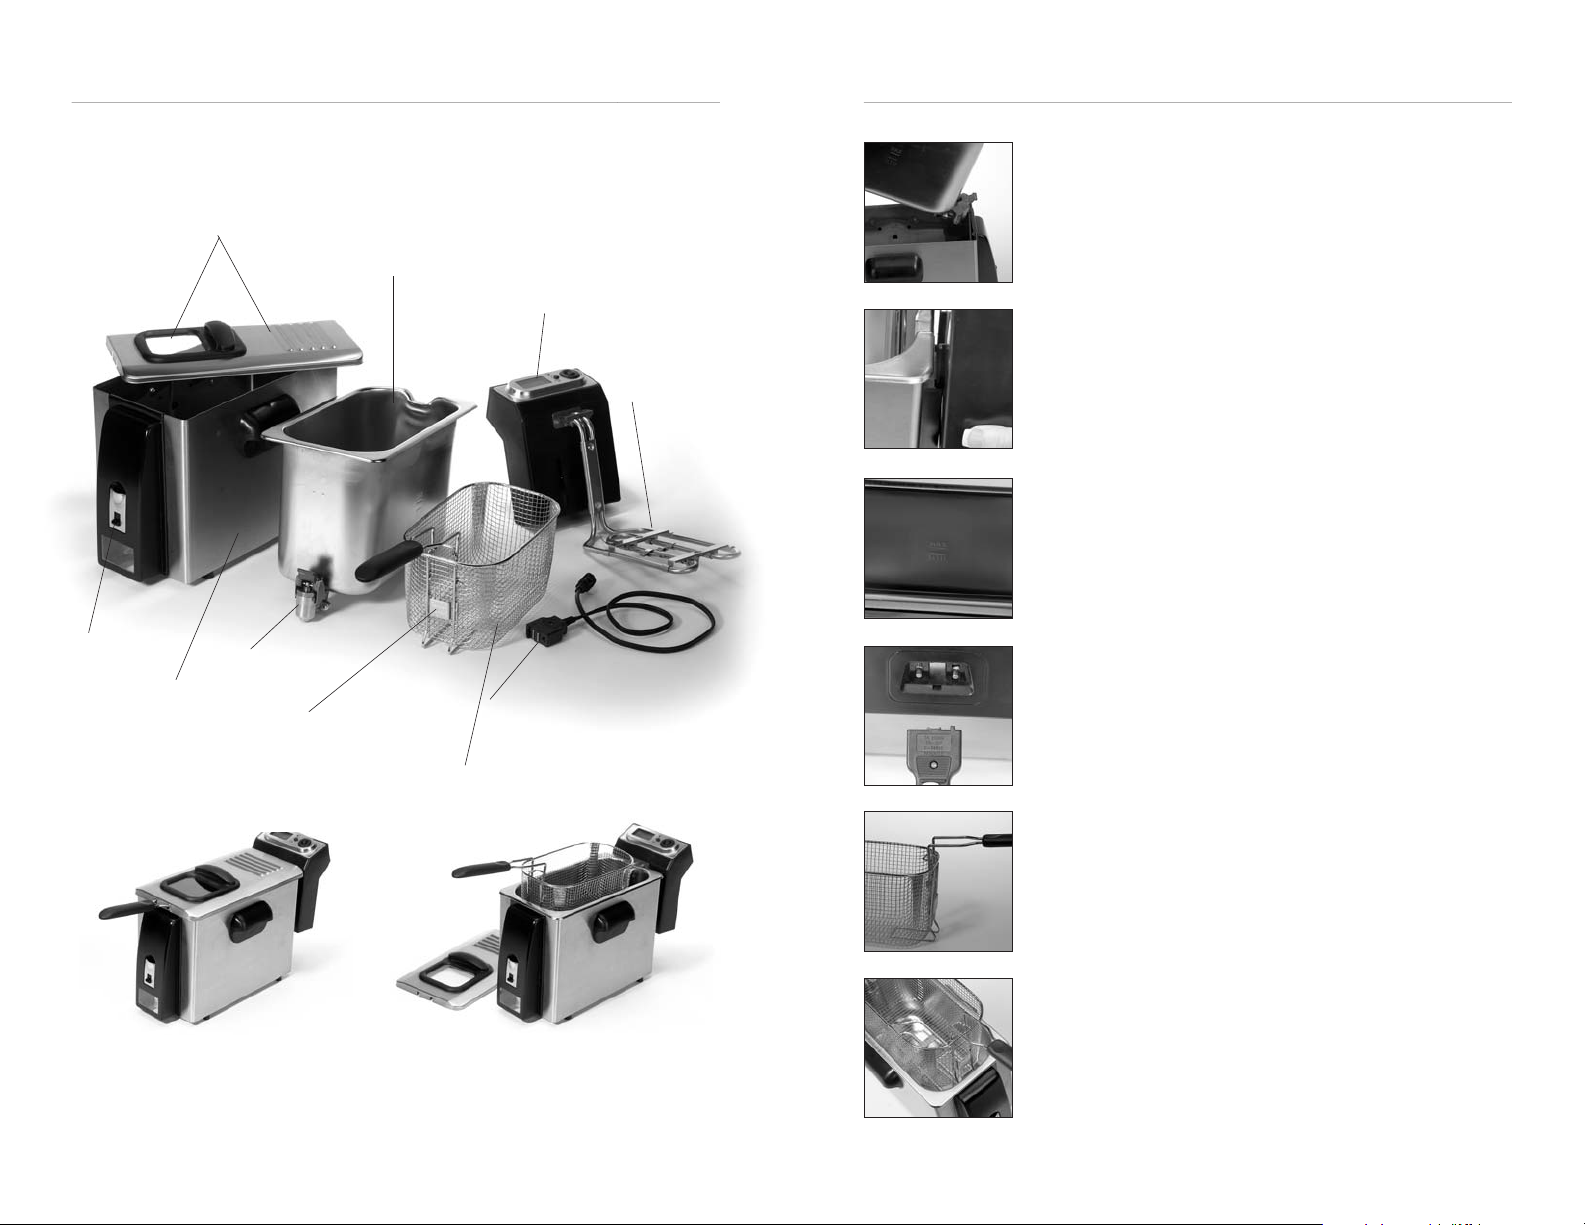
Know Your Deep Fryer
6
• Heating Element
• Drain Lock
Assembled Fryer in
cooking position
• Housing
• Oil Pan Front
• Frying Basket with folding handle
• Basket clip with
MAX food level
• Lid with viewing window and permanent filter
• Oil pot with drain tap
• Control Panel
• Magnetic Release Power Cord
7
Assembling your Deep Fryer for Use
1
Place the Deep Fryer housing on a stable,
level surface.
2
Ensure that all components of your Deep Fryer are
completely dry prior to use to avoid risk of injury
due to spattering.
3
Insert the oil pot into the Deep Fryer housing
ensuring that the front of the pot (the front is
indicated by the tap) is placed at an angle into
the housing. (See figure 1).
4
Line up the control panel into the grooves
on the rear of the Deep Fryer housing. Your Deep
Fryer is equipped with a safety microswitch which
will not allow the control panel to work unless
it is properly seated into both grooves in the
housing. (See figure 2).
5
Add the appropriate amount of oil to the oil pot.
Do not fill with oil above the maximum level or
below the minimum level marked on the inside
of the Deep Fryer pot. (See figure 3).
6
Attach the Magnetic Release Power Cord into the
receptacle on the back of the housing. Only use
the approved receptacle marked TA-3 5P in your
unit. To attach the receptacle ensure that the nubs
on the magnetic end of the cord are on the right
side of the plug (TA-35P) in order to line up with
the plug receptacle on the Control Panel.
(See figure 4).
7
Unfold the basket handle and ensure that it is
locked into place. (See figure 5).
8
Place the basket into the basket holder inside the
pot. (See figure 6)
Using Your Deep Fryer
Basket in elevated position
for loading or food draining
figure 1
figure 2
figure 3
figure 4
figure 5
figure 6
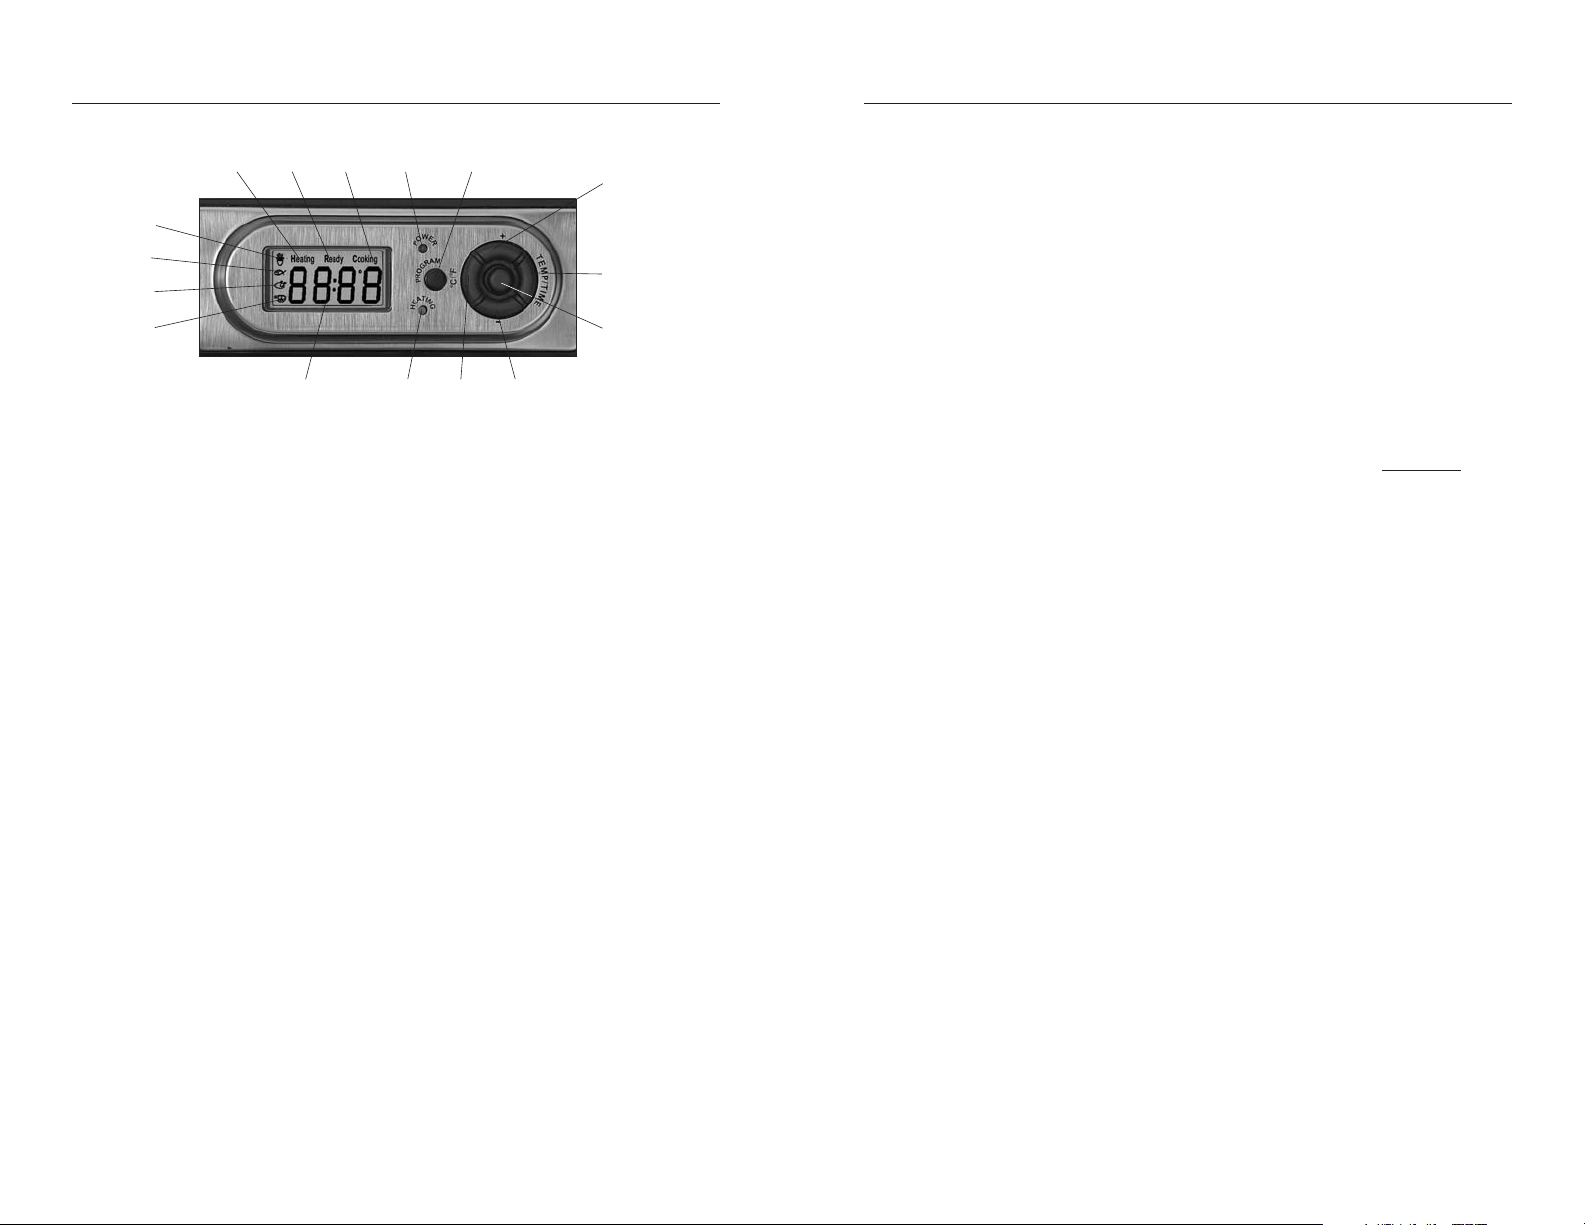
Operating the Control Panel
1 On/Off Button. Used to start preheat function and countdown timer.
2 Temp/Time Button. Used to change temperature and timer settings.
Temperature and time must be blinking in order to change.
3 Celsius/Fahrenheit Button. Used to change display to either setting.
4 + (plus) Button. Used to increase temperature or time while blinking.
5 – (minus) Button. Used to decrease temperature or time while
blinking.
6 Heating Light. Will illuminate during the preheating cycle.
Will cycle on and off during Ready and Cooking to maintain the
set temperature.
7 Program Button. Press to change between 4 preset programs.
8 Power Light. Will illuminate whenever the unit is plugged in.
9 Temperature/Time Display. Will display the selected function
10 French Fry Progam Indicator. Preset time/temperature setting for
french fries.
11 Fish Program Indicator. Preset time/temperature setting for
fish fillets.
12 Chicken Program Indicator. Preset time/temperature setting for
chicken breast.
13 Shrimp Program Indicator. Preset time/temperature setting
for shrimp.
14 Heating Indicator. Will blink while unit is preheating.
15 Ready Indicator. Will blink when preset temperature has been
reached. Fryer will maintain temperature displayed when ready
indicator is blinking.
16 Cooking Indicator. Will blink when preset temperature has been
reached and countdown timer is being used.
• 1
• 4
• 5• 6
• 9
10
•
11 •
12 •
13 •
14 •
15 • 16 •• 7• 8
• 2
• 3
Setting the Temperature
1 Add the appropriate amount of oil to the oil pot. Do not fill with
oil above the maximum level or below the minimum level marked on
the inside of the Deep Fryer pot.
2 When the unit if first plugged in the blue backlight will illuminate
and the temperature will display.
3 Press the Temp/Time button once and the temperature will blink.
You cannot change the temperature unless it is blinking.
4 While blinking Press +/– to adjust temperature.
5 Press ON/OFF to start preheating the oil. The HEATING indicator
will blink on the control panel indicating the preheating cycle.
6 The temperature will display the current oil temperature and will
continue to rise until it reaches your set temperature.
7 Your oil is ready when the READY indicator blinks and 5 beeps
sound.
8 Place your food in the basket ensuring that you do not exceed the
MAX line indicated on the basket near the handle.
9 To fry without using the optional timer, simply lower the food into
the Fryer while the READY indicator is blinking and visually track the
cooking process.
10 The Fryer will maintain the temperature displayed as long
as the READY light is blinking. The yellow heating light will cycle
on/off indicating that the thermostat is maintaining the
displayed temperature.
8 9
 Loading...