

Page 1

USE & CARE
Three in One
Blender/Food Processor/Citrus Juicer
LIFE IS ABOUT BALANCE
AND EATING WELL
IMPORTANT NOTICE
PLEASE DO NOT RETURN TO STORE.
If you have any problems with this unit, contact Consumer
Relations for service PHONE: 1-800-275-8273 or visit our
website at wphousewares.com
Please read operating instructions before using this
product. Please keep original box and packing materials
in the event that service is required.
W.P. APPLIANCES, INC. Toll Free (800) 275-8273
Models BBLFP050 Printed in China REV 1.0
All trademarks, service marks and trade names (collectively the “Marks”) are proprietary
to Wolfgang Puck World Wide.
HSN_3n1BlenderManual 6/25/10 11:03 AM Page 1
Page 2

1 2
Additional Safety Information
SHORT POWER CORD
A short power-supply cord is provided to reduce the hazards resulting
from entanglement or tripping over a longer cord. An extension cord
may be used with care; however, be sure the marked electrical rating
is at least as great as the electrical rating of this appliance. The extension
cord should be positioned such that it does not drape over the counter
or tabletop where it can be pulled on by children or tripped over. The
electrical rating of this appliance is listed on the bottom panel of
the unit.
POLARIZED PLUG
This appliance has a polarized plug (one blade is wider than the other).
To reduce the risk of electric shock, this plug will fit in a polarized outlet
only one way. If the plug does not fit fully in the outlet, reverse the plug.
If it still does not fit, contact a qualified electrician. Do not attempt to
modify the plug in any way.
IMPORTANT SAFEGUARDS
When using electrical appliances, basic safety precautions should always
be followed, including the following:
1 Read all instructions carefully.
2 To protect against risk of electrical shock, do not put appliance base,
cord or plug in water or other liquid.
3 Close supervision is necessary when any appliance is used by or
near children.
4 Unplug from outlet when not in use, before putting on or taking
off parts, and before cleaning. To disconnect, turn unit off, grasp
plug, and pull from the wall. Never yank on cord.
5 Avoid contact with moving parts.
6 Be certain cover is securely locked in place before operating
Food Processor.
7 Your Food Processor attachment includes a safety interlock device
which prevents the unit from operating without the Lids locked in
place. Do not attempt to defeat this interlock. Always check Lids for
damage prior to use.
8 Keep hands and utensils out of Blender Jug and away from blades
and discs while processing food to reduce the risk of severe injury to
persons or damage to the unit. Scraper may be used but must be
used only when Blender/Food Processor is not running. .
9 Do not operate any appliance with a damaged cord or plug or
after the appliance malfunctions or is dropped or damaged in any
manner. Return the appliance to an authorized service facility for
examination, repair, or electrical or mechanical adjustment.
10 The use of attachments not recommended or sold by the appliance
manufacturer, including canning jars, may cause fire, electric shock,
or injury to persons.
11 Do not use outdoors.
12 Do not let cord hang over edge of table or counter or touch
hot surfaces, including the stove.
13 Never feed food by hand. Always use food pusher.
14 Blades are very sharp. Handle carefully. Store out of reach of
children.
15 To reduce the risk of injury, never place cutter-assembly or discs
on base without Blender Jug properly attached or without first
putting Mixing Bowl properly in place.
16 Always operate Blender with cover in place.
17 When blending hot liquids, remove Filler Cap from cover and do not
fill Blender beyond 3-cup level. Keep hands and face away from Filler
Cap while motor is running.
18 Do not use this appliance for other than intended use.
SAVE THESE INSTRUCTIONS
HOUSEHOLD USE ONLY
HSN_3n1BlenderManual 6/25/10 11:03 AM Page 1
Page 3

3
Wolfgang Puck,
owner of the famous
Spago restaurants
and one of the most
influential chef-restauranteurs in America, is
credited with reviving
California’s rich culinary
heritage. His cooking
innovations, a result of
blending fresh California ingredients with his classical French techniques,
are enjoyed by world leaders, stars and fellow chefs alike. He established
other trend-setting restaurants like Postrio, Chinois on Main in Santa
Monica, Trattoria del Lupo, Cut, and his latest creation, Jai, an Asian
fusion restaurant in San Diego. Home chefs can also share Mr. Puck’s
talents through his cookbooks, cutlery, cookware and, of course, through
his appliances!
Table of Contents
Important Safeguards 1
Additional Safety Information 2
About Wolfgang Puck 3
Know Your Blender/Food Processor/Citrus Juicer 5
Before Your First Use 7
Using Your Blender 7
Blender Helpful Hints 9
Using Your Food Processor with Chopping Blade 10
Using Your Food Processor with Slicing
or Shredding Disc 13
Helpful Hints Food Processor 15
Processing Guide 16
Using Your Citrus Juicer Attachment 17
Maintenance and Cleaning 19
Recipes 21
Limited Warranty 42
HSN_3n1BlenderManual 6/25/10 11:04 AM Page 3
Page 4
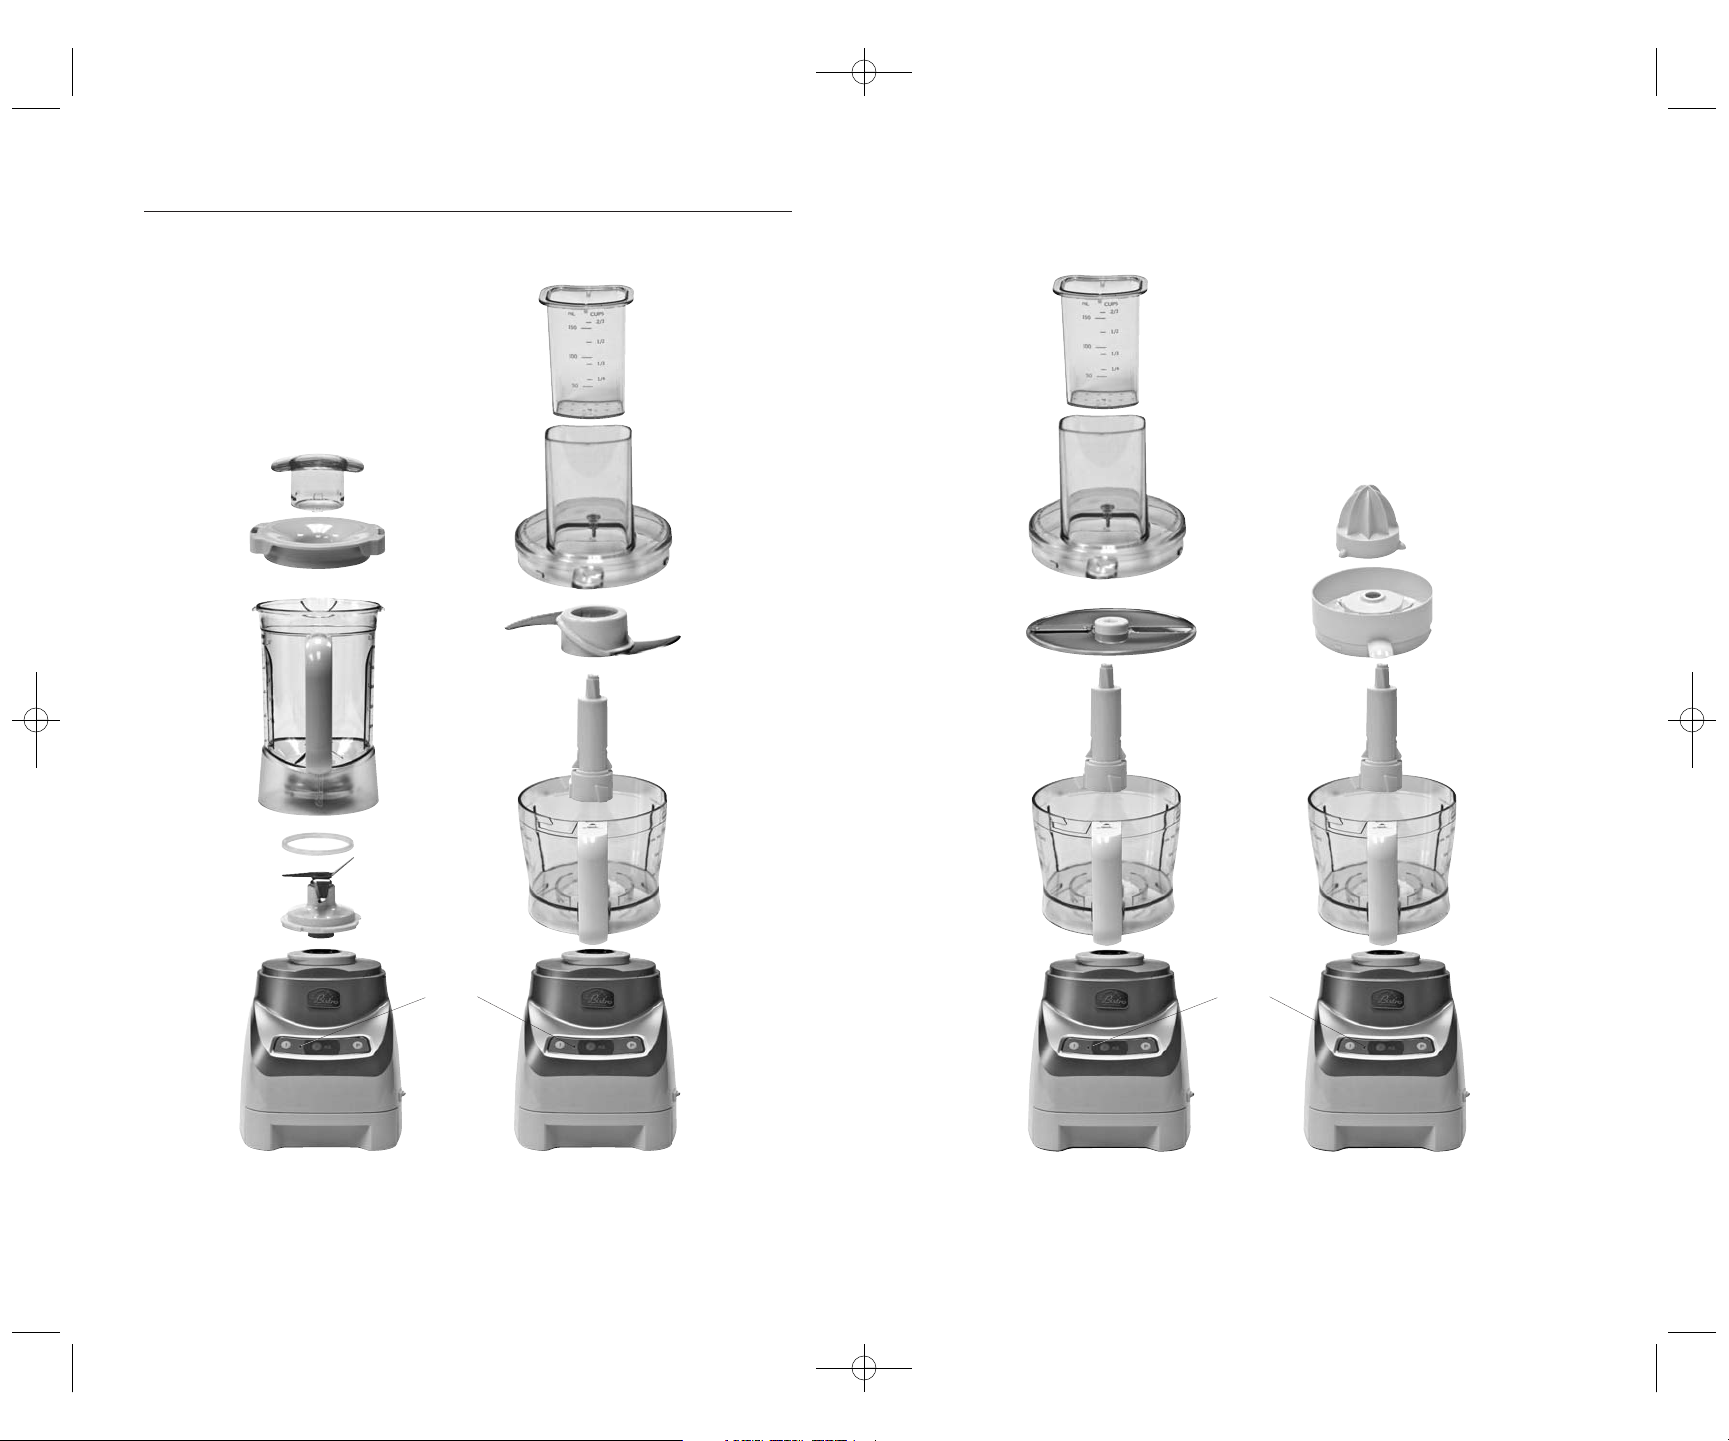
65
Know Your Blender/
Food Processor & Citrus Juicer
Blender
Food Processor
with Chopping
Blade
Food Processor
with Slicer or
Shredder Disc
Citrus
Juicer
Filler Cap
Blender
Lid
Blender
Jug
Blade
Assembly
Gasket
Food
Pusher
Food
Pusher
Mixing
Bowl Lid
with Food
Chute
Mixing
Bowl Lid
with Food
Chute
Processing/
Chopping
Blade
Slicing or
Shredding
Disc
(Slicing Disc shown)
Accessory
Shaft
Accessory
Shaft
Accessory
Shaft
Strainer
Reamer
Mixing
Bowl
Mixing
Bowl
Mixing
Bowl
Motor
Housing
Motor
Housing
Motor
Housing
Motor
Housing
Standby
Indicator
Light
Standby
Indicator
Light
Power
Switch
Power
Switch
Power
Switch
Power
Switch
HSN_3n1BlenderManual 6/25/10 11:05 AM Page 5
Page 5
87
Before Your First Use
Wash all parts, except Motor Housing or Cord, in warm soapy water and
dry thoroughly. Never immerse Motor Housing or Cord in water as this
will damage the unit.
Figure 1
Figure 2
Figure 3
Figure 4
Figure 5
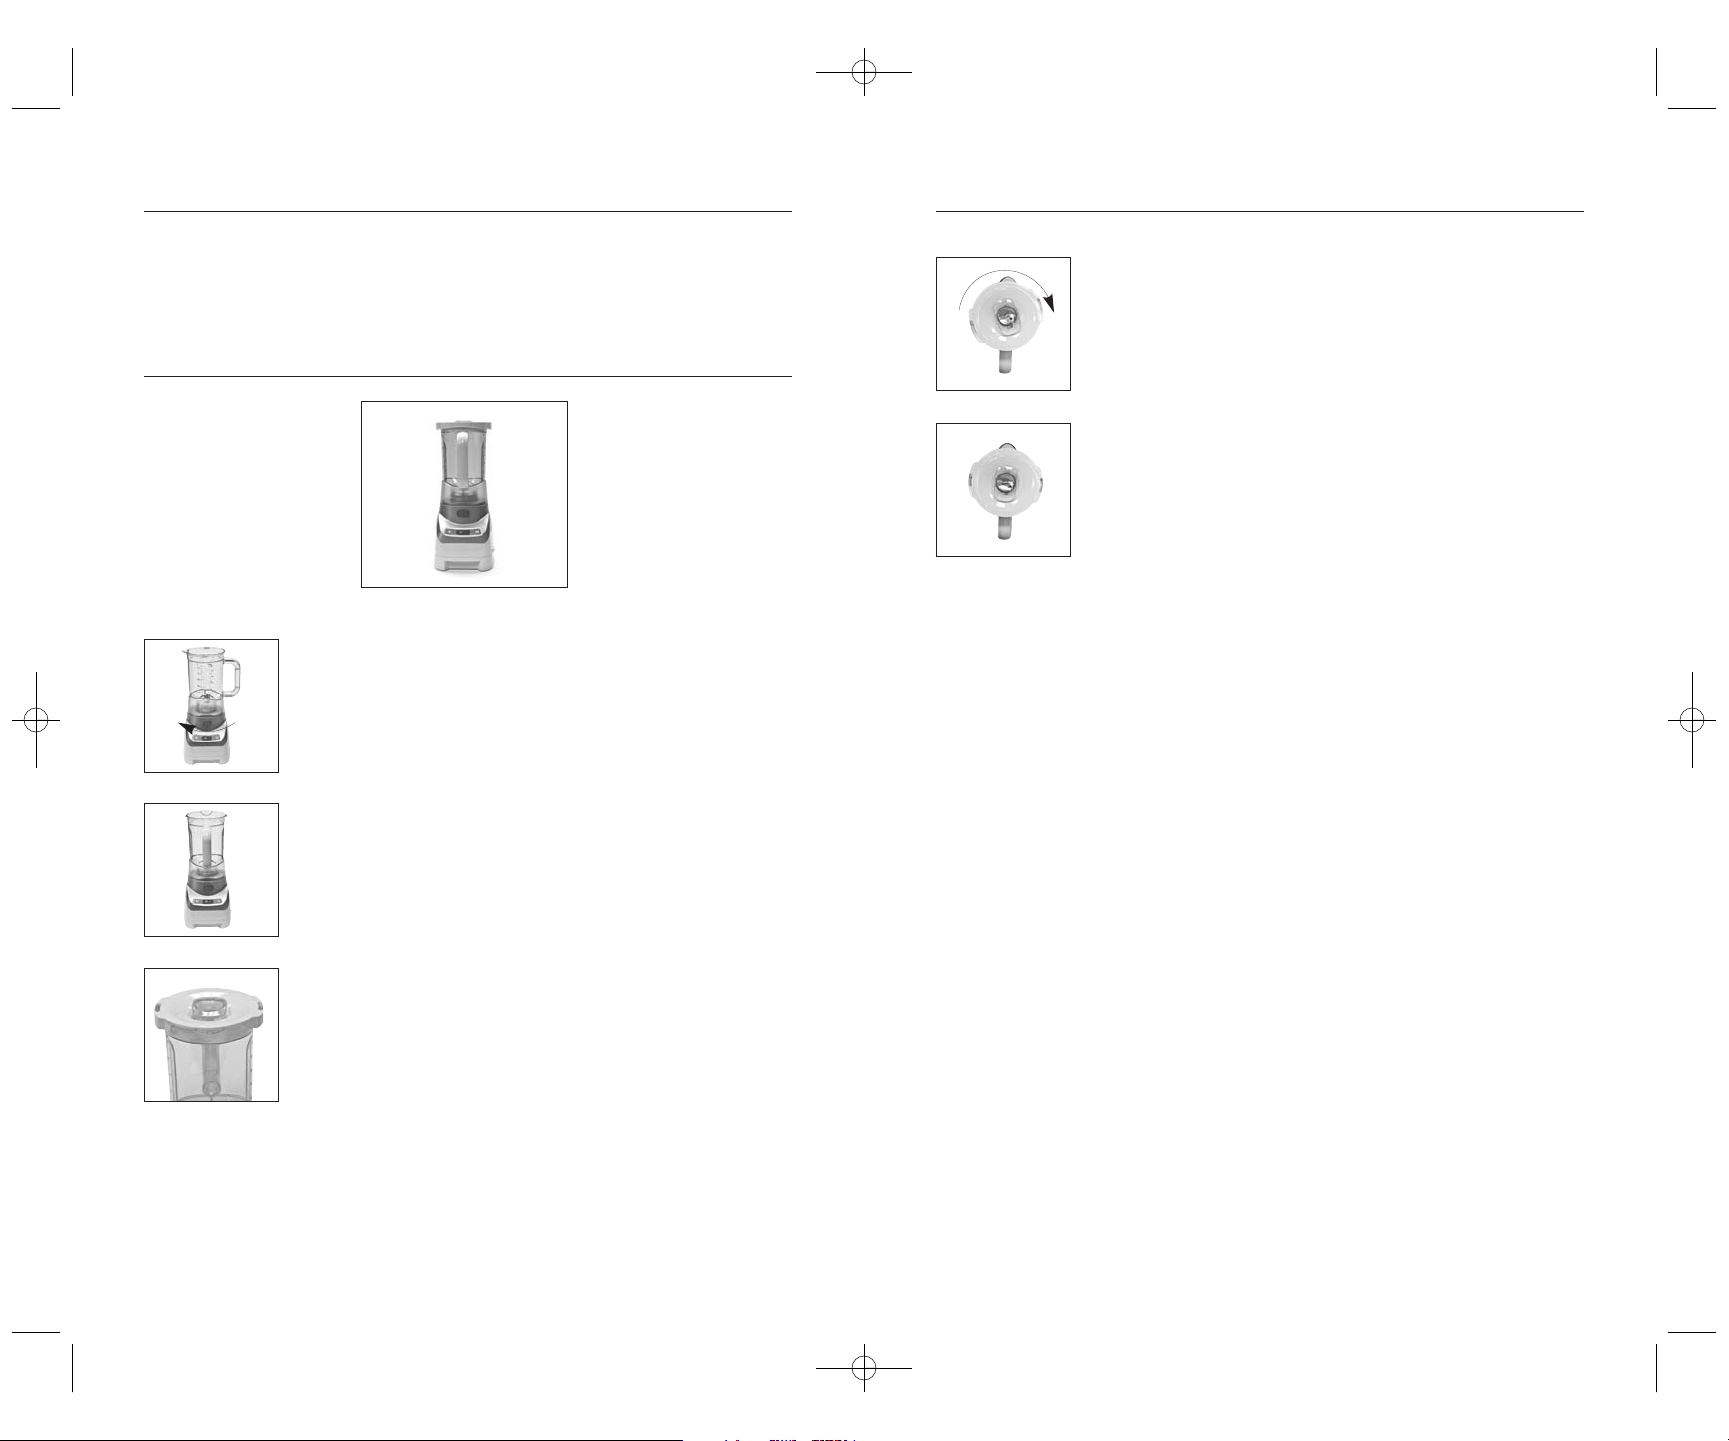
1 Place the appliance on a flat, stable, level
surface where it cannot fall.
2 Place the Blender Jug on the Motor
Housing. Rotate the Blender Jug clockwise
as far as possible until you hear it click into
place (see Figures 1 and 2).
3 Cut the ingredients into pieces that fit in the
Jug. Do not cut into pieces that are too
large, since they will need to be small
enough to fall to the base of the Jug.
4 Place the Lid onto the Jug to prevent
splashing. The cutaway portion of the Lid
will go over the pour spout side of the
Blender Jug (see Figure 3). Place the Lid on
the Jar at a slight angle and turn clockwise
to lock into place (see Figures 4 and 5 nest
page).
5 Insert the plug into the wall outlet and turn
the power switch on the side of the Motor
Housing to the ON position.
6 Press the P(ulse) button to operate the
motor for a short period at high speed
(pulse function) or press the I button for
continuous low speed, or the II/FROZEN
DRINK button for continuous high speed.
The Standby Indicator Light will dim and the
blue indicator light for the selected function
will illuminate.
• Note: the Blender works very fast.
In a few seconds the ingredients will
be processed. The consistency of the
ingredients increases with longer
blend times.
7 If necessary, you can add ingredients
through the cover by removing the center
cap of the Lid: turn the Filler Cap counterclockwise and remove. If the pieces are too
large for the filling opening then switch off
the Blender, remove the Lid, and add the
ingredients. Put the Lid back on the Jug
before switching the Blender on again.
8 Once you have processed the required
quantity of ingredients
you can switch the appliance off (press the
button with the lit indicator light).
9 Remove the Jug from the Motor Housing by
turning it counter clockwise 90 degrees and
lifting straight up.
Automatic Frozen Drink Mode
• Your Blender is equipped with a special
electronic function to make frozen drinks.
Press the II/FROZEN DRINK button for
more than 3 seconds to use this function.
The Blender will automatically pulse on and
off for approximately 22 seconds. This
allows the ice cubes to fall back onto the
chopping blades during processing, giving
you an even, smooth texture. You can stop
the automatic function at any time once
your drink has reached the desired consistency by simply pressing the II/FROZEN
DRINK button a second time.
Using Your Blender
Using Your Blender cont.
HSN_3n1BlenderManual 6/25/10 11:06 AM Page 7
Page 6
10
1 Place the appliance on a flat, stable, level
surface where it cannot fall.
2 Place the Mixing Bowl on the Motor Housing
with the handle at a 90 degree angle (see
Figure 6). Rotate the Mixing Bowl clockwise
as far as possible until you hear it click into
place (See Figure 7).
3 Slide the Processing Blade over the
Accessory Shaft and push it downwards
until the locks into place.
CAUTION: Be careful when attaching and
removing accessories. The Processing Blade
is sharp.
4 Place the assembled blade and
Accessory Shaft over the drive shaft in the
Mixing Bowl.
5 Place your ingredients into the Mixing Bowl.
6 Place the Lid on the Mixing Bowl as show in
Figure 8 and rotate the Lid clockwise as far
as possible. The Lid’s protruding lip must be
slide over the Mixing Bowl’s handle (See
Figure 9).
7 Place the Food Pusher into the Food Chute.
Figure 6
Figure 7
Figure 8
Figure 9
9
Blender Helpful Hints
• Do not place any utensil (spatula, fork, etc.) in the Blender container
while the Blender is operating. If you need to scrape ingredients
from the sides of the jar, first stop the Blender and wait for the
blades to completely stop moving.
• When blending solid foods, always cut them into no larger than
1-inch pieces before placing them into the jar. Blend no more than
1/2 cup of these foods at a time for uniform blending.
• Remember that ice cubes vary in size and shape. Smaller ice cubes
can be chopped or crushed faster than larger ones. To add ice cubes
to mixtures while the Blender is operating remove the Filler Cap and
drop through the opening. Never attempt to crush ice utilizing your
Food Processor Bowl. As a general rule, add no more than 3 cups of
ice to 4 cups of liquid.
• If too much food is blended at one time, the motor may stall. If this
happens, stop the Blender, turn switch off, unplug from wall outlet,
remove a portion of the food and repeat the blending process.
• Always add liquid ingredients first, followed by solid ingredients.
• To add food or liquid while the Blender is operating, remove the
Filler Cap from the Blender Lid and drop the ingredients through the
opening. Remember to replace the Filler Cap when you have finished
adding the ingredients.
• Avoid over-blending. Usually, you will need to blend for only a few
seconds, not minutes.
• This Blender is not intended to do any of the following tasks: grind
meat, mash potatoes, whip cream, knead dough, whip egg whites, or
serve as a juice extractor.
• Never place any of the following ingredients into the Blender jar:
bones or large pieces of solidly frozen foods or coffee beans. If the
food cannot be cut with a knife, do not place in the Blender jar.
Using Your Food Processor
with Chopping Blade
HSN_3n1BlenderManual 6/25/10 11:06 AM Page 9
Page 7

12
8 Pull the Power Cord out out of the Storage
Cavity at the rear of the Motor Housing.
Ensure that the cord is over the larger
opening in the cord storage area and not in
the locked position, see figs. 10 and 11.
9 Insert the plug into the wall outlet.
If after plugging the cord in, all indicator
lights are flashing, the Mixing Bowl and/or
the Lid is not placed correctly on the Motor
Housing. For safety reasons it is not possible
to switch on the appliance in Food
Processor Mode UNLESS both bowl and Lid
are properly assembled. Check the position
of the bowl and the Lid and ensure that it
matches Figures 7 & 9. When the Mixing
Bowl and the Lid are fitted correctly, only
the Standby Indicator Light flashes. Only
then can the appliance be operated.
10 Press the P(ulse) button to have the Motor
Housing run for a short period at high speed
(pulse function) or press the I button for
continuous low speed or the II/FROZEN
DRINK button for continuous high speed.
The Standby Indicator Light will dim and the
blue indicator light for the selected speed
will be illuminated.
11 Add ingredients during use via the Food
Chute in the Lid. Use the Food Pusher to
push solid ingredients downwards through
the chute opening.
12 Use the Food Pusher to close the Chute
opening during use so that nothing can fall
into or splash out of the Mixing Bowl.
13 You can turn the motor off by pressing the
Selected Speed button or if using the
P(ulse) button, simply remove your finger
from the button. Switch the power off by
pressing the power switch, located on the
right side of the Motor Housing and unplug
from the wall outlet.
11
Figure 12
Figure 10
Figure 11
Using Your Food Processor
cont.
Using Your Food Processor
cont.
Locked
Released
14 Remove the Mixing Bowl by rotating counter clockwise and lifting
straight up. Remove the Processing Blade with the Accessory Shaft
from the bowl before emptying.
• Your electronically-controlled motor comes equipped with an
automatic overload protection system which serves two
functions:
1) Time Protection: After two minutes of continuous operation,
the motor will shut off. Fifteen seconds before switching off, the
Standby Indicator Light will begin to flash. This prevents the
motor from overheating during use; and
2) Overload Protection: In the event of an electrical overload, the
motor will automatically shut off. Simply unplug the unit from the
outlet. Wait at least 15 seconds before using again.
• To avoid personal injury or damage to the appliance, never insert
a hand or another object into the Mixing Bowl while the appliance
is being used.
• Always use the Food Pusher to push ingredients. Never use your
fingers, a fork or another object to push ingredients.
• Do not remove the Lid from the Mixing Bowl before the
Processing Blade has stopped moving.
• To remove the Processing Blade from Accessory Shaft, press the
two side lock tabs in, and carefully the lift the blade off the Shaft.
See Figure 12.
HSN_3n1BlenderManual 6/25/10 11:06 AM Page 11
Page 8

13
1 Place the appliance on a flat, stable, level
surface where it cannot fall.
2 Place the Mixing Bowl on the Motor Housing
with the handle at a 90 degree angle (see
Figures 6 & 7). Rotate the Mixing Bowl
clockwise as far as possible until you hear it
click into place.
3 Slide the selected disc over the Accessory
Shaft and ensure that the white center ring
on the Accessory Disc is flush with the
Accessory Shaft (see Figure 13)
4 Place the Lid on the Mixing Bowl as show in
Figure 8 and rotate the Lid clockwise as far
as possible. The Lid’s protruding lip must be
slid over the Mixing Bowl’s handle. (See
Figure 9).
5 Pull the Power Cord out of the storage
space at the rear of the Motor Housing.
6 Insert the plug into the wall outlet and turn
the power switch on the side of the Motor
Housing to the ON position
If after plugging the cord in, all indicator
lights are flashing, the Mixing Bowl and/or
the Lid is not placed correctly on the Motor
Housing. For safety reasons it is not possible
to switch on the appliance in Food
Processor Mode UNLESS both bowl and Lid
are properly assembled. Check the position
of the bowl and the Lid and ensure that it
matches Figures 7 & 9. When the Mixing
Bowl and the Lid are fitted correctly, only
the Standby Indicator Light flashes. Only
then can the appliance be operated.
7 Press the I button for continuous low speed.
The Standby Indicator Light will dim and the
blue indicator light will illuminate.
Figure 13
14
8 Add ingredients during use via the Food Chute in the Lid. Use the
Food Pusher to push solid ingredients downwards through the filling
opening. Do not push too hard, slow steady pressure is all that is
needed. Too much pressure could damage the unit.
• Your electronically-controlled motor comes equipped with
an automatic overload protection system which serves
two functions:
1) Time Protection: After two minutes of continuous operation,
the motor will shut off. Fifteen seconds before switching off, the
Standby Indicator Light will begin to flash. This prevents the
motor from overheating during use; and
2) Overload Protection: In the event of an electrical overload,
the motor will automatically shut off. Simply unplug the unit
from the outlet. Wait at least 15 seconds before using again.
• To avoid personal injury or damage to the appliance, never
insert a hand or another object into the Mixing Bowl while the
appliance is operating.
• Always use the Food Pusher to push ingredients. Never use
your fingers, a fork or another object to push ingredients.
9 You can turn the motor off by pressing the Selected Speed button
or if using the P(ulse) button, simply remove your finger from the
button. Switch the power off by pressing the power switch, located
on the right side of the Motor Housing and unplug from the wall
outlet.
10 Remove the Mixing Bowl by rotating counter clockwise and
lifting straight up. Remove the Processing Blade with the Accessory
Shaft from the bowl before emptying. Remove the Cutting Disc from
the Spindle by grasping from the white center ring and lifting
straight up.
Using Your Food Processor
with Slicing or Shredding Disc
HSN_3n1BlenderManual 6/25/10 11:06 AM Page 13
Page 9

15 16
Helpful Hints
Food Processor
1 Never attempt to process any food that cannot be cut with a
sharp knife.
2 When mincing garlic, fresh herbs or small quantities of foods, add to
feed tube with multipurpose blade in place and processor running.
Make sure bowl and all parts are very dry before processing garlic or
fresh herbs.
3 To chop nuts, use the chopping blade and the pulse setting. Use
short pulses. Process smaller batches for coarser texture.
4 Let hard cheeses, such as Parmesan and Romano, come to room
temperature before processing. For best results, chill soft cheeses in
the freezer, such as cheddar and mozzarella, for 10 to 15 minutes
before processing.
5 Make sure uncooked meats and poultry are very cold before
processing.
6 Do not overfill processing bowl. Fill no more then 1/3 to 1/2 full when
chopping. The bowl can hold up to 3 cups of dry ingredients or 2
cups liquid.
7 Position the slicing and shredding disks so that cutting surfaces are
to the right of the feed tube. This will allow one full rotation of the
blade before contacting food.
8 If any part becomes stained or discolored after processing, clean
with bleach and water solution.
9 When processing several slices or pieces of food, put as many pieces
as will fit in feed tube together to help hold each other in place.
10 This food processor is NOT designed to crush ice.
11 Most foods can be processed in 10 to 30 seconds, depending on the
quantity. For large quantities, process in several batches. Let the
processor rest about 1 minute between batches.
12 If the food processor suddenly stops running, turn the unit OFF and
unplug. Let the unit cool down for 15 minutes and restart.
13 A food processor is not recommended for making Italian meringue
(a meringue made by using hot sugar syrup).
14 In the P(ulse) mode, the Processing Blade rotates at its maximum
speed as long as the button is pressed.
15 If the ingredients stick to the blade or to the inside of the Mixing
Bowl, switch the appliance off, unplug from wall outlet and remove
the Lid and the blade. The ingredients can then be scraped off using
a spatula.
16 Cut the ingredients into small pieces before placing them in the
Mixing Bowl.
17 The machine chops very quickly. Make sure the machine does not
chop for too long! It is better to chop briefly a number of times using
the P(ulse) mode.
18 Do not chop hard ingredients in the Mixing Bowl, such as coffee
beans, nutmeg or ice cubes.
Processing Guide
Food Attachment Comments
APPLES Slicing Side Up Stack 2 quarters horizontally
in chute. Use moderate pressure.
BANANAS Slicing Side Up Peel and cut in half; use light pressure.
BREAD Chopping blade Use up to 2 slices/broken into pieces.
Pulse speed.
CABBAGE Shredding Side Up Cut to fit chute; shred into bowl.
Add slaw ingredients (mayo,
vinegar, salt, etc.)
CARROTS Slicing Side Up Cut into 4" lengths and pack in chute,
alternating thick and thin ends.
CELERY Chopping blade Up to 2 cups cut into 1/2" lengths.
(chopped) Pulse to desired texture.
CHEESE Shredding Side up cut chilled cheese
(cheddar) to fit chute/shred.
CHEESE Chopping blade Cut into 1/2" cubes and
(parmesan) pulse up to 1 cup at a time.
CHOCOLATE Chopping blade Use 1-2 squares cut into 8 pieces
(grated) Chop to desired texture.
CUCUMBER Slicing Side Up Cut to fit chute; use light pressure.
EGGS Chopping blade Quarter up to 3 eggs and pulse to
(Hard boiled) desired texture. Add mayo, salt, and
seasoning for egg salad
NUTS Chopping blade Add up to 2 cups; pulse to
(chopped) desired fineness.
ONIONS Chopping blade Quarter and fill chute, position
onions upright for coarsely
chopped results. Pulse.
PEPPERONI Shredding Side Up Cut into 4" (10 cm) lengths. Slice 1
piece at a time using firm pressure.
POTATOES Shredding Side Up Cut to fit chute. After shredding,
place in cold water to prevent
darkening before frying.
SQUASH Shredding Side Up Cut to fit chute; shred, salt and drain.
(shredded) Fries well in butter or oil. Position in
chute & shred.
HSN_3n1BlenderManual 6/25/10 11:06 AM Page 15
Page 10

1817
Using Your
Citrus Juicer Attachment
Using Your
Citrus Juicer Attachment cont.
1 Place the appliance on a flat, stable, level
surface where it cannot fall.
2 Place the Mixing Bowl on the Motor Housing
with the handle at a 90 degree angle (see
Figure 6). Rotate the Mixing Bowl clockwise
as far as possible until you hear it click into
place (See Figure 7).
3 Place the Accessory Shaft into the mixing
bowl over the center hub
4 Place the assembled citrus juicer
attachment on top of the mixing bowl with
the tab of the citrus juicer strainer slightly to
the right of the bowl handle (See Figure 14).
5 Rotate the citrus juicer strainer until the
tab lines up with the mixing bowl handle
(See Figure 15).
6 Pull the Power Cord out out of the Storage
Cavity at the rear of the Motor Housing.
Ensure that the cord is over the larger
opening in the cord storage area and not in
the locked position, see Figures 10 and 11.
7 Insert the plug into the wall outlet and turn
the power switch on the side of the Motor
Housing to the ON position.
If after plugging the cord in, all indicator lights are flashing, the
Mixing Bowl and/or the Lid is not placed correctly on the
Motor Housing. For safety reasons it is not
possible to switch on the appliance in Food Processor Mode both
Bowl and Lid are properly assembled. Check the position
of the Bowl and the Lid and ensure that it matches Figures 7 & 9.
When the Mixing Bowl and the Lid are fitted correctly, only the
Standby Indicator Light flashes. Only then can the appliance be
operated.
8 When processing citrus, we recommend speed I only. Apply steady
pressure over reamer. If juicer is not passing through to bowl turn
motor off and clean pulp from strainer. You can turn the motor off
by pressing the Selected Speed button. Switch the power off by
pressing the power switch, located on the right side of the Motor
Housing and unplug from the wall outlet.
9 When bowl reaches the 3 cup mark turn motor off and pour out
contents
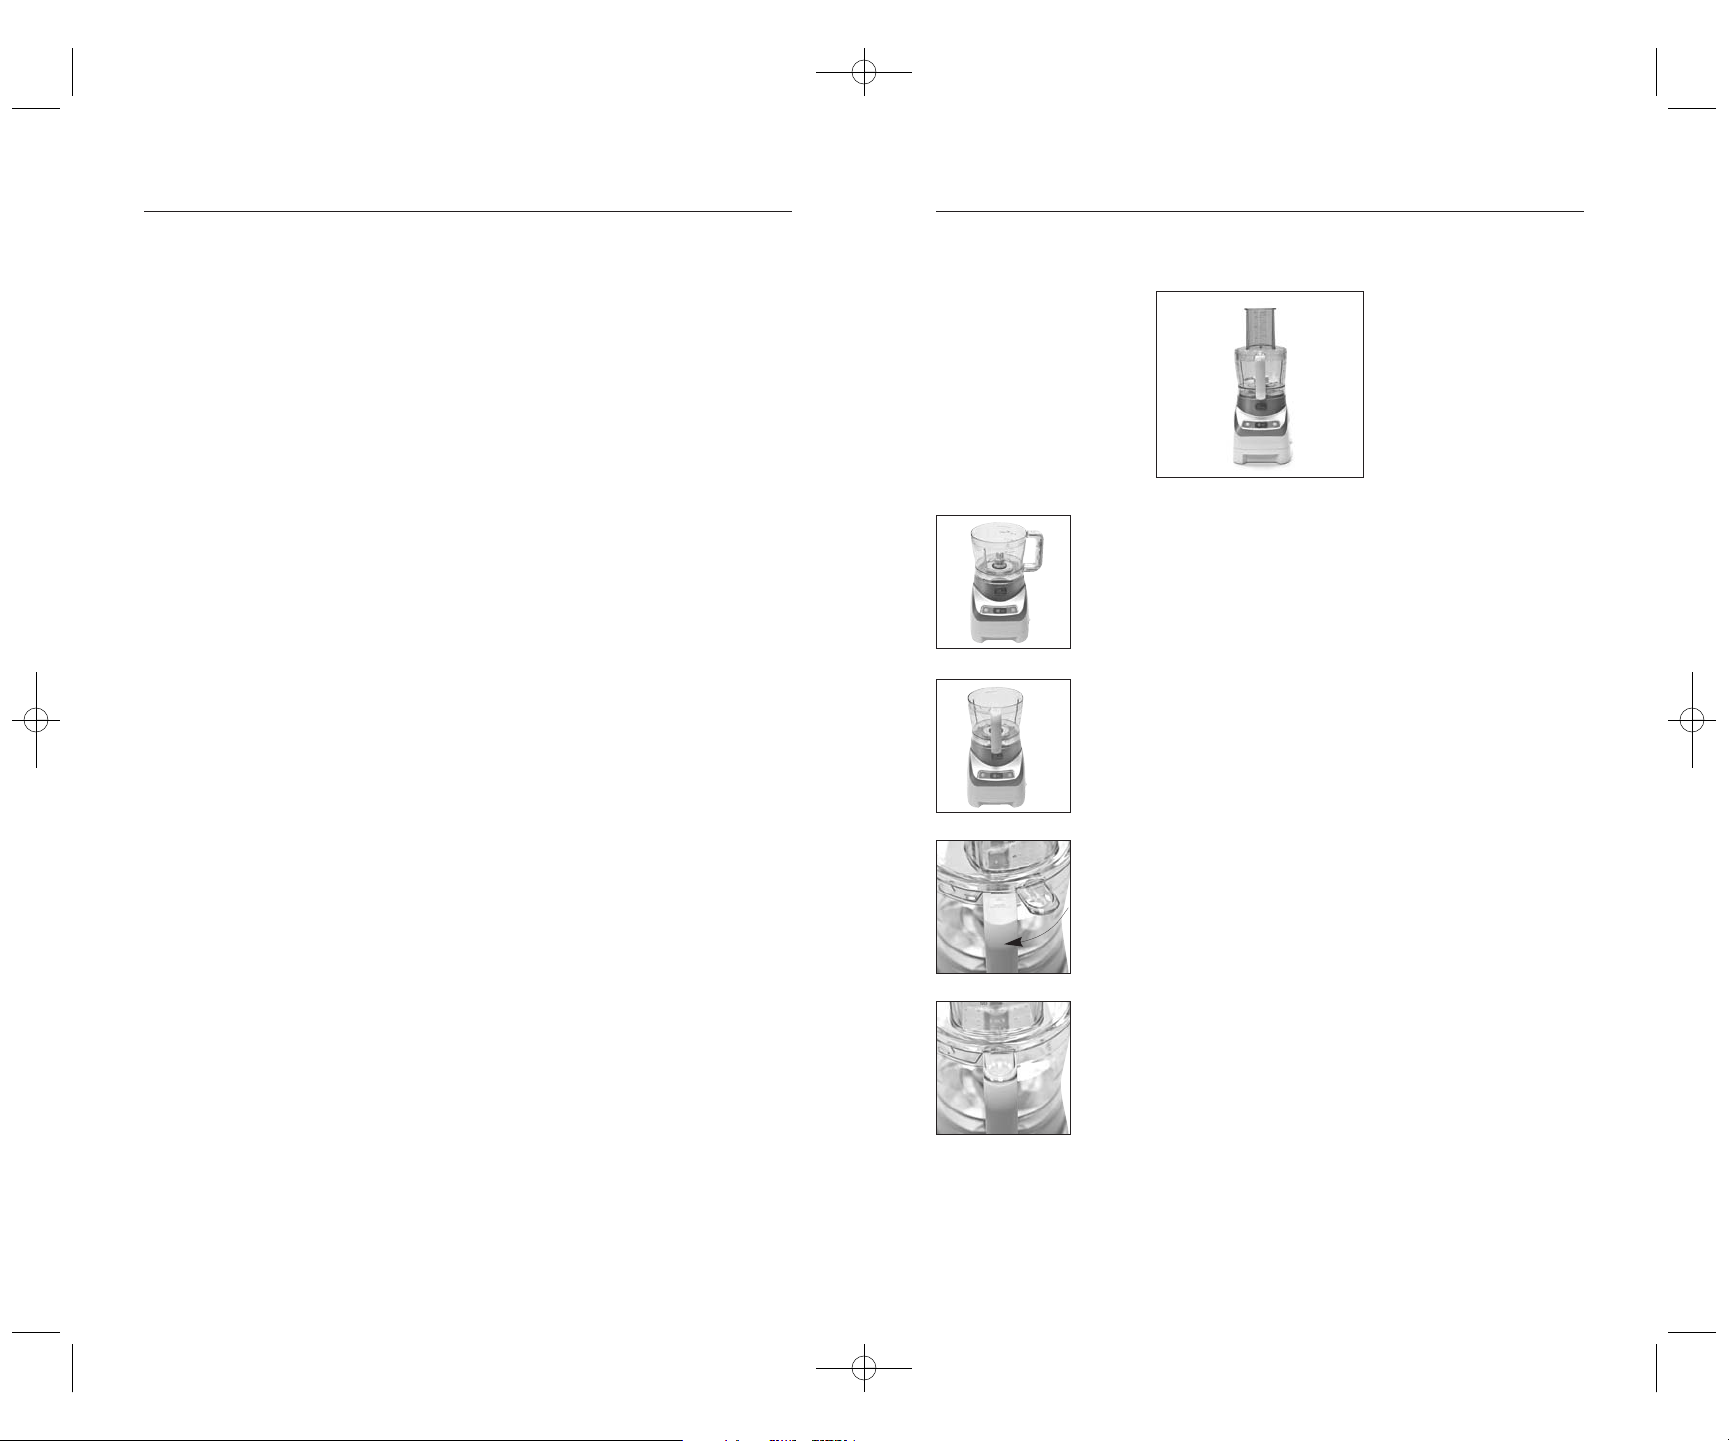
10 To remove strainer rotate citrus juicer housing slightly to the right
(See Figure 14) and lift straight up.
Your electronically-controlled motor comes equipped with an
automatic overload protection system which serves two functions:
1) Time Protection: After two minutes of continuous operation,
the motor will shut off. Fifteen seconds before switching off,
the Standby Indicator Light will begin to flash. This prevents
the motor from overheating during use; and
2) Overload Protection: In the event of an electrical overload,
the motor will automatically shut off. Simply unplug the unit
from the outlet. Wait at least 15 seconds before using again.
Wait at least 15 seconds before using again by pressing the
Speed Button to restart.
Figure 14
Figure 15
HSN_3n1BlenderManual 6/25/10 11:07 AM Page 17
Page 11

20
Maintenance and Cleaning
CAUTION: To avoid a laceration hazard, extreme care must be used
when handling discs, blades and blade assemblies. They are precisionhoned and extremely sharp.
• Turn the power switch off, located on the right side of the Food
Processor Motor Housing. Remove the plug from the wall outlet.
Food Processor
• If using the Processing Blade, remove from the Accessory Shaft,
press the two side lock tabs in, and carefully the lift the blade off the
Shaft. See Figure 12. If using the Cutting Discs, remove from the
Spindle by grasping from the white center ring and lifting straight
up.
• Clean the Mixing Bowl, Lid and all the Accessories, except the Motor
Housing with warm, soapy water and dry thoroughly. You can also
clean the Accessories in the top rack of your dishwasher.
CAUTION: Be careful when attaching and removing accessories. The
Processing Blade, the Slicing Disc and Shredding Disc are sharp.
• Clean the Motor Housing and the Power Cord with a damp cloth and
dry thoroughly.
• Make sure no moisture comes into contact with the appliance’s
electrical parts, never immerse the appliance, the Power Cord or the
plug in water or other liquids.
• Never use aggressive or abrasive cleaning products or sharp objects
(such as a knife or a hard brush) to clean the appliance.
19
Maintenance and Cleaning cont.
Blender
• You can use the frozen drink mode to clean the Blender Jar
by placing two cups of warm water in the Jar with a drop of
dishwashing detergent. Let the Blender run for the full cycle.
Rinse and repeat if necessary.
• If food is stuck to the Blade Assembly, you can remove it from
the Blender Jar for cleaning. The Filler Cap also acts as a Blade
Assembly removal tool. Turn the Blender upside down and place
the open end of the Filler Cap over the center of the blade. Make
sure no moisture comes into contact with the appliance’s electrical
parts. Turn the Filler Cap clockwise about one-half inch until it
stops turning. Remove the Blade Assembly by grasping the
white Accessory Shaft and lifting out of the Jug. Angle the
Blade Assembly to remove.
• To replace the Blade Assembly, ensure that the Silicone Gasket is
properly placed over the Blade Assembly. Line up the four cutouts
on the Blade Assembly with the four tabs on the Blender Jug. Use
the Filler Cap to lock the blade into place by turning counter
clockwise about a half inch until it stops.
• The Blender Jug with Blade Assembly, Lid and Filler Cap can be
washed in warm, soapy water or placed in the top rack of the
dishwasher.
Citrus Juicer
• Remove the Reamer, Strainer, Accessory Shaft, and Mixing Bowl and
clean these parts with warm soapy water and dry thoroughly. These
parts can also be placed in the top rack of your dishwasher.
• The Motor housing can be cleaned with a damp cloth. Do not
immerse into any liquid.
Figure 16
Figure 17
Storage
1 Place the discs in the storage tray at the
bottom of the Motor Housing as shown in
figures 16 and 17.
2 Push the Power Cord into the storage space
at the back of the appliance.
HSN_3n1BlenderManual 6/25/10 11:08 AM Page 19
Page 12

22
Strawberry Kiwi Slushy
Makes 2 servings
INGREDIENTS
6 whole strawberries, topped
3 tablespoons granulated sugar, divided
6 kiwi’s, peeled
1 cup pear nectar
1 cup ice
METHOD
1 Place strawberries and 1 tablespoon sugar into Blender Jug.
2 Pulse until smooth.
3 Pour strawberry puree into serving glasses; rinse out blender jar.
4 Place kiwi’s, pear nectar, 2 tablespoons sugar, and ice into
Blender Jug.
5 Puree on high speed until smooth.
6 Pour into glasses, on top of strawberry puree, and serve.
Recipe courtesy Marian Getz, Wolfgang Puck Pastry Chef
21
Recipes
HSN_3n1BlenderManual 6/25/10 11:08 AM Page 21
Page 13

24
Instant Blackberry Ice Cream
Try variations of frozen fruit and the pudding mix flavors. If using pudding
mixes which contain sugar; the ice cream will be somewhat softer in
consistency. I love banana and white chocolate cheesecake flavored
pudding. Dark cherries with chocolate pudding mix is very good too.
Makes about 2 1/2 cups
INGREDIENTS
8 ounces frozen blackberries
1 cup heavy whipping cream
1 regular-sized package instant, sugar-free vanilla pudding (dry, as is)
METHOD
1 Pour frozen blackberries into processor bowl fitted with the
Chopping blade.
2 Pour package of instant sugar free pudding mix over blackberries.
Quickly pour the cream over that and process for 20 seconds.
Remove lid and scoop into serving bowls or onto ice cream cones.
Recipe courtesy Marian Getz, Wolfgang Puck Pastry Chef
23
Homemade
Peanut Butter
Makes about 1 cup
INGREDIENTS
1 cup roasted peanuts
1/4 teaspoon kosher salt
1 tablespoon honey
3 tablespoons peanut oil
1 tablespoon water
METHOD
1 Combine all ingredients into Processor Mixing Bowl fitted with the
Chopping Blade. Process for 20-30 seconds. Mix a little longer if a
smoother texture is desired.
TIP
Use the same amounts but vary the ingredients to suit your tastes.
Cashews and almonds are wonderful too.
Recipe courtesy Marian Getz, Wolfgang Puck Pastry Chef
HSN_3n1BlenderManual 6/25/10 11:08 AM Page 23
Page 14

26
Asian Vinaigrette
This simple dressing gives a light yet rich Asian flavor to salad
greens. You'll find rice wine vinegar and toasted sesame oil in the
Asian foods section of well-stocked markets.
Makes 1/2 cup
INGREDIENTS
3 tablespoons rice wine vinegar
2 tablespoons soy sauce
2 tablespoons peanut oil
1 tablespoon toasted Asian sesame oil
Juice of 1/2 lemon
Salt
Freshly ground black pepper
METHOD
1 Use the Citrus Juicer attachment to juice the lemon.
2 In the Blender Jug combine the vinegar, soy sauce, peanut oil,
sesame oil, and lemon juice on low speed.
3 Season to taste with salt and pepper.
Recipe Courtesy Wolfgang Puck
25
Caesar Vinaigrette
Makes about 2 cups
INGREDIENTS
1 egg
3 tablespoons fresh lemon juice
1 tablespoon garlic, minced
1/2 teaspoon Worcestershire sauce
1/4 teaspoon red pepper flakes
1 tablespoon Dijon mustard
2 anchovy fillets, mashed
Scant cup peanut oil
1/3 cup extra-virgin olive oil
1/4 cup freshly grated Parmesan
Kosher salt
Freshly ground black pepper
METHOD
1 Use the Citrus Juicer attachment to juice the lemon.
2 In Blender Jug, combine the egg, lemon juice, garlic, Worcestershire
sauce, red pepper flakes, mustard, and anchovies on low speed.
3 Slowly pour in the oils to emulsify. Stir in the cheese and season with
salt and pepper.
4 Refrigerate in a covered container. When ready to use, whisk or
shake the container.
Recipe courtesy Marian Getz, Wolfgang Puck Pastry Chef
HSN_3n1BlenderManual 6/25/10 11:08 AM Page 25
Page 15

28
Tapenade
Crostini are thin versions of the classic Italian Bruschetta. Tapenade is
the great olive spread of Provence. It’s a perfect combination.
Makes 1 heaping cup
INGREDIENTS
For the Tapenade
1 cup Niçoise olives, pitted
1 cup small green French olives (Picholine), pitted
1/4 cup oven-dried tomatoes (see recipe next page), drained
1 tablespoon capers
1 clove garlic
1 anchovy fillet
1/2 tablespoon fresh basil leaves, chopped
1/2 tablespoon fresh thyme leaves, chopped
1/2 tablespoon fresh flat-leaf parsley leaves, chopped
1/4 tablespoon fresh oregano leaves, chopped
1/4 cup extra-virgin olive oil
For the Crostini
1 loaf crusty French bread, cut into slices on a bias
Goat cheese
METHOD
1 In the Food Processor Mixing Bowl fitted with the Chopping blade,
combine all the ingredients for the Tapenade except the olive oil.
Using the PULSE button, process until coarsely chopped and well
blended. Continue to process, slowly adding the olive oil. Refrigerate
in a covered container. Use as needed for up to 1 month.
2 Preheat oven to 400 degrees F.
3 Place bread slices on a cookie sheet and bake for 5 minutes, or until
lightly toasted.
4 Spread crostini toast with a thin layer of goat cheese, and then add
tapenade. Serve immediately.
Recipe Courtesy Wolfgang Puck
Oven-Dried Tomatoes
Makes 1 1/4 cups
INGREDIENTS
About 1 2 medium Roma tomatoes (2 pounds)
3/4 cup extra virgin olive oil, plus additional oil
1 teaspoon fresh thyme leaves, minced
6 cloves garlic, crushed
1/2 teaspoon kosher salt
1/4 teaspoon freshly ground black pepper
1/2 teaspoon sugar
METHOD
1 Preheat the oven to 250 degrees F.
2 In a pot of boiling water, blanch tomatoes for about 15 seconds.
Drain and refresh in ice water. Drain water, peel, core and cut
tomatoes into quarters and remove seeds.
3 Line a baking tray with parchment paper. Place tomatoes quarters
on the tray, cut side down. Drizzle with 1/4 cup of olive oil. Sprinkle
with thyme and garlic. In a small bowl, combine salt, pepper and
sugar and sprinkle evenly over the tomatoes.
4 Bake tomatoes until they begin to shrivel, about 1 hour. When
tomatoes are cool enough to handle, transfer to a container and
pour remaining 1/2 cup of olive oil over them. Cover, refrigerate and
use as needed.
Recipe Courtesy Wolfgang Puck
27
HSN_3n1BlenderManual 6/25/10 11:08 AM Page 27
Page 16

30
Ricotta Pancakes
These are so light and delicious yet satisfying. Serve with fresh fruit
and dust with powdered sugar.
Makes approximately 12 four-inch pancakes
INGREDIENTS
2 cups ricotta cheese
4 large eggs
4 tablespoons unsalted butter, melted
2 tablespoons sugar
1/2 cups all-purpose flour
1 teaspoon salt
1 teaspoon baking powder
METHOD
1 Preheat griddle or large fry pan on medium heat.
2 Fit Food Processor Mixing Bowl with the Chopping blade. Add
ricotta, eggs, butter and sugar to Mixing Bowl and process for
1 minute.
3 Add flour, salt, and baking powder. Pulse several times; all you want
to do is to incorporate ingredients. Don’t over mix.
4 Dab griddle with butter or non-stick spray. Pour approximately
3 tablespoons of batter onto griddle and spread it out to form
pancakes.
5 Cook for 2 - 3 minutes. Lift pancakes to make sure they are brown
then flip. These pancakes do not emit little bubbles like traditional
pancakes so you need to check for color.
Recipe Courtesy Debra Murray, Wolfgang Puck HSN Host
29
Homemade Potato Chips
Makes 12 - 16 servings
INGREDIENTS
4 pounds baking potatoes or Yukon Gold potatoes, scrubbed clean
Peanut oil for deep frying
Kosher salt
Seasoning possibilities
Salt mixed with cayenne
Freshly grated Parmesan
Salt mixed with chopped fresh thyme or rosemary
Thinly sliced or slivered truffles
METHOD
1 If the potatoes have thick, gnarly skins, as older potatoes do, peel
them. Otherwise, just scrub.
2 Using the Slicing Disc in your Food Processor, slice the potatoes
crosswise into very thin slices in batches. Soak sliced potatoes in
cold water for about 10 minutes, then drain and very carefully. Pat
the slices completely dry with separate layers of paper towels.
3 Put several inches of oil in an automatic deep fryer or a deep, heavy
pan or skillet. Set the deep fryer or bring the oil in the pan to 350°F.
4 In batches, deep-fry the potato slices, turning them with a wire
strainer if necessary to cook them evenly until they turn light golden
brown, 2 to 3 minutes. Lift out the basket or scoop out the potatoes
with a deep-fry skimmer and spread them onto paper towels to
drain. Sprinkle right away with salt and your choice of seasonings.
5 Bring the oil back up to 350°F before adding the next batch.
Arrange the chips attractively in one or more napkin-lined baskets
and serve.
Recipe courtesy Wolfgang Puck Makes it Easy,
Rutledge Hill Press, 2004
HSN_3n1BlenderManual 6/25/10 11:08 AM Page 29
Page 17

32
Potato Latkes
The ever-popular potato pancakes of the Jewish kitchen make a
wonderful appetizer, side dish, or even a vegetarian main course.
Makes 12 servings
INGREDIENTS
8 medium baking potatoes, peeled and trimmed
to fit Food Processor Food Chute
1 medium onion, peeled and cut into quarters
1 tablespoon lemon juice
1 cup all-purpose flour
1 cup milk
1 egg
1 tablespoon baking powder
2 tablespoons unsalted butter, melted
Peanut oil
Freshly grated nutmeg
Salt and pepper to taste
Watercress, for garnish
Caviar, for garnish (optional)
Applesauce, for garnish (optional)
Crème fraiche or sour cream, for garnish
METHOD
1 In your Food Processor Mixing Bowl fitted with the Shredding Blade,
shred the potatoes and onion in batches. Place potatoes into a large
mixing bowl. Toss them with a squeeze of lemon juice. A handful at a
time, squeeze out as much liquid as possible from the shreds.
2 In another mixing bowl, stir together the flour, milk, egg, baking
powder, and nutmeg. Stir this batter into the potatoes and then stir
in the melted butter.
3 Heat a large, heavy skillet over medium-high heat. Add an even film
of peanut oil about 1/4 inch deep and, when it is hot, form pancakes
about 1 heaping tablespoonful large, spreading out and smoothing
the top surface with the back of the spoon. When the undersides are
golden brown, about 3 minutes, use a metal spatula to flip the
pancakes over and cook until their other sides are browned.
4 Serve the pancakes as a side dish or appetizer, garnished with
watercress. If serving as an appetizer, also accompany the pancakes
with your choice of caviar or applesauce, along with some crème
fraiche or sour cream.
Recipe courtesy Wolfgang Puck
31
Almond Pesto
Makes 1/2 cup
INGREDIENTS
1 cup loosely packed parsley, washed, stems removed
1 cup firmly packed basil leaves
2 tablespoons garlic, chopped and blanched
1 tablespoon almonds, finely ground
3/4 cup olive oil
1 teaspoon salt
1 teaspoon freshly ground white pepper
2 teaspoons lemon juice
METHOD
1 In the Food Processor Mixing Bowl fitted with the Chopping blade,
combine the parsley, basil, garlic, almonds and a little of the oil until
combined well.
2 With the motor still running, slowly pour the remaining oil through
the opening, and process until smooth. Season with salt, pepper and
lemon juice. Correct seasonings to taste.
Recipe Courtesy Wolfgang Puck
HSN_3n1BlenderManual 6/25/10 11:08 AM Page 31
Page 18

34
Basic Pizza Dough
Makes dough for 1 small pizza
INGREDIENTS
1 package active dry or fresh yeast
1 teaspoon honey
1/2 cup warm water, 105 to 1 15 degrees F
1 1/2 cups unbleached, all-purpose flour
1/2 teaspoon kosher salt
1 tablespoon extra-virgin olive oil, plus additional for brushing
METHOD
1 In a small bowl, dissolve the yeast and honey in 1/4 cup warm water.
2 In the Mixing Bowl of your Food Processor fitted with the Chopping
Blade, combine the flour and the salt. Add the oil, the yeast mixture,
and the remaining 1/4 cup of water and process until the mixture
forms a ball.
3 Turn the dough out onto a clean work surface and knead by hand
2 or 3 minutes longer. The dough should be smooth and firm.
Cover the dough with a clean, damp towel and let it rise in a cool
spot for about 2 hours. (When ready, the dough will stretch as it is
lightly pulled).
4 Work ball by pulling down the sides and tucking under the bottom
of the ball. Repeat 4 or 5 times. Then on a smooth, unfloured
surface, roll the ball under the palm of your hand until the top of the
dough is smooth and firm, about 1 minute. Cover the dough with a
damp towel and let rest 1 hour. At this point, the ball can be wrapped
in plastic and refrigerated for up to 2 days.
Pizza dough can be rolled out, covered airtight with plastic and foil,
frozen, then transferred directly form the freezer to hot oven.
• You can make pizza dough ahead and let it rise in a covered
bowl in the refrigerator. Just punch it down and knead it a few
times when you’re ready to roll it out.
• If you don’t have a pizza wheel for cutting the pizzas, use
kitchen scissors or a serrated knife.
Recipe courtesy Wolfgang Puck Pizza, Pasta, and More!,
Random House, 2000
33
Brunch Pizza with Scrambled
Eggs and Smoked Salmon
Makes 2 servings
INGREDIENTS
6 ounces Pizza Dough (see recipe next page)
Chili and Garlic Oil (see recipe p. 33)
4 large eggs
1/4 cup milk
Kosher salt and freshly ground black pepper
1 tablespoon olive oil
1 tablespoon unsalted butter
METHOD
1 Place a pizza stone on the middle rack of the oven and preheat
oven to 500 degrees F.
2 On a lightly floured surface, stretch or roll out the dough to an
8-inch round. Place the dough on a pizza peel that has been dusted
with flour or semolina (you can also place on a cookie sheet). Lightly
brush the surface of the dough with chili oil. Place dough on the
pizza stone and bake until the bottom begins to turn golden brown,
but the pizza is not cooked through, about 6 to 8 minutes. Remove
from the oven and set aside.
3 In a medium bowl, whisk together the eggs, milk, salt, and pepper.
Place a nonstick 10-inch skillet over medium-high heat. When the
pan is hot, add the olive oil and butter and cook until the butter is
melted. Add the egg mixture and cook, stirring constantly, until the
eggs are slightly set, but still fairly undercooked, about 4 minutes.
The eggs will cook further in the oven so it is important not to
overcook them. Remove from the heat and remove from the pan to
stop the cooking.
4 Spread the eggs on the pizza dough, leaving a 1/2-inch border
around the edges. Scatter the mozzarella and Fontina cheeses
evenly over the eggs. Return to the oven and cook just until the
cheese melts and is bubbly, about 5 minutes.
5 Remove the pizza from the oven and transfer to a firm surface.
Arrange the smoked salmon slices over the surface of the pizza,
covering completely. Garnish with the chopped chives and
salmon eggs.
Recipe courtesy Wolfgang Puck Pizza, Pasta, and More!,
Random House, 2000
HSN_3n1BlenderManual 6/25/10 11:08 AM Page 33
Page 19

36
Banana Smoothie
Makes 2 servings
INGREDIENTS
6 ounces fresh squeezed orange juice from 4 oranges
6 ounces plain nonfat yogurt
2 ripe bananas
1/2 teaspoon vanilla extract
1 tablespoon honey
1 cup ice cubes
METHOD
1 Use Citrus Juicer attachment to juice the oranges.
2 Combine ingredients into Blender Jug.
3 Puree on high speed until smooth and creamy.
4 Pour into glasses and serve.
Recipe courtesy Marian Getz, Wolfgang Puck Pastry Chef
35
Chili and Garlic Oil
Makes 2 cups
INGREDIENTS
1 whole head garlic, separated and peeled
2 cups extra virgin olive oil
1 tablespoon red pepper flakes
METHOD
1 In a small saucepan, combine the garlic cloves and olive oil. Bring to
a boil over high heat, then reduce the heat to maintain a bare
simmer and cook until the garlic turns brown, 10 to 15 minutes. Keep
a close watch; if the garlic gets too dark, the oil will have a bitter
taste.
2 Let the oil cool, then stir in the red pepper flakes. Leave at room
temperature for at least 2 hours to let the flavors blend. Strain the oil
into a clean glass container, cover and refrigerate.
Recipe courtesy Wolfgang Puck Pizza, Pasta, and More!,
Random House, 2000
HSN_3n1BlenderManual 6/25/10 11:08 AM Page 35
Page 20

38
Gazpacho cont.
METHOD
1 In a large, nonreactive bowl, stir together the tomatoes, celery stalks,
red bell pepper, cucumber, tomato juice, vegetable broth or water,
olive oil, sherry vinegar, parsley leaves, 1 tablespoon sugar, tomato
paste, paprika, cayenne, 2 teaspoons salt, and black pepper. Cover
with plastic wrap and refrigerate for 2 hours.
2 In batches, transfer the chilled gazpacho mixture to your Food
Processor Mixing Bowl fitted with the Chopping blade and use the
PULSE button until the soup is coarsely puréed. Transfer the
batches, as ready, to another nonreactive bowl. Stir the mixture to
blend the batches. Taste and add salt and pepper or sugar, if
necessary, to highlight the sweetness of the tomatoes. Cover with
plastic wrap and refrigerate until well chilled, several hours more.
3 Prepare the avocado garnish: In a small bowl, gently stir together
the avocado, red onion, and lime juice. Season to taste with salt and
pepper. Cover with plastic wrap and refrigerate.
4 If serving in hollowed-out beefsteak tomatoes, slice the tops off the
beefsteak tomatoes. With a teaspoon or tablespoon, scoop out the
seeds and the cores, taking care not to break through the tomatoes'
bottoms or outer walls. Place the hollowed-out tomatoes upside
down on a platter to drain and refrigerate them until ready to serve.
5 At serving time, place a beefsteak tomato bowl on each of eight
serving plates. Ladle the gazpacho into each tomato (or into bowls),
top with a generous tablespoonful of the avocado mixture, and
garnish with a parsley sprig. Serve immediately.
Recipe courtesy Wolfgang Puck Makes it Easy,
Rutledge Hill Press, 2004
37
Gazpacho with
Avocado Garnish
Makes 6 - 8 servings
INGREDIENTS
For the Gazpacho
2 pounds sun-ripened tomatoes, cored and chopped
2 celery stalks, chopped
1 small red bell pepper, cored, seeded, and chopped
1 large English cucumber, peeled, halved lengthwise,
seeded, and chopped
1 1/2 cups good-quality canned tomato juice or V-8
1/2 cup vegetable broth or water
1/2 cup extra-virgin olive oil
1/4 cup sherry vinegar
1/2 cup packed fresh flat-leaf parsley leaves
1 to 2 tablespoons sugar (or to taste)
2 tablespoons tomato paste
1/2 teaspoon sweet paprika
1/4 teaspoon cayenne
2 to 3 teaspoons kosher salt (or to taste)
1/2 teaspoon freshly ground black pepper
For the Avocado Garnish
1 large, ripe but firm Hass avocado, peeled, pitted,
and cut into 1/4-inch dice
1/4 small red onion, peeled and cut into 1/4-inch dice
1 tablespoon fresh lime juice
Salt and freshly ground black pepper
For serving (optional)
6 to 8 beefsteak tomatoes
8 sprigs flat-leaf parsley
HSN_3n1BlenderManual 6/25/10 11:08 AM Page 37
Page 21

40
Fresh Peach Melba with
Raspberry Sauce
Makes 6 servings
INGREDIENTS
For the Poached Peaches
3 large ripe, firm, freestone peaches
2 cups water
2 cups sugar
1/4 cup lemon juice
Grated zest of 1 lemon
For the Raspberry sauce
1 pound raspberries
1/2 cup sugar
2 tablespoons lemon juice
METHOD
1 Bring a saucepan of water to a boil and boil peaches for about
20 seconds. Transfer to a bowl of ice water to cool. Drain and peel
away skin.
2 Use Citrus Juicer attachment to juice the lemon.
3 In another saucepan, make a simple syrup. Stir together the 2 cups
water, the sugar, and the lemon juice and zest. Over medium-high
heat, bring the mixture to a boil, then reduce the heat to low. Add
the peach halves to this syrup and continue simmering until tender,
5 to 7 minutes. Remove from the heat and let the peaches cool in
the syrup. Transfer the fruit and syrup to a nonreactive bowl, cover
with plastic wrap, and refrigerate until serving time.
4 Make the Raspberry sauce: Put the berries, sugar, and lemon juice in
the Food Processor Mixing Bowl fitted with the Chopping blade and
process until puréed. Place a fine-mesh strainer over a nonreactive
bowl and, with a rubber spatula, pass the puree through the strainer
to remove the seeds. Cover with plastic wrap and refrigerate.
5 Before serving, toast the sliced almonds in a small, dry skillet over
low heat, stirring almost continuously, until they turn light golden,
about 3 minutes. Transfer immediately to a bowl to cool.
6 To serve, scoop the ice cream into six attractive, chilled serving
bowls. Remove the peach halves from their syrup and place them
cut side down on top of the ice cream. Drizzle each serving generously with the raspberry sauce, garnish with whipped cream and
toasted almonds, and serve immediately.
Recipe courtesy Wolfgang Puck Makes it Easy,
Rutledge Hill Press, 2004
39
Cilantro-Mint Vinaigrette
Makes 4 servings
INGREDIENTS
1 egg yolk
Juice of 2 limes
1 1/2 tablespoons soy sauce
1 medium clove garlic, chopped
1 cup rice vinegar
1/2 teaspoon Chinese chile sauce (optional)
1/2 cup (1 bunch) cilantro leaves, coarsely chopped
6 sprigs mint leaves
1/2 teaspoon kosher salt
Pinch of black pepper
1 1/2 tablespoons packed brown sugar
1 1/2 cups peanut oil
2 teaspoons sesame oil
METHOD
1 Assemble all ingredients.
2 Use Citrus Juicer attachment to juice the limes.
3 Put the egg yolk, lime juice, soy sauce, garlic, rice vinegar, Chinese
chile sauce (if using), cilantro leaves, mint leaves, salt, pepper, and
brown sugar in the Blender Jug. Mix on low speed for about 20
seconds or until the mixture is smooth.
4 With the machine running, drizzle in the oils and process until the
mixture is thick. Refrigerate until ready to use.
Recipe courtesy Wolfgang Puck Makes it Easy,
Rutledge Hill Press, 2004
HSN_3n1BlenderManual 6/25/10 11:08 AM Page 39
Page 22

42
Limited Warranty
This warranty covers all defects in workmanship or materials in the
mechanical and electrical parts, arising under normal usage and care, in
this product for a period of 12 months from the date of purchase
provided you are able to present a valid proof-of-purchase. A valid
proof-of-purchase is a receipt specifying item, date purchased, and
cost of item. A gift receipt with date of purchase and item is also an
acceptable proof-of-purchase. Product is intended for household use only.
Any commercial use voids the warranty.
This warranty covers the original retail purchaser or gift recipient. During
the applicable warranty period within normal household use,we will
repair or replace, at our discretion, any mechanical or electrical part
which proves defective, or replace unit with a comparable model.
To obtain service under the terms of this warranty,
call Toll Free (800) 275-8273.
THIS LIMITED WARRANTY COVERS UNITS PURCHASED AND USED
WITHIN THE UNITED STATES AND DOES NOT COVER:
• Damages from improper installation.
• Defects other than manufacturing defects.
• Damages from misuse, abuse, accident, alteration, lack of proper
care and maintenance, or incorrect current or voltage.
• Damage from service by other than an authorized dealer or
service center.
This warranty gives you special legal rights and you may also have other
rights to which you are entitled which may vary from state to state.
41
Recipe Notes
HSN_3n1BlenderManual 6/25/10 11:08 AM Page 41
 Loading...