


TSC_PizzaOvenManual 8/12/09 10:06 AM Page 1
I M P O R T A N T N O T I C E
PLEASE DO NOT RETURN TO STORE. If you have any problems with this unit, contact Consumer Relations for service PHONE: 1-800-275-8273 or
visit our website at wphousewares.com Please read operating instructions before using this product.
Please keep original box and packing materials in the event that service is required.
W.P. APPLIANCES, INC. Toll Free (800) 275-8273
Model WPDCORP10 Printed in China REV 1.0
Wolfgang Puck
Dual Electronic Convection Oven with Rotisserie
Use and Care
All trademarks, service marks and trade names (collectively the “Marks”) are proprietary to Wolfgang Puck World Wide.

TSC_PizzaOvenManual 8/12/09 10:06 AM Page 1
IMPORTANT SAFEGUARDS
When using electrical appliances, basic safety precautions should always be followed, including the following:
1Read all instructions.
2The exterior of the oven will become very hot during use. Do not touch hot surfaces. Use handles or knobs. Do not place anything on top of the oven.
3Close supervision is necessary when any appliance is used by or near children. This appliance is not recommended for use by children.
4To protect against electric shock, do not immerse cord, plug, or any parts of the oven in water or other liquids.
5Do not operate appliance with damaged cord or plug or after the appliance malfunctions, or has been damaged in any manner. Return appliance to the nearest Authorized Service Center for examination, repair, or adjustment.
6The use of accessory attachments not recommended by the appliance manufacturer may cause hazard or injury.
7Do not use outdoors.
8Do not place on or near a hot gas or electric burner, or in a heated oven or in a microwave oven.
9Do not let the cord hang over the edge of table or counter, or touch hot surfaces, including the stove.
10When operating the oven keep at least four inches of space on all sides of the oven to allow for adequate air circulation.
11Unplug from outlet when not in use and before cleaning. Allow to cool before putting on or taking off parts, and before cleaning.
12To disconnect, press the ON/OFF button until the display turns off, (do not hold button down) then remove the plug. Always hold the plug, never pull the cord.
13Extreme caution must be used when moving an appliance containing hot oil or other hot liquids.
14Do not clean with metal scouring pads. Pieces can break off the pad and touch electrical parts, creating a risk of electric shock.
15A fire may occur if the oven is covered, touching, or near flammable material, including curtains, draperies, walls, and the like, when in operation. Do not store any item on top of the oven when in operation, or before the oven cools down.
16Extreme caution should be used when using containers other than metal or glass.
17Do not cover crumb tray or any part of the oven with metal foil. This will cause overheating. Foil can be used to cover approved cooking containers. Do not place any of the following materials in the oven: cardboard, plastic, paper, or anything similar.
18Do not place eyes or face in close proximity with the tempered safety glass door, in the event that the safety glass breaks.
19Use extreme caution when removing trays or disposing of hot grease or other hot liquids.
20Do not store any materials, other than manufacturers recommended accessories, in this oven when not in use.
21Oversized foods or metal utensils must not be inserted in a toaster-oven as they may create a fire or risk of electric shock.
22Always wear protective, insulated oven mitts when inserting or removing items from the hot oven.
23This appliance has a tempered, safety glass door. The glass is stronger than ordinary glass and more resistant to breakage. Tempered glass can break, but the pieces will not have sharp edges. Avoid scratching door surface or nicking edges. If the door has a scratch or nick, contact our toll-free customer service line before using the oven.
24Do not use appliance for other than intended use.
SAVE THESE INSTRUCTIONS
HOUSEHOLD USE ONLY
Additional Safety Information
Grounding Instructions
This appliance must be grounded. It is equipped with a 3-wire cord having a grounded plug. The plug must be plugged into an outlet which is properly installed and grounded.
Warning: Improper use of the grounded wire can result in the risk of electric shock. Consult a qualified electrician if necessary. Do not attempt to defeat this safety feature by modifying plug.
A short power-supply cord is provided to reduce the hazards resulting from entanglement or tripping over a longer cord. If it is necessary to use an extension cord, it should be positioned such that it does not drape over the counter or tabletop where it can be pulled on by children or tripped over and:
a.Use only 3-wire extension cord with 3-blade grounding plug.
b.The marked rating of the extension cord must be equal to or greater then the rating of this appliance. The electrical rating is listed on the back of this unit.
IMPORTANT: This oven is rated 1,500 watts. Be sure this is the only appliance operating on this circuit.
Please take a few minutes to read this manual before using your oven to become familiar with its parts and operation. Included you will find a wide assortment of mouth-watering recipes that were specially written for use in your new Dual Electronic Convection Oven with Rotisserie.
1 |
2 |
TSC_PizzaOvenManual 8/12/09 10:06 AM Page 3
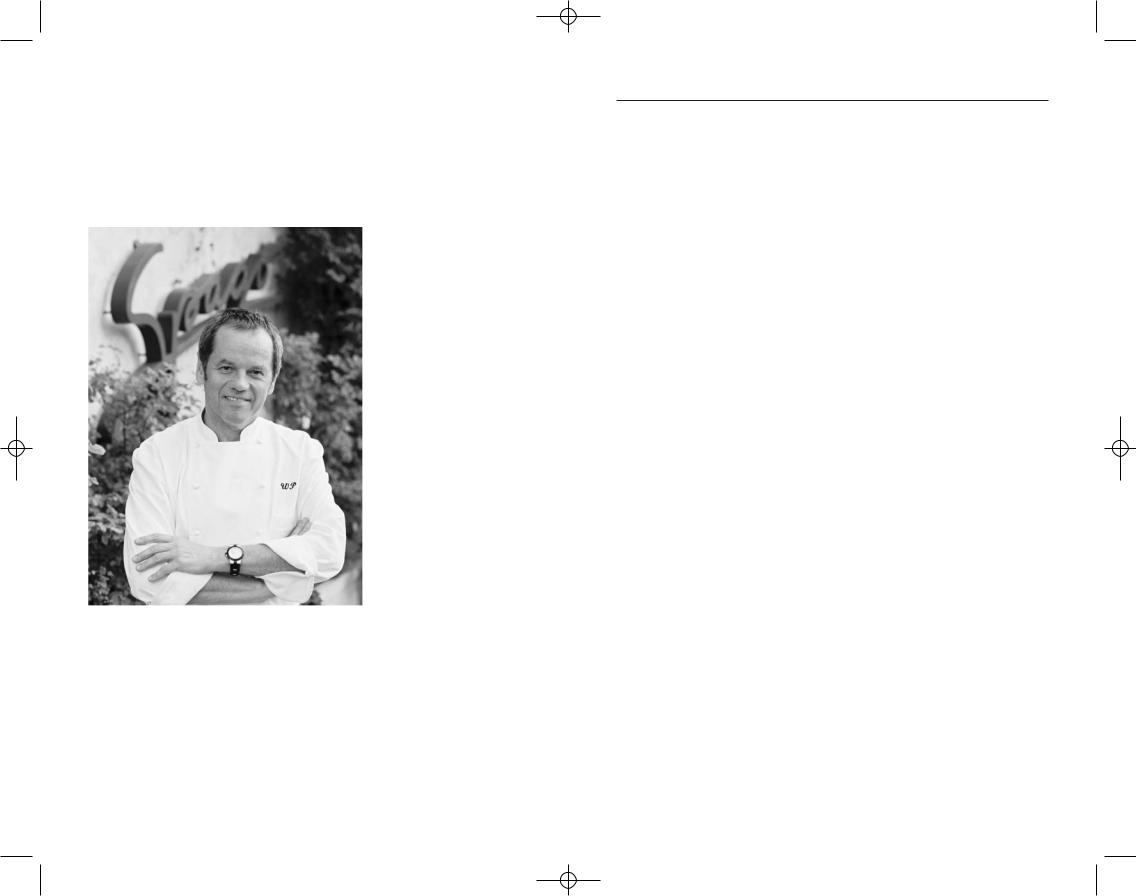
Wolfgang Puck, owner of the famous Spago restaurants and one of the most influential chef-restauranteurs in America, is credited with reviving California’s rich culinary heritage. His cooking innovations, a result of blending fresh
California ingredients with his classical French techniques, are enjoyed by world leaders, stars and fellow chefs alike. He established other trend-setting restaurants like Postrio, Chinois on Main in Santa Monica, Trattoria del Lupo, Cut, and his latest creation, Jai, an Asian fusion restaurant in San Diego. Home chefs can also share Mr. Puck’s talents through his cookbooks, cutlery, cookware and, of course, through his appliances!
Table of Contents
Important Safeguards |
1 |
Additional Safety Information |
2 |
About Wolfgang Puck |
3 |
Know Your Dual Convection Oven |
5, 6 |
Before Your First Use |
7 |
Using Your Oven |
8, 9 |
Function: Lower Oven |
1 0 |
Function: Defrost |
1 1 |
Function: Keep Warm |
12 |
Function: Standard Bake |
13 |
Function: Convection Bake |
14 |
Convection Baking Tips |
15 |
Function: Slow Cook |
16 |
Function: Roast |
17 |
Roasting Chart |
18 |
Function: Broil |
19 |
Broil Chart |
20 |
Function: Rotisserie |
21 |
Rotisserie Chart |
22 |
Care and Cleaning |
23 |
Recipes Upper Oven |
24 |
Recipes Lower Pizza Oven |
46 |
Lower Oven Tips |
47 |
Limited Warranty |
66 |
Contact Information |
back |
3 |
4 |

TSC_PizzaOvenManual 8/12/09 10:06 AM Page 5
Know Your Dual Convection Oven
Baking Racks
Broil Pan Insert
Drip/Broil Pan
Upper Oven
Crumb Tray
Temperature Selector
Left Side
of Oven
Timer Selector
Function Selector
Temp/Timer Adjust Up
Temp/Timer Adjust Down
On/Off Control
Power Indicator Light
Right Side
Rotisserie of Oven
Fork Screws
Rotisserie
Spit
Rotisserie
Removal Tool
5
Lower Oven
Drawer
Lower Oven
Crumb Tray
Active
Function
Indicator
Function
Settings
Closed
Open
Timer
Convection Fan On
Child Lock Indicator
Preheat Indicator
6

TSC_PizzaOvenManual 8/12/09 10:06 AM Page 7
Before Your First Use
Read all instructions in this manual carefully. The information included in this book will help you to use your Bistro Convection Oven with Rotisserie to its fullest.
Place your oven on a level surface such as a countertop or table.
Be sure the sides, back and top of the oven are at least four inches away from any walls, cabinets or objects on the counter or table.
Wash the Baking Racks, Drip Pan, Broil Pan in hot, sudsy water or in the dishwasher. DO NOT use abrasive cleaners or metal scouring pads to clean the oven rack, Broiling/Roasting rack or Drip Pan. The Crumb Trays and Lower Oven Drawer should be washed in hot, sudsy water and dried thoroughly, do not place these items in the dishwasher. Clean stubborn stains with a nylon or polyester mesh pad and a mild, nonabrasive cleaner. Rinse and dry thoroughly.
We recommend a “trial run” at a high temperature to familiarize yourself with your oven and to eliminate any protective substance or oil that may have been used for packing and shipping.
1Set the FUNC to CONVECTION BAKE, the Temperature Control to 450°F, and the TIMER to 20 minutes.
2Press the ON/OFF button to begin the trial run preheat process. Once the oven is preheated you will hear 3 short beeps and READY will show next to FUNCTION on the display panel. Press the ON/OFF button to start the countdown timer.
When the upper oven preheat cycle has completed, you should also conduct a trial run on the Lower Oven.
3Set the FUNC to LOWER OVEN, the Temperature Control to 400°F, and the TIMER to 20 minutes.
4Press the ON/OFF button to begin the trial run preheat process. Once the LOWER OVEN is preheated you will hear 3 short beeps and READY will show next to FUNCTION on the display panel. Press the ON/OFF button to start the countdown timer.
During the trial run process a small amount of smoke and odor may be detected. This is normal.
To avoid scratching, marring, discoloration or fire hazard, do not store anything on top of the oven, especially during operation.
This appliance requires 1,500 watts and should be the only appliance operating on the circuit.
Using Your Oven
1Set FUNC
a Press the FUNC button to scroll through the 9 separate functions of your oven. You will notice an arrow next to the selected function.
2Set TEMP
a Press the TEMP button to set the temperature. Scroll through the temperature by pressing the + or – button until the temperature is selected. Hold the TEMP button in to scroll at a faster rate. You cannot set the Temperature for DEFROST and KEEP WARM functions.
3Set TIMER
a Press the TIMER button once to set the cooking time. Scroll through the time range by pressing the + or – button until the desired cooking time is selected. Press and hold the TIMER button to scroll through the times at a faster rate. For times longer than 3 hours do not use the TIMER function as the oven will turn off after 3 hours elapse, once the display shows READY use a standard kitchen timer.
4Once all settings have been made, press the ON/OFF button to begin the preheat process. Your oven will preheat for approximately 10 minutes depending on temperature setting. Once the oven is preheated, you will hear 3 short beeps and will see a READY indicator on the control panel. Please note that the following functions do not require a preheat function: ROTISSERIE and DEFROST.
5If you are using the oven timer, once your oven has completed
the preheat cycle and the display shows READY, press the ON/OFF button to begin the TIMER. The TIMER will not start until the oven is preheated (except for Functions listed under section 4 above.) You can adjust the TIMER or TEMP during the cooking process by selecting either option, followed by the + or – button. When changing these settings during the cooking process, you will no longer see the READY indicator displayed as the preheat cycle has
already been completed. You cannot adjust the FUNCTION once you have started the cooking process; you must press the ON/OFF button once and END will be displayed on the control panel.
7 |
8 |

TSC_PizzaOvenManual 8/12/09 10:06 AM Page 9
Using Your Oven cont.
6CHILD LOCK Feature
a Your Convection Oven comes with a CHILD LOCK feature that prevents changes to the oven during the cooking cycle. To invoke the CHILD LOCK feature hold down the FUNC and
ON/OFF button for approximately 3 seconds and you will see a LOCK symbol on the LCD panel. You will no longer be able to make any changes to the oven until you unlock this feature.
To unlock hold the FUNC and ON/OFF button for approximately 3 seconds and you will see an unlock symbol on the
control panel.
7Turning the Oven Off
a If you are using the oven timer, your oven will turn off after the time has expired. To manually turn the oven off press the ON/OFF button until the display panel shuts off and unplug your oven from the wall outlet.
Function: Lower Oven
TEMPERATURE °F |
PREHEAT |
CONVECTION |
|
FROM |
TO |
MODE |
FAN |
150° |
400° |
Yes |
Off |
|
|
|
|
In LOWER OVEN function, only the heating elements in the lower pizza drawer will operate. You cannot use the lower oven and the upper oven at the same time due to wattage constraints. When running the Lower Oven, the temperature in the upper oven will warm to approximately 200°F from the residual heat. This is the perfect temperature to act as a plate warmer, or for keeping food warm.
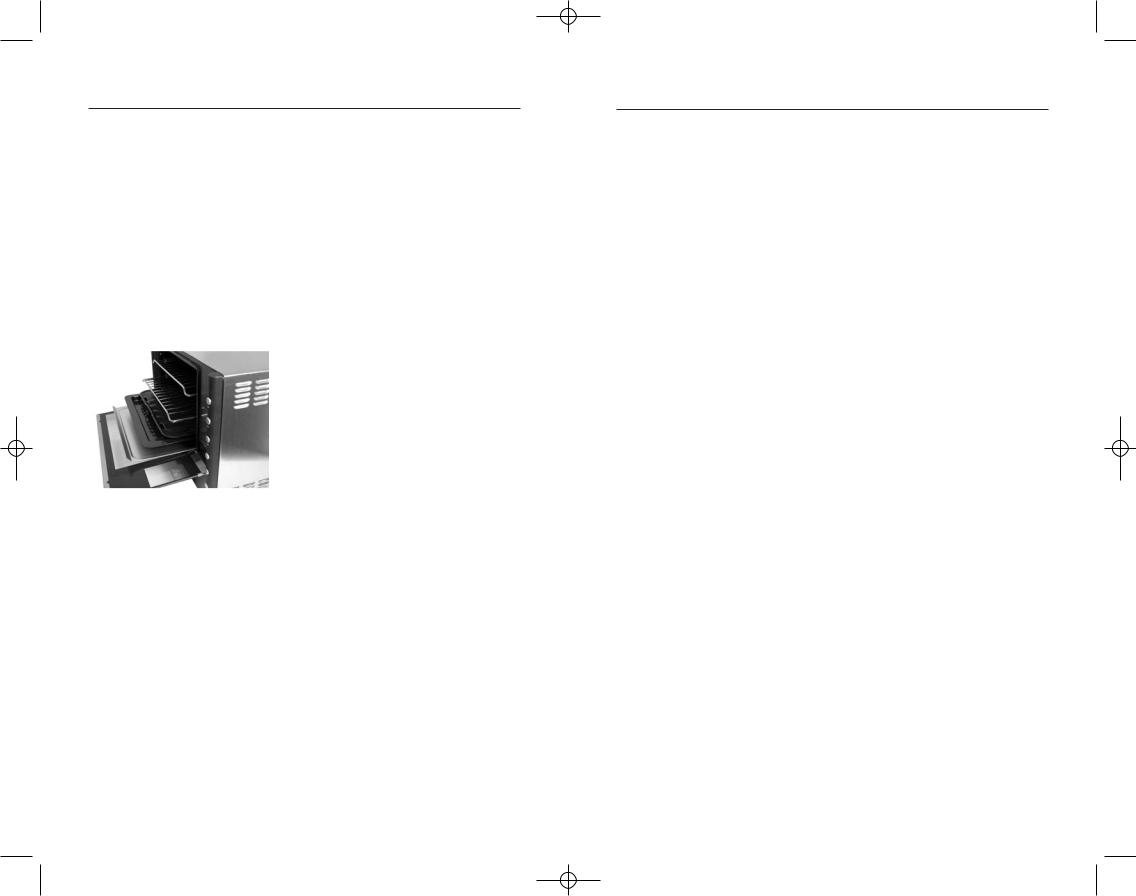
1Always ensure that the retractable handle is in the open position. See Figure 1.
2Set the FUNCTION to LOWER OVEN.
|
3 |
Set the TEMP Control to the |
|
|
Closed |
|
|
|
Open |
recommended temperature. |
|
|
|
|
|
|
|
|
(150°F to 400°F) |
|
|
4 |
Set the TIMER Control to the shortest |
Figure 1 |
|
||
|
|
baking time in the recipe. The maximum |
|
|
|
|
|
|
|
|
allowable time for the lower oven is |
|
|
|
30 minutes. |
5Press the ON/OFF button to begin the preheating process.
6Once preheated and the READY Indicator is displayed on the control panel, add your food to the oven and press the ON/OFF button to start the countdown timer.
9 |
10 |

TSC_PizzaOvenManual 8/12/09 10:06 AM Page 11
Function: Defrost
TEMPERATURE RANGE °F |
PREHEAT |
CONVECTION |
|
FROM |
TO |
MODE |
FAN |
0° |
0° |
No |
On |
|
|
|
|
The heating elements do not operate for the DEFROST FUNCTION. The convection fan circulates air to thaw food in a shorter period of time than conventional methods of defrosting.
Important: Defrosted foods should be cooked as soon as possible after thawing and should never be left at room temperature when completely thawed as harmful bacteria can begin to grow. DO NOT defrost large amounts of food at one time.
1Place the Drip Pan in the lower rails of the oven.
2Place the oven rack in the desired position facing up.
3Place the food to be defrosted on the center of the oven rack.
4Set the FUNCTION to DEFROST.
5Set the Time Control to the shortest amount of time necessary for defrosting.
6Press the ON/OFF button to begin the DEFROST FUNCTION.
Function: Keep Warm
TEMPERATURE °F |
PREHEAT |
CONVECTION |
|
FROM |
TO |
MODE |
FAN |
175° |
175° |
Yes |
On |
|
|
|
|
In the KEEP WARM setting, the temperature stays fixed at 175°F and cannot be adjusted. The convection fan circulates the air throughout the oven to ensure even heat distribution. The convection fan will not begin to operate until the preheat FUNCTION has completed.
1Place the oven rack or baking pan in the desired rack position, facing up.
2Set the FUNCTION Control to KEEP WARM
3Set the TIMER Control to the desired setting
4Press the ON/OFF button to begin the preheating process.
5Once preheated and the READY Indicator is displayed
on the control panel, add your food to the oven and press the ON/OFF button to start the countdown timer.
11 |
12 |
TSC_PizzaOvenManual 8/12/09 10:06 AM Page 13
Function: Standard Bake
TEMPERATURE RANGE °F |
PREHEAT |
CONVECTION |
|
FROM |
TO |
MODE |
FAN |
150° |
450° |
Yes |
Off |
|
|
|
|
In most cases you should use the lowest rack position; however, if more browning is desired, place in the upper racks. Always use the Baking Rack facing up, see Figure 2. The Drip Pan included with your oven can be used for baking. It is enamel-coated, making it easy to clean. When not in use, the Drip Pan should always be removed from the oven as it will interfere with the flow of hot air from the bottom elements. When it is being used, the pan should be placed in the middle rack (depending on size of food), and the temperature must be increased by 50° F.
|
1 |
Place the oven rack or baking pan |
|
|
in the desired rack position. |
|
2 |
Set the FUNCTION Control to |
|
|
STANDARD BAKE. |
|
3 |
Set the TEMP Control to the |
|
|
recommended temperature. |
|
|
(If using the black baking pan that |
|
|
comes with your oven adjust |
|
|
the temperature up by 50°F.) |
Figure 2 |
4 |
Set the TIMER Control to the |
|
|
shortest baking time in the recipe. |
|
5 |
Press the ON/OFF button to begin |
|
|
the preheating process. |
|
6 |
Once preheated and the READY |
|
|
Indicator is displayed on the control |
|
|
panel, add your food to the oven |
|
|
and press the ON/OFF button to |
|
|
start the countdown timer. |
Function: Convection Bake
TEMPERATURE RANGE°F |
PREHEAT |
CONVECTION |
|
FROM |
TO |
MODE |
FAN |
150° |
450° |
Yes |
On |
|
|
|
|
During convection baking, a fan circulates hot air around the food making baked goods rise quickly and evenly. In many convection ovens, it is necessary to lower the baking temperature to achieve acceptable results. Your Convection Oven has been designed for easy use. Lowering the baking temperature is not necessary. Follow package or recipe directions and check after the shortest baking time.
In most cases you should use the lowest rack position; however, if more browning is desired, place in the upper racks. Always use the Baking Rack facing up, see Figure 2. The Drip Pan included with your oven can be used for baking. It is enamel-coated, making it easy to clean. When not in use, the Drip Pan should always be removed from the oven as it will interfere with the flow of hot air from the bottom elements. When it is being used, the pan should be placed in the middle rack position, and the temperature must be increased by 50° F.
1Place the oven rack or baking pan in the desired rack position, facing up.
2Set the FUNCTION to CONVECTION BAKE.
3Set the TEMP Control to the recommended temperature.
4Set the TIMER Control to the shortest baking time in the recipe.
5Press the ON/OFF button to begin the preheating process.
6Once preheated and the READY Indicator is displayed on the control panel, add your food to the oven and press the ON/OFF button to start the countdown timer (if used).
13 |
14 |

TSC_PizzaOvenManual 8/12/09 10:06 AM Page 15
Convection Baking Tips
1Your Wolfgang Puck Convection Oven can bake up to 25% percent faster than standard ovens using radiant heat. The fan on the side of the oven circulates the heated air and removes colder air from around your food, allowing the heat to penetrate faster.
2Expect food to be done in less time (up to 25% less) than it would be in a conventional oven. Recipes that cook for hours, such as large roasts and poultry, will give you a greater time savings than baking cakes or cookies which only take up to 12 - 20 minutes.
3When convection baking, select pans with shallow sides which will allow greater air circulation to reach you food.
4It may be necessary to rotate your food halfway through the cooking cycle for even browning. Almost all convection ovens, including commercial ovens, require turning halfway through the cooking process.
5Your convection oven comes equipped with an interior light and a large glass door for viewing the cooking process of your food.
Do not open the door to check on your baked goods as this will let out a significant amount of heat and create longer baking times. The only time the door should be opened is if you need to rotate your baked goods halfway through the cooking process. When cooking a roast or large poultry we suggest using an oven safe thermometer that you can keep in the meat to monitor the temperature while the food is cooking. (Do not use a thermometer when using the rotisserie to avoid damage to the interior of the oven, or the rotisserie motor.)
6Follow the temperature guidelines in this manual. Using higher than suggested temperatures will not cook your food any faster, instead it will dry out the food.
7For better results you should always bake food that has been thoroughly thawed. The only exception to this is rule is when baking packaged frozen dinners and or pizzas. Follow the manufacturer’s instructions for required time. If the manufacturer does not recommend using convection bake, simply use the STANDARD BAKE function.
8Always distribute the food evenly around the inside of the oven. Give equal space around the pans as well as above and below.
9Do not use aluminum foil or parchment paper to cover your food
in the CONVECTION BAKE function. The foil will defeat the purpose of circulating the air in the oven. In addition, the foil could become loose and potentially get caught in the fan causing damage to
the oven.
Function: Slow Cook
TEMPERATURE °F |
PREHEAT |
CONVECTION |
|
FROM |
TO |
MODE |
FAN |
150° |
250° |
Yes |
Off |
|
|
|
|
Slow cooking is a long cooking process at a low temperature used to tenderize less tender cuts of meat and blend flavors in soups and stews. Foods to be slow cooked are usually placed in a covered casserole with some liquid and cooked at 250°F for 4 to 12 hours. This FUNCTION will only allow you to set the temperature between 150°F to 250°F.
1Place the baking rack in the lowest rack position facing upward.
2Set the FUNCTION Control to SLOW COOK.
3Set the TEMP Control to 250°F.
4Since the TIMER can only be set to a maximum of three hours, you will need to manually track your time in the SLOW COOK mode, as most recipes call for slow cooking from 4 to 12 hours.
5Press the ON/OFF button to begin the preheating process.
6Once preheated and the READY indicator is displayed, add your food to the oven and use a separate kitchen timer to track the cooking time. Place the covered casserole with food to be slow cooked on the center of the baking rack. Do not press the ON/OFF button after preheat as this will start the countdown timer, forcing the oven to turn off after the displayed time has elapsed.
NOTE: The Drip Pan should always be removed from oven when slow cooking as it will interfere with the flow of hot air from the bottom elements
15 |
16 |

TSC_PizzaOvenManual 8/12/09 10:06 AM Page 17
Function: Roast
TEMPERATURE °F |
PREHEAT |
CONVECTION |
|
FROM |
TO |
MODE |
FAN |
300° |
450° |
Yes |
Off |
|
|
|
|
1Place the Drip Pan in the lower racks of the oven.
2Set the FUNCTION to ROAST.
3Set the TEMP Control to the desired temperature.
4Set the TIMER Control to the shortest time. If more than 3 hours, use a separate kitchen timer.
5Press the ON/OFF button to begin the preheating process.
6Once preheated and the READY Indicator is displayed on the control panel, add your food to the oven and press the ON/OFF button to start the countdown timer. Place the meat fat side up in the Drip Pan (unless otherwise directed).
Use the following chart as a guide for roasting. Use a reliable meat thermometer for the most accurate results. Roasts should stand for 10 to 15 minutes before carving. During this time, they will continue to cook, increasing the meat thermometer reading by about 10°F.
Roasting Chart
|
Food Type |
Weight (lbs) |
Time / Lb |
Desired Doneness |
|
|
|
|
Beef |
|
|
|
Sirloin Tip/Top Round |
3 - 8 |
20 - 22min |
Rare 120 - 130 |
|
|
|
|
23 - 24 min |
Med 140 - 150 |
|
|
|
|
25 - 27 min |
Well 160 - 170 |
|
|
Eye Round |
3 - 6 |
18 - 20min |
Rare 120 - 130 |
|
|
|
|
21 - 23 min |
Med 140 - 150 |
|
|
|
|
24 - 26 min |
Well 160 - 170 |
|
|
Standing Rib |
3 - 6 |
20 - 22min |
Rare 120 - 130 |
|
|
|
|
23 - 24 min |
Med 140 - 150 |
|
|
|
|
25 - 27 min |
Well 160 - 170 |
|
|
|
|
Pork |
|
|
|
Loin (bone in) |
3 - 6 |
25 min |
170 |
|
|
Loin (boneless) |
3 - 8 |
15 min |
170 |
|
|
Fresh Ham |
4 - 8 |
25 min |
170 |
|
|
|
|
|
|
|
|
|
Smoked Ham |
|
|
|
|
Fully cooked/w bone |
|
|
|
|
|
Half |
6 - 8 |
15 min |
140 |
|
|
Whole |
8 - 12 |
15 -17 min |
140 |
|
|
|
|
|
|
|
|
|
|
Lamb |
|
|
|
Leg |
6 - 8 |
20 - 23 min |
Med 170 |
|
|
|
|
25 min |
Well 180 |
|
|
|
|
|
|
|
|
|
|
Poultry |
|
|
|
Chicken (unstuffed) |
6 - 8 |
20 min |
180 |
|
|
Chicken (stuffed) |
6 - 8 |
20 min |
180 |
|
These cooking times are an average and should be adjusted to individual preferences. The temperature for your oven should be set at 375°F.
17 |
18 |
TSC_PizzaOvenManual 8/12/09 10:06 AM Page 19
Function: Broil
|
TEMPERATURE °F |
PREHEAT |
CONVECTION |
||
|
FROM |
TO |
MODE |
FAN |
|
300° |
450° |
Yes |
Off |
||
|
|
|
|
|
|
When broiling, the top heating elements cycle on and off to maintain the selected temperature in the oven. During the preheat function both the top and bottom elements will come on to shorten the preheat time. Once preheated only the top elements will remain on. The convection fan will not operate in the BROIL function.
Barbecue or other sweet sauces should be brushed on during the last few minutes of broiling. They will burn if applied too early in the cooking.
1Remove all accessories from the oven.
2Set the FUNCTION to BROIL.
3Set the TEMP Control to the desired temperature. Most broiling is done at the maximum temperature (450°F).
4Set the TIMER Control according to recipe instructions.
5Press the ON/OFF button to begin the preheating process.
6While the oven is preheating, place the food to be broiled directly on the Drip Pan or you may use the broiling pan and place directly into the Drip Pan, unless otherwise directed.
7Once preheated and the READY Indicator is displayed on
the control panel, place the Drip Pan in the upper rack position and press the ON/OFF button to start the countdown timer (if used).
Warning: Do not leave the oven unattended during broiling.
Broil Chart
|
Food |
Weight/ |
Desired |
|
|
|
Type |
Thickness |
Doneness |
Time |
|
|
|
|
|
|
|
|
|
Beef |
|
|
|
|
Steak: Porterhouse |
1 inch |
Rare |
18 - 20 min |
|
|
Sirloin, London broil, |
|
Medium |
21 - 23 min |
|
|
Top round |
|
Well done |
24 - 28 min |
|
|
Hamburger |
6 ounces |
Rare |
15 - 17 min |
|
|
|
|
Medium |
18 - 21 min |
|
|
|
|
Well done |
22 - 25 min |
|
|
|
|
|
|
|
|
|
Pork |
|
|
|
|
Chops |
1 inch |
Well Done |
19 - 23 min |
|
|
Ribs |
Cut in Pieces |
Well Done |
30 - 35 min |
|
|
Sausage |
Links |
Well Done |
25 - 30 min |
|
|
|
|
|
|
|
|
|
Chicken |
|
|
|
|
Pieces w/ Skin |
- |
Well Done |
20 - 25min |
|
|
Boneless Breasts - each |
- |
Well Done |
12 - 15 min |
|
|
Halves w/ skin - each |
- |
Well Done |
30 - 40 min |
|
|
|
|
|
|
|
|
|
Fish |
|
|
|
|
Fillets |
1/2 inch |
Well Done |
10 - 12 min |
|
|
Steaks |
1 inch |
Well Done |
15 - 20 min |
|
These cooking times are an average and should be adjusted to individual preferences.
Turn foods halfway through cooking time.
19 |
20 |

TSC_PizzaOvenManual 8/12/09 10:06 AM Page 21
Function: Rotisserie
TEMPERATURE °F |
PREHEAT |
CONVECTION |
|
FROM |
TO |
MODE |
FAN |
150° |
400° |
No |
Off |
|
|
|
|
Rotisserie roasting is a healthy way to cook meats because the slow-turning spit provides natural basting of meats while fats drip away. The rotisserie can be used to roast meats up to 6 pounds.
It is not necessary to preheat the oven for rotisserie roasting. If desired, at the end of the cooking process, you can set your oven temperature to 150°F to keep food warm on the spit until you are ready to carve.
Warning: Never use your Rotisserie without the Black Drip Pan in the lower rails of the oven.
1Place one Rotisserie Fork on the end of the Rotisserie Spit opposite the point with the tines facing the center and tighten the
screw slightly.
2Slide the pointed end of the Rotisserie Spit through the center of the food to be cooked.
3Place the other Rotisserie Fork on the other end of the Rotisserie Spit with the tines facing the roast.
4Adjust the roast so that it is centered on the Rotisserie Spit. Make sure the forks secure the roast on the spit and tighten the screws. When cooking poultry it is necessary to secure legs and wings to
the body with string to make the chicken as compact as possible.
5Season or baste as desired.
6Put the rounded end of the Rotisserie Spit in the drive socket on the right interior wall of the oven.
7Place the grooved end on the spit support on the left interior wall of
the oven.
8 Set the FUNCTION to ROTISSERIE. Set the TEMP Control to 400°F.
9Set the TIMER Control to the shortest time. If more than 3 hours, use a separate kitchen timer.
WARNING! Ensure that the food placed on the rotisserie freely spins and does not touch the upper heating elements when turning.
10When the roast is done, press the ON/OFF button until the display turns off (do not hold button down). Unplug your oven from the wall outlet.
11Remove the Rotisserie Spit from the oven using the Rotisserie Removal Tool included with your oven.
12Place the roast on a cutting board or platter and allow to stand for 10 - 15 minutes.
13Using a pot holder, loosen the screws on the Rotisserie Forks and remove the Rotisserie Spit from the roast.
Caution: The Rotisserie Spit, Rotisserie Forks, screws and the roast will be hot.
21
Rotisserie Chart
Use the following chart as a guide for rotisserie roasting. Use a reliable meat thermometer for the most accurate results. Roasts should stand for 10 to 15 minutes before carving. During this time they will continue to cook, increasing the meat thermometer reading about 10°F.
Food Type |
Weight |
Time |
|
Chicken |
3 - 4 lb. |
1 |
1/2 - 2 hours |
|
4 - 5 lb. |
2 - 2 1/2 hours |
|
Pork Roast |
4 - 5 lb. |
1 |
1/2 - 2 hours |
Roast Beef |
3 - 5 lb. |
1 |
1/2 hours (rare) |
|
|
1 |
3/4 hours (med) |
|
|
2 hours (well) |
|
Cornish Hens |
2-1.5 lbs. each |
1 hour |
|
Smoked Ham |
4-5 lb. |
1 |
1/2 - 2 hours |
Boneless |
|
|
|
These cooking times are an average and should be adjusted
to individual preferences. The temperature for your oven should be set at 400°F.
Do not exceed 6 pounds on the rotisserie spit to avoid damage to the rotisserie motor.
22
 Loading...