

MASTERING
TECHNIQUES AND RECIPES
the
M SERIES OVEN
Discover more recipes, tips,
and resources on our website.
subzero-wolf.com
DELIGHT IN A BETTER WAY TO COOK
ANYTHING YOU CAN IMAGINE
Your adventure starts the moment your M series oven
is installed in your kitchen. The more you learn how
it works, and understand the proper techniques for
using your oven, the more you’ll be able to do. Instead
of just setting your oven to a temperature and hoping
for the best, you can enjoy the skill, pleasure, and
care of making a delicious meal. No shifting racks
around or fretting about the final result. Let your
advanced M series oven create the customized cooking
environment that ensures delicious results every time.
In this book, we give you the tips, techniques, and recipes
to get the most out of this state-of-the-art dual convection
oven. We hope you refer to it again and again, as you
continue to embark on exciting cooking adventures and
make your ownership experience the best it can be.
2
3
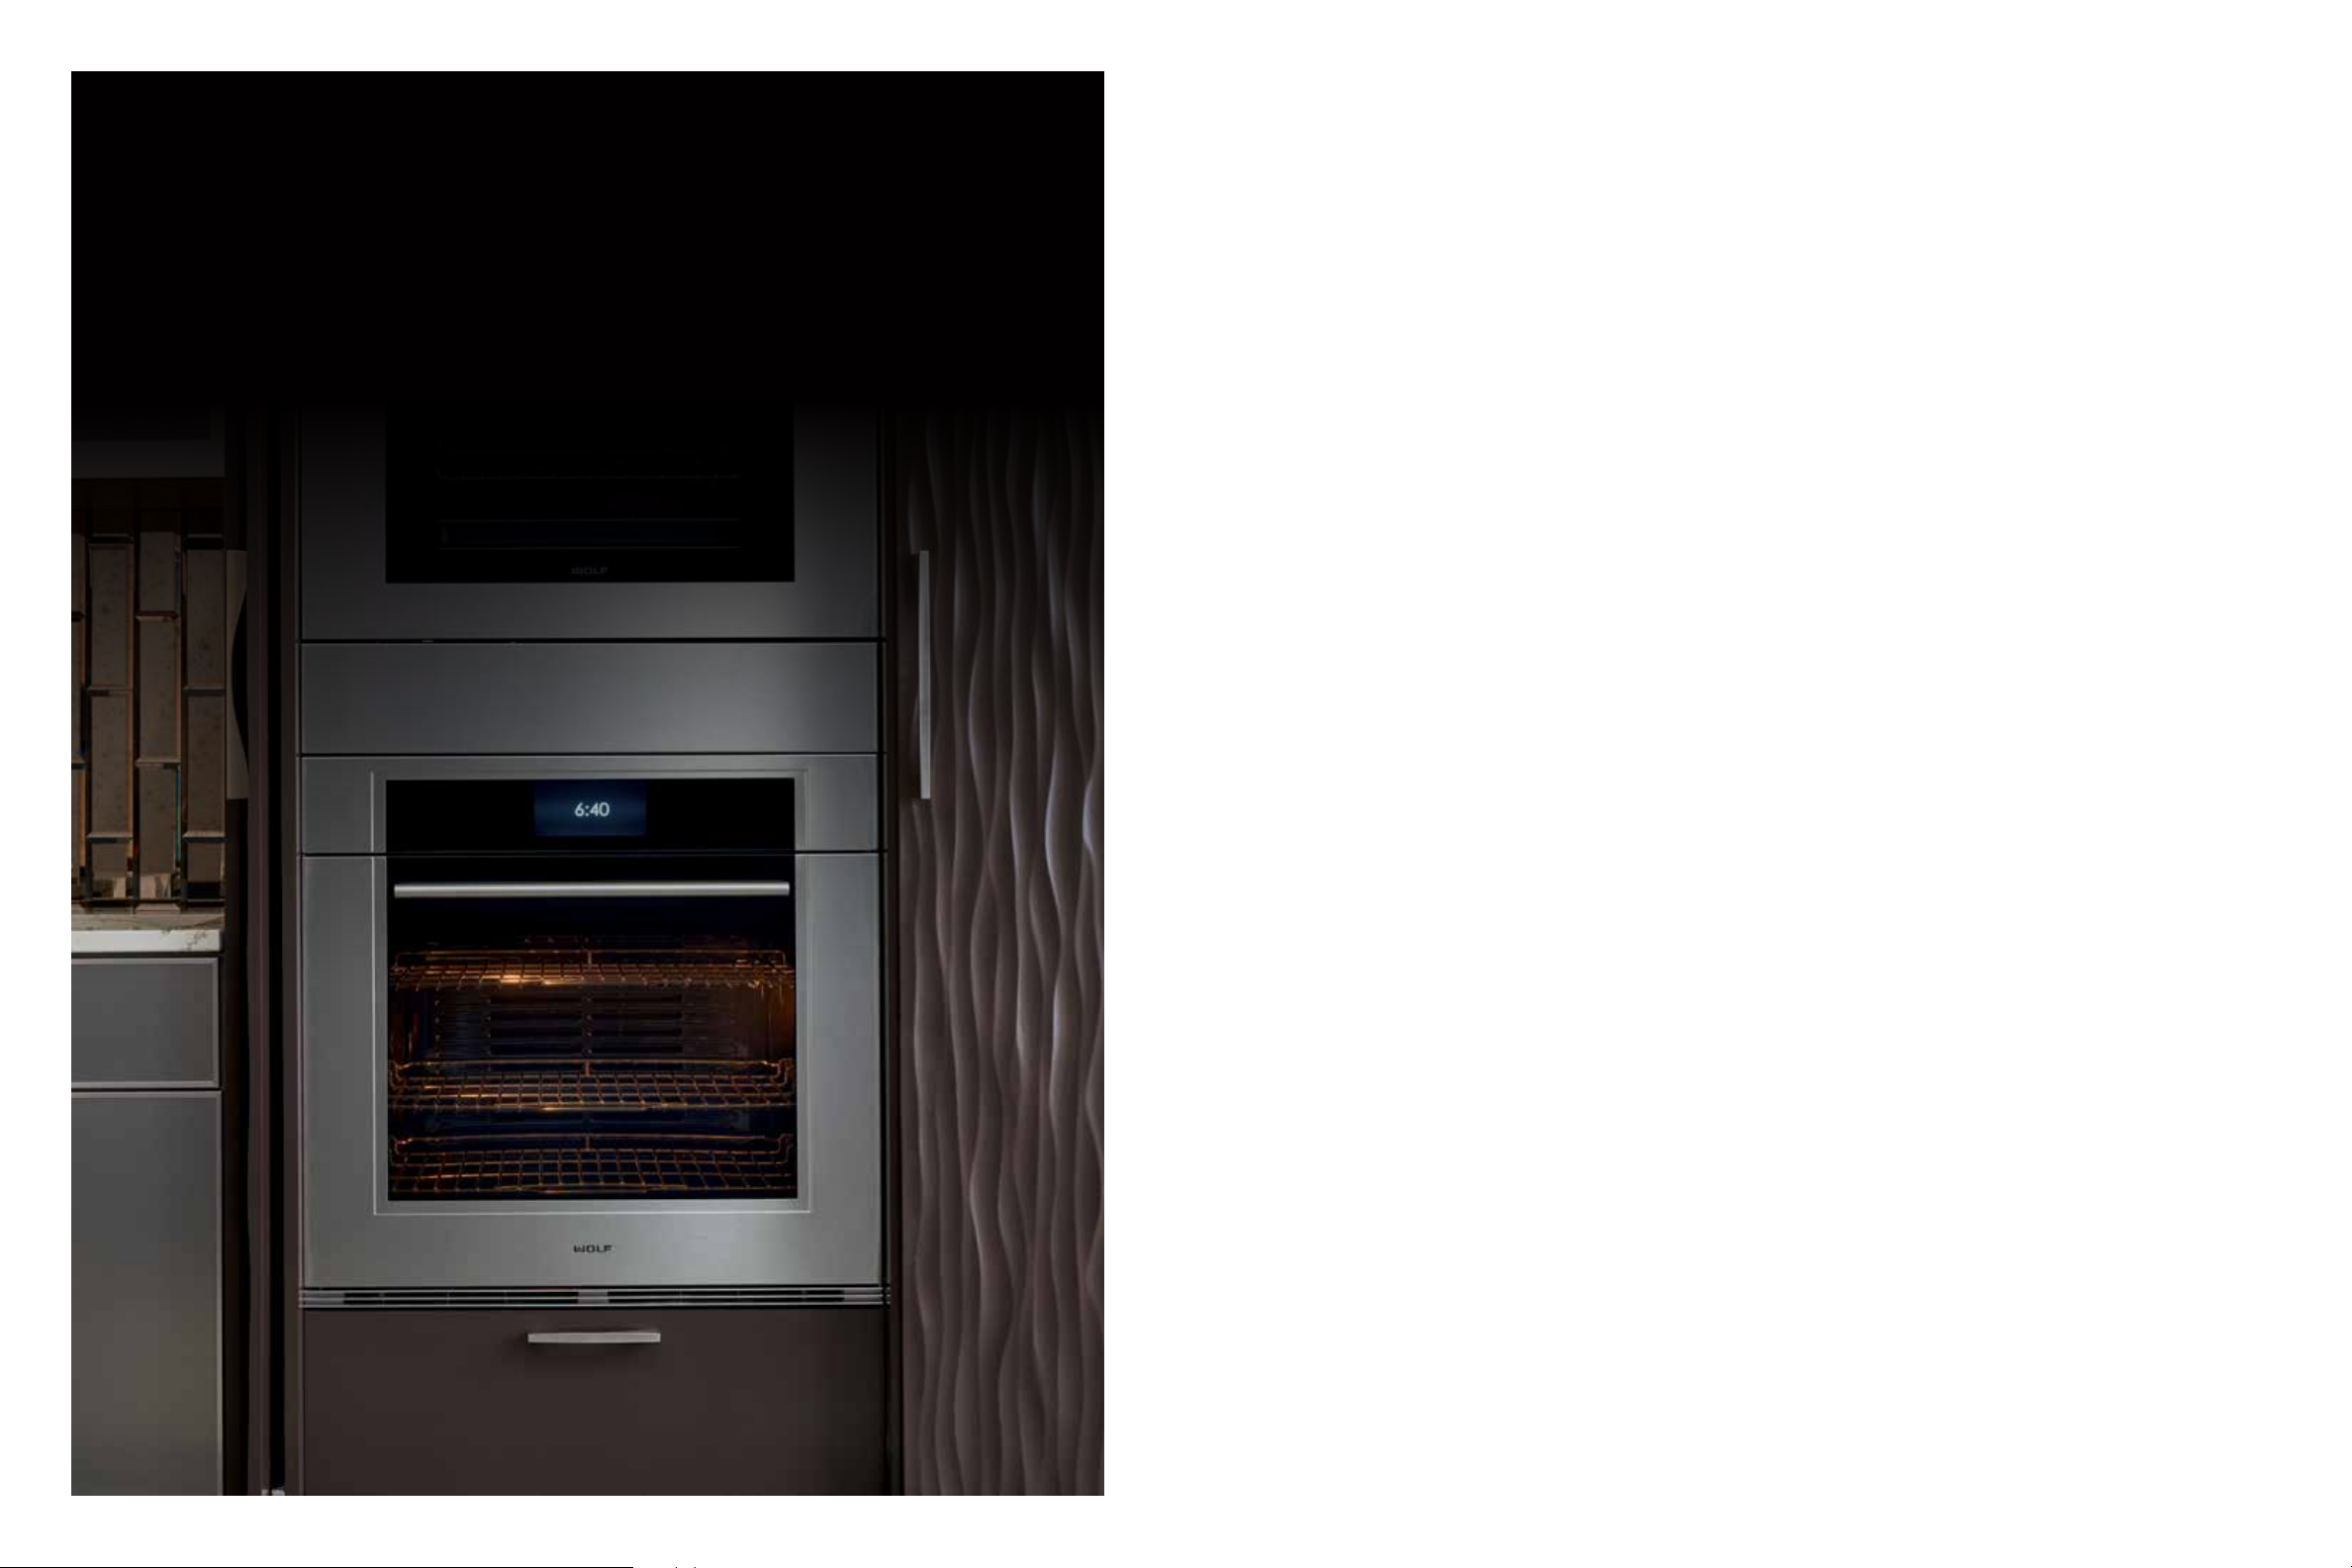
What is a M series oven?
Your state-of-the-art Wolf oven is designed to assist and ease all of your
Table of
culinary endeavors for superior results you can count on. Wolf’s Dual VertiCross™
convection system and chef-tested modes work in tandem to produce remarkable
flavor development. It removes the limitations and inconsistencies found in
non-convection ovens—no more nervous waiting by the oven. Your Wolf
oven takes care of all the details so you can enjoy the time spent cooking.
Contents
WHAT IS A M SERIES OVEN? .................................................4
MODES ...............................................................................................7
CONVECTION ................................................................................9
– Herb and Cheese Scones ....................................................... 11
– Peanut Butter Chocolate Chip Cookies ...........................12
– Chicken Wing ............................................................................13
– Pork Tenderloin and Roasted Cauliflower .....................15
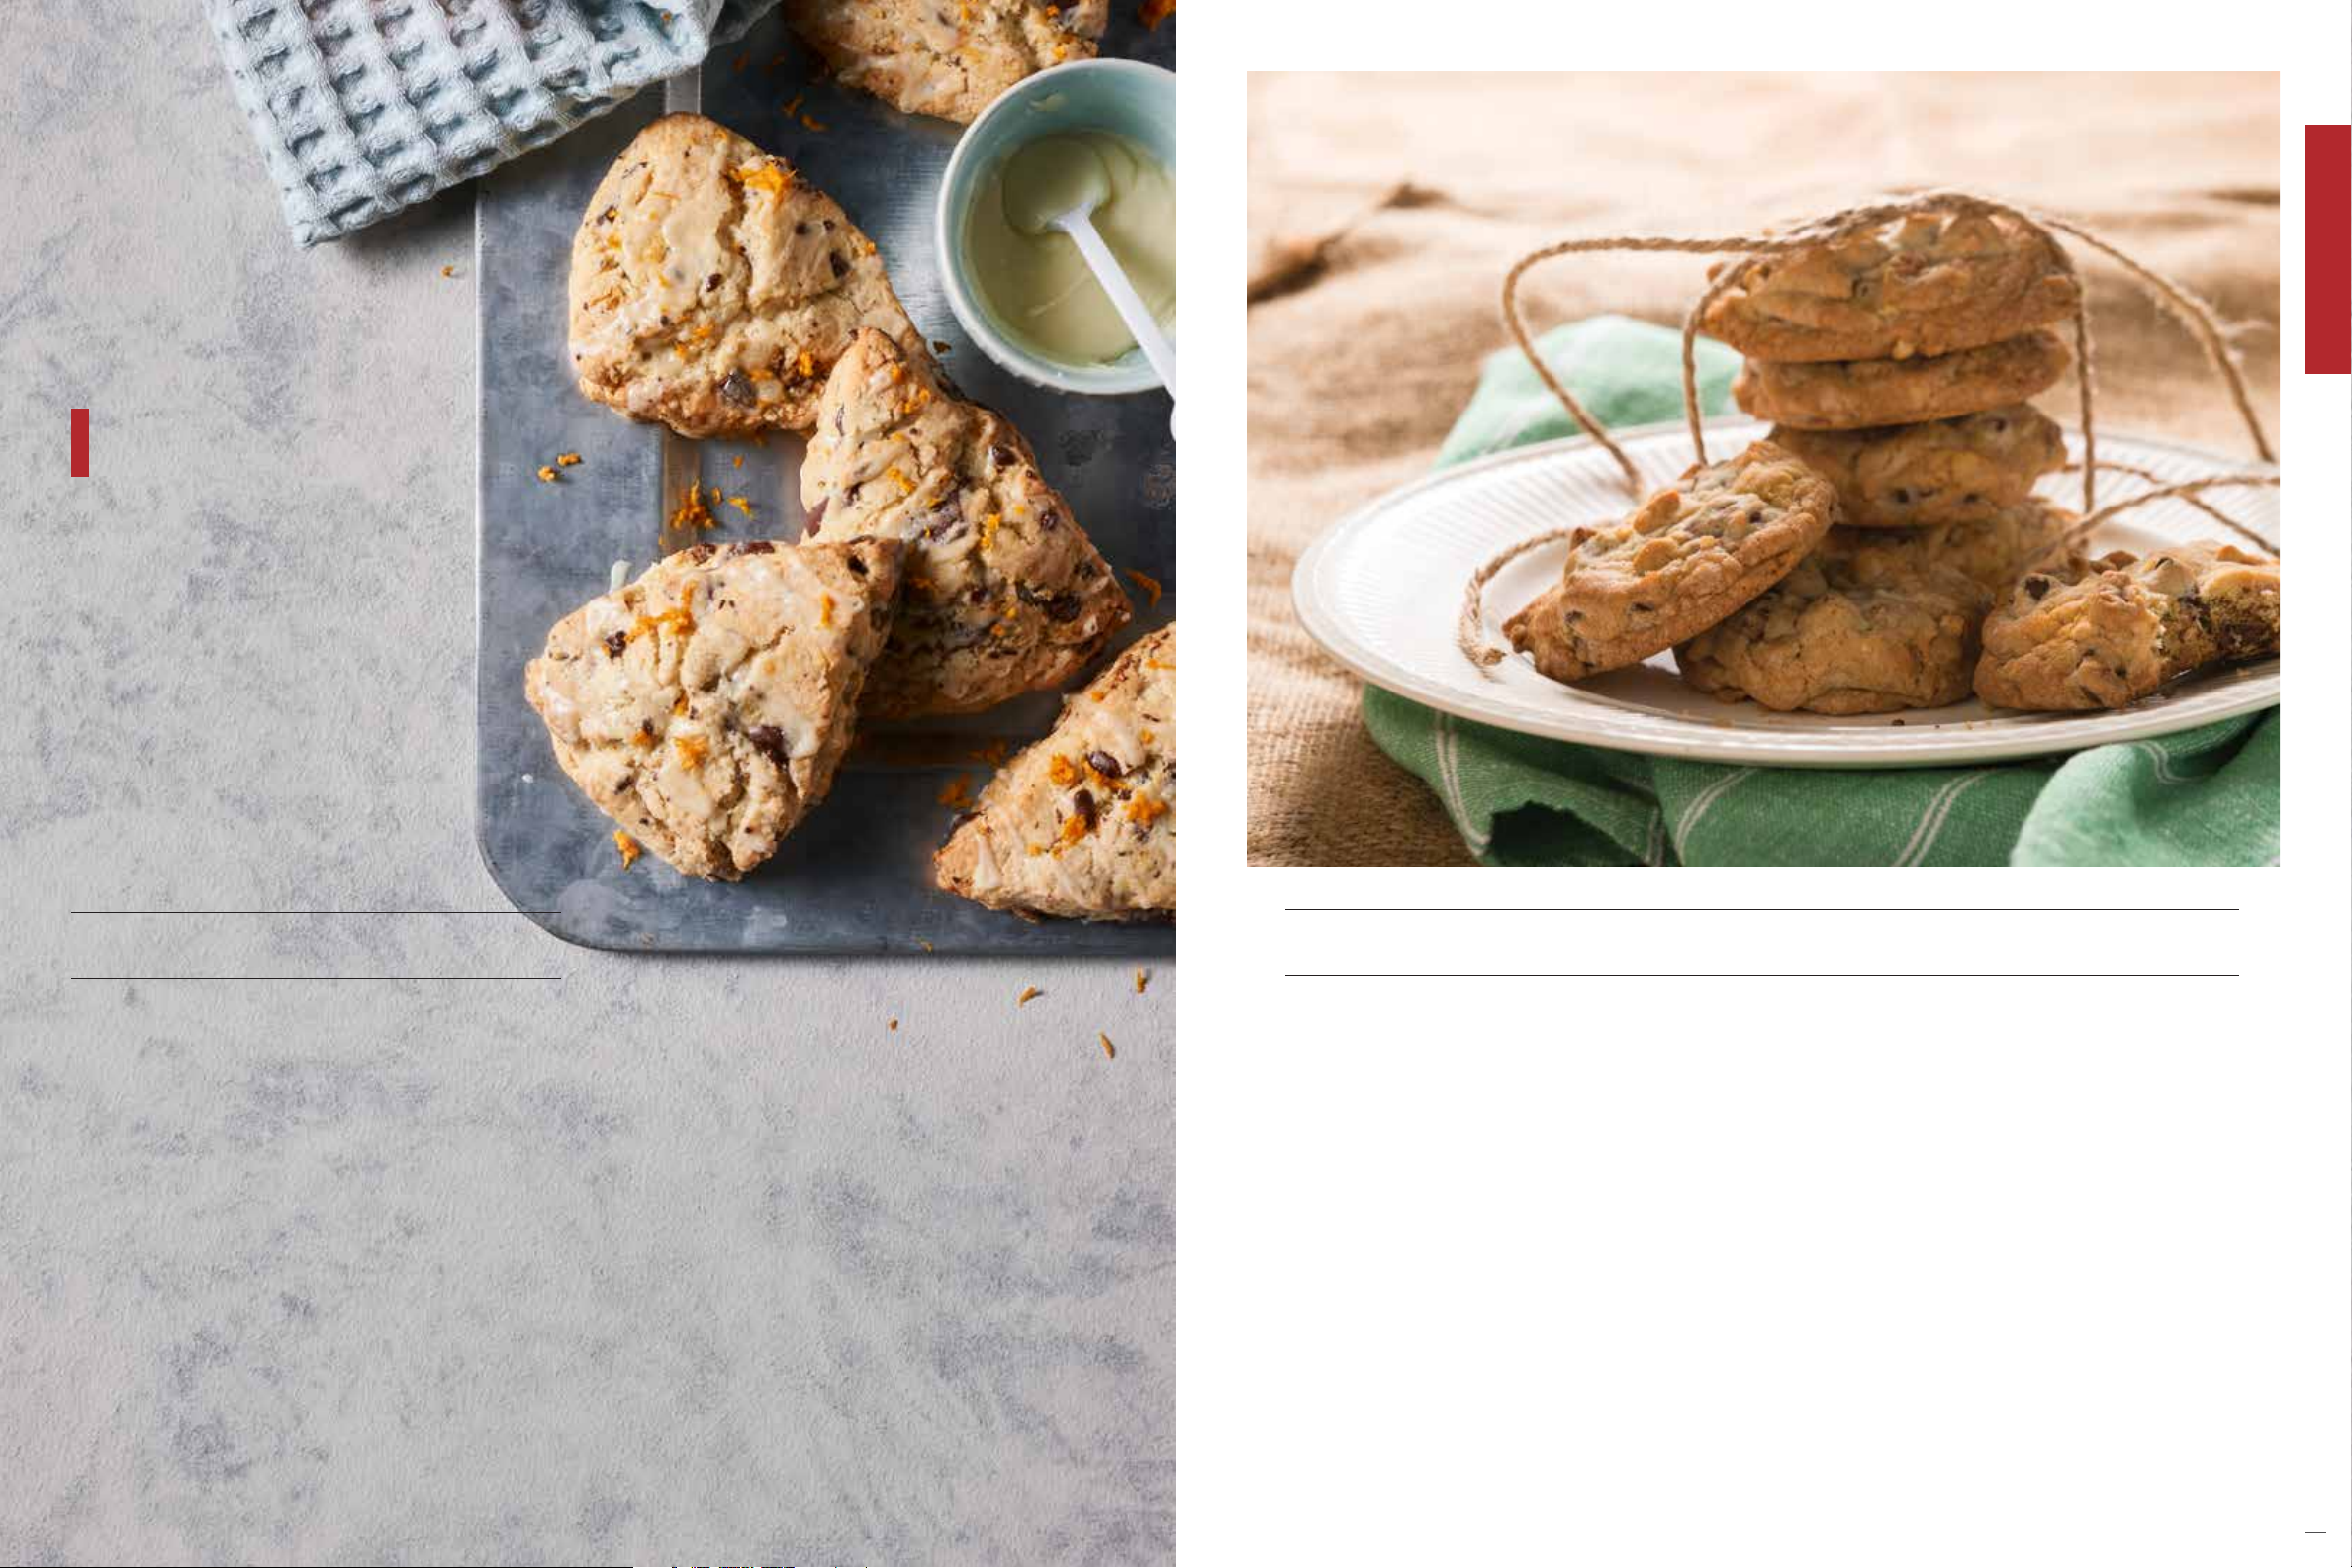
– Dark Chocolate Orange Scones ..........................................16
– Everything Cookies .................................................................17
– Party Crackers...........................................................................19
– Hasselback Potatoes ..............................................................20
– Hazelnut Biscotti .....................................................................21
– Pistachio Carrot Cake ...........................................................23
– Gougères ..................................................................................... 25
BAKE ................................................................................................. 27
– Parmesan Garlic Beer Bread .............................................28
– Chocolate Pot de Crème .......................................................29
– Spicy Cheese Bread ................................................................31
– Cinnamon Chocolate Chip Banana Bread .................... 33
– Focaccia Bread ........................................................................ 35
– Quiche Lorraine ..................................................................... 37
– Buttermilk Biscuits ............................................................... 38
– Lemon Pudding Cakes .......................................................... 39
CONVECTION ROAST ............................................................ 41
– Roast Turkey .............................................................................43
– Roasted Tomatoes ...................................................................44
– Italian Meatballs .....................................................................45
– Chicken Enchiladas ................................................................47
– Roasted Vegetables .................................................................48
– Lamb Roast ................................................................................49
ROAST ..............................................................................................51
– Kale Chips ................................................................................. 52
– Candied Pecans .......................................................................53
– Pot Roast ....................................................................................55
– Coq au Vin ................................................................................. 57
BROIL ............................................................................................... 59
– Tomato Basil Shrimp Skewers ...........................................60
– Steak .............................................................................................61
– Honey and Soy Chicken Skewers ......................................63
PROOF .............................................................................................65
DEHYDRATE ................................................................................. 67
– Fruit Leather ............................................................................68
– Beef Jerky .................................................................................. 69
STONE ..............................................................................................71
– Pizza ............................................................................................. 73
GOURMET ..................................................................................... 75
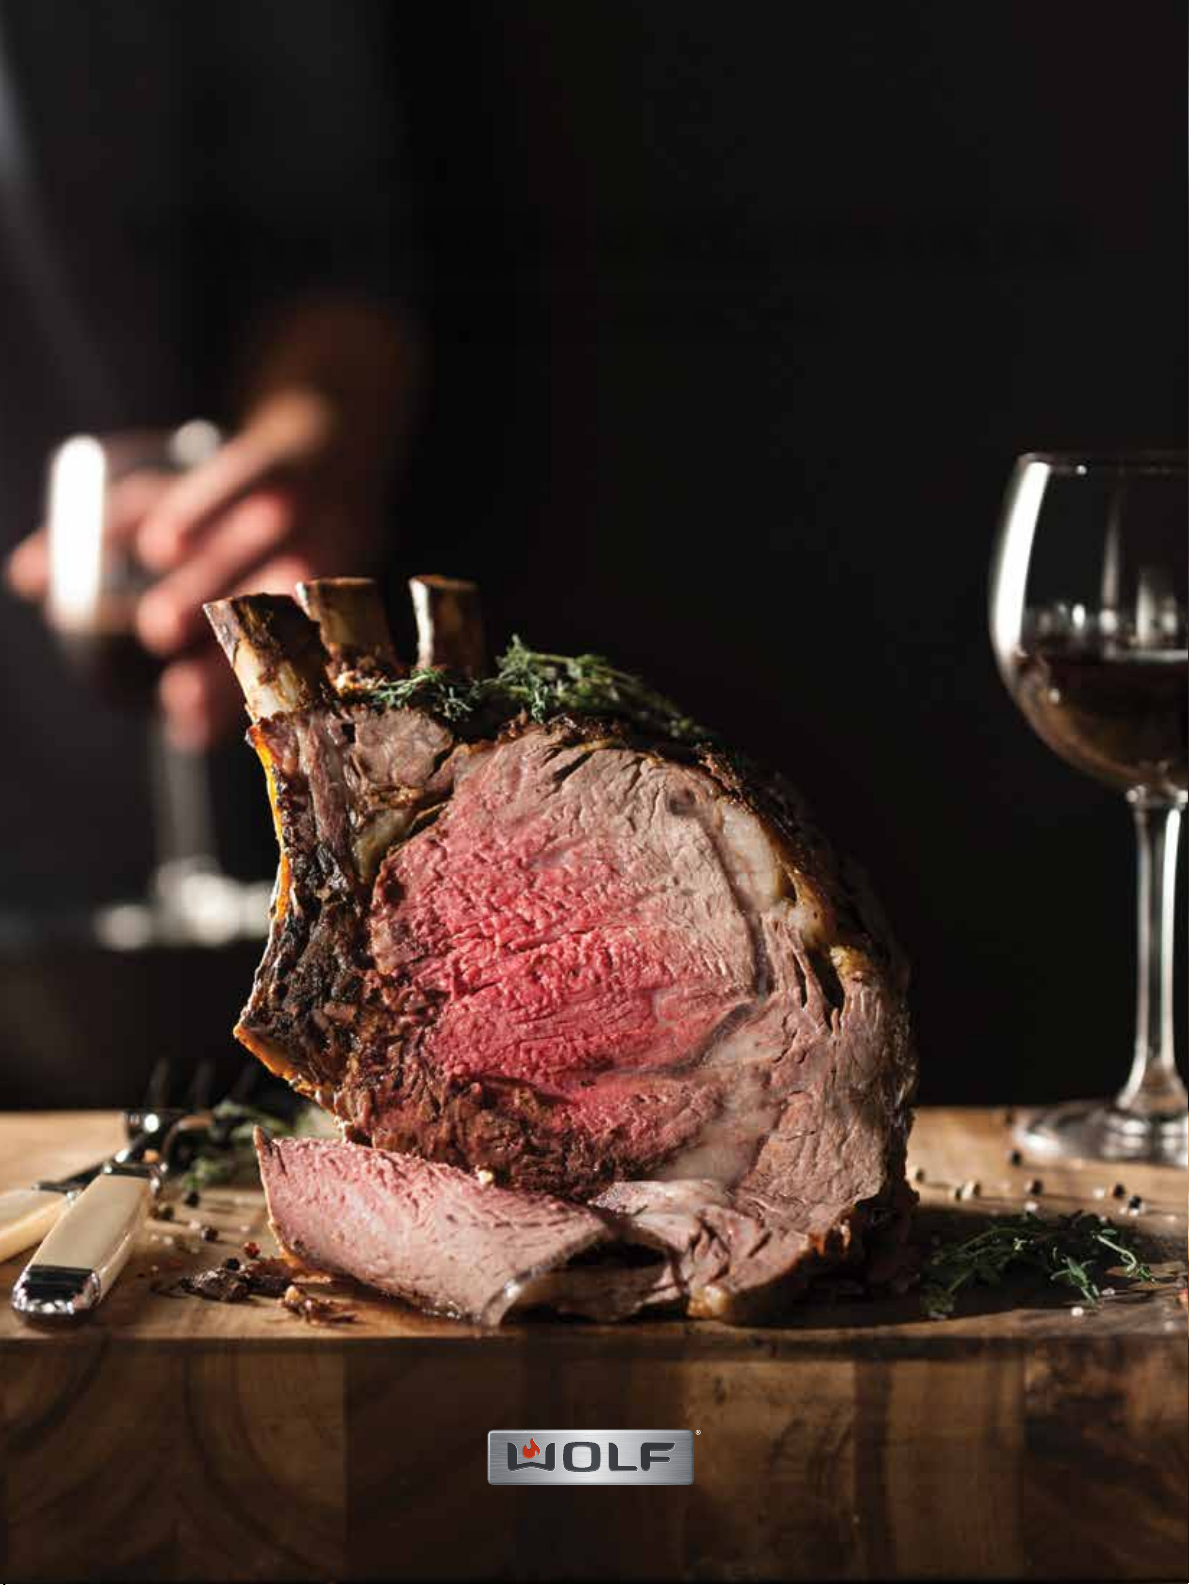
– Prime Rib Roast ...................................................................... 77
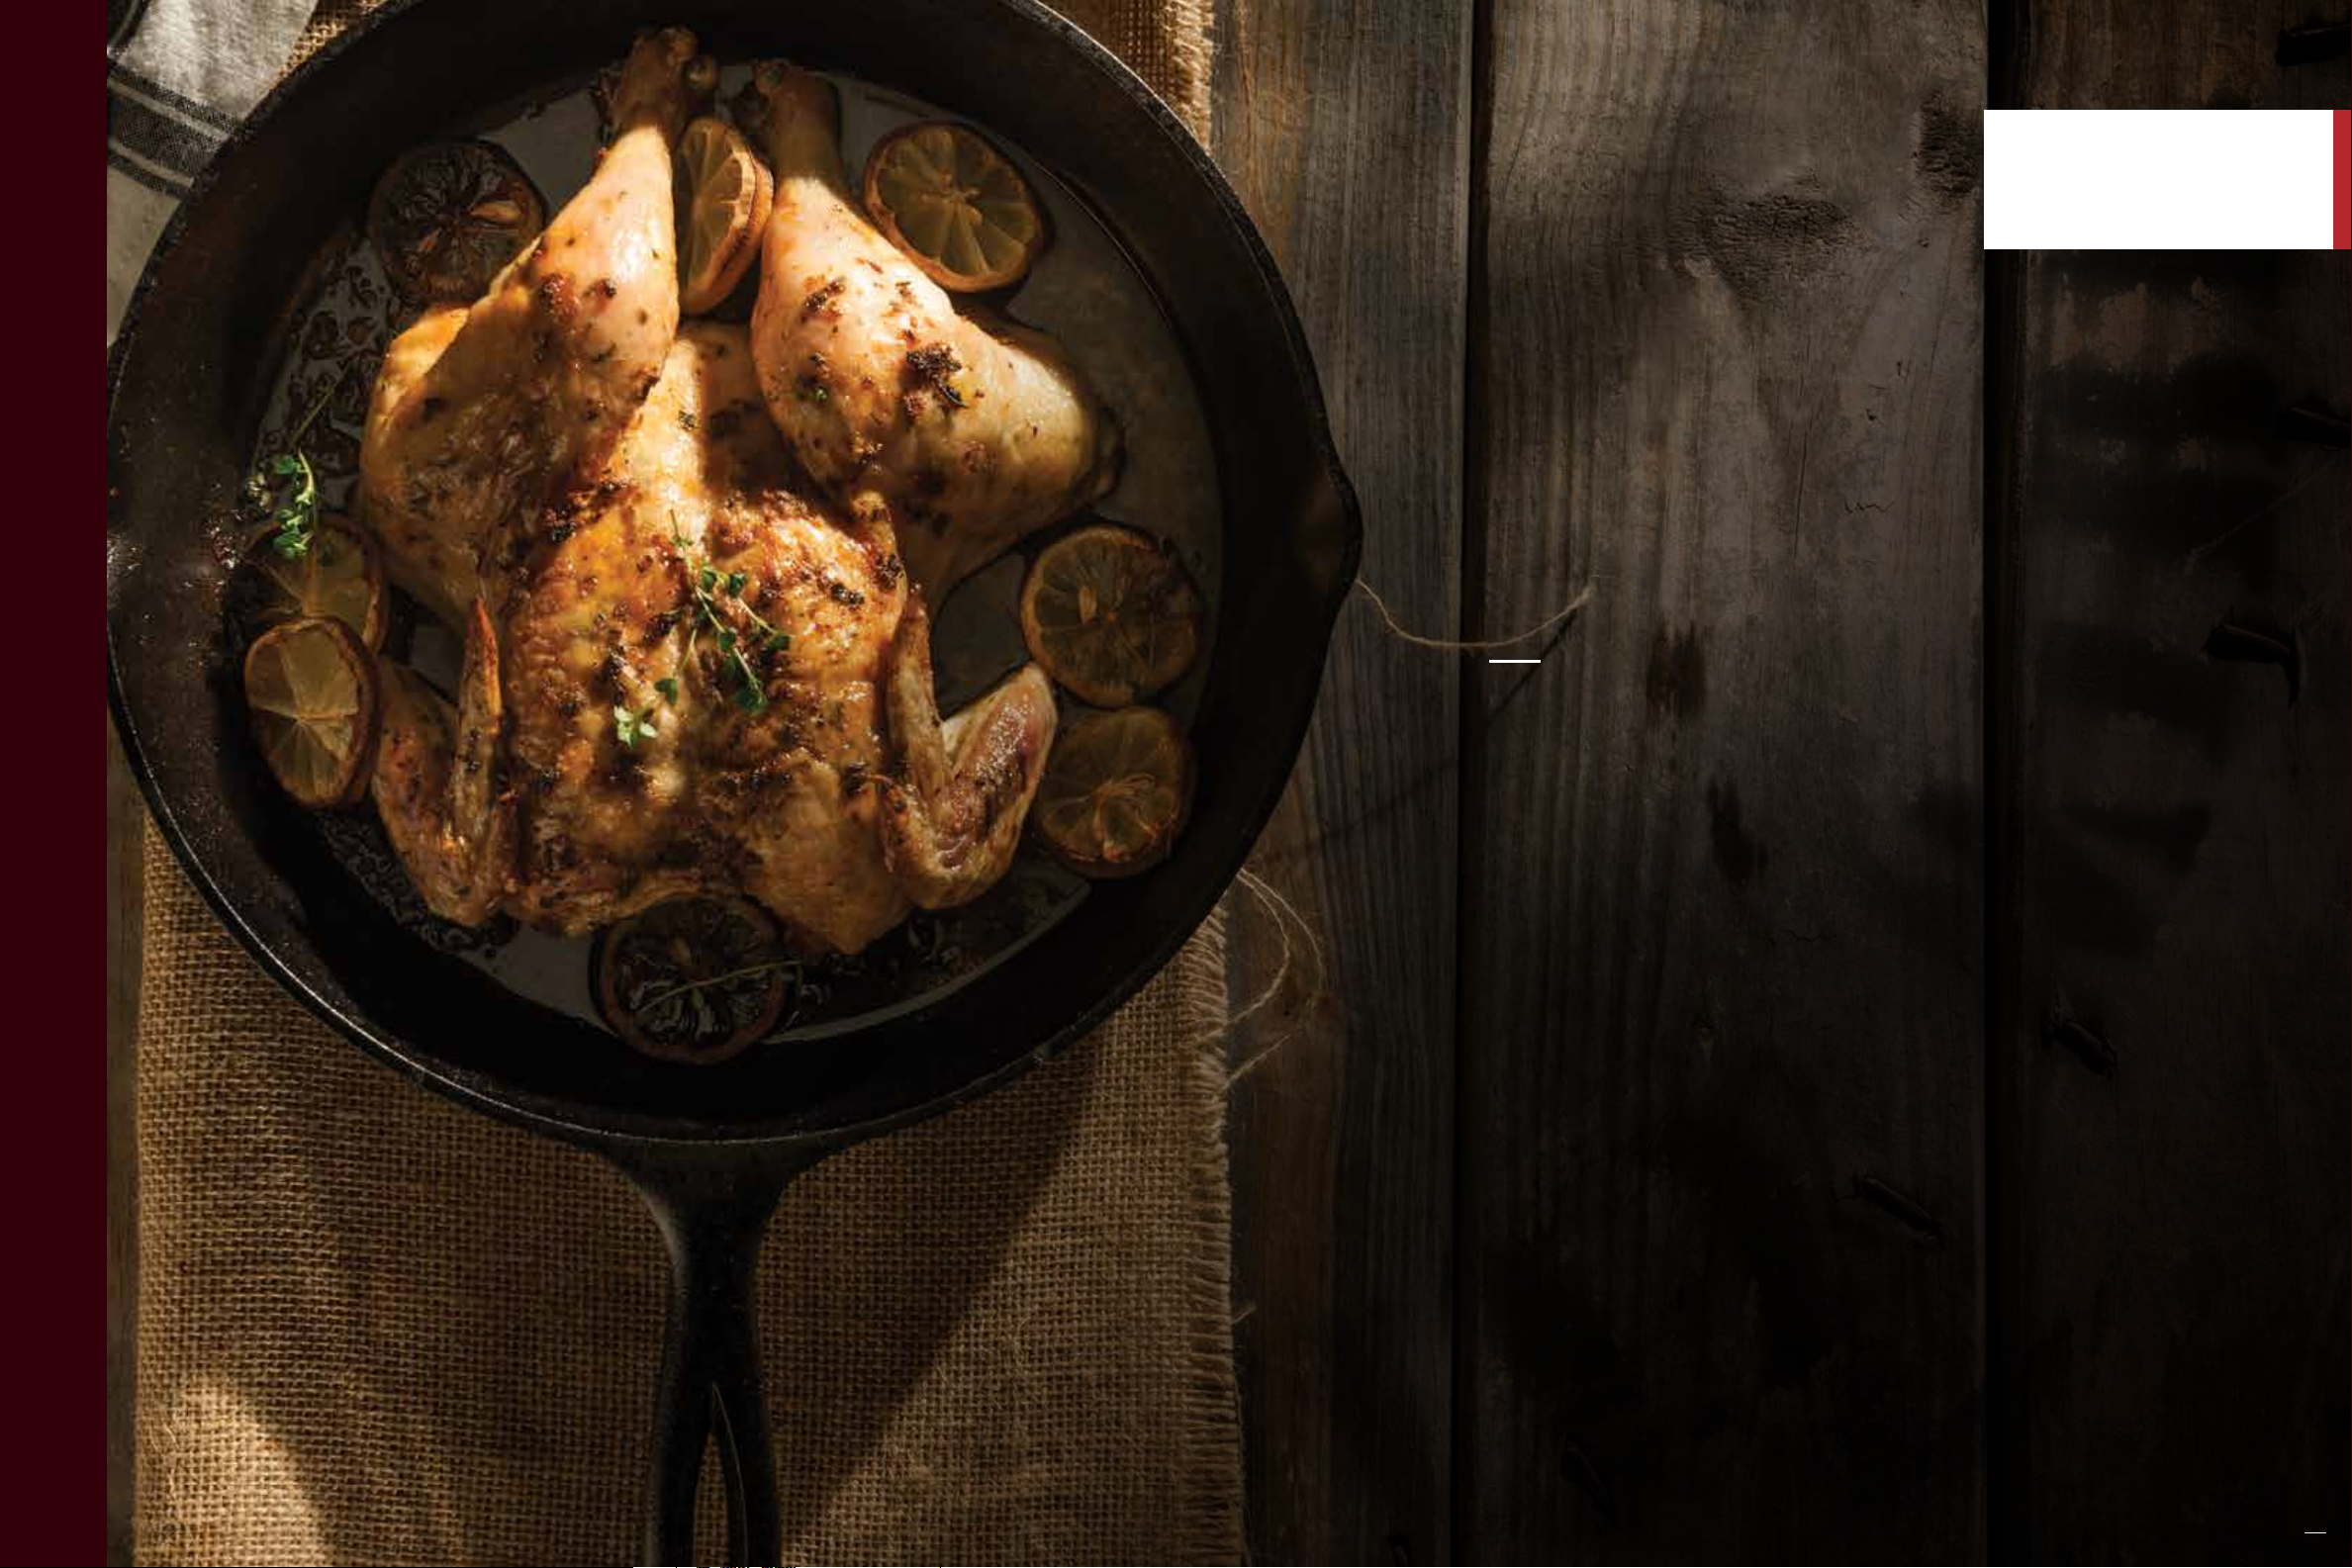
– Spatchcock Chicken ............................................................... 79
– Mixed Berry Pie .......................................................................81
WARM .............................................................................................. 83
GLOSSARY ..................................................................................... 84
MODE CHEAT SHEET .............................................................. 85
BROIL
Modes
SOPHISTICATED, PRECISE METHODS
By learning which mode is best for each particular
dish, you are practically guaranteed success with
any meal, from simple to spectacular.
CONVECTION
Almost anything that you would normally make in an
oven will benefit from the gentle, circulating warm air
of this mode. Cookies, breads, even pork tenderloin
are consistently browned, no matter the rack.
BAKE
The “standard” oven mode. The right choice for single-rack
cooking of more delicate items, such as quiches, custards,
and cakes that require a more humid environment.
Many people think “steak” when they think of
this mode, but it can be useful for many other
types of food too, such as caramelizing the
sugary top of a crème brûlée. Intense, radiant
heat from the broil element excels at searing
and browning foods one side at a time.
PROOF
There isn’t anything quite as comforting as the
smell of bread baking. The first step in that baking
process, proofing, requires a low, controlled
heat to ensure the correct rise of your breads.
DEHYDRATE
This unique mode oers you new versatility to
create your own dried fruit, meat, and herbs.
The oven curates the proper drying atmosphere
to make some of your favorite snacks.
MODES
CONVECTION ROAST
This high-powered roasting method produces
intense and even browning results. Combining
the consistent, enveloping convection heat with
the power of the broil element, roasted meats and
vegetables will be your new weeknight standard.
ROAST
All cuts of meat are not created equal—some are
tender right from the butcher, others are not. The
consistent heat produced by the top and bottom
heating elements creates the ideal environment
for roasting those tougher cuts long and slow,
transforming the inedible into the irresistible.
STONE
Approximate the “brick oven” eect in
your own home. Using the bake stone
accessory, achieve the crispy, chewy
crust you’ve only been able to get at
your favorite pizza place—until now.
GOURMET
No guesswork here. Simply place your
desired dish in the chamber, select
the cooking agenda from the intuitive
menu, and the oven does the rest.
WARM
A savior for mistimed meals and
latecomers alike. Ensures everything
is served hot, holding food at its
ready-to-serve temperature.
6
7
Convection Mode
FASTER, MORE EFFICIENT COOKING OF ALMOST ANYTHING
Convection Mode is perhaps the most versatile of all modes and is an essential part
of your M series dual convection oven. It works by circulating hot air throughout
the cavity and venting out excess moisture. Two heated fans oer distinct
advantages over the usual radiant heat: they minimize hot and cool spots, enable
multi-rack cooking (no rotating of pans required), cook about twenty-five percent
CONVECTION
faster, and improve the flavor of your food with increased caramelization. Muns
are fluy and evenly browned. Chicken stays juicier underneath crackly skin.
Vegetables quickly caramelize. And cookies pu to chewy or crispy goodness.
CONVECTION MODE REVIEW
– Food cooks more evenly and quickly
– Multiple foods can be cooked on
multiple racks
– Temperature probe may be used
– Best “all-around” mode when you are
unsure of what mode to use
8
9
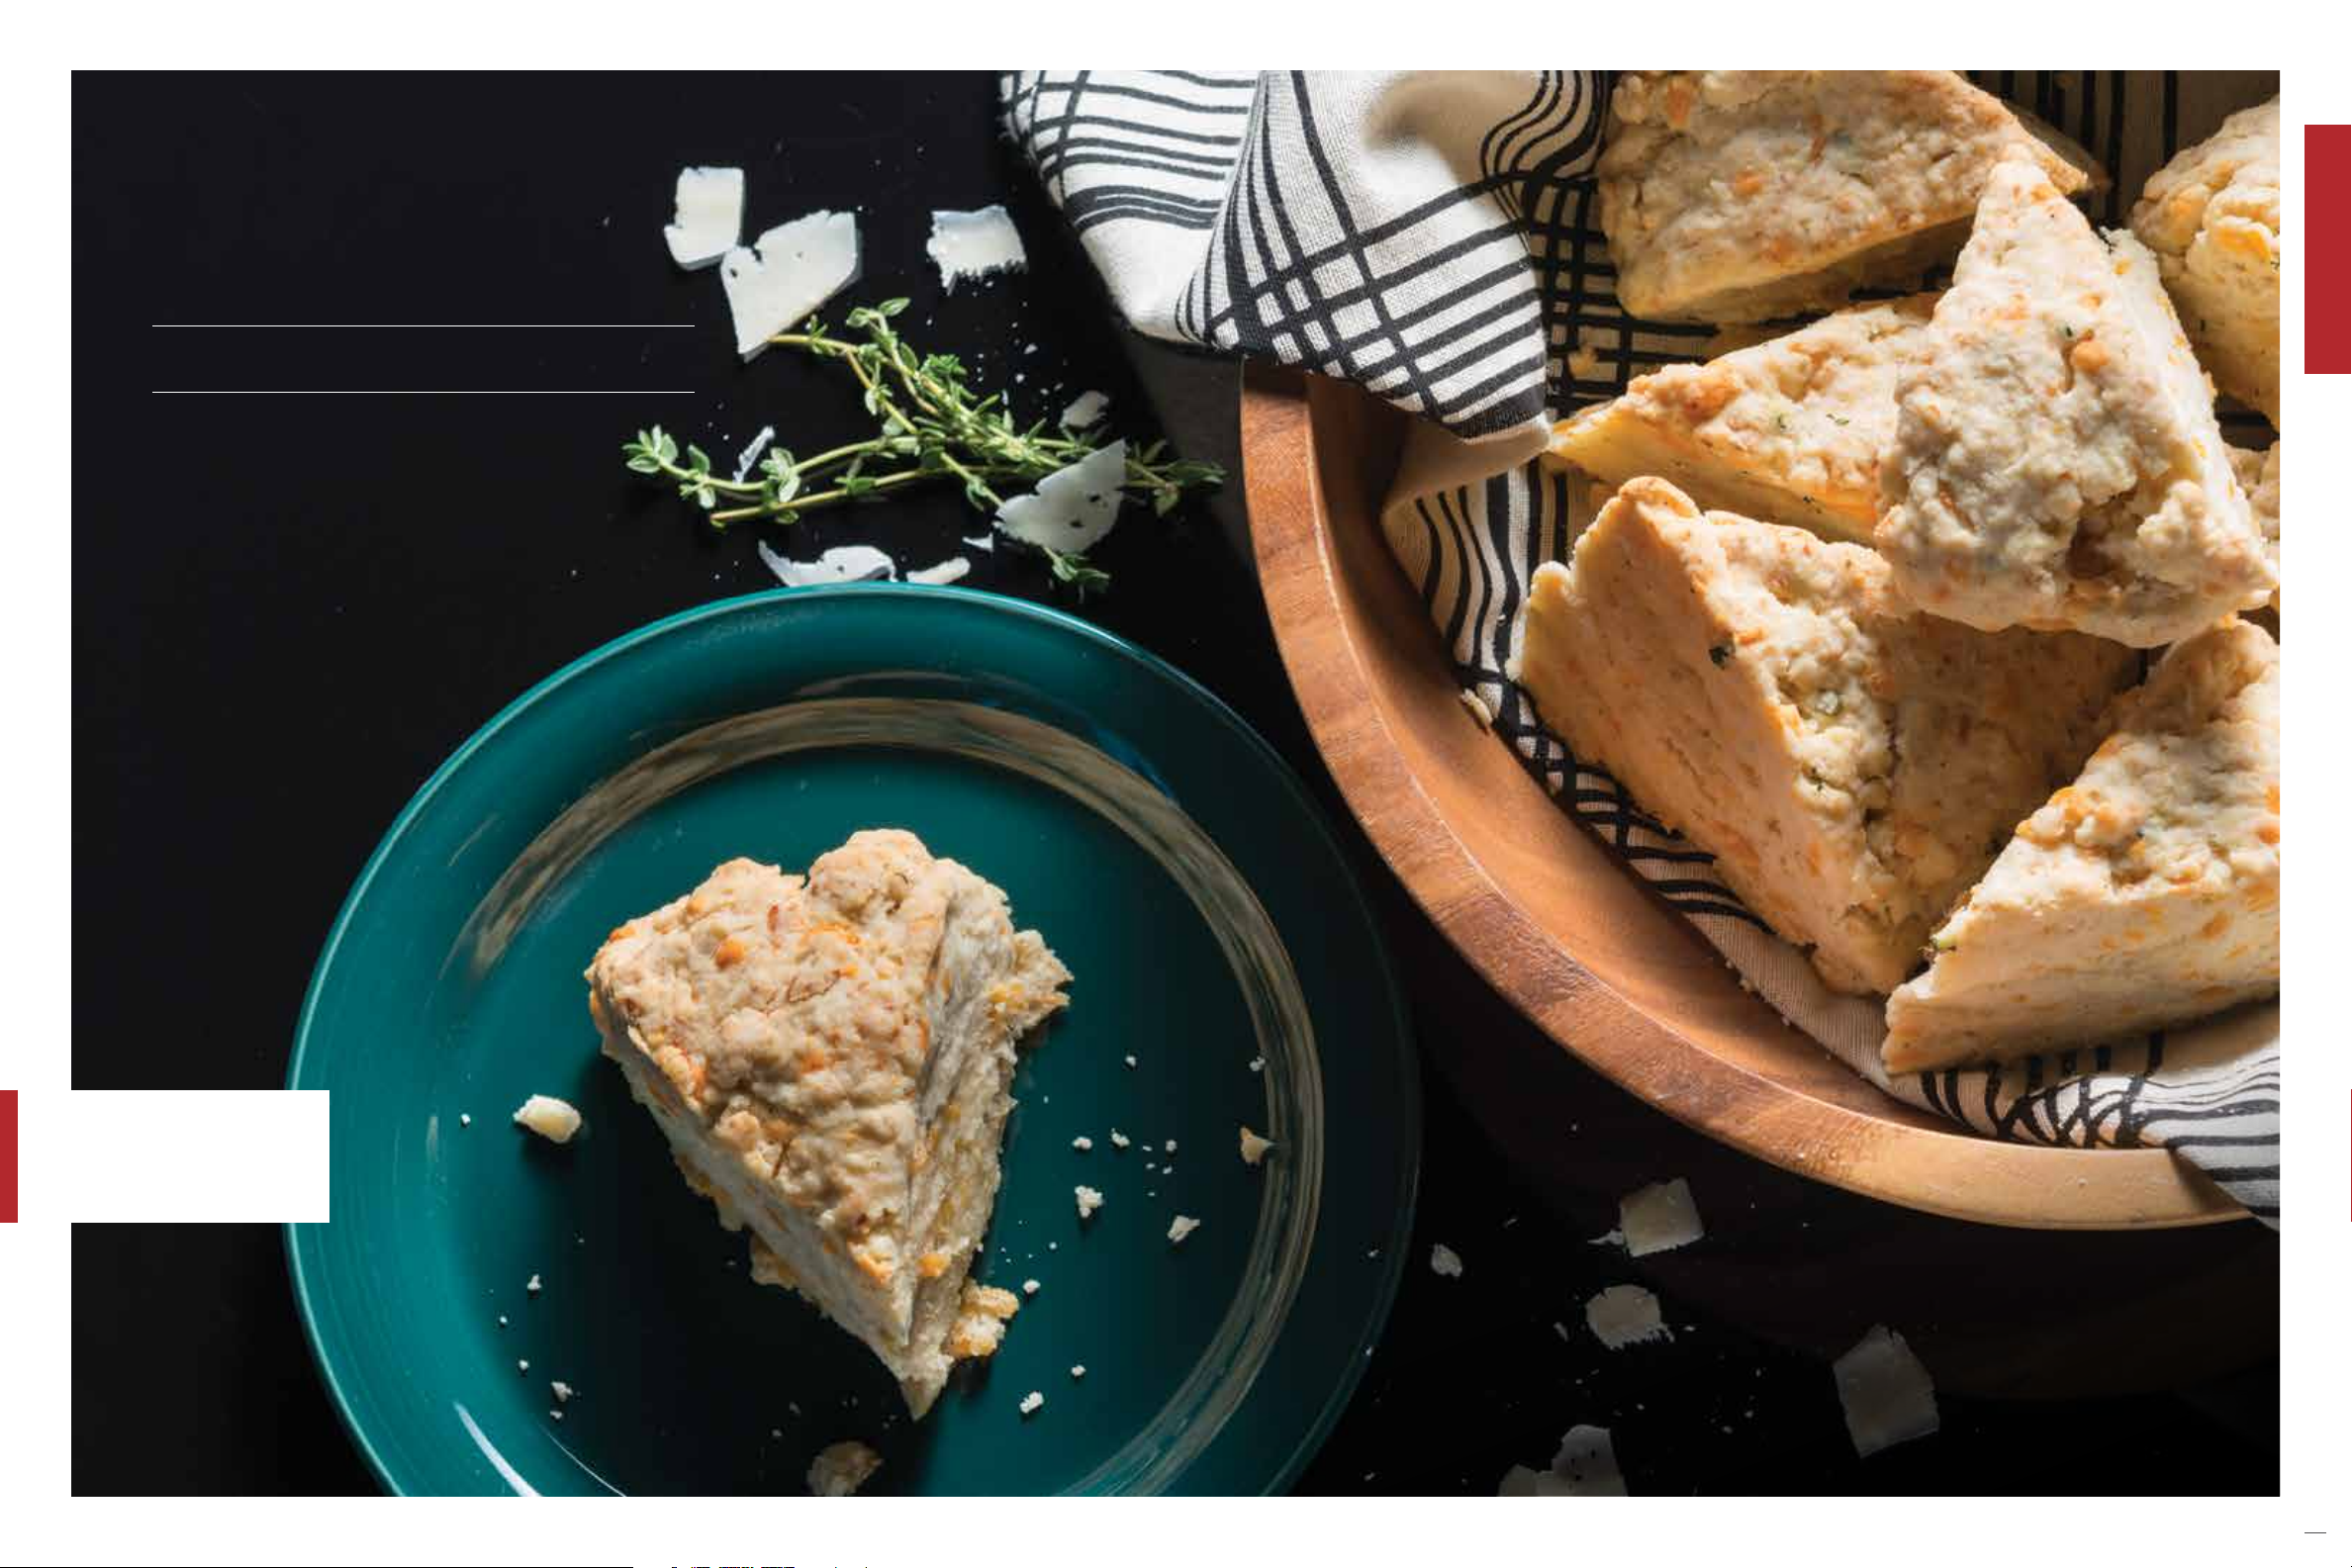
Herb
and
Cheese Scones
A savory variant on the traditional, this herb and cheese
scone is a great twist.
MAKES RACK POSITION COOK TIME
8 SERVINGS 3 1618 MINUTES
INGREDIENTS
– 2¼ cups all-purpose flour
– 1 tablespoon baking powder
– 1 teaspoon onion powder
– 1 tablespoon fresh thyme, finely
chopped
– ½ teaspoon kosher salt
– ¼ teaspoon ground black pepper
– ½ cup (1 stick) unsalted butter,
cold, cut into ½-inch pieces
– ¾ cup heavy cream
– ¼ cup Parmesan, grated
– ½ cup cheddar
cheese, grated
CONVECTION
BEFORE YOU START
Be sure to use cold butter and
do not overwork the dough.
PREPARATION METHOD
1. Preheat the oven to 350°F on Convection Mode with a rack set on position “3.” 2. Whisk together
all the dry ingredients and the thyme. 3. Mix the butter into the dry ingredients by hand until
hazelnut size pieces are formed. 4. Add in cheese and then the heavy cream. 5. Mix gently by hand
until the dough comes together. This can also be done in a stand mixer or food processor, though
caution must be taken not to overwork the dough. 6. Turn out the dough onto a floured surface
and press out into a 7-inch disk, about 1-inch thick. 7. Cut disk into eight pieces. 8. Place on a
parchment-lined baking pan and bake for 16–18 minutes until golden brown around the edges.
10
11
Peanut Butter Chocolate Chip Cookies
Who can say no to peanut butter and chocolate? And the addition of oatmeal provides
an extra layer of flavor and texture to this already delectable treat.
MAKES RACK POSITION COOK TIME
2024 COOK IES 2, 4, AND 6 10 MINUTES
INGREDIENTS
– ½ cup (1 stick) unsalted butter,
room temperature
– ½ cup granulated sugar
– ⁄ cup firmly packed brown
sugar
– ½ cup peanut butter
– ½ teaspoon vanilla extract
– 1 large egg
– 1 cup all-purpose flour
– 1 teaspoon baking soda
– ½ teaspoon kosher salt
– ½ cup rolled oats
– 1 cup semi-sweet chocolate chips
CONVECTION
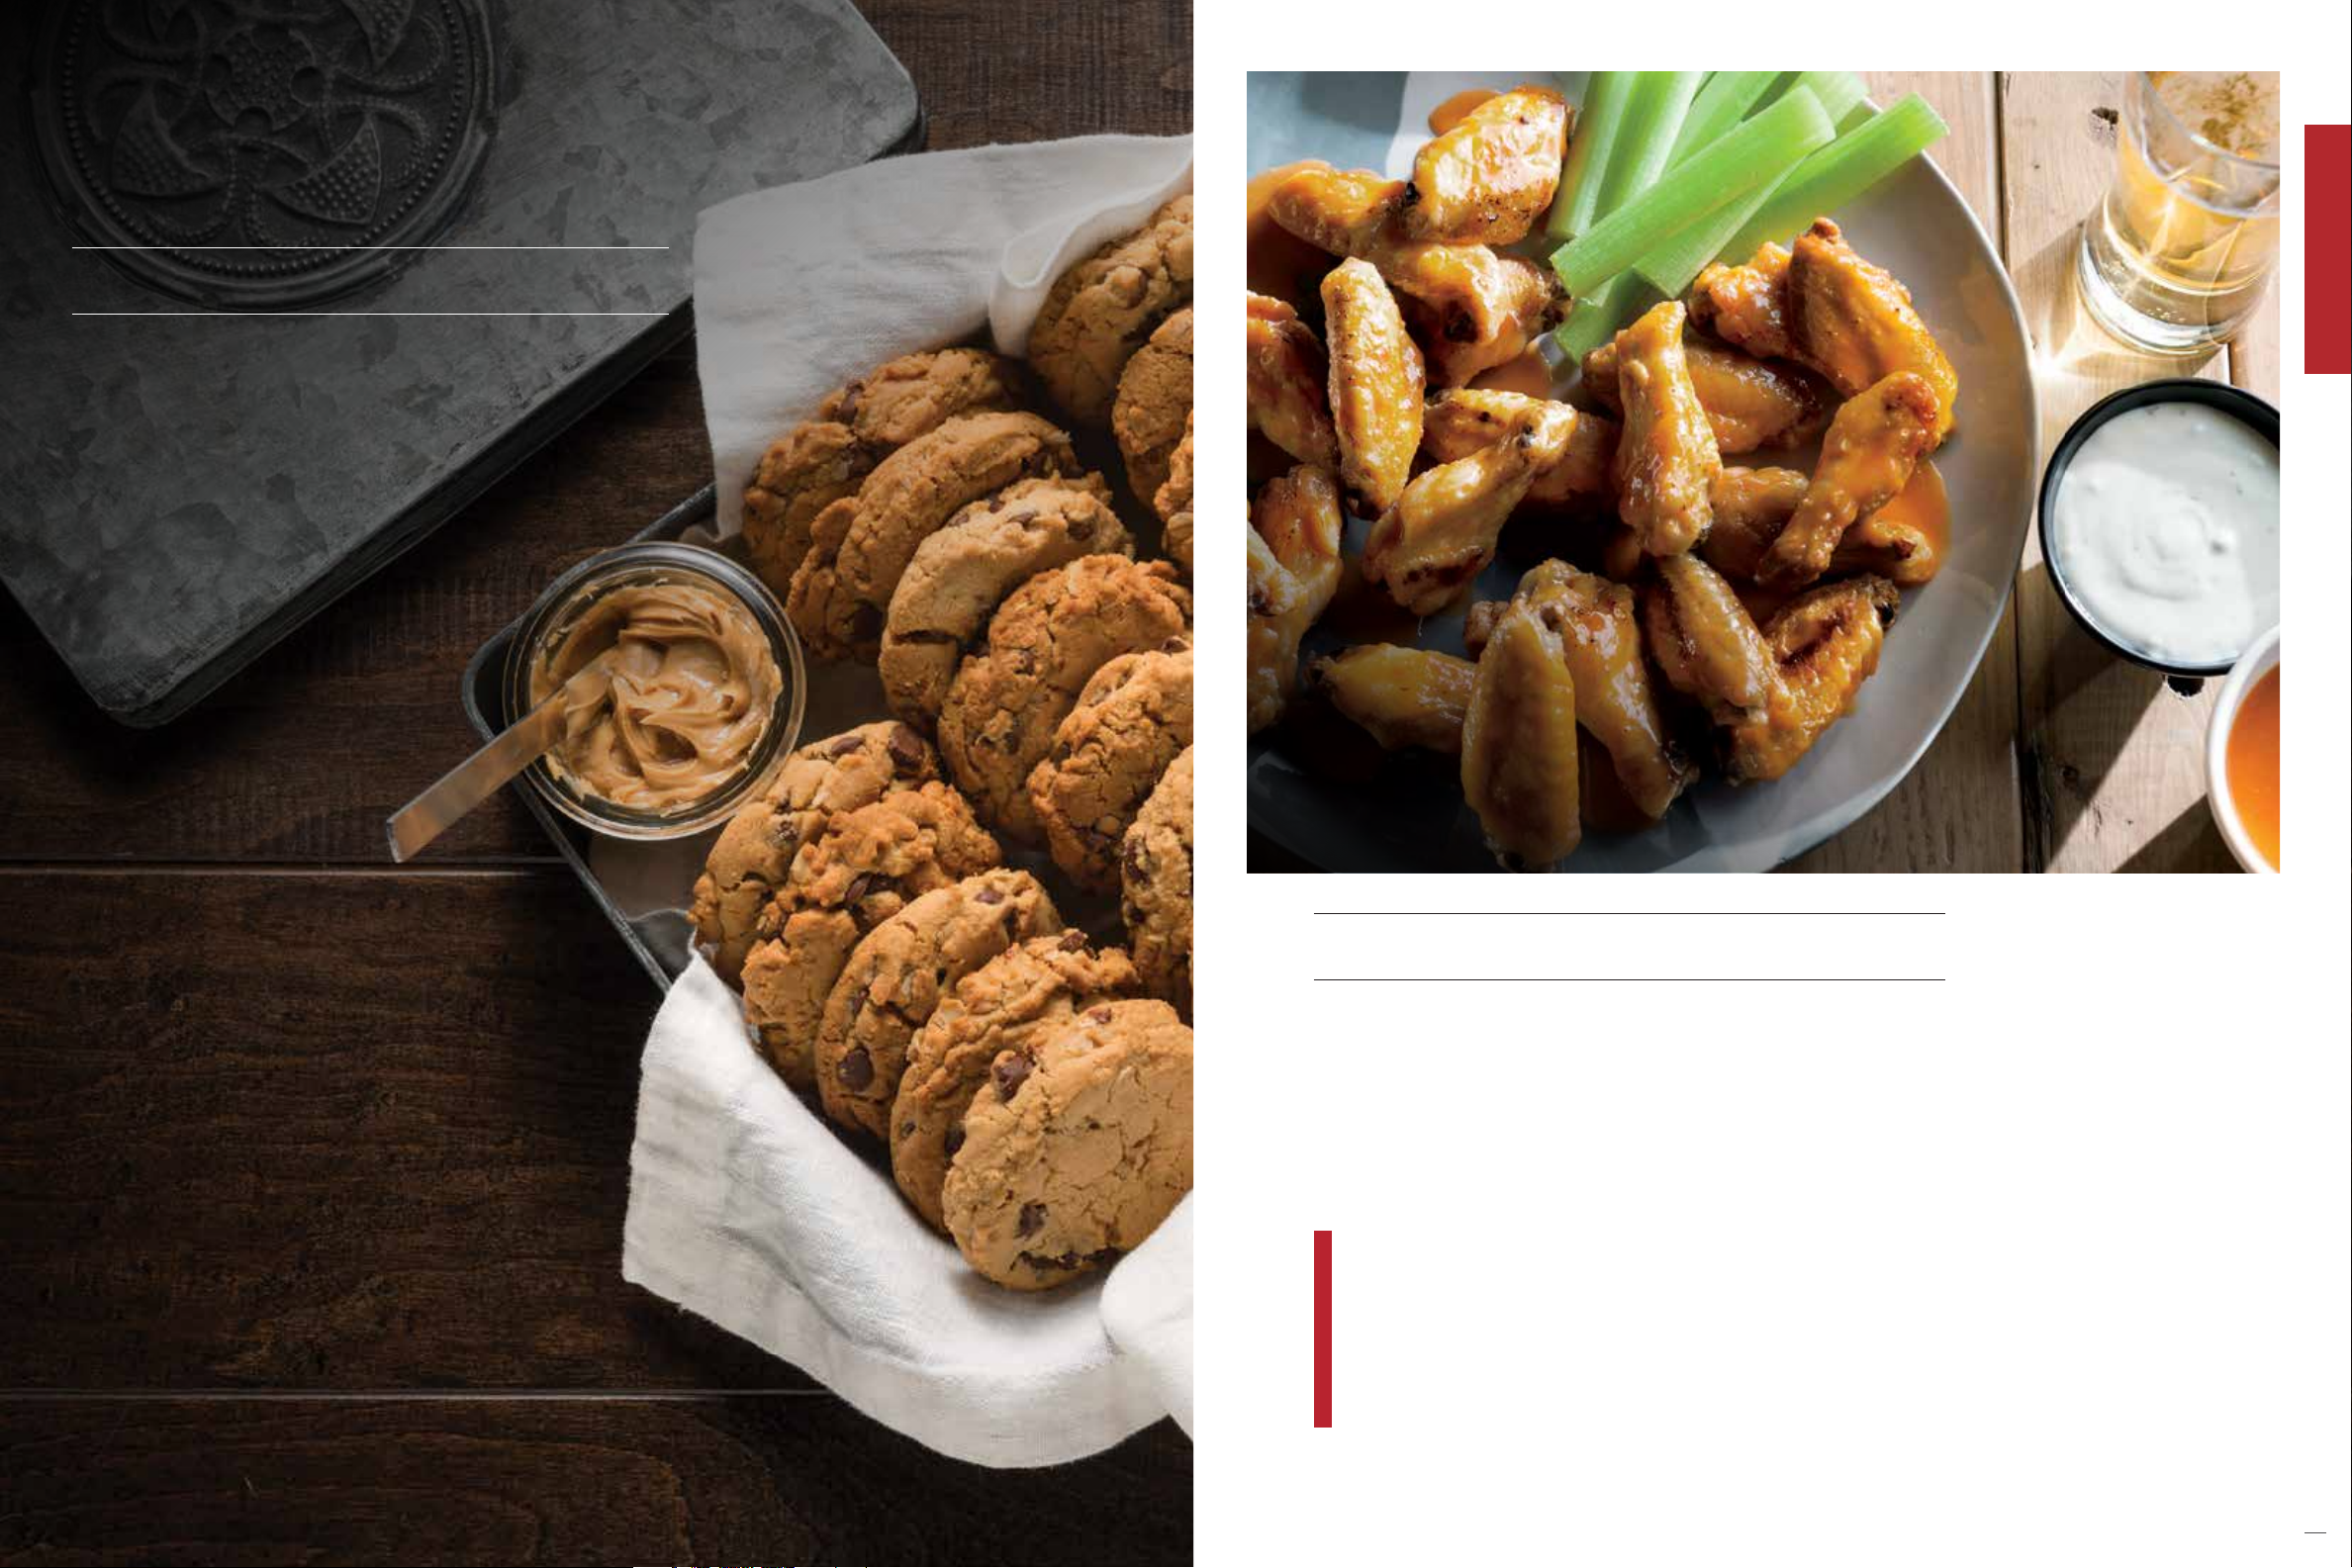
Chicken Wings
PREPARATION METHOD
1. Preheat the oven to 325°F on Convection Mode with
racks set on positions “2,” “4,” and “6.” 2. In a medium
bowl, sift together the all-purpose flour, baking soda,
and kosher salt. 3. In the bowl of a stand mixer, cream
together the butter and sugars on medium speed
for 2 minutes until light in color and fluy. 4. Add in
the peanut butter and vanilla, mixing to combine on
medium speed, and scraping the bowl as needed until
well combined. 5. Add in the egg and mix until well
blended. 6. Add the sifted dry ingredients and mix on
low speed just until the flour is no longer visible. 7. Mix
in the oats and chocolate chips until evenly distributed.
8. Drop rounded tablespoons of dough—or use a 1 to
1¼-inch cookie scoop—onto parchment-lined cookie
sheets at least 2-inches apart. 9. Press down slightly
with your fingers or a floured fork so the cookie is about
½-inch thick. 10. Bake for approximately 10 minutes
or until edges start to brown. 11. Remove from oven
and cool on cookie sheets for 5 minutes. 12. After 5
minutes, slide the parchment paper and cookies o the
pan and transfer to wire racks to cool completely.
These chicken wings turn out crispy without needing to be fried.
Easily doubled for larger gatherings, they are sure to impress.
MAKES RACK POSITION COOK TIME
46 SERVINGS 3 35 MINUTES
INGREDIENTS
– 2½ pounds chicken wings
and drumsticks
– 1 tablespoon baking powder
– ½ teaspoon kosher salt
BEFORE YOU START
The rendering fat may
produce some smoke, so
turn on your hood vent
while baking. Also, it
may be helpful to line
your broiling pan with
parchment paper or foil.
PREPARATION METHOD
1. Preheat the oven to 425°F on Convection Mode with a rack on position
“3.” 2. While the oven is preheating, dry wings thoroughly with a paper
towel and place in a large bowl. 3. Combine the baking powder and kosher
salt together in a small bowl and sprinkle about a third of the mixture
over wings. 4. Toss the wings several times to ensure an even coating.
5. Continue adding the baking powder and kosher salt mixture a third at
a time, tossing the wings between each addition. 6. Check to see if the
wings are evenly covered—depending on the wings’ moisture content,
you may not need to use the last third of the mixture. 7. Place the wings
on a broiler pan and rack lined with aluminum foil, leaving some space
between them. 8. You can also use a metal cooling rack placed on a
baking tray lined with aluminum foil. 9. Place the wings into the oven and
cook for 20 minutes. 10. After 20 minutes, remove the pan from the oven
and flip the wings over. 11. Return the wings to the oven and cook for an
additional 15 minutes. 12. Remove the wings from the oven and place in a
large clean bowl. 13. Toss the wings with your favorite sauce, if desired.
12
13
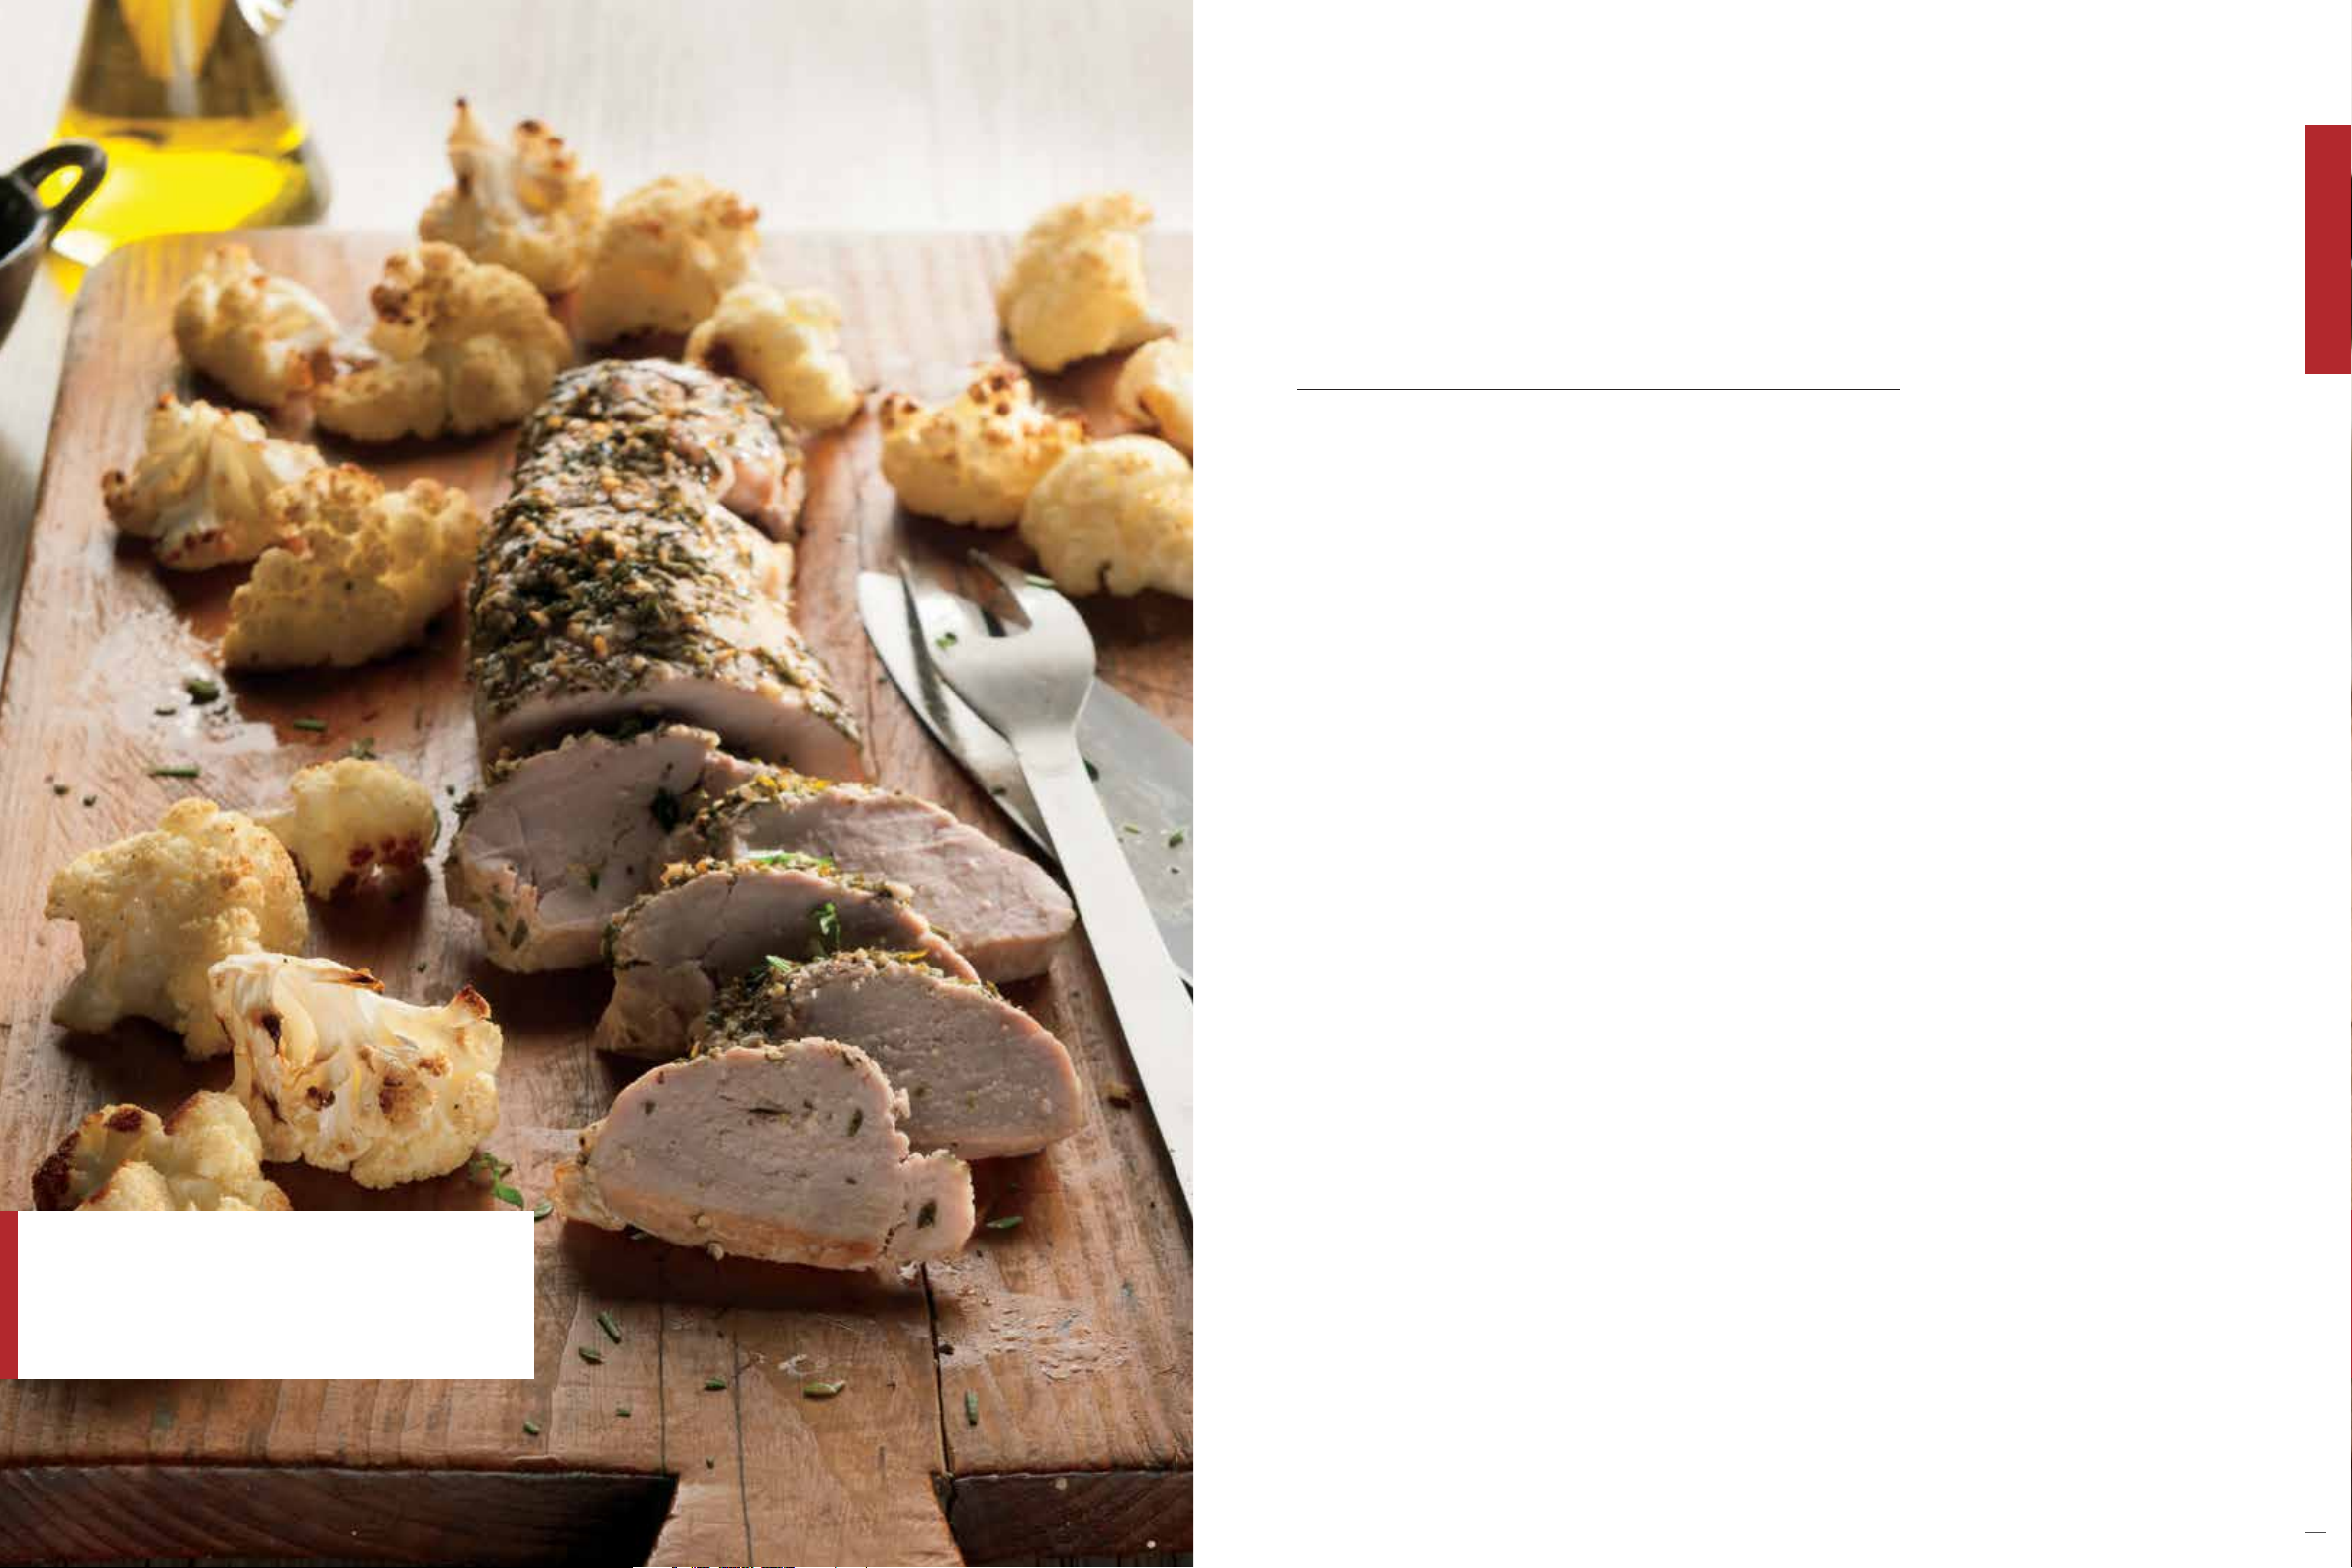
Pork Tenderloin
Roast the cauliflower and pork tenderloin at the same time so the whole meal comes out
at once. This recipe does not require preheating, so food can be served that much sooner.
MAKES RACK POSITION COOK TIME
4 SERVINGS 2 AND 5 45 MINUTES
INGREDIENTS
– 1 pork tenderloin, approximately 1 pound
– 2 teaspoons fresh rosemary, chopped
– 2 teaspoons fresh thyme, chopped
– 1 teaspoon freshly ground black pepper
– 1 clove garlic, chopped
– 2 tablespoons olive oil
– 1 pound cauliflower, broken into florets
– 1 tablespoon olive oil
– ½ teaspoon kosher salt
and
Roasted Cauliflower
CONVECTION
BEFORE YOU START
If your tenderloin is not injected (most store-bought pork
loins are—the ingredients on the package will list salt or
brine), add 2 teaspoons kosher salt to the to the rub.
PREPARATION METHOD
1. Lay the pork tenderloin on a large plate and pat dry with a paper towel. 2. Combine rosemary, thyme,
pepper, garlic, and olive oil in a small bowl and rub onto the tenderloin. 3. Place tenderloin onto a
baking tray or shallow roasting pan and insert the temperature probe into the thickest part of the meat.
4. In large bowl, toss cauliflower with the olive oil and kosher salt and place on a baking tray lined with
parchment. 5. Place the pork into the oven on rack position “5” and plug the probe into the receptacle.
6. Place the cauliflower into the oven on rack position “2.” 7. Set the oven to 400°F on Convection Mode
and set probe temperature to an alert temperature of 160°F. 8. After the alert temperature is reached,
remove the pork from the oven and allow to rest for 5 minutes. 9. While the pork is resting, continue
cooking the cauliflower, if necessary. 10. Remove the cauliflower from the oven and serve with the pork.
14
15
BEFORE YOU START
Be sure to use cold butter and
do not overwork the dough.
Dark Chocolate
CONVECTION
Orange Scones
Add various substitutions to this
versatile scone base to keep brunch
interesting weekend after weekend.
MAKES RACK POSITION COOK TIME
8 SCONES 3 1618 MINUTES
INGREDIENTS
– 2¼ cups all-purpose flour
– 6 tablespoons granulated sugar
– 1 tablespoon baking powder
– ⁄ teaspoon kosher salt
– ½ cup (1 stick) butter, cold,
cut into ½-inch pieces
– ¾ cup heavy cream
– Zest of 1 large orange
– ½ cup semi-sweet dark
chocolate chips or chunks
ORANGE GLAZE
– 1 tablespoon orange juice
– 1 tablespoon unsalted
butter, melted
– ¾ cup powdered sugar
– Thin with milk if needed
PREPARATION METHOD
1. Preheat the oven to 350°F on Convection Mode with a
rack set on position “3.” 2. Whisk together all the dry ingredients.
3. Mix the butter into the dry ingredients by hand until hazelnut
size pieces are formed. 4. Add in the orange zest and chocolate
chips or chunks, then the heavy cream and mix gently by hand
until the dough comes together. This can also be done in a
stand mixer or food processor, though caution must be taken
not to overwork the dough. 5. Turn out the dough onto a floured
surface, and press out into a 7-inch disk, about 1-inch thick. 6. Cut
disk into 8 pieces. 7. Place on a parchment-lined baking pan and
bake for 16–18 minutes until golden brown around the edges.
FOR THE ORANGE GLAZE
1. Whisk together the orange juice, butter, and powdered sugar.
2. After the scones have cooled completely, drizzle with the icing.
Everything Cookies
For when you don’t know what kind of cookie to make—just add everything.
MAKES RACK POSITION COOK TIME
32 COOKIES 2, 4, AND 6 12 MINUTES
INGREDIENTS
– ¾ cup (1½ sticks) unsalted butter,
room temperature
– ½ cup plus 2 tablespoons firmly
packed brown sugar
– ½ cup granulated sugar
– 2 large eggs
– 1½ teaspoon vanilla
– 1 cup all-purpose flour
– ¾ cup cake flour
– 1 teaspoon kosher salt
– ¾ teaspoon baking soda
– 1 cup semi-sweet chocolate
chips
– 1 cup butterscotch chips
– ¾ cup walnut pieces
– ¾ cup pecan pieces
– ½ cup sweetened shredded coconut
PREPARATION METHOD
1. Preheat the oven to 325°F on Convection Mode with racks set on
positions “2,” “4,” and “6.” 2. In a medium bowl, sift together the allpurpose flour, cake flour, kosher salt, and baking soda. 3. In the bowl
of a stand mixer, cream the butter and sugars on medium speed
for 2 minutes until light and fluy. 4. Add in the eggs one at a time,
mixing on medium speed and scraping bowl after each addition until
well combined. 5. Add the vanilla. 6. Add the sifted dry ingredients
and mix on low speed just until the flour is no longer visible. 7. Stir
in the chocolate, butterscotch, walnut, pecans, and coconut on low
speed until combined. 8. Drop rounded tablespoons of dough—or
use a 1 to 1¼-inch cookie scoop—onto parchment-lined cookie
sheets at least 2-inches apart. 9. Bake for approximately 12 minutes
or until edges are lightly browned and center is set. 10. Remove from
oven and cool on cookie sheets for 5 minutes. 11. After 5 minutes,
slide the parchment paper and cookies o the pan and transfer to
wire racks to cool completely.
16
17
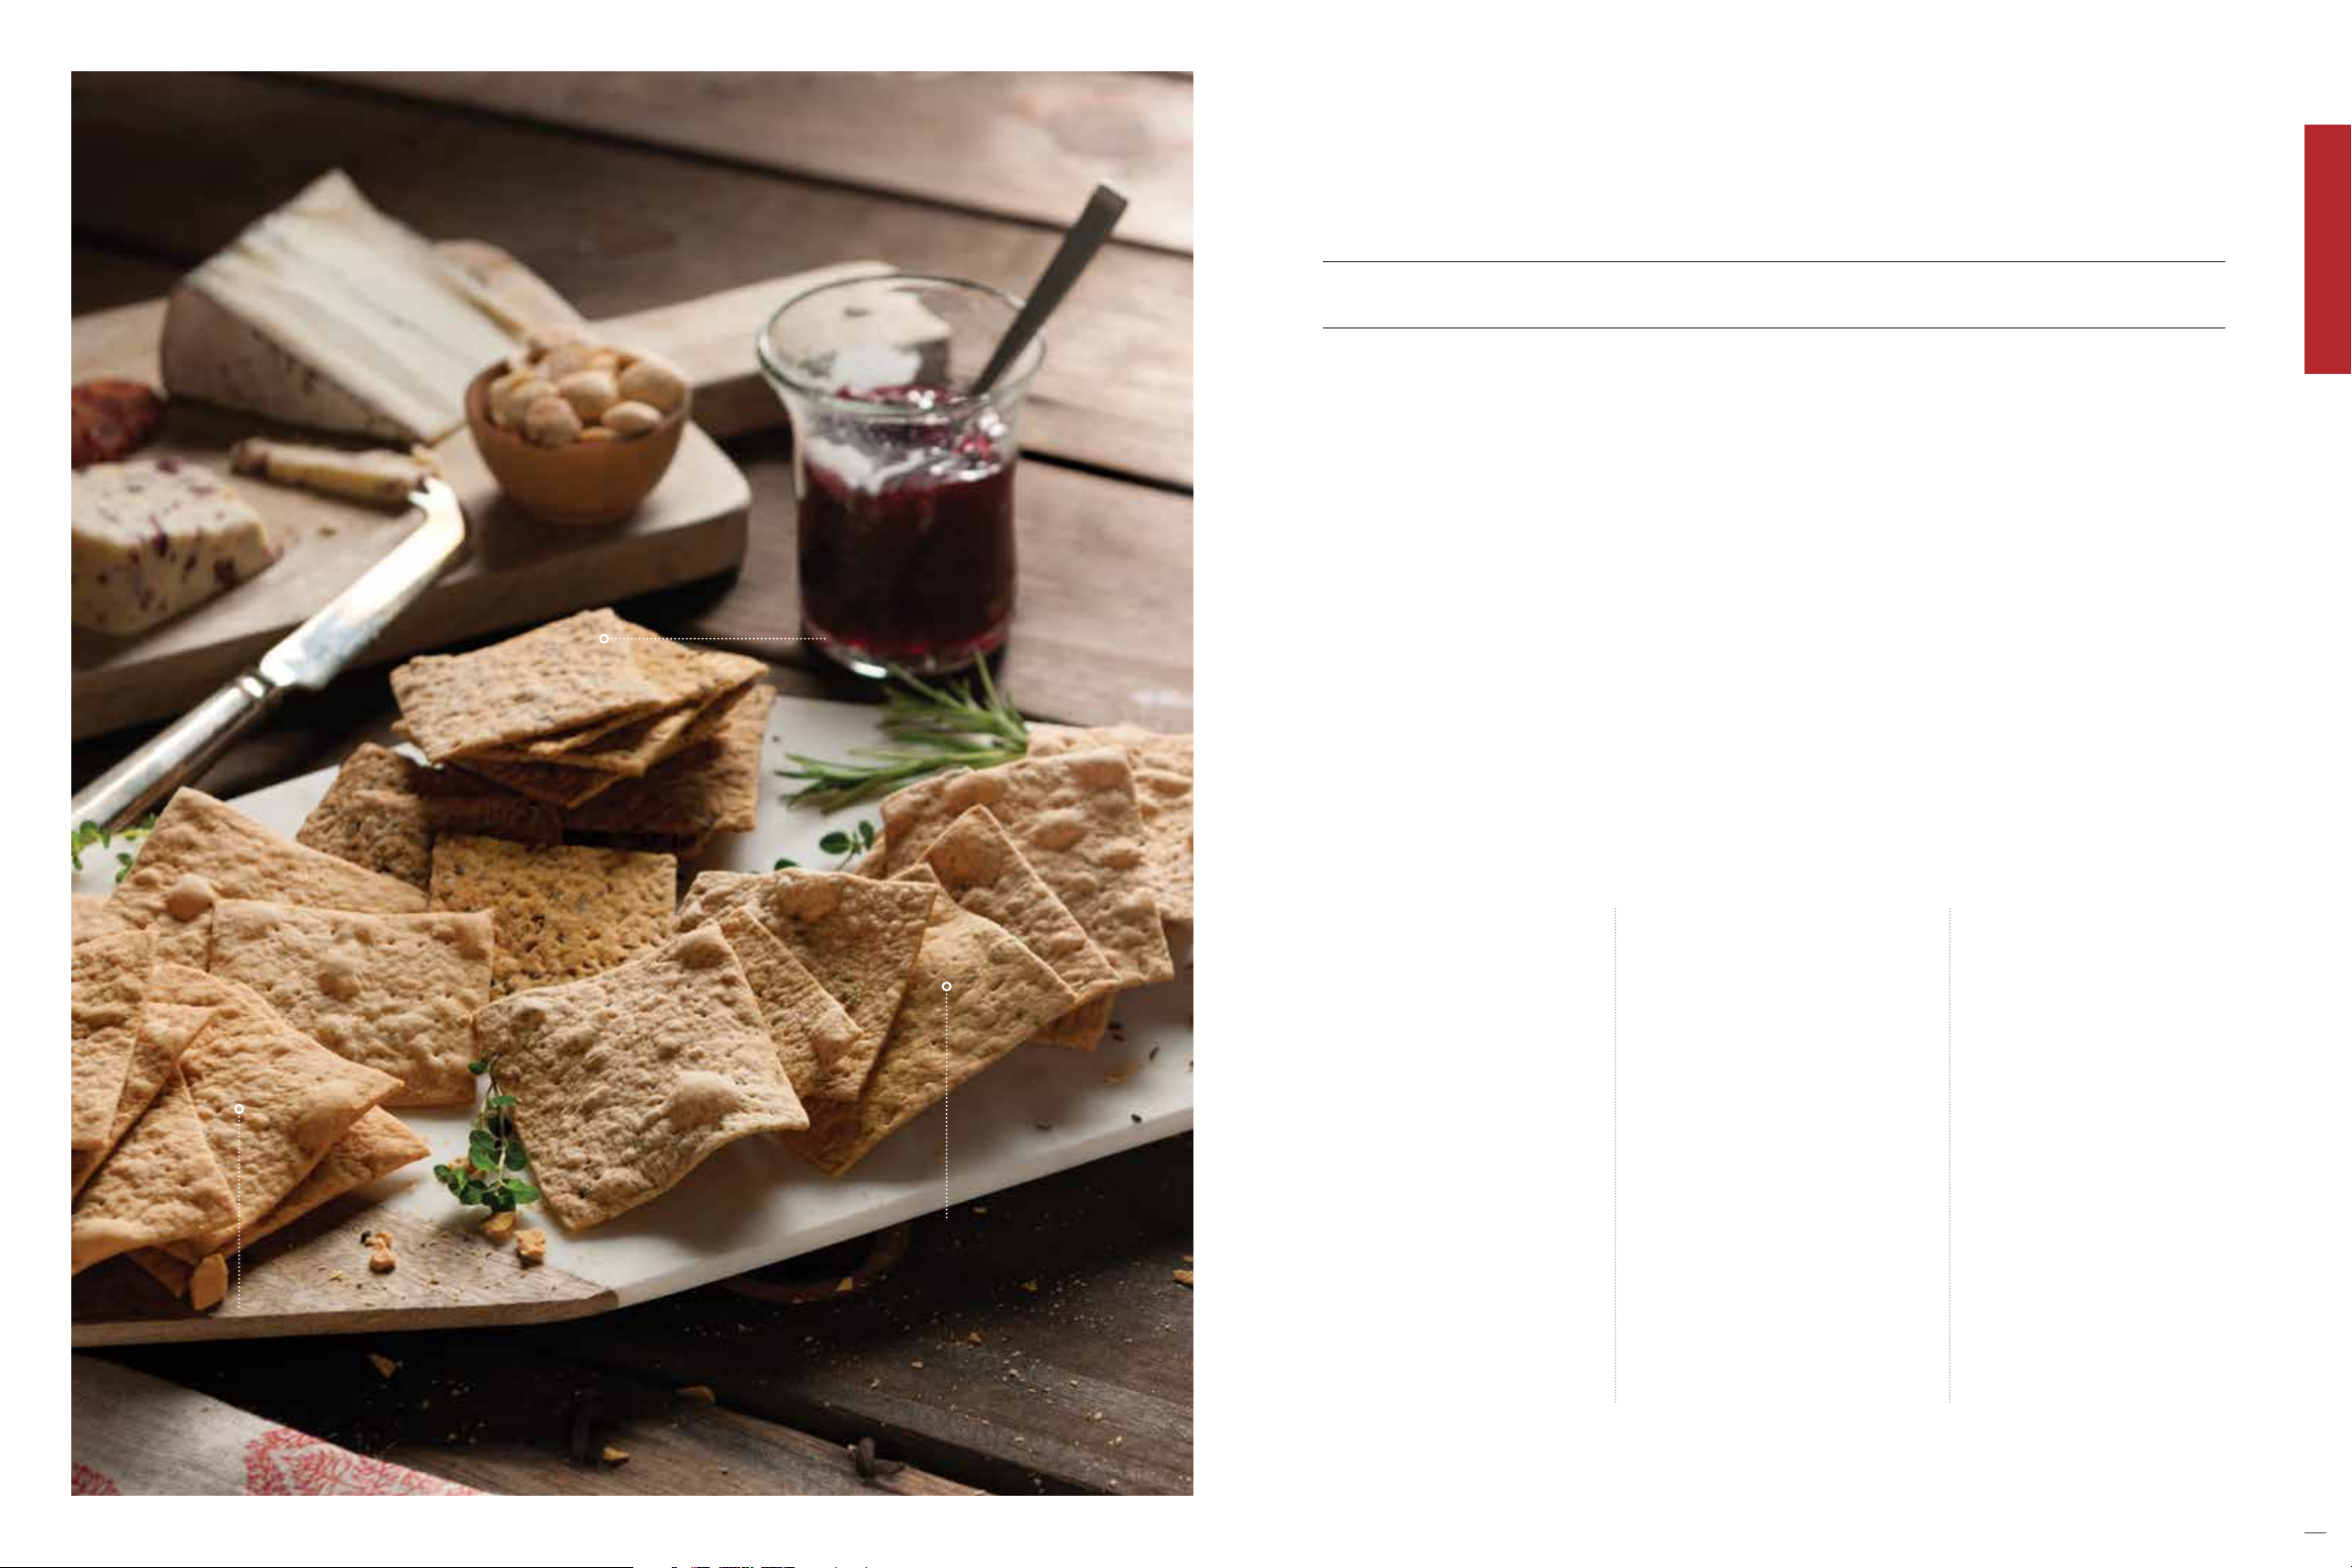
Party Crackers
EVERYTHING
CRACKERS
Easy to make, with almost limitless flavor and topping options, these crackers become a made-fromscratch appetizer that is suitable for cocktail parties year round.
MAKES RACK POSITION COOK TIME
24 CRACKERS 2, 4, AND 6 1214 MINUTE S
INGREDIENTS
– 10 tablespoons all-purpose flour
– ⁄ teaspoon kosher salt
– ⁄ teaspoon freshly ground black pepper
PREPARATION METHOD
1. Preheat oven to 325°F on Convection Mode with racks set on positions “2,” “4,” and “6.” 2. Whisk together the dry
ingredients, then add the oil, mixing until the dough looks like cornmeal. 3. Add in the water and mix by hand until
the dough comes together. 4. Knead the dough a few times on a lightly floured surface until smooth. If needed, add
a few more teaspoons of water, but be careful—the wetter the dough the harder it will be to roll out. 5. Using a rolling
pin, roll the dough until thin enough to fit through a pasta roller at its thickest setting. Roll dough through the pasta
rolle r. 6. Fold the dough into thirds and roll through the pasta roller on the thickest setting a second time. 7. Continue
running the dough through the roller on each setting until setting “6.” Do not let the cracker dough sit uncovered or
it will quickly dry out. 8. Transfer the sheet of dough to a parchment-lined baking pan. 9. Cut the dough into 3-by-3
inch squares (or other desired size), and pierce with a fork in several places. 10. Brush with olive oil, sprinkle lightly with
kosher salt and bake for 12–14 minutes, until crisp and golden brown on the edges.
– 1 tablespoon olive oil
– 3 tablespoons warm water
CONVECTION
WHEAT AND HERB
CRACKERS
RYE CRACKERS
WHEAT AND HERB CRACKERS
– 5 tablespoons all-purpose
flour
– 5 tablespoons whole wheat
flour
– 1 teaspoon fresh rosemary,
finely chopped
– 1 teaspoon fresh thyme,
finely chopped
– ¼ teaspoon garlic powder
– ½ teaspoon salt
– ⁄ teaspoon freshly ground
black pepper
– 1 tablespoon olive oil
– 3 tablespoons warm water
Mix herbs and garlic powder
in with the flours and follow
the preparation method above.
RYE CRACKERS
– 8 tablespoons
all-purpose flour
– 2 tablespoons rye
flour
– 2 teaspoons caraway
seeds, finely ground
– ½ teaspoon kosher salt
– ⁄ teaspoon freshly
ground black pepper
– 1 tablespoon olive oil
– 3 tablespoons warm water
Add the ground caraway to the
dry ingredients and follow the
preparation method above.
Caraway seeds, if desired, can be
rolled into the dough as well.
EVERYTHING CRACKERS
Once the white cracker dough is
made, roll out with rolling pin and
sprinkle with assorted seeds and
dry seasonings, such as poppy
seeds, white and black sesame
seeds, granulated garlic, and dried
onion. Press the seeds into the
dough, fold into thirds and run
through the pasta roller on the
thickest setting. Continue to roll
through the settings to number
“6.” Then continue with step 8 of
the preparation method above.
18
19
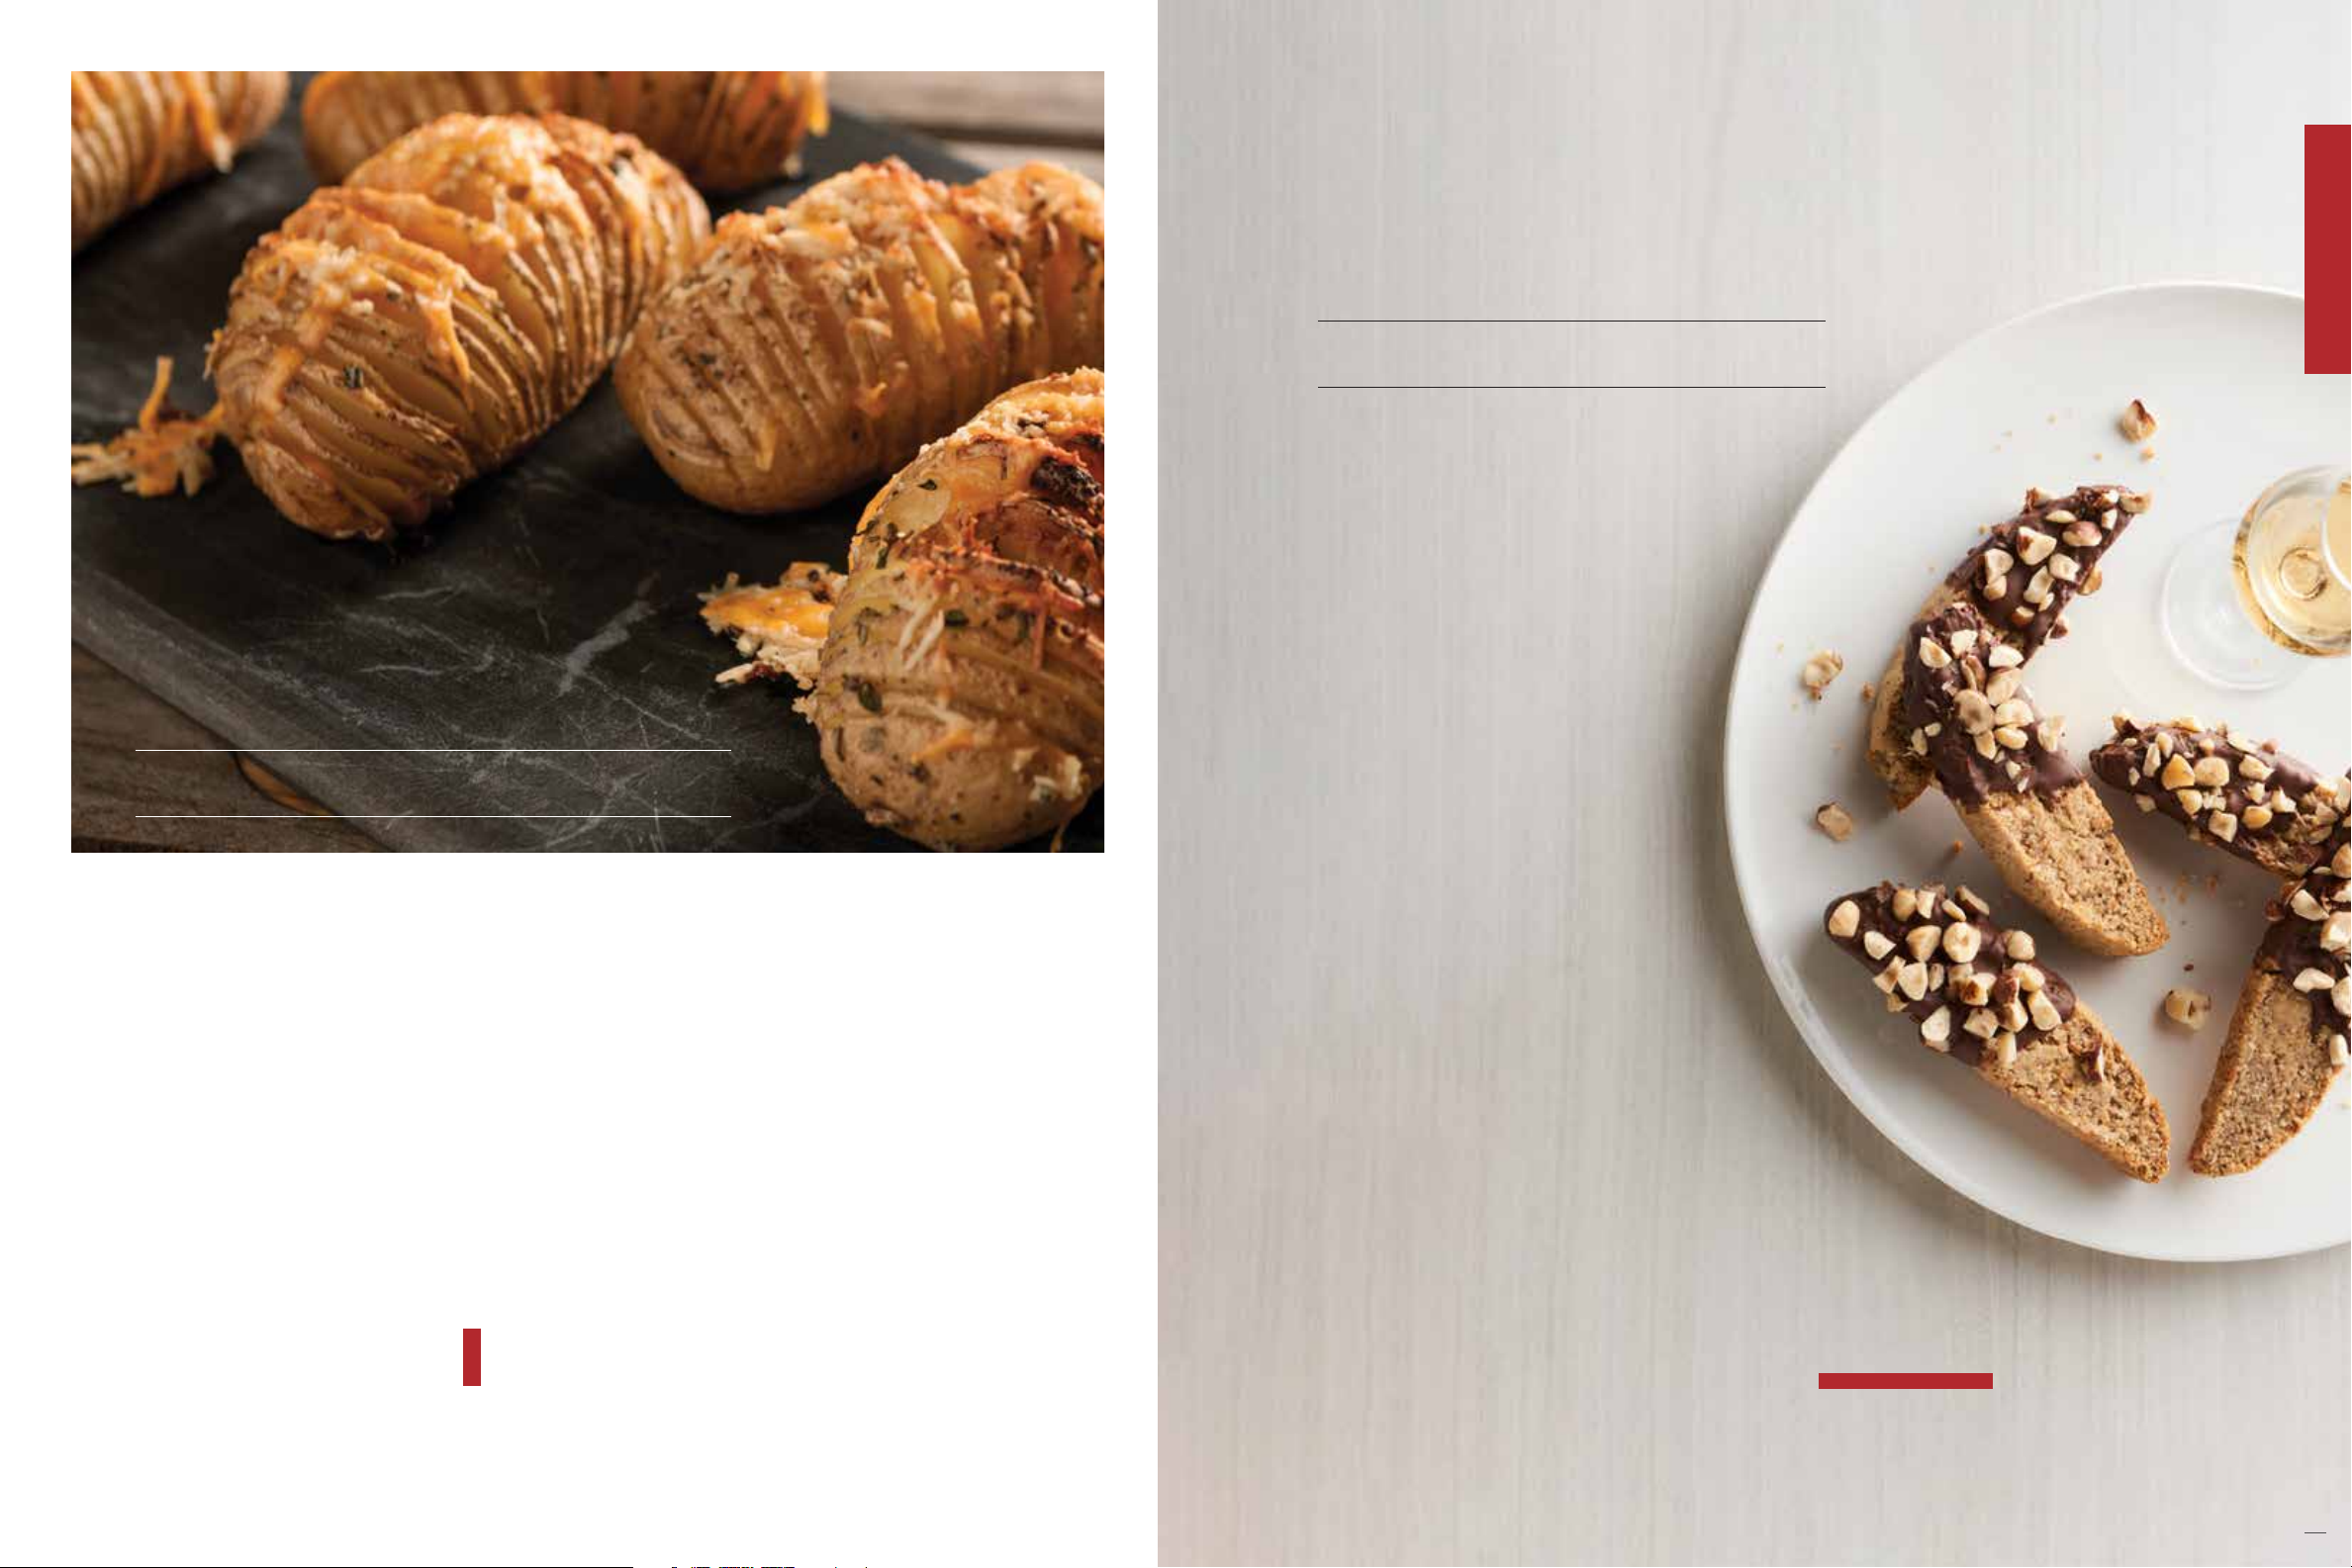
Hasselback Potatoes
Named for the Stockholm restaurant Hasselbacken where it
was first served, this dish is a dierent take on a baked potato.
Hazelnut Biscotti
Enjoy as a snack on their own or with a cup of coee.
The nutty flavor lends itself well to being dipped in
chocolate and served as a dessert..
MAKES RACK POSITION COOK TIME
10 BISCOT TI 3 45 MINUTES
INGREDIENTS
– 1 cup hazelnuts
– 1 cup all-purpose flour
– ½ teaspoon baking
powder
– ½ teaspoon kosher salt
– ½ cup (1 stick)
unsalted butter, cubed
– ⁄ cup granulated sugar
– 1 large egg
– 1 teaspoon vanilla extract
CONVECTION
MAKES RACK POSITION COOK TIME
8 SERVINGS 3 1 HOUR 15 MINUTES
INGREDIENTS
– 8 medium Yukon gold
potatoes, about 7 ounces
each
– 1 tablespoon
fresh rosemary, finely
chopped
– 1 tablespoon
fresh thyme, finely chopped
– 4 tablespoons unsalted butter
– 2 tablespoons olive oil
– 1 teaspoon kosher salt
– ¼ teaspoon freshly
ground black pepper
– ½ teaspoon garlic powder
– ½ teaspoon onion powder
– ¾ cup Parmesan cheese,
grated or shaved
– ¾ cup cheddar cheese,
shredded
PREPARATION METHOD
1. Preheat oven to 400°F on Convection Mode with a rack set on position
“3.” 2. Melt butter in a sauce pan and add oil, herbs, and other seasonings.
3. To cut the potatoes—place the potato on the counter between two
cutting boards of the same thickness, about ¼ to ½-inch thick. Two pieces
of cardboard or chopsticks can also be used. 4. Cut across the width of the
potato every ¼-inch from end to end. Ensure that you do not cut completely
through the potatoes to keep the bottom of the potato intact. 5. Gently toss
the potatoes with the butter mixture in a large bowl to coat. 6. Place potatoes
in a 9-by-13 inch baking dish and into the oven. As the potatoes bake, the
slices will begin to open up. 7. Bake for 1 hour and then add the cheese on top.
Try to sprinkle it between the slices as well as on top of the potatoes. 8. Bake
for an additional 8–10 minutes until the cheese is melted and golden brown.
BEFORE YOU START
Make sure not to slice the potato all the way through.
PREPARATION METHOD
1. Preheat the oven to 350°F on
Convection Mode with a rack set on
position “3.” 2. Pulse the hazelnuts in a
food processor just until finely ground.
3. Add the flour, sugar, kosher salt,
baking powder, and butter, and pulse to
a coarse crumble. 4. Add the egg and
vanilla and pulse until a soft dough is
formed. 5. Divide the dough and roll out
into two short logs. 6. Flatten one log
until it is about 5-inches in width. 7. Place
on a parchment-lined pan and bake for
15 minutes. 8. Remove from the oven
and allow to cool. 9. Reduce the oven
temperature to 300°F. 10. Slice the logs
into ½-inch thick pieces and place onto
the baking pan, cut side down. 11. Return
to the oven and bake for 15 minutes.
12. After 15 minutes, turn the biscotti
over and bake for another 15 minutes.
13. Cool on a wire rack before serving.
BEFORE YOU START
As with all biscotti recipes, remember that
these too will need to be baked twice.
20
21
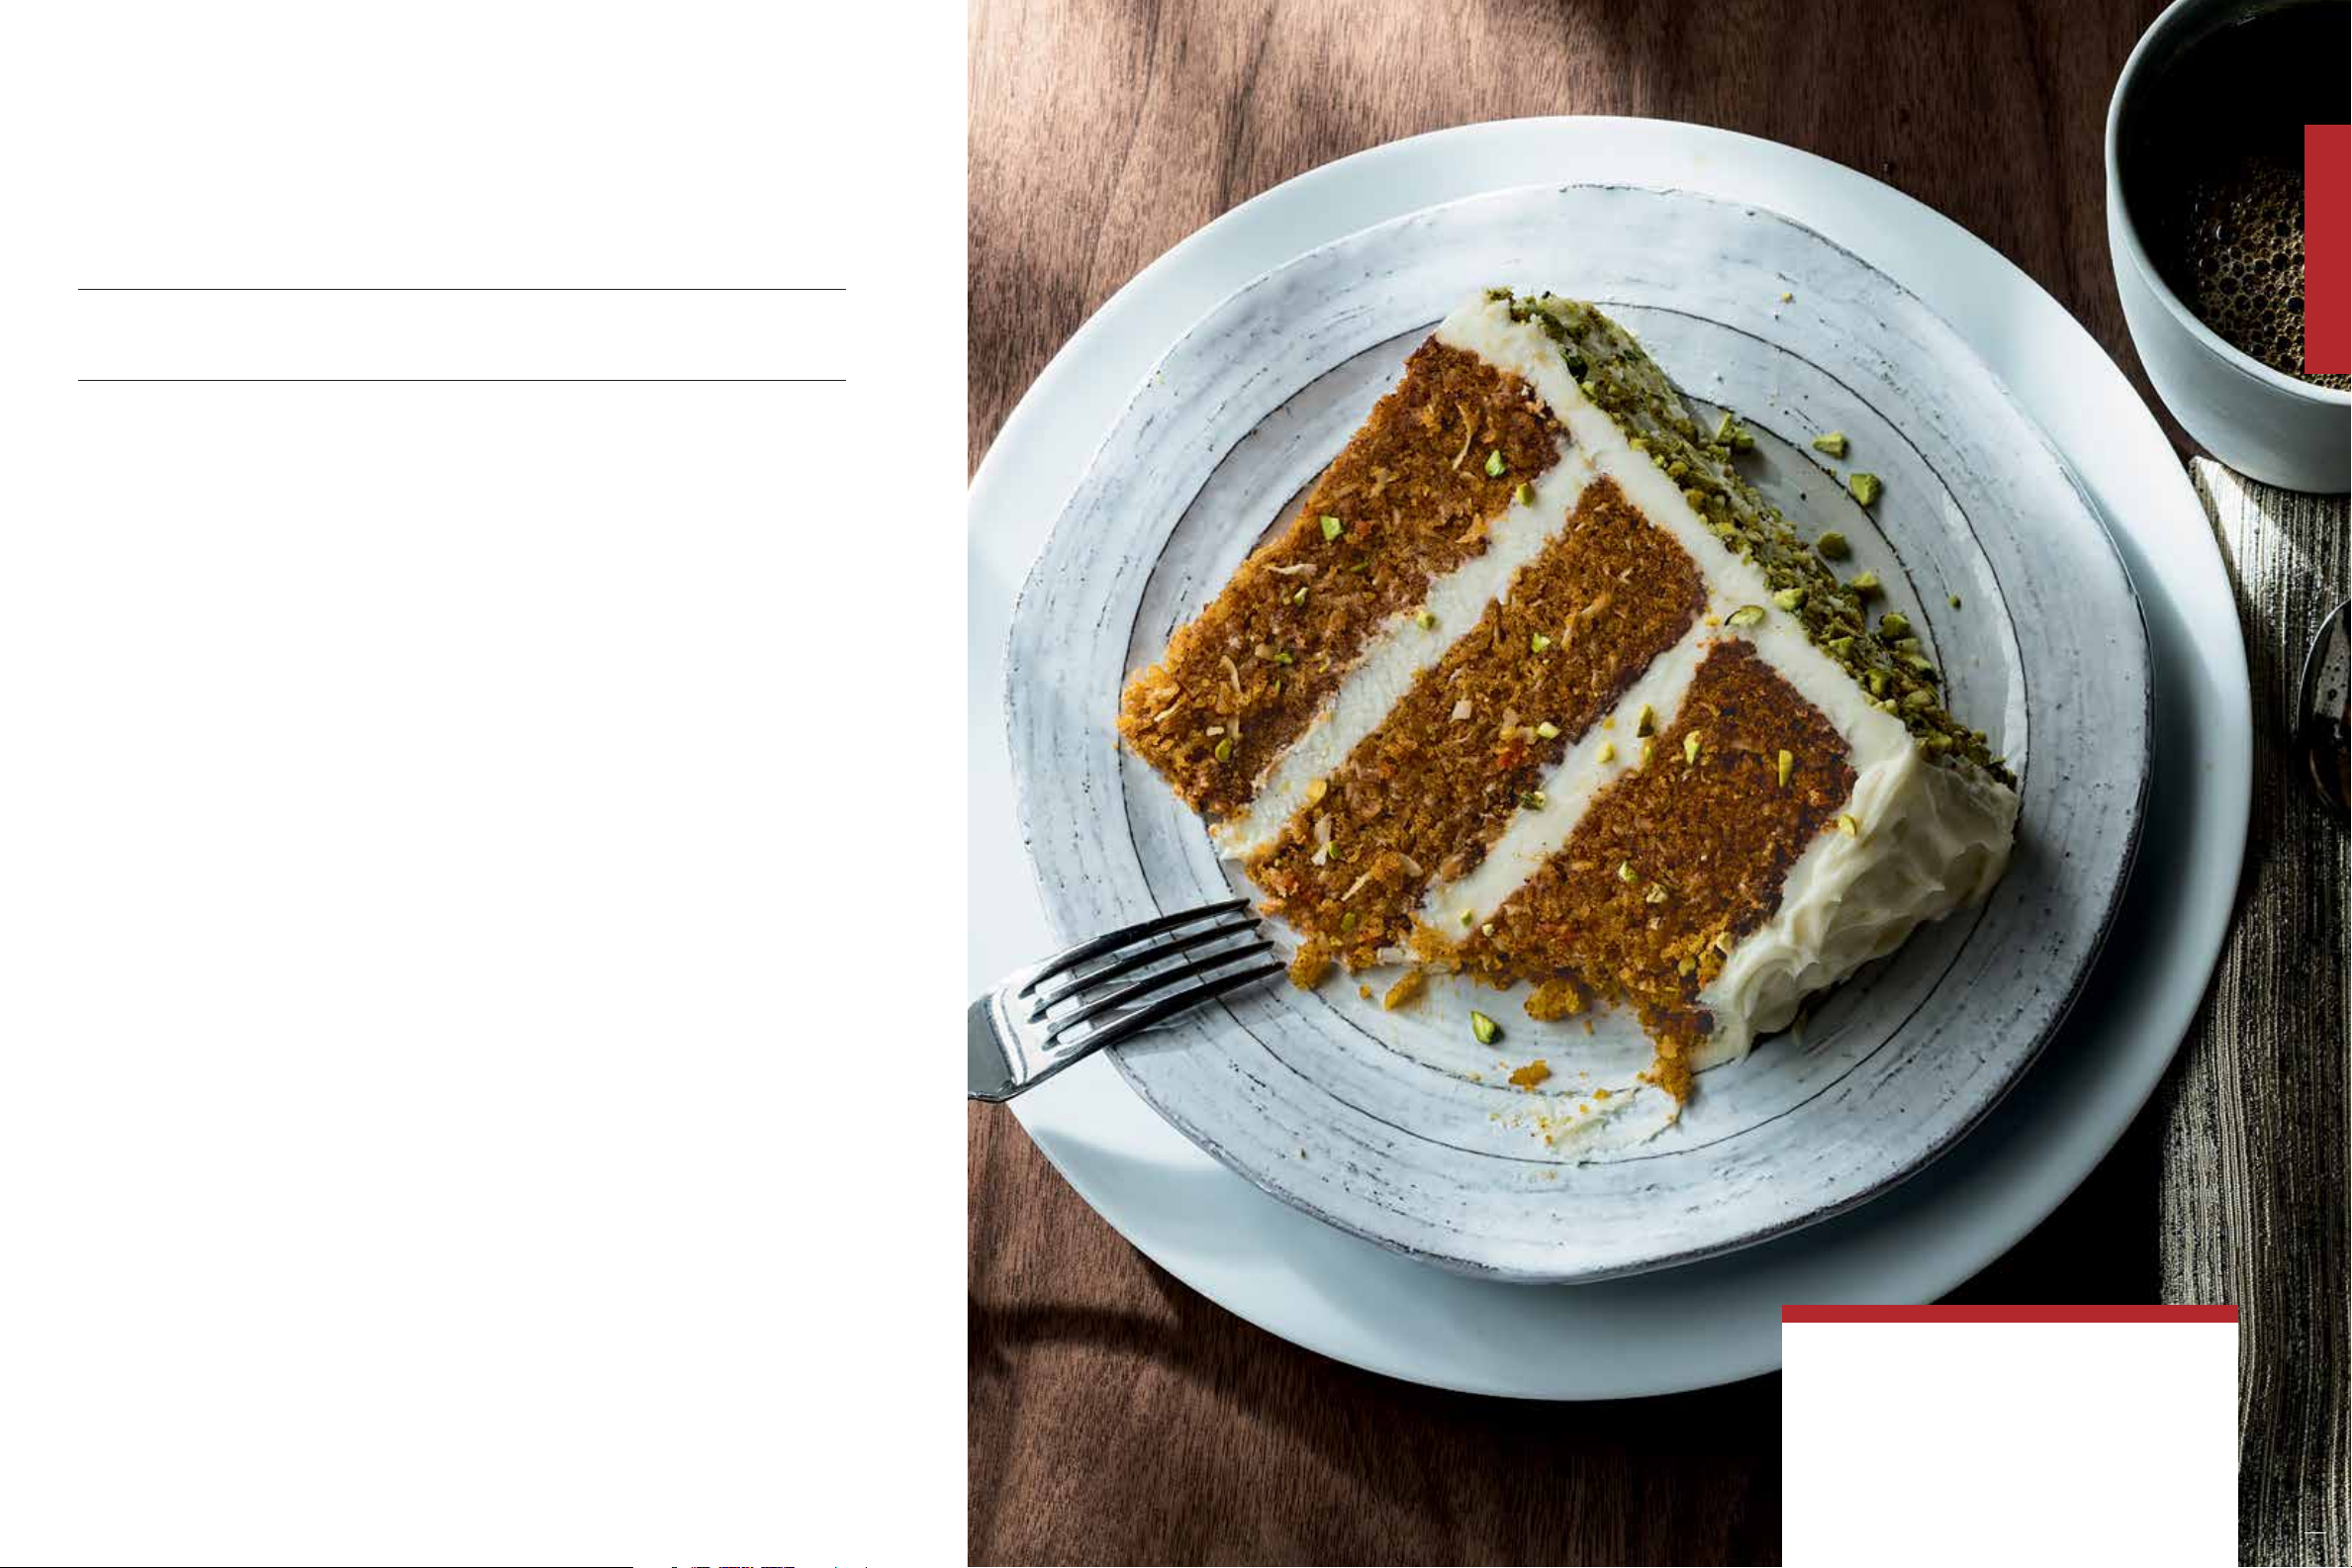
Pistachio Carrot Cake
This three-layer carrot cake is as gorgeous as it is decadent.
MAKES RACK POSITION COOK TIME
ONE 8INCH TRIPLE
LAYER CAKE
2 AND 4 30 MINUTES
CONVECTION
INGREDIENTS
FOR THE CAKE
– 1¾ cups plus 2 tablespoons
(3¾ sticks) unsalted butter,
room temperature
– 3 cups firmly packed brown
sugar
– 1½ teaspoons kosher
salt
– 1½ teaspoons vanilla
– 6 large eggs
– 3¾ cups all-purpose flour
– 4½ teaspoons baking powder
– 1 teaspoon cinnamon
– 4½ cups carrots, finely grated
– 1½ cup pistachios, toasted,
cooled, and finely ground
FOR THE ICING
– 36 ounces cream cheese
– 2¼ cups butter (4½
sticks),
room temperature
– 4½ cups powdered sugar
– 1 teaspoon vanilla extract
– 2 cups pistachios,
toasted, cooled, and
roughly chopped
PREPARATION METHOD
FOR THE CAKE
1. Preheat the oven to 325°F on Convection Mode with
racks set on positions “2” and “4.” 2. Spray three 8-inch
round cake pans with nonstick cooking spray and line
the bottoms with a circle of parchment paper slightly
smaller than the inside of the pan. The pans could also
be buttered and lightly floured. 3. In a medium bowl,
sift together the flour, baking powder, and cinnamon.
4. In the bowl of a stand mixer, cream together the
butter, sugar, kosher salt, and vanilla on medium speed
for two minutes. 5. Add the eggs one at a time, mixing
well and scraping the bowl between each addition.
6. Add in the flour mixture and mix until just combined.
7. Fold in the carrots and pistachios. 8. Divide the batter
evenly between the prepared cake pans. 9. Bake for 30
minutes or until the center is set and springs back and a
toothpick comes out clean. 10. Cool cakes completely.
11. If needed, use a serrated knife to level o the tops
of the cakes so they are easier to stack and ice.
FOR THE ICING
1. Cream together the cream cheese and butter on
medium speed until smooth—about 2 minutes. 2. Add
in the powdered sugar and vanilla and mix together
until smooth. 3. Place the first cake layer on the platter
it will be served on, and spread a layer of icing ½-inch
thick on top of it. 4. Place the next cake layer on top of
the icing and spread with another layer of icing ½-inch
thick. 5. Place the top layer on and refrigerate for 15–20
minutes to help firm up the icing. 6. Remove from the
refrigerator and ice the top and side of the cake with
remaining icing. 7. Press the pistachios onto the side
of the cake. 8. Refrigerate the cake until the icing has
firmed up. 9. Serve or cover it with plastic wrap.
BEFORE YOU START
Roasting nuts helps to bring out their flavor,
as the oils in the nut become more pronounced.
Grinding or chopping them very fine gives a
better texture to your cake. Also, shredded carrots
can be purchased for this recipe but make sure to
chop them smaller for a finer texture in your cake.
22
23
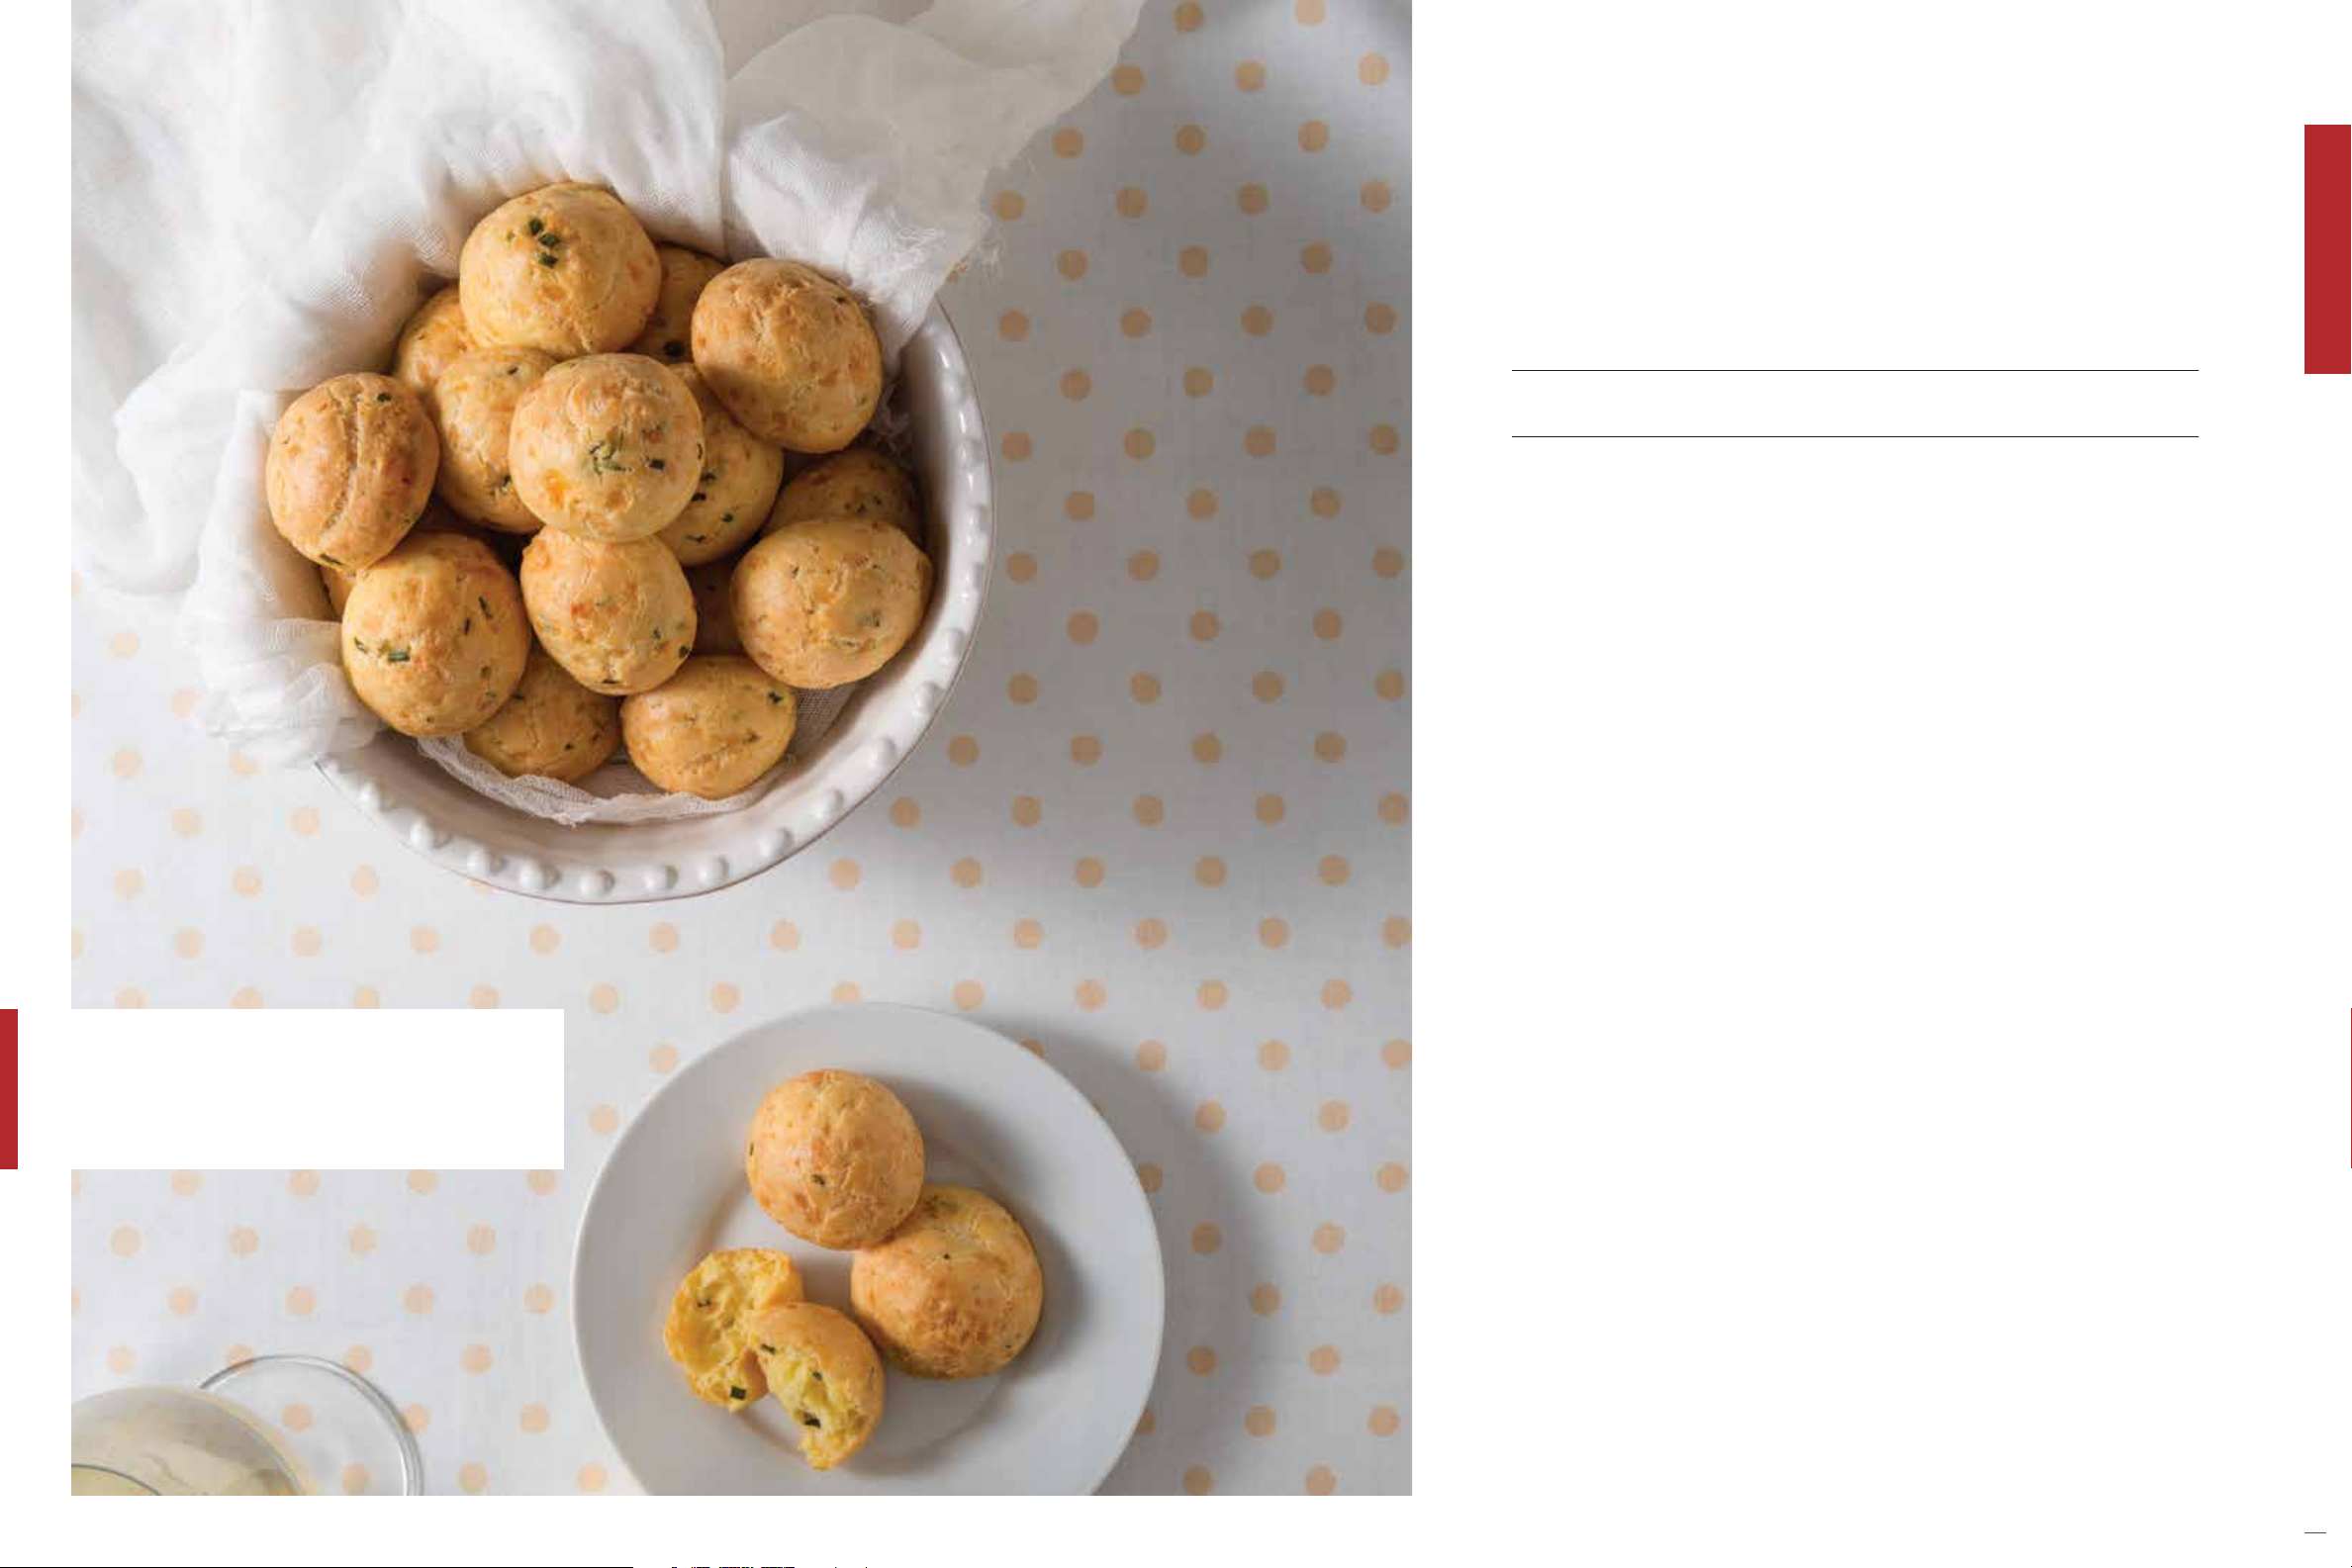
Gougères
Gougères (pronounced goo/zhehrs) can be enjoyed as is or cut open and filled.
In France, gougères are often served cold when tasting wine or served warm as
appetizers. This recipe can also be used as a base to make cream pus and éclairs
as well. Simply omit the cheese and herbs, bake, cool, and fill with sweet whipped
cream or vanilla custard.
MAKES RACK POSITION COOK TIME
24 2INCH GOUGÈRES 2 AND 4 2025 MINUTES
CONVECTION
BEFORE YOU START
To achieve consistent size, use a portion scoop or a pastry
bag. If using the piping method, use a pencil to trace circles
on the back side of your parchment paper to be your guide.
INGREDIENTS
– 1 cup water
– ½ cup (1 stick)
unsalted butter
– 1 cup all-purpose flour
– 4 large eggs
– ¾ cup sharp cheddar
cheese, grated
– ¾ cup Asiago cheese,
grated
– 2 tablespoons fresh
chives, minced
– 1 tablespoon
fresh thyme, chopped
PREPARATION METHOD
1. Preheat the oven to 375°F on Convection
Mode with racks set on positions “2” and “4.”
2. In a large sauce pan over medium-high
heat, bring the water and butter to a boil.
3. Stir in the flour with a wooden spoon
and mix until the mixture forms a dough.
4. Continually stir and cook over mediumlow heat for 2–3 minutes. 5. Remove from
heat and continue to stir the mixture until it
cools down and it stops steaming. The ideal
temperature is 140°F, if using a thermometer.
6. By hand or in the bowl of a stand mixer,
add in the eggs one at a time, beating well.
Wait between each addition to make sure
the egg is completely mixed in. The dough
should be very smooth and glossy. 7. Mix
in the cheese and herbs, then transfer the
mixture to a large pastry bag fitted with a
large round tip. 8. On a parchment-lined
baking tray, pipe a 2-inch gougere or use
a cookie scoop. 9. Wet the tip of your
finger and smooth out the tops of each
gougere to remove any points. 10. Bake
for approximately 20–25 minutes or until
golden brown with a crisp outside. 11. Cool
completely before cutting or serving.
24
25
Bake Mode
GENTLE BAKING HEAT FROM THE BOTTOM UP
This is the traditional kind of baking and cooking that you are probably familiar with.
While Bake Mode isn’t as proficient at multi-rack cooking as Convection Mode, it
delivers the proper environment to help quiches, custards, quick breads, and cakes
stay moist and bake evenly. Gentle heat from the bake element and just a touch
of browning from the broiler is the right combination. Our chefs suggest to first
use Convection Mode to quickly and uniformly preheat the oven, then bake using
BAKE
the racks in the lower half of the oven. The lower you place the food, the more the
bottom will brown. Enjoy the consistent results of this tried-and-true baking method.
BAKE MODE REVIEW
– Single-rack cooking
– Provides heat that preserves moisture
and prevents overbrowning
– Best for delicate items like custards,
quiches, and cakes
– Temperature probe may be used
26
27

Chocolate
Parmesan Garlic Beer Bread
Ready to serve in just over an hour, this savory quick bread is
an easy addition to your baking repertoire. The garlic, Parmesan
cheese, and rosemary can all be substituted for other add-ins,
and dierent varieties of beer will provide distinct flavor and color.
MAKES RACK POSITION COOK TIME
1 LOAF 9 X 5 PAN 3 5560 MINUTES
INGREDIENTS
– 3 cups all-purpose flour
– 3 teaspoons baking powder
– 1 teaspoon salt
– ¼ cup sugar
– 4 cloves garlic, peeled
and chopped
PREPARATION METHOD
1. Preheat oven to 375°F on the Bake Mode with a rack set on position
“3.” 2. Spray a 9-by-5 inch loaf pan with nonstick cooking spray.
3. Add all the ingredients, except the beer and melted butter, into a
medium-sized bowl. 4. Whisk together to combine. 5. Slowly pour the
beer into the dry ingredients. 6. Fold together with a spoon or rubber
scraper until the mixture is thoroughly combined and all the beer has
been absorbed. 7. Spoon the mixture into the greased loaf pan and spread
evenly. 8. Pour the melted butter over the top of the dough. 9. Place the
pan into the oven and bake for 55-60 minutes or until a toothpick comes
out clean. Allow to cool for 10 minutes before serving warm.
– ¼ cup grated
Parmesan cheese
– 1 tablespoon fresh
rosemary, finely chopped
– 12 ounces of beer
– ¼ cup unsalted
butter, melted
Pot de Crème
A rich and creamy chocolate custard is
a memorable ending to any meal.
MAKES RACK POSITION COOK TIME
FOUR 8OUNCE CUPS 3 3035 MINUTES
INGREDIENTS
– ¾ cup heavy cream
– ¾ cup whole milk
– 3 large egg yolks
– 6 ounces Ghirardelli®
semi-sweet chocolate bars
(one and a half 4-ounce
bars)
– 2 tablespoons granulated
sugar
– ½ teaspoon vanilla extract
– ⁄ teaspoon kosher salt
PREPARATION METHOD
1. Preheat the oven to 300°F on Bake Mode with a rack
set on position “3.” 2. Break the chocolate into small
pieces. 3. In a small saucepan over medium heat, bring
the cream and milk to a simmer. 4. Remove the pan from
the heat, add the chocolate pieces and let stand for 5
minutes. 5. In a large bowl whisk together yolks, vanilla,
sugar, and kosher salt. 6. With a whisk, gently stir the
chocolate mixture until smooth. 7. Gradually add the
chocolate mixture to egg yolk mixture, whisking as you
do so. 8. Strain the final mixture through a fine sieve. 9.
Place four 8-ounce custard cups or ramekins in a shallow
roasting pan or 9-by-13 inch baking dish. 10. Divide the
chocolate custard evenly among them. 11. Pour hot water
into the pan so it reaches halfway up the sides of cups
and carefully place in the oven. 12. Bake until the custards
are almost set in the center—about 30–35 minutes.
13. Remove the baking dish from the oven and allow
the cups to sit 10–15 minutes in the water bath.
14. Remove from the water bath and refrigerate until
chilled. Serve with whipped cream and fresh berries,
or with a sprinkle of sea salt.
BAKE
BEFORE YOU START
A hot water bath is necessary when baking
custards—it prevents cracking and drying out and
helps regulate the temperature during the baking.
28
29

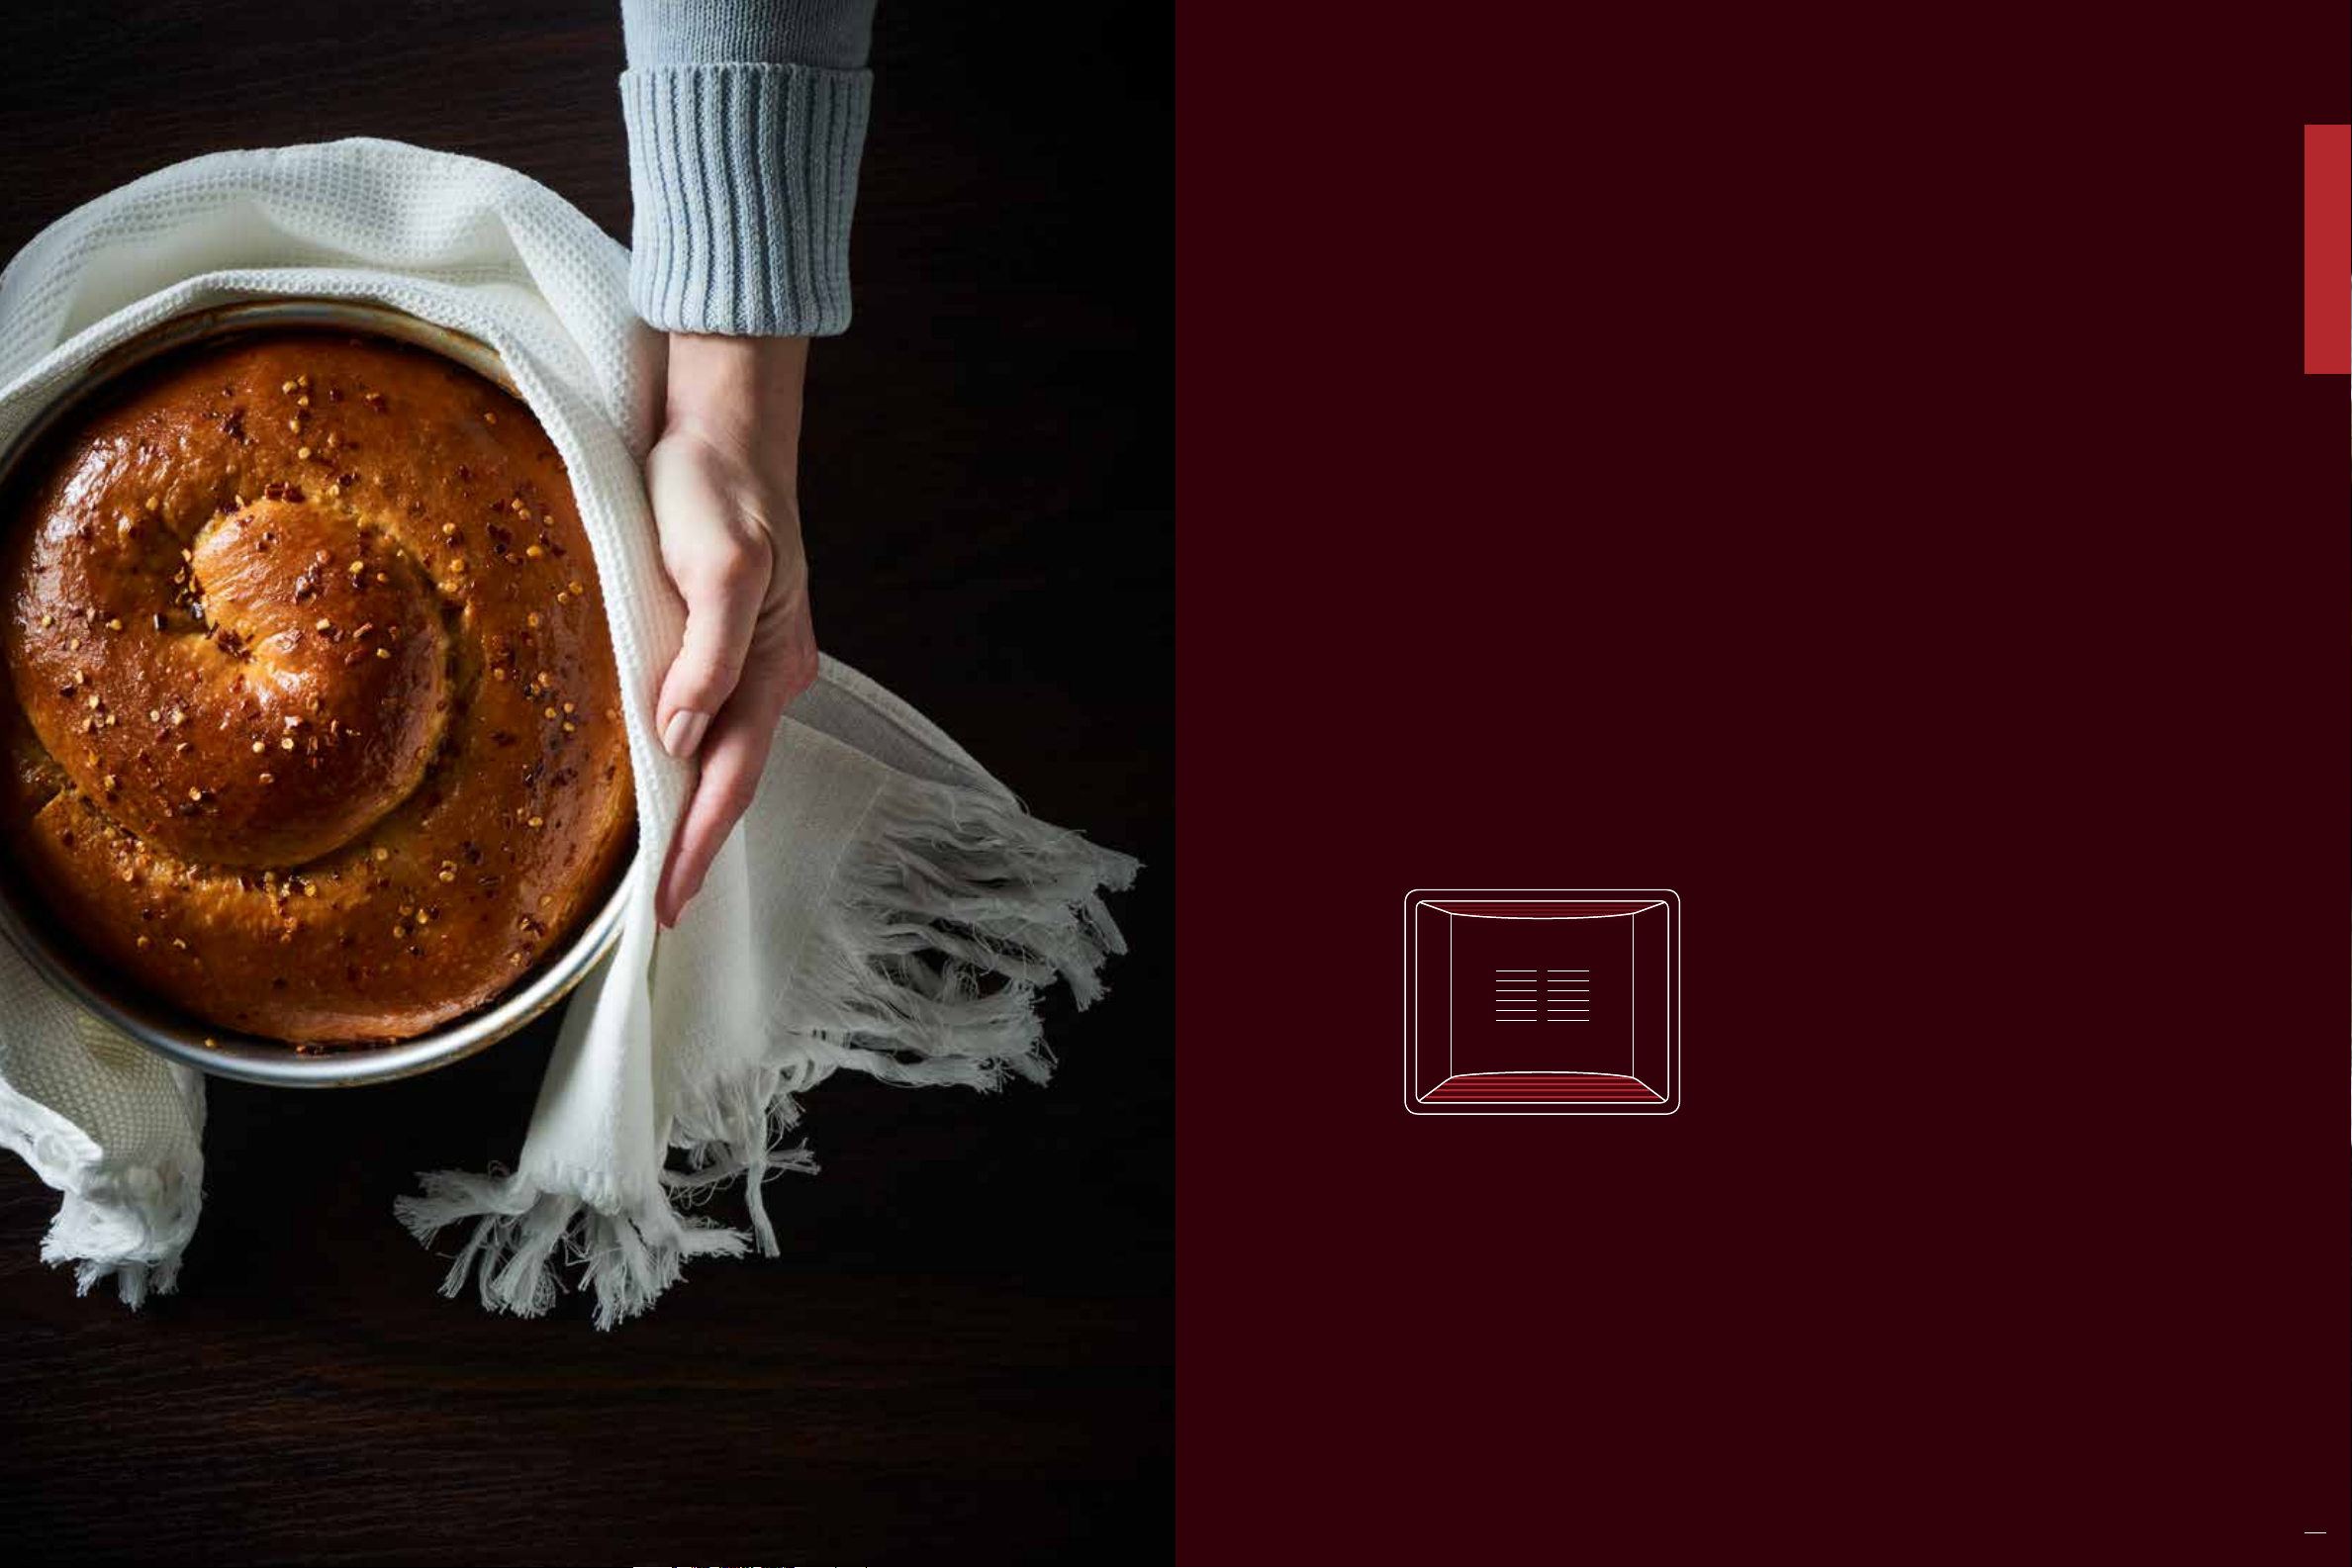
Spicy Cheese Bread
This spicy cheese bread, with its soft and chewy texture, is a delicious flavor-filled pairing of
two cheeses and red pepper flakes.
MAKES RACK POSITION COOK TIME
1 LOAF 3 5055 MINUTES
BAKE
INGREDIENTS
FOR THE BREAD
– 3¼ cups all-purpose flour
– ¼ cup granulated sugar
– 1 tablespoon instant yeast
– 1½ teaspoons red pepper
flakes
– 1¼ teaspoons salt
– ½ cup warm water
– 2 eggs
– 1 egg yolk
– 4 tablespoons unsalted butter,
melted
– 6 ounces Monterey Jack
cheese cut into ½-inch cubes
(about 1½ cups), at room
temperature
– 6 ounces provolone cheese
cut into ½-inch cubes
(about 1½ cups), at room
temperature
FOR THE TOPPING
– 1 egg, lightly beaten
– 1 teaspoon red pepper flakes
– 1 tablespoon unsalted butter,
at room temperature
PREPARATION METHOD
1. In the bowl of a stand mixer, whisk together the flour,
sugar, yeast, red pepper flakes, and salt. 2. In a separate bowl,
whisk together the water, eggs, egg yolk, and melted butter.
Add the wet ingredients to flour mixture. 3. Using a dough
hook, knead on medium-low speed until the dough pulls
away from the bottom of the bowl, about 5 to 7 minutes.
4. Form the dough into a ball and transfer to a lightly
greased, medium-sized bowl. Cover the bowl with plastic
wrap and allow to rise until doubled in size, about 2 hours.
5. Grease a 9-inch round cake or springform pan and set
aside. 6. Transfer the dough to the countertop. Roll the
dough into an 18-by-12-inch rectangle with the long side
parallel to the counter’s edge. 7. Sprinkle the cubed cheese
evenly over the surface of the dough, leaving a 1-inch border
around the edges. 8. Beginning with the edge nearest to
you, roll the dough into a log. Roll the log back and forth,
applying gentle pressure, until it reaches about 30 inches in
length. 9. Starting at one end, coil the dough and tuck the
end underneath the coil. 10. Place the coiled loaf into the
greased pan and cover with plastic wrap. Allow to rise in until
doubled in size, 1½ to 2 hours. 11. Preheat the oven to 350°F
on Bake Mode with a rack set on position “3.” 12. After the
dough has doubled in size, brush the top of the loaf with the
beaten egg and sprinkle with red pepper flakes. Place the pan
into the oven and bake until the loaf is golden brown, about
25 minutes. 13. After 25 minutes, form a tent with tinfoil and
place it over the loaf. Bake for an additional 25-30 minutes.
14. Remove the pan from the oven and onto a wire rack.
Brush the loaf with the softened butter while it is still warm.
Allow the bread to cool for 10-15 minutes before running a
knife around the edge and turning the loaf out the wire rack.
Allow the loaf to cool for an additional 30-40 minutes
before serving warm.
BEFORE YOU START
Proofing bread dough is a very important step in making bread. It gives the yeast a
chance to grow and provides volume and flavor to the dough. Test your yeast to ensure
it is still alive and active—if the yeast does not begin to bubble or foam when mixed
with water, you may need to purchase new yeast.
The bread is done when it reaches an internal temperature of 200°F. Use the
temperature probe or a digital thermometer to evaluate doneness.
Optionally, this dough can be made in advance, proofed in your refrigerator overnight
(8–12 hours). If you choose to make it early, skip ahead to filling and rounding the
dough by removing the dough from the refrigerator and letting it come to room
temperature, then pressing it out to fill. Proceed with the recipe directions.
Using your oven’s Proof Mode, or a Wolf warming drawer, you can proof the dough at
85°F for the same amount of time.
30
31

Cinnamon Chocolate Chip
Banana Bread
Banana bread is a favorite snack adults and kids alike, and an ecient use for
overripe bananas. Adding cinnamon and chocolate chips gives this classic a
deliciously unique twist.
MAKES RACK POSITION COOK TIME
3 MINI LOAVES 3 4045 MINUTES
BAKE
INGREDIENTS
– 3 large, ripe bananas
– ⁄ cup unsalted butter, melted
– ⁄ cup light brown sugar, firmly
packed
– 1 large egg
– 1 teaspoon vanilla extract
– 1 teaspoon baking soda
– ⁄ teaspoon kosher salt
– 1 ¼ cups all-purpose flour
– ⁄ teaspoon ground cinnamon
– ⁄ cup cocoa powder
– ⁄ cup chocolate chips
PREPARATION METHOD
1. Preheat oven to 350°F on the Bake
Mode with a rack set on position “3.”
2. Spray a 9-by-5 inch loaf pan with
nonstick cooking spray. 3. In medium
bowl, mash the bananas until smooth.
Add the melted butter and stir to
combine. 4. Add the brown sugar, egg,
vanilla, baking soda, and salt and whisk
until well combined. 5. Add 1 cup of the
flour, stirring gently until the flour just
disappears. 6. Pour half of the batter
into a second bowl. 7. In one bowl of
batter, add the remaining 1/4 cup of
flour and cinnamon. Stir to combine. In
the other bowl of batter, add the cocoa
powder and chocolate chips. Stir to
combine. 8. Alternating between the
two bowls, add spoonfuls of the batters
into the 9-by-5 inch pan. 9. Using a
butter knife, make a few figure-eights
through the combined batters to marble
them. 10. Place the loaf pan into the
oven and bake 55-65 minutes, until a
toothpick inserted into the center of
the loaf comes out clean. Allow the pan
to cool for 10 minutes. After cooling,
run a knife around the edge of the
pan and invert the loaf onto a cooling
rack. Allow to cool before serving.
32
33

Focaccia Bread
Wonderful on its own and equally delicious for sandwiches or paninis,
this bread may find its way into almost any meal.
MAKES RACK POSITION COOK TIME
1 LOAF 3 3545 MINUTES
BAKE
INGREDIENTS
– 1½ cup warm water,
90-95°F
– 1 teaspoon instant yeast
– 3¾ cups bread flour
– 4 teaspoons kosher salt
– 2 tablespoons olive oil
FOR THE TOPPING
– ½ cup red onion,
thinly sliced
– 4 tablespoons olive oil,
divided
– 1 tablespoon rosemary,
finely chopped
– ½ teaspoon kosher salt
– ¼ teaspoon ground
black pepper
PREPARATION METHOD
1. Preheat the oven to 85°F on Proof Mode with
a rack set on position “3.” 2. Combine the water
and yeast in a small mixing bowl and set aside
for 10 minutes until the yeast starts to bubble
and foam. 3. Pour the yeast mixture and olive oil
into the bowl of a stand mixer. 4. Add the flour
and salt. 5. Mix on speed 1 for 15 minutes, then
on medium speed for an additional 2 minutes to
develop a smooth, elastic dough. If the dough
looks dry and firm while mixing on 1st speed,
add a little more water. 6. Place dough in an oiled
bowl, cover with a damp towel and proof in the
oven for 1 hour, or until the dough doubles in
volume. 7. While the dough is proofing, sweat the
onion in the 1 tablespoon of olive oil until tender
in a small skillet over medium heat. 8. Cool and
set aside to be used later. 9. Once the dough has
proofed, gently punch it down once or twice and
remove from the bowl. 10. Oil the bottom and
sides of a jelly roll pan with two tablespoons of
the olive oil. 11. Place the dough in the pan and
press it out into an even layer to the edges of
the pan. 12. Cover with a damp towel again and
proof for another 30 minutes. 13. Remove from
the oven and preheat the oven to 400°F on Bake
Mode with a rack set on position “3.” 14. Brush
the top of the dough carefully with the remaining
2 tablespoons of olive oil, sprinkle the dough with
rosemary, kosher salt, pepper, and the cooked
onions. 15. Dimple the dough with your finger
tips. 16. Place on center rack in the oven and
bake for 35–45 minutes until golden brown and
internal temperature of 210°F. Cool before
slicing and serving.
BEFORE YOU START
Use different sized and shaped vessels to bake this bread. A 6–8 qt. oven
1
safe stainless Dutch oven (about 10
/
-inches in diameter) will produce a
2
thicker loaf, or use a large pan for the rustic shape of a free-form loaf.
34
35

Quiche Lorraine
Reheating well, make this quiche ahead of time for a convenient breakfast
option. Pair with a salad or fruit for an equally satisfying dinner option.
MAKES RACK POSITION COOK TIME
1 QUICHE 3 65 MINUTES
INGREDIENTS
FOR THE CRUST
– 1¼ cups all-purpose flour
– ¼ teaspoon kosher salt
– ½ cup (1 stick)
butter, cold, cut
into ½-inch pieces
– 3 tablespoons ice water
FOR THE FILLING
– ½ cup onion,
thinly sliced and cooked
until translucent
– ½ cup Swiss cheese,
finely shredded
– ½ cup ham, diced ¼-inch
– 4 large eggs
– 1¾ cups heavy cream
– 1½ teaspoons kosher salt
– ½ teaspoon freshly
ground black pepper
– 1 tablespoon fresh chives,
minced
– 1 tablespoon fresh thyme,
chopped
PREPARATION METHOD
FOR THE CRUST
1. Combine flour and kosher salt together, cut
the butter into the flour by hand or with a food
processor until pea size pieces form. 2. Add in
the ice water and mix until a dough forms. 3. Turn
out onto a lightly floured surface and knead a few
times to smooth the dough. 4. Flatten into a disk,
wrap with plastic wrap and chill for 1 hour in the
refrigerator. 5. After an hour, roll out the dough
and place in a 9-inch pie shell. 6. Trim the edges
to ¼-inch from the pie pan, roll under and press
down around the edge of the pie pan. 7. Chill for
30 minutes in the refrigerator. 8. While the dough is
chilling, preheat the oven to 400°F on Bake Mode
with a rack set on position “3.” 9. After 30 minutes,
line the unbaked pie crust with parchment and
weight it down with something so that the bottom
doesn’t pu and the sides don’t slouch. You can find
special pie weights for this job, but you can also use
dry beans (about 2 cups). 10. Blind bake the crust for
25 minutes, remove from the oven and allow to cool
completely before filling.
FOR THE FILLING
BAKE
BEFORE YOU START
Blind baking, or baking a pie crust without the filling, helps to
ensure the end product is crisp and flaky.
Cook and cool the onions completely, before adding to the filling.
This helps to remove the extra water from the onions that would
otherwise negatively affect the consistency of your filling.
1. Reduce the heat of the oven to 350°F on
Bake Mode with rack still set on position “3.”
2. In a medium bowl, whisk together the eggs
and heavy cream until smooth. 3. Add in the
kosher salt, pepper, and herbs and mix to combine.
4. In even layers add the onions, cheese, and ham to
the bottom of the precooked pie shell. 5. Carefully
pour the custard over the filling. Bake the quiche
for 40–45 minutes, or until the quiche is set.
6. Remove from the oven and allow to cool
slightly before serving.
36
37

Lemon Pudding Cakes
These pudding cakes look as good as they taste. During baking, the batter naturally separates into delicate
cakes on bottom with a sweet and tart lemon glaze on top.
MAKES RACK POSITION COOK TIME
8 8OZ CUSTARD CUPS 3 3540 MINUTES
BAKE
Buttermilk Biscuits
Making homemade buttermilk biscuits is a rite of passage in the South, but
people all over enjoy their hearty deliciousness. The combination of butter
and shortening will provide flavor and keep the biscuits tender and flaky.
MAKES RACK POSITION COOK TIME
1 DOZEN 3INCH BISCUITS 3 20 MINUTES
INGREDIENTS
– ½ cup granulated sugar,
to coat the ramekins
– 1⁄ cups granulated sugar
– 4 large eggs, separated
– 1⁄ cups buttermilk
– ¼ cup lemon juice
– Zest of two lemons
– ¼ teaspoon kosher salt
– ½ cup all-purpose
flour
PREPARATION METHOD
1. Preheat the oven to 325°F on Bake Mode with a rack set on position “3.” 2. Spray
eight 1 cup custard cups with nonstick cooking spray and dust with 2 teaspoons
of sug ar. 3. In a medium bowl, whisk together the 1⁄ cups sugar, egg yolks,
buttermilk, lemon juice, and zest. 4. Sift together the flour and kosher salt, and
whisk into the buttermilk and egg mixture. 5. Whip the egg whites to soft peaks,
and combine the two mixtures by gently folding in the egg whites. 6. Divide the
batter evenly between the custard cups. 7. Place ramekins into two 9-by-13 inch
pans and fill with hot water halfway up the side of the ramekins. 8. Place the pans
side by side into the oven and bake in a hot water bath for about 35–40 minutes or
until the tops are lightly golden brown and the cake tops spring back when gently
pressed. 9. Allow cakes to cool for 5 minutes before removing them from the water.
10. Allow the ramekins to cool, then wrap and store in the refrigerator for at least
3 hours or overnight. 11. To unmold the cake, run a butter knife gently around the
edges of the cakes. 12. Place a plate over the ramekin, turn upside down and gently
shake to release the cake. 13. Optionally, top with whipped cream and fresh berries.
INGREDIENTS
– 2 cups all-purpose flour
– 1 tablespoon double-acting
baking powder
– 1 tablespoon
granulated sugar
– 1 teaspoon kosher salt
– ⁄ teaspoon baking soda
– 4 tablespoons
unsalted butter,
cut into ⁄-inch cubes
– 1⁄ cups buttermilk
– 2 tablespoons
unsalted butter, melted
FOR SHAPING
– 1 cup unbleached all-
purpose flour, spread
onto a 9-by-13 inch pan
PREPARATION METHOD
1. Preheat oven to 450°F on the Bake Mode with a rack set on position “3.”
2. Grease a 9-inch round cake pan with nonstick cooking spray and set aside.
In a 9-by-13 inch pan, evenly distribute 1 cup of flour and set aside. 3. In the
bowl of a food processor, pulse together 2 cups of flour, baking powder,
sugar, salt, and baking soda until combined. 4. Add the cubed butter and pulse
until the mixture resembles coarse cornmeal. 5. Pour the flour mixture into
a medium bowl. Add the buttermilk and stir until just incorporated. 6. Spray
the inside of a 1/4 dry measuring cup with nonstick cooking spray and scoop
a level amount of dough. Drop the portion into the floured 9-by-13 inch pan.
Repeat to form 12 evenly sized biscuits. 7. Dust the top of each dough mound
with extra flour from the pan. 8. With floured hands, gently pick up one dough
mound and coat with flour. 9. Gently shape the individual dough piece into a
rough ball. Shake o any excess flour and place into the prepared round cake
pan. Repeat with the remaining pieces, distributing the biscuits around the
perimeter of the prepared round cake pan. Nine biscuits should fit around the
outside and three in the middle. 10. Gently brush the biscuits with melted butter.
11. Place the pan into the oven and bake for 17-20 minutes or until a deep
golden brown. 12. After baking, let the biscuits cool slightly in the pan, then
remove them from the pan. Cool for an additional 5 minutes before serving.
BEFORE YOU START
A water bath is required to evenly
cook and regulate the temperature
of the cakes while baking.
38
39

Convection Roast Mode
ROASTING IN MOMENTS
In Convection Roast, an even and enveloping heat produces deep browning
and crisping in less time than normal roasting. An unstued 25-pound turkey
in Convection Roast set to 350°F may cook in as little as two and a half hours—
about half the time you are used to. In this mode, most of the heat comes from
CONVECTION ROAST
the two fans and two heating elements in back of the oven, circulating evenly
throughout the oven cavity, with some also coming from the broil element. It
is saturating, powerful heat for delicious roasting results.
CONVECTION ROAST MODE REVIEW
– Best for single rack cooking, producing
even browning from the broil element
– Food cooks more evenly and quickly
– Deeper browning and crisping for more
delicious flavor
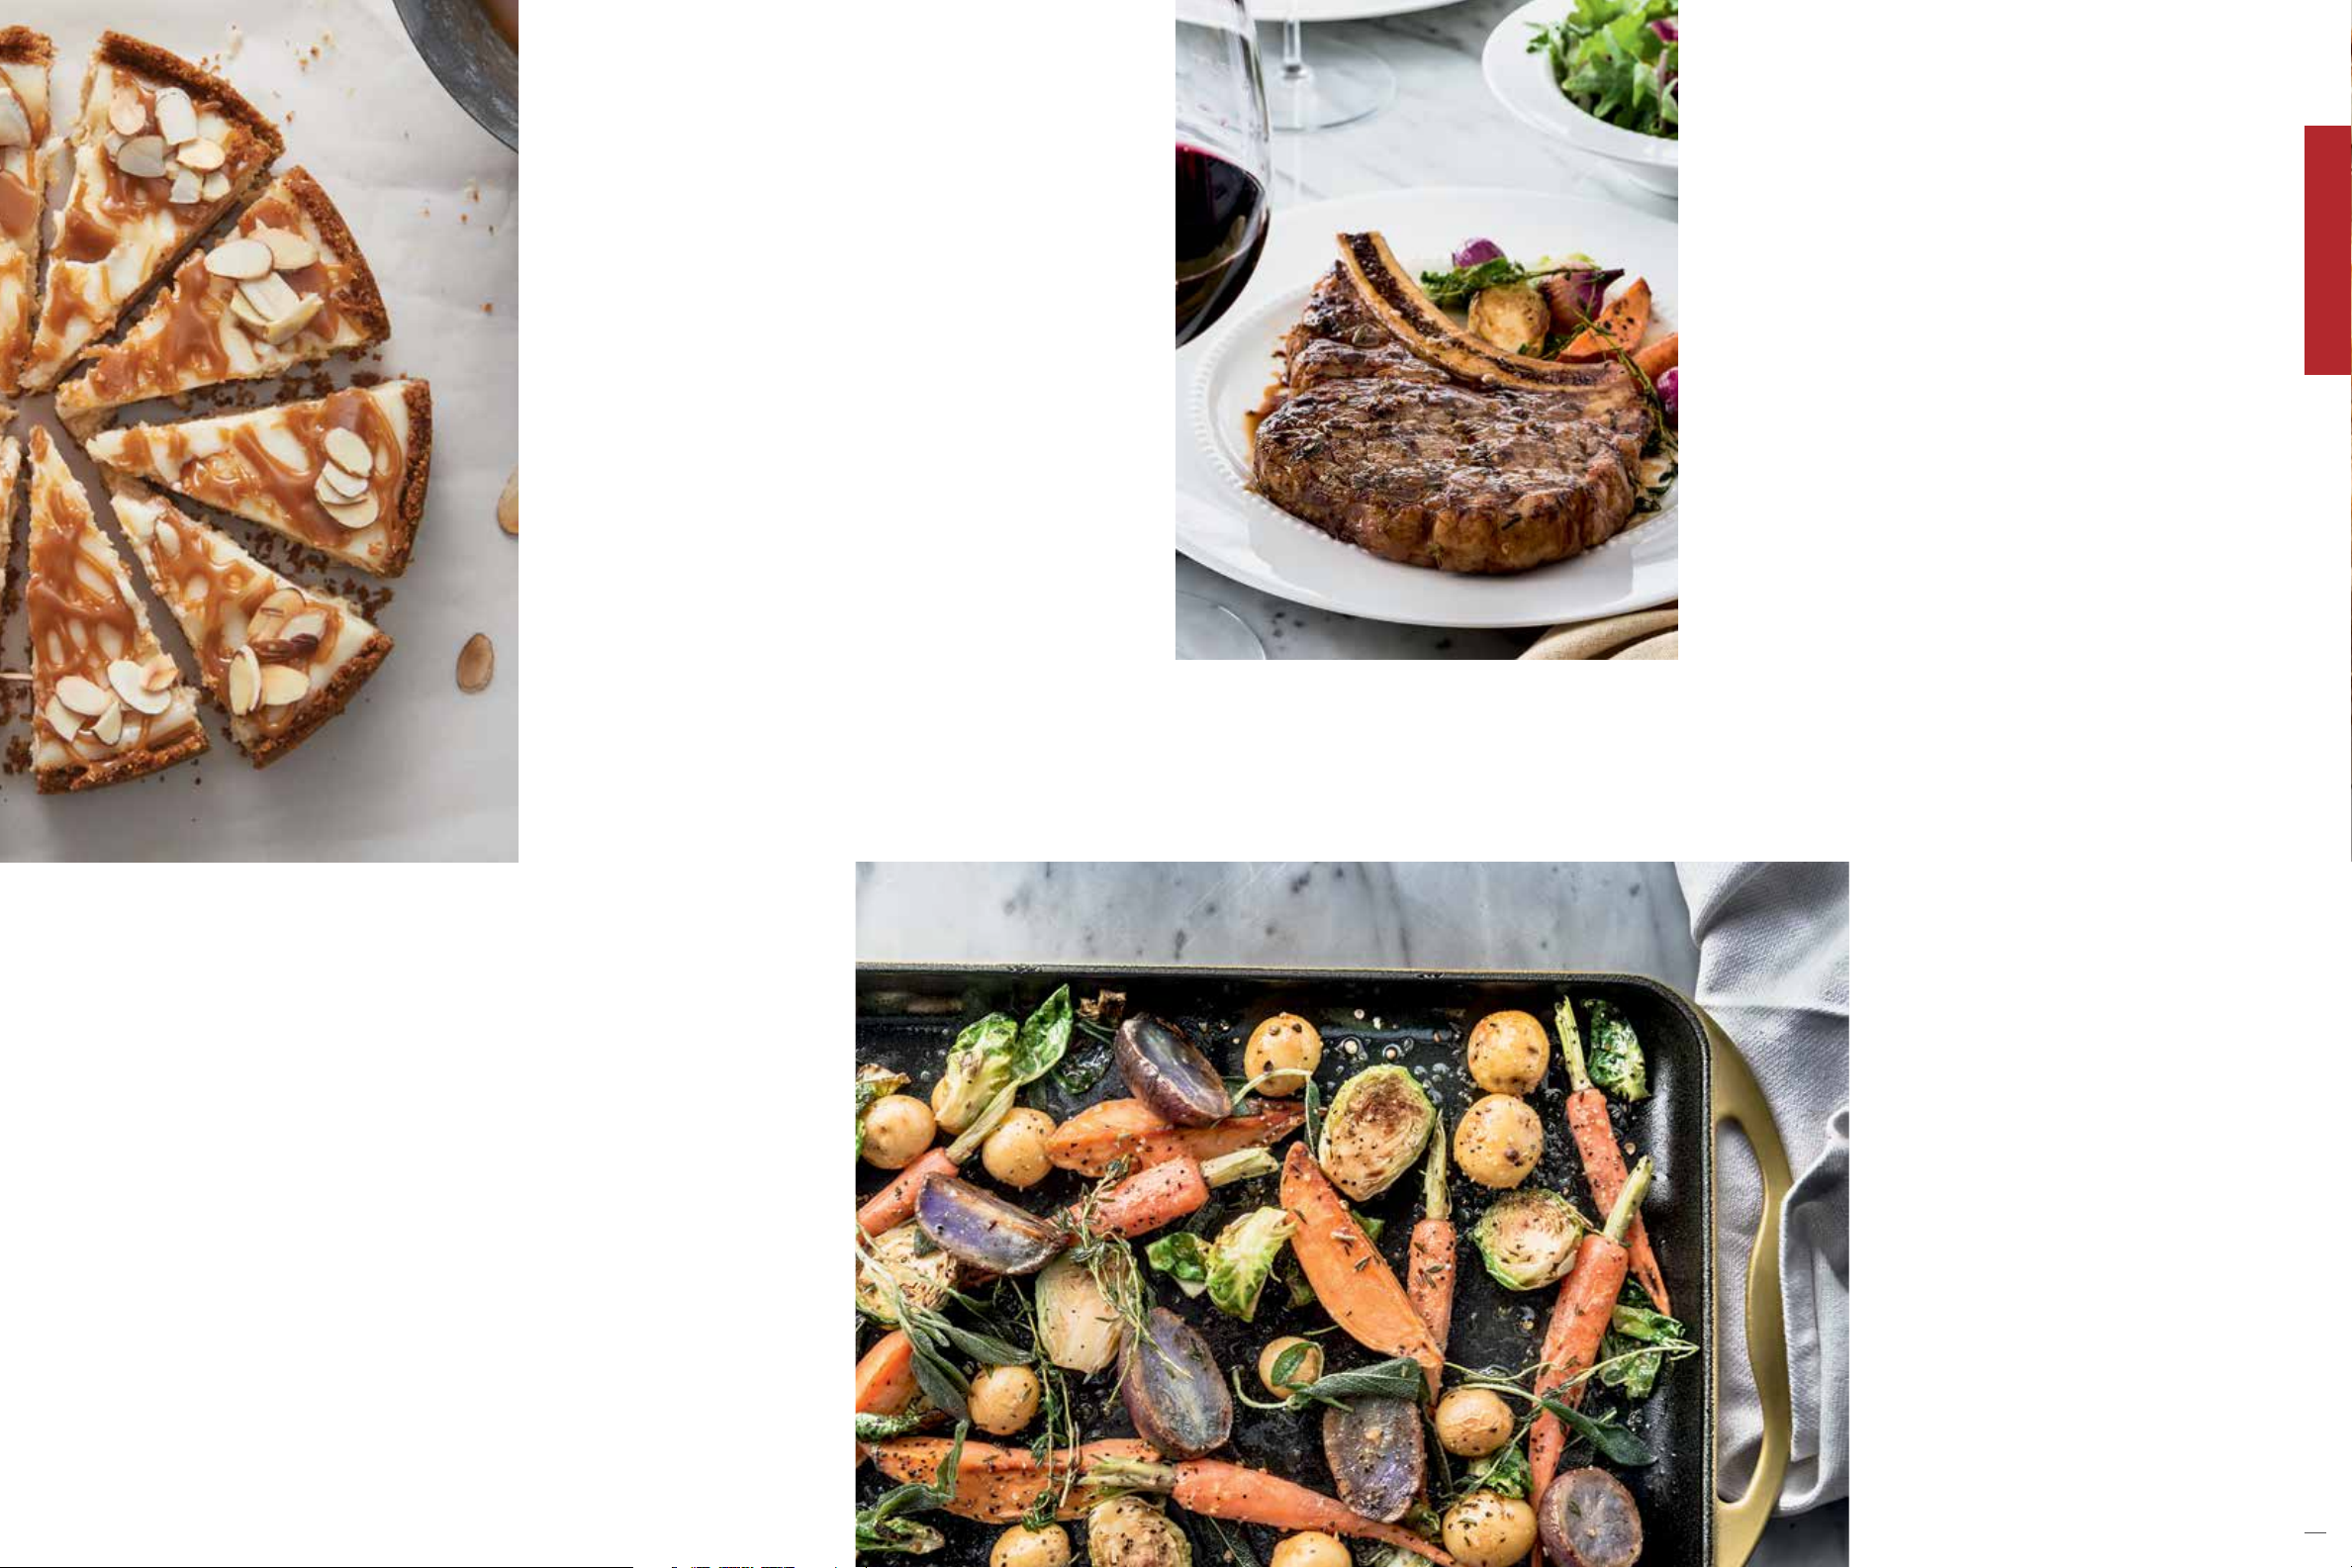
– Ideal for a whole turkey, prime rib,
mixed root vegetables
– Temperature probe may be used
40
41

Roast Turkey
Roast turkey is a succulent dish that is standard in many individual’s
repertoires. With this chef-tested recipe and Convection Roast
Mode, holiday meals and weeknight dinners just got easier.
MAKES RACK POSITION COOK TIME
1 TURKEY 1 N/A
INGREDIENTS
– 1 thawed whole turkey
– ½ cup unsalted butter, softened
– 2 tablespoons fresh thyme, chopped
– 2 tablespoons fresh rosemary, chopped
– 2 tablespoons fresh parsley, chopped
– 2 tablespoons fresh sage, chopped
CONVECTION ROAST
PREPARATION METHOD
1. Rinse turkey with cold water and pat dry with paper towels.
2. Mix together butter and herbs, and gently tuck under the
skin over the turkey breast. 3. Place turkey, breast side up, on
a roasting rack in a large roasting pan. 4. Insert temperature
probe into the thickest part of the thigh. 5. Place the turkey
into the oven on rack position “2.” 6. Plug the probe into the
receptacle. Set the oven to 300°F on Convection Roast Mode
and set the probe alert temperature to 180°F. 7. Roast the turkey
until temperature probe chimes, indicating the temperature
has been reached. 8. Using a secondary thermometer, double
check that the internal temperature has reached 180°F in
the thigh. 9. Remove turkey from oven and allow to rest
uncovered for 20 minutes before carving and serving.
BEFORE YOU START
Approximate 10-15 minutes of roasting per pound,
though the actual time depends on the starting
temperature of the turkey.
42
43

Italian Meatballs
Start with this flexible base recipe, then experiment with your
desired flavor profile. They work equally well served as an
appetizer with a sauce, or on the side of a main pasta entrée.
MAKES RACK POSITION COOK TIME
3036 MEATBALLS 3 20 MINUTES
INGREDIENTS
– 1 pound ground beef
– 1 pound ground pork
– ½ medium yellow onion, finely
diced
– 3 cloves garlic, minced
– 4 teaspoons kosher salt
PREPARATION METHOD
– 1 teaspoon freshly ground black
pepper
– ¼ cup fresh parsley, minced
– ½ cup Parmesan cheese, grated
– 2 eggs, beaten lightly
– 1 cup panko (Japanese/coarse)
bread crumbs
CONVECTION ROAST
Roasted Tomatoes
Fresh garden tomatoes are delicious on their own, but are extraordinary when roasted. At home
in pasta dishes or salads or served with grilled meats, it is a versatile add-on to any meal.
MAKES RACK POSITION COOK TIME
8 SERVINGS 5 15 MINUTES
INGREDIENTS
– 3–4 heirloom tomatoes
(a variety is best)
– 2 tablespoons olive oil
– 2 teaspoons
fresh thyme, chopped
– ½ teaspoon kosher salt
– ¼ teaspoon freshly
ground black pepper
PREPARATION METHOD
1. Preheat the oven to 425°F on Convection Roast Mode
with a rack set on position “5.” 2. Slice the tomatoes ¼-inch
thick and place in a large bowl, toss the tomatoes with the
remaining ingredients until well coated. 3. Spread out onto a
baking sheet lined with parchment. 4. Place into the oven and
cook for 12–15 minutes. 5. Remove from the oven and allow
to cool slightly before serving or adding to another recipe.
1. Preheat the oven to 400°F on Convection Roast Mode with a rack at
position “3.” 2. In a large bowl, mix the first 8 ingredients together until
well incorporated. 3. Add the eggs and mix until just combined, then do
the same with the panko. 4. Form the mixture into 1 ounce balls (about 2
tablespoons). 5. Place onto a lightly oiled rimmed baking pan. 6. Roast for
18–20 minutes or until cooked through.
44
45

BEFORE YOU START
Some chili powders contain salt—you may want to test the sauce
before adding the kosher salt. Sauce color will vary depending on
the chili powder—some are more red and others more brown
Chicken Enchiladas
CONVECTION ROAST
Simplify this recipe by substituting store-bought sauce and
a precooked chicken from your local grocery store.
MAKES RACK POSITION COOK TIME
6 ENCHILADAS 3 45 MINUTES
INGREDIENTS
FOR THE ROASTED CHICKEN
– 2 pounds boneless
skinless chicken breasts
– ½ teaspoon kosher salt
– ½ teaspoon black pepper
– ½ teaspoon onion powder
– ¼ teaspoon cumin
– ¼ teaspoon garlic powder
– 2 tablespoons vegetable oil
FOR THE RED ENCHILADA SAUCE
– 2 tablespoons vegetable oil
– 2 tablespoons all-purpose flour
– 4 tablespoons chili powder
– 1½ teaspoons tomato paste
– 1 teaspoon red wine vinegar
– ½ teaspoon garlic powder
– ½ teaspoon kosher salt
– ¼ teaspoon cumin
– ¼ teaspoon oregano
– 2 cups vegetable stock
FOR THE ENCHILADAS
– Roasted chicken, shredded
– 2 tablespoons vegetable oil
– 1 cup yellow onion, diced
– 1 (4-ounce) can diced green
chiles
– 1 (15.5 ounce) can black beans,
rinsed and drained
– 6 large flour tortillas
– 3 cups shredded cheese
– 1 batch red enchilada sauce
– Kosher salt
– Freshly ground black pepper
– Optional: ¼ cup
fresh cilantro, chopped
PREPARATION METHOD
FOR ROASTING THE CHICKEN
1. Preheat the oven to 425°F on Convection Mode with a rack set on
position “3.” 2. Combine all the ingredients in a zip top bag and mix
to combine. 3. Remove the seasoned chicken breasts from the bag.
Lay the chicken breasts on a parchment-lined baking pan and place
into the oven. 4. Cook for 15 minutes or until thoroughly cooked.
5. Remove from the oven and allow to cool. 6. Shred the chicken
and set aside.
FOR THE RED ENCHILADA SAUCE (MAKES 2 CUPS)
1. In a sauce pan heat the oil over medium-high heat for 1 minute.
2. Add the flour and stir for 2–3 minutes to combine. 3. The mixture
should not start to darken, turn the heat down if it begins to change
color. 4. Stir in the spices, tomato paste, and vinegar, and mix well.
5. Gradually add the stock in small amounts and whisk constantly to
ensure there are no lumps. 6. Bring to a gentle simmer and cook for
15 minutes. 7. Sauce will continue to thicken as it cools.
FOR THE ENCHILADAS
1. Set the oven to 350°F on Convection Roast Mode. 2. In a large
skillet, heat the oil over medium heat. 3. Add the onion and sauté for 3
minutes, stirring occasionally. 4. Add the shredded chicken and green
chiles, and sauté for 3–4 minutes, stirring occasionally. 5. Remove
from heat and set aside. 6. To assemble the enchiladas, set up an
assembly line including: tortillas, enchilada sauce, beans, chicken
mixture, and cheese. 7. Lay out a tortilla, and spread two tablespoons
of sauce over the surface of the tortilla. 8. Add beans in a line down
the middle of the tortilla, then add in a spoonful of the chicken
mixture, then sprinkle with 1⁄3 cup cheese. 9. Roll up tortilla and place
in a greased 9-by-13 inch baking dish. 10. Repeat with the remaining
ingredients. 11. Then spread the remaining enchilada sauce on top
of the tortillas, and sprinkle on the remaining shredded cheese.
12. Bake uncovered for 20 minutes. 13. Remove from oven and serve
immediately, garnished with chopped fresh cilantro if desired.
46
47

Roasted Vegetables
Other ingredients can easily be swapped in and out.
Try turnips, parsnips, or cauliflower.
MAKES RACK POSITION COOK TIME
46 SERVINGS 4 25 MINUTES
INGREDIENTS
– 2 pounds fingerling
or baby potatoes, halved
– 2 tablespoons olive oil, divided
– Kosher salt
– Freshly ground black pepper
PREPARATION METHOD
1. Preheat the oven to 400°F on Convection Roast Mode with a rack on
position “4.” 2. In a medium bowl, toss potatoes with 1 tablespoon of olive
oil and sprinkle generously with salt and pepper. 3. Spread evenly in a single
layer onto a parchment-lined sheet pan. Place pan into the oven and roast
for 15 minutes. 4. Meanwhile, in the medium bowl toss broccoli florets with
1 tablespoon of olive oil, salt, and pepper. 5. Remove the pan from the oven
and add broccoli and bacon. 6. Roast for another 8 -10 minutes, or until
potatoes and broccoli are fork tender and bacon is crispy. 7. Sprinkle with
cheese and return to the oven until melted, 1-2 minutes. 8. Sprinkle with
fresh chives and serve immediately.
– 2 cups broccoli florets
– 4 strips bacon, diced
– 1⁄ cups shredded
sharp cheddar cheese
– 1 tablespoon
chopped fresh chives
BEFORE YOU START
It is important to
have the boneless leg
of lamb tied prior to
roasting. Your butcher
can do this.
Lamb Roast
A welcomed alternative to chicken, pork, and beef. The temperature
probe ensures the roast is prepared to your desired doneness.
CONVECTION ROAST
MAKES RACK POSITION COOK TIME
810 SERVINGS 2 1 ⁄ 2 HOURS
INGREDIENTS
– ¼ cup extra virgin olive oil
– ¼ cup whole grain mustard
– ¼ cup fresh chives,
chopped
– 2 tablespoons fresh thyme
leaves, chopped
– 2 tablespoons flat leaf
parsley, chopped
– 1 tablespoon fresh
rosemary leaves, chopped
– 4 cloves garlic, peeled,
finely chopped
– 2 teaspoons freshly ground
black pepper
– 1 (5–7 pound) boneless
leg of lamb, rolled and tied
with butcher’s twine
PREPARATION METHOD
TWO DAYS AHEAD
1. Combine all ingredients except the lamb in a small bowl. 2. Working
over a baking sheet or cutting board, spread the mixture over entire
surface of lamb roast. 3. Wrap lamb tightly in plastic wrap and place on a
pan or large dish and store in the refrigerator for 2 days.
ROA STING DAY
1. Remove the lamb from the plastic and place on rack in a roasting pan.
Insert temperature probe into the thickest part of the lamb roast and
place the pan into the oven on rack position “2.” 2. Plug the probe into the
receptacle. 3. Set the oven to 350°F on Convection Roast Mode and set
the probe alert temperature to 125°F. 4. Cook until internal temperature
has been reached. 5. Remove the pan from the oven and allow to rest for
20 minutes before carving.
48
49

Roast Mode
FOR THAT “FALL APART” TEXTURE
Slow roast or braise less tender cuts of meat like chuck roasts, lamb shanks,
pot roasts, and stew meat to delicate, fall-o-the-bone texture. In this mode,
the majority of the heat comes from the broil element, with some help from
the bake elements. Roast Mode is designed for use on a single rack at a time.
If you enjoy braising, roast the meat a day or two before you plan on serving it,
and after it has cooled, cover and leave it overnight in the refrigerator, still in the
ROAST
braising liquid. The flavor will improve as it sits and you can reheat it just before
serving on the stove top over medium low heat.
ROAST MODE REVIEW
– Cook on single rack only
– Top and bottom heat for long, slow
roasting of less tender cuts
– Ideal for chuck roast, lamb shanks,
Cornish game hens
– Temperature probe may be used
50
51

Candied Pecans
Candied nuts are an inspired addition to cheese boards,
salads, or desserts, and are just as delectable on their own.
MAKES RACK POSITION COOK TIME
810 SERVINGS 1 AND 3 15 MINUTES
ROAST
Kale Chips
Try a greener spin on the beloved potato
chip, and customize to your taste by
adding or substituting seasonings.
MAKES RACK POSITION COOK TIME
4 SERVINGS 3 5660 MINUTES
INGREDIENTS
– 6 cups lightly packed kale leaves
– 2 teaspoons olive oil
– ¼ teaspoon red pepper flakes
– ¼ teaspoon kosher salt
PREPARATION METHOD
INGREDIENTS
– 1 cup raw pecan halves
– 3 tablespoons firmly
packed brown sugar
– 1 tablespoon water
– ¼ teaspoon kosher salt
– ⁄ teaspoon ground
black pepper
PREPARATION METHOD
1. Preheat the oven to 350°F on Roast Mode with racks set on positions
“1” and “3.” 2. Use a Silpat® or silicone baking mat in a baking tray or spray
a nonstick baking tray with nonstick cooking spray. 3. Spread the pecans
into a single large layer on the pan. 4. Place them in the oven on the rack at
position “3.“ 5. Roast the pecans for 7–8 minutes, stirring halfway through.
6. Remove the pecans from the oven. 7. In a medium bowl, mix the brown
sugar, water, and pepper until well combined. 8. Toss pecans with sugar
mixture then return them to the baking tray, spreading them into a single
layer. 9. Place the pan back into the oven on rack position “1.” 10. Roast the
pecans for 8 minutes stirring halfway through. 11. Remove the pecans from
the oven, and in a clean medium size bowl, toss pecans with kosher salt.
12. Pour the pecans onto a piece of parchment paper or onto a clean baking
tray and allow to cool. Be careful as the liquid sugar coating the pecans is
hot. The nuts will harden as they cool. 13. Allow to fully cool before serving.
1. Preheat the oven to 200°F on Roast Mode with a rack set on
position “3.” 2. Remove the stems from the kale and cut the leaves
into 2-inch pieces. 3. In a large bowl, toss the kale with oil, salt,
and red pepper flakes until well combined. 4. Spread out onto
a baking sheet lined with parchment. 5. Place into the oven and
cook for 45 minutes. 6. After 45 minutes, turn the oven to the
Convection Roast mode and set the temperature to 200°F. Cook
for 10 minutes, or until the pieces are nicely crisped. 7. Remove
from the oven and transfer to a fresh sheet of parchment paper
and allow to cool on the counter before serving.
BEFORE YOU START
You can use pre-chopped, bagged kale. Be sure to remove
the stems and if the pieces are smaller than those in the
recipe, the cooking time will be slightly shorter.
52
53

Pot Roast
A one-pot masterpiece, this hearty pot roast creates an elegant main dish
without all the cleanup.
MAKES RACK POSITION COOK TIME
6 SERVINGS 3 3 HOURS
ROAST
INGREDIENTS
– 3 pound beef chuck roast
– 2 teaspoons kosher salt
– 2 tablespoons olive oil
– 3 cloves garlic, chopped
– 4 sprigs fresh thyme
– 2 sprigs fresh rosemary
– 2½ cups beef stock, divided
into 2 cups and ½ cup
– 1 teaspoon freshly ground
black pepper
– 1 pound small potatoes
(Yukon gold or baby red,
quartered)
– 1 pound carrots, peeled and
cut into 2-inch slices
– 4 stalks celery cut into
2-inch slices
– 2 medium yellow onions,
quartered
BEFORE YOU START
The key to starting a pot roast off the right way
is a good sear on all sides. This can be achieved
right in the stovetop-safe roasting pan (if one is
being used), large skillet, or sauté pan.
Remove racks above position “3” for proper
clearance of the roasting pan.
PREPARATION METHOD
1. Preheat the oven to 325°F on Roast Mode
with a rack set on position “3.” 2. Season the
roast on all sides with kosher salt, place on a
large plate or platter and allow to rest on the
counter for 30 minutes. 3. Add the olive oil to a
stovetop safe roasting pan and over high heat,
sear the roast until evenly browned, about 3
minutes per side. 4. Remove the roast from
the pan onto a plate. 5. Turn the heat down to
medium and add 2 cups of beef stock to the
pan and deglaze, scraping up the bits stuck to
the bottom. A flat edged wooden spoon works
best. 6. Add the herbs, garlic, and freshly ground
black pepper to the pan and stir to combine.
7. Place the roast back into the pan and roast in
the oven, uncovered, for 1 hour. 8. After 1 hour,
flip the roast over, cover the pan with a lid or
aluminum foil and roast for one additional hour.
9. After the second hour, temporarily remove
the roast to a plate. 10. Add the vegetables and
potatoes to roasting pan. 11. Nestle the roast
into vegetables. 12. Pour the remaining ½ cup
of stock over roast. 13. Cover the pan with a lid
or aluminum foil, return the pan to the oven and
roast for 45 minutes or until the potatoes and
carrots are easily pierced by a fork. 14. After the
potatoes and vegetables are cooked through,
remove the roast from the oven and place on
a platter. 15. Allow to rest for 5 minutes before
carving. 16. Remove the vegetables with a
slotted spoon and place in a dish. 17. Serve with
au jus from the pan.
54
55

BEFORE YOU START
It is important to follow the steps to sear the chicken
pieces on the stove top first to help produce a crispy skin
on the chicken before it is braised in the liquid.
Coq au Vin
The widespread introduction of this classic French dish to the American
dinner table may be credited to Julia Child, her cookbooks, and television
shows. Rich with seared chicken, bacon, mushrooms, and onions, this winebased stew may soon have you exclaiming, “bon appetite!”
MAKES RACK POSITION COOK TIME
4 SERVINGS 3 60 MINUTES
INGREDIENTS
– One 3½ to 4½ pound chicken
– ½ cup sliced bacon, cut into
¼-inch pieces
– 1 teaspoon kosher salt
– ½ teaspoon ground black
pepper
– 2 cups cremini mushroom caps,
cut into ⁄-inch pieces
– 1½ cups carrots, ½-inch dice
– 1 cup celery, ½-inch dice
– 1¼ cups onion, ½-inch dice
– 1 clove fresh garlic, minced
– 4 tablespoons tomato paste
– ¼ cup brandy
– 2 cups red wine, such as a
Bordeaux or Cabernet
– 1 cup chicken stock
– 1 sprig rosemary
– 2 sprigs thyme
– 2 tablespoons butter, unsalted
– 3 tablespoons flour
PREPARATION METHOD
1. Cut the chicken into 6 pieces: 2 legs, 2 thighs, and
2 breasts. 2. Cut the breasts in half to make 8 pieces
in all. 3. Pat the chicken pieces dry with paper towel
and season both sides with 1 teaspoon kosher salt
and ½ teaspoon black pepper. In an 8 quart (or similar
sized) roasting pan, cook bacon over medium heat
until crisp, 8–10 minutes. 4. Remove the bacon pieces
and reserve for later, leaving the rendered fat in the
pan. 5. Heat the pan with the bacon fat over medium-
high heat and sear both sides of the chicken pieces
in two batches, increasing the heat to high as needed
to brown and crisp the skin, about 5 minutes for each
side. 6. Remove the chicken from the pan and place
the chicken on a platter to reserve for later use, skin
side up. 7. Preheat the oven to 250°F on Roast Mode
with a rack set on position “3.” 8. Add the mushrooms
to the same roasting pan and cook over medium heat
until the mushrooms are lightly browned. 9. Tu rn
heat down to medium-low, add in the onions and
garlic and cook until soft and translucent. 10. Add the
celery and continue to cook until the celery is soft.
11. Add in the carrots and cook until the carrots are
fork tender. If needed, add in ¼ cup of the chicken
stock and continue to cook until the vegetables are
tender. 12. Deglaze the pan of vegetables by adding
the brandy, red wine, and then chicken stock. This
will help to release all of the flavor built up on the
bottom of the pan. 13. Add the chicken back to the
pan, arranging in one layer over the vegetables and
cooking liquid. 14. Place a lid on the pan and place in
the oven. Braise covered, for 30 minutes. 15. Check
to make sure the internal temperature of the chicken
re aches 165° F. 16. If needed, continue to cook until
the temperature is reached. 17. Mix together the butter
and flour with your fingers to a crumbly consistency.
18. After 30 minutes, remove the pan from the oven
and return it to the stove top. 19. Bring the pan to
a simmer. 20. In a small bowl combine 1 cup of the
braising liquid and the butter/flour mixture. 21. Whisk
together until smooth. 22. Pour the contents back into
the roasting pan and gently stir. 23. Simmer for another
10–15 minutes until the mixture thickens and serve.
ROAST
56
57

Broil Mode
THE SECRET TO SEARING, TOASTING, AND BROWNING
The intense, radiant heat produced by the broiler can create an entire dish
from beginning to end—as with thin steaks, chops, or fish—or add the finishing,
browning touch to more delicate items like pie meringue. It is also a great
alternative to grilling outdoors. Three temperature settings oer you a world of
possibility. Proceed with a dash of caution, though. Food under the broiler can
finish cooking in a matter of minutes, so it is best to keep a close eye on your
BROIL
culinary creations.
BROIL MODE REVIEW
– Best for single-rack cooking
– Intense radiant heat for searing and
browning steaks, fish, poultry
– Also handy for toasting baked goods
– Temperature probe cannot be used
58
59

Tomato Basil
Shrimp Skewers
A classic combination—tomato and basil—adds a light,
refreshing flavor to this seared shrimp.
MAKES RACK POSITION COOK TIME
6 SKEWERS 3 7 MINUTES
INGREDIENTS
– 1 pound raw peeled and deveined,
⁄ count (medium size) shrimp
– 3 tablespoons olive oil
– 6 tablespoons tomato sauce
– 2 tablespoons red wine vinegar
– 2 cloves garlic, minced
– ¼ teaspoon chili flakes
– 2 tablespoons minced fresh basil
Steak
A porterhouse combines two of the best cuts of steak: a New York Strip
and a filet. Depending on your taste, other cuts can easily be substituted.
MAKES RACK POSITION COOK TIME
2 STEAKS 5 9 MINUTES
INGREDIENTS
– 2 porterhouse steaks
– Kosher salt
– Freshly ground black pepper
PREPARATION METHOD
1. Preheat oven to Broil high with a
rack at position “5” for 10 minutes.
2. Liberally season both sides of the
steaks with kosher salt and black
pepper. 3. Place on the broiler pan
rack and set in the preheated oven.
4. Broil the steaks for 5 minutes on
the first side, flip and broil for an
additional 4 minutes for rare, or
continue broiling until the desired
internal temperature is reached.
BROIL
PREPARATION METHOD
1. In a medium sized bowl combine the olive oil, tomato sauce, vinegar, garlic, and red pepper flakes.
2. Add the shrimp and toss to coat. Allow to marinate for one hour. 3. After marinating the shrimp,
preheat oven to Broil high with a rack at position “5” for 10 minutes. 4. While the oven is preheating,
thread shrimp onto skewers through body and tail, 3–4 per skewer. Be sure not to overcrowd them.
5. Place the skewers on the broiling pan and broil for 3 minutes, flip skewers, and cook 4 additional
minutes. 6. Remove from the oven, garnish with fresh basil and serve immediately.
BEFORE YOU START
Line the broiler pan with foil for easy cleanup.
Pull the steaks out of the refrigerator 45 minutes
before cooking to bring up to room temperature.
60
61

Honey
and
Soy Chicken Skewers
The salty and slightly sweet combination of the glaze will guarantee
these skewers disappear in moments at your next gathering.
MAKES RACK POSITION COOK TIME
10 SKEWERS 5 10 MINUTES
INGREDIENTS
– 4 boneless skinless chicken
breasts, sliced lengthwise
into 5 thin strips each
– ½ teaspoon red pepper
flakes
– 3 cloves garlic, minced
– ⁄ cup honey
– ⁄ cup soy sauce
– ¼ cup canola oil
– ½ teaspoon lemon juice
– ½ teaspoon grated ginger
– 2 scallions, thinly sliced
PREPARATION METHOD
1. In a medium bowl, combine the
honey, soy, red pepper flakes, and garlic.
2. Reserve half of this mixture, place in
another bowl and set aside. 3. Add the oil
to first half in the medium bowl and stir
to combine. 4. Add the chicken strips and
marinate for at least 2 hours, though no
more than 8 hours in refrigerator. 5. After
marinating the chicken, preheat oven to
Broil medium with a rack at position “5”
for 10 minutes. 6. Take the reserved half
of the marinade and add the ginger and
lemon juice. 7. Reduce the mixture over
medium low heat until thickened, about
3–4 minutes. 8. Thread chicken strips
onto each skewer and place on a broiler
rack. 9. Broil the skewers for 4 minutes.
10. Flip the skewers over and broil for an
additional 4 minutes or until the chicken
is cooked through. 11. Remove from the
oven, brush with the thickened glaze
and sprinkle with thinly sliced scallion.
BROIL
BEFORE YOU START
Reserve half the prepared marinade for later
use—it will become the glaze to be brushed on
the skewers when they are finished.
62
63

Proof Mode
FOR LOAVES YOU WILL LOVE
One of the secrets to a good bake is a good proof. Whether you make bread every
day or as a treat for special occasions, this mode will help you prepare buoyant,
beautifully raised breads. While professional bakers utilize proof boxes to stimulate
the correct environment for yeast activity, your M series oven is engineered with
similar technology to achieve the same fluy results. Proof Mode should typically
be used for the second or final proof, after the bread has already gained much of its
PROOF
volume and flavor in an initial proofing or fermentation (often referred to as the “bulk
proof”). A low, gentle heat between 85°F and 110°F allows bread to rise more rapidly
than it would at room temperature, especially during colder seasons.
PROOF MODE REVIEW
– Proof on a single rack for best results
– Gentle heat provides the ideal
environment for proofing bread
– Covering dough with a damp cloth is
recommended
– Expedites the second proofing
64
65

Dehydrate Mode
A NEW TAKE ON FRUITS AND MEATS
Delicious, nutritious snacks are something we all look for these days. But the ones
at the store—even the “healthy foods” stores—may be both expensive and loaded
with extra sugar and preservatives. Many of our Wolf owners are discovering the
pleasures of making their own dried fruit or meat snacks using Dehydrate Mode.
Circulating heat from the convection fans warms the oven up to between 110°F
and 160°F, providing the proper drying atmosphere. Just cut up the food you would
DEHYDRATE
like to dry—apples and pears, flank steak for beef jerky, fresh herbs—and lay it over
the dehydration racks in the oven. It usually takes about 10 hours to dry fruit and 4 to
15 hours for meat, depending on thickness. As some foods require more time to fully
dehydrate, the Dehydrate Mode overrides the 12-hour shut-o safety feature.
DEHYDRATE MODE REVIEW
– Dehydrate on single or multiple racks
– Gentle heat from convection fans
– Perfect for drying fruits, vegetables,
herbs, and meats
– Dehydrate kit recommended (available
for purchase from your dealer)
– Estimate 10 hours to dry fruit and 4 to
15 hours for meat
66
67

Fruit Leather
Customize by substituting the cherries with apricots or other dried fruits.
This treat is a sweet alternative to candy and requires very little prep time to make.
MAKES RACK POSITION COOK TIME
1 SHEET 6 2.5 3 HOURS
INGREDIENTS
– 1 cup dried cherries
– 1 cup water
– 1 tablespoon lemon juice
– 1 tablespoon honey
BEFORE YOU START
Silicone baking mats
aid in easily removing
the dehydrated fruit.
They can be found
at most local baking
supply stores or online.
PREPARATION METHOD
1. Set oven to 170°F Dehydrate Mode. 2. Cook fruit in water for about 10–15 minutes
at a simmer until soft. 3. Using a blender or food processor, puree the fruit with
the remaining liquid until very smooth. 4. Add a little more water if needed to get
a consistency thin enough to slowly pour out of the blender. 5. Pour out onto a
silicone baking mat on a cookie sheet and spread it evenly across pan. It will be very
thin. 6. Dehydrate at 170°F on Dehydrate Mode for 2½-3 hours, until the edges of
the fruit leather can be pulled o the mat. 7. Cool completely before trying to peel
o mat. Make sure the entire surface of the fruit is set, a slight tacky feeling but not
wet. 8. Remove it from the pan and allow to cool to room temperature, then cut
into strips. 9. Store rolled in parchment and then plastic wrap in the refrigerator.
FLAVOR VARIATION
Use 1 cup dried apricots, chopped into small pieces and increase the water to 2 cups.
DEHYDRATE
BEFORE YOU START
You will need the Wolf dehydration
kit to prepare this recipe.
Beef Jerky
Complete your camping trip experience with a batch of homemade jerky.
Prefer a spicier rendition? Add one or two teaspoons of red chili flakes.
MAKES RACK POSITION COOK TIME
1 POUND 1 AND 5 56 HOURS
INGREDIENTS
– 4 ounces ginger root,
peeled
– ½ cup pineapple juice
– ½ cup soy sauce
– 2 tablespoons firmly
packed brown sugar
– 1 tablespoon kosher
salt
– ½ teaspoon freshly
ground
black pepper
– 2 pounds flank steak,
cut into ⁄-inch thick
slices against the grain
PREPARATION METHOD
TO MAKE GINGER JUICE
1. Lay a clean kitchen towel on the countertop. 2. Using the fine side of a grater, grate the
ginger onto the towel. 3. Gather the corners of towel and squeeze the ginger juice into
small bowl, wringing firmly. 4. Measure two tablespoons; set aside. 5. Discard ginger pulp.
TO MARINADE
1. Combine ginger juice, pineapple juice, soy sauce, brown sugar, salt, and pepper in two-
quart bowl. 2. Mix together until well combined. 3. Press a layer of plastic wrap down to
the surface of the marinade. Be sure to submerge all the meat in marinade. 4. Cover the
bowl with a second piece of plastic wrap and store in the refrigerator to marinate for 8
hours or overnight.
TO DEHYDRATE
1. Lay the strips of meat over the surface of two Wolf dehydration racks. 2. Discard
any remaining marinade. 3. Position oven racks at positions “3” and “5.” 4. Transfer the
prepared dehydration racks of meat into the oven. 5. Set the door stop included with your
dehydration kit in place. 6. Set oven to 150°F on Dehydrate Mode and dehydrate for 5–6
hours, turning jerky over after 2 hours. 7. Continue to dehydrate until meat is dry to the
touch. 8. Remove from oven, allow to cool and place in airtight container.
68
69

Stone Mode
SATURATING HEAT FOR A “BRICK OVEN” EFFECT
For authentic pizza made like those in Italy by pizzaiolos—pizza bakers—you need
an extremely hot oven and cooking surface that mimics a wood-fired brick oven
environment. This mode uses heat from the bottom bake element and the top broil
element combined with the circulating air of the fans to create intense, saturating heat
up to 550°F. Using Stone Mode along with the bake stone kit, you can achieve crispy
bottom crusts for almost all types of pizzas, artisan breads, calzones, and flatbreads. But
STONE
it is meant for breads only—avoid placing meat, fish, vegetables, or other food items on
the bake stone or it will produce unwanted odors, tastes, and smoke. To prevent dough
from sticking, dust the stone and pizza peel with cornmeal or flour—never use oil as it
will gum up the stone. Preheat the stone with the oven, placing it on the very bottom
rack and removing all others. After baking, leave the stone in the oven to cool.
STONE MODE REVIEW
– Cook on a single rack only
– Creates an intense “brick oven” eect
– Ideal for pizza, artisan breads, and
calzones
– Requires the bake stone kit (available
for purchase from your dealer)
70
71

Pizza
This pizza dough recipe requires a couple days to develop, but your patience
will be rewarded with a flavorful crust.
MAKES RACK POSITION COOK TIME
2 PIZZAS 1 15 MINUTES
STONE
INGREDIENTS
– 3¾ cups all-purpose flour
– 1⁄ cups warm water
– 1 tablespoon honey
– 2½ teaspoons kosher salt
– ¾ teaspoon instant yeast
PREPARATION METHOD
TO PREPARE THE DOUGH
1. Place all the ingredients in the bowl of a stand
mixer fitted with a dough hook. 2. Mix the dough
on low speed for 7 minutes. 3. Stop and cover the
mixing bowl with a clean dish towel or plastic wrap
and allow to stand for 10 minutes. 4. Remove the
cover on the mixing bowl and continue kneading
on low speed for 7 more minutes. 5. Place the
dough in a greased container. 6. Cover and
refrigerate for 2 days.
TO PREPARE THE PIZZA
1. Preheat the oven to 450°F on Stone Mode
with the bake stone and rack set on position “1.”
2. While the oven is preheating, portion the dough
into 2 equal pieces. The second piece of dough can
be rolled out or frozen for later use if desired.
3. Gently roll the dough into a ball, cover and
allow to come to room temperature. 4. Dust the
countertop with flour. 5. Roll the pizza dough until
just under ¼-inch thick. 6. Dust the top of the
rolled out dough and the pizza peel with flour.
7. Flip the pizza dough over and place the floured
surface of the pizza dough onto the floured peel.
This will make sliding the pizza into the oven
much easier. 8. Add your favorite pizza sauce and
toppings. As the cheese melts it will spread out—
be sure to leave enough open space and don’t
overcrowd the toppings. 9. Transfer the pizza to
the oven and slide the pizza onto the center of the
preheated bake stone. 10. Cook for approximately
15 minutes or until the pizza has reached the
desired browning.
BEFORE YOU START
You will need the bake stone kit for this recipe. When storing the rising
pizza dough, choose a container large enough to accommodate the dough
doubled in size. Allow two to three days for the rise and to develop the
depth of flavor that gives this pizza dough its unique character.
72
73

Gourmet Mode
YOU SELECT THE DISH, GOURMET DOES THE REST
This is the guesswork-free mode. Simply tell it the type of food you wish to prepare—
anything from a soué to pizza to a few sweet potato wedges. After you make your
choice, Gourmet tells you the proper rack position, sets the cooking mode, and adjusts
the temperature on its own—sometimes using multiple modes and temperatures—for
reliable, delicious results. You will have more time to enjoy knowing that Gourmet
Mode’s chef-tested recipes guarantee gorgeous meals. This advanced multi-mode,
GOURMET
multi-temperature preparation of complex meals is the reason why you may eventually
make Gourmet your “go to” mode.
GOURMET MODE REVIEW
– Can use a single rack or multiple racks
– Automatic cooking of almost any dish from 50 presets
– Utilizes multiple modes and multiple temperatures based
on your selected dish
– Temperature probe can be used
– Preheat can be skipped in some recipes
– Easy on-screen menu for simple recipe selection
74
75

Prime Rib Roast
Roasting a prime rib can be a daunting task. The best preparation
method for prime rib calls for two dierent modes and temperatures
throughout the cooking process, something Gourmet Mode adjusts
automatically, thus simplifying the cooking process.
MAKES RACK POSITION COOK TIME
810 SERVINGS 3 3 HOURS
INGREDIENTS
– 12 pound beef bone-in prime rib roast
– 3 tablespoons olive oil
– 3 tablespoons garlic, chopped
– 3 tablespoons fresh rosemary, chopped
– 2 tablespoons fresh thyme, chopped
– 1 tablespoon freshly ground black pepper
– Kosher salt
GOURMET
PREPARATION METHOD
1. In a small bowl, combine the olive oil, garlic, rosemary, thyme, and black
pepper together to create a rub. 2. Season the roast liberally on all sides
with kosher salt. 3. Coat the prime rib with the prepared rub. 4. Place the
prime rib roast in a roasting pan with an elevated roasting rack. 5. Insert
the temperature probe into the thickest part of the roast. 6. Place the roast
into the oven on rack position “2” and plug the probe into the port. 7. Set
the oven to Gourmet Mode and choose “meat,” “beef,” “prime rib,” as well
as your desired doneness. The oven will cook the roast until the probe alert
indicates it has reached the desired internal temperature. 8. Remove the
roast from the oven and let it rest for 15 minutes before cutting and serving.
BEFORE YOU START
If you are missing a roasting rack, use the
broiler rack that came with your broiler pan
and place it in your roasting pan.
76
77

Spatchcock Chicken
Like roast chicken, only flattened. This preparation cooks the
bird more quickly and evenly and leads to a deliciously crispy
and golden-brown skin.
MAKES RACK POSITION COOK TIME
6 SERVINGS 3 45 MINUTES
INGREDIENTS
– 1 (3–4 pound) chicken, rinsed, dried, and backbone removed
– 2 whole lemons, cut into 4 slices
FOR THE RUB
– 2 tablespoons olive oil
– 1 teaspoon garlic powder
– 1 teaspoon onion powder
– ½ teaspoon black pepper
– 1 teaspoon kosher salt
– 1 tablespoon fresh rosemary, chopped
– 1 tablespoon fresh thyme, chopped
– Zest of 1 lemon
GOURMET
BEFORE YOU START
Remove the backbone by cutting through the rib bones
with a kitchen shears. Turn the chicken breast-side up
and push down to flatten.
PREPARATION METHOD
1. In a small bowl combine the 8 ingredients to make the rub. 2. Coat the
chicken with the spice and herb rub, front and back, and under the skin on
the thighs and breasts. 3. Arrange the lemon slices on the bottom of an
oven-safe cast iron or roasting pan. 4. Place the chicken, breast side up,
in the pan. 5. Insert the probe into the thickest part of the thigh. 6. Place
the pan into the oven and plug the probe into the port. 7. Set the oven
to Gourmet Mode and choose “meat,” “poultry,” “whole bird,” “under 12,”
and “unbrined.” The oven will cook the chicken on Convection Roast until
the probe alert indicates it has reached the internal temperature of 180°F.
8. Remove from the oven and let rest for 5 minutes before cutting.
78
79

Mixed Berry Pie
You may think of this as a special summertime dessert, but by using frozen berries, you can
enjoy it any time of the year. Customize it to your special taste, mixing raspberries, blueberries,
blackberries, or less common varieties like huckleberries and gooseberries.
MAKES RACK POSITION COOK TIME
1 PIE 3 1 HOUR, 15 MINUTES
GOURMET
INGREDIENTS
PIE DOUGH
– 2½ cups
all-purpose flour
– ½ teaspoon
kosher salt
– 2 tablespoons sugar
– 1 cup (2 sticks) unsalted
butter, cold and cut into
½-inch pieces
– 6 tablespoons ice water
PIE FILLING
– 4 cups mixed berry
frozen fruit
– ¼ cup water
– ¼ cup sugar
– 3 tablespoons cold
water
– 3 tablespoons
cornstarch
– ½ cup sugar
– ¼ teaspoon salt
– 2 tablespoons lemon
juice
PREPARATION METHOD
PIE DOUGH (YIELDS TOP AND BOT TOM CRUST)
1. Combine the flour, kosher salt, and sugar together, cut
the butter into the dry mixture to pea size pieces. 2. Add in
the ice water and mix until a dough forms. This can be done
by hand or in a food processor. 3. Turn out onto a lightly
floured surface and knead a few times to smooth the dough.
4. Chill for 1 hour in the refrigerator. While waiting, prepare
the pie filling below. 5. After 1 hour, divide the dough in half
and roll out top and bottom crust to fit a 9-inch pie shell.
PIE FILLING
1. Combine the fruit, sugar, and ¼ cup of water in a sauce pan
and bring to a simmer. 2. Whisk together the 3 tablespoons of
water and cornstarch to make a slurry. 3. Once the fruit comes
to a simmer, add the cornstarch slurry and cook the mixture until
the juice thickens—about 7 minutes. 4. Add in the ½ cup of sugar,
kosher salt, and lemon juice, and simmer another 4 minutes,
or until the sugar has dissolved. 5. Cool the mixture
completely before filling the pie crust.
PIE ASSEMBLY METHOD
1. Place bottom crust into pan and trim the edges to ¼-inches
from the pie pan. 2. Fill with the cooled mixed berry filling
and add top crust. 3. Trim edges of top crust to ¼-inch and
pinch the top and bottom crust together, roll under and crimp
the crust around the edge of the pie pan. 4. To bake the pie,
use Gourmet Mode and select “baked goods,” “pie,” “double
crust.” 5. Follow the instructions provided in the pop-up dialog
boxes. 6. Once the oven has preheated to 425°F place the
pie in the oven. 7. After 15 minutes the oven will turn down
automatically to 350°F. Once it does, set a timer and bake
the pie for 50–60 minutes more. 8. Remove the pie from the
oven and allow to cool and set completely before serving.
BEFORE YOU START
Make sure to chill the pie dough between steps.
Chilled dough will keep its shape better once it
goes into the oven and starts to bake.
80
81

Warm Mode
KEEPING DINNER DELICIOUS
Whenever your family and friends gather around the table, this mode ensures they
have a hot, flavorful meal. Or use it to keep the first batch of food warm while you are
preparing the second. No matter the scenario, you can count on gently warmed food.
Consistent heat between 140°F and 200°F comes from the bake element, precisely the
right temperature to keep food warm for an additional 30–45 minutes. To keep things
moist, place a pan of shallow water on the rack below the food.
WARM
STONE MODE REVIEW
– Warm on single rack only
– The ideal heat to keep meals
warm and delicious
– Also can be used to warm
dinner plates
82
83

M Series Glossary
Mode Cheat Sheet
BAKE STONE
A flat cooking surface used in
baking, usually made of a porous
ceramic material that results in a
crispier texture for pizza crust or
bread. Mimics the eects of
cooking a pizza in a brick oven.
BLIND BAKE
To pre-bake a pie crust
without its filling.
BRAISE
A combination cooking method in
which meat is first seared, then
finished by cooking it in a covered
pot with liquid at a lower temperature.
BRINE
To soak chicken, turkey, or other meat
in a liquid solution of salt, sugar, and
water (as well as herbs, spices, and
aromatics) before cooking to enhance
the flavor. You can dry brine by rubbing
salt, sugar, and other seasonings
directly to the skin or surface.
CARAMELIZE
The browning of sugars contained
in foods, a chemical process that
occurs during cooking and can add
buttery, nutty, acidic, or bitter notes.
CONVECTION FAN
A fan that circulates hot air to
cook food.
DEHYDRATION
The process of drying food, aiding
in longer preservation—for instance:
fruits, vegetables, herbs, beef jerky.
DOUGH HOOK
A curved attachment for your
stand mixer that kneads dough
quickly and eciently.
DRY RUB
A mixture of dried herbs and spices,
often with salt and sugar, rubbed
directly into meat. Often, it permeates
meat more quickly and eectively
than a liquid marinade.
DUAL CONVECTION OVEN
An oven that cooks food by
circulating hot air via two fans.
DUAL VERTICROSS™ CONVECTION
The advanced convection system in the
Wolf M series oven which utilizes two
columnar fans with heating elements
to provide more even, consistent
heat throughout the oven cavity.
MODE
A pre-programmed oven operation
that utilizes specific heating and fan
elements to create a customized
cooking environment for a particular
dish, such as Convection, Bake,
Roast, and Bake Stone.
PARCHMENT PAPER
Also called bakery paper, it is used
as a disposable nonstick surface in
baking or for cooking en papillote.
PROOF
The rise of shaped bread dough
before baking.
RADIANT HEAT
Heat that radiates from the top or
bottom of an oven to cook food.
SEAR
Cook the surface of meat at high
temperature until it browns.
TEMPERATURE PROBE
A small, pointed rod, attached to a
cord—in this case, that measures
the internal temperature of the food
into which it is inserted and the
other end into the oven's sensor
to alert you when your dish has
reached the desired temperature.
TEMPERATURE PROBE RECEPTACLE
The slot into which the temperature
probe is inserted—it will click into
place. The probe must be fully seated
in the receptacle before you adjust
the probe temperature setting.
CONVECTION MODE
The go-to mode for multi-rack
cooking. Heat comes entirely
from two rear convection fans.
ROAST MODE
For ultimate tenderness, with
most heat from top broil and some
from the bottom bake element.
BAKE MODE
Best for traditional baking, with
almost all the heat radiating up
from the bottom element.
BROIL MODE
Sear steaks, chops, and fish
with intense, radiant heat
from the top broil element.
CONVECTION ROAST MODE
A faster, more flavorful way to
roast, with most of the heat
from two rear convection fans.
PROOF MODE
Bread rises beautifully with
low, controlled heat from
the bake element.
CONVECTION OVEN
An oven that heats food through the
circulation of hot air by a fan or fans.
MULTI-RACK COOKING
Cooking on more than one rack at
the same time—something a dual
convection oven does more eciently
than a non-convection oven.
DEHYDRATE MODE
Low, drying heat from the
convection fans for fruit
snacks, jerky, and herbs.
STONE MODE
Create a “brick oven eect” for
pizza with intense 550°F heat
from the bake and broil elements.
WARM MODE
Keep dinner warm with
gentle heat of 140°F to 200°F
from the bake element.

Get the most out of
your M series oven.
THIS IS NOT JUST A RECIPE BOOK.
It is a technique-focused approach to understanding and
mastering the Wolf M series oven. Understand how to use
the oven’s main operating modes, and you will enjoy one
delicious meal after another.
04/19 | 180223
 Loading...