

Page 1
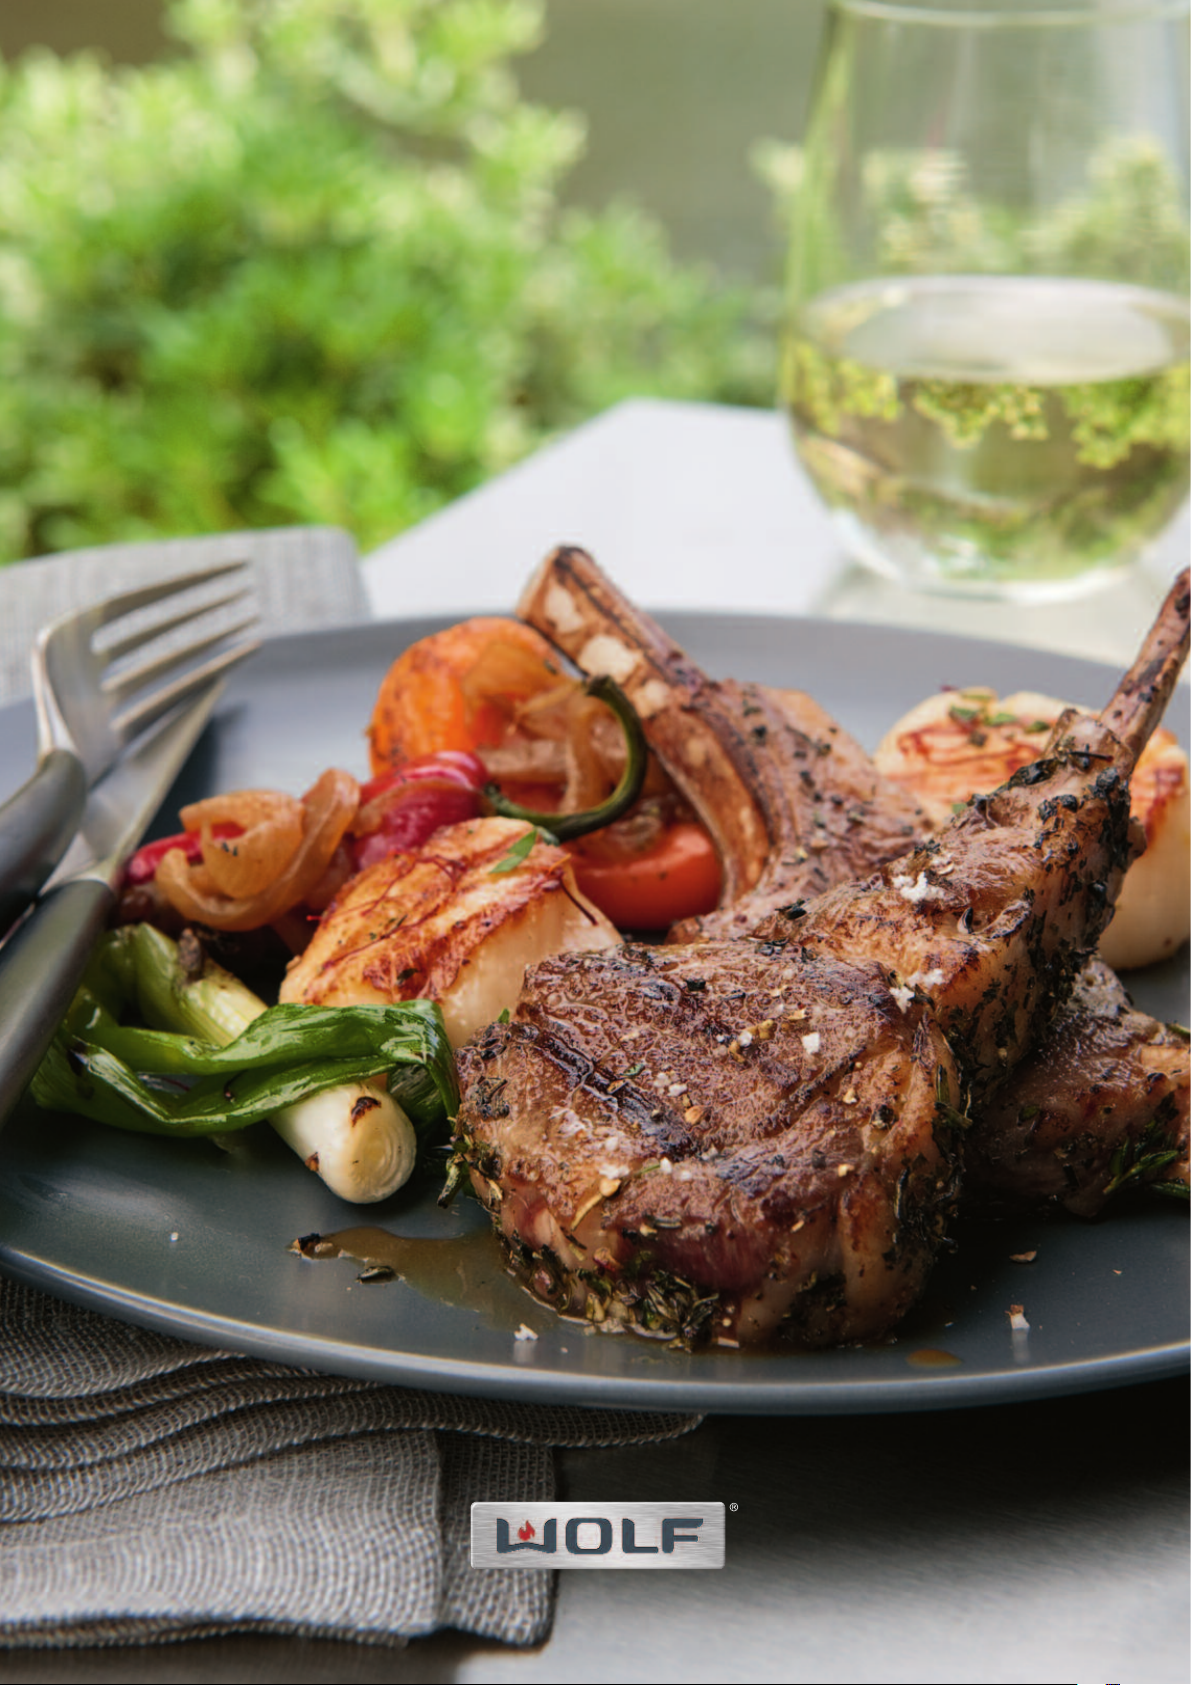
USE & CARE GUIDE
Outdoor Gas Grills
Page 2

Contents
Important Note
WolfOutdoorGasGrills ........................3
SafetyInstructions ............................4
OutdoorGrillFeatures .........................6
OutdoorGrillUse&Care .......................8
TroubleshootingGuide ........................18
WolfOutdoorGrillingGuide ....................19
ServiceInformation...........................22
WolfWarranty ...............................23
Features and specifications are subject to change at any time
without notice. Visit our website, subzero-wolf.com.au for the
most up-to-date information.
IMPORTANT NOTE: Throughout this guide, dimensions in
parentheses are millimeters unless otherwise specified.
CONTACT
INFORMATION
To ensure the safe and efficient use of Wolf equipment,
please take note of the following types of highlighted
information throughout this guide:
IMPORTANT NOTE highlights information that is especially
important.
CAUTION signals a situation where minor injury or product
damage may occur if instructions are not followed.
WARNING states a hazard that may cause serious injury or
death if precautions are not followed.
Sub-Zero Group Australia Pty Ltd
Level 10, 469 La Trobe Street
Melbourne Victoria 3000
Phone 03 9600 2218
subzero-wolf.com.au
Page 3

WolfOutdoor Gas Grills 3
IMPORTANT INSTRUCTIONS
FORYOUR SAFETY
If you smell gas:
1. Shut off gas to the appliance.
2. Extinguish any open ames.
3. Open lid or remove cover.
4. If odor continues, keep away from the appliance and immediately call your gas supplier or
re department.
FORYOUR SAFETY
1. Do not store or use gasoline or other ammable vapors and liquids in the vicinity of this or
any other appliance.
2. An LP cylinder not connected for use shall not
be stored in the vicinity of this or any other
appliance.
3. Keep any electrical supply cord and the fuel
supply hose away from any heated surfaces.
This appliance shall only be used in an above
ground open-air situation with natural
without stagnant areas, where gas leakage and
products of combustion are rapidly dispersed by
wind and natural convection.
Any enclosure in which the appliance is used shall
comply with one of the following: An enclosure with
walls on all sides, but at least one permanent
opening at ground level and no overhead cover.
Within a partial enclosure that includes an overhead
cover and no more than two walls. Within a partial
enclosure that includes an overhead cover and
more than two walls,the following shall apply—(i)
at least 25% of the total wall area is completely
open; and (ii) at least 30% of the remaining wall
area is open and unrestricted. In the case of
balconies, at least 20% of the total of the side,
back and front wall areas shall be and remain
open and unrestricted.
ventilation,
THESEOUTDOOR PRODUCTS ARE FOR
OUTDOOR USE ONLY
If stored indoors, detach and leave LP cylinder
outdoors.
BEFORE LIGHTING
1. Read instructions before lighting.
2. Open lid or remove cover before lighting.
3. Ignition does not occur in5seconds, turn
the burner control(s) off, wait 5 minutes, and
repeat the lighting procedure.
Page 4
Safety Instructi ons 4
Thank You
Your purchase of a Wolf outdoor product attests to the
importance you place upon the quality and performance of
your cooking equipment. We understand this importance
and have designed and built your grill with quality materials and workmanship to give you years of dependable
service.
We know you are eager to start grilling, but before you do ,
please take some time to read this use & care guide.
Whether you are a beginning cook or an expert chef,
be to your benefit to familiarize yourself with the safety
practices, features, opera tion and care recommendations
of the Wolf outdoor gas grill.
Your Wolf outdoor product is protected by a warranty that
is one of the finest in the industry. Take a moment to read
the warranty statement at the end of this guide and refer
to it should service become necessary.
IMPORTANT NOTE: Wolf outdoor products are manufac-
tured for use with natural gas or LP gas. Check the
product rat
model. If this appliance does not correspond to your type
of gas, contact your authorized Wolf dealer.
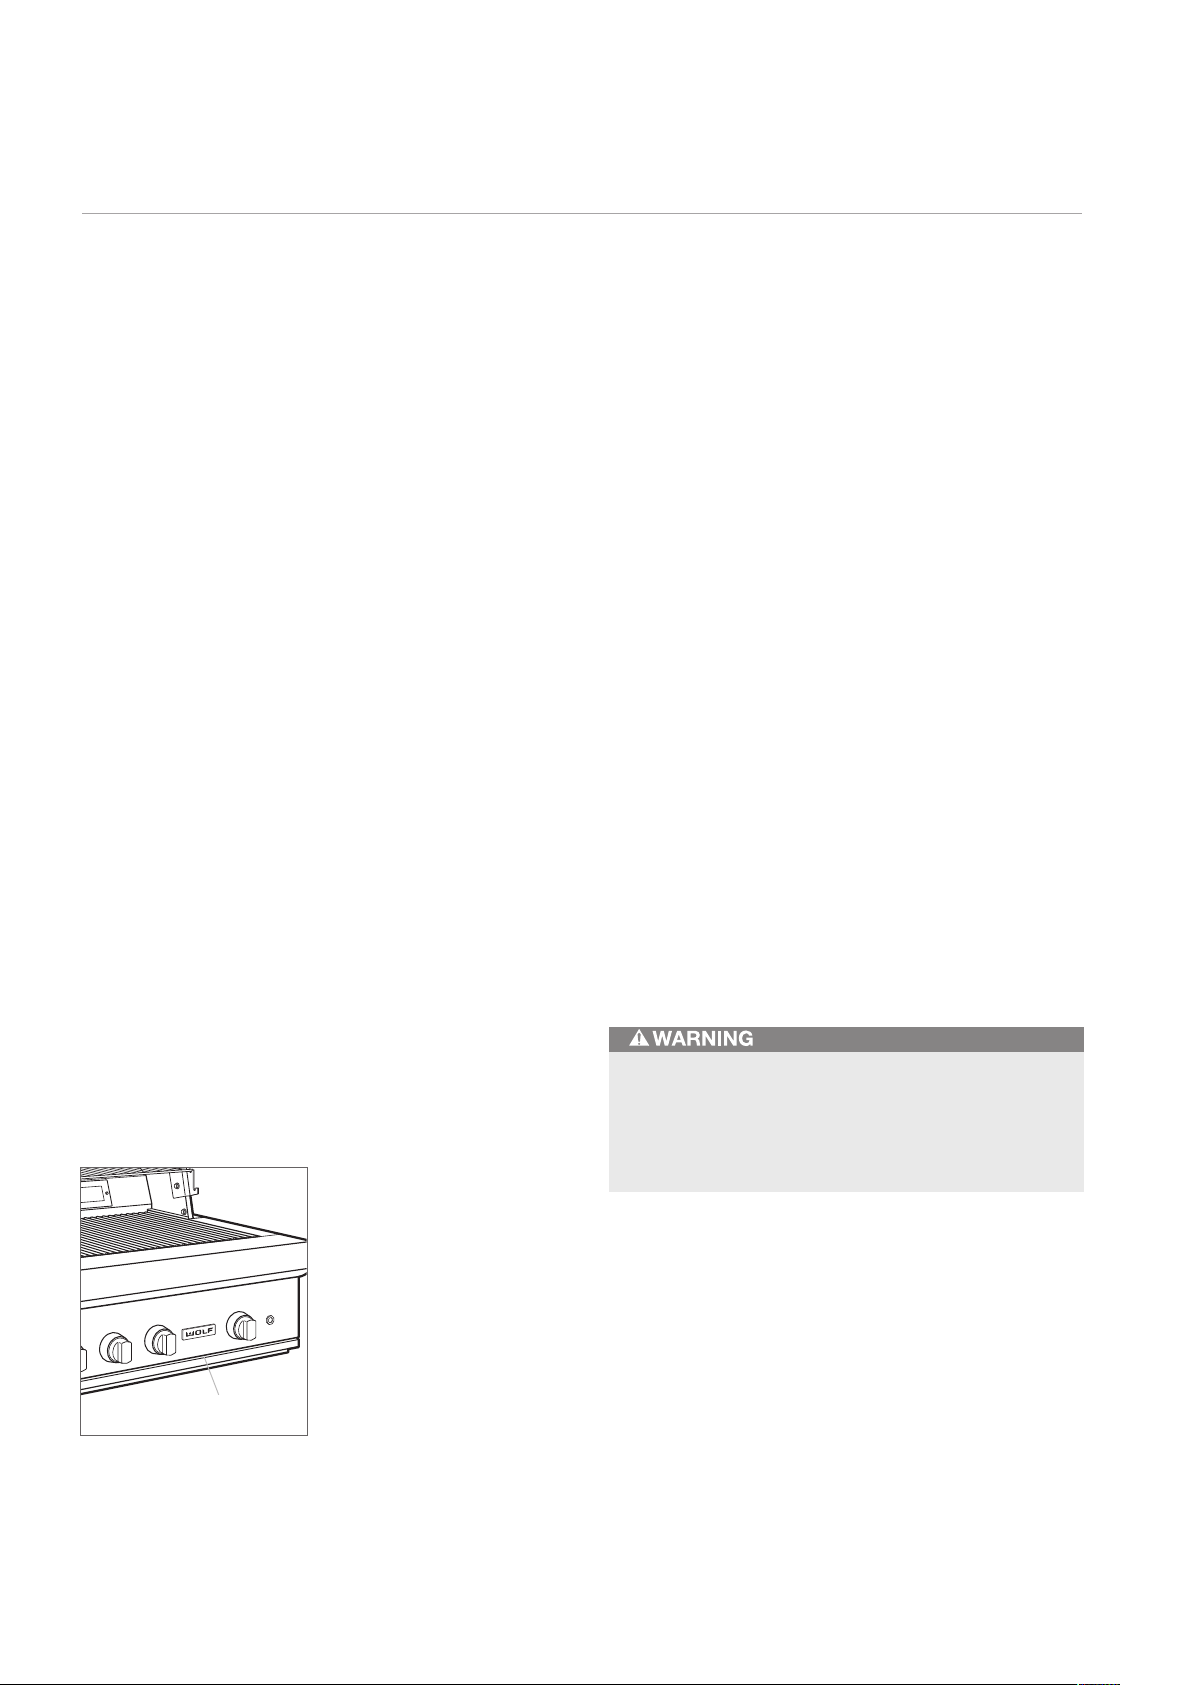
For the outdoor grill, the rating plate is located above the
drip tray, behind the logo. The drip tray must be removed
to view the rating plate.
ing plate for the type of gas for your specific
it will
IMPORTANT INSTRUCTIONS
•
Read this use & care guide carefully before using
your outdoor product to reduce the risk of fire,
electric shock or injury to persons.
•
Installation must be performed by a qualified
installer, service agency or the gas supplier.
•
Warranty service must be performed by Wolf
factory certified service.
•
Make sure the outdoor product is properly installed
and connected to the gas for which your unit was
designed. Do not use charcoal or other material in
your outdoor product.
•
Make sure the outdoor product is connected to a
properly grounded electrical supply.
•
Have the installer show you where the gas shut-off
valve is so you can shut off the gas supply in an
emergency.
•
If the smell of gas is present, gas connections may
not be properly sealed or you may have a gas leak.
Determining where the gas leak is should be done
by Wolf factory certified service or the gas supplier.
Refer to the illustrations below.
RATING PLATE
Outdoor grill
Wolf outdoor products are for outdoor use only!
Do not operate in enclosed areas. This could result
in carbon monoxide buildup which would result in
injury or death.
Page 5

Safety Instructions 5
IMPORTANT INSTRUCTIONS
GENERAL SAFETYREQUIREMENTS
•
The installation of this appliance must conform with
local codes or, in the absence oocal codes, either
the National Fuel Gas Code, ANZI Z223.1/NFPA 54,
or CAN/CGA-B149.1, Natural Gas Installation Code
or CAN/CGA-B149.2, Propane Installation Code.
•
Minimum clearance of 12"
sides of the grill to adjacent combustible construction must be maintained. This outdoor cooking gas
appliance should not be located under overheadunprotected combustible construction.
•
The utilization of an external electrical source
requires that when installed, this outdoor cooking
gas appliance must be electrically grounded in
accordance with the local codes or, in the absence
oocal codes, with the National Electrical Code,
ANSI/NFPA 70, or the Canadian Electrical Code,
CSA C22.1. Keep any electrical supply cord, or the
rotisserie motor cord and the fuel supply hose away
from any heated surfaces.
•
It is critical that the gas burners are properly installed
with their orices inside the burners air shutters. If
not properly installed, gas may leak outside of the
burner that could lead to re, potential damage to
your grill and bodily injury.
•
When choosing an area for the grill, whether a
portable or built-in application, consider exposure to
wind, proximity to trafc paths and length of the gas
supply line.
•
LP cylinder must be disconnected when not in use.
•
This outdoor cooking gas appliance is not intended
to be installed in or on recreational vehicles and/or
boats.
(305)
from the back and
•
Do not obstruct the ow of combustion and ventilation air to this appliance. Keep the ventilation
openings of the cylinder enclosure free and clear
from debris.
•
Check all gas connections for leaks with soapy
water solution and brush. Never use an open ame.
Refer to the outdoor gas grill installation guide for
the leak testing procedure.
•
Check exible hoses for cuts and wear that may
affect the safety before each use.
•
Never light the outdoor product with cover in place.
•
Never use the grill without the drip pan installed and
pushed all the way to the back of the grill.
•
Never ll an LP cylinder beyond 80% full.
•
CALIFORNIA PROPOSITION 65—WARNING:
The burning of gas cooking fuel generates some
by-products which are on the list of substances
known by the State of California to cause cancer or
reproductive harm. California law requires businesses to warn customers of potential exposure to
such substances. To minimize exposure to these
substances always operate this unit according to the
use and care manual, ensuring you provide good
ventilation when cooking with gas.
•
In Massachusetts: All gas products must be installed
usinga“Massachusetts” licensed plumber or gastter.A“T” handle type manual gas valve must be
installed in the gas supply line to this appliance. This
applies to permanently installed natural gas and
propane installations. This does not apply to propane
portable installations usinga20-lb tank.
• Ensure all transit protection and packaging is removed
before operation of this appliance.
Page 6
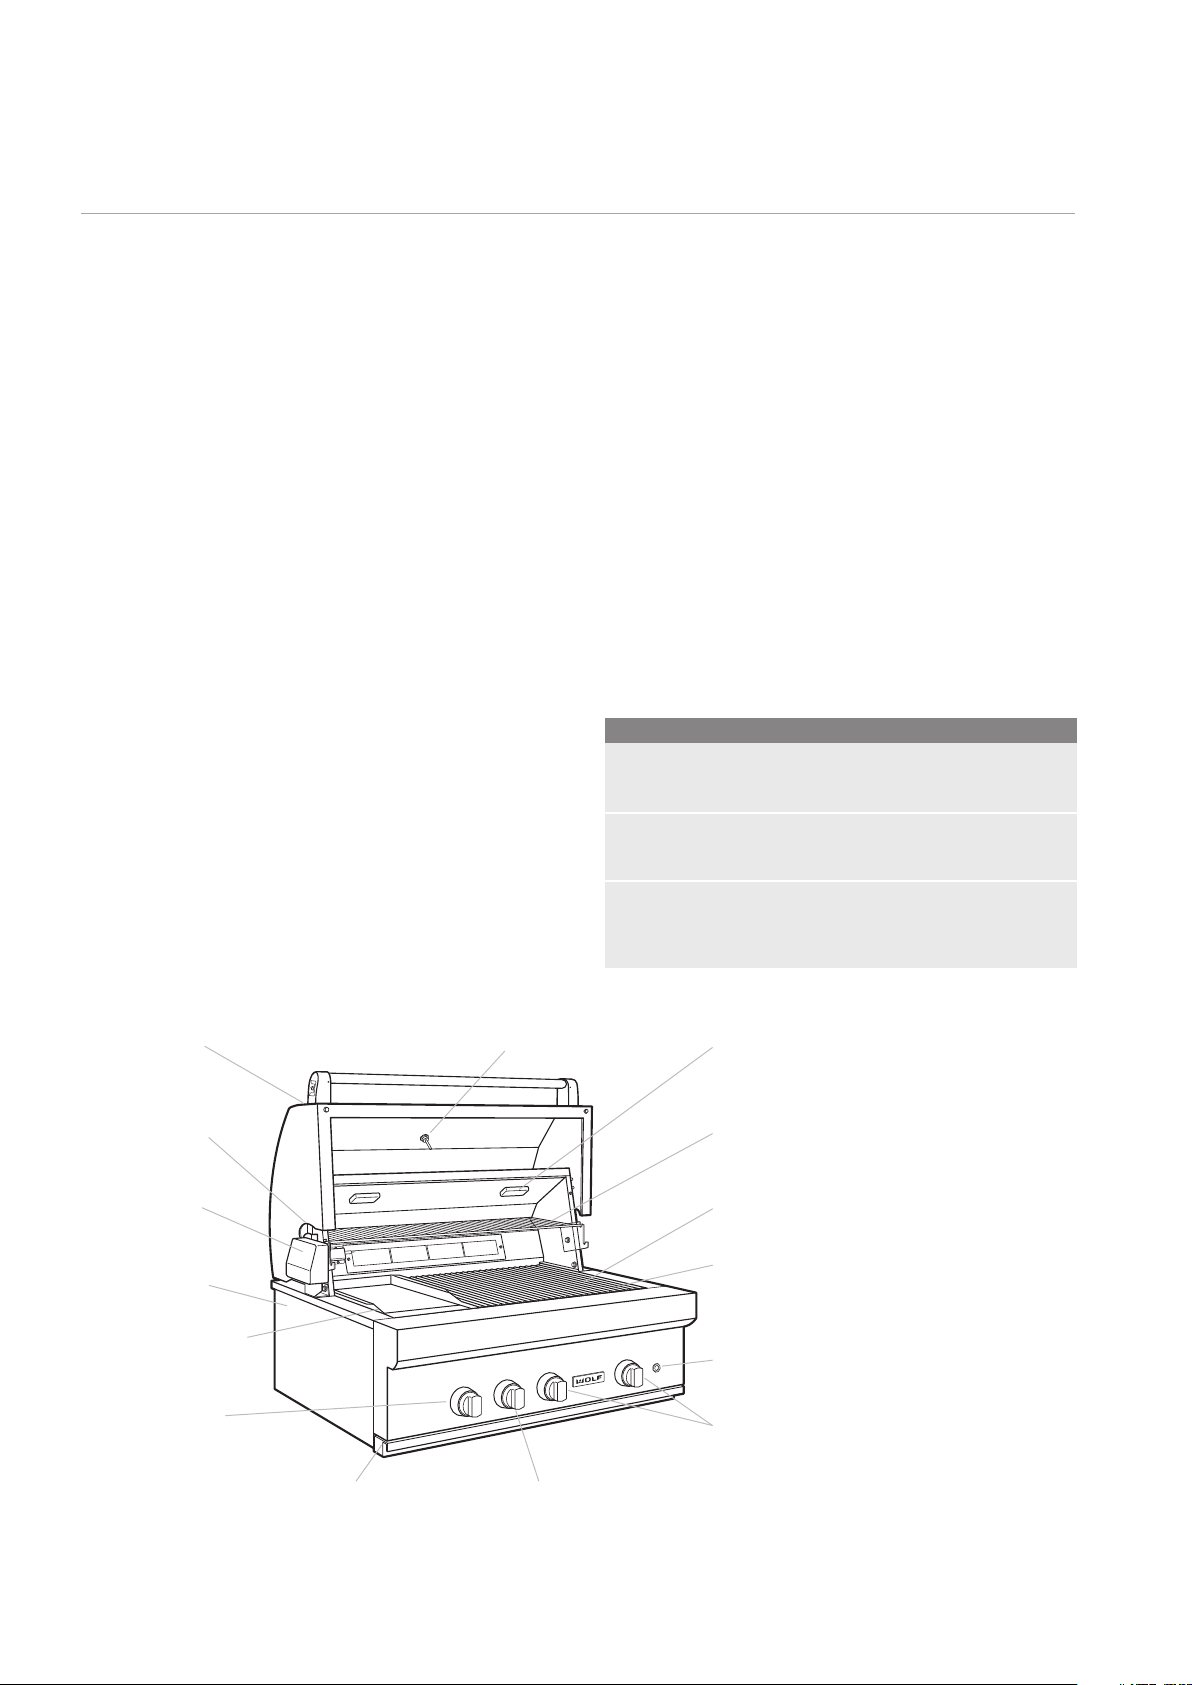
Outdoor Grill Features 6
Outdoor Gas Grill Features
• Natural gas or LP gas outdoor grills in 30" (762),
36"
(914)
, 42" (1067)
• Crafted of heavy-duty stainless steel.
• Each grill burner is individually contained for independ-
ent heat control.
• Infrared sear zone—direct heat sears meats to seal in
juices.
• Radiant heat from ceramic briquettes mixes with direct
heat for more thorough grilling.
• Two-position rotisserie system with infrared burner.
• Stainless steel burner grates provide more heat
contact for even grilling.
• Halogen lights illuminate the grilling surface—LED lit
control knobs allow for night grilling.
O UTD OOR GRI LL
Model OG36 shown
Double wall hood
front
Thermometer
• Electric hot surface ignitors operate by pushing in
control knobs.
• Double wall hood front for insulation.
• Hood assist system with concealed springs for easy
opening and closing.
• Three-position warming rack stowable when not in use.
• 30"
(762), 36" (914) and 42" (1067) LP gas models
include gas regulator and hose.
• Smoker box and basting pan included.
Bu r n er Ra t i n g
GRILL BURNERS Mj/ hr
OG30, OG36 and OG42 LPG 28 / NG 29
SOLID PLATE Mj/ hr
OG36, OG42 LPG 28 / NG 29
ROT ISSERIE B URN ER Mj/ hr
OG36 and OG42 LPG/NG 17
Refer to appliance dateplate for further technical information
located under grease tray
Halogen interior
lights
Hood assist system
concealed springs
Two-position
rotisserie system
Heavy-duty stainless
steel construction
Radiant heat ceramic
briquettes
Infrared sear zone
control knob
Pull-out drip tray
WARNING: SOLID PLATE MUST BE FITTED OVER SEAR BURNER
Infrared rotisserie
control knob
Three-position
warming rack
Stainless steel burner
grates
Individually-contained
grill burners
Interior and LED knob
light button
Hot surface ignition
control knobs
Page 7
Outdoor Grill Operat ion 8
ROTISSERIE
IGNITER
CONTROL
KNOB ON HI
Outdoor Grills
BURNER LIGHTING
1) Open the grill hood completely. Do not attempt to light
the grill with the h ood closed.
2) Open the gas supply shut-off valve.
3) Push in the burner control knob and verify that the hot
surface igniter glows. The hot surface igniters are
located below the burner grates inside the flash tubes.
The rotisserie igniter is located on the rear panel next
to the rotisserie burner. Refer to the illustrations below.
If the igniter does not glow, verify t
hat the grill is
plugged into a approved electrical outlet.
4) Once the glow is verified, push in and turn the knob
counterclockwise to the HI position. Hold the knob in
for five seconds. Depending on which burne r you are
attempting to light, a flame will be visible under the
briquettes or on the rotisserie or sear burne r. Once you
see the flame, release the knob. If the burner fails to
light within five seconds, turn knob to the OFF position,
wait five minutes and repeat the lighting procedure.
There may be a popping sound wh
en the burners are
first lit, this is normal.
MANUAL LIGHTING
If no electrical supply is available or if the hot surface
igniter will not light the grill burners, the burners can be lit
manually using a long lit match or BBQ lighter.
1) Open the grill hood completely. Do not attempt to light
the grill with the h ood closed.
2) Open the gas supply shut-off valve.
3) Push in and turn the burner knob counterclockwise to
the HI position. Hold the knob in for five seconds.
4) Insert a lit match held by the lany
ard (located in the
drip tray) or BBQ lighter through the burner grates and
near the top of the flash tube. A flame will be visible
under the briquettes. Once you see the flame, release
the knob. If the burner fails to light within five seconds,
turn knob to the OFF position, wait five minutes and
repeat the lighting procedure.
Always keep your face and body as far away as
possible when lighting.
5) Close the hood and allow the grill to preheat until the
desired temperature is displayed on the thermometer.
FLASH TUBE
Location of flash tube. Rotisserie igniter.
Burner control k nob.
Page 8

Outdoor Grill Operation 9
Using the Outdoor Grill
IMPORTANT NOTE: B
the outdoor grill on high for 10 minutes with the hood
closed. This will heat the internal components and burn off
any residual oil and grease used in the manufacturing
process. A small amount of smoke and odor may be
noticed during the initial break-in period.
1) Make sure the drip tray is fully inserted into the grill.
2) Light the grill burners following the procedure on
the previous page.
3) Turn burner control knobs to HI and allow the grill to
preheat for 10 minutes or until the desired temperature
is displayed on the thermometer. The hood should be
closed during preheating.
4) Place food on the grill and cook to the desired temperature or doneness. Adjust the heat setting if necessary.
The burner control knob may be set to any position
between HI and LO. Refer to heat settings on page 13.
5) Allow grill to cool and clean the drip tray after each
use.
efore grilling for the first time, turn
Infrared Sear Burner
Searing steaks and other meats with the infrared sear
burner at the beginning of the grilling cycle helps lock in
juices and flavor. Sear meats quickly, followed by regular
grilling over the grill burners.
Never allow liquids to come in contact with the infrared
sear burner. This could cause damage to the ceramic
tiles. Do not place briquette trays over the infrared sear
burner. This will block the infrared heat and cause
damage to the tray.
Page 9

Outdoor Grill Operation 10
Rotisseri e System
The rotisserie system rotates food in front of an infrared
burner for even cooking and a more juicy taste. The twoposition rotisserie allows for food of different sizes to cook
at the proper distance from the infrared rotisserie burner.
The maximum load for the rotisserie is 25 lbs
LOW POSITION FOR LARGE LOADS
(11 kg).
1) Install the rotisserie motor in the position shown in the
illustration below. The motor so cket hole will line up
with the lower notch o
f the spit saddles.
2) Insert the rotisserie spit rod in to the motor socke t hole
and place rod on the lower notch of each spit saddle.
Remove the burner grates and place the basting pan
on top of the briquette trays to catch drippings.
HIGH POSITION FOR SMALL LOADS
1) Install the rotisserie motor in the position shown in the
illustration below. The motor so cket hole will line up
with the upper notch of the spit saddles.
2) Insert the rotisserie spit rod in to the motor socke t hole
and
place rod on the upper notch of each spit saddle.
Place the basting pan on top of the burner grates to
catch drippings.
For easy removal of the spit rod, lift slightly on the rotisserie motor and pull the spit rod out.
LOW POSITION
HIGH POSITION
USING THE ROTISSERIE
1) Install the rotisserie motor on the motor bracket and
plug it in to a approved e lectrical outlet.
2) Insert food in the middle of the spit rod and secure it
with the meat forks on both ends by tightening the
thumb screws. If multiple pieces of food will be cooked
at the same time, make sure the load is evenly
balanced on the spit rod.
3) Insert the spit rod in the rotisserie motor at the desired
cooking position. For large loads, you may need to
remove the burner grates and warmi
ng rack for extra
clearance.
4) Always use the basting pan beneath the food to catch
drippings and prevent them from falling on the burners
and briquette trays. For large loads, the burner grates
may be removed to allow basting pan to sit directly on
the briquettes.
5) Locate the rotisserie knob which is the second knob
from the left.
6) Push in and turn the knob counterclockwise to the
HI position. The rotisserie igniter is locate d on the rear
panel next to the rotisserie burner.
Refer to the illustration on page 8. If the burner fails to light within five
seconds, turn knob to the OFF position, wait five
minutes and repeat.
7) Once lit, close hood until the rotisserie burner has
reached desired cooking temperature (approx 10
minutes). Then place spit rod with food into rotisserie
motor.
8) Once cooking is complete, shut off the rotisserie
burner and main gas valve.
Low rotisserie position. High rotisserie position.
IMPORTANT NOTE: The rotisserie igniter will remain on
during the entire cooking period.
Page 10

Outdoor Grill Operation 11
Rotisserie System
TIPS FOR USING THE ROTISSERIE
• Make sure the food is evenly balanced on the spit rod.
Proper load balance will allow even cooking and
prolong the life of the rotisserie motor.
• The warming rack must be removed or in the storage
position during operation of the rotisserie.
• When using the rotisserie, always keep the hood
closed except when basting or checking the food. A
meat thermometer is recommended to verify that the
food is completely cooked.
• In sunny conditions, it may be difficult to see the flame
to verify ignition of the infrared rotisserie burner.
• When not in use, the rotisserie motor must be stored in
an area protected from outdoor elements. Do not leave
it mounted on the grill.
Warming Rack
The warming rack of the outdoor grill has three positions.
It may be used to warm food in the high or low position, or
stowed away when not in use. The high position is further
away from the heat source while the low position is closer
to the heat source. When the warming rack is not in use, it
conveniently stows away by moving up to the top support
hooks.
IMPORTANT NOTE: From the high position, the warming
rack must be removed and rotated 180° for the low
position and storage position.
The warming rack must be removed or in the storage
position during rotisserie operation.
STORAGE
Warming rack positions.
HIGH
LOW
Page 11

Outdoor Grill Operation 12
Smoker Box
The Wolf sealed smoker box can hold your favorite liquid
or soaked wood chips to give meat a smoky flavor. The
smoker box is provided with all outdoor grills.
TO INSTALL AND USE THE SMOKER BOX
1) Remove one burner grate section and slide the remain-
ing sections to the side inside the grill, so the center is
exposed. Remove a center hal
where there is no flash tube. Refer to the illustration on
page 8 for location of the flash tubes.
2) Position the smoker box in place of the briquette tray.
The smoker box will line up over the top of the burner
flame. For best results, have the smoker box centered
in the middle of the grill.
3) Open the smoker box lid, add your favorite soaked
wood chips and replace the l id. Do not overfill the
smoker box with wood chips.
4) Turn the control knob fo r the burner und
box on HI. Once smoking begins, turn heat down to
prevent wood chip flare-up.
5) Wear a barbecue mitt to protect hands. Replace the
burner grate se ction over the smoker box and place
food directly on the grate o ver the smoker box.
f-size briquette tray
er the smoker
IMPORTANT NOTE: The smoker box may warp slightly
with heat, but will retain i ts original shape after it cools.
Never use the smoker box over the infrared sear
burner.
6) Every 30 to 45 minutes, slide the grate section to the
side to expose the smoker box, open the smoker box,
stir chips and add more if needed.
7) Turn food if needed. Repeat steps 5 and 6 until desired
temperature or doneness.
Page 12

Outdoor Grill Operation 13
Grilling Recommendations
GRILLING METHODS
Direct method: Food is cooked directly over the heat
source. Turn food halfway through grilling time for even
cooking. The hood may be open or closed. Used for
steaks, chicken pieces, chops and vegetables.
Indirect method: Food is placed next to heated area, not
on top of it. Place food in the middle of the grill with the
outside burners on. Hood must be closed. Used for ribs,
large roasts, whole poultry and rotisserie grilling of large
roasts or poultry.
Select the grilling method best suited to the food you will
be cooking; direct, indirect or rotisserie. Refer to the Wolf
outdoor grilling guide on pages 19–21 for grilling method
recommendations.
HEAT SETTINGS
HI and SEAR: Used for quick searing of meats and
vegetables.
MED: Grill steaks, pork chops and hamburgers. You may
also sear meats on medium and cook them on low.
LO: Used for cooking dense vegetables, roasts, thick cuts
of meat, poultry and fish.
Page 13

Outdoor Grill Operation 14
Grilling Recommendations
TIPS FOR SUC CESSFUL GRILLING
• Never leave food unattende d.
• Cooking with the hood closed will decrease cooking
time, provide an even temperature, conserve gas,
lessen flare-ups and improve fl avor.
• Do not use aluminum foil. Grease trapped in the foil
may cause flare-ups.
• Trim excess fat from meats and slit the remaining fat at
two-inch increments to avoid f lare-ups and curling.
Fatty meats may be cooked indirectly
settings. Refer to grilling methods.
• When opening the hood, wear a barbecue mitt that
covers your wrist. Stand to the side of the grill and lift
the hood handle slowly.
• Allow meat to defrost in the refrigerator overnight
rather than microwaving it to help retain juices.
• Apply salt to meat only after cooking t o prevent it from
drying out.
• Baste meat with barbecue sauce or other sugar-based
sauces only during the last few minutes of cooking to
prevent burning.
on lower heat
• If using bamboo skewers, soak the skewers in cold
water for 30 minutes before cooking time.
• To burn off grease drippings after cooking, operate the
grill on high for five minutes. When the grill cools down,
remove and c lean the drip tray.
• When deep fat frying, be sure the pan is large enough
to accommodate the food without overflowing when fat
begins to bubble. Heat fat slowly. Never leave a deep
fat fryer unattended. Avoid deep fat frying moist or
frost-covered foods. Foods
may cause the hot fat to spatt er. Use a thermometer to
avoid heating the fat above the flash point.
with a high water content
•
Turn food only once, halfway through cooking time.
• Use a spatula or tongs to turn meat instead of p iercing
with a prong to prevent juices from escaping.
• Brush vegetables, lean cut s of meat, skinless poultry,
fish and seafood with oil to p revent sticking.
Page 14

Outdoor Grill Care 15
Grill Lights
Wolf outdoor grills are equipped with halogen interior
lights and LED lights in the control knobs for night grilling.
To turn the interior lights and control knob lights on, push
the button located on the front panel of the grill. Interior
lights turn off automatically when the hood is closed but
the control knob lights will remain on. Push the button
again to turn all lights off.
INTERIOR LIGHT BULB REPLACEMENT
For replacement, outdoor gas grills require 10W, type
G4 halogen bulbs available at hardware stores or through
your authorized Wolf dealer. For local dealer information,
visit the find a showroom section of our website,
wolfappliance.com.
Use caution when handling light bulbs. Halogen bulbs
get hot instantly and adjacent parts may retain heat.
IMPORTANT NOTE: Use a paper towel when handling the
replacement halogen bulb to keep oil on fingers from
touching the bulb. Failure to do this will shorten the life of
the bulb.
1) Unplug the grill from the electrical outlet and allow the
halogen bulb to cool before replacing.
2) Remove the light cover lens by pushing in on one of
the side retaining brackets with a screwdriver. Remove
the old halogen bulb by pulling it straight out of the
socket without twisting the bulb.
3) Using a paper towel to handle the new halogen bulb,
insert the bulb into the socket. Place the light cover
lens back onto the light assembly.
Page 15

Outdoor Grill Care 16
Care Recommendations
STAINLESS STEEL EXTERIOR
Outdoor grills Grill interior.
• Never clean the stainless steel exterior when it is hot.
After the initial grilling, certain areas of the outdoor
product may discolor. This is a normal discoloration
caused by the intense heat given off by the burners.
• After the grill has cooled, use a mild abrasive pad such
as Scotch Brite with a mild stainless steel cleaner to
scrub the stainless steel parts of your grill. Always
scrub in the direction of the grain.
••Specks of grease can gather on the surface of the
stainless steel and get baked-on. These can be
removed by using a mild abrasive pad with a stainless
steel cleaner. Do not use steel wool to clean stainless
steel.
Regular cleaning of the appliance is recommended
periodically. The appliance should always be cleaned
thoroughly when it has not been used for some time.
GENERAL CLEANING
• Turn all grill burners (including sear) on HI. Do not turn
on the rotisserie. Let the grill heat for 10 to 12 minutes
on HI with the hood closed. Turn burners OFF and
allow the grill to cool completely.
• Remove burner grates and briquette trays. Cover
burner tubes and the infrared sear burner with plastic
wrap. Spray the grill interior with oven cleaner and let
stand according to directions.
• Wipe out the inside of the grill with a sponge, SOS
pads and water. A putty knife can be used to scrape off
thicker debris.
Stainless steel burner grates.
• Scrub the burner grates with a grill brush immediately
after cooking is completed and the burners are turned
off. Cleaning the grates would be more difficult once
they are allowed to cool.
• Wear a barbecue mitt to protect hands. Dip the grill
brush in water frequently and scrub the hot burner
grates. Steam, created as water contacts the hot grate,
helps loosen food particles. The food particles will
either get burned into the briquettes or fall into the
drip tray.
• Do not clean the burner grate section while in place
over the infrared sear burner. The grates may be
rotated for cleaning. Liquids should not come in
contact with the infrared sear burner to avoid damage
to the ceramic tiles.
Page 16

Outdoor Grill Care 17
Care Recommendations
GENERAL CLEANING
Ceramic briquettes and briquette tray.
• It is not necessary to clean the ceramic briquettes after
every grilling. They will burn themselves clean during
the next cooking cycle. If desired, operate the grill on
high for 10–12 minutes to burn the briquettes clean.
• Periodically, the briquette trays need to be cleaned.
Allow briquette trays to cool. Remove trays from the
grill, shake off loose debris and wipe trays clean.
Smoker box.
• The smoker box and lid can easily be removed from
the outdoor grill for cleaning. Empty contents and
clean with warm water and a mild detergent.
Grill drip tray.
• The grill drip tray collects grease and food particles.
Allow the drip tray and its contents to cool before
cleaning. Slide the tray out and wipe it clean. Make
sure the drip tray is fully inserted back into the grill.
To avoid a grease fire, the drip tray should be cleaned
after every use.
MAINTENANCE
Infrared sear burner.
• The infrared sear burner has a stainless steel housing
and protective screen. The screen helps reflect heat up
to the cooking surface and also catches any food particles from landing on the ceramic burner. At searing
temperatures, all food particles will be burned off. The
only maintenance required is to clean the protective
screen and check for particles that may be trapped.
• Never allow liquids to come in contact with the infrared
sear burner. This could cause damage to the ceramic
tiles.
Grill burner inspection.
• Inspect the grill burners for spiders and insects once
a year or if the outdoor product has not been used for
more than a month.
• Inspect the grill burners if the grill does not reach
temperature, heats unevenly or flames appear yellow
along with the smell of gas.
Spiders and insects can nest in the burners of the
outdoor product which causes the gas to flow from the
front of the burner. This dangerous condition can cause
a fire behind the valve panel, damaging the grill and
making it unsafe to operate.
Page 17

Trou blesho oting G uide 18
Trou blesho oting
If your Wolf outdoor product is not operating properly, use
the following troubleshooting guide before calling Wolf
factory certified service. This guide will save you time and
trouble and may help you avoid the expense of a service
call.
Burners do not light.
• Push burner control knob in and verify that igniter
glows.
• If igniter does not glow, verify that the outdoor product
is plugged into a
• Verify that the GFCI has not been tripped.
• If no electrical supply is available, burners can be lit
manually. Refer t o page 8.
• Purge line of trapped air.
Smell of gas is present.
• Have Wolf factory certified service or the gas supplier
check for a gas leak.
Burner flame is yellow and smell of gas is present.
approved electrical outlet.
Burner flame blows out.
• Check for proper gas supply.
• LP gas models, check for empty LP gas cylinder.
• If exposed to high winds, provide a wind block.
Excessive flare-ups occur.
• Clean burner grates.
• Excess fat on meat or excessive cooking temperature.
Interior or control knob lights will not operate.
• Verify that the outdoor product is plugged into a
approved electrical outlet.
• Verify that the GFCI has not been tripped.
• Interior light bulb may need to be replaced.
Hot surface igniter will not operate.
• Verify that the outdoor product is plugged into a
approved electrical outlet.
• Verify that the GFCI has not been tripped.
• Inspect grill burners for obstr uctions such as spiders
and insects.
• Have Wolf factory certified service or the gas supplier
check for a gas leak.
Burners do not provide enough heat.
• Check for proper gas supply.
• Check for bent or kinked gas supply hose.
• LP gas models, check for empty LP gas cylinder.
• Preheat the outdoor product for 10 minutes.
• Inspect grill burners for obstr uctions such as spiders
and insects.
Thermometer not reaching high temperatures.
• Operate grill on high for 10–12 minutes with hood
closed to reach higher temperatures.
Page 18

Wolf Outdoor Grilling Guide 19
Outdoor Grilling Guide
The outdoor grilling guide on the following pages provides
the suggested grilling time and flame setting for a variety
of foods. Consult an outdoor grilling cookbook for more
specific times and handling of various foods. For more
outdoor grilling recipes and ideas, visit wolfappliance.com.
GENERAL GRILLING
Preheat grill burners for 10 minutes on the desired heat
setting. To sear foods, preheat the infrared sear burner on
HI for 10 minutes. Sear meat up to two minutes on each
side, then move food to the grilling area, turning food
halfway through cooking time. Cook to the desired
temperature or doneness.
ROTISSERIE
Preheat the infrared rotisserie for 10 minutes on the
desired heat setting. Heat from the rotisserie comes only
from the back of the grill. Additional indirect heat from the
far right burner, on LO, may be used to speed up cooking
time.
Internal Temperature
The internal temperatures shown in the chart below are
USDA recommended carving temperatures.
INTERNAL TEMPERATURE
DONENESS INTERNAL TEMP
BEEF, LAMB AND VEAL
Rare 140°F
Medium Rare 145°F (65°C)
Medium 160°F (70°C)
Well Done 170°F (75°C)
PORK
Well Done 170°F (75°C)
POULTRY
Well Done Breast 170°F
Well Done Thigh 180°F (80°C)
Well Done Stuffing 165°F (75°C)
(60°C)
(75°C)
Grill Temperature
HOOD THERMOMETER TEMPERATURE
SMOKE ENHANCED
Use the smoker box (provided) to smoke enhance foods.
Refer to page 12 for instructions on using the smoker box.
For a more smoke enhanced flavor, keep the grill temperature between 200°F
(95°C) and 250°F (120°C) to slow cook
the food and do not overfill the smoker box with wood
chips. For a less smoke enhanced flavor, place the food
above the smoker box on the warming rack. Timing for
food on the warming rack will be longer.
SETTING TEMPERATURE
DIRECT HEAT
LO 200–250°F
MED 325–375°F (165–190°C)
HI 400–450°F (205–230°C)
INDIRECT HEAT
MED 300–325°F
HI 375–400°F (190–205°C)
(95–120°C)
(150–165°C)
Page 19

Wolf Outdoor Grilling Guide 20
Outdoor Gr illing Guid e
GENERAL GRILLING
FOOD THICKNESS OR WEIGHT GRILLING TIME FLAME SETTING
BEEF
Hamburgers
Steaks
1
/2" (13) thick 3–5 min (8–10 min)* MED
3
/4"–1" (19–25) thick 4–10 min (12–24 min)* MED
1
1"–1
/2" (25–38) thick 9–12 min (12–24 min)* MED
Tenderloin (whole) 3" (76) diameter 30–40 min (40–45 min)* MED–LO to LO turning occasionally.
PORK
Chops
Tenderloin (whole) 2"
3
/4"–1" (19–25) thick 8–10 min (15–18 min)* MED
(51) diameter 20–25 min (25–35 min)* MED–LO turning occasionally.
Ribs half rack 1 hr 30 min–2 hrs MED for 5 min bone side down, then
turn heat to LO. Turn every 20 min.
Ham Steaks 1" (25) thick 10–15 min MED
POULTRY
Chicken (boneless, skinless breast) flattened to
1
/2" (13) 12–14 min MED
Chicken (bone-in breast) 28–32 min MED
Chicken (bone-in legs) 16–20 min MED
Chicken (bone-in thighs) 20–25 min MED
Chicken (halved) 3–5 lbs
Cornish Hens 1
Turkey (halved) 20 lbs
Turkey Breast (boneless) 4–5 lbs
Turkey (bone-in legs and thighs)
(1.4–2.3 kg) whole weight 35–40 min MED
1
/2–2 lbs (.7–.9 kg) 40–50 min MED–LO
(9.2 kg) whole weight 2 hr 45 min–3 hrs MED–LO to LO
(1.8–2.3 kg) 2 hr 30 min–3 hrs Indirect (HI)
3
/4–1 lbs (.3–.5 kg) 45–55 min MED–LO
FISH AND SEAFOOD
Fish Fillets 1"–1
1
/4" (25–32) thick 12–14 min MED Brush oil on food and grates
before grilling.
VEGETABLES
Corn (with husks) 20 min MED
Summer Squash and Zucchini (halved) 10–13 min MED Brush with oil before grilling.
Winter Squash 1 hr Indirect (MED) Brush with oil before grilling.
Bell Peppers (whole) 10–15 min MED
Portabella Mushrooms (whole) 12 min MED Brush with oil before grilling.
FRUIT
Apples (whole) 35–40 min Indirect (MED)
Pears (halved) 10–12 min MED Brush with oil before grilling.
Skin side down first.
*Sear up to 2 minutes per side. Use grilling time in parentheses with no searing.
Consult an outdoor grill ing cookbook for specific times and handling of various foods. For more outdoor grilling ideas, go to wolfappliance.com.
Page 20

Wolf Outdoor Grilling Guide 21
Outdoor Grilling Guide
ROTISSERIE
FOOD THICKNESS OR WEIGHT GRILLING TIME FLAME SETTING
Chicken 3–4 lbs
(1.4–1.8 kg) 1 hr 30 min Rotisserie (HI)
Place pan on grates to collect drippings.
Turkey 19–20 lbs
(8.7–9.2 kg) 4 hrs Rotisserie (HI) with right burner on LO.
Remove grates and place pan on
briquettes to collect drippings.
GRILLING IN 8 MINUTES OR LESS
FOOD THICKNESS OR WEIGHT GRILLING TIME FLAME SETTING
MEAT AND FISH
Ham Steaks
1
/2" (13) thick 6 min MED
Hot Dogs 5–6 min MED–HI
Shrimp 16–20 pkg 5–6 min MED–HI
Scallops 5–6 min MED–HI
VEGETABLES
Asparagus 3–6 min Indirect (MED) Brush with oil before grilling.
Can also use a vegetable basket.
Eggplant
1
/2" (13) thick 6 min MED Brush with oil before grilling.
Portabella Mushrooms (sliced) 6 min MED Brush with oil before grilling.
Onion (sliced)
1
/2" (13) thick 6–7 min MED Brush with oil before grilling.
FRUIT
Apple (sliced)
1
/2" (13) thick 4–5 min MED Brush with oil before grilling.
Banana (halved) 5–6 min MED Brush with oil before grilling.
Start grilling on cut side.
Pineapple (sliced)
1
/2" (13) thick 8 min MED Brush with oil before grilling.
SMOKE ENHANCED
FOOD THICKNESS OR WEIGHT GRILLING TIME FLAME SETTING
Chicken (whole) 3–4 lbs
Cornish Hens 1
(1.4–1.8 kg) 2–3 hrs MED–LO
1
/2–2 lbs (.7–.9 kg) 1 hr 30 min–1 hr 45 min MED–LO
Chicken (whole, cut up) 45 min–2 hrs MED–LO
Brats and Sausages (uncooked) 30 min–1 hr MED–LO
Fish
1
/2"–1" (13–25) thick 45 min–1 hr MED–LO.
Brush with oil and place in grilling basket.
Consult an outdoor grilling cookbook for specific times and handling of various foods. For more outdoor grilling ideas, go to wolfappliance.com.
Dimensions in parentheses are in millimeters unless otherwise specified.
Page 21

Service Information 22
Service Information
When requesting information, literature, replacement parts
or service, always refer to the model and serial numbers of
your Wolf outdoor product. This information is found on
the product rating plate. For the outdoor grill, the rating
plate is located above the drip tray, behind the logo. The
drip tray must be removed to view the rating plate.
For location of the
on page 4. Record the
rating plate, refer to the illustrations
rating plate information below for
future reference.
Model Number:
Serial Number:
Installation Date:
Wolf Factory Certified Service:
Phone:
Authorised Wolf Dealer:
BEFORE CALLING FOR SERVICE
Before calling Wolf factory certified service, refer to the
troubleshooting guide on page 18.
PRODUCT REGISTRATION
Register your new Wolf product today so that we may
ensure your satisfaction. You may register by one of the
following options:
1) Mail in the completed Wolf product registration card.
2) Register online at subsero-wolf.com.au
3) Register by phone by calling Wolf customer care at
1300 808 859.
The model and serial numbers of your unit are printed on
the enclosed Wolf product registrat
ion card. If you provide
us with your e-mail address, we will send you exciting new
product updates and recipes as they become available,
along with information on special events.
Phone:
CONTACT
INFORMATION
Sub-Zero Group Australia Pty Ltd
Level 10, 469 La Trobe Street
Melbourne Victoria 3000
Phone 03 9600 2218
subzero-wolf.com.au
The information and images in this guide are the copyright property of Wolf Appliance, Inc. Neither this guide nor any information or images contained herein
may be copied or used in whole or in part without the express written permission of Wolf Appliance, Inc. ©Wolf Appliance, Inc. all rights reserved.
Wolf, Wolf & Design, Wolf Gourmet, W & Design and the color red as applied to knobs are registered trademarks and service marks of Wolf Appliance, Inc.
Sub-Zero, Sub(collectively,the“Company Marks.”) All other trademarks or registered trademarks are property of their respective owners in the United Statesandothercountries.
Zero & Design, Dual Refrigeration, Constant Care and The Living Kitchen are registered trademarks and service marks of Sub-Zero, Inc.
Page 22

Page 23

Wolf Appliance Outdoor Products Limited Warranty
PRODUCT MUST BE APPROVED FOR OUTDOOR USE, DESIGNATED BY MODEL AND SERIAL NUMBER
FOR RESIDENTIAL USE ONLY
FULL ONE YEAR WARRANTY*
For one year from the date of original installation, your Wolf Appliance product warranty covers all parts and
labor to repair or replace, under normal residential use, any part of the product that proves to be defective in
materials or workmanship. All service provided by Wolf Appliance under the above warranty must be performed
by Wolf factory certified service, unless otherwise specified by Wolf Appliance, Inc. Service will be provided
during normal business hours.
LIMITED FIVE YEAR WARRANTY
Wolf Appliance warrants the stainless steel briquette trays, gas valves, drip pans, electronic control boards and
electric heating elements to be free from defects in materials and workmanship under normal residential use
for a period of five years from the date of original installation. The part(s) will be repaired or replaced, free of
charge, with the owner paying for all other costs including labor. All service provided by Wolf Appliance under
the above warranty must be performed by Wolf factory certified service, unless otherwise specified by Wolf
Appliance, Inc. Service will be provided during normal business hours.
LIMITED LIFETIME WARRANTY
For the life of the product, Wolf Appliance will repair or replace any stainless steel part including all fabricated
stainless steel components, stainless steel burners and grates (excluding what is covered in the Limited Five
Year Warranty) to be defective from workmanship and when subjected to normal domestic use and service. This
warranty excludes surface corrosion, scratches, discoloration, weather and atmospheric related staining, and
minor surface rust and oxidation which are normal conditions. Labor to remove and replace defective parts is
not covered. All service provided by Wolf Appliance under the above warranty must be performed by Wolf
factory certified service, unless otherwise specified by Wolf Appliance, Inc.
TERMS APPLICABLE TO EACH WARRANTY
The warranty applies only to products installed for normal residential use. The warranty applies only to products
installed in any one of the fifty states of the United States, the District of Columbia or the ten provinces of
Canada. This warranty does not cover any parts or labor to correct any defect caused by negligence, accident
or improper use, maintenance, installation, service or repair.
THE REMEDIES DESCRIBED ABOVE FOR EACH WARRANTY ARE THE ONLY ONES THAT WOLF APPLIANCE,
INC. WILL PROVIDE, EITHER UNDER THIS WARRANTY OR UNDER ANY WARRANTY ARISING BY OPERATION
OF LAW. WOLF APPLIANCE, INC. WILL NOT BE RESPONSIBLE FOR ANY CONSEQUENTIAL OR INCIDENTAL
DAMAGES ARISING FROM THE BREACH OF THIS WARRANTY OR ANY OTHER WARRANTY, W
EXPRESS, IMPLIED OR
Some states do not allow the exclusion or limitation of incidental or consequential damages, so the above
limitation or exclusion may not apply to you. This warranty gives you specific legal rights and you may also have
other legal rights that vary from state to state.
To receive parts and/or service and the name of Wolf factory certified service nearest you, contact Wolf
Appliance, Inc., P. O. Box 44848, Madison, WI 53744; check the contact & support section of our website,
wolfappliance.com or call 800-222-7820.
*Stainless steel doors, panels, handles, product frames and interior surfaces are covered by a limited 60-day
parts and labor warranty for cosmetic defects.
STATUTORY.
HETHER
Page 24

Sub-Zero Group Australia Pty Ltd
Level 10, 469 La Trobe Street
Melbourne Victoria 3000
Phone +61 3 9600 2218
subzero-wolf.com.au
MF 077
 Loading...