

Page 1

Avaya 1140E IP Deskphone
User Guide
Avaya Communication Server 1000
Document Status: Standard
Document Version: 06.03
Part Code: NN43113-106
Date: May 2011
Page 2

© 2010 Avaya Inc. All Rights Reserved.
Notices
While reasonable efforts have been made to ensure that the information in this docum ent is complete and accurate at the time of
printing, Avaya assumes no liability for any errors. A vaya reser ves the right to make changes and corrections to the information
in this document without the obligation to notify any person or organization of such changes.
Documentation disclaimer
Avaya shall not be responsible for any modifications, additions, or deletions to the original published version of this
documentation unless such modifications, additions, or deletions were performed by Avaya. End User agree to indemnify and
hold harmless Avaya, Avaya’s agents, servants and employees against all claims, lawsuits, demands and judgments arising out
of, or in connection with, subsequent modifications, additions or deletions to this documentation, to the extent made by End
User.
Link disclaimer
Avaya is not responsible for the contents or reliability of any linked Web sites referenced within this site or documentation(s)
provided by Avaya. Avaya is not responsible for the accuracy of any information, statement or content provided on these sites
and does not necessarily endorse the products, services, or information described or offered within them. Avaya does not
guarantee that these links will work all the time and has no control over the availability of the linked pages.
Warranty
Avaya provides a limited warranty on this product. Refer to your sales agreement to establish the terms of the limited warranty.
In addition, Avaya’s standard warranty language, as well as information regarding support for this product, while under
warranty, is available to Avaya customers and other parties through the Avaya Support Web site: http://www.avaya.com/
support
Please note that if you acquired the product from an authorized reseller, the warranty is provided to you by said reseller and not
by Avaya.
Licenses
THE SOFTWARE LICENSE TERMS AVAILABLE ON THE AVAYA WEBSITE, HTTP://SUPPORT.AVAYA.COM/
LICENSEINFO/ ARE APPLICABLE TO ANYONE WHO DOWNLOADS, USES AND/OR INSTALLS AVAYA
SOFTWARE, PURCHASED FROM AVAYA INC., ANY A VAYA AFFILIATE, OR AN AUTHORIZED AVAYA RESELLER
(AS APPLICABLE) UNDER A COMMERCIAL AGREEMENT WITH AVAYA OR AN AUTHORIZED AVAYA
RESELLER. UNLESS OTHERWISE AGREED TO BY AVAYA IN WRITING, AVAYA DOES NOT EXTEND THIS
LICENSE IF THE SOFTWARE WAS OBTAINED FROM ANYONE OTHER THAN AVAYA, AN AVAYA AFFILIATE OR
AN AVAYA AUTHORIZED RESELLER, AND AVAYA RESERVES THE RIGHT TO TAKE LEGAL ACTION AGAINST
YOU AND ANYONE ELSE USING OR SELLING THE SOFTWARE WITHOUT A LICENSE. BY INSTALLING,
DOWNLOADING OR USING THE SOFTWARE, OR AUTHORIZING OTHERS TO DO SO, YOU, ON BEHALF OF
YOURSELF AND THE ENTITY FOR WHOM YOU ARE INSTALLING, DOWNLOADING OR USING THE SOFTW ARE
(HEREINAFTER REFERRED TO INTERCHANGEABLY AS "YOU" AND "END USER"), AGREE TO THESE TERMS
AND CONDITIONS AND CREATE A BINDING CONTRACT BETWEEN YOU AND AVAYA INC. OR THE
APPLI C A B LE AVAYA AFFILI AT E ("AVAYA").
Copyright
Except where expressly stated otherwise, no use should be made of the Documentation(s) and Product(s) provided by Avaya.
All content in this documentation(s) and the product(s) provided by Avaya including the selection, arrangement and design of
the content is owned either by Avaya or its licensors and is protected by copyright and other intellectual property laws
including the sui generis rights relating to the protection of databases. You may not modify, copy, reproduce, republish, upload,
post, transmit or distribute in any way any content, in whole or in part, including any code and software. Unauthorized
reproduction, transmission, dissemination, storage, and or use without the express written consent of Avaya can be a criminal,
as well as a civil offense under the applicable law.
Third Party Components
Certain software programs or portions thereof included in the Product may contain software distributed under third party
agreements ("Third Party Components"), which may contain terms that expand or limit rights to use certain portions of the
Product ("Third Party Terms"). Information regarding distributed Linux OS source code (for those Products that have
distributed the Linux OS source code), and identifying the copyright holders of the Third Party Components and the Third
Party Terms that apply to them is available on the Avaya Support Web site: http://support.avaya.com/Copyright.
Trademarks
The trademarks, logos and service marks ("Marks") displayed in thi
Avaya are the registered or unregistered Marks of Avaya, its affiliates, or other third parties. Users are not permitted to use
such Marks without prior written consent from Avaya or such third party which may own the Mark. Nothing contained in this
site, the documentation(s) and product(s) should be construed as granting, by implication, estoppel, or otherwise, any license
or right in and to the Marks without the express written permission of Avaya or the applicable third party . Avaya is a registered
trademark of Avaya Inc. All non-Avaya trademarks are the property of their respective owners.
Downloading documents
For the most current versions of documentation, see the Avaya Support. Web site: http://www.avaya.com/support
Contact Avaya Support
Avaya provides a telephone number for you to use to report problems or to ask questions about your product. The support
telephone number is 1-800-242-2121 in the United States. For additional support telephone numbers, see the Avaya Web site:
http://www.avaya.com/support
s
site, the documentation(s) and product(s) provided by
Page 3

Revision history
May 2011
Stan dard 06.03. This docum ent is up-issued to reflect chang es in
global power supply information.
March 2011
Stan dard 06.02. This docum ent is up-issued to reflect chang es in
the procedures for cancelling Call Forward.
October 2010
Standard 06.01. This document is up-issued to support Unistim
5.0 and Avaya Communication Server 1000 Release 7.5.
June 2010
Stan dard 05.02. This docum ent is up-issued to reflect chang es in
technical content for Call Log Options, and to add Record on
Demand content.
Revision history
June 2010
Standard 05.01. This document is up-issued to support
Communication Server 1000 Release 7.0 for UNIStim 4.0.
January 2010
Standard 04.02. This document is up-issued to support
Communication Server 1000 Release 6.0 for UNIStim 4.0.
October 2009
Standard 04.01. Because of the similarity between
Communication Server 1000 Release 6.0 for UNIStim 4.0
features and Release 5.5 features, UNISt im 4.0 Release 6.0
documentation is also used for Release 5.
3
Page 4

Revision history
June 2009
Standard 03.02. This document is up-issued to support
Communications Server 1000 Release 6.0.
May 2009
Standard 03.01. This document is up-issued to support
Communications Server 1000 Release 6.0.
January 2009
Standard 02.05. This document is up-issued to support
Communications Server 1000 Release 5.5 for UNIStim 3.0. This
document reflects changes in section Enabling USB Headset.
December 2008
Standard 02.04. This document is up-issued to support
Communications Server 1000 Release 5.5 for UNIStim 3.0. This
document reflects changes in sections Setting up a conference
call and Charging a call or charging a forced call.
April 2008
Standard 02.03. This document is up-issued to support
Communications Server 1000 Release 5.5 for UNIStim 3.0.
May 2007
Standard 01.01. This document is up-issued to support
CS 1000 Release 5.0. This document reflects the ne w document
number.
November 2006
Stan dard 5.00. This do cument is up- issued to reflect a n update to
Regulatory information.
4
Page 5

June 2006
Standard 4.00. This document is issued to support
Communication Server 1000 Release 4.5 software. Added
support for new security features.
February 2006
Standard 3.00. This document is issued to support
Communication Server 1000 Release 4.5 software.
January 2006
Standard 2.00. This document is issued to support
Communication Server 1000 Release 4.5 software.
November 2005
Standard 1.00. This document is issued to support
Communication Server 1000 Release 4.5 software.
Revision history
5
Page 6

Revision history
6
Page 7

Contents
Customer Service . . . . . . . . . . . . . . . . . . . . . . . . . . . . . . . . . 15
Navigation . . . . . . . . . . . . . . . . . . . . . . . . . . . . . . . . . . . . 15
Getting technical documentation . . . . . . . . . . . . . . . . . . . 15
Getting product training . . . . . . . . . . . . . . . . . . . . . . . . . . 15
Getting help from a distributor or reseller . . . . . . . . . . . . . 15
Getting Help from the Avaya Web site . . . . . . . . . . . . . . . 15
About the Avaya 1140E IP Deskphone . . . . . . . . . . . . . . . . 17
Basic features . . . . . . . . . . . . . . . . . . . . . . . . . . . . . . . . . . . . . 17
Telephone controls . . . . . . . . . . . . . . . . . . . . . . . . . . . . . . . . . 20
Telephone display . . . . . . . . . . . . . . . . . . . . . . . . . . . . . . . . . 28
License Notification . . . . . . . . . . . . . . . . . . . . . . . . . . . . . . . . 28
Call features and Flexible Feature Codes . . . . . . . . . . . . . . . 29
Audio and text message broadcast . . . . . . . . . . . . . . . . . . . . 29
Contents
WML Browser support . . . . . . . . . . . . . . . . . . . . . . . . . . . . . . 30
Security features . . . . . . . . . . . . . . . . . . . . . . . . . . . . . . . . . . . 34
Using encrypted calling . . . . . . . . . . . . . . . . . . . . . . . . . . 34
Managing your Station Control Password (SCPW) . . . . . 34
Entering and editing text . . . . . . . . . . . . . . . . . . . . . . . . . . . 37
Entering text using the IP Deskphone dial pad . . . . . . . . . . . . 37
Entering text using the USB keyboard . . . . . . . . . . . . . . . . . . 38
Editing text using the soft keys . . . . . . . . . . . . . . . . . . . . . . . . 38
Connecting the components . . . . . . . . . . . . . . . . . . . . . . . . 40
Before you begin . . . . . . . . . . . . . . . . . . . . . . . . . . . . . . . . . . 41
Connecting the components of the phone . . . . . . . . . . . . . . . 41
Replacing your narrowband handset with a wideband handset . .
46
7
Page 8

Contents
Replacing your narrowband headset with a wideband headset . .
46
Virtual Private Network . . . . . . . . . . . . . . . . . . . . . . . . . . . . 48
Before you begin . . . . . . . . . . . . . . . . . . . . . . . . . . . . . . . . . . 48
Connecting your IP Deskphone . . . . . . . . . . . . . . . . . . . . . . . 49
QoS configuration recommendations . . . . . . . . . . . . . . . . 51
Installing and configuring VPN . . . . . . . . . . . . . . . . . . . . . . . . 52
Configuring Telephone Options . . . . . . . . . . . . . . . . . . . . . 67
Using the Telephone Options menu . . . . . . . . . . . . . . . . . . . . 68
Adjusting the volume . . . . . . . . . . . . . . . . . . . . . . . . . . . . 69
Adjusting the display screen contrast . . . . . . . . . . . . . . . . 70
Selecting a language . . . . . . . . . . . . . . . . . . . . . . . . . . . . 71
Selecting date and time format . . . . . . . . . . . . . . . . . . . . 72
Accessing display diagnostics . . . . . . . . . . . . . . . . . . . . . 73
Choosing a local dialpad tone . . . . . . . . . . . . . . . . . . . . . 73
Viewing IP Deskphone information . . . . . . . . . . . . . . . . . 74
Diagnostics . . . . . . . . . . . . . . . . . . . . . . . . . . . . . . . . . . . . 75
Configuring call log options . . . . . . . . . . . . . . . . . . . . . . . 76
Choosing a ring type . . . . . . . . . . . . . . . . . . . . . . . . . . . . 81
Enabling or disabling Call Timer . . . . . . . . . . . . . . . . . . . 82
Enabling OnHook Default Path . . . . . . . . . . . . . . . . . . . . 82
Changing feature key labels . . . . . . . . . . . . . . . . . . . . . . . 83
Configuring the name display format . . . . . . . . . . . . . . . . 85
Configuring Live Dialpad . . . . . . . . . . . . . . . . . . . . . . . . . 86
Configuring Caller ID display order . . . . . . . . . . . . . . . . . 87
Configuring Normal mode indication . . . . . . . . . . . . . . . . 87
Configuring Local Menu options . . . . . . . . . . . . . . . . . . . . 89
1. Preferences submenu . . . . . . . . . . . . . . . . . . . . . . . . . . . . 91
Changing 1. Display Settings . . . . . . . . . . . . . . . . . . . . . . 91
Changing 2. Language . . . . . . . . . . . . . . . . . . . . . . . . . . . 92
Changing 3. Headsets . . . . . . . . . . . . . . . . . . . . . . . . . . . 93
8
Page 9

Contents
Configuring 4. Bluetooth . . . . . . . . . . . . . . . . . . . . . . . . . 100
2. Local Diagnostics submenu . . . . . . . . . . . . . . . . . . . . . . . 112
1. IP Set Information . . . . . . . . . . . . . . . . . . . . . . . . . . . 112
2. Network Diagnostic Tools . . . . . . . . . . . . . . . . . . . . . 112
3. Ethernet Statistics . . . . . . . . . . . . . . . . . . . . . . . . . . . 112
4. IP Network Statistics . . . . . . . . . . . . . . . . . . . . . . . . . 113
5. USB Devices . . . . . . . . . . . . . . . . . . . . . . . . . . . . . . . 113
6. Advanced Diag Tools . . . . . . . . . . . . . . . . . . . . . . . . . 113
7. License Information . . . . . . . . . . . . . . . . . . . . . . . . . . 113
8. VPN Information . . . . . . . . . . . . . . . . . . . . . . . . . . . . . 113
9. Certificate Information . . . . . . . . . . . . . . . . . . . . . . . . 114
10. DHCP Information . . . . . . . . . . . . . . . . . . . . . . . . . . 114
3. Network Configuration menu . . . . . . . . . . . . . . . . . . . . . . 114
4. Lock Menu . . . . . . . . . . . . . . . . . . . . . . . . . . . . . . . . . . . . 116
Making a call . . . . . . . . . . . . . . . . . . . . . . . . . . . . . . . . . . . . 117
Using Off-hook dialing . . . . . . . . . . . . . . . . . . . . . . . . . . . . . 117
Using On-hook dialing . . . . . . . . . . . . . . . . . . . . . . . . . . . . . 118
Using handsfree dialing . . . . . . . . . . . . . . . . . . . . . . . . . . . . 119
Using the Directory applications . . . . . . . . . . . . . . . . . . . . . . 121
Making a call using the Corporate Directory . . . . . . . . . 121
Making a call using the Personal Directory . . . . . . . . . . 122
Making a call using the Callers List . . . . . . . . . . . . . . . . 123
Making a call using the Redial List . . . . . . . . . . . . . . . . . 124
Using Predial . . . . . . . . . . . . . . . . . . . . . . . . . . . . . . . . . . . . 124
Using AutoDial . . . . . . . . . . . . . . . . . . . . . . . . . . . . . . . . . . . 125
Using Ring Again . . . . . . . . . . . . . . . . . . . . . . . . . . . . . . . . . 127
Using Last Number Redial . . . . . . . . . . . . . . . . . . . . . . . . . . 128
Using Speed Call . . . . . . . . . . . . . . . . . . . . . . . . . . . . . . . . . 128
Using System Speed Call . . . . . . . . . . . . . . . . . . . . . . . . . . . 130
Using HotLine . . . . . . . . . . . . . . . . . . . . . . . . . . . . . . . . . . . . 130
9
Page 10

Contents
Using intercom calling . . . . . . . . . . . . . . . . . . . . . . . . . . . . . 130
Answering a call . . . . . . . . . . . . . . . . . . . . . . . . . . . . . . . . . 132
While on an active call . . . . . . . . . . . . . . . . . . . . . . . . . . . . 133
Placing a call on hold . . . . . . . . . . . . . . . . . . . . . . . . . . . . . . 133
Transferring a call . . . . . . . . . . . . . . . . . . . . . . . . . . . . . . . . . 134
Using Timed Reminder Recall . . . . . . . . . . . . . . . . . . . . . . . 135
Using Attendant Recall . . . . . . . . . . . . . . . . . . . . . . . . . . . . . 136
Using Call Park . . . . . . . . . . . . . . . . . . . . . . . . . . . . . . . . . . . 136
Recording a Calling Party Number . . . . . . . . . . . . . . . . . . . . 139
Displaying incoming calls . . . . . . . . . . . . . . . . . . . . . . . . . . . 139
Tracing a malicious call . . . . . . . . . . . . . . . . . . . . . . . . . . . . 140
Incoming calls . . . . . . . . . . . . . . . . . . . . . . . . . . . . . . . . . . . 141
Using Automatic Answerback . . . . . . . . . . . . . . . . . . . . . . . . 141
Using Call Pickup . . . . . . . . . . . . . . . . . . . . . . . . . . . . . . . . . 141
10
Using Call Waiting . . . . . . . . . . . . . . . . . . . . . . . . . . . . . . . . 143
While away from your desk . . . . . . . . . . . . . . . . . . . . . . . . 145
Using Call Forward . . . . . . . . . . . . . . . . . . . . . . . . . . . . . . . . 145
Using Internal Call Forward . . . . . . . . . . . . . . . . . . . . . . . . . 147
Using Remote Call Forward . . . . . . . . . . . . . . . . . . . . . . . . . 148
Securing your IP Deskphone . . . . . . . . . . . . . . . . . . . . . . . . 150
Talking with more than one person . . . . . . . . . . . . . . . . . 152
Using the Call Join feature . . . . . . . . . . . . . . . . . . . . . . . . . . 152
Setting up a conference call . . . . . . . . . . . . . . . . . . . . . . . . . 152
Using Conferee Selectable Display . . . . . . . . . . . . . . . . . . . 154
Using Group Call . . . . . . . . . . . . . . . . . . . . . . . . . . . . . . . . . 155
Page 11

Contents
Working without interruption . . . . . . . . . . . . . . . . . . . . . . 158
Using Make Set Busy . . . . . . . . . . . . . . . . . . . . . . . . . . . . . . 158
Call Deflect . . . . . . . . . . . . . . . . . . . . . . . . . . . . . . . . . . . . . . 158
Additional call features . . . . . . . . . . . . . . . . . . . . . . . . . . . 160
Using AutoDial Transfer . . . . . . . . . . . . . . . . . . . . . . . . . . . . 160
Using the Buzz signal . . . . . . . . . . . . . . . . . . . . . . . . . . . . . . 161
Using Call Page Connect to make an announcement . . . . . 161
Using Centrex/Exchange Line Switchhook Flash . . . . . . . . . 162
Charging a call or charging a forced call . . . . . . . . . . . . . . . 163
Using Enhanced Override . . . . . . . . . . . . . . . . . . . . . . . . . . 166
Using Forced Camp-on feature . . . . . . . . . . . . . . . . . . . . . . 167
Overriding a busy signal . . . . . . . . . . . . . . . . . . . . . . . . . . . . 168
Using Privacy Release . . . . . . . . . . . . . . . . . . . . . . . . . . . . . 169
Using Radio Page . . . . . . . . . . . . . . . . . . . . . . . . . . . . . . . . . 169
Using Voice Call . . . . . . . . . . . . . . . . . . . . . . . . . . . . . . . . . . 172
Additional phone features . . . . . . . . . . . . . . . . . . . . . . . . . 173
Using the Personal Directory . . . . . . . . . . . . . . . . . . . . . . . . 173
Using the Callers List . . . . . . . . . . . . . . . . . . . . . . . . . . . . . . 176
Using the Redial List . . . . . . . . . . . . . . . . . . . . . . . . . . . . . . . 178
Using Virtual Office . . . . . . . . . . . . . . . . . . . . . . . . . . . . . . . . 180
Logging in to Virtual Office . . . . . . . . . . . . . . . . . . . . . . . 181
Using Virtual Office on your Remote IP Deskphone . . . 182
Using Virtual Office on your Office IP Deskphone . . . . . 185
Logging out of Virtual Office . . . . . . . . . . . . . . . . . . . . . . 186
Emergency calls on your Remote IP Deskphone . . . . . . 186
Automatic log out from Virtual Office . . . . . . . . . . . . . . . 186
Troubleshooting Virtual Office . . . . . . . . . . . . . . . . . . . . 187
Using Media Gateway 1000B . . . . . . . . . . . . . . . . . . . . . . . . 189
Using Test Local Mode . . . . . . . . . . . . . . . . . . . . . . . . . 190
11
Page 12

Contents
Using Resume Normal Mode . . . . . . . . . . . . . . . . . . . . . 190
Troubleshooting MG 1000B . . . . . . . . . . . . . . . . . . . . . . 191
Using Hospitality features . . . . . . . . . . . . . . . . . . . . . . . . . 192
Configuring Automatic Wake-Up . . . . . . . . . . . . . . . . . . . . . 192
Activating Message Registration . . . . . . . . . . . . . . . . . . . . . 194
Using Maid Identification . . . . . . . . . . . . . . . . . . . . . . . . . . . 195
Displaying Room Status . . . . . . . . . . . . . . . . . . . . . . . . . . . . 196
Accessing External Server Applications . . . . . . . . . . . . . 199
Using Record On Demand key . . . . . . . . . . . . . . . . . . . . . . . 199
Using SAVE key . . . . . . . . . . . . . . . . . . . . . . . . . . . . . . . 200
Flexible Feature Codes (FFCs) . . . . . . . . . . . . . . . . . . . . . 202
Quick Reference Card . . . . . . . . . . . . . . . . . . . . . . . . . . . . 203
Feature operation . . . . . . . . . . . . . . . . . . . . . . . . . . . . . . . . . 203
Legend . . . . . . . . . . . . . . . . . . . . . . . . . . . . . . . . . . . . . . . . . 204
12
Services and Telephone Options menus . . . . . . . . . . . . . . . 205
Regulatory and safety information . . . . . . . . . . . . . . . . . . 207
Third party terms . . . . . . . . . . . . . . . . . . . . . . . . . . . . . . . . 213
Third Party Terms for UNIStim sw releases
4.1 thru 5.0 (Jan 2010 - Nov 2010) . . . . . . . . . . . . . . . . . . . . 213
GNU . . . . . . . . . . . . . . . . . . . . . . . . . . . . . . . . . . . . . . . . 214
OpenSSL . . . . . . . . . . . . . . . . . . . . . . . . . . . . . . . . . . . . 221
Zlib . . . . . . . . . . . . . . . . . . . . . . . . . . . . . . . . . . . . . . . . . 224
Curl . . . . . . . . . . . . . . . . . . . . . . . . . . . . . . . . . . . . . . . . . 225
Libpng . . . . . . . . . . . . . . . . . . . . . . . . . . . . . . . . . . . . . . 226
Kern_random . . . . . . . . . . . . . . . . . . . . . . . . . . . . . . . . . 228
ConvertUTF . . . . . . . . . . . . . . . . . . . . . . . . . . . . . . . . . . 229
Wchar functions . . . . . . . . . . . . . . . . . . . . . . . . . . . . . . . 230
Libjpeg . . . . . . . . . . . . . . . . . . . . . . . . . . . . . . . . . . . . . . 231
Page 13

Contents
Terms you should know . . . . . . . . . . . . . . . . . . . . . . . . . . 233
Index . . . . . . . . . . . . . . . . . . . . . . . . . . . . . . . . . . . . . . . . . . 239
13
Page 14

Contents
14
Page 15

Customer Service
Customer Service
Visit the Avaya Web site to access the complete range of services and
support that Avaya provides. Go to www.avaya.com or go to one of the
pages listed in the following sections.
Navigation
• “Getting technical documentation” on page 15
• “Getting product training” on page 15
• “Getting help from a distributor or reseller” on page 15
• “Getting Help from the Avaya Web site” on page 1 5
Getting technical documentation
To download and print selected technical publications and release notes
directly from the Internet, go to www.avaya.com/support.
Getting product training
Ongoing product training is available. For more information or to register,
you can access the Web site at www.avaya.com/support. From this Web
site, you can locate the Training contacts link on the left-hand navigation
pane.
Getting help from a distributor or reseller
If you purchased a service contract for your Avaya product from a
distributor or authorized reseller, contact the technical support staff for
that distributor or reseller for assistance.
Getting Help from the Avaya Web site
The easiest and most effective way to get technical support for Avaya
products is from the Avaya Technical Support Web site at
www.avaya.com/support.
15
Page 16

Customer Service
16
Page 17
About the Avaya 1140E IP Deskphone
About the
Avaya 1140E IP Deskphone
Your Avaya 1140E IP Deskphone brings voice and data to the desktop by
connecting directly to a Local Area Network (LAN) thro ug h an Ethe r ne t
connection.
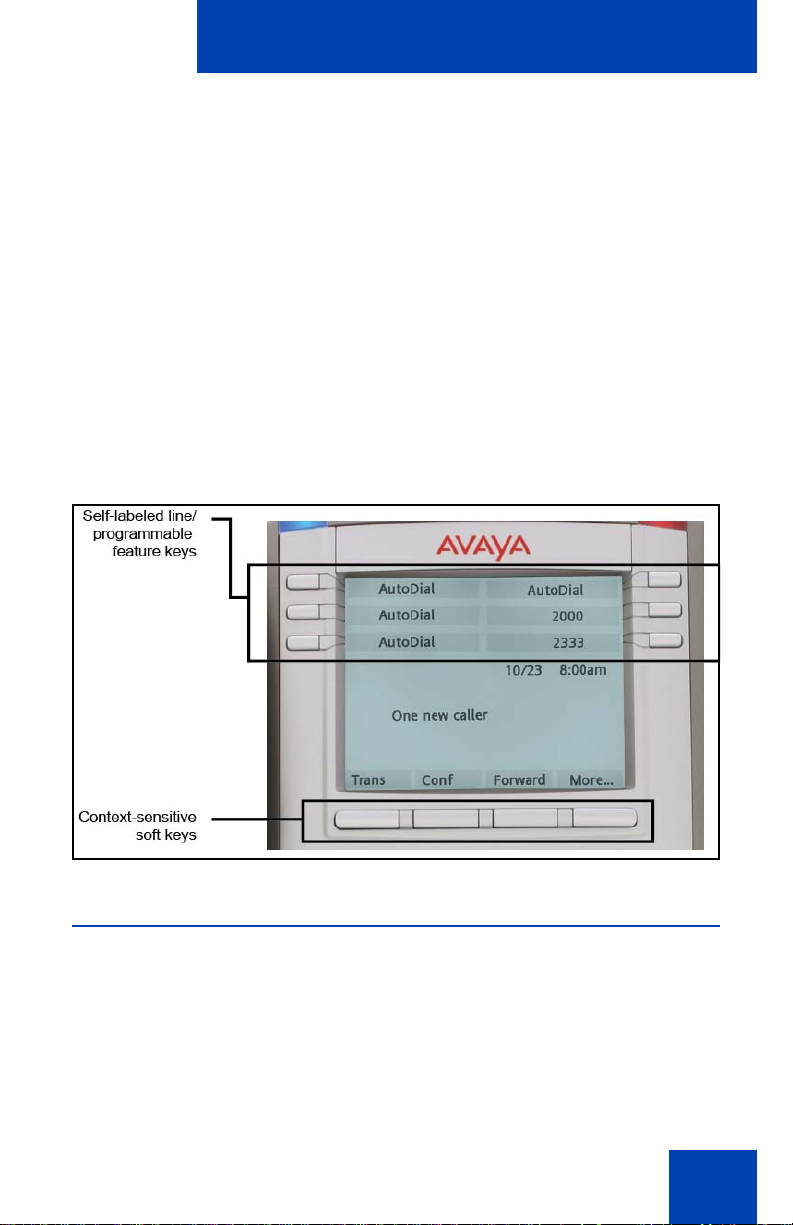
In this guide, self-labeled line/programmable feature key labels appear
beside the keys, and context-sensitive soft key labels appear directly
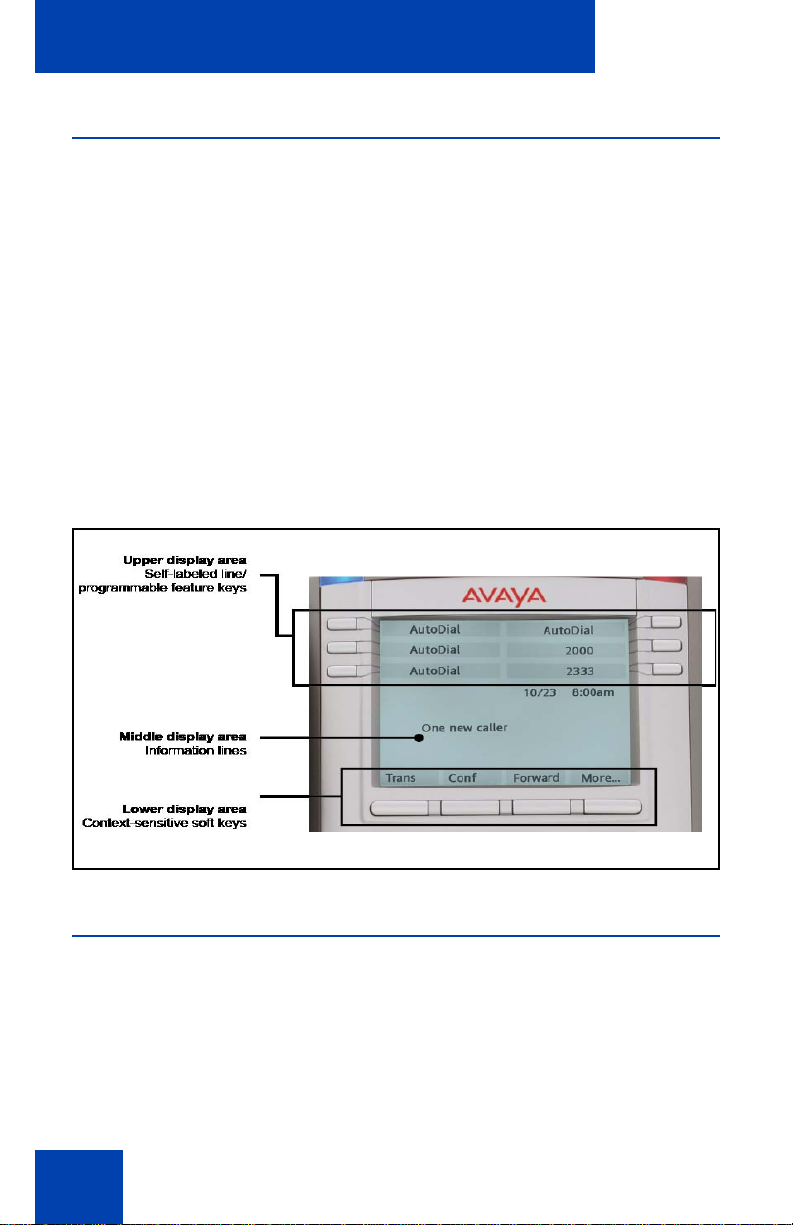
above the keys. Figure 1 shows self-labeled line/programmable feature
keys and context-sensitive soft keys.
Figure 1: Self-labeled line/programmable feature keys and
context-sensitive soft keys
Basic features
Your Avaya 1140E IP Deskphone supports the following features:
• six self-labeled line/programmable feature keys with labels and
indicators
• four context-sensitive soft keys
17
Page 18

About the Avaya 1140E IP Deskphone
For information about context-sensitive soft keys, see Avaya Features
and Services Fundamentals (NN43001-106).
Note: Some Avaya 1140E IP Deskphone phones are not configured
to support soft key functionality. Consult your system administrator.
• graphical, high-resolution LCD display, backlit, with adjustable
contrast
• high-quality speaker phone
• volume control keys for adjusting ringer, speaker, handset, and
headset volume
• six specialized feature keys:
—Quit
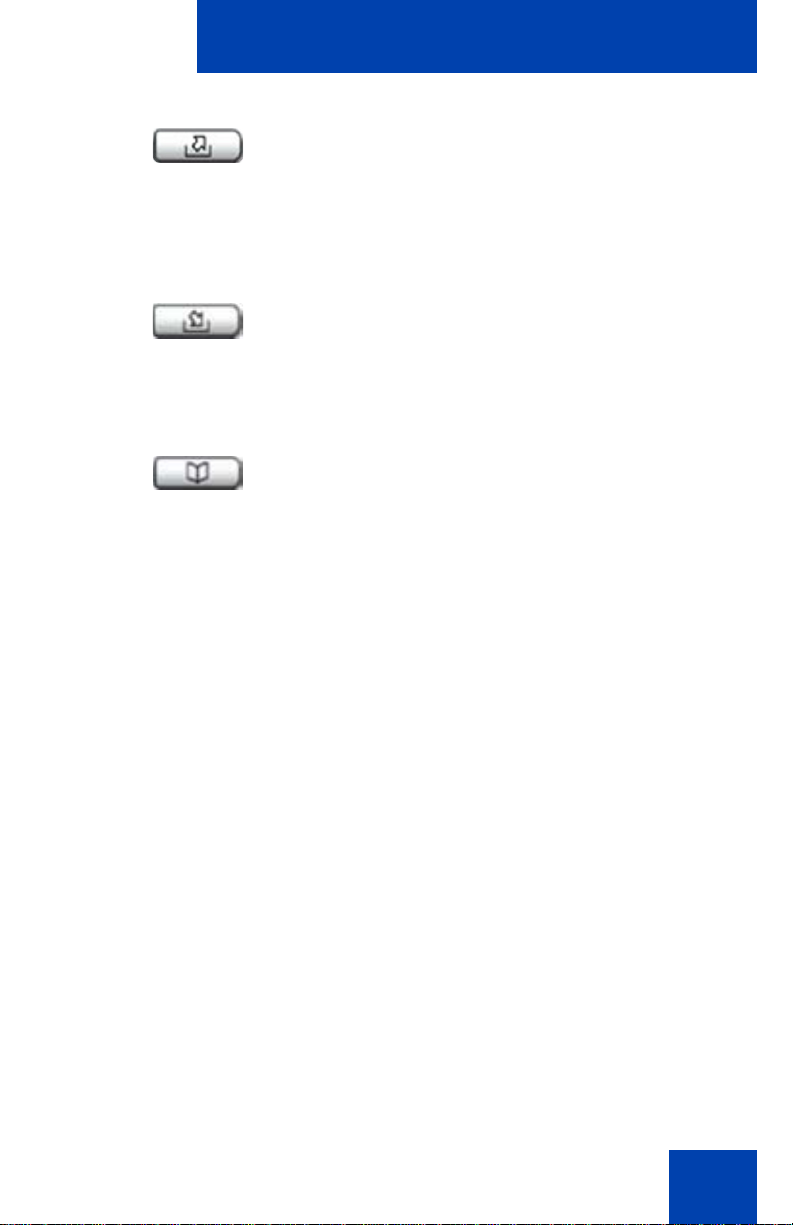
— Directory
— Message/Inbox
— Shift/Outbox
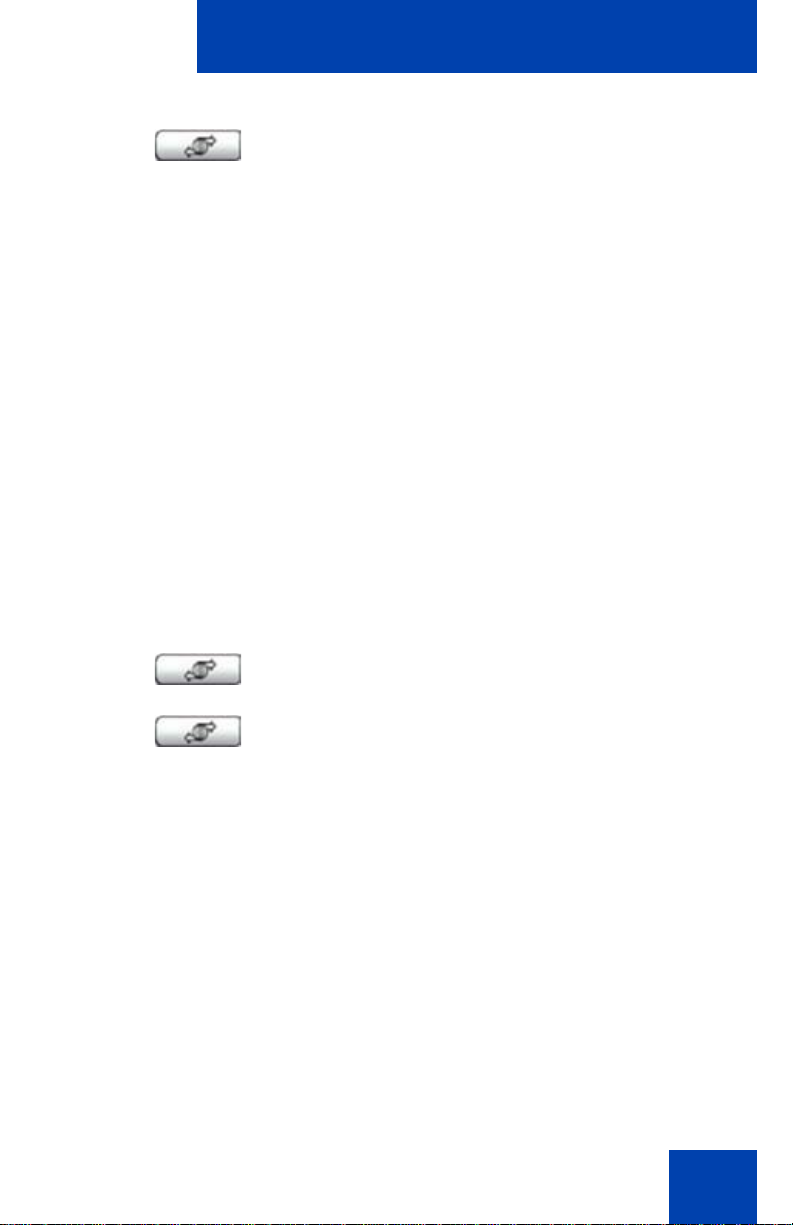
— Services
—Copy
• six call-processing fixed keys:
—Mute
— Handsfree
— Goodbye
— Expand
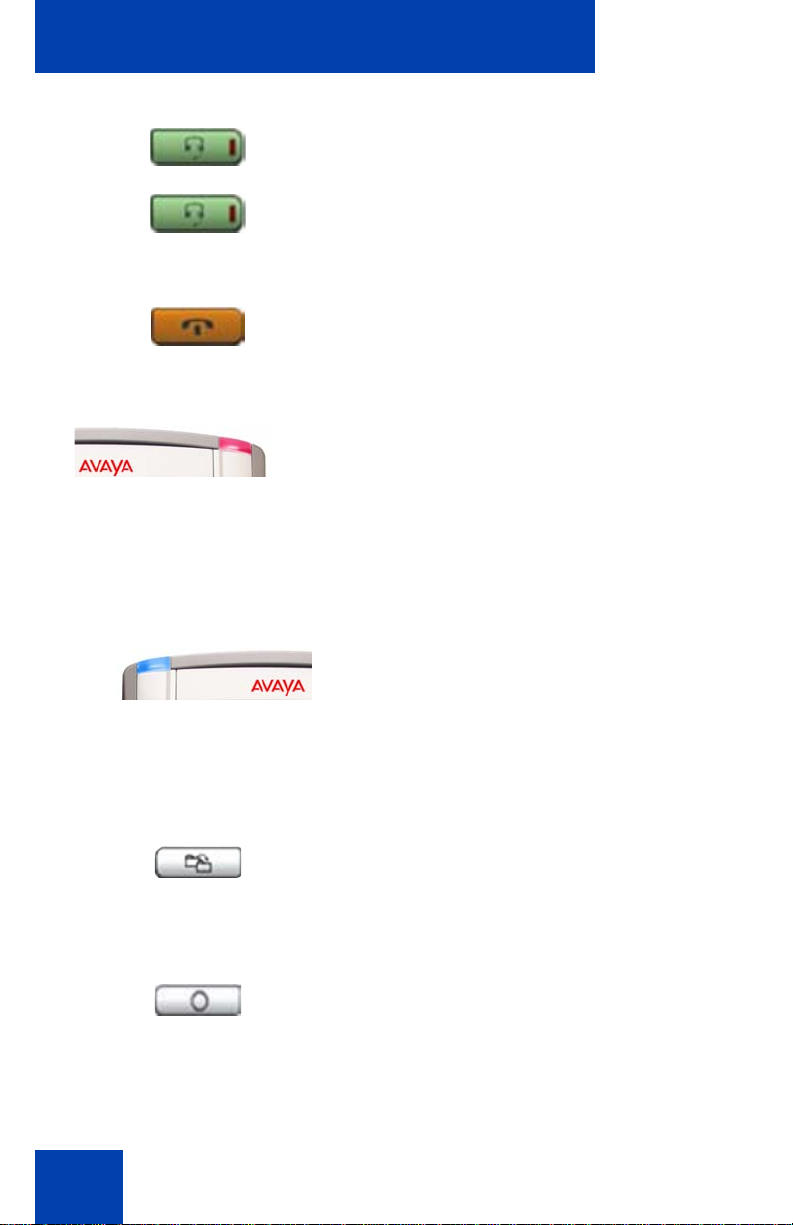
— Headset
—Hold
• gigabit Ethernet ports
• built-in gigabit Ethernet switch for shared PC access
• headset jack with an On/Off key
• USB port to support a keyboard, mouse, wireless headset, or an
audio device. The USB audio devices include the Avaya Enhanced
USB Headset Adapter, the Avaya Mobile USB Headset Adapter, the
Algo 4900 USB Analog Terminal Adapter (ATA), and wireless
headsets from GN Netcom and Plantronics. Powered downstream
18
Page 19

About the Avaya 1140E IP Deskphone
1.1-compliant USB hubs are supported, including USB 2.0 hubs, if
they offer USB 1.1 backwards compliancy.
• automatic network configuration
• Graphical XAS
• hearing aid compatibility
• wireless headset support using a Bluetooth® 1.2
wireless technology compliant Audio Gateway
(Headset Profile, Bluetooth Power Class 2).
• Accessory Expansion Module port to connect the Avaya 1100 Series
Expansion Module
For information about using the Expansion Module, see the Avaya
1100 Series Expansion Module User Guide (NN43130-101).
• supports wideband audio when the deskphone is equipped with a
wideband-capable handset. You must supply your own widebandcapable handset.
• supports wideband audio when the deskphone is equipped with a
wide-band capable headset. You must supply your own widebandcapable headset.
• supports wideband audio using the internal speakerphone
• supports the ability to deliver text messages to the display and audio
messages to the speaker (see “Using Hospitality features” on
page 192)
• supports the WML Browser (see “WML Browser support” on pag e 30)
19
Page 20
About the Avaya 1140E IP Deskphone
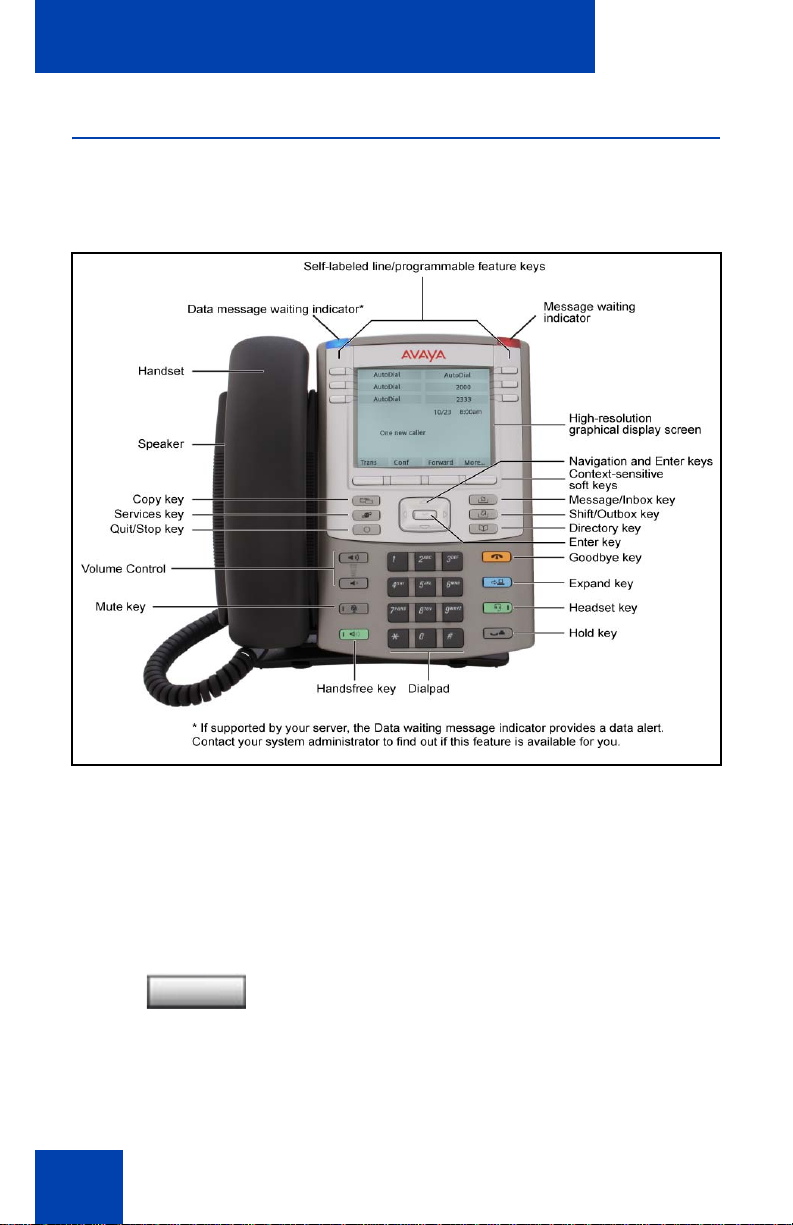
Telephone controls
Figure 2 shows the Avaya 1140E IP Deskphone.
Figure 2: Avaya 1140E IP Deskphone
This section describes the controls on your Avaya 1140E IP Deskphone.
In some geographic regions, the Avaya 1140E IP Deskphone is offered
with key caps that have English text labels. In this document, text in
parentheses indicates the labels that appear on the key caps, for
example, (Services).
Context-sensitive soft keys are located
below the display area. The LCD label above
each key changes based on the active
feature.
20
Page 21
About the Avaya 1140E IP Deskphone
Z
(Volume +)
(Volume -)
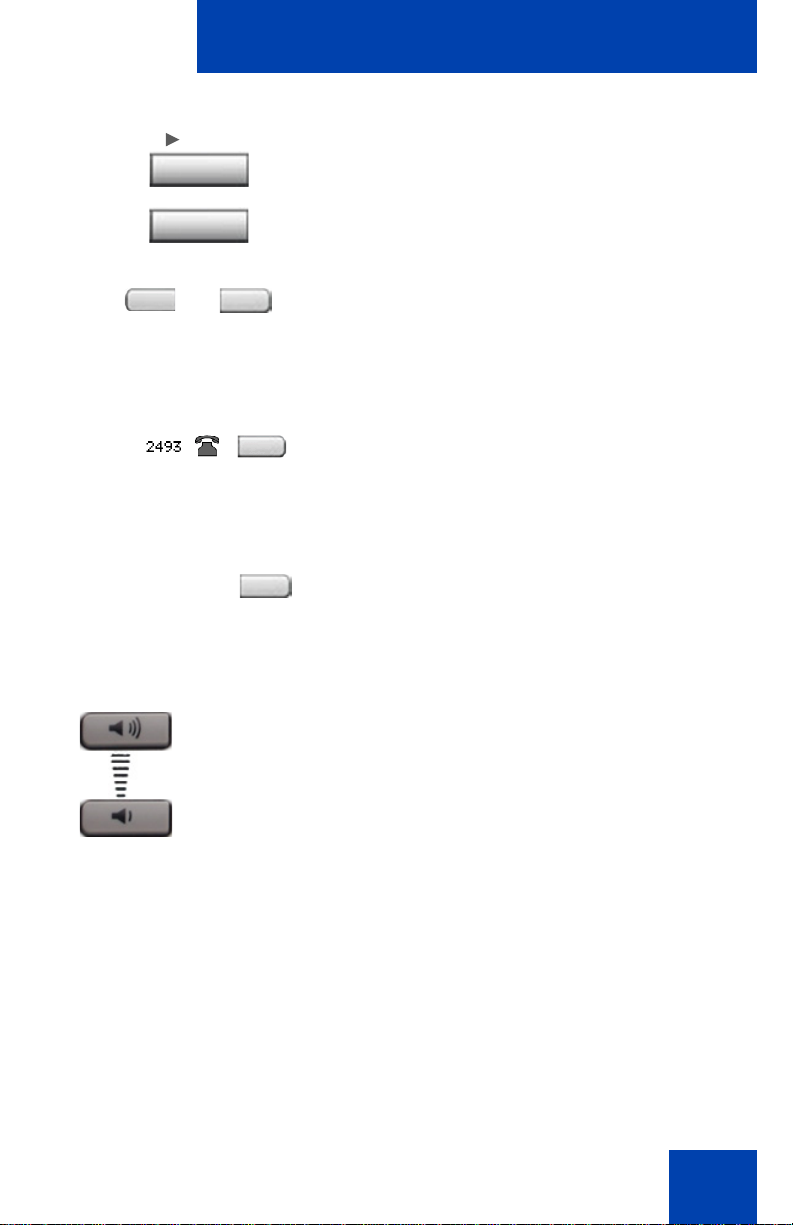
When a triangle appears before a soft key
label, the feature is active.
Press the More key to access the next layer
of context-sensitive soft keys (self-labeled).
The keys on either side of the LCD display
area are self-labeled line/programmable
feature keys, with labels on the LCD. These
keys also function as line (DN) keys.
A steady LCD light beside a line (DN) key
indicates that the line is active. A flashing
LCD light indicates the line is on hold or the
feature is being programmed.
A steady LCD light beside a feature key
indicates that the feature is active. A flashing
LCD light indicates that the feature is being
programmed.
Use the Volume control buttons to adjust
the volume of the ringer, handset, headset,
speaker, and the Handsfree feature. Press
the top button to increase the volume, and
press the bottom button to decrease the
volume.
21
Page 22

About the Avaya 1140E IP Deskphone
(Mute)
(Handsfree)
Your Mute key functionality is enabled or
disabled by your system administrator.
Contact your system administrator to
determine if your Mute key is enabled.
If your Mute key is enabled, press the Mute
key to listen to the receiving party without
transmitting. Press the Mute key again to
return to two-way conversation.
Note: If your Mute key is not enabled,
pressing the Mute key places the call on
hold. Press the Mute key again to
restore the active call or press the line
key to restore the active call. You cannot
retrieve this call from hold by pressing
the Hold key
The Mute key a pplies to handsfree, handset,
and headset microphones.
The Mute LED indicator, located on the Mute
key, flashes to indicate that the microphone
is muted.
22
Press the Handsfree key to activate
handsfree.
The Handsfree LED indicator, located on the
Handsfree key, lights to indicate when
handsfree is active.
Page 23
About the Avaya 1140E IP Deskphone
(Hold)
(Expand)
(Headset)
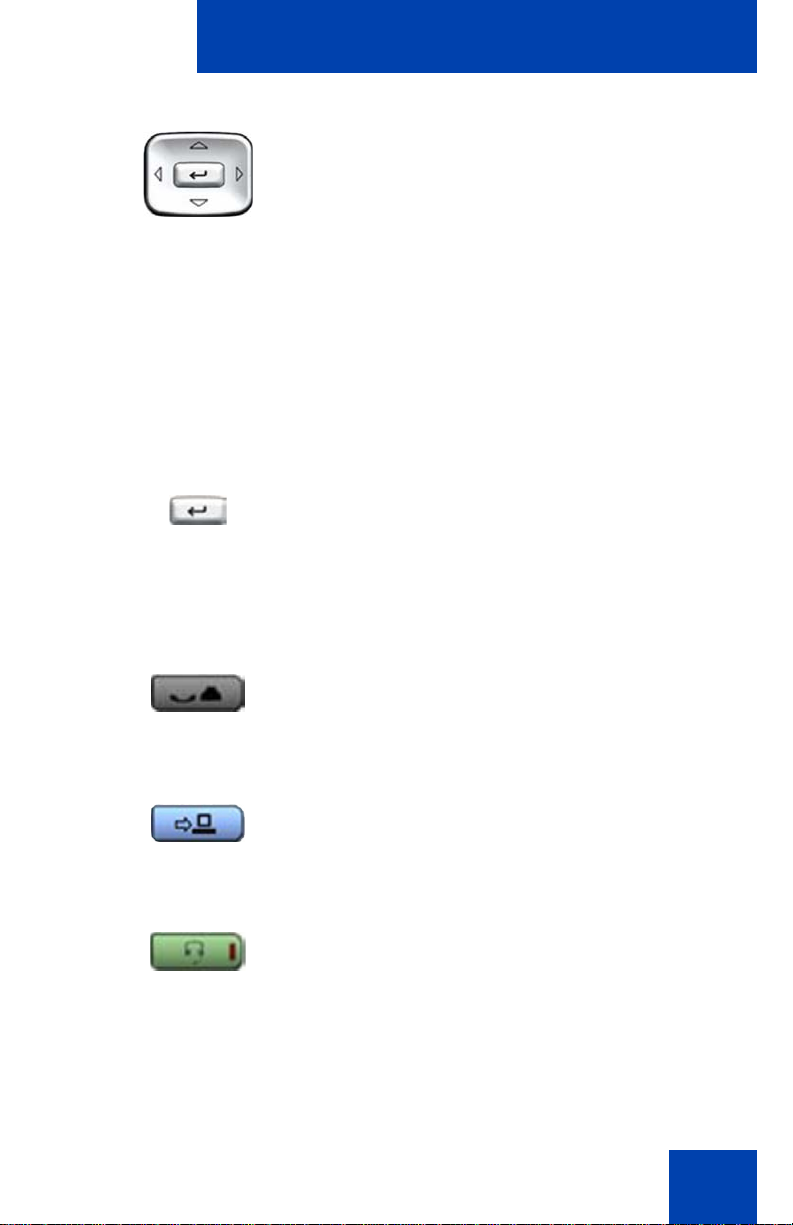
Use the Navigation keys to scroll through
menus and lists appearing on the LCD
display screen. The outer part of this key
cluster rocks for up, down, left, and right
movements.
Use Up and Down to scroll up and down in
lists, and the Left and Right keys to position
the cursor. In some dialog boxes that app ear
on your phone, you can also use the Left
and Right keys to select editable fields;
press the Right key to select the field below
the current selection, or the Left key to
select the one above.
Use the Enter key, at the center of the
Navigation key cluster, to confirm menu
selections.
In most menus, you can use the Enter key
instead of the Select soft key.
Press the Hold key to put an active call on
hold. Tap the flashing line (DN) soft key to
return to the caller on hold.
Use the Expand key to access external
server applications
Press the Headset key to answer a call
using the headset or to switch a call from the
handset or handsfree to the headset.
The Headset LED indicator, located on the
Headset key, lights to indicate that the
headset is in use.
23
Page 24
About the Avaya 1140E IP Deskphone
(Headset)
(Headset)
(Goodbye)
(Copy)
(Quit)
Press the Headset key twice to open the
Bluetooth Setup menu.
If Bluetooth wireless technology is not
enabled on your phone, this menu is not
available.
Use the Goodbye key to terminate an active
call.
When a message is waiting, the red Visual
Alerter/Message Waiting indicator lights.
Also, when the ringer sounds, this indicator
flashes.
Note: You may also hear an audio
Message Waiting Indicator (stutter or
beeping dial tone) when you go off-hook.
24
When your Avaya 1140E IP Deskphone
firmware is being updated, the blue Feature
Status Lamp indicator flashes.
To find out if additional features are
supported for this lamp, contact your
administrator.
Press the Copy Key to copy entries to your
Personal Directory from other lists, such as
the Caller List, Redial List, and Corporate
Directory.
Press the Quit/Stop key to exit an active
menu or dialog. Pressing the Quit/Stop key
does not affect the status of active calls.
Page 25
About the Avaya 1140E IP Deskphone
(Shift/Outbox)
(Msg/Inbox)
(Directory)
Press the Shift/Outbox key to toggle
between two feature key pages and to
access an additional six lines/features.
This function is not available on all phones;
consult your system administrator.
Press the Message/Inbox key to access
your voice mailbox.
This function is not available on all phones;
consult your system administrator.
Press the Directory key to access directory
services.
25
Page 26

About the Avaya 1140E IP Deskphone
(Services)
Press the Services key and use the
navigation keys to access the following
items:
• Telephone Options:
— Volume adjustment
— Contrast adjustment
— Language
— Date/Time
— Display diagnostics
— Local Dialpad Tone
— Set Info
— Diagnostics
— Call Log Options
— Ring type
— Call Timer
— On hook default path
— Change Feature Key Label
— Name Display Format
— Live Dialpad
26
— Caller ID display order
— Normal mode indication
Page 27
(continued)
(Services)
(Services)
(Services)
About the Avaya 1140E IP Deskphone
• Password Admin:
— Station Control Password
The Password Admin menu is not
available on all
Avaya 1140E IP Deskphone phones.
Consult your system administrator.
• Display Network Diagnostics Utilities
Only your system administrator
or service provider can use Display
Network Diagnostics Utilities to perform
Internet diagnostics.
• Virtual Office Login and Virtual Office
Logout (if Virtual Office is configured)
• Test Local Mode and Resume Local
Mode (if Media Gateway 1000B is
configured)
Press the Services key to exit from any
menu or menu item.
Press the Services key twice to access the
Local Tools menu, and use the navigation
keys to access the following items:
• 1. Preferences
• 2. Local Diagnostics
• 3. Network Configuration
•4. Lock Menu
If you attempt to access the Local Tools
menu and a dialog box appears
prompting you for a password, contact
your system administrator. Your system
administrator can establish a password
for the Local Tools menu.
27
Page 28
About the Avaya 1140E IP Deskphone
Telephone display
Your Avaya 1140E IP Deskphone has three display areas:
• The upper display area provides labels for the six self-labeled line/
programmable feature key labels.
• The middle display area contains single-line information for items
such as caller number, caller name, Call Timer, feature prompt
strings, user-entered digits, date and time information, and IP
Deskphone information.
• The lower display area provides labels for the four context-sensitive
soft keys.
Figure 3 shows an idle LCD screen.
Figure 3: Avaya 1140E IP Deskphone LCD screen
License Notification
Notify your system administrator if your phone displays a message in a
pop-up window about the licensing feature or evaluation period. License
notification provides details to help diagnose why the features are
disabled on the phone. You can press the Stop key or lift the handset to
close the window. The window redisplays every 24 hours at 1:00 AM
(default). The time and time frame can be configured when you provision
28
Page 29

About the Avaya 1140E IP Deskphone
the phone. For information about provisioning the IP Deskphones, see
Avaya Communication Server 1000 IP Deskphones Fundamentals
(NN43001-368).
Call features and Flexible Feature Codes
Some features are not available on all IP Deskphones. Call features and
Flexible Feature Codes (FFC) must be assigned to your IP Deskphone
and supported by system software. Contact your system administrator to
configure these features and codes on your IP Deskphone.
Audio and text message broadcast
The Avaya 1140 IP Deskphone can display special messages in the
display area of your telephone, and can play special audio messages
through the speaker. Your administrator broadcasts these messages,
which can be used to inform you of events like company news, meeting
reminders, and weather bulletins. The message can be preceded by an
audio alert (a series of beeps).
The Avaya 1140 IP Deskphone supports the following special messages:
• text: a single line of text displays. If the message is too long for the
display , the message is truncated, you see an ellip sis and you cannot
see the rest of the message.
• display: content in the form of a WML web page is displayed on a
WML browser on the IP deskphone
• audio: an audio message streams to the telephone
When an audio message starts, the Interrupt Screen displays. While the
audio message plays, you can switch to your handset or headset to liste n
to the message. Depending on the priority of the message, the message
can barge-in during an active telephone cal l, during an incoming call alert,
or when another message is playing.
You can also cancel the audio using the following methods:
• if listening on the speaker, pressing the Handsfree key
29
Page 30

About the Avaya 1140E IP Deskphone
• if listening on the handset, placing the handset on hook
• if listening on the headset, pressing the Headset key
• by pressing the Cancel soft key
• by pressing any Line or Feature key
WML Browser support
The Avaya 1140 IP Deskphone includes a WML Browser. This browser
supports the display of WML pages containing text and images from your
administrator. You can also use it in the same way as you would use a
browser on a smartphone.
One or more tones may precede content displayed in the WML Browser.
There are two modes of content display: normal and barge. Normal
display of content occurs if you are not actively using th e ph on e ; barg e
display of content occurs at any time.
You configure your IP Deskphone to support the WML Browser, including
configuring a WML home page. For more information, see “3. Network
Configuration menu” on page 114. Your administrator may have already
configured the browser for you.
When you access a WML page (called a deck) using the browser, the
pages (called a set of cards) download to your IP Deskphone. The
browser handles navigation between the cards in the downloaded deck.
After a card loads, it can cause a timer to be activated. When this timer
expires, the action defined on the card occurs.
When a card is active, but you have not done anything on the card for a
configurable amount of time, an inactivity page can display, if configured.
If you have a keyboard and mouse attached to your IP Deskphone, you
can use the mouse and keyboard on the WML page . Use the mous e to
navigate on the page, and to select or activate items. Use the keyboard to
navigate and input text.
30
Page 31

About the Avaya 1140E IP Deskphone
The WML Browser supports basic HTTP authentication. If you connect to
a WML page that requires authentication, the browser leads you through
the authentication steps.
When you are browsing, the following soft keys on your IP Deskphone
can appear:
• Home: Pressing this soft key causes the page defined in the WML
Home field to display.
• Refresh: Pressing this soft key causes the current page to reload,
including a complete refresh of the deck.
• Cancel: Pressing this soft key causes the active WML page request
to be cancelled.
The displayed WML page can have its own soft keys. These additional
soft keys can span multiple levels, so you use the More soft key to display
the next level of soft keys.
The following table describes some of the typical conditions and the soft
keys displayed.
Table 1: WML softkey display
Condition
Page loading,
WML Home not
configured
Page loading,
WML Home
configured
Page loaded,
WML Home not
configured
Soft key 1Soft key 2Soft key 3Soft key
4
Cancel (blank) (blank) (blank)
Home Cancel (blank) (blank)
Refresh (blank) (blank) (blank)
31
Page 32

About the Avaya 1140E IP Deskphone
Table 1: WML softkey display
Condition
Page Loaded,
WML Home
configured,
no page-defined soft
keys
Page Loaded,
WML Home
configured,
one page-defined
soft key
Page Loaded,
WML Home
configured,
two page-defined
soft keys
Page Loaded,
WML Home
configured,
three page-defined
soft keys
Soft key 1Soft key 2Soft key 3Soft key
4
Home Refresh (blank) (blank)
<page-
Home Refresh (blank)
defined
soft key
1>
<pagedefined
soft key
1>
<pagedefined
soft key
1>
<page-
defined
soft key
2>
<page-
defined
soft key
2>
Home Refresh
<page-
More
defined
soft key
3>
Home Refresh (blank) More
Page Loaded,
WML Home
configured,
four page-defined
soft keys
32
<pagedefined
soft key
1>
<pagedefined
soft key
4>
<pagedefined
soft key
2>
<pagedefined
soft key
3>
More
Home Refresh More
Page 33

About the Avaya 1140E IP Deskphone
Table 1: WML softkey display
Condition
Page Loaded,
WML Home
configured,
five page-defined
soft keys
Soft key 1Soft key 2Soft key 3Soft key
4
<pagedefined
soft key
1>
<pagedefined
soft key
4>
<pagedefined
soft key
2>
<pagedefined
soft key
5>
<page-
More
defined
soft key
3>
Home More
Refresh (blank) (blank) More
Some web pages enable you to use Click to Dial from the browser. When
a handset icon displays, the number shown besid e the icon is the ph one
number that will be dialed when the icon is selected. Highlight the icon
and select it to place a call; the web browser screen does not display
during the call.
Use the up and down arrow keys to highlight items on a page.
The browser tracks a history of the pages displayed. When the history
has items to display, you can see left and right arrows in the bottom right
corner of the display; these arrows indicate the directions available for
moving over the display.
Activate an item using the Enter key or the Feature keys lo cated on either
side of the display.
Note: The Access key feature allows you to selec t item s usin g
dialpad keys (such as pressing 1 for room service.) This function
must be configured.
33
Page 34

About the Avaya 1140E IP Deskphone
(Services)
Security features
The following security features are available on your
Avaya 1140E IP Deskphone:
• Using encrypted calling
• Managing your Station Control Password (SCPW)
Using encrypted calling
Your Avaya 1140E IP Deskphone supports secure communication using
SRTP media encryption. If the feature is enabled, a security icon (q)
appears on the screen when your call is secured using SRTP media
encryption. Contact your system administrator to find out if this feature is
available for your use.
Managing your Station Control Password (SCPW)
Your Station Control Password (SCPW) enables the following security
features:
• Electronic Lock to prevent others from making calls from your IP
Deskphone
• password-protected IP Deskphone features (for example, Personal
Directory, Redial List, and Callers List)
Your system administrator defines your initial SCPW. Contact your
system administrator for detailed inform at ion .
To change your SCPW:
1. Press the Services key.
2. Press the Up/Down keys to scroll and
highlight Password Admin.
34
Page 35

About the Avaya 1140E IP Deskphone
(Directory)
3. Press the Enter key.
4. Use the dialpad to enter your password
at the prompt.
5. Press the Up/Down keys to scroll and
highlight New Password.
6. Press the Enter key.
7. Use the dialpad to enter the new
password.
8. Press the Select soft key to accept the
new password.
If you are locked out of your
Avaya 1140E IP Deskphone, or if you
forget your SCPW, contact your system
administrator.
Note: The default configuration for Password Protection is off.
To turn Password Protection on or off:
1. Press the Directory key.
35
Page 36

About the Avaya 1140E IP Deskphone
or
2. Press the Up/Down navigation keys to
scroll and highlight Change Protection
Mode.
3. Use the dialpad to enter your password
(if Password Protection is enabled).
4. Press the Enter soft key.
5. Press the Up/Down navigation keys to
scroll and highlight one of the following:
— Enable Password Protection
— Disable Password Protection
6. Choose one of the following soft keys:
36
— Yes to accept the selection
— No to return to the Directory menu
7. Press the Done soft key.
Page 37

Entering and editing text
Entering and editing text
You can enter and edit text on your Avaya 1140E IP Deskphone using the
following methods:
• “Entering text using the IP Deskphone dial pad” on page 37
• “Entering text using the USB keyboard” on page 38
• “Editing text using the soft keys” on page 38
The use of any of these methods for text entry or editing depends on the
application. Table 2 shows the applications and input devices that you
can use for text entry.
Table 2: Application text entry
For: Use:
Call Server-related applications
(for example, changing feature
key labels, adding personal
directory entries, or dialing)
Graphical applications USB keyboard
Local Tools menu USB keyboard
Dialpad
USB keyboard for numeric
entries only
Dialpad for numeric entries
Entering text using the IP Deskphone dial pad
You can use the dialpad to enter text when you use features such as
Personal Directory, Redial List, and Callers List. Use the dialpad in
conjunction with the soft keys.
For example, if you want to enter the letter A, press the number 2 key
once. If you want to enter the letter C, press the number 2 key three
times. No letters are associated with the number 1 or the 0 keys.
37
Page 38

Entering and editing text
Entering text using the USB keyboard
You can use the USB keyboard, when connected, to enter text in the tools
and graphical applications.
For number entry in phone applications (for example, when dialing), you
can use the keyboard to enter digits (0 to 9), as well as * and #. Other
characters are ignored.
When on a call, you can use the function keys (f1, f2, f3, f4, f5, f6, f7, and
f8) to control the IP Deskphone. Table 3 shows the function keys and their
associated action during IP Deskphone calls.
Table 3: USB keyboard function keys during IP Deskphone
calls
Function key Action
f1 Go to Handsfree mode
f2 Go to Headset mode
f3 Place the current call on hold
f4 Mute the current call
f5 Volume up
f6 Volume down
f7 Copy
f8 Quit
Editing text using the soft keys
You can use soft keys to edit text when you use features such as
Personal Directory, Redial List, and Callers List. Use the soft keys in
conjunction with the dialpad.
38
Page 39

Entering and editing text
To edit an entry in your Personal Directory, press the Directory key, and
select the desired entry from your Personal Directory.
To edit text with the soft keys:
1. Press the Edit soft key.
2. Press the Left/Right navigation keys to move through the text.
3. Select the appropriate editing soft key for the operation you want to
perform.
4. If the character you want is not visible, press the More soft key to
access the next layer of soft keys.
5. To add non-alphanumeric symbols, press the Symbol soft key, and
perform the following:
a. Press the Up navigation key to access the symbols.
b. Press the Left/Right navigation keys to move to a specific
symbol.
c. Press the Choose soft key to select a symbol.
6. Press the Next soft key to submit your changes.
When you are editing text using the soft keys, various commands are
available on the soft keys to help you, as described in Table 4.
Table 4: Editing soft key description
Soft key Description
Cancel Cancel an action.
Choose Select a non-alphanumeric symbol (available
only after the Symbol soft key is selected).
Clear Clear the input field.
Case Switch the next character to either uppercase or
lowercase.
Delete Backspace one character.
Done/Select/Enter Varies, depending on the state of your phone.
More Access additional soft keys.
39
Page 40
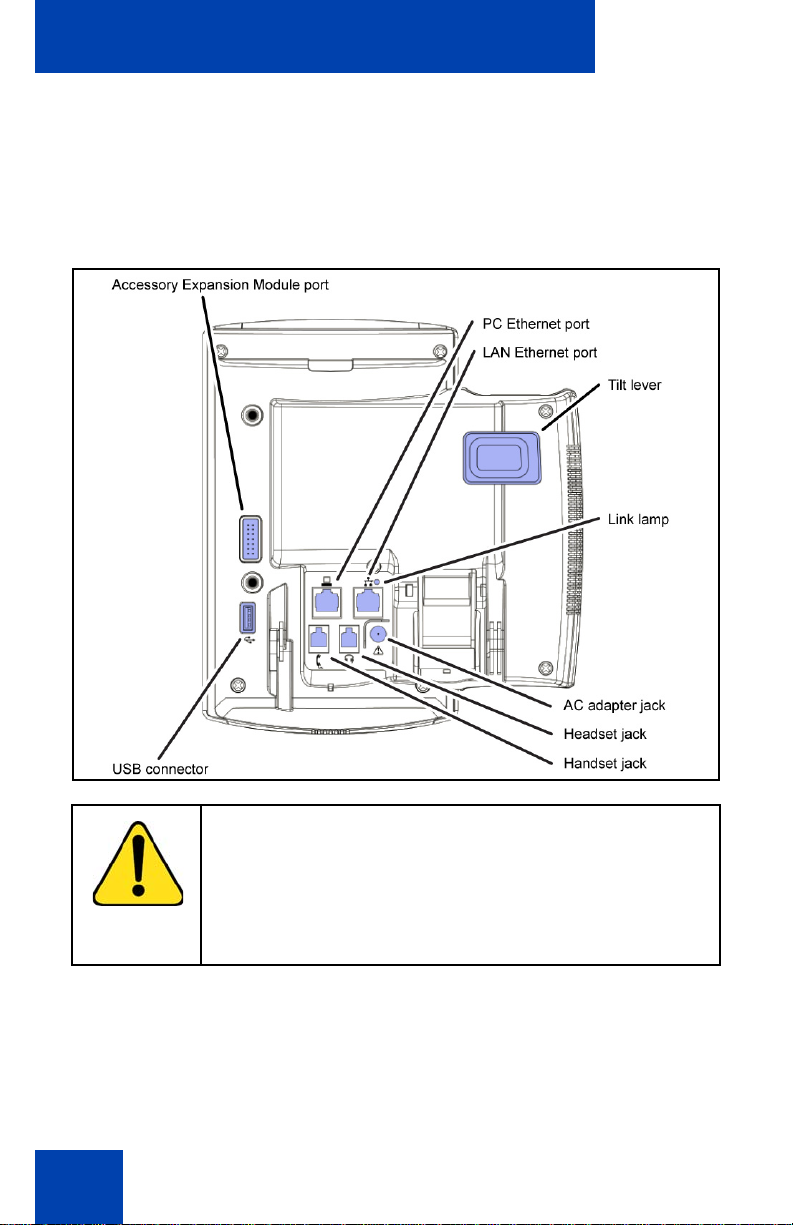
Connecting the components
Connecting the components
Figure 4 shows connections on the Avaya 1140E IP Deskphone.
Figure 4: Avaya 1140E IP Deskphone connections
40
WARNING
Ensure that the protective rubber cap on the Accessory
Expansion Module port is in place when the port is not in
use. Connecting anything other than the proper Avaya
1100 Series Expansion Module connector to this port
can cause damage to the IP Deskphone.
Page 41

Connecting the components
Before you begin
CAUTION
Damage to Equipment
Do not plug your Avaya 1140E IP Deskphone into a
regular phone jack. This results in severe damage to
the IP Deskphone. Consult your system administrator
to ensure that you plug your IP Deskphone into a 10/
100BaseT Ethernet jack.
CAUTION
Your Avaya 1 140E IP Deskphone is designed for use
in an indoor environment only.
Connecting the components of the phone
WARNING
Your Avaya 1140E IP Deskphone is shipped with the
base locked in position. To avoid damaging your phone,
press the wall-mount lever, located just under the
Handsfree key as indicated in Figure 5 on page 42, to
release the base and pull it away from the phone.
41
Page 42

Connecting the components
Figure 5: Release the Avaya 1140E IP Deskphone from the stand
Use the following steps to connect the components of your phone.
1. Remove the stand cover. Pull upward on the center catch as
indicated in Figure 6 on page 43, and remove the stand cover. The
cable routing tracks are now accessible.
42
Page 43

Figure 6: Remove the stand cover
Connecting the components
2. Connect the global power supply (optional). Connect the global power
supply to the AC adapter jack in the bottom of the phone. Form a
small bend in the cable, and then thread the adapter cord through the
channels in the stand.
WARNING
Use only the approved Avaya Global Power Supply with
your 1140E IP Deskphone.
Note 1: Your 1140E IP Deskphone supports AC power or Power over
Ethernet (PoE) options, including IEEE 802.3af standard power. To
use local AC power, use only the Avaya-approved Global Power
Supply (NTYS17xxE6). To use PoE, where power is delivered over
43
Page 44

Connecting the components
the CAT5 cable, your connected LAN must support PoE. If you use
PoE, you do not require an AC adapter.
Note 2: You must use CAT5e (or later) cables if you want to use
gigabit Ethernet.
3. Install the handset. Connect the end of the handset cable with the
short straight section into the handset. Connect the end of the
handset cable with the long straight section to the back of the phone,
using the RJ-9 handset jack marked with the sym bol
bend in the cable, and then thread the handset cord through the
channels in the stand so that it exits behind the handset on the right
side, in the Handset cord exit in the stand base, as shown in Figure 7
on page 45.
4. Install the headset (optional). If you are installing a headset, plug the
connector into the RJ-9 headset jack on the back of the phone
marked with the symbol ), and thread the headset cord along with
the handset cord through the channels in the stand, so that the
headset cord exits the channel marked with the symbol ).
5. Install the Ethernet cable. Connect one end of the supplied Ethernet
cable to the back of your phone using the RJ-45 connector marked
with the symbol %, and thread the network cable through the ch annel
marked with the symbol %.
+. Form a small
6. If you are connecting your PC through the ph on e , you requir e a
second CAT5e cable. Only one cable is included with the
Avaya 1140E IP Deskphone package. Install the Ethernet cable
connecting the PC to the phone (optional). Connect one end of the
PC Ethernet cable to your phone using the RJ-45 connector marked
with the symbol ( and thread it through the channel marked with the
symbol (. Connect the other end to the LAN connector on the back
of your PC.
7. Install additional cables. If applicable, plug in optional USB devices.
Connect the Ethernet cable to the LAN Ethernet connection. If you
are using a global power supply, plug the global power supply into an
AC outlet.
44
Page 45

Connecting the components
Figure 7: Cable routing tracks and mounting holes
8. Wall-mount your phone (optional). Your Avaya 1140E IP Deskphone
can be mounted either by: (Method A) using the mo u nt ing holes on
the bottom of the phone stand, or (Me th od B) using a tr ad itio nal-style
wall-mount box with RJ-45 connector and 15-cm (6-inch) RJ-45 cord
(not provided).
Complete steps 1-7, as needed, before you wall-mount your phone:
Method A: Press the wall-mount lever, and pull the phon e away from
the stand, as shown in Figure 5 on page 42. Using the stand cover
(the part you removed in step 1), mark the wall-mount holes by
pressing the bottom of the stand cover firmly against the wall in the
location where you wish to install the phone. Four small pins on the
bottom of the stand cover make marks on the wall. Use the marks as
a guideline for installing the wall-mount screws (not provided). Install
the screws so that they protrude 3 mm (1/8 inch) from the wall, and
then install the phone stand mounting holes over the screw heads.
You may need to remove the phone from the wall to adjust the lower
screws. When the lower screws are snug, install the phone on the
45
Page 46

Connecting the components
mounting screws, and then tighten the top screws. See Figure 7 on
page 45.
Method B: Attach the 15-cm (6-inch) CAT5e cable, position the stand
over the mounting rivets, and slide the phone down the wall so that
the rivets fit into the slots on the stand, indicated in Figure 7 on page
45 (Method B).
9. Replace the stand cover. Ensure that all cables are neatly routed and
press the stand cover into place until you hear a click.
10. Put the phone in the wall-mount position (optional). If you wallmounted your phone, put it in the wall-mount position by holding the
Tilt Lever and pressing the phone towards the base until the phon e is
parallel with the base. Release the Tilt Lever and continue to push the
phone towards the base until you hear an audible click. Ensure the
phone is securely locked in position.
Replacing your narrowband handset with a wideband handset
In order to take advantage of wideband audio, you must replace the
handset supplied with the deskphone with a wideband handset.
1. Obtain a wideband handset.
2. Unplug the handset supplied with the deskphone, leaving the handset
cord attached to the phone.
3. Connect the handset cord to the wideband handset.
Replacing your narrowband headset with a wideband headset
In order to take advantage of wideband audio, you must replace the
handset supplied with the deskphone with a wideband handset.
1. Obtain a wideband headset.
2. Unplug the handset supplied with the deskphone, leaving the headset
cord attached to the phone.
3. Connect the headset cord to the wideband headset.
46
Page 47

Connecting the components
47
Page 48

Virtual Private Network
Virtual Private Network
A Virtual Private Network (VPN) is a network that uses a public network
infrastructure, such as the Internet, to provide you with secure access to
the private network of your organization.
The IP Deskphone VPN feature allows you to connect to your
organization’s private network from a public or remote network. For
example, you can use your home public Internet connection to connect to
your organization’s private network.
This chapter describes the procedure to upg rad e th e software of your I P
Deskphone (if required) and configure the VPN on your IP Deskphone.
An installation wizard helps you perform the necessary steps.
Note: The Avaya Phone VPN Configuration Wizard uses the default
language of the operating system of your PC. If the language is not
supported by the wizard, the default wizard language is English.
Your system administrator provides you with all the necessary files you
require to configure your IP Deskphone for VPN, and helps you to reso lve
any errors that occur during configuration.
Before you begin
Before you upgrade the IP Deskphone software and configure VPN on
your IP Deskphone, complete the following checklist.
• Ensure that your PC is using one of the following operating systems:
— Windows XP
— Windows Vista
— Macintosh OS
• Ensure that you received a copy of the provisioning files from your
network administrator. The following files should be included:
— Avaya Phone VPN Configuration Wizard.jar
— provisioning files (for example: system.prv)
48
Page 49

Virtual Private Network
— .bin files (for example: 0625C7C.bin)
• Java Virtual Machine (JVM) version 1.5 or later must be installed on
your PC. Check Start, Settings, Control Panel, Java to see if JVM
is installed on your machine and the version of it. If it is not installed,
contact your system administration to help you to install it. To
download the latest JVM, go to www.java.com.
• Ensure that your PC has a firewall that allows incoming
communication to the following ports:
— UDP Port 69 (TFTP)
— TCP Port 80 (HTTP)
— UDP Port 49000
Note: The Avaya Phone VPN Configuration Wizard.jar file creates a
log.txt file during execution. This file is helpful to troubleshoot
problems you experience using the Avaya Phone VPN Configuration
Wizard.jar. The log.txt file is located in the same directory as
Avaya Phone VPN Configuration Wizard.jar.
Connecting your IP Deskphone
Before you connect your IP Deskphone to your PC, ensure that
components of your phone are connected prope rly. For more information
about connecting your IP Deskphone, see “Connecting the components”
on page 40.
Connect your IP Deskphone using one of the following methods:
• connect to your modem. See Figure 8 on page 50.
• connect to your router. See Figure 9 on page 50.
• connect to your wireless access point and modem. See Figure 10 on
page 51.
49
Page 50

Virtual Private Network
Figure 8: IP Deskphone connected to the modem
Figure 9: IP Deskphone connected to the router
50
Page 51

Virtual Private Network
Figure 10: IP Deskphone connected to the wireless access
point and modem
Note: If your home network is not configured as described in the
above figures, contact your system administrator for assistance.
Note: You cannot connect multiple PCs directly to the PC port on the
IP Deskphone.
Note: The Avaya Phone VPN Configuration Wizard requires direct
communication with the IP Deskphone on the network. Ensure that
your network allows devices to communicate with each other on the
local network. Some network equipment allows you to isolate devices
from each other. If you are unsure, it is recommended that you
temporarily connect your PC to the IP Deskphone to run the initial
Avaya Phone VPN Configuration Wizard. See Figure 8 on page 50.
QoS configuration recommendations
Avaya recommends that you connect the PC to the IP Deskphones PC
Ethernet Port as the IP Deskphone provides Quality of Service (QoS) on
outbound traffic automatically.
If other PCs share the internet connection then Avaya recommends that
you configure QoS for outbound traffic and prioritize the IP Deskphone
traffic. Typical QoS methods that are available are port based priority,
MAC Address based Priority, and IP Address based Priority. To configure
QoS, see your router documentation.
51
Page 52

Virtual Private Network
Installing and configuring VPN
Use the following procedure to install and configure VPN on your IP
Deskphone.
Note: Depending on the version of software installed on your IP
Deskphone you may need to upgrade the software on the IP
Deskphone prior to configuring the VPN feature.
To install and configure VPN
1. Follow the instructions provided by your system administrator to
obtain the required files.
2. Power-down the IP Deskphone.
3. Run the Avaya Phone VPN Configuration Wizard.jar file.
The Welcome & language select ion window of the Wizard ap pears,
as shown in Figure 11.
Figure 11: Welcome & language selection window
52
Page 53

4. Select your language preference.
The following languages are supported:
• Arabic
• Chinese - simplified
• Chinese - traditional
• Czech
•Danish
•Dutch
• English
•Finnish
•French
•German
•Greek
•Hebrew
• Hungarian
Virtual Private Network
• Italian
• Japanese - Katakana
• Japanese - Kanji
• Korean
•Latvian
• Norwegian
•Polish
• Portuguese
• Russian
• Spanish
•Swedish
• Turkish
5. Click Next.
53
Page 54

Virtual Private Network
The Equipment Setup and VPN window appears, as shown in
Figure 12.
Figure 12: Equipment Setup and VPN window
6. Verify that the modem, IP Deskphone, and PC are connected
properly.
7. Disconnect any VPN connection currently running on your PC. See
Figure 4 on page 40 to confirm that your LAN Ethernet Port and PC
Ethernet Port on the IP Deskphone are connecte d cor rec t ly.
Note: Connect the IP Deskphone LAN Ethernet port, marked with th e
% symbol on the back of the phone to your network equipment only.
Connect only 1 PC (if applicable) to the PC Ethernet port, marked
with the ( symbol on the back of the phone.
Note: Optional: Click More to read a description of VPN.
8. Click Next.
The Locate Data Files window appears, as shown in Figure 13 on
page 55.
54
Page 55

Virtual Private Network
Figure 13: Locate Data Files window
9. Click Browse to locate the provisioning files provided by your system
administrator, if the wizard was not able to locate the files.
10. Click Next.
The Prepare Phone for Configuration window appears as sho wn in
Figure 14 on page 56.
55
Page 56

Virtual Private Network
Mute
Mute
Figure 14: Prepare Phone for Configuration window
11. Power on your IP Deskphone.
Note: Depending on the current software version on the IP
Deskphone “Listening Mode” may not be detected. If your phone
does not enter “Listening Mode”, follow the steps below.
12. After you hear the chimes tune and the text AVAYA appears on the
IP Deskphone display screen, quickly press the following keys in
order.
13. Verify that the IP Deskphone displays Listening Mode.
Note: The IP Deskphone can take up to 60 seconds for “Listening
Mode” to appear in the display area.
If the IP Deskphone displays Listening Mode, click Yes and go to
Step 15 on page 61.
OR
If the IP Deskphone does not display Listening Mode, click No.
56
Page 57

Virtual Private Network
Mute
Mute
The Prepare Phone for Configuration (Try again) window appears,
as shown in Figure 15 on page 57.
Figure 15: Prepare Phone for Configuration (Try again)
window
a. Power off your IP Deskphone and power it back on again.
14. After you hear the chimes tune and the text AVAYA appears on the
IP Deskphone display screen, quickly press the following keys in
order.
Note: The IP Deskphone can take up to 60 seconds for “Listening
Mode” to appear in the display area.
b. If the IP Deskphone displays Listening Mode, click Yes and go
to Step 15 on page 61.
OR
If the IP Deskphone does not display Listening Mode then your
57
Page 58

Virtual Private Network
IP Deskphone requires a software upgrade in order to proceed.
Click No to proceed to a software upgrade. Follow the next steps
to perform a software upgrade on your phone.
The Prepare Phone for Configuration window appears as
shown in Figure 16.
Figure 16: Prepare Phone for Configuration window
c. Double-press the Services key on the IP Deskphone quickly.
Select the Network Configuration menu item.
Move the cursor to locate Provision: or (TFTP IP:) in the
Network Configuration menu, and then write down the existing
address of the provisioning server so you can revert to it after you
complete this procedure.
Note: If a password prompt dialog box appears, press Cancel. Wait
until your IP Deskphone display completes the “Starting DHCP…”
screen then perform Step c again.
For information about entering and editing text in the Local menu , see
“Entering and editing text” on page 37.
58
Page 59

Virtual Private Network
d. If you are able to navigate to the Provision: or (TFTP IP:)
parameter, and edit this field, click Yes.
The Prepare Phone for Configuration (Input Provisioning
Server IP address) window appears, as shown in Figure 18 on
page 60.
OR
If you are not able to navigate and edit the address in Provision:
or (TFTP IP:) in the Network Configuration menu or you were not
able to edit this field, click No.
The Prepare Phone f or Configuration (A lternate Provisioning
Server) window appears. See Figure 17.
Figure 17: Prepare Phone for Configuration (Alternate
Provisioning Server) window
e. Press the Auto soft key on the IP Deskphone.
Navigate to 12. Provisioning Server.
Clear the Provisioning Server check box.
f. Press the Config soft key on the IP Deskphone.
Navigate to the Provision: item.
Note: If you can locate the existing provisioning server address, write
it down so you can revert to it after you co mplete this procedu re, then
59
Page 60

Virtual Private Network
click Yes.
Observe the Provision: or (TFTP IP) address, as shown in Figure 18
on page 60. This is the IP Address of your PC running the Wizard
tool. Use the IP Deskphone keypad to enter the Provision: or (TFTP
IP) address of the provisioning server.
Note: To enter a dot (period) when entering an IP address using the
IP Deskphone keypad, press the 1 key repeatedly or you can double-
press the asterisk (*) key.
Figure 18: Prepare Phone for Configuration (Input
Provisioning Server IP address) window
OR
If you cannot locate the Provisioning Server address, contact
your system administrator to obtain the IP address and follow the
administrator instructions.
Click No to return to the Prepare Phone for Configuration
window shown in Figure 16 on page 58.
g. To reset the IP Deskphone and begin the software update, press
the Apply&Reset key on the IP Deskphone.
60
Page 61

Virtual Private Network
The progress bar displays the percent complete of the software
transfer.
h. Restart your IP Deskphone.
i. Click Next.
j. Go back to Step 12 on page 56 and repeat the steps.
15. When the Autodiscover Phone window appears, as shown in
Figure 19 on page 62, click Autodiscover Phone to discover
connected IP Deskphones.
Note: Click Stop to stop the search.
The text “Searching for connected phones” displays while the
connected IP Deskphones are located. The text “Autodiscovery
complete” displays in the Avaya Phone VPN Configuration Wizard
tool when the search is finished.
If the search is successful, “Listening Mode: Connected” appears in
the IP Deskphone display area.
If the search is not successful, do the following
• Ensure that the IP Deskphone continues to display
“Listening Mode: Listening…” during the Autodiscovery
process. If your IP Deskphone does display this message,
power down the IP Deskphone and repeat the steps,
starting with Step 11 on page 56.
• Ensure that UDP Port 49000 is not currently blocked by
your PC firewall.
• Ensure that UDP Port 49000 is not already in use by
existing applications on your PC.
• Review the log.txt file for additional information.
61
Page 62

Virtual Private Network
Figure 19: Autodiscover Phone window
16. Click Next.
If more than one connected IP Deskphone was discovered, the
Autodiscover Phone (More than one phone was discovered)
window appears. See Figure 20 on page 63.
62
Page 63

Virtual Private Network
Figure 20: Autodiscover Phone (more than one phone was
discovered) window
a. Obtain the MAC address of the IP Deskphone for which you are
configuring the VPN. The MAC address is printed on a label
located on the back of the IP Deskphone.
b. Select the IP Deskphone to configure from the drop-down list.
c. Click Next.
17. When the Configure phone window appears, as shown in Figure 21
on page 64, click Configure phone to initiate the provisioning
session that configures the VPN feature on the IP Deskphone.
63
Page 64

Virtual Private Network
Figure 21: Configure phone window
The progress bar displays the percent complete of the provisioning
file transfer.
Configuring phone is displayed during the file transfer.
18. When Phone configuration complete is displayed, click Next.
The Confirmation & Finish window appears. See Figure 22 on page
65.
64
Page 65

Virtual Private Network
Figure 22: Confirmation & Finish window
19. Verify that the IP Deskphone is successfully configured.
Note: You may be prompted to enter a User ID and Passwor d be fore
the IP Deskphone registers with the system. This information is
provided by your system administrator. The following list provides
character key mappings.
Key Generates
0 0
1 _ - . ! @ $ % & + & ^ \ 1
2 a b c A B C 2
3 d e f D E F 3
4 g h i G H I 4
5 j k l J K L 5
65
Page 66

Virtual Private Network
Key Generates
6 m n o M N O 6
7 p q r s P Q R S 7
8 R U V T U V 8
9 w x y z W X Y Z 9
* ., - + = ^ ; : ‘ \ “ *
# { } | ( ) < > [ ] #
a. Look for the following information on the IP Deskphone display:
—Date
—Time
— Type of call server
— Directory number
b. Lift the IP Deskphone handset and listen for a dial tone.
If the IP Deskphone is not configured successfully, ensure that the basic
requirements are met; repeat the steps in the Avaya Phone VPN
Configuration Wizard or contact your system administrator. For more
information about basic requirements, see “Before you begin” on
page 48.
66
Page 67

Configuring Telephone Options
Contrast adjustment
Volume adjustment
Language
Date/Time
On hook default path
Local Dialpad Tone
Name Display Format
Set Info
Display diagnostics
Change Feature Key Label
Live Dialpad
Diagnostics
Call Log Options
Ring type
Call Timer
Configuring Telephone Options
Your Avaya 1140E IP Deskphone Services menu lists the following
submenus:
•The Telephone Options menu enables you or your system
administrator to configure IP Deskphone preferences. The
Telephone Options menu offers the options shown in Figure 23.
•The Password Admin menu enables you or your system
administrator to change the Station Control Password (SCPW).
•The Virtual Office Login and Test Local Mode (for branch office)
menus are listed when an Avaya 1140E IP Deskphone Class of
Service is configured for Virtual Office and branch office. (For more
information, see “Using Virtual Office” on page 180).
Note: The Password Admin, Virtual Office Login, and Test Local
Mode menus are not available on all Avaya 1140E IP Deskphone
phones. Consult your system administrator.
Figure 23: Telephone Options menu
Note: When an option has a sublist, an ellipsis (...) appears after the
option.
67
Page 68

Configuring Telephone Options
(Services)
Using the Telephone Options menu
Use the Telephone Options menu to access the following:
• “Adjusting the volume” on page 69
• “Adjusting the display screen contrast” on page 70
• “Selecting a language” on page 71
• “Selecting date and time format” on page 72
• “Accessing display diagnostics” on page 73
• “Choosing a local dialpad tone” on page 73
• “Viewing IP Deskphone information” on page 74
• “Diagnostics” on page 75
• “Configuring call log options” on page 76
• “Choosing a ring type” on page 81
• “Enabling or disabling Call Timer” on page 82
• “Enabling OnHook Default Path” on page 82
• “Changing feature key labels” on page 83
• “Configuring the name display format” on page 85
• “Configuring Live Dialpad” on page 86
• “Configuring Caller ID display order” on page 87
• “Configuring Normal mode indication” on page 87
To use the Telephone Options menu:
1. Press the Services key.
2. Press the Up/Down navigation keys to
scroll and highlight Telephone Options.
68
Page 69

Configuring Telephone Options
or
3. Press the Enter key.
4. Press the Up/Down navigation keys
to scroll and highlight an option
(for example, Language…).
5. Press the Enter key. The display
provides information required to adjust
your selection.
6. Choose one of the following:
— Press the Select soft key to save
changes and return to the
Telephone Options menu.
— Press the Cancel soft key to keep
existing configurations.
Adjusting the volume
To adjust the volume, press the Services key and select Telephone
Options, and select Volume adjustment…
To adjust the volume:
1. Press the Up/Down navigation keys to
scroll and highlight one of the following:
— Ringer
— Handset listen
— Handsfree listen
— Headset listen
—Buzzer
69
Page 70

Configuring Telephone Options
or
or
2. Press the Enter key.
3. To increase or decrease the volume, do
or
4. Choose one of the following:
one of the following:
— Press the Down and Up soft keys.
—Press the Up/Down navigation keys.
—Press the Select soft key to save t he
volume level and return to the
Telephone Options menu.
— Press the Cancel soft key to keep
existing configurations.
Adjusting the display screen contrast
To adjust the LCD screen contrast, press the Services key, select
Telephone Options, and select Contrast adjustment.
You can also adjust the contrast using the Local Tools menu; Avaya
recommends that you use the control in the Telephone Options menu.
Note: If you have an Avaya 1100 Series Expansion Module attached
to your IP Deskphone, adjusting the IP Deskphone LCD screen
contrast also adjusts the display screen contrast configuration for
the Avaya 1100 Series Expansion Module.
70
Page 71

To adjust the display screen contrast:
or
or
1. To increase or decrease the display
contrast level, choose one of the
following:
Configuring Telephone Options
or
— Press the Down and Up soft keys.
—Press the Up/Down navigation keys.
2. Choose one of the following:
—Press the Select soft key to save the
changes and return to the
Telephone Options menu.
— Press the Cancel soft key to keep
existing configurations.
Selecting a language
The display is available in multiple languages. To choose a language,
press the Services key, select Telephone Options, and select
Language…
This language setting controls the language used by features on your
phone only. To set the language used elsewhere on your phone, press
Services twice, select Preferences, and select Language.
If the Language setting is password-protected, you must enter a
password (SCPW) to change the language. If you enter an incorrect
password, an error message is displayed. If you enter an incorrect
password more than three times, the passwor d fu nct ion a lity is locked.
Contact your system administrator to unlock the password.
71
Page 72

Configuring Telephone Options
or
To select a language:
1. Press the Up/Down navigation keys to
scroll and highlight the desired language
(for example, German [Deutsche]).
Note: Some languages may not be
installed on your IP Deskphone. Cont act
your system administrator for more
information about available languages.
2. Choose one of the following:
—Press the Select soft key to save the
desired language and return to the
Telephone Options menu.
— Press the Cancel soft key to keep
existing configurations.
Selecting date and time format
Several date and time formats are available. Formats are based on the
12-hour and 24-hour clocks. To select the date and time fo rmat, press the
Services key, select Telephone Options, and select Date/Time…
To select a date and time format:
1. Press the Up/Down navigation keys to
scroll and highlight the desired format.
Sample formats appear on the upperright side of the display area.
72
Page 73

Configuring Telephone Options
or
2. Choose one of the following:
—Press the Select soft key to save the
format and return to the
Telephone Options menu.
— Press the Cancel soft key to keep
existing configurations.
Accessing display diagnostics
The Display diagnostics option tests the IP Deskphone display screen
and indicator lights.To access Display diagnostics, press the Services
key, select Telephone Options, and select Display diagnostics.
To use Display diagnostics:
1. Press the Up/Down navigation keys to
scroll through the list to view display
capabilities.
2. Press the Cancel soft key to return to
the Telephone Options menu.
Choosing a local dialpad tone
The Local DialPad Tone option produces Dual-Tone Multi-Freque ncy
(DTMF) sounds, a single tone, or no sound when you press a key on the
dialpad. To choose a local dialpad tone, press the Services key, select
Telephone Options, and select Local DialPad Tone.
73
Page 74

Configuring Telephone Options
or
To choose a local dialpad tone:
1. Press the Up/Down navigation keys to
2. Choose one of the following:
scroll and highlight one of the following
dialpad tones:
— None to disable all tones
— Short Click to enable a single tone
for all keys
— DTMF to turn on a separate DTMF
tone for each key
—Press the Select soft key to save the
tone selection and return to the
Telephone Options menu.
— Press the Cancel soft key to keep
existing configurations.
Viewing IP Deskphone information
The Set Info option displays the following phone-specific information:
• General Info
• Set IP Info
• Ethernet Info
• Server Info
• Encryption Info
To view IP Deskphone information, press the Services key, select
Telephone Options, and select Set Info.
74
Page 75

Configuring Telephone Options
To view IP Deskphone information:
1. Press the Up/Down navigation keys to
scroll through the list to view IP
Deskphone information.
2. Press the Cancel soft key to return to
the Telephone Options menu.
Diagnostics
The Diagnostics option displays the following phone-specific information:
• Diag Tools (Ping, do Route Traces)
• EtherStats (Speed, Auto Neg, CRC Errors, Collision)
• IP Stats (Packet Info)
• RUDP Stats (Message receive or transmit)
•QOS Stats
To view diagnostic information, press the Services key, select
Telephone Options, and select Diagnostics.
To view diagnostic information:
1. Press the Up/Down navigation keys to
scroll through the list of diagnostic
information.
2. Press the Cancel soft key to return to
the Telephone Options menu.
75
Page 76

Configuring Telephone Options
or
Configuring call log options
Use the call log option to configure the following preferences:
• “Configuring the Callers List log” on page 76
• “Configuring New Call Indication” on page 77
• “Configuring Preferred Name Match” on page 78
• “Configuring Area Code Setup” on page 79
Configuring the Callers List log
You can configure the Callers List to log all incoming calls including calls
while your IP Deskphone is busy, or only unanswered calls. The default
setting is Log all calls.
To log only unanswered calls, press the Services soft key, select
Telephone Options, and select Call Log Options from the menu.
To log only unanswered calls:
1. Press the Up/Down navigation keys to
scroll and highlight the Log Mode
option.
76
2. Press the Enter key.
3. Press the Up/Down navigation keys to
scroll and highlight Log unanswered
calls.
4. Choose one of the following:
—Press the Select soft key to save the
configuration.
— Press the Cancel soft key to keep
existing configurations.
Page 77

Configuring Telephone Options
To log all incoming calls including calls while IP Deskphone is busy:
To log all incoming calls including calls while your IP Deskphone is busy,
press the Services key and select Call Log Options from the Telephone
Options menu.
1. Press the Up/Down navigation keys to scroll and highlight the
Incoming Calls option.
2. Press the Select soft key.
3. Press the Up/Down navigation keys to scroll and highlight Log calls
if busy.
4. Choose one of the following:
— Press the Select soft key to save the configuration.
— Press the Cancel soft key to keep existing configurations.
Configuring New Call Indication
You can configure your Avaya 1140E IP Deskphone to display a
message to indicate that a new incoming call was received. The default
configuration is On. To configure new call indication, press the Services
key, select Telephone Options, and select Call Log Option.
To configure New Call Indication:
1. Press the Up/Down navigation keys to
scroll and highlight the Log Mode
option.
2. Press the Enter key.
3. Press the Up/Down navigation keys to
scroll and highlight New Call Indication.
4. Press the Enter key.
77
Page 78

Configuring Telephone Options
or
5. Press the Up/Down navigation keys to
scroll and highlight one of the following:
— New call indication off
— New call indication on
6. Choose one of the following:
—Press the Select soft key to save the
configuration.
— Press the Cancel soft key to keep
existing configurations.
Configuring Preferred Name Match
You can configure your Avaya 1140E IP Deskphone to display the name
of the caller as defined in your Personal Directory. The default
configuration is Off. To configure Preferred Name Match, press the
Services key, select Telephone Options, and select Call Log Option.
To configure Preferred Name Match:
78
1. Press the Up/Down navigation keys to
scroll and highlight Preferred Name
Match.
2. Press the Enter key.
3. Press the Up/Down navigation keys to
scroll and highlight one of the following:
— Preferred name match on
— Preferred name match off
Page 79

Configuring Telephone Options
or
4. Choose one of the following:
—Press the Select soft key to save the
configuration.
— Press the Cancel soft key to keep
existing configurations.
Configuring Area Code Setup
Use the Area Code Setup menu to save up to three area codes. When
an incoming call arrives with an area code that matches one of the three
stored area codes, the incoming call number is reordered to display the
phone number followed by the area code (as opposed to the area code
followed by the phone number).
This reordering is also performed when you scroll through yo ur Callers
List. To configure area codes, press the Services key, select Telephone
Options, and select Call Log Option.
To configure default area codes (maximum of three):
1. Press the Up/Down navigation keys to
scroll and highlight Area Code Setup.
2. Press the Enter key.
3. Press the Up/Down navigation keys to
scroll and highlight one of the following:
— Area Code # 1
— Area Code # 2
— Area Code # 3
4. Press the Enter key.
79
Page 80

Configuring Telephone Options
or
5. Use the dialpad to enter the number at
6. Choose one of the following:
To edit area code display:
1. Press the Up/Down navigation keys to
2. Press the Enter key.
the prompt.
—Press the Select soft key to save the
configuration.
— Press the Cancel soft key to keep
the existing configurations.
scroll and highlight Area Code Setup.
80
3. Press the Up/Down navigation keys to
scroll and highlight one of the following:
— Area Code # 1
— Area Code # 2
— Area Code # 3
4. Press the Enter key.
5. Use the dialpad to edit the number.
Page 81

Configuring Telephone Options
or
6. Choose one of the following:
—Press the Select soft key to save the
configuration.
— Press the Cancel soft key to keep
existing configurations.
Choosing a ring type
The Ring type… option configures the IP Deskphone ring tone. To
choose a ring type, press the Services key, select Telephone Options,
and select Ring type…
To select a ring type:
1. Press the Up/Down navigation keys to
scroll and highlight one of the ring types.
2. Press the Play soft key to sample the
ring tone.
3. Choose one of the following:
—Press the Select soft key to save the
ring type and return to the
Telephone Options menu.
— Press the Stop soft key and use the
Up/Down navigation keys to select a
different ring type.
— Press the Cancel soft key to keep
existing configurations.
81
Page 82

Configuring Telephone Options
or
or
Enabling or disabling Call Timer
The call timer measures how long you are on each call. To enable Call
Timer, press the Services key, select Telephone Options, and select
Call Timer.
To enable or disable Call Timer:
1. Choose one of the following:
— To turn on the call timer, press the
On soft key.
— To turn off the call timer, press the
Off soft key.
2. Choose one of the following:
—Press the Select soft key to save the
configuration and return to the
Telephone Options menu.
— Press the Cancel soft key to keep
existing configurations.
Enabling OnHook Default Path
The OnHook Default Path option allows you to choose whether to use a
headset or the Handsfree feature to operate your IP Deskphone whil e it is
on-hook.To enable OnHook Default Path, press the Services key, select
Telephone Options, and select OnHook Default Path.
To enable OnHook Default Path:
1. Press the Up/Down navigation keys to
highlight one of the following:
— Handsfree enable
— Headset enable
82
Page 83

Configuring Telephone Options
or
2. Choose one of the following:
—Press the Select soft key to save t he
default path and return to the
Telephone Options menu.
— Press the Cancel soft key to keep
existing configurations.
Changing feature key labels
The Change feature key label option renames the label displayed next to
each feature key or restores the default labels to the keys (collectively or
individually). To rename feature key labels, press the Services key,
select Telephone Options, and select Change feature key labels.
Note: If a feature key is configured as an auto-dial key, the label does
not change if the auto-dial key configuration changes.
If the feature key label setting is password-protected, you must enter a
password (SCPW) to change the feature key label. If you enter an
incorrect password, an error message is displayed. If you enter an
incorrect password more than three times, th e password functionality is
locked. Contact your system administrator to unlock the password.
To rename the labels:
1. Press the Enter key.
2. Press the feature key that you are
changing.
If you press a prime DN key, an error
message appears.
83
Page 84

Configuring Telephone Options
or
3. Enter the new information for the feature
key label. To enter special characters,
press the Up navigation key. For
information about entering text, refer to
“Entering text using the IP Deskphone
dial pad” on page 37.
4. Choose one of the following:
—Press the Select soft key to save the
changes and return to the
Telephone Options menu.
— Press the Cancel soft key to keep
existing configurations.
To restore the default labels:
To restore feature key labels, press the Services key, select Telephone
Options, and select Change feature key labels.
84
5. Press the Enter key.
Page 85

Configuring Telephone Options
6. Use the Up/Down navigation keys to
scroll and highlight one of the following:
a. Restore all key labels
— Press the Yes soft key to change all
feature keys to default values.
b. Restore one key label
— Press the Select soft key.
— Press the feature key.
—Press the Yes soft key to change the
selected feature key label to the
default value.
Note: If labels are changed to default
values, you cannot undo the change.
The label configurations must be
reentered.
Configuring the name display format
You can configure your Avaya 1140E IP Deskphone to display the name
of the incoming calling party in the following formats:
• first name, last name
• last name, first name
To configure name display format, press the Services key, select
Telephone Options, and select Name Display Format.
To configure name display format:
1. Press the Up/Down navigation keys to
scroll and highlight Name display
format.
85
Page 86

Configuring Telephone Options
or
2. Press the Enter key.
3. Press the Up/Down navigation keys to
scroll and highlight one of the following:
— first name, last name
— last name, first name
4. Choose one of the following:
—Press the Select soft key to save the
configuration.
— Press the Cancel soft key to keep
existing configurations.
Configuring Live Dialpad
The Live Dialpad option activates the Primary DN key when you make a
call by dialing a directory number on the dialpad without picking up the
handset or pressing the handsfree key.
To configure Live Dialpad, press the Services key, select Telephone
Options, and select Live Dialpad.
To configure Live Dialpad:
1. Press the Up/Down navigation keys to
scroll and highlight Live Dialpad.
2. Press the Enter key.
86
Page 87

Configuring Telephone Options
or
3. Press the Up/Down navigation keys to
scroll and highlight one of the following:
— On
— Off (default)
4. Choose one of the following:
—Press the Select soft key to save the
configuration.
— Press the Cancel soft key to keep
existing configurations.
Configuring Caller ID display order
Caller ID display order appears in 2 formats:
• Number, name (default)
• Name, Number
Use the following procedure to configure Caller ID display order.
1. Press the Services key, select Telephone Options and select Caller
ID display order.
2. Press the Up/Down navigation keys to scroll and select one of the
following:
— Number, name (default)
— Name, number
3. Press the Select soft key to save the configuration, else press the
Cancel key to cancel the modifications.
Configuring Normal mode indication
The Normal mode display indication can be On or Off when the IP
Deskphone is in normal mode.
Use the following procedure to configure Normal mode indication.
87
Page 88

Configuring Telephone Options
1. Press the Services key, select Telephone Options, and select
Normal mode indication.
2. Press the Up/Down navigation keys to scroll and select one of the
following:
— On
— Off
3. Press the Select soft key to save the configuration, else press the
Cancel key to cancel the modifications.
88
Page 89

Configuring Local Menu options
Configuring Local Menu options
Note: Many of the options discussed in this section are for
administrator use only. Do not make any changes unless instructed
by an administrator.
Your system administrator can establish a password for the Local Tools
menu. When the password is enabled, a password prompt dialog box
appears when you attempt to access this menu. If this happens, contact
your system administrator.
Your Avaya 1140E IP Deskphone has both local and server-based
options. Press the Services key twice to access the Local Tools menu,
which is organized into the following submenus:
• “1. Preferences submenu” on page 91
• “2. Local Diagnostics submenu” on page 112
• “3. Network Configuration menu” on page 114
• “4. Lock Menu” on page 116
If a menu entry has a number in front of it, you can select that entry by
pressing the associated key on the dialpad. For example, in the Local
Tools menu, you can access 2. Local Diagnostics by pressing the 2 key
on the dialpad.
The function of some keys on the IP Deskphone varies depending on th e
situation. The key functions in the menus are descr ibed in Table 5.
Table 5: Navigation key f unctions in menus (Part 1 of 2)
Key Function
Down arrow keys Move the highlight down
Up arrow keys Move the highlight up
Right arrow key Select the current menu item
Left arrow key Close the menu
Enter key Select the current menu item
89
Page 90

Configuring Local Menu options
Table 5: Navigation key f unctions in menus (Part 2 of 2)
Key Function
Enter digits on the
Select the associated menu item
dialpad
Stop soft key Close the menu
The key functions in dialog boxes are described in Table 6.
Table 6: Navigation key functions in dialog boxes
Key Function
Down arrow keys Scroll the window down
Up arrow keys Scroll the window up
Right arrow key Go to the next Edit item
Left arrow key Go to the previous Edit item
Enter key Toggle Edit mode on or off
Toggle the check box status
If you are working in Edit mode, the first field of the item is highlighted and
a blinking cursor is to the right of the current edit positio n. The navigation
key functions in Edit mode are described in Table 7.
Table 7: Navigation key functions in Edit mode (Part 1 of 2)
Key Function
Down arrow keys Open the list
Move the highlight down the list
Up arrow keys Move the highlight up list
Right arrow key Select the current list item
Move the cursor to the right
Left arrow key Delete a character in the edit field
90
Page 91

Configuring Local Menu options
Table 7: Navigation key functions in Edit mode (Part 2 of 2)
Key Function
Enter key Select the highlighted item in the
Exit edit mode box
Enter characters
or digits on the
dialpad
If you are using a USB mouse, you can right-click on the Telephony
screen to open the Local Tools menu, and click on an item to select it.
Insert characters or digits at the current cursor
position
1. Preferences submenu
The Local Tools menu 1. Preferences submenu offers the following
choices:
• “Changing 1. Display Settings” on page 91
• “Changing 2. Language” on pag e 92
• “Changing 3. Headsets” on page 93
• “Configuring 4. Bluetooth” on page 100
Changing 1. Display Settings
The Display Settings menu provides access to two tools: Contrast and
Sleep. Use the Contrast tool to alter the physical settings of the display.
Use the Sleep tool to control how long the display remains lit if th e phone
is inactive.
Note: Changes you make to contrast in this men u ar e lost if the
phone is reset. To avoid losing your changes, Avaya recommends
that you use the Contrast Adjustment control in the Telephone
Options menu.
To adjust Contrast or Sleep settings, press the Services key twice to
open the Local Tools menu, press the 1 key on the dialpad to select
1. Preferences, and press the 1 key on the dialpad to select
1. Display Settings.
91
Page 92

Configuring Local Menu options
To adjust Contrast or Sleep settings:
1. Press the Up/Down arrow keys to scroll
and highlight one of the following:
— Contrast
— Sleep
Sleep appears in the format xxx, where
xxx is a time in minutes or hours.
2. Press the Enter key.
3. Press the Up/Down arrow keys to
increase or decrease the selected value.
Available values for Sleep are as follows:
5m (5 minutes)
15m (15 minutes)
30m (30 minutes)
1h (1 hour — default)
2h (2 hours)
Never (screen does not go black)
Note: Extending the sleep time, or
setting it to Never, reduces the life span
of the display screen.
4. Press the Exit soft key to exit to the main
display. Changes are saved
automatically.
Changing 2. Language
Use the Preferences menu item to configure local preferences. Use the
Language tool to select the language used on your phone.
92
Page 93

Configuring Local Menu options
or
Note: This language setting controls the language used in the local
menus on your phone only. To select the lang uage used by features
on your phone, press the Services key, select Telephone Options,
and select Language…
To select the language used in the local menus, press the Services key
twice to open the Local Tools menu, press the 1 key on the dialpad to
select 1. Preferences, and press the 2 key on the dialpad to select
2. Language.
To select the language used in local menus:
1. Press the Up/Down navigation keys to
scroll and highlight the desired language
(for example, German [Deutsche]).
2. Choose one of the following:
—Press the Select soft key to save the
desired language and return to the
Telephone Options menu.
— Press the Cancel soft key to keep
existing configurations.
3. Press the Exit soft key to exit to the main
display. Changes are saved
automatically.
Changing 3. Headsets
Headset Configuration
In order to use your headset, you must configure your deskphone to
recognize the headset. For information on how to configure your
deskphone to use the wideband headset, see “Configuring 3. Headsets”
on page 91.
93
Page 94

Configuring Local Menu options
or
Each headset has its own tuning parameters, and your deskphone must
be configured to use the proper parameters. If you do not configure the
deskphone for the proper tuning parameters, you may not be taking fu ll
advantage of the audio qualities of the headset.
Selecting Active Headset Device
To select the Active Headset Device, press the Enter key. Press the Up/
Down navigation keys to select the desired headset.
To select the active headset device
1. Press the Up/Down navigation keys to
scroll and highlight the Headsets menu.
2. Choose one of the following:
—Press the Apply soft key to save the
desired headset and return to the
Telephone Options menu.
— Press the Cancel soft key to keep
existing configurations.
Note: You can select a headset
regardless of its connection status. It
does not have to be physically
connected to the Avaya 1140E IP
Deskphone.
3. Press the Cancel soft key to exit to the
main display. Changes are saved
automatically.
Enabling HID Commands
To enable HID Commands, press the Right/Left navigation key to open
the Local Tools menu, press the 1 key on the dialpad to select
1. Preferences, and press the 3 key on the dialpad to select 3.Headsets.
94
Page 95

To enable HID Commands:
or
Configuring Local Menu options
1. Press the Up/Down navigation keys to
scroll and highlight the Headsets menu.
2. Select the Enable HID Commands
checkbox.
3. Choose one of the following:
—Press the Apply soft key to save the
desired selection and return to the
Telephone Options menu.
— Press the Cancel soft key to keep
existing configurations.
4. Press the Cancel soft key to exit to the
main display. Changes are saved
automatically.
Enabling USB Headset
The wireless USB headset support included in UNIStim firmware release
3.1 for IP Deskphones is the Jabra GN9330E USB4 and the Plantronics
CS50-USB and CS60-USB. The Plantronics CS50-USB utilizes 900MHz
wireless technology whereas the Plantronics CS60- USB and Jabra
GN9330E USB utilize 1.9Mz DECT wireless technology. These wireless
headsets provide wireless freedom typically in the range of 60 meters or
200 feet. The actual distance allowed, before acceptable audio quality is
threatened, is dependant on the operating environment.
Included in the support of the Jabra and Plantronics headsets is
compliance to GN Netcom’s and Plantronic’s USB Human Interface
Device (HID) respectively. Compliance to their HID allows the phone to
recognize call controlling features from the headset including off-hook
(call answer/call initiate), on-hook (call release), mute, and volume
control.
95
Page 96

Configuring Local Menu options
To enable USB headset
1. Select the Headset option in the Preferences menu of the Avaya
1120E IP Deskphone, Avaya 1140E IP Deskphone, and Avaya
1150E IP Deskphone. See the following Figure.
Making a change in the Headset menu page will take affect immediately,
but only temporarily depending on what further action is taken.
2. Press the Apply button to make the changes permanent.
3. Press Cancel button to discard any changes.
96
Page 97

Configuring Local Menu options
4. Select the appropriate headset type in the Active Headset Device
field from a list of Wired, USB, or Bluetooth as depicted in the
following figure.
5. Select the Enable HID Commands check box to provide full
HID for supported headsets.
6. Select the Headset type from the following list of headsets.
• DuraPlus-B (GN Netcom DuraPlus Binaural Headset)
• DuraPlus-M (GN Netcom DuraPlus Monaural Headset)
• GN2020 (GN Netcom GN2020 NC Monaural Headset)
• GN2100 (GN Netcom GN2100 Monaural Headset)
• GN2115 (GN Netcom GN2115 ST Binaural Headset)
• GN2117 (GN Netcom GN2117 ST Monaural Headset)
• GN2125 (GN Netcom GN2125 NC Binaural Headset)
• GN2220 (GN Netcom GN2220 NC Monaural Headset)
• GN2225 (GN Netcom GN2225 NC Binaural Headset)
• Avaya Handset
You can select the headset type and configure as the active headset
device regardless of whether the headset is connected or not.
97
Page 98

Configuring Local Menu options
Note: You can select the Headset Type only for the Avaya USB
Headset Adapters. If the Avaya USB Headset Adapter is not
detected, the Headset Type selection is disabled and cannot b e
modified.
7. Select the Back Light check box to control the backlight on the
Avaya USB Headset Adapters. This check box is selected by
default.
Note: If the Avaya USB Headset Adapter is not detected this item is
disabled and cannot be modified.
Limitations and Advisories
• USB headsets consume power from the USB port in order to oper ate.
The USB port on the IP Deskphone imposes a limit of only 100mA.
The limit of 100mA is sufficient to power the Avaya USB
Adapters but is not sufficient to power the wireless headsets
from GN Netcom an Plantronics. Also 100mA is not sufficient to
power the Algo 4900 USB ATA.
• USB Audio support does not include stereo audio.
• Changes have occurred regarding the provisioning of Bluetooth on
the Avaya 1140E IP Deskphone and 1150E.
With UNIStim 3.1, the
Bluetooth setup page no longer provides the option to select
98
Page 99

Configuring Local Menu options
Bluetooth headset since this choice has been moved to the
Headset menu.
• Users of USB Audio on an Avaya 1120E IP Deskphone or Avaya
1140E IP Deskphone when connected to a BCM system may
experience constant beeping from the wireless headsets if the user
inadvertently hits a call control keys in error.
• For the Avaya USB Adapters it is a requirement that the firmware of
this device be V2.0.32 or later.
• For the Algo 4900 USB ATA it is a requirement that the firmware of
this device be v1.00.32 or later.
• The Algo 4900 USB ATA is classified as a high power USB device
and must be connected to the phone through a powered USB hub.
• The Plantronics CS50-USB and CS60-USB must be AC powered
prior to connecting them to phone.
• For the Plantronics CS50-USB and CS60-USB please make sure the
headset base is in ready mode (i.e. the green LED on th e rig ht ha n d
side of the headset cradle is solid) before using the headset.
• For the Plantronics CS50-USB and CS60-USB the On Hook/Off Hook
button must be depressed for 3 seconds to go off hook.
• At the time of this writing, GN Netcom produces four models of the
Jabra GN9300 series headsets: Jabra GN9330, Jabra GN 9330E,
Jabra GN 9350 and Jabra GN9350E.
The USB Audio feature in
the IP Deskphones only supports the Jabra GN9330E and
Jabra GN9350E connected via USB.
• For the GN Netcom 9300 series occasionally a single ring is lost
between the phone and the headset but is recovered at the next ring.
• For the GN Netcom 9300 series occasionally a drop in audio quality
may be experienced when a 3-way conference is established.
Avaya Mobile Headset Adapter properties
You can use the Avaya Mobile Headset Adapter to answer calls
whenever the Avaya 1140E IP Deskphone is running.
To access the Avaya Mobile Headset Adapter (MHA) properties, press
the Services key twice to open the Local Tools menu, press the 1 key on
99
Page 100

Configuring Local Menu options
the dialpad to select 1. Preferences, and press the 3 key on the dia lpad to
select 3.Headsets.
Note: The Headset type and Backlight options are only available
when MHA is attached.
Table 7 describes the features of the Avaya Mobile Headset Adapter.
Table 8: Avaya Mobile Headset Adaptor elements and
functions
Key Function
Answer key Press to answer an incoming
call.
If there is no incoming call, the
Avaya 1140E IP Deskphone
selects a line and you hear a dial
tone. This is also referred to as
Off-hook.
Release/Goodbye key This is also referred to as On-
hook.
Mute key Press the Mute key to listen to
the receiving party without
transmitting.
Press the Mute key again to
return to two-way conversation.
Volume key Use the Volume buttons to
increase or decrease the volume
of the headset.
Backlight The backlight illuminates when
you connect your headset to the
Avaya 1140E IP Deskphone.
Configuring 4. Bluetooth
Your Avaya 1140E IP Deskphone is equipped with a radio system to
support Bluetooth wireless technology enabled headsets. Double press
100
 Loading...