

Wilbur Curtis TCO308ARS000 Service Manual
WARNING:
• Clean the dispenser completely before using it for the first time according to the DAILY CLEANING
INSTRUCTIONS (back). Clean it regularly as instructed in the DAILY CLEANING INSTRUCTIONS.
• This product can expose you to chemicals including Acrylamide and Bisphenol A (BPA), which are
known to the State of California to cause cancer and birth defects or other reproductive harm. For
more information visit www.P65Warnings.ca.gov.
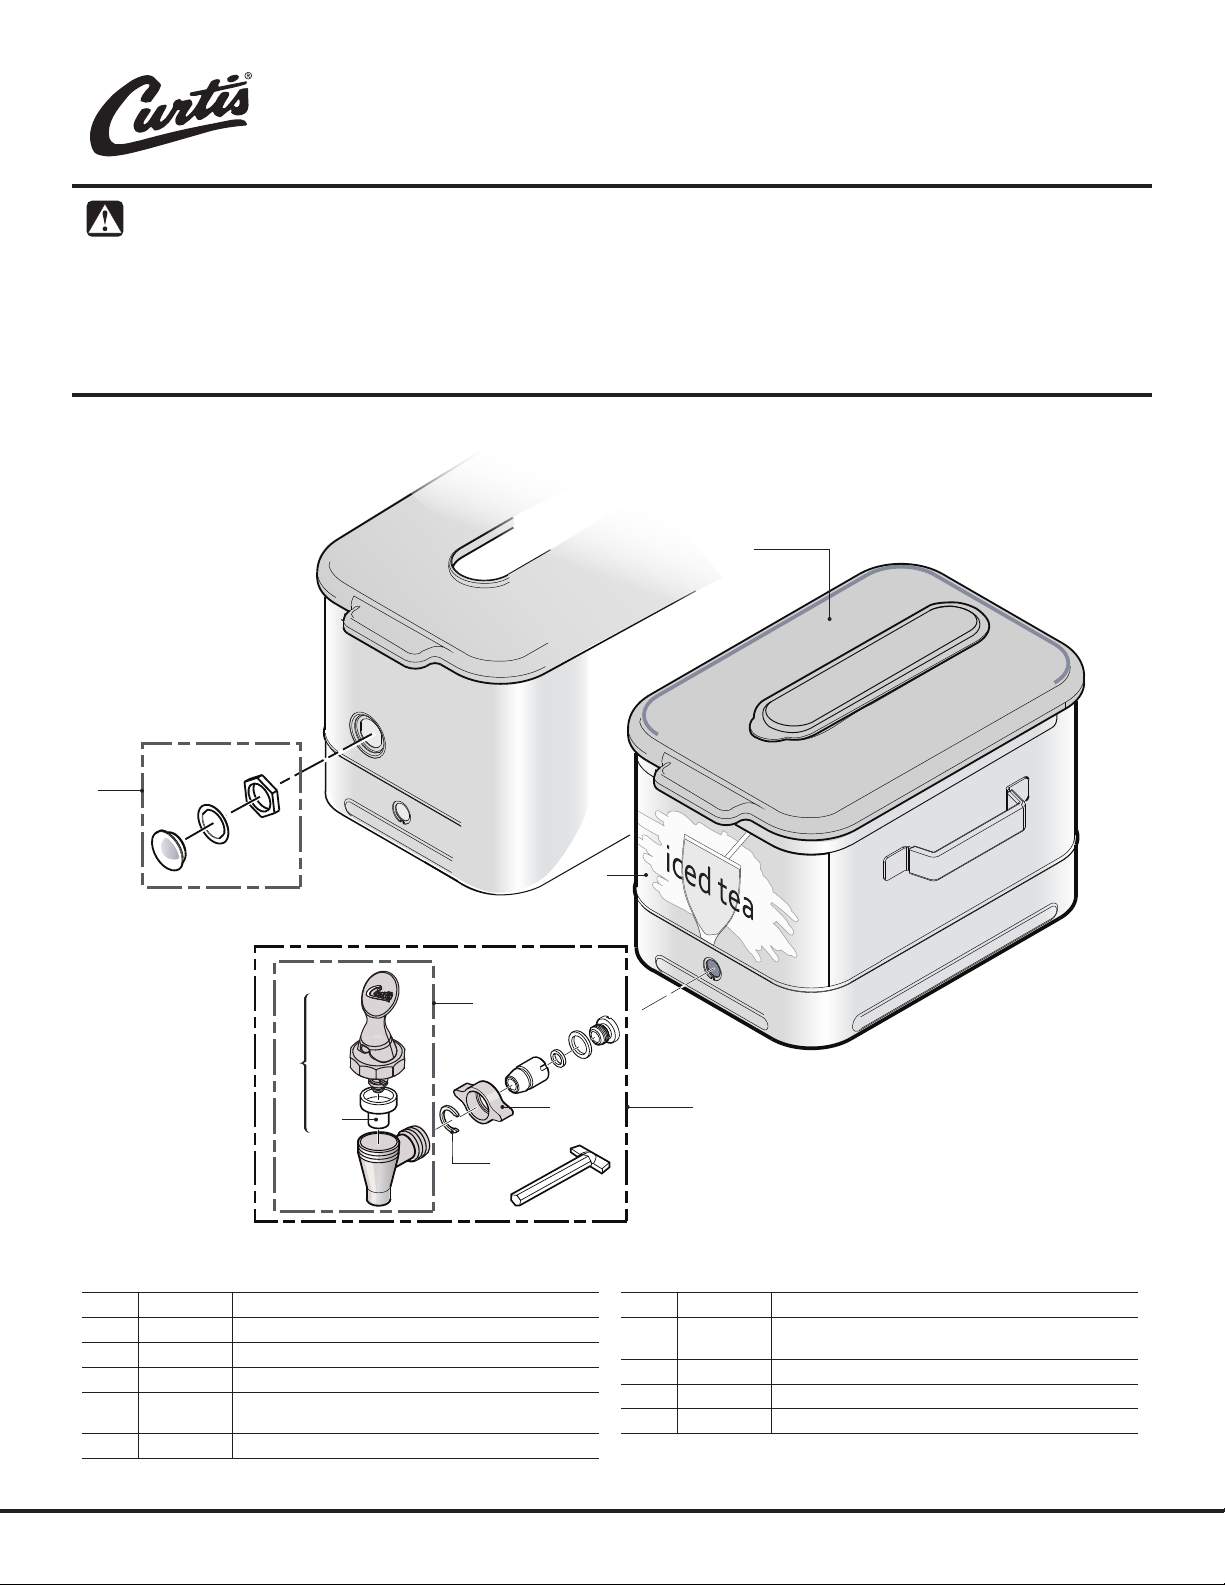
PARTS LIST
INSTRUCTIONS AND PARTS LIST
TCO SERIES ICED TEA DISPENSERS
1
3
4
5
6
9
ITEM # PART # DESCRIPTION
1 WC-5683 LID, SOLID/BREW-THRU (OPTIONAL USES) TCO’S
2 WC-38471 LABEL, FRONT TCO ICED TEA GENERIC.
3* WC-3724 KIT, EZ VIEW REPLACEMENT
4 WC-1803
5 WC-3707 KIT, FAUCET SPB SERIES USE ON WC-1803
FAUCET, “SPB” SERIES,BLACK HANDLE/
PLASTIC 1-1/32-14 UNS CURT
2
Configuration varies
with model number
8
ITEM # PART # DESCRIPTION
Older units with EZ-VIEW.
*
** Not used on newer units with a shank that is welded to the container.
7
6 WC-1805
7** WC-37260 KIT, FAUCET W/ADAPTER COMPLETE TC/TT
8 WC-1905 NUT, WING PLASTIC 1-1/32-14UNF (TC-2,3,5,10)
9 WC-1906 “C” RING .917 X .760 X .090 TT-3 TC’S
SEAT CUP, “S” FAU. USE ON WC-1800/B/LB/D/DL/L/WC1803
Service & Sales
1-800-421-6150
www.wilburcurtis.com
DAILY CLEANING INSTRUCTIONS
NOTICE: Do not use cleaning liquids, compounds or powders containing chlorine (bleach) or corrosives.
These products promote corrosion and will damage the finishes. USE OF THESE PRODUCTS WILL VOID
THE WARRANTY.
Cleaning the Container
1 Prepare a mild solution of detergent and warm water.
Remove the container from the brewer and remove the
lid. Rinse.
2 Wash - Wipe the exterior surfaces with a sponge and
the detergent solution to remove spills and debris. Use
the detergent solution and a soft bristled brush to wash
the inside of the container.
3 Rinse - Rinse with clean, warm water.
4 Sanitize* - Sanitize the interior of the container
using a commercial sanitizer suitable for food grade
applications. Sanitize according to the directions on the
package.
* If a three compartment sink large enough to submerge
the container is not available, swab, brush or pressure
spray the sanitizing solution according to the directions
on the package.
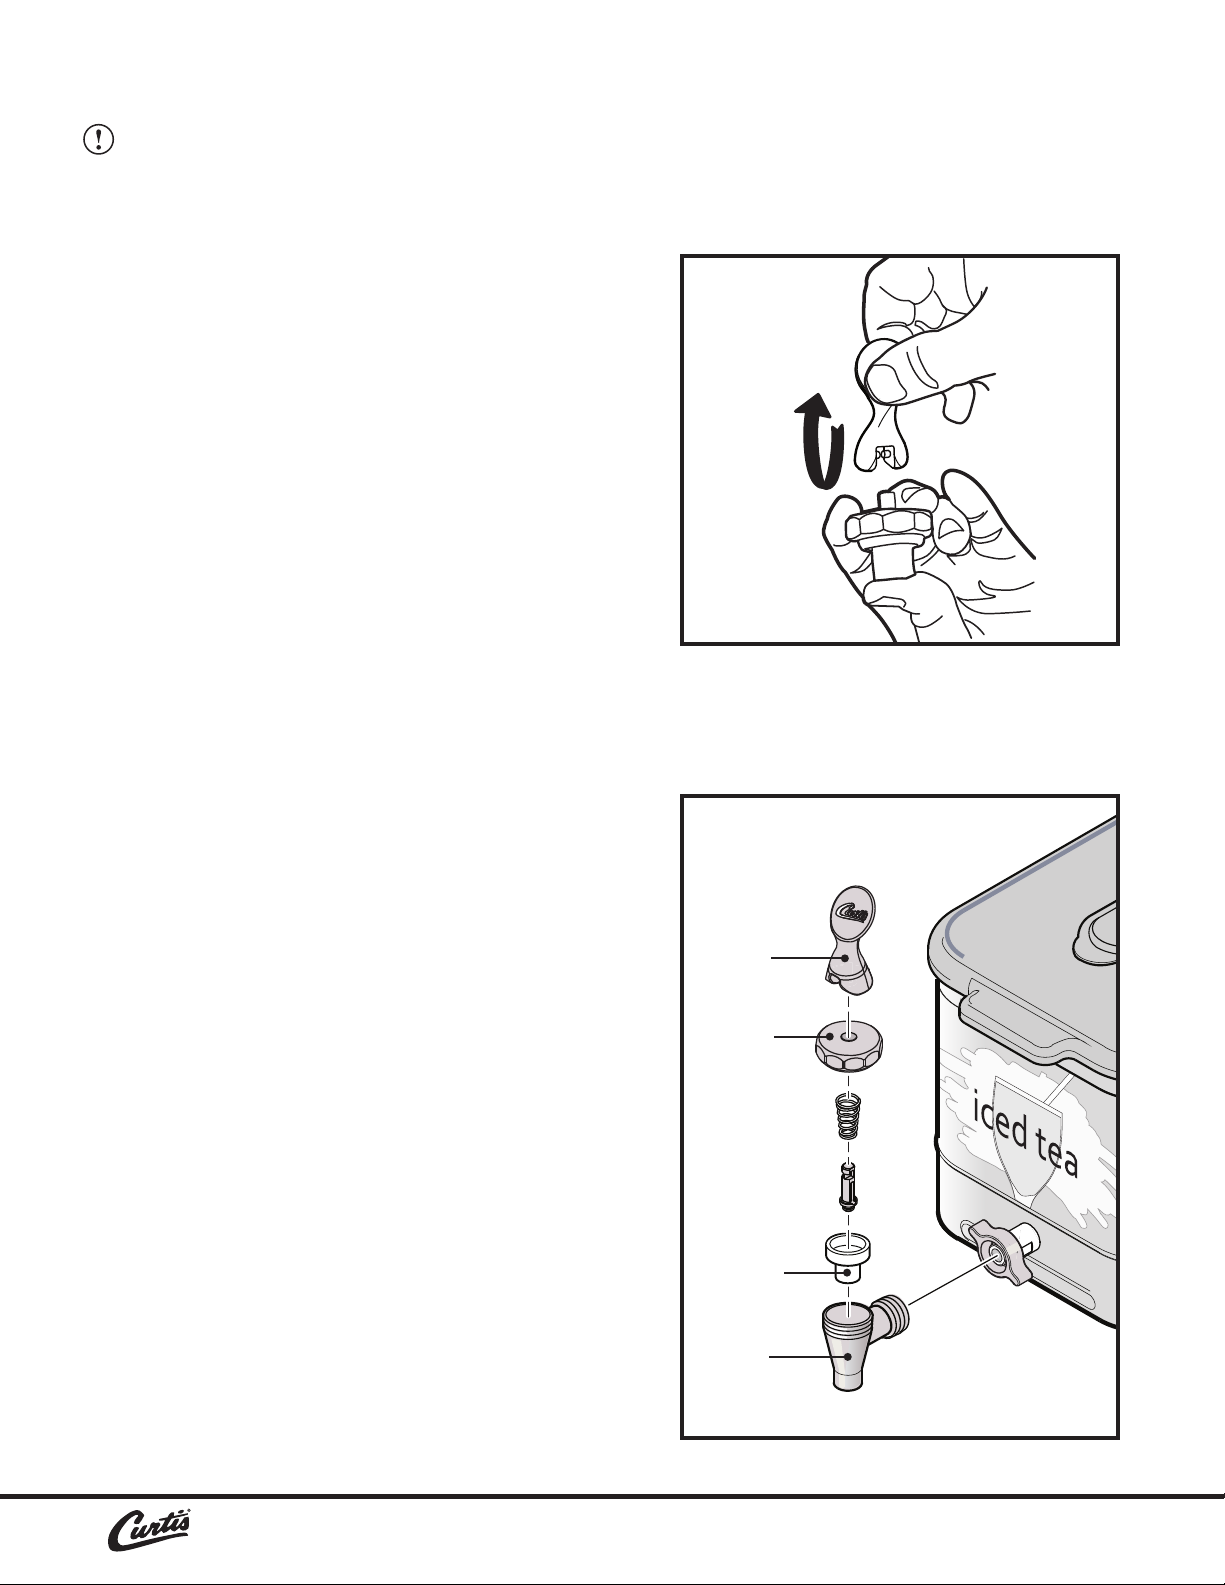
To dis-assemble the top of the faucet,
grasp the bonnet and push up on the
seat cup, while unhooking the handle.
5 Air Dry - Turn the container upside down and allow to
air dry.
Cleaning the Faucet Parts and Lid
1 Disassemble the faucet - Unscrew the faucet assembly
from the container. Then, unscrew the handle/bonnet
assembly from the top of the faucet and remove.
Inspect the seat cup for wear. Replace the seat cup if it
is damaged.
2 Wash - Wash the lid and faucet parts with the
detergent solution.
3 Rinse - Thoroughly rinse all parts with clean, warm
water.
4 Sanitize - After rinsing, place the faucet parts in the
sink to be sanitized. Immerse them in a commercial
sanitizer suitable for food grade applications. Sanitize
according to the directions on the package.
5 Air Dry - Allow all parts to thoroughly air dry.
6 Reassemble - When dry, reassemble the handle/
bonnet. Hand tighten the handle/bonnet onto the
top of the faucet assembly. Hand-tighten the faucet
assembly onto the container outlet. Curtis recommends
wiping down the outside surfaces with stainless steel
polish after cleaning for a polished look and to prevent
scratches.
Handle
Bonnet
Seat cup
Faucet
Wilbur Curtis Co., Inc.
Mail: 6913 Acco Street, Montebello, CA 90640-5403 U.S.A.
Phone: 800-421-6150 │ Fax: 323-837-2410 │ Technical Support Phone: 800-995-0417 (M-F 5:30
09/2018 F-3387 revJ
a.m. - 4:00 p.m. PST) │ Email: techsupport@wilburcurtis.com │ www.wilburcurtis.com
 Loading...