

Whirlpool SM988PEP User Manual
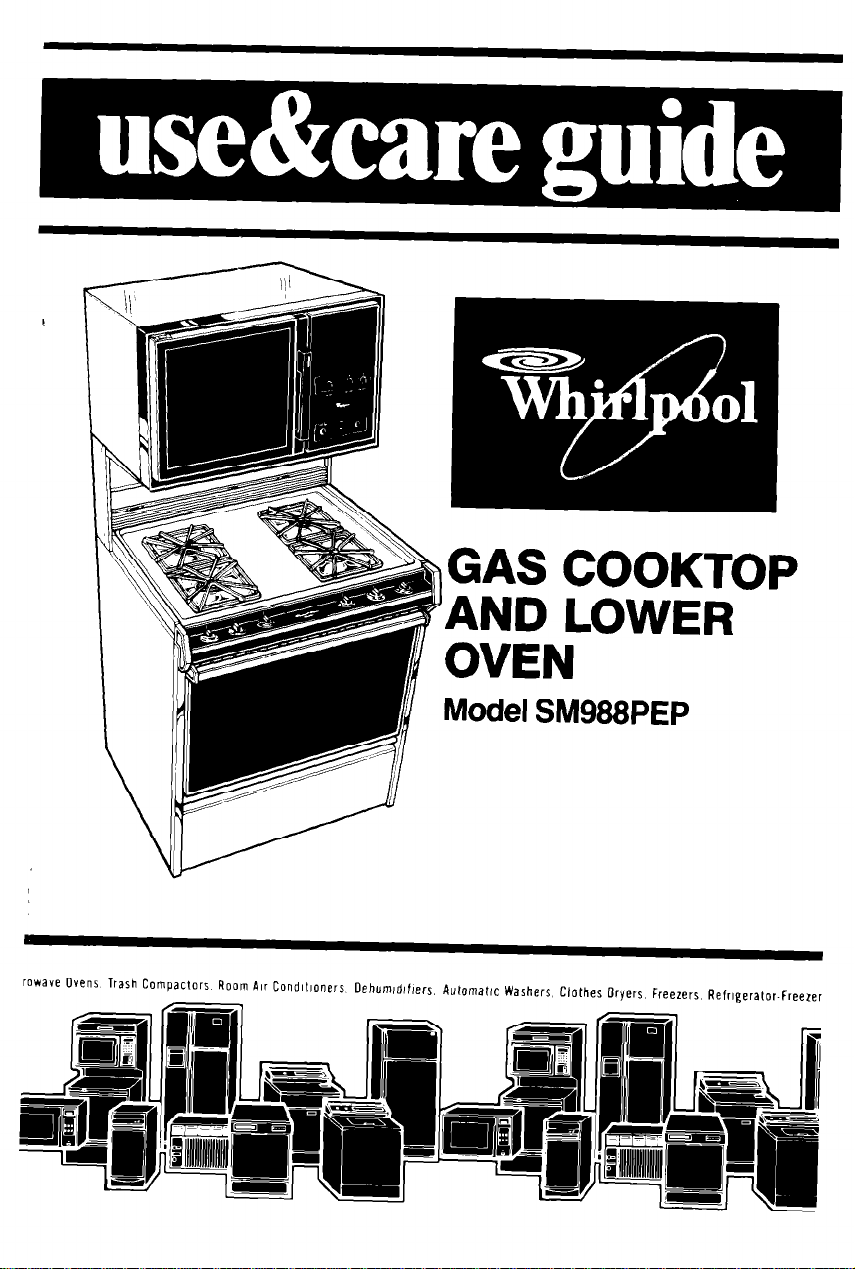
)GAS COOKTOP
AND LOWER
OVEN
Model SM988PEP
wave Ovens Trash Cwac~ors Room Air Condltloners Oehumldlflers. Automatic Washers Clothes Dryers. Freezers
Refrigerator-Freezer
Contents
Before You Use Your Range,
Important Safety Instructions
Parts and Features
Using Your Range
Using the Surface Burners
Using the Lower Oven
Baking or Roasting
Broiling
Using the Automatrc
MEALTIMER’ Clock
OvenVent
Storage Drawer : : : :
Caring for Your Cooktop and
lower Oven.
L
Page
-2
01985 Whirlpool Corporation
Control Panels
Surface Burner Grates and
3
5
6
6
7
7
B
9
10
11
12
Reflector Pans.
Surface Burners
Removable Cooktop
Using the Self-Cleaning
Cycle ....................
Cleaning Chart
Cooktop Light.
Oven Light
If You Need Service or
Assistance.
............
..........
...........
...........
............
................
.................
......
Page
12
13
13
14
15
::
21
22
‘Tm
Before you use your range
Read and carefully follow the ‘61NSTALLATION INSTRUCTIONS”
packed with your range.
Read this “Use & Care Guide” and your “Cooking Guide” carefully for important
use and safety information. Store these with the Upper Microwave Oven literature
in the Range Literature Pat for future use.
You are personally responsible for:
l
Reading and following all safety precautions in this Use & Care Guide and the
Cooking Guide.
l
Having your range Installed by a qualified installer.
l
Installing the range where it is protected from the elements, and on a level floor
strong enough to hold its weight
l
Having your range properly connected to electrlcal supply and grounded.
(See “Installation Instructions:‘)
l
Having your range properly connected to the proper gas supply and
checked for leaks. (See “Installation Instructions:‘)
l
Making sure the range is not used by children or anyone unable to operate it
properly
. Properly maintaining your range.
l
Using the range only for jobs expected of a home range.
See your “Cooking Guide” and “Upper Microwave Oven Use & Care Guide”
for additional safety and use information.
IMPORTANT
SAFETY INSTRUCTIONS
1.
DO NOT allow children to use or
play with any part of the range,
or leave them unattended near
It They could be burned or
injured being pushed off the cooktop.
2. DO NOT store things children
might want above the range.
Children could be burned or fire with large lid or smother with
injured while climbing on it.
3. DO NOT allow anyone to touch a
hot surface burner, oven burner
or areas around them. They
could be hot enough to burn hot burner or surrounding area
severely.
4. KEEP children away from the
range when it is on. The cooktop,
oven walls, racks and door can
be hot enough to cause burns. container particles could cause
5. DO NOT use a range to heat a
room. Persons in the room could
be burned or injured, or a fire
could start
6.
KEEP pan handles turned in, but
not over another surface burner
to prevent burns, injury and to
help prevent the utensil from
7. DO NOT use water on grease
fires. The fire will spread. Cover
baking soda or salt.
8.
DO NOT wear loose or hanging
garments when using the range.
They could ignite if they touch a
and you could be burned.
9. DO NOT heat unopened containers. They could explode. The
hot contents could burn and
injury
10.
When adding or removing
food, MAKE SURE to open the
oven door all the way to
prevent burns.
continued on next page
3
14. GREASE ,s FlammaDle ano
ihc3clid De nandled carefully Let
*,a+ coo1 Defore attempting ?o
,;ondle It Do not allow grease
to
collect around range or
12.
MAKE SURE ‘t-8~ -I~J’:: 15 yo<~ JS!
[Ire large e Tc\i~ii;J’ fc ,:ontcin
‘ooc! arid aic~c c,i)ii avers 3176
hp’llovers T’;I~ vy1’1 Reip preven“uzara3us ?L,ld ,p; af toca
Heai’b :,plaier nq 31 >pII/o4ers
ep on CI rar ge Z.IV gnlte (jnd
:)tirn LCU P[IQ siz<z 15 espec!nllv
rnportcint 111 deeC fct fryIn
13. DO NOT let ve su”a~e btiriers
in vents. Wipe spillovers
mmedlately
15. NEVER use a match or other
‘lome to look for a gas leak
Explosion and Injury couid resuit
16.
DO NOT repair or replace any
Darts tinless specifically recommended in this manual All other
;ervlclng should be referred to a
z~~cllf~ed sewIce technIcIan
,)n hlgF heel’ .,eI%;:gs Bo~i cvers
and greas) spIIlovers could
,:uuse steair! SrncKe and could
gnlte end l>urp vsu
l
DO NOT STORE OR USE GASOLINE OR OTHER FLAMMABLE VAPORS AND LIQUIDS
FOR YOUR SAFETY
IN THE VICINITY OF THIS OR ANY OTHER APPLIANCE. THEY COULD IGNITE
CAUSING EXPLOSION AND/OR FIRE.
l
- SAVE THESE INSTRUCTIONS -
Copy your Jlodel and Serial Numbers here...
If you need service or call with a question nave this information ready
1. Complete Model and Serial
Numbers (from the plate
located behind the mlcrowave
oven door]
2. Purchase Gate from sales slip
Copy this Information in these
spaces Keep this book your
warranty and sales slip together in
the Literature Pat
There IS no warranty registration to
return Proof-of-purchase
IS
all that
required for In-warranty service
Model Number
Serial Number
Purchase Date
IS
Service Company/Phone Number
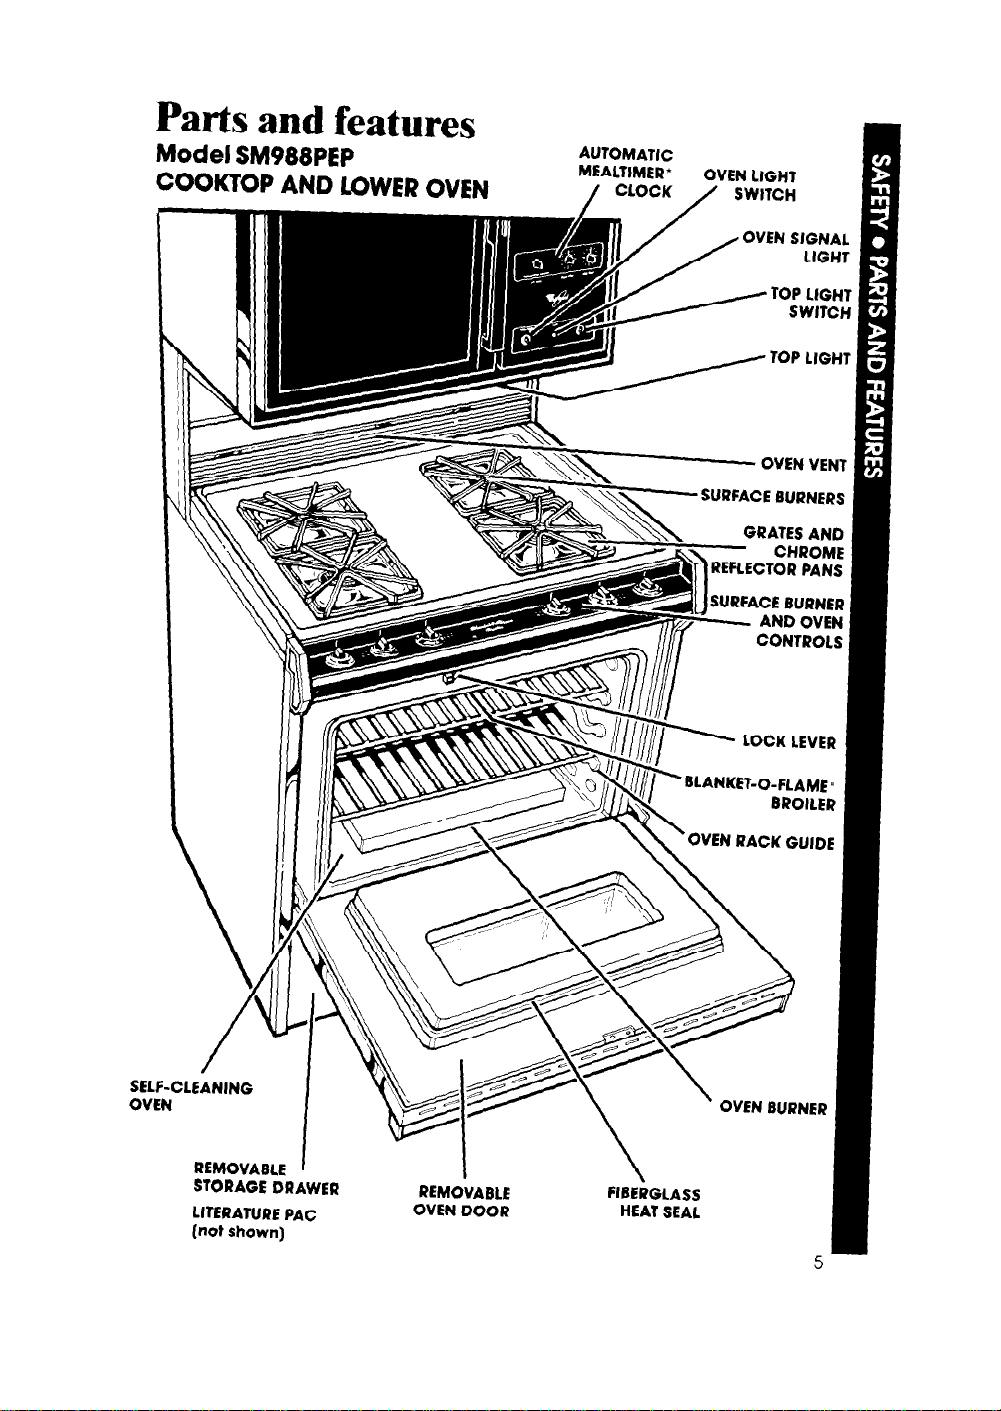
Parts and features
Model SM988PEP
-
TOP LIGHT
SWITCH
TOP LIGHT
OVEN VENT
LOCK LEVER
I
SELF-t
OVEN
XEiNING
REMOVABLE
STORAGE DRAWER
LITERATURE PAC
Inot show-t
.“,
I
--‘-7 DOOD
\
FIBERGLASS
“L.W m-1,
“S-8 JLAL
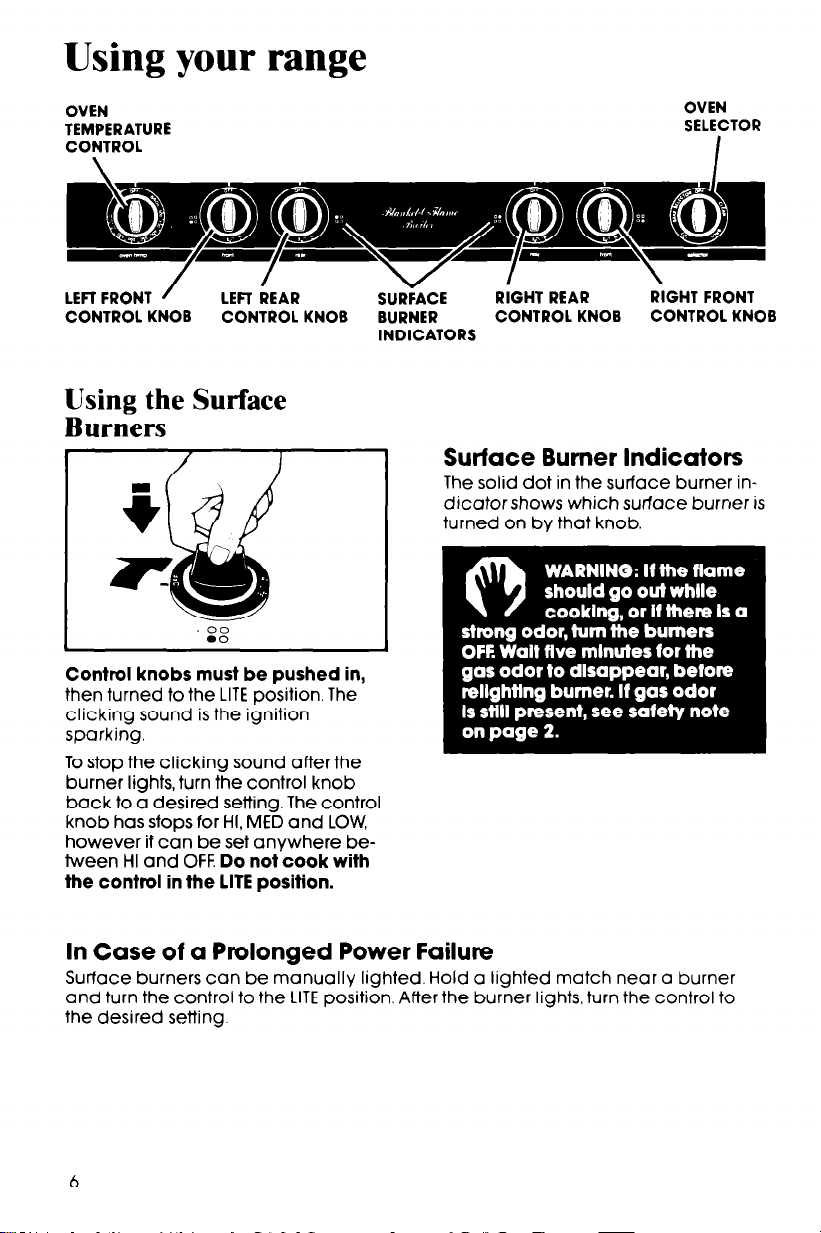
Using your range
OVEN
TEMPERATURE
CONTROL I
LEFI FRONT / LER IAR vP(GHT REAR ~G~YT FRONT
CONTROL KNOB
CONTROL KNOB BURNER
SURFACE
CONTROL KNOB CONTROL KNOB
INDICATORS
OVEN
SELECTOR
Using the Surface Burners
Surface Burner Indicators
The solid dot in the surface burner indicator shows which surface burner is
turned on by that knob.
Control knobs must be pushed in,
then turned to the LITE position. The
clicking sound is the ignition
sparking.
To stop the clicking sound after the
burner lights, turn the control knob
back to a desired setting. The control
knob has stops for HI, MED and LOW,
however if can be set anywhere between HI and OFF. Do not cook with
the control in the LITE position.
In Case of a Prolonged Power Failure
Surface burners can be manually lighted. Hold a lighted match near a burner
and turn the control to the LITE position. After the burner lights, turn the control to
the desired setting
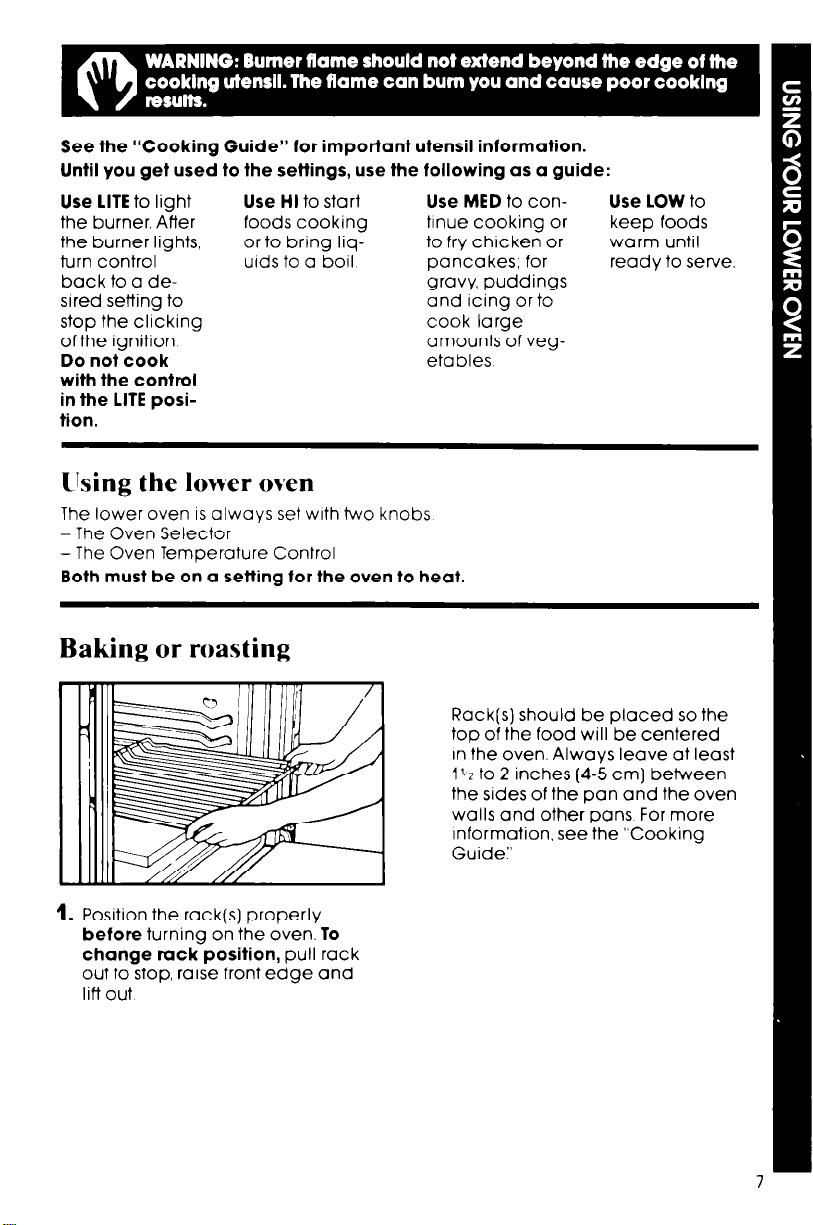
See the “Cooking Guide” for important utensil information.
Until you get used to the settings, use the following as a guide:
Use LITE to light
the burner. After
the burner lights,
turn control
back to a desired setting to
stop the clicking
of the ignition
Do not cook
with the control
in the LITE position.
Use HI to start
foods cooking
or to bring liqulds to a boil
Use MED to contlnue cooking or
to fry chicken or
pancakes; for
gravy, puddings
and icing or to
cook large
amounts of vegetables.
lking the lower oven
The lower oven IS always set with two knobs
-The Oven Selector
- The Oven Temperature Control
Both must be on a setting for the oven to heat.
Baking or roasting
Rack(s) should be placed so the
top of the food will be centered
In the oven. Always leave at least
I~z to 2 inches (4-5 cm] between
the sides of the pan and the oven
walls and other pans For more
Information. see the “Cooking
Guide”
Use LOW to
keep foods
warm until
ready to seme
1.
Position the rack(s) properly
before turning on the oven. To
change rack position, pull rack
out to stop, raise front edge and
lift out
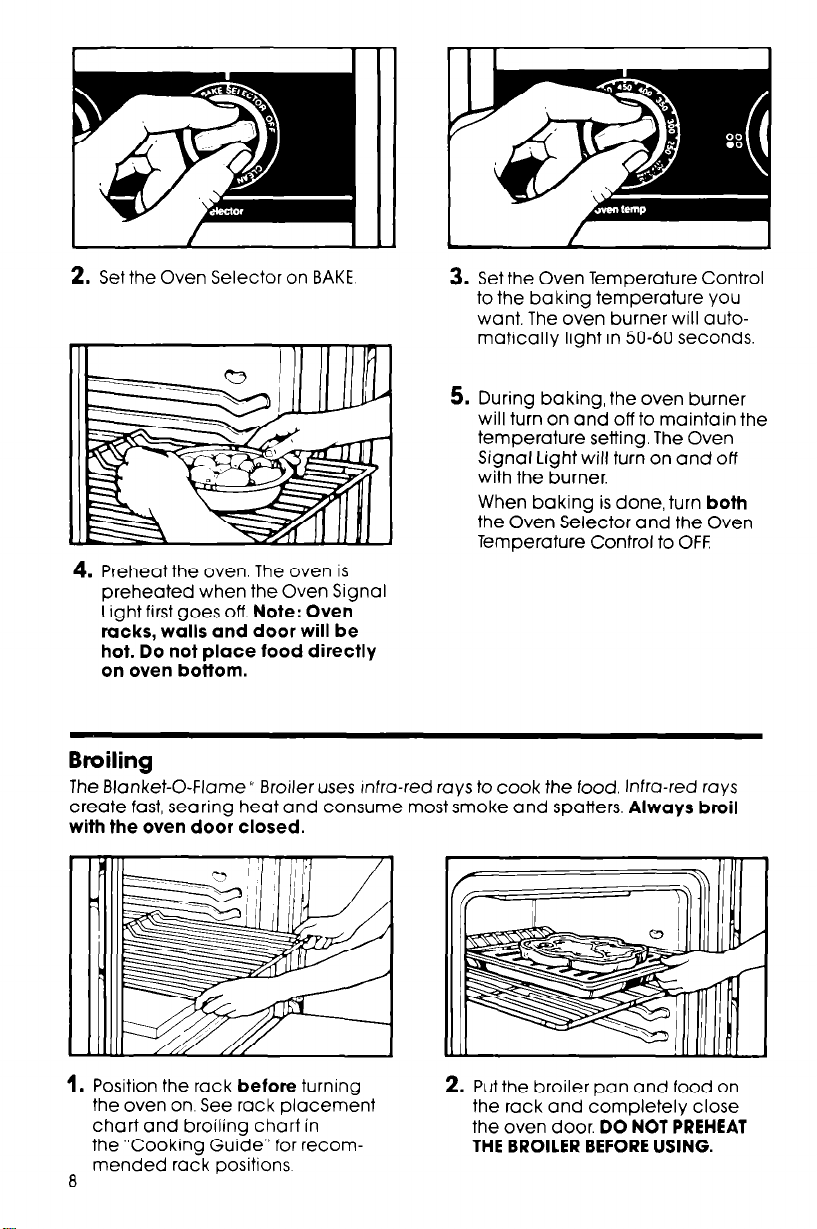
2. Set the Oven Selector on BAKE
4. Preheat the oven. The oven is
preheated when the Oven Signal
Light first goes off Note: Oven
racks, walls and door will be
hot. Do not place food directly
on oven bottom.
3. Set the Oven Temperature Control
to the baking temperature you
want. The oven burner will automatically light in 50-60 seconds.
5. During baking, the oven burner
will turn on and off to maintain the
temperature setting. The Oven
Signal Light will turn on and off
with the burner.
When baking is done, turn both
the Oven Selector and the Oven
Temperature Control to OFF:
Broiling
The Blanket-O-Flame’ Broiler uses rnfra-red rays to cook the food. Infra-red rays
create fast, searing heat and consume most smoke and spatters. Always broil
with the oven door closed.
1.
Position the rack before turning
the oven on. See rack placement
chart and broiling chart in
the “Cooking Guide” for recom-
mended rack positions
8
2. Put the broiler pan and food on
the rack and completely close
the oven door. DO NOT PREHEAT
THE BROILER BEFORE USING.
 Loading...